Contents
Computer Controlled Cutting
1. Introduction to lasser cutter
2. Lasser Cutter Settings
3. Joints
4. Flower Pot
5. Press Fit Construction
6. Vinylcutter
1. Introduction to laser cutter
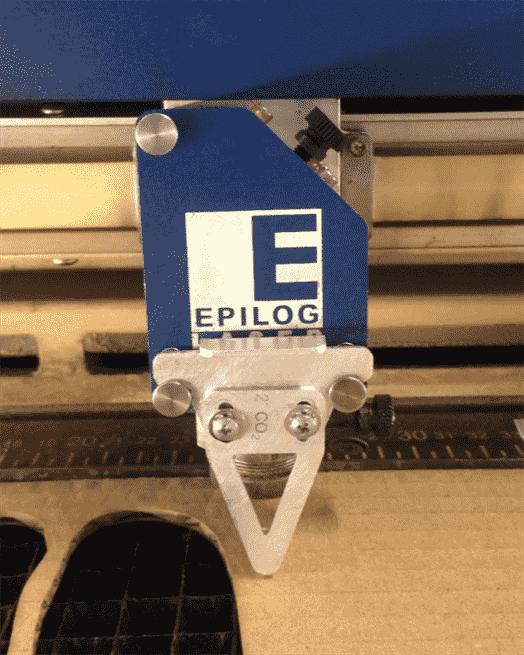
Fig 1.0.1 : Laser Cutter
What is a laser cutter?
Laser cutter is at type of CNC (Computer Numerical Controlled) with a lasser beam.
1.1 Vector Cutting and Raster Engraving
Vector
Resolution independent. eg.software : Adobe Ilustrator and Draftsight
Pixle
Resolution dependent. eg. software : photoshop
Vector Cutting
The process in which the lasser stream to burn a closed contour completely through the workpiece by following the "path" or vectors in the outline.
Raster Engraving
The process in which the lasser stream to burn a closed contour but not completly through the whole thickness of the workpiece by following the "path" or vectors in the outline.
Pixle Engraving
The process in which the lasser stream to burn on the workpiece by interpreting a pixel based file.
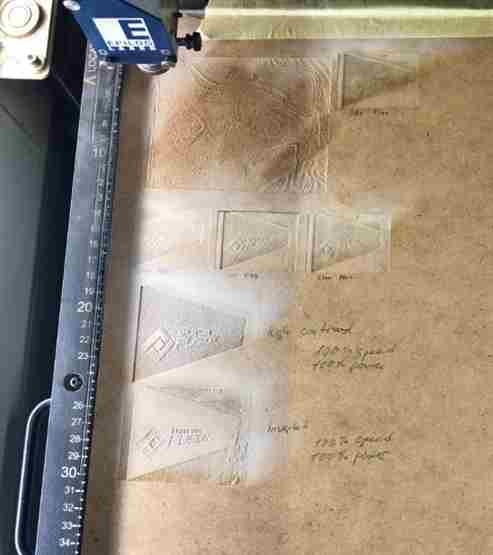
This is our group work trying to work on the image and engrave with different parameters on the aser cutter.
1.2 How does a laser cuter work?
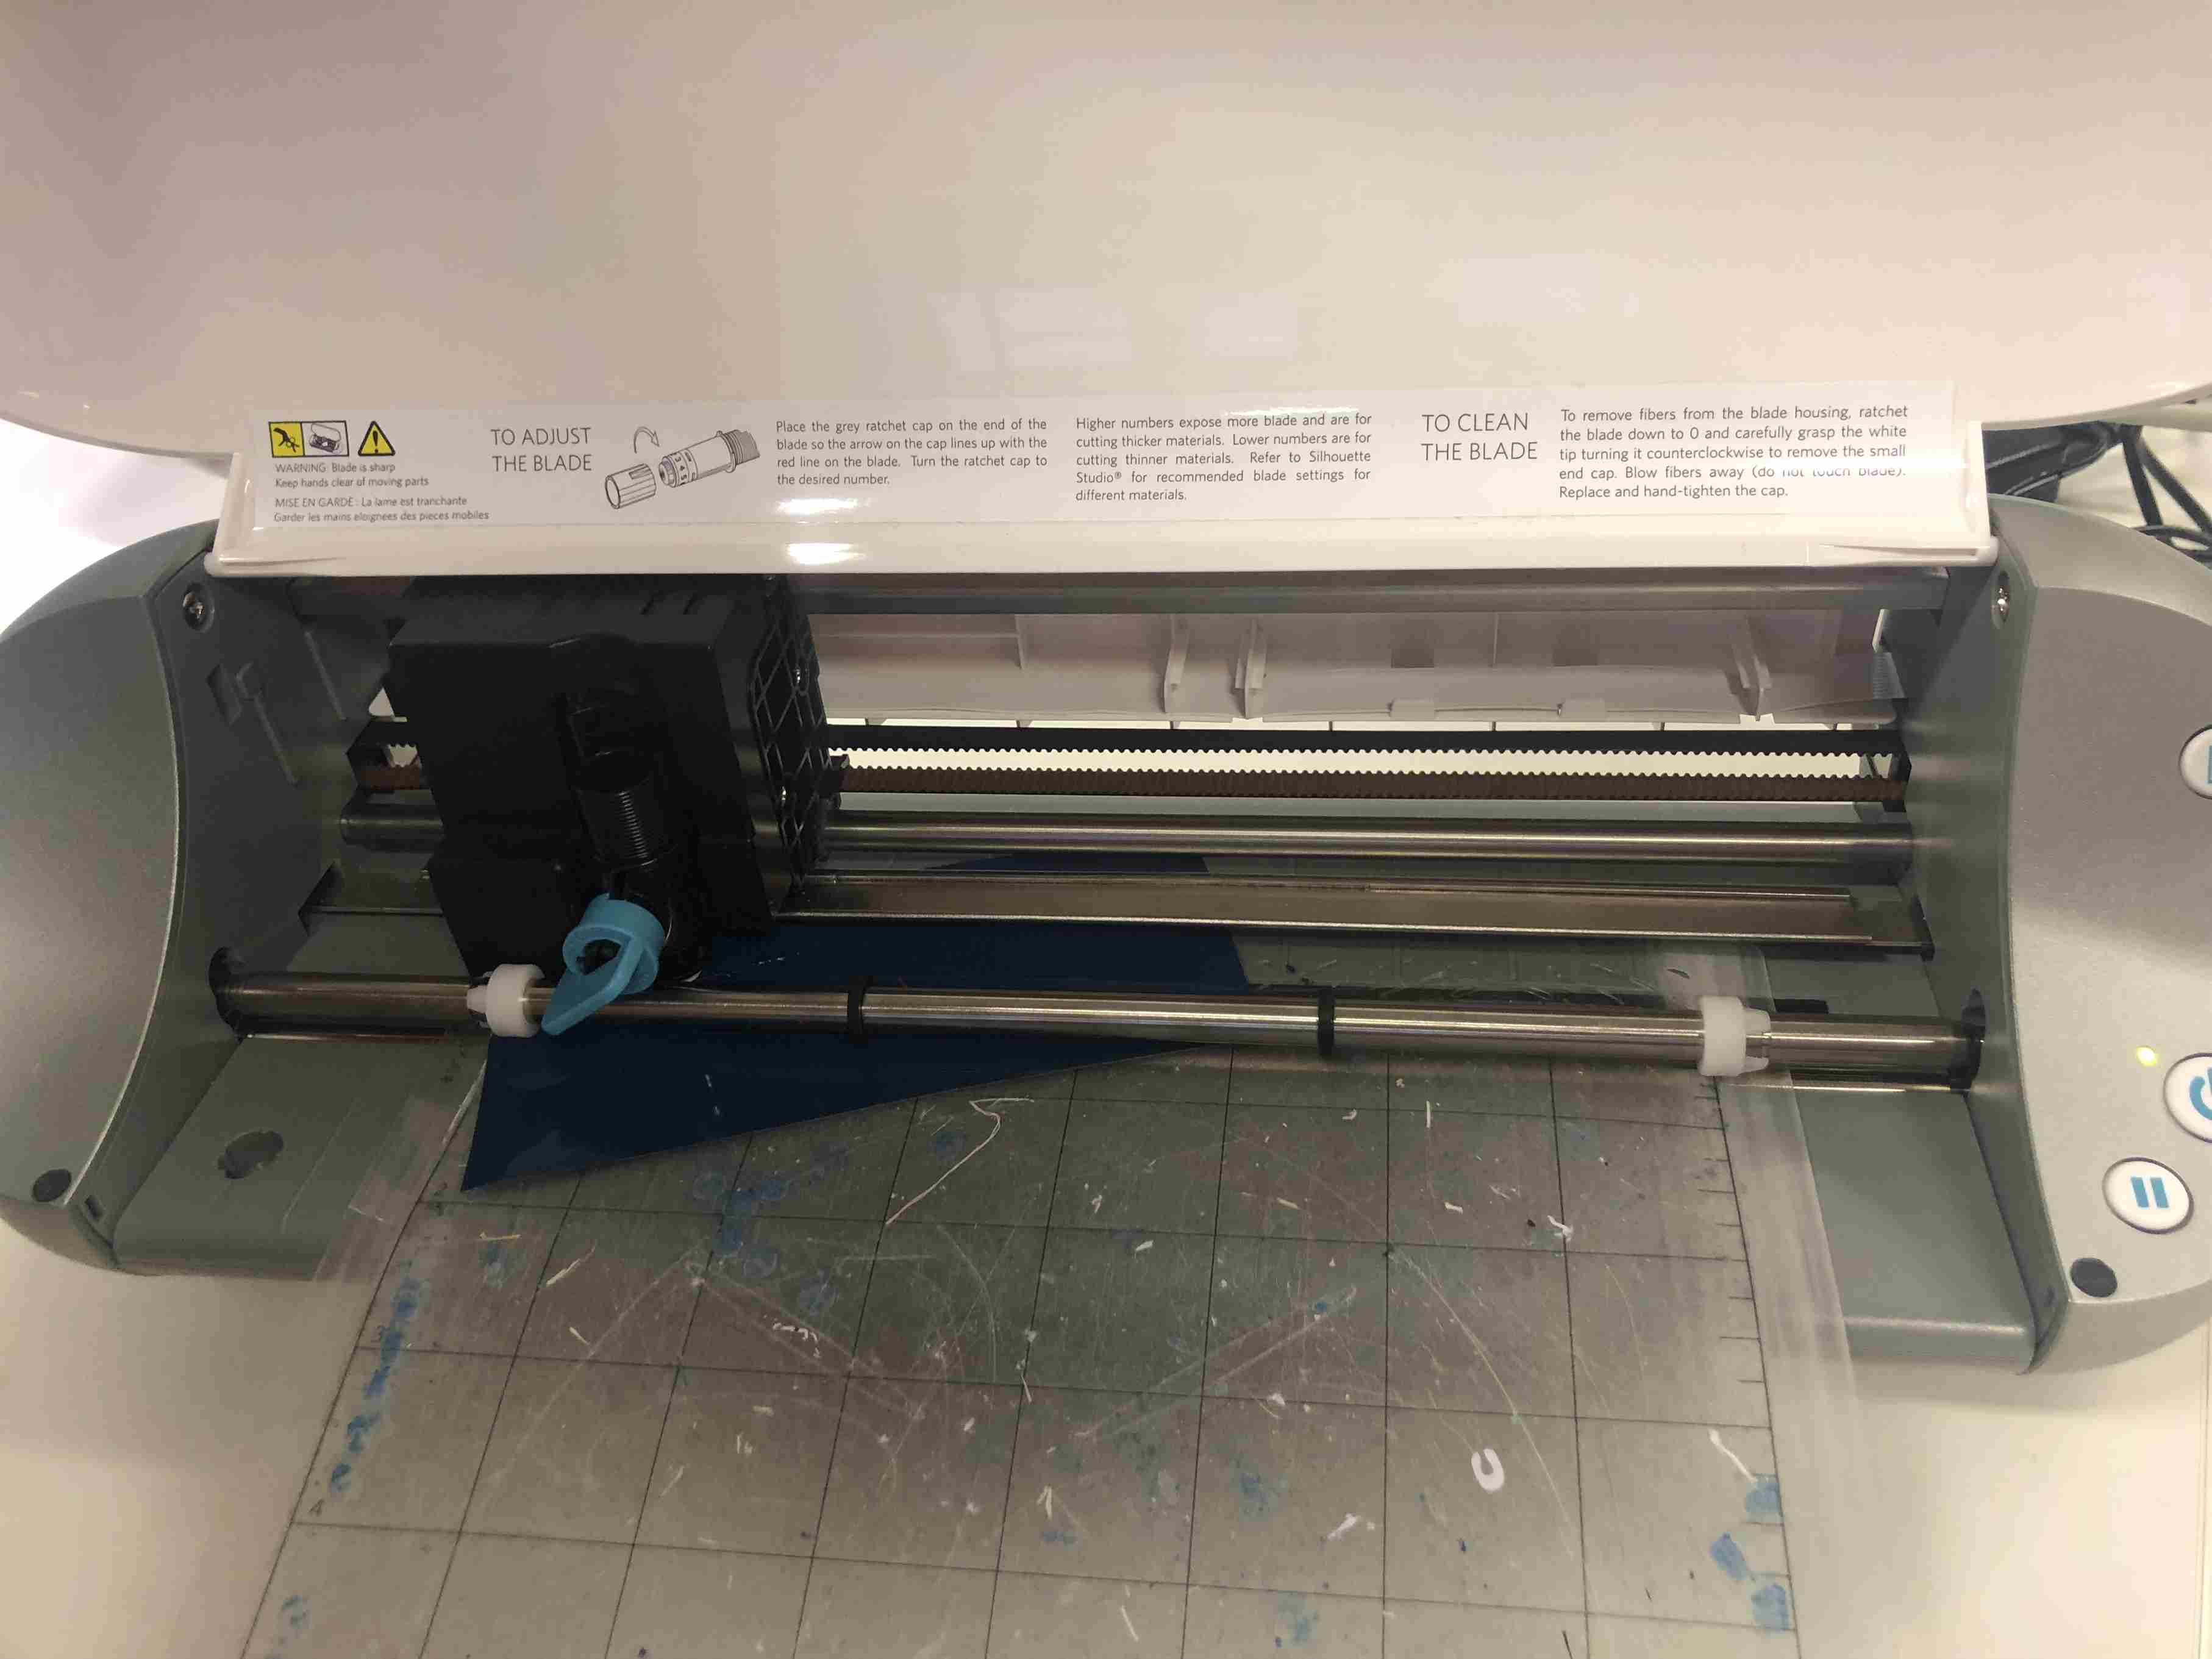
A laser beams from a laser resonator and reflects through a mirros to the cutting head. In the cutting head, the light is focused through a lens and narrowed down to an extremely thin and burn the workpiece.
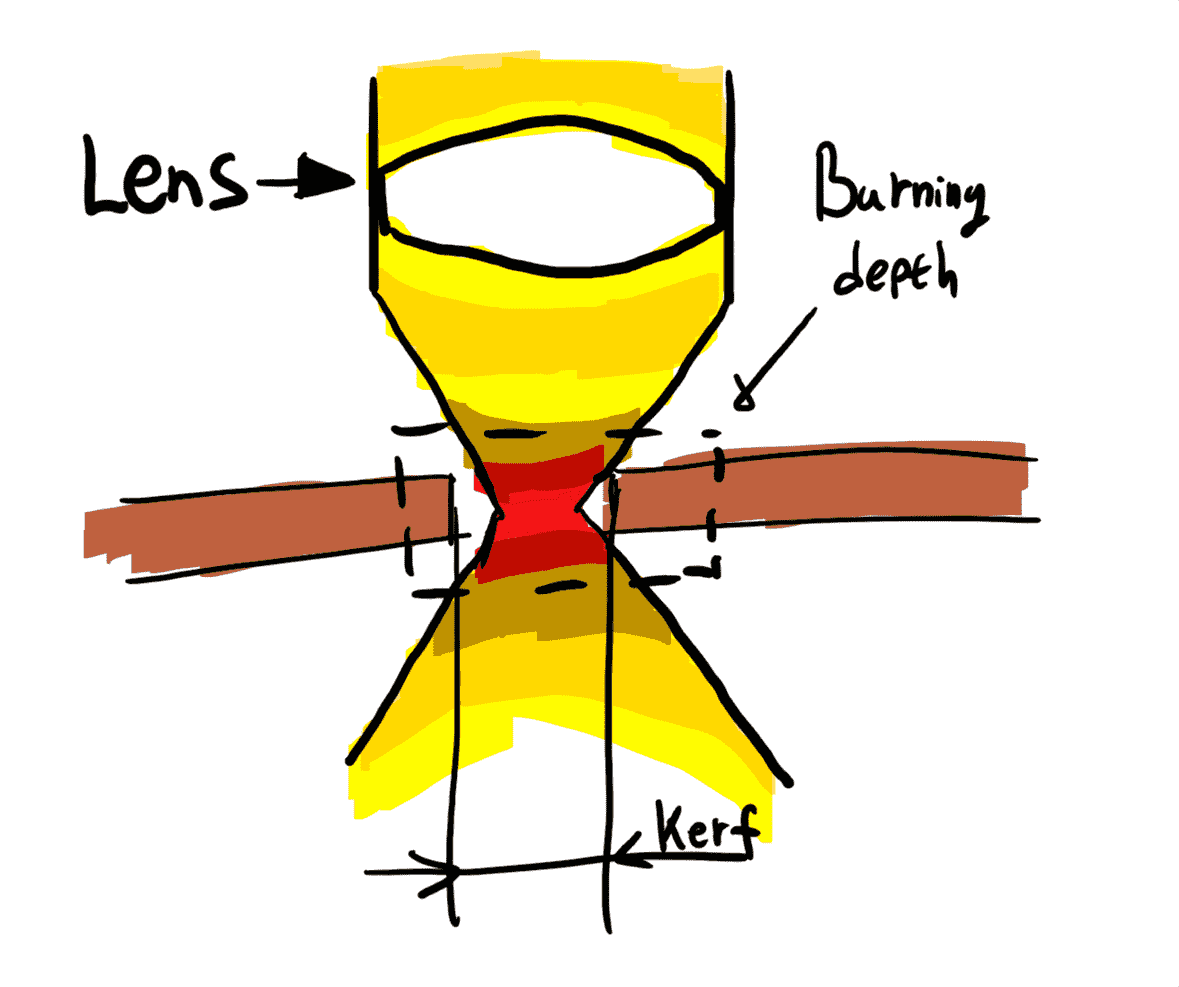
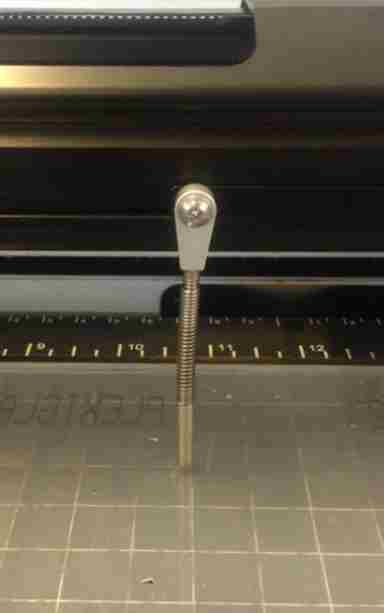
To initiliaze the focal point of a laser we have a ruller for that that can attached to the laser beams and adjusting the z axis of the laser beam to have a perpinduclar ruler to the surface of the workpiece.
Use the arrow buttons to change the menu option on the right side and use the joy stick to move the axis of the laser beam.
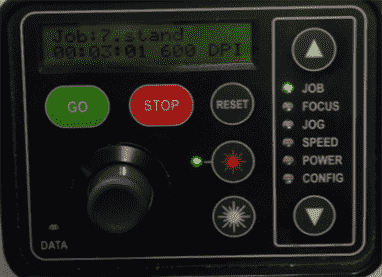
Then, adjust the z axis so the laser beam has a good focal point by move to Focus menu and then use the stick, but do not forget to put the ruler at the laser beam. After the ruler is perfectly adjusted press the stick to enter the new position of the focuse point.
1.3 Laser Cutting Design Software
2D Design
DraftSight is a professional-grade 2D design and drafting solution from Dassault Systems, the parent company of SOLIDWORKS.
2.0 Laser Cutter Settings
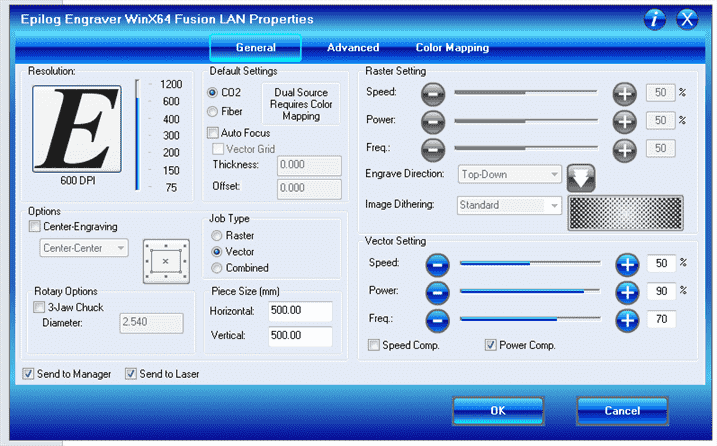
Power
How strong the laser fires.
High power cut thicker material but end up burning thinner and giving more flammable stock.
Low power will not cut very strong and may not burn deep through the materials.
Therefore, during rastering, higher power will burn more layers and depper which result a darker image.
Speed
How fast the head moves along.
High speed, may not cut all the way through when the material is too thick.
Low speed, higher chanca to burn or melt the efges of the material.
In raster operation, higher speed will guaranty engrave the material.
Frequency
Only for cutting
How fast the laser pulses.
The laser turns on and off rapidly during cut. The higher frequency will give a clean cut but if the material is flammeable, it may catach fire.
Resolution
Only for rastering.
Determine the resolution and quality.
Higher resolution will produce darker image, yet it may melt or damage the work piece.
3.0 Joints
Finger Joints
Basic joint for putting two flat plates in perpendicular.
Vector Engraving
Stacking
Slice a 3d parts into 2ds and stick it with glue together to create a 3d object.
Vector Engraving
Using Bolts
In case we do not want a permanent join, and having a press fit because it breaks the material after it become fatique or it is too rigid and brittle. Bolts is a good option to join parts in semipermanent.
4.0 Self Watering Pot
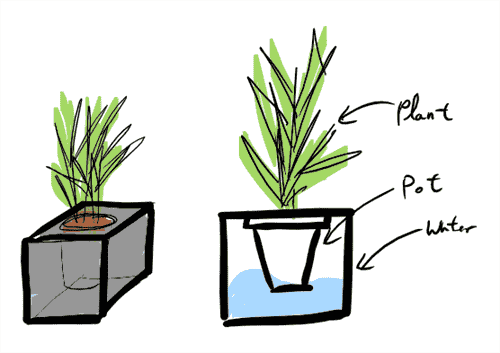
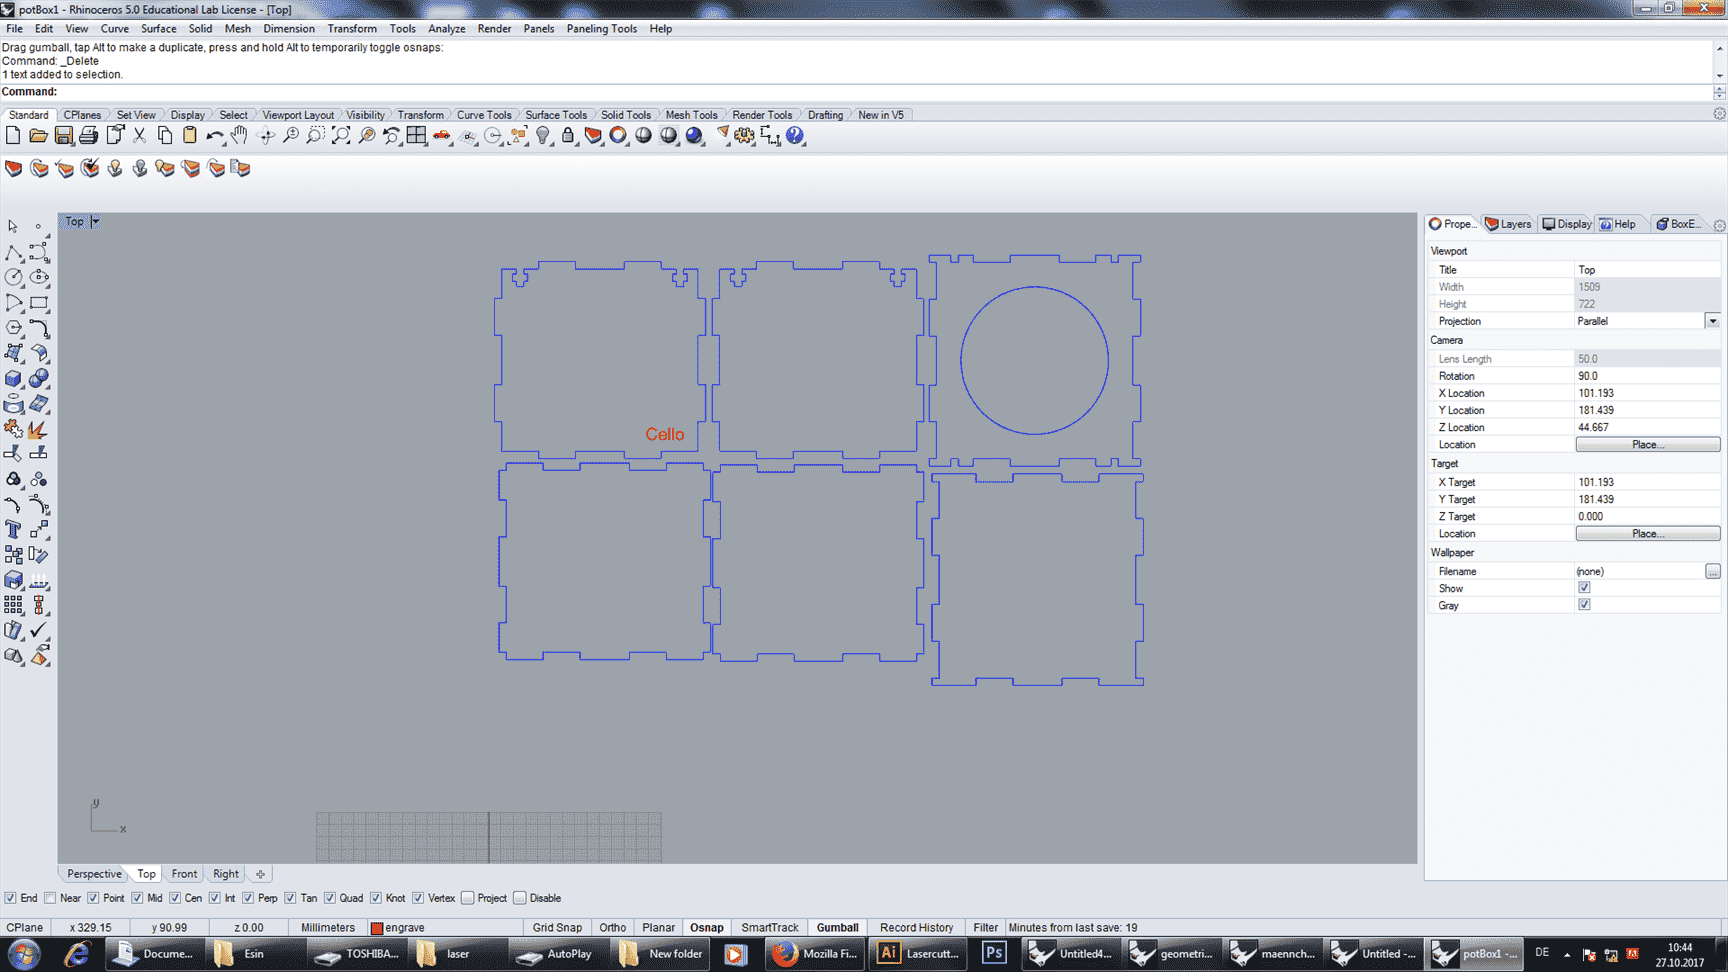
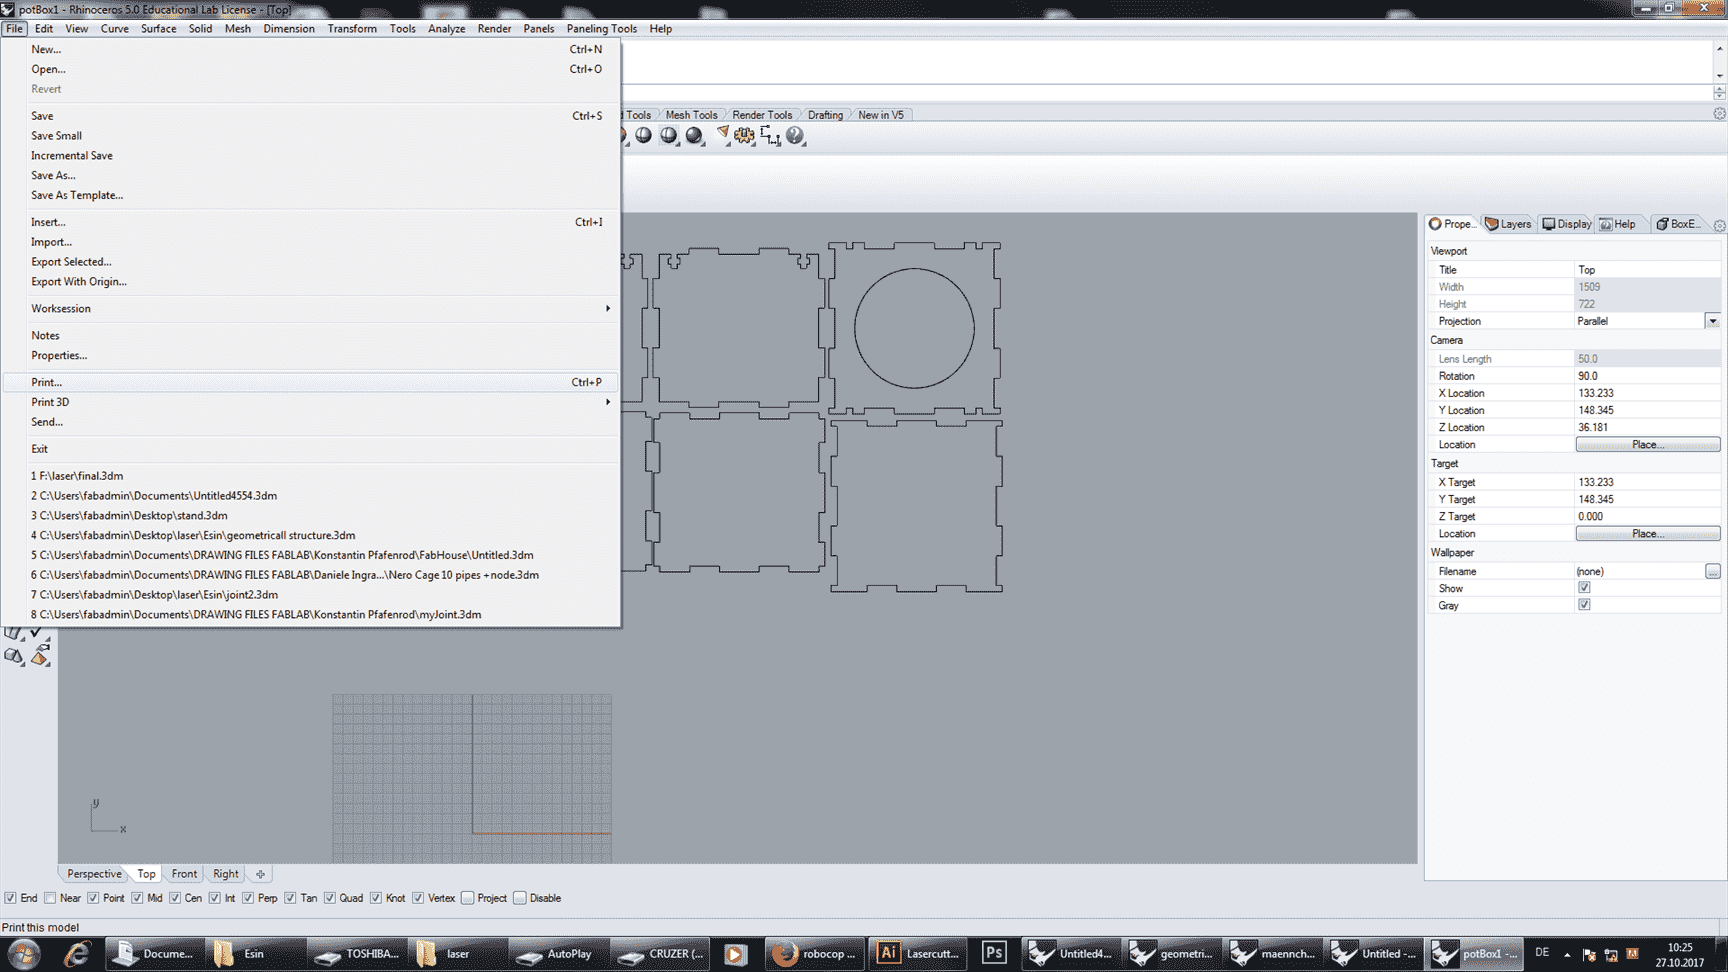
Open the 2D drawing that you have made before.
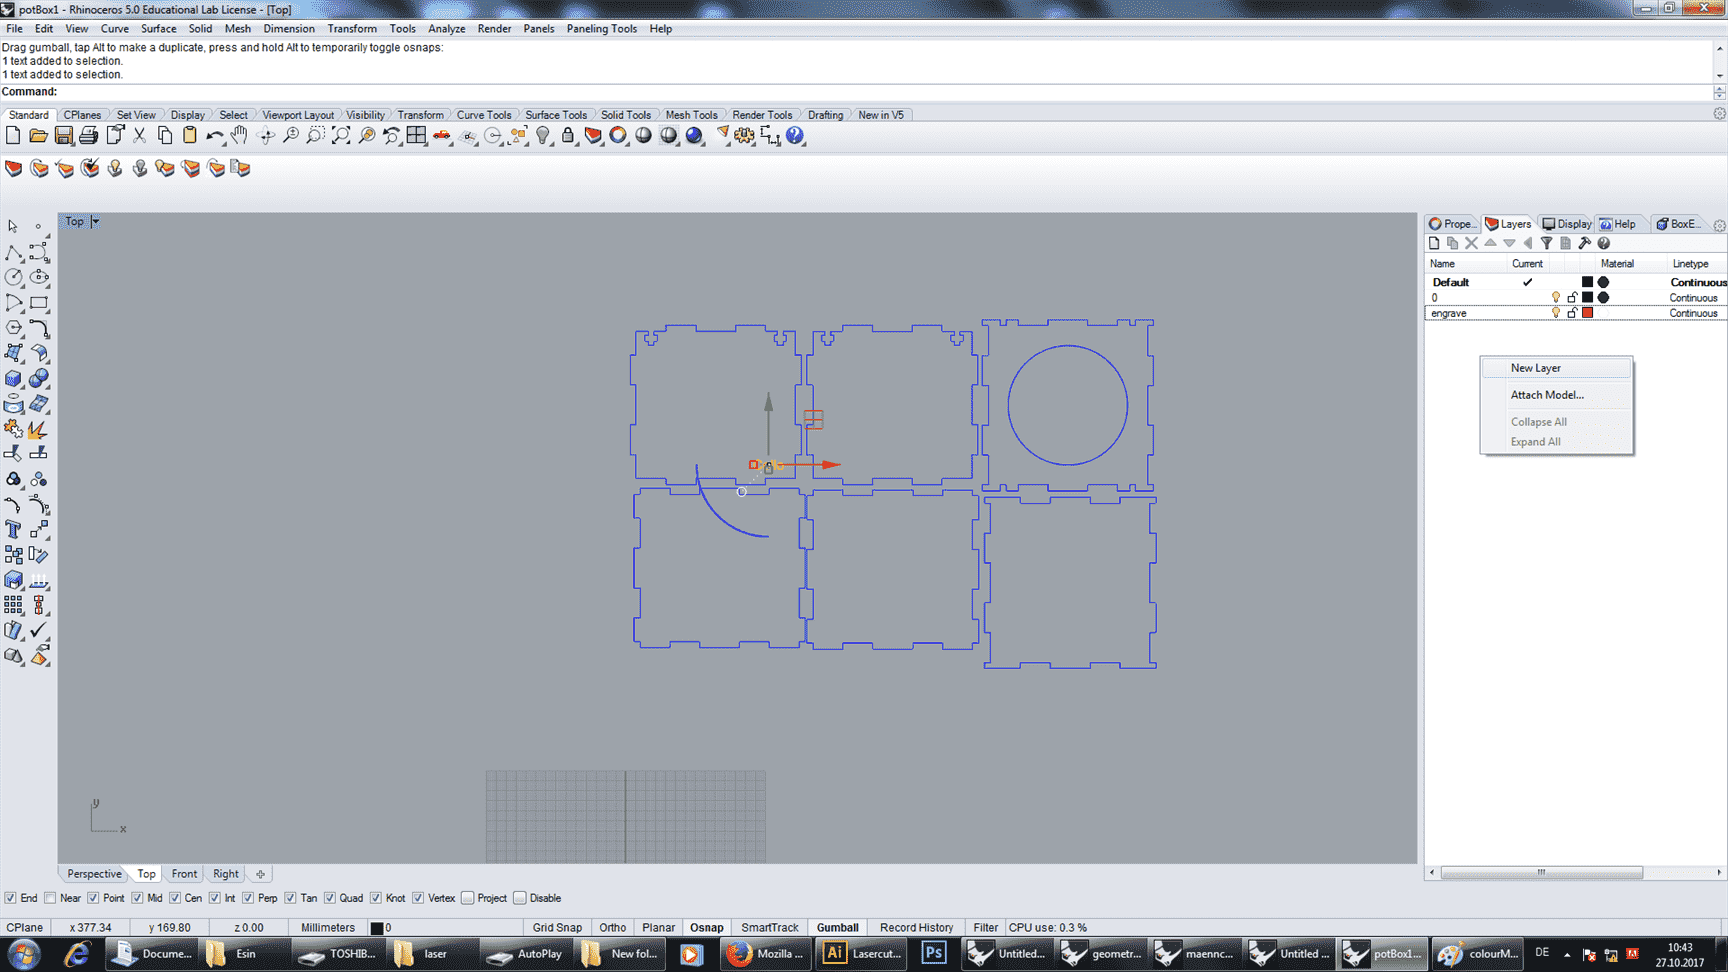
Making sure that you will have 2 layers for engraving and cutting.
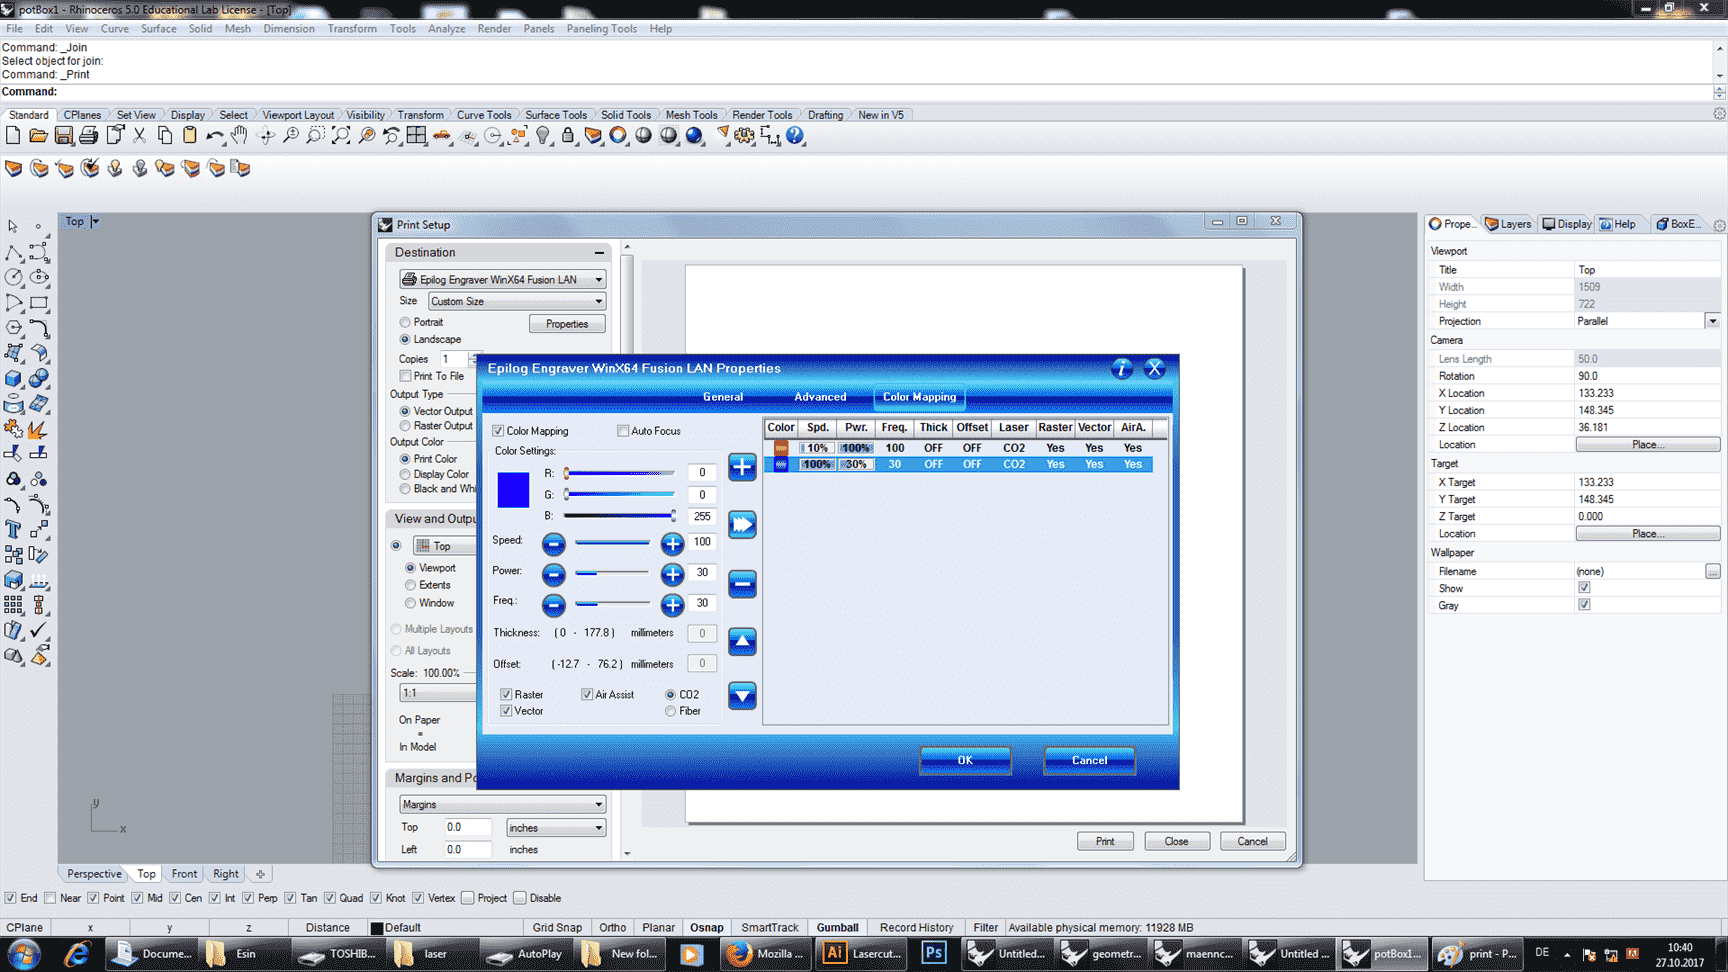
Open the properties in printer option and it always the best to engrave first before cutting the materials. The workpiece will not move while engraving.
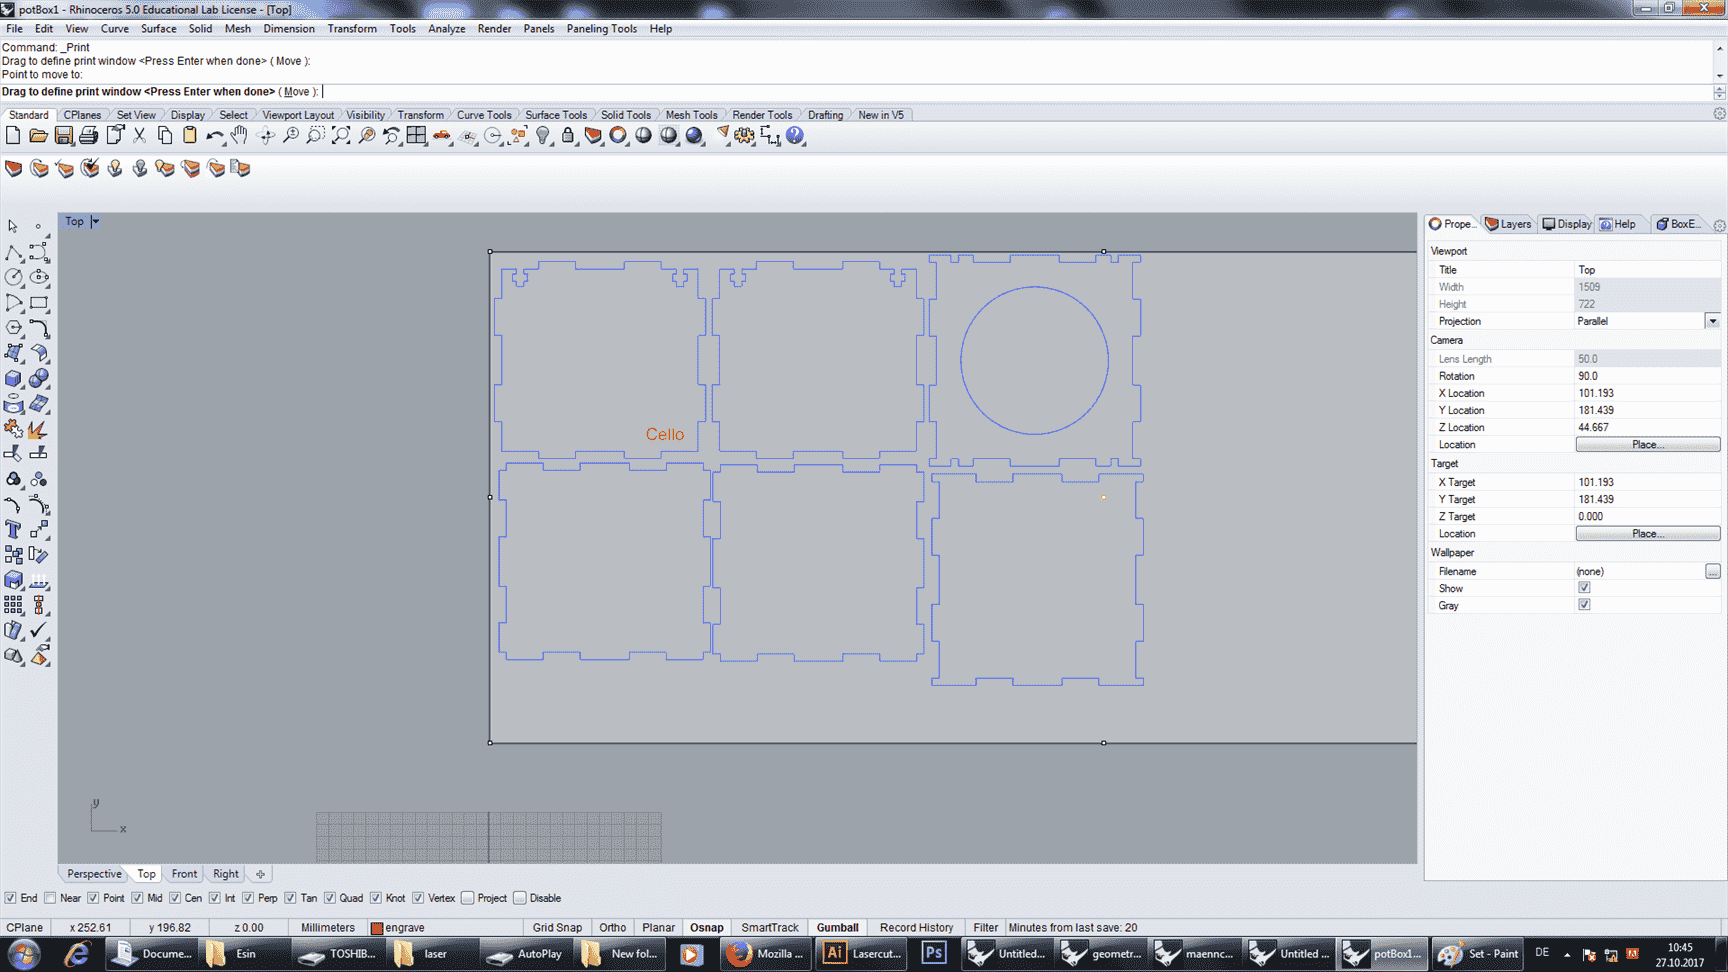
Set the focus and the initiliaze point and click set to have a correct position of the canvas.
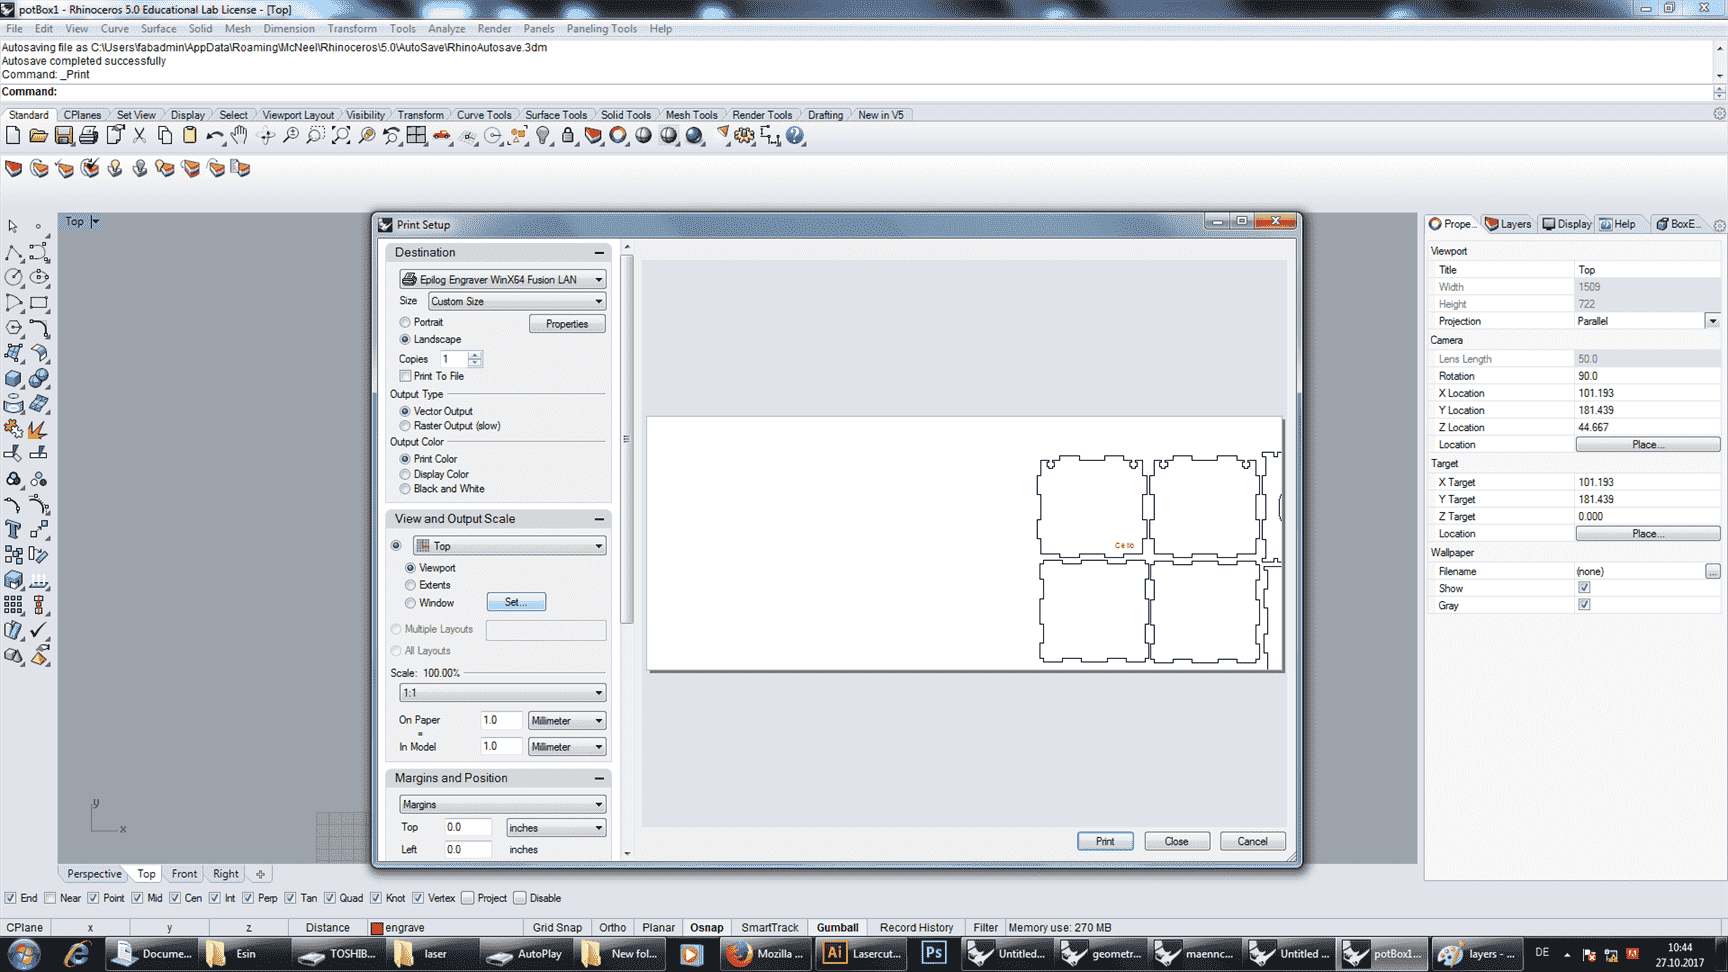
Set the focus point.
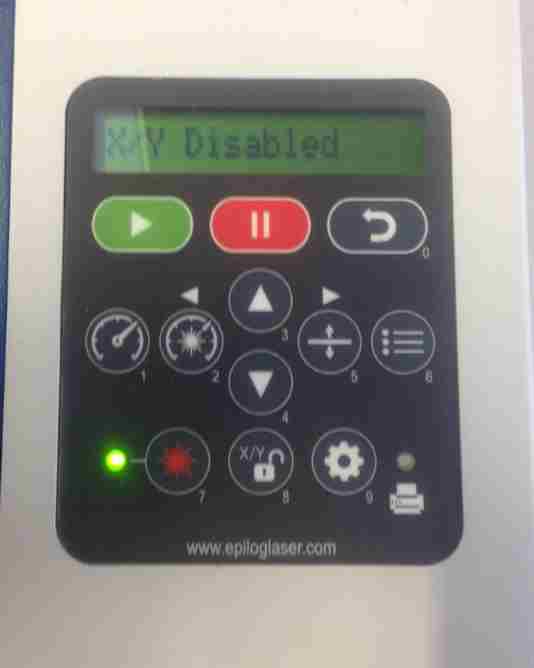
initialize the X and Y axis by unlock number 8 and move it manually by hand and then diasble the X/Y axis to lock.
Turn on the vacuum, start o print and in case of trouble always remember to press the emergency button.
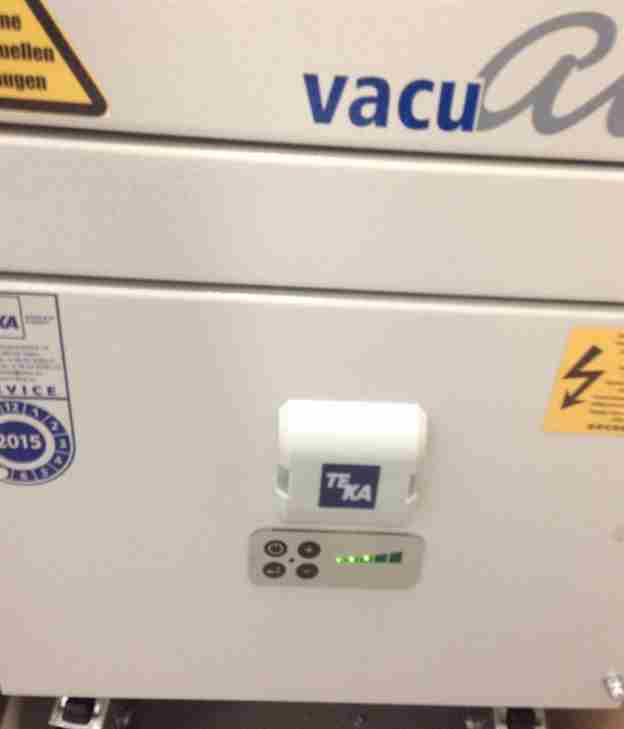
Turn on the vacuum.
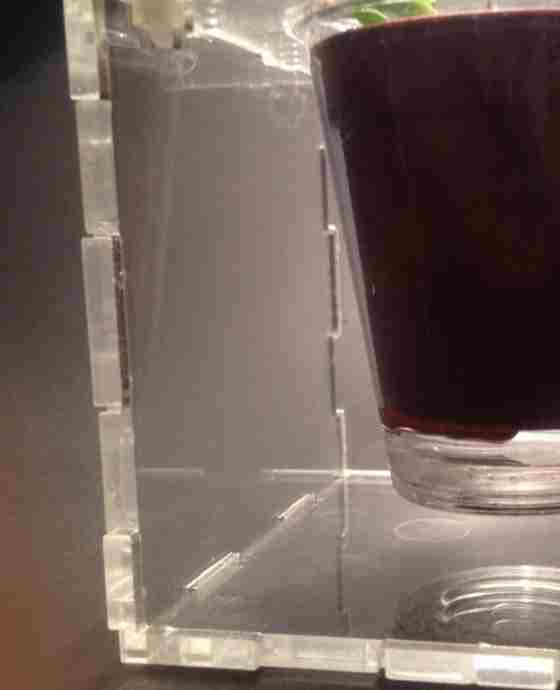
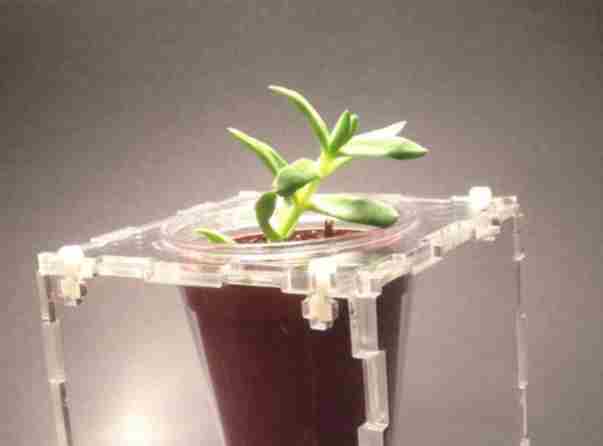
4.1 Result
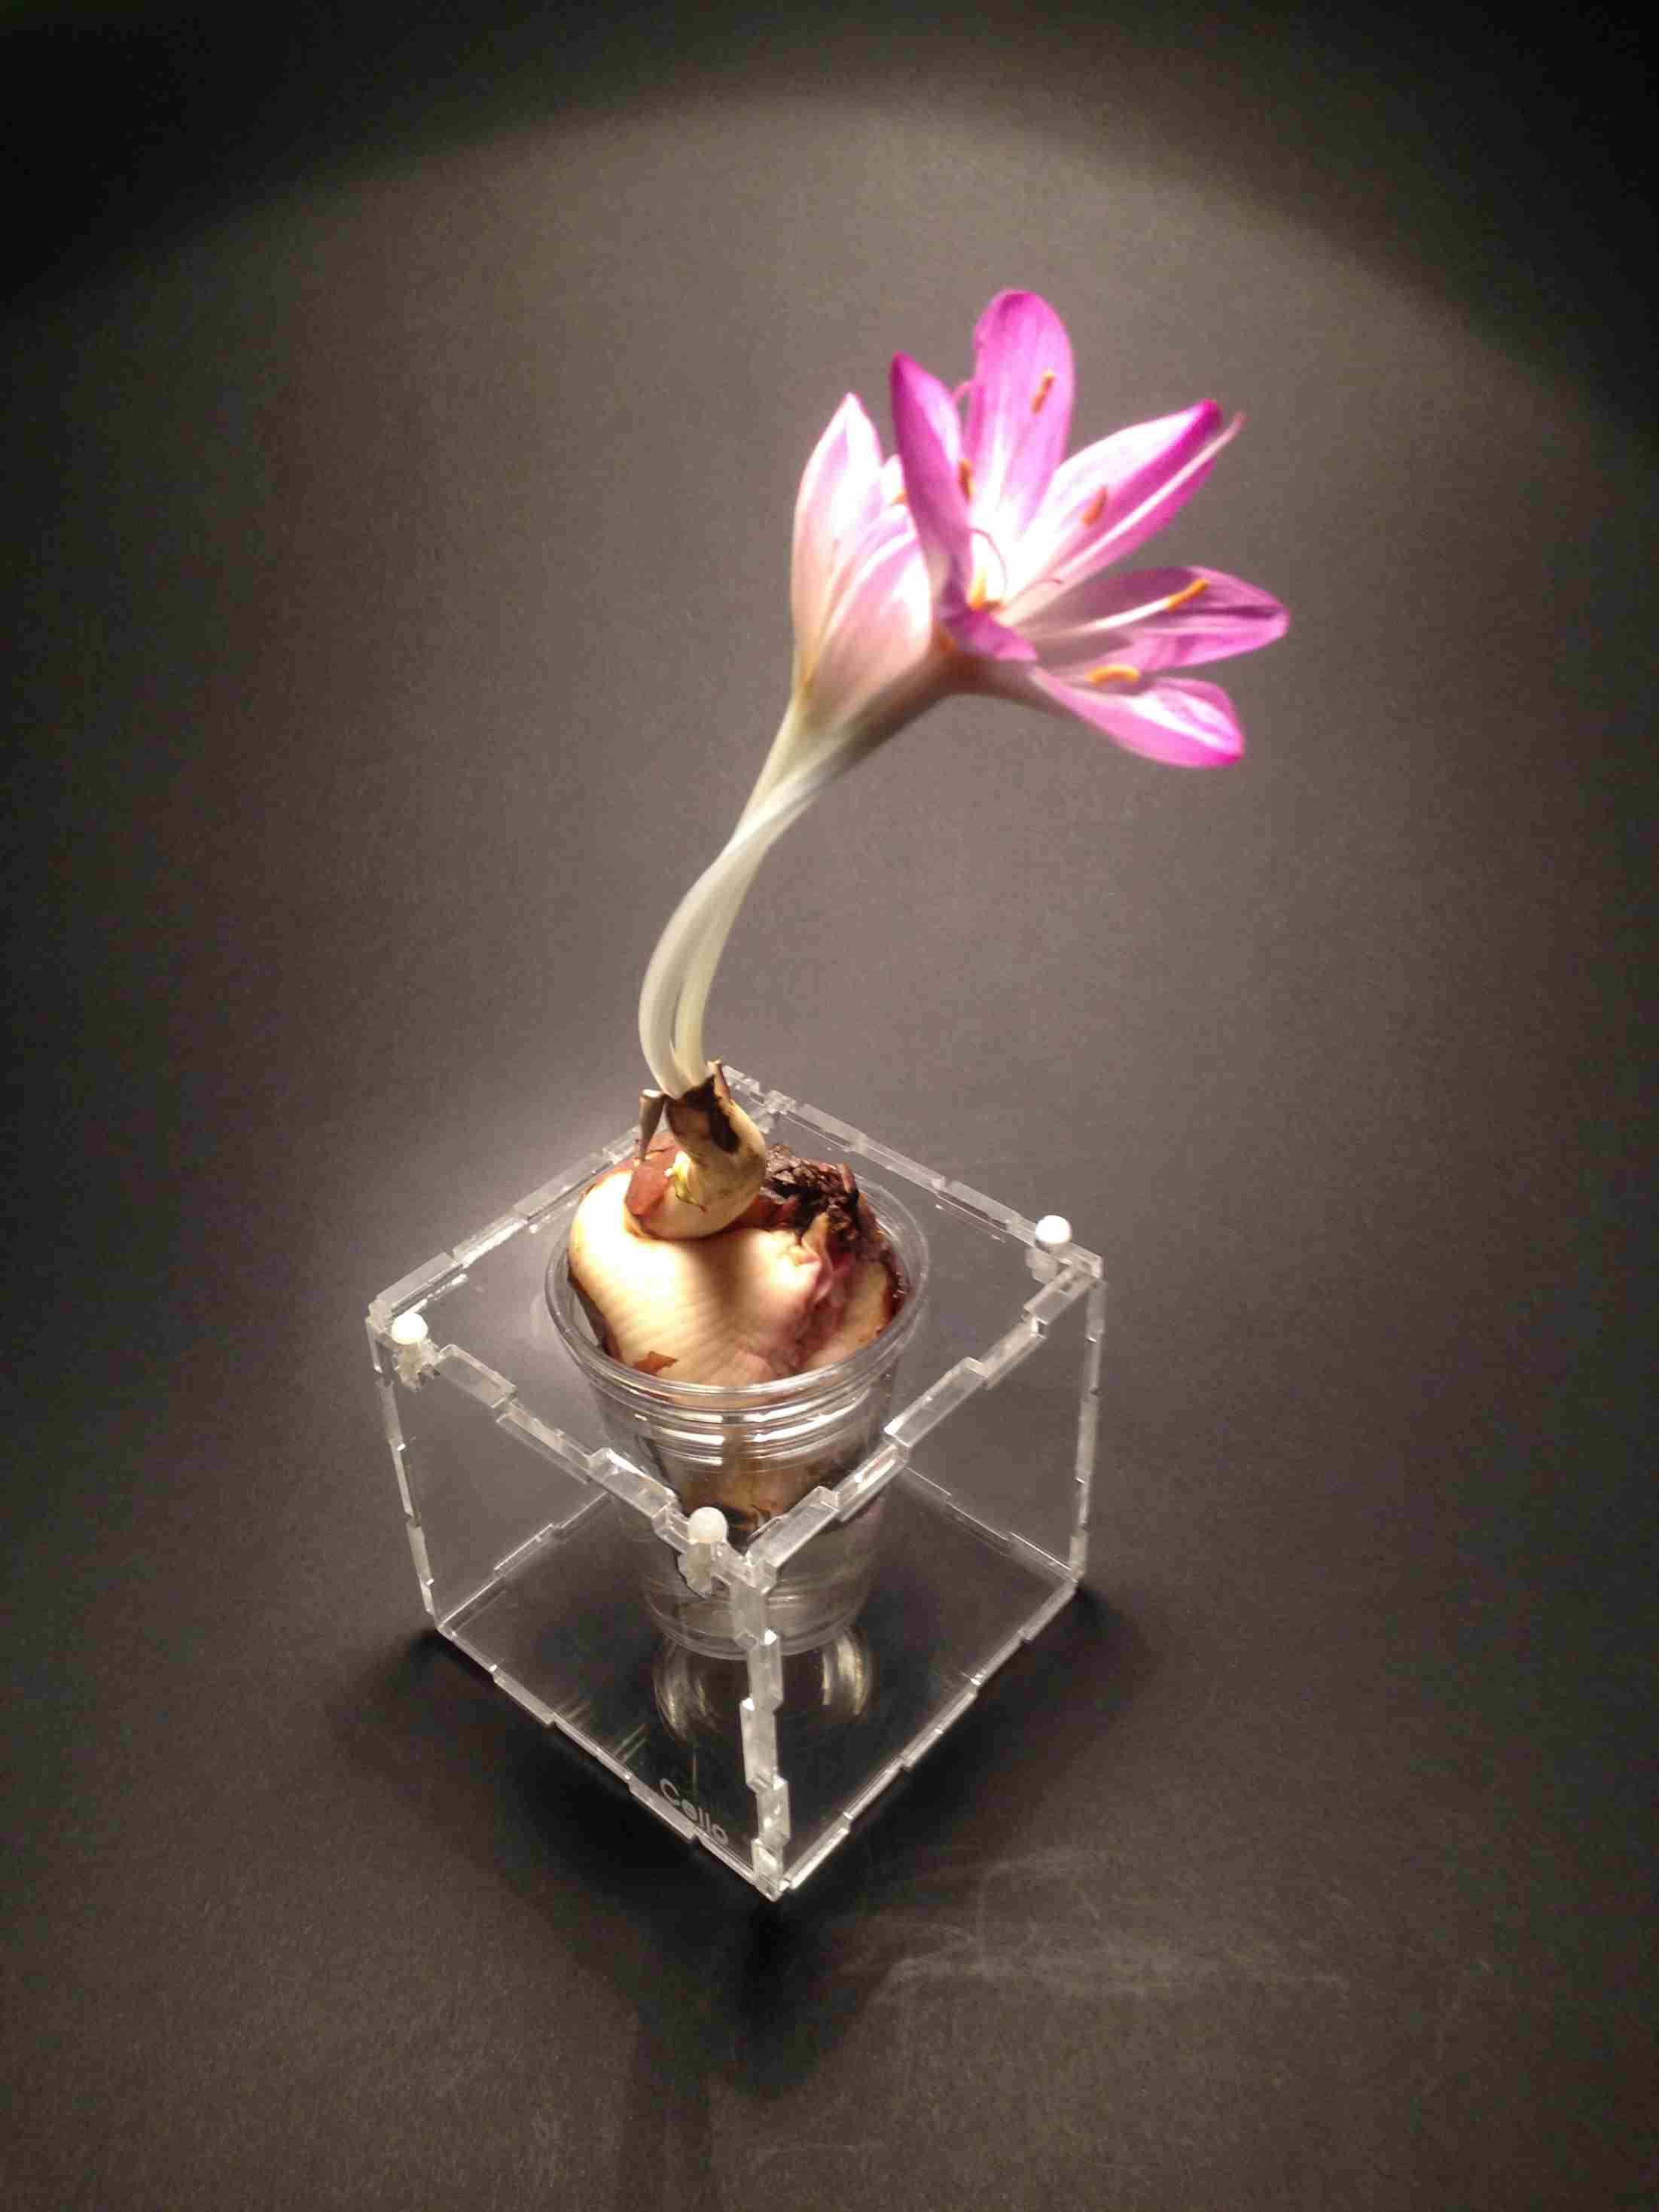
The pot with a flower. :)
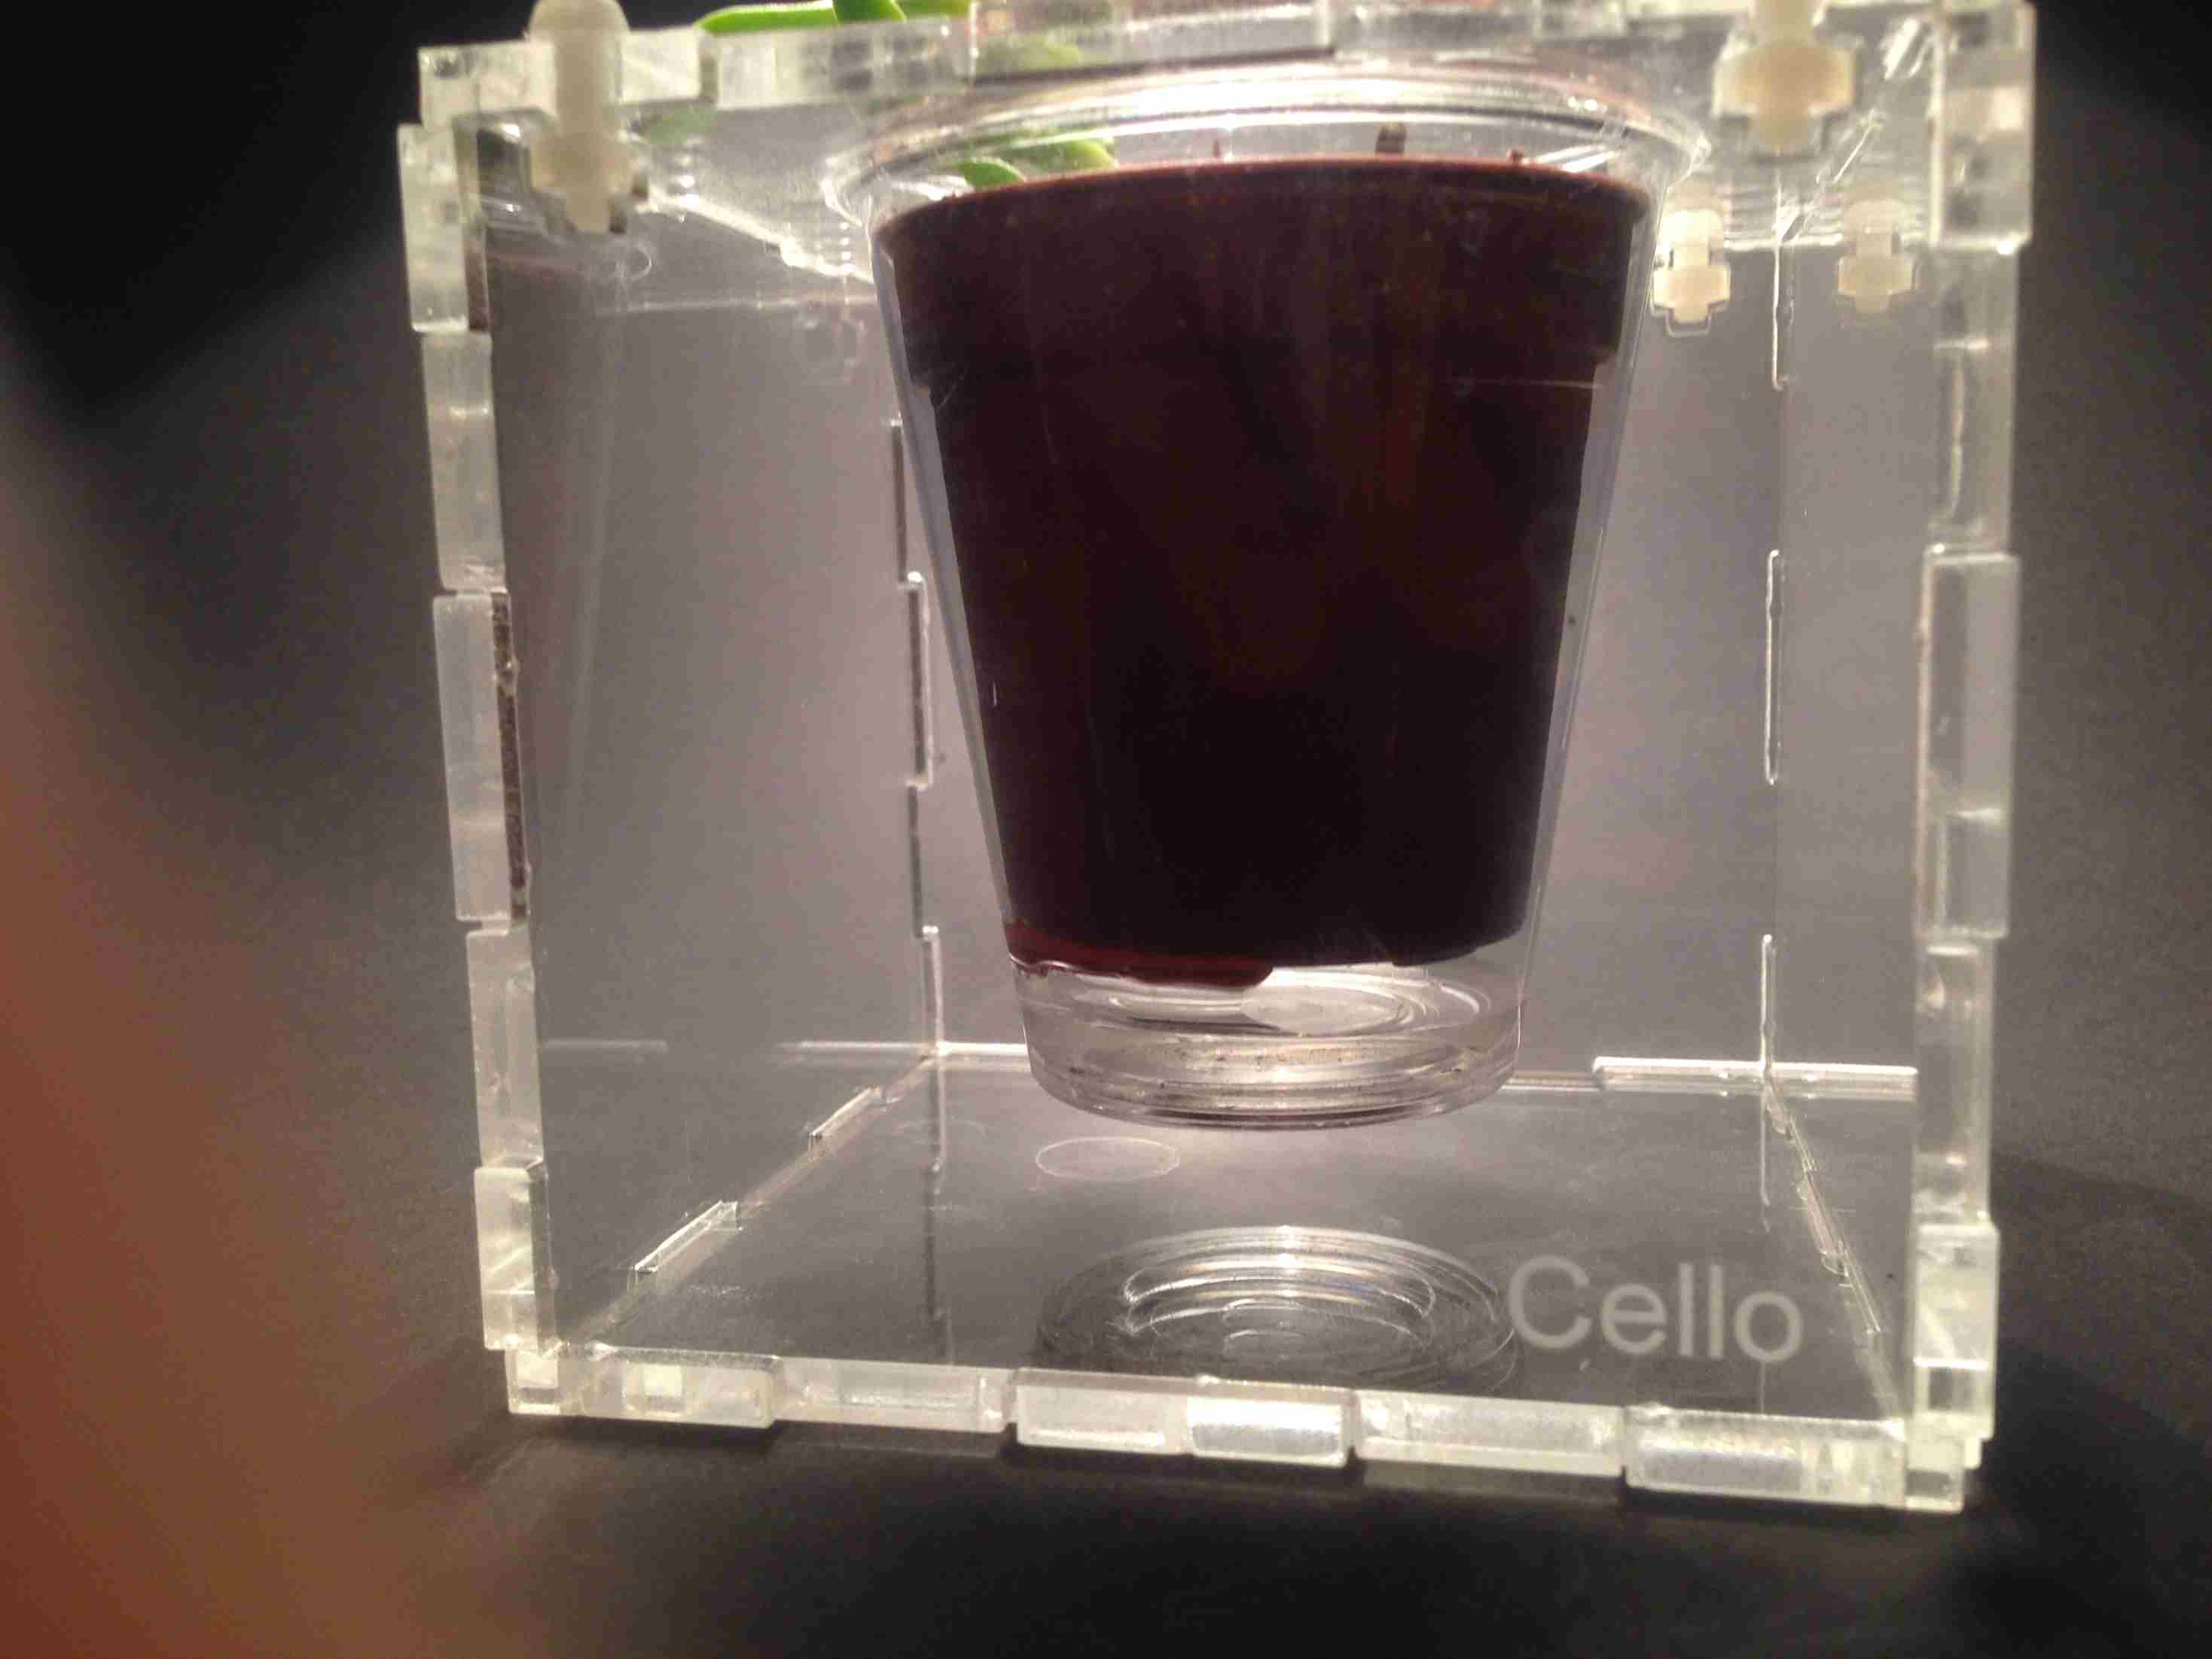
Engraving by a vector.
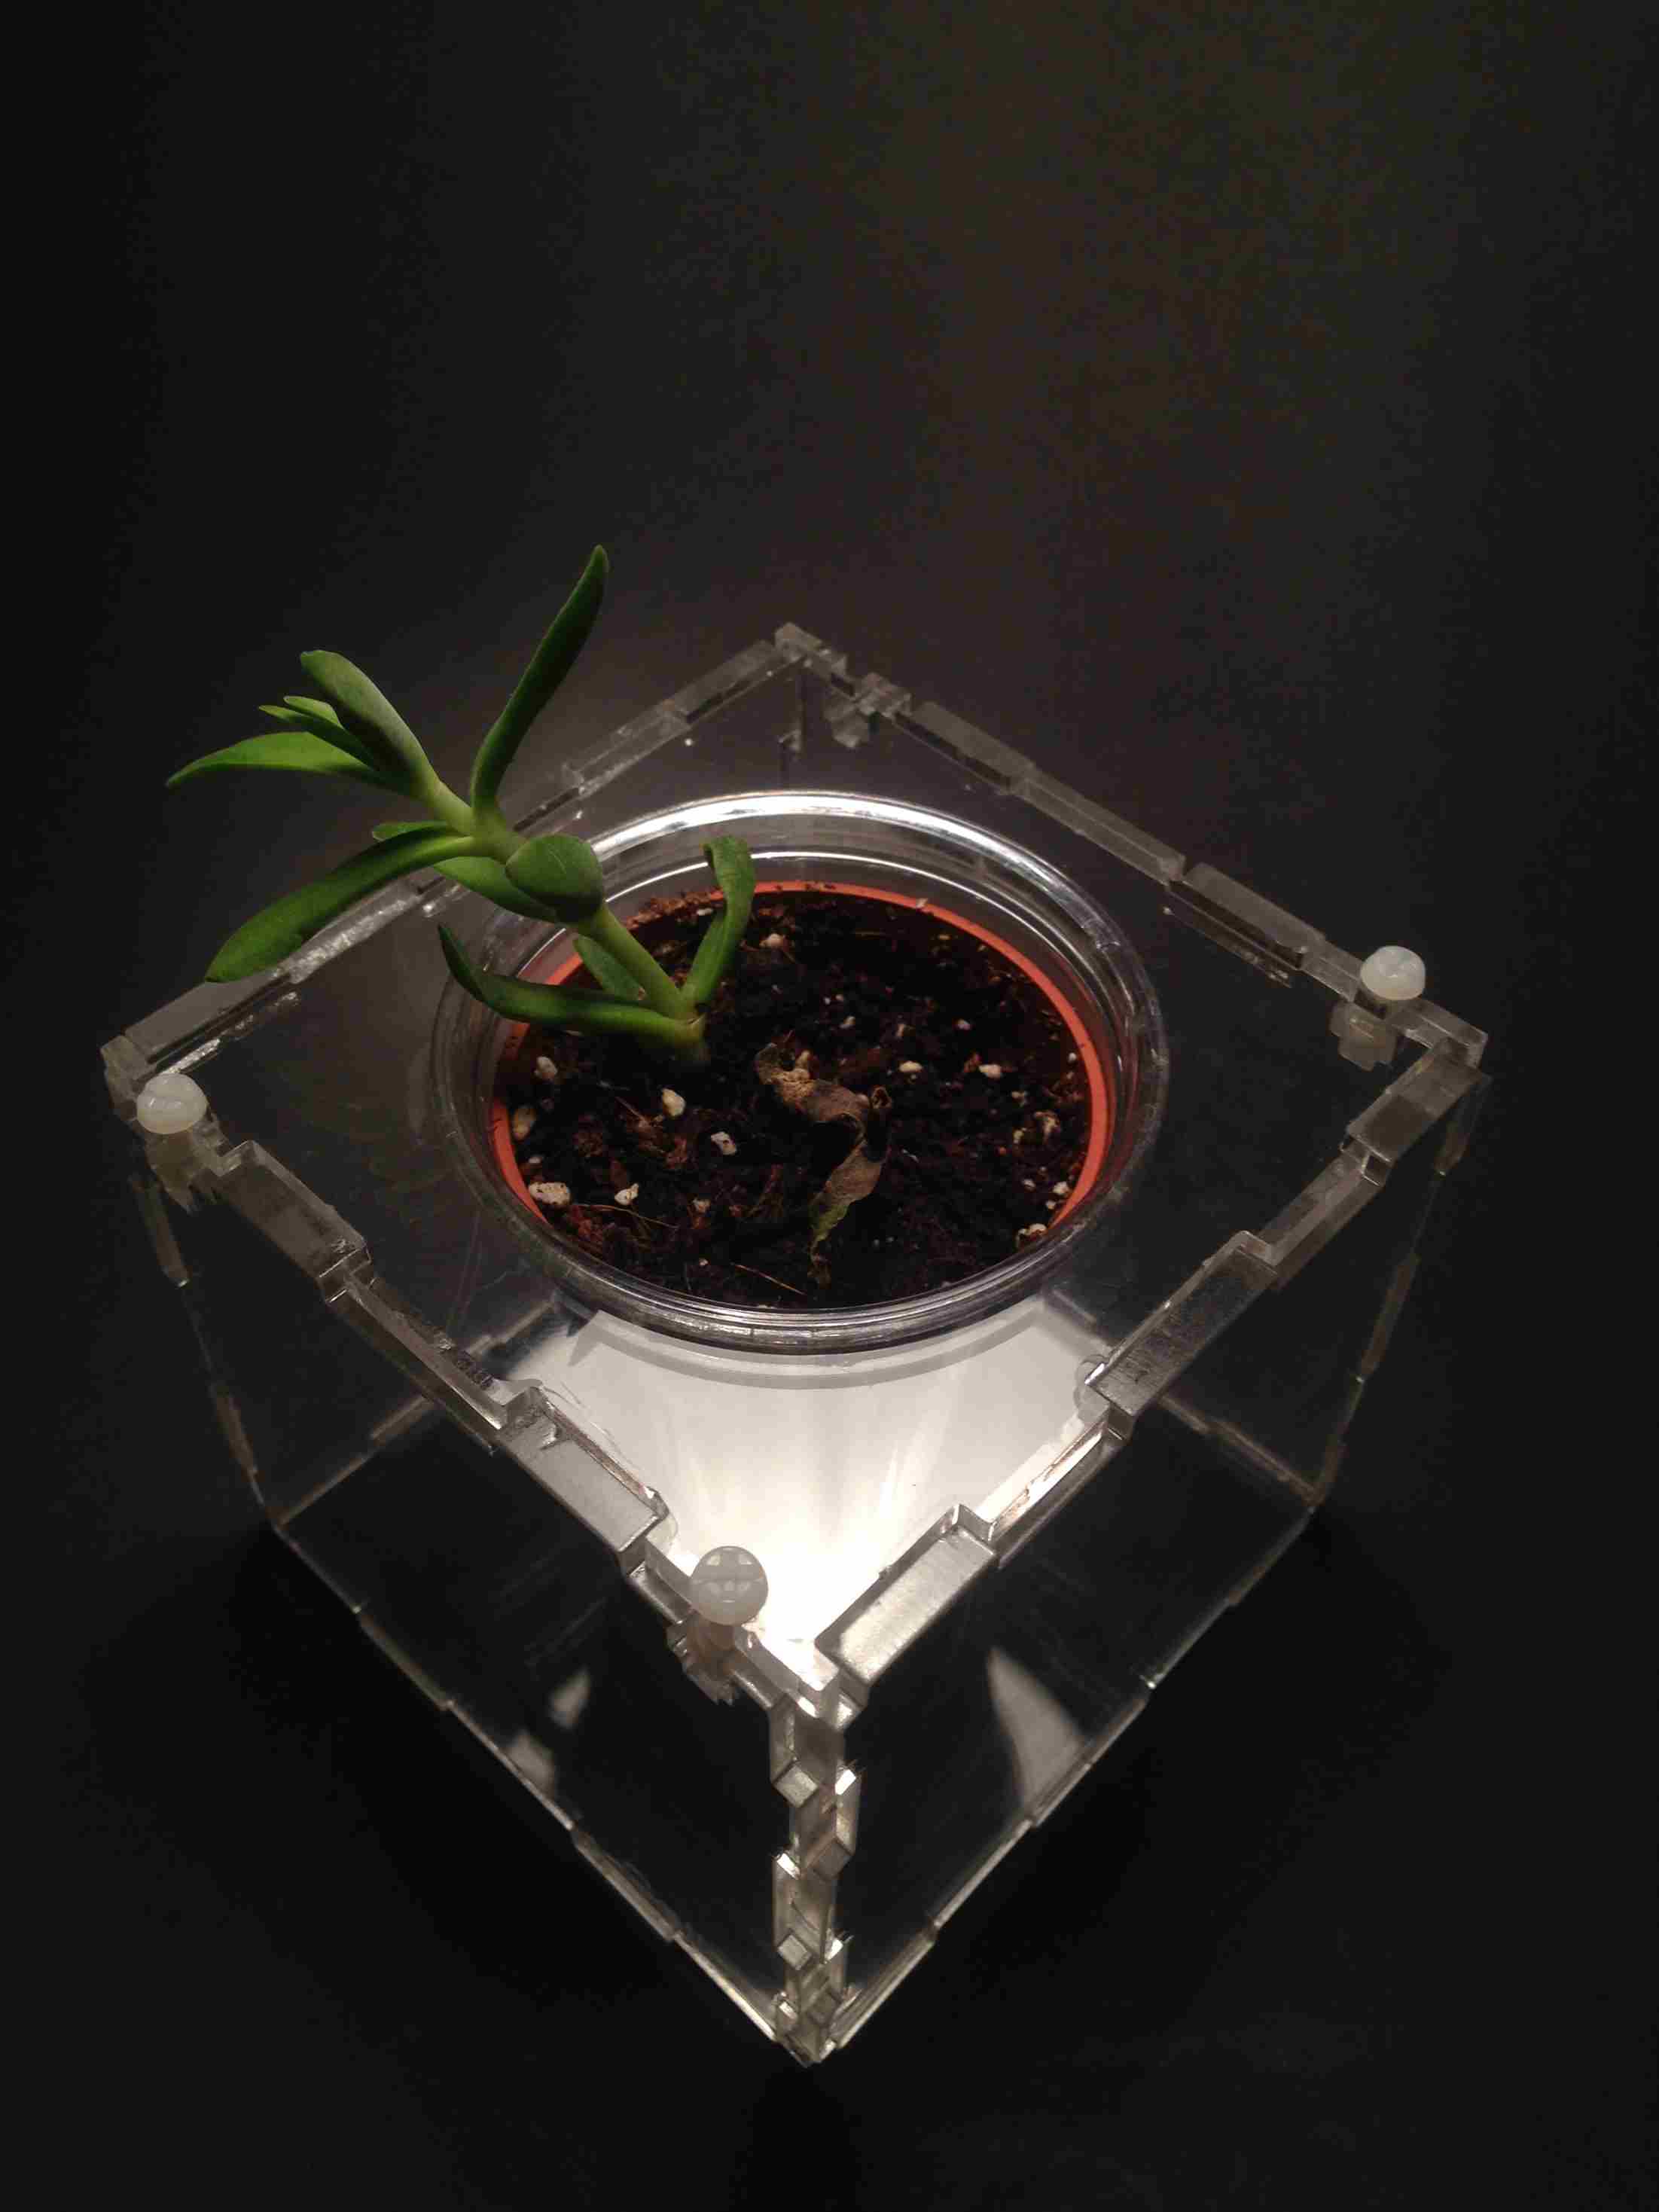
Pot by cello.
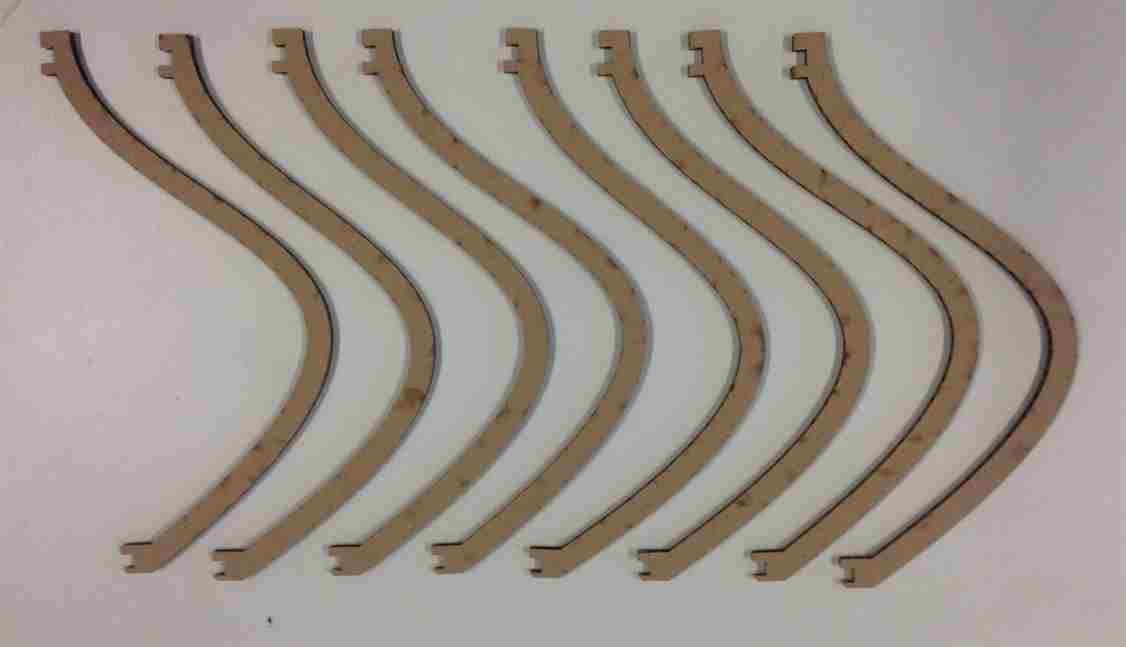
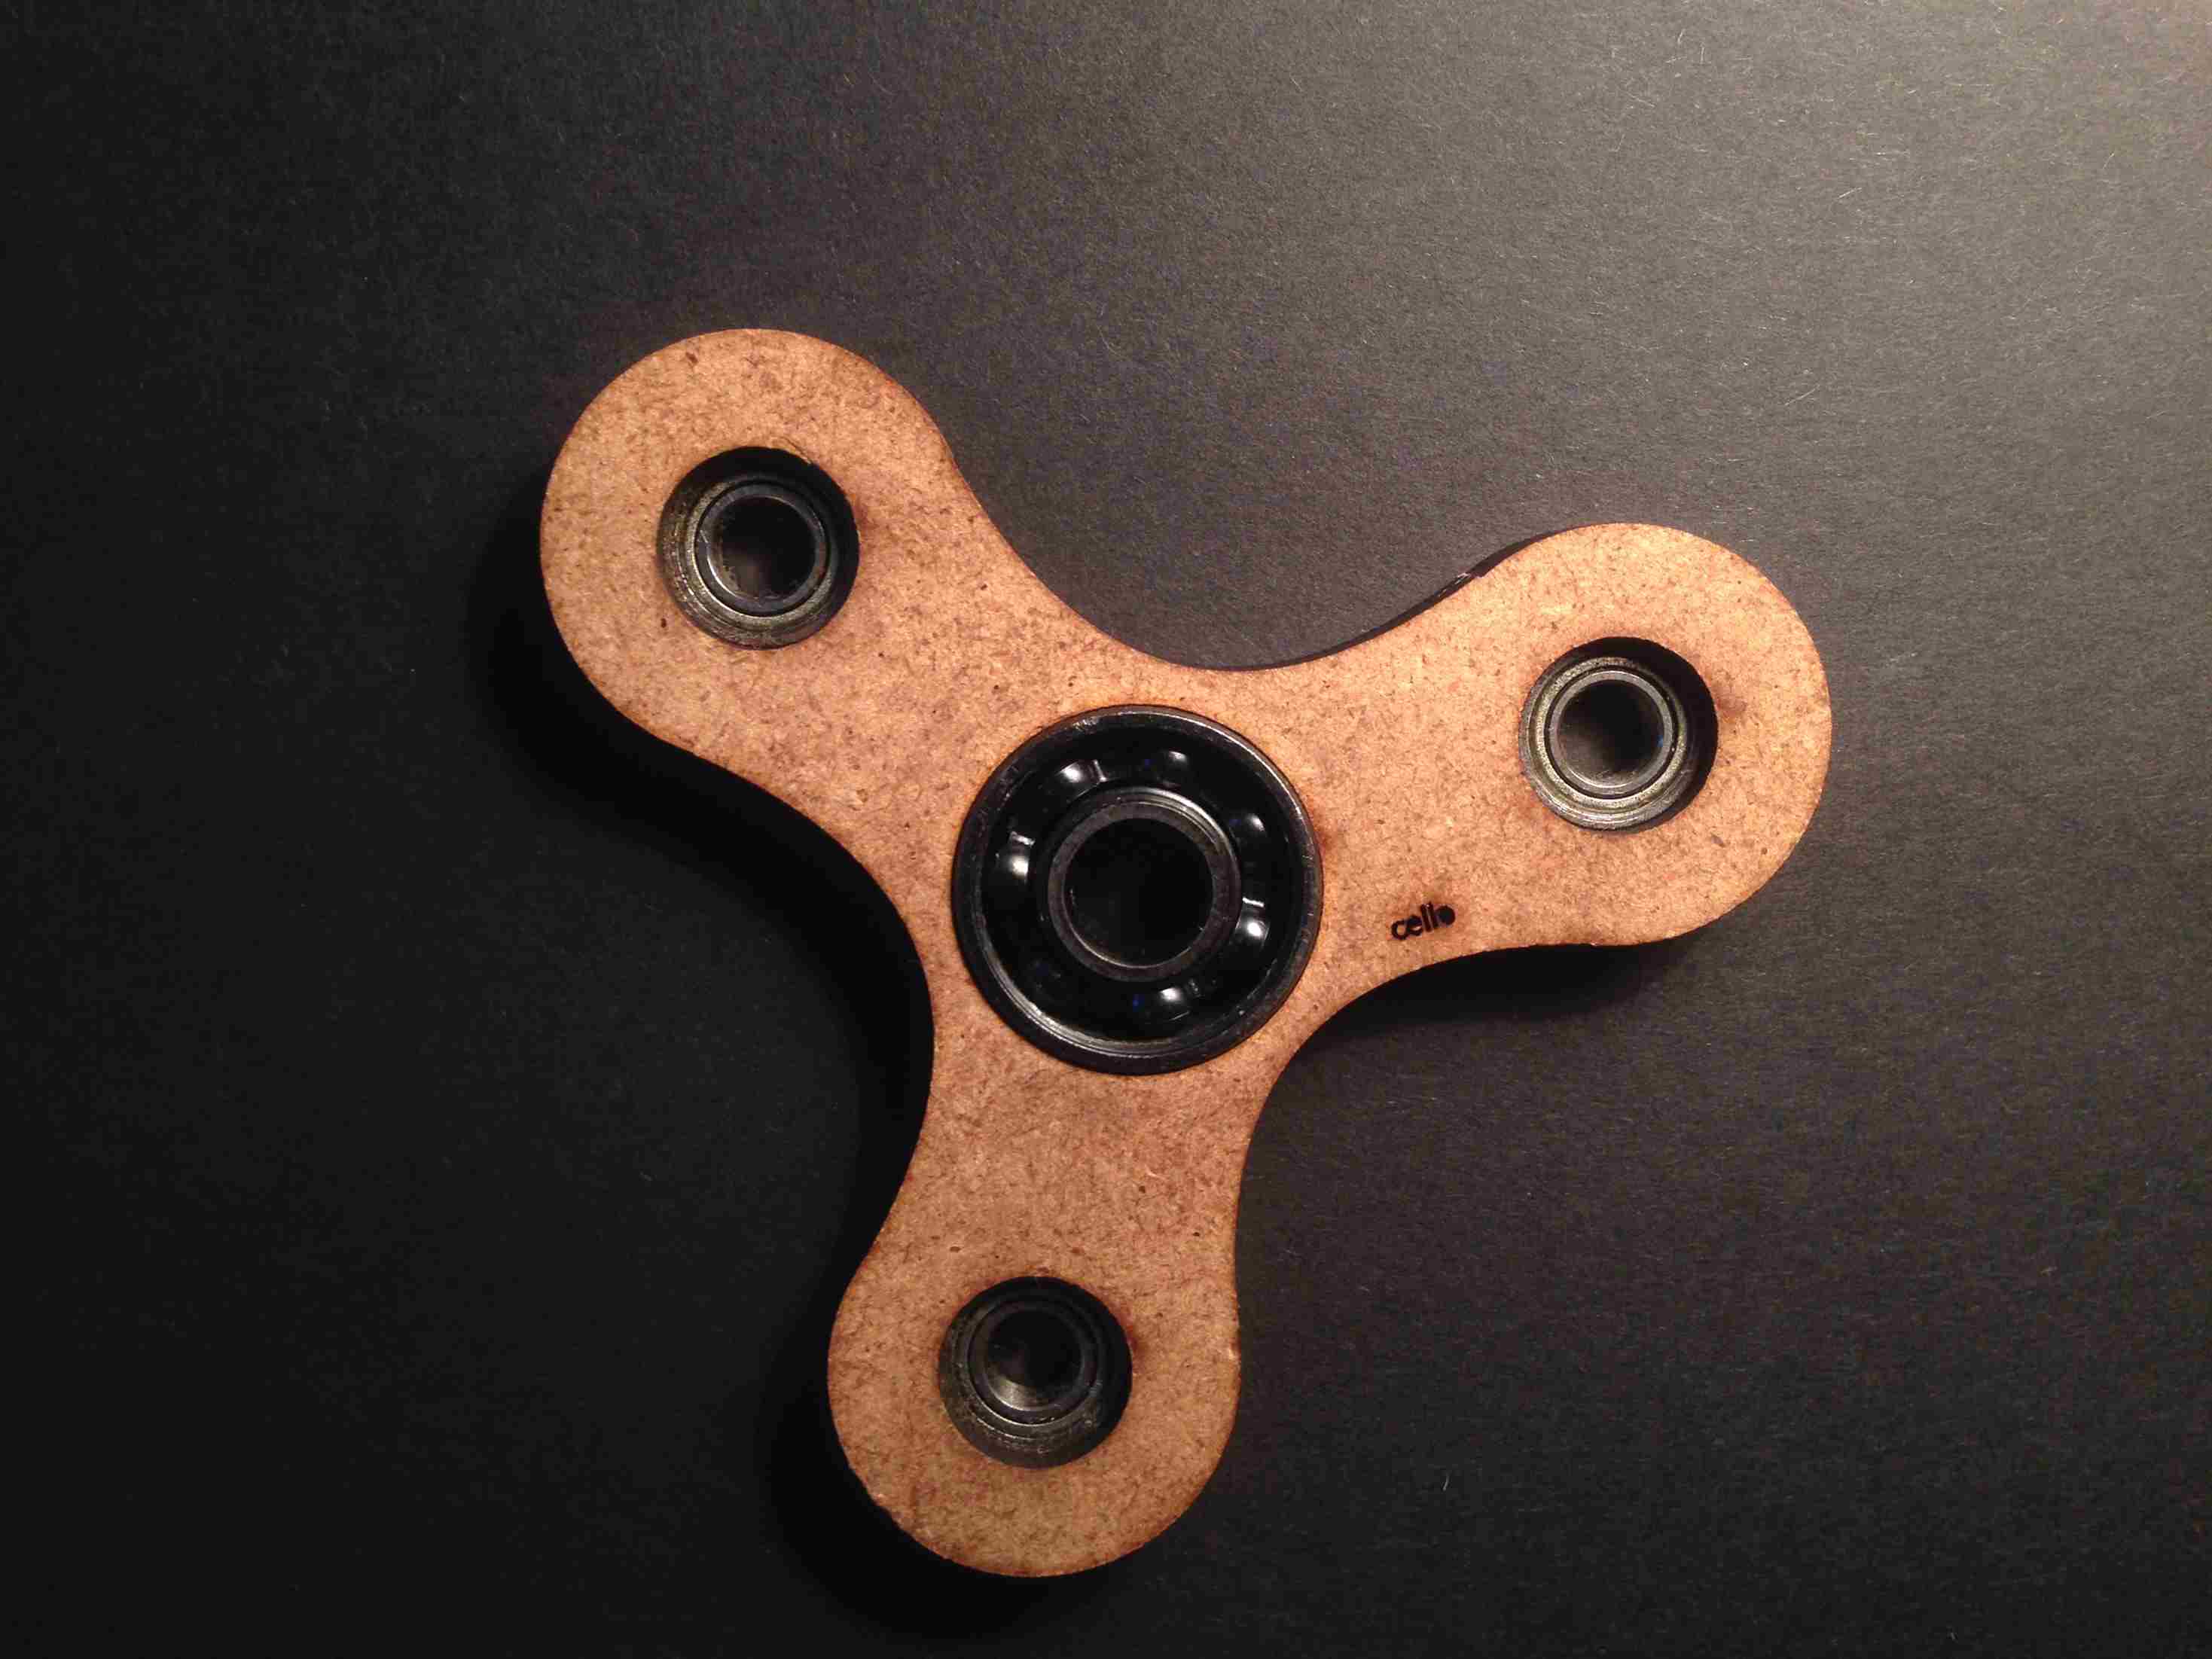
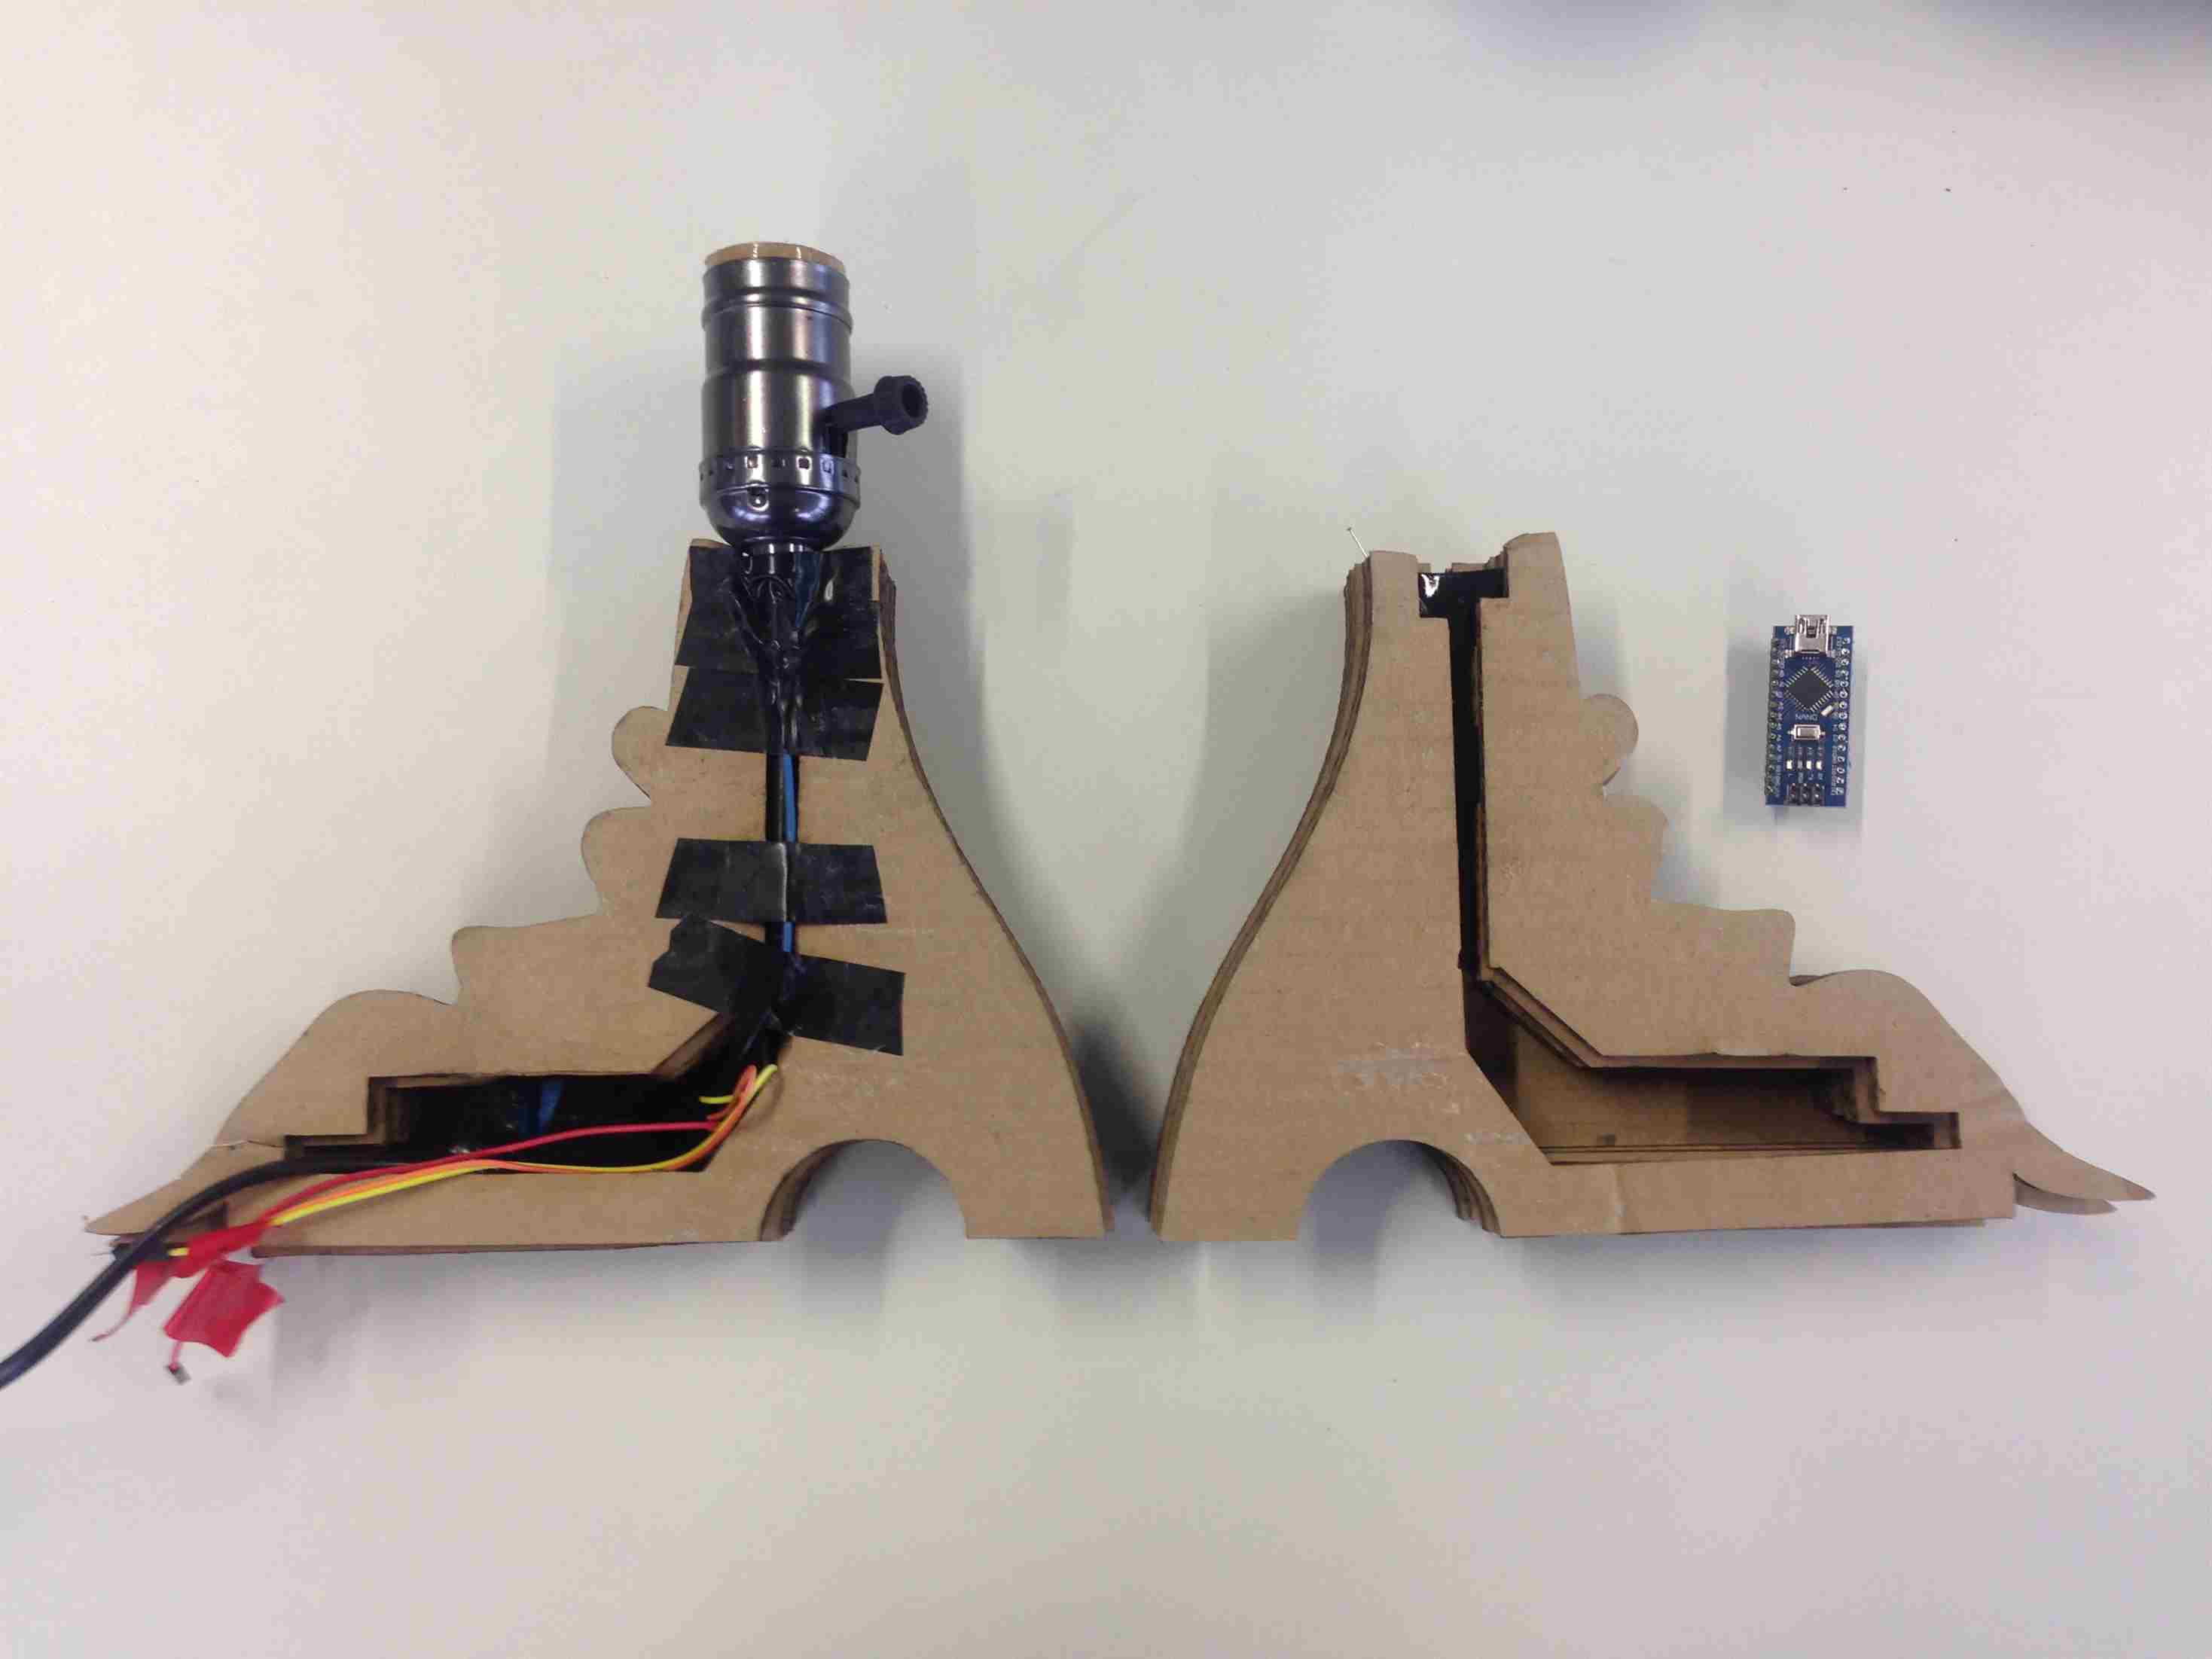
5.0 Parametric Press- Fit Construction Kit
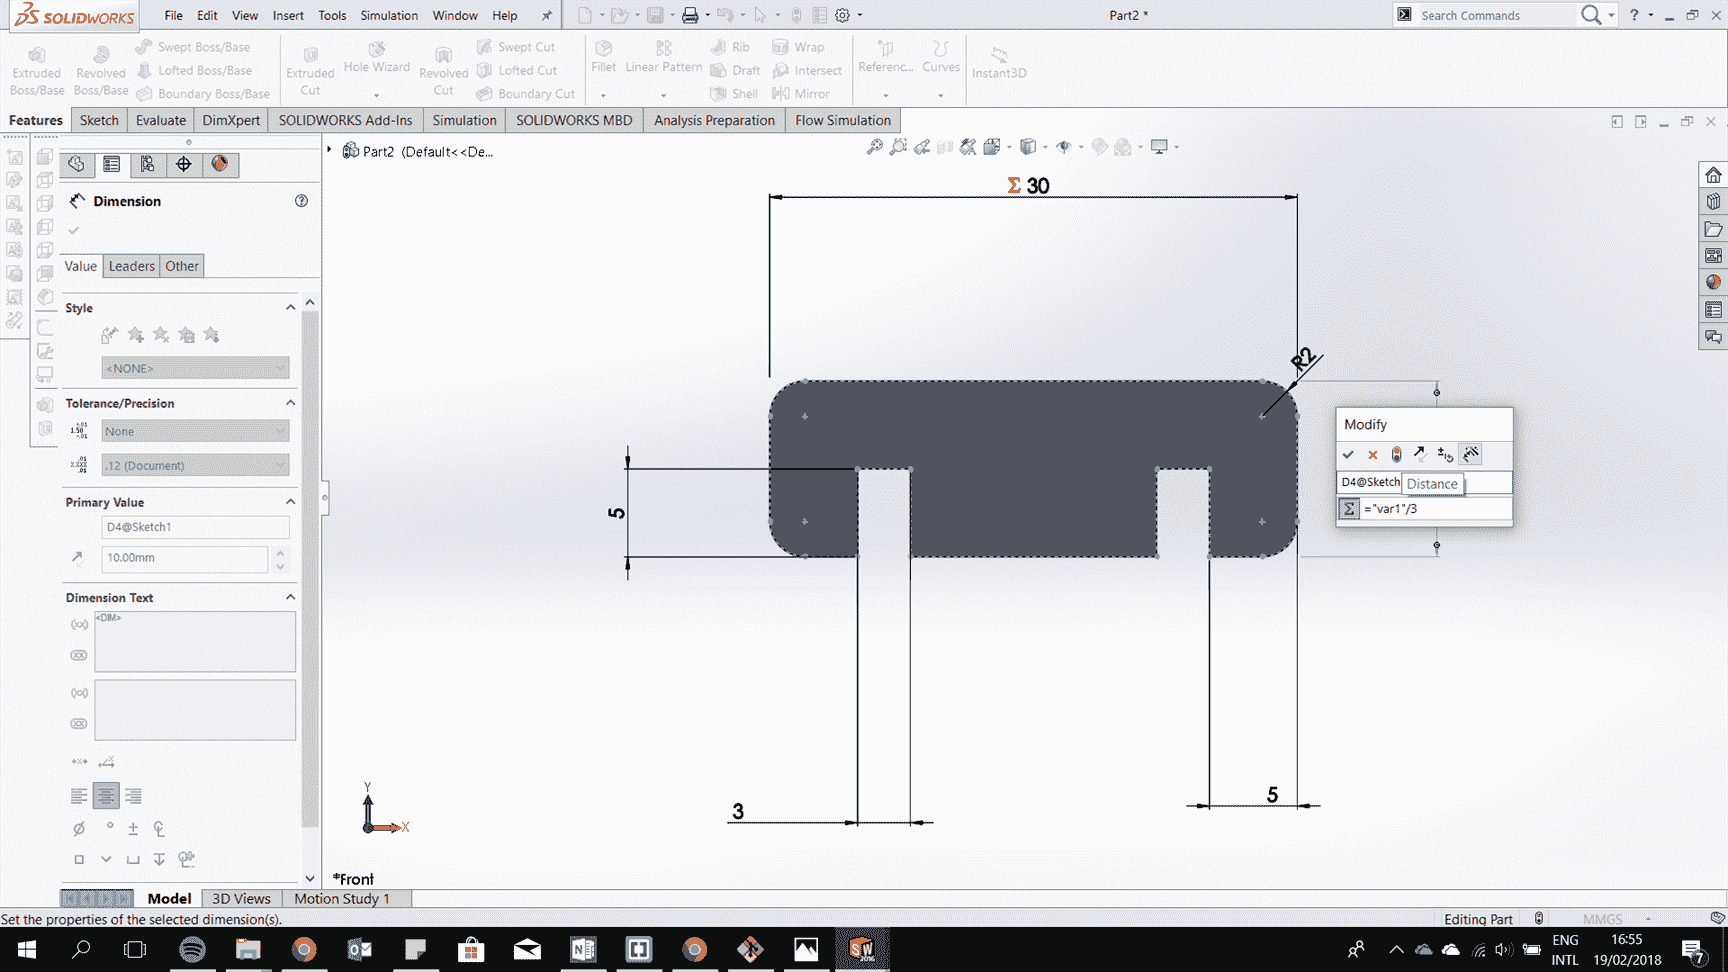
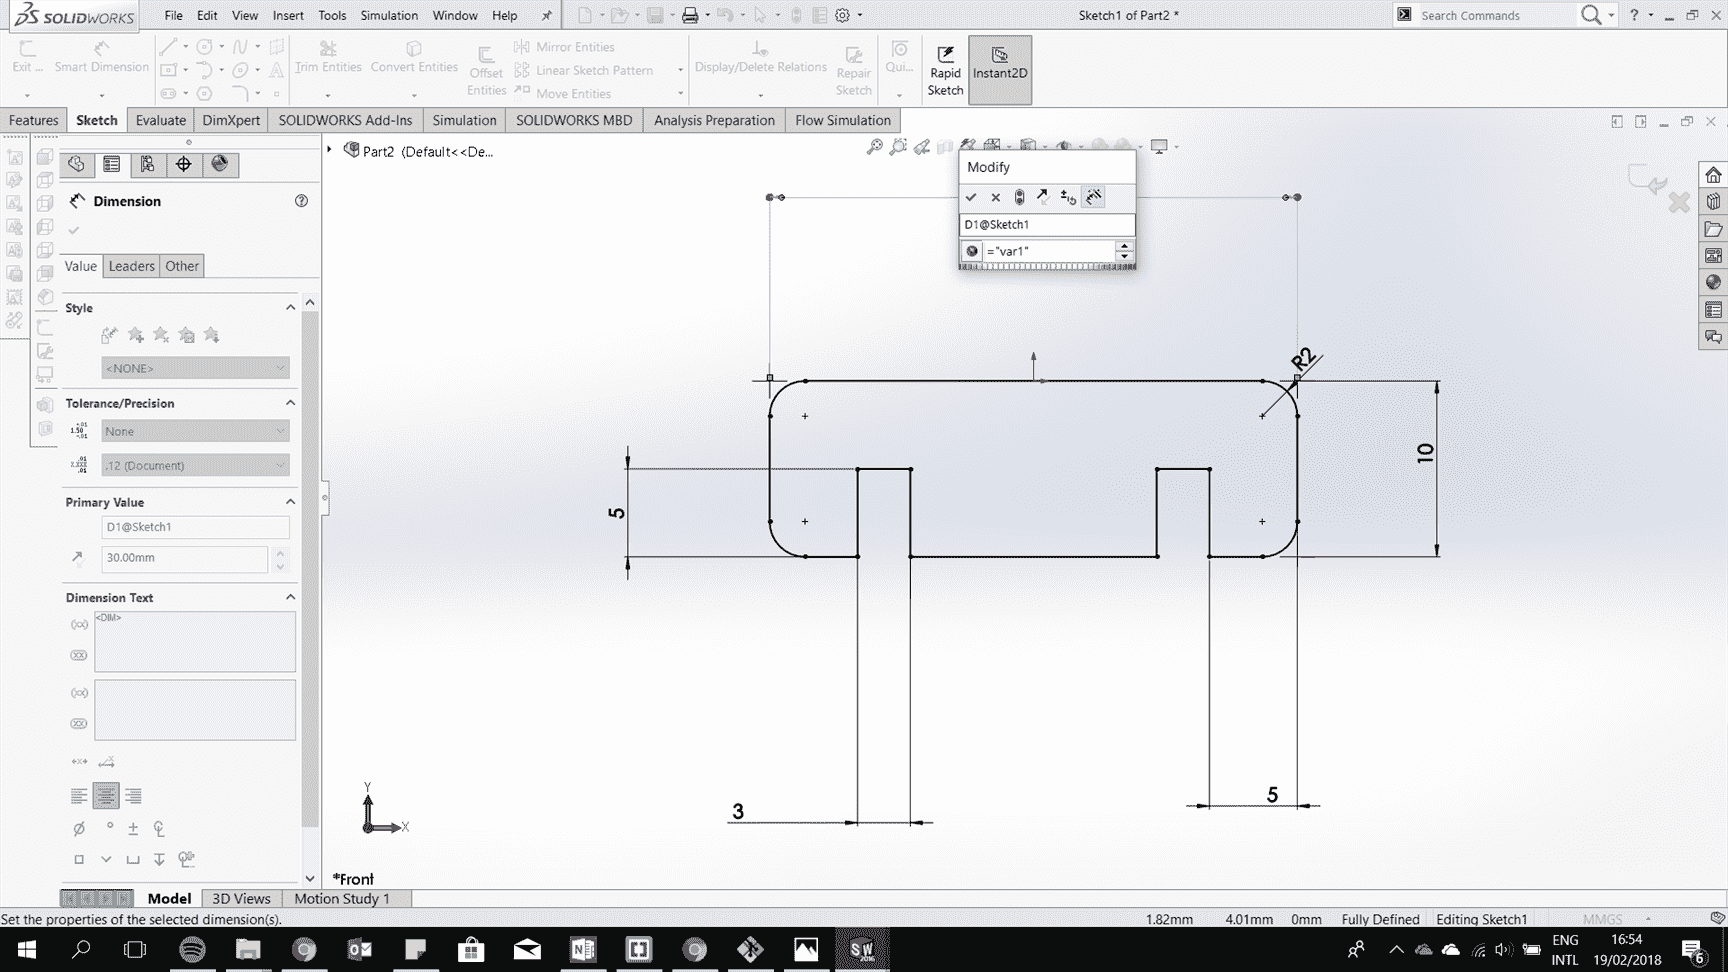
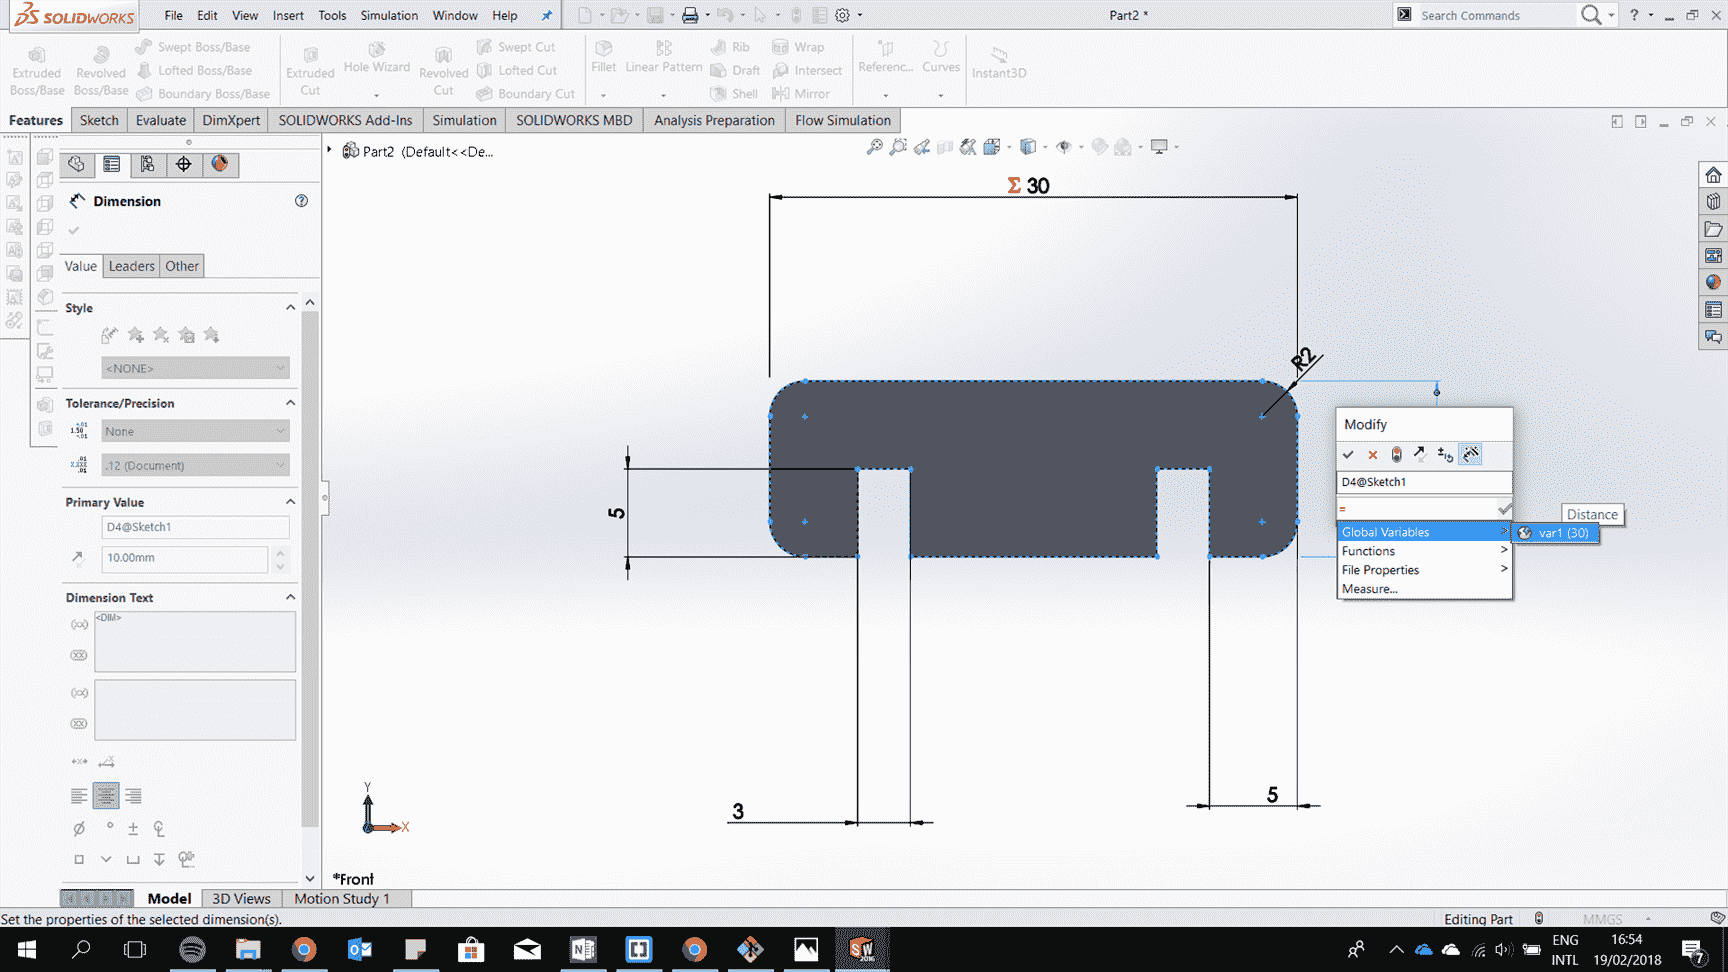
What is exactly a parametric modelling?
Parametric modelling refers to the used of parameters such as constraint or the relationship between the geometry identity as well as the dimension.
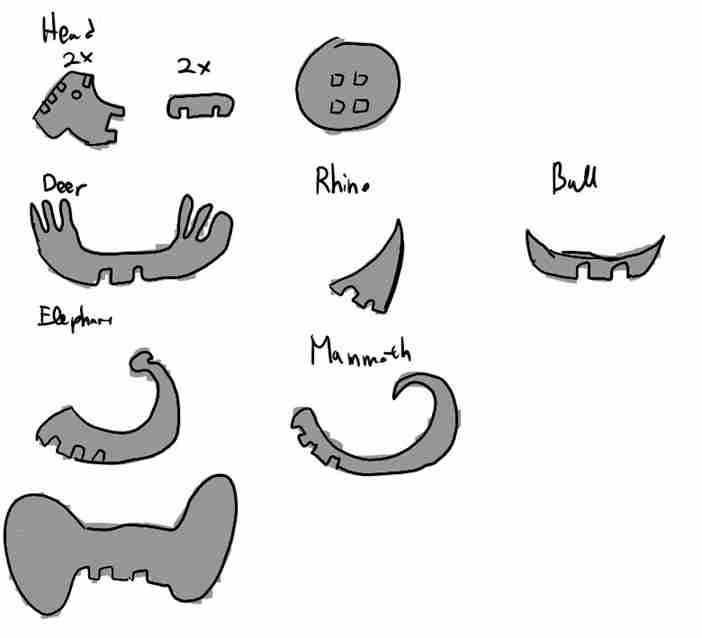
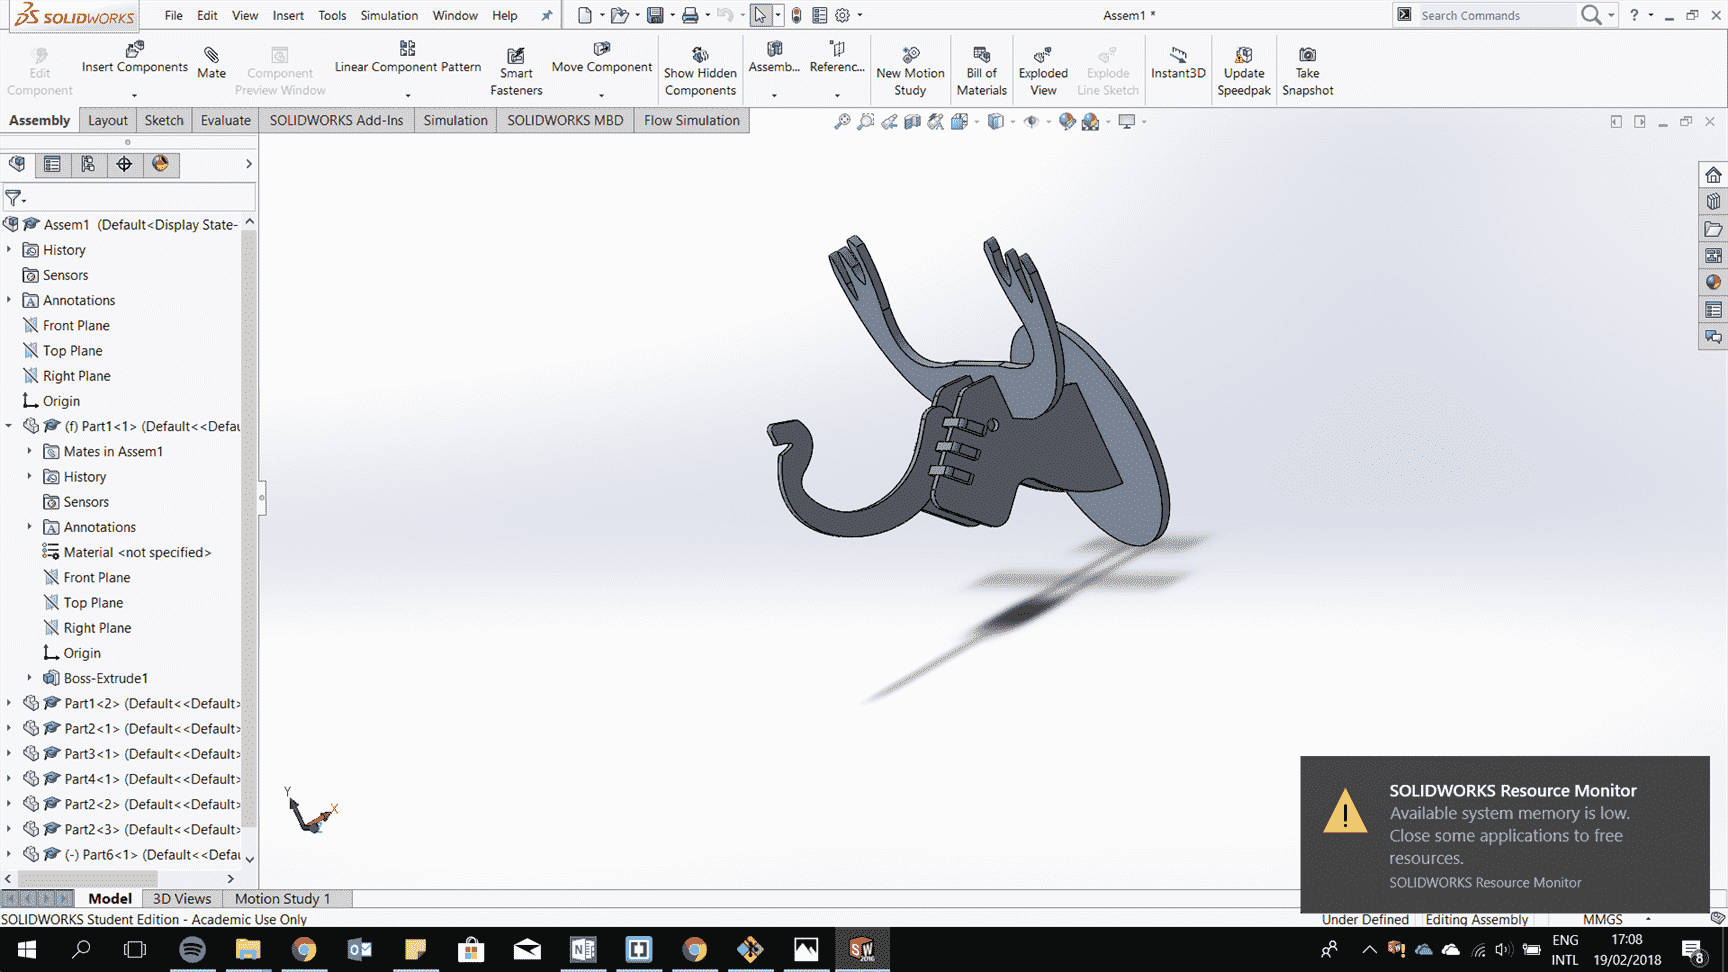
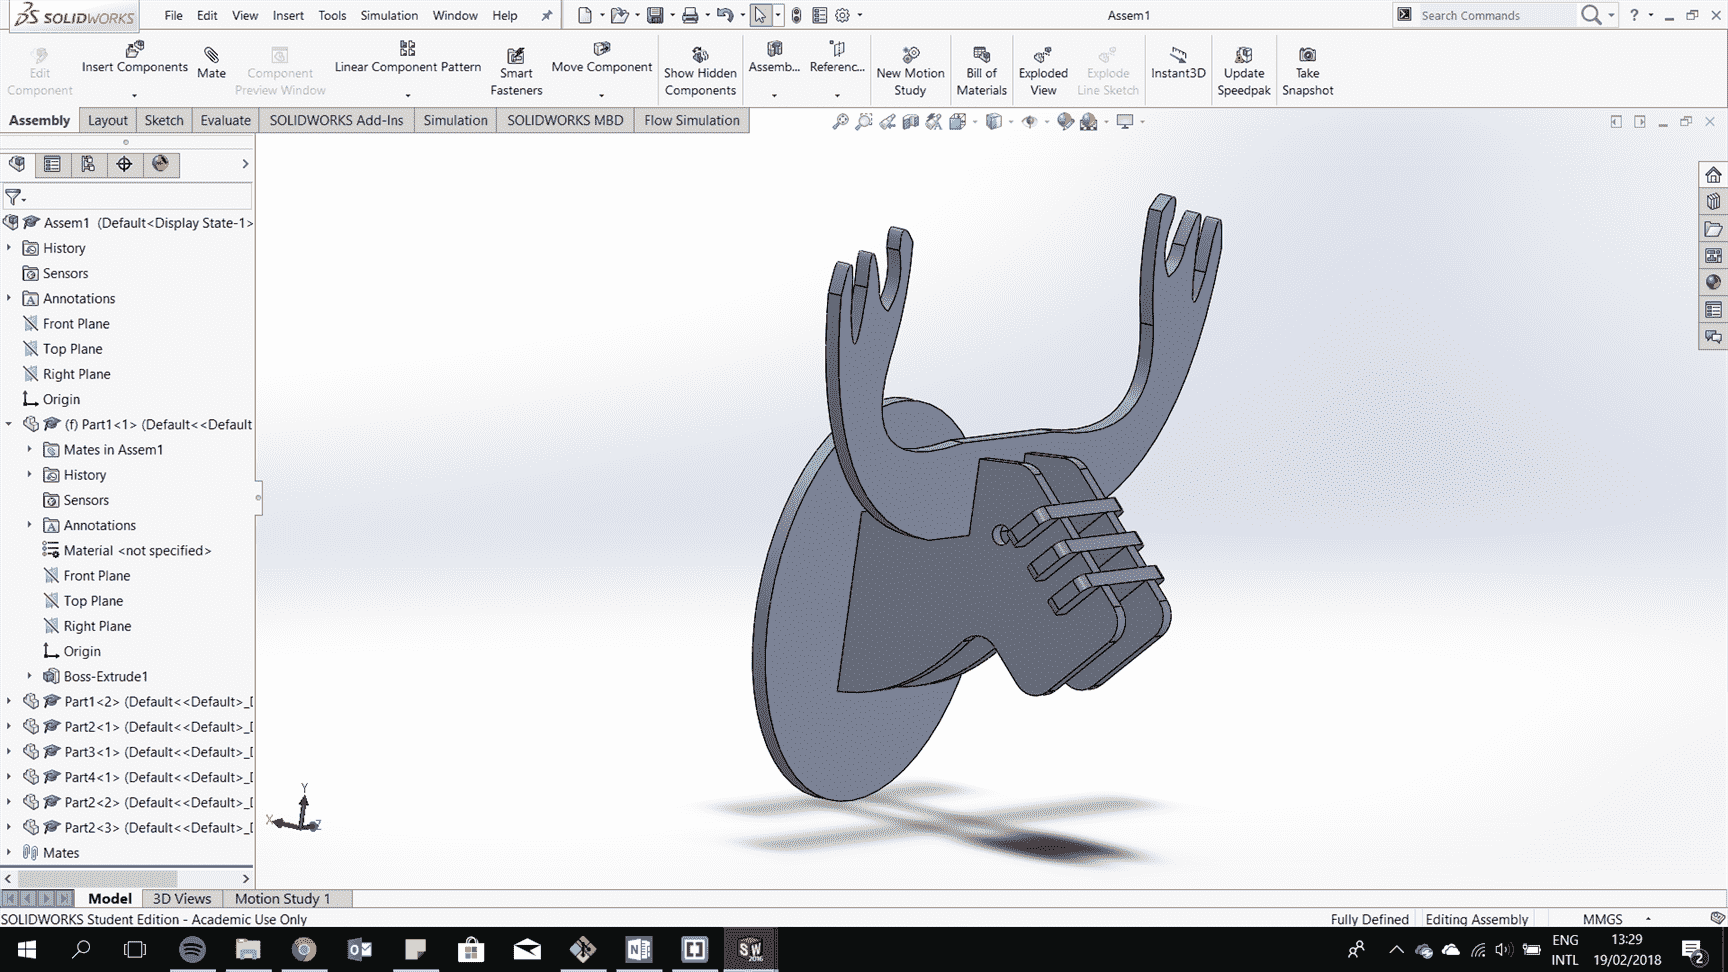
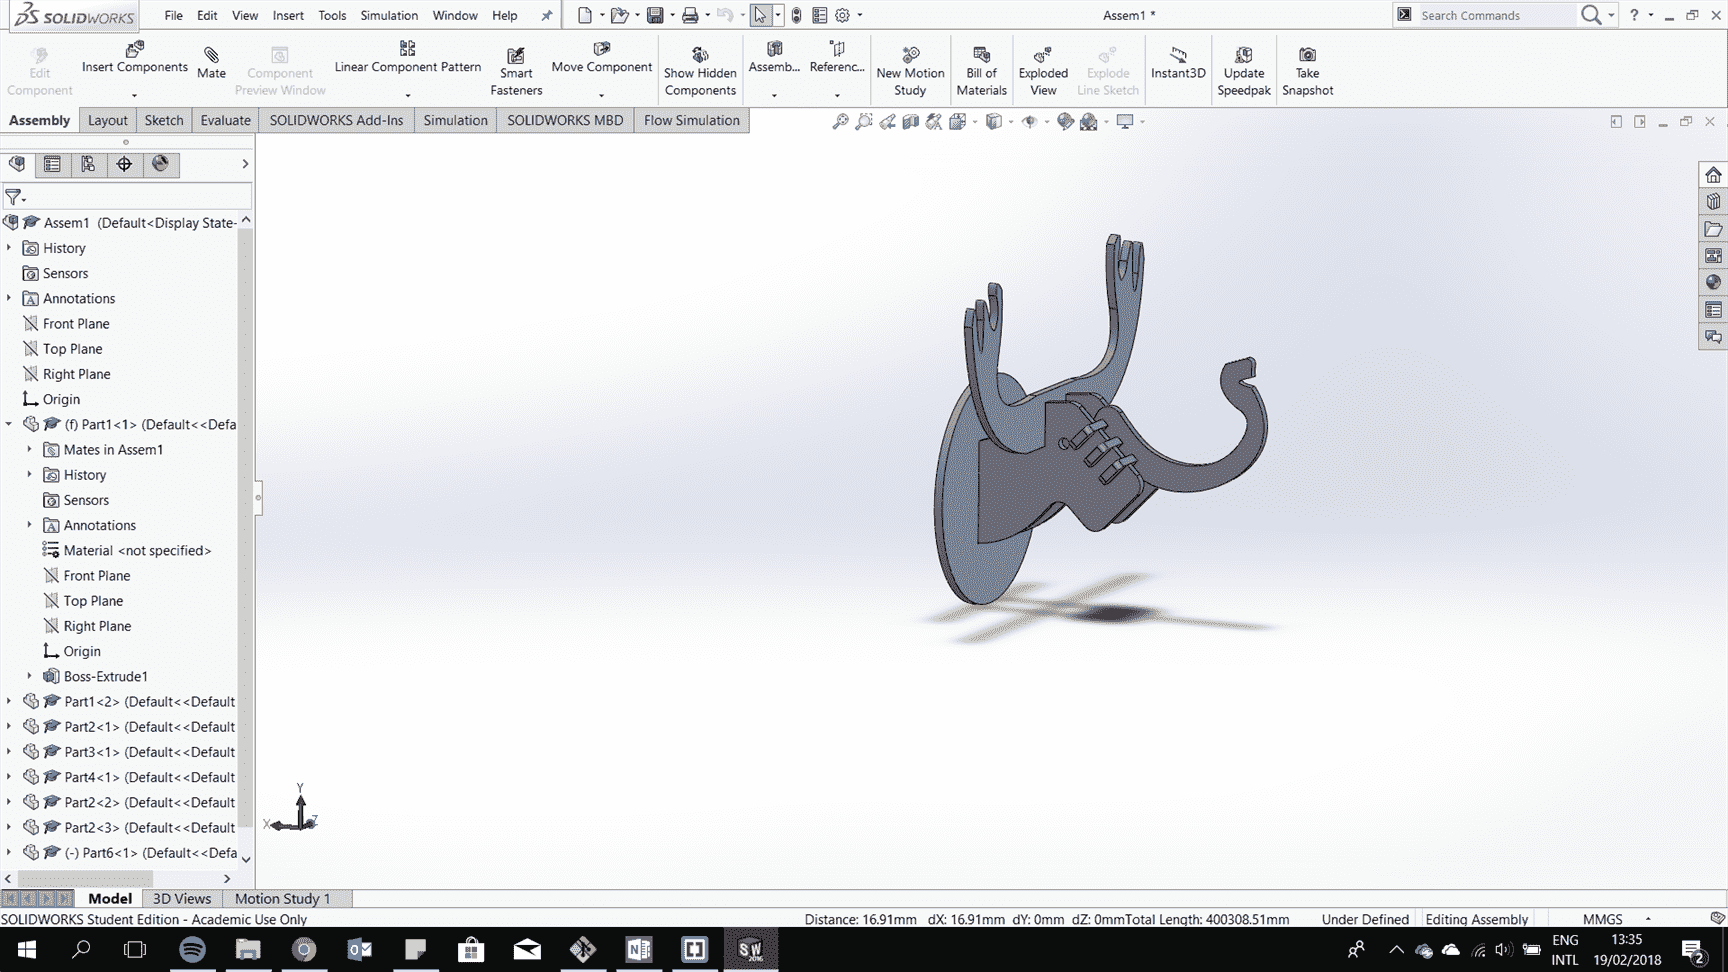
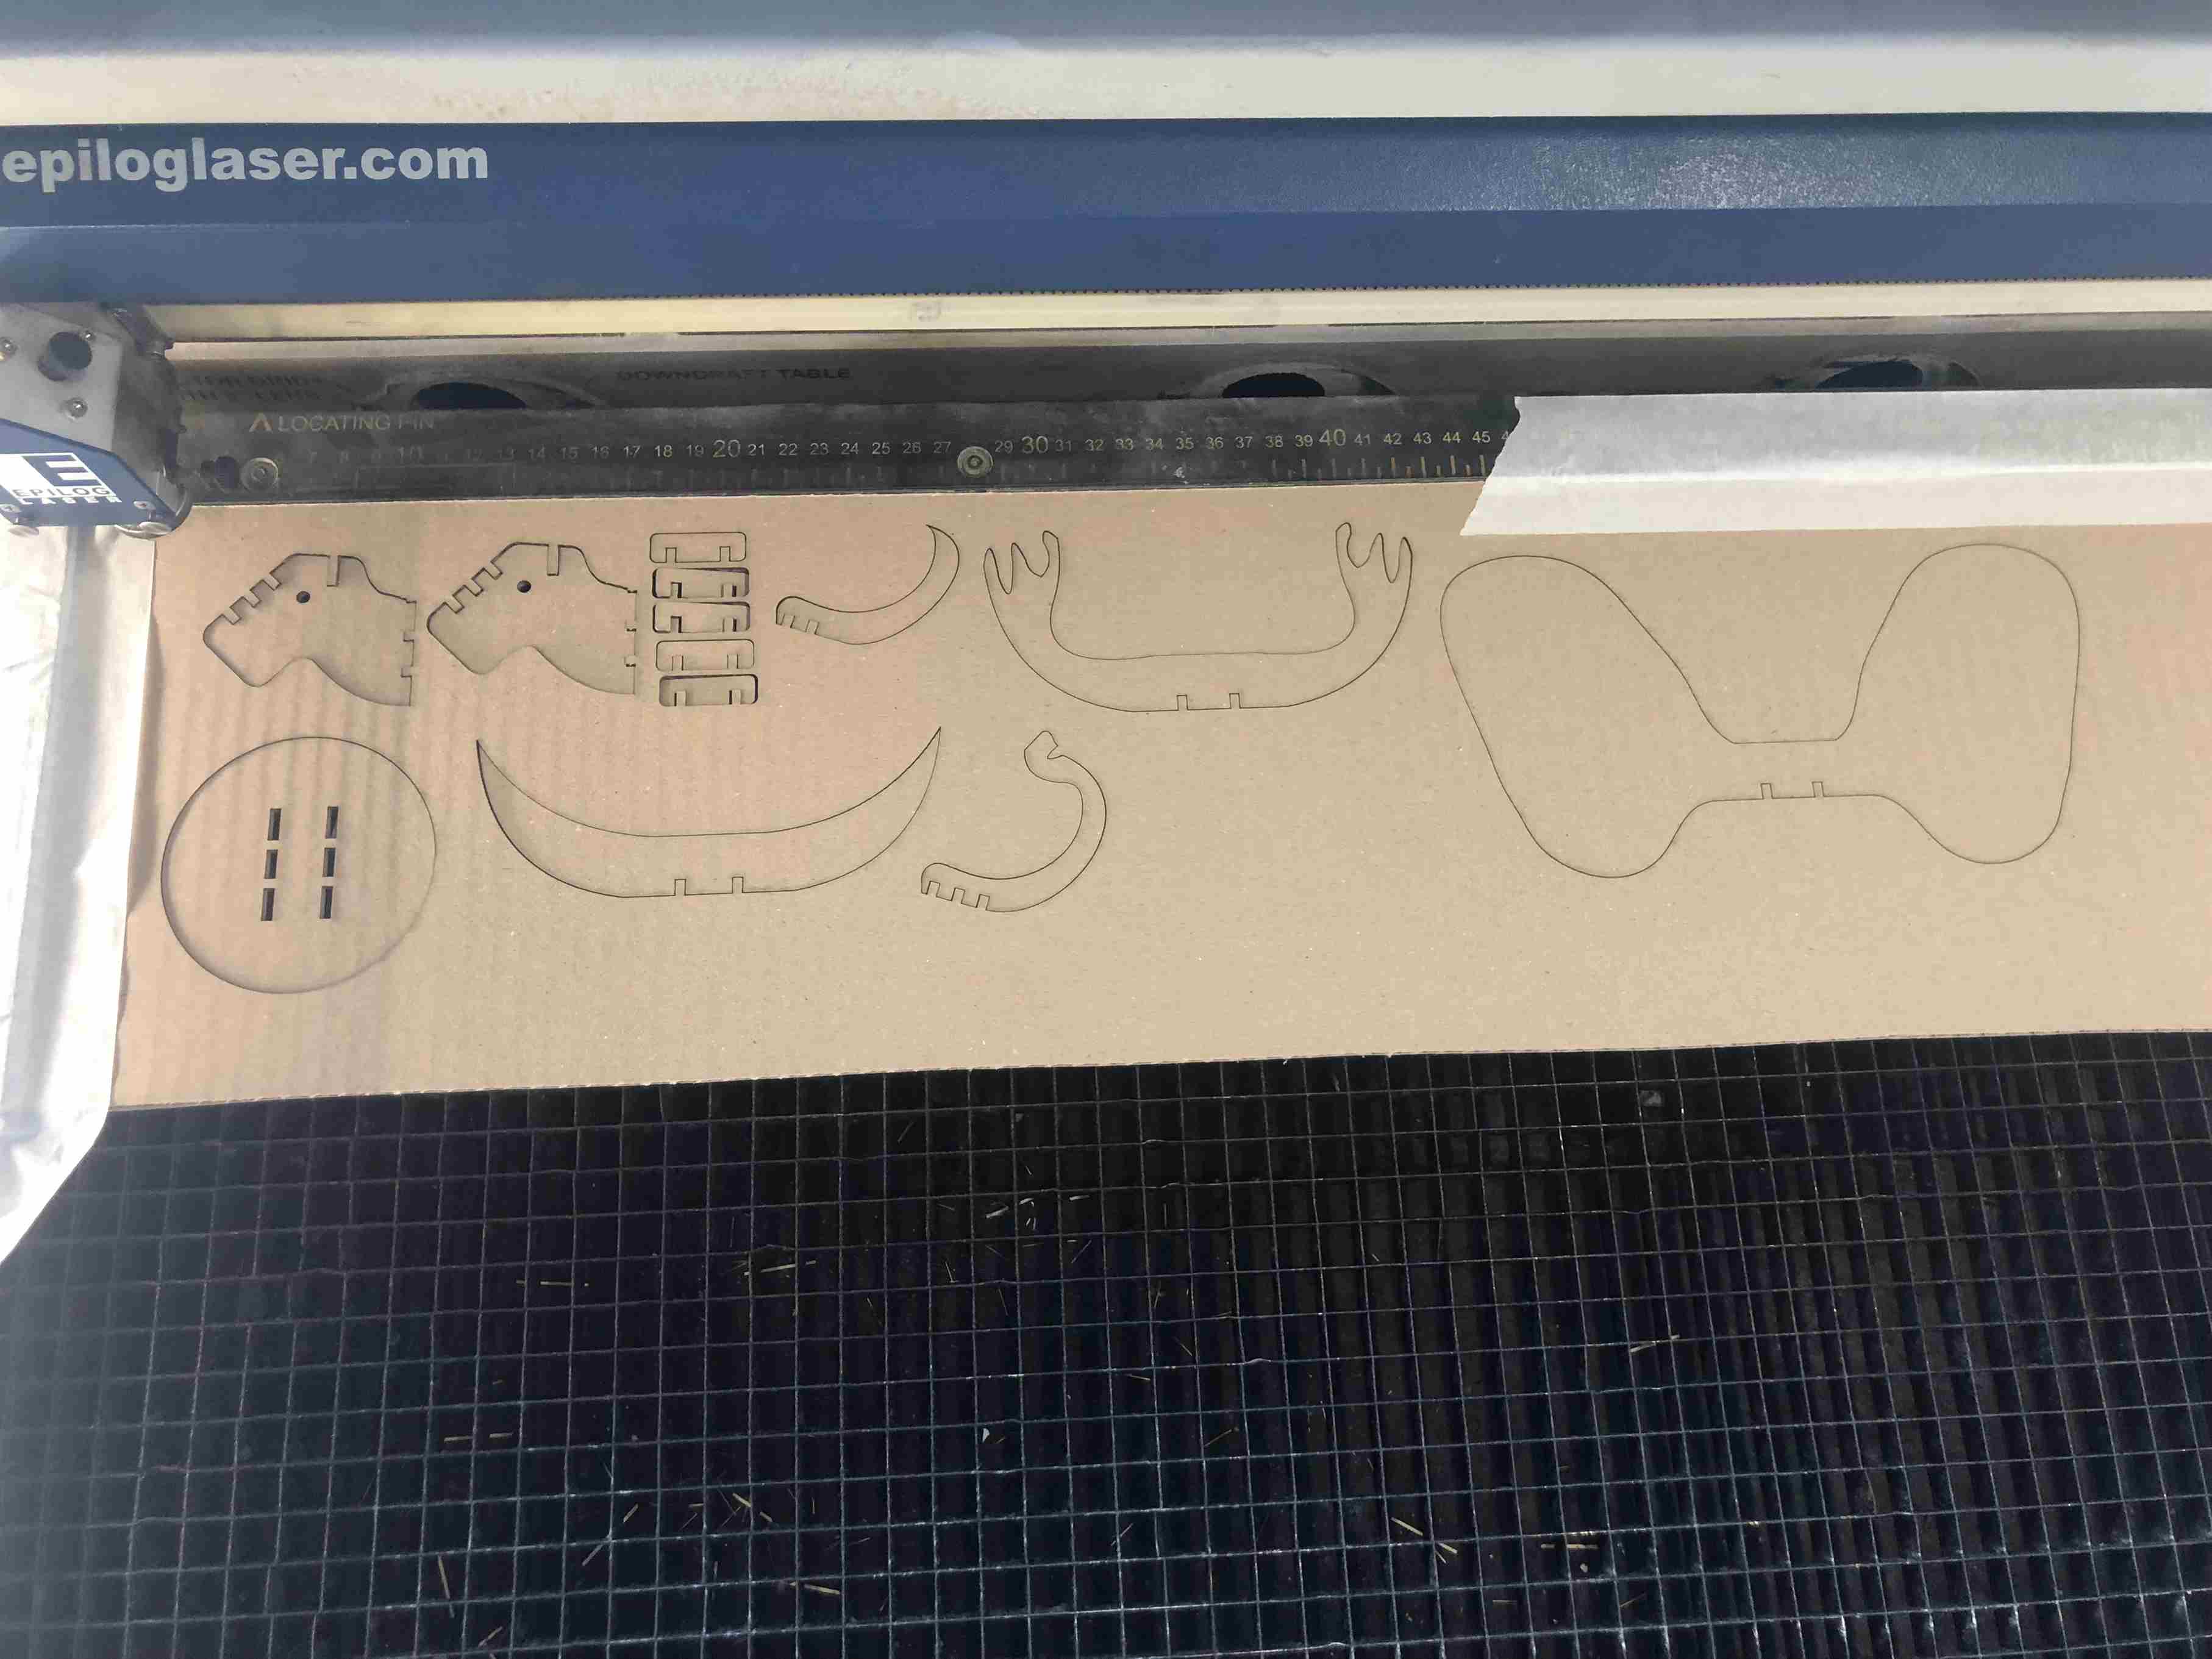
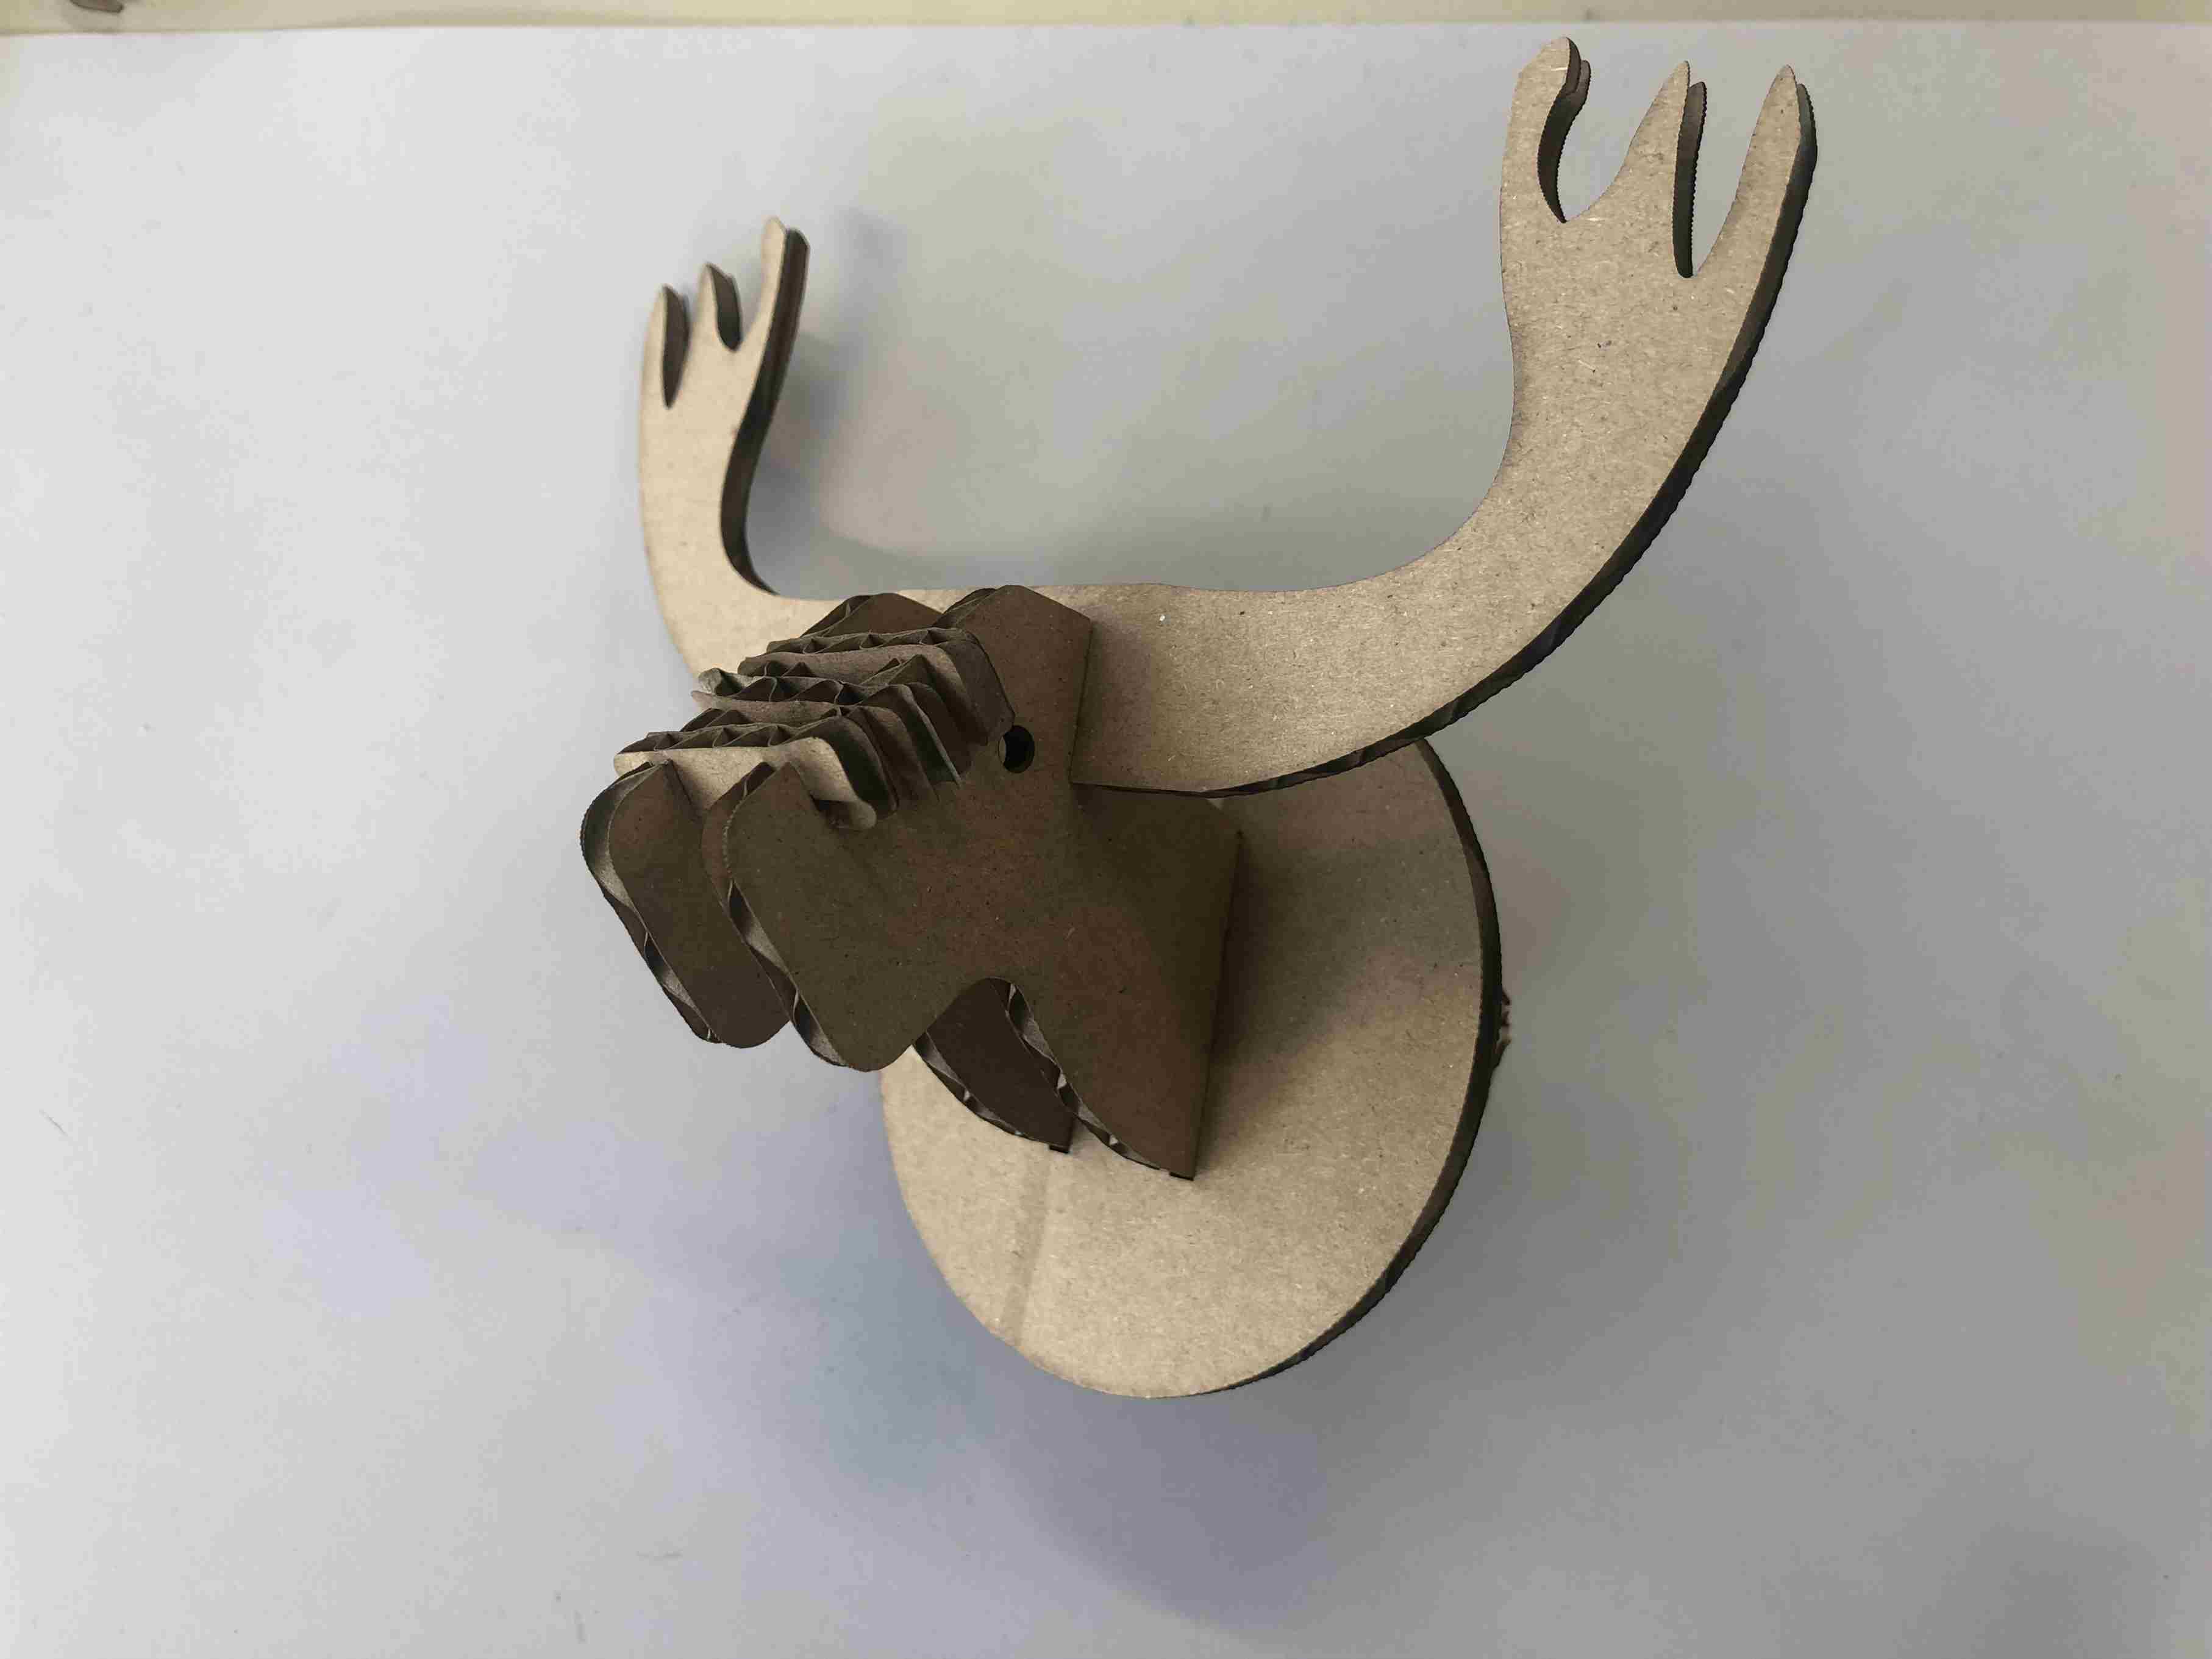
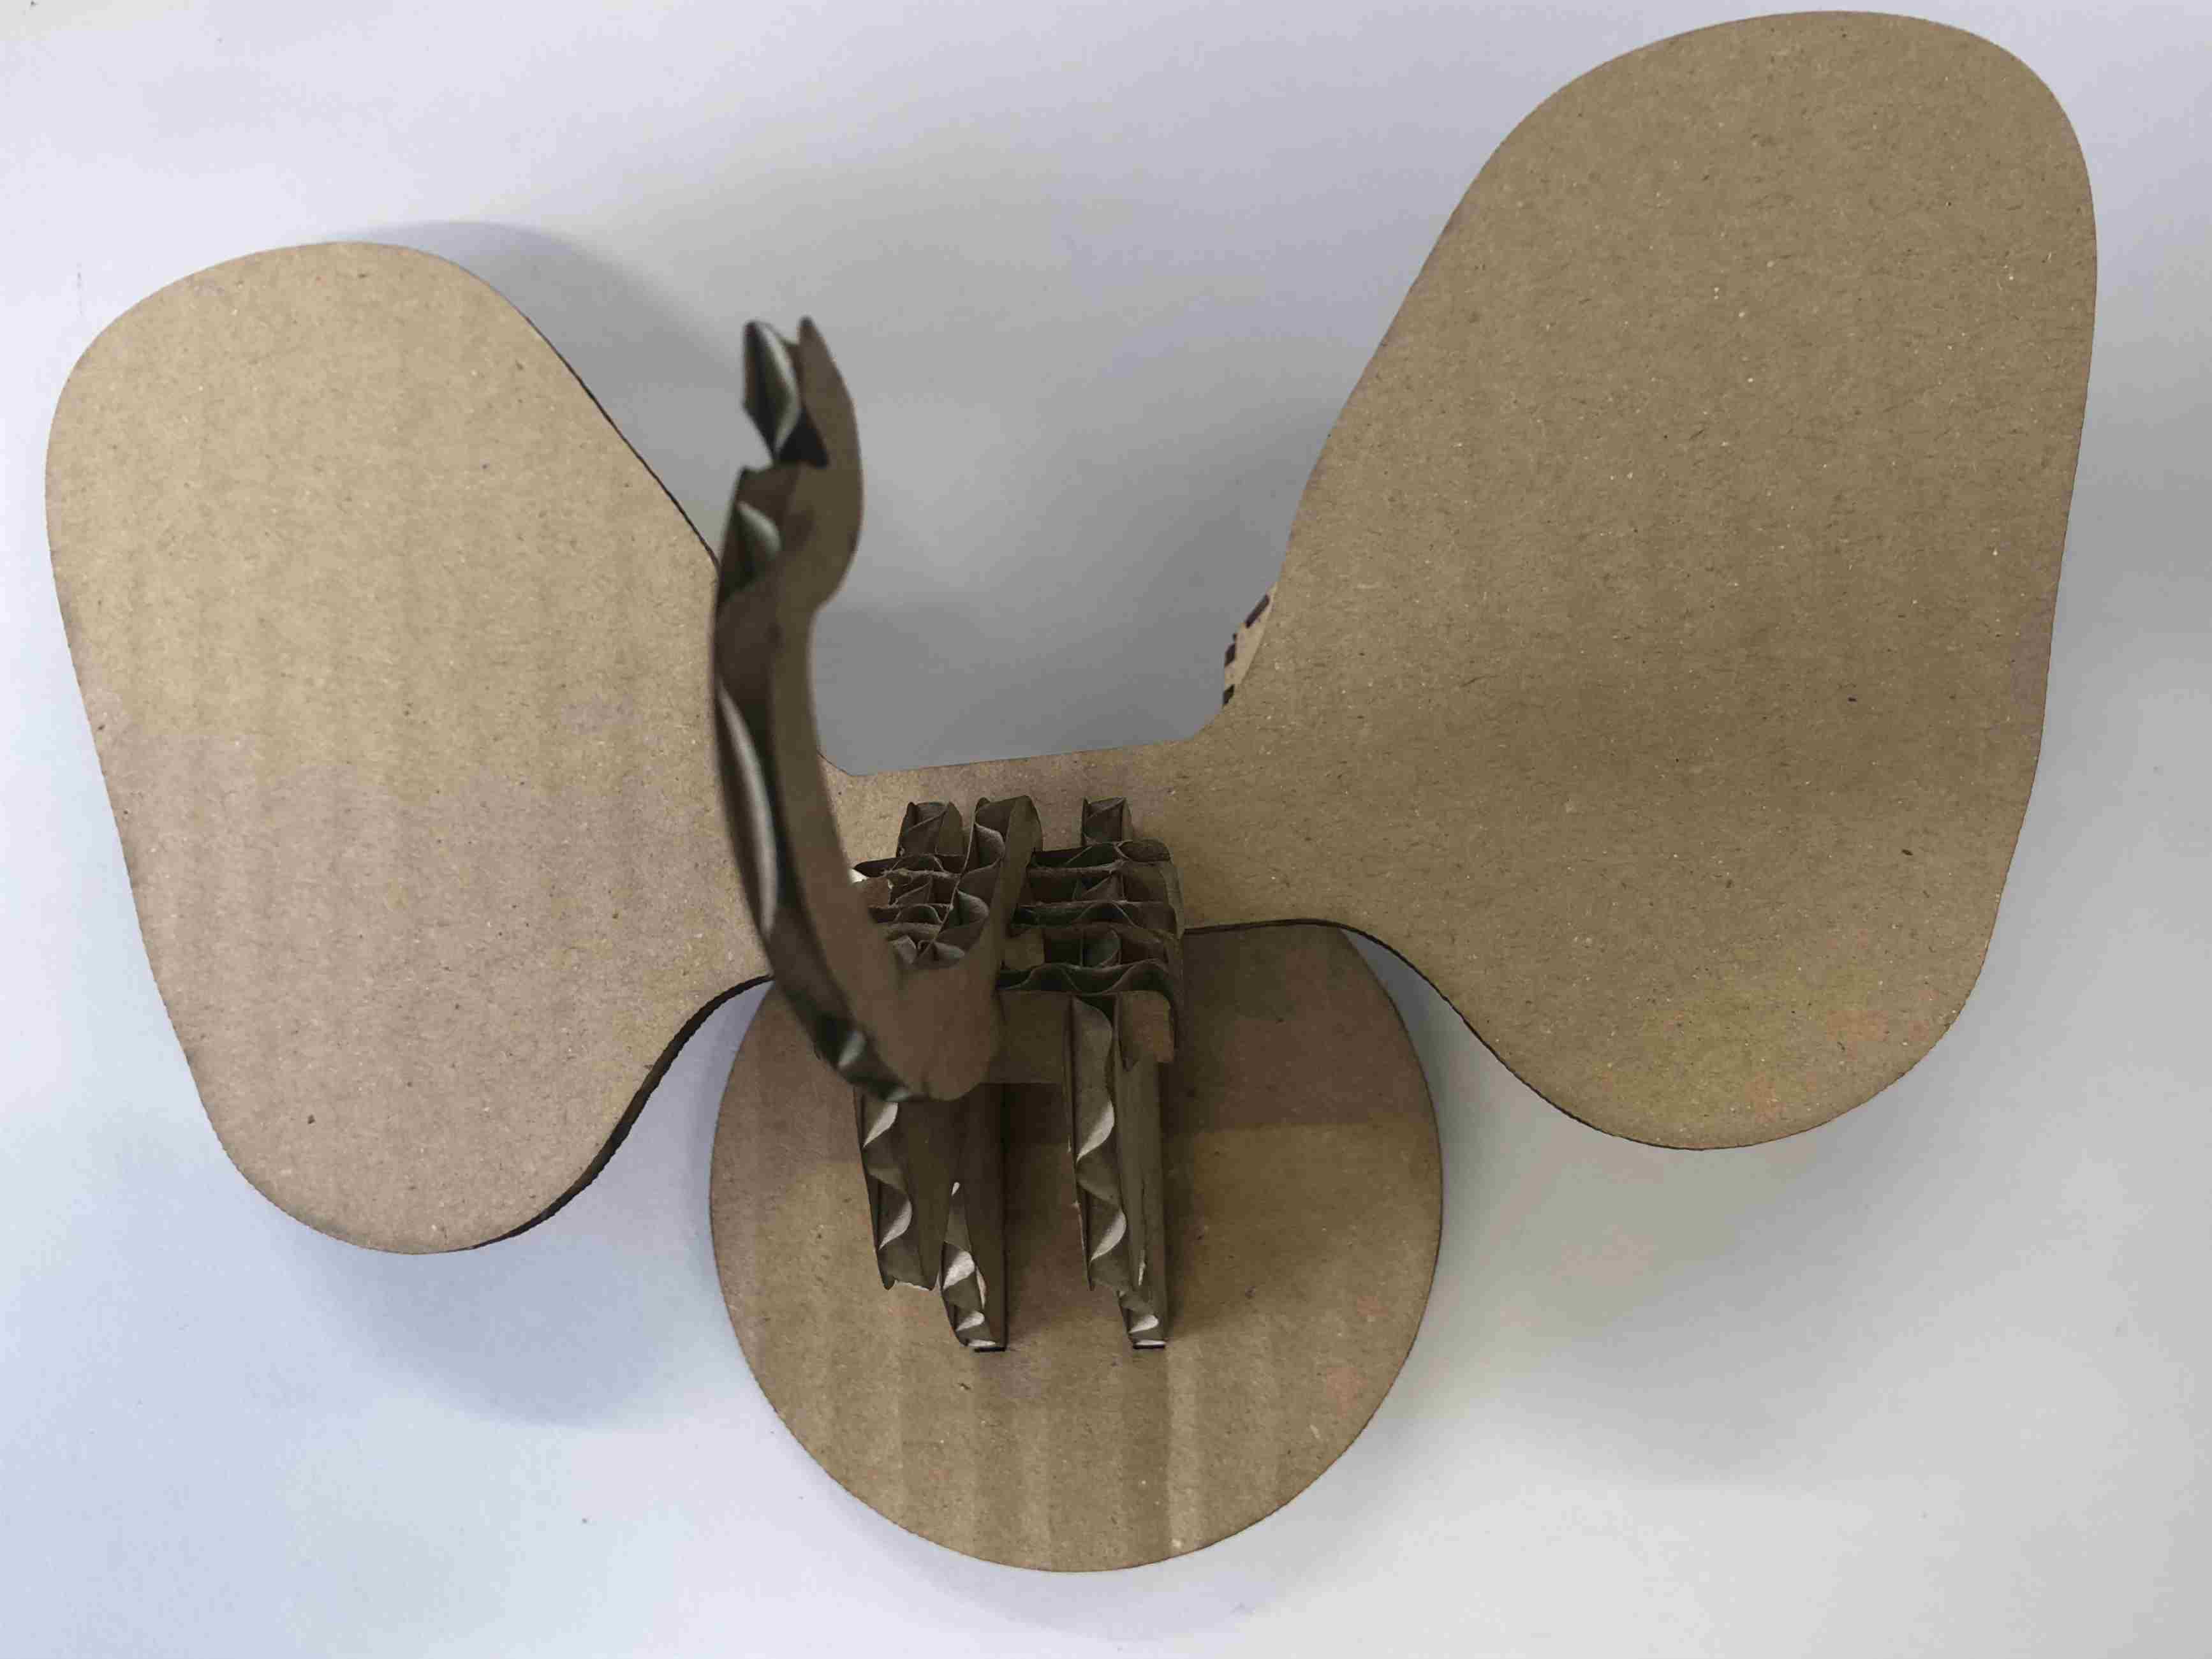
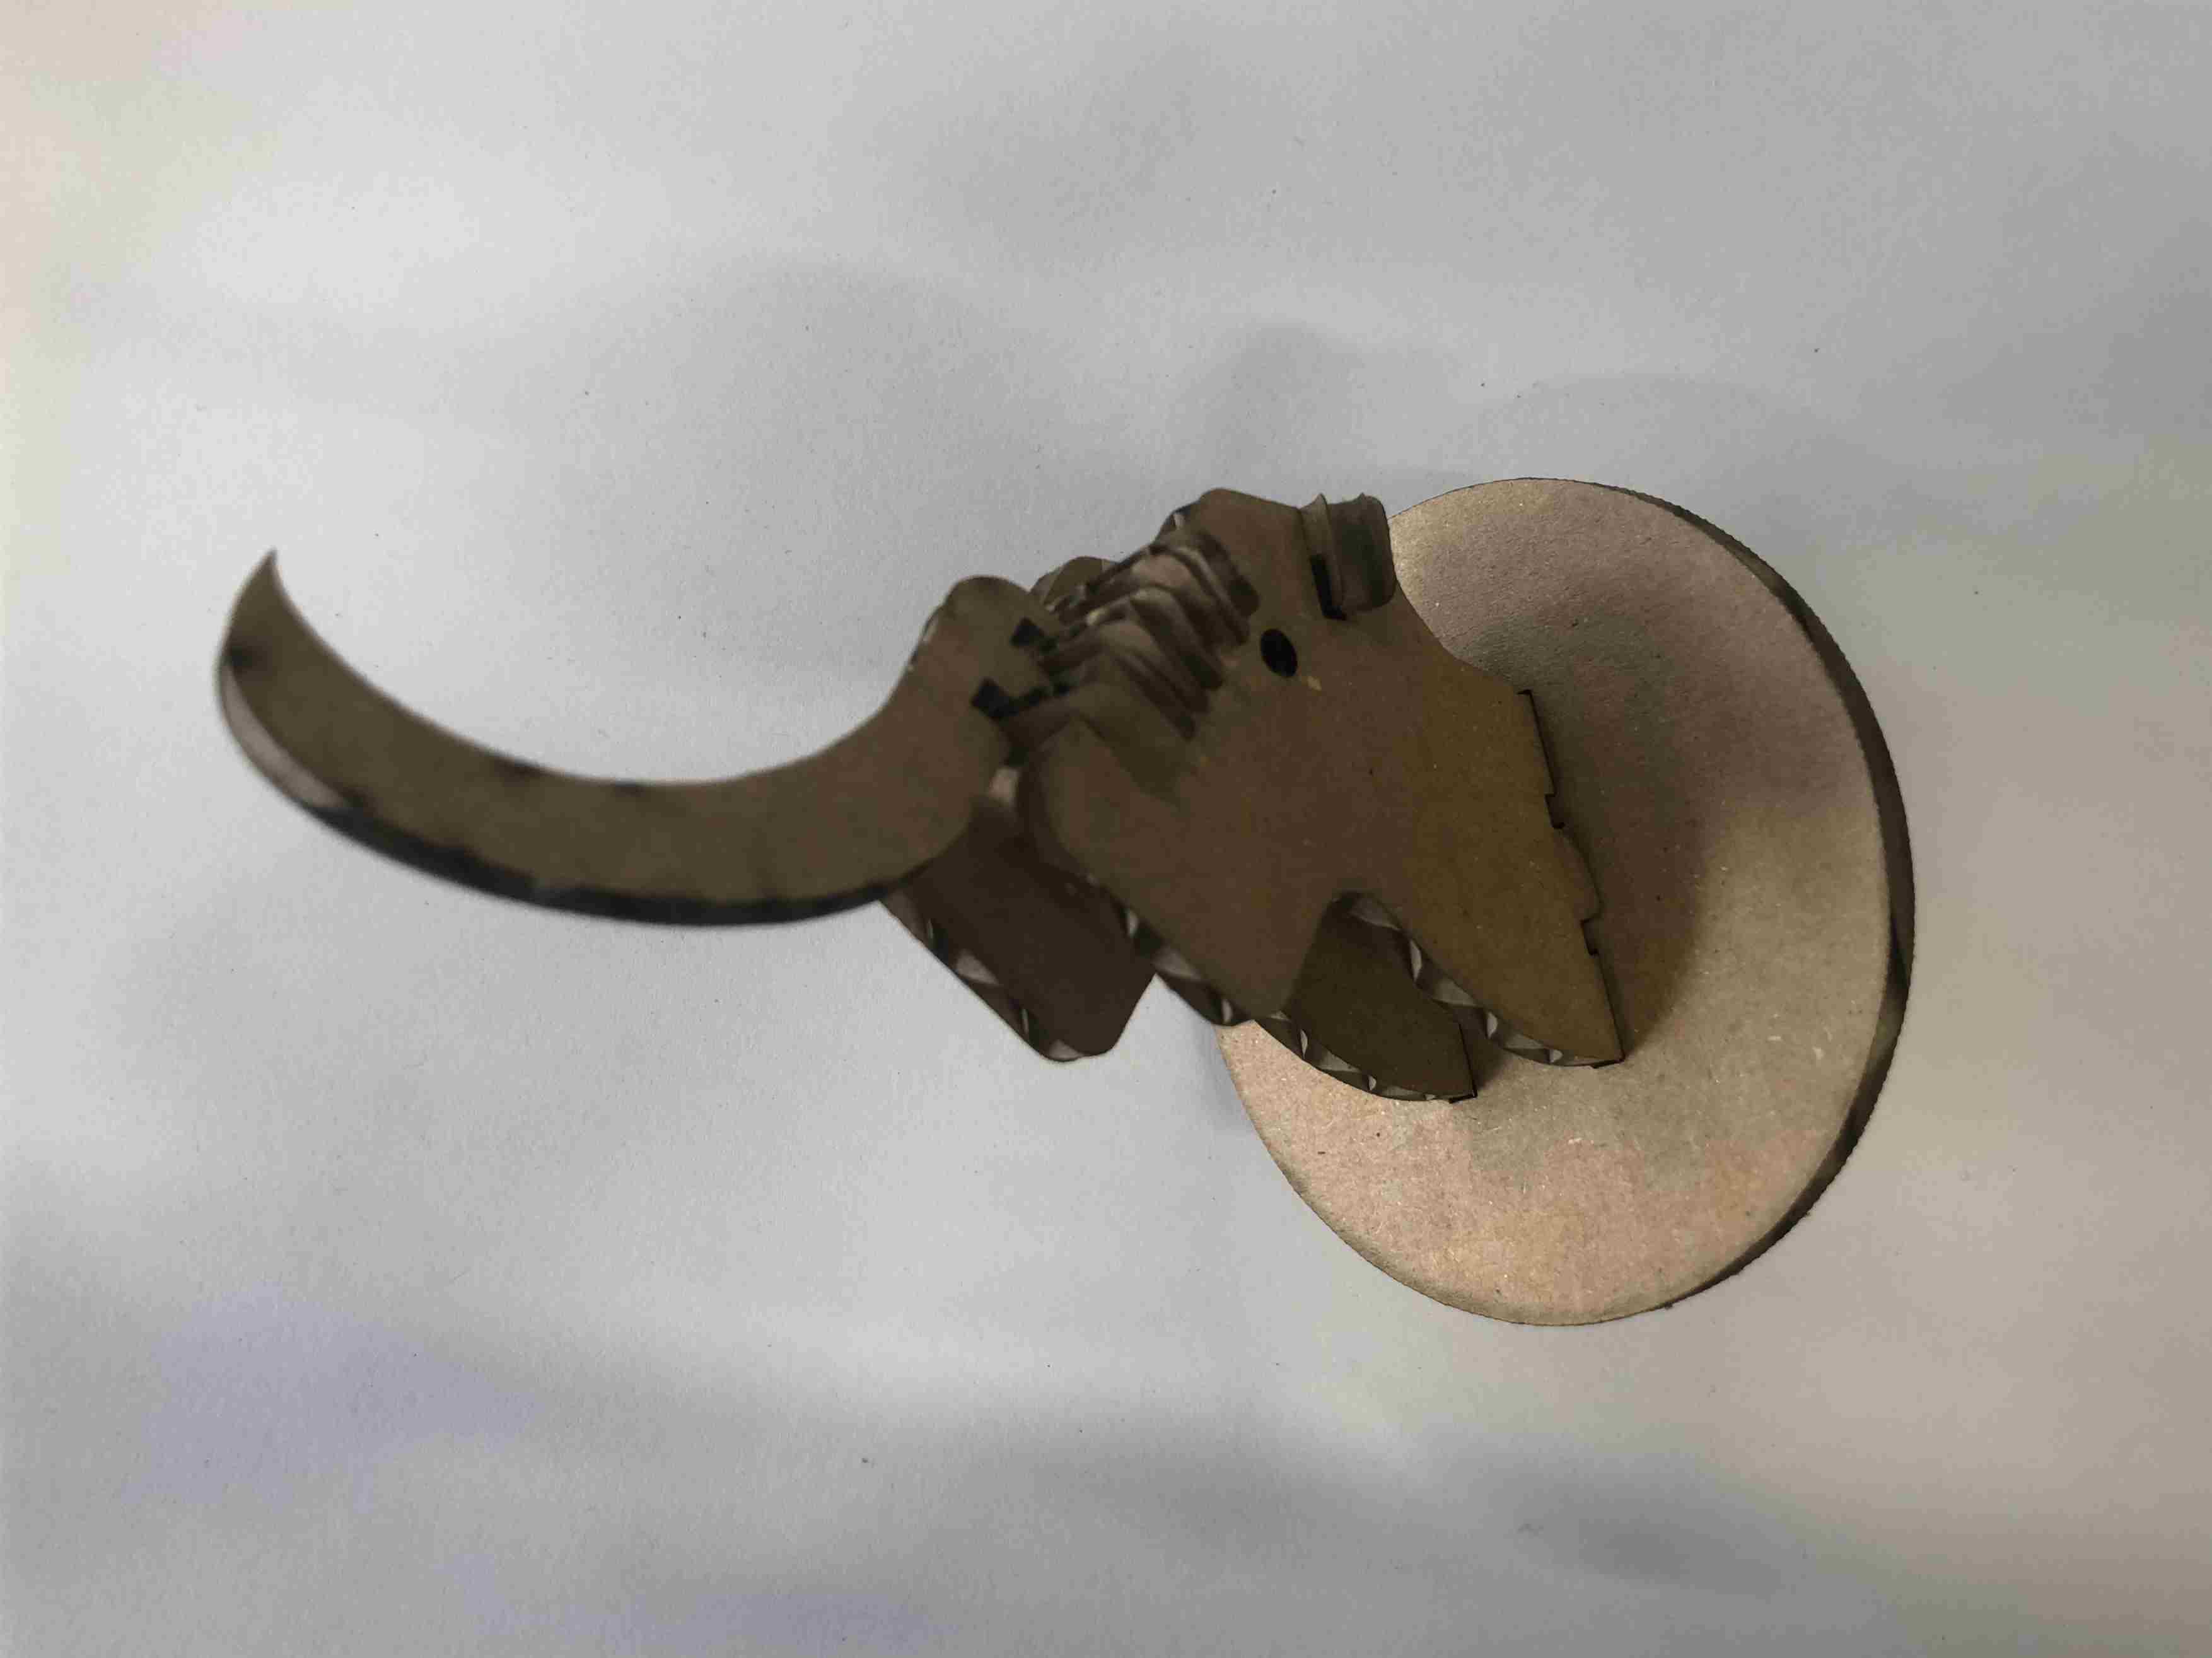
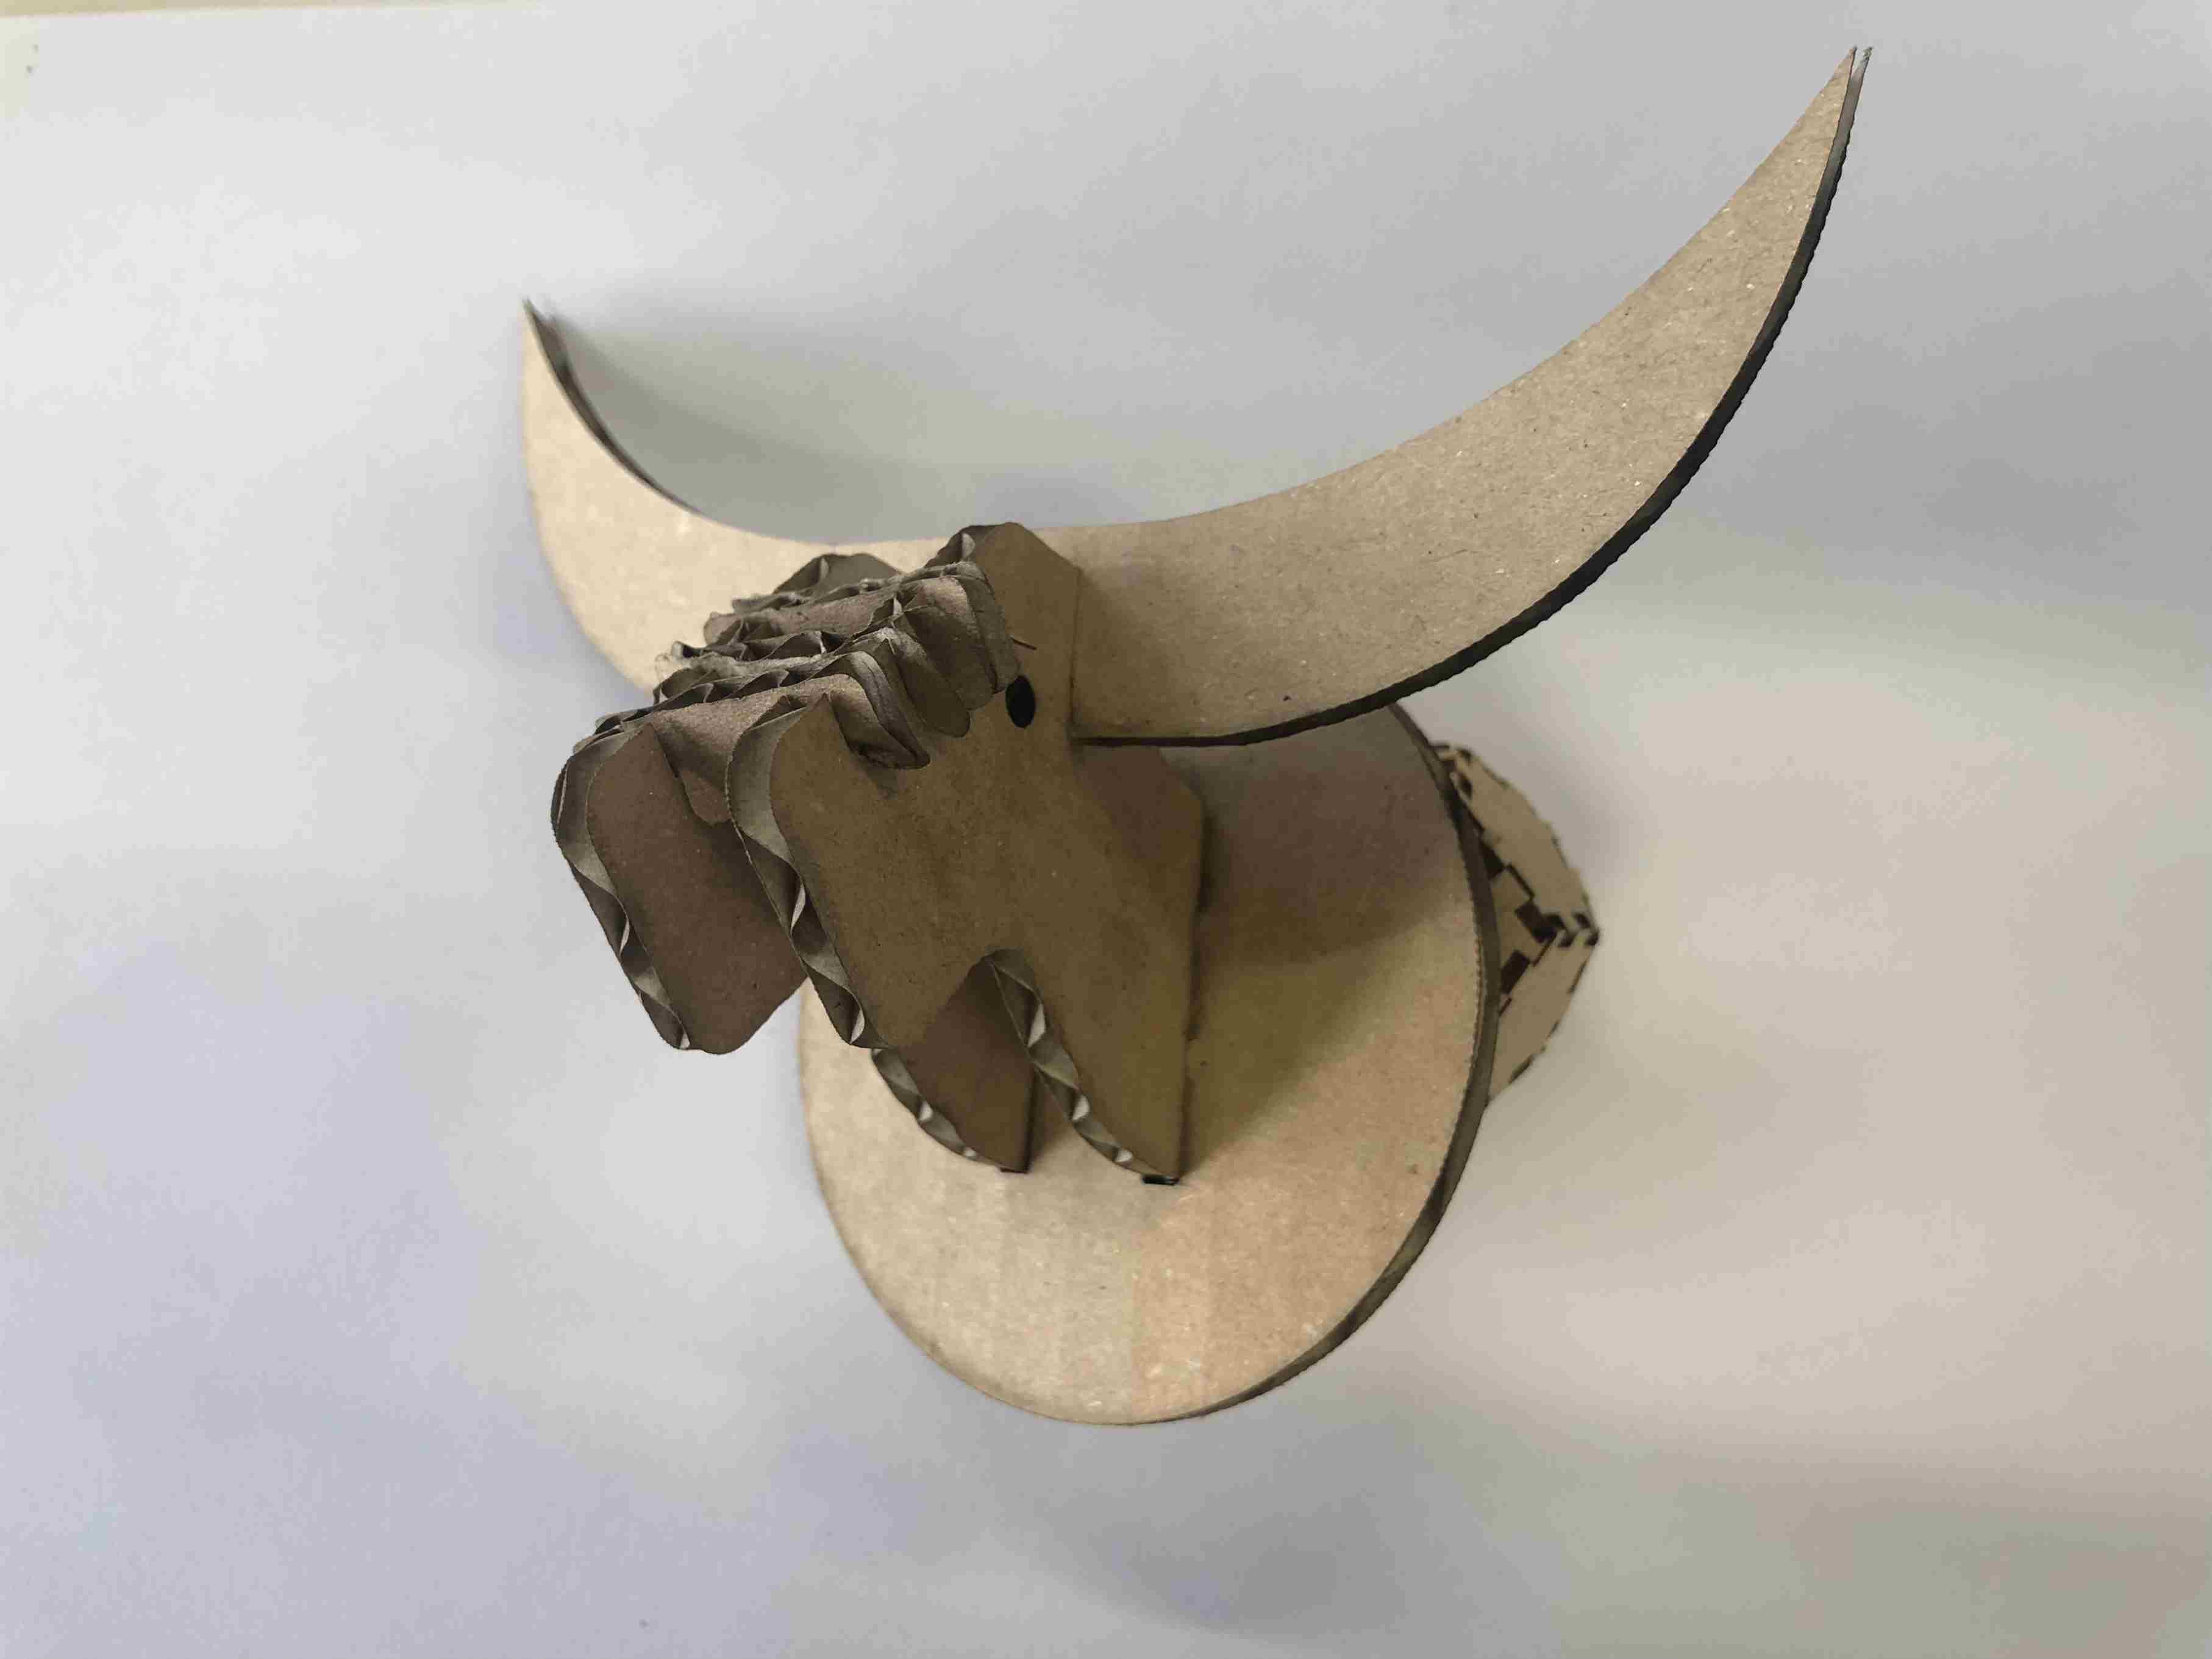
The idea is to have a press fit construction of a Animal Head Hanger where kids can play an guest what the animals they are building.
Constraint to draw a 2d drawing by adding a relation of colinear
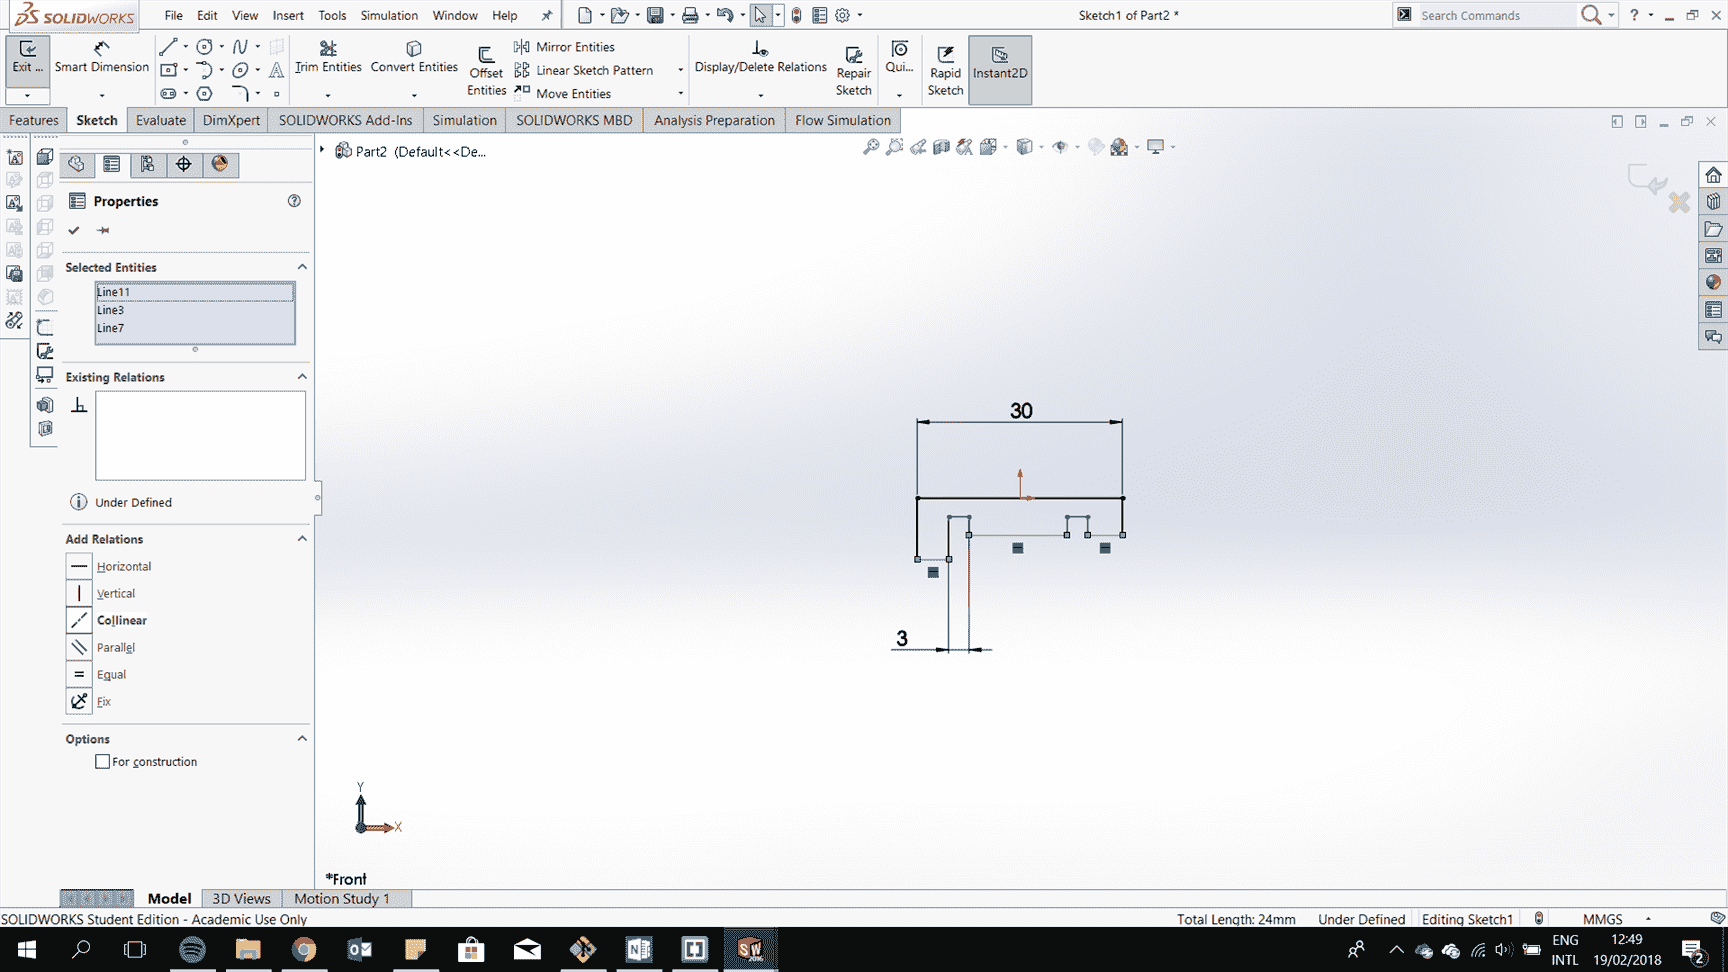
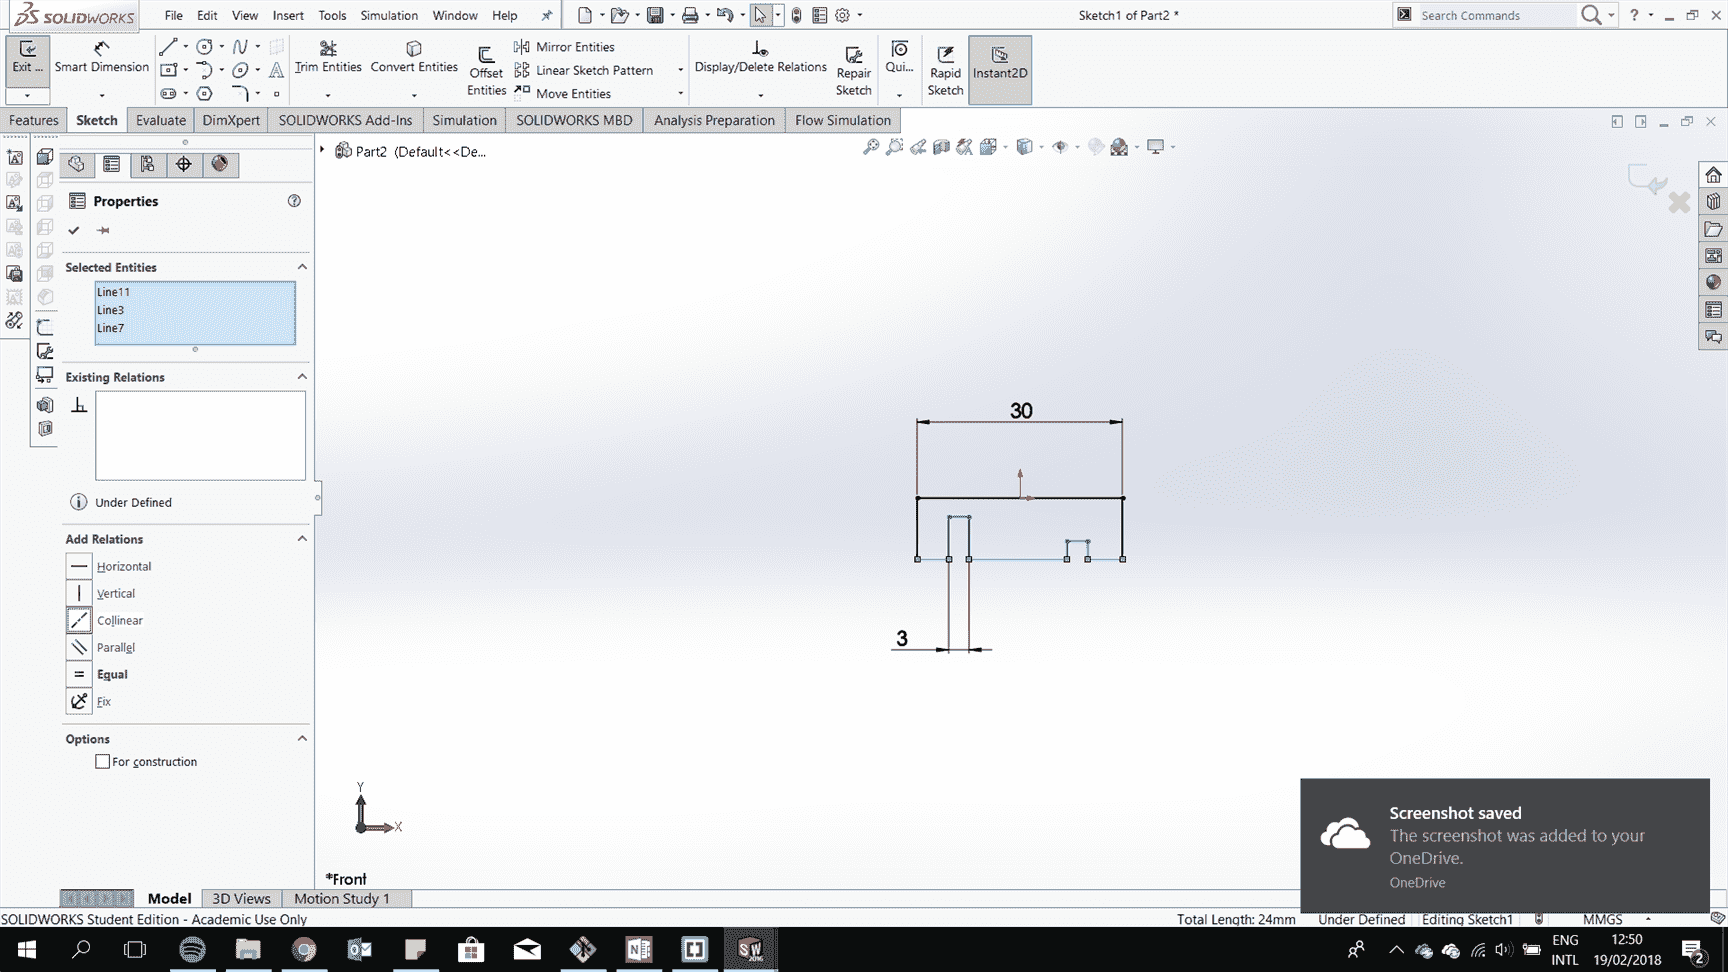
Add lines to have equal length
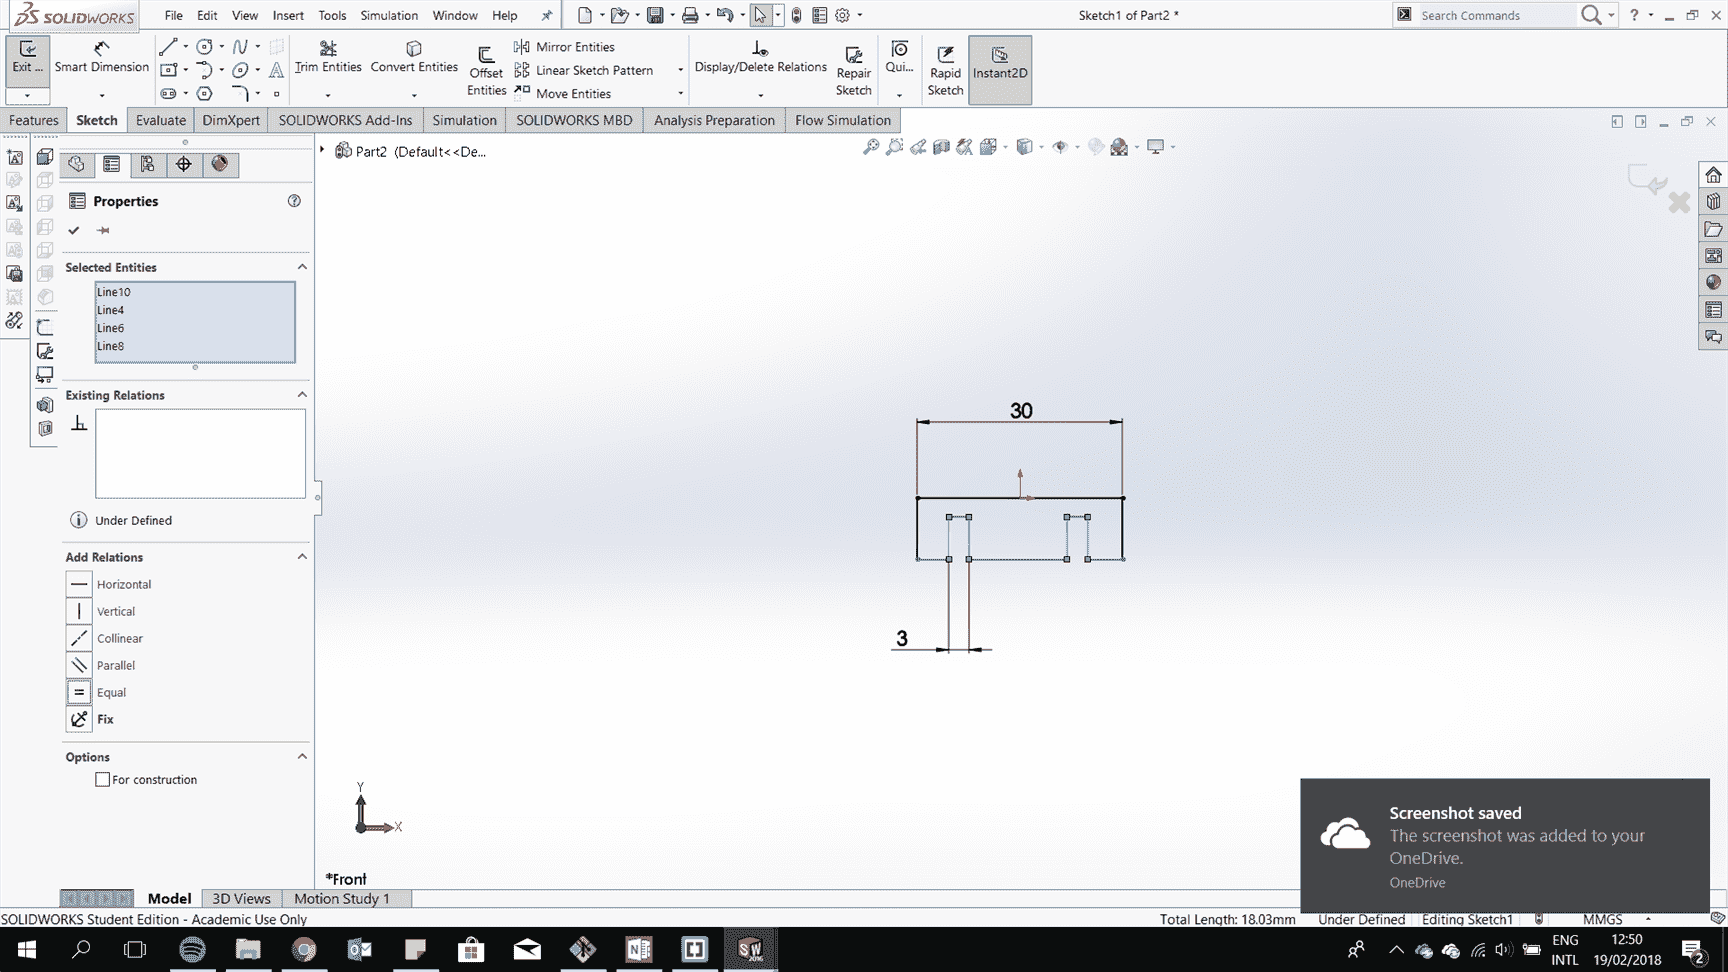
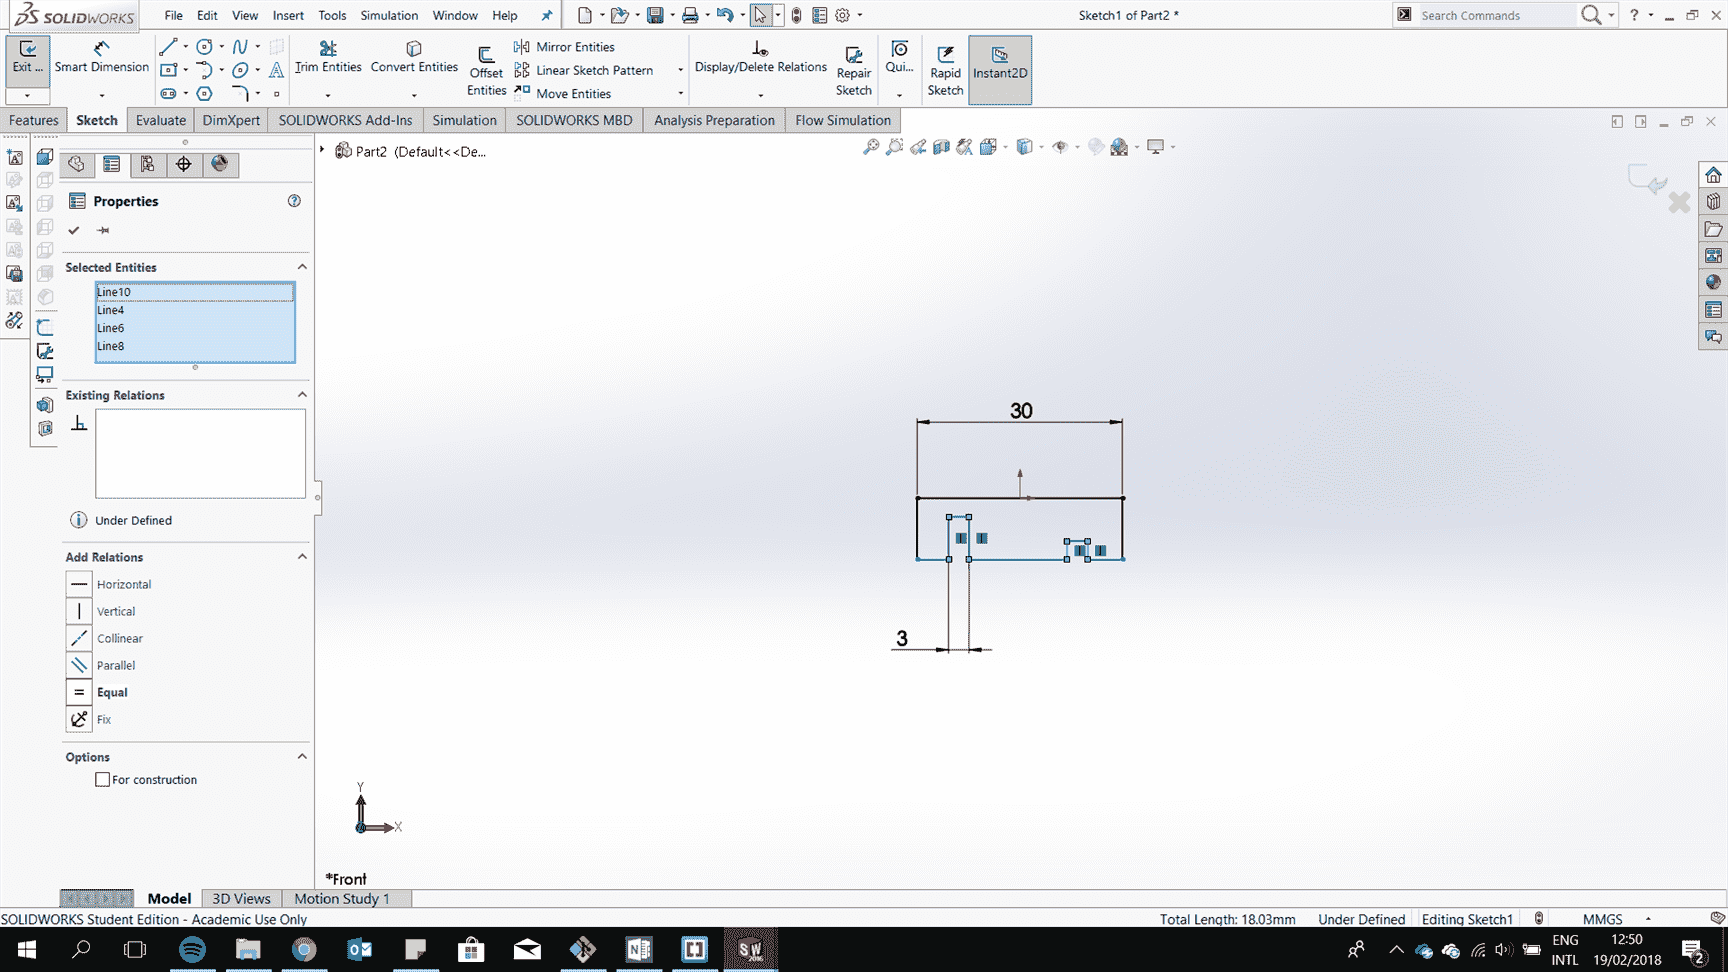
Add parametric geometry by adding an equation for a line related to another line.
Continue to draw all the 2d drawing of the parts and extrude them.

Make all the parts and assemble them.
After it is all fit togther try to consider the kerf to have perfect fit.
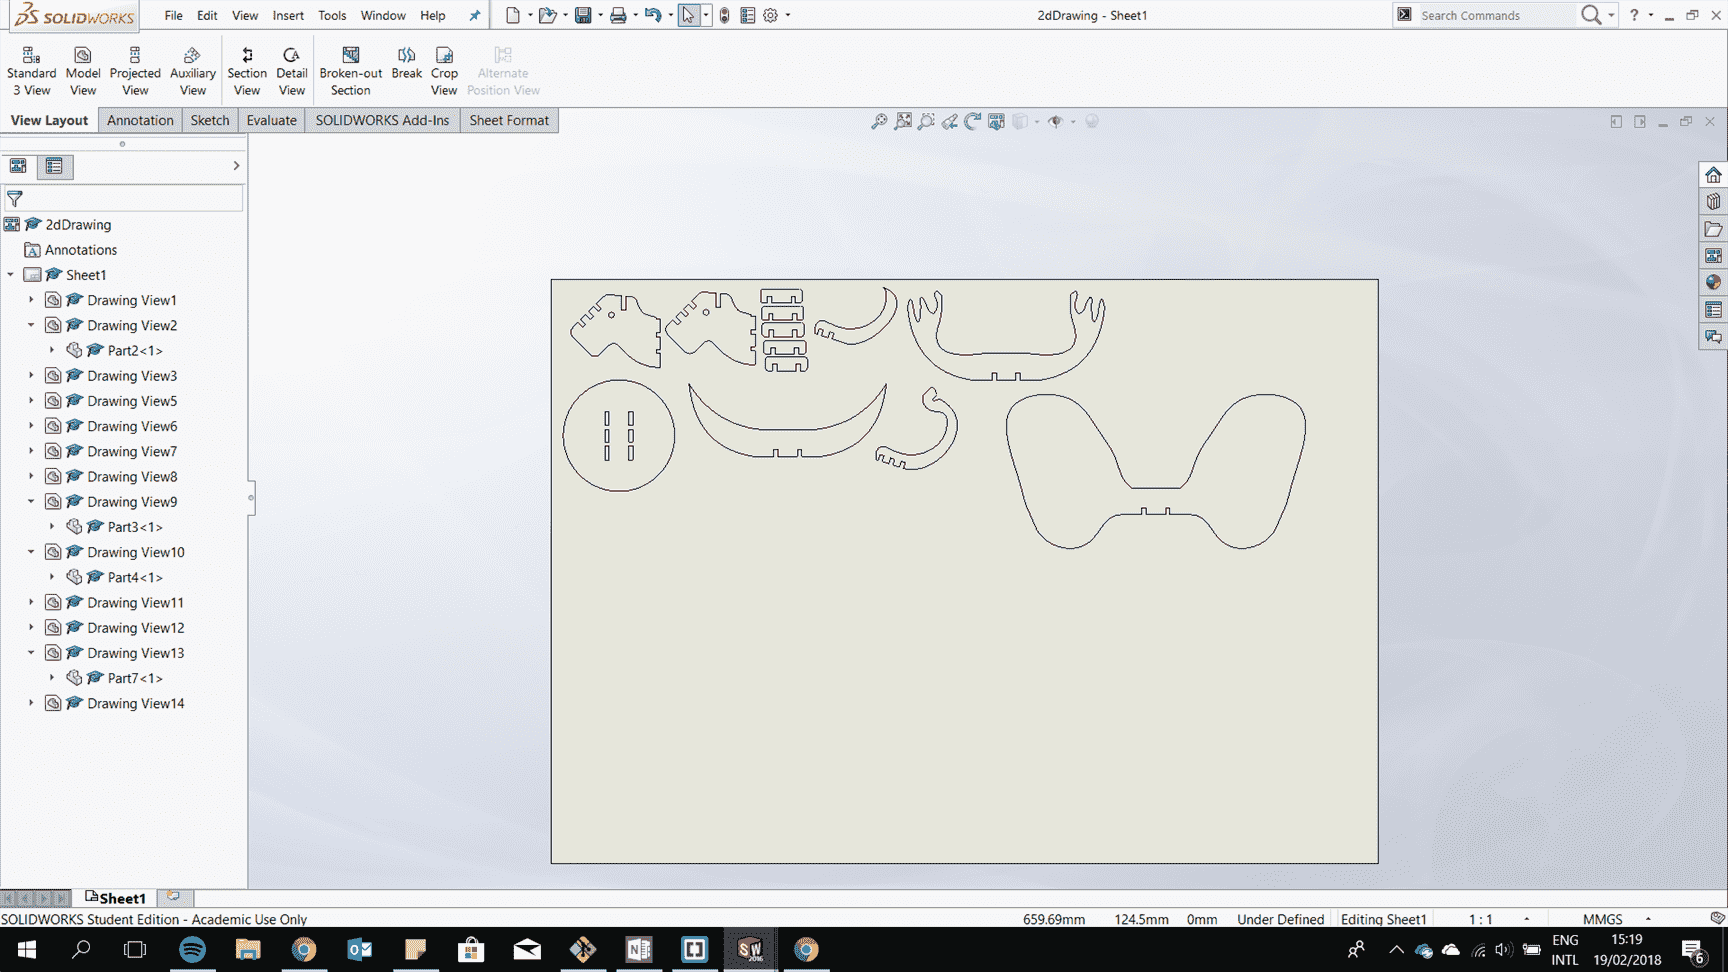
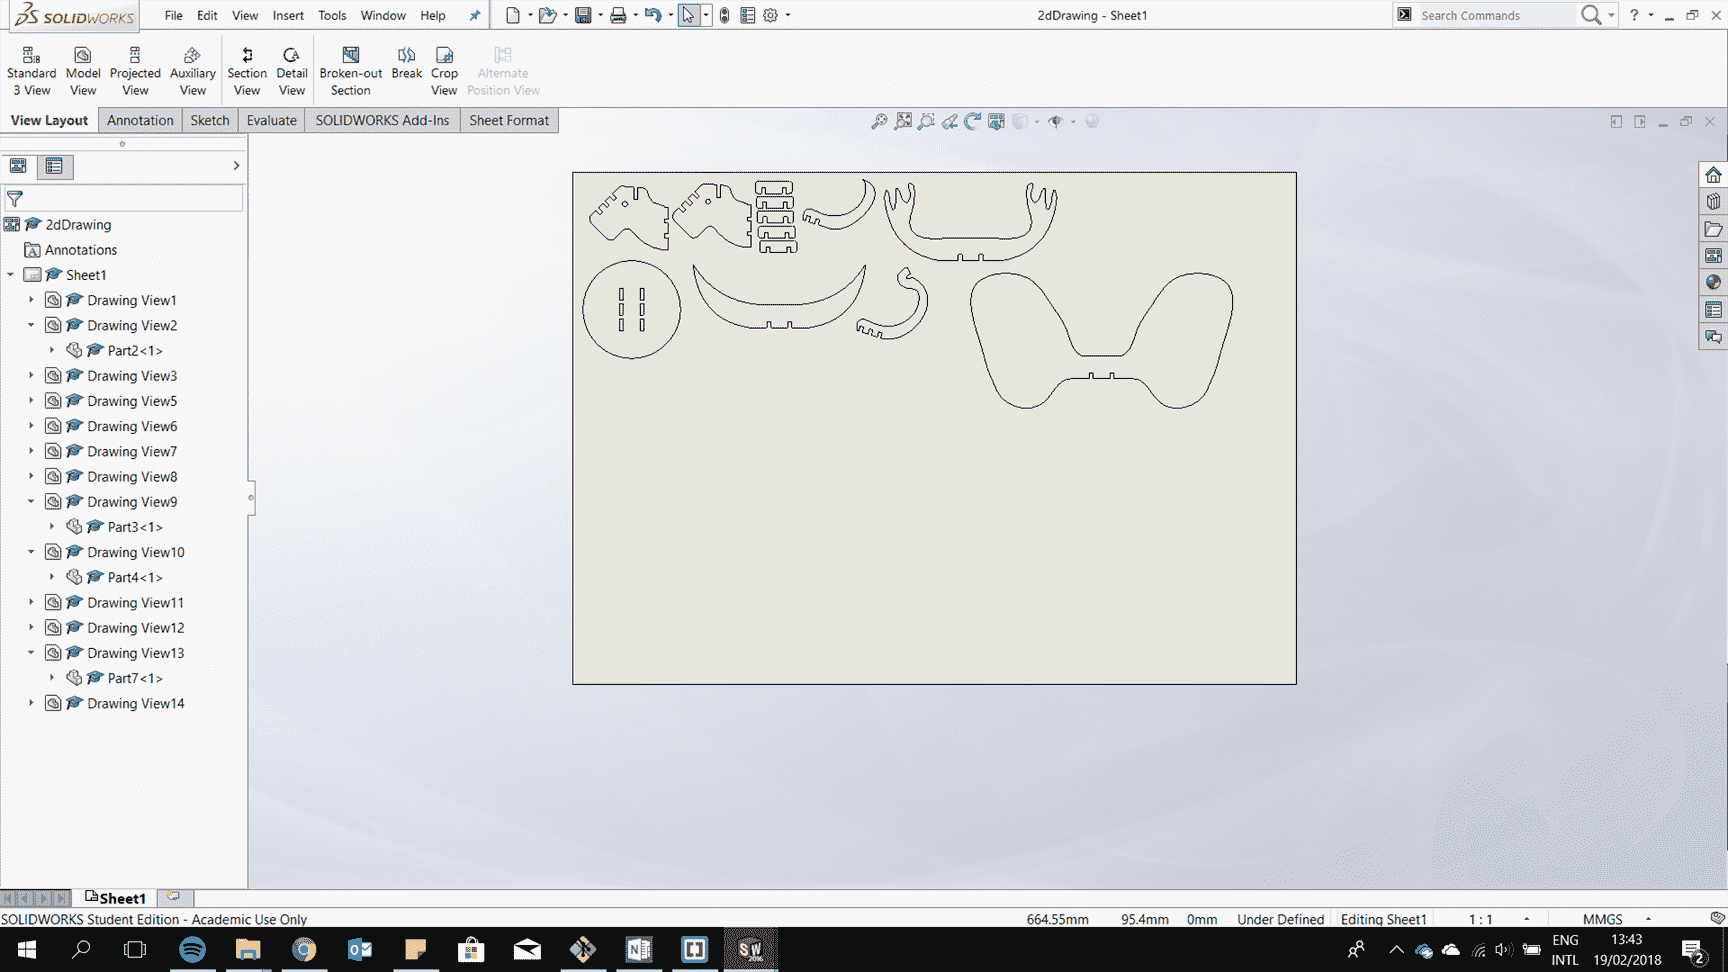
Laser cut it.
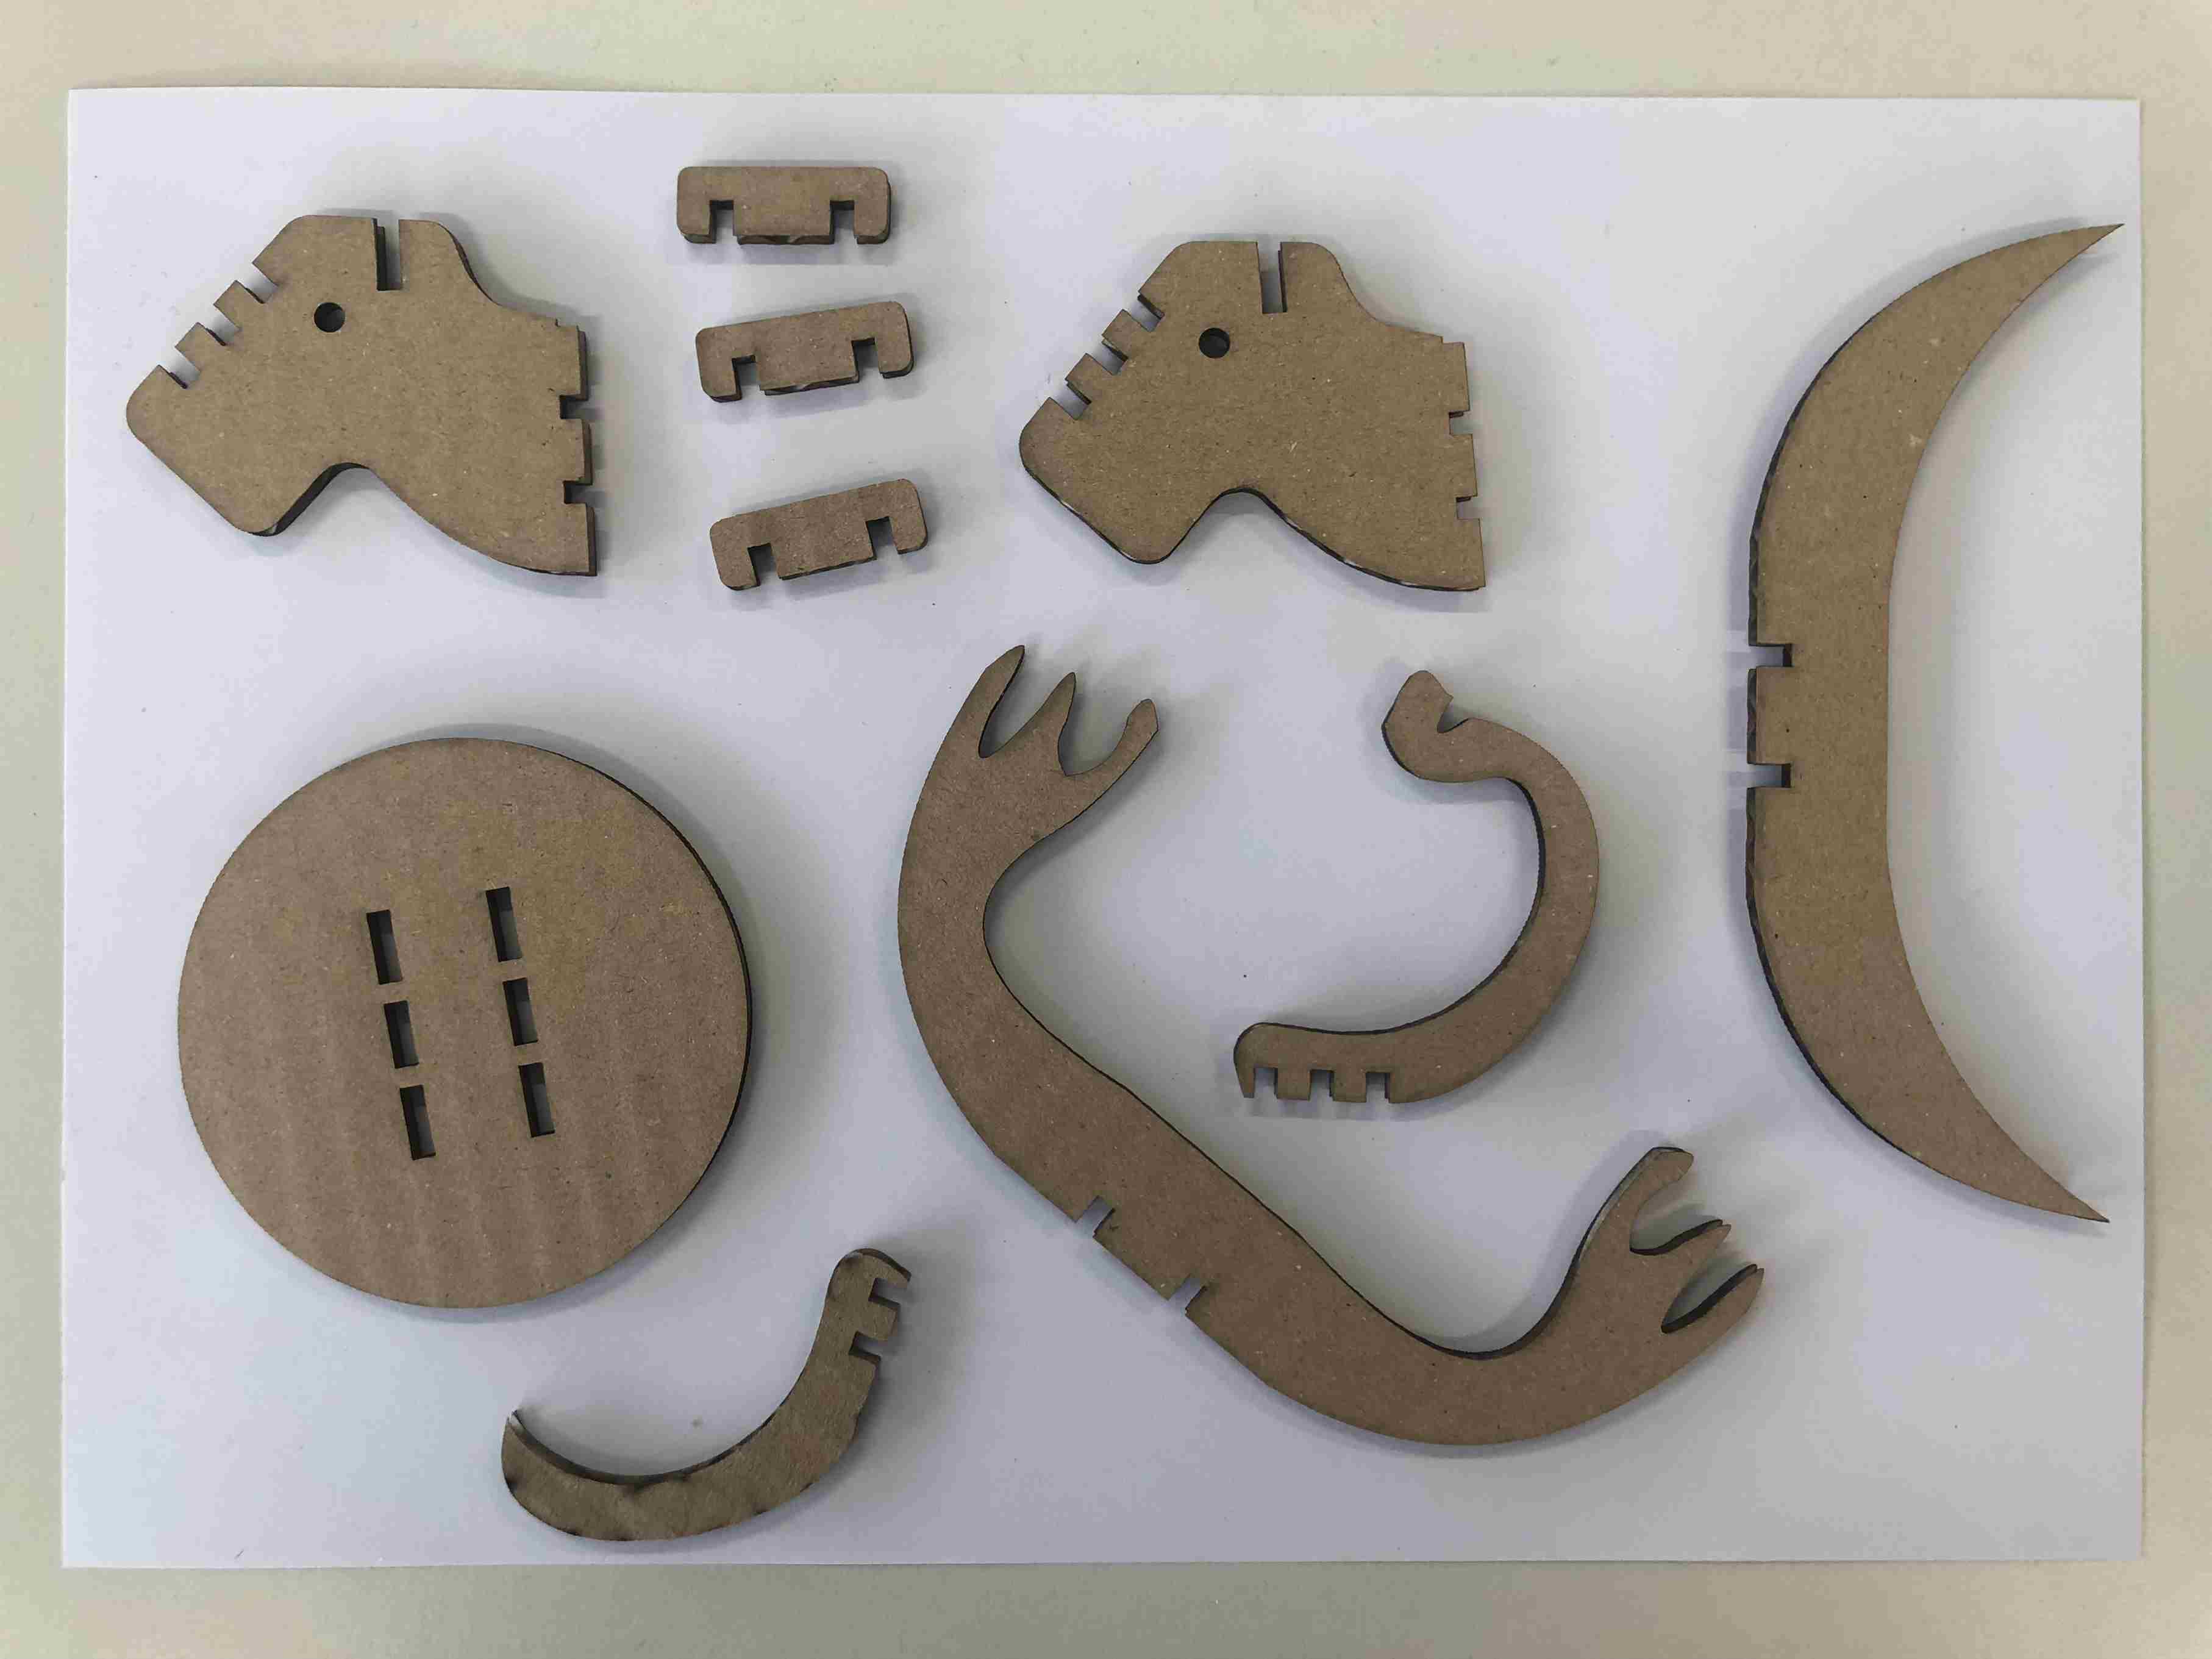
Assemble them.
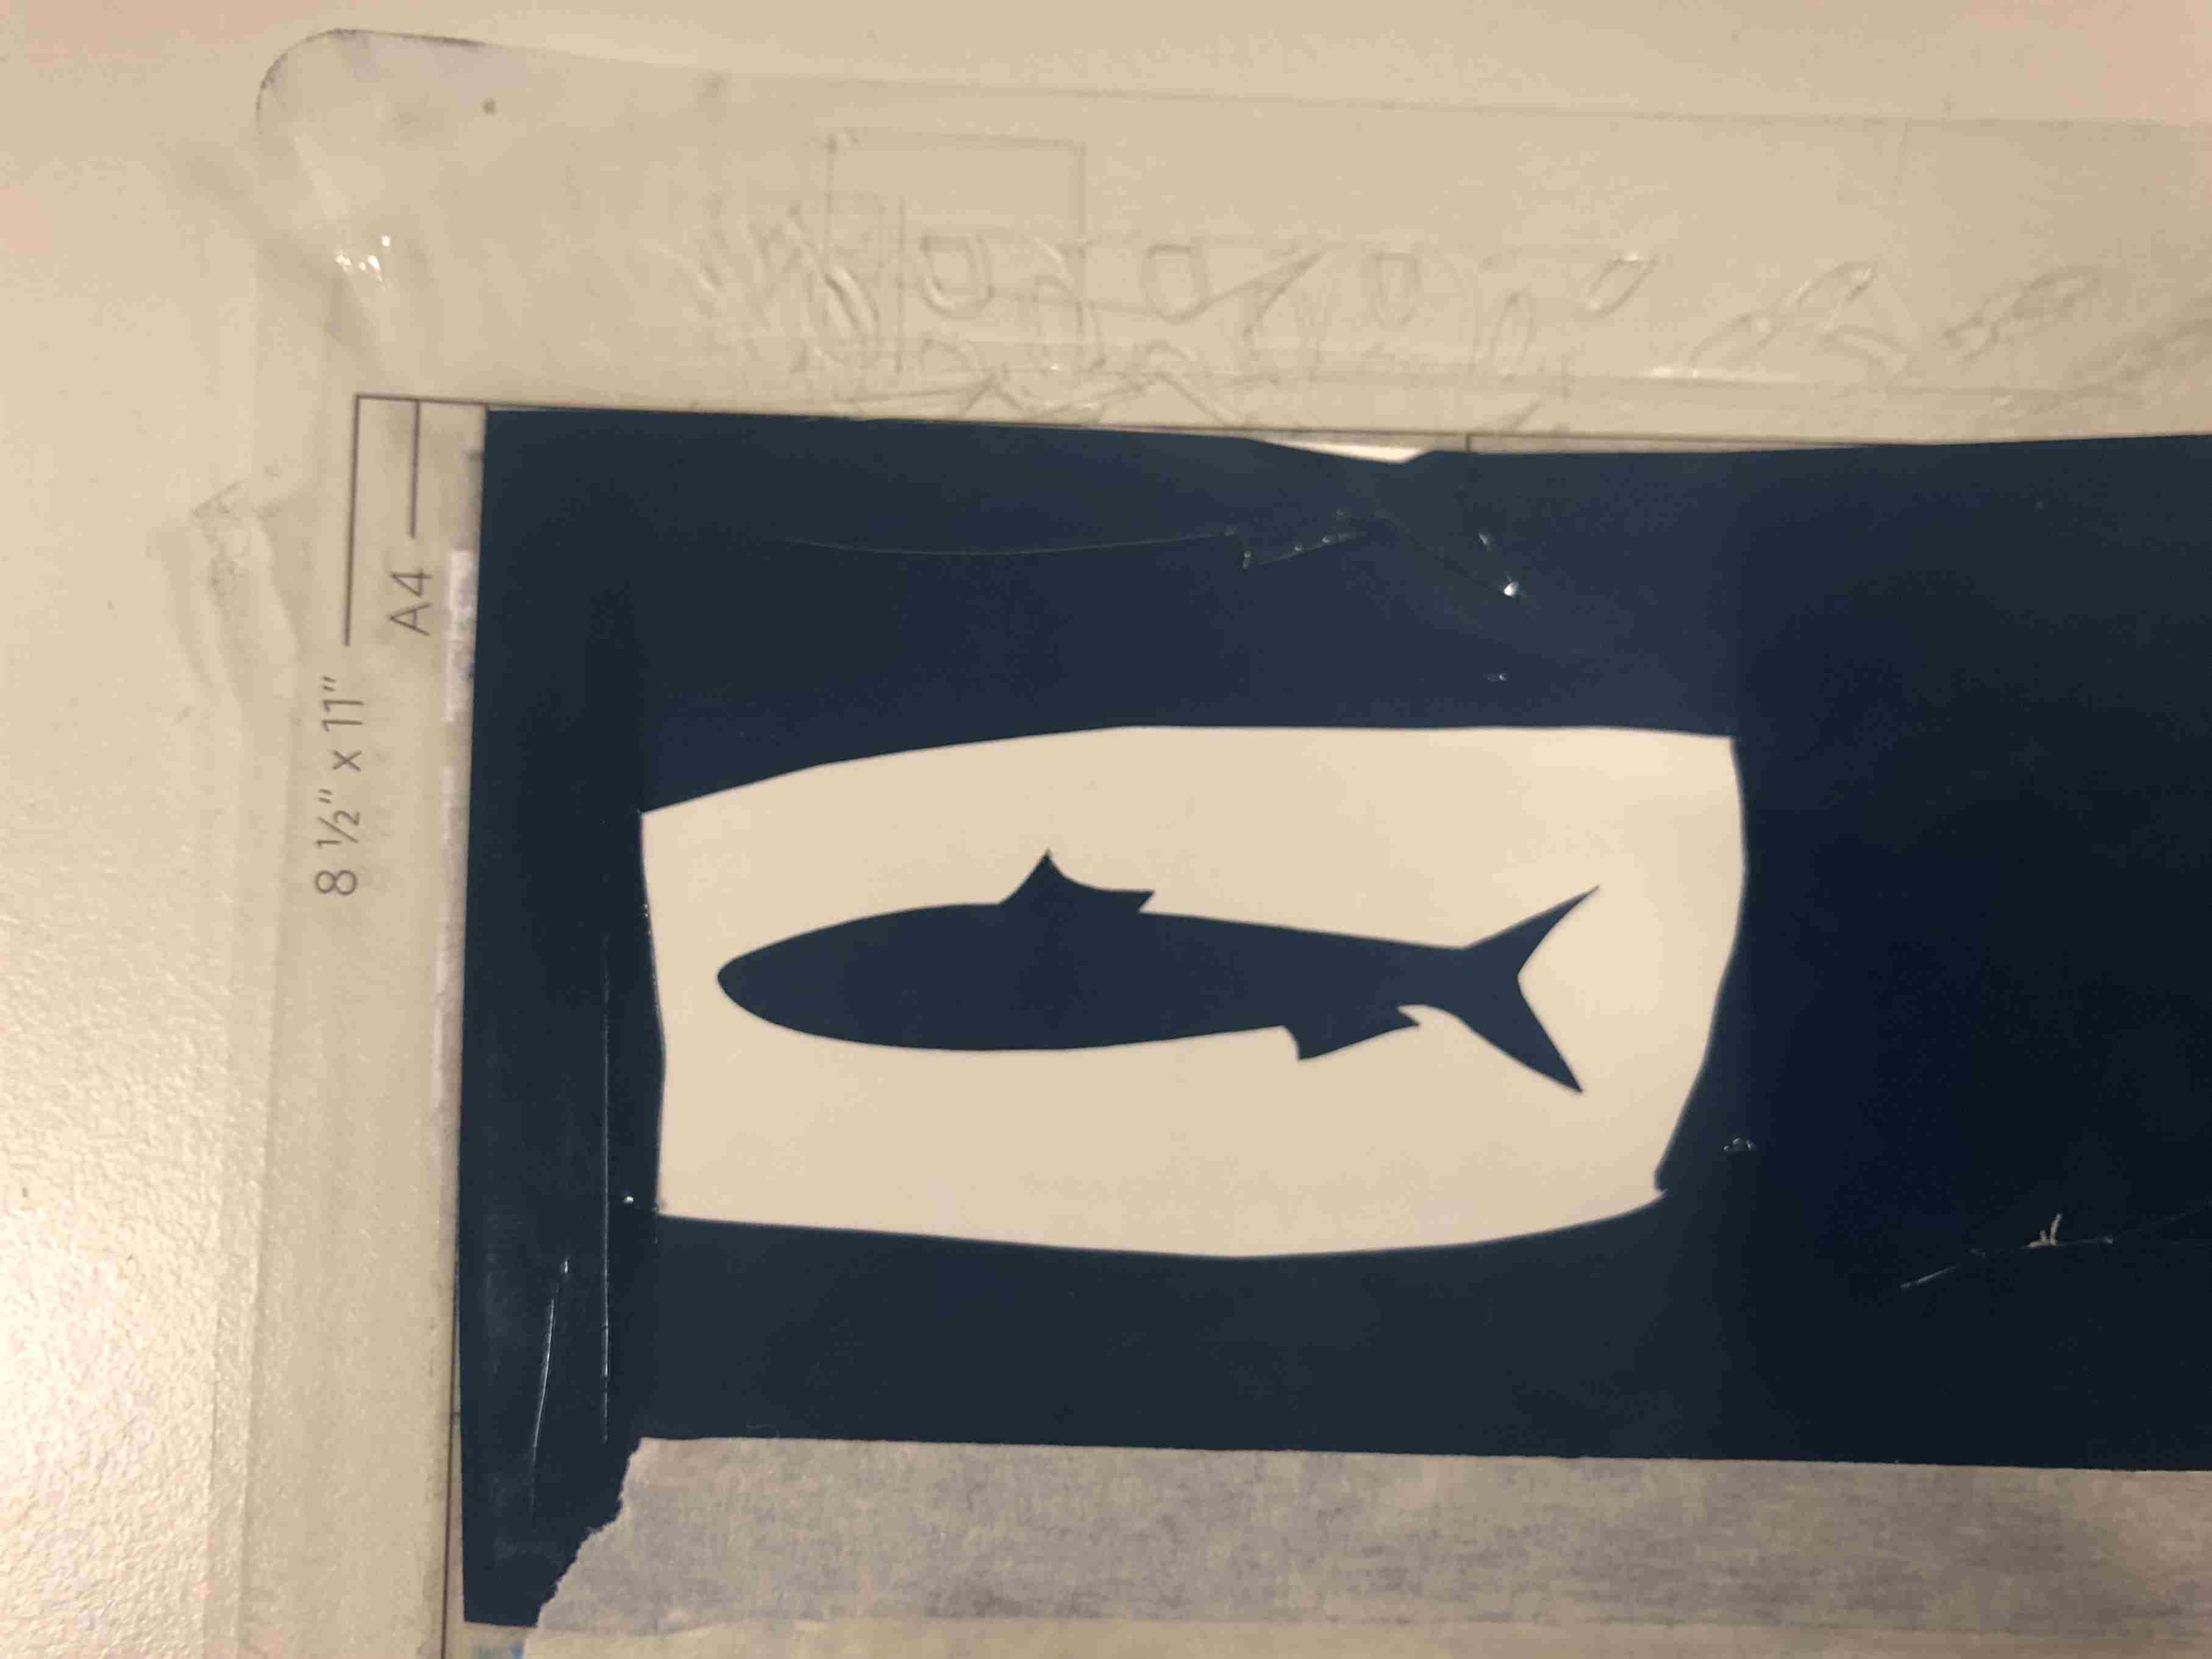
6. Vinylcutter
Make a sticker on the vinylcutter.
Firstly, save the vector drawing into dxf file and then cut it. This is a fish sticker I designed.

Download
Vector Self Watering Pot
Animals head
Fish sticker