5. 3D scanning and printing

This week’s group assignment was to test the design rules for our 3D printer(s).
Design Rules outlines the important considerations when designing for 3D printing, in order to get a good finish and reduce overall production time. The Design Rules published by ProtoLabs provides a good reference point for major printing processes.

Overview
Which 3D Printers we tested
We decided to characterise the design rules for these 3D printers;
| Specs | Anycubic Kobra2 | Bambu Lab P1S | Creality K1C |
|---|---|---|---|
| Slicer | Anycubic Slicer | Bambu Studio | Creality Slicer |
| Build volume, mm | 250 x 220 x 220 | 256 x 256 x 256 | 220 x 220 x 250 |
| Layer height, mm | 0.1-0.35 | 20%-70% of nozzle diameter | 0.1-0.35 |
| Positioning Accuracy (Precision), mm | X/Y/Z 0.0125/0.0125 / 0.0025 | around 0.1 | 100±0.1mm |
| Filament diameter, mm | 1.75 | 1.75 | 1.75mm |
| Nozzle diameter, mm | 0.4 | 0.4 | 0.4 |
| Materials Supported | PLA/ABS/PETG/TPU | PLA, PETG, TPU, ABS, ASA, PVA and PET, and even PA PC, etc. | ABS, PLA, PETG, PET, TPU, PA, ABS, ASA, PC, PLA-CF, PA-CF, PET-CF |
| Print speed, mm/s | 200m | max 500 | 300mm/s Max: ~600 |
| Print bed temperature | 110°C | 55°C for most PLA | ≤100℃ |
| Extruder temperature | 260°C | 300°C | ≤300℃ |
| Input Formats | STL, OBJ, AMF | .3mf, .stl | STL, OBJ, 3MF |
Test model
After considering different tests, we decided to test with the All in one 3D Printer Test 2 and Clearance and tolerance test.
- All In One 3D Printer test (Made on November 20, 2017)
- Smaller, more effective version of above(Made on June 24, 2018)
- All in One 3D Printer test 2(Made on February 14, 2024)
- All-in-One Object from Kickstarter-Autodesk-3d(2018) - according to Nagano-san, this one takes 9 hours to print
- This one is not new but has 21 tests and prints in 1+ hour?
https://fabacademy.org/2021/labs/waag/students/nadieh-bremer/blog/week-5/ - Comprehensive one made in 2025
Printing settings
We used these parameters when printing;
| Parameter | Description | Value |
|---|---|---|
| Infil Density | Expressed as a percentage, ranging from 0–100%. Higher infill percentage results in a denser, stronger print, while a lower percentage makes the object lighter but potentially less durable | Value recommended by instructors; 15% |
| Support | Use if over 45˚ | None |
| Skirt | Good for purging nozzle before printing model | 2 rounds |
| Brim | Good for increasing bed adhesion | None |
| Raft | Good for clean first layer of model | None |
| Layer Height | Smaller layer height produces a smoother surface finish but takes longer to print; a larger layer height prints faster but may have visible layer lines depending on application. | 0.2mm |
| Print speed | Depends on printer. To get more details, consider reducing speed. | 230mm/s for Inner wall, 138 mm/s |
For Printing Temperature, we kept the printer’s default value, which was around 220˚C (±10˚C for different printers, but we forgot to note down the exact values. PLA filament is usually between 205-225, adjusted depending on filament, printer, temperature on the day, etc. It is typically recommended to raise the temperature for faster speed printing.)
Summary of Results
These are the final prints.

And these are the test results, alongside ProtoLabs’ design rule recommendations for FDM printers.
| Design Rule | Description | ProtoLabs’ recommendation | Anycubic Kobra2 | Bambu Lab P1S | Creality K1C |
|---|---|---|---|---|---|
| Time to print | Depends on object’s volume, complexity, and printer’s capabilities | - | 2h41m | 2h41m | 1h51m |
| Support & Overhangs | The maximum angle a wall can be printed at without requiring support | 45° | 50° | 60-70° | 70° |
| Horizontal Bridges | The span a technology can print without the need for support. | 10mm | 10mm | 20mm | 20mm |
| Diameter | How accurately the printer can print cylinder diameters | not provided (min:3mm) | Almost perfect accuracy | Account for -0.2mm error | Account for -0.1mm error |
| Holes (Negative feature resolution) | How accurately the printer can print holes | not provided (min:Ø2 mm) | Rectangles are acurate. For circles, account for -0.3~-0.5mm error | Rectangles are acurate. For circles, account for -0.2~-0.4mm error | Rectangles are acurate. For circles, account for -0.3~-0.5mm error |
| XYZ Tolerance | Dimensional accuracy of a specific technology. | ±0.3% (lower limit ±0.3 mm) | All accurate | Mostly accurate, except for y:+0.2mm for 10mm spire | Mostly accurate, except for X:-0.1mm for 30mm spire |
| Connecting/Moving parts | Recommended clearance between two moving / connecting parts (min space b/w each object), so they can move after being printed. | 0.5 mm | Could not test due to failed printing |
1. Overhangs
 Ability of printer to accurately produce overhangs without supports.
What is the maximum angle the printer can print in good quality?

2. Horizontal Bridges
 Ability of printer to create horizontal bridges without support structures.
What is the maximum length the printer can print without drooping or sagging?

3. Dimensional Accuracy (Diameter/Clearance)
![]() Difference in diameter of printed filament versus acutal design.
Difference in diameter of printed filament versus acutal design.
What value to consider offsetting when designing?

4. Negative feature resolution

Ability of the printer to make holes, and their tolerance (how easily the holes can be easily released with your fingers)

5. XYZ Resonance
How well the printer makes prints in the XY direction.

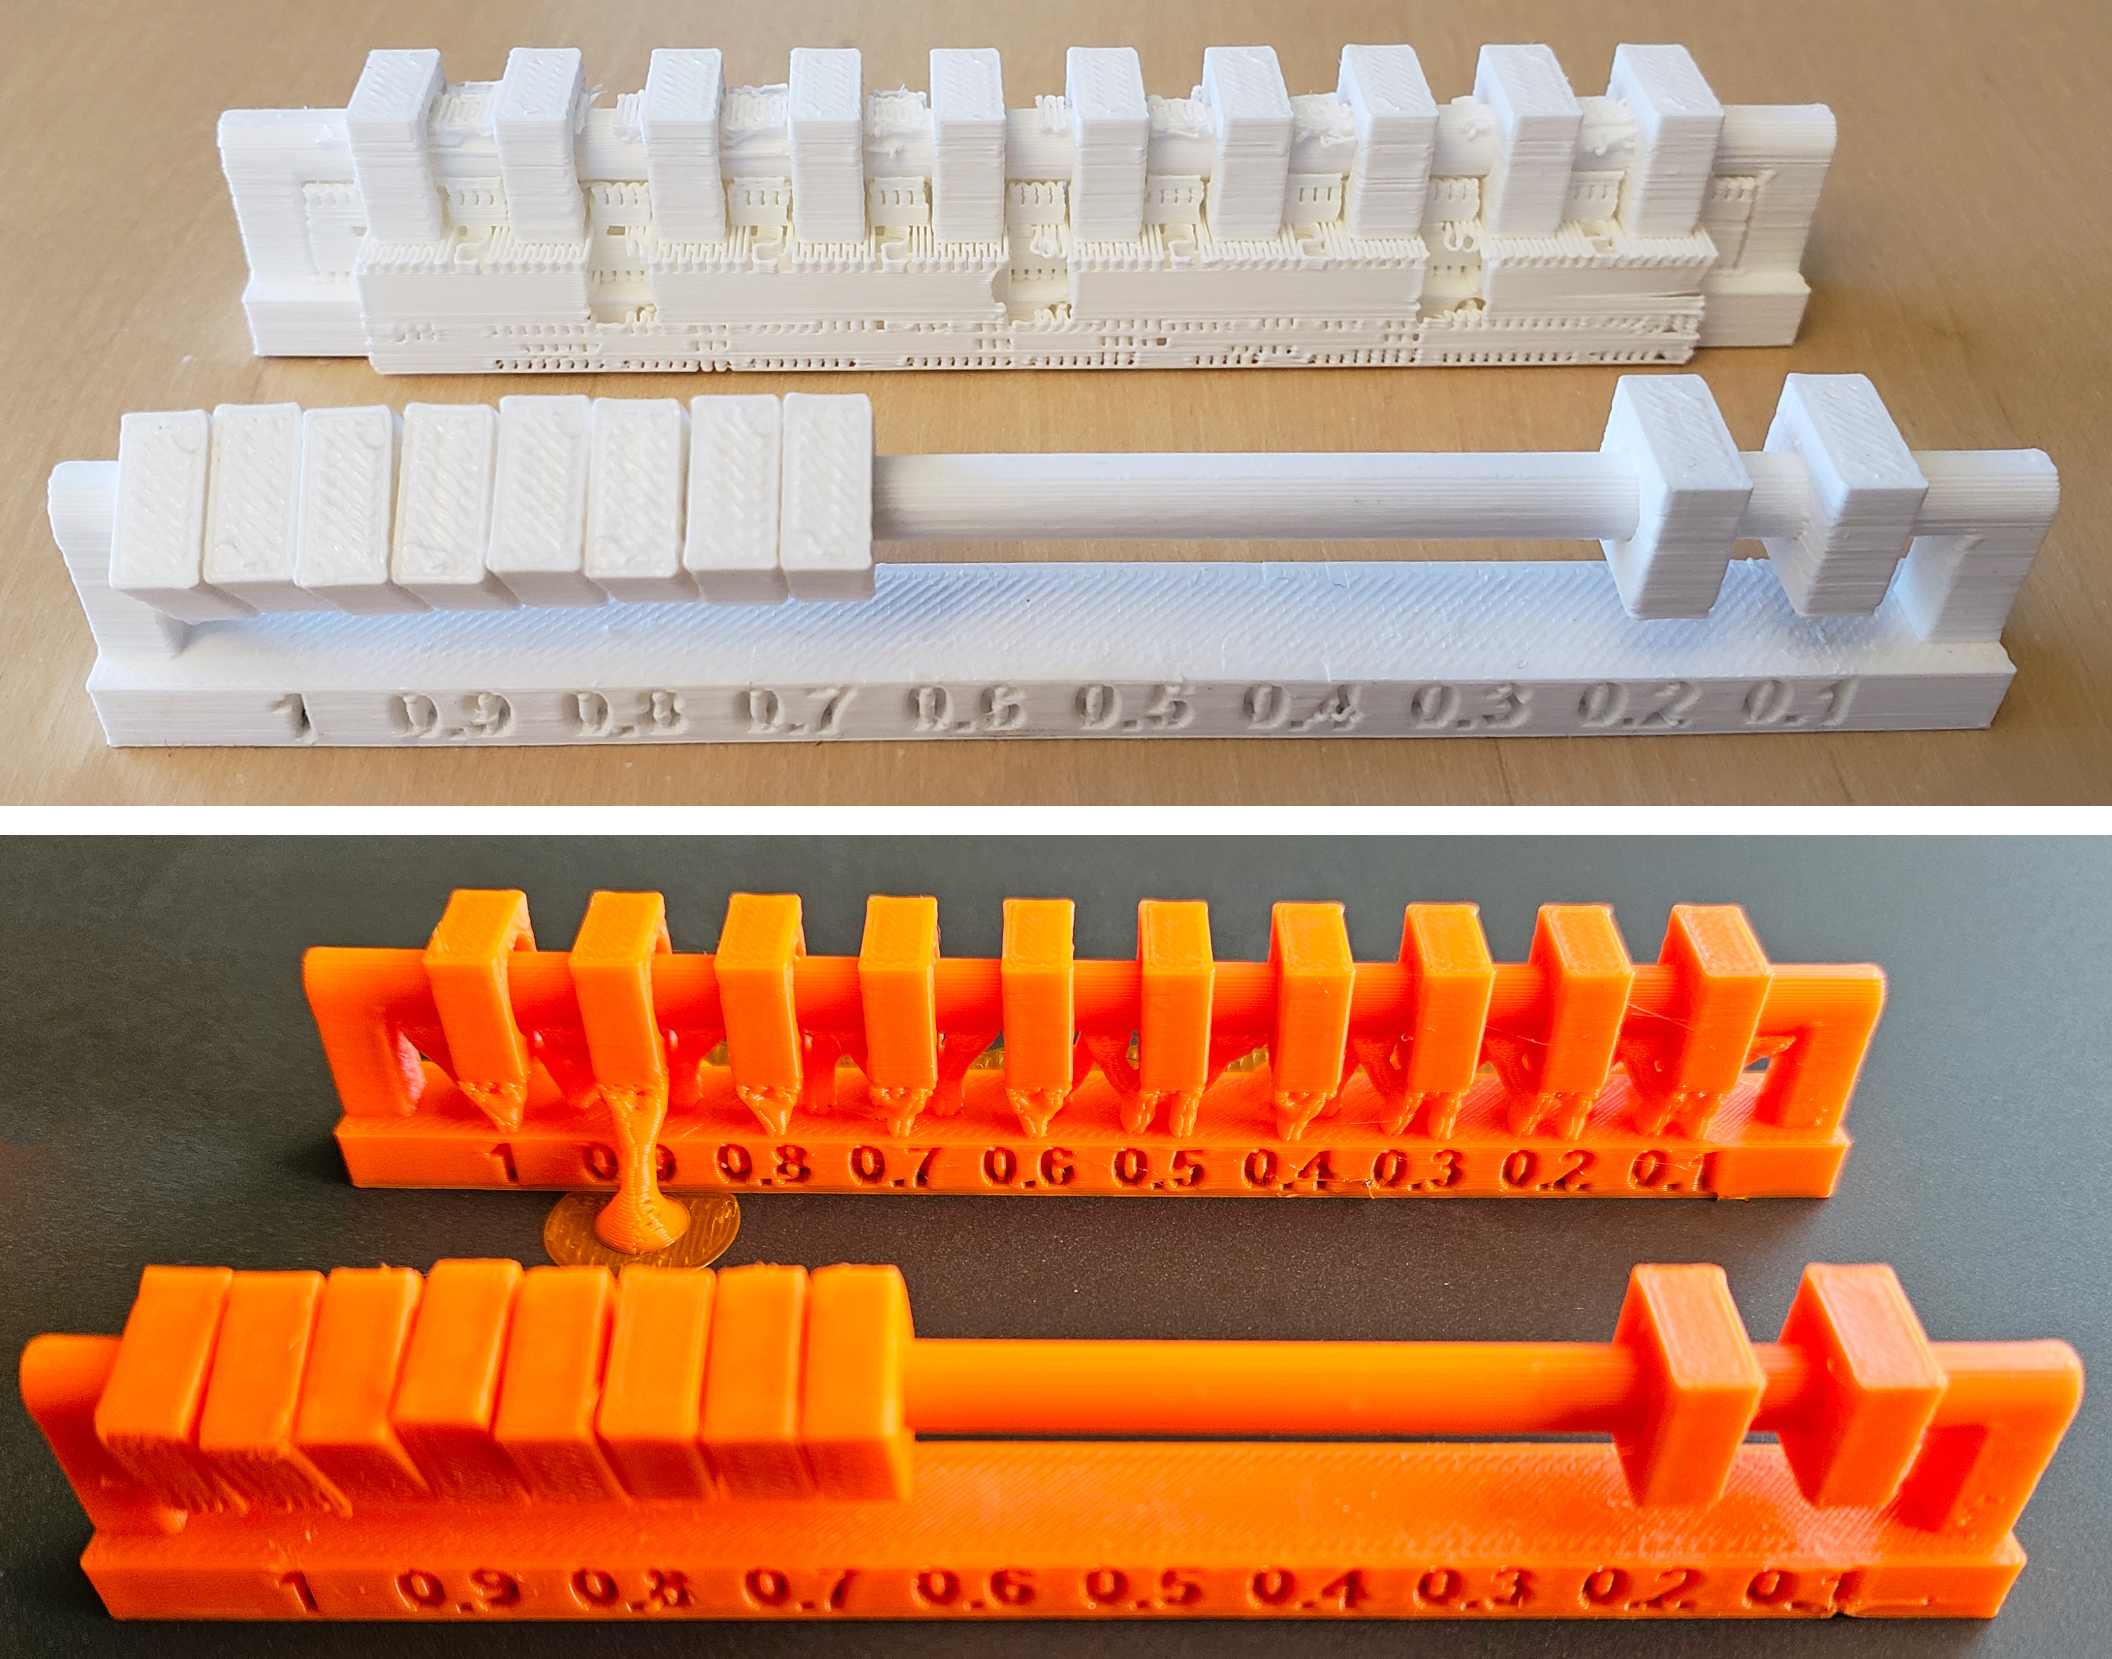
6. Clearance
Gap or space between two parts - awareness of this value ensures smooth fit. Especially critical for tight internal geometry and print-in-place objects.
At least how much apart should 2 components should be so that they can move after being printed?

7. Fine Flow Control

How well the printer can make small spires. Measure the height of the tower that can be made, and whether there are any strings between towers.

Other
Bambu could not print engraved texts on flat surface (XY plane).
AnyCubic can print, but very roughly and not very legibly.
Creality had the best quality by far.