.png)
Hi! Welcome to Week 2
This week's assignment is to work through a git tutorial
and build a personal site in the class archive describing me and my final project
This week's assignment is to work through a git tutorial
and build a personal site in the class archive describing me and my final project
This is my first time trying to build a website. However, I decided to try and make it as close as I want it to what I have in mind from the beginning instead of starting with a basic design and working on it each week as I prefer to dedicate my time for each week’s assignment.
I started off with my lab instructor Nadine Tuhaimer, we went through the basics of using brackets anf HTML (short for Hyper Text Markup Language) got to know how to set the looks using Cascading Style Sheet (CSS). I also learned several codes that are helpful, like how to change the color of the text, the background, adding picture:
internal and external linking using:
for internal:
<a href="Week%203.html"> the link </a>
or for external:
<a href="https://www.blablabla.com"> the link </a>
and also
alignment and others.
I sketched how I imagined my website will look, and chose the color scheme in order to match the look of my portfolio and CV.
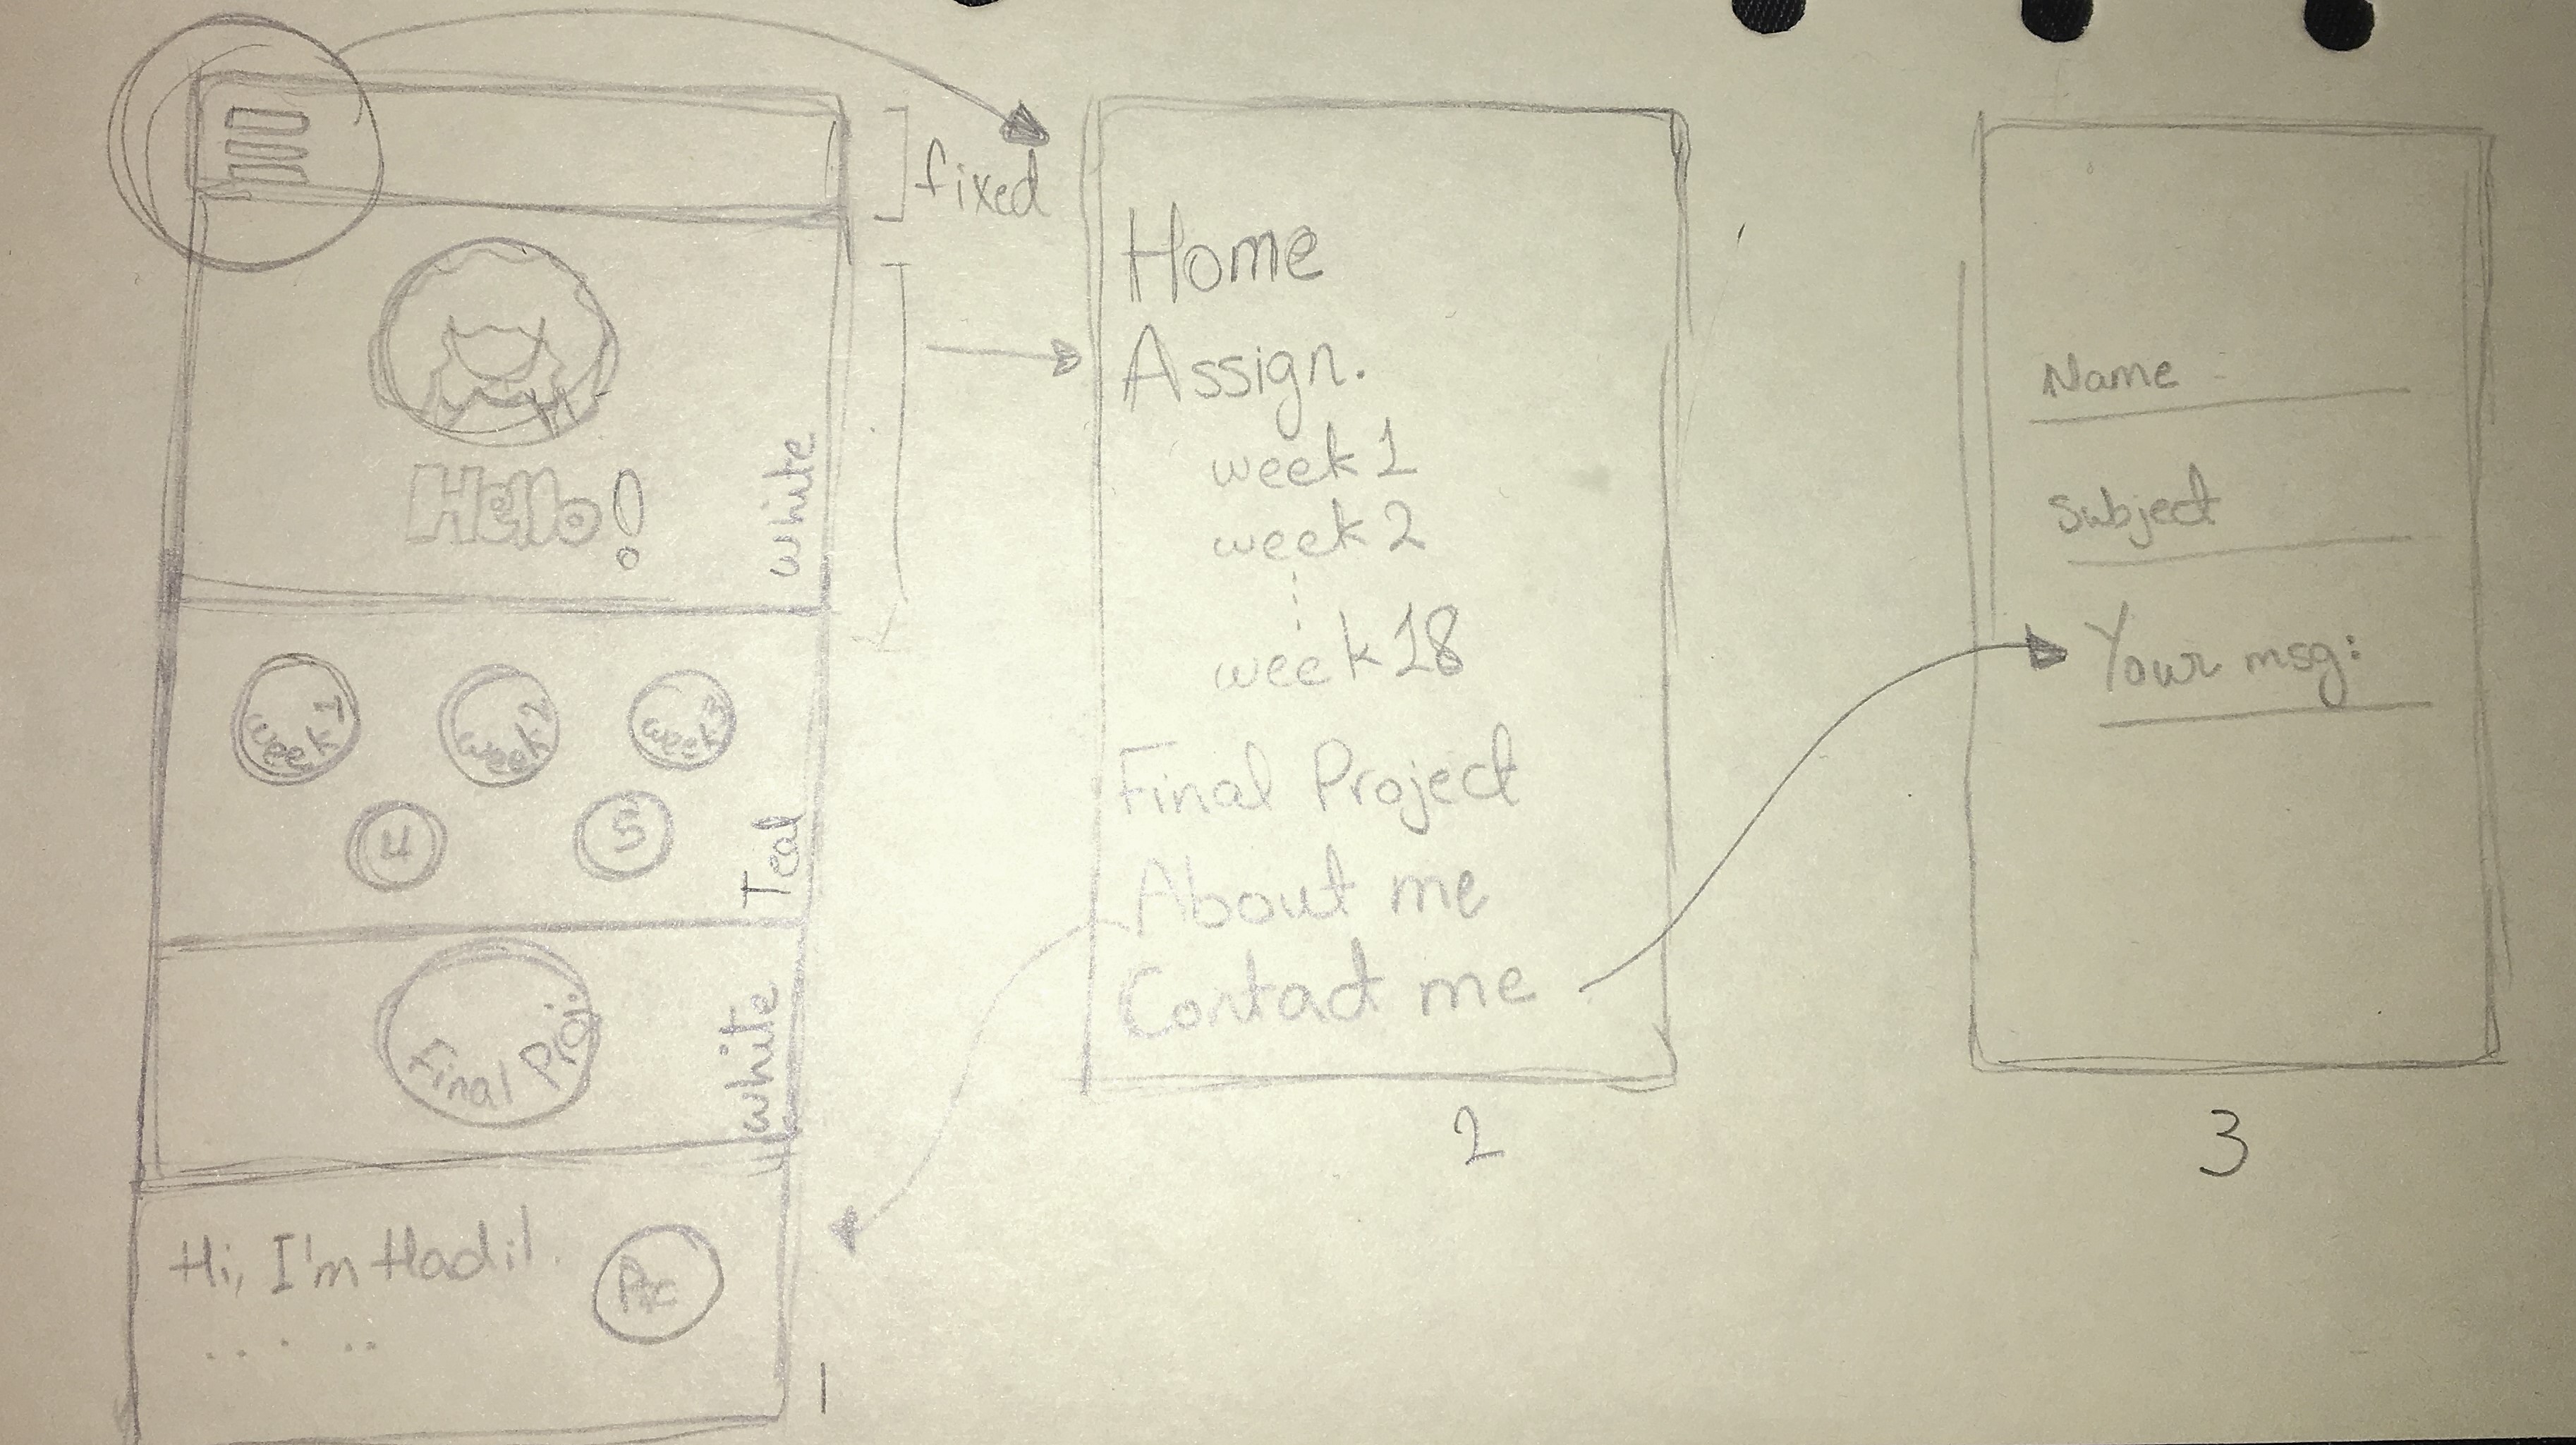
I then prepared the written content that will be taking part on each section or page.
After searching, I was advised to use “bootstrap” to add my backgrpunds and style as they’ll look better and are easier to handle. You can check the tutorial that I followed from here .
After practicing for a while, I moved on to the available templates and started editing my website following this tutorial .
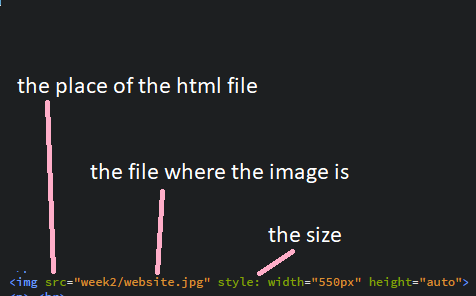
I added the backgrounds for each section, the picture in the beginning, and the images of the icons of the assignments. However, I couldn’t align them in the start:

, so I went back here and added the last two elements:
.navbar {
color: #fff;
padding-top: 15px;
padding-bottom: 15px;
border: 0;
border-radius: 0;
margin-bottom: 0;
font-size: 12px;
letter-spacing: 5px;
{
Yet the problem wasn’t solved, after some trial and error, I found out that removing the following:
class="img-responsive margin"
from each picture’s div element would do the trick. I then moved link the icons with the pages of each week's assignment. and I was able to set the icons as links by following this tutorial .
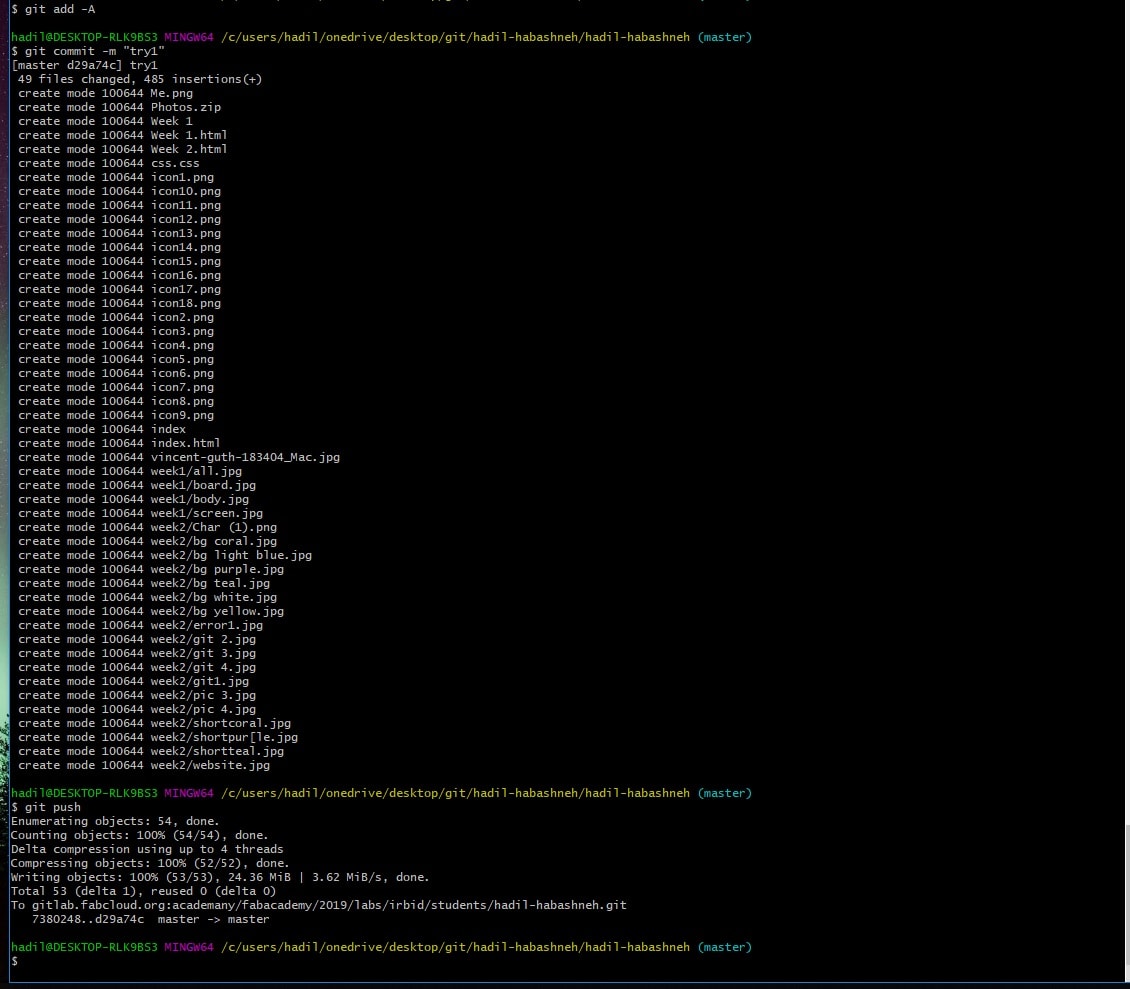
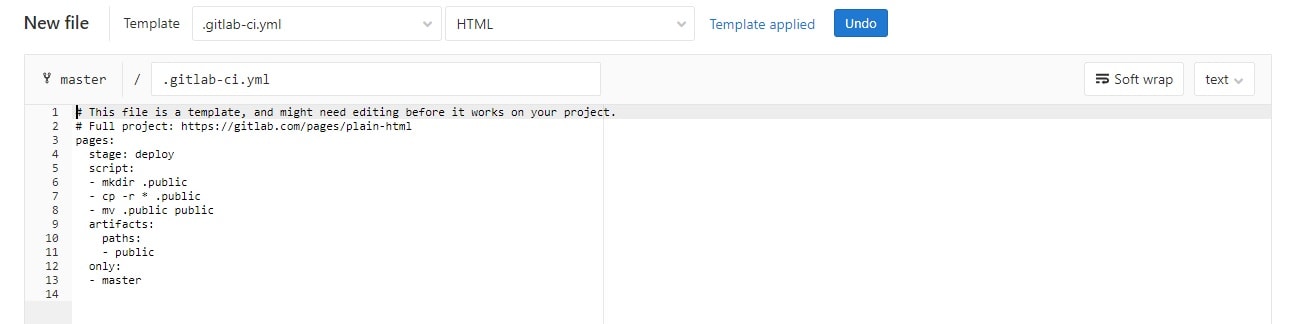
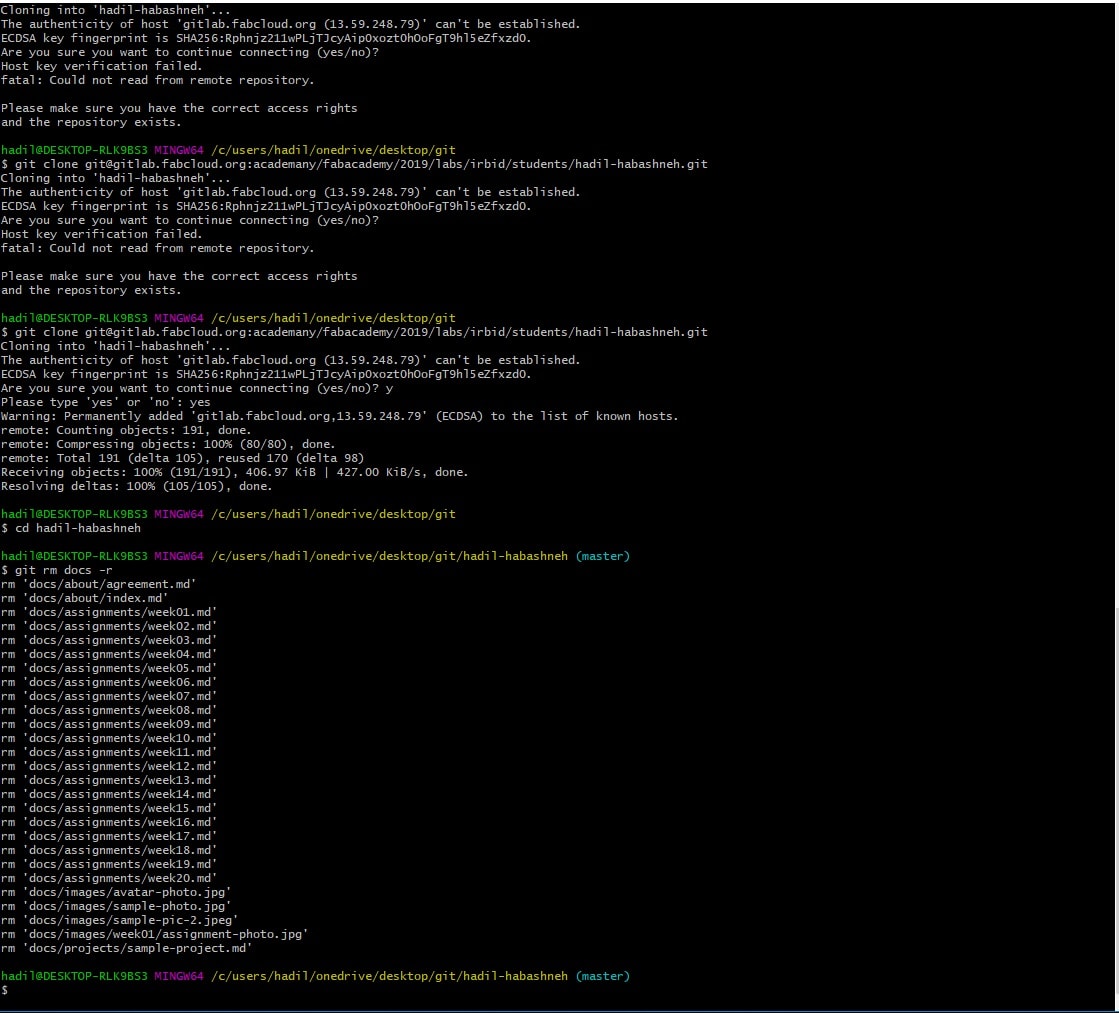
Next, I had to set up my git account and launch my page. The first step was to delet the contents that are already on the git page. I created a new file online named gitlab-ci.yml:
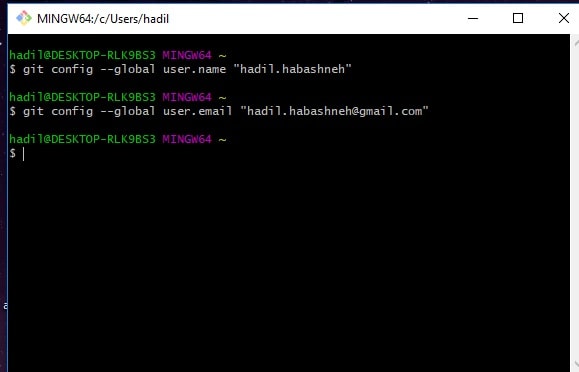
Then I configured my username and email on Git Bash by using:
* Configure username: git config --global user.name "my username"
* Configure email: git config --global user.email "my email"
and proceeded to create an SSH key by: ssh-keygen -t rsa -C "my email"
and I accessed it using: cat ~/.ssh/id_rsa.pub

By goinig to my GitLab Profile Settings, then SSh Keys, copying the private part of the SSh from Git Bash (the part that begines with ssh-rsa and ends with my email, and then adding the key.
Now I was able to delete the default content:
And the final step is to upload and push my webstie, using the "git add -A" to add all modified and new files in the current directory and all subdirectories to the staging area, "git commit -m" which saves the changes to the local repository and the -m to write a message, and "git push" to upload local repository content to the remote repository.