Xiao-Ukulele
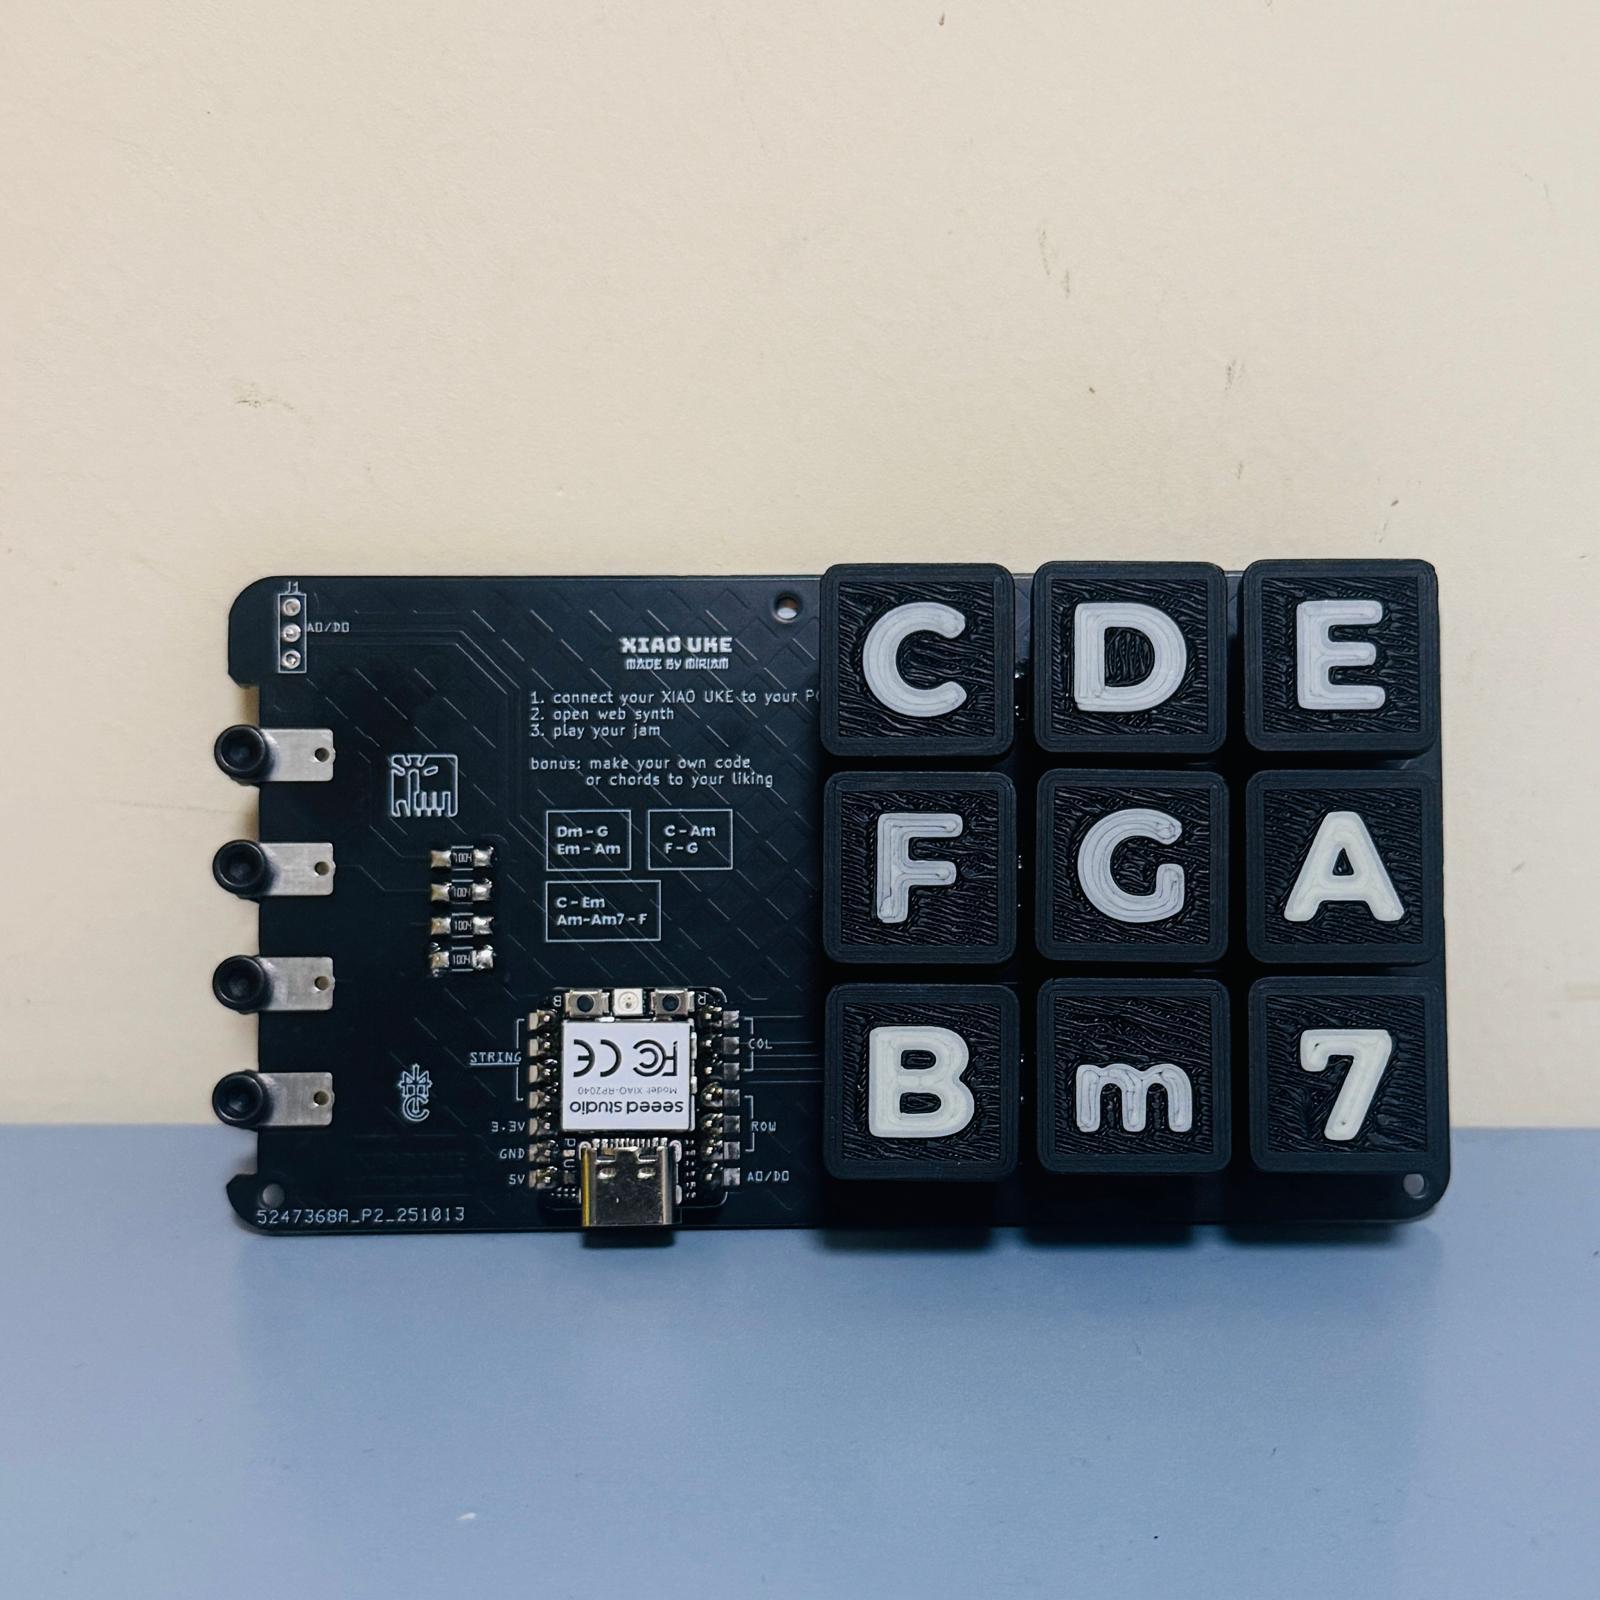
A compact MIDI and HID instrument interface using XIAO RP2040, a 3x3 key matrix, capacitive touch pads, and NeoPixel feedback.
Fabrication Files
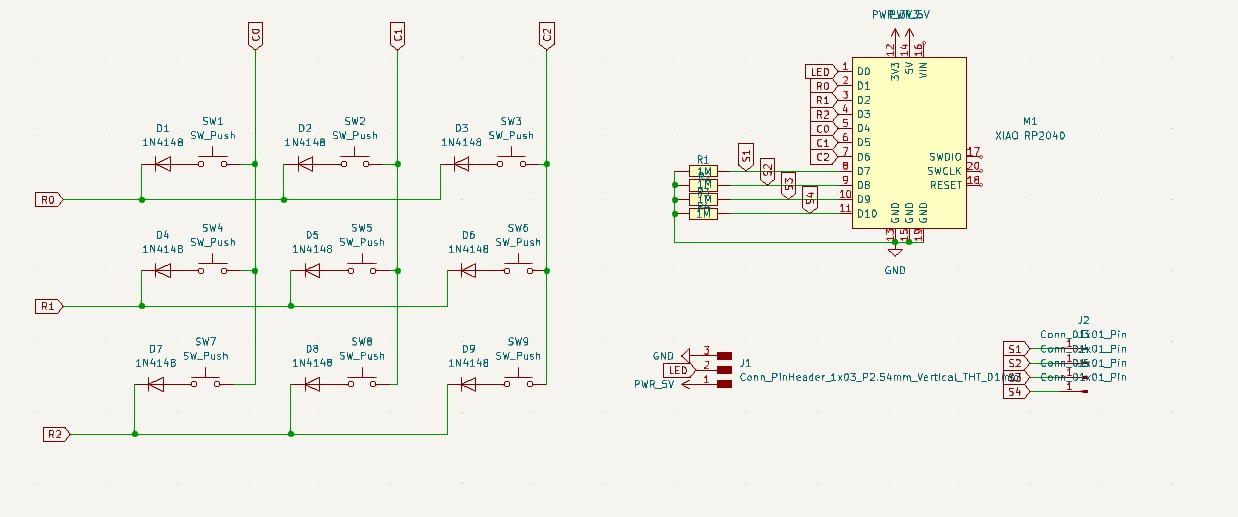
schematics

Front traces
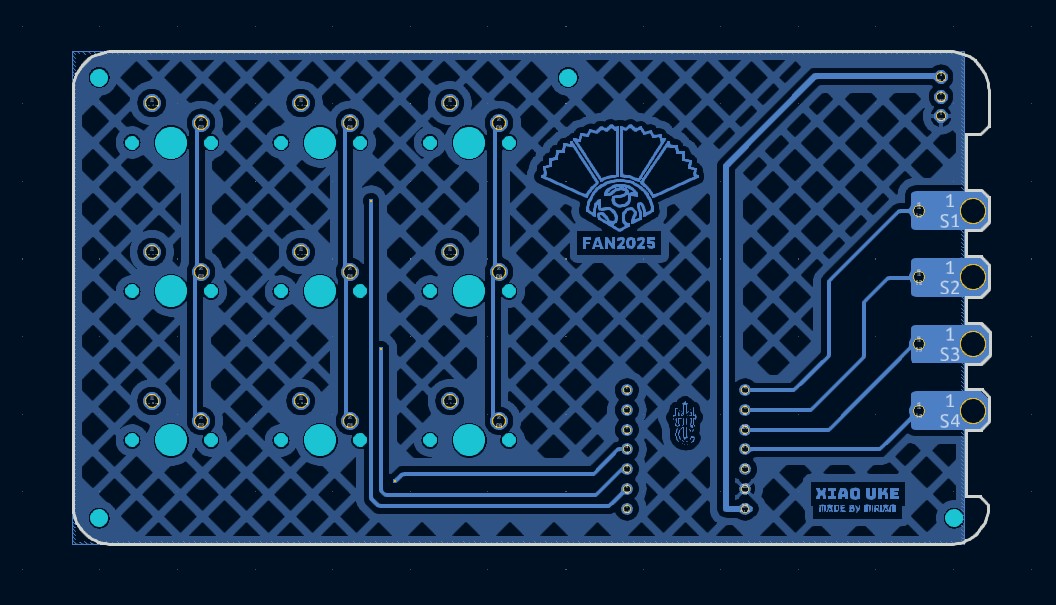
Back traces
Bill of Materials (BOM)
Core parts used in the Xiao-Ukulele build.
| Item # | Ref. | Comp # | Description | Package | Link |
|---|---|---|---|---|---|
| 1 | U1 | XIAO RP2040 | Main microcontroller board | Seeed Xiao RP2040 module | Seeed |
| 2 | SW1-SW9 | MX switches | 3x3 key matrix for note/command input | whichever you prefer | - |
| 3 | D1-D9 | 1N4148W Diode | Switching diodes | SOD-123 | AliExpress |
| 4 | R1-R4 | 1MΩ Resistor | Pull-down Resistor | 1206 SMD | Fab Academy inventory |
| 5 | XiaoUke Board | PCB | PCB designed by Miriam | 118mmx64mm | - |
Assembly
Is quite easy if you are used to soldering pcb boards. Solder the diodes first. Polarity is important for the diodes, so check the schematics for the direction, the Diode has a tiny line on one side, that side should be facing the same direction as the line on the PCB silkscreen.
Solder the switches last, just so that you don't accidentally melt the switches while soldering other components.
I secured m3 bolts to the touchpads for protecting the pads, and for easy touch when strumming.
Programming Process
The firmware supports multiple interaction modes including MIDI output and HID keyboard. I used Thonny to upload the CircuitPython code to the XIAO RP2040.
- Download CircuitPython for the Seeeduino XIAO RP2040.
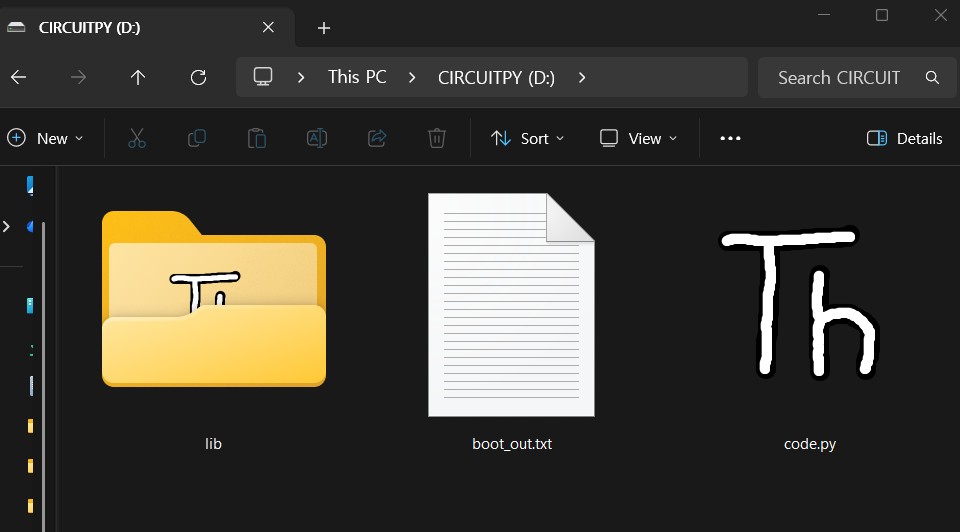
- Drag the .uf2 file that you just downloaded into the folder that pops up when you connect your Xiao to your PC
- The Xiao will automatically reboot and be recognized as a circuitpython device.
- Copy the adafruit_midi and neopixel libraries into the lib folder in the Xiao's storage.
- Now, you can use Thonny to run your CircuitPython code on the Xiao.
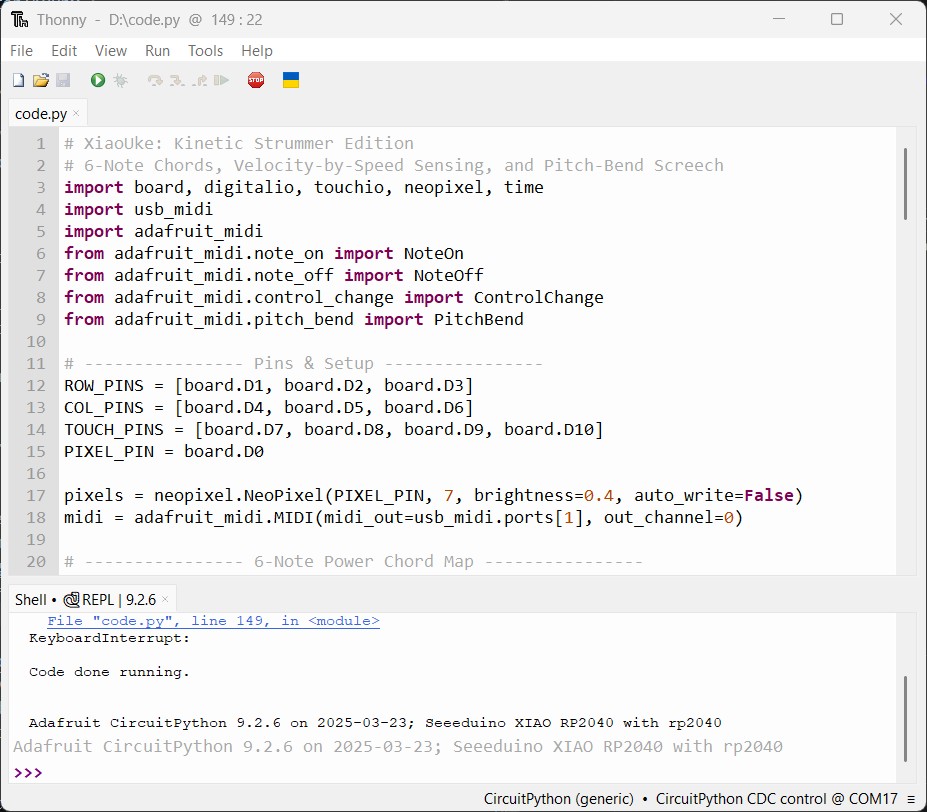
On thonny, you can directly bootload the circuitpython firmware to the Xiao. but I think you need to be online to be able to do this.
Project Demo

Example Code (CircuitPython)
# XiaoUke_hardware_check.py
# CircuitPython debug/test for XiaoUke before you go crazy with customization
# Checks matrix switches, capacitive pads, and NeoPixel strip

import board
import digitalio
import touchio
import neopixel
import time

# ---------------- Pins ----------------
ROW_PINS = [board.D1, board.D2, board.D3]
COL_PINS = [board.D4, board.D5, board.D6]
TOUCH_PINS = [board.D7, board.D8, board.D9, board.D10]
PIXEL_PIN = board.D0
NUM_LEDS = 7

# ---------------- Setup ----------------
rows = [digitalio.DigitalInOut(p) for p in ROW_PINS]
for r in rows:
    r.direction = digitalio.Direction.INPUT

cols = [digitalio.DigitalInOut(p) for p in COL_PINS]
for c in cols:
    c.direction = digitalio.Direction.INPUT
    c.pull = digitalio.Pull.UP

touches = [touchio.TouchIn(p) for p in TOUCH_PINS]
for t in touches:
    t.threshold = 1200

pixels = neopixel.NeoPixel(PIXEL_PIN, NUM_LEDS, brightness=0.4, auto_write=True)

# ---------------- Matrix Helpers ----------------
def set_row_active(i):
    for r in rows:
        r.direction = digitalio.Direction.INPUT
    rows[i].direction = digitalio.Direction.OUTPUT
    rows[i].value = False

def release_rows():
    for r in rows:
        r.direction = digitalio.Direction.INPUT

# ---------------- LED Test ----------------
print("Testing NeoPixel strip...")
for i in range(NUM_LEDS):
    pixels.fill((0, 0, 0))
    pixels[i] = (255, 100, 0)
    print("LED", i + 1, "ON")
    time.sleep(0.2)
pixels.fill((0, 0, 0))
print("LED test complete\n")

# ---------------- Button + Touch Test ----------------
print("Testing matrix and touch inputs...\n")

while True:
    # Matrix keys
    for r in range(len(rows)):
        set_row_active(r)
        time.sleep(0.001)
        for c in range(len(cols)):
            if not cols[c].value:
                key_id = r * len(cols) + c
                print("Key", key_id + 1, "pressed (Row", r, "Col", c, ")")
                pixels.fill((0, 255, 0))
                pixels[key_id % NUM_LEDS] = (255, 0, 0)
                time.sleep(0.2)
                pixels.fill((0, 0, 0))
        release_rows()

    # Touch pads
    for i, t in enumerate(touches):
        if t.value:
            print("Touch Pad", i + 1, "active")
            pixels.fill((0, 0, 255))
            pixels[i % NUM_LEDS] = (255, 255, 255)
            time.sleep(0.2)
            pixels.fill((0, 0, 0))

    time.sleep(0.01)
MIDI code
This code let's you play the XiaoUke as a MIDI instrument. You need to press a keyswitch down to select the chord, and then strum the capacitive touch pads to play the notes.
# ukulele_midi_NEO.py
# CircuitPython XiaoUke MIDI
# 3×3 matrix, 4 capacitive strings, 7-LED NeoPixel strip
# NeoPixel strip: D0 (7 LEDs)
# Touch pads (G,C,E,A) Ukulele strings: D7, D8, D9, D10
# Requires adafruit_midi and neopixel libraries

import board, digitalio, touchio, neopixel, time
import usb_midi
import adafruit_midi
from adafruit_midi.note_on import NoteOn
from adafruit_midi.note_off import NoteOff

# ---------------- Pins ----------------
ROW_PINS = [board.D1, board.D2, board.D3]
COL_PINS = [board.D4, board.D5, board.D6]
TOUCH_PINS = [board.D7, board.D8, board.D9, board.D10]
PIXEL_PIN = board.D0
NUM_LEDS = 7

pixels = neopixel.NeoPixel(PIXEL_PIN, NUM_LEDS, brightness=0.4, auto_write=False)

# ---------------- MIDI ----------------
midi = adafruit_midi.MIDI(midi_out=usb_midi.ports[1], out_channel=0)
MIDI_ROOTS = [60, 62, 64, 65, 67, 69, 71]  # C D E F G A B

# ---------------- Colors ----------------
COLOR_MAJOR  = (255, 100, 180)
COLOR_MINOR  = (255, 255, 0)
COLOR_7TH    = (0, 100, 255)
COLOR_MINOR7 = (100, 255, 255)
COLOR_OFF    = (0, 0, 0)
COLOR_NEUTRAL= (80, 80, 80)

# ---------------- States ----------------
minor_pressed = False
seventh_pressed = False
key_states = [False] * 9
last_touch_vals = [False] * 4
shimmer_queue = []  # for non-blocking shimmer

# ---------------- Matrix setup ----------------
rows = [digitalio.DigitalInOut(p) for p in ROW_PINS]
for r in rows: r.direction = digitalio.Direction.INPUT

cols = [digitalio.DigitalInOut(p) for p in COL_PINS]
for c in cols:
    c.direction = digitalio.Direction.INPUT
    c.pull = digitalio.Pull.UP

NUM_ROWS = len(rows)
NUM_COLS = len(cols)
DEBOUNCE_MS = 20
state = [[0]*NUM_COLS for _ in range(NUM_ROWS)]
last_change_ts = [[0]*NUM_COLS for _ in range(NUM_ROWS)]

# ---------------- Touch setup ----------------
touches = [touchio.TouchIn(p) for p in TOUCH_PINS]
for t in touches:
    t.threshold = 1200  # faster, more sensitive response

# ---------------- Helpers ----------------
def set_row_active(i):
    for r in rows: r.direction = digitalio.Direction.INPUT
    rows[i].direction = digitalio.Direction.OUTPUT
    rows[i].value = False

def release_rows():
    for r in rows: r.direction = digitalio.Direction.INPUT

def chord_color():
    if minor_pressed and seventh_pressed: return COLOR_MINOR7
    if minor_pressed: return COLOR_MINOR
    if seventh_pressed: return COLOR_7TH
    return COLOR_MAJOR

def update_leds():
    color = chord_color()
    for i in range(7):
        pixels[i] = color if key_states[i] else COLOR_OFF
    pixels.show()

def add_shimmer(color, steps=5):
    """Add shimmer to queue (non-blocking)"""
    shimmer_queue.append({'color': color, 'step': 1, 'steps': steps})

def process_shimmer():
    """Non-blocking shimmer update"""
    if not shimmer_queue: return
    finished = []
    for s in shimmer_queue:
        step = s['step']
        steps = s['steps']
        c = s['color']
        r,g,b = tuple(int(v*step/steps) for v in c)
        pixels.fill((r,g,b))
        pixels.show()
        s['step'] +=1
        if s['step'] > steps:
            finished.append(s)
    for f in finished: shimmer_queue.remove(f)
    # After shimmer, restore normal LED state
    if not shimmer_queue:
        update_leds()

def handle_key_event(r, c, pressed):
    global minor_pressed, seventh_pressed
    idx = r*NUM_COLS + c
    key_states[idx] = pressed
    if idx == 7: minor_pressed = pressed
    elif idx == 8: seventh_pressed = pressed
    update_leds()

def get_chord_notes(root):
    fifth = root + 7
    octave = root + 12
    maj3 = root + 4
    min3 = root + 3
    min7 = root + 10
    if minor_pressed and seventh_pressed: return [fifth, root, min3, min7]
    if minor_pressed: return [fifth, root, min3, octave]
    if seventh_pressed: return [fifth, root, maj3, min7]
    return [fifth, root, maj3, octave]

def handle_touch_event(i, on):
    if not on: return
    active = [k for k in range(7) if key_states[k]]
    if not active:
        pixels.fill(COLOR_NEUTRAL)
        pixels.show()
        time.sleep(0.06)
        update_leds()
        return
    root_note = MIDI_ROOTS[active[0]]
    chord_notes = get_chord_notes(root_note)
    note = chord_notes[i]
    midi.send(NoteOn(note, 100))
    add_shimmer(chord_color())
    time.sleep(0.01)
    midi.send(NoteOff(note, 0))

def scan_matrix():
    now = time.monotonic_ns()//1_000_000
    for r in range(NUM_ROWS):
        set_row_active(r)
        time.sleep(0.0003)
        for c in range(NUM_COLS):
            pressed = not cols[c].value
            if pressed != (state[r][c]==1):
                if last_change_ts[r][c]==0:
                    last_change_ts[r][c]=now
                elif (now-last_change_ts[r][c])>=DEBOUNCE_MS:
                    state[r][c]=1 if pressed else 0
                    handle_key_event(r,c,pressed)
                    last_change_ts[r][c]=0
            else:
                last_change_ts[r][c]=0
    release_rows()

def poll_touches():
    for i,t in enumerate(touches):
        v = bool(t.value)
        if v != last_touch_vals[i]:
            last_touch_vals[i] = v
            handle_touch_event(i, v)

# ---------------- Main ----------------
print("🎸 Ukulele MIDI controller — fast touch & 7-LED ready")
update_leds()

while True:
    scan_matrix()
    poll_touches()
    process_shimmer()  # non-blocking LED animation
    time.sleep(0.002)  # faster polling for touch responsiveness
Power Chords
# XiaoUke: Kinetic Strummer Edition
# 6-Note Chords, Velocity-by-Speed Sensing,touchpad 3 for sustain chug(not quite satisfactory...yet),
#and Pitch-Bend Screech (not quite working yet)
# In the Key of E Major for playing "Failing Is Okay(If you Show your Work)" by Patrick
# A Fab Academy Anthem

import board, digitalio, touchio, neopixel, time
import usb_midi
import adafruit_midi
from adafruit_midi.note_on import NoteOn
from adafruit_midi.note_off import NoteOff
from adafruit_midi.control_change import ControlChange
from adafruit_midi.pitch_bend import PitchBend

# ---------------- Pins & Setup ----------------
ROW_PINS = [board.D1, board.D2, board.D3]
COL_PINS = [board.D4, board.D5, board.D6]
TOUCH_PINS = [board.D7, board.D8, board.D9, board.D10]
PIXEL_PIN = board.D0

pixels = neopixel.NeoPixel(PIXEL_PIN, 7, brightness=0.4, auto_write=False)
midi = adafruit_midi.MIDI(midi_out=usb_midi.ports[1], out_channel=0)

# ---------------- 6-Note Power Chord Map ----------------
CHORD_MAP = {
    0: [28, 35, 40, 47, 52, 64], # E5
    1: [35, 42, 47, 54, 59, 71], # B5
    2: [44, 51, 56, 63, 68, 80], # G#m
    3: [33, 40, 45, 52, 57, 69], # A5 (Chorus)
    4: [37, 44, 49, 56, 61, 73], # C#m (Breakdown)
    5: [42, 49, 54, 61, 66, 78], # F#m
    6: [38, 45, 50, 57, 62, 74], # D5 (The Rock Chord)
    7: [0, 0, 0, 0, 0, 0],       # KILLSWITCH
    8: [40, 52, 64, 76, 88, 100] # FEEDBACK (Harmonics)
}

COLOR_MAP = {
    0: (0, 255, 0), 1: (255, 255, 0), 2: (0, 0, 255),
    3: (255, 100, 0), 4: (255, 0, 255), 5: (100, 100, 255),
    6: (255, 0, 0), 7: (0, 0, 0), 8: (255, 255, 255)
}

# ---------------- Kinetic Variables ----------------
strum_start_time = 0
MIN_STRUM_TIME = 0.015  # Fastest swipe (seconds)
MAX_STRUM_TIME = 0.18   # Slowest "strum" (seconds)
key_states = [False] * 9
last_touch_vals = [False] * 4
last_chord_idx = 0

# ---------------- Handlers ----------------
def update_leds():
    pixels.fill((0,0,0))
    for i in range(9):
        if key_states[i]:
            pixels.fill(COLOR_MAP.get(i, (40,40,40)))
    pixels.show()

def handle_touch_event(i, on):
    global strum_start_time, last_chord_idx
    active_btns = [k for k in range(9) if key_states[k]]
    if not active_btns: return

    active_btn = active_btns[0]

    # --- BUTTON 7: KILLSWITCH ---
    if active_btn == 7:
        if on:
            midi.send(ControlChange(123, 0))
            midi.send(PitchBend(8192))
        return

    # --- BUTTON 8: FEEDBACK SCREECH ---
    if active_btn == 8:
        notes = CHORD_MAP.get(last_chord_idx, CHORD_MAP[0])
        if on:
            for n in notes: midi.send(NoteOn(n, 110))
            midi.send(PitchBend(16383))
        else:
            for n in notes: midi.send(NoteOff(n, 0))
            midi.send(PitchBend(8192))
        return

    # --- KINETIC CHORD LOGIC ---
    notes = CHORD_MAP.get(active_btn, [0]*6)
    last_chord_idx = active_btn

    if on:
        if i == 0: # Start Strum
            strum_start_time = time.monotonic()

        elif i == 3: # End Strum OR Chug
            now = time.monotonic()
            duration = now - strum_start_time

            # If the swipe from Pad 0 to Pad 3 was fast enough:
            if strum_start_time > 0 and duration < MAX_STRUM_TIME:
                # Calculate velocity based on speed
                vel = int(127 - ((duration - MIN_STRUM_TIME) / (MAX_STRUM_TIME - MIN_STRUM_TIME) * 57))
                vel = max(70, min(127, vel))

                midi.send(PitchBend(8192))
                for n in notes:
                    if n > 0: midi.send(NoteOn(n, vel))
                strum_start_time = 0 # Reset

            else:
                # Only Pad 3 was touched (or too slow) = CHUG
                for n in notes:
                    if n > 0: midi.send(NoteOn(n, 35))
                time.sleep(0.01)
                for n in notes:
                    if n > 0: midi.send(NoteOff(n, 0))
                strum_start_time = 0
    else:
        # Lift finger = Stop sustain
        if i == 3:
            for n in notes: midi.send(NoteOff(n, 0))

# ---------------- Hardware Scanning ----------------
rows = [digitalio.DigitalInOut(p) for p in ROW_PINS]
cols = [digitalio.DigitalInOut(p) for p in COL_PINS]
for r in rows: r.direction = digitalio.Direction.INPUT
for c in cols:
    c.direction = digitalio.Direction.INPUT
    c.pull = digitalio.Pull.UP

def scan_matrix():
    for r in range(3):
        rows[r].direction = digitalio.Direction.OUTPUT
        rows[r].value = False
        time.sleep(0.0003)
        for c in range(3):
            pressed = not cols[c].value
            idx = r * 3 + c
            if pressed != key_states[idx]:
                key_states[idx] = pressed
                update_leds()
        rows[r].direction = digitalio.Direction.INPUT

touches = [touchio.TouchIn(p) for p in TOUCH_PINS]
for t in touches: t.threshold = 1200

# ---------------- Main Loop ----------------
print("🎸 XiaoUke Kinetic Strummer Initialized!")
while True:
    scan_matrix()
    for i, t in enumerate(touches):
        v = bool(t.value)
        if v != last_touch_vals[i]:
            last_touch_vals[i] = v
            handle_touch_event(i, v)
    time.sleep(0.002)