Existing Git
As I am enrolled in the Masters of Design for Emergent Futures in IAAC and FabLab Barcelona, we were asked to create a website for the same reason we have this fabacademy website. I documented some steps and issues that came up while working on my first website.
my MDEF website
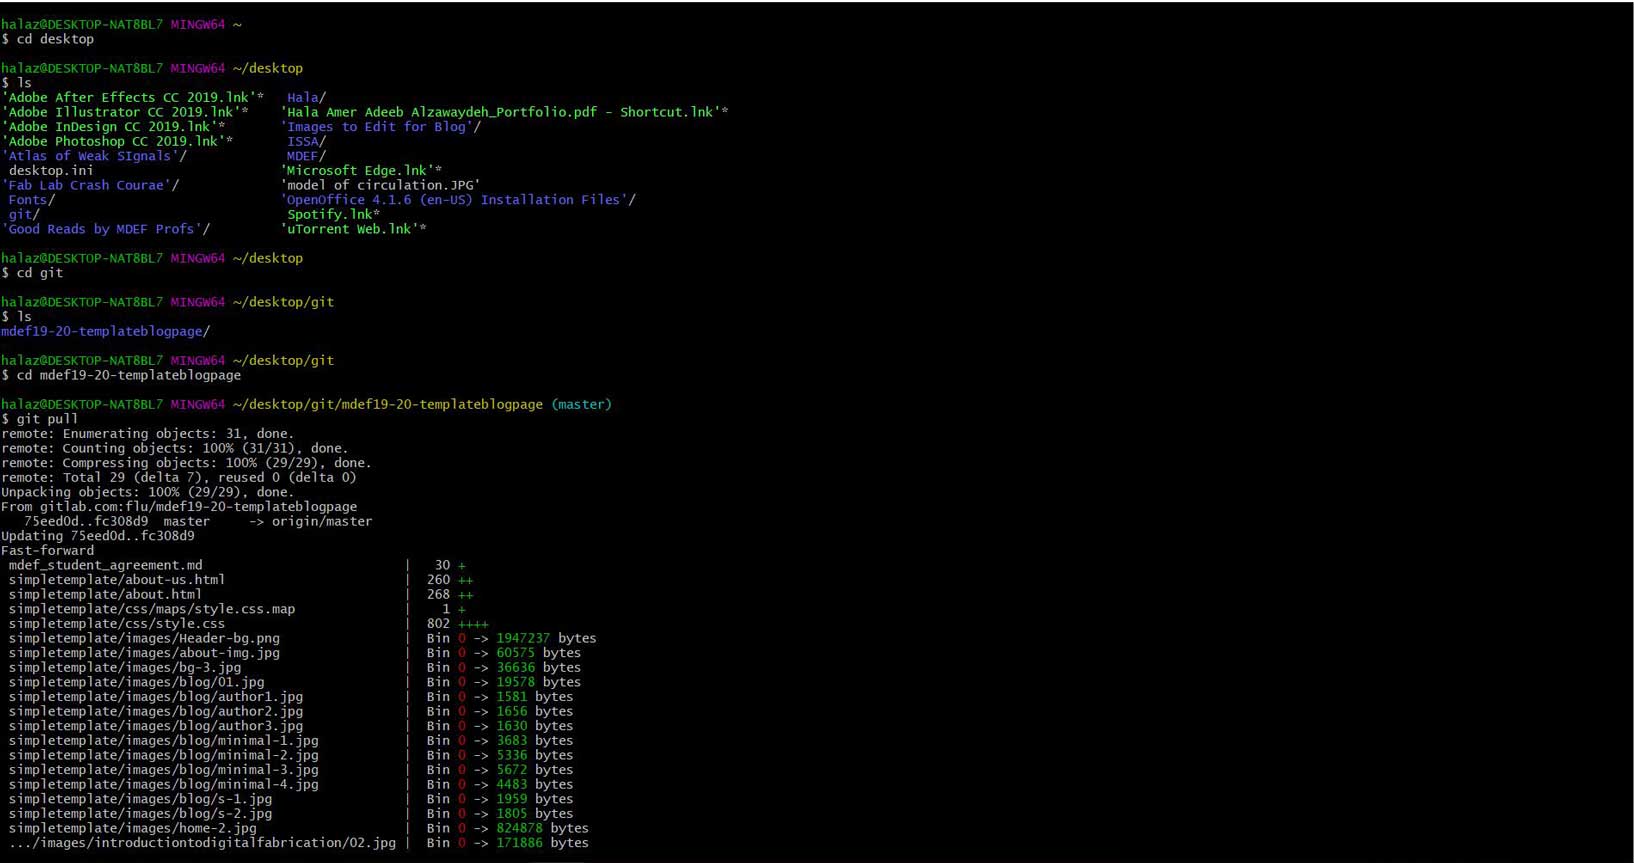
creating the first website, I used an existing template designed and developed by Themefisher. I cloned the website's repo onto my computer in a folder and then through GitBash pulled the cloned folder into my local folder.
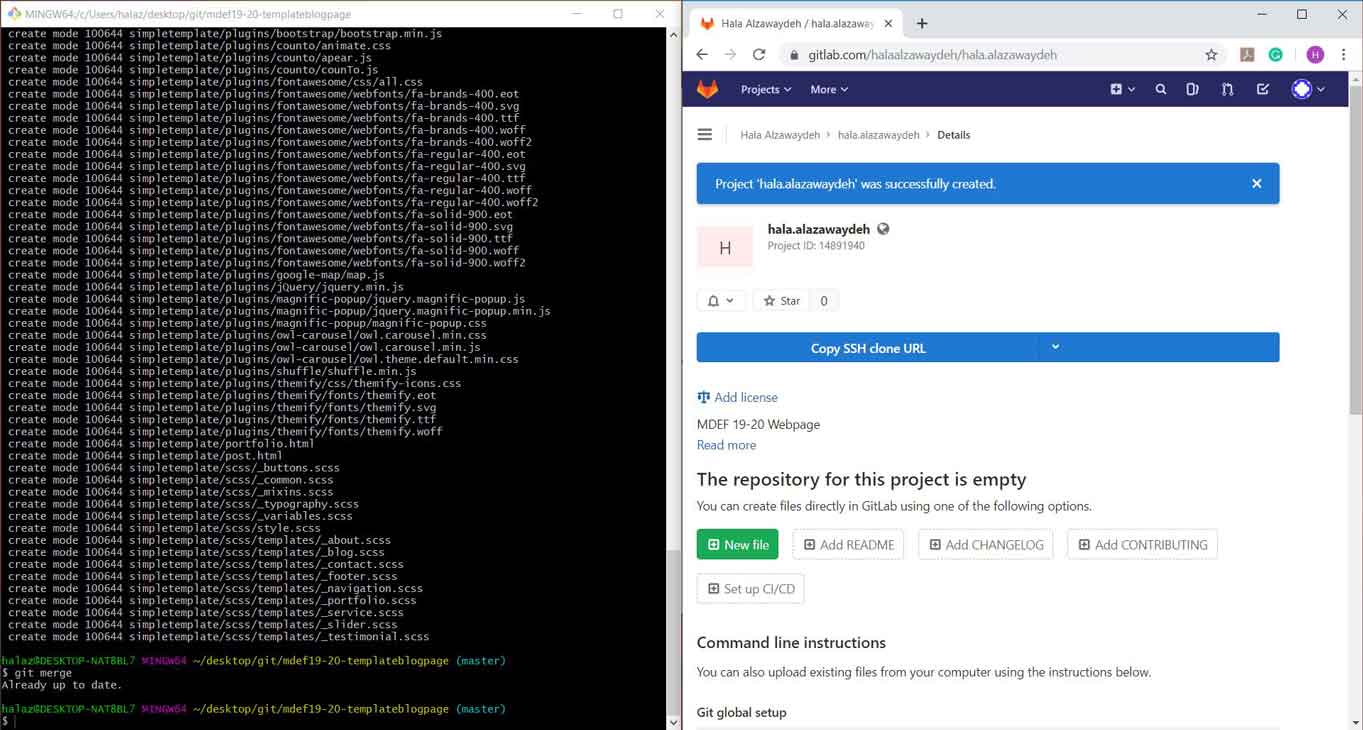
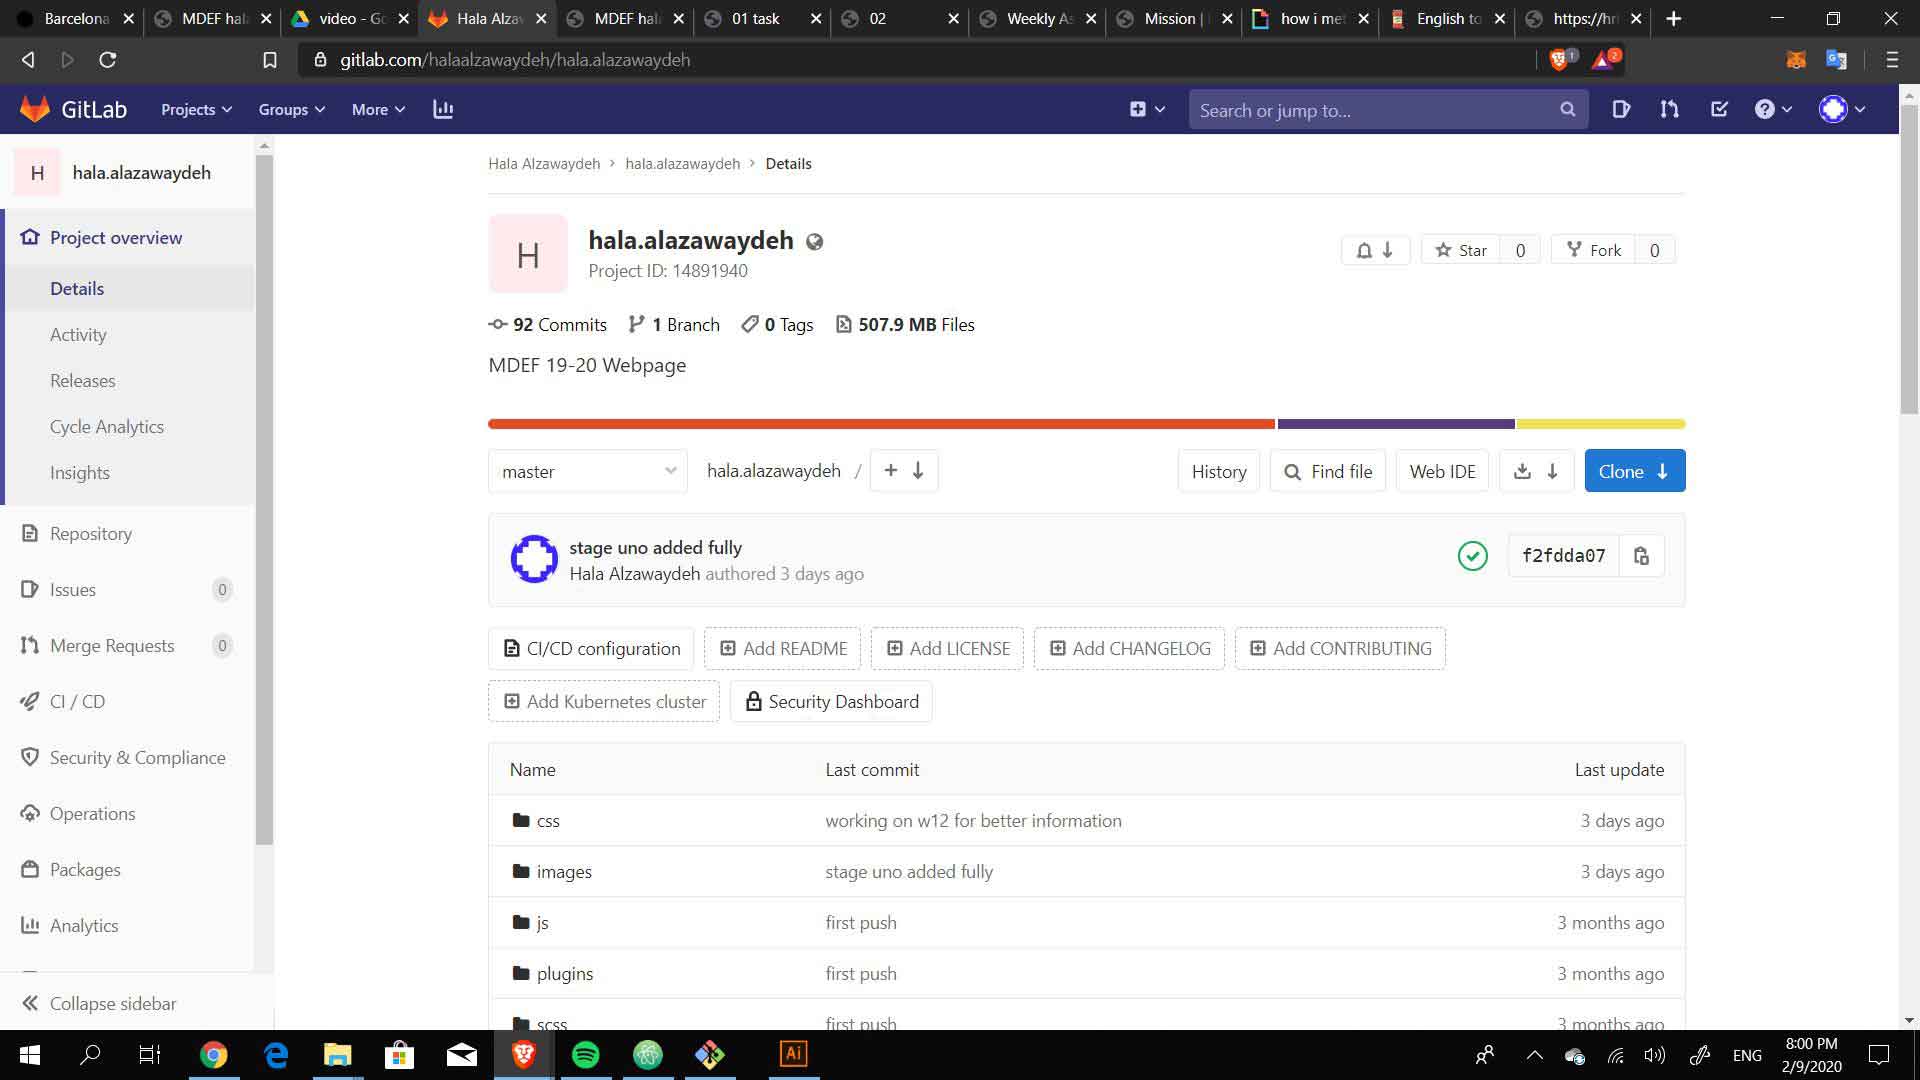
after pulling everything into my local folder, I created a new project in my gitlab repo.
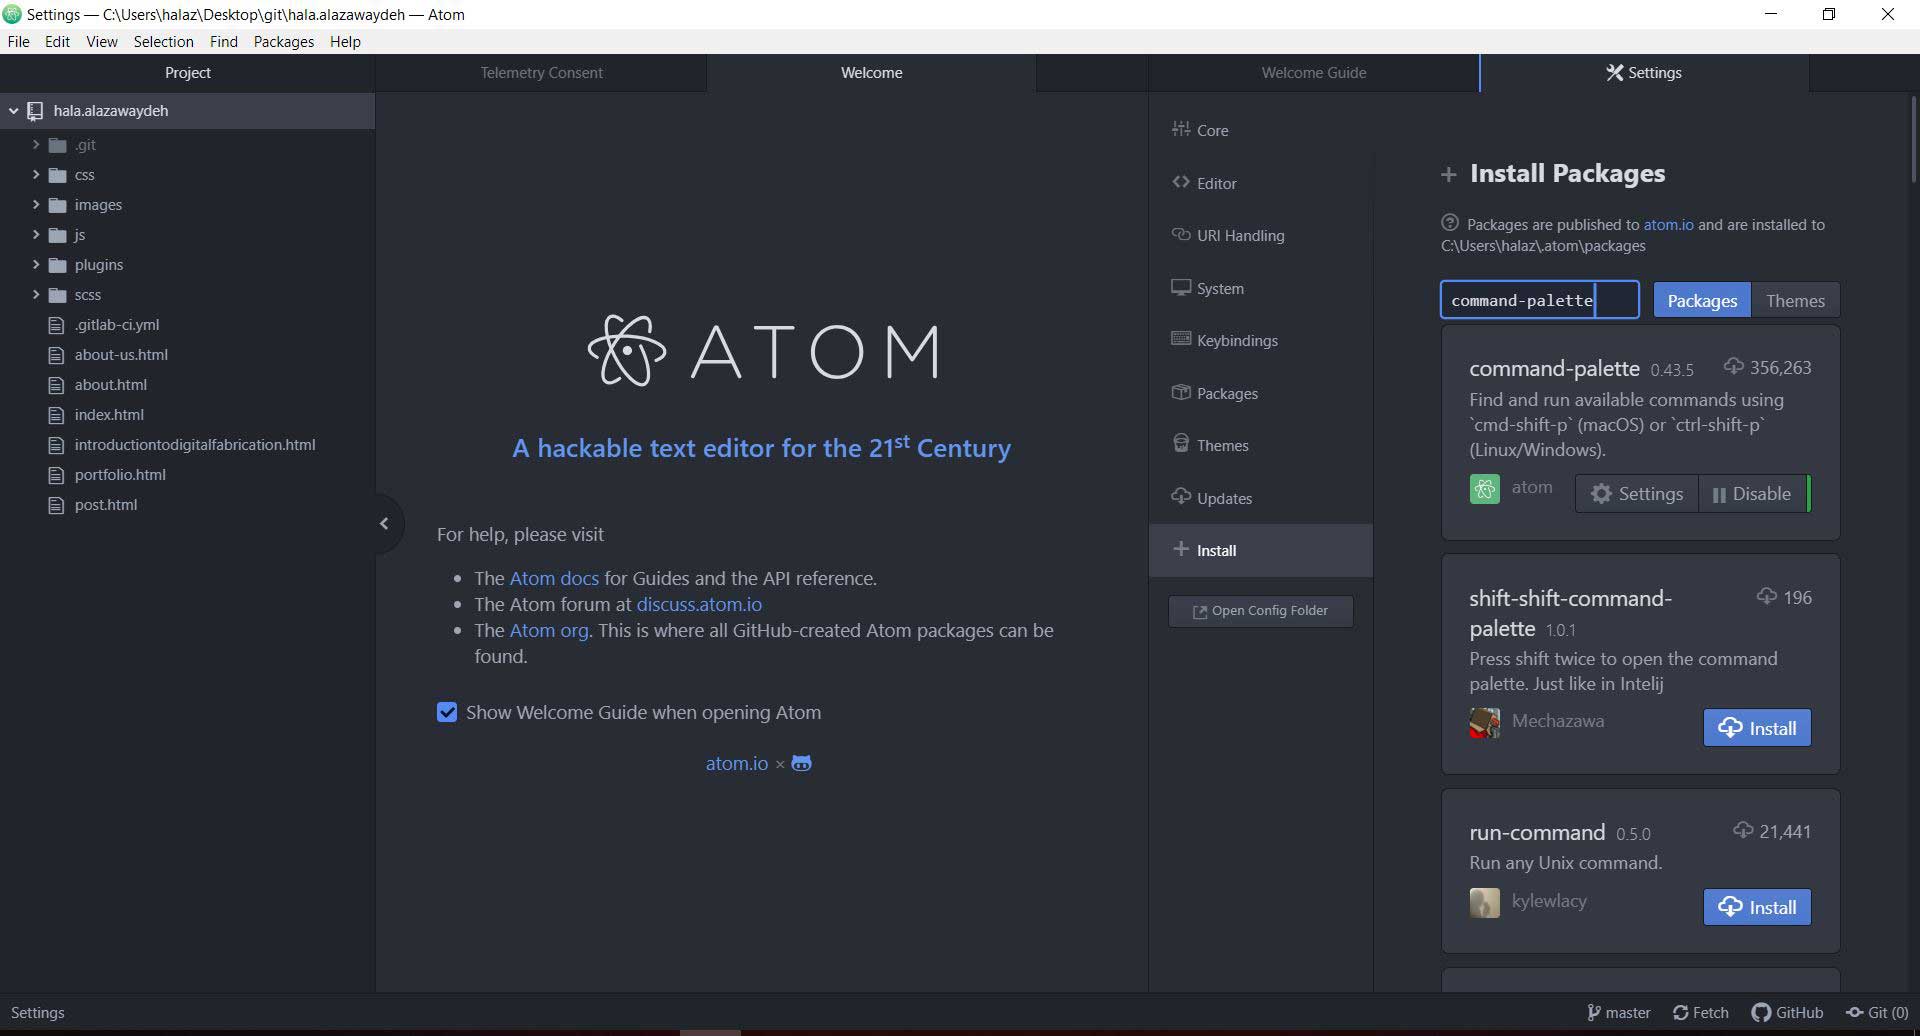
to be able to work on the code easily, I downloaded atom and began downloading plugins that will help with the bootstrap elements
FabAcademy git
My only experience in coding was creating the first website and for that reason I did not unerstand many of the connection between the languages and applications. As it is recommended to work with Markdown for the FabAcademy documentation, I wanted to give it a try. Through GitBash, I downloaded markdown, ruby, ruby gem, and jekyll. That was when my first issues started because everytime I tried to download them, a pop-up would show saying it was not understood. To find the fix to the problem I watched a youtube tutorial by
Mike Dane, the Giraffe Academy, which was very helpful as he has an album of videos showing step-by-step how to create a new website.
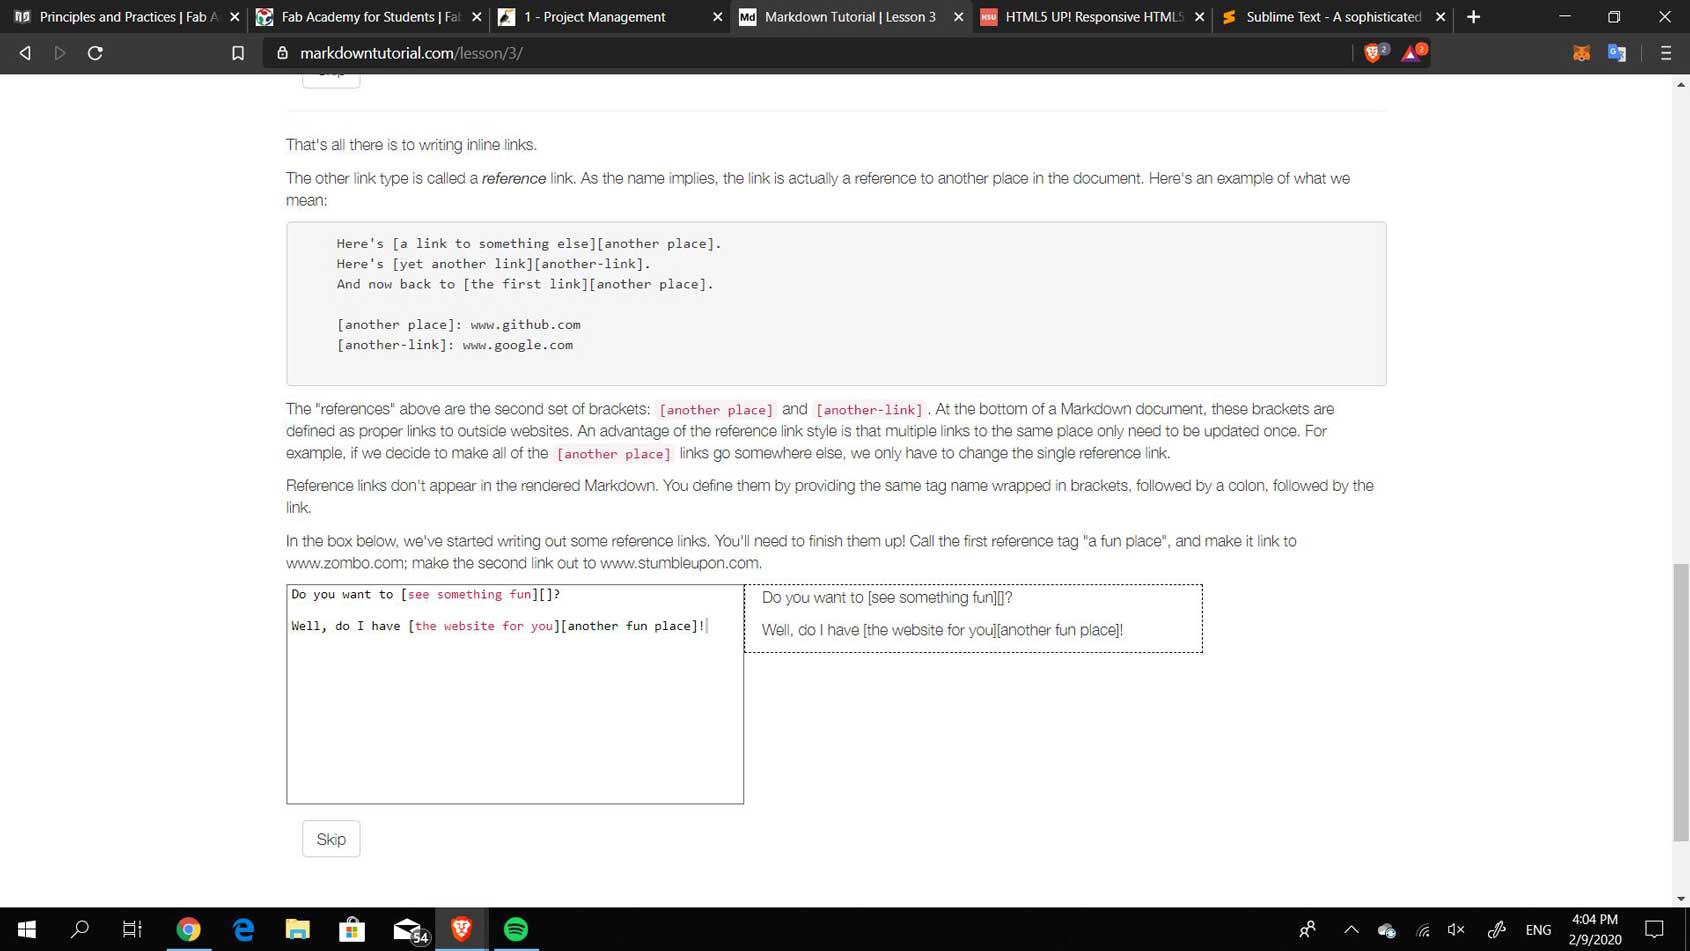
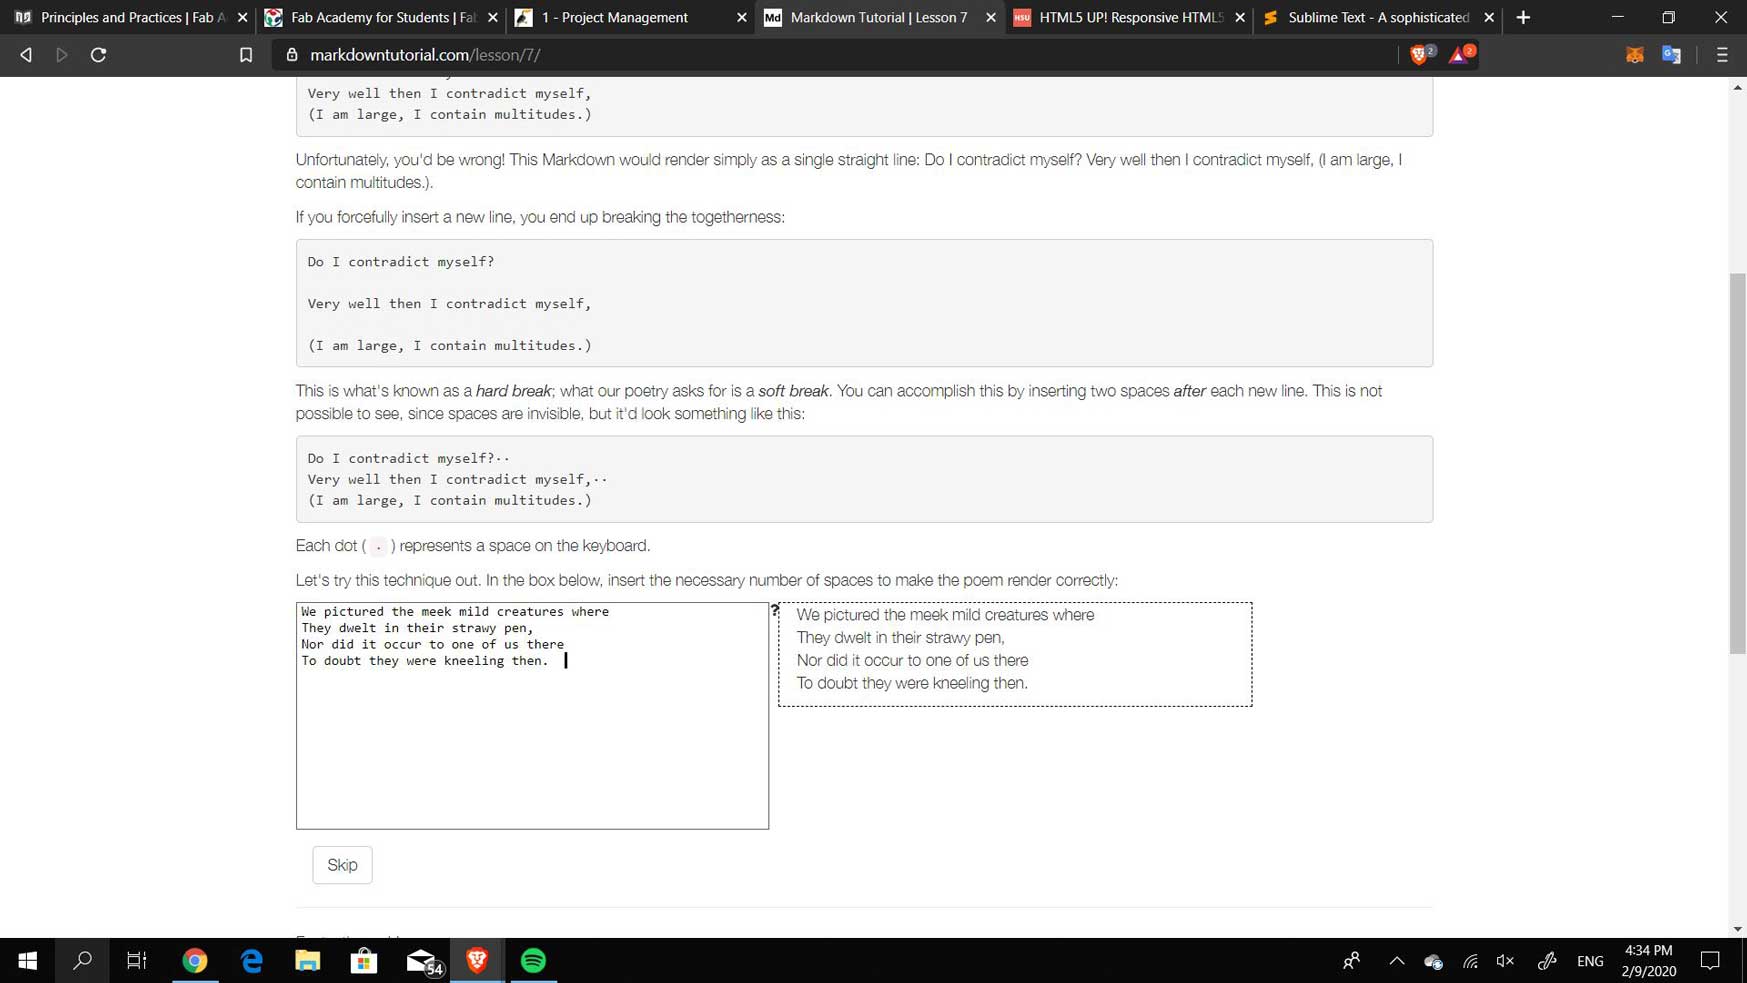
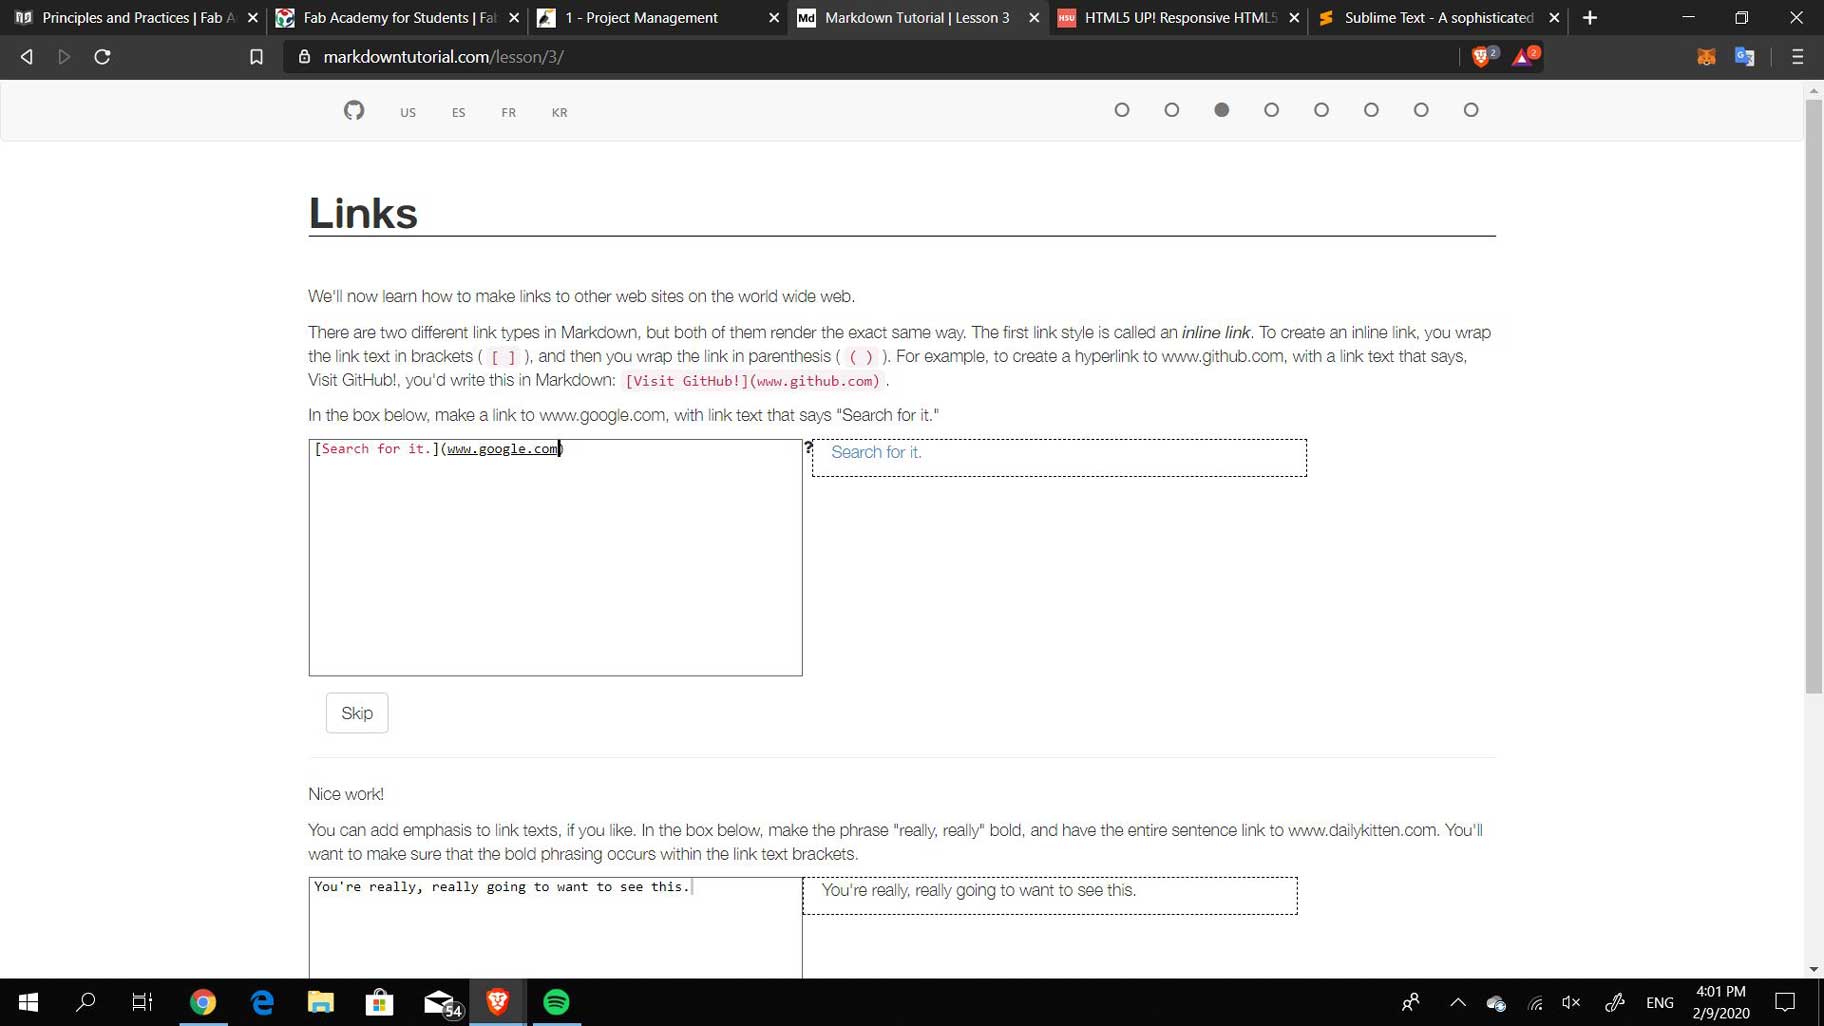
After being able to install the necessary language I began to work on setting up my repo. I cloned the folder from the fabcloud website, downloaded it into my local folder, and then used GitBash to find my existing key which I then pasted into my FabCloud GitLab repo. I then began to follow tutorials about Markdown to understand how to write my content. One tutorial that gave all the basics was a
website that allowed you to follow step-by-step the basics of the content writing.
Although markdown is much easier for writing content, I did not like the fact that customization was very limited on Jekyll. For that reason I tested another route, using html and transforming it to work through Jekyll. I began to follow a tutorial by JekyllRBwhich is a simple tutorial.
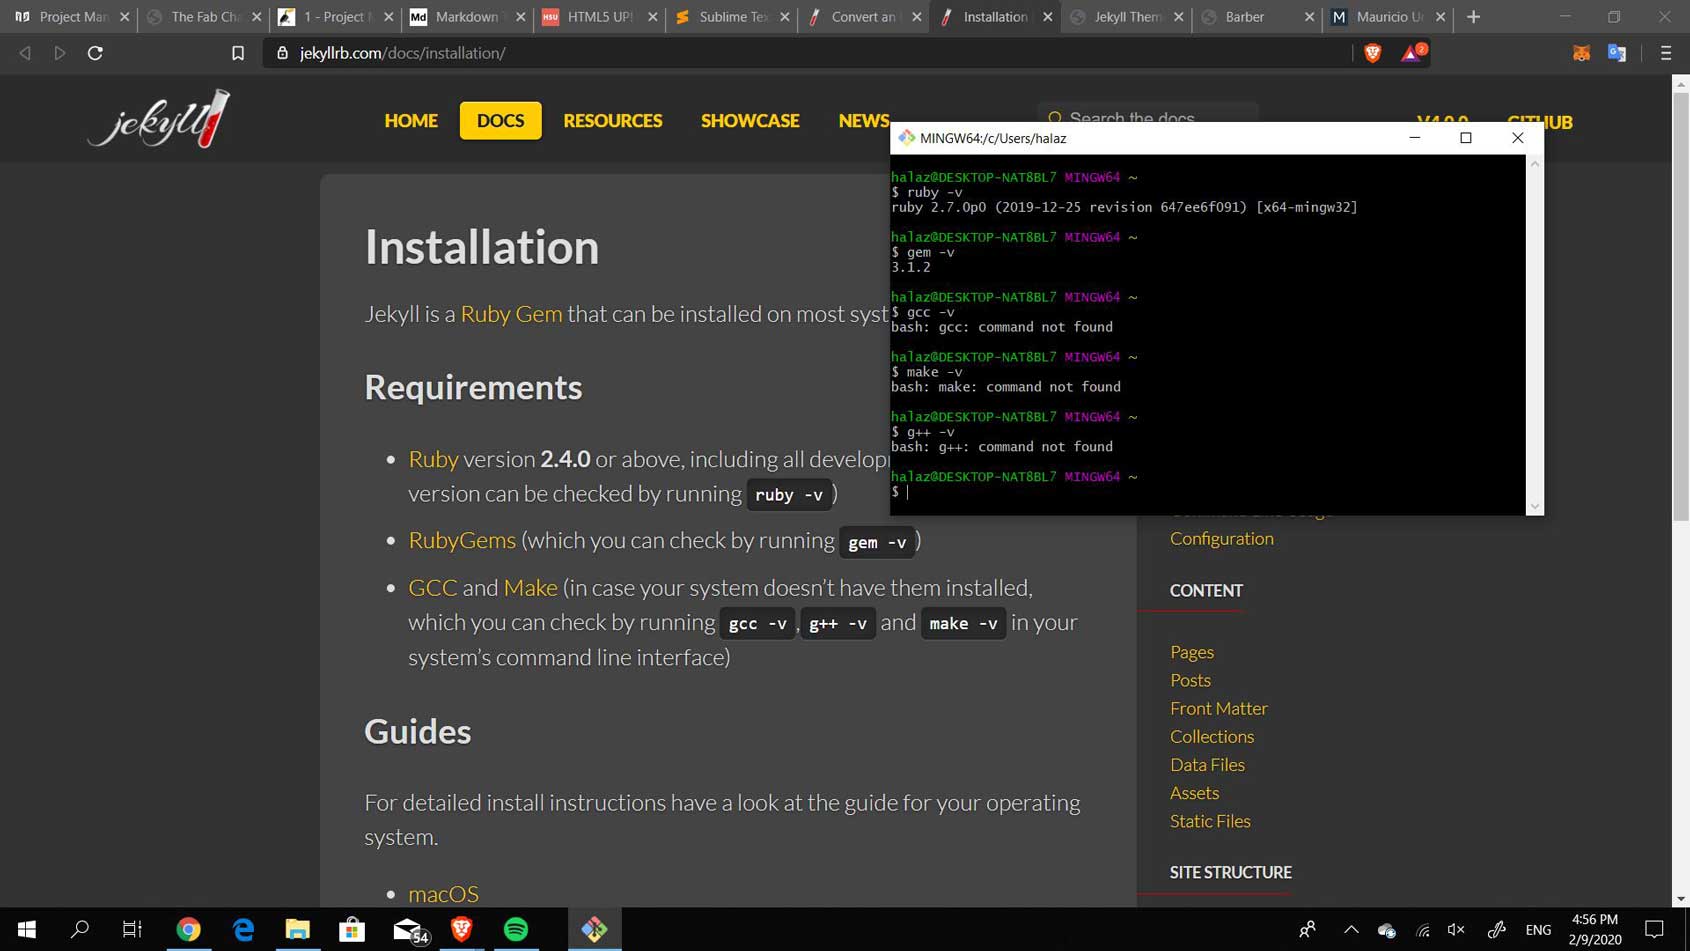
I began by double-checking if the necessary softwares were downloaded on my computer
Then, I followed the instructions to set up a new folder with a configuration file, an html default file, and an index markdown file. From reading the tutorial, I got a superficial understanding that the index.html folder is used for the style and the plugins and the markdown folder is used for the writing of the content. In the html code, inside the body you type {{content}} which references to the markdown code, which is where you benefit from the basic type. In the markdown code, in this case, you may use html commands but when you do, you will need to use the type just like in a normal html code.
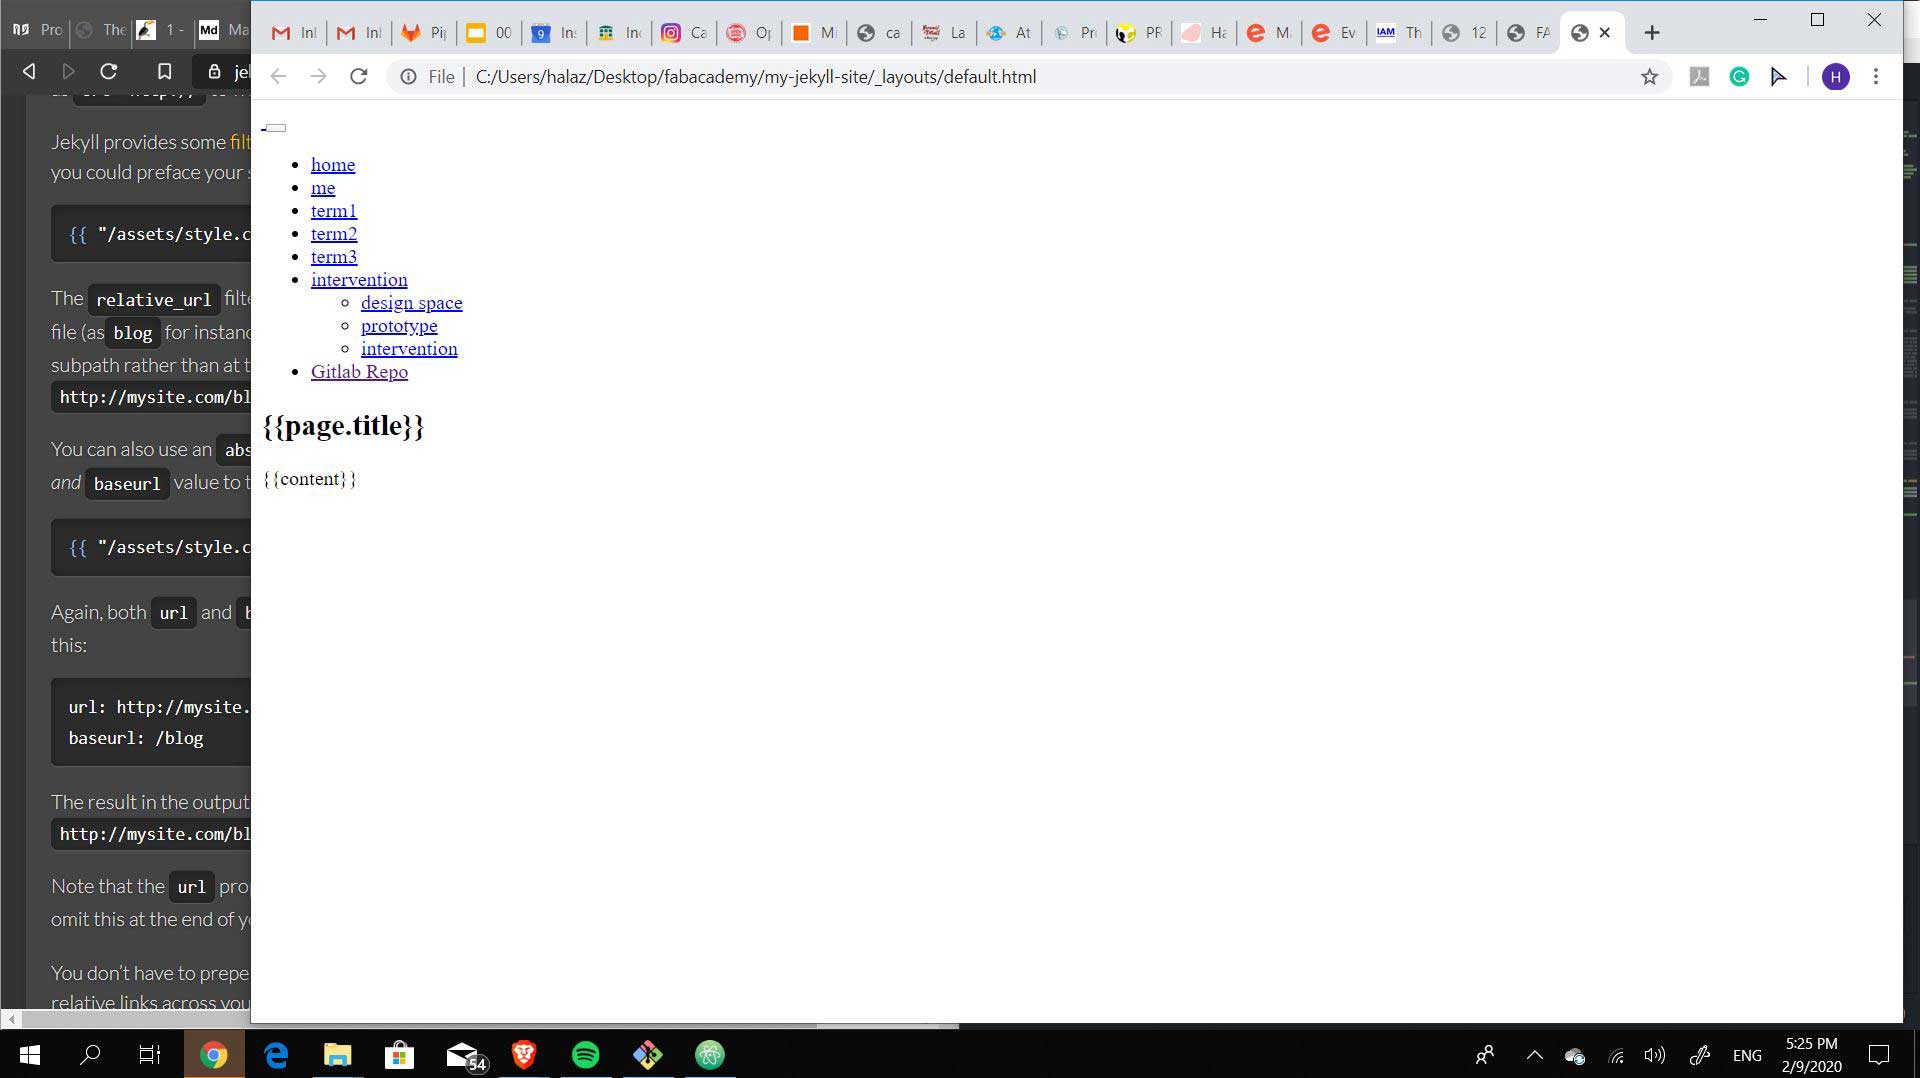
However, even with following the steps, I was not able to have the css be accessible to jekyll.
Because I am more familiar with html and because I hope to keep customizing and updating my website, I chose to continue working in html using a similar aesthetic to my master's website. So I copied my folder into a new folder and also copied the jekyll files from the cloned folder from the fabcloud gitlab. With the help of Josep Marti, a 2019 graduate of FabAcademy who currently works in FabLab Barcelona, I was able to link my html to jekyll and push my website on to the fabcloud!
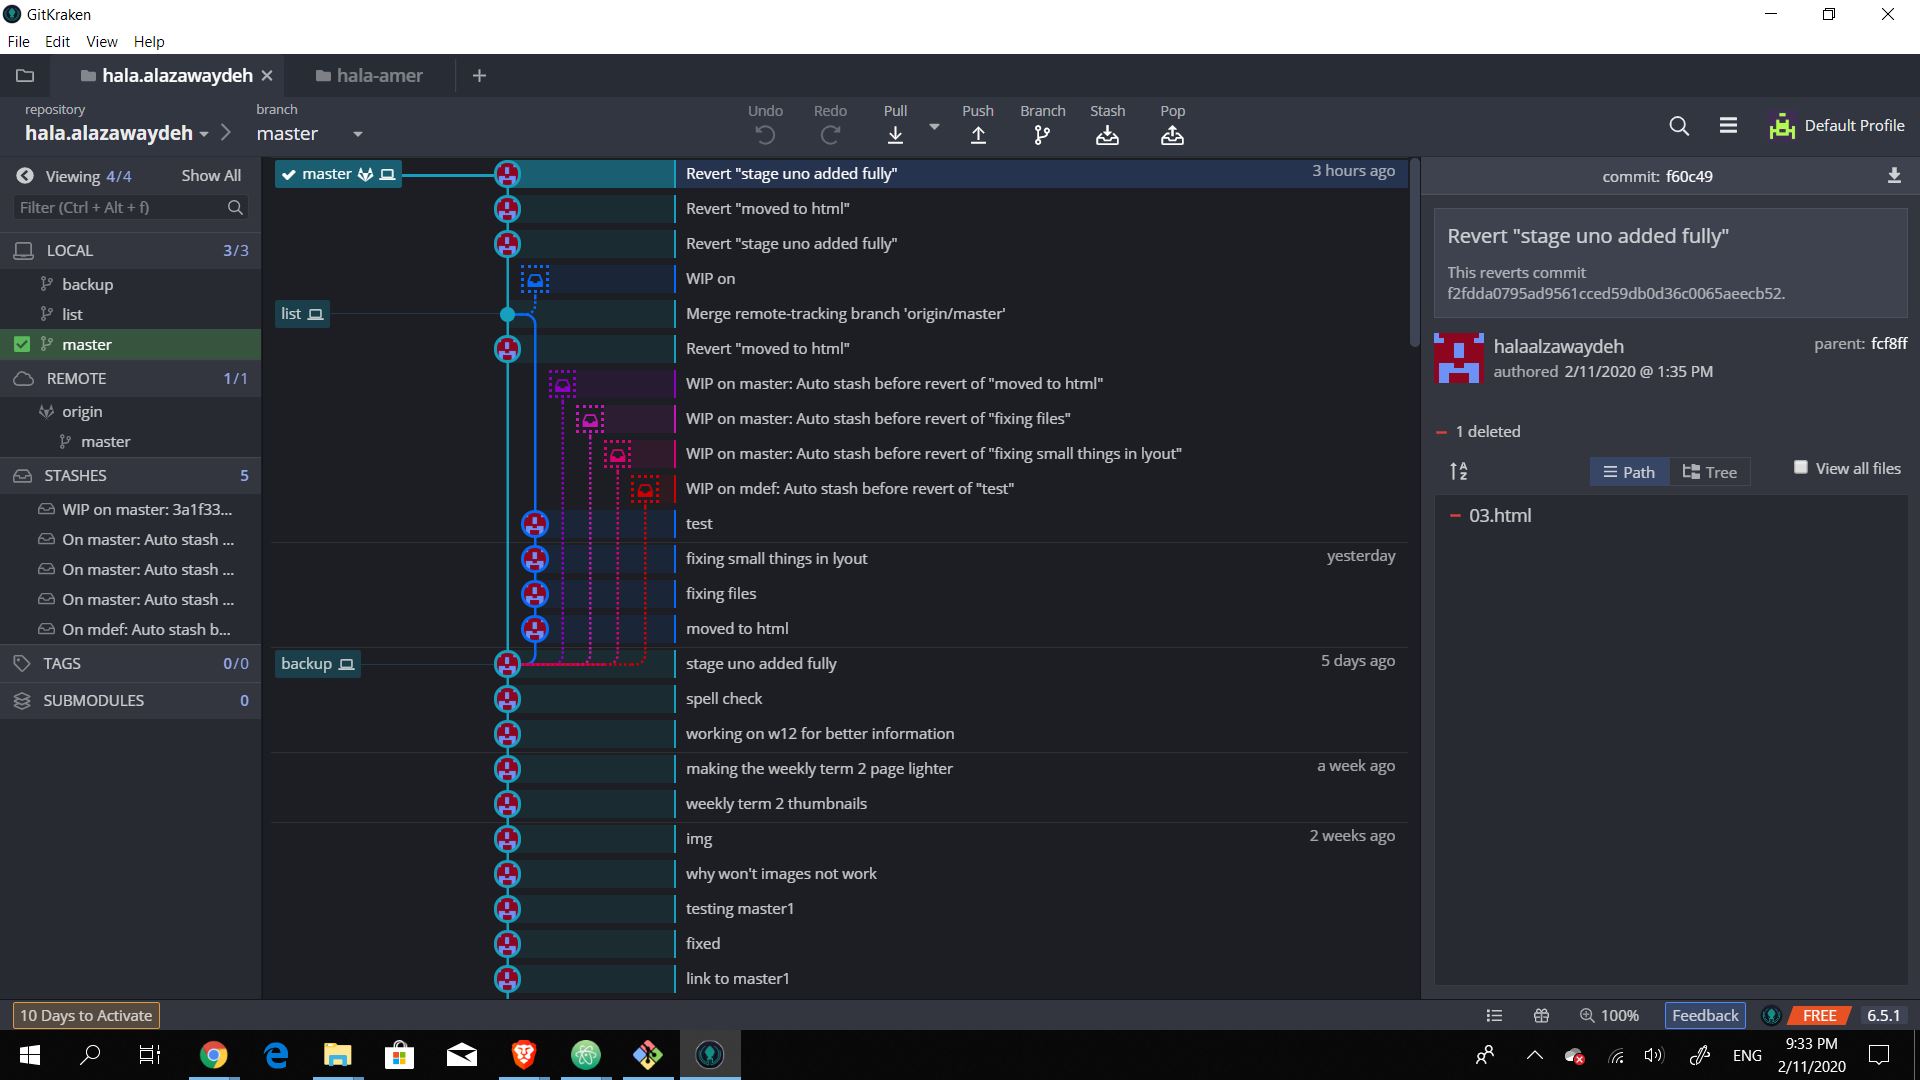
I copied my MDEF website, the masters program website, and pasted the files into a new folder. I then copied the folders from my FabAcademy website into the same folder. The mistake that I did was when I was copying my MDEF website, I accidentally also copied the .git hidden folder and the .gitlab-ci.yml which meant that it became attached to the remote/repo that is for my personal website. I reverted all the changes made from the last commit before I started working on html. I ran into many problems while trying to revert and I downloaded gitKraken to better understand the reverting and merging of the commits. The process of separating the folders once more was very complicated, took a number of hours and the help of a few tutors from the FabLab and for that reason I was not able to document the steps.
Troubleshooting
One issue I have faced a few times over the course of 6 weeks has been having commits that are too large to push. One method that I have used each time to fix it was to rebase the head, split the large commits, and the re-push the head. Rebasing is similar to going back and changing time, it is usually used to integrate changes from one branch to another. In this document rebasing is explained in depth, take a look at it to understand the command better. In this section I will explain the steps that I take to fix the issue of exceeding the maximum allowed push size.
 failed message: exceeds maximum allowed file
-
Step 1
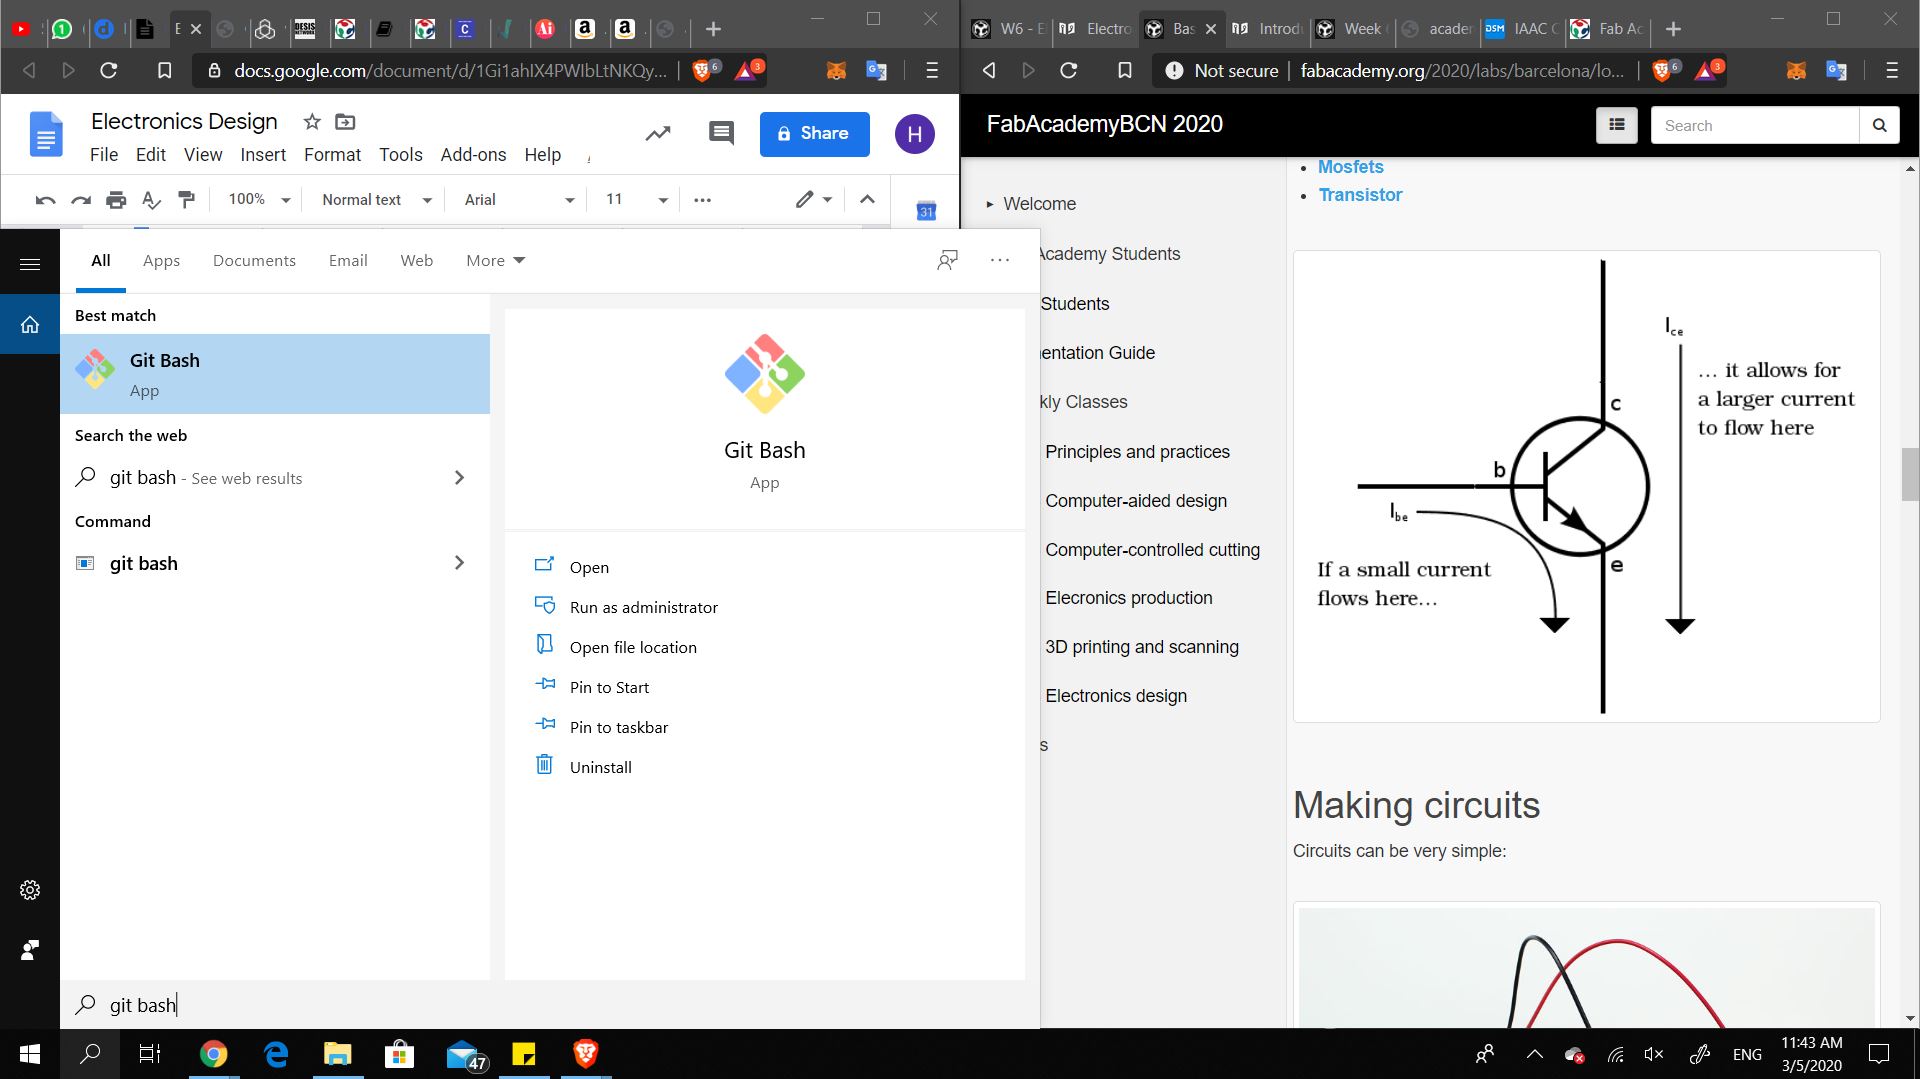
Open Git Bash, or terminal. Git Bash has been easier to read for me for the way it is setup with the colors and the command lines
-
Step 2
Enter the directory folder where the master is located. Mine is inside a folder on the Desktop. One way to enter the directory is to type cd and then drage the folder into Git Bash. Another, the more official way, is to enter the file location step by step. $ cd Desktop > $ cd fabacademy > $ cd hala-fab > $ cd hala-amer. The command cd means "change directory".
 Once inside the folder you will notice that at the end of the command line it will say (master)
-
Step 3
The next step is to check the logs to see which commit your remote head is stuck on.
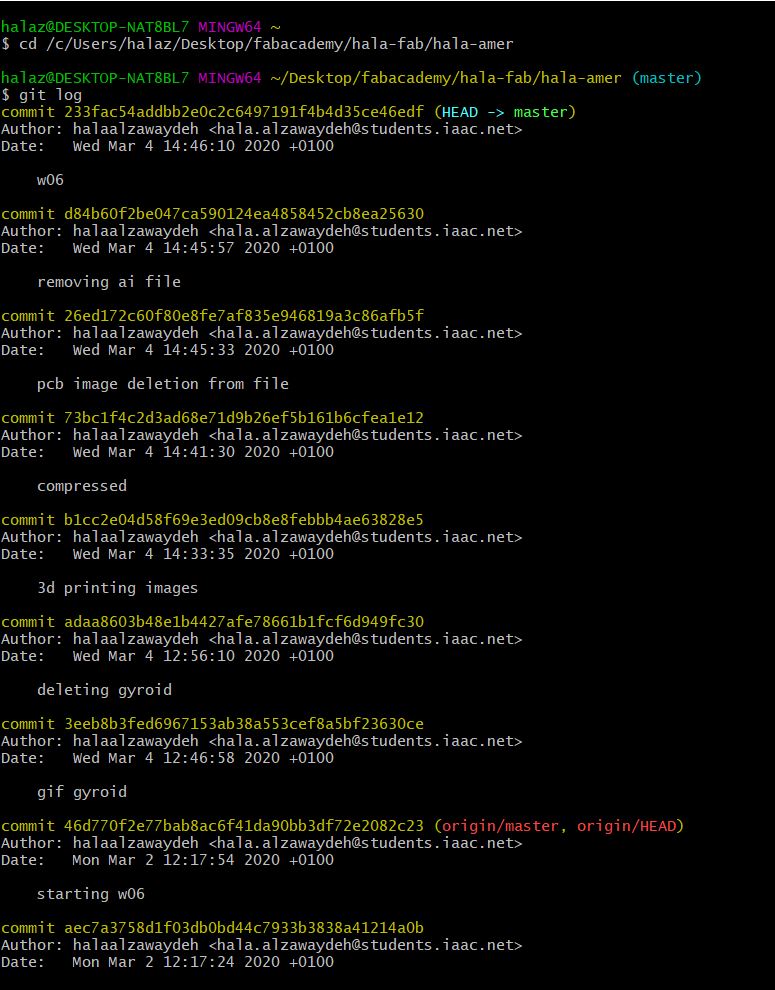
as we can see, the remote head is 7 commits behind the local head which means that the 6th to last commit is too large to push
-
Step 4
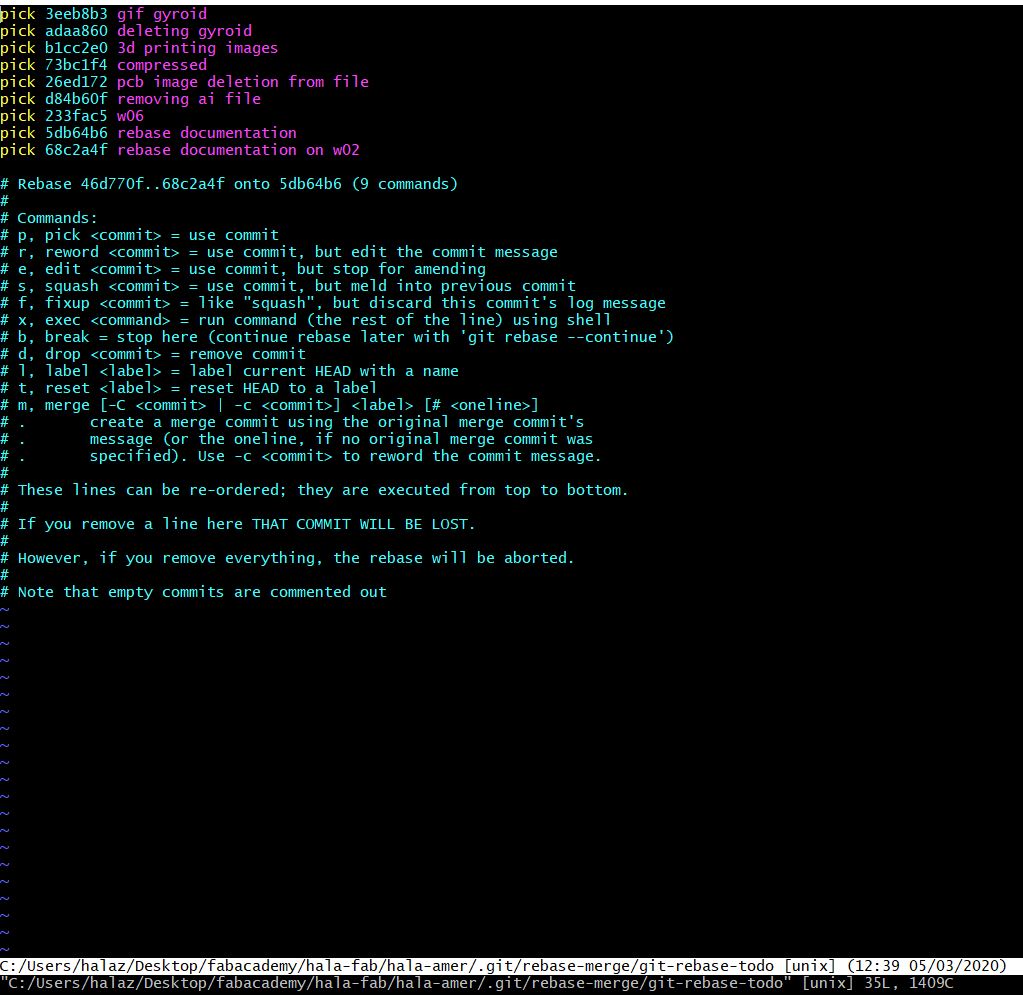
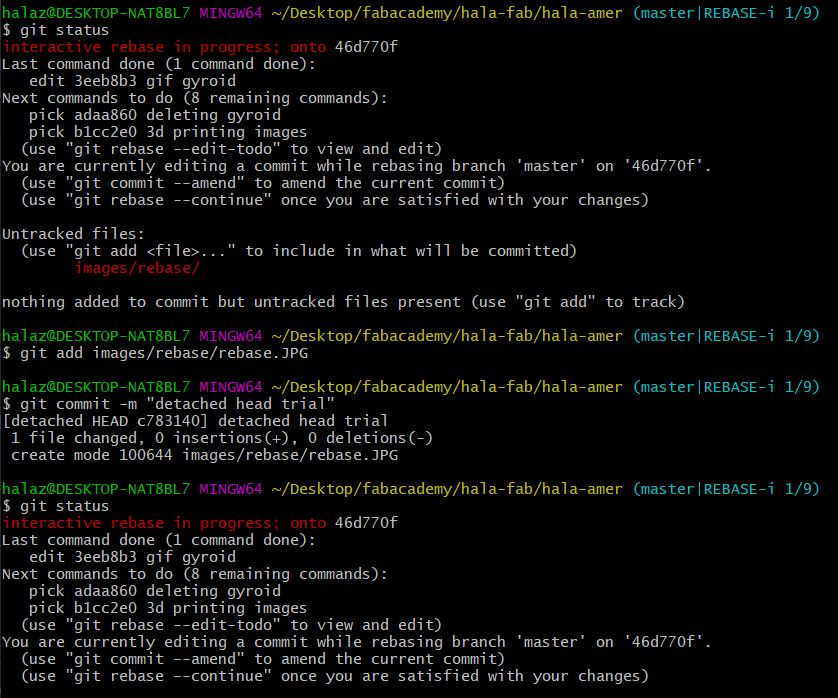
Type in "git rebase -i". If you have any unstaged elements you will receive a warning and you will need to add and commit them before rebasing. If you do not have any unstaged elements you will see a page that shows you the previous commits with the word "pick" in front of each one.
-
Step 5
Since I know which commit is the one causing me problems I will need to edit that specific commit. Click on "i" and then change "pick" to "e". Pick keeps the commit as it is, e allows you to edit the specific commit.

-
Step 6
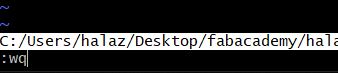
Once you have changed the options for the commit you need to edit, you will need to exit this page. To exit the page click on "esc" and then type ":wq" which stands for "write quit".
-
Step 7
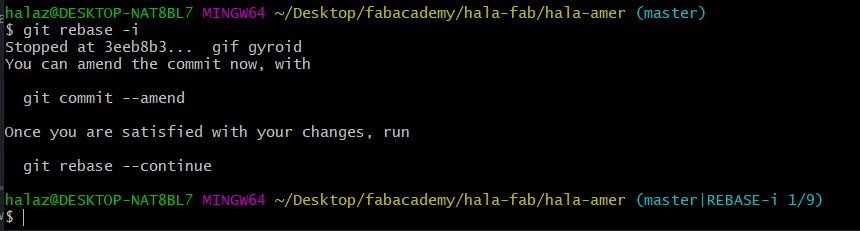
You have now successfully rebased and can edit the commit causing problems.
-
Step 8
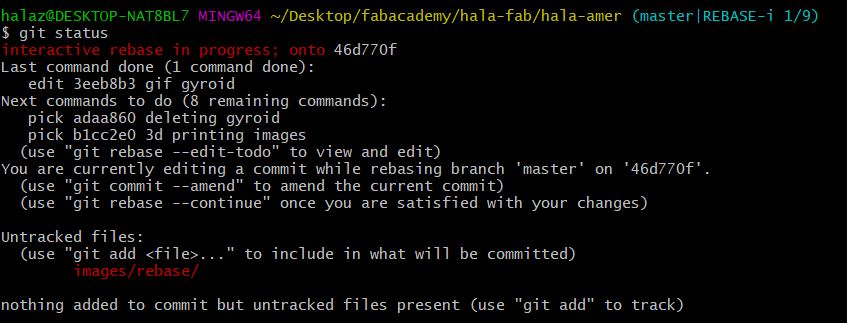
To double check our steps we can type in "git status". It will tell us how many commits to be edited and how many commits the remote and local have in between.
-
Step 9
We have reached the commit that is too large to push. This next step is to detach the head to be able to split the commit into smaller ones. To reset the head, type "$ git reset HEAD~" A detached head means you are no longer on a branch, you have checked out a single commit in the history and can now proceed to add and commit into smaller commits.

-
Step 10
Check the log by entering "git log" and then add and commit what is not staged yet. Use "git add" and "git commit -m "your message""
-
Step 11
Once everything is commited and we have no more unstaged files, we can begin to push the remote head. To push the head use "$ git push origin <>:master" To find the commit name you can copy (control+insert on windows) from the git log and paste it (shift+insert)

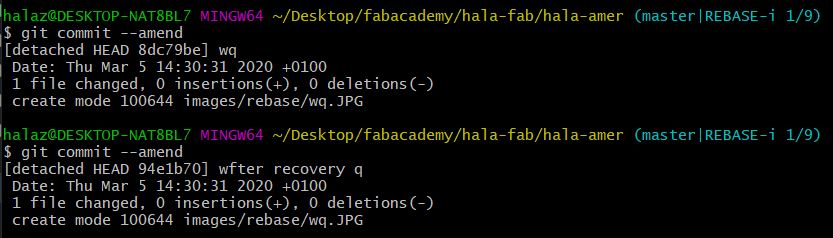
In my case, the commit was still too large to push, so I had to use "$ git commit --amend" where you can split the commits further
-
Step 12
If you also need to amend, type in "$ git commit --amend" and it will take you to a page where you need to type in a commit message. Do so for as many times you will need to split the message.
-
Step 13
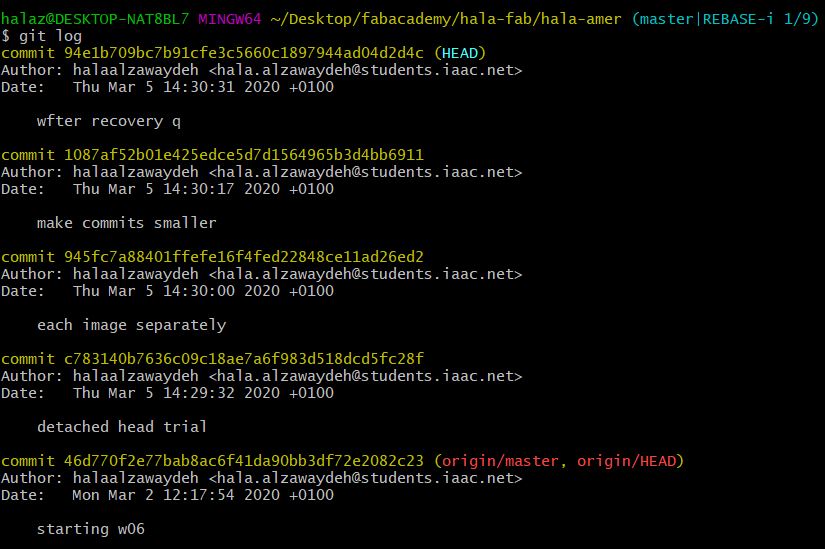
Checking the log, we see that the new commits we just added are showing. Now we can push each commit separately. Use "$ git push origin <>:master" by using the name of each command.
-
Step 14
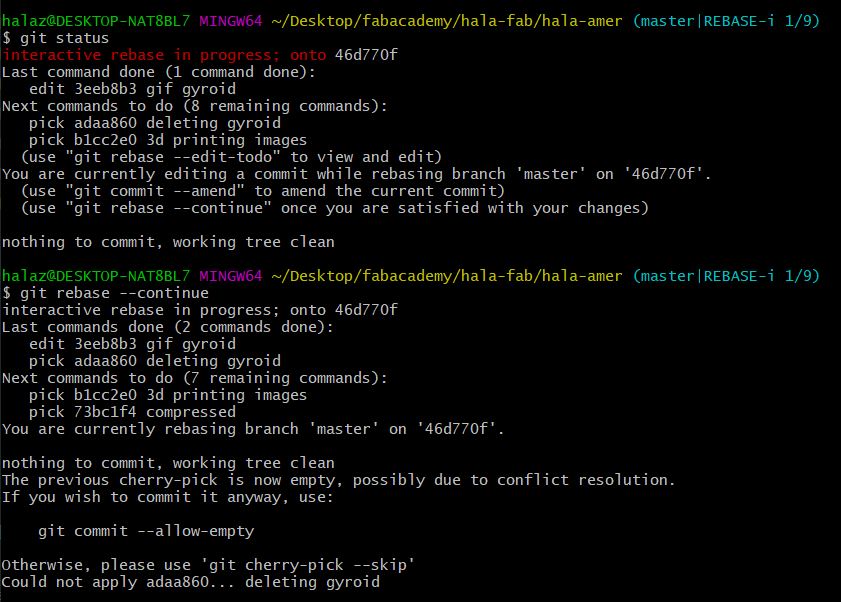
Now that we have split and pushed the large commit we can continue rebasing. Type in "$ git rebase --continue" and it will take you back to the original commits.
-
Step 15
Repeat step 13 until you have pushed all your outstanding commits. Your remote and local head are now caught up and all latest changes are showing on the remote website!

Do not worry if you notice that your code or website have changed while you are rebasing, as soon as you reach the final step all the final changes will be available. The changes are saved in the commits. If you do need to stop rebasing you can type in "$ git rebase --abort" and everything you changed while rebasing will be ignored and the rebase will be aborted.
As I am a continuing student from 2019/20, I have a number of assignments already completed from the original year with the new assignments. In the old website, I used html primarily. This year I am more comfortable and it is more convenient to use mkdocs. For that reason, I merged my old website with the new mkdocs material template website. In there I relinked all the weeks depending on whether they are old or new. (old html and new md). The merge was done locally by cloning the repos, and then copy pasting the new md template into my html old website folder.
In the mkdocs.yml, I also needed to change the site url to match the old website: