Back To Top
Week 05 - 3D Scanning and Printing
At Fablab Barcelona we have a bunch of different 3D printers available:
- Ender 3 Pro.
- Creality CR10
- Anycubic Photon M3 plus
- Anycubic Kossel
- Prusa MK3
These printers owork in slightly different ways:
- Cartesian xyz (regular 3D coordinate system)
- Delta printing (with a tiangular motion)
- Xy core (XY are interconnected + Z is independent)
Ender 3 Pro
For this project, we took a closer look into how to work with the Ender 3 Pro.
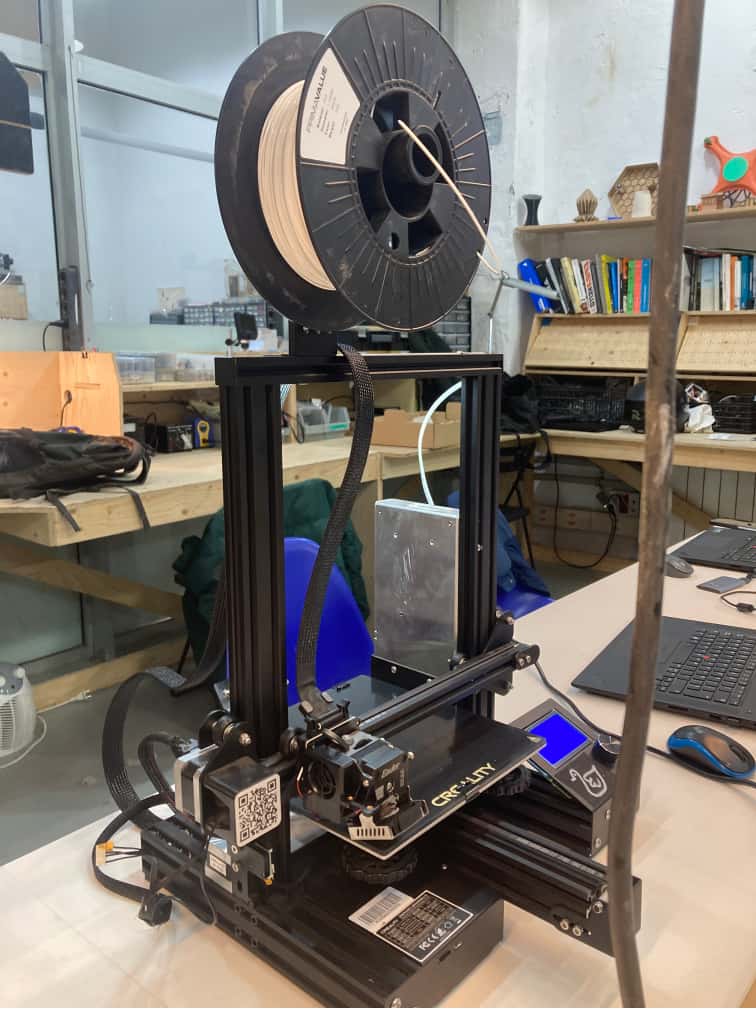
The one that we have at the Fabla is actually slightly different because it uses a different motor that's been set up by the team here. It has been modified to use a direct drive motor rather than a Bowden motor. The difference between the two is that the direct motor directly pushes the filament through the nozzle and the motor is placed next to the nozzle, whereas the Bowden motor pushes to the filament further away from the nozzle, this allows the nozzle to have less weight and therefore move (and print) at faster a speed. The downside is that it limits the amount of material you can use, because only rigid materials can be printed properly. With a direct drive so filament is pushed directly by the nozzle- so the rigidity of the material does not matter as much as the force is applied at the point of extrusion.
Since the head was changed, the actual printer needs to be recalibrated. But it hasn't been exactly perfectly calibrated yet: therefore it has a tendency to not start printing as it's assuming that the nozzle is not at the correct temperature while it's trying to heat it, so it continues to try to heat it. There's actually a little hack they showed us which consist in setting the temperature to a slightly different temperature while this infinite loop is happening in order for the printer to actually start printing.
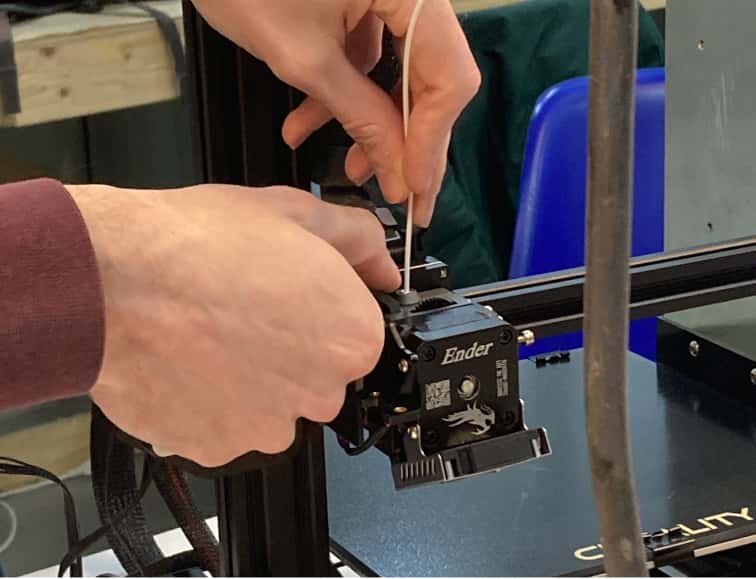
The Ender 3 Pro has a 0,4 mm nozzle. The nozzle is part of the machine where the material comes out. Before getting into the nozzle the material is heated at high temperatures. To load the material into the 3D printer we use filament. In this machine, we can use the 1,75mm filament or 3mm filament. For this test, we used PLA and set up its temperature of it to 215° and the plate to 60° (based on the lab's previous experience with PLA) we also set up the speed to 50ms, the infill to 20% and 0,2mm for the space between slices. We didn't use any supports because we wanted precisely to test what the machine can achieve, but we did add a base for our object (a thin layer before the object so it sticks better).
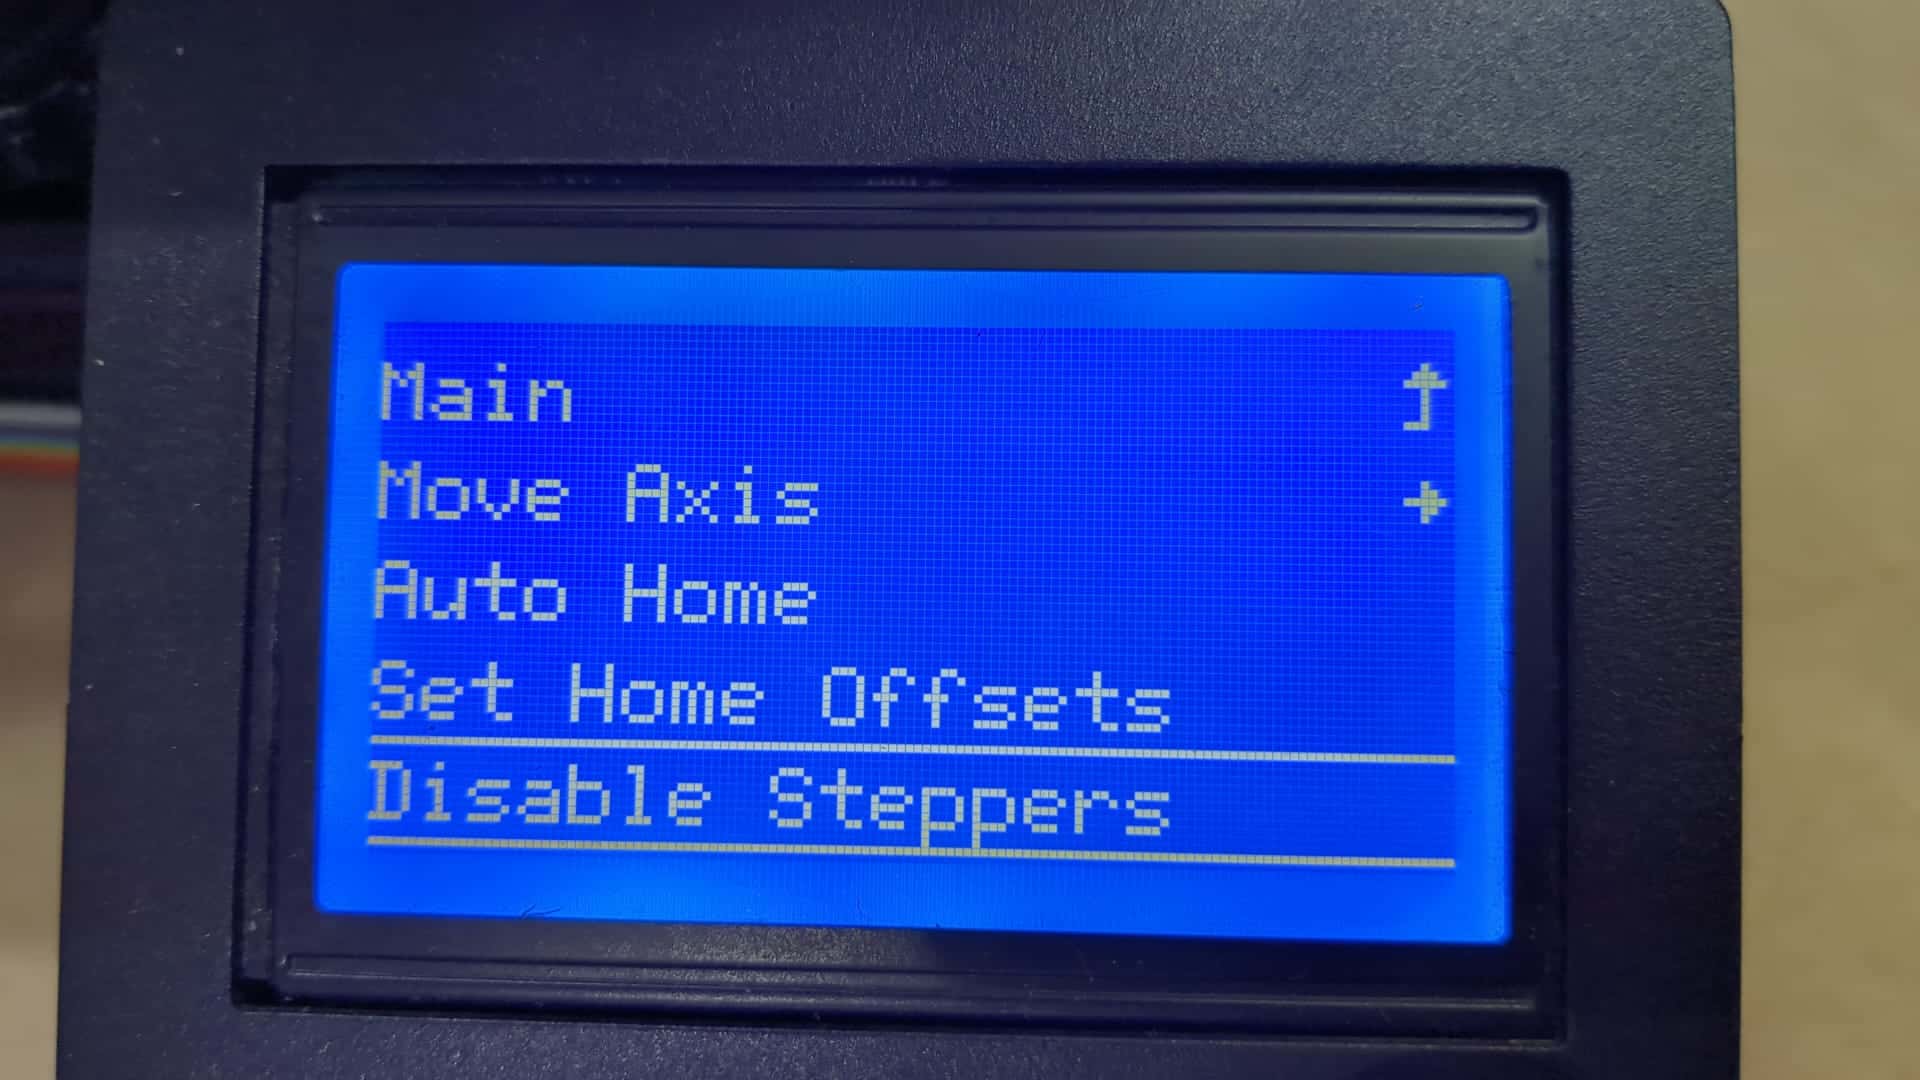
We can operate the machine by using the control button it has and navigating the menu. Whenever we want to use the machine we should always callibrate the plate suing the wheels it has bellow and also setting up the axis to 0,0,0 by selecting "Auto Home" in the menu.
An office paper sheet should easily but not freely pass between the nozzle and the surface. During the printing of the test at the beginning of the program, it is possible to assess by the thickness of the line whether the material fits snugly enough to the surface, whether the base is sufficiently horizontally adjusted.
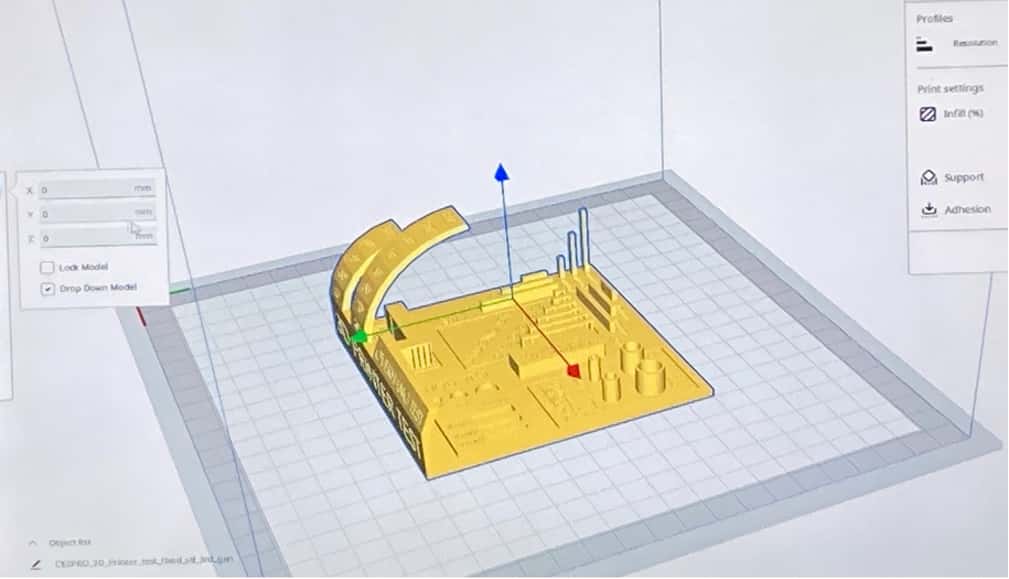
For testing the machine we use a template that allowed us to understand the angles the machine would support and precision.
here is the result!
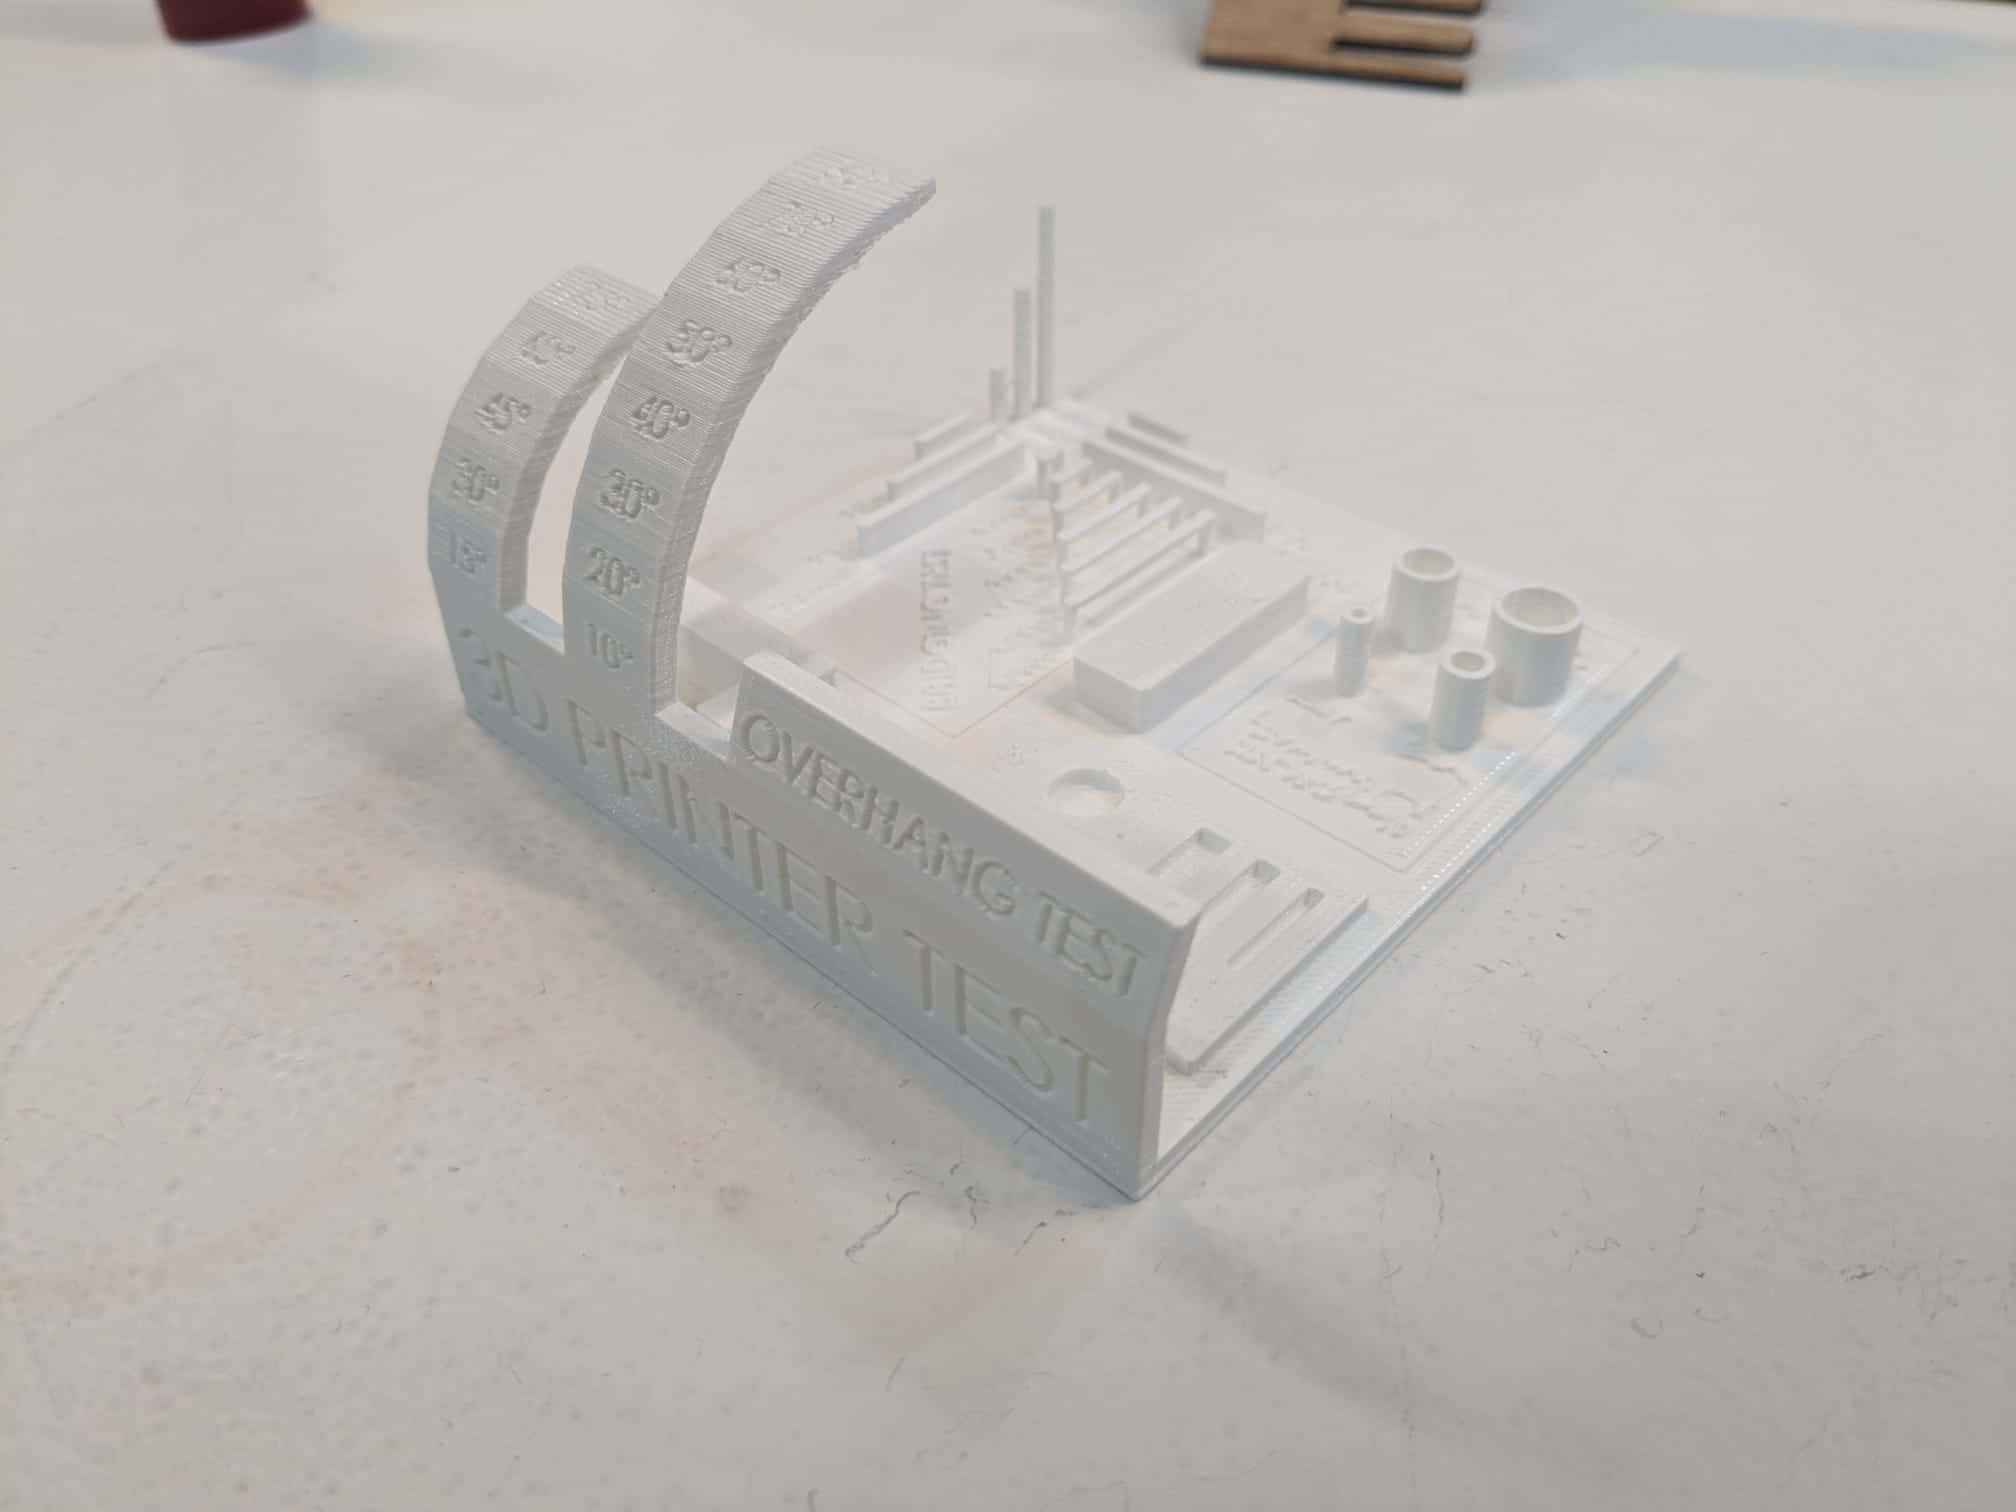
For the group assignment we printed an overhang
test downloaded from thingiverse ,
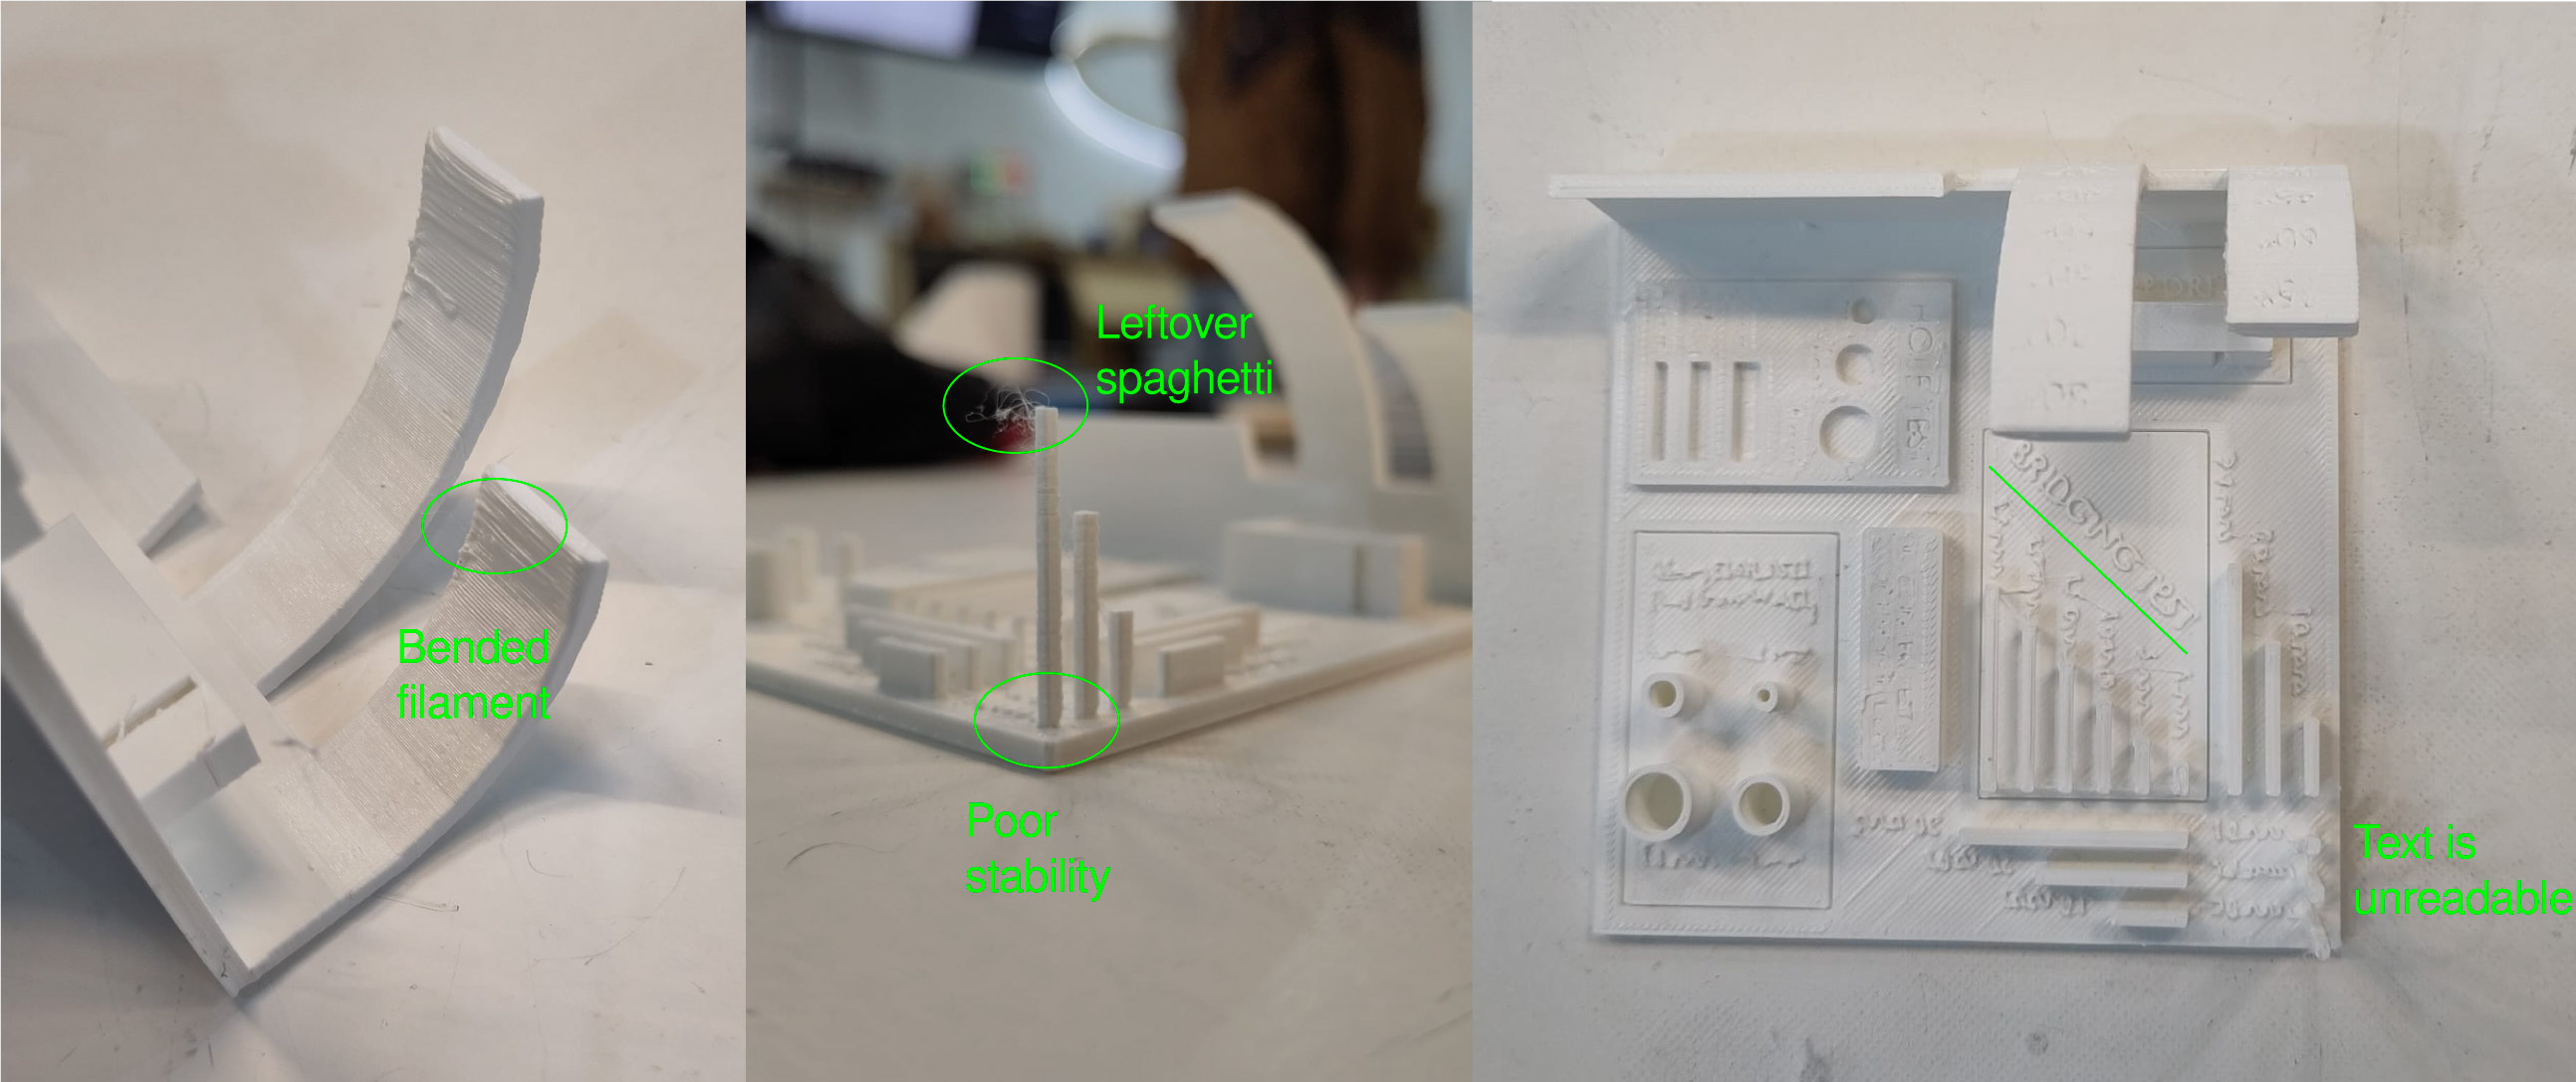
In here there where things we could see.
In general, the text is not visible if its smaller than 0.5cm.
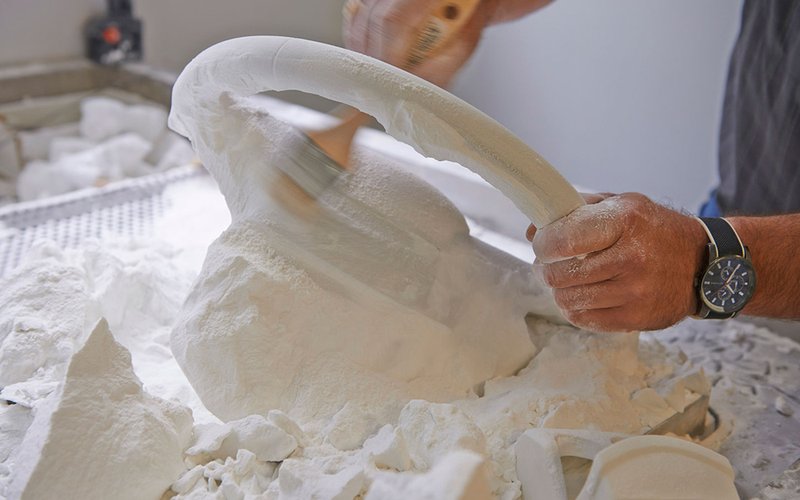
SLS - Selective Laser Sintering
- Selective laser sintering is a manufacturing method in which a laser beam sinters powdered polymers into a durable product.
- SLS printing has been popular for many years, as it has many advantages:
- availability of raw materials;
- low cost;
- high performance.
- Since SLS printing does not require the creation of supports (their function is performed by unsealed material), the technology becomes an excellent tool for manufacturing parts of complex geometric shape.
- Another advantage of laser selective sintering is the strength of products that are not inferior in this parameter to parts cast under pressure.
- The details are inherent in the grain of the surface.
SLS advantage to FDM and SLA
- The advantage of SLS printing (as well as SLA) over FDM technology is the lack of structurally separable layers.
- Even with FDM printing with carbon fiber, the joints of the layers are a weak point for breaking.
- SLS printing with polyamide, allows you to create connecting parts that can be subjected to multidirectional load.
- Standard PLA printing is more rigid and brittle than polyamide SLS technique.
Results FDM vs SLA
To compare the two technologies studied, we printed the part mentioned above. To print in stereolithography, we used the Form3 printer from Formlabs and a gray standar resin from the same company was used.
This technology in turn has variants, which allow a greater or lesser variation of the parameters. However, this company (leader in SLA) does not allow the change of many manufacturing parameters. Those used are shown in the following table.
| Parameter | Value |
|---|---|
| Layer thickness | 0.1 mm |
| Layers | 923 |
| Support | Active at the base |
| Type of support | Minibases |
The Form3 printer from Formlabs was used to print the part. The printing time according to the software was approximately 4 hours and 30 minutes, with a material consumption of 53.24 ml.
The results are much better in SLA technology than in FDM. One of the main reasons is the intrinsic post-processing. This means that when the part is printed in SLA it must undergo a solvent bath (usually isopropyl alcohol) to help smooth the surface. Subsequently, the curing process must be completed, either in a specific machine or in the open air. All this involves a longer processing time.
The figure shows the results of the test part printed in FDM and SLA at a glance.


SLA is also a more expensive technology than FDM for standard materials, and has less material diversity than FDM. This is limited to photosensitive materials, which do not usually provide important mechanical characteristics.
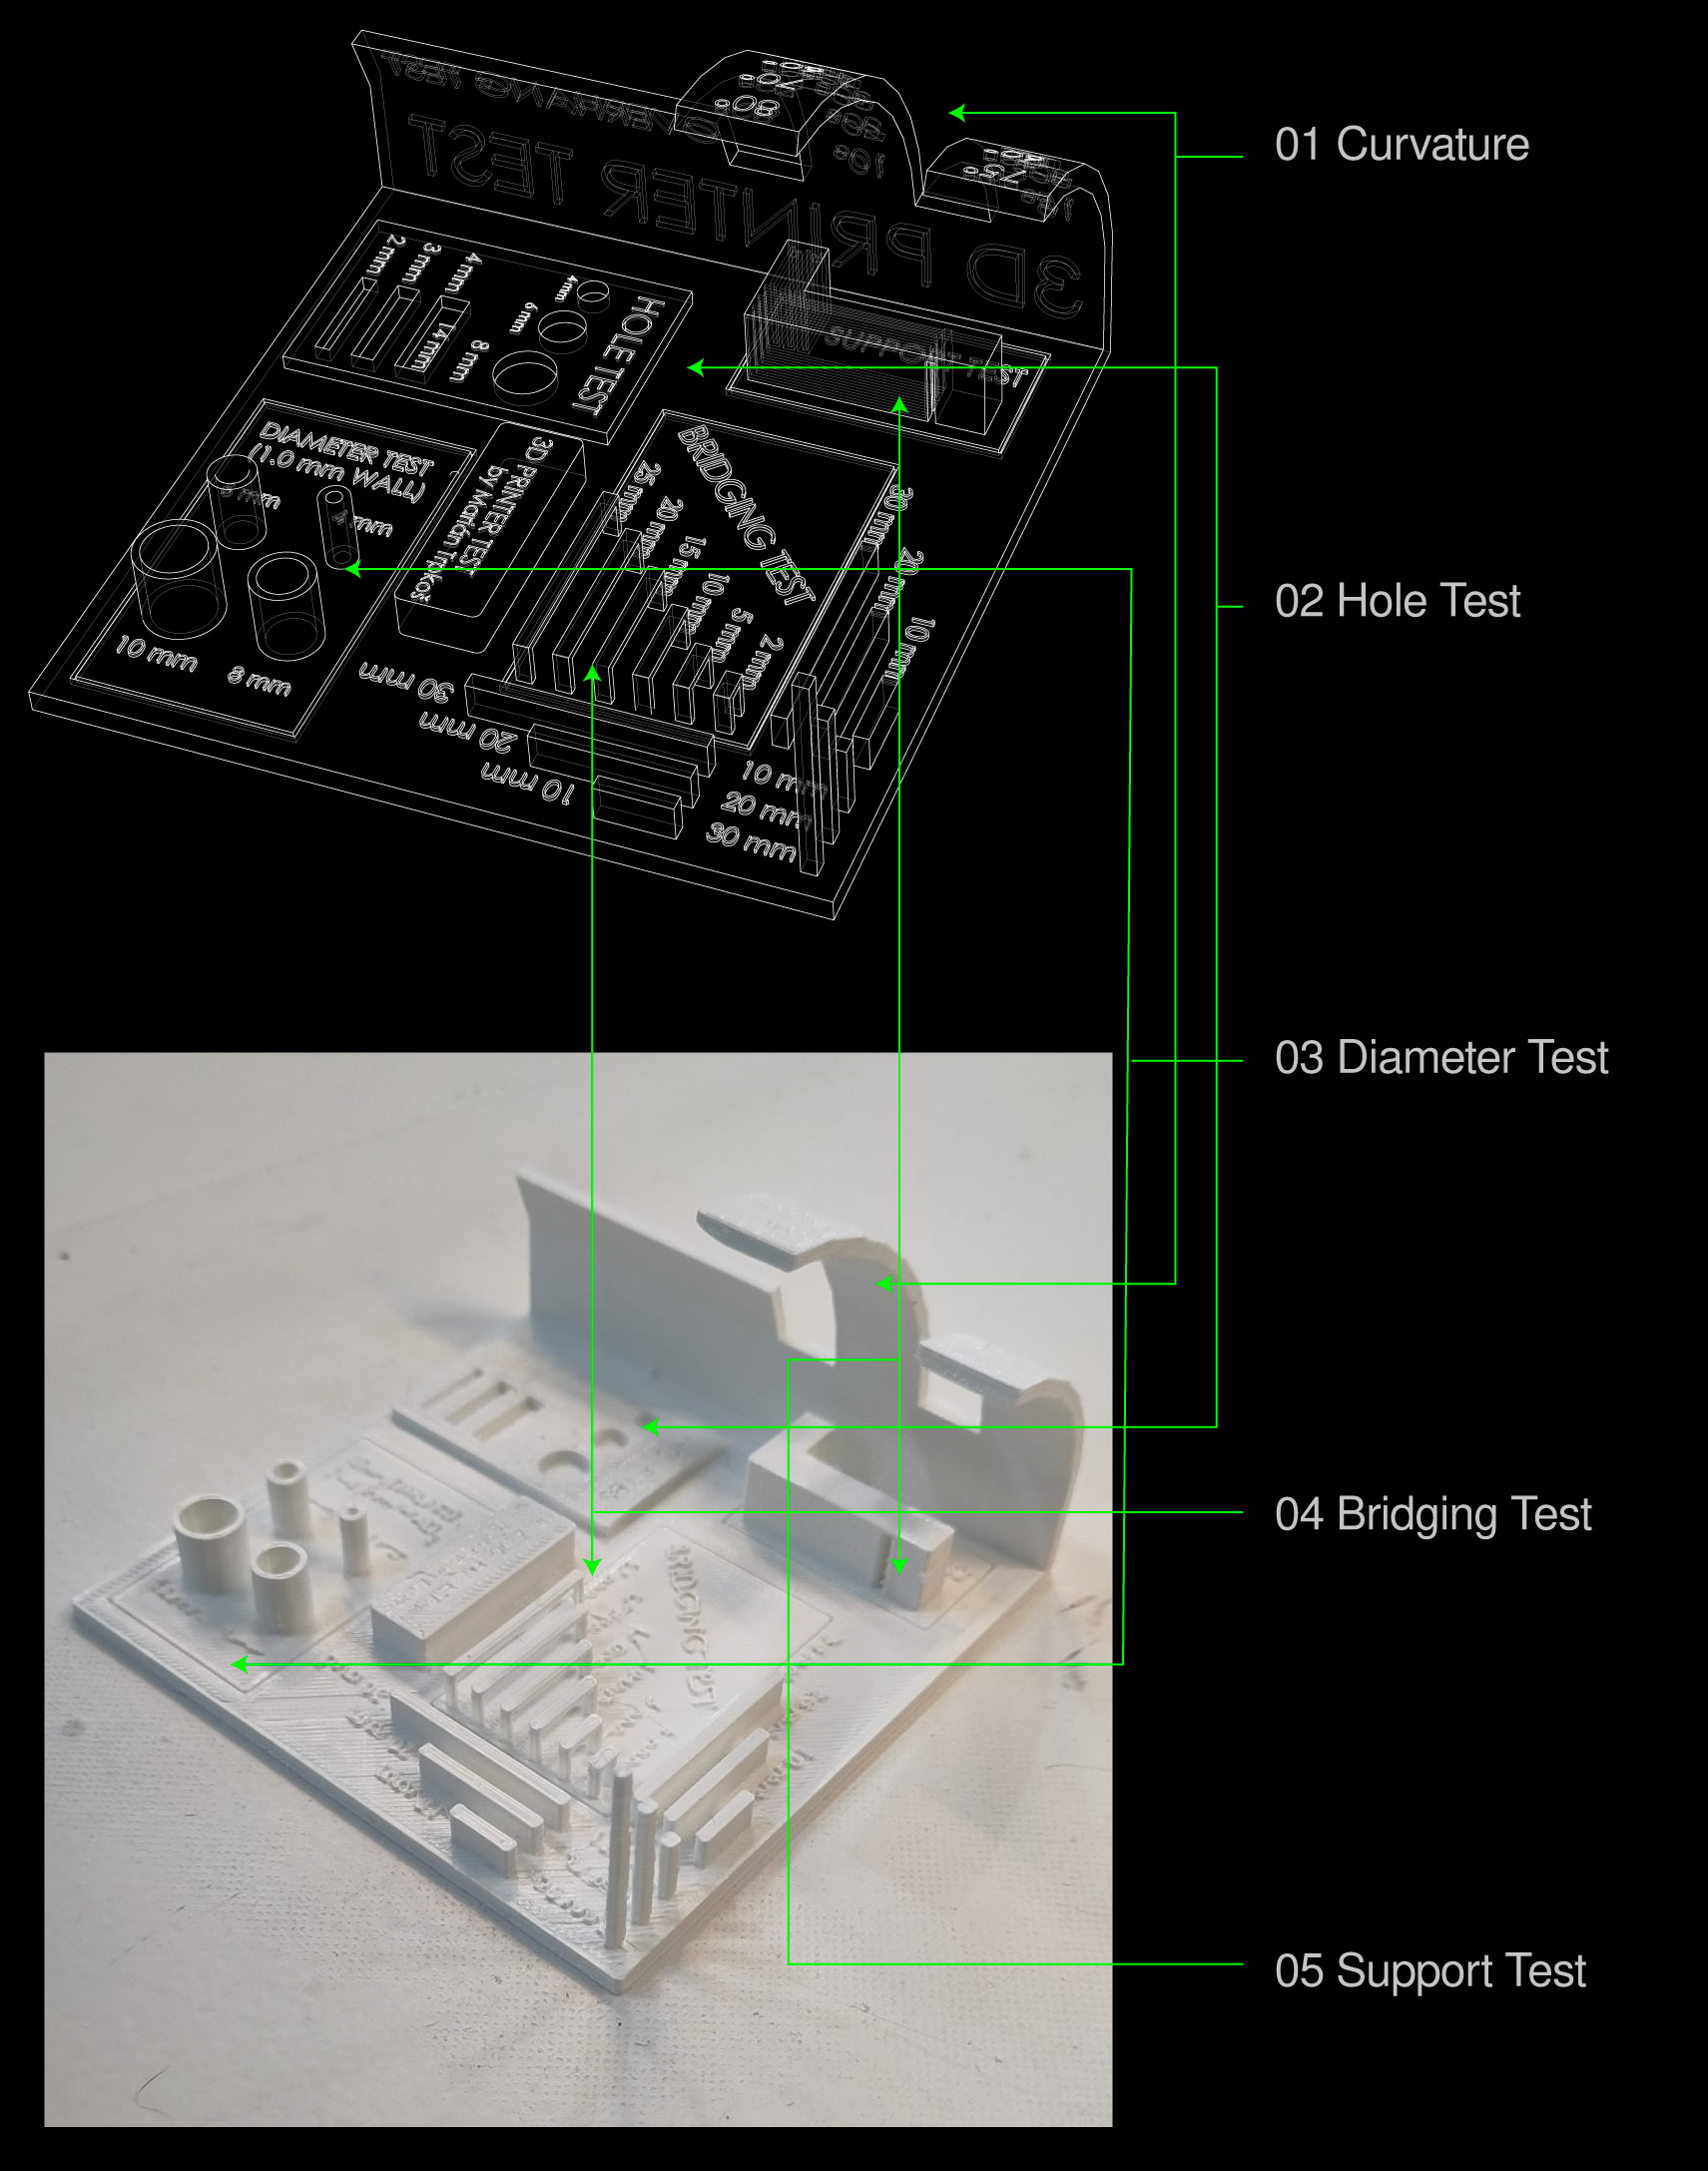
We can also analyze in this new results the 5 sections mentioned above:


However, it should be noted that this process has generated warping at the base, since it has a large surface area and low thickness. This has not happened with PLA in FDM because it has a low thermal shrinkage coefficient, but it could have happened with other materials such as ABS or PET, so it is not considered a disadvantage of the technology as such, but rather of the material.
