11—Networking and Communications
Asignment
- Group assignment:
- Send a message between two projects
- Document your work to the group work page and reflect on your individual page what you learned
- Individual assignment:
- design, build and connect wired or wireless node(s) with network or bus addresses and a local interface
Outline
- 00—The plan
- 01— The setup
- 02— The process
- 03— Results
00—The plan
The plan is simple, use two microcontroller boards and use a wireless method to exchange some data between them.
Now, since we are using two ESP32-based boards (Andrew’s and Gonzalo’s) we considered ESP-NOW, but since some of us had already used that on the individual assignment another WiFi protocol was prefered. Concretely, using TCP sockets.
01—The setup
Using the Arduino WiFi.h library, we can create wifi client instances using one microcontroller (ESP32-S3) as the server and the other (ESP32-C3) as client.
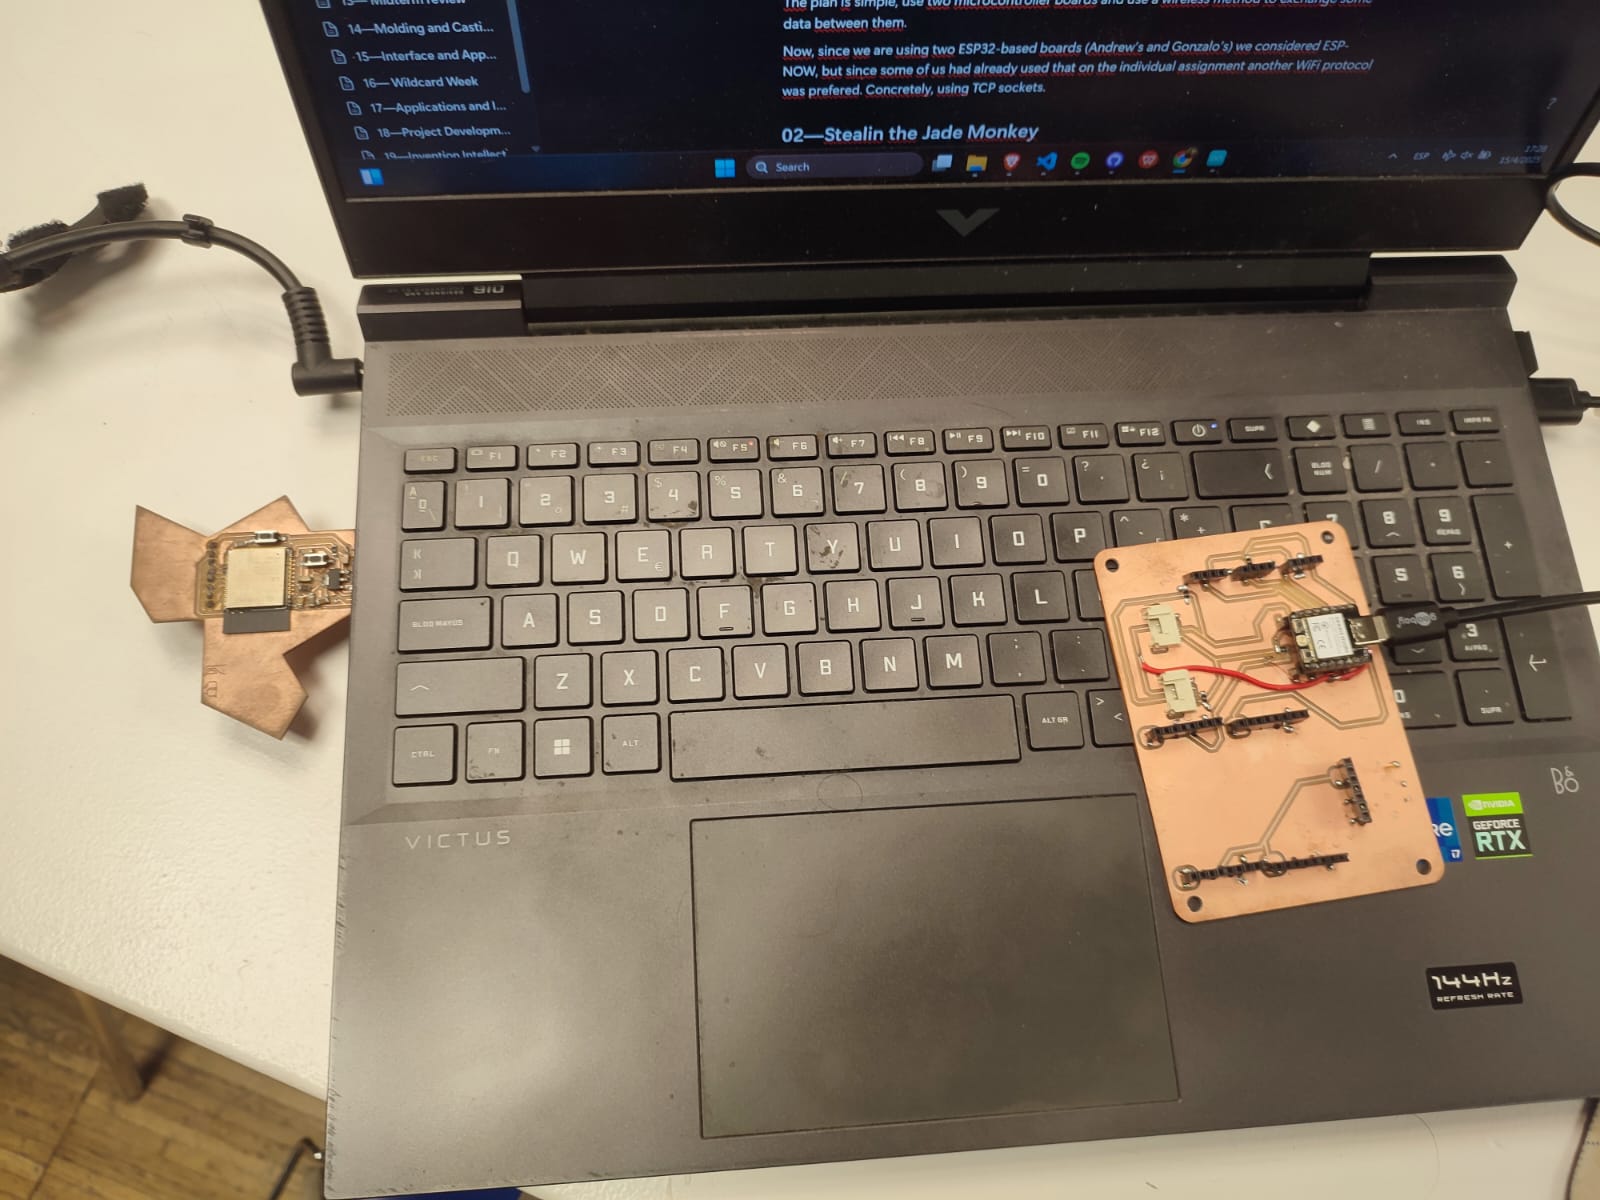
The server is created using an SSID and a password. Then it checks if there is a client available through server.available(). If there is a client, it subsequently checks if it is connected and then the messaging task starts. The client simply connects to the server using its SSID and password as well as the server IP address and the communication port.

02—The process
Here’s the code that we used for this process. First the server:
#include <WiFi.h>
WiFiServer server(3333); // TCP port

const char *ssid = "ESP32_Server";
const char *password = "12345678";

void setup() {
  Serial.begin(115200);

  WiFi.softAP(ssid, password);
  Serial.println("Access Point Started");
  Serial.print("IP Address: ");
  Serial.println(WiFi.softAPIP());

  server.begin();
}

void loop() {
  WiFiClient client = server.available();
  if (client) {
    Serial.println("Client connected");
    while (client.connected()) {
      if (client.available()) {
        String data = client.readStringUntil('\n');
        Serial.print("Received: ");
        Serial.println(data);
        data.trim();
        if(data == "Start"){
          Serial.println("Continuing");
          client.println("Continue");
        }
        if(data == "Next"){
          Serial.println("Disconnecting");
          client.println("Terminate");
          client.stop();
        }
      }
    }

    Serial.println("Client disconnected");
  }
}
And now, the client:
#include <WiFi.h>

const char *ssid = "ESP32_Server";
const char *password = "12345678";
const char *host = "192.168.4.1";  // IP of the ESP32-S3 server
const uint16_t port = 3333;
WiFiClient client;
void setup() {
  Serial.begin(115200);
  delay(1000);

  WiFi.begin(ssid, password);
  Serial.println("Connecting to WIFI");

  while (WiFi.status() != WL_CONNECTED) {
    delay(500);
    Serial.print(".");
  }
  Serial.println("\nConnected to WIFI");

  if (client.connect(host, port)) {
    Serial.println("Connected to server");
    client.println("Hello from ESP32-C3");
    client.println("Start");
  } else {
    Serial.println("Connection to server failed");
  }
}

void loop() {
    if (client.connected()) {
      if (client.available()) {
        String response = client.readStringUntil('\n');
        Serial.print("Received: ");
        response.trim();
        if(response = "Continue"){
          Serial.println(response);
          client.println("Next");
        } else if(response = "Terminate"){
          client.stop();
          Serial.println("Disconnected");
        }
      }
    }
}
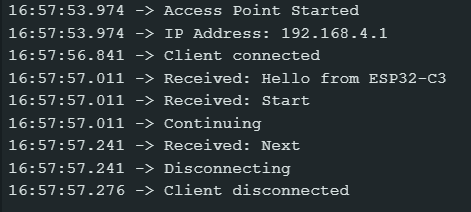
So, after creating the server & client and connecting them, the main working loop consists of a few message exchanges. Once the client connects, it prints a hello message (a simple message we used as a test in the previous version) and continues to print the “Start” command in the client. The server checks for any messages print in the client, pre-process it with the trim command and check if any of the protocol-defined commands have been received. Therefore, when receiving the “Start” command it will print “Continue” in the client. Then, the client will go through a very similar process and answer “Next” to the “Continue” command. Finally, the server will print the command “Terminate” and proceed to stop the connection. The client will disconnect too when receiving the “Terminate” command.
03 — Results
With this test we demonstrated:
- The ability to set up one microcontroller as a TCP server and another as a client.
- Custom protocol handling via string-based messaging.
- Sequencing and logic flow for initiating and terminating a connection.