05—3D Scanning and Printing
Assignment
- Group assignment:
- Test the design rules for your 3D printer(s)
- Document your work on the group work page and reflect on your individual page what you learned about characteristics of your printer(s)
Outline
- 00—Initial Thoughts
- 01—Our Calibration Model: Insights and observations
- 02—Our FDM Test Model
- 03—Our SLA Test Model
- 04—TLDR on SLA Printing
- 05—TLDR of FDM Print Settings
- 06—3D Design for FDM Printing
- 07—Advanced Considerations for FDM Printing (Focus on Bambu machines)
00— Initial Thoughts
01— Our Calibration Model: Insights and observations
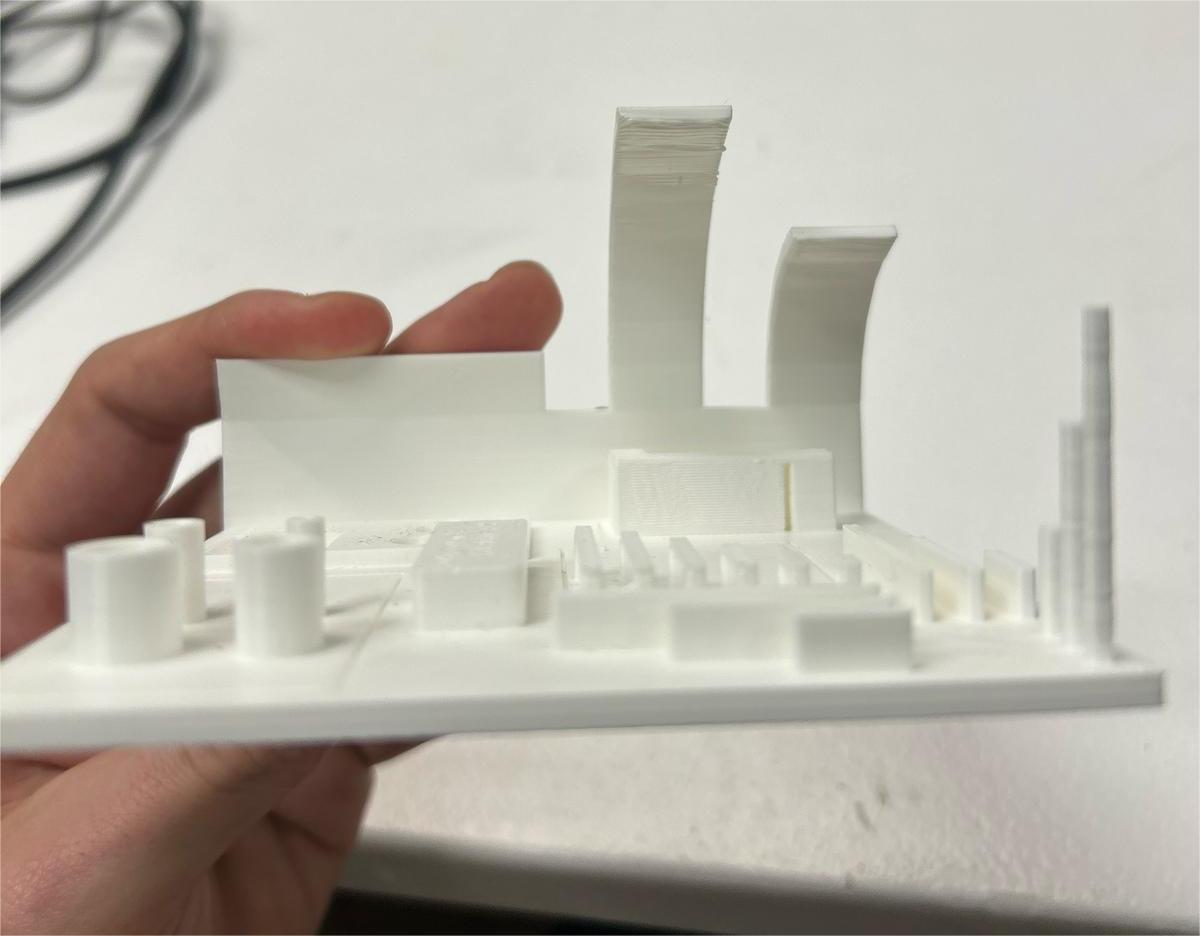
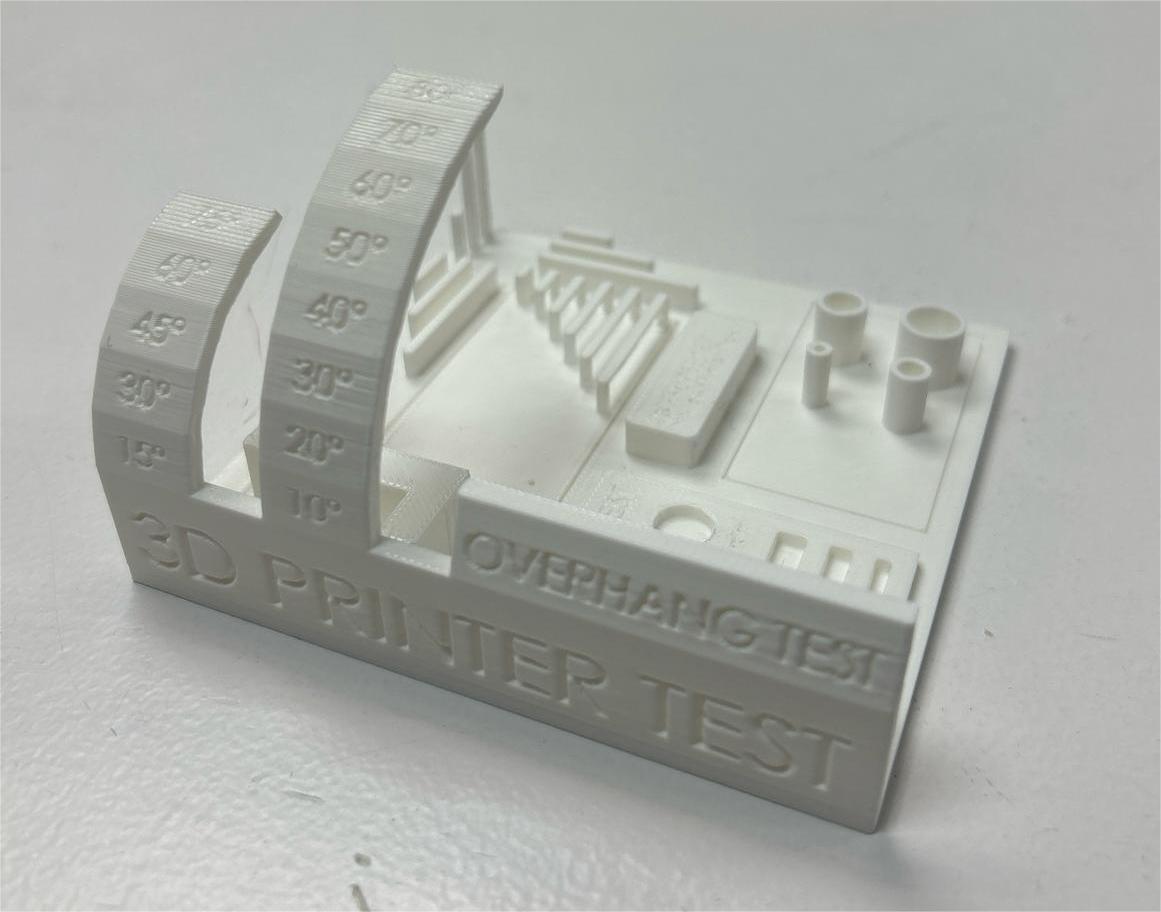
- For our test model we used a very standard FDM (Fused Deposition Modeling) print test model that shows you how the printer performs in several keys areas. The download for the model can be found here.
- Final result— The quality of the model was almost flawless.
- Only at the maximum overhang [70-80 degrees] did minor stringing occur
- Only at maximum bridging distance did stringing occur
- On the calibration model there are 3 labeled hole insets. Below is a chart of the nominal, actual and difference. Our findings tell us our average difference was -.3mm deviation from our nominal value. So when designing we should increase hole diameter by +.3mm.
Nominal Actual Difference 4 mm 3.59mm -.31 6 mm 5.75mm -.25 8 mm 7.66mm -.34
02— Our FDM Test Model
Bambu X1 Settings
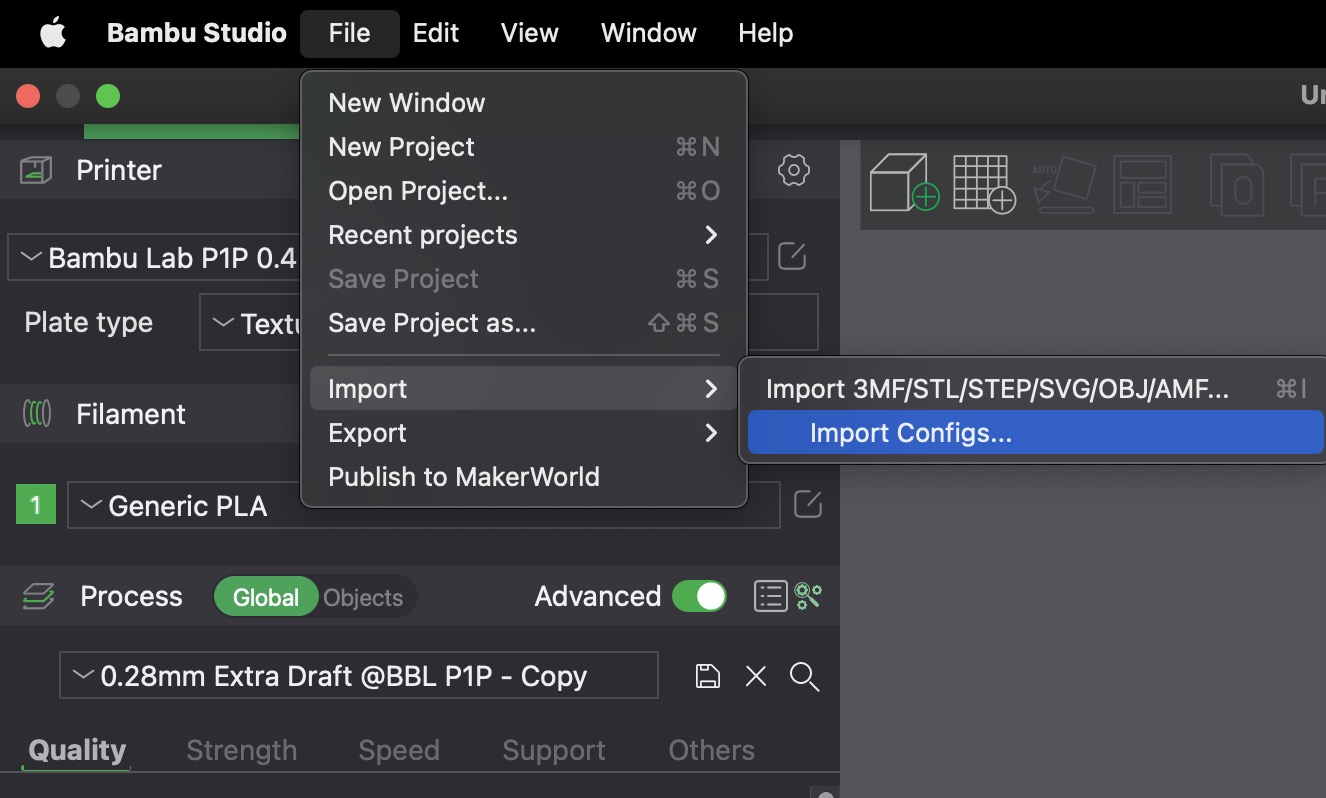
To begin, we opened Bambu Studio and imported our file into the workspace. In this case, we used an STL file format.
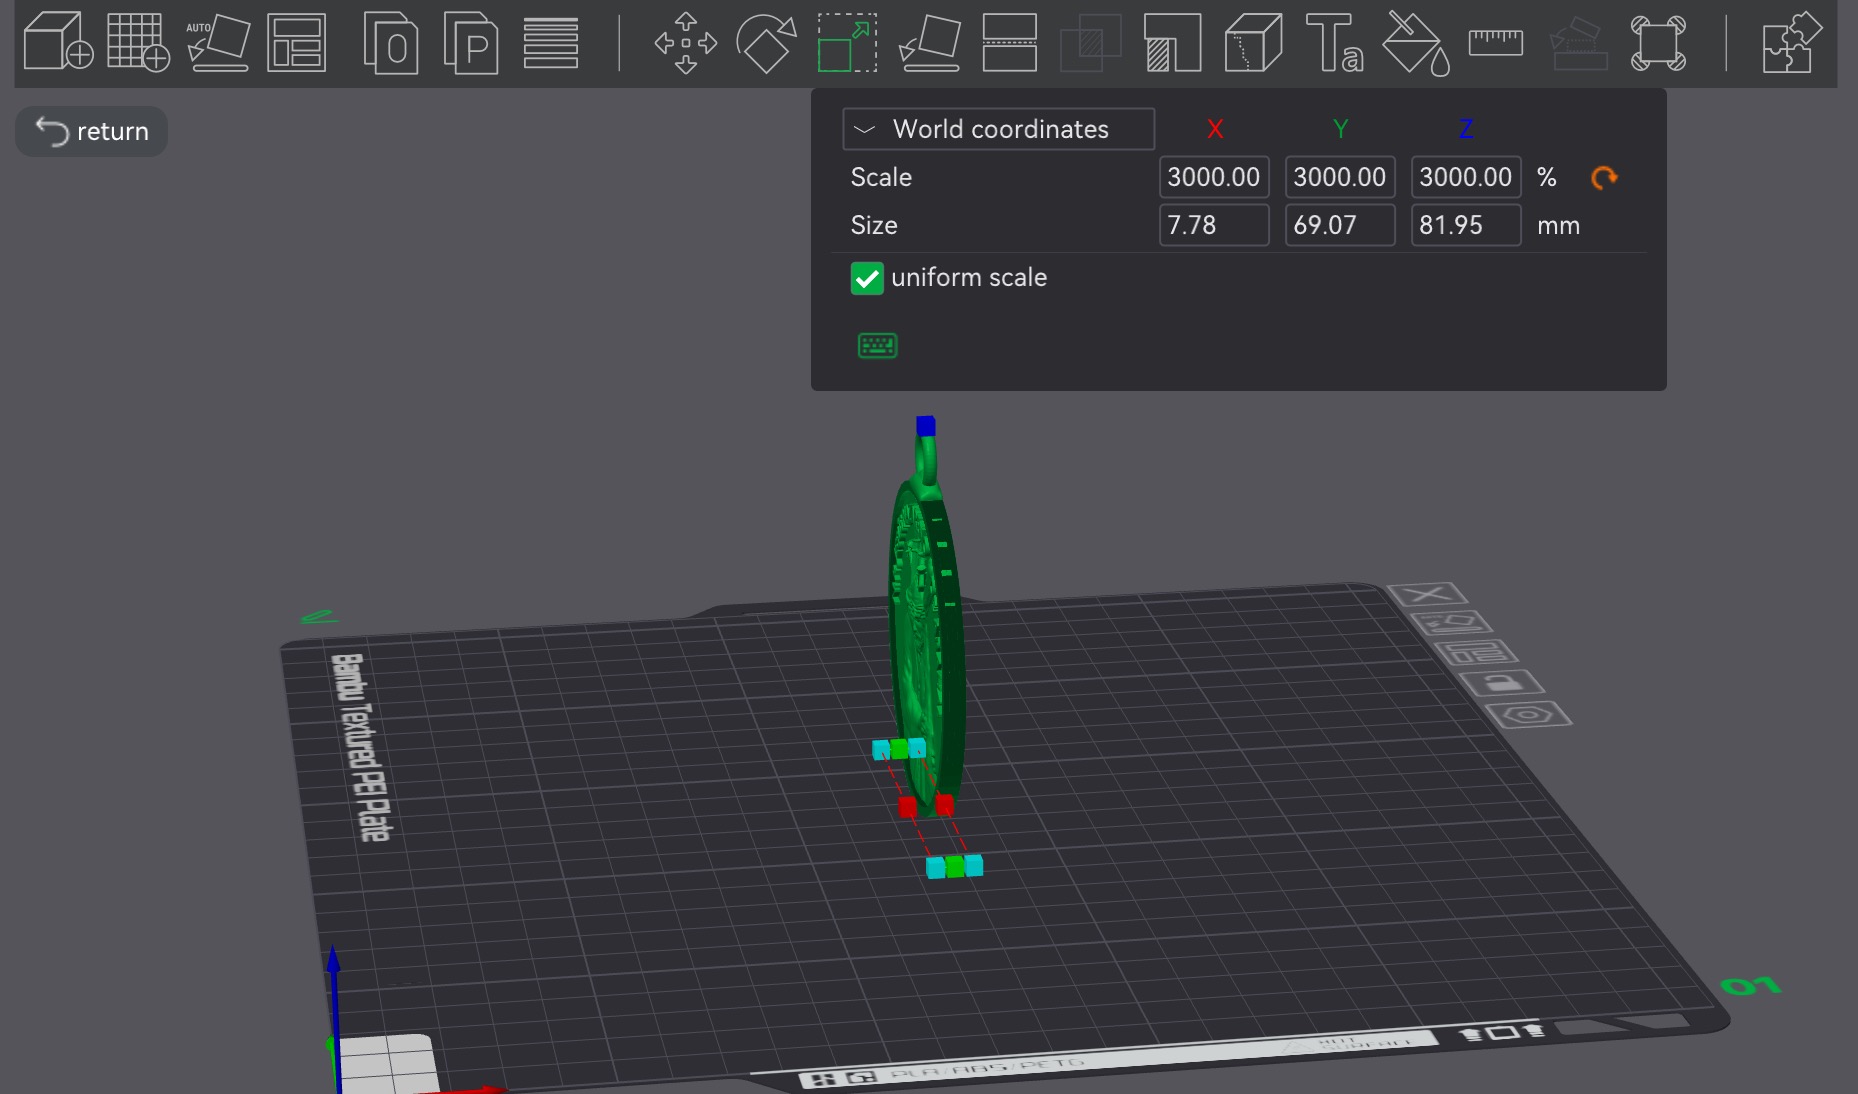
Once our model appeared in the workspace, we immediately noticed it was too small for the level of detail we needed. To resolve this, we used the Scale tool (located at the top of the screen) to uniformly scale all three axes to 3000%.
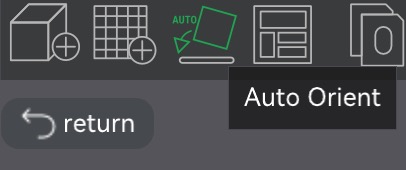
We also tested the Auto Orient feature, which optimizes the model’s position on the print bed for better printing results.
Moving on to the settings, we navigated to the Quality tab and selected a 0.12mm fine layer height. This choice allowed us to capture intricate details, though it did increase the overall print time.
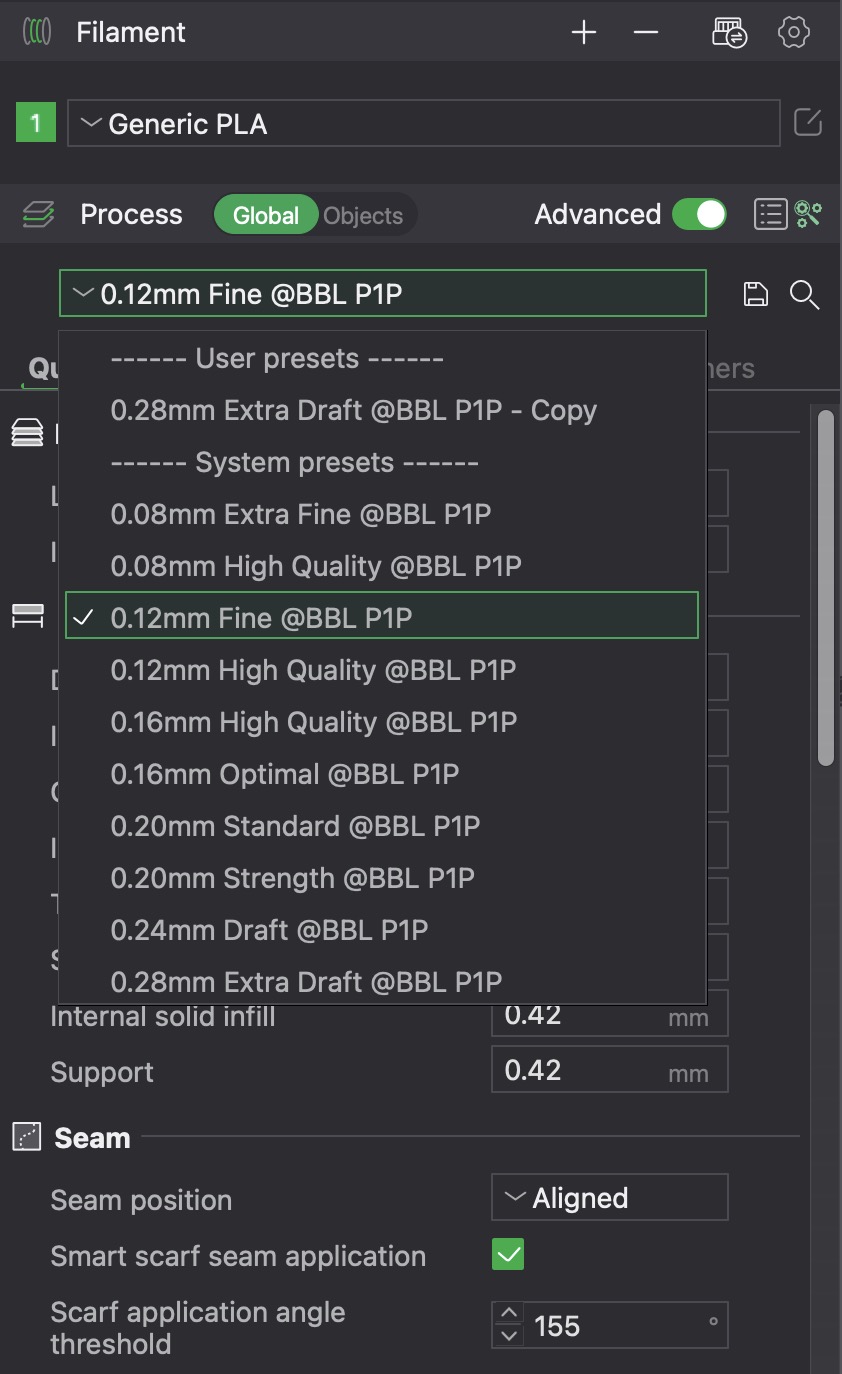
For the material, we chose Generic PLA, as it was already available and loaded in our lab’s printer.
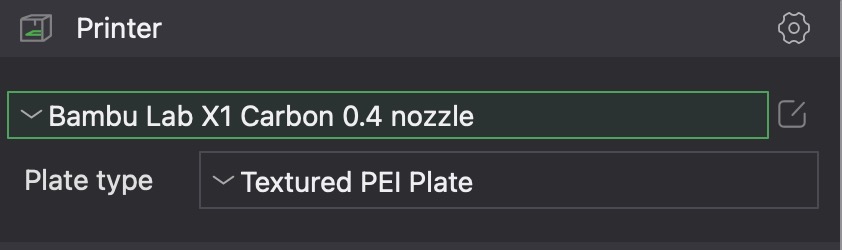
In the bottom-left corner, we ensured the printer was set to Bambu Lab X1 Carbon with a 0.4mm nozzle.
Under the Support tab, we enabled Tree-Type Supports with a 30° angle to provide stability during the print.
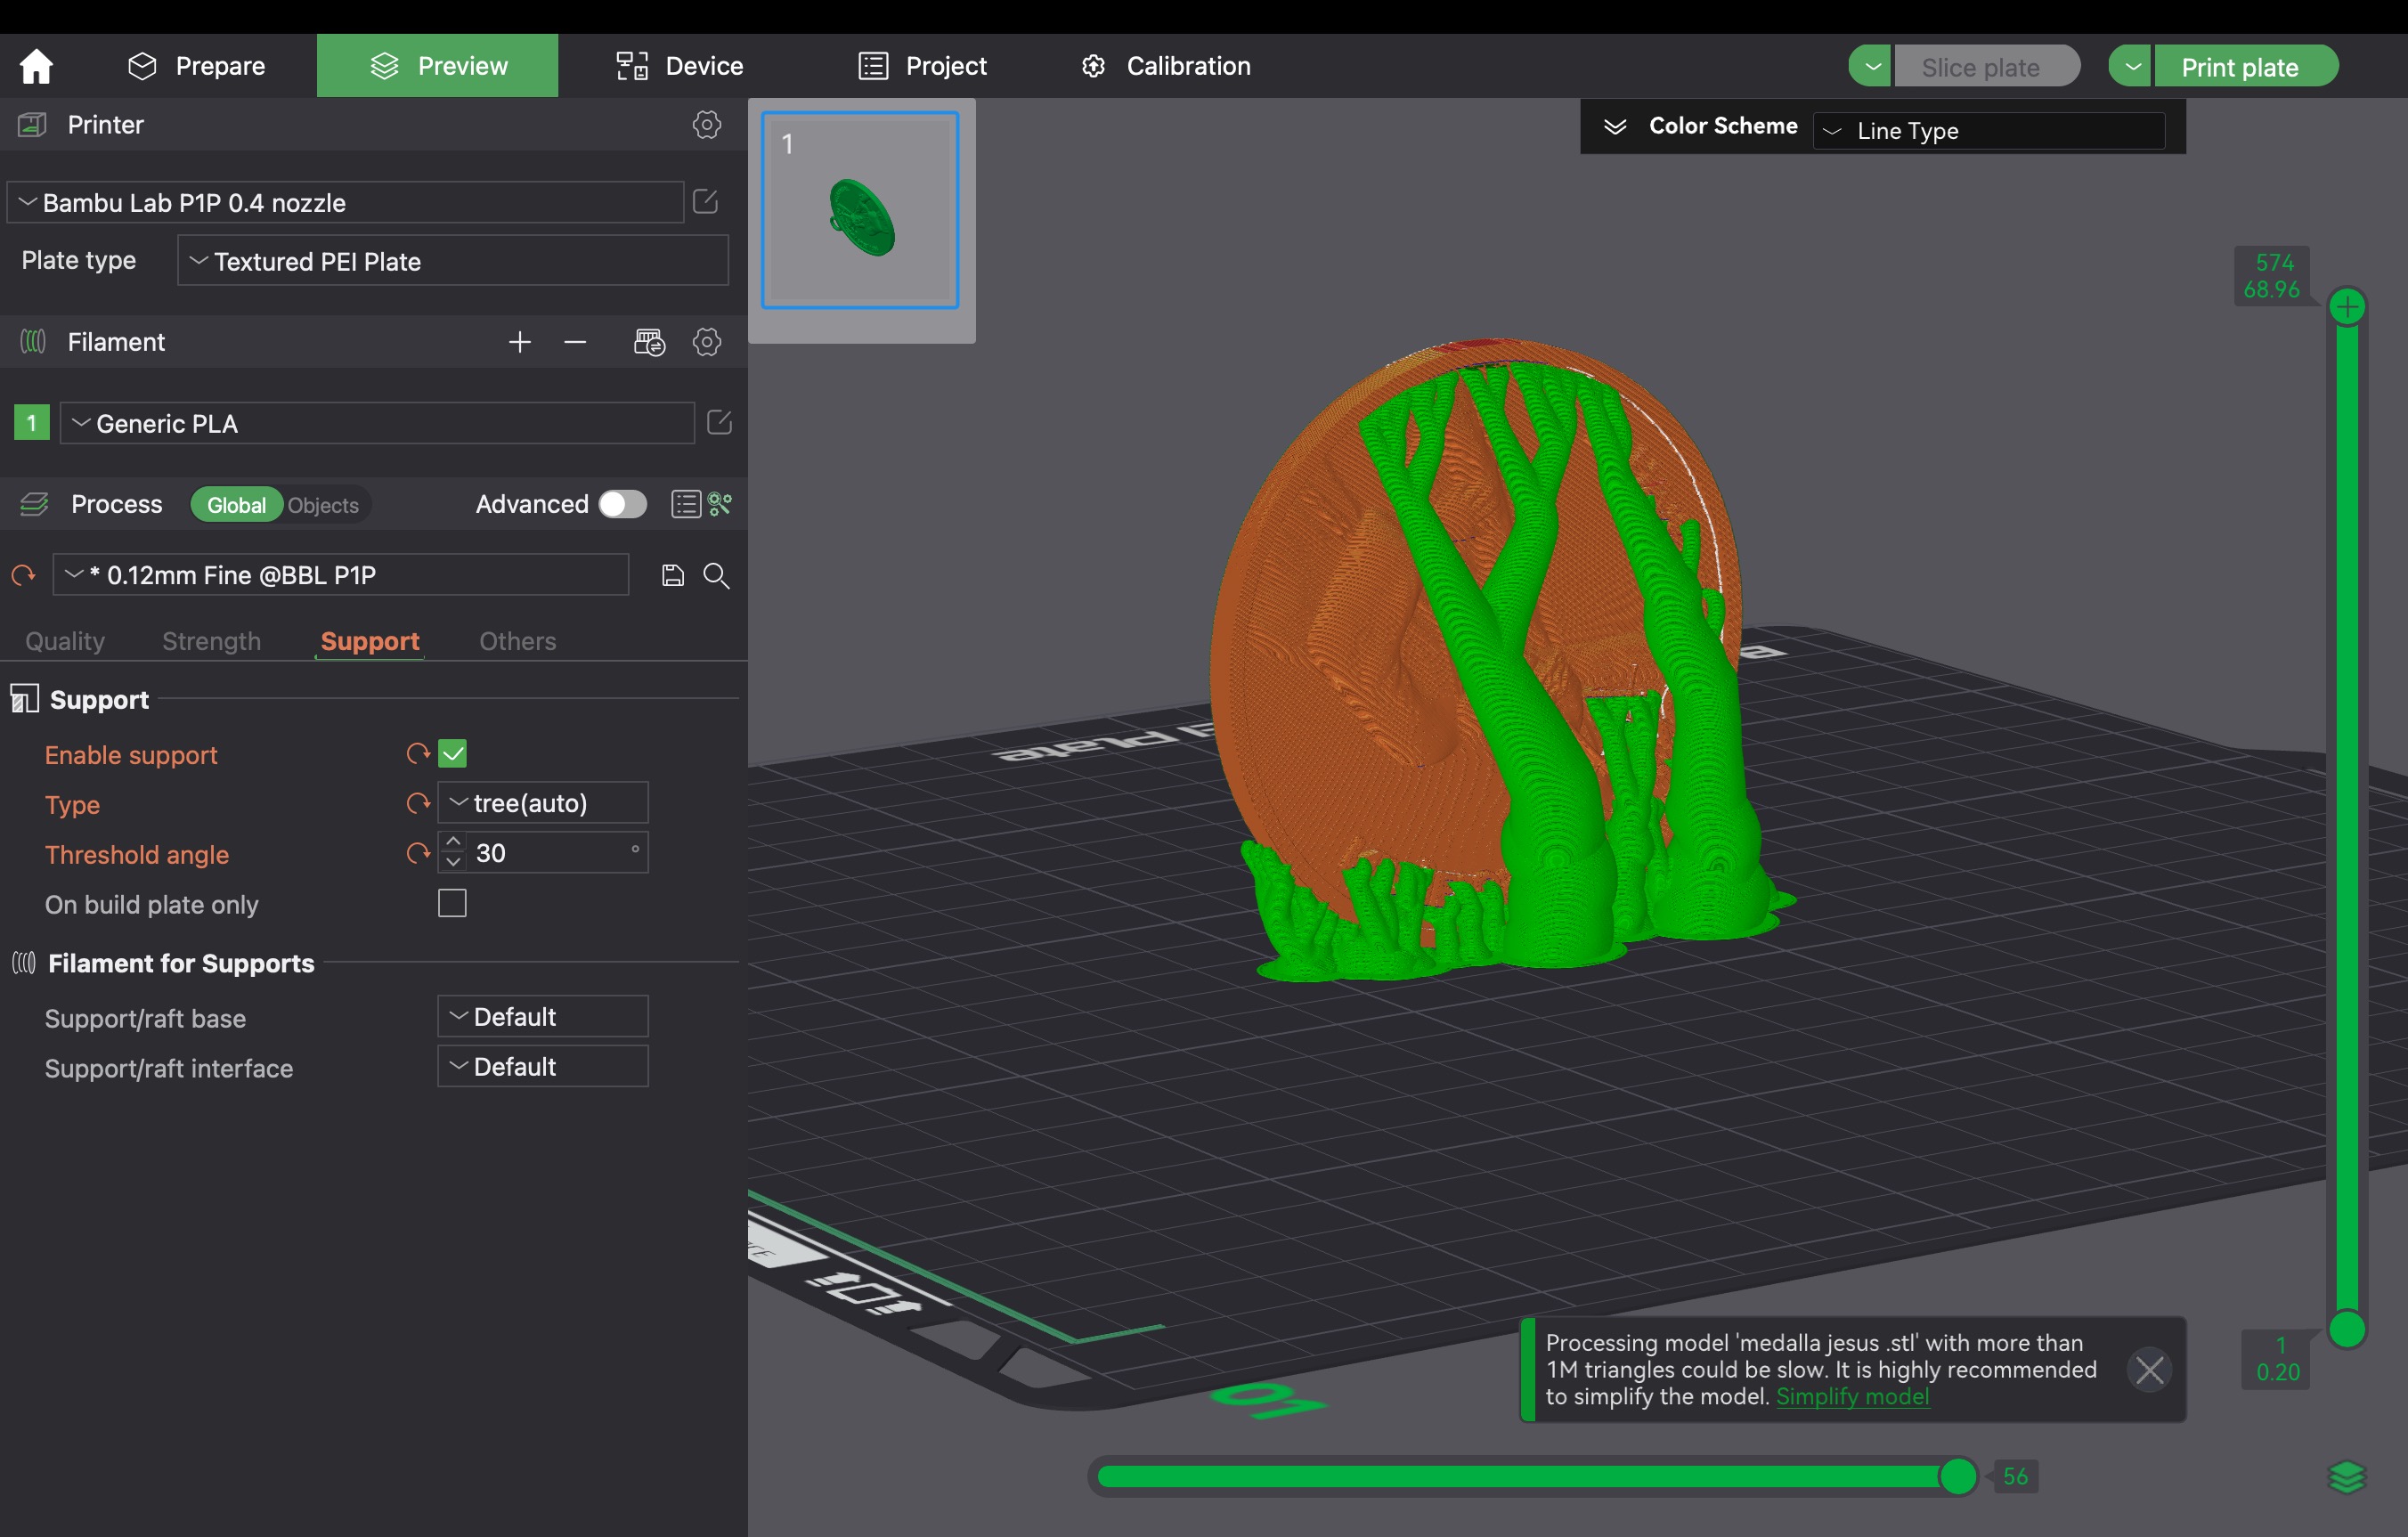
Once everything was set, we clicked Slice Plate in the top-right corner to generate the final print file.
After slicing, we exported the file by selecting Export Plate Sliced File, then manually choosing the destination folder.

And that’s it for Bambu Studio! We transferred the file to the printer, selected it, and hit Play (print)—ready for printing!
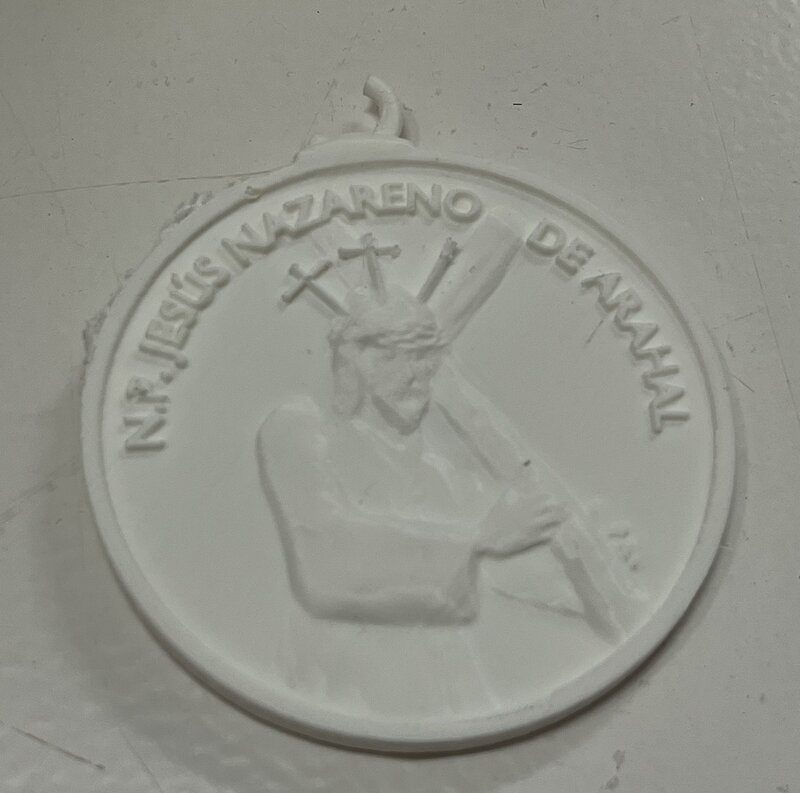
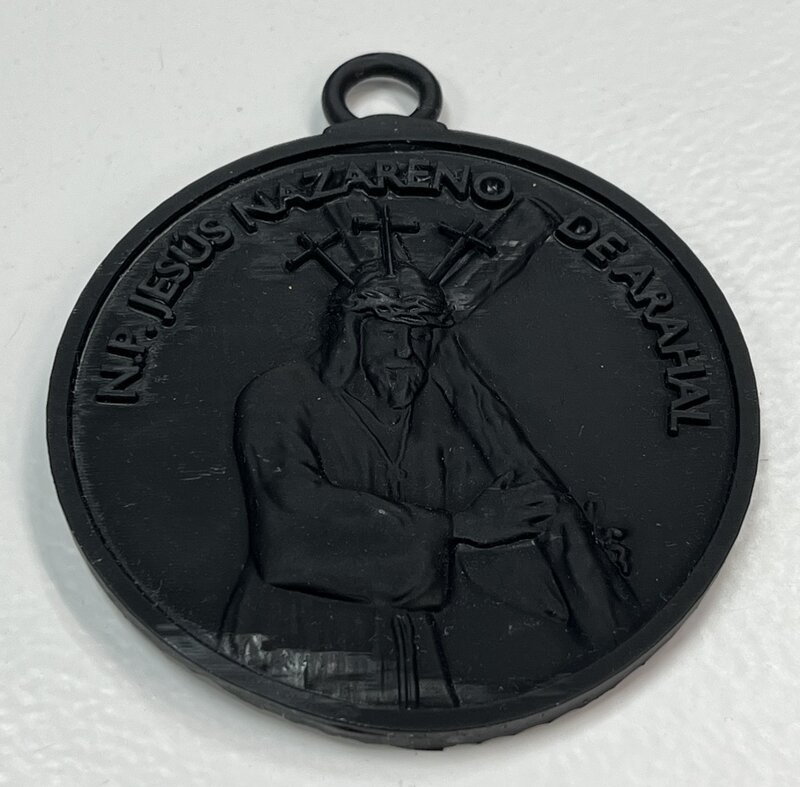
The final Print—The Emboss details on the coin (original model created by Camila) came out shockingly well and required less support than we had expected. Unfortunately we waited to remove the supports so prying them off the coin proved to be a hassle.

03— Our SLA Test Model
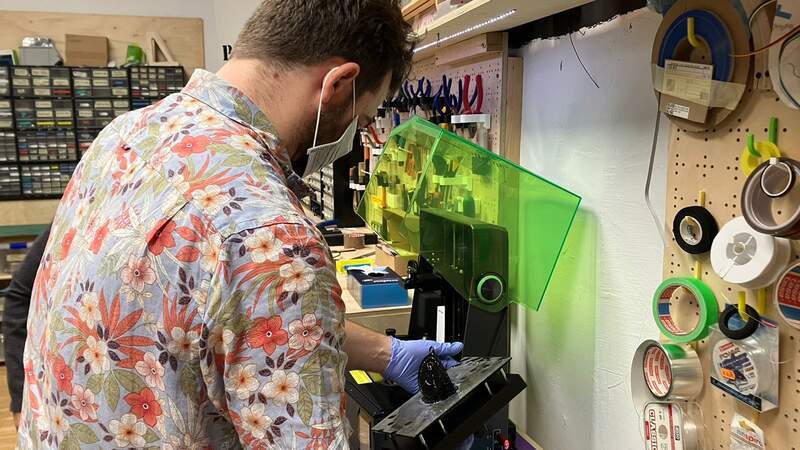
- Elegoo Settings—
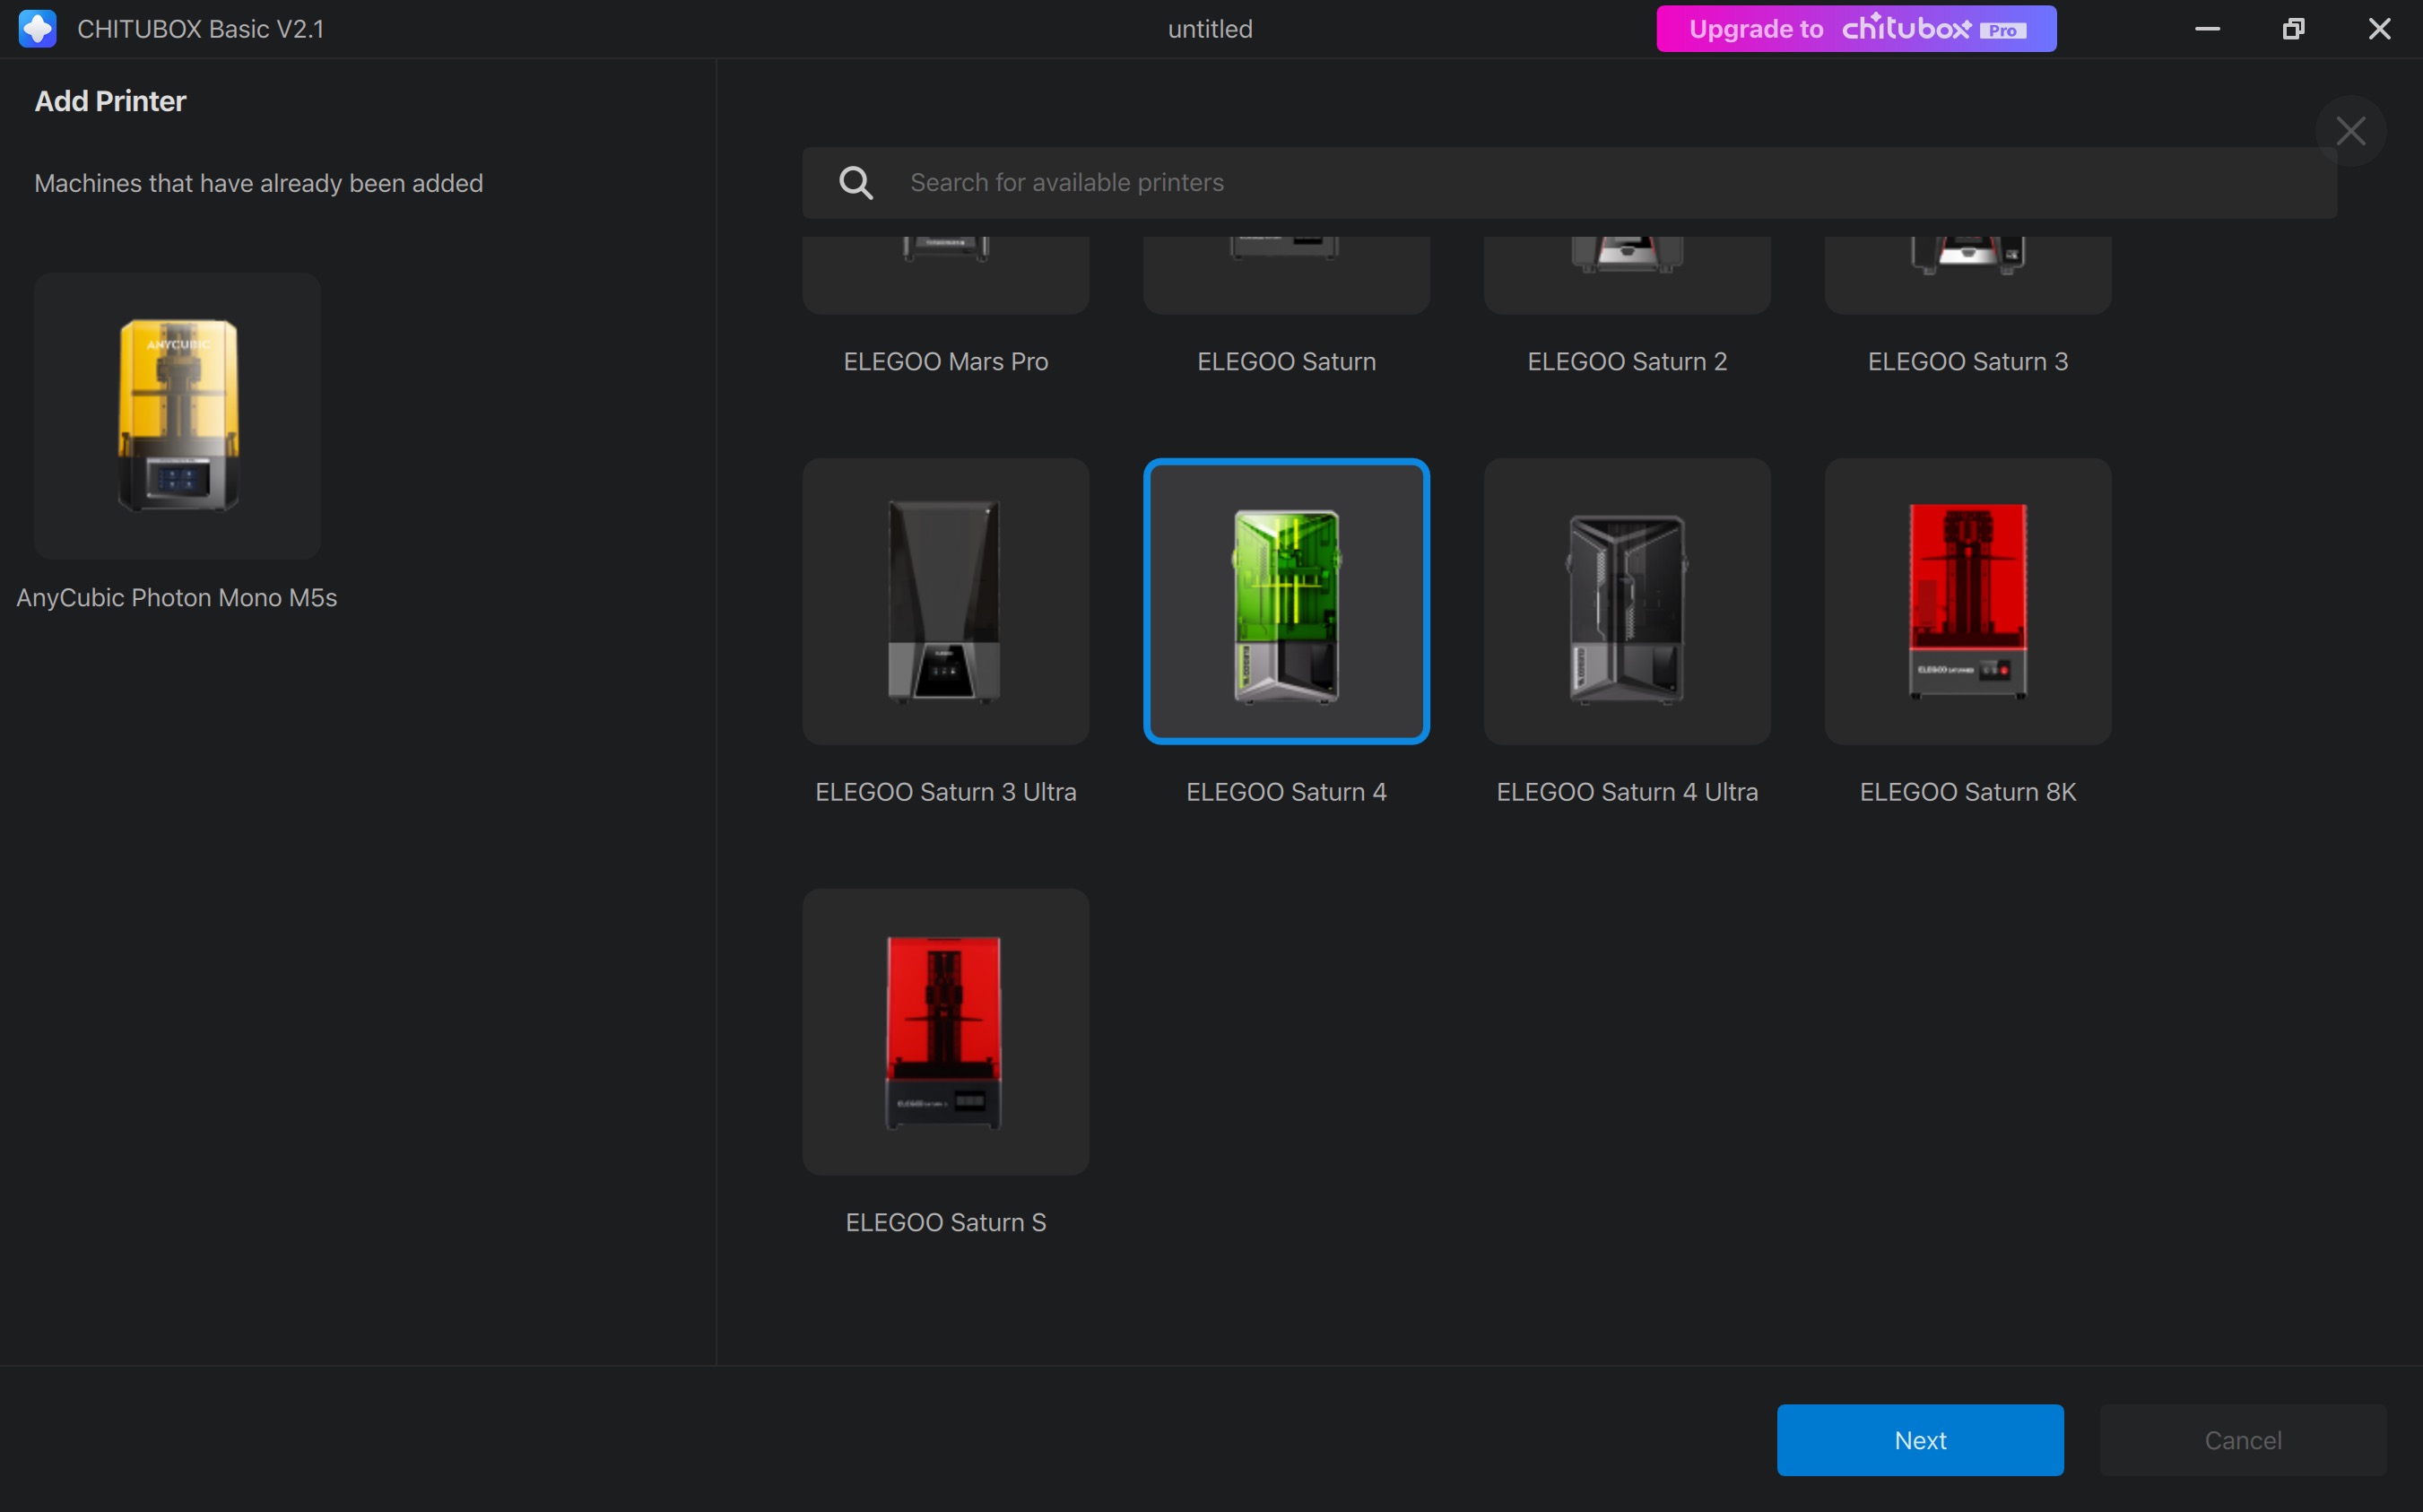
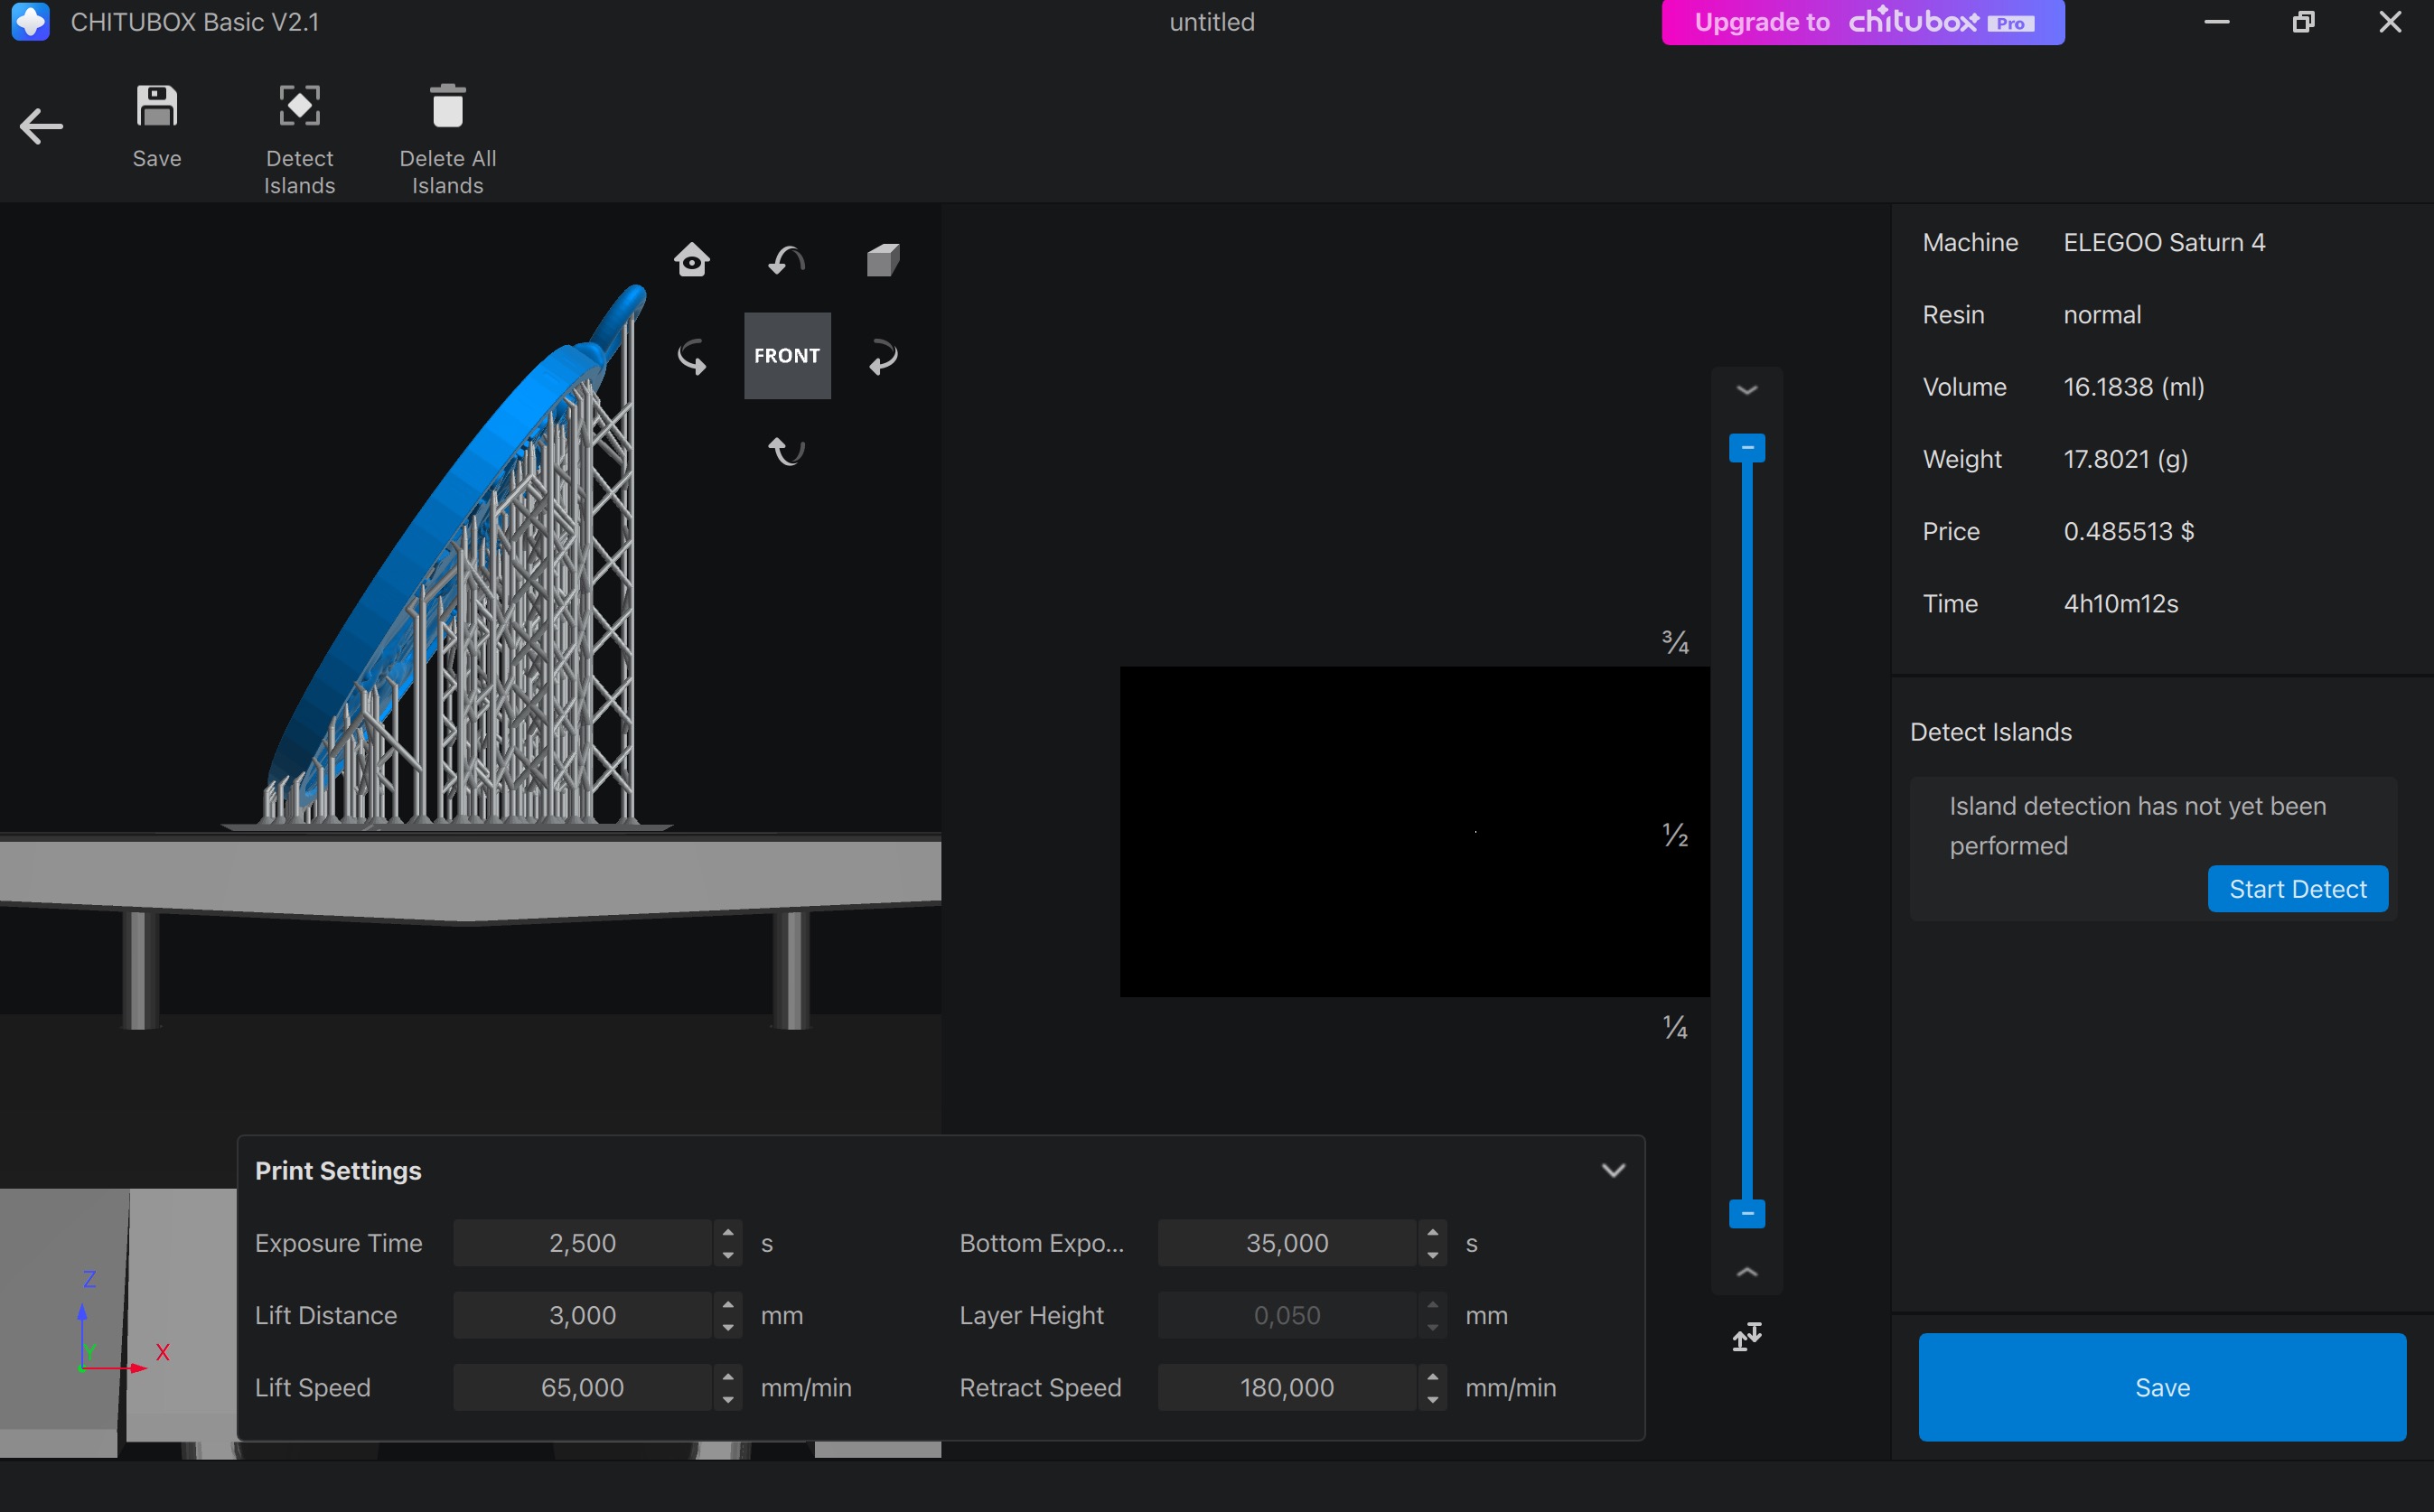
We tested this model on our Saturn 4 Elegoo resin printer using Chitubox slicer and Standard Black Resin. First, click "Open" (top left) to select your file.
Once placed, we scaled the model by 3000% to match the PLA print.
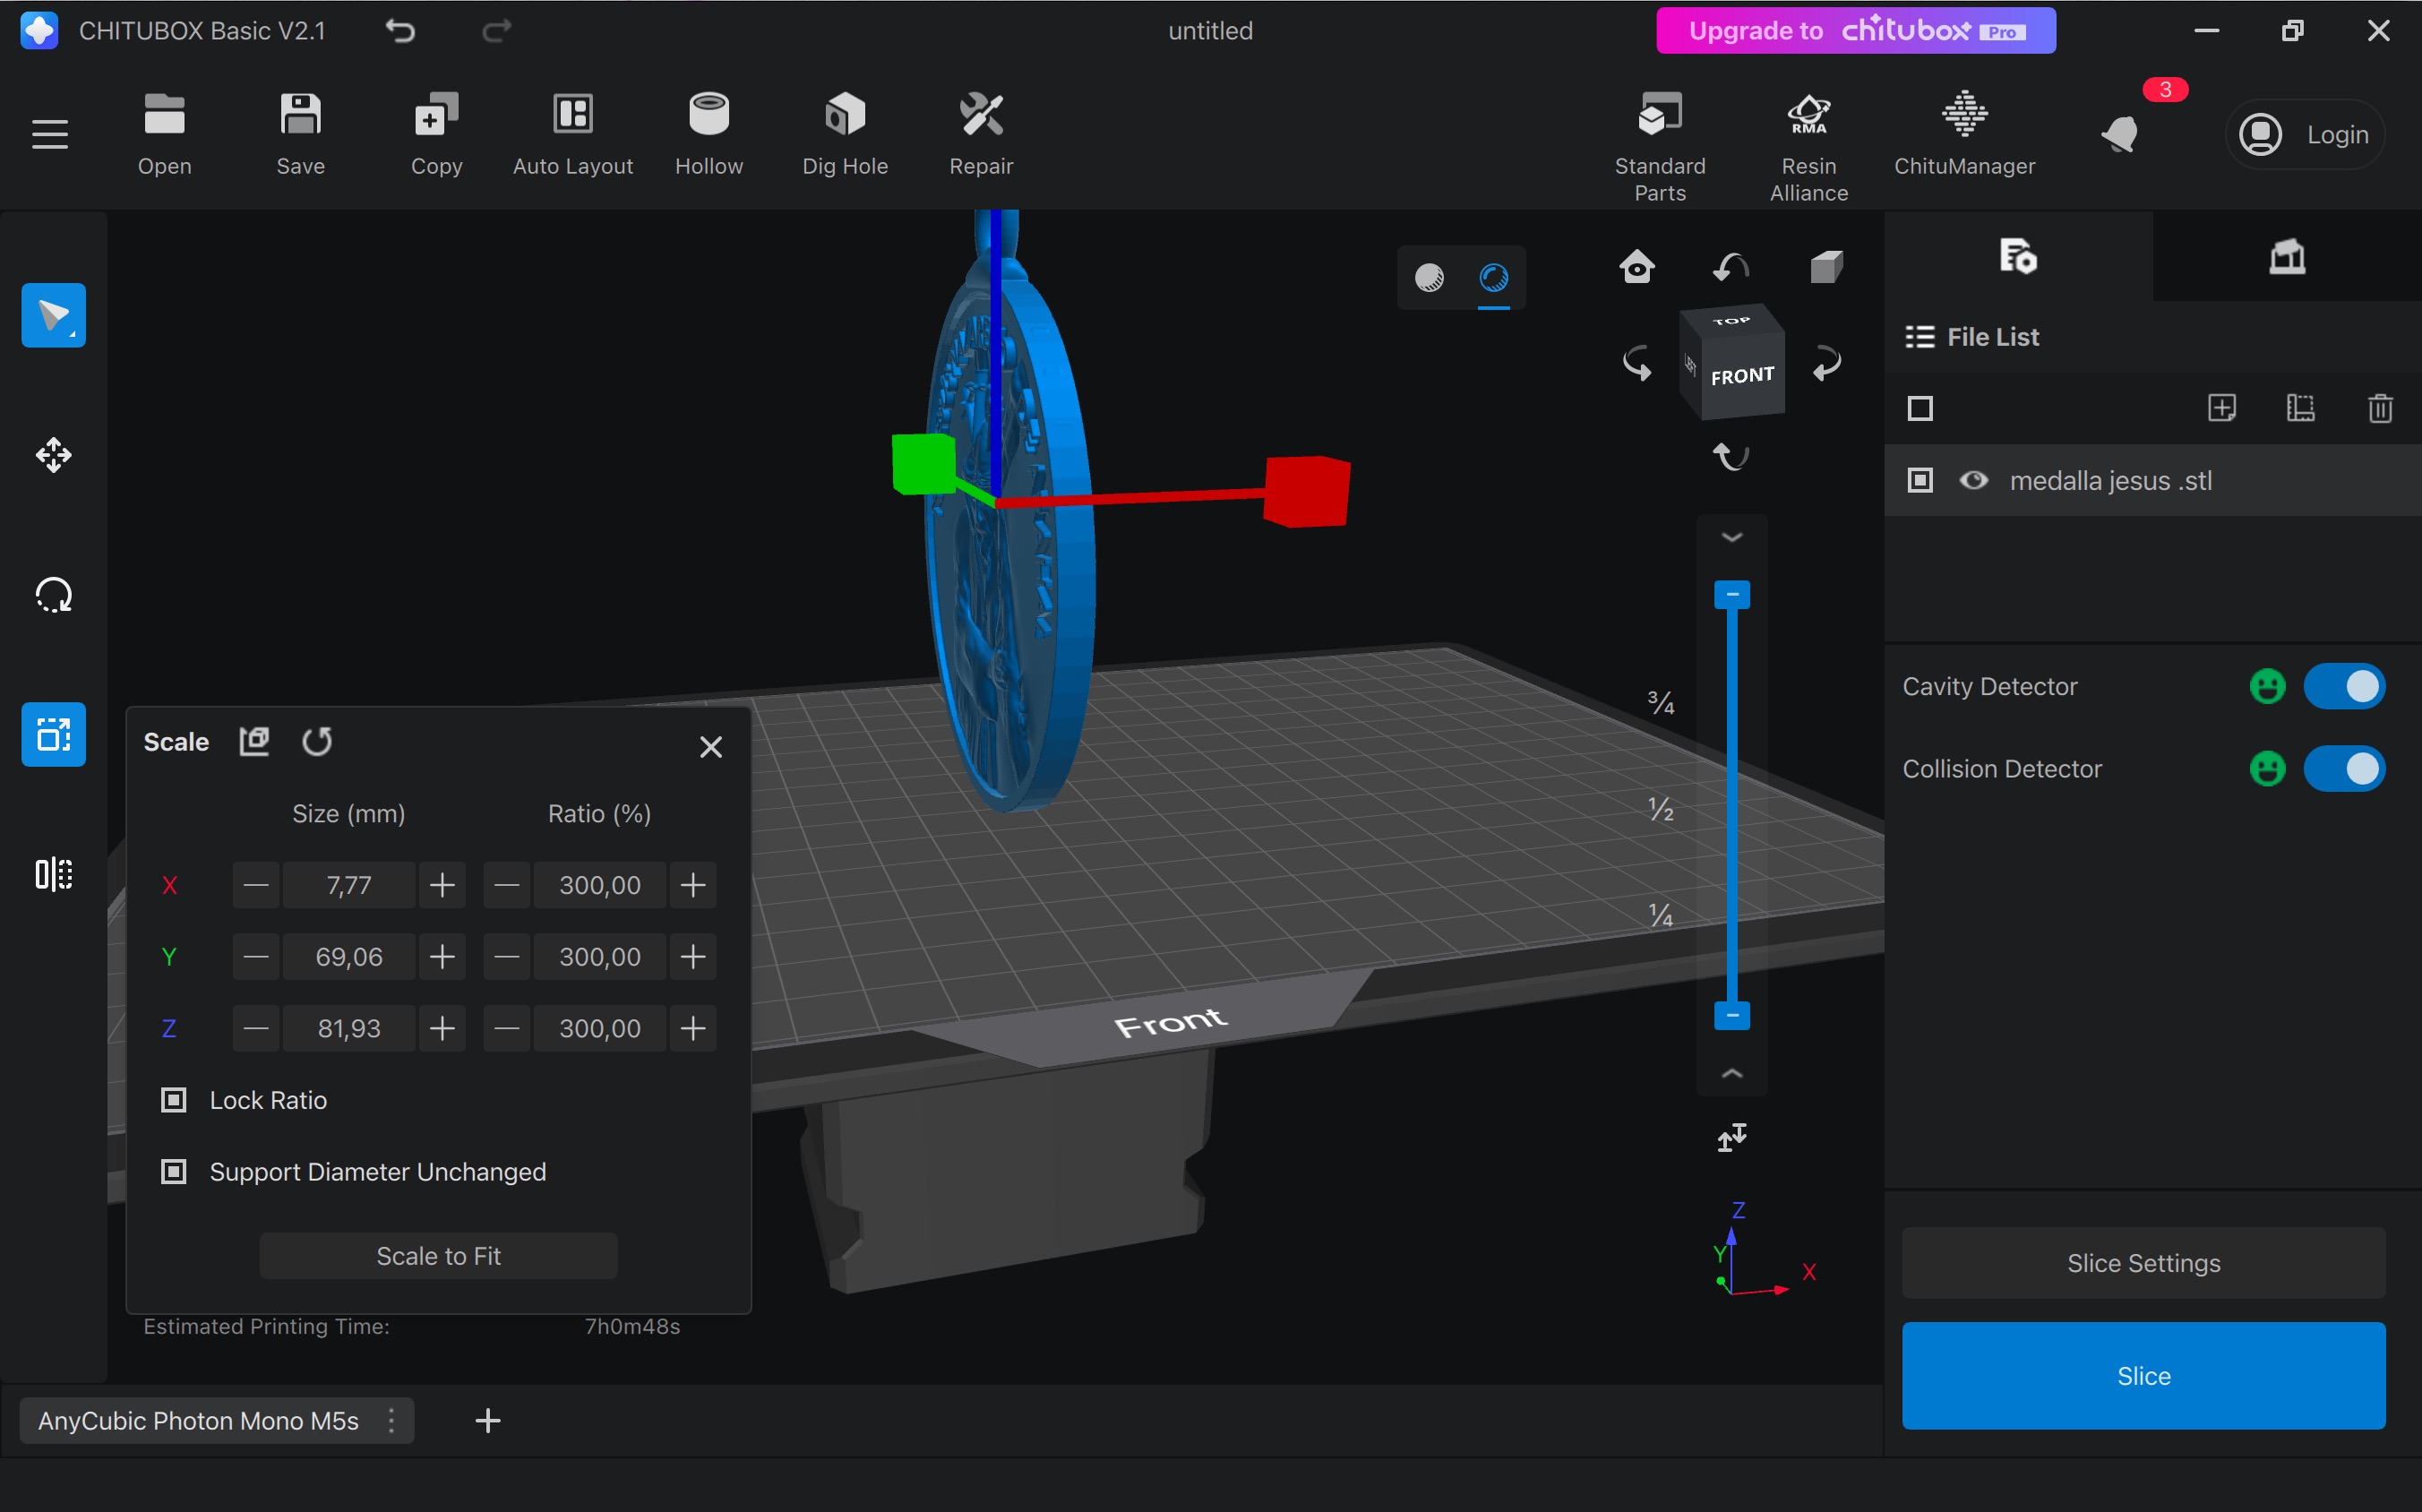
We then tilted it slightly (rotation tool) for better definition.
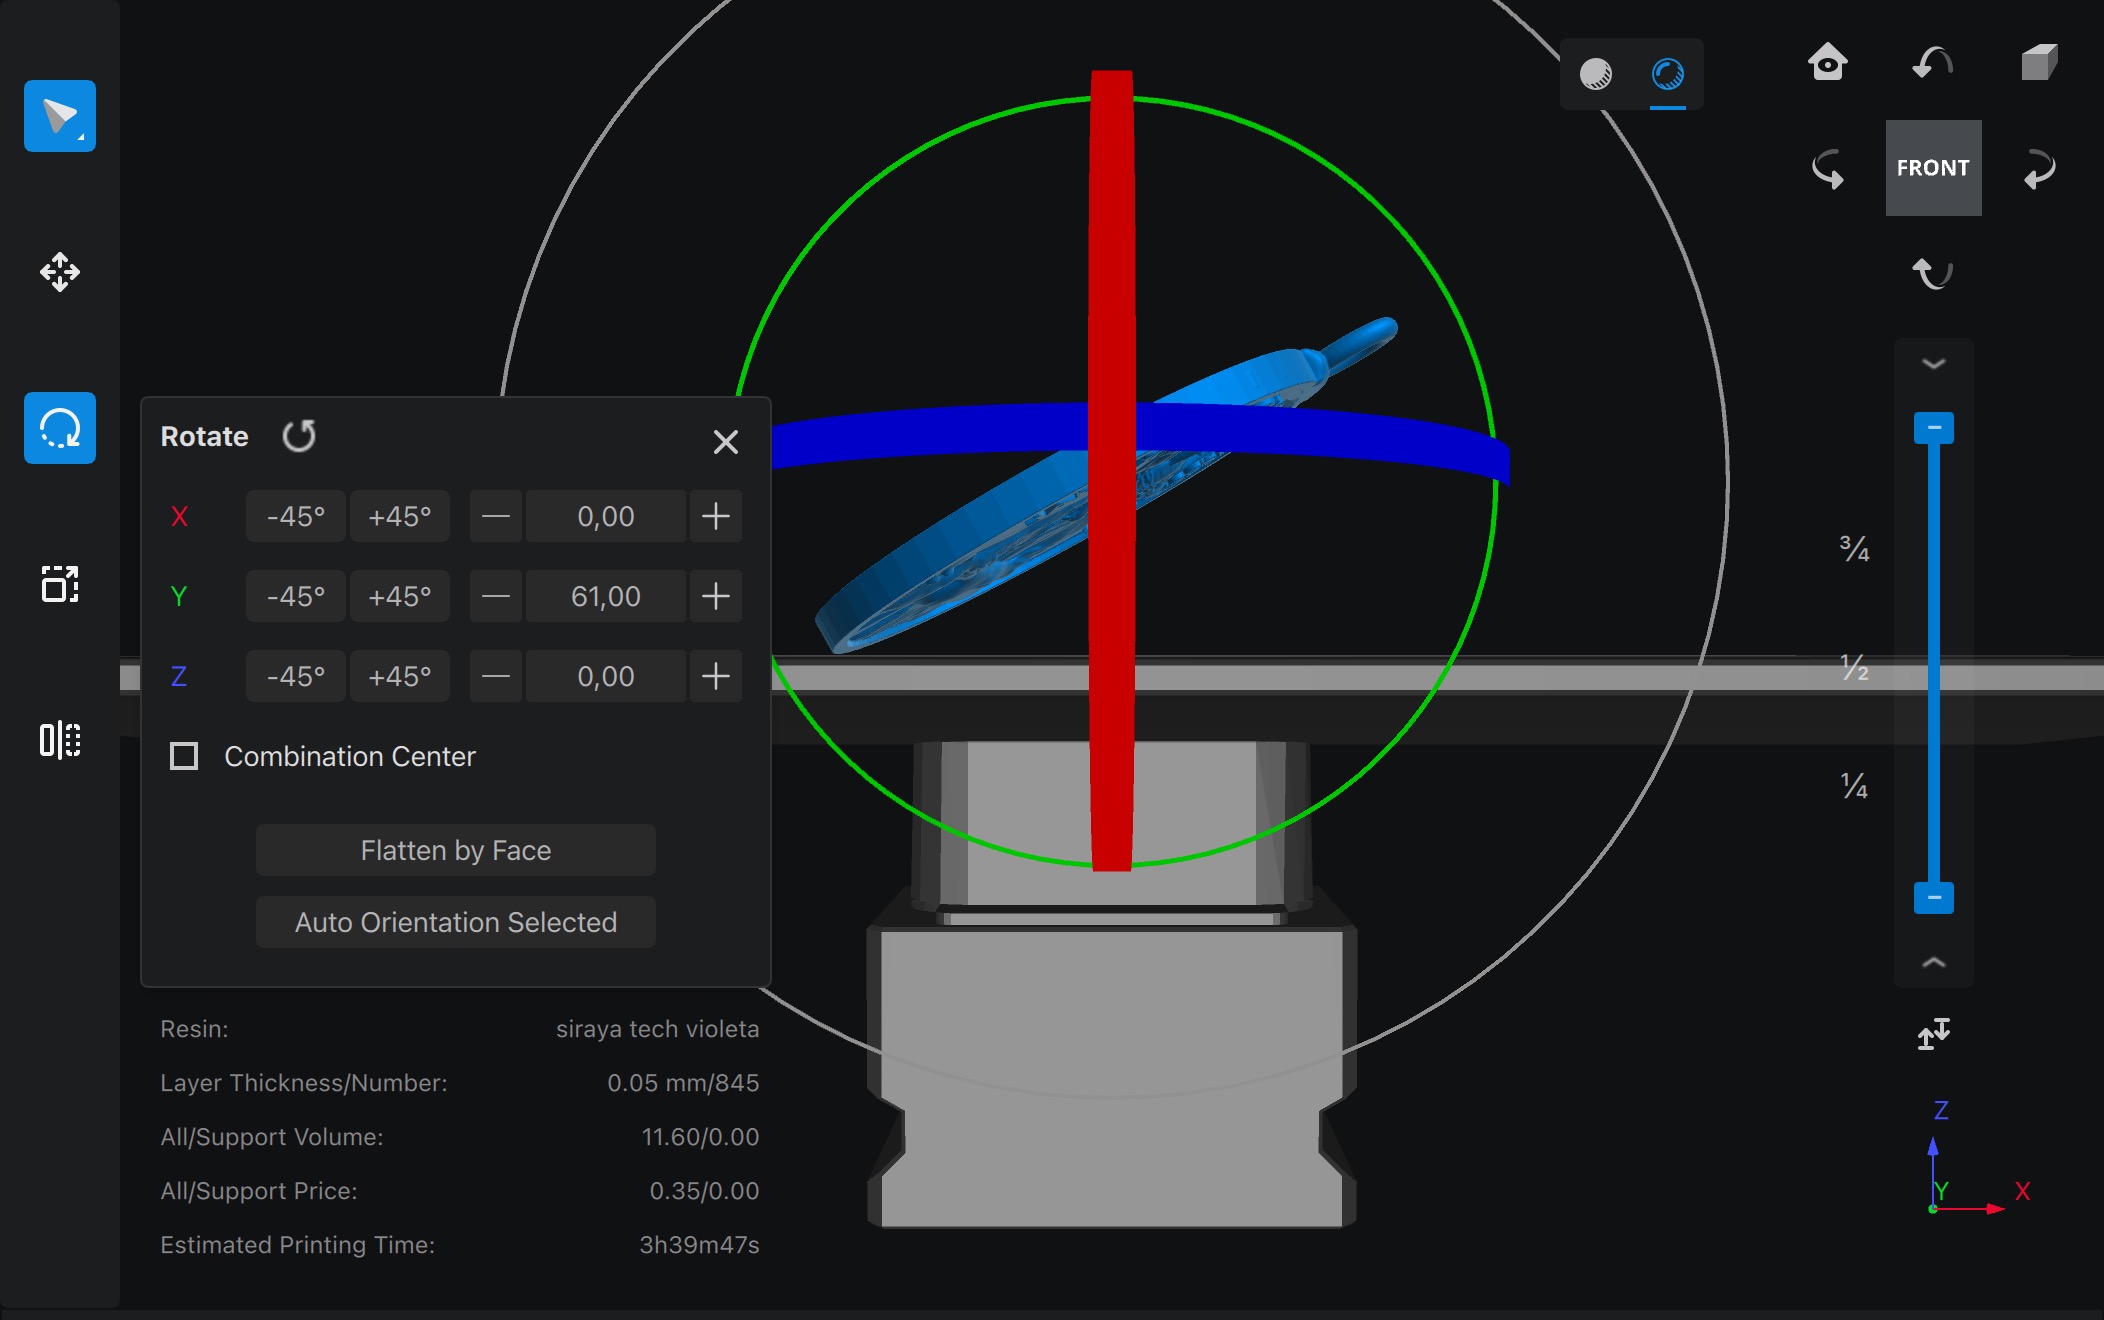
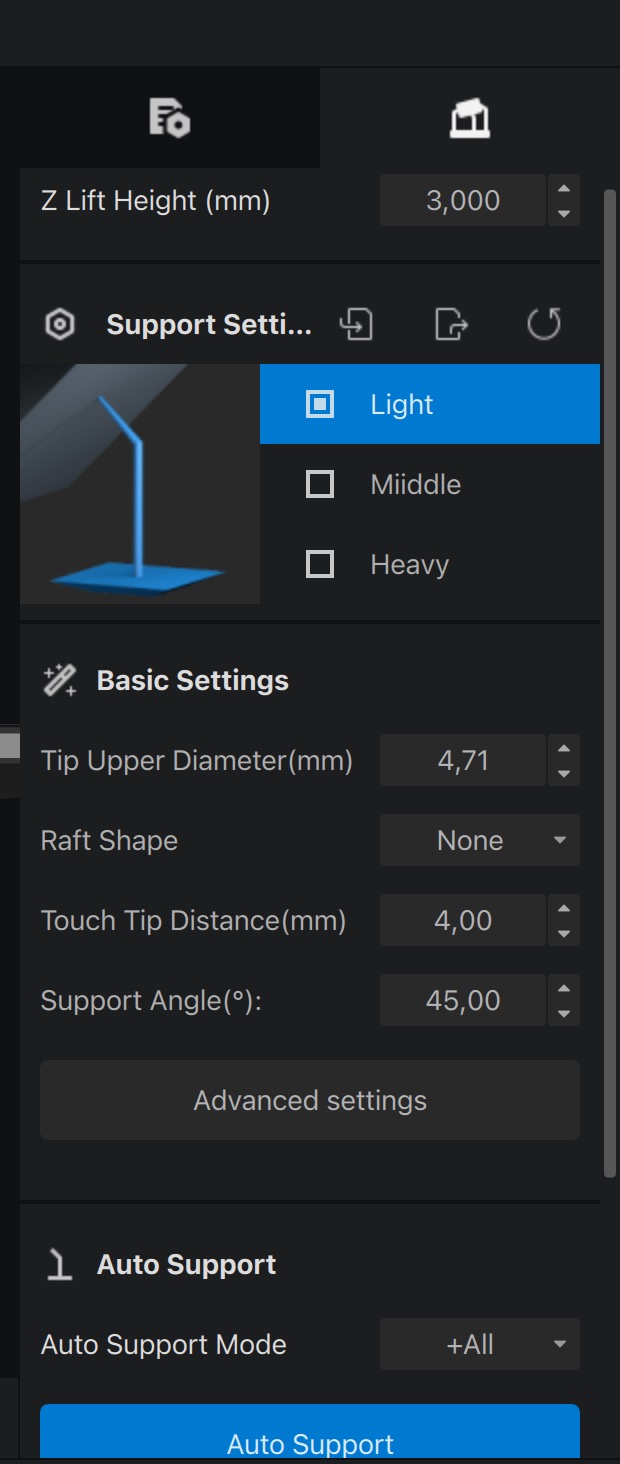
Next, we added supports by clicking the support icon (top right). Using the auto support option, we applied the settings.
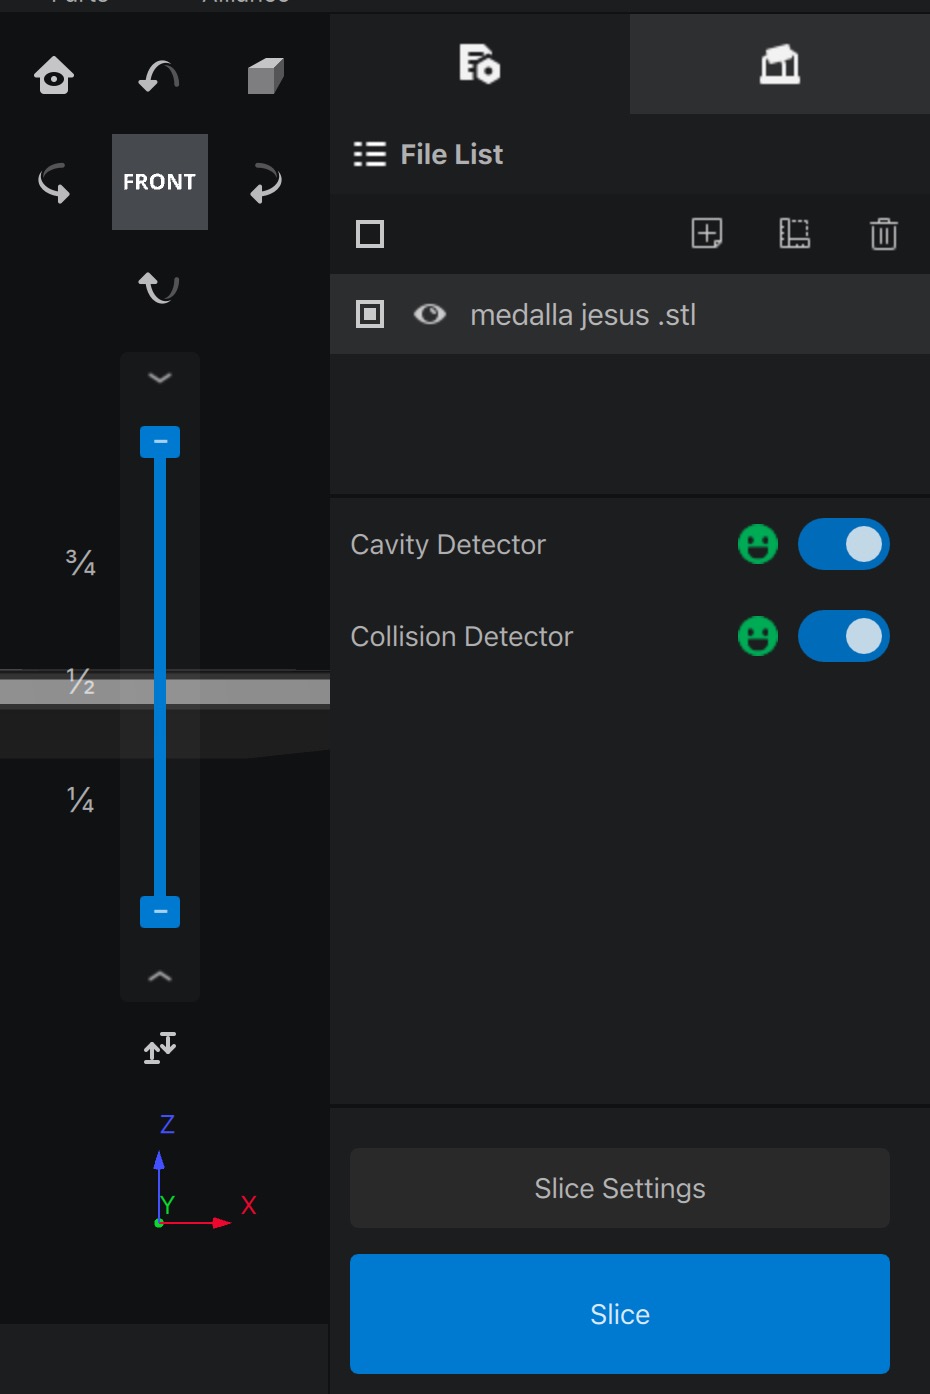
At the bottom left, you can see the printer’s name; click to select a different printer if needed.
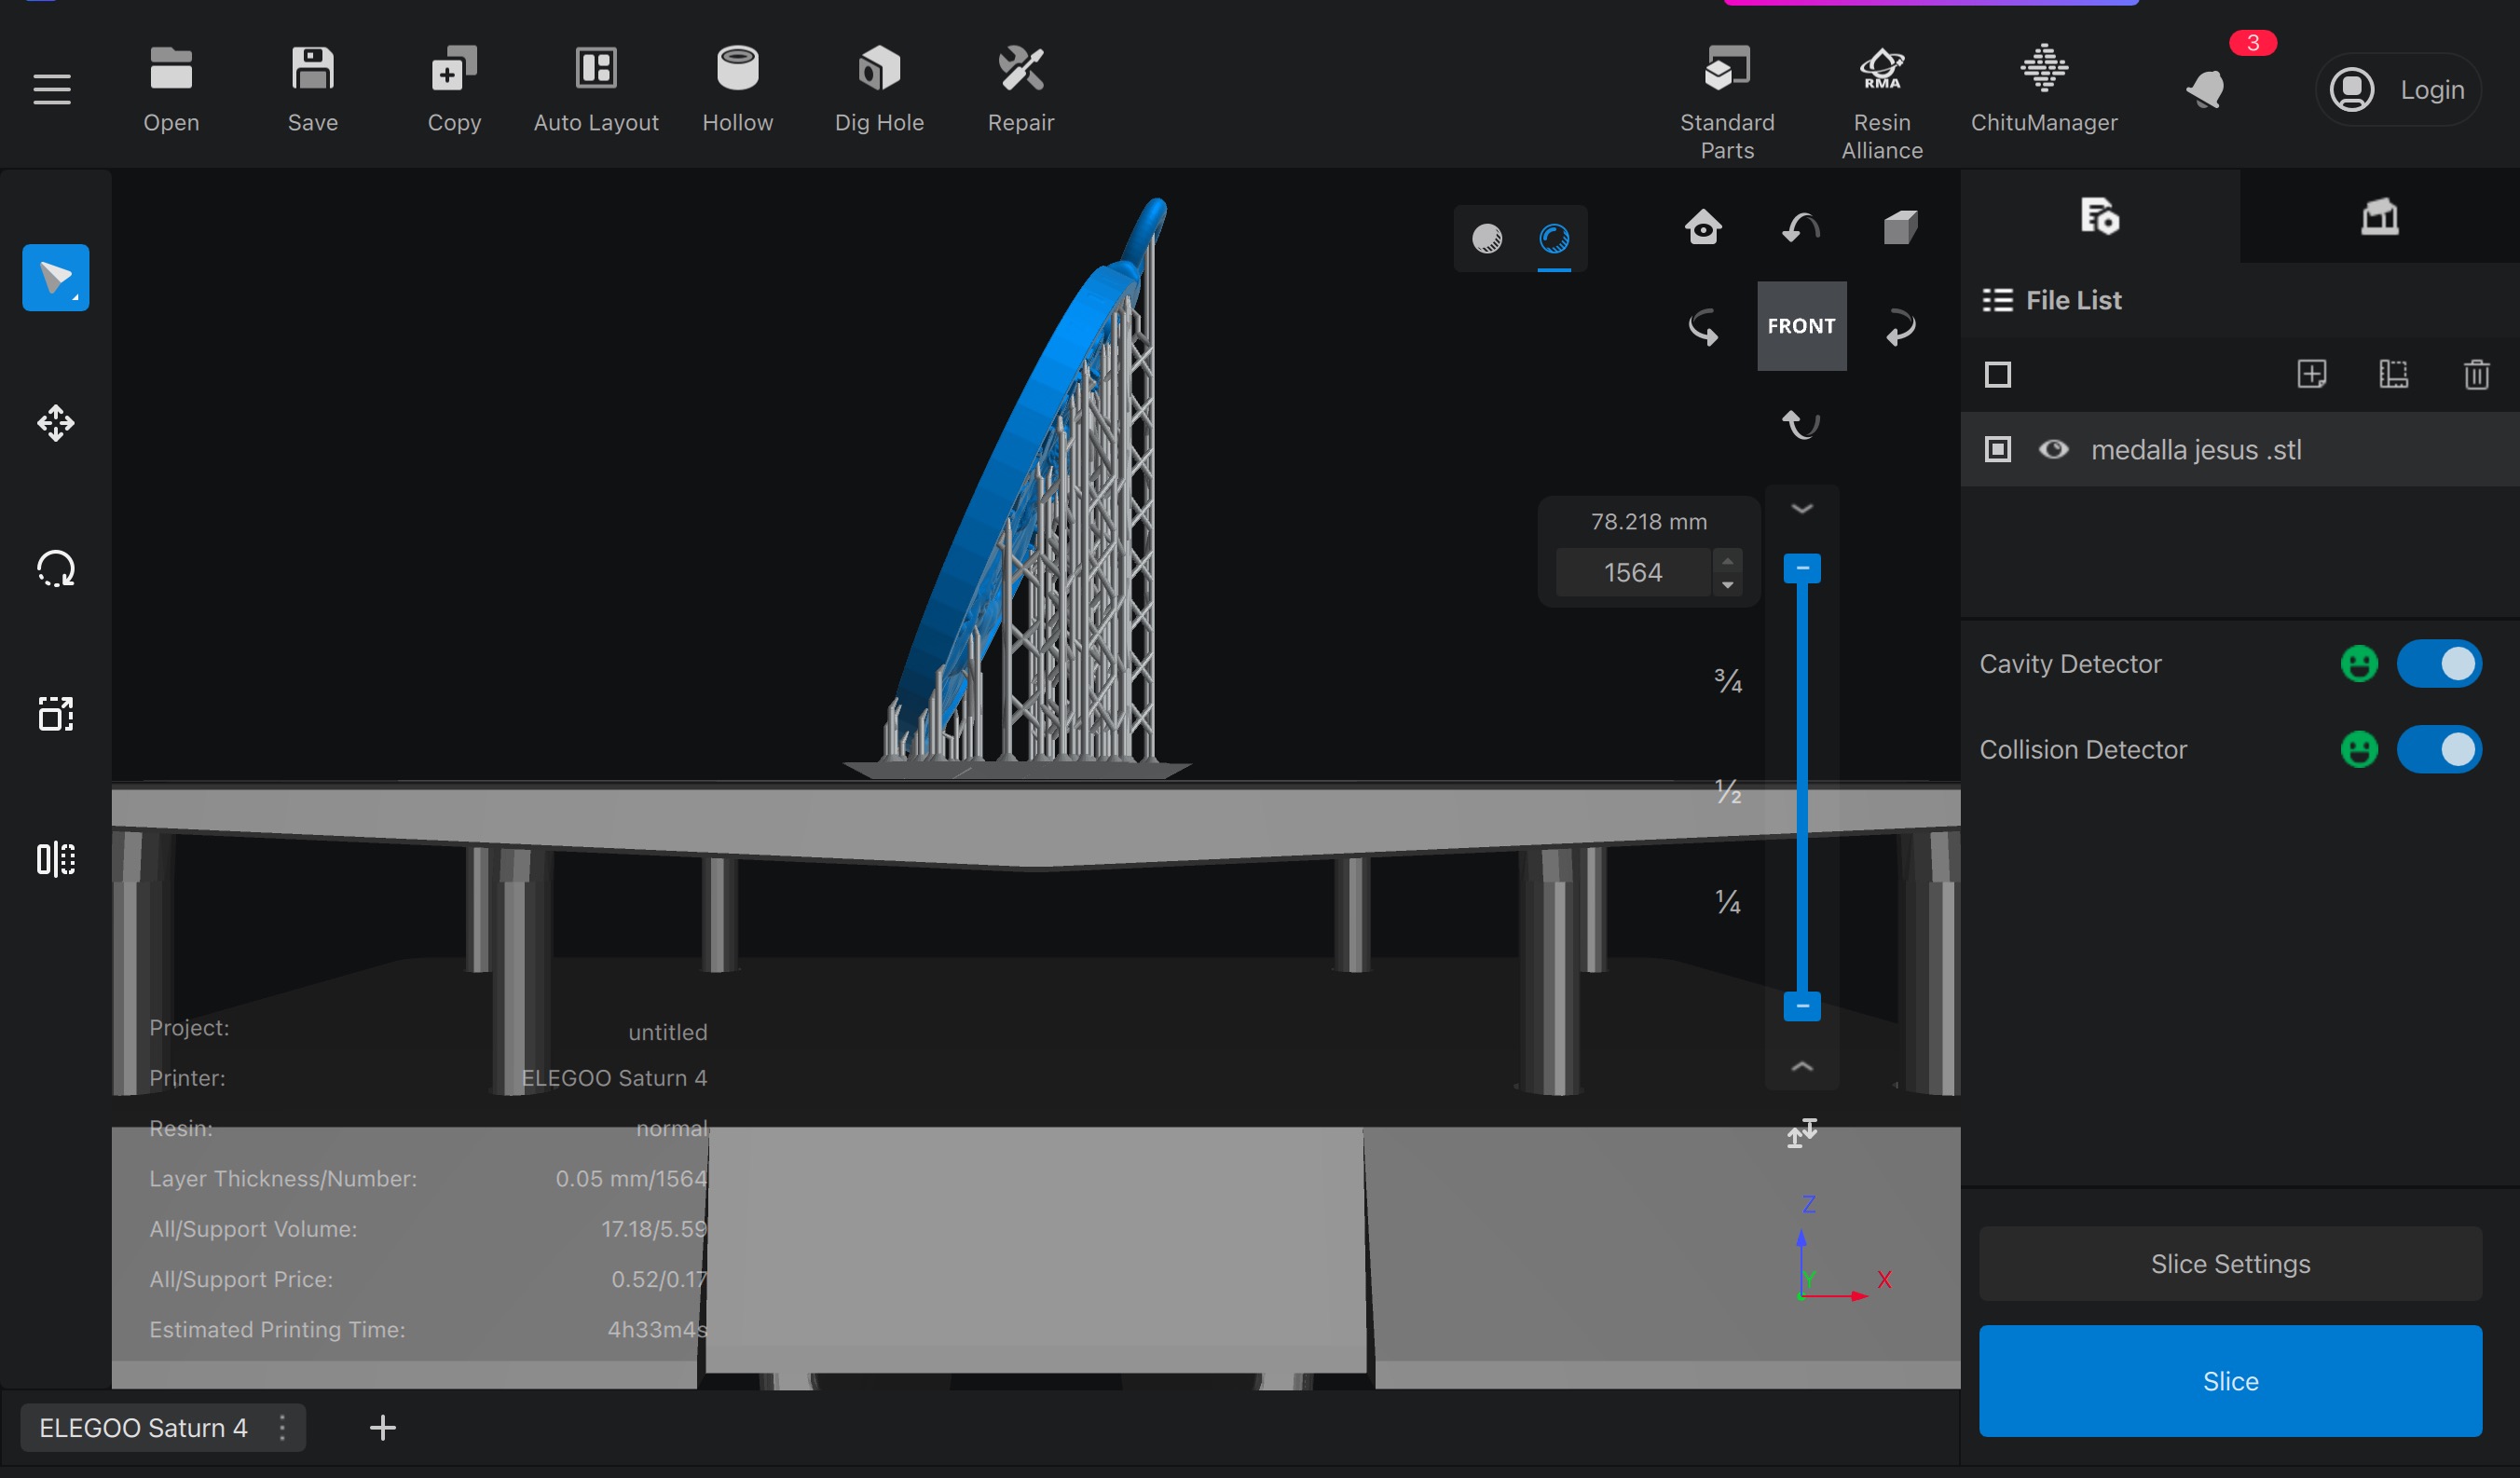
Finally, we clicked "Slice" (bottom right), checked our resin settings, saved it as a code, and transferred it to the printer.
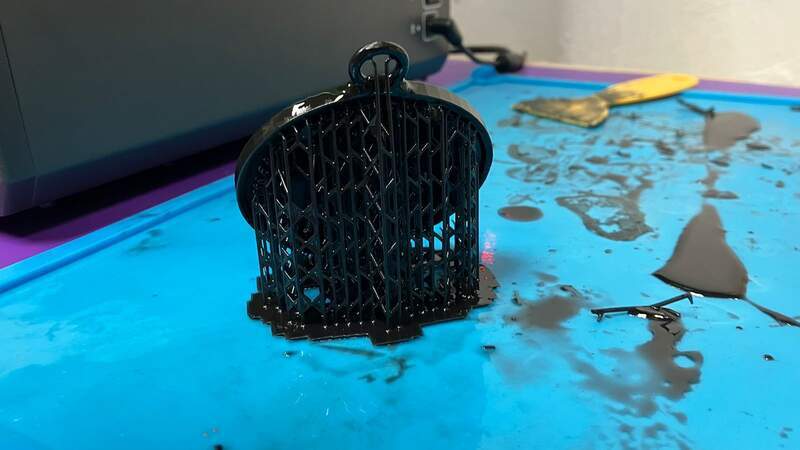
- The final Print
T
he resin print was a huge improvement over PLA. The details came out much sharper, capturing intricate features that PLA couldn’t match. Removing the supports was surprisingly easy, leaving a much cleaner finish. However, the real challenge was the post-processing. Cleaning up the print and handling the resin required extra care.

04—TLDR on SLA Printing
- SLA prints offer superior detail and surface quality compared to FDM.
- Layer height: 0.05mm is a good balance between speed and detail, while 0.025mm provides ultra-fine resolution.
- Supports: Auto-generated supports work well and tilting models reduces suction forces and improves detail.
- Exposure time matters: 1.5–3s per layer is typical for standard resins, but you can always calibrate using a test print (e.g., XP2 Validation Matrix).
- Post-processing is essential: IPA wash, UV curing, and careful handling are needed for a clean final print.
05—TLDR of FDM Print Settings
- For draft parts print them in PLA.
- .4mm nozzle
Standard 0.12mmsetting in Bambu is sufficient for most scenarios. If supports are needed and time is not an issue use tree supports.
- When higher strengths are needed going from 2→3 perimeters will provide a significant improvement in strength.
- For maximum strength parts 6 perimeters at 25% infill is your best strength to print time trade off.
06— 3D Design for FDM Printing
Essentials
- Fillet 90º degree edges in the Horizontal plane— this reduces inertia of printer when changing directions improving quality and stress concentrations in print.
- Base Chamfer - add about ~0.3 mm (initial layer height + layer height) easier part cleaning and reduced chance of elephant foot
- Overhangs/chamfers — Rule of thumb is support after 45º in most cases you should be able to get away with 50º unsupported.
- Bridging can be up to 15mm— that is an expanse that clears an area without support and joins to a side at the same height as its start point
- Vertical Plane Holes — will become undersized because the holes topmost edge is an overhang. This is where you can modify the hole profile to be a teardrop.
- Horizontal Plane Holes - will become undersized as a result of expansion consider enlarging them by .2mm to compensate.
- Ribs and fillets — or both combined, for low profile strengthening of critical areas
Clearance Values
- Nominal clearance value / clearance for draft setting prints— .3mm offset from bass profile for matted components I would still consider this a maximum.
- Moving joint — between .2-.25mm
- Glue Joint / Screw hole— .15-.2mm
Special Cases
- Fastener and heat-set insert clearance — for tapping with a tap print at 90% thread diameter of fastener, Self-Tap (using screw to create threads) 96% diameter of fastener threads, for inserts print at 98% of inserts (major) outer diameter
- Printing threads — min recommendation for usable printed threads is M5 or UNC #10
07— Advanced Considerations for FDM Printing (Focus on Bambu machines)
Section summary: Everything below are notes taken from Bambu’s Wiki and Orca slicers wiki.
Important Concepts and Trouble Shooting
Nozzle Clogging
- Nozzle can be fully clogged or partially clogged— partial clog will result in a non straight or bending extrusion and lowered extrusion volume.
- Heat creep: is heat moving up the hot end from insufficient cooling and can result from chamber temps being too high.
- Removing a clog
- set hot end to 250C
- Push cleaning needle up into the nozzle to where the sock begins
- Confirm nozzle flow by advancing filament and looking for a straight line extrusion
- Perform a cold pull as a final cleaning procedure
- Issues with gear feed check that the extrusion is long smooth + falling veritcally. Feed filament into it manually to isolate the issue as either being an issue with the gear feed or gears vs the nozzle clogging.
General Print Plate Adhesion
- Wash with dish soap, warm water and a rough scrub brush every few prints
- Dont touch the plate— skin oils decrease adhesion
- Raise temp by 5 degree C increments
- Increase the surface area of the bottom through support structures like brims will increase adhesion
- Bambu makes general recommendation of .5mm line width and .25 layer height if you are not getting good first layer adhesion.
- Coat with a layer of liquid glue
X1C Increasing Chamber Heat (for high temp materials)
- General recommendation is probably to push it only to 60C to avoid potential wear on components
- For preheat: raise up the heated bed, set bed to 100C with vent covers and minor insulation it should easily reach 60 C
- Cutoff likely occurs past 70C chamber temp
- Higher heat away from door glass
Core Calibration Concepts that Impact Print Quality/Speed
- Pressure advance— It adjusts the extrusion rate to compensate for changes in acceleration of the print head. These acceleration changes happen around corner moves especially. The faster speeds you are trying to print at the more relevant the tuning of this is.
- Proper pressure advance improves
- Corner fidelity
- Stringing
- Consistent extrusion leading to better surface quality and strength
- Improve print speeds without blobbing and under extrusion
- Proper pressure advance improves
- Retraction— Meant to reduce stringing and oozing by moving the print head off the print surface as it makes non printing moves.
- Max Volumetric Flow Rate— Nozzle size, material properties, hot end capabilities(heat transfer capabilities of materials used matters a lot), increased temperature specifically to reduce material viscosity (use with caution), environmental factor like temperature humidity and filament water content.
Bambu Lab — Filament Calibration
- Auto Flow Dynamics Calibration— Will have issues with soft materials like TPU. Clear filament and filament that has reflective qualities will also mess with the lidar. If a blockage is present this will also mess with expected flow. Calibration results have about 10% jitter or noise from test to test. Multiple materials can be tested at once.
- Auto flow dynamics during print— this only calibrates for 1 material and then uses the default for the other one.
- Manual Flow Dynamics Calibration— Use the pattern mode as it should give you more information ( I think). Run and check the line quality.
- Flow rate calibration— Bambu has its auto flow calibration setting and a manual flow calibration. The auto does not work on filaments that have reflective qualities. It is also not a 100% reliable.
Avoiding Common Print Quality Problems
- Bad overhangs— overhanging elements are not getting cooled fast enough for the print speed
- Enable “slow down for overhangs”
- Enable “supports”
- Nozzle temp could be reduced if speed is reduced
- Increase aux part cooling and main part cooling fans
- Open door and glass cover for better heat dissipation (mainly for TPU PETG and PLA)
- Bad Bridges — Bridges are sagging or disconnected
- Bridge disconnects—Speed is too high and flow is too low
- Bridge sags— speed is low and flow is high causing the bridge to sag
- Cooling is too low increase part cooling
- Model Warping — Falling Off — Collapsing
- Collapsing / Dislocating
- If the center of gravity is too high ie the print is tall an thin it might get knocked off from vibration.
- Consider a different orientation or slower print speeds/ accelerations.
- Enable support
- Nozzle might have hit print surface
- A dirty nozzle sticking or too low a nozzle temperature can cause this.
- Crossings within a single layer for certain infills (such as Grid, Triangles, etc.) can cause this. Switch to Line, Rectilinear, Gyroid, or Concentric.
- Reduce sparse infill feed
- If the center of gravity is too high ie the print is tall an thin it might get knocked off from vibration.
- Warping
- The model pulls off of the build plate
- Bed temp is too low
- Chamber temp is too low cooling fans too high so the model is cooling to fast or unevenly
- Large model size with high infill
- Change infill to gyroid to better reduce shrinkage
- No Brim
- Add a large brim to increase adhesion
- Clean heat bed use glue make sure its been trammed + leveled and make sure its hot enough
- Reduce contact surface area of model by printing it at a 45 degree angle with supports
- Under extreme circumstances you can clamp the build plate down with clips
- The model pulls off of the build plate
- Collapsing / Dislocating
- Filament sticks to Nozzle
- Damp filament
- Flow ratio is too high/nozzle is worn
- Print speed to low or temp is too high
- Used nozzle wipe
- Too many discontinuous jumping areas in model
- General Under Extrusion
- Stuck spool or tangled filament
- Worn PTFE tubes
- Extruder gear stuck or damaged
- Nozzle blockage
- Print speed is not keeping up with volumetric flow
- Under Extrusion at Corners
- Pressure Advance (PA) value is too low causing it not to have the right extrusion during acceleration changes. This can be adjusted in AMS filament area. This what the auto calibration should be able to sort out.
- Stringing and Oozing
- Damp filament
- Long travel too small a retraction distance or slow retraction speed… too much retraction can cause a plug though do not exceed 2mm
- ‘Avoid crossing walls’ can decrease stringing with models that have many discontinuous areas probably increases print time.
- Too high nozzle temp
- Worn nozzle
- Inconsistant Surface Gloss
- This has too do with inconsistencies in the printer speed when printing different areas. The amount of melting is different so its fluid and drying properties are different causing different finishes.
- Re-slice and reduce the speed of the outer wall
- This has too do with inconsistencies in the printer speed when printing different areas. The amount of melting is different so its fluid and drying properties are different causing different finishes.
- Fishscale
- occurs with low layer height— increase temp and print speed
- Interlayer Cracking
- A bunch of things could be the culprit make sure the enough filament is being extruded and its hot enough, you are not cooling it too much and the filament does not suck.
- Seam
- Not avoidable but can be more pronounced with the head traveling betwen multiple models.
Bambu Slicer
Process Parameter at Different Levels
Notes: The value that is set at the smallest level will be used and wil override all other values.
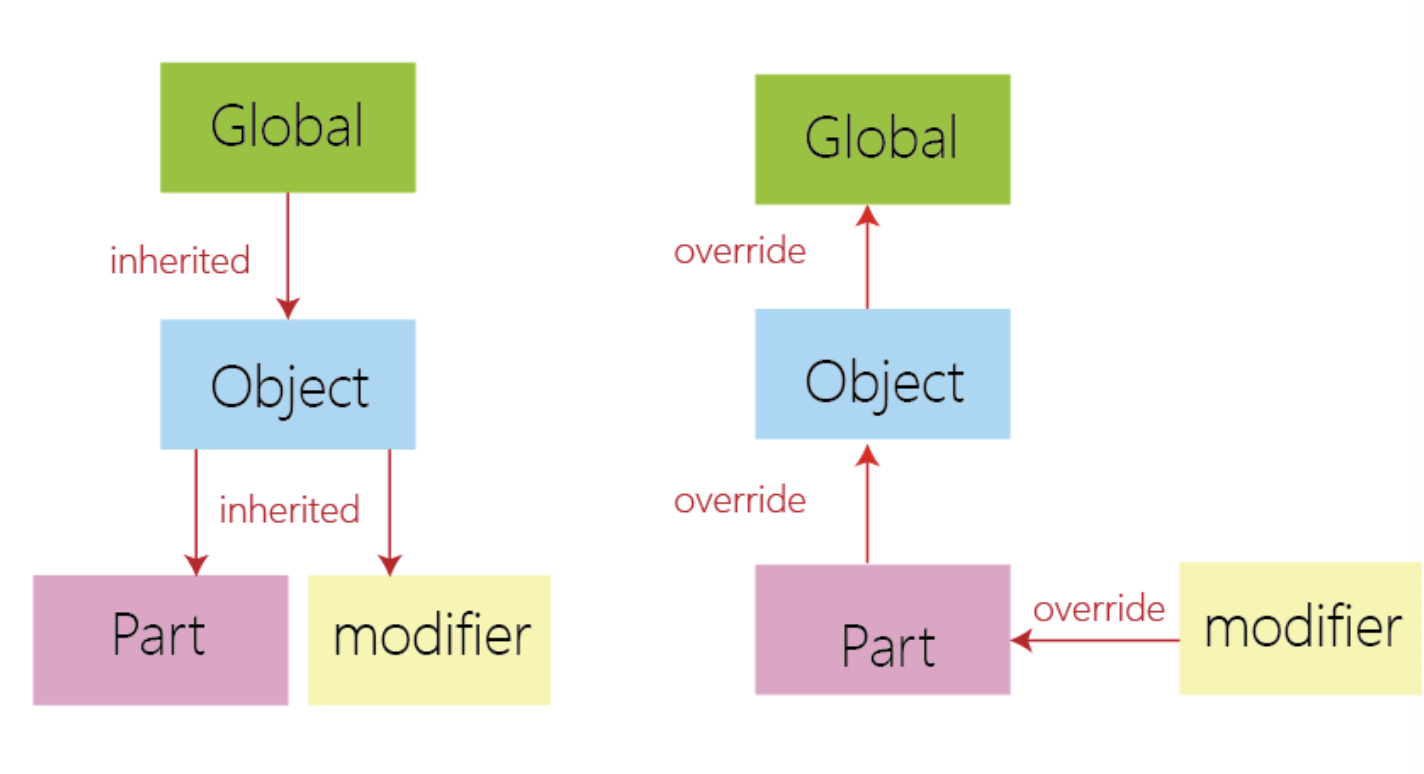
- Global- Everything that does not have a lower level designation already is impacted.
- Object— May have nested parts and will impact anything that is a part of that object or object group.
- Part— only impacts a specific part that would be found in a group.
- Modifier — only impacts a designated region of an option using a null solid to designate the impacted zone of an object. In a sense it is a fake ‘part’.
Printing Multiple Plates
- Its easy create a multi plate print ‘slice all’ send and then when the first is finished cancel out and choose the next from the folder.
Skip Object on Printer Function
- Problem objects can be selected and skipped mid print on the x1 carbon.
Advanced Optimization for FDM: Finish / Precision / Print Time
Wall number— number of walls used
- Typically worth adjusting up before adjusting up infill
Seem Position — where it places the seam on the model
- Aligned is default
- Scarf is new and can in non super glossy prints hide the seam well
- Contour tries to blend the seam
Precision Settings
- X-Y hole compensation
- X-Y contour compensation
- Elephant foot compensation
- Precise z Height
- Improves z height precision
Ironing Features
- All solid layer will decrease overall layer lines visability— will take a very long time
- Top most layers at default work great without tweaking settings typically
Wall Generator— Classic or Arachne
- Arachne gives variable wall thicknesses produces smoother curves and more accurate dimensions. Many setting use the defaults under typical circumstances.
Advanced
- Wall Ordering— order of printed outer walls
- Inner Wall / Outer Wall / Inner Wall for 3 wall or Outer/Inner if I have 2 walls — this will improve acuracy and surface finish
- Avoid crossing walls— reduce sagging and improve surface quality.
- Bridge flow and thick bridges — can be adjusted to improve briding quality
Variable Layer Height
- Use it if you can tolerate the extra print time. Switch the slicer focus view mode to analyze the results