
Week 12
Introduction
This page outlines the steps followed during week 12 of the Fab Academy assignments.
The tasks for this week involved Mechanical and Machine Design and the following assignments:
- Design a machine that includes mechanism + actuation + automation + application.
- Build the mechanical parts and operate it manually.
- Document the group project and your individual contribution.
- Actuate and automate your machine.
- Document the group project and your individual contribution.
group assignment:
Individual assignment:
Let's start.....................

Group assignment
For this week, I decided to create a bubble gum dispenser machine. The machine is designed to dispense bubble gum balls in a controlled manner, I based the design on the machines I have seen in the past, which are typically used in supermarkets or candy stores. The machine is designed to be operated with motion, allowing users to dispense a single bubble gum ball at a time.
The next image is a reference image of a bubble gum dispenser machine that I found online.
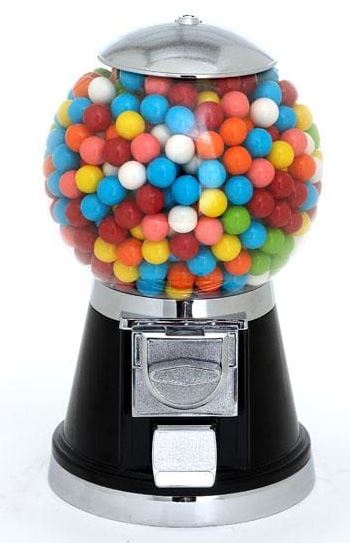
Image source Bubble Gum Machine
To design the machine, I decided to use a SolidWorks and then print the parts using a 3D printer. The design process involved creating the mechanical parts that would allow the machine to function properly. The design includes a mechanism for dispensing the bubble gum balls, this mechanism consists of a rotating gear system that allows the machine to dispense one bubble gum ball at a time.
Some of the parts that I designed for the machine include:
- A base to hold the machine.
- A rotating gear system to dispense the bubble gum balls.
- A cover to protect the internal components of the machine.
- A mechanism to hold the bubble gum balls in place.
Now that I have explained what I considered before the design process, I will show you the steps I followed to create the machine and how I designed.
Designing the machine
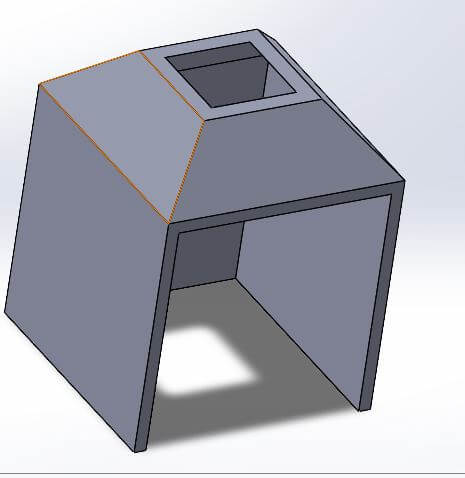
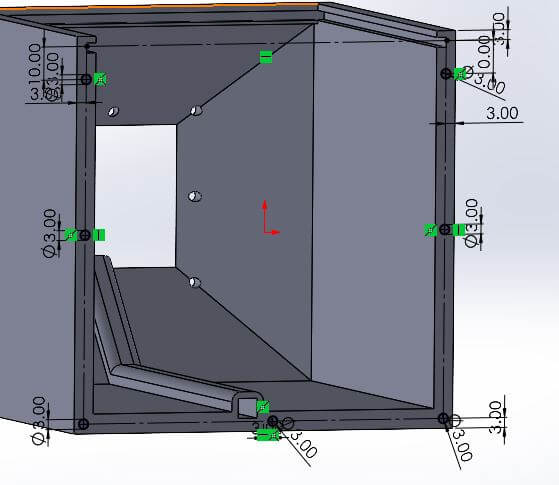
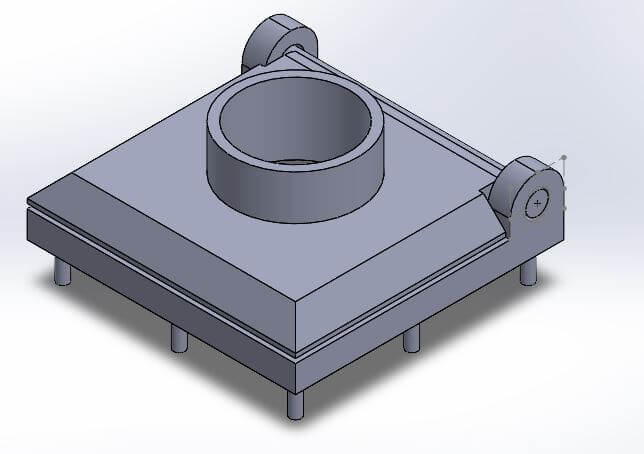
The first part I started designing was the body of the machine, the part that would hold the bubble gum balls and the mechanism to dispense them.
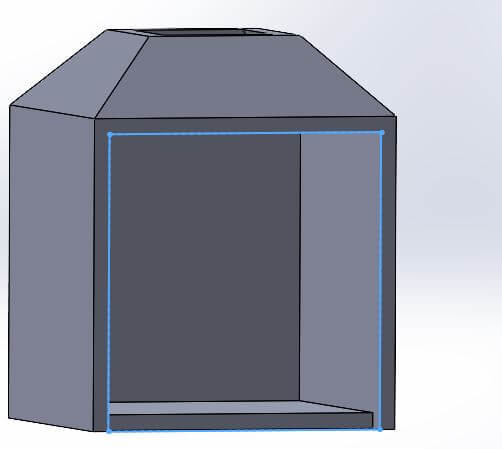
I started by creating a new design in SolidWorks and then I created a new sketch on the top plane. I used the rectangle tool to create a rectangle that would be the base of the machine. I then extruded the rectangle to create a solid body. Then use the tool shell to create a hollow body, this would allow me to add the gum balls inside the machine.
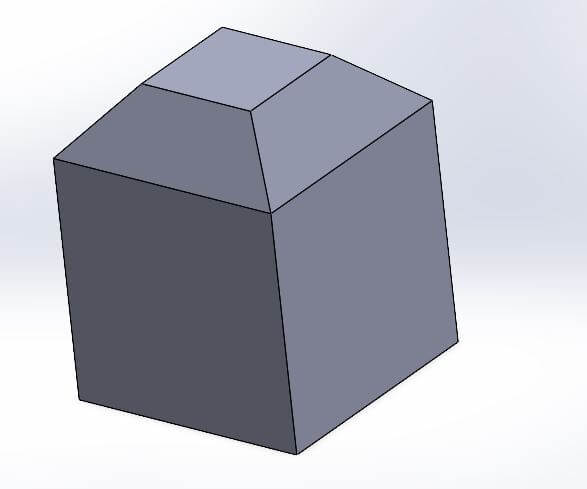
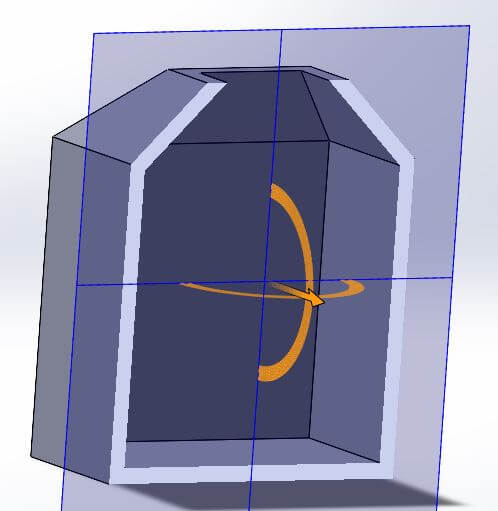
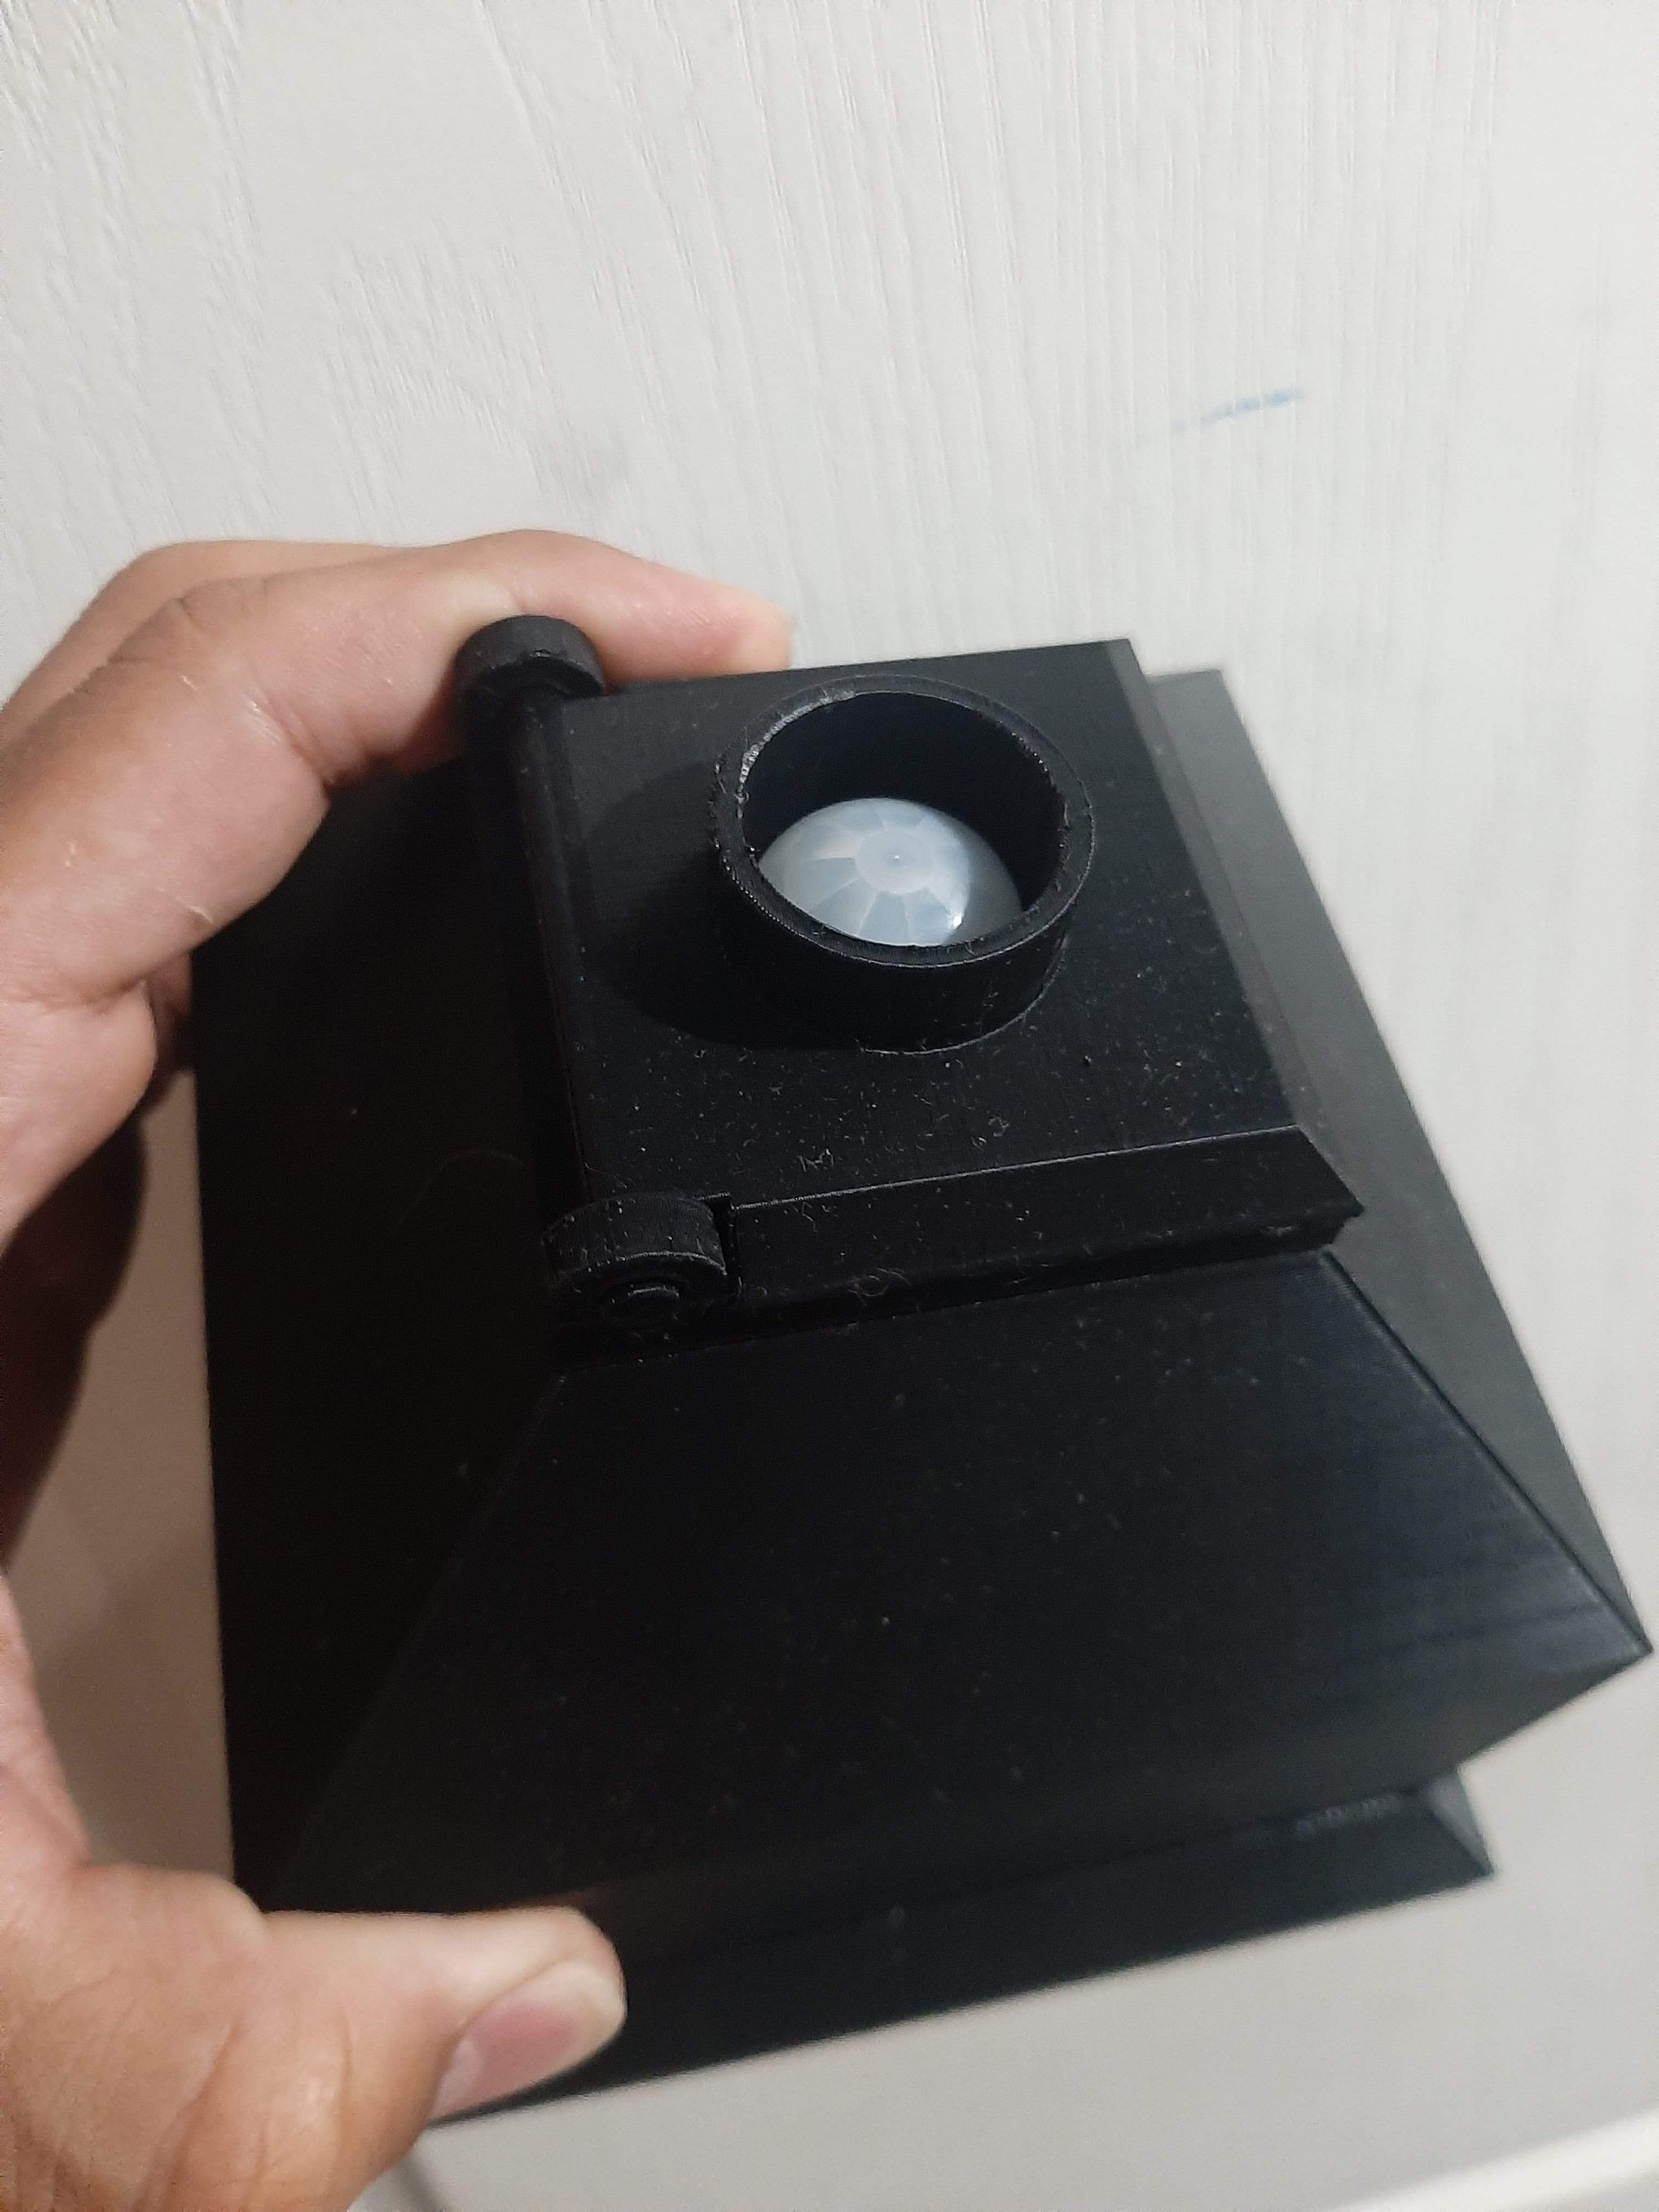
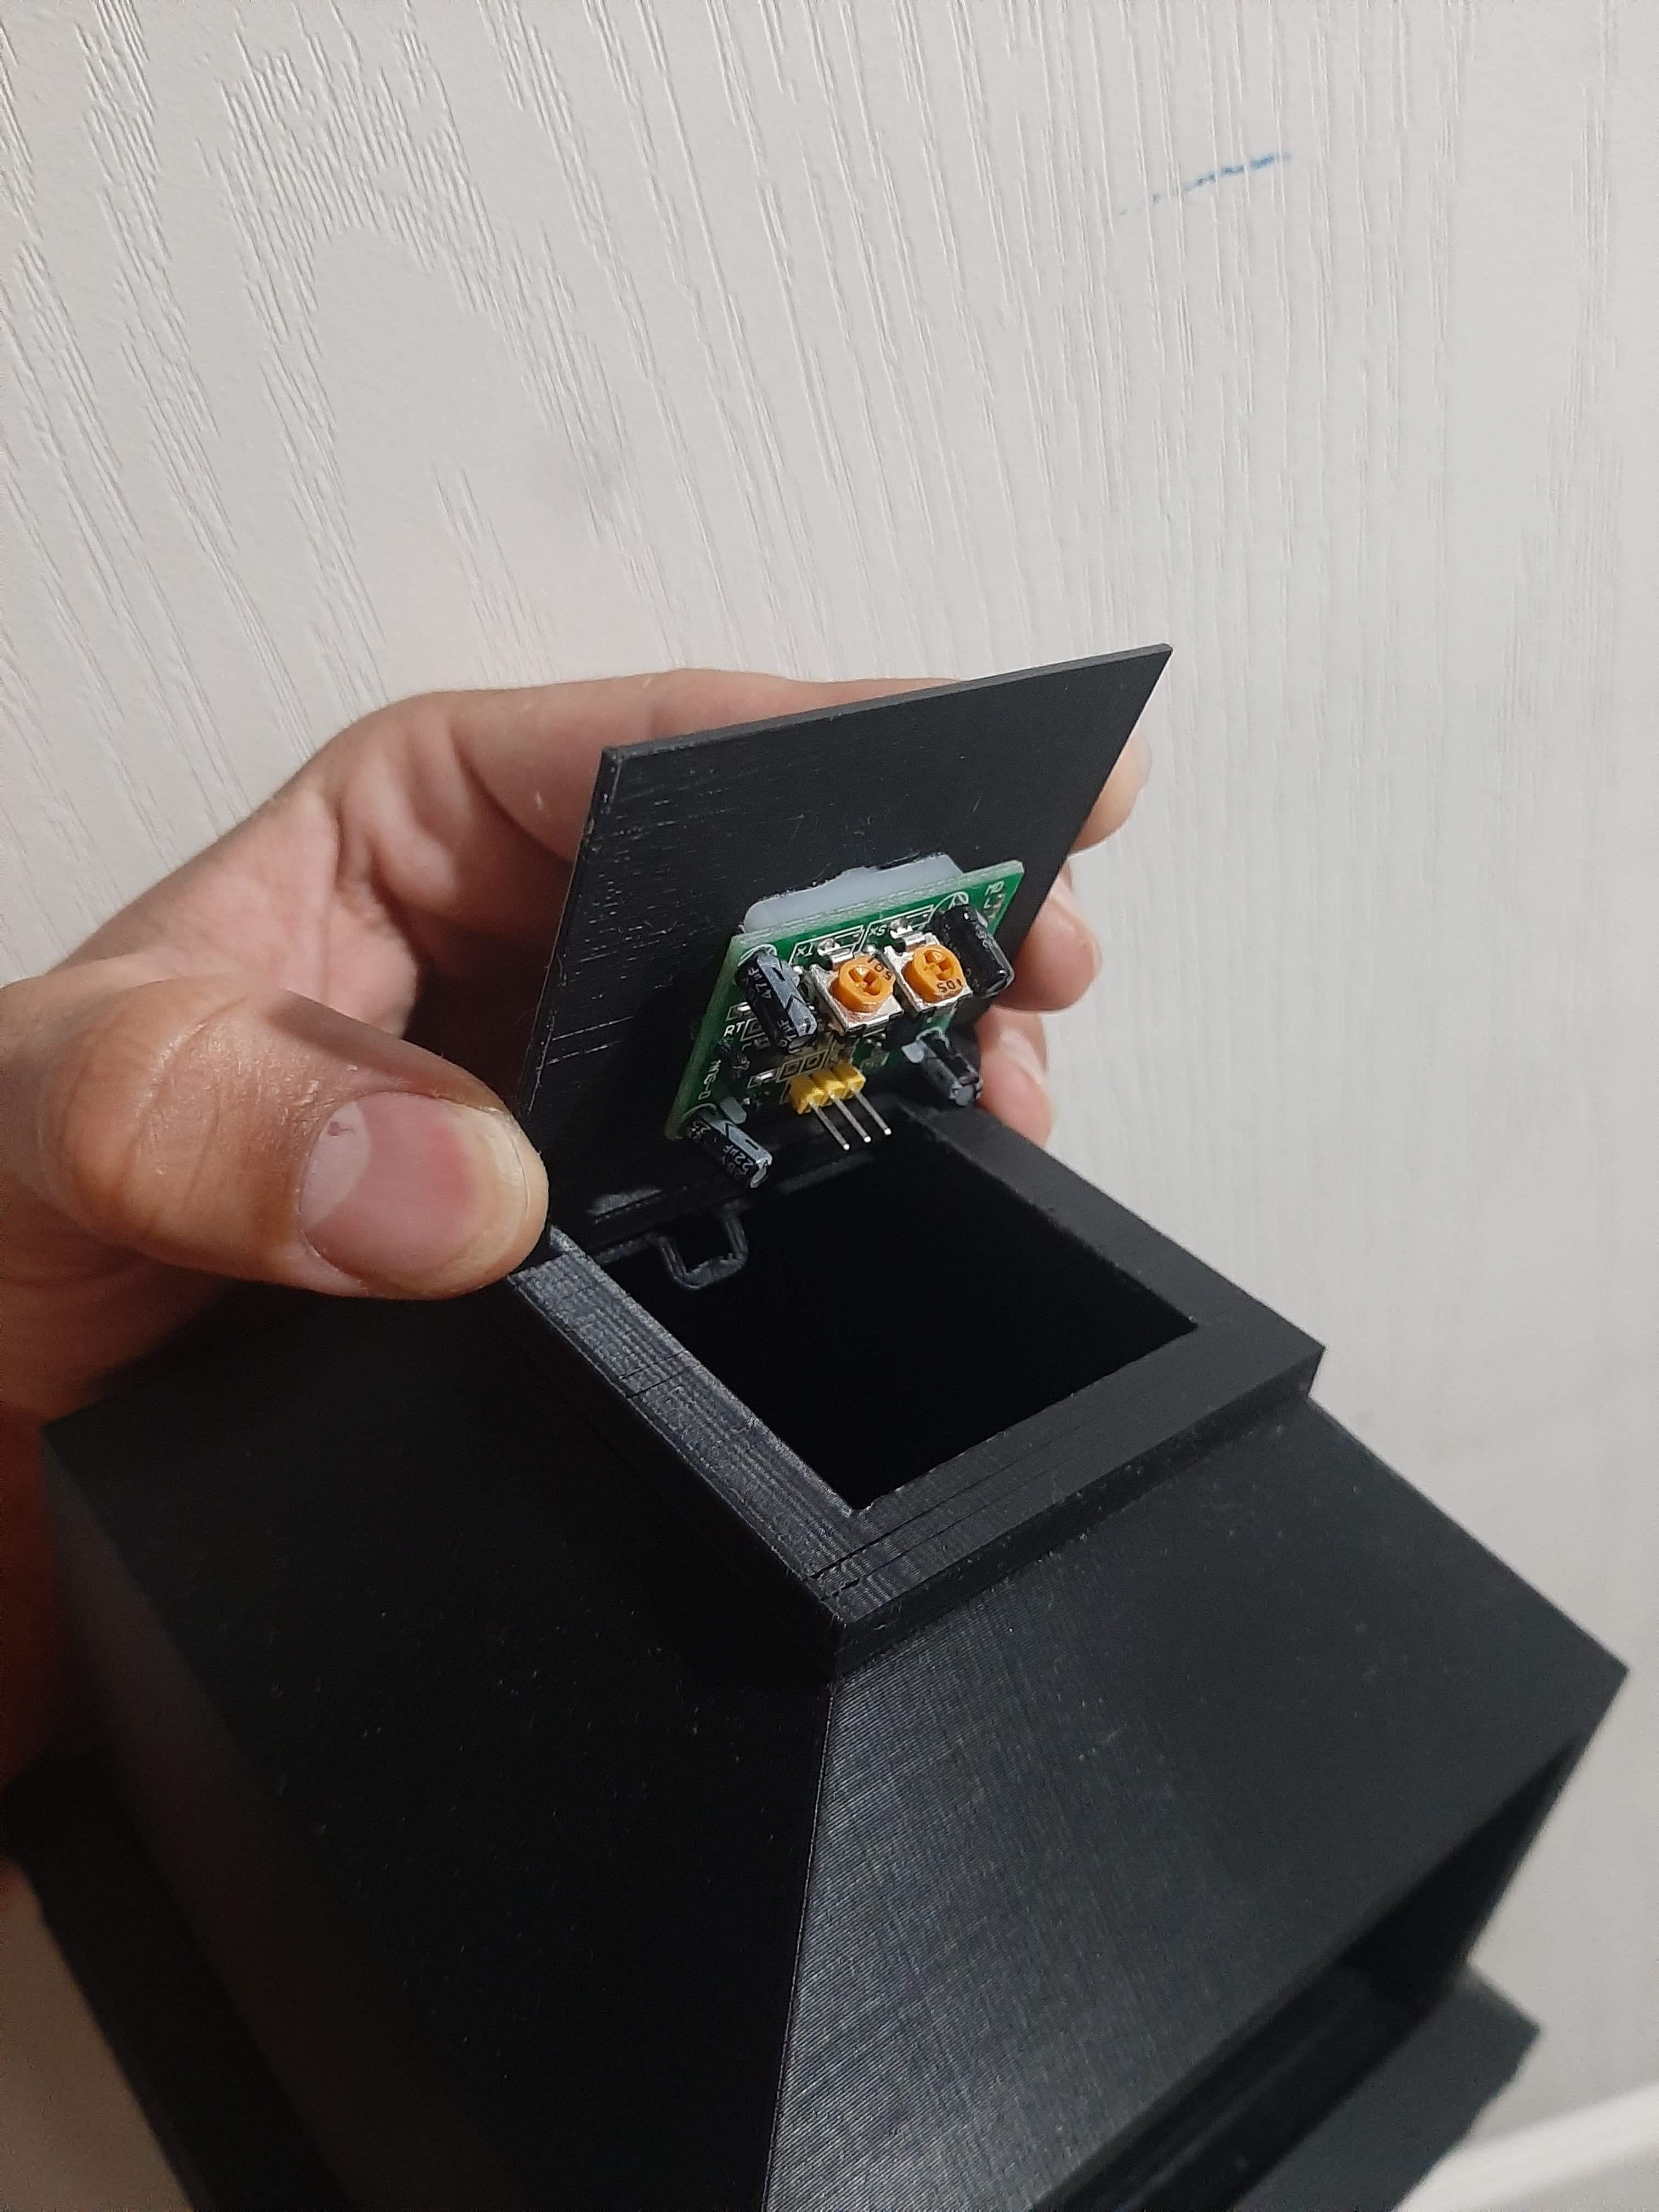
I included a hole in the top of the body to allow the bubble gum balls to be inserted into the machine. Also this hole would have a cap that would contain the motion sensor this can help us in the future when we start to automate the machine.
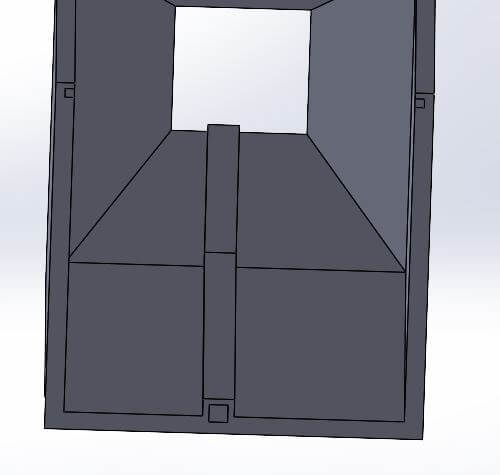
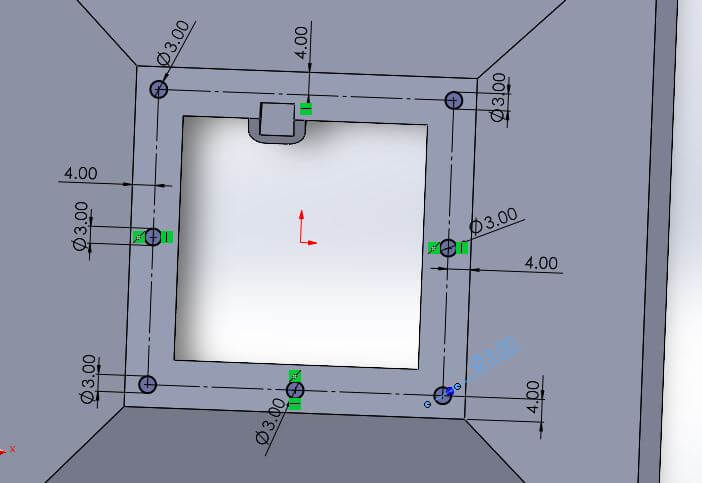
I also added some details to the body, like holes and pins that would allow me to attach the rest of the parts and not using screws to hold them in place.
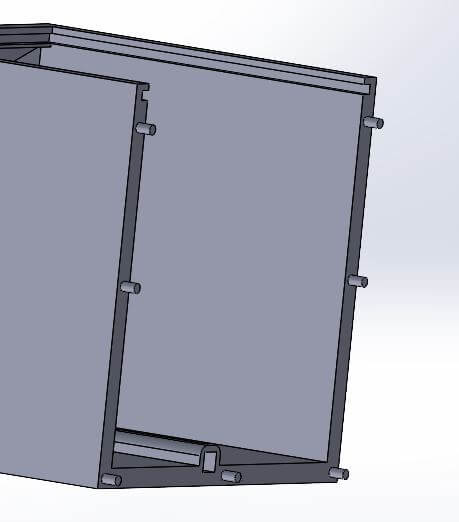
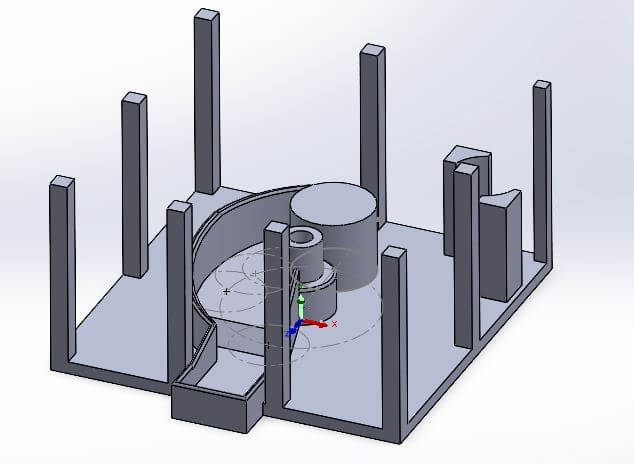
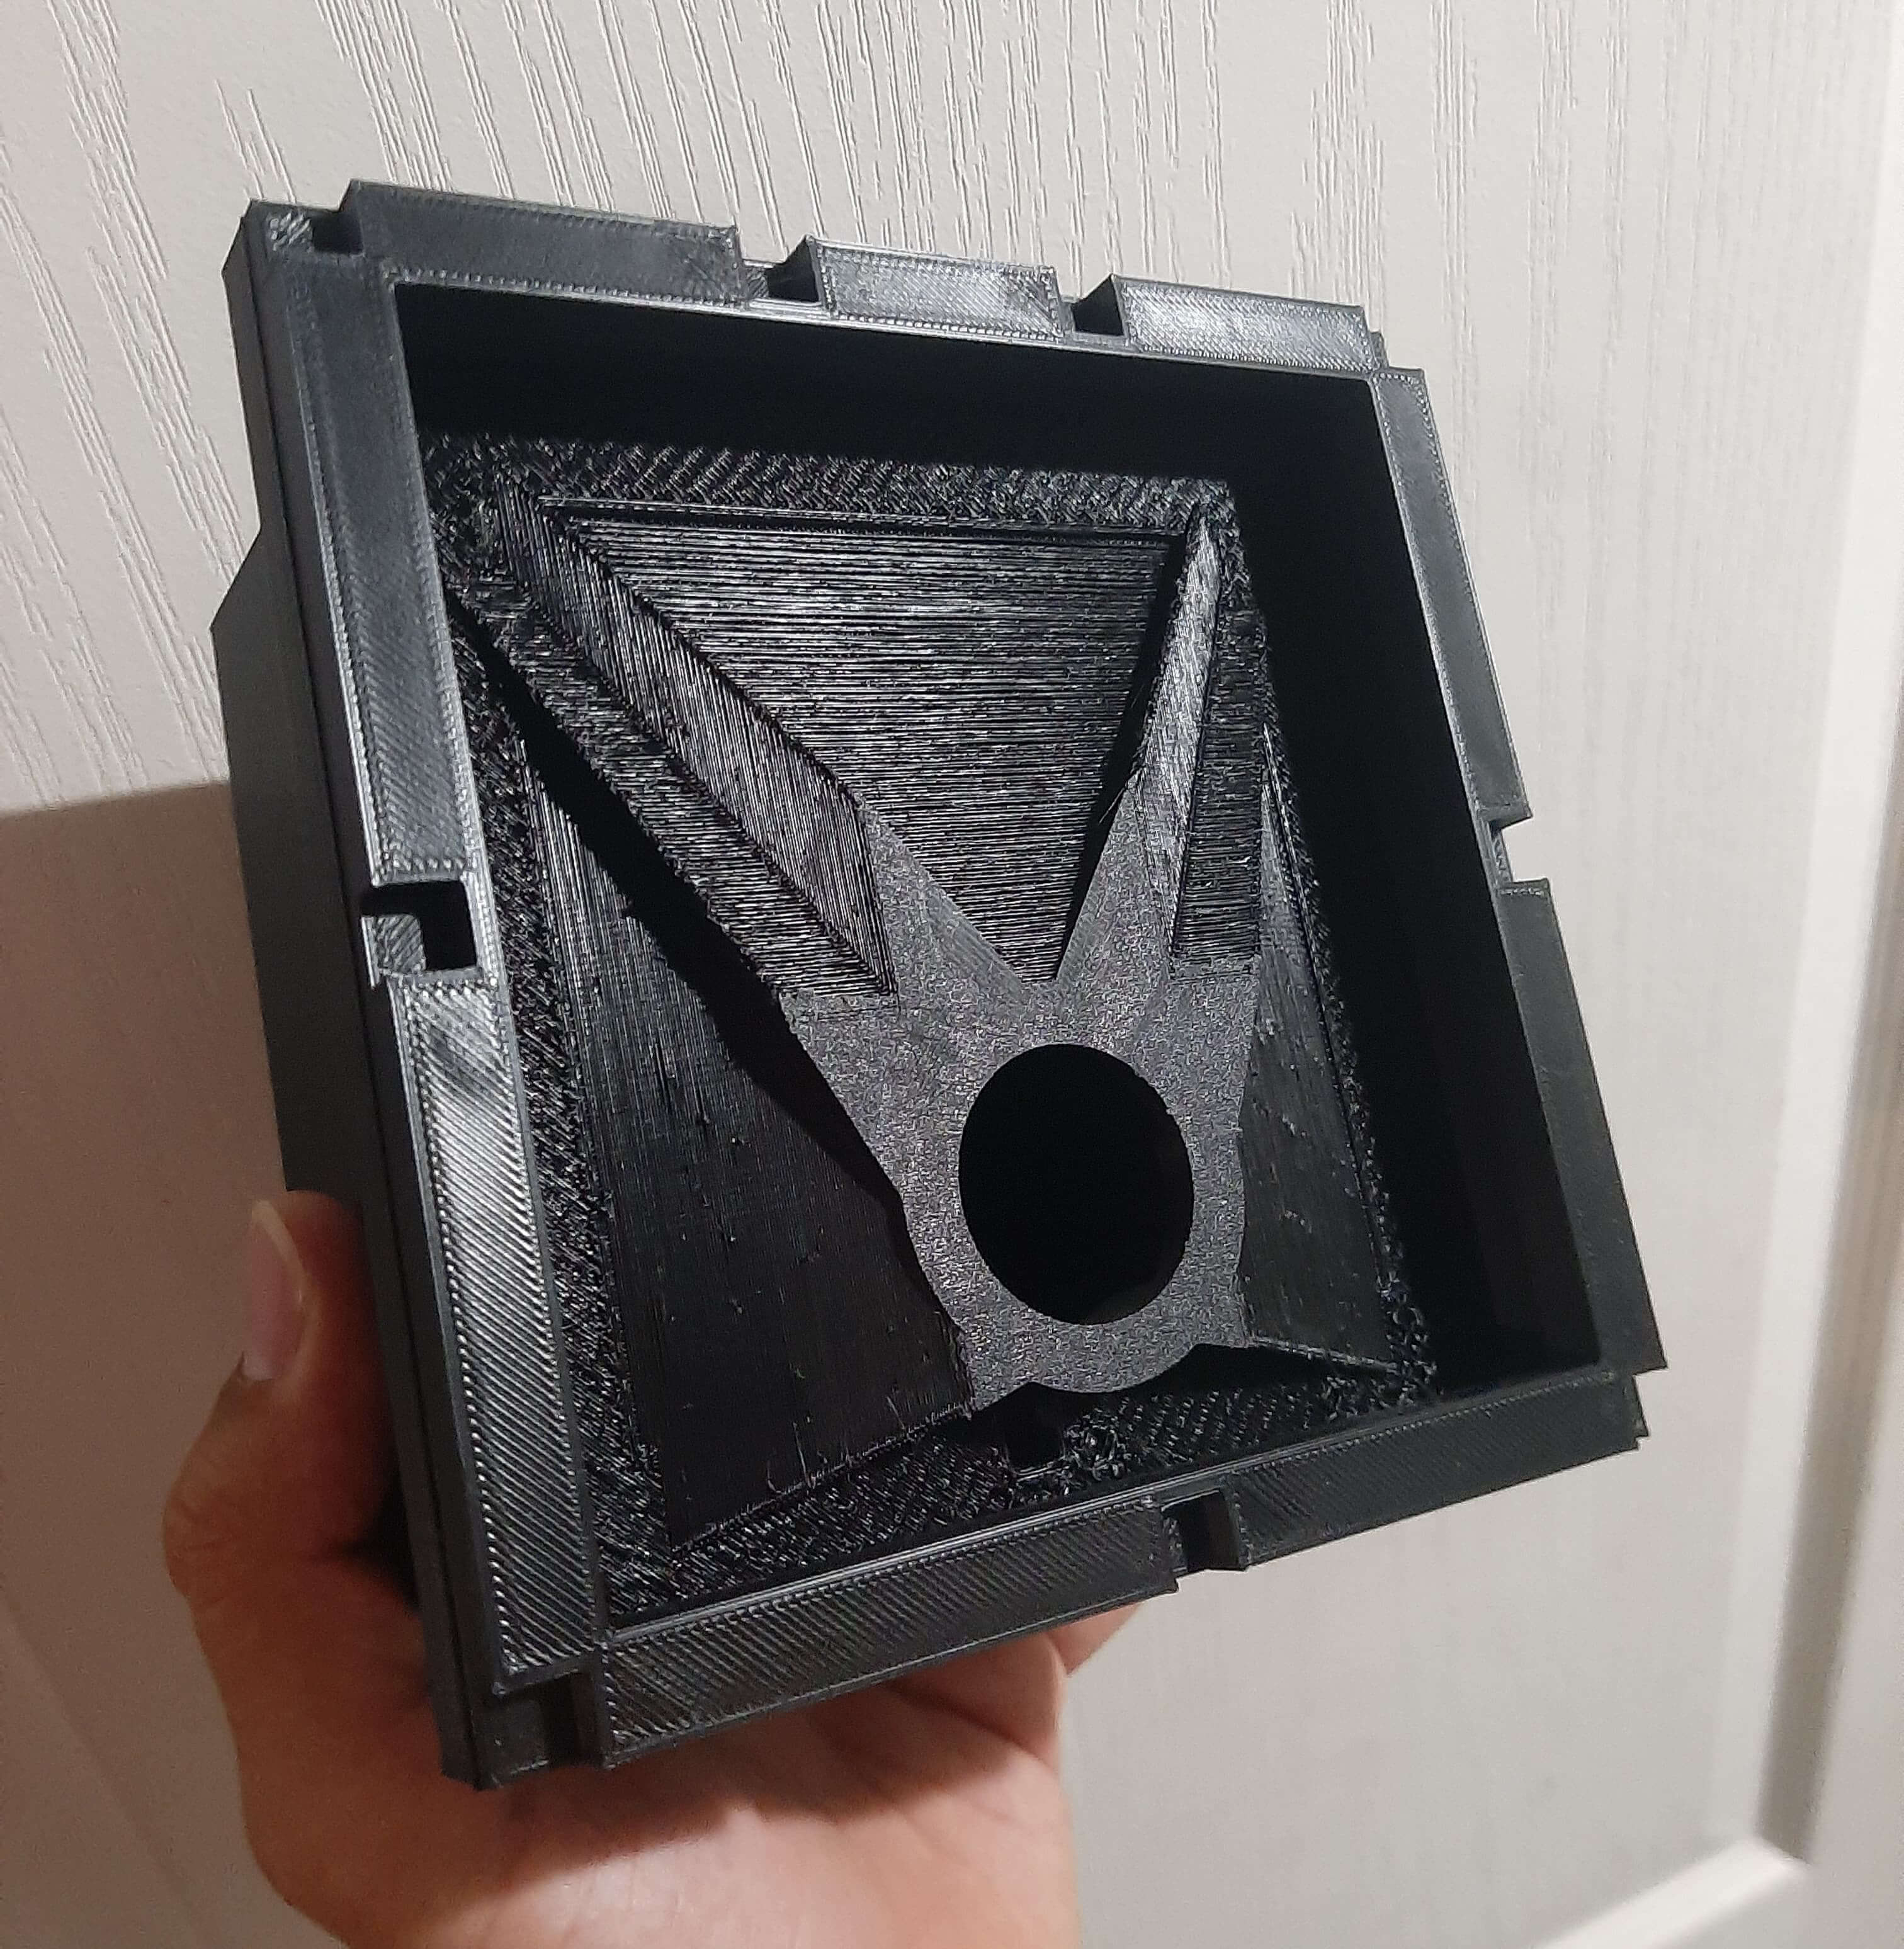
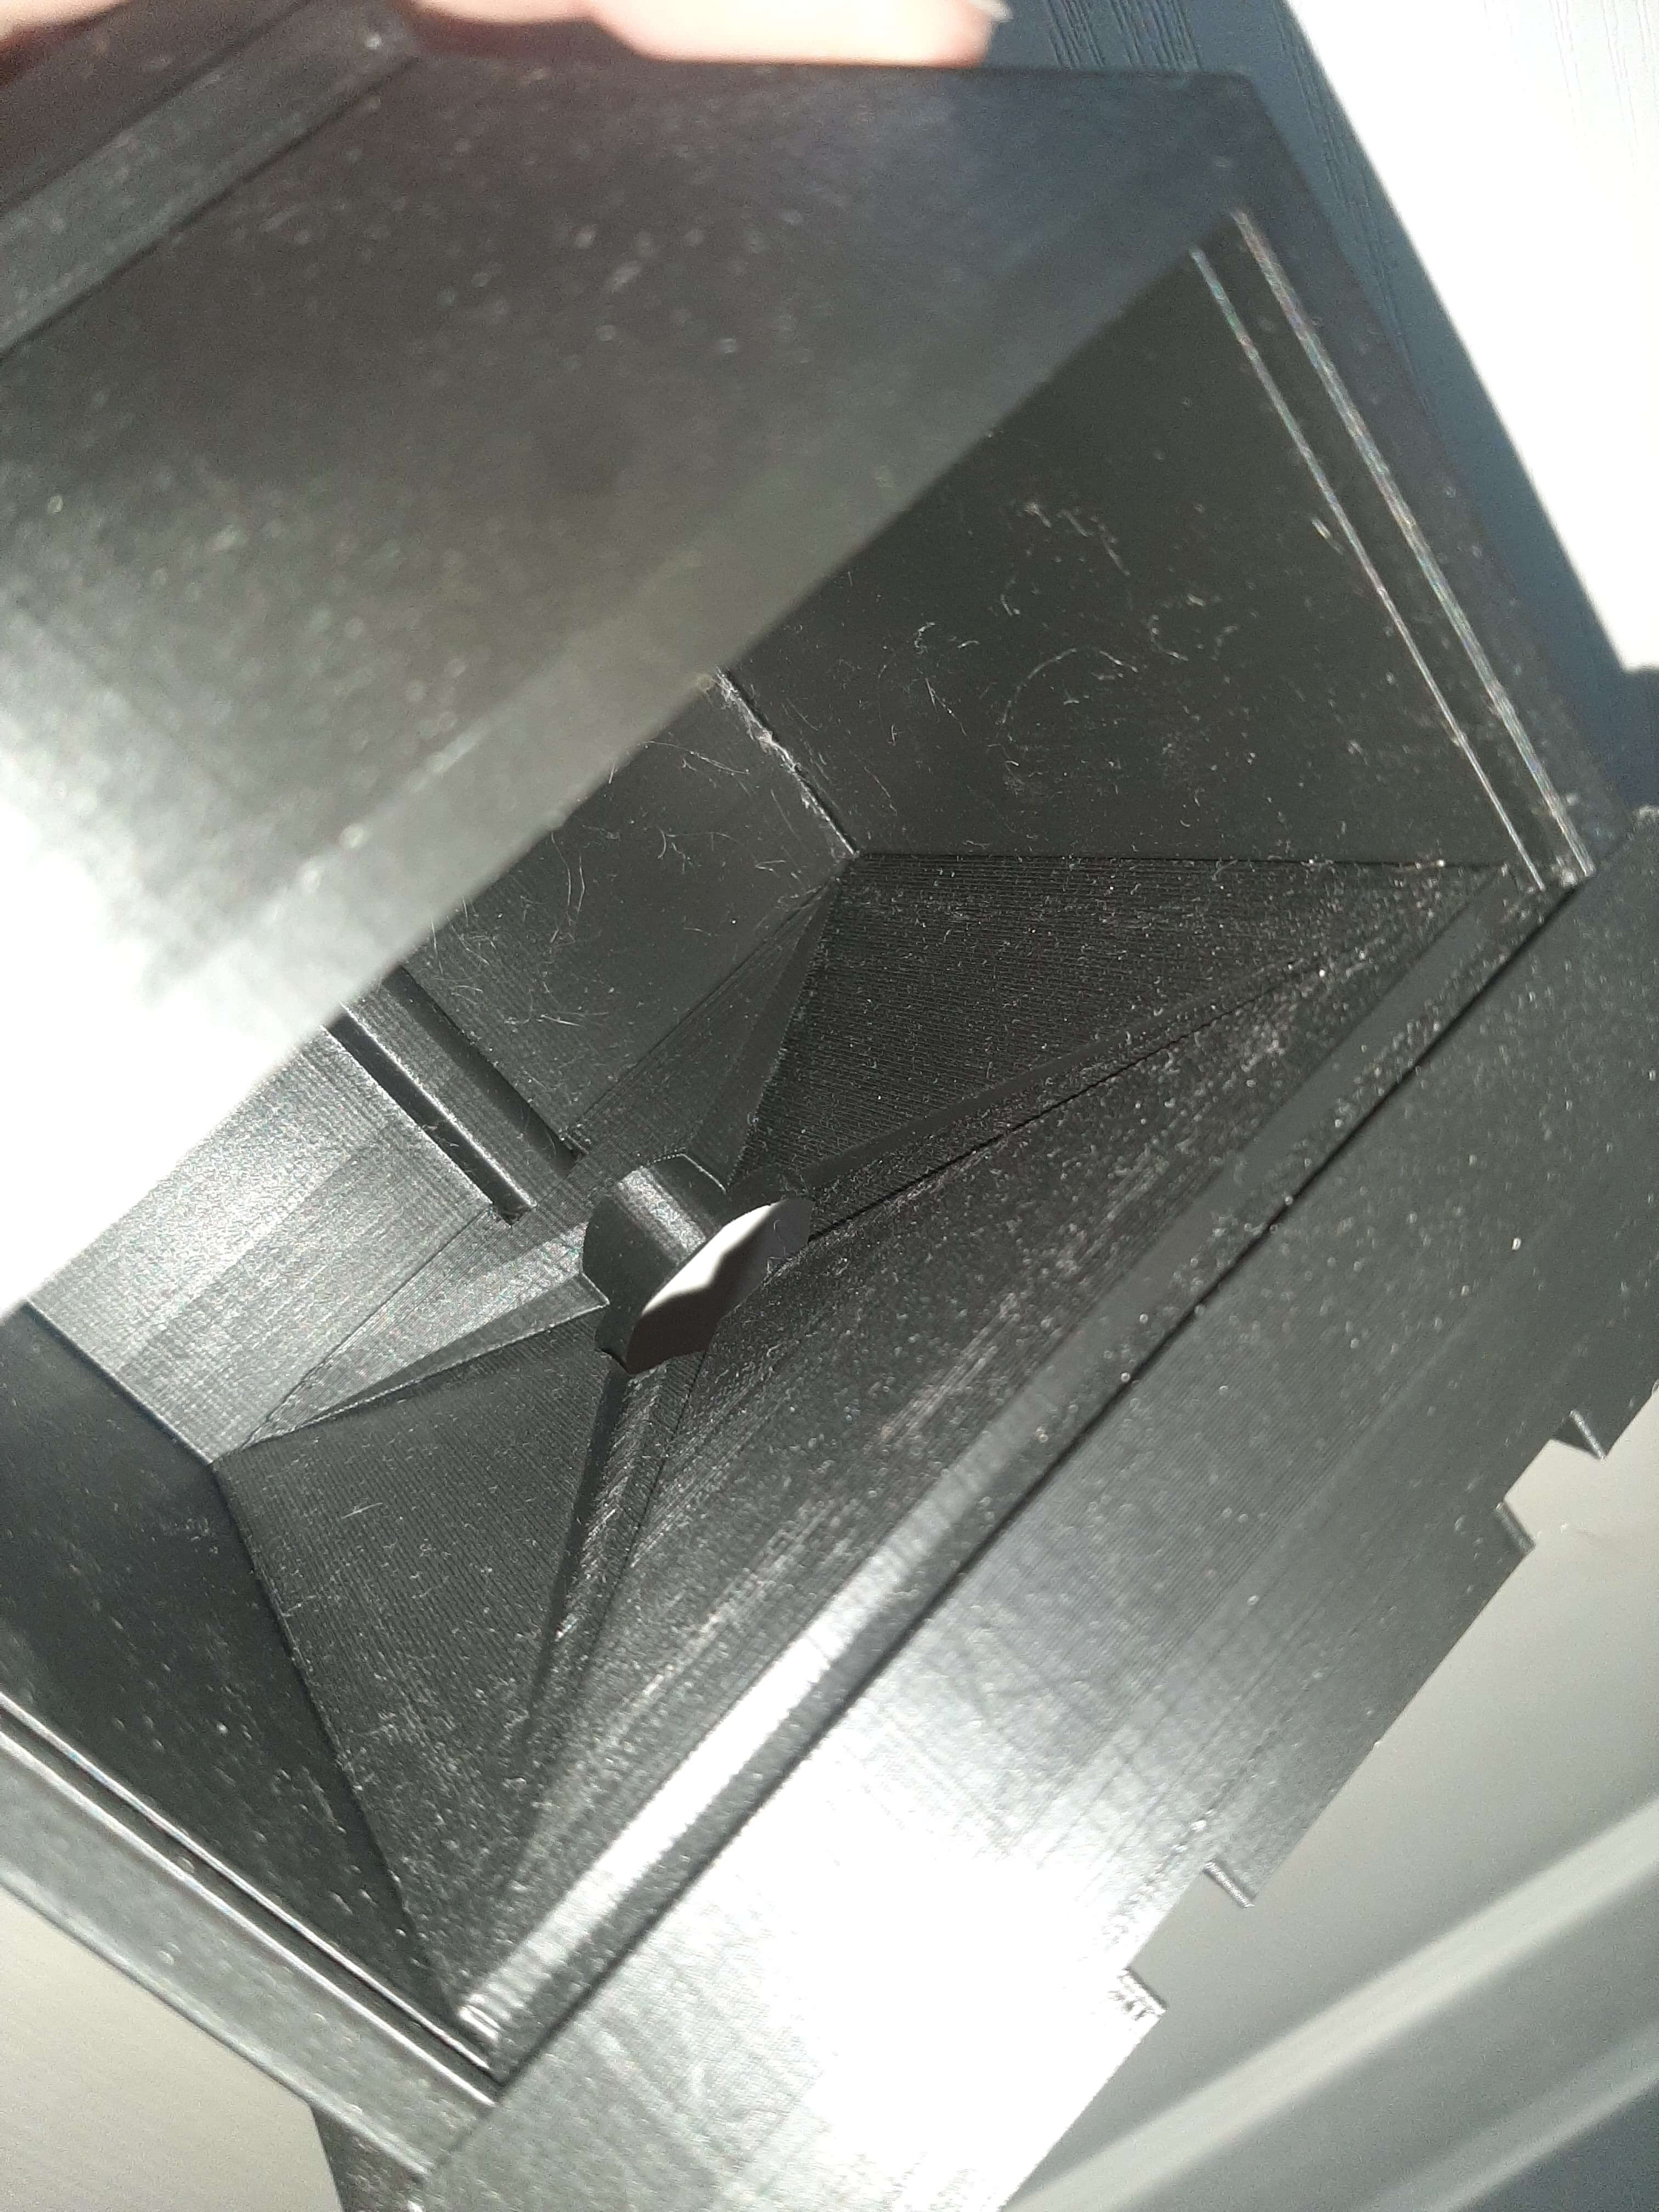
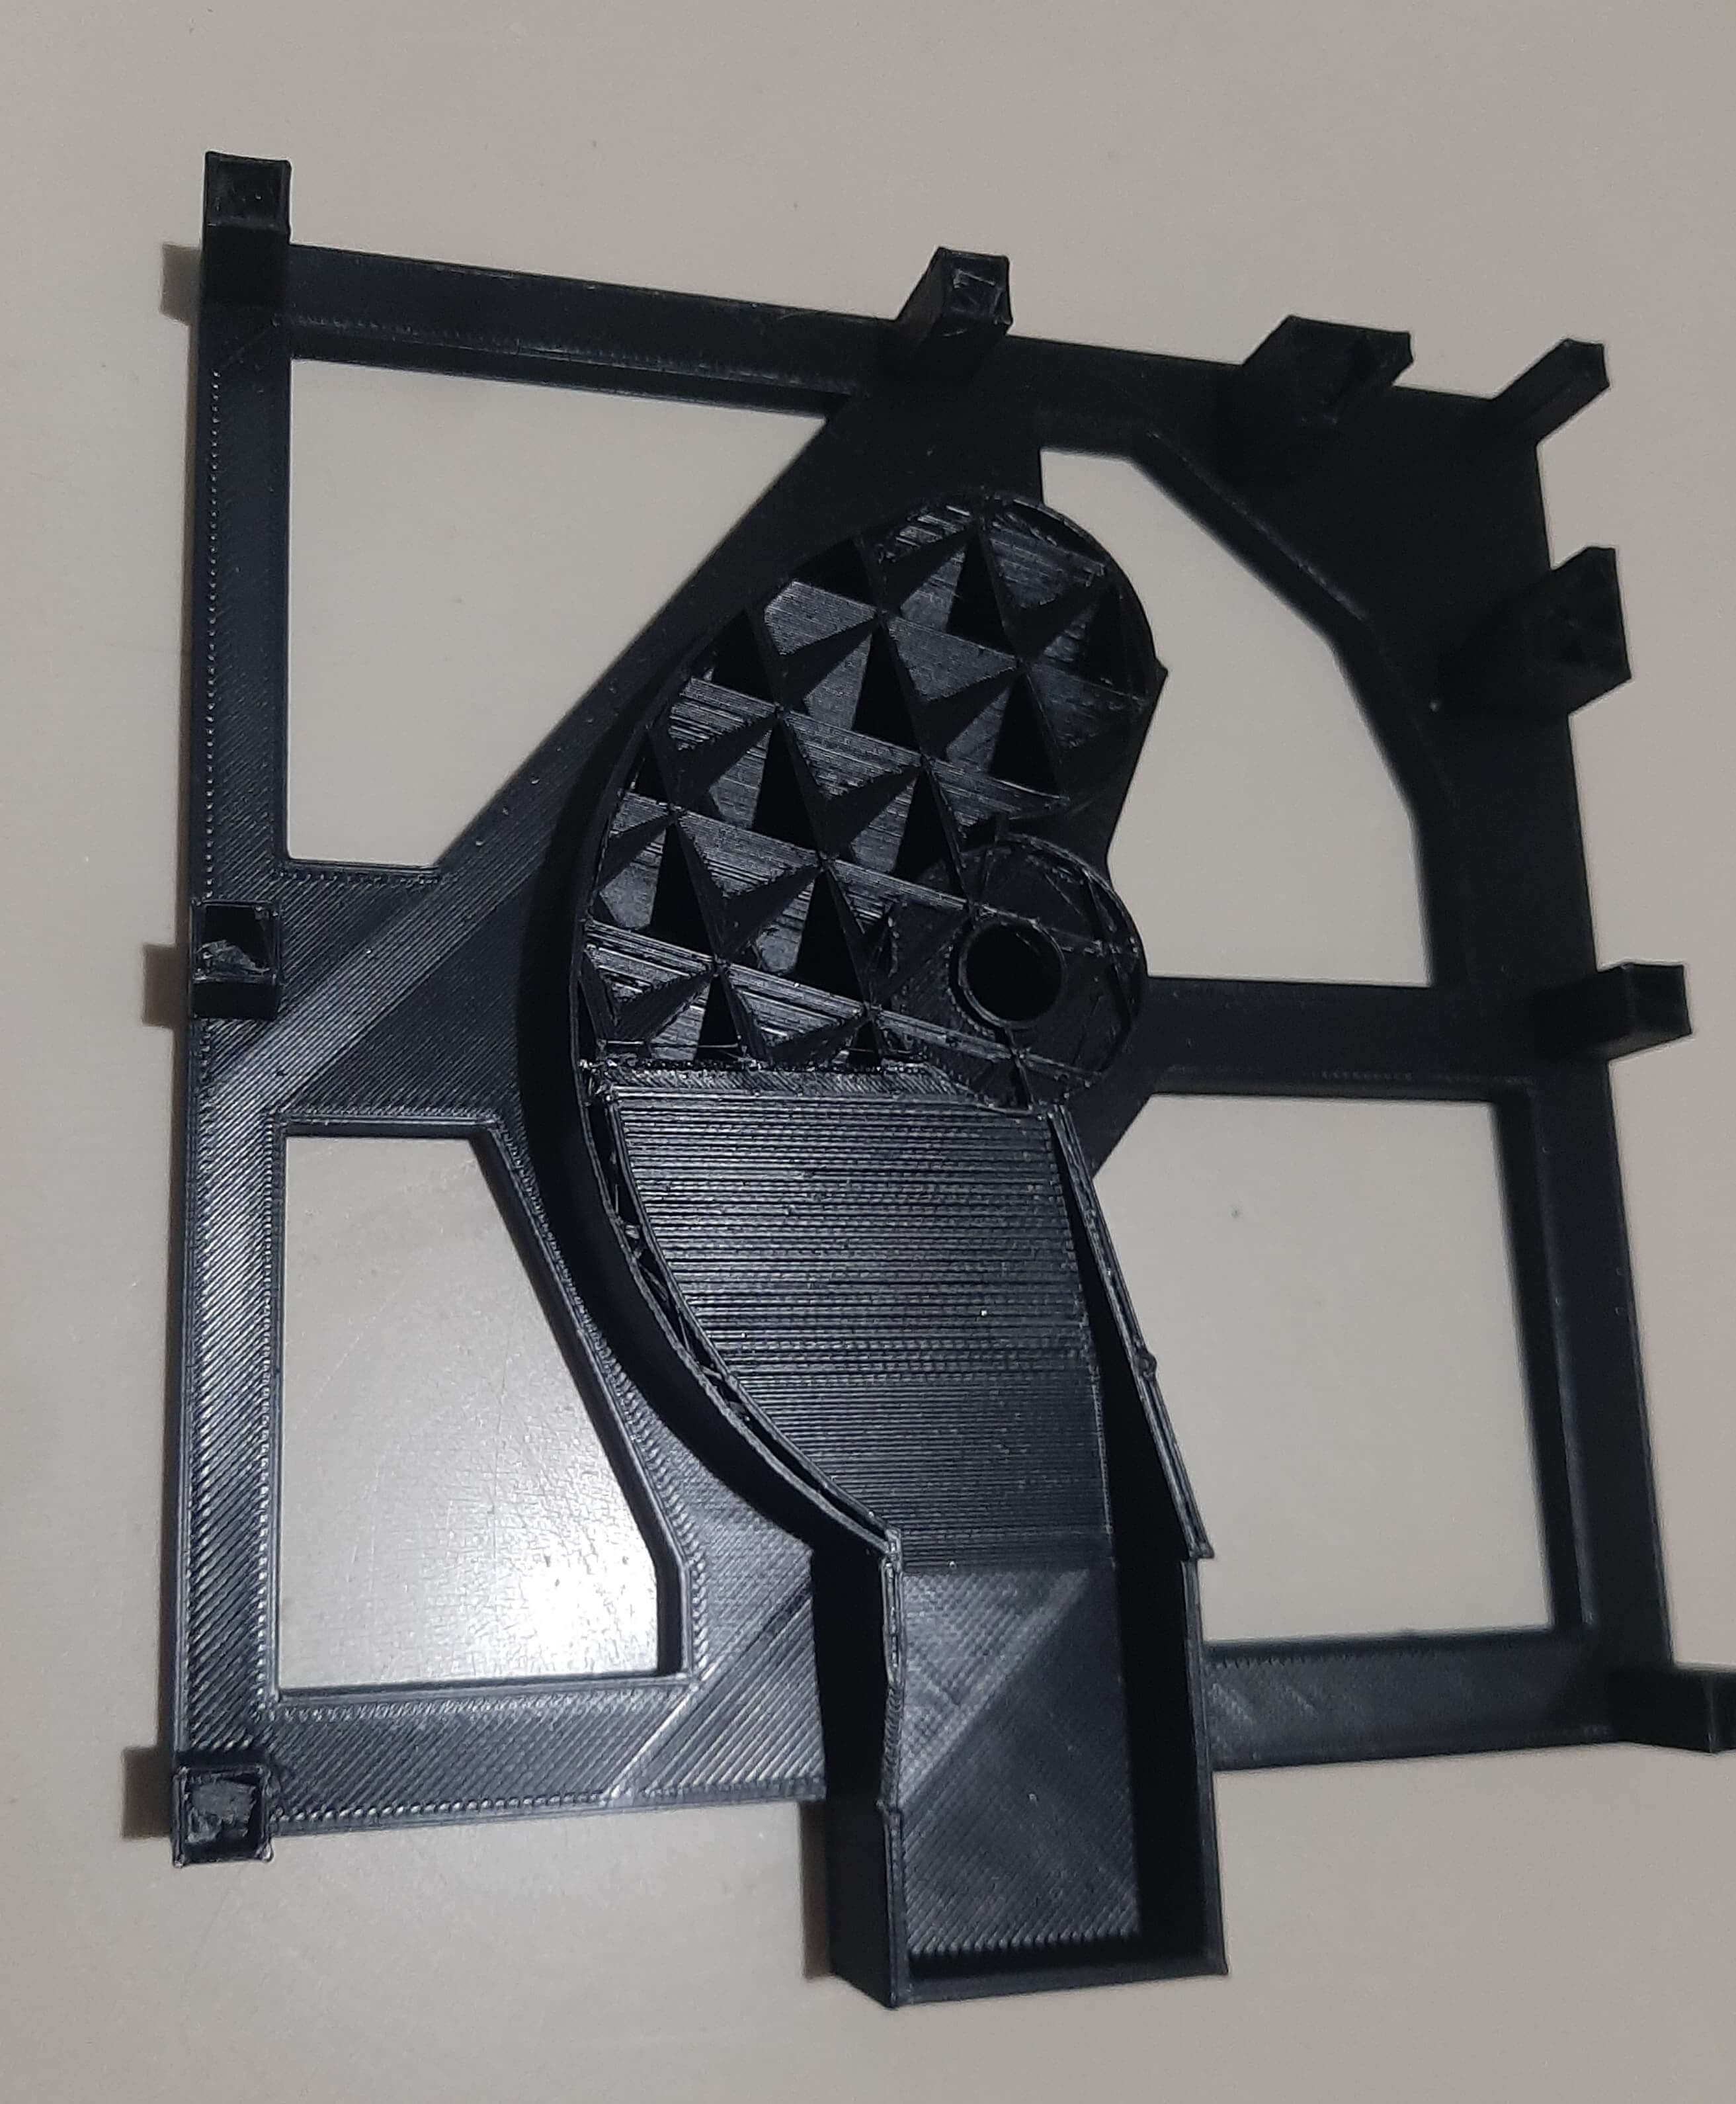
The next part I designed was the bottom part of the machine. This part has a particular shape because it helps to redirect the bubble gum balls to the dispensing mechanism.
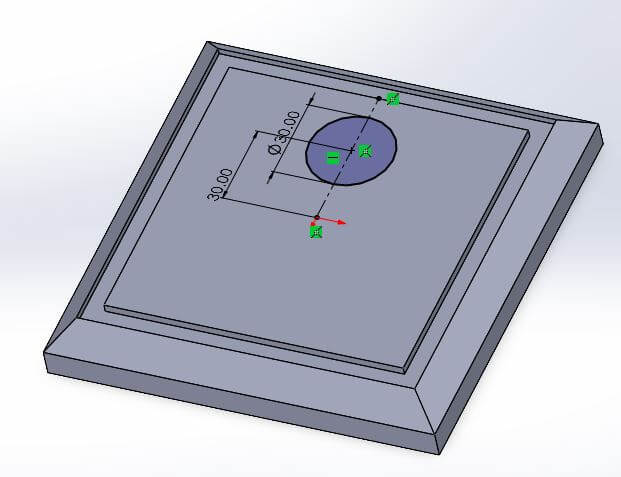
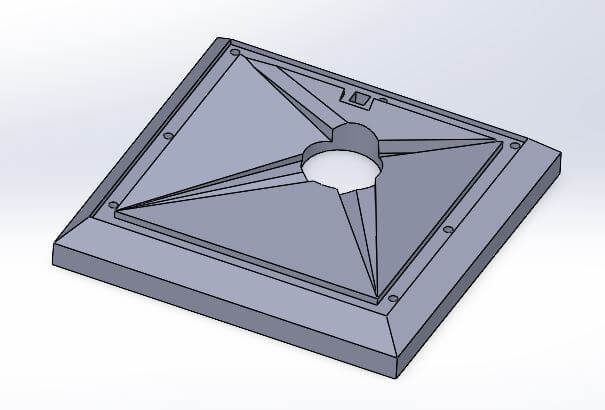
To design the cap of the machine, I considered the dimensions of the motion sensor that I would use in the future to automate the machine. With that in mind, I create the cap in two parts, but in the same solid body, this would allow me to print the cap in one piece and can be easily attached to the machine, also permitting the cap to have motion while the base is attached to the machine with the pins.
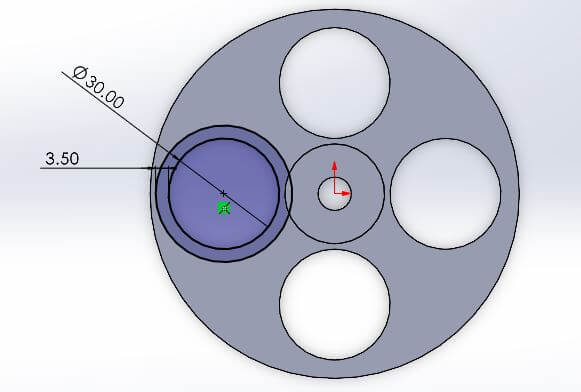
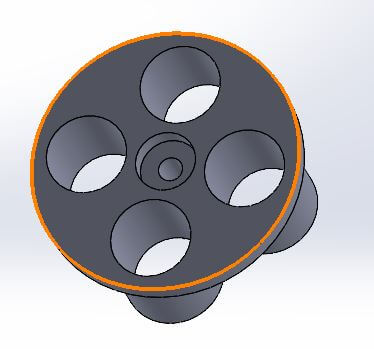
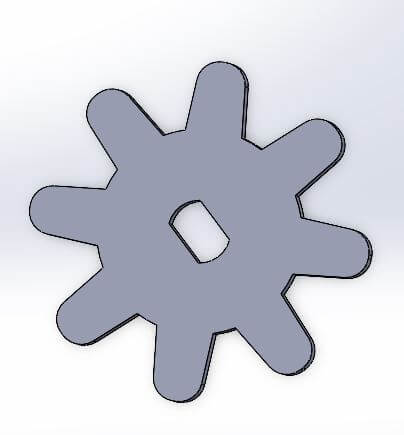
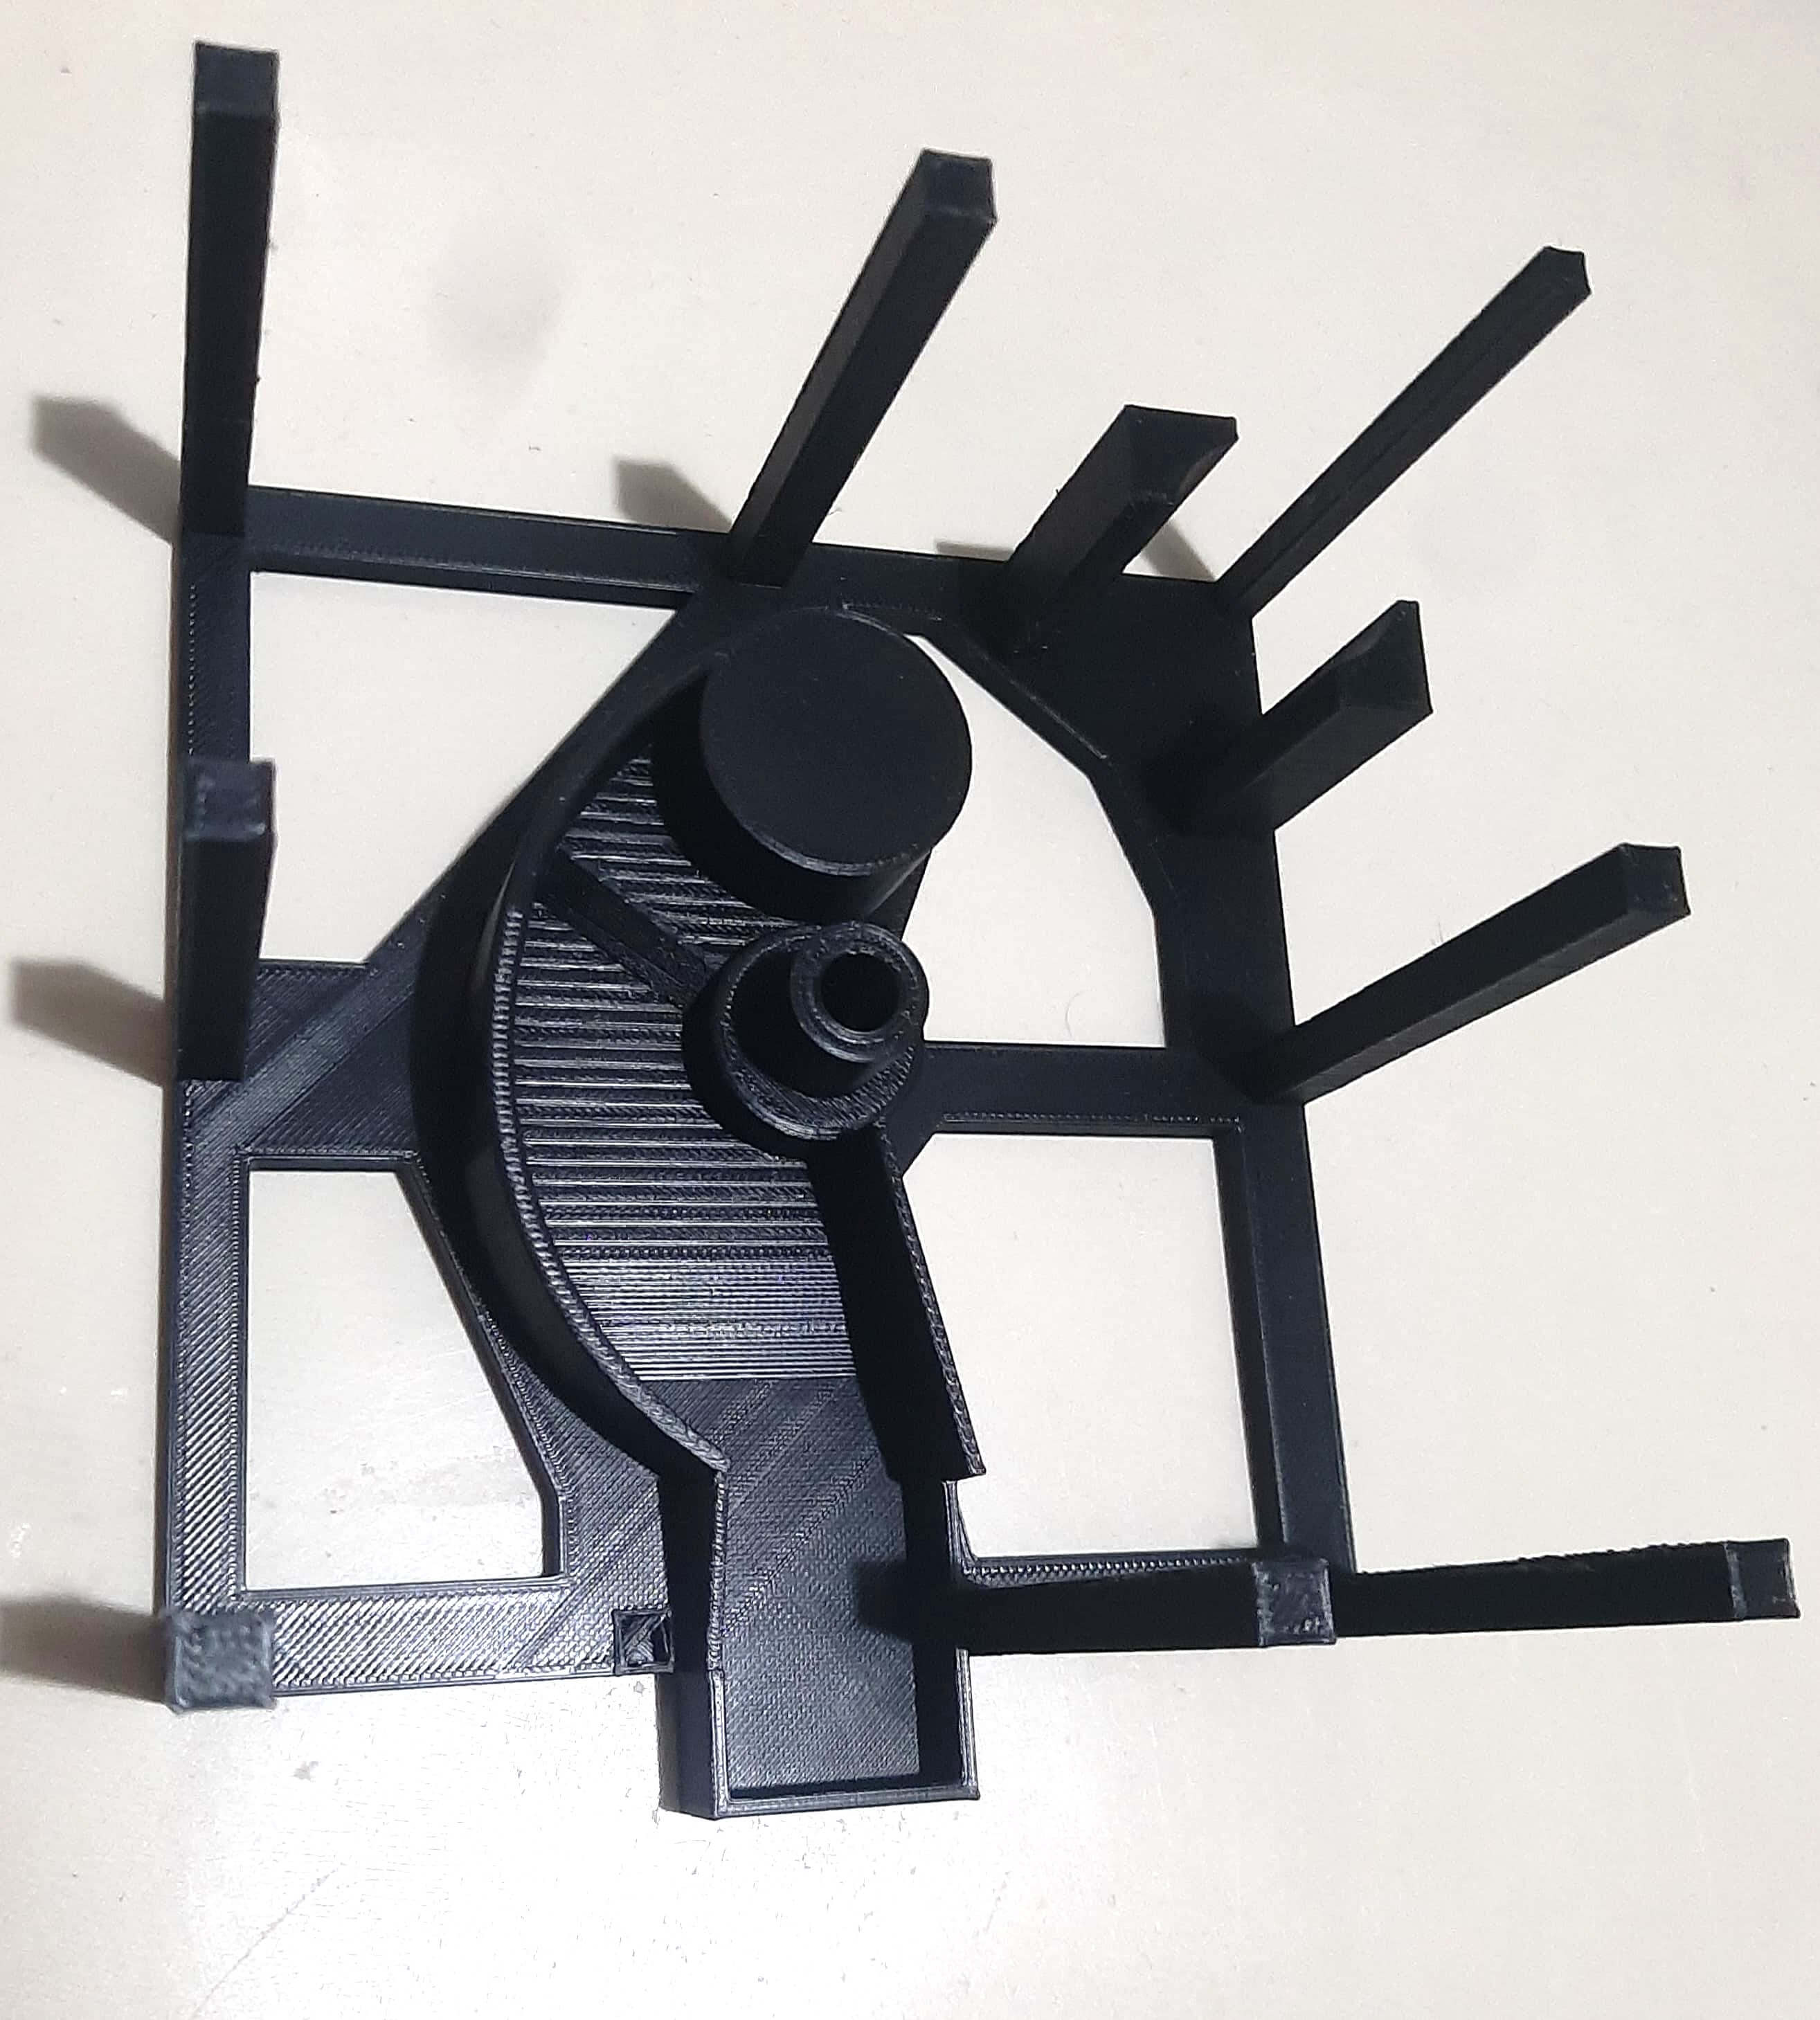
The next part in the proccess was the dispensing mechanism, this part is the most important part of the machine, it is the part that will allow us to dispense the bubble gum balls.
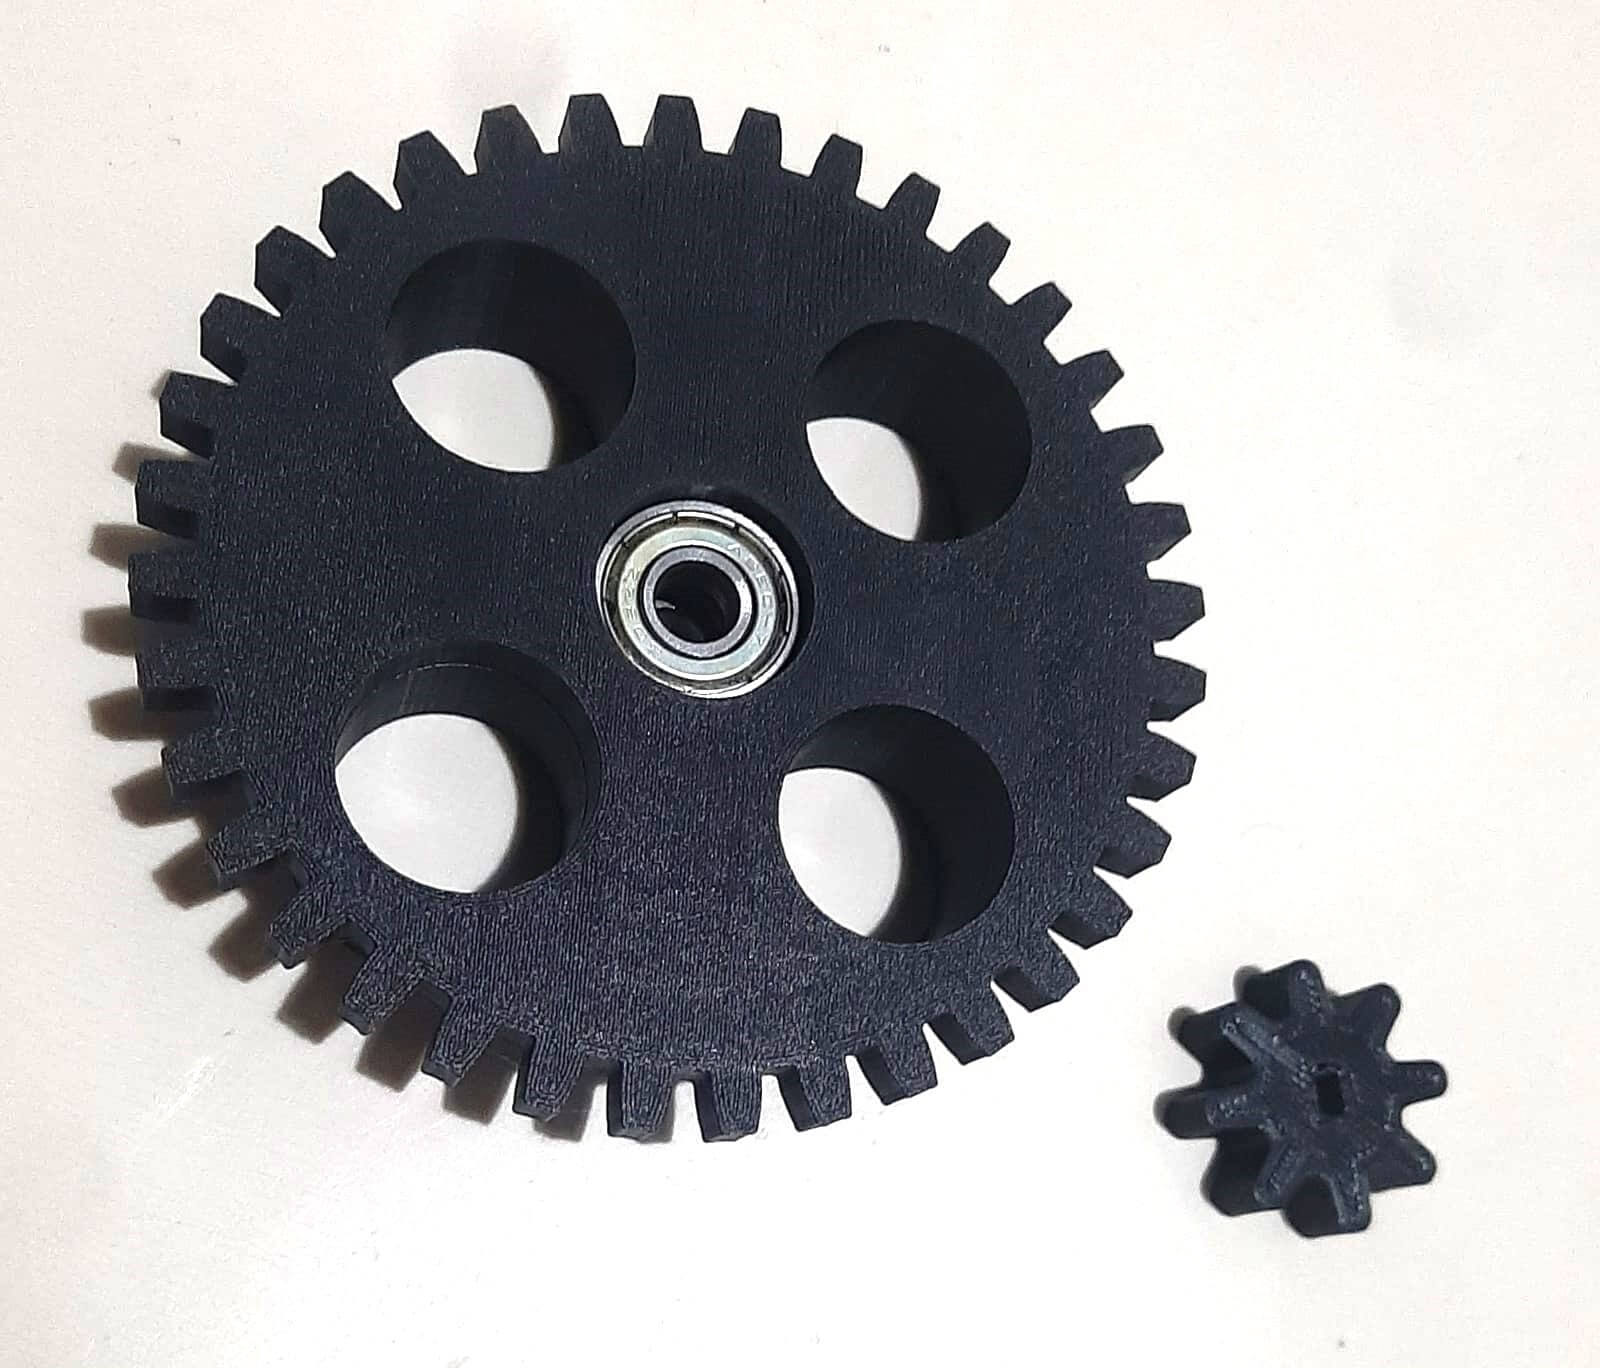
This mechanism consists in three parts, the base that will hold the mechanism in place, this also contains the ramp that will allow the bubble gum balls to be dispensed, the second part is the rotating gear that will allow us to dispense the bubble gum balls, and the last part is the second gear that will allow us to rotate the first gear and dispense the bubble gum balls.

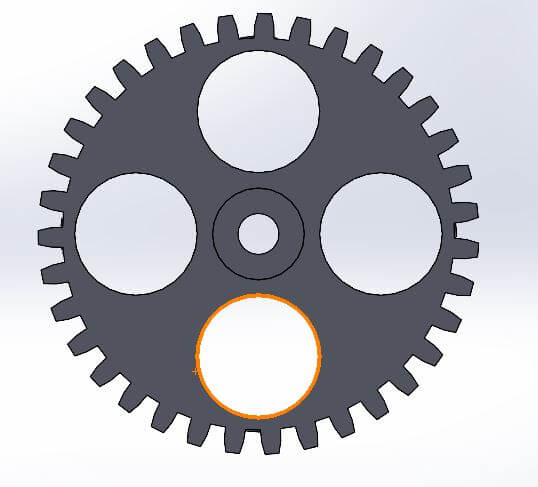
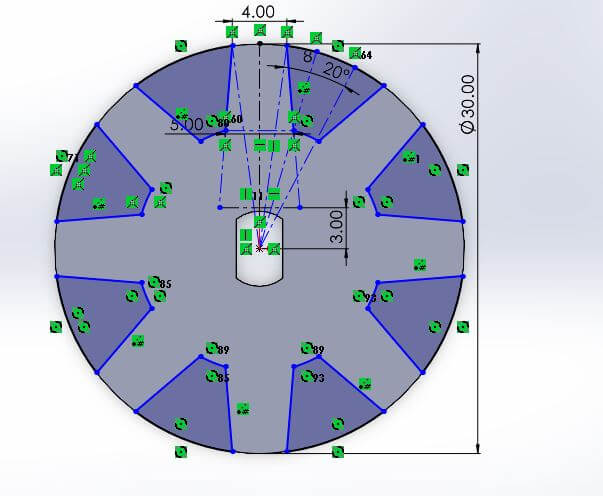
The gears design was a bit tricky, I had to make sure that the gears would fit and rotate properly, to do this I considered the dimensions of the gears and the distance between them, I also made sure that the gears would not touch the body of the machine, this would allow the gears to rotate freely.
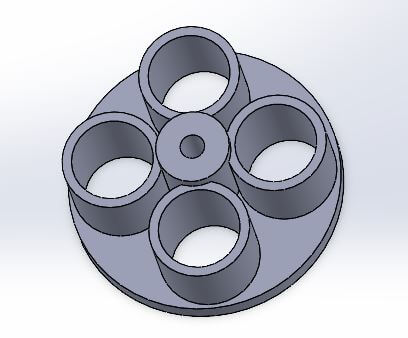
The first gear also has the holes that will allow us to move the bubble gum balls to the ramp, this is done by rotating the gear and allowing the bubble gum balls to fall into the ramp.
To the gear I considered a connection angle of 20 degrees, this is the angle that will allow us to attach both gears together and allow them to rotate freely.
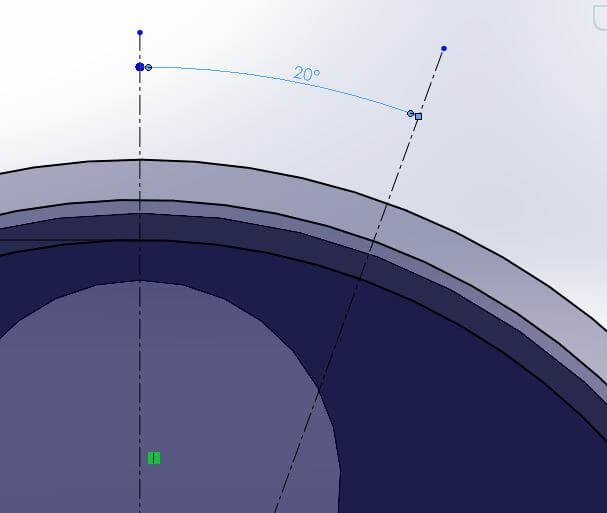
The other gear is the one that will allow us to rotate the first gear, this gear is attached to a motor that will allow us to rotate the gear and dispense the bubble gum balls. I considered the same connection angle of 20 degrees but with a different diameter, this in consecuence give us less teeth in the gear.
Now that I have designed the parts of the machine, I will show the result of the 3D printing and how they look like when they are assembled.
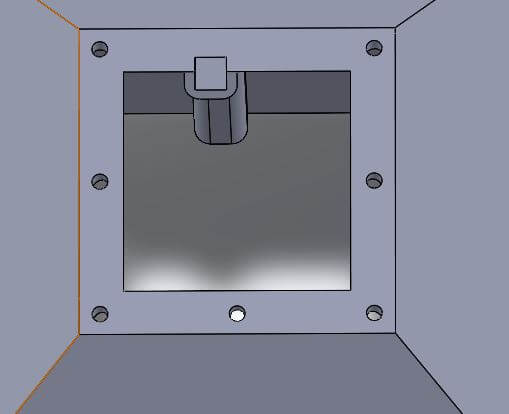
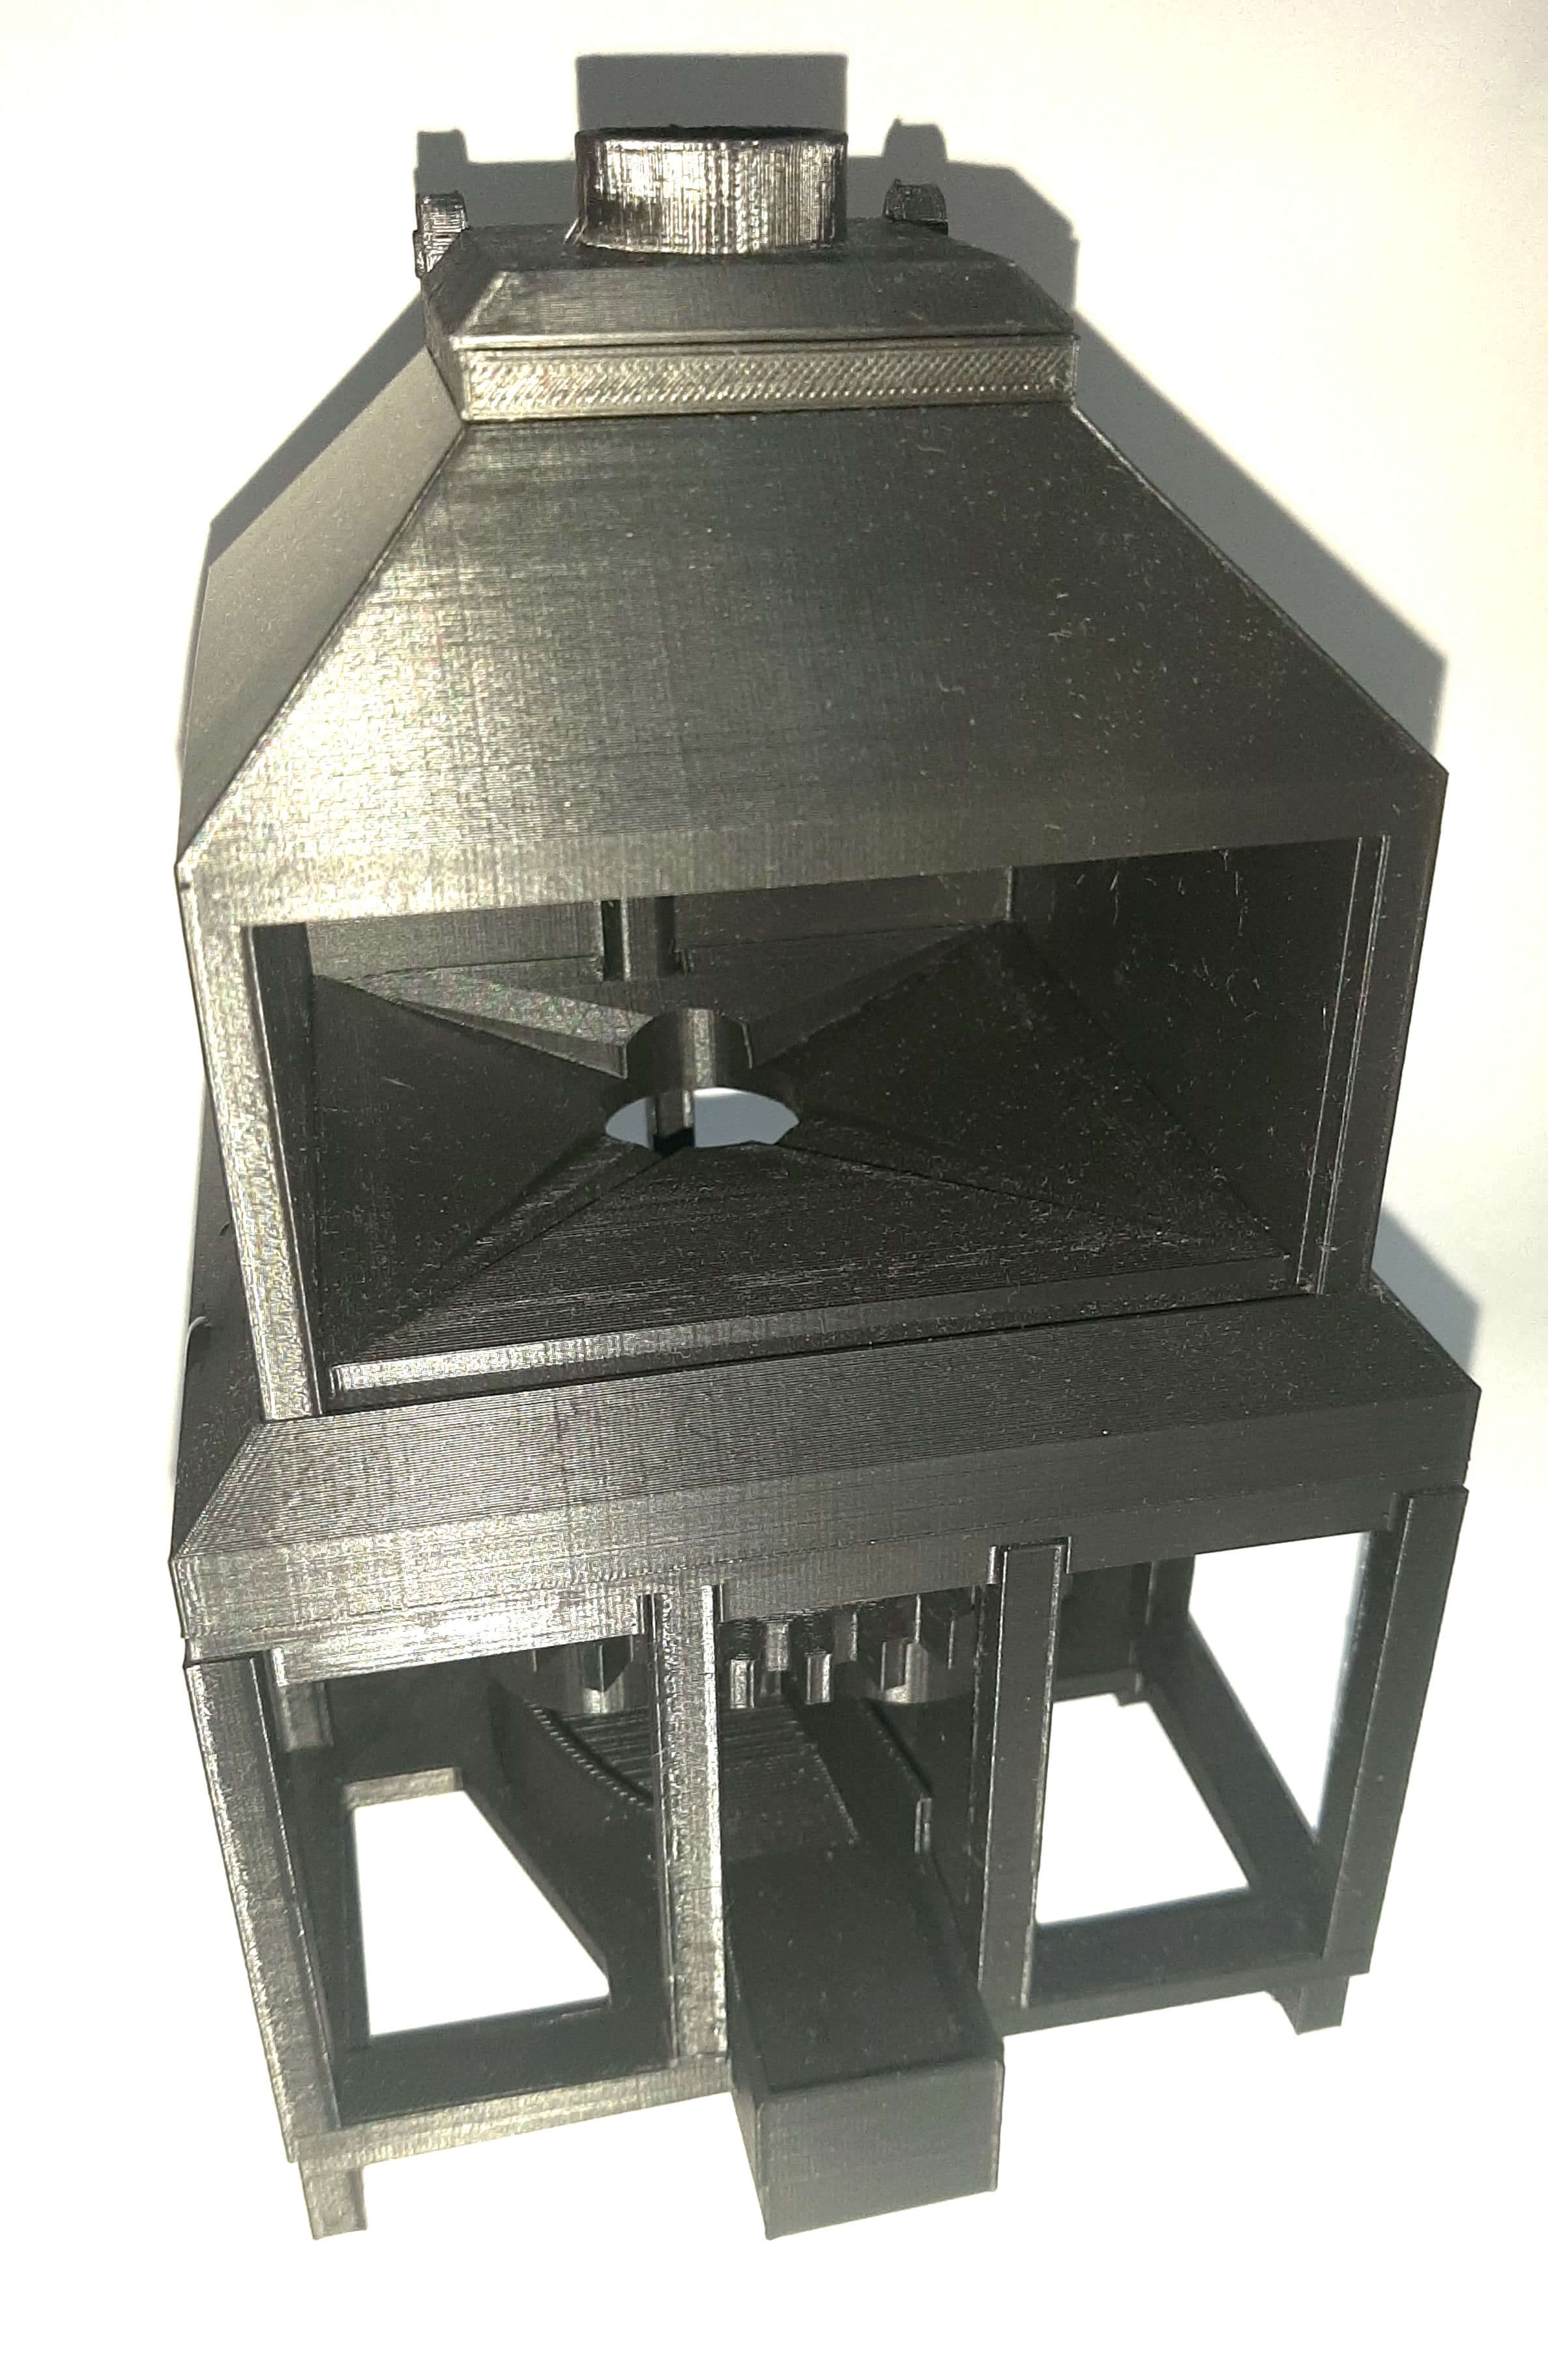
The next images shows the parts of the top body of the machine.

The part of the cap also was attached really well and opened and closed without any problem.
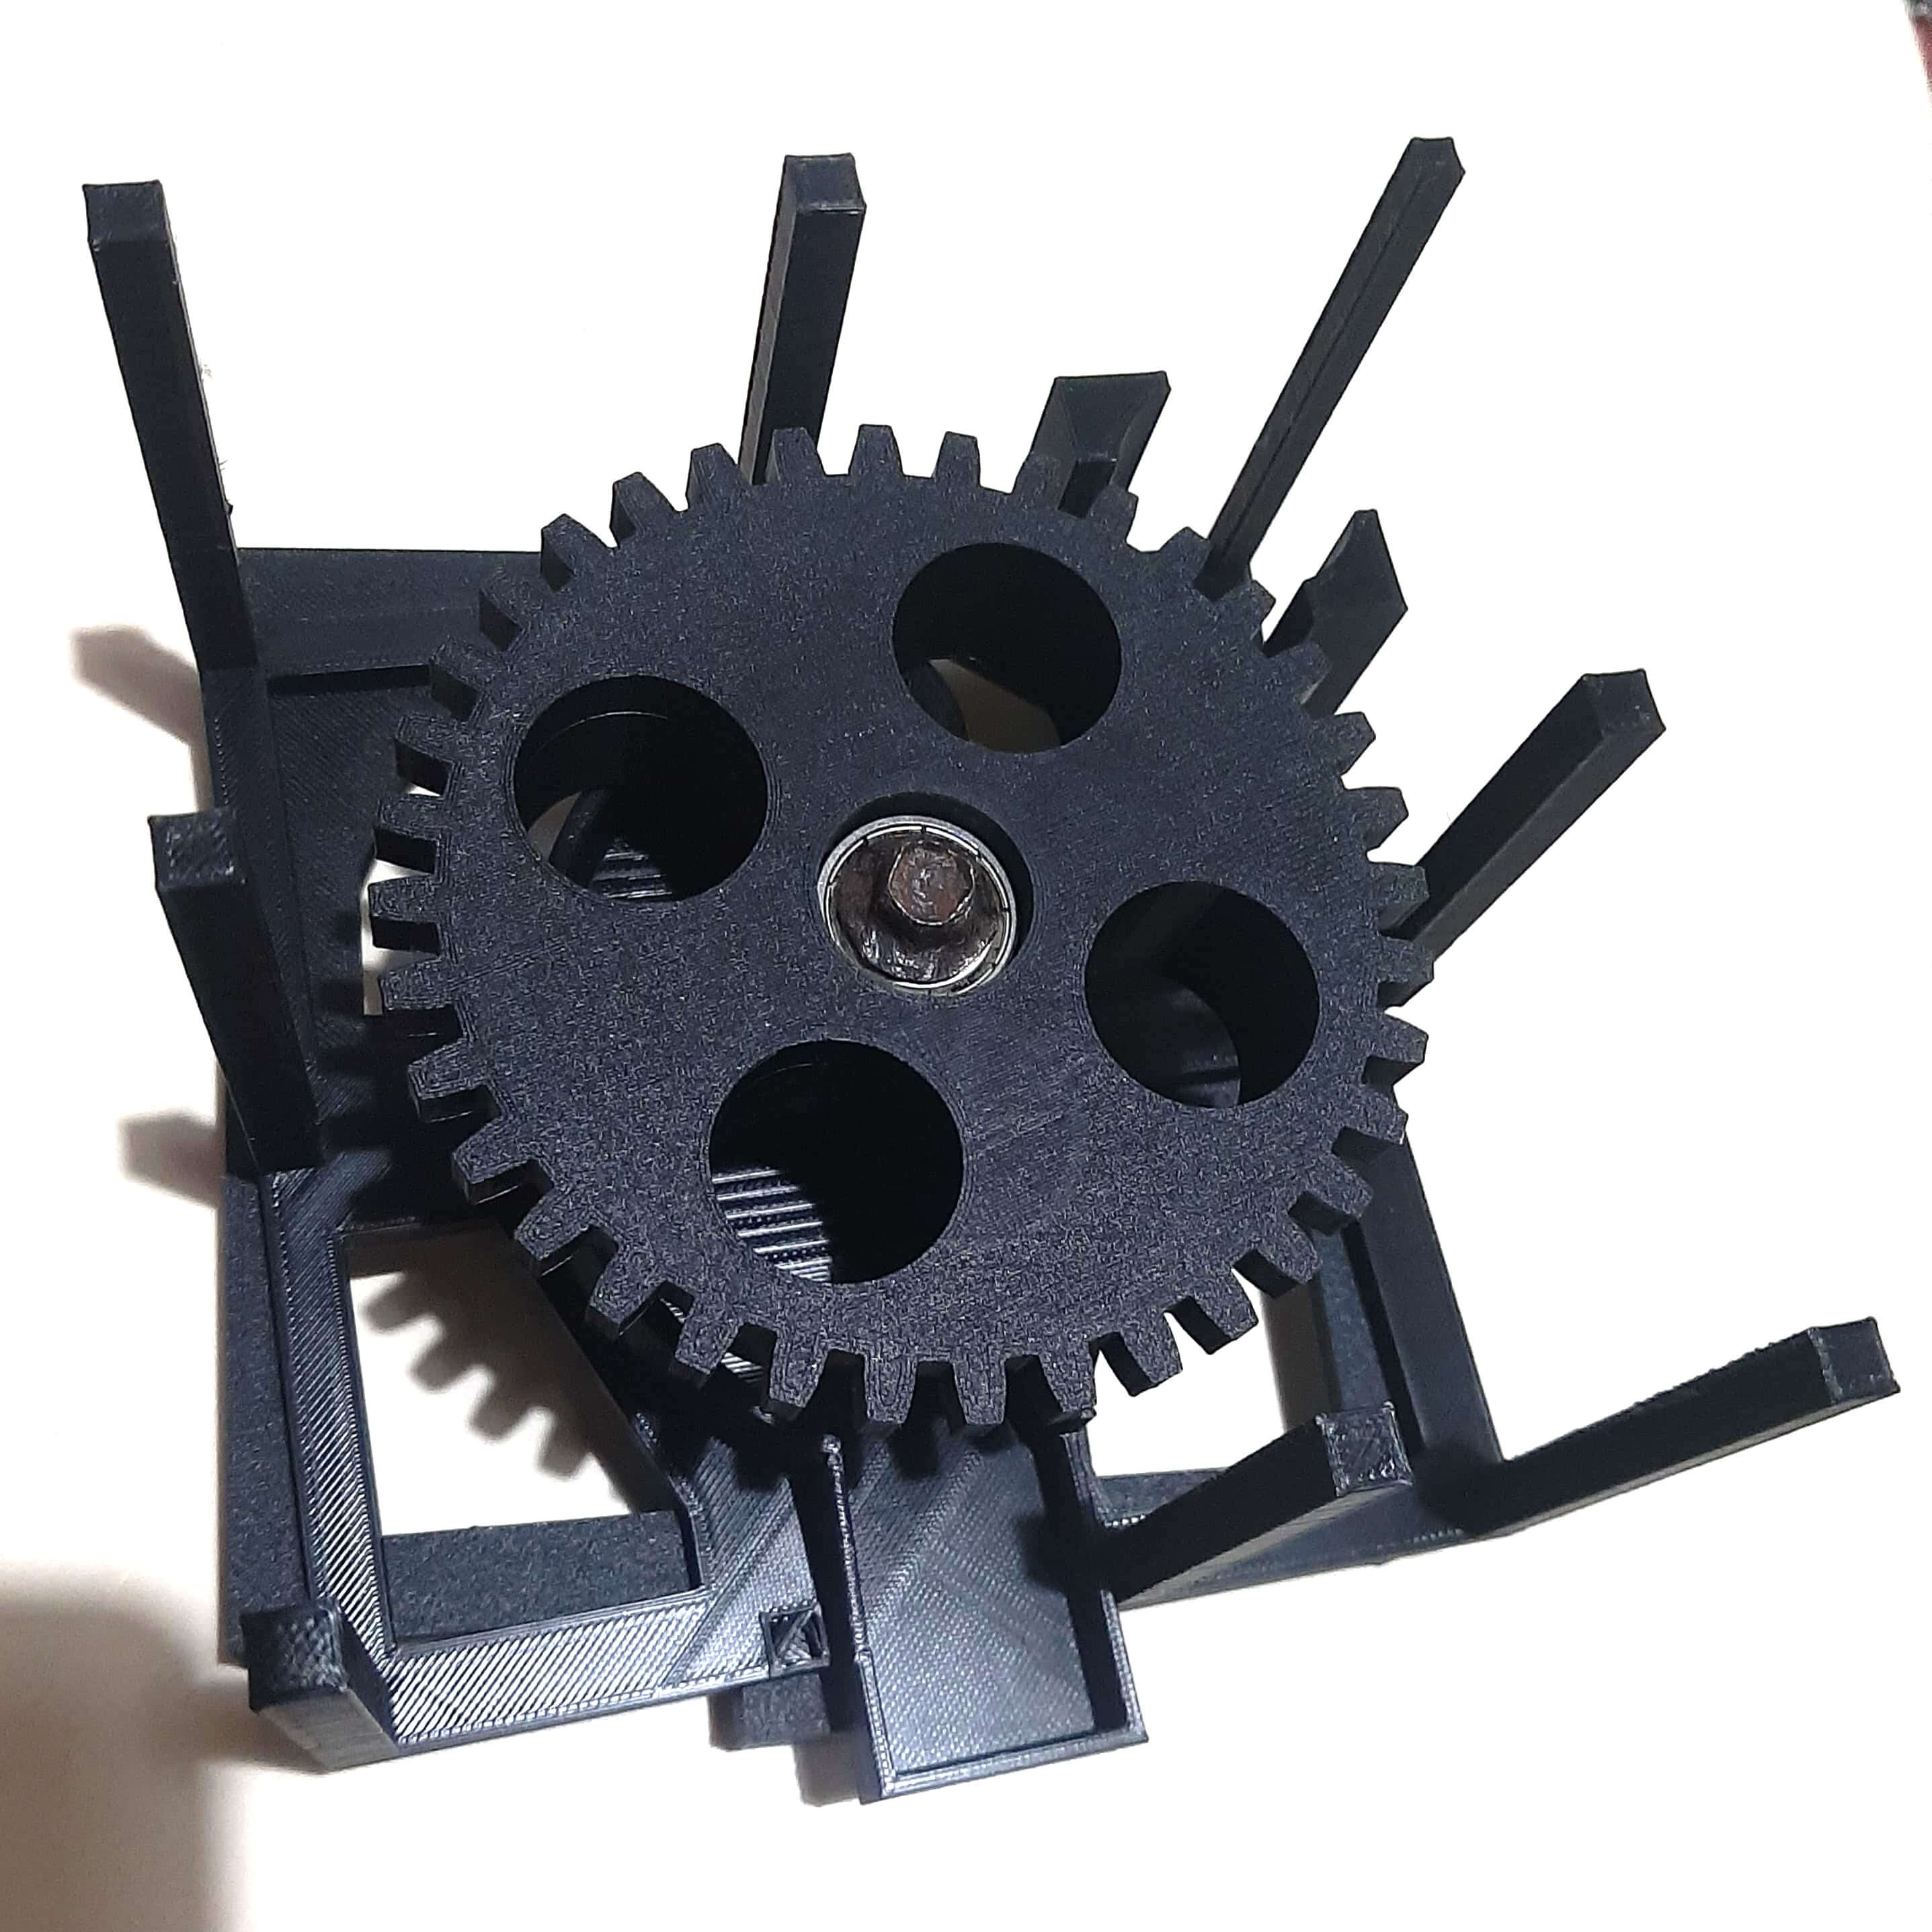
The gears were printed with a really good quality, the teeth of the gears were printed with a good precision and they fit perfectly.
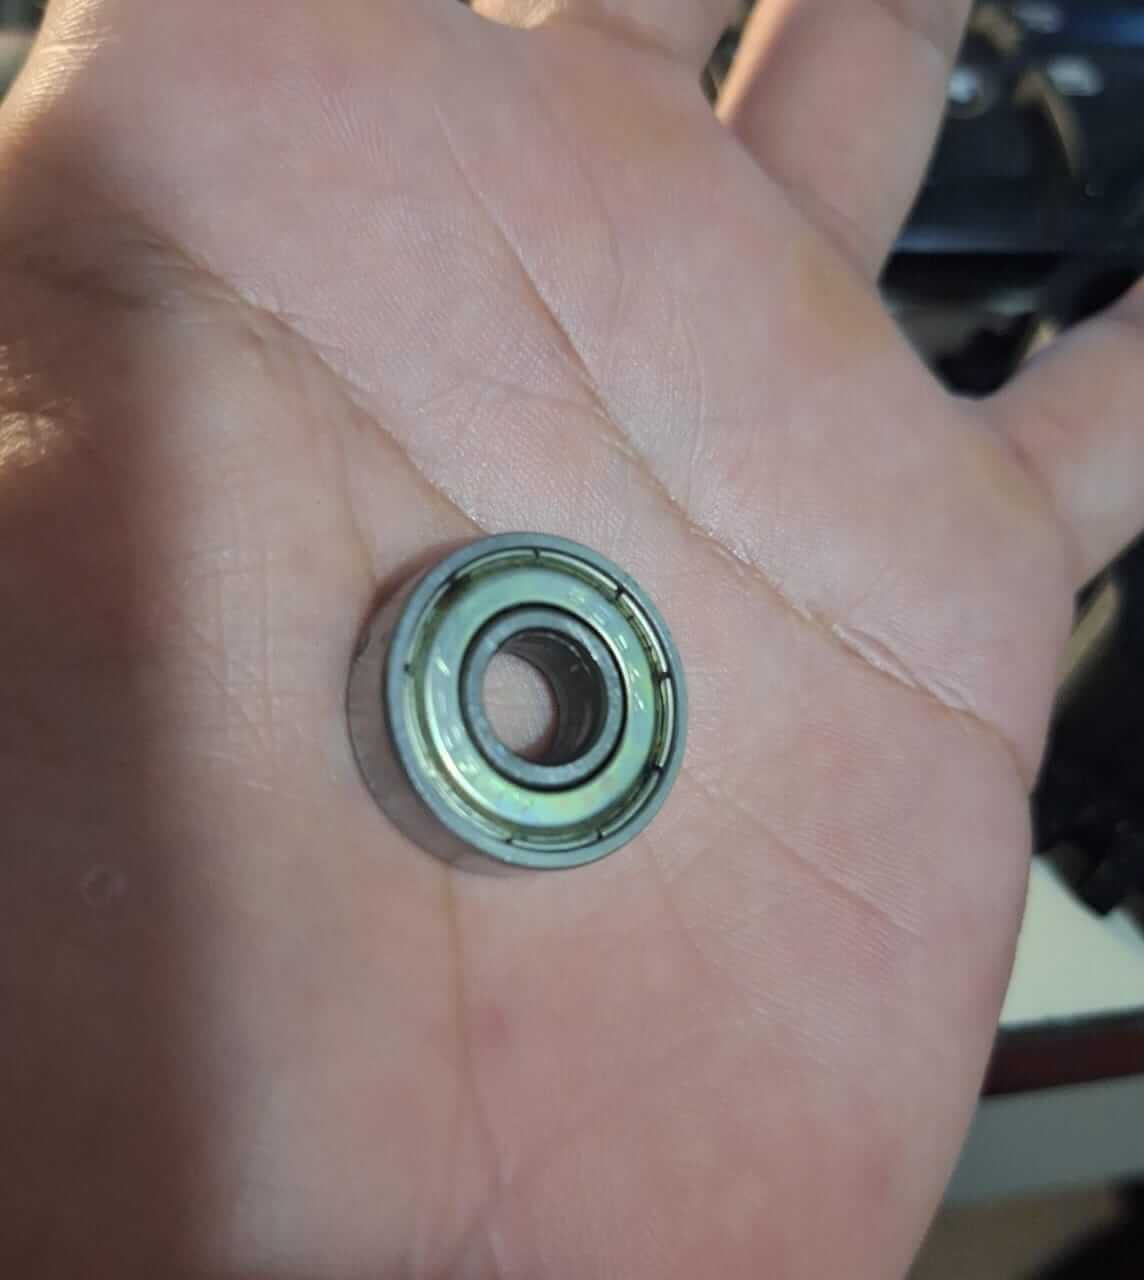
Something to mention is the first gear, was designed to have a hole in the center, this hole is to allow the gear to had 2 bearings, this will allow the gear to rotate freely and not touch the body of the machine, this is really important because if the gear touches the body of the machine, it will not rotate properly and will cause friction. I used skate bearings, these are small bearings that are used in small machines and they are perfect for this kind of projects.

Now the bottom part of the machine was printed, this part is the one that will hold the mechanism in place and will allow the bubble gum balls to be dispensed.
So the final assembly of the machine was done, I attached the top part of the machine to the bottom part using the pins that I designed in the body of the machine. This is the final result of the assembly of the machine.
Individual assignment
Now that I have designed and printed the parts of the machine, I will show you how I automated the machine.
Remember that the machine is designed to dispense bubble gum balls, so I needed to add a mechanism that would allow me to dispense the bubble gum balls also I needed a sensor that would allow me to detect when the user wants to dispense a bubble gum ball.
The electronics that I used for the automation of the machine are:
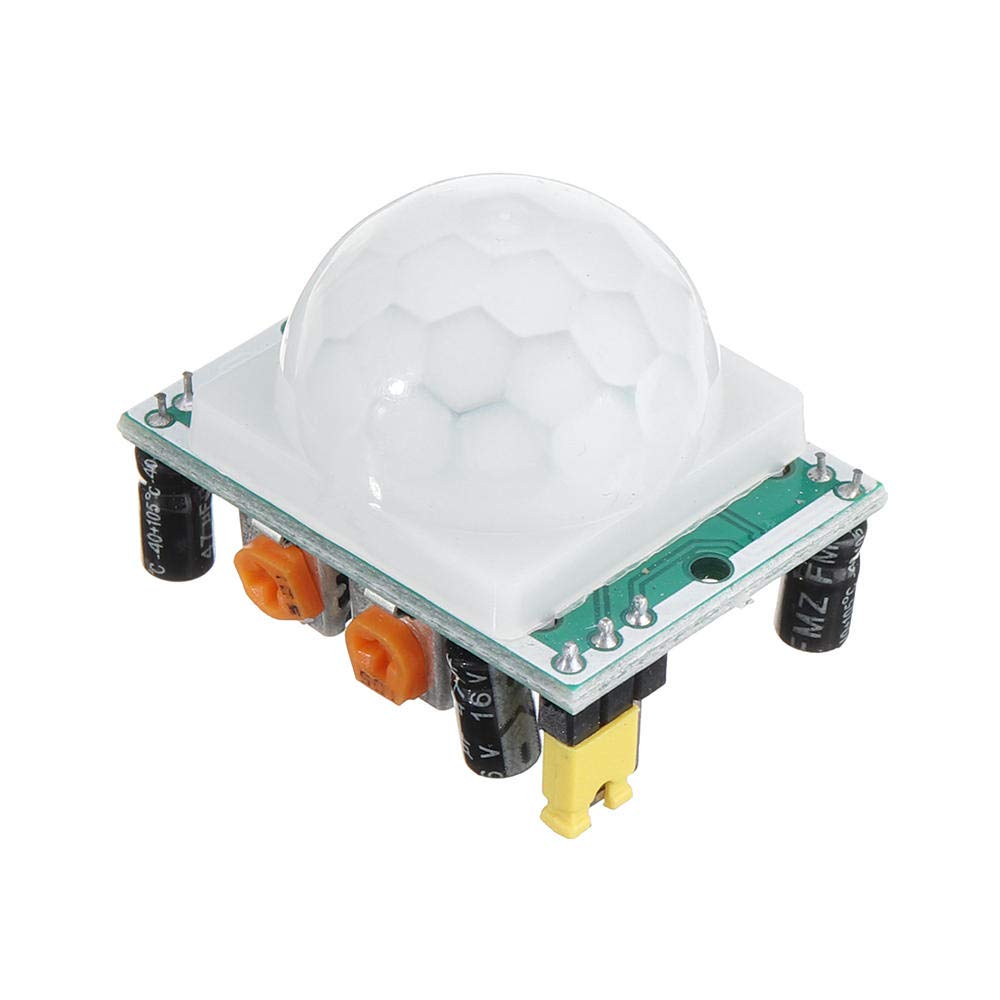
- ESP32
- Servo Motor
- Motion Sensor
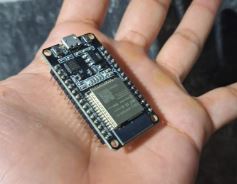
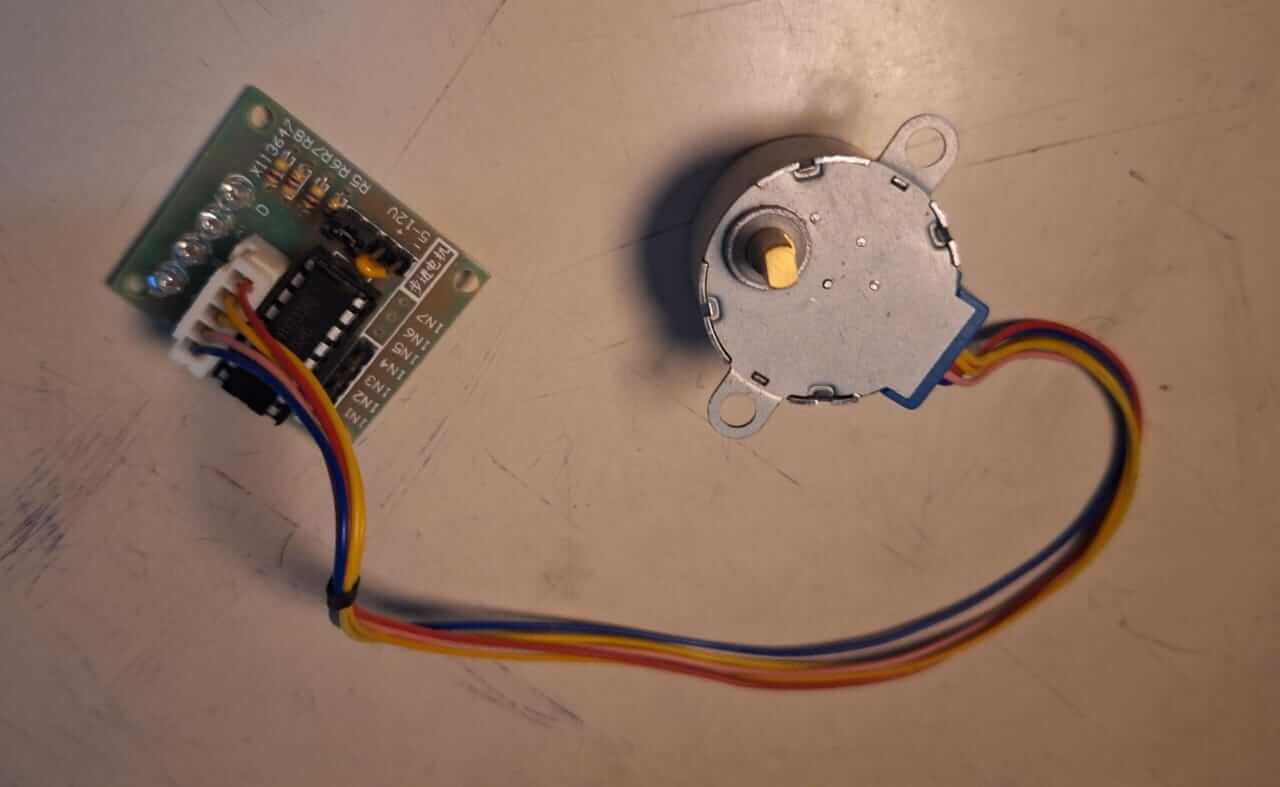
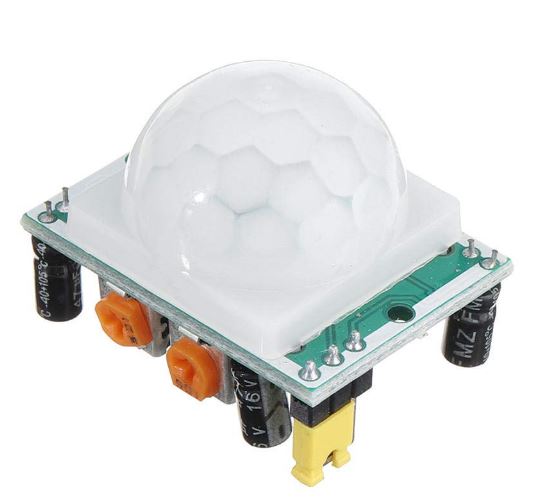
Image source Motion Sensor
Now that I have the electronics, I will show you the code that I used to automate the machine. The code is written in VS Code and is uploaded to the ESP32 using the platformio extension.
Code used
                        #include "Arduino.h"
                        #include "Stepper.h"

                        const int stepsPR = 2048;

                        #define IN1 33
                        #define IN2 32
                        #define IN3 26
                        #define IN4 25
                        #define PIN_MOTION_SENSOR 18


                        Stepper myStepper(stepsPR, IN1, IN3, IN2, IN4);

                        void setup() {
                            Serial.begin(115200);
                            pinMode(PIN_MOTION_SENSOR, INPUT);
                        }

                        void loop() {

                            if(digitalRead(PIN_MOTION_SENSOR)){
                            myStepper.setSpeed(10);
                            myStepper.step(-stepsPR*1.15);
                            delay(1000);
                            }

                            Serial.println(digitalRead(PIN_MOTION_SENSOR));

                            delay(1000);
                        }
Code source: Developed by Oscar Gomez
The next image shows the connections of the electronics to the machine. Are really simple, the servo motor is connected to the ESP32, the motion sensor is connected to the ESP32 and the power supply is connected to the ESP32 with usb cable, because we are settin this like a desktop machine.

Image source: Own Design
Now that I have the code and the diagram of the connections, I will show you how the machine works.
I started connecting the stepper motor and attaching it to the gear that I designed, this will allow the motor to rotate the gear and dispense the bubble gum balls.
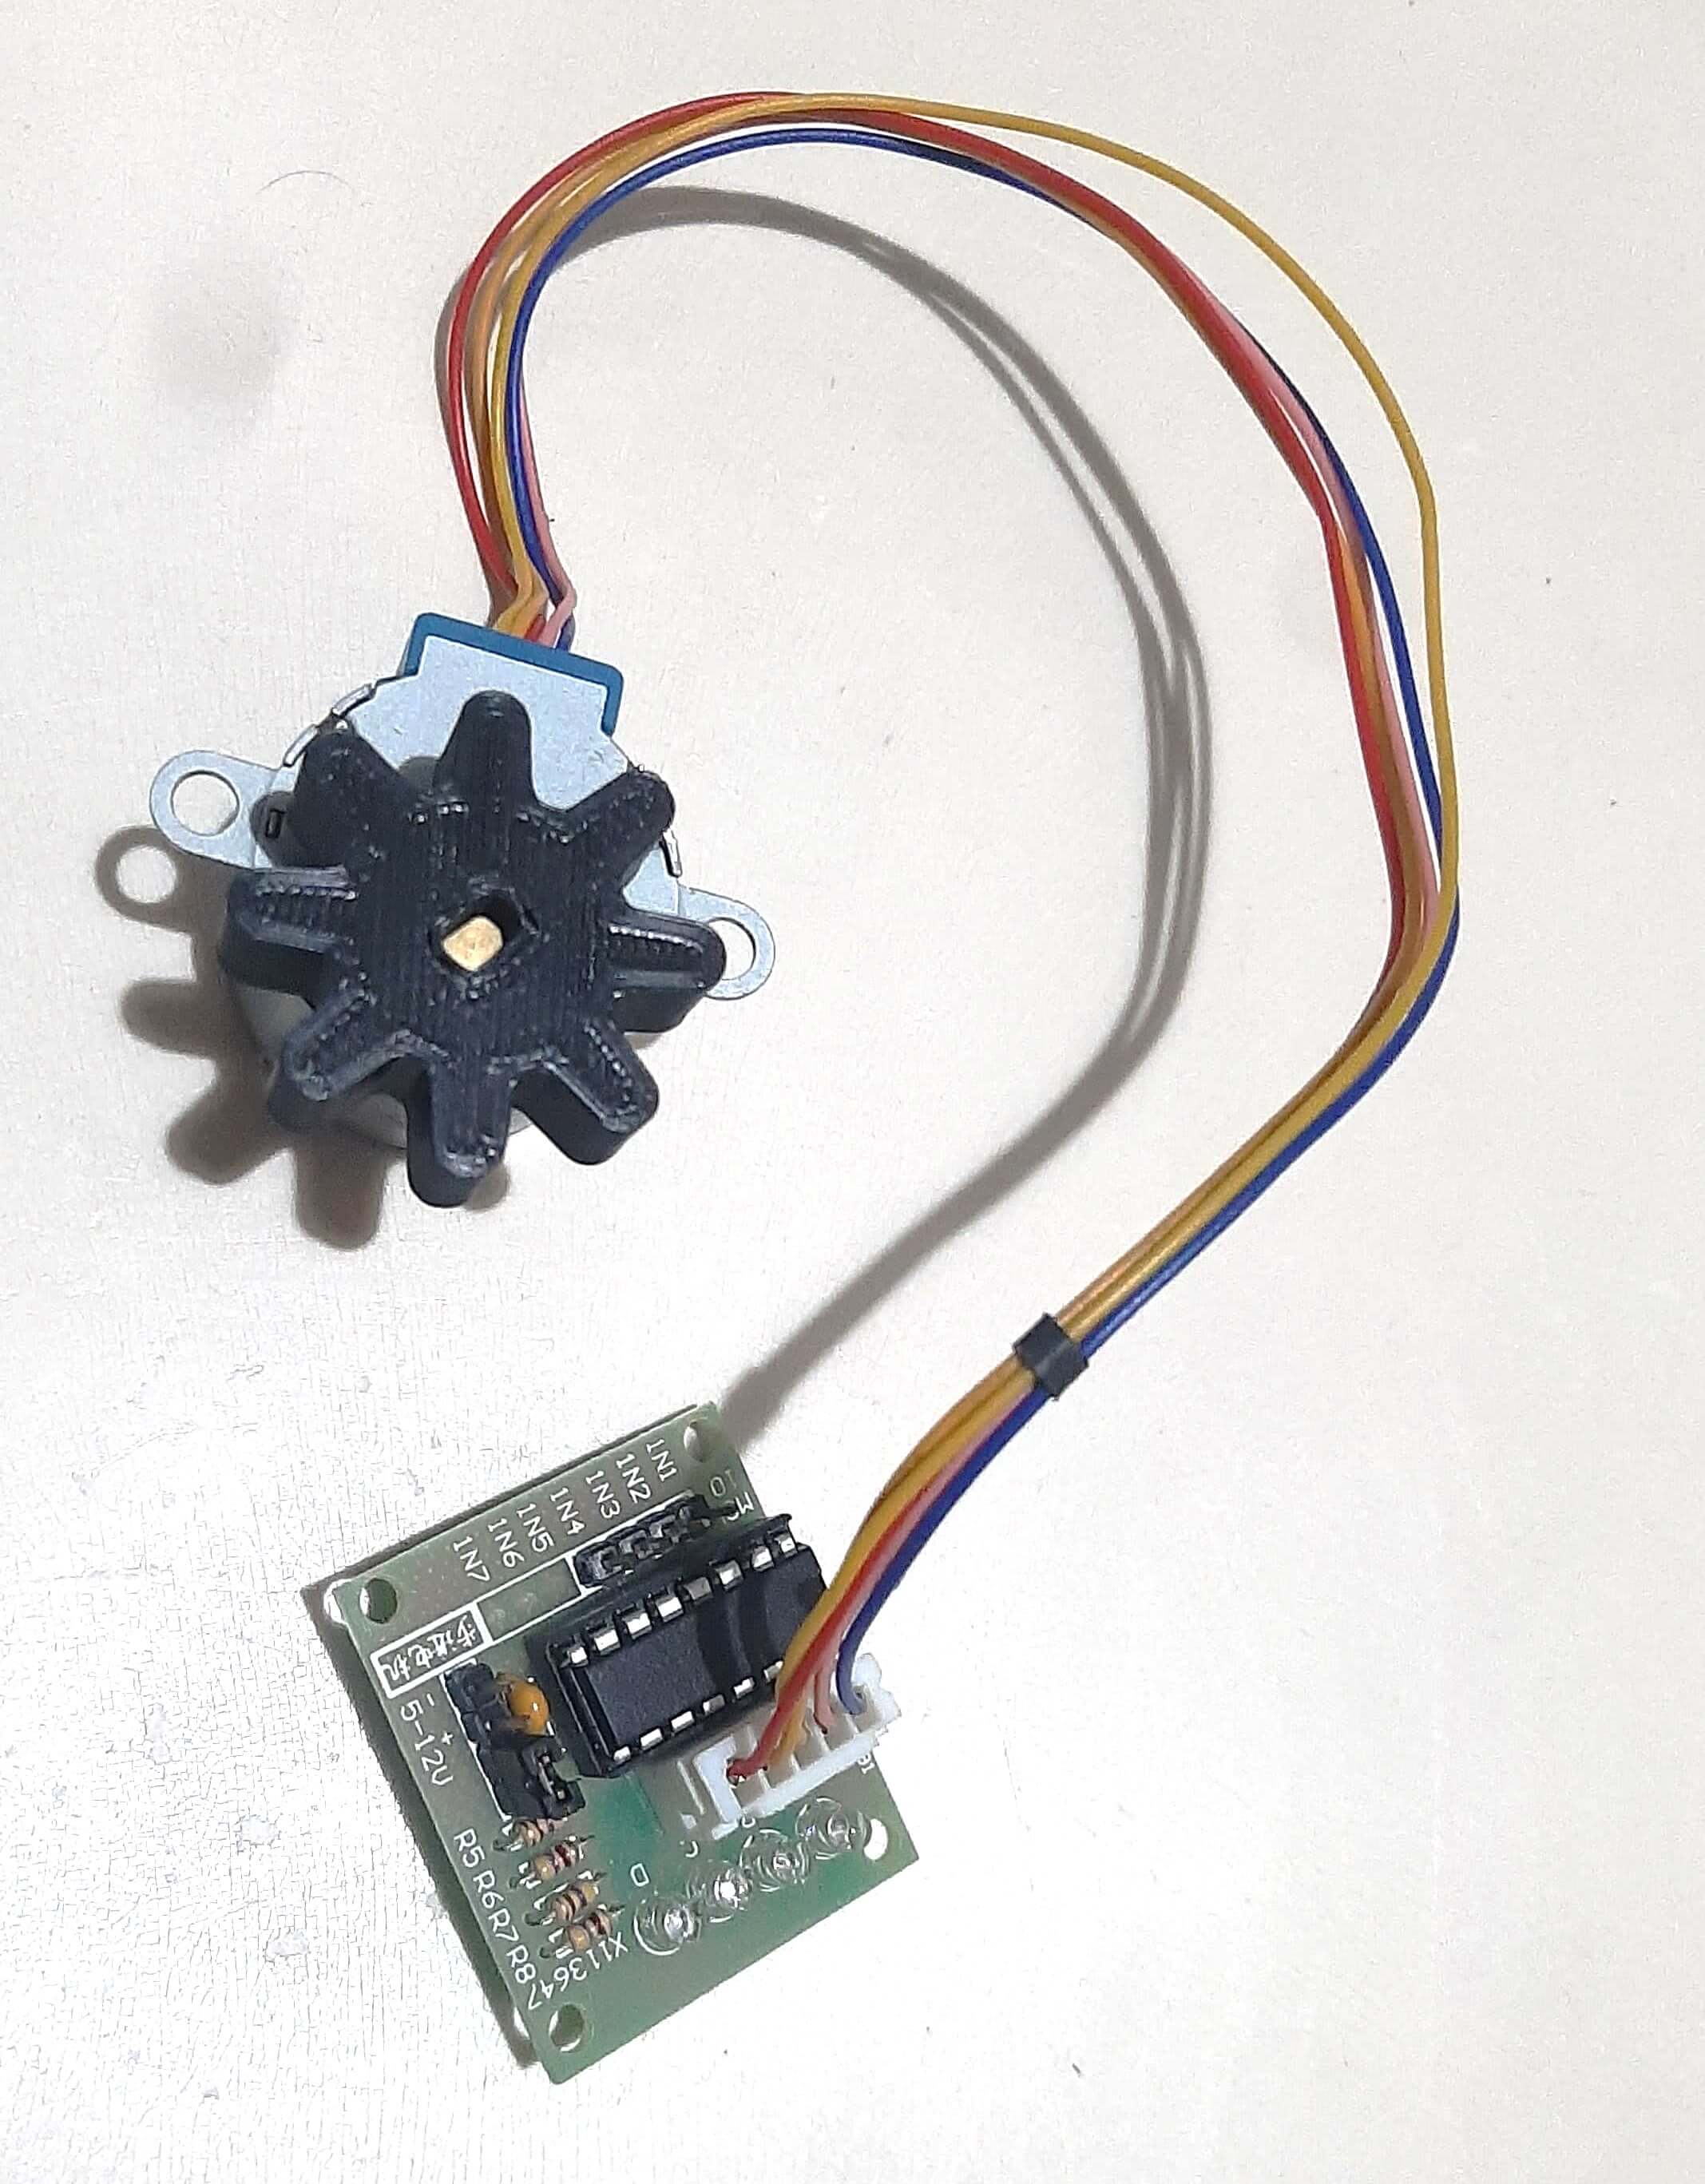
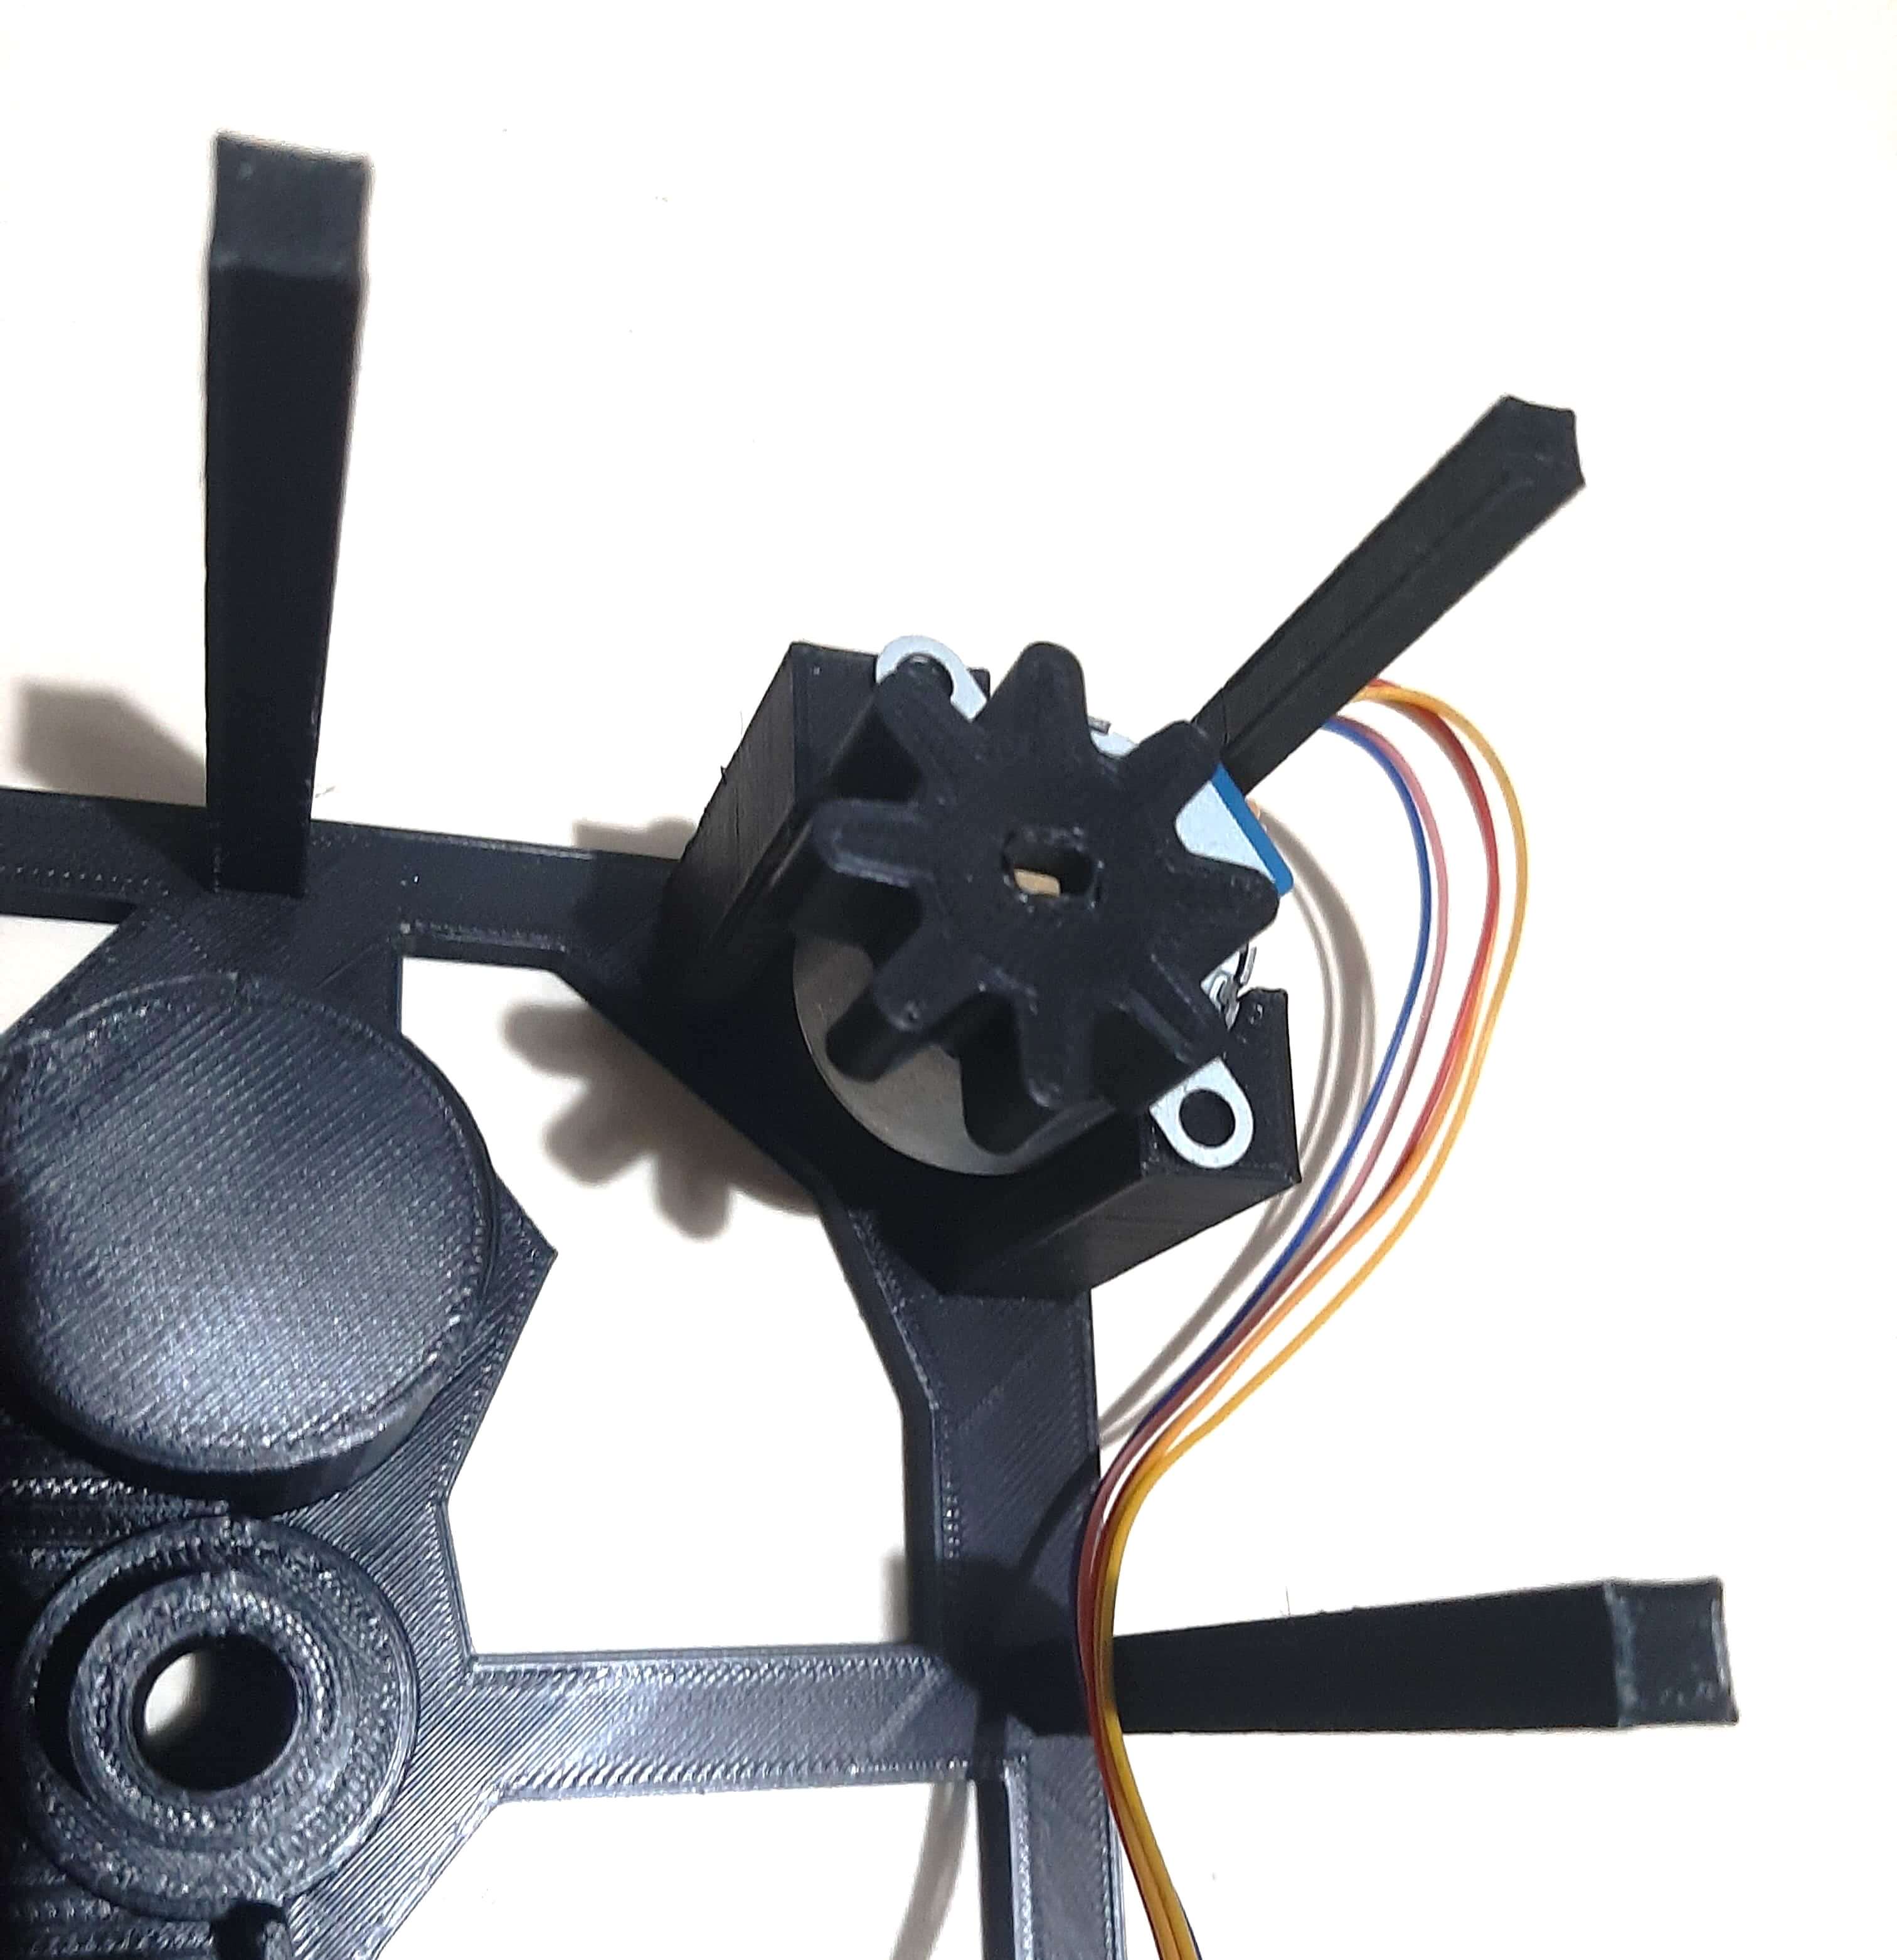

Ones, everything is assembled, I started testing the machine, I added some bubble gum balls to the machine and started the code. The first test was a success, the machine dispensed one bubble gum ball at a time, we just needed to calculate the steps of the motor to dispense the bubble gum balls in a controlled manner.
The next video shows the machine in action, dispensing bubble gum balls. But in this case using the motion sensor to detect when the user passes the hand over the machine, this will trigger the motor to rotate and dispense a bubble gum ball.
The final result of the machine is a fully functional bubble gum dispenser machine that can dispense bubble gum balls in a controlled manner.
VIDEO
Issues
During the printing process, I had some issues with the 3D printer, the first issue was that while printing the bottom body of the machine, was a cut off in the middle of the print, this caused that the print was not finished and I had to start the print again, this was a problem because I had to wait for the print to finish and the time was limited.
Another issue that I had was that the small gear, I tried to print it with a different fill density, I tried to print it with 50% fill density, but the print was not strong enough and the motor damaged the gear, so I had to print it again with 100% fill density, this solved the problem and the gear was strong enough to withstand the force of the motor.
Things to Improve
Talking about something I would like to improve in the future is add a battery system to give the capability of by portable.
Another improvement the machine needs is to calibrate the motion sensor or maybe change to another type of sensor or simply modify the cap design, because the current design also triggers when someone moves close to the machine, it's not a problem but if I can improve this would be good.
Also, I want to add a small screen, like the OLED I tested during week 10 for output devices, to show animations or notify you when the machine is going to dispense a bubble gum.Project Files links
In the next links, you can download the files for the assignments.
- Top Part Machine SolidWorks
- Body Part Machine SolidWorks
- Funnel Part Machine SolidWorks
- Cap Part Machine SolidWorks
- Gear 1 Part Machine SolidWorks
- Gear 2 Part Machine SolidWorks
- Top Part Machine STL
- Body Part Machine STL
- Funnel Part Machine STL
- Cap Part Machine STL
- Gear 1 Part Machine STL
- Gear 2 Part Machine STL
- Code VS Code Platform IO Project
Conclusion
In conclusion, this week was really interesting, I learned a lot about mechanical design and how to create a machine that can dispense bubble gum balls. The automation of the machine was also a great experience, I used all the knowledge that I have learned in the previous weeks to create a machine that can dispense bubble gum balls in a controlled manner.
Lessons Learned
I learned a lot about mechanical design and how to create gears. I also learned how to automate a machine using electronics and programming. The most important lesson that I learned is that the design process is really important, you have to consider all the details and make sure that the parts fit together and work properly, this will save you a lot of time and effort in the future.