
Week 16
Introduction
This page outlines the steps followed during week 16 of the Fab Academy assignments.
The tasks for this week involved WildCard Week and the following assignments:
- Design and produce something with a digital process (incorporating computer-aided design and manufacturing) not covered in another assignment, documenting the requirements that your assignment meets, and including everything necessary to reproduce it.
Assignment:
Let's start.....................

Assignment
For this week, I decided to make an Embroidery assignment. The goal was to explore the use of digital embroidery machines to create a custom design.
I started by designing a pattern using Wilcome Embroidery Studio. The design was then exported in a format compatible with the embroidery machine, such as .JEF, .JPX, .SEW and .PES.
But before start in details with the embroidery assignment, I need to explain the Embroidery machine that I used for this assignment, and also the Wilcom Embroidery Studio software.
Embroidery Design Materials
| Component | Description | Fabrication Method |
|---|---|---|
| Wilcom Embroidery Studio | Software used to design embroidery patterns | Digital Design |
| Janome MC 500E | Embroidery machine used to stitch the design | Machine Embroidery |
| Fabric | Base textile on which the embroidery is stitched | Purchased |
| Stabilizer (Interfacing) | Material placed under the fabric to provide support | Purchased |
| Embroidery Threads | Color threads used for stitching the design | Purchased |
| Embroidery Hoop | Frame to hold fabric and stabilizer in place | Included with Machine / Purchased |
| USB Drive | To transfer the design file from software to machine | Purchased |
Embroidery machine
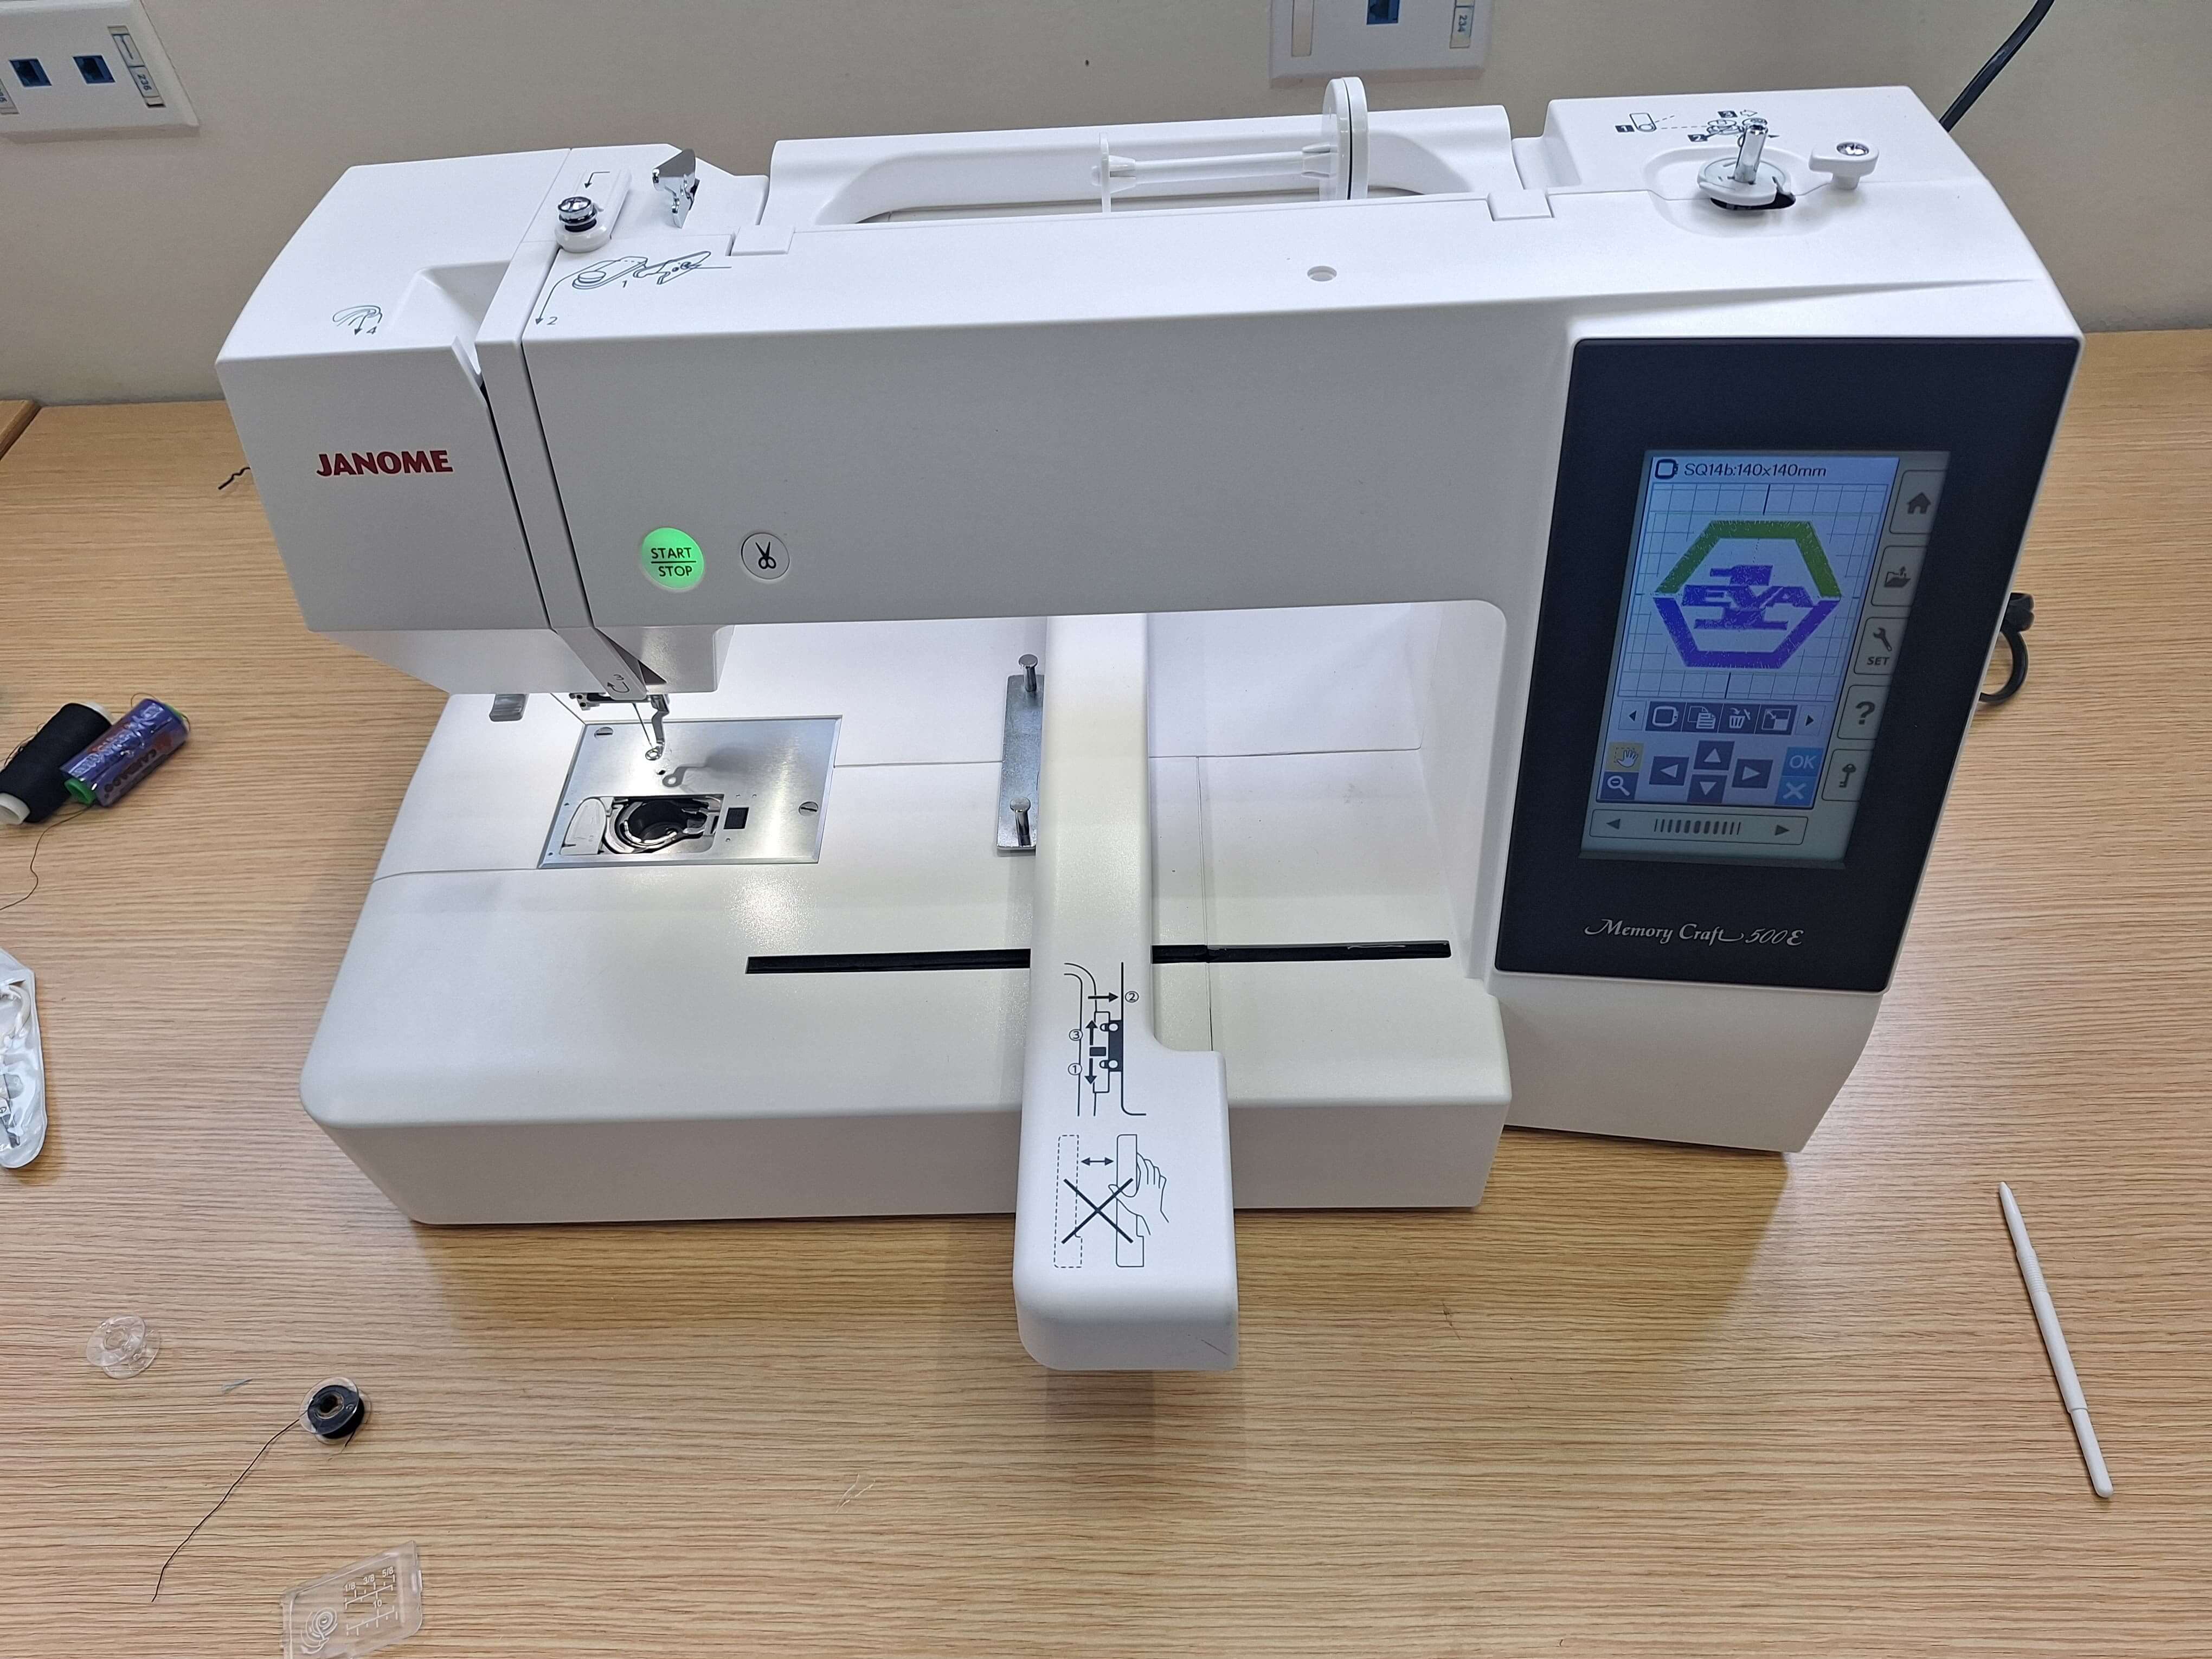
The Janome MC 500E is a digital embroidery machine that allows users to create intricate designs on fabric. It features a large embroidery area, multiple built-in designs, and the ability to import custom designs via USB. The machine is equipped with advanced technology that ensures precise stitching and a variety of stitch options.
The machine is user-friendly, with a touchscreen interface that allows for easy navigation and customization of designs. It also includes features such as automatic thread cutting, adjustable speed settings, and a built-in needle threader. The Janome MC 500E is suitable for both beginners and experienced embroiderers, making it a versatile choice for creating personalized embroidery projects.
Some specifications of the Janome MC 500E:
- Embroidery Area: 7.9" x 11" (200mm x 280mm)
- Built-in Designs: 160
- Built-in Fonts: 6
- Maximum Speed: 860 stitches per minute
- USB Connectivity: Yes
- Touchscreen Interface: Yes
- Automatic Thread Cutter: Yes
- Design Creation: Yes
- Image Conversion: Yes
- Stitch Editing: Yes
- Color Management: Yes
- File Formats Supported: .DST, .PES, .JEF, .EXP, and more
- User Interface: Intuitive and customizable
- Advanced Stitch Types: Yes
You can find more information about the Janome MC 500E in the following link: Janome MC 500E
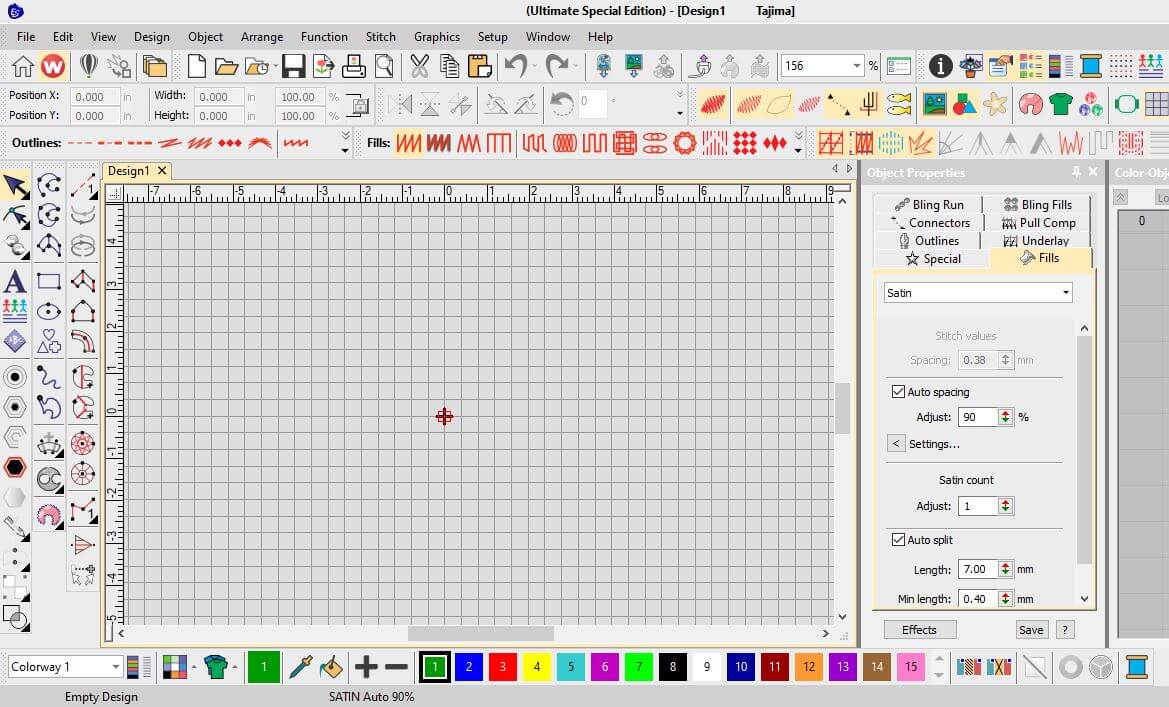
Wilcom Embroidery Studio
Wilcom Embroidery Studio is a professional embroidery design software used for creating and editing embroidery patterns. It offers a wide range of tools and features that allow users to design intricate embroidery designs, convert images into embroidery files, and customize stitch types and colors. The software supports various embroidery file formats, making it compatible with different embroidery machines. Wilcom Embroidery Studio is widely used in the embroidery industry for its advanced capabilities and user-friendly interface.
We used a free version of the software, which is available as a trial version. The trial version allows users to explore the software's features and capabilities, but it may have limitations compared to the full version.
Some specifications of the Wilcom Embroidery Studio:
You can find more information about the Wilcom Embroidery Studio in the following link: Wilcom Embroidery Studio
Designing the Embroidery Pattern
The design process involved creating a custom pattern using the Wilcom Embroidery Studio software. I started by selecting a base image and then used the software's tools to convert it into an embroidery design. The design was customized with different stitch types, colors, and sizes to achieve the desired look. The software also allowed me to preview the design and make adjustments before exporting it.
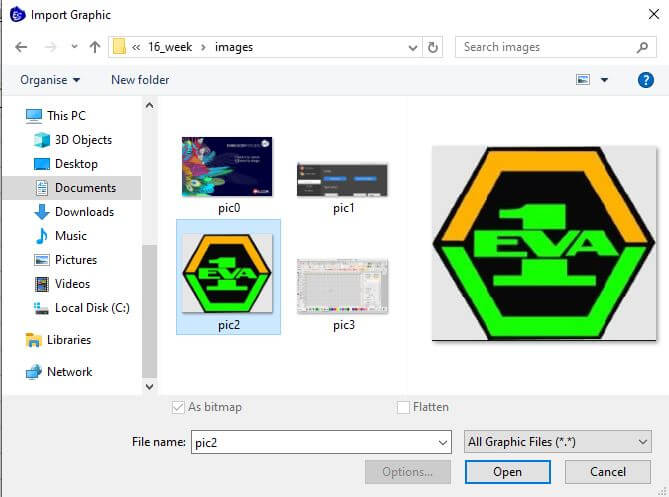
The first step was to select a base image for the embroidery design. I chose an image that was simple and had clear lines, as this would make it easier to convert into an embroidery pattern.

Image source EVA 1
After selecting the base image, I created a new design in Wilcom Embroidery Studio and imported the image.
To import the image, I used the "Import" function in the software and selected the image file.
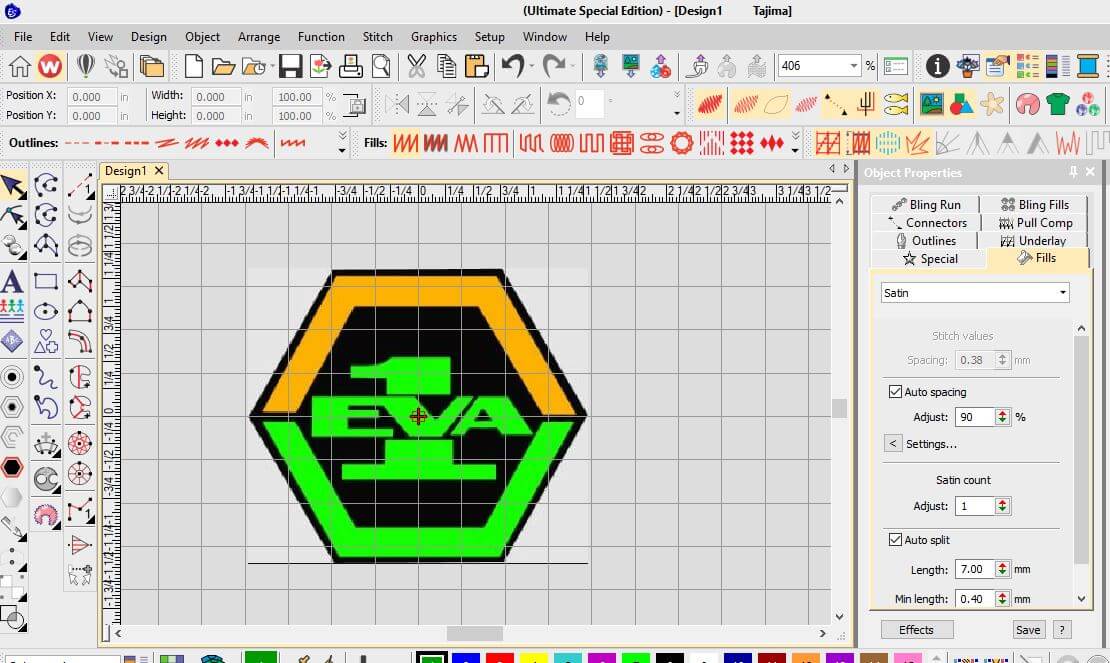
After importing the image, I used the software's tools to convert it into an embroidery design. I use the tool Close Trace to convert the image into a vector format. With this tool, I create all the lines and shapes of the image into close shapes, then the software automatically creates the stitches for the design.
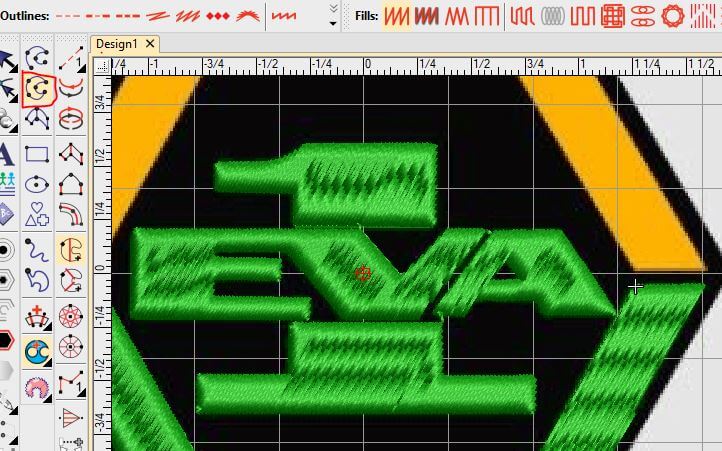
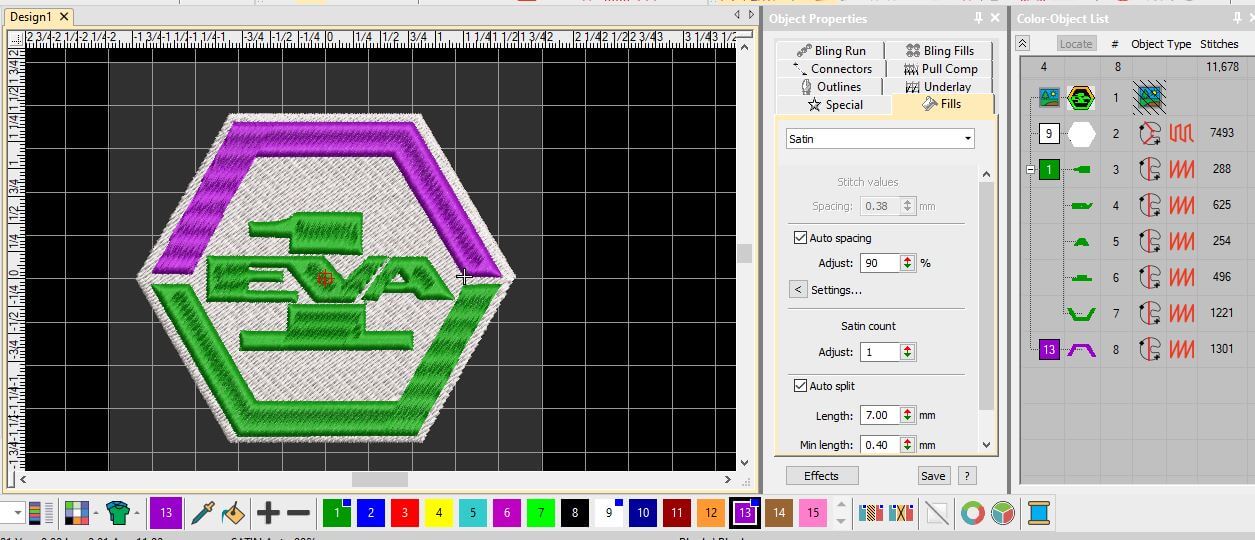
After creating the stitches, I used the software's editing tools to customize the design. I adjusted the stitch types, colors, and sizes to achieve the desired look. The software also allowed me to preview the design and make adjustments before exporting it. I tried different stitch types, such as satin stitches and fill stitches, to see how they would look in the final design. Also I changed the colors of the threads to match the design I had in mind.

After finalizing the design, I saved it in a format compatible with the embroidery machine. The Wilcom Embroidery Studio software supports various file formats, including .DST, .PES, and .JEF. I chose the .JEF format for my design, as it is compatible with the Janome MC 500E embroidery machine.
To save the design, I used the "Export Machine File" function in the software and selected the .JEF format from the list of available formats. I also made sure to name the file appropriately for easy identification later.
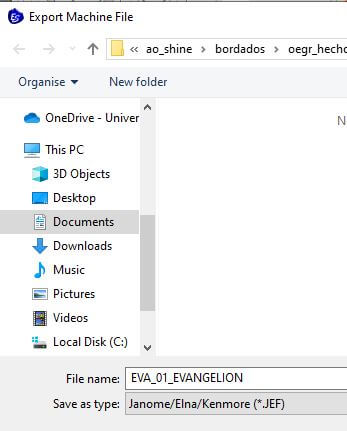
This software also let us save the design in different formats, such as .JPX, .SEW and .PES. all of them are compatible with the Janome MC 500E embroidery machine. Just the .PES format is not compatible with the Janome MC 500E embroidery machine. This is because the .PES format is a proprietary format used by Brother embroidery machines, and it may not be recognized by other brands of embroidery machines. But I also tried to save the design in this format, and it worked.
After saving the design, I transferred it to a USB drive for use with the embroidery machine. The Janome MC 500E has a USB port that allows users to easily transfer designs from a computer or USB drive.
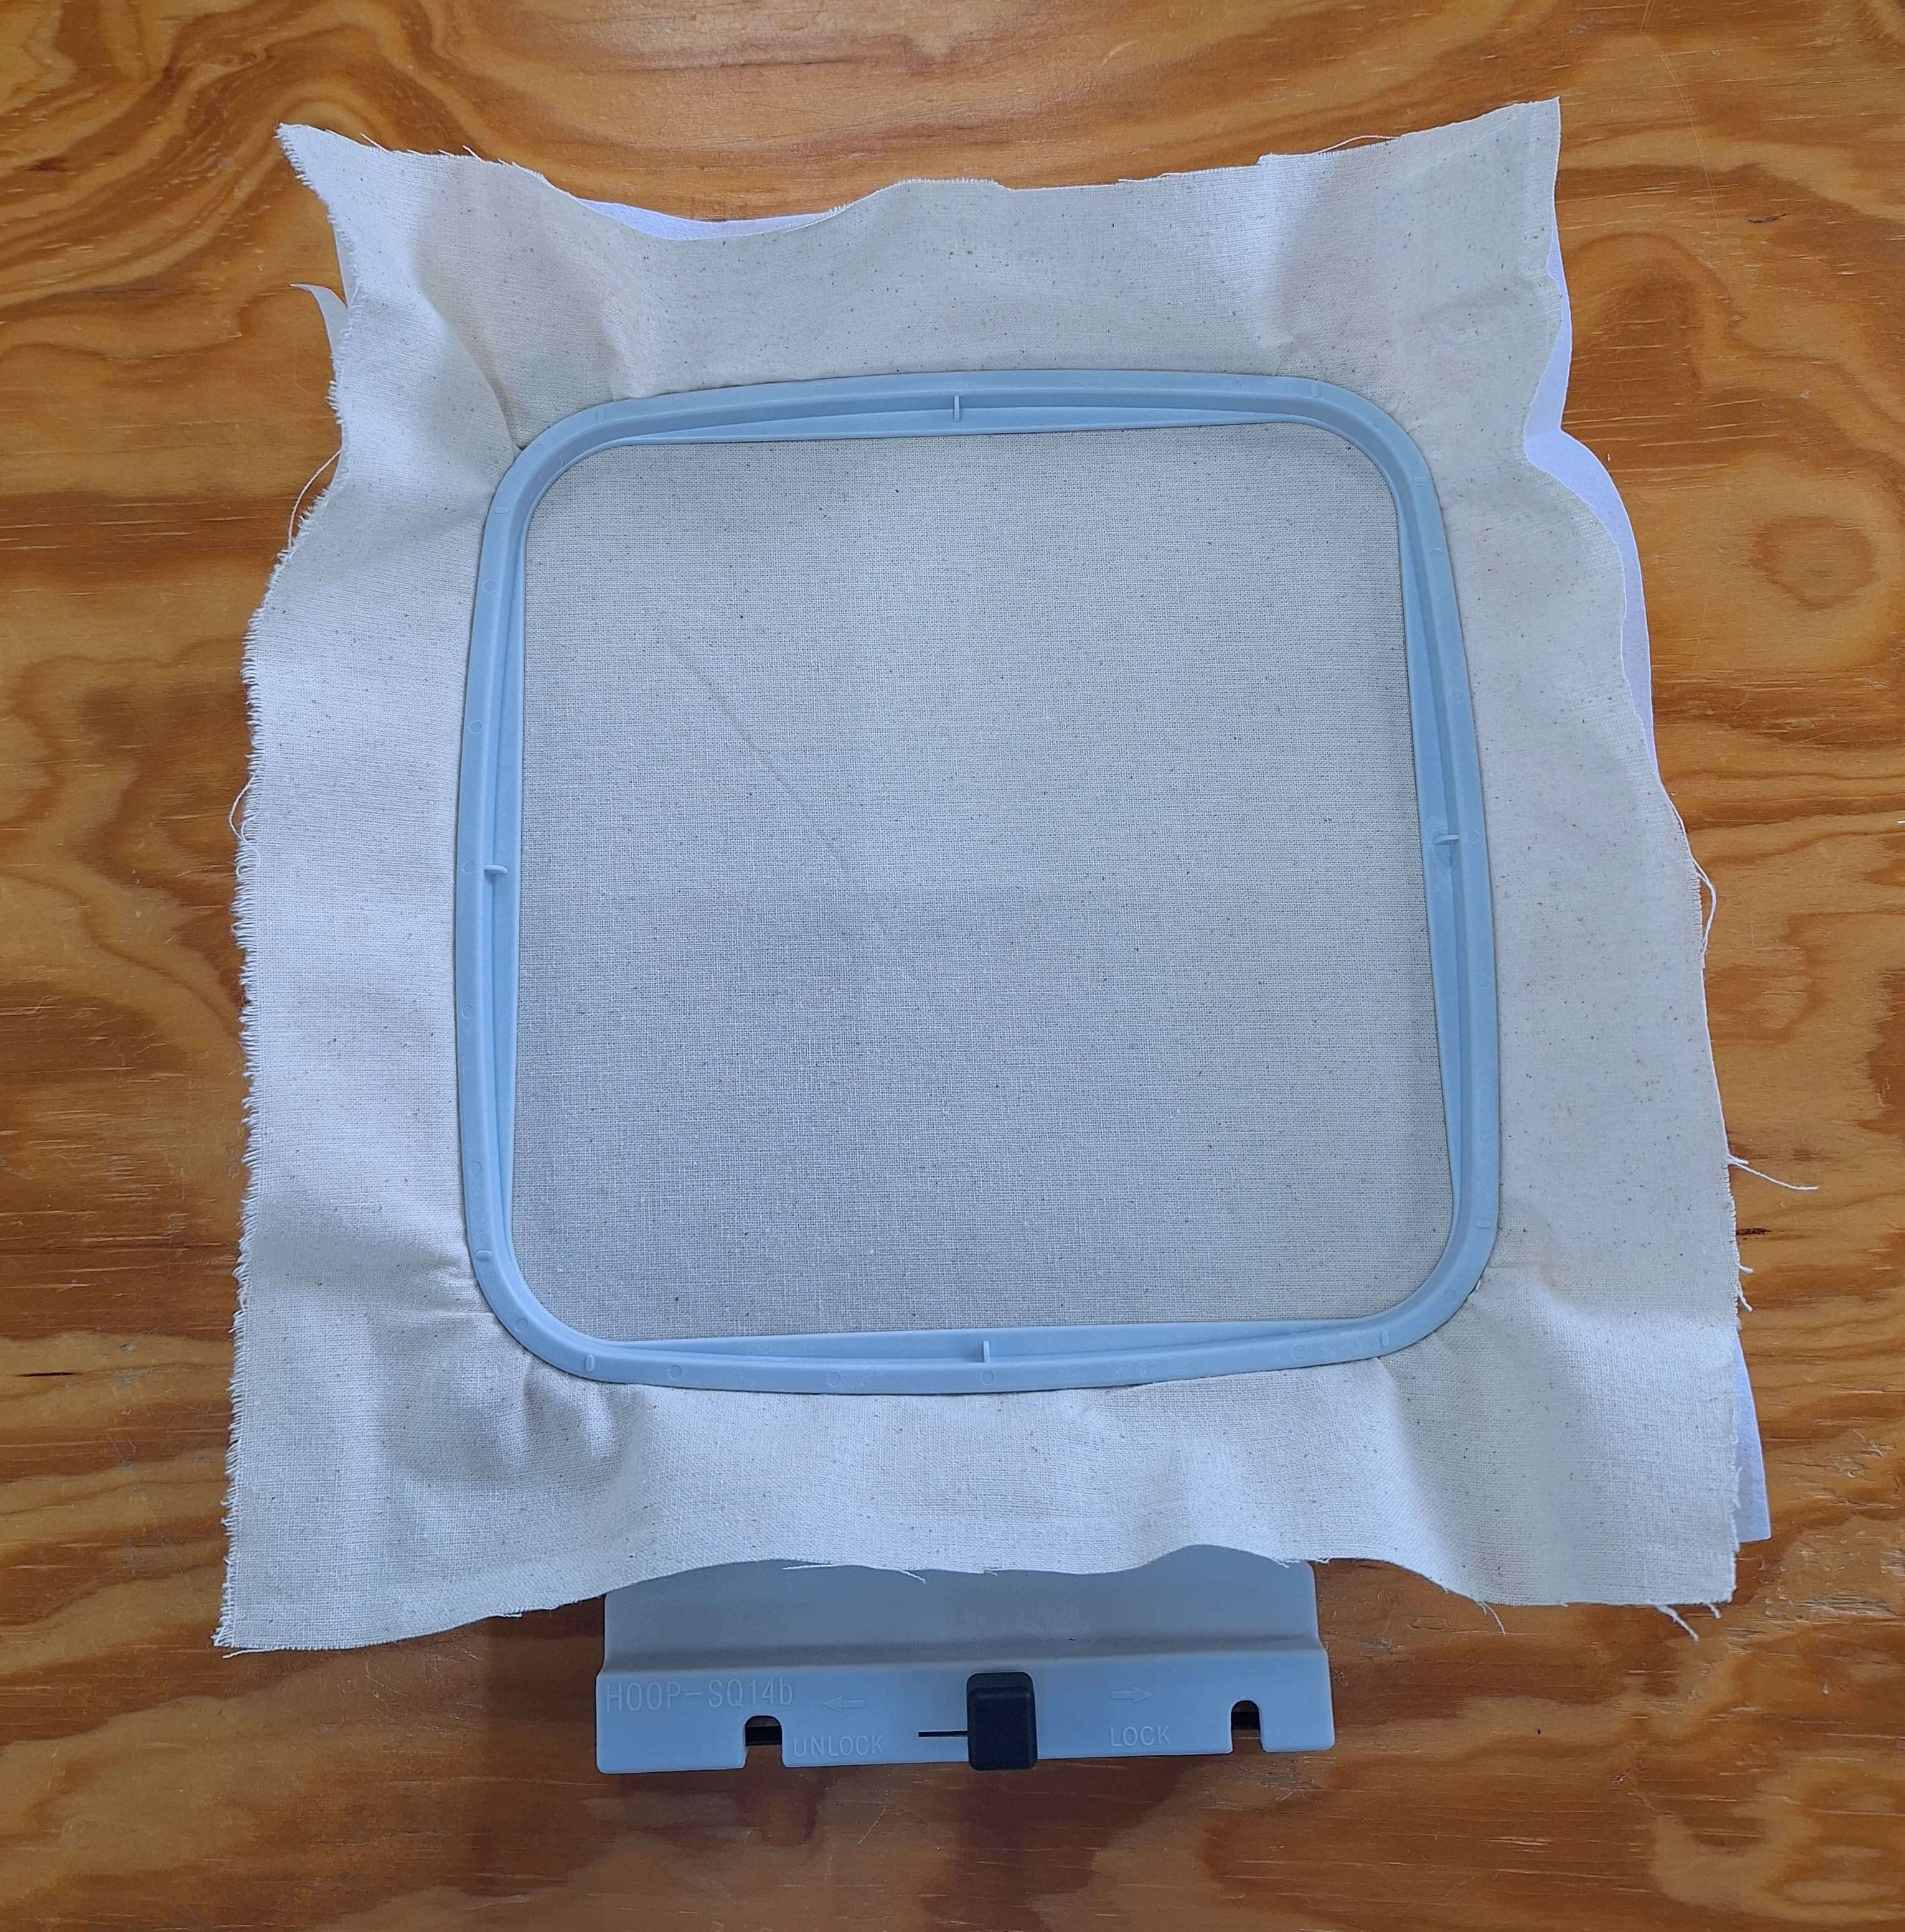
Preparing the Fabric and Stabilizer
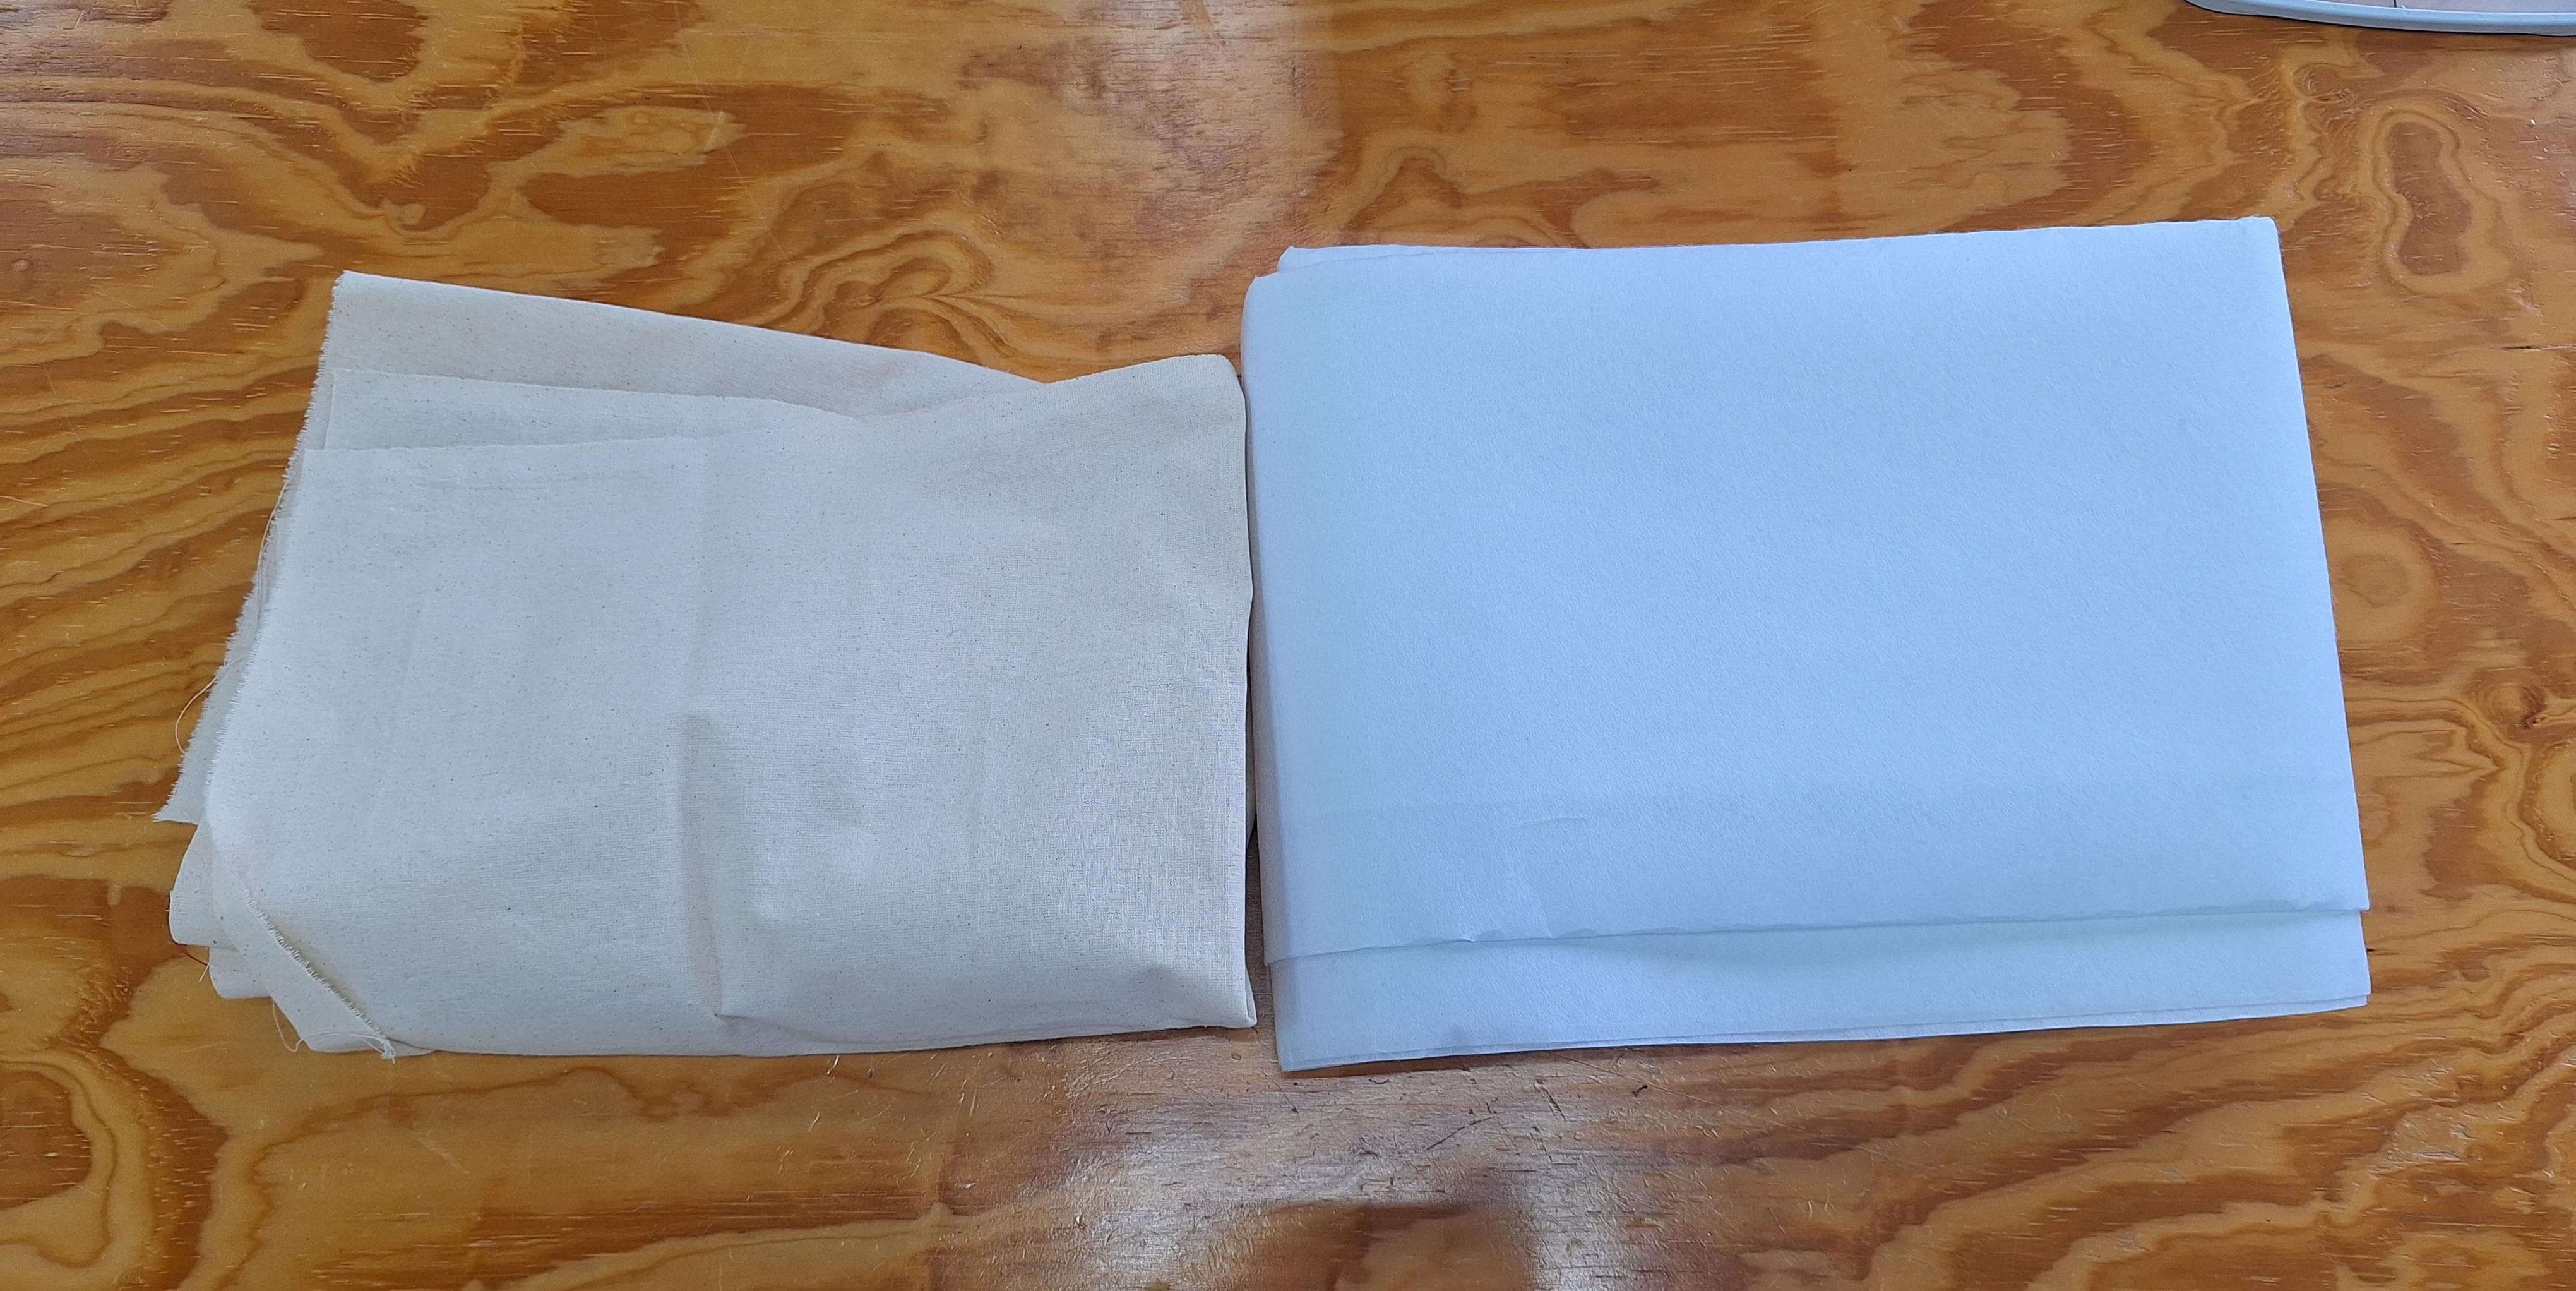
Before starting the embroidery process, I prepared the fabric and stabilizer. I chose a cotton fabric for the embroidery project, as it is easy to work with and provides a good base for the design. I also used a tear-away stabilizer to provide support during the embroidery process. The stabilizer helps prevent the fabric from puckering and ensures that the stitches are even and consistent.
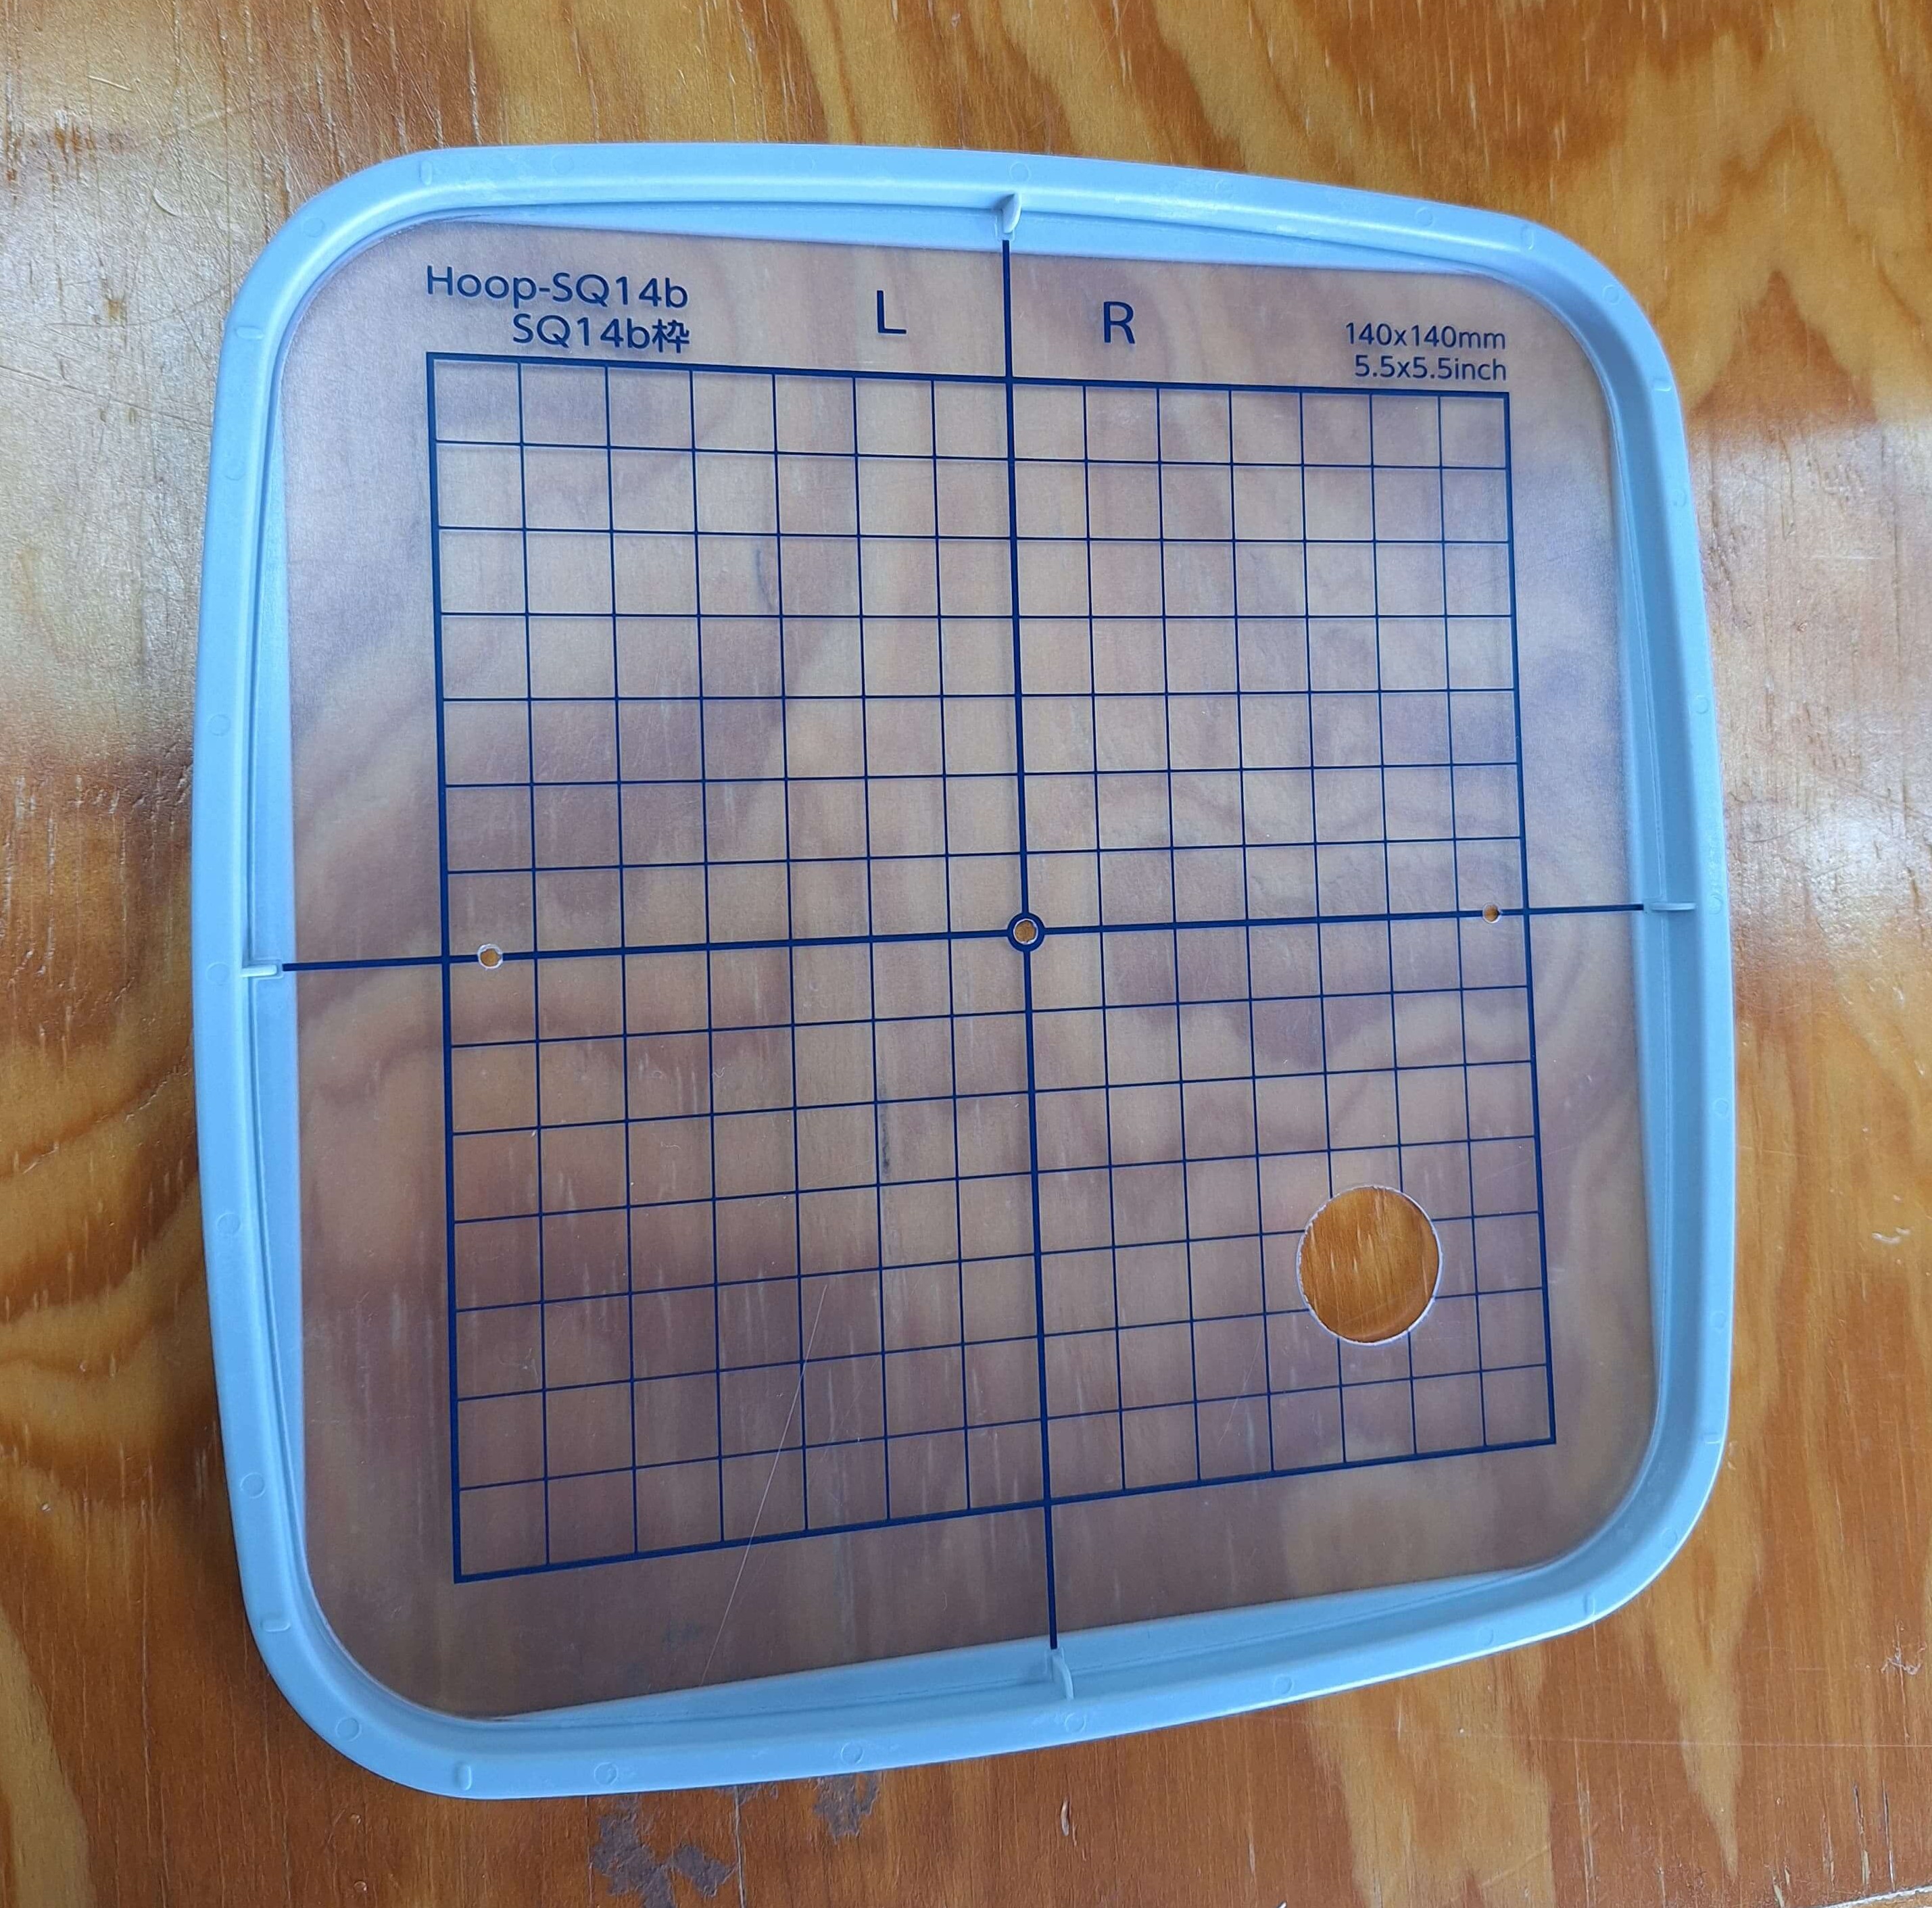
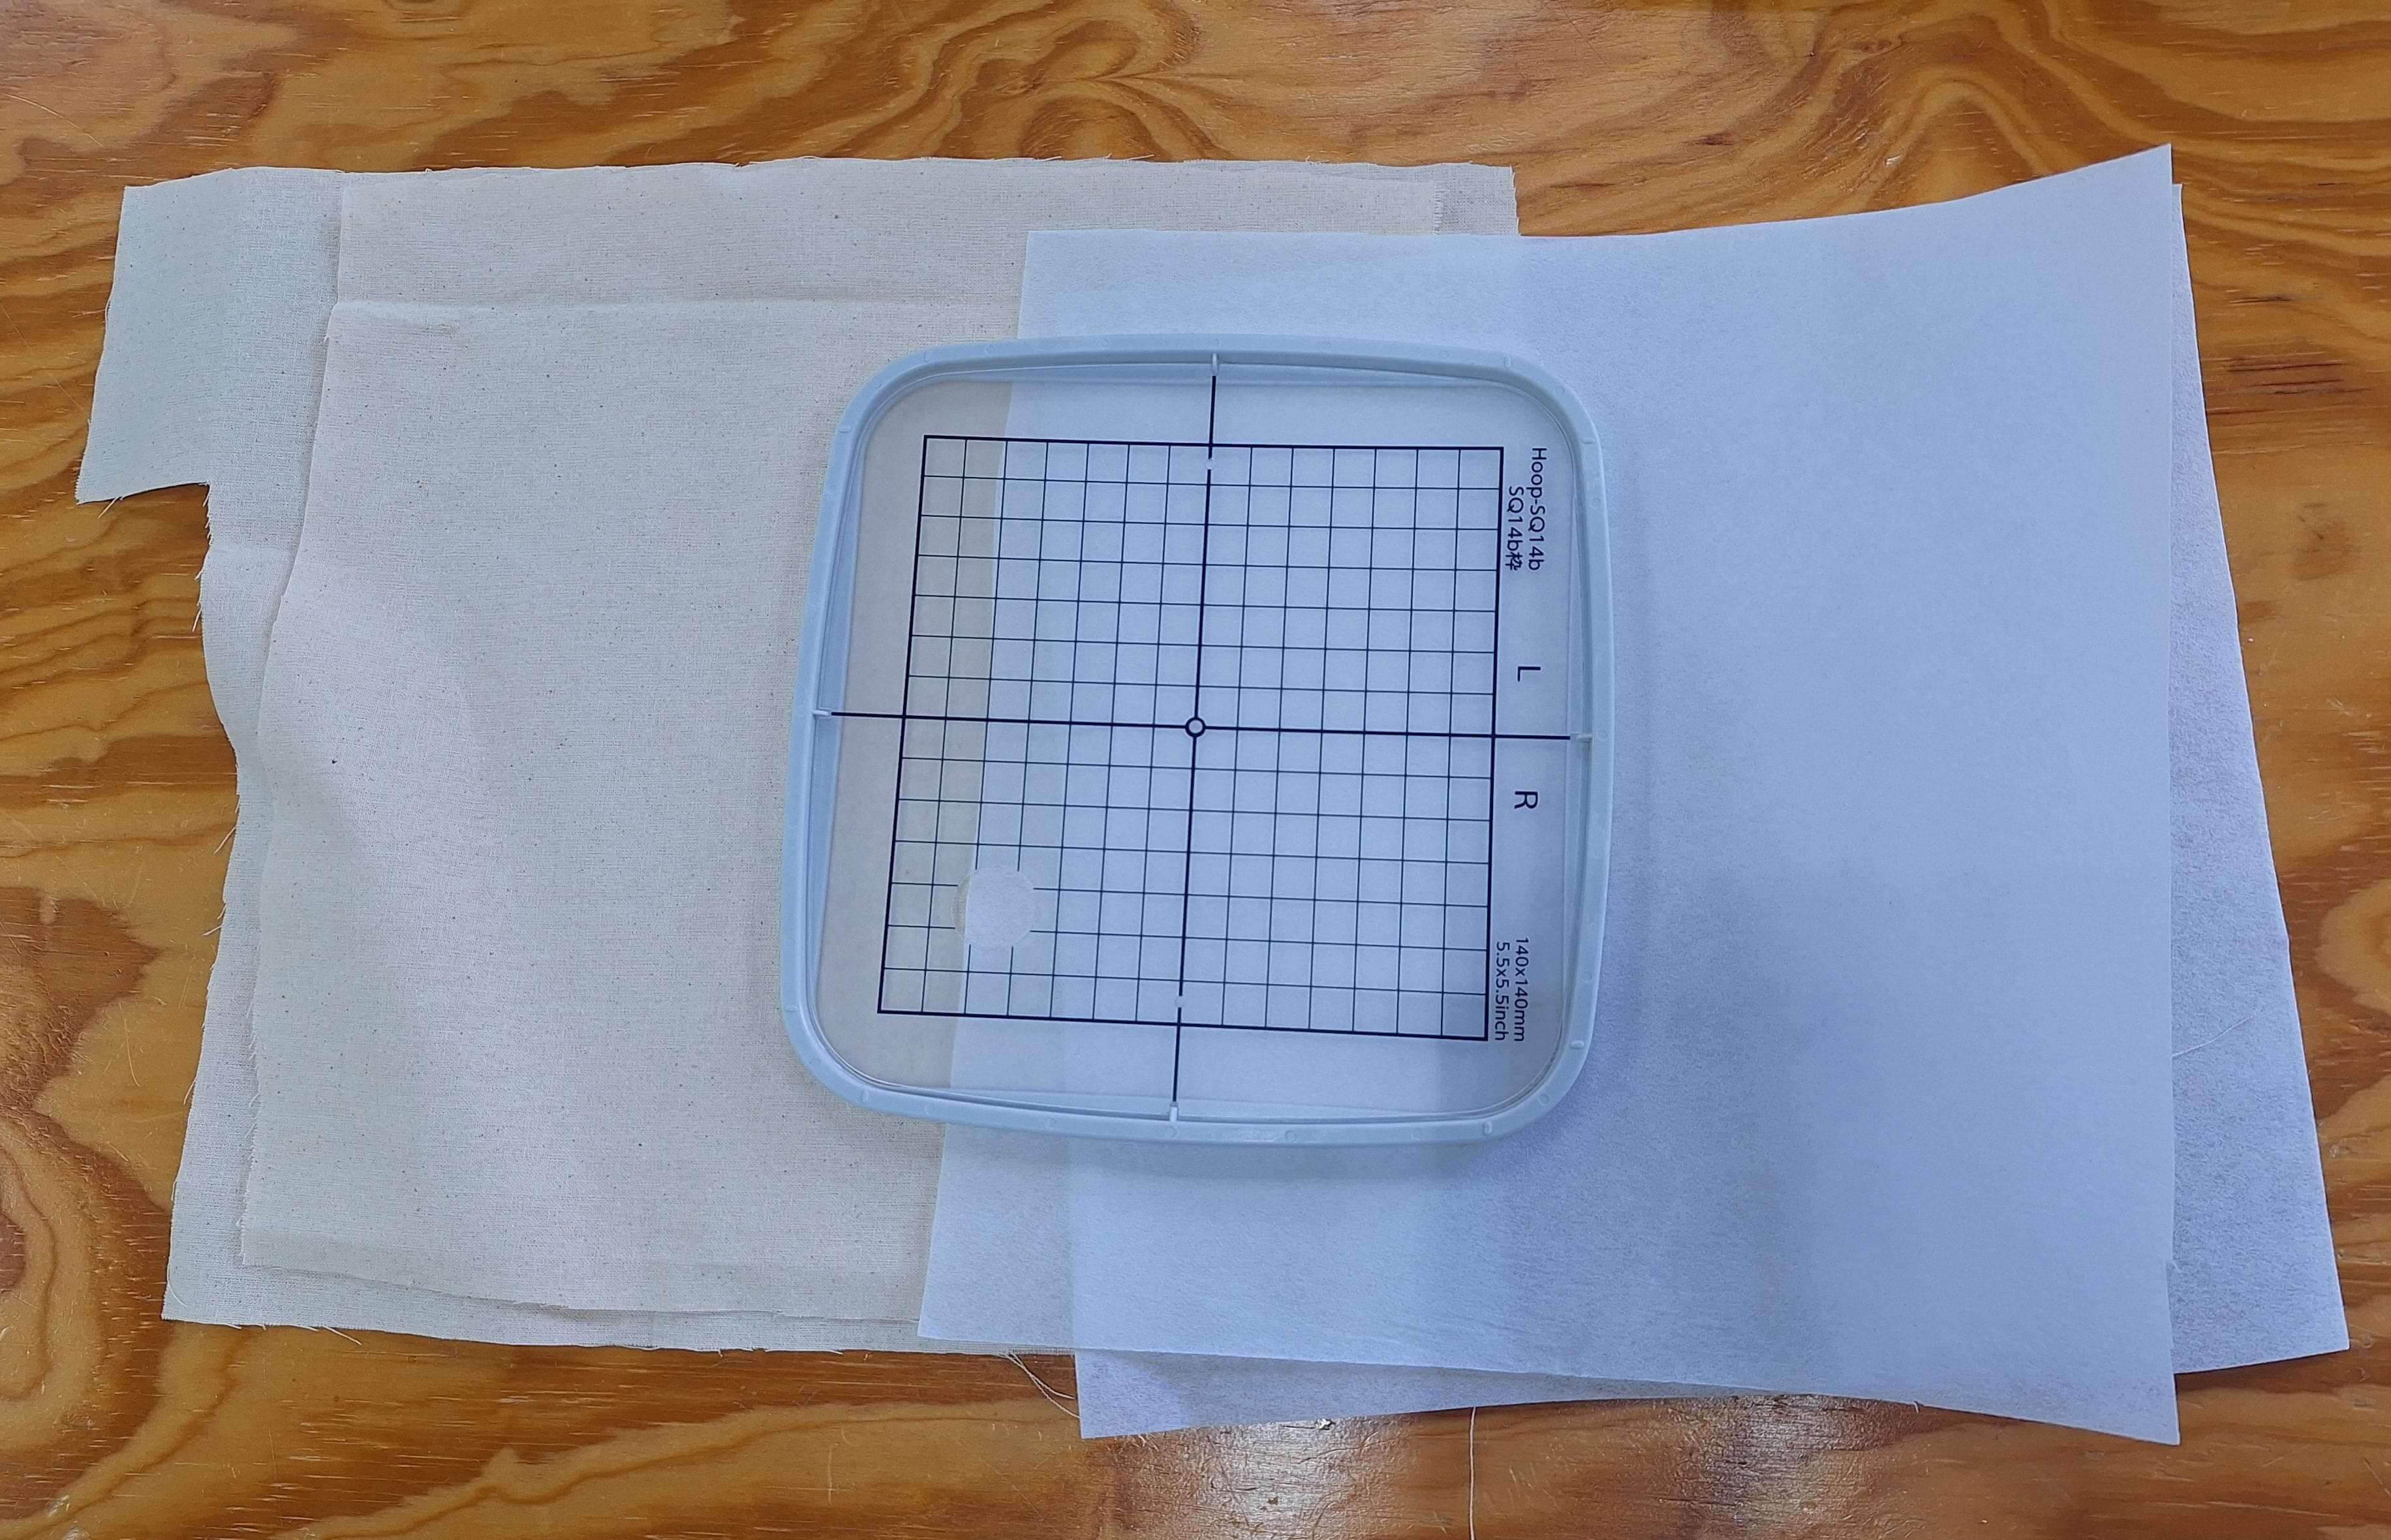
To prepare the fabric, I cut it to the desired size and placed it in the embroidery hoop along with the stabilizer. I made sure that the fabric was taut and secure in the hoop to prevent any movement during the embroidery process. The embroidery hoop holds the fabric and stabilizer in place, ensuring that they do not shift during stitching.
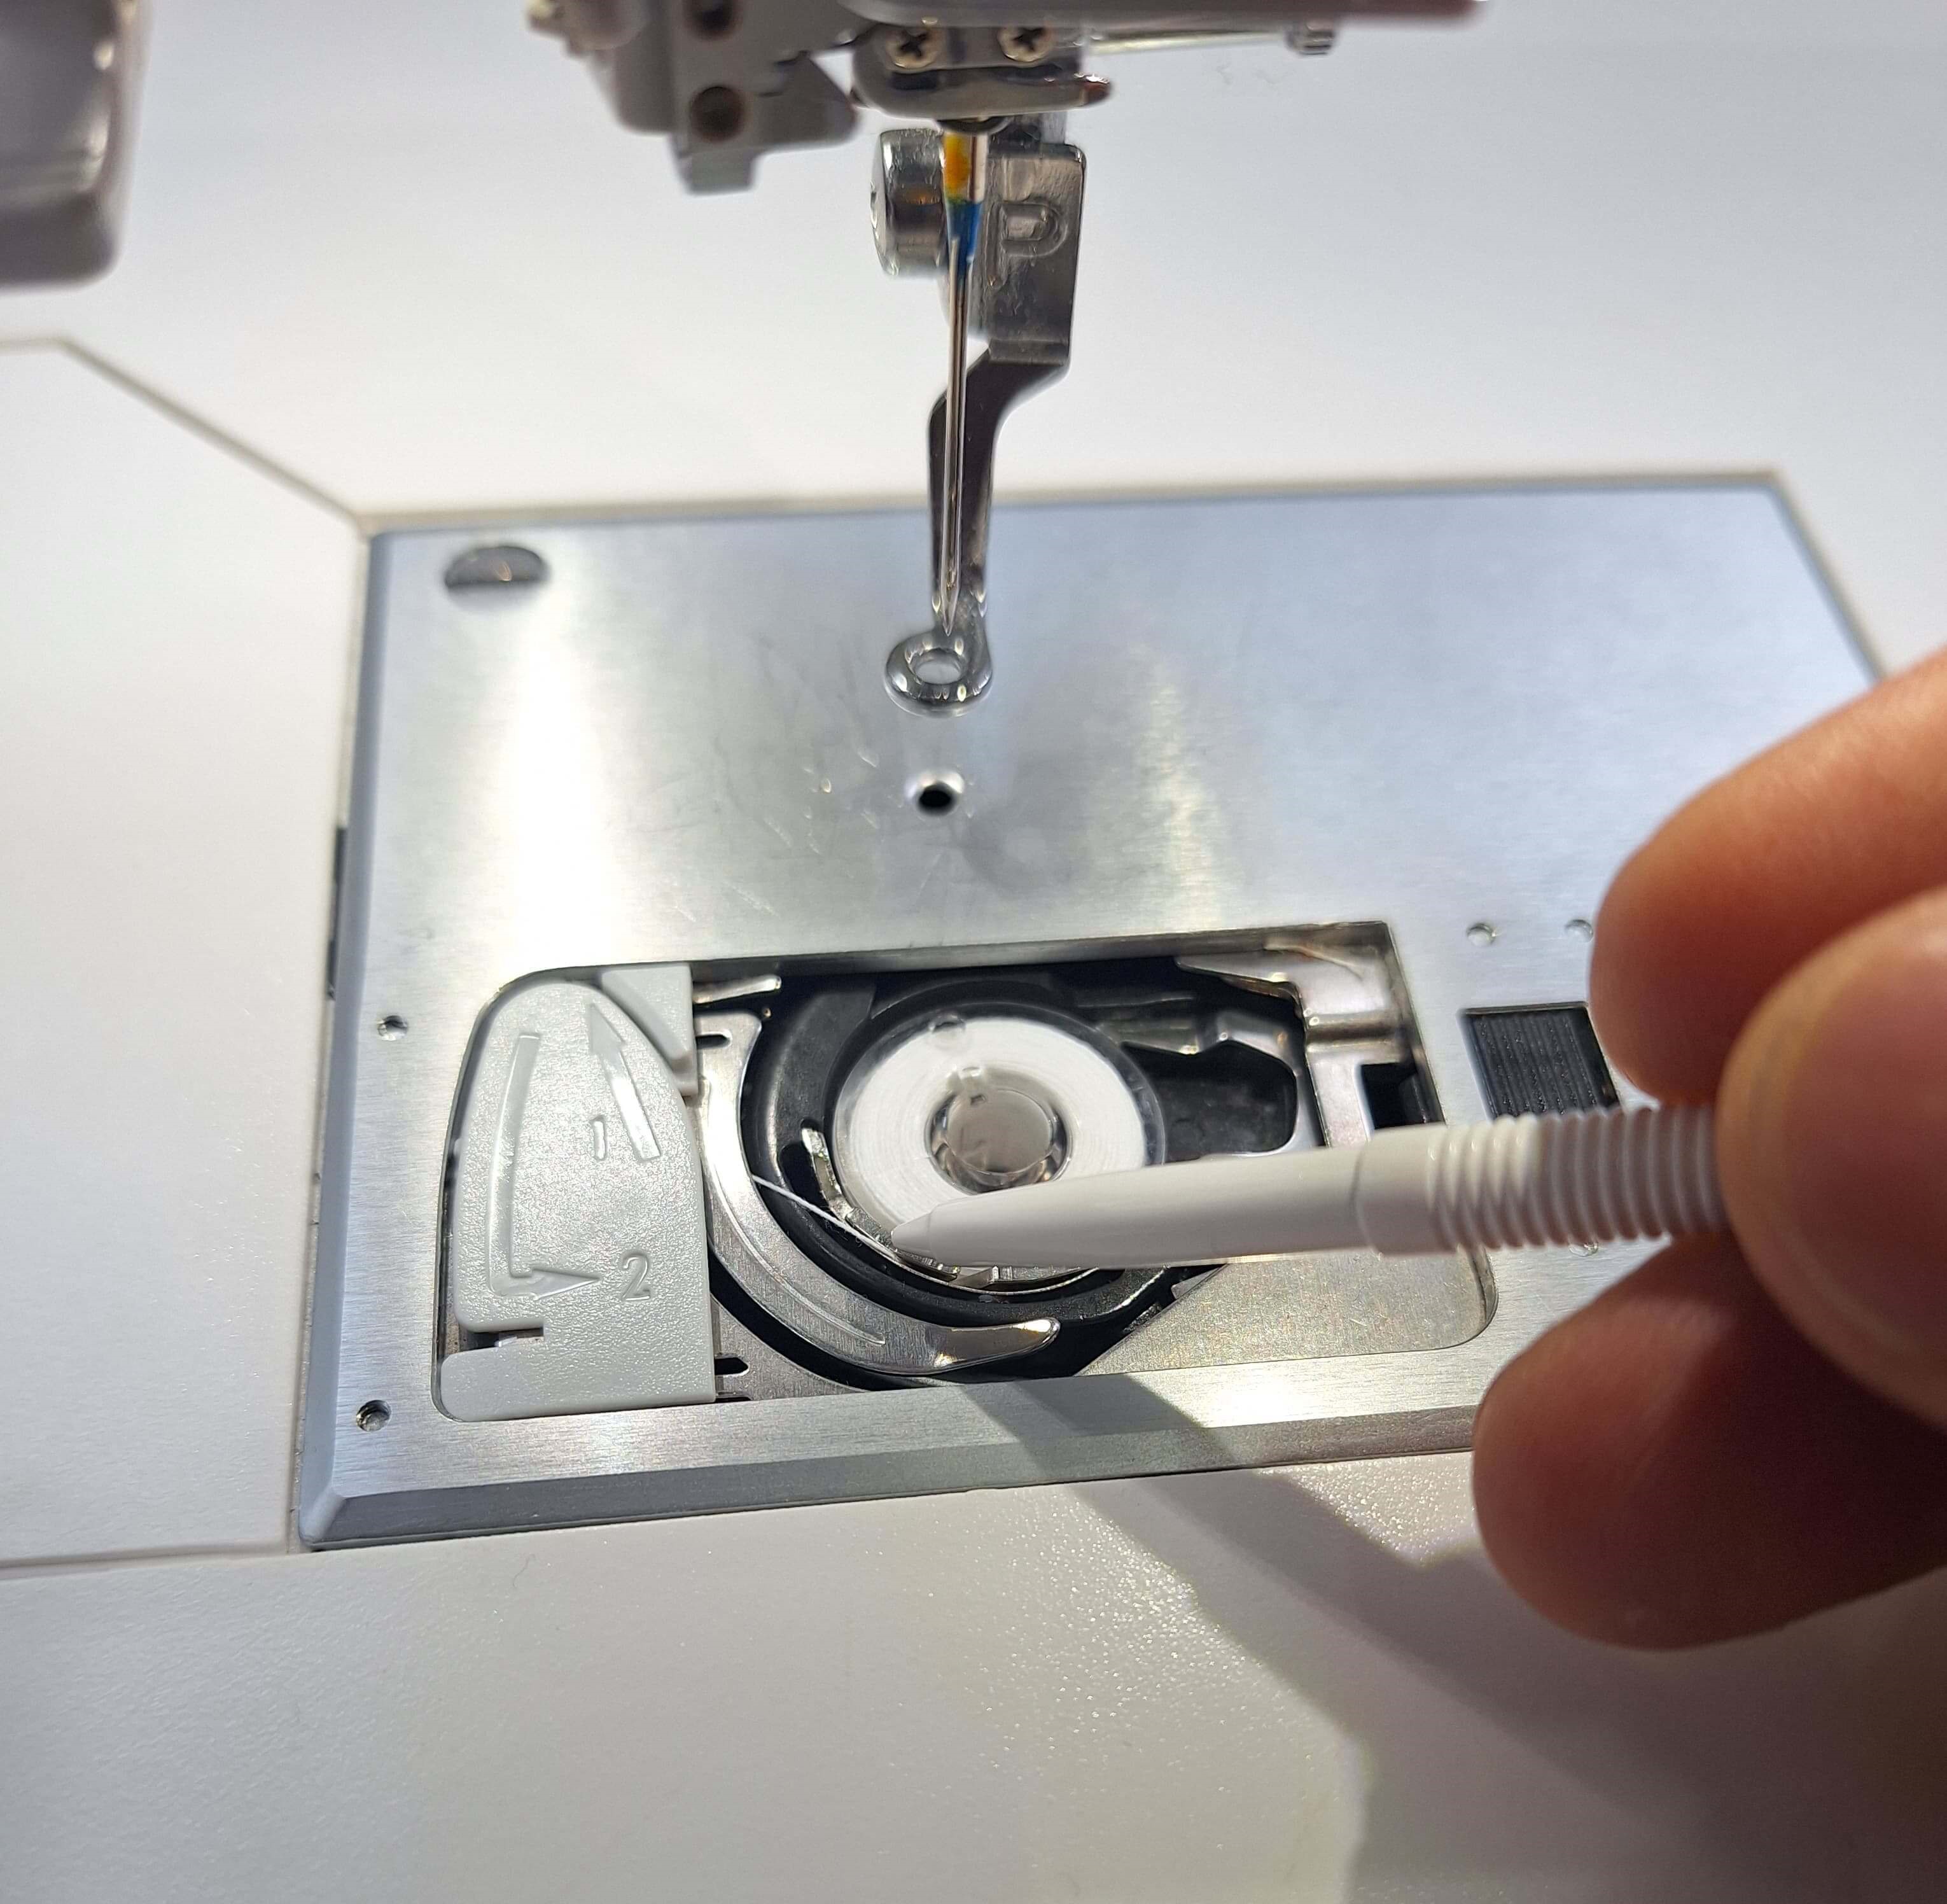
Before inserting the fabric and stabilizer into the embroidery machine, I made sure to thread the machine with the appropriate color thread for the design. The Janome MC 500E has a built-in needle threader that makes this process easier.
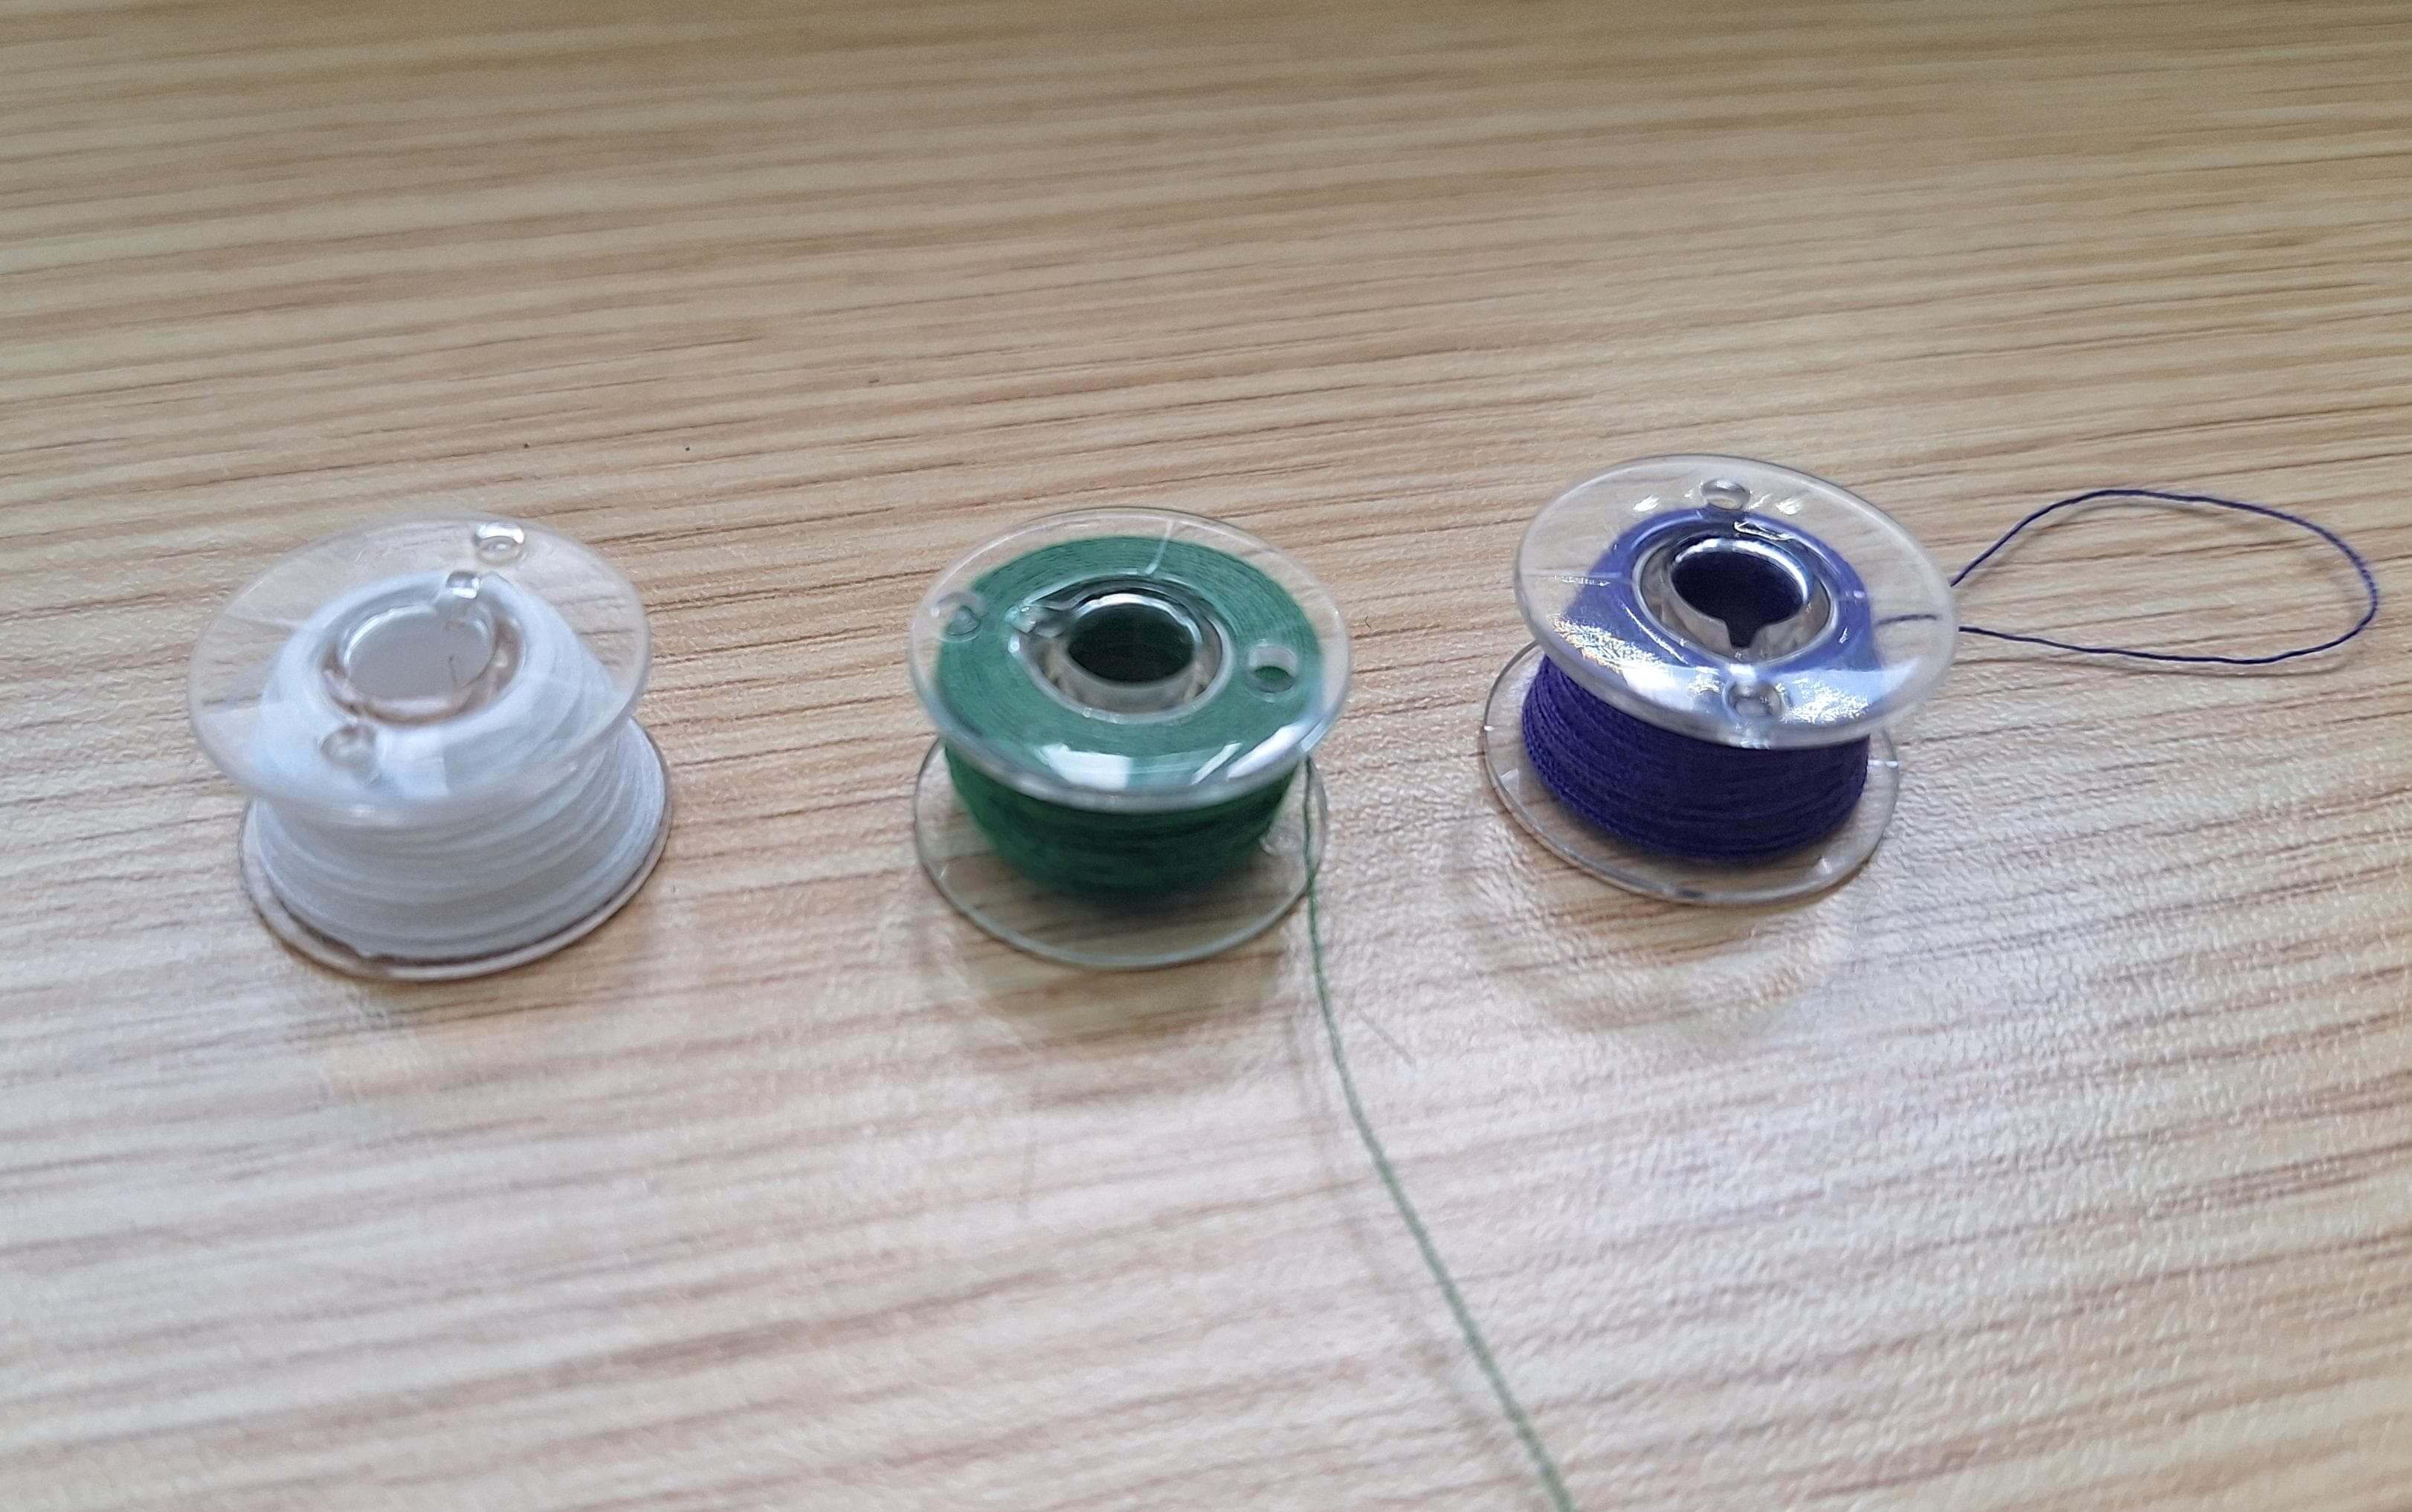
Also I made sure to have both the upper and bobbin threads properly threaded. The upper thread is the thread that is used for the top stitching, while the bobbin thread is used for the bottom stitching.
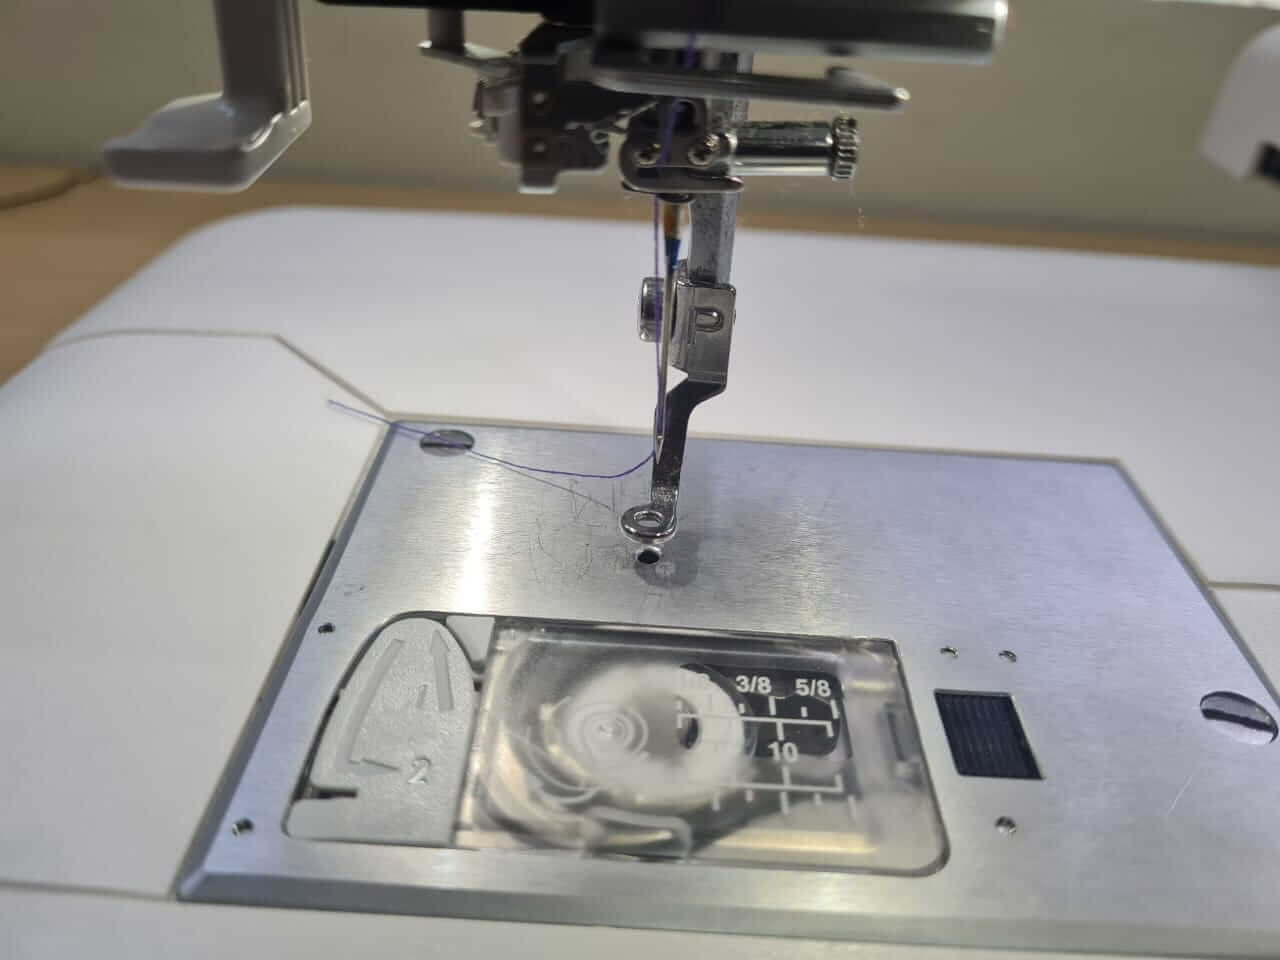
Now that the fabric and stabilizer were prepared, and the machine was threaded, I was ready to start the embroidery process.
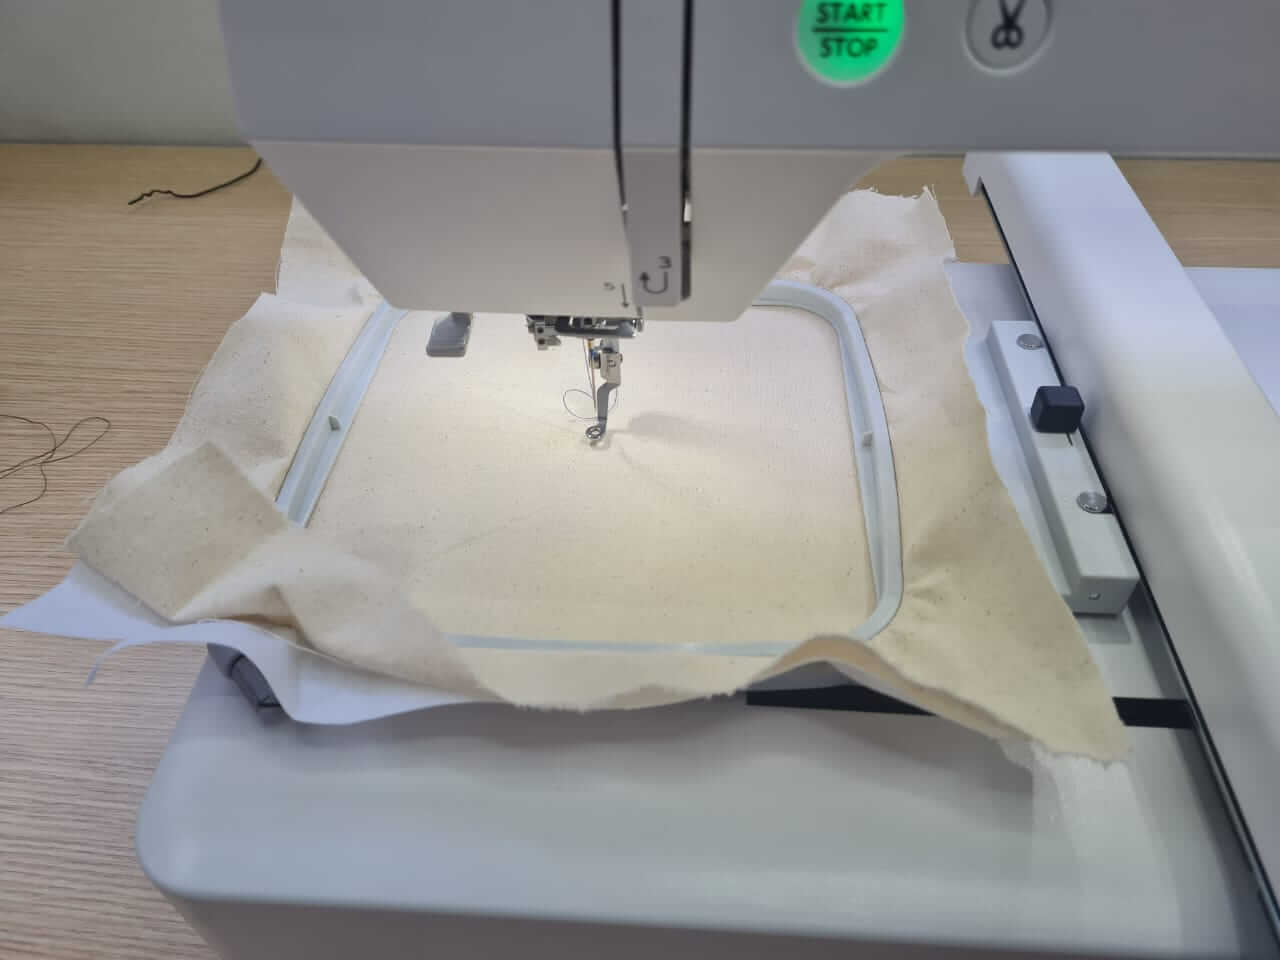
Embroidery Process
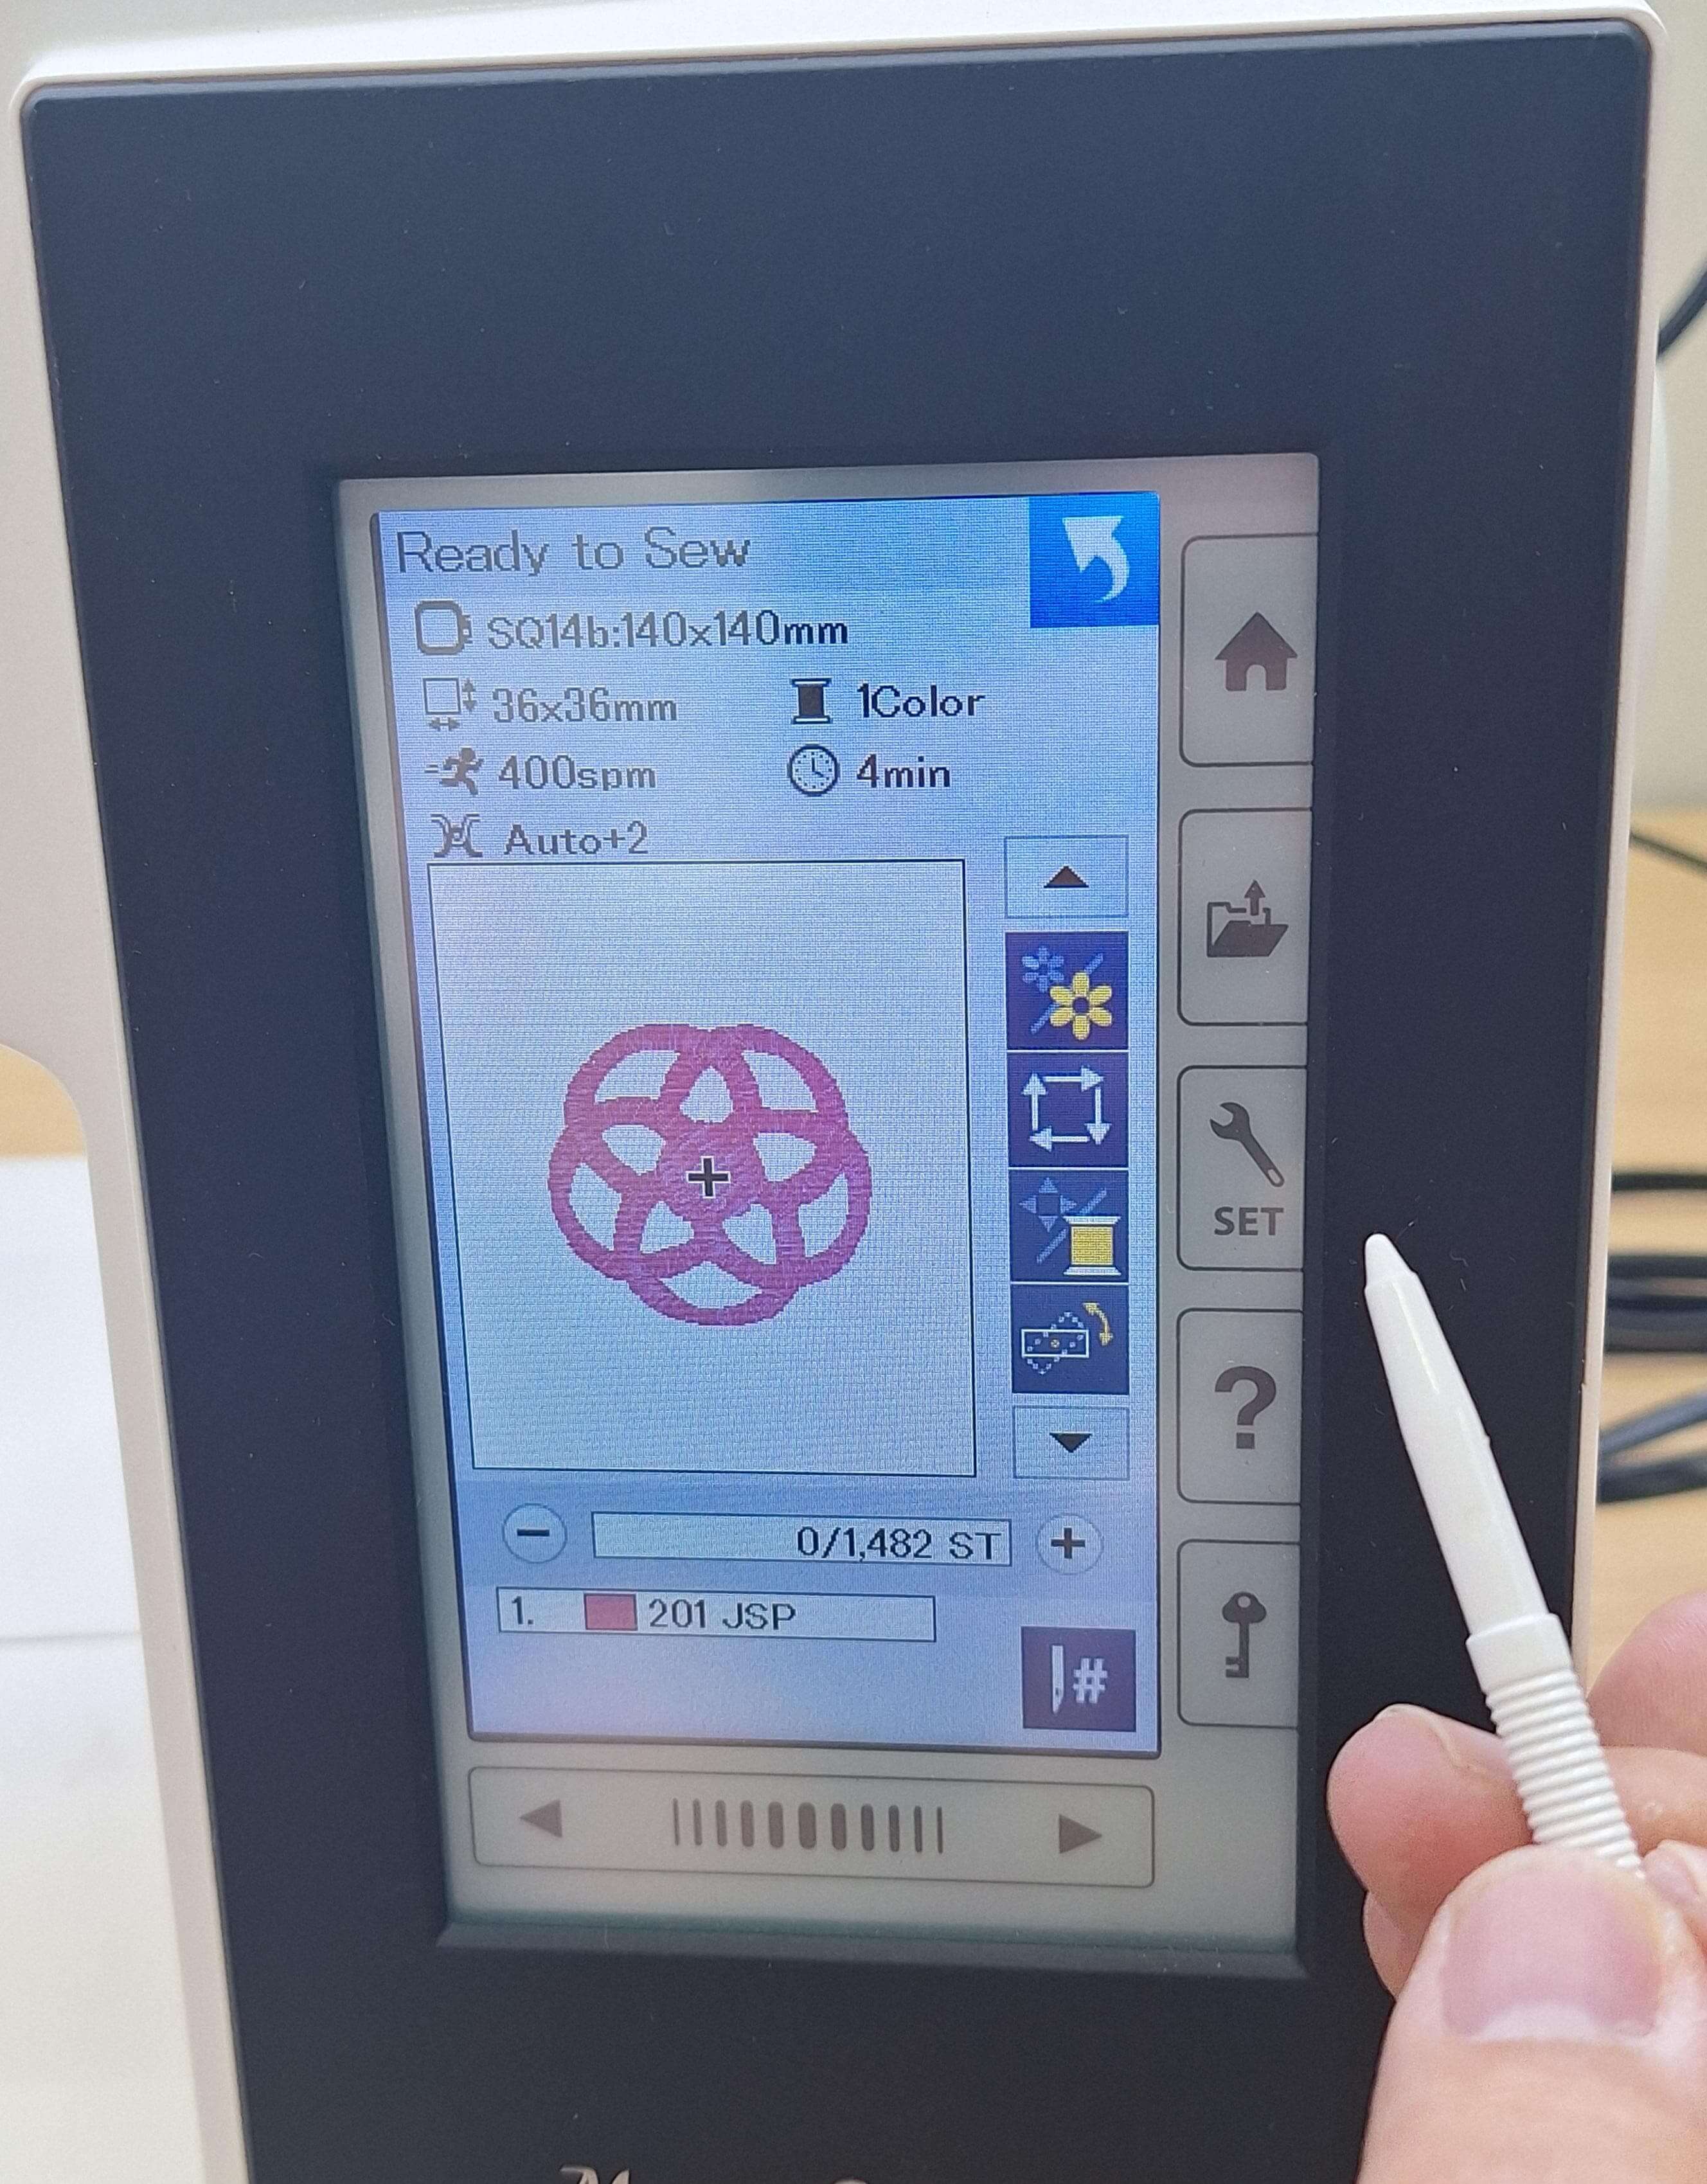
Before starting the embroidery process, I tried a test design on a scrap piece of fabric to ensure that the machine was set up correctly and that the design would stitch out as expected. This is an important step to avoid any issues during the actual embroidery process. I selected a simple design from the machine's built-in library and stitched it out on the scrap fabric.
The steps I followed to start the test design were:
- Turn on the embroidery machine and select the test design from the built-in library.
- Select the hoop size
- Adjust the design settings, such as size and color, if necessary.
- Press the "Start" button to begin stitching.
- Monitor the machine as it stitches out the design, ensuring that the fabric and stabilizer remain secure.
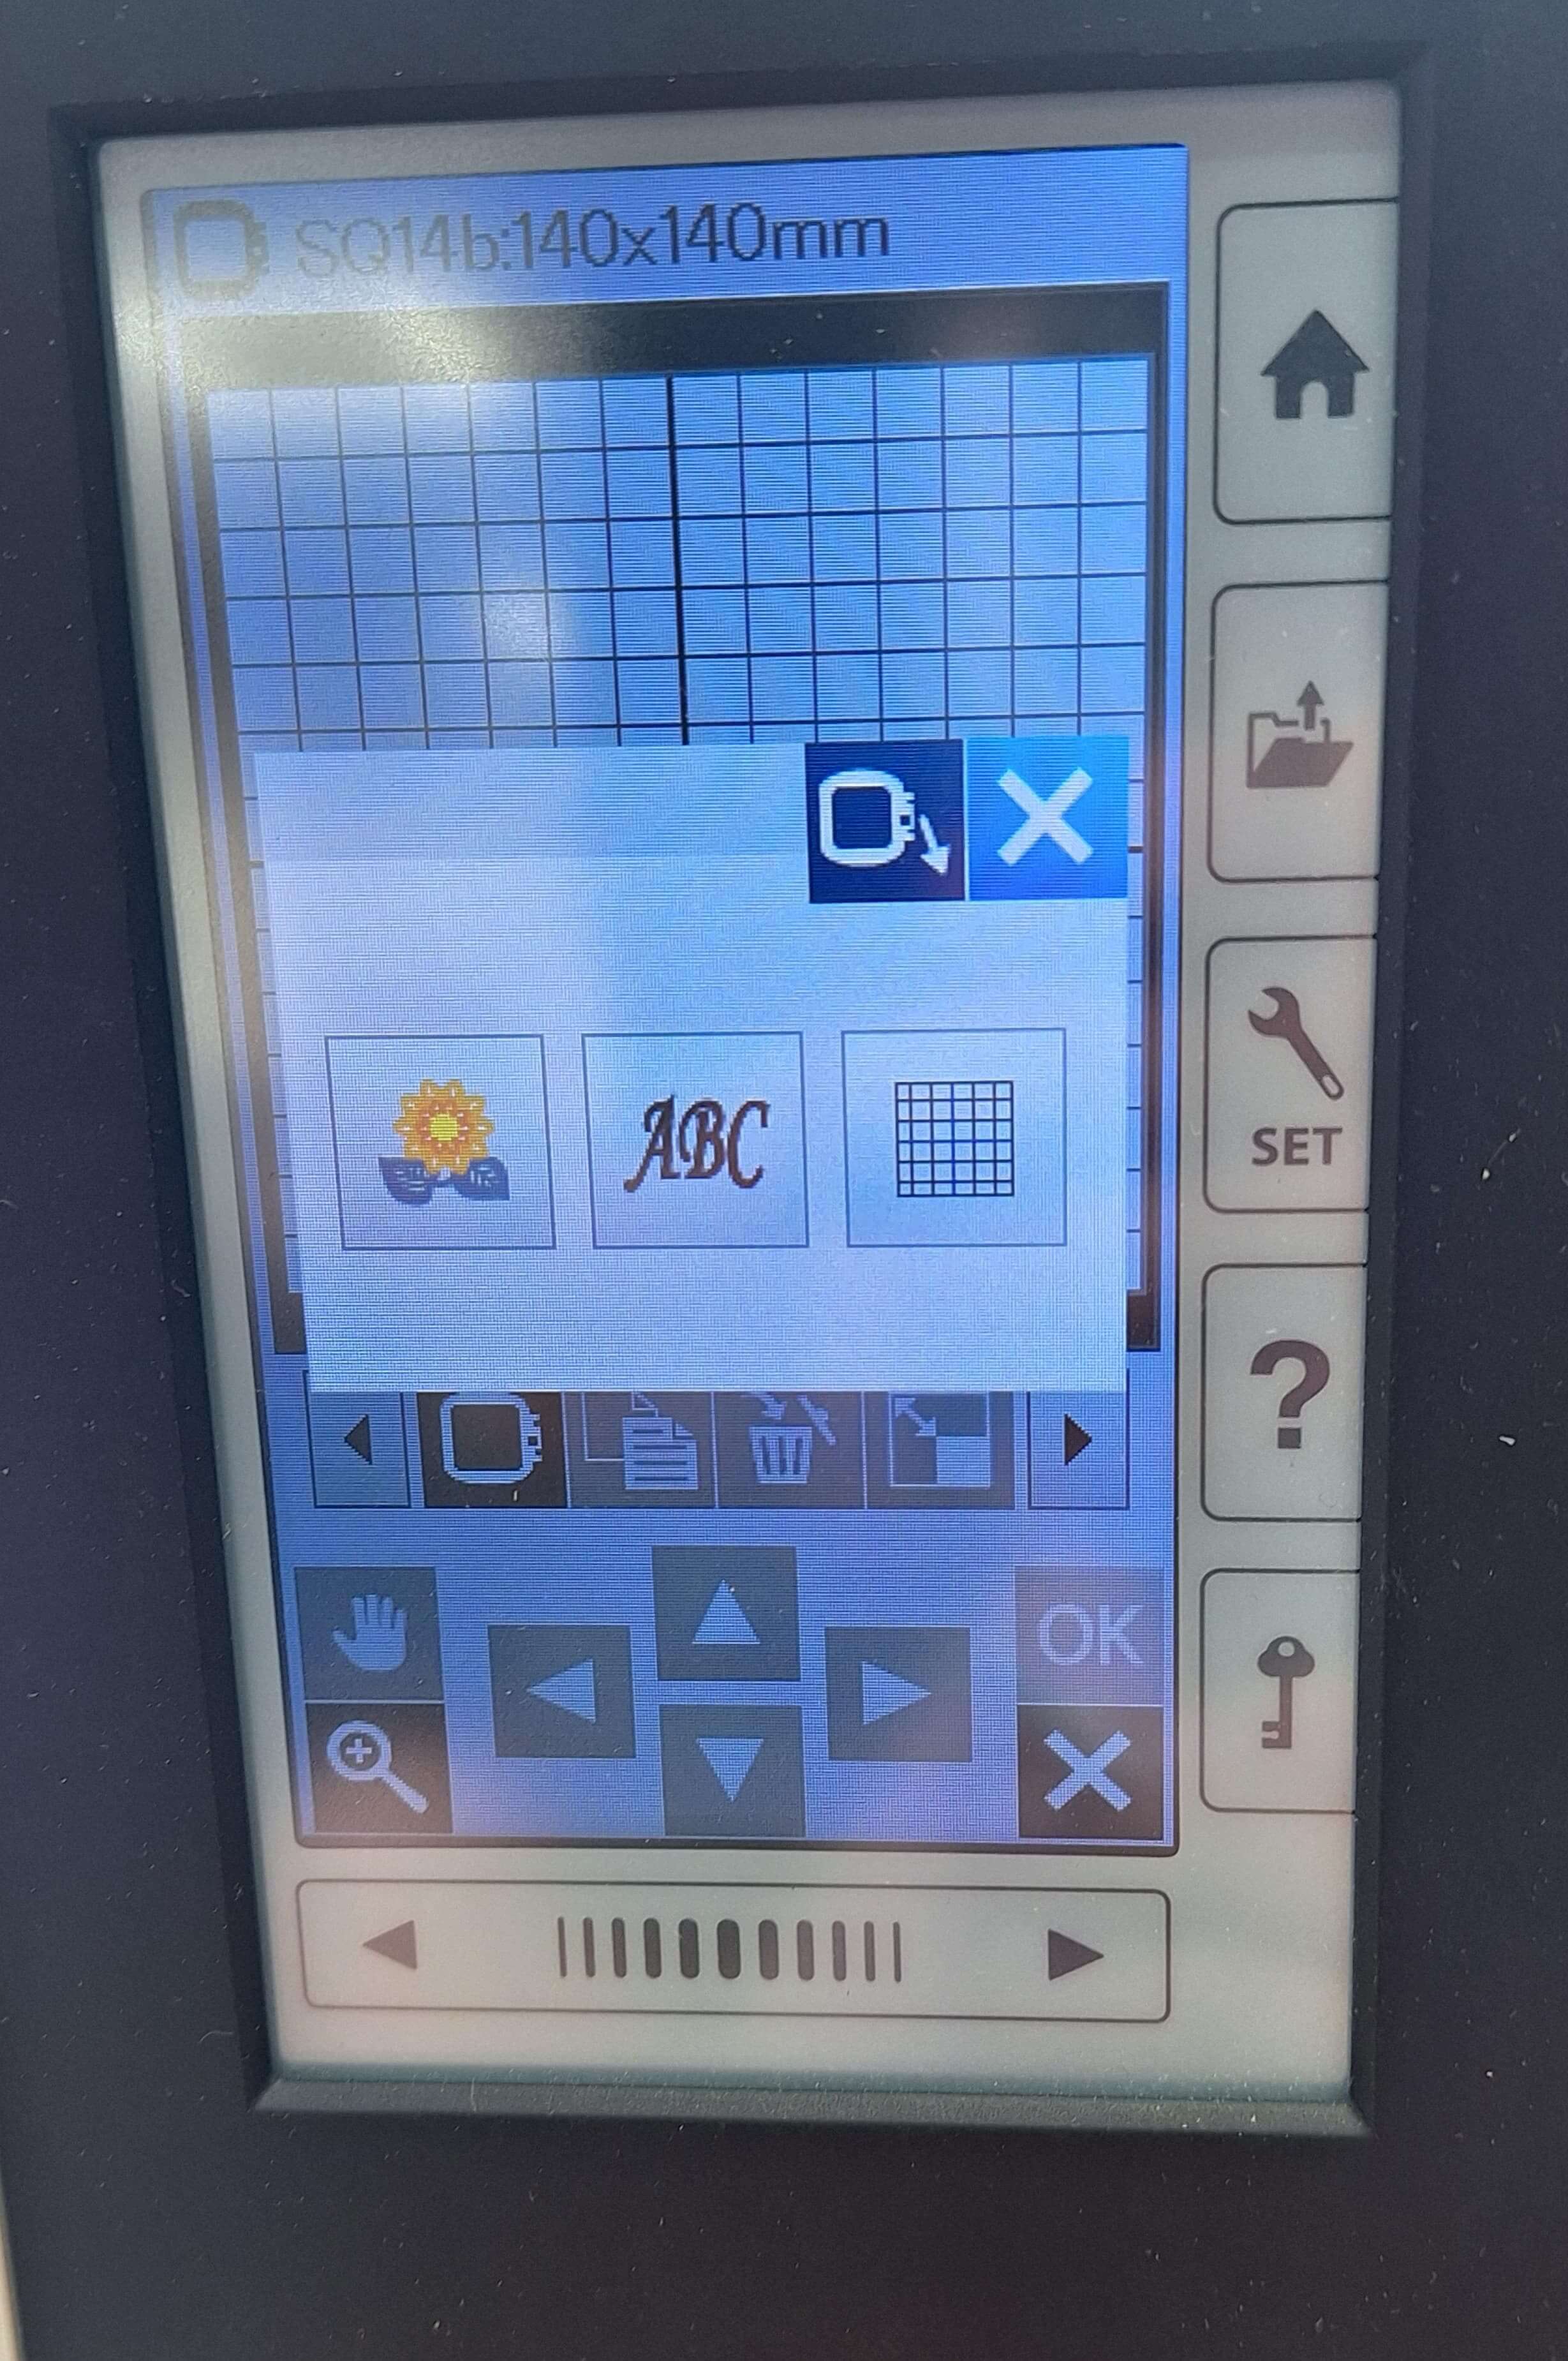

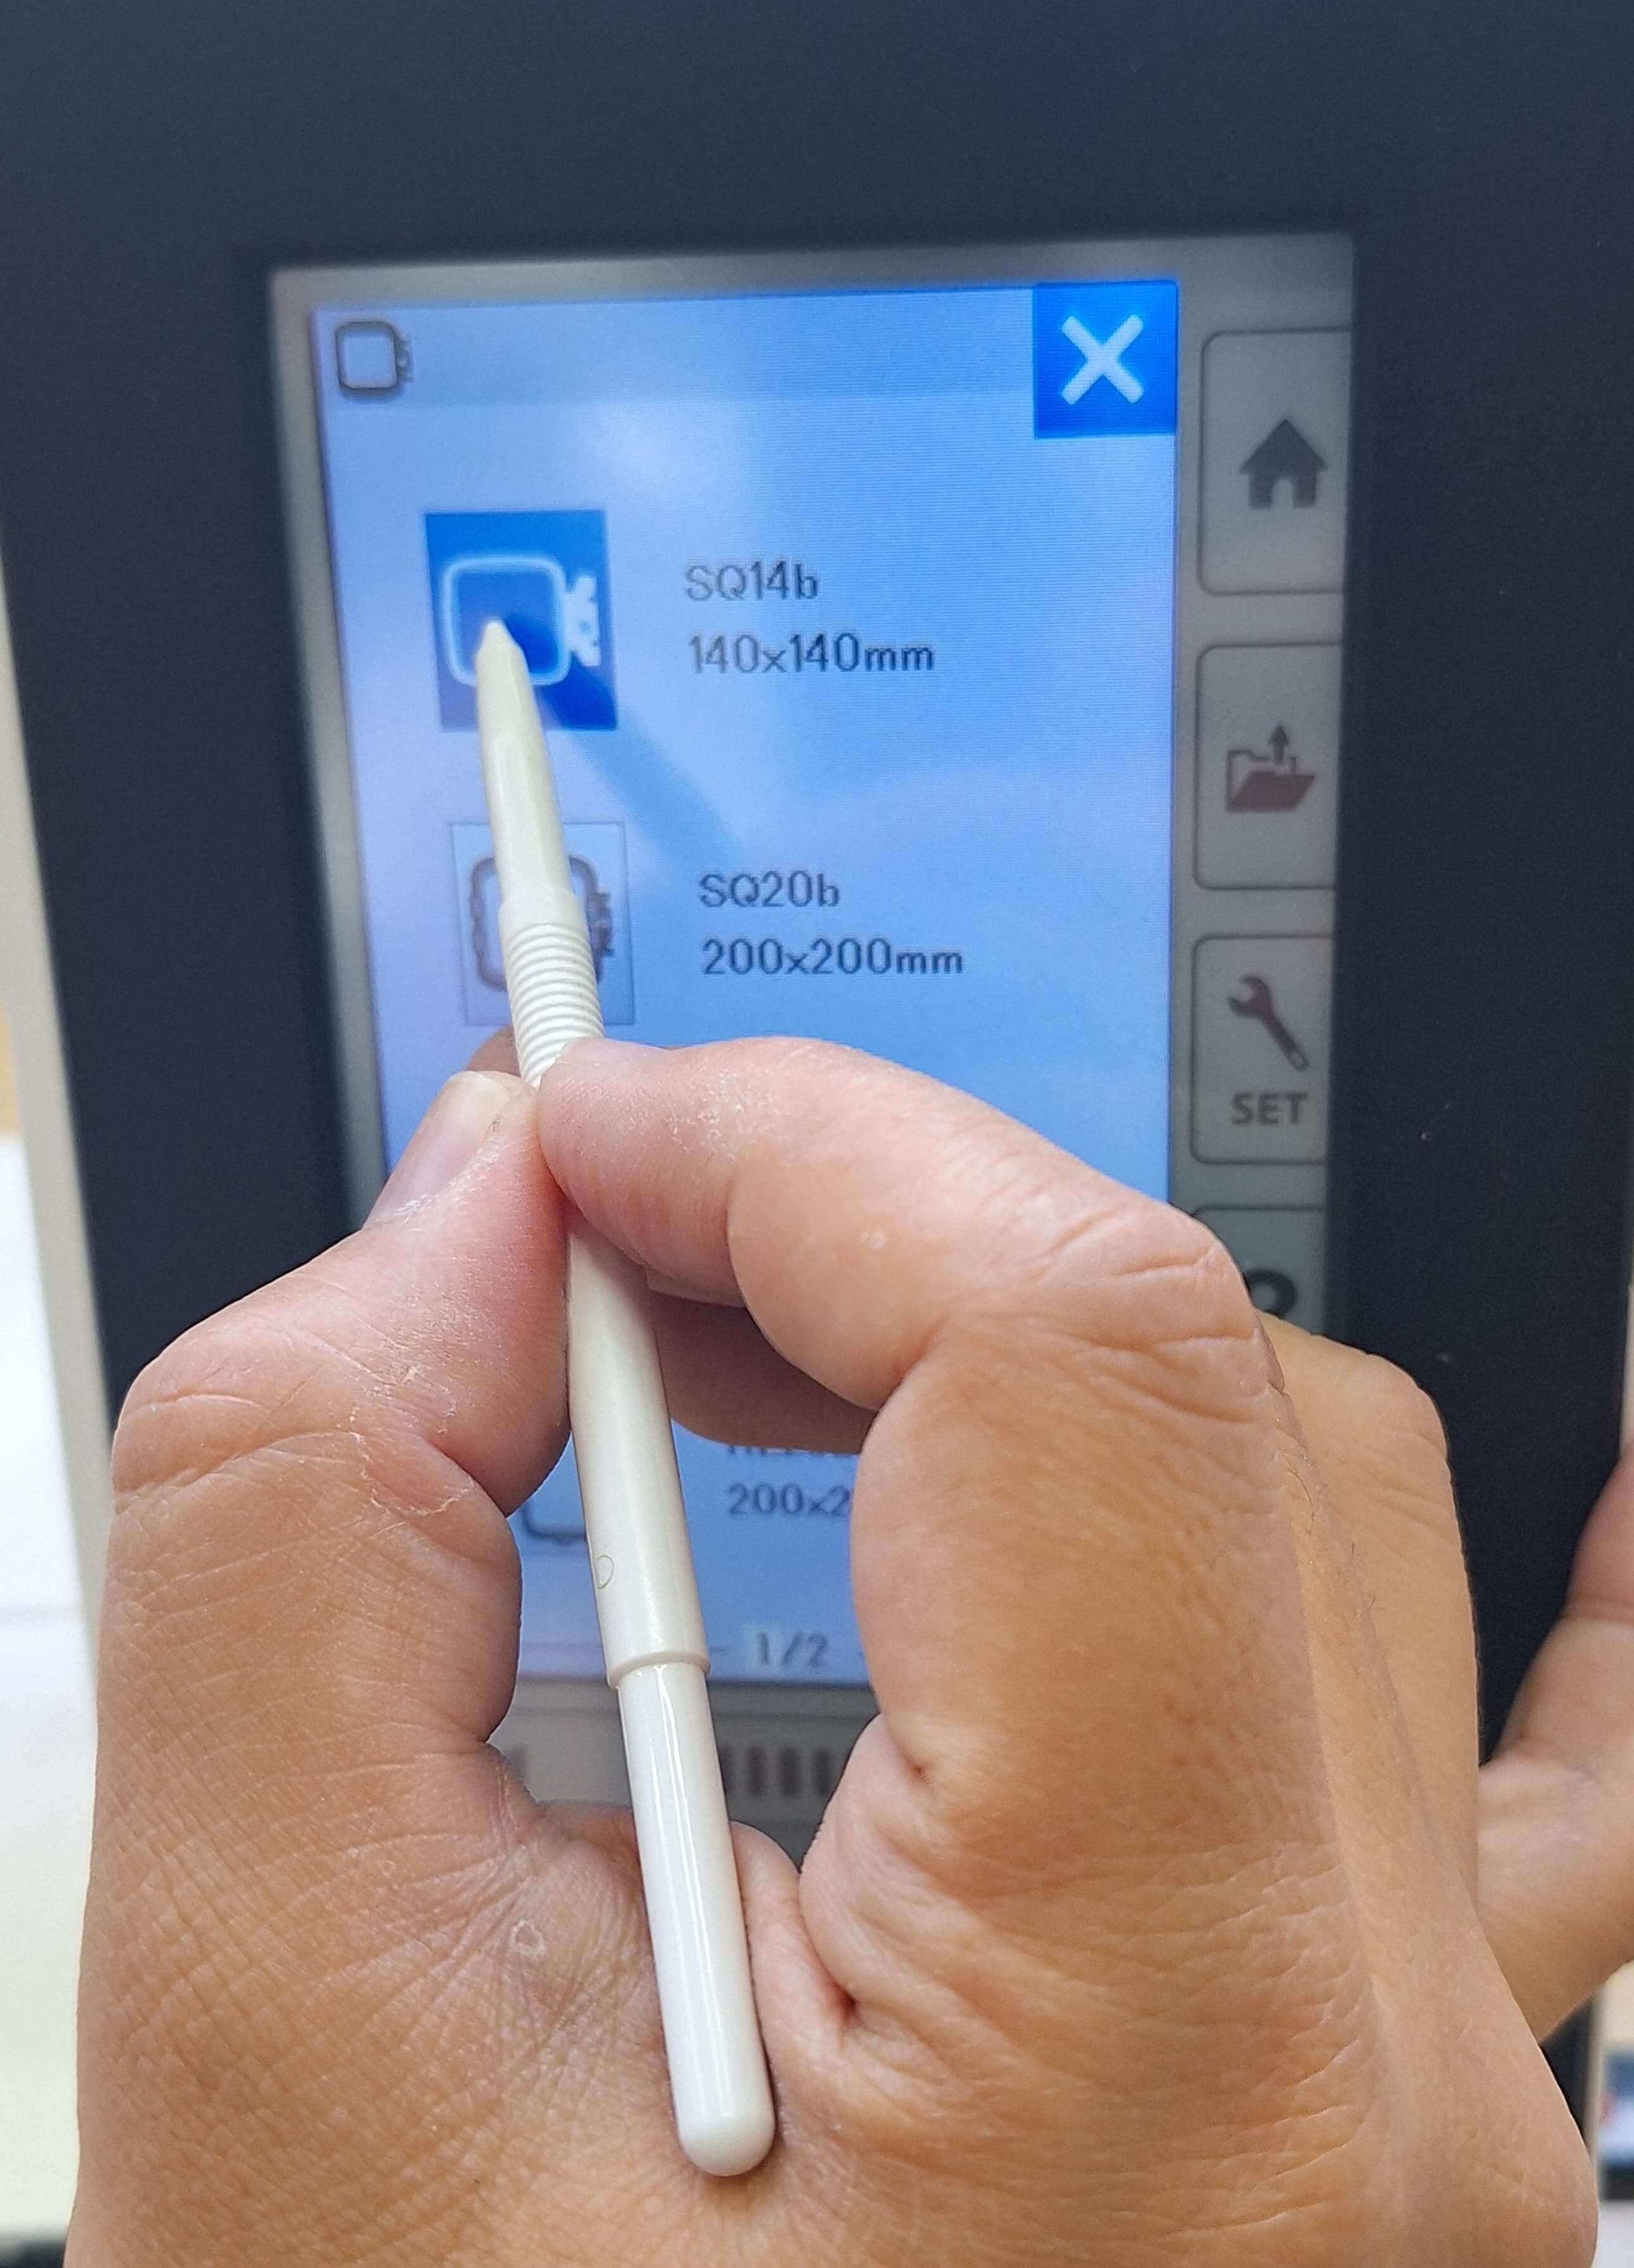
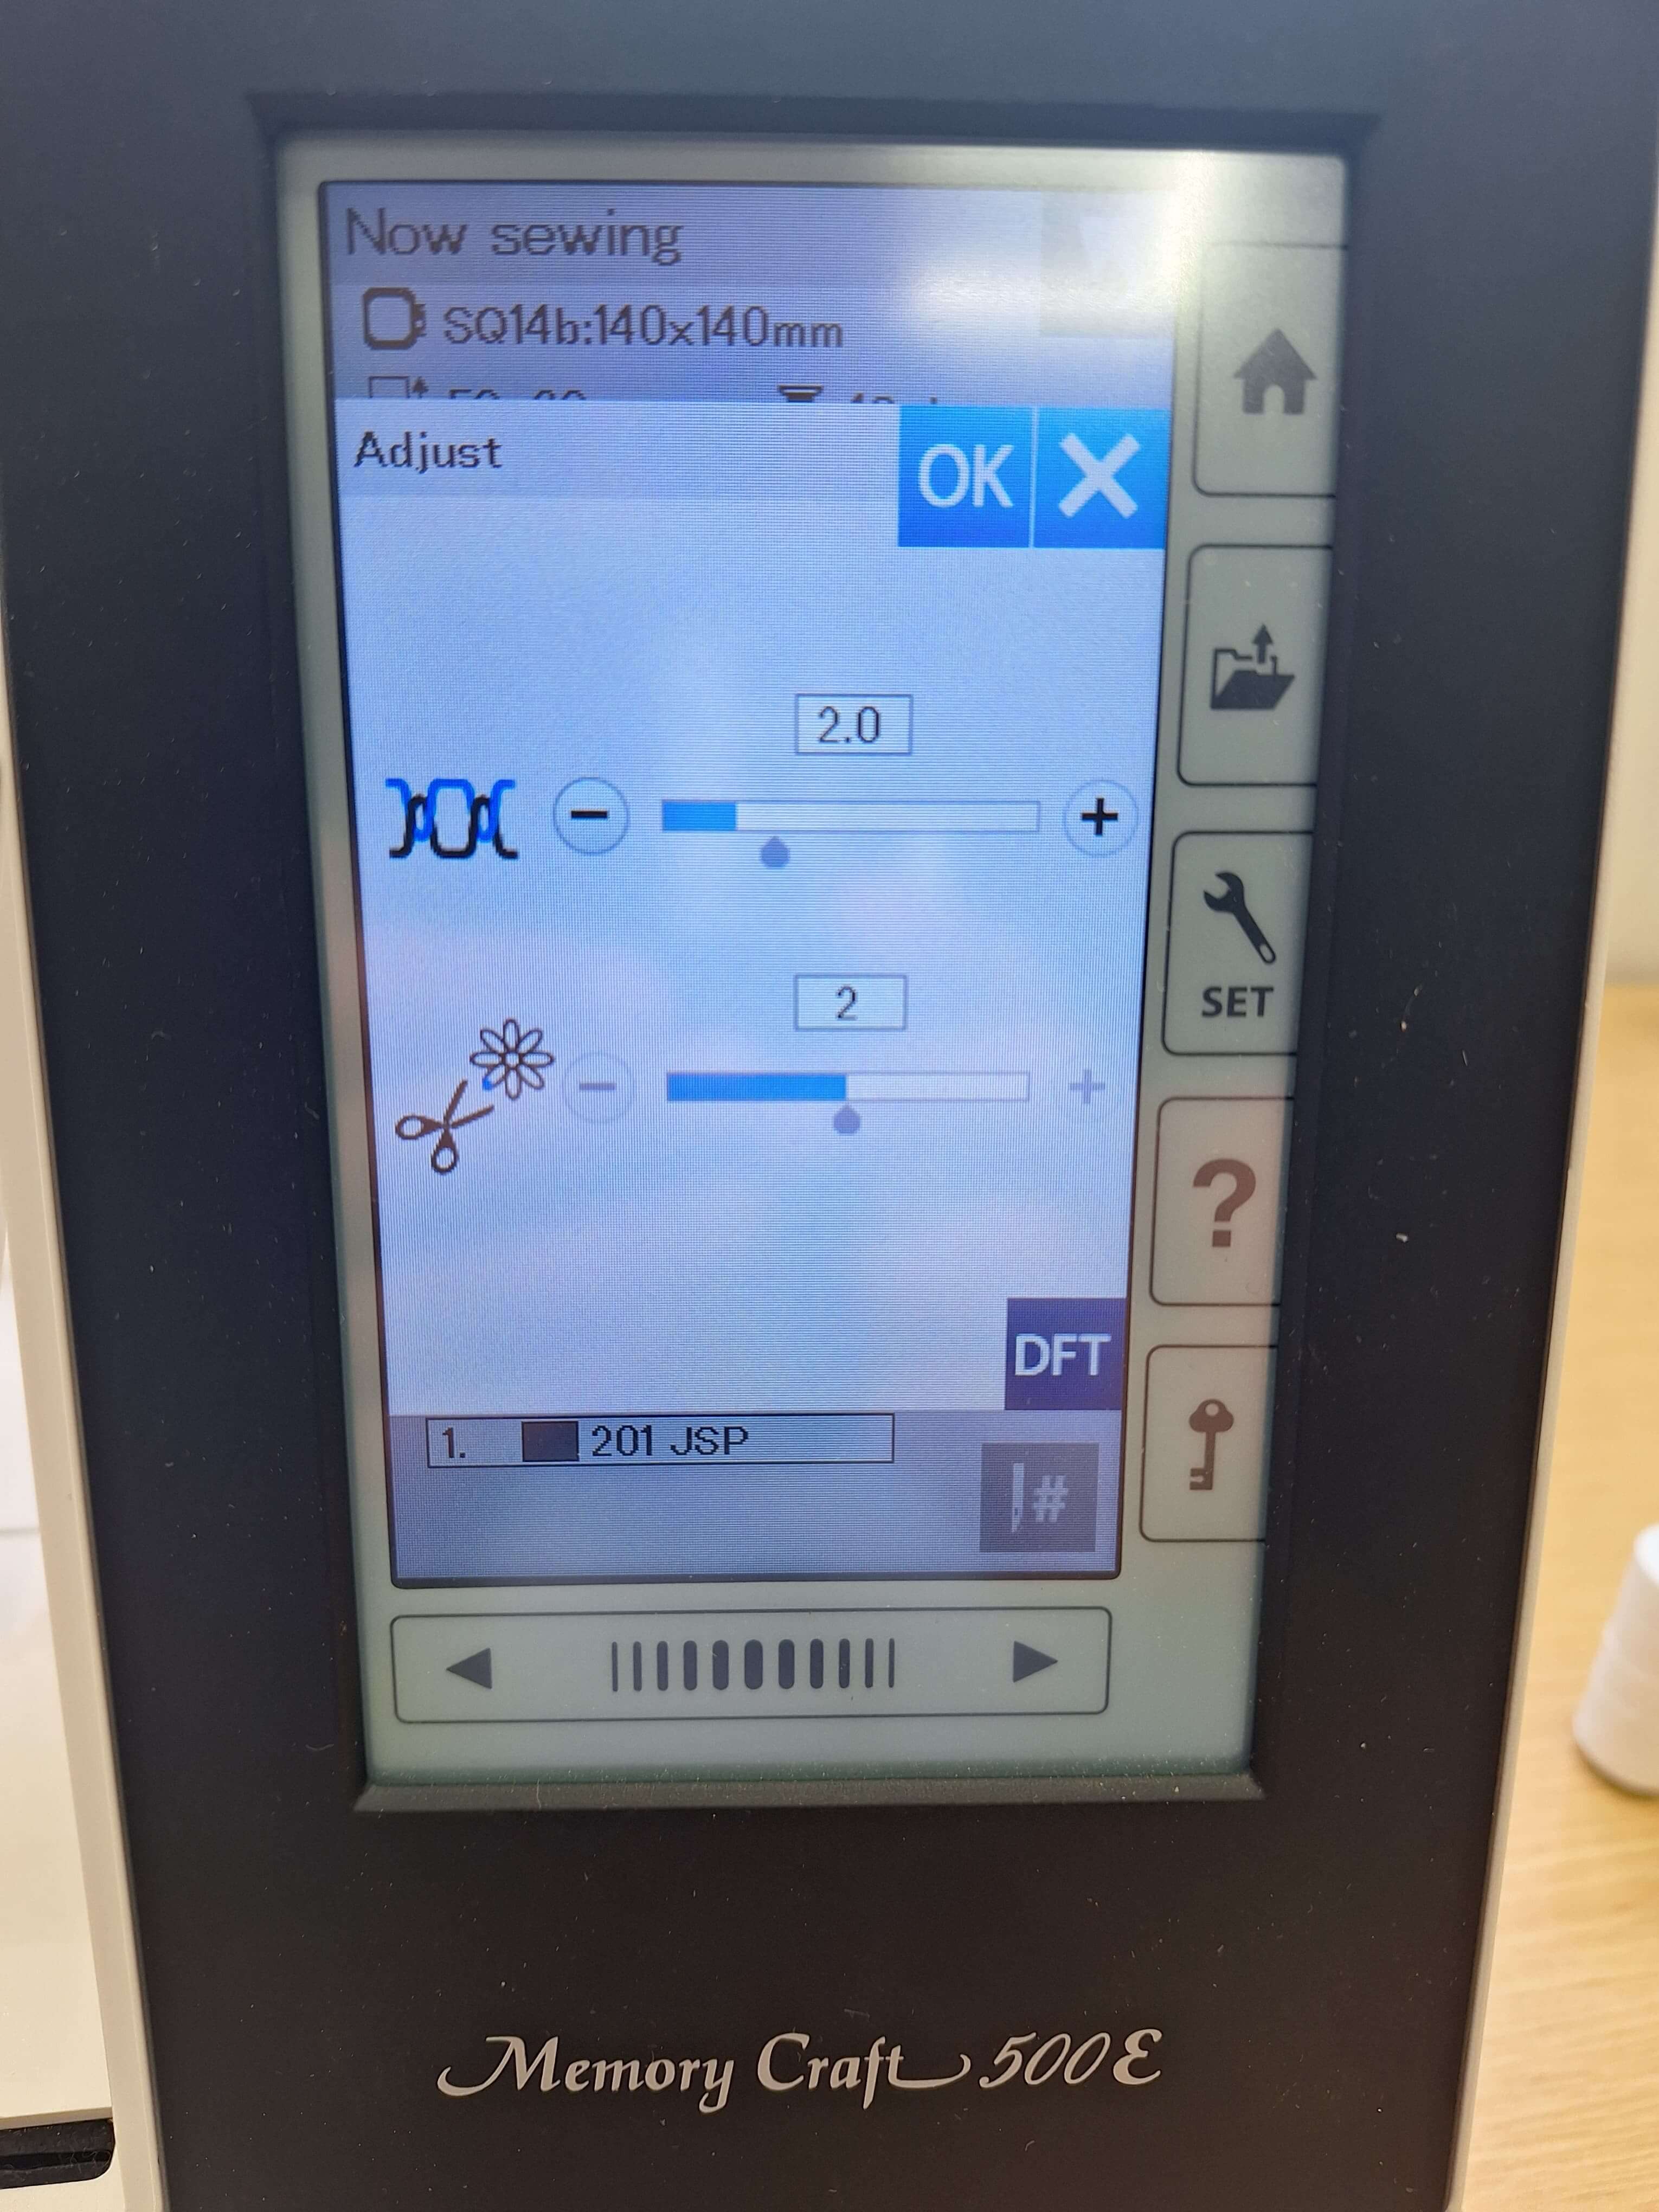
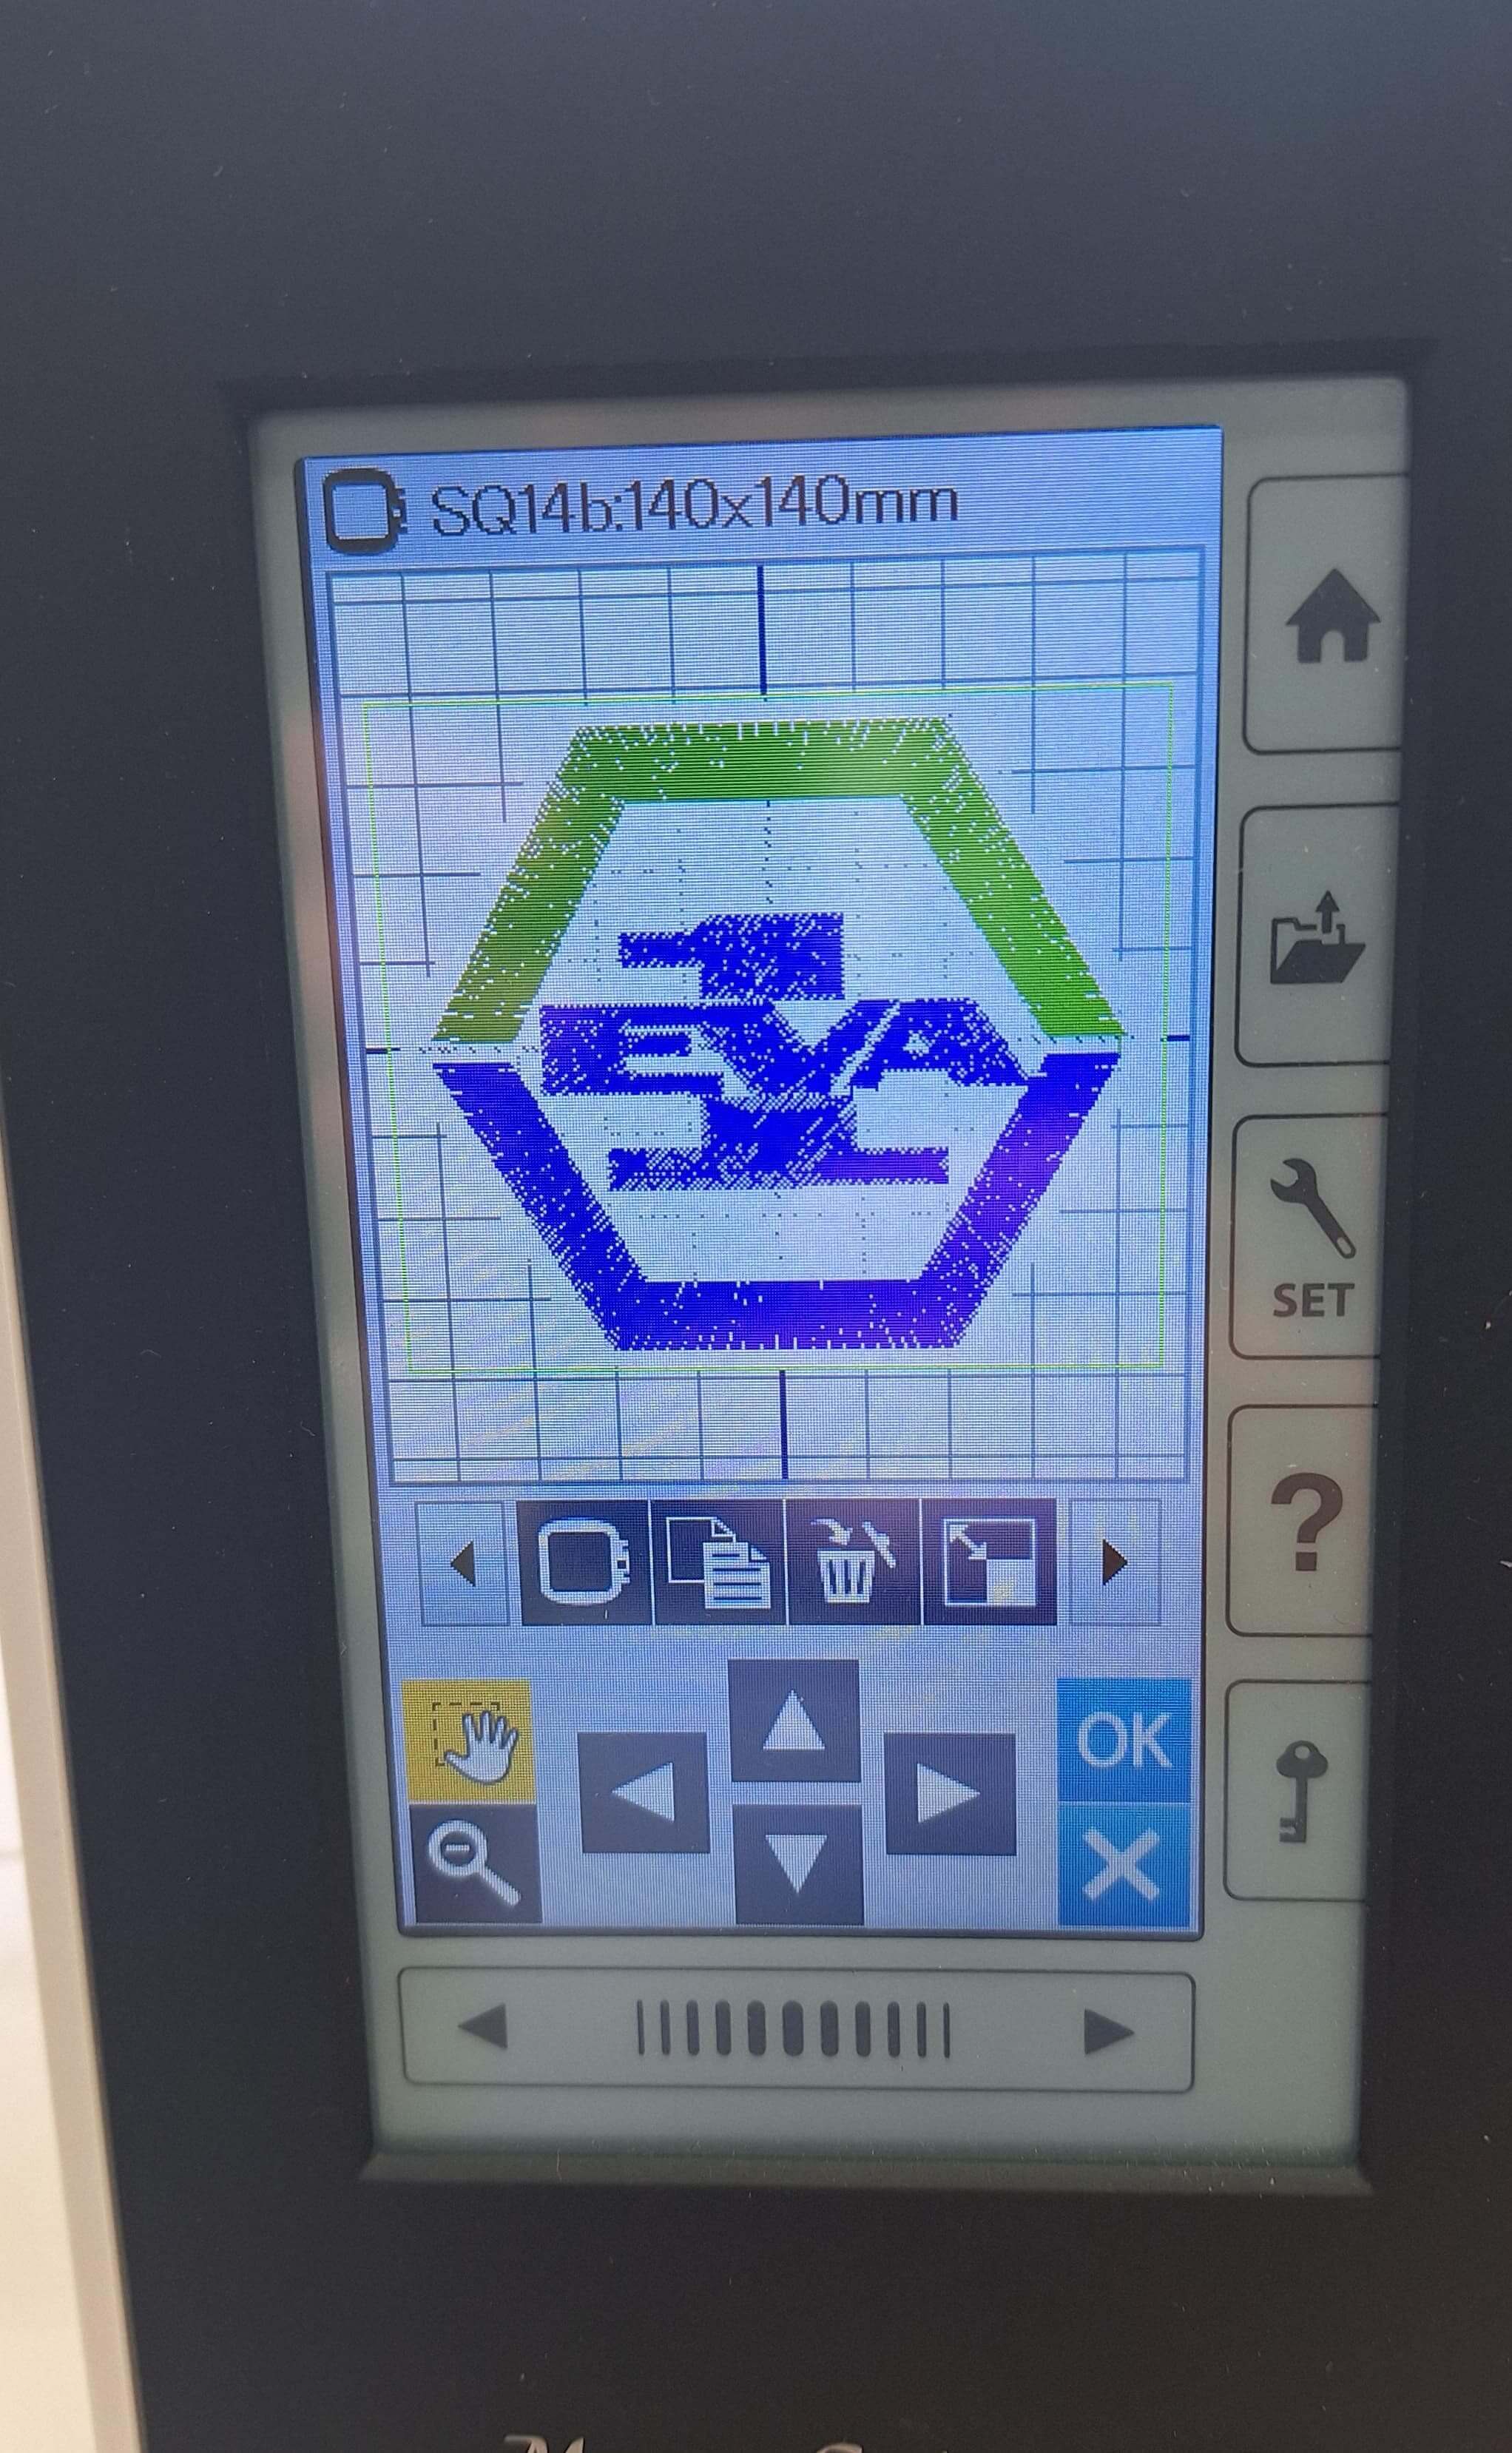
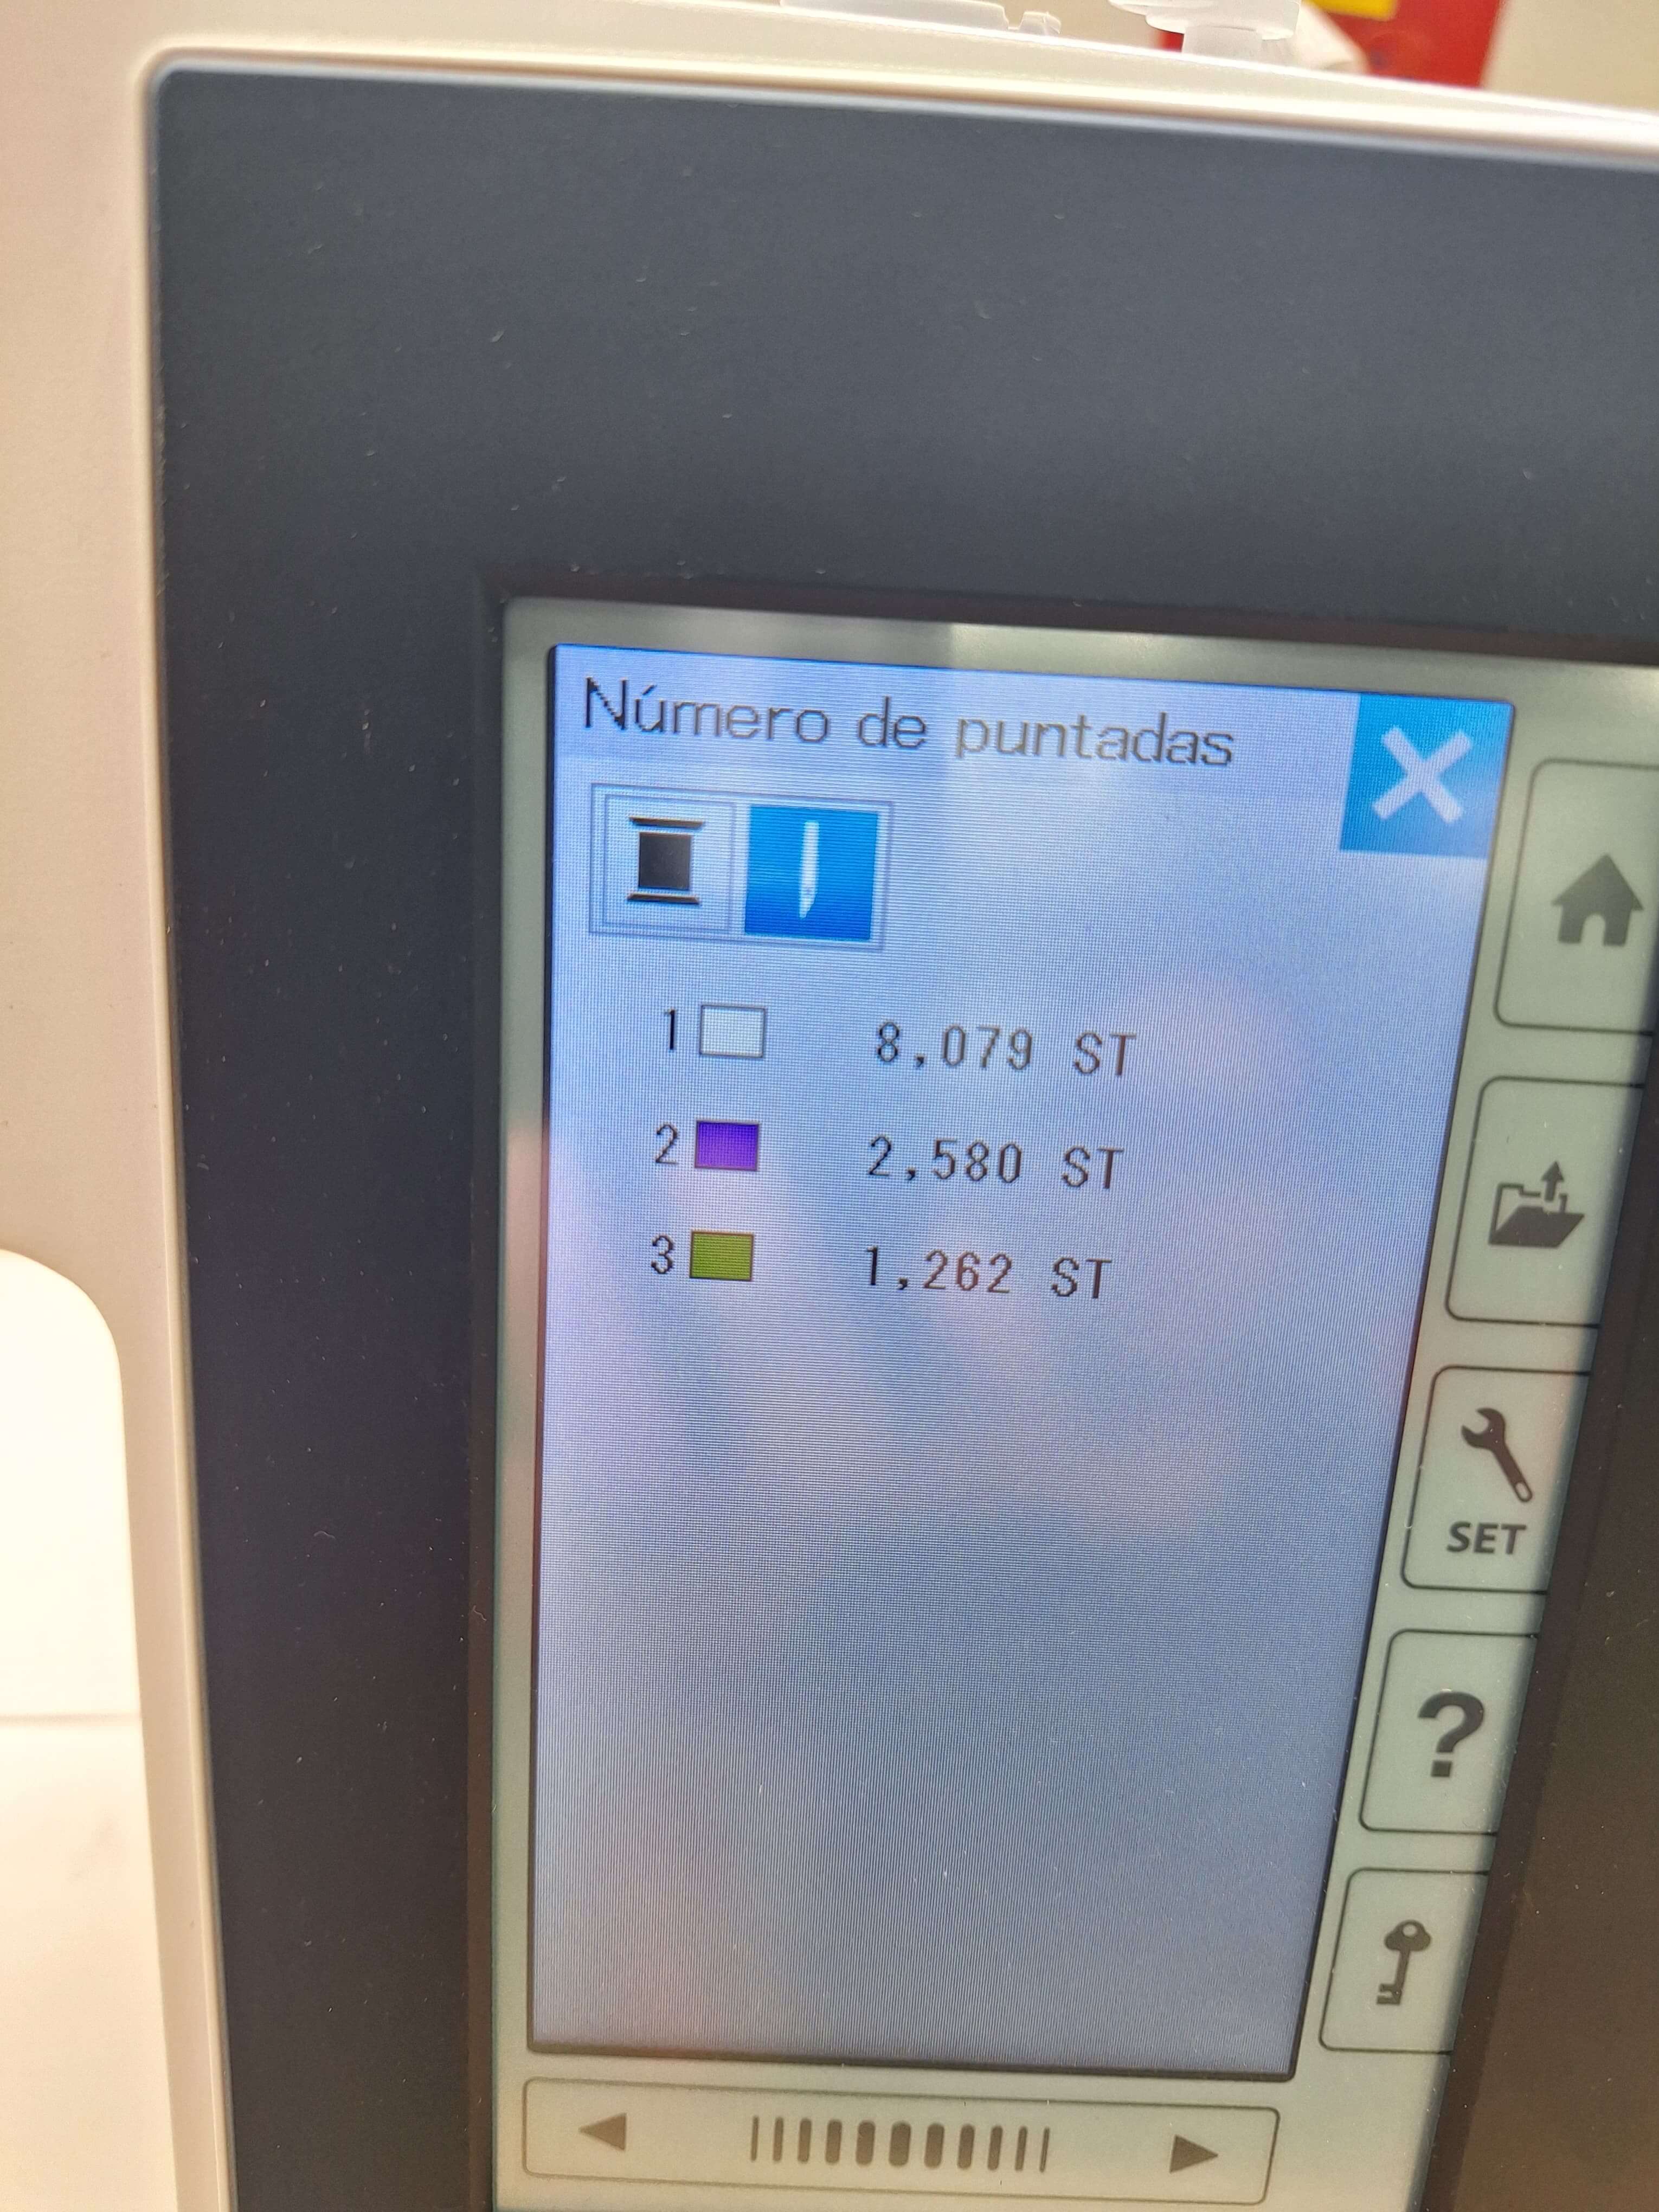
The next images show the screen of the embroidery machine during the test design. The screen displays the design, the color sequence, and the estimated time for completion.
Issues
During the test design, I encountered a few issues:
- The machine had some tension issues with the bobbin thread, causing uneven stitches.
To fix this, I adjusted the tension settings on the machine and re-threaded the bobbin thread. After making these adjustments, I ran another test design, and the stitches were much more even.
So we test until we get the right tension for the bobbin thread.
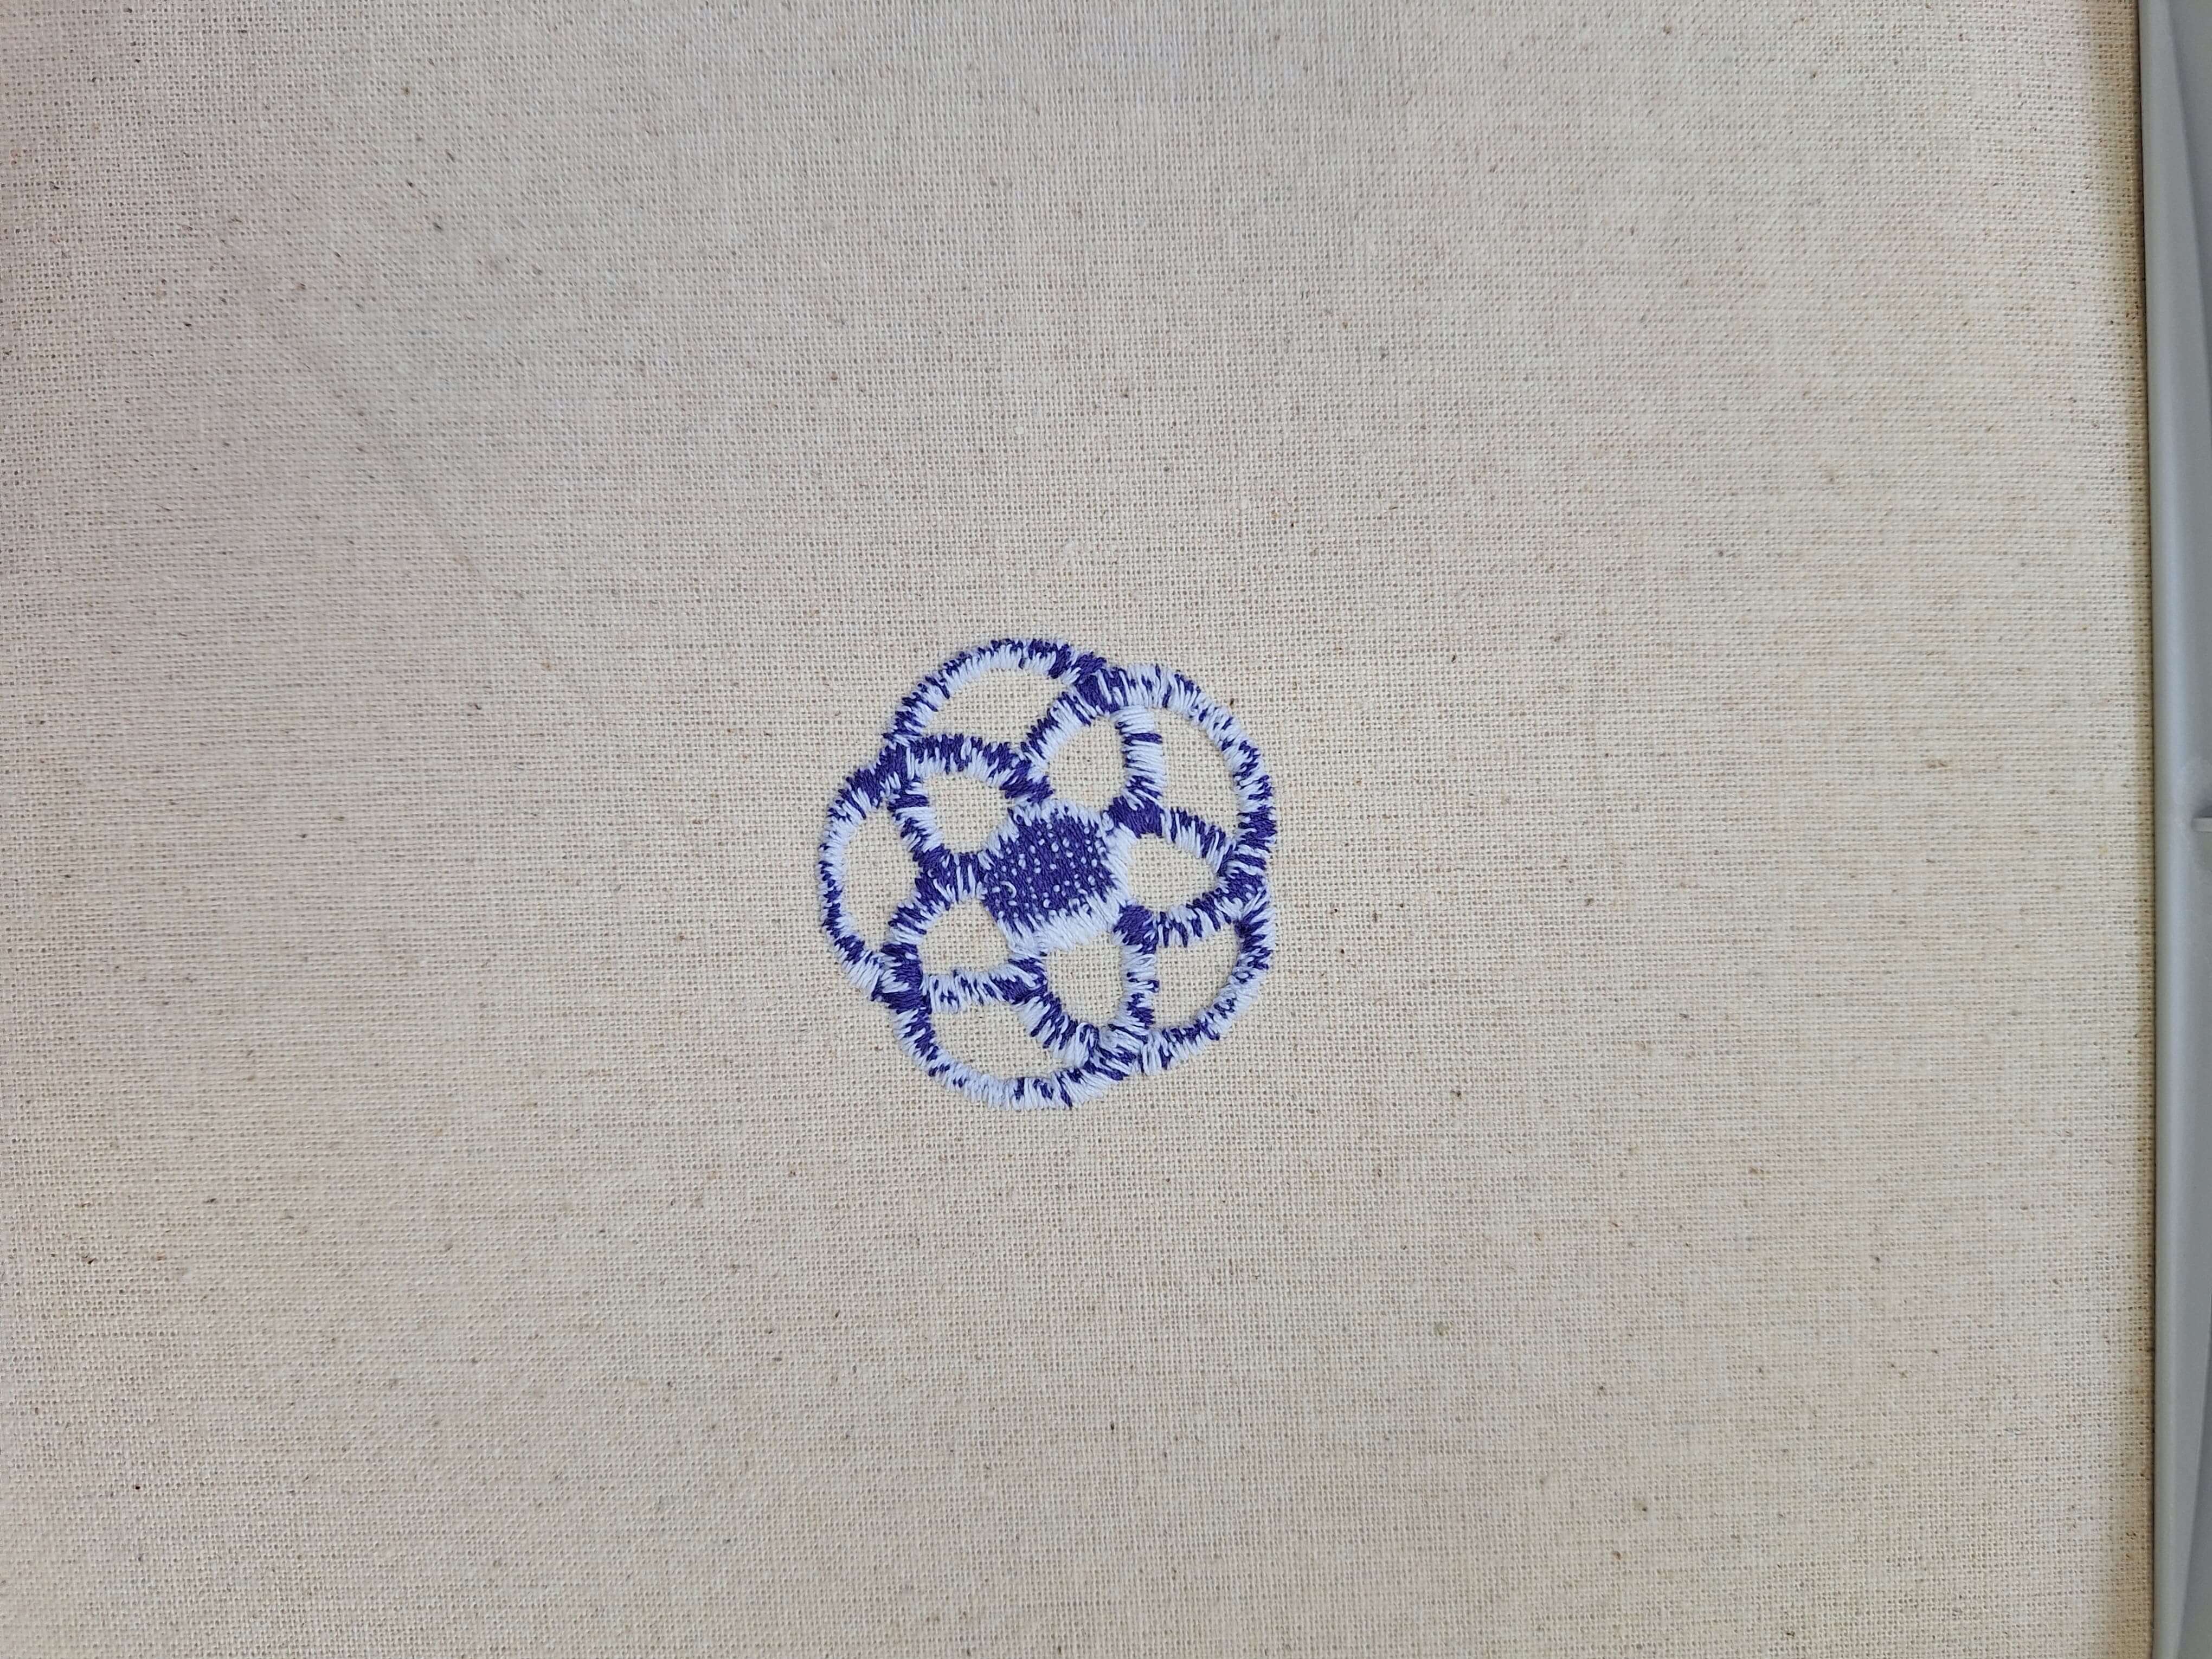
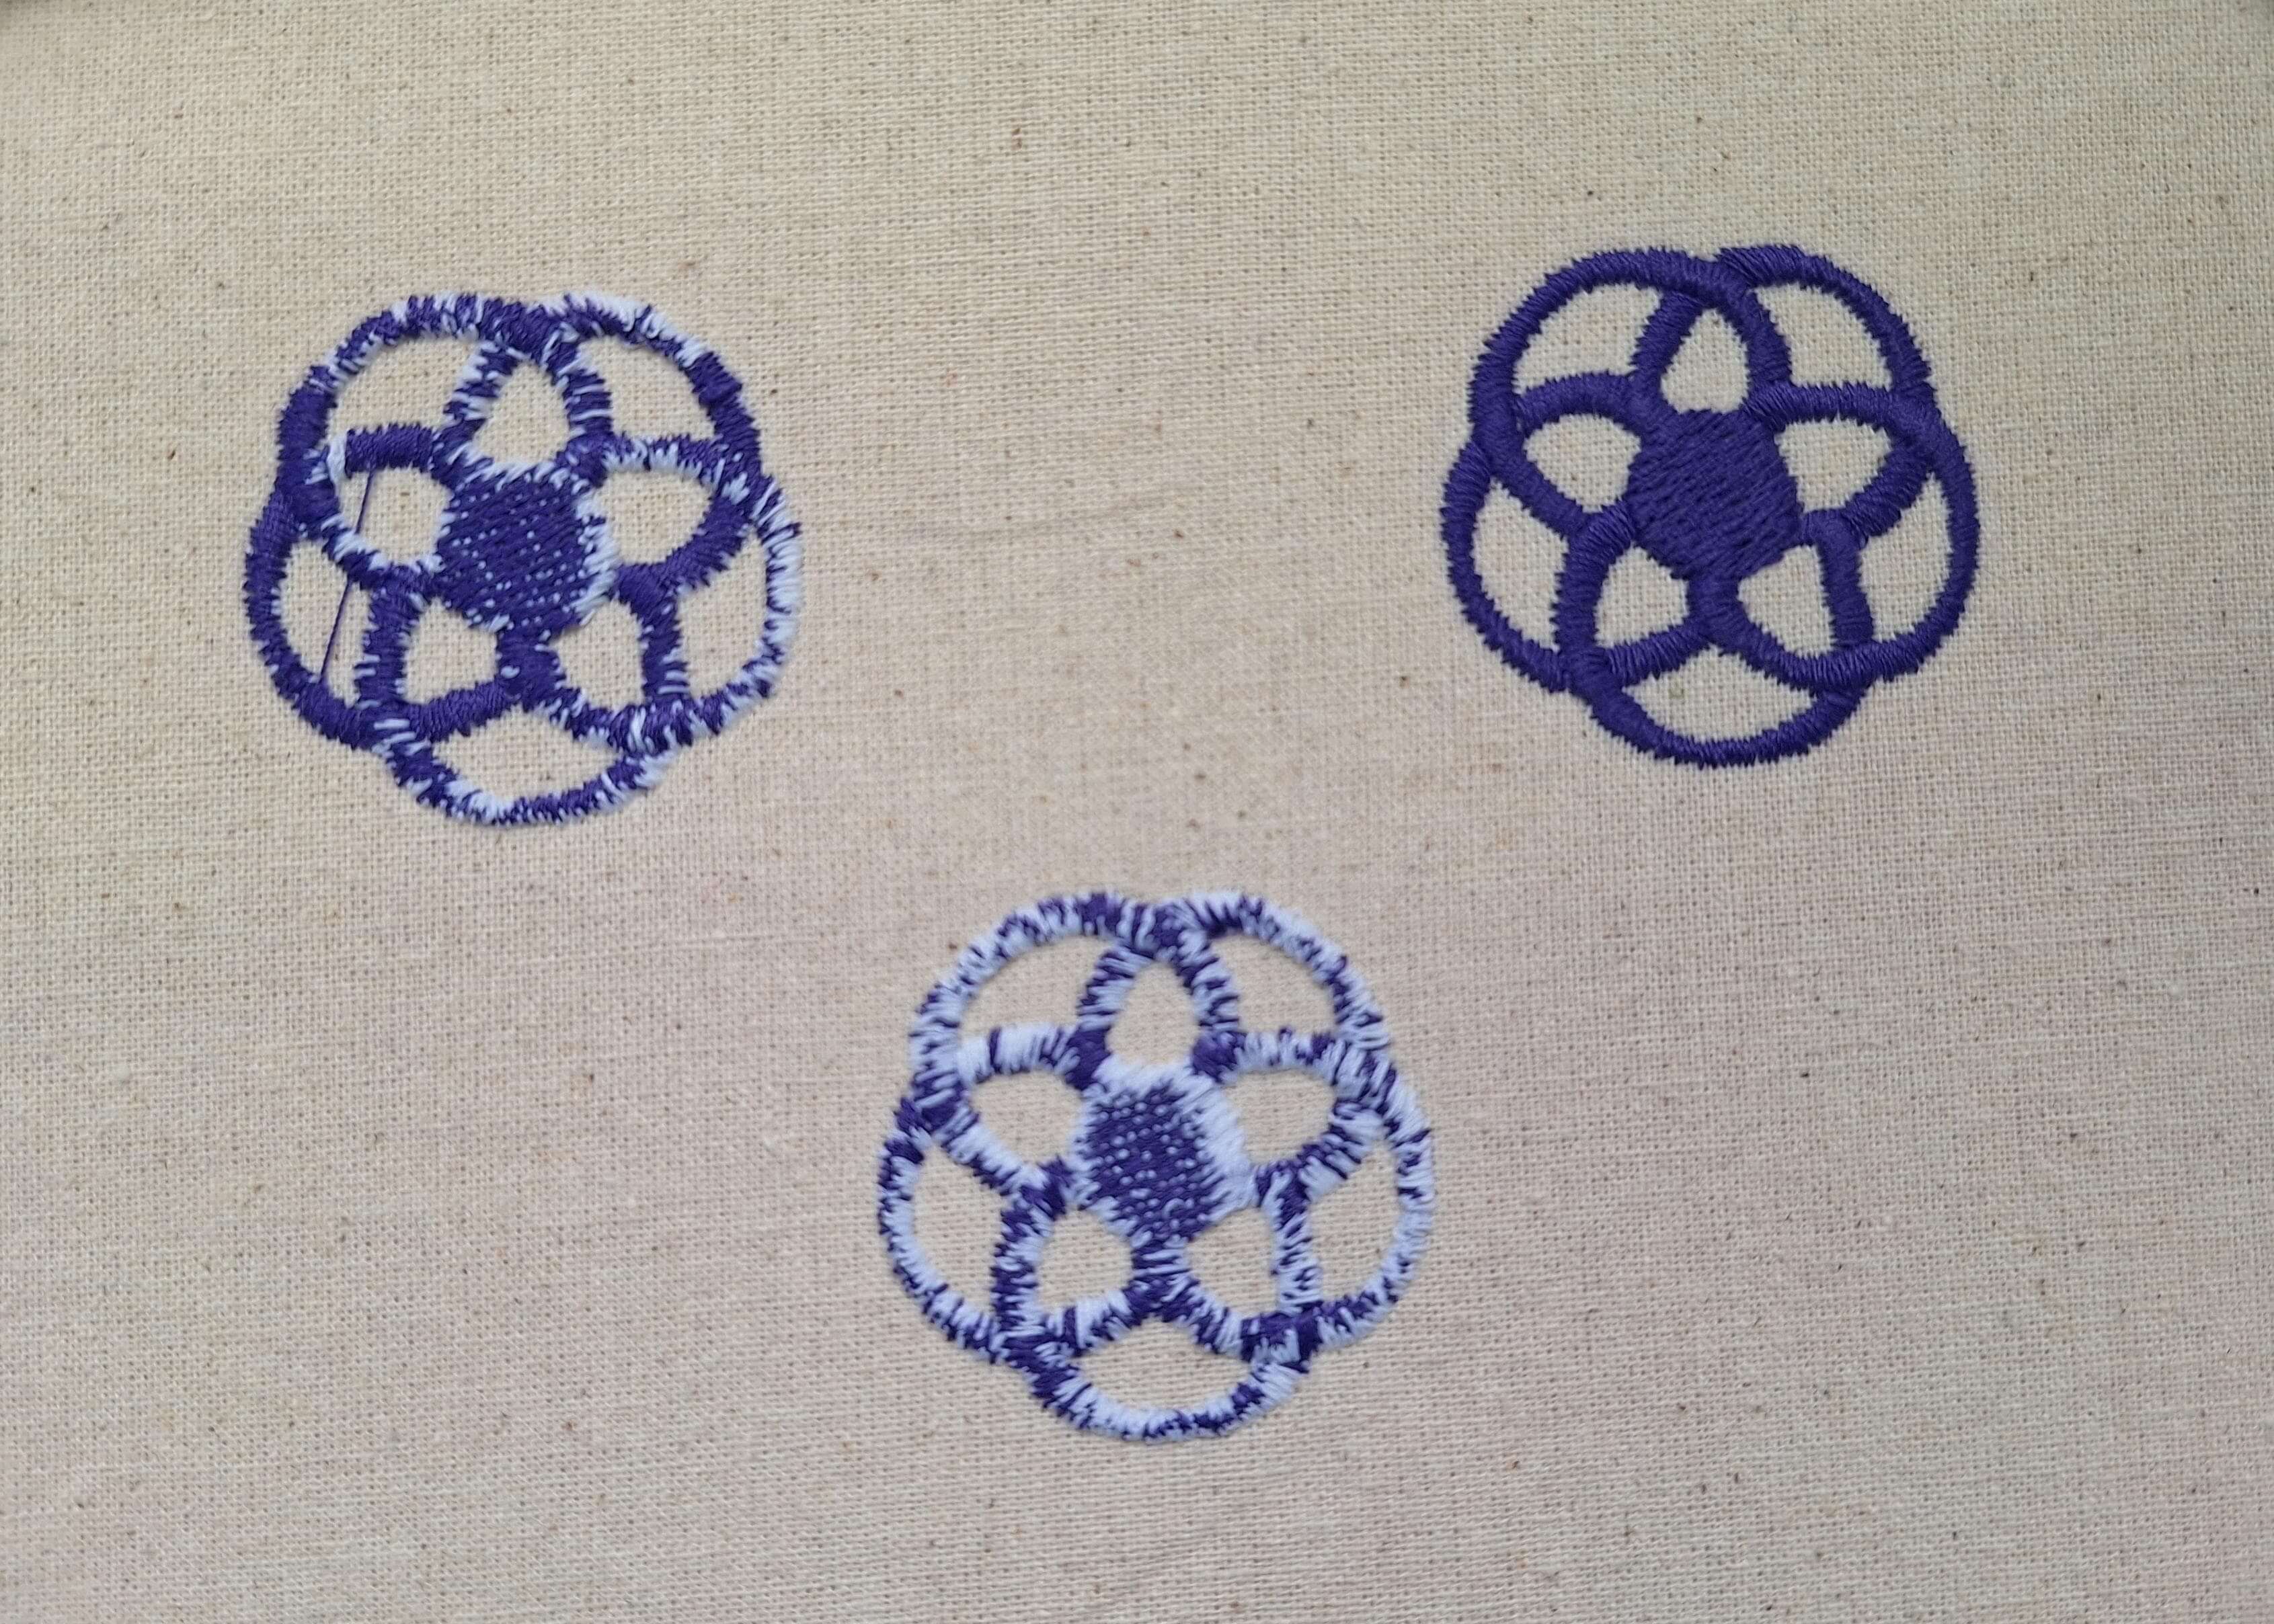
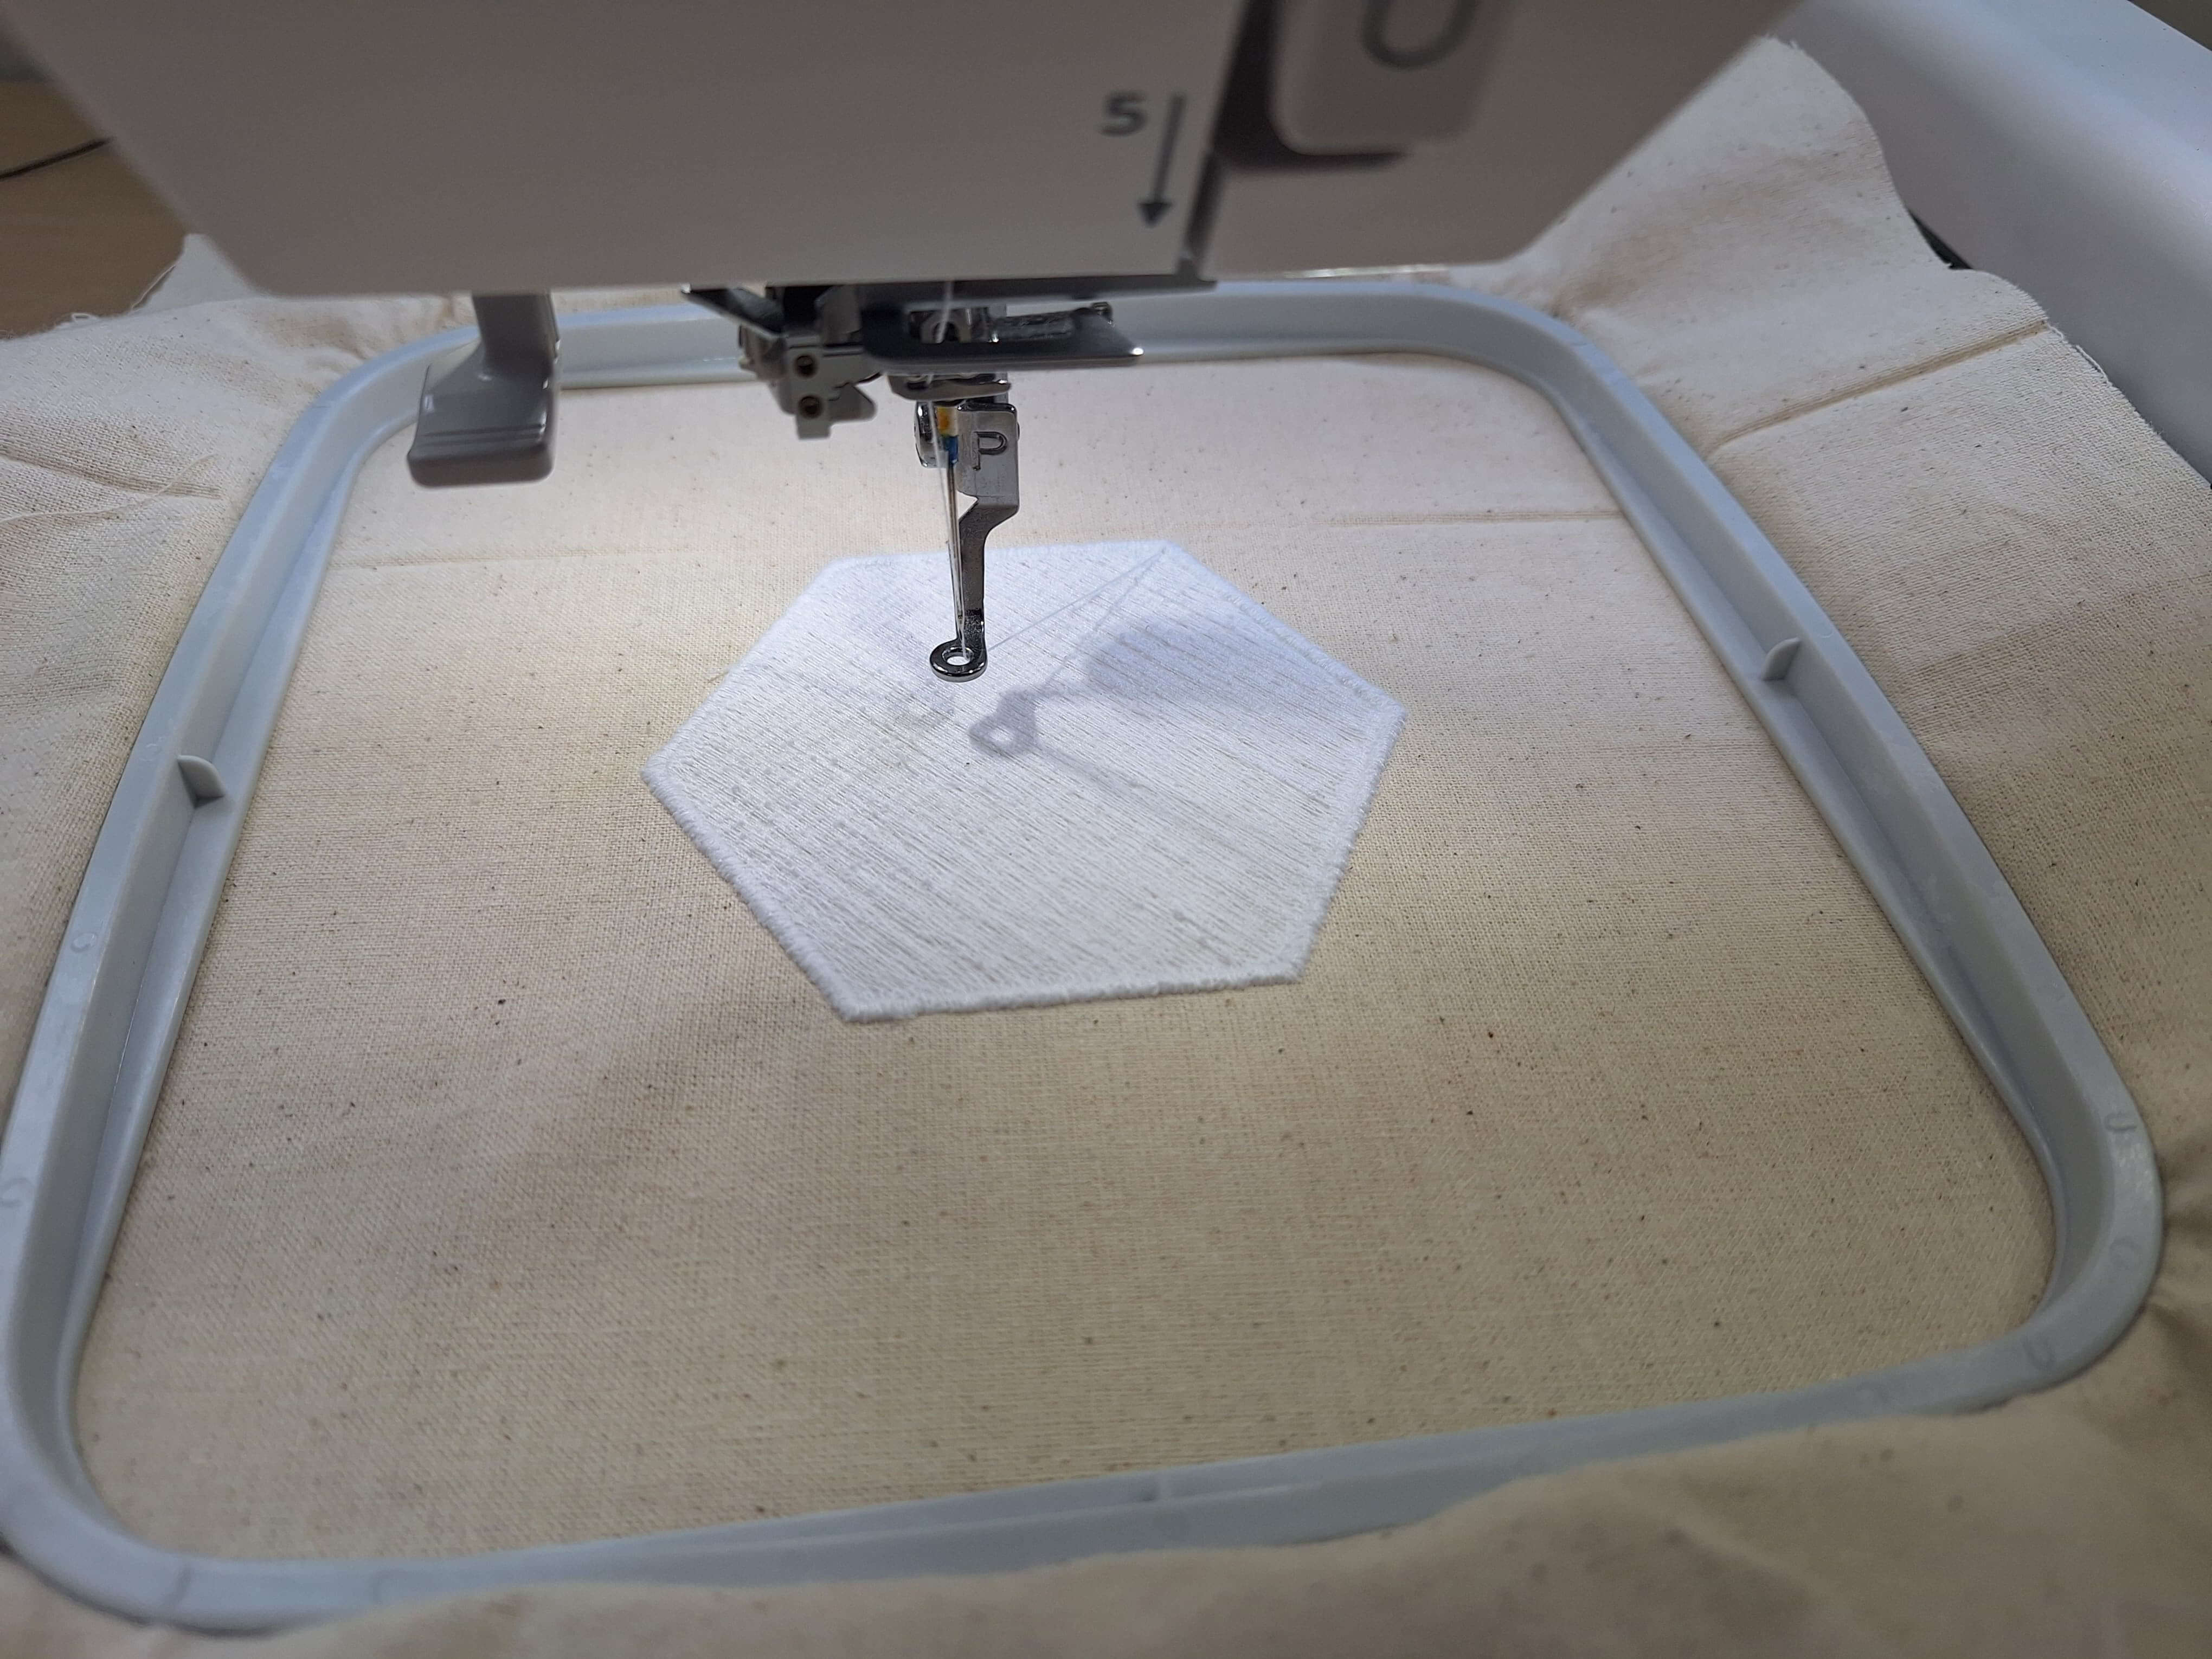
The result of the test process
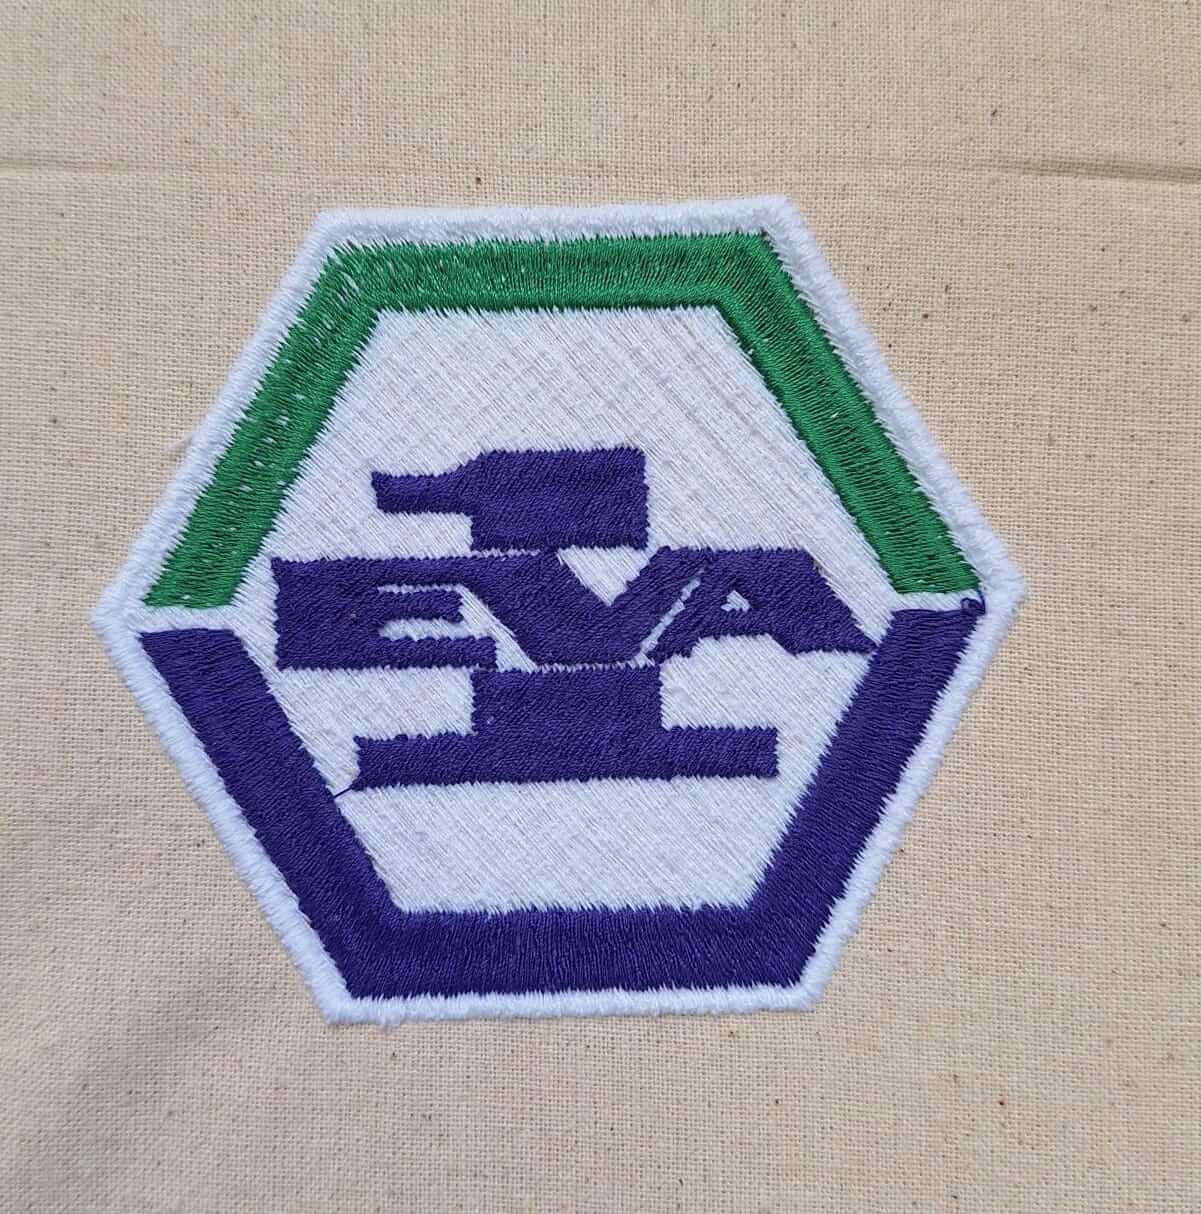
HERO SHOT
Finally, I started my design embroidery process. The fist step was to prepare the bobbin threads and upper threads color to use, In my case I used white, purple and green.
I imported the design into the machine and also set all the previous steps I used for the test design with my design, ones everything was set, I started the embroidery.
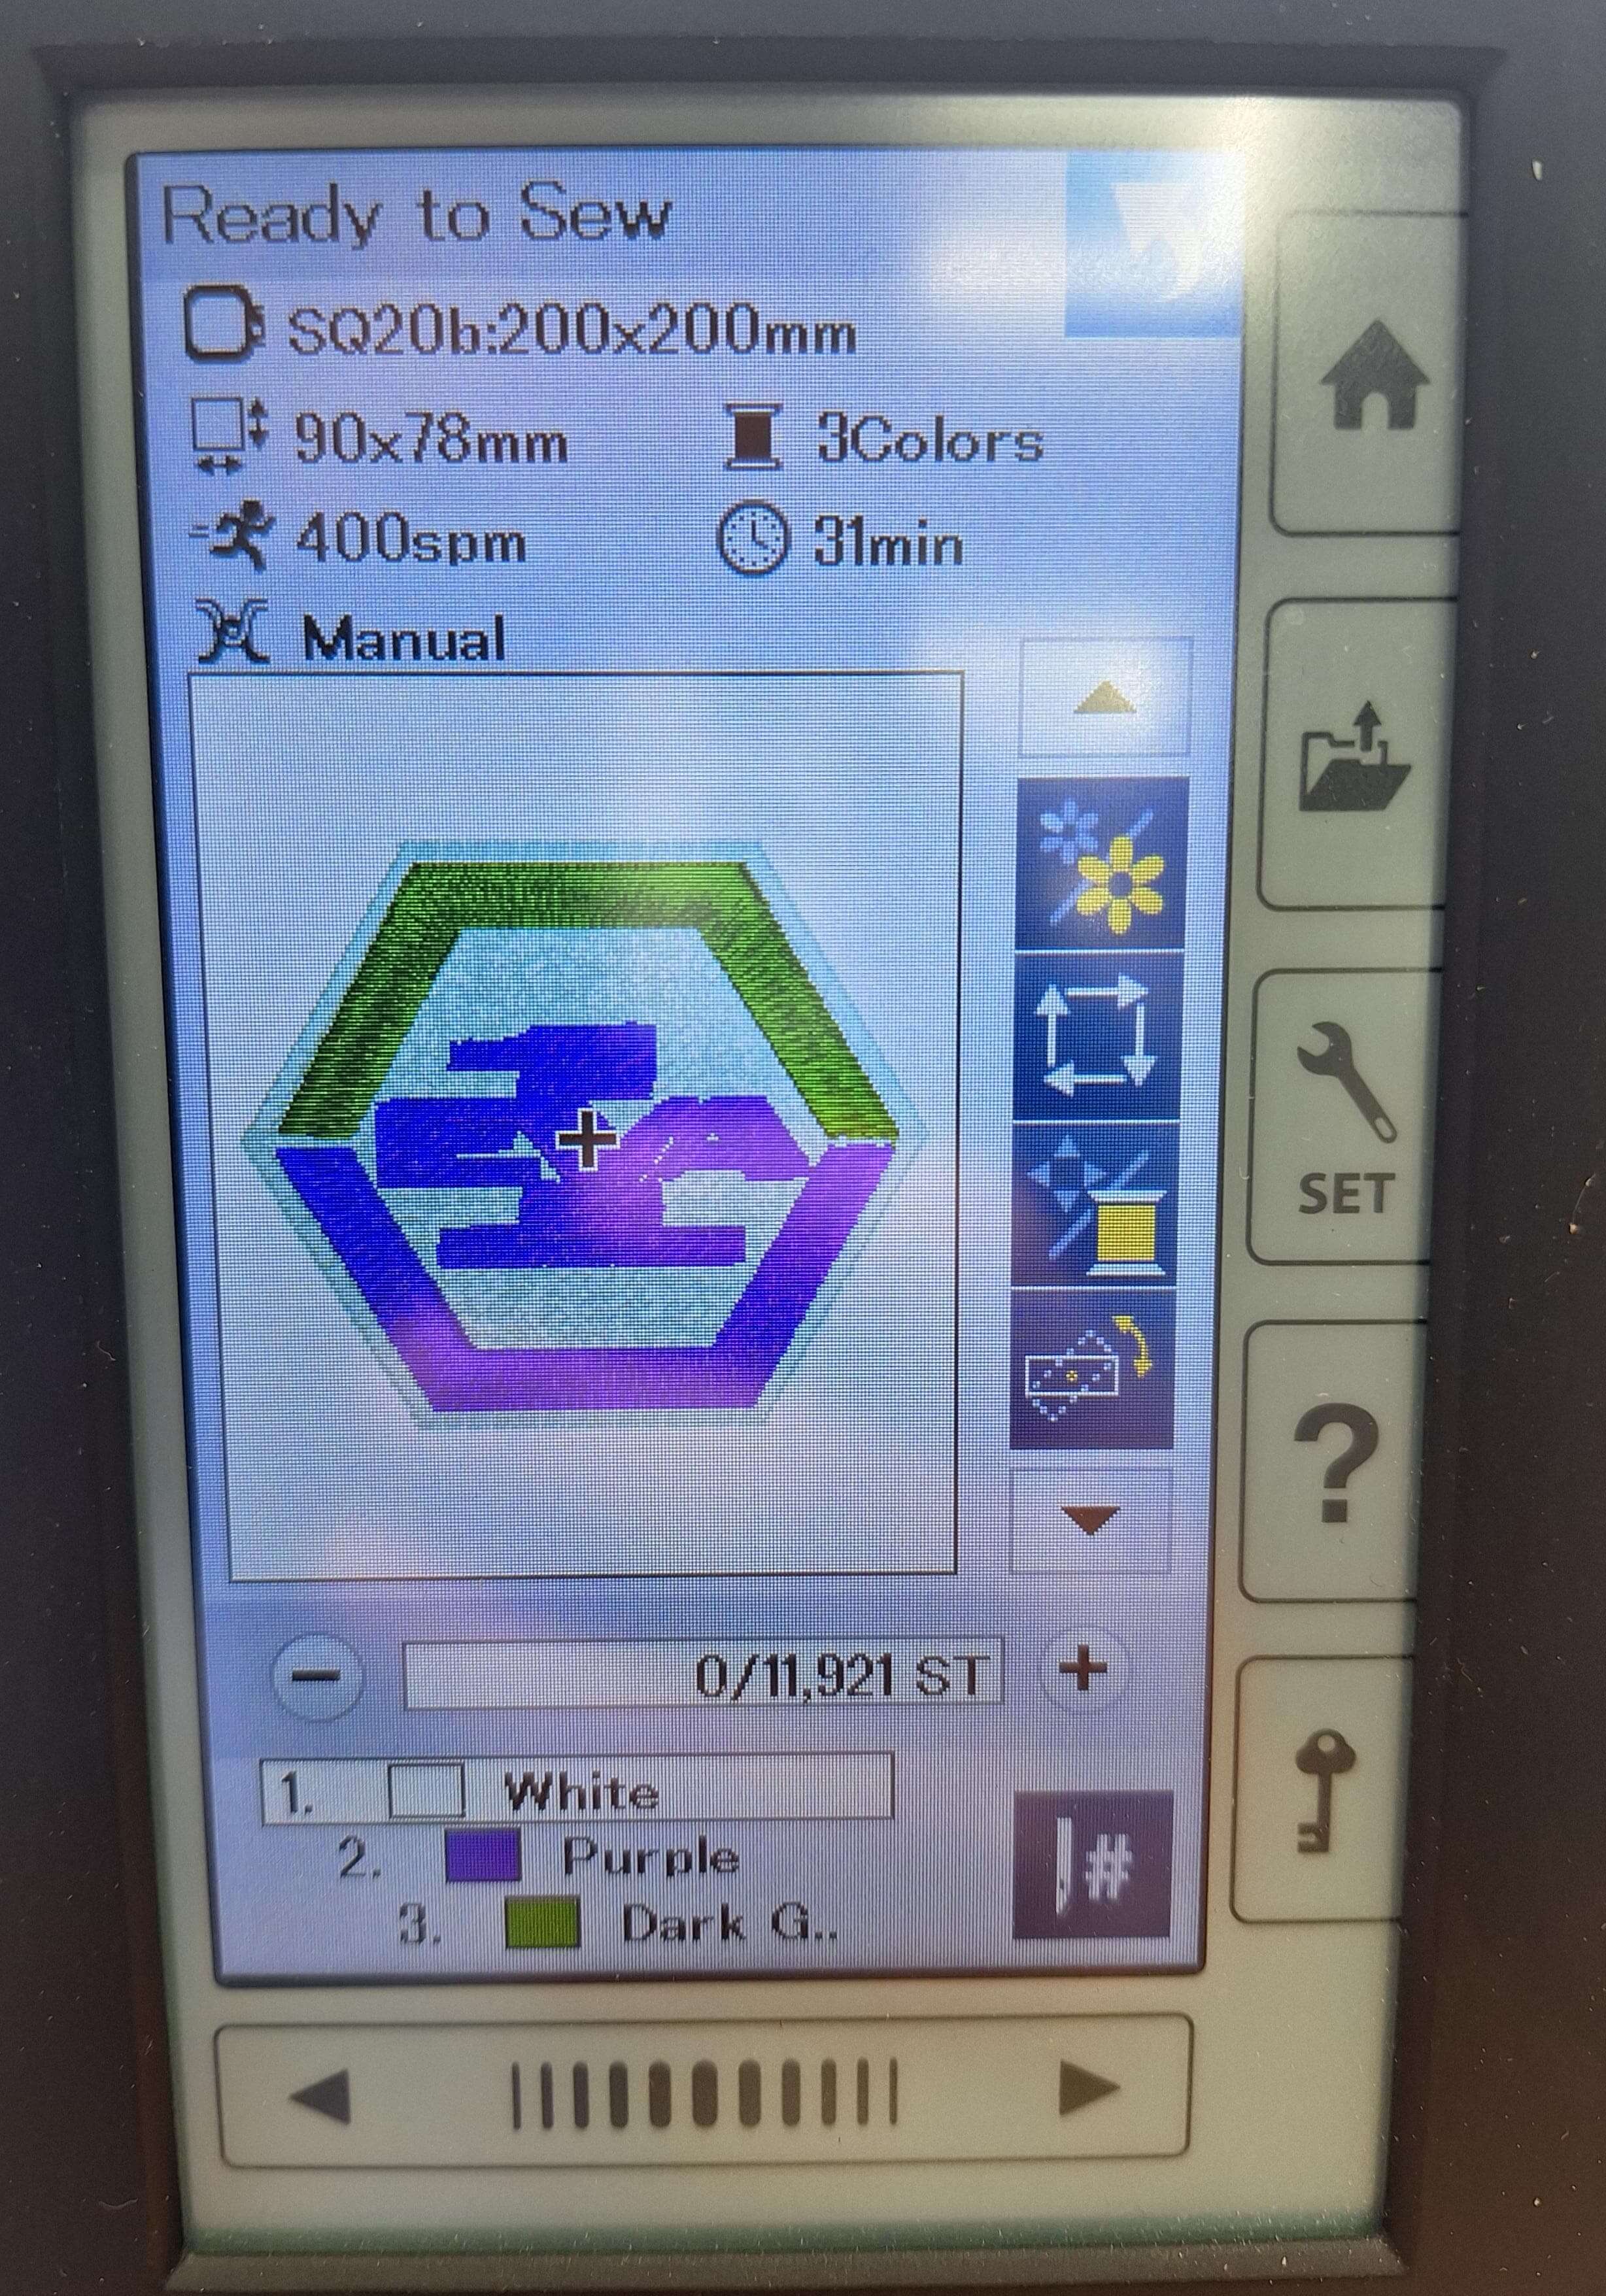
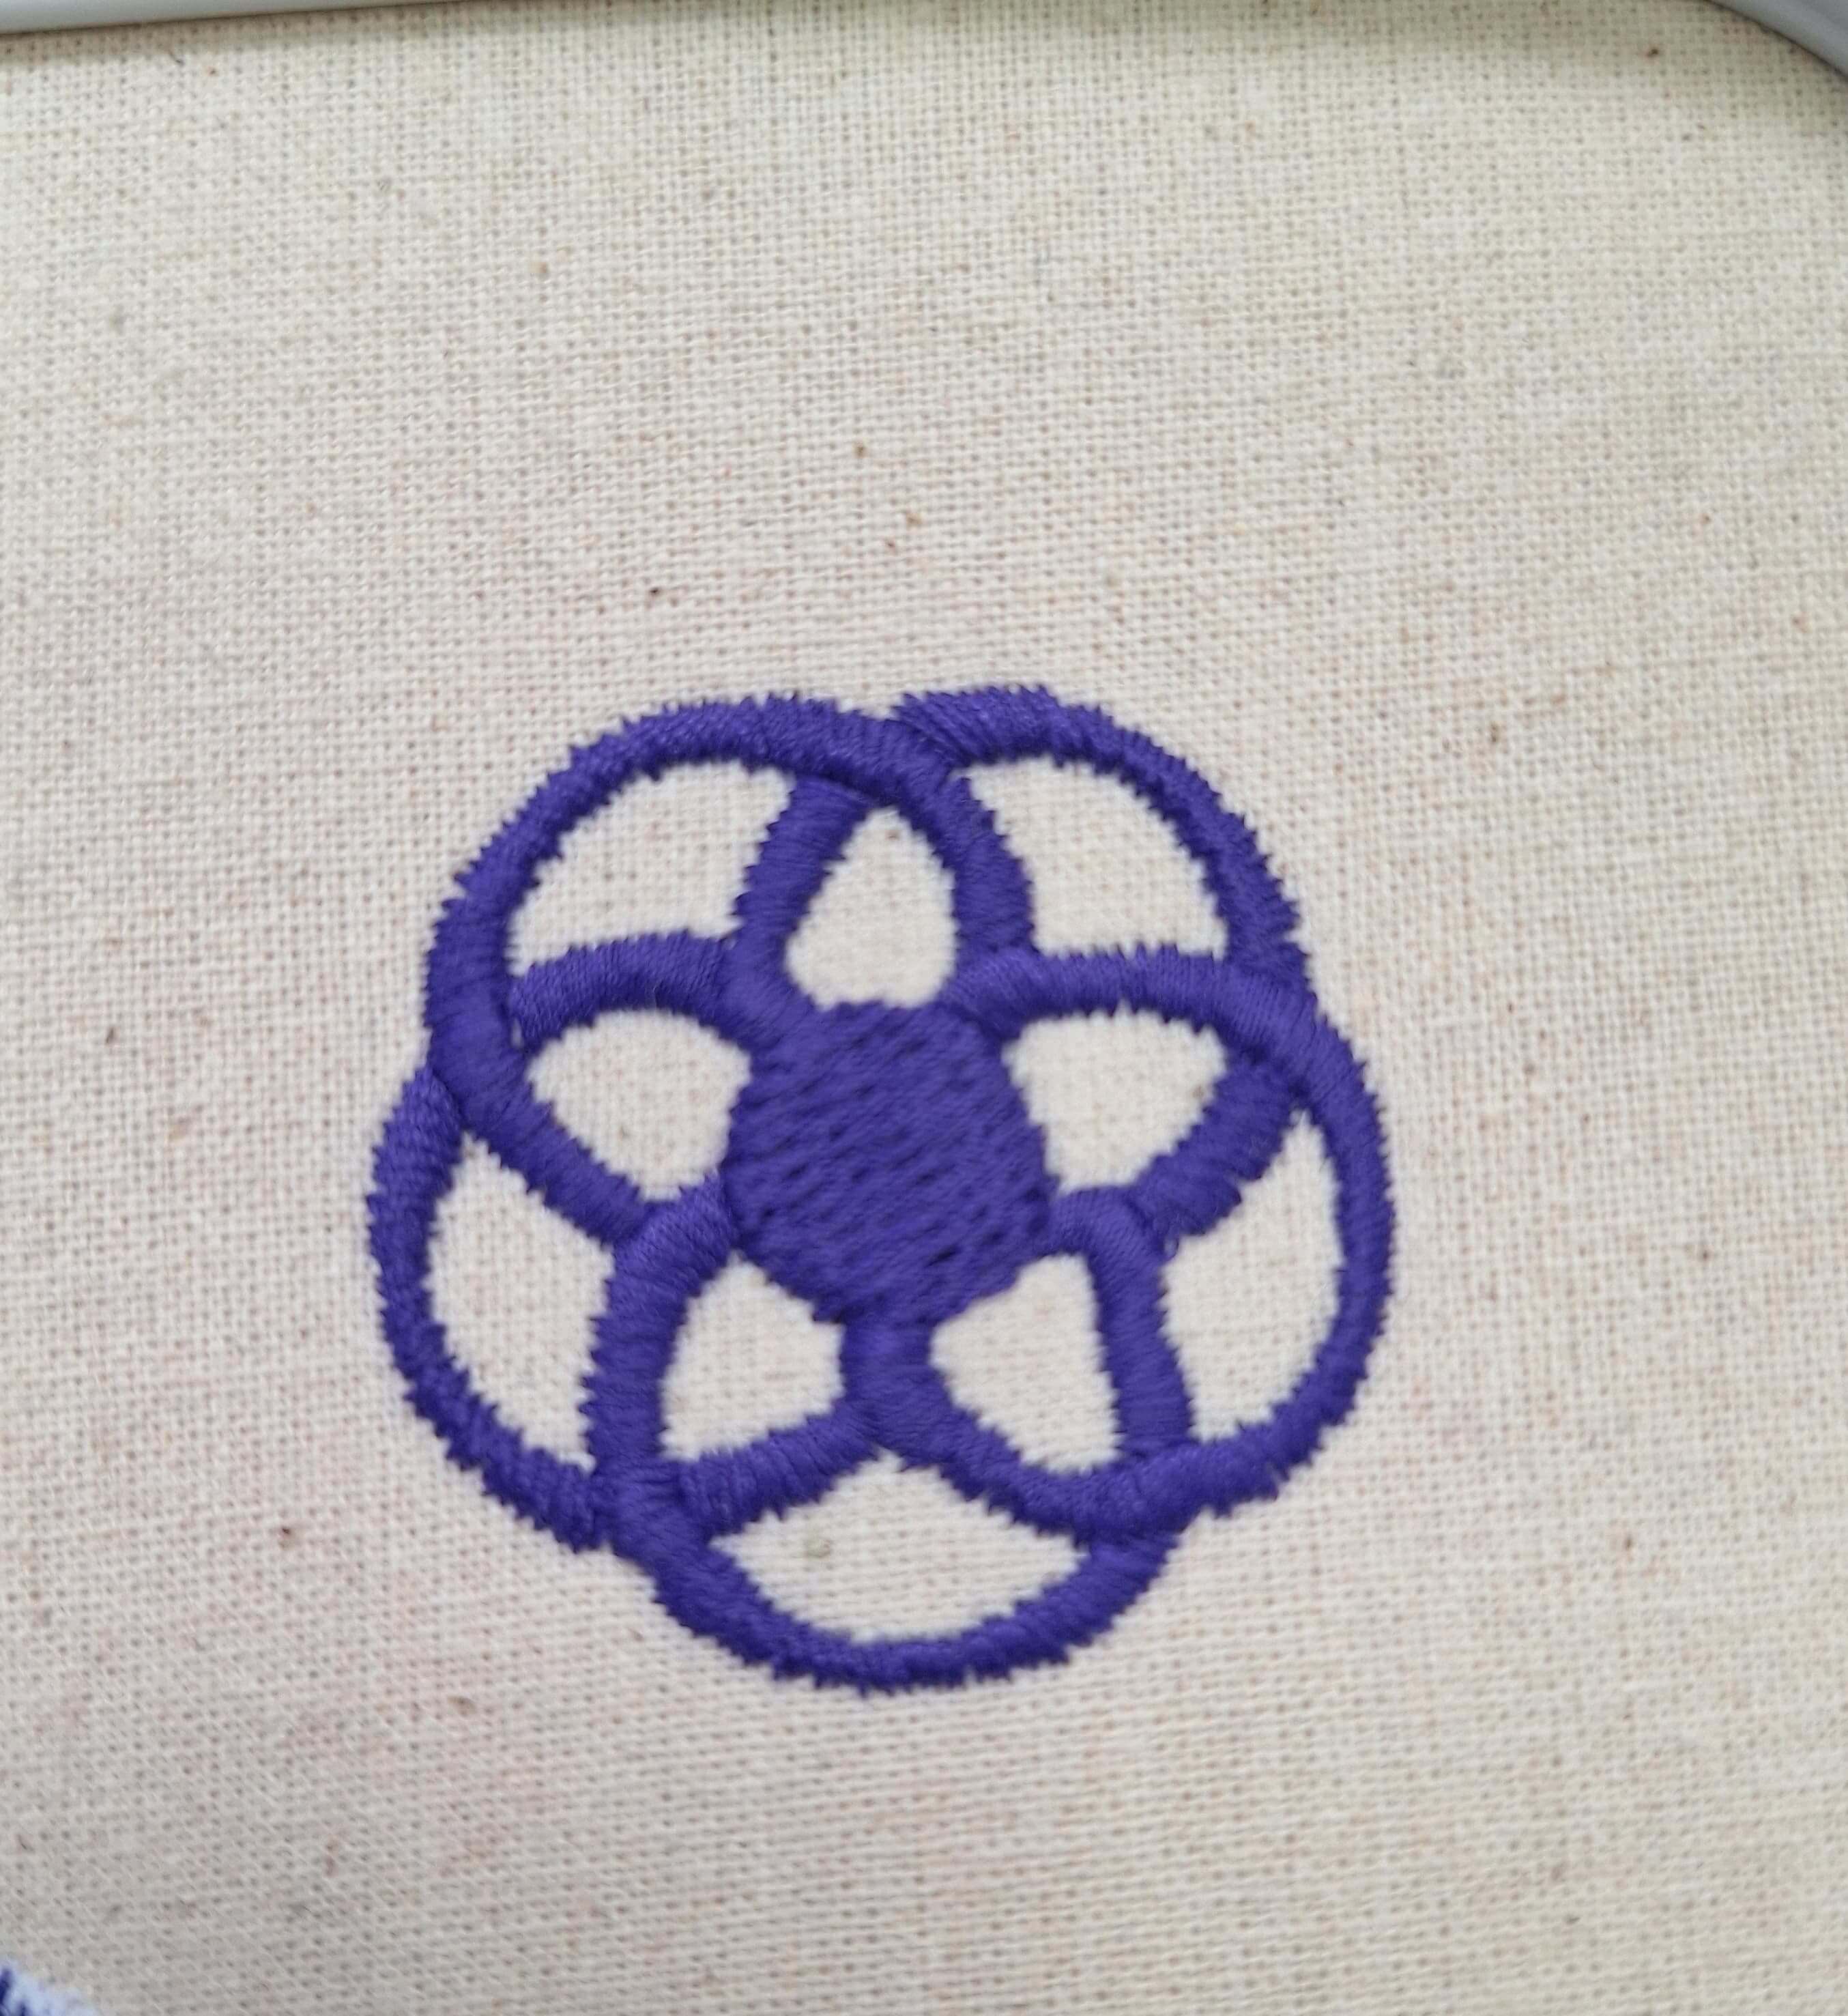
The final result
HERO SHOT
Project Files links
In the next links, you can download the files for the assignments.
- EVA 1 Embroidery Design Wilcom
- EVA 1 Embroidery .JEF
- EVA 1 Embroidery .JPX
- EVA 1 Embroidery .SEW
- EVA 1 Embroidery .PES
Conclusion
This week provided an excellent opportunity to explore the use of digital embroidery machines and professional design software. By working with the Janome MC 500E and Wilcom Embroidery Studio, I gained valuable insights into the process of creating custom embroidery designs, from initial concept to final execution. Despite encountering challenges such as tension issues with the bobbin thread, these were resolved through testing and adjustments, resulting in a successful final design.
The experience highlighted the importance of preparation, including selecting the right materials, stabilizers, and thread colors, as well as the value of conducting test designs to ensure optimal results. Overall, this assignment expanded my understanding of digital fabrication techniques and demonstrated the potential of embroidery as a creative and functional tool in digital manufacturing.
Lessons Learned
This week taught me the importance of preparation and testing when working with digital embroidery machines. I learned how critical it is to select the right materials, such as fabric and stabilizers, to ensure the success of the embroidery process. Additionally, I gained a deeper understanding of how to troubleshoot issues like thread tension and how to make adjustments to achieve consistent results.
Another key takeaway was the value of using professional design software like Wilcom Embroidery Studio. The software's tools and features allowed me to create intricate designs and customize them to meet my needs. I also realized the importance of conducting test designs to identify potential issues before starting the final project.
Overall, this experience enhanced my skills in digital fabrication and demonstrated the potential of embroidery as a versatile and creative tool in manufacturing.
Resources