
Week 18
Introduction
This page outlines the steps followed during week 18 of the Fab Academy assignments.
The tasks for this week involved Invention, Itellectual Property and Income and the following assignments:
- Develop a plan for dissemination of your final project Complete your final project, tracking your progress:
- what tasks have been completed, and what tasks remain?
- what's working? what's not?
- what questions need to be resolved?
- what will happen when?
- what have you learned?
Assignment:
Let's start.....................

Assignment
CNC Routing
The main task for this week is to finish or at least complete 90% of the final project to be ready for the final presentation. In my case, the project is a smart bartender or liquid dispenser machine, and I have almost everything ready for the final assembly and testing. So, let's start.
After working on some 3D part designs and versions of the frame, I made some changes. Let me explain a little bit about this. Let's go to the latest version. In the case of the frame, we have the following version:
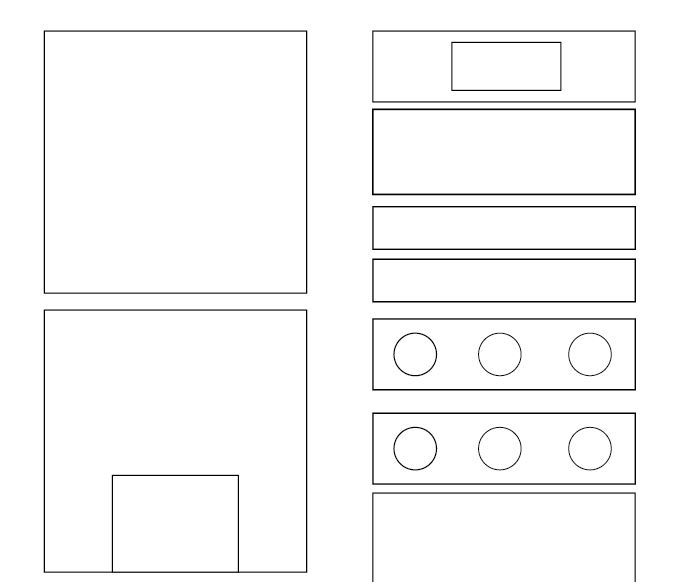

However, this version is complex when it comes to joining each part. To reduce complexity, I changed the top part of the machine and gave it a simpler design, allowing for the addition of other details. The final frame looks like this.
The changes are minimal but significantly reduce production and assembly time. Now, with the final version ready, it's time to use the CNC machine to cut the frame.
3D Printing
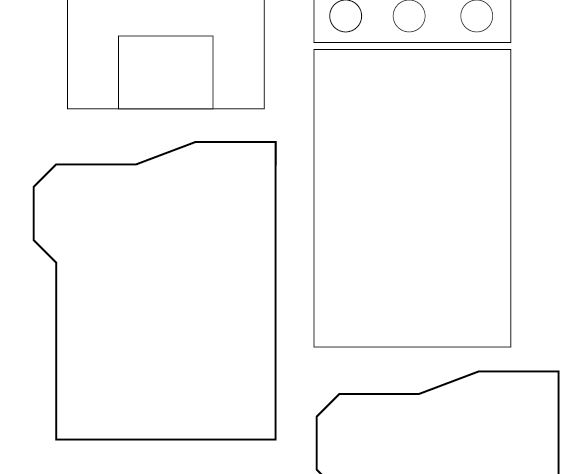
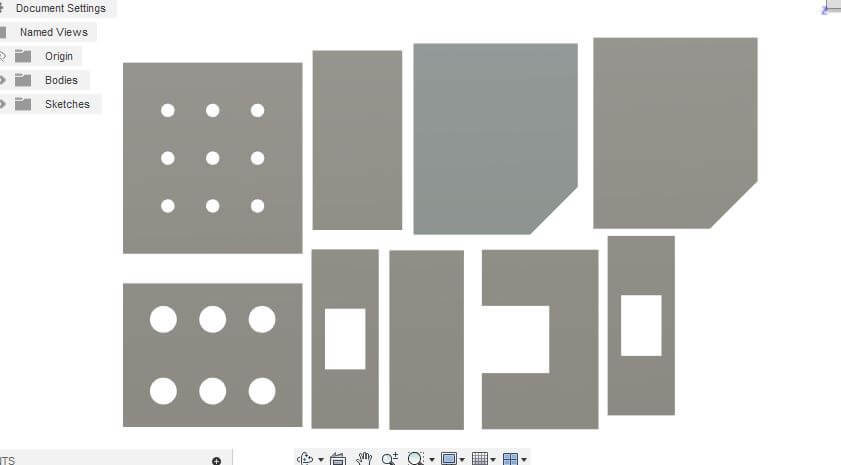
Now I have the frame it's time to create the 3D parts, I add some details to the previous versions of the 3D parts I designed just to reduce time and also to fit the new frame.
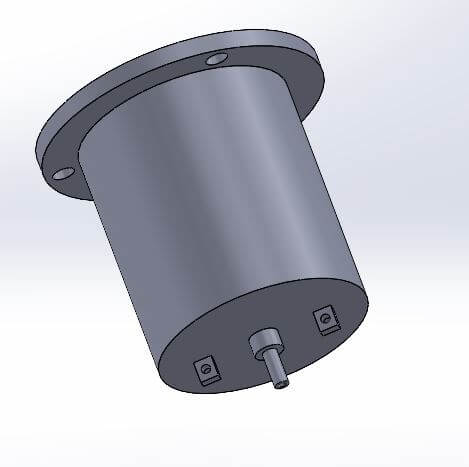
In these first images, you can see the bottle holder and the cup holder. These parts are the most important in the system because they are the ones visible from the outside and the ones in contact with the liquid.
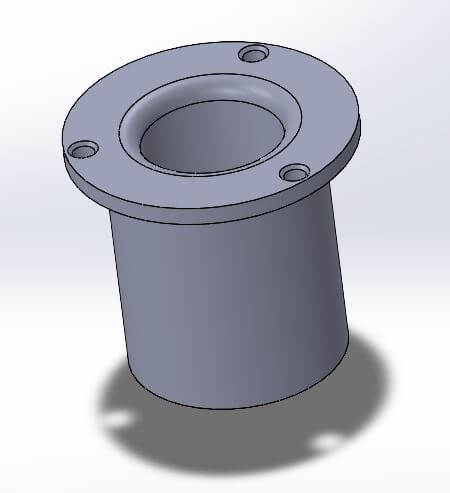
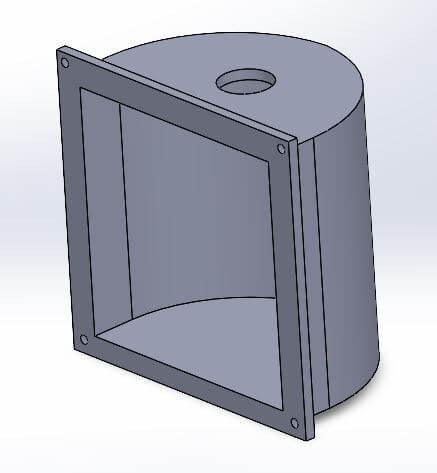
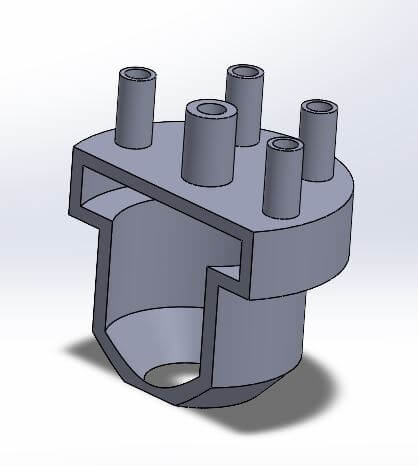
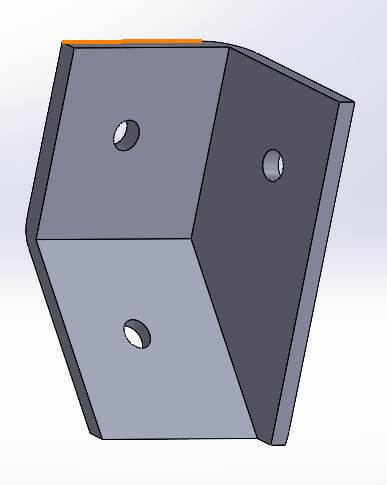
The following images show the 90-degree joints and edge connections, as well as the extruder. This specific part is placed on top of the cup holder and helps direct the liquid.
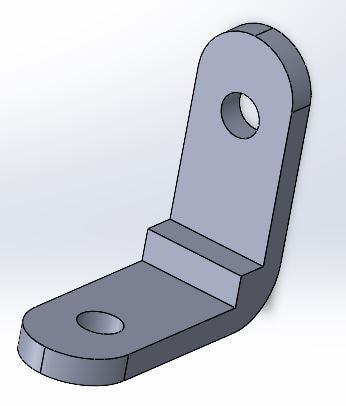
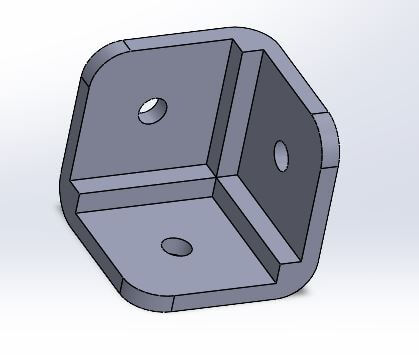
The last parts are the angle joint and the screen holder. This is a nice frame that allows us to add the touchscreen to the frame without too many parts.

Now I had everything ready. It's time to print all the parts. For this, I used almost five printers, including Ender 3 and Prusa models, with an estimated print time of 90 hours to get everything ready.
After printing, I tested how some parts fit into the frame.

With the frame and the 3D parts ready, it's time to assemble. However, there are two things to do first: prepare the electronics and add some finishing touches to the frame.
PCB Production
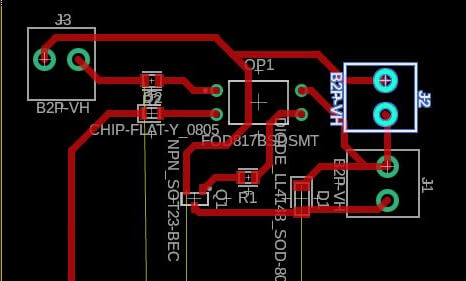
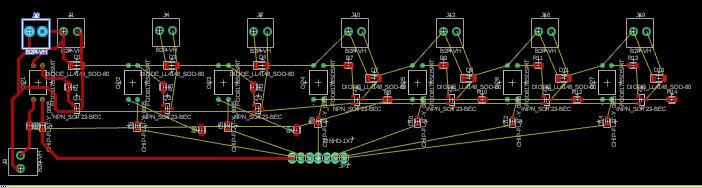
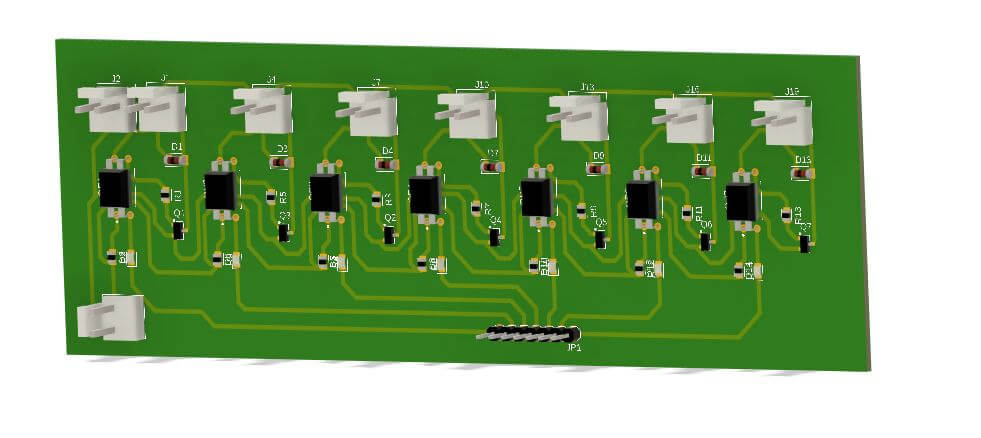
I started with the electronics. The first step was to design the PCB. As you saw a few weeks ago, I created a small version. This one is ready to control the six solenoid valves I am going to use. The design is the same; the only change is the quantity, making it bigger. Additionally, I added one input for 5V and one for 12V.
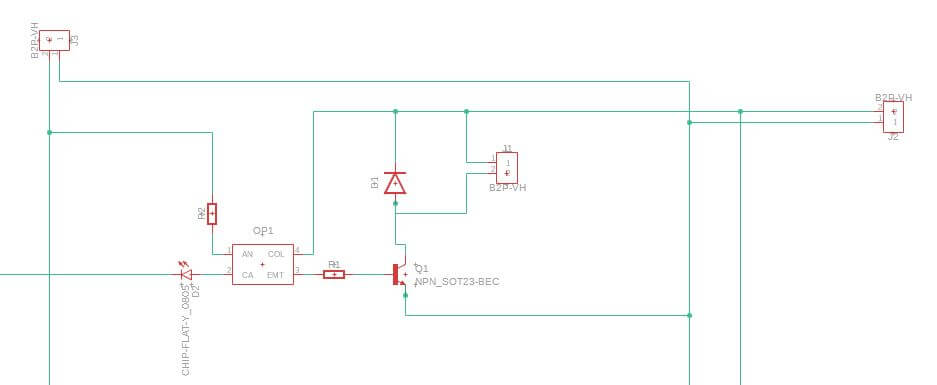
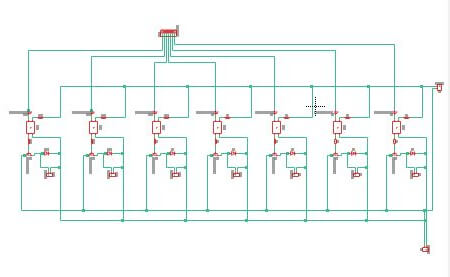
With this ready, it's time to route and create the G-code files for production. Let's review the process.
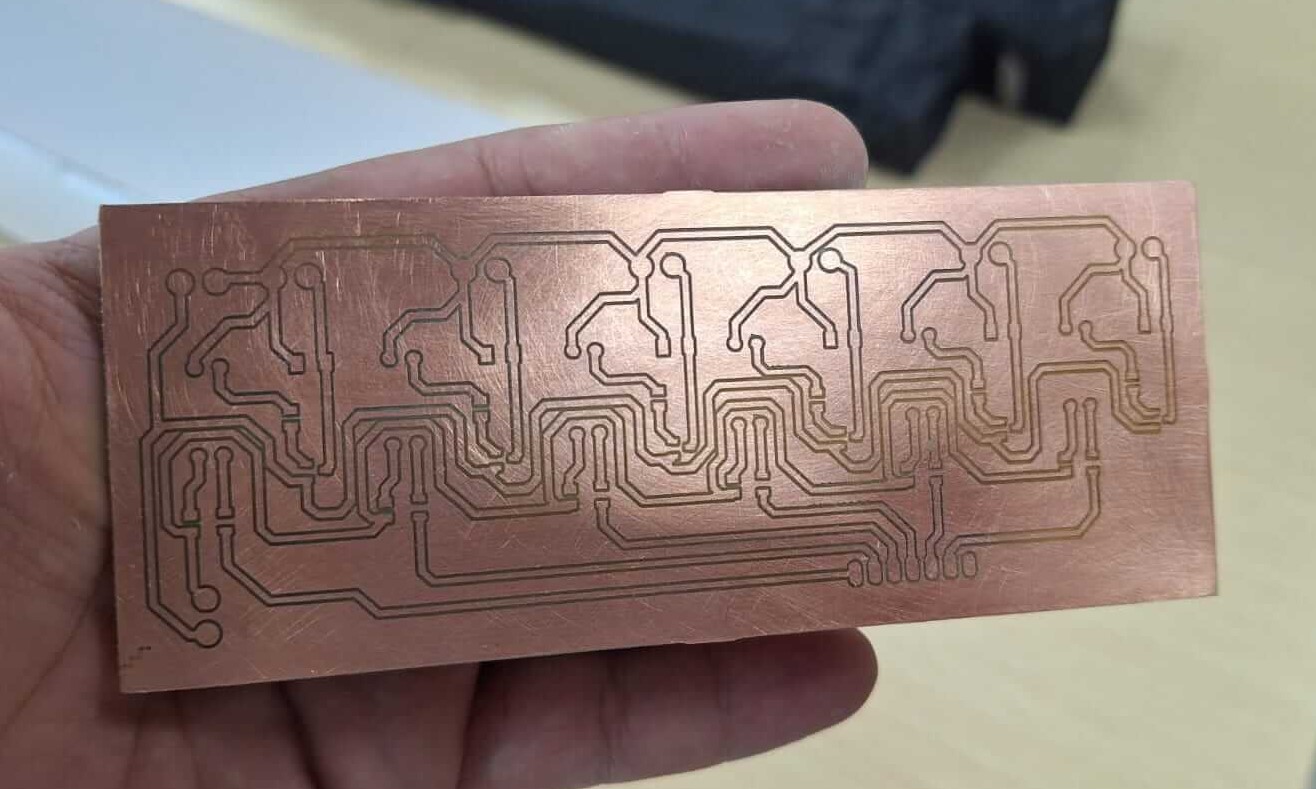
Now, we start the milling process and solder the components.
And this is the result of the milling process.
With the PCB ready, I started adding the SMD parts to ensure everything works correctly.
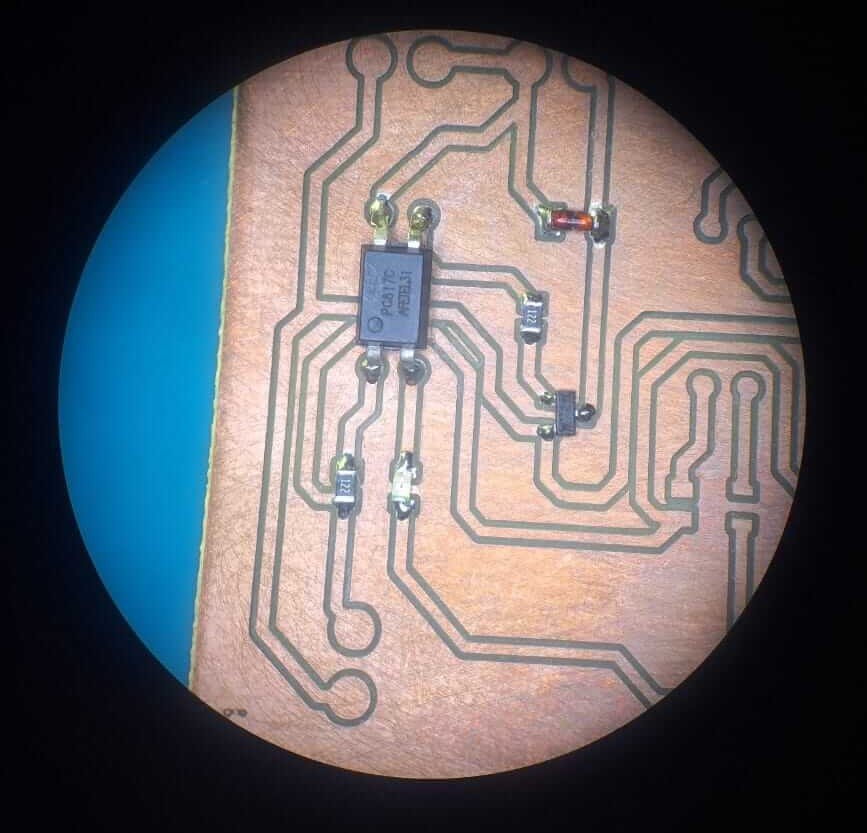
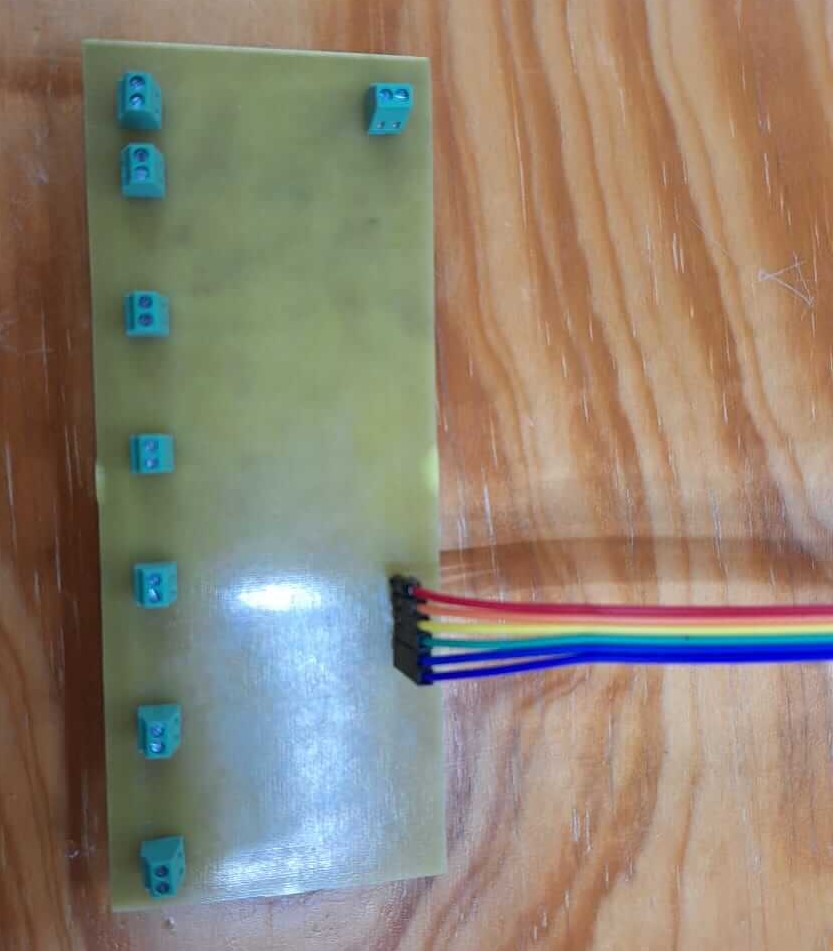
PCB finished with all the SMD components, now it's time to connectors and terminals.


The result of all the PCB process
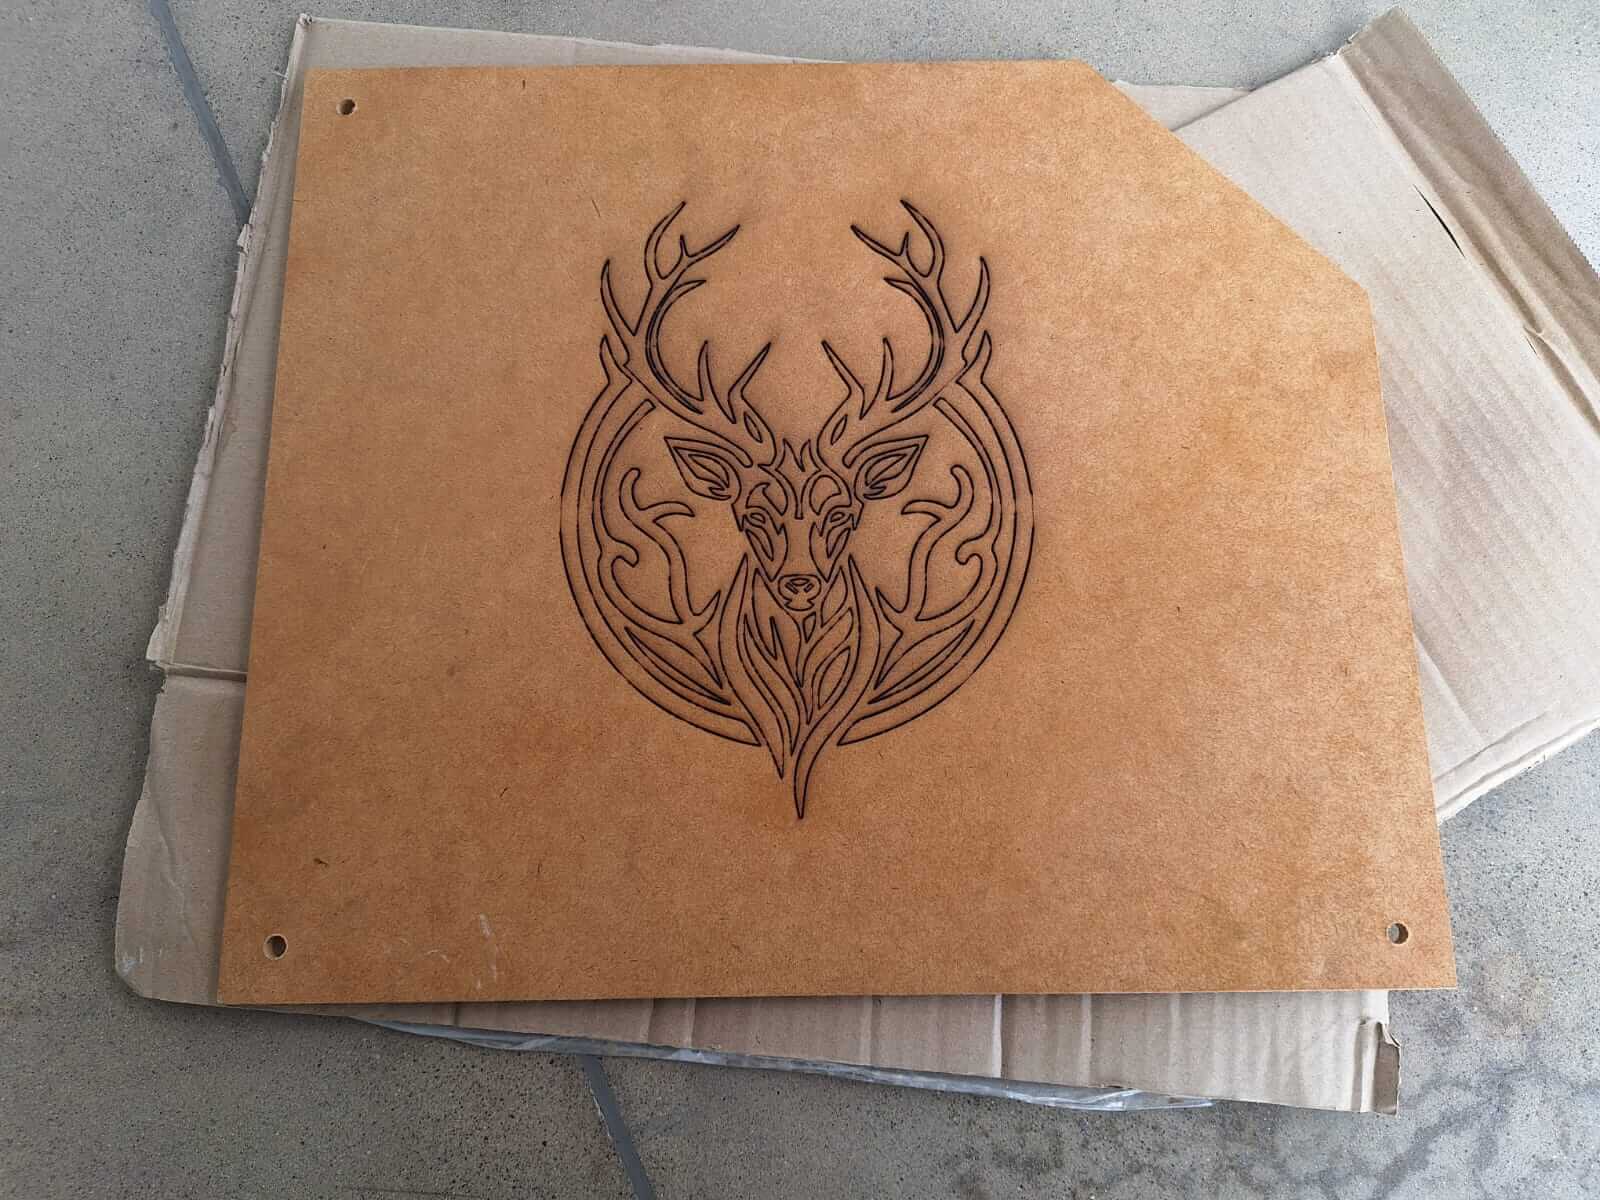
Now it's time to give a good finishing touch to the frame, to do this I used laser engraving and also added clear to the MDF to give a shadow effect looking like wood.
The result?
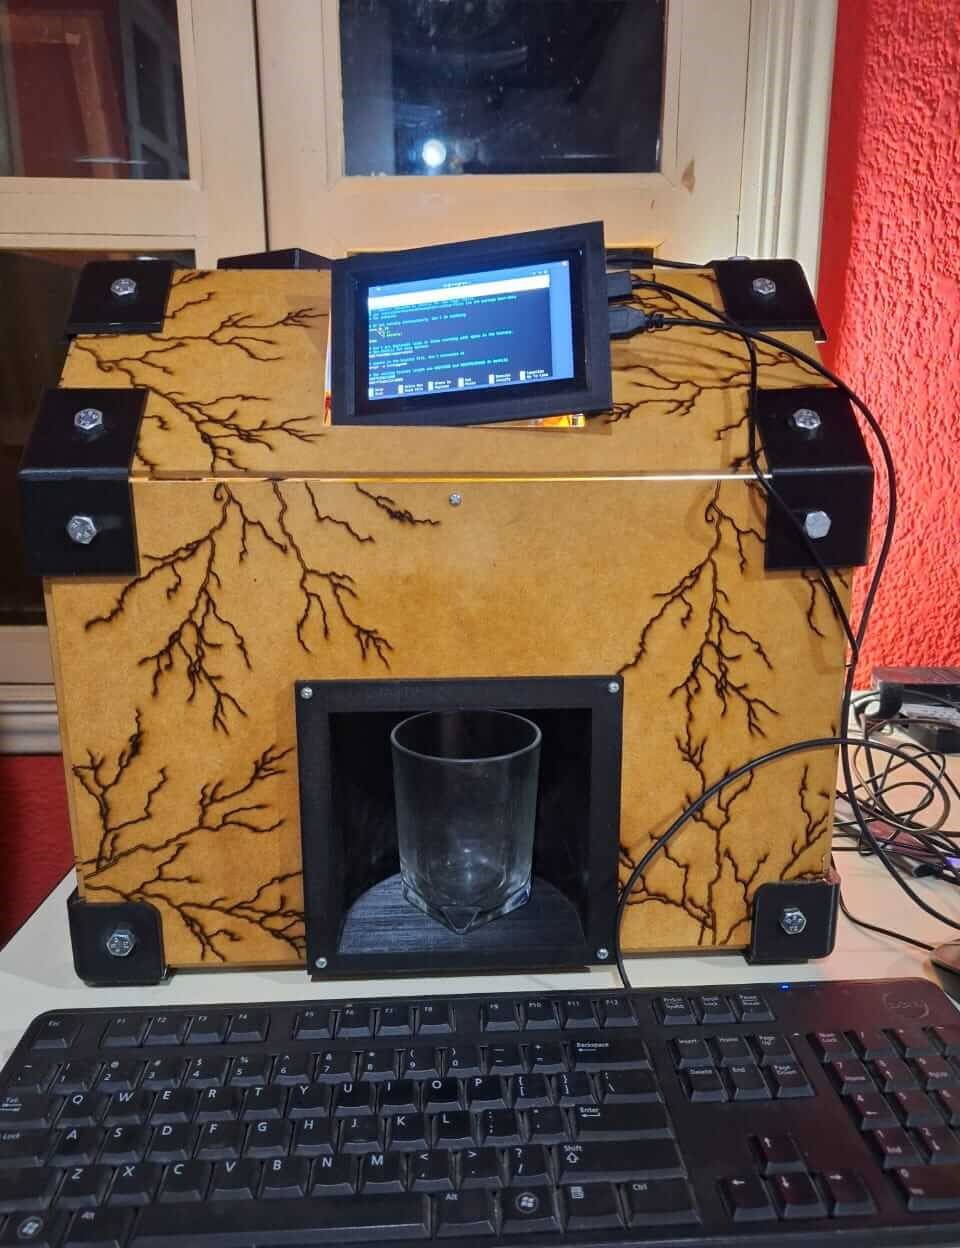
It's time to assemble everything and start seeing how all the hard work comes together.
Integration
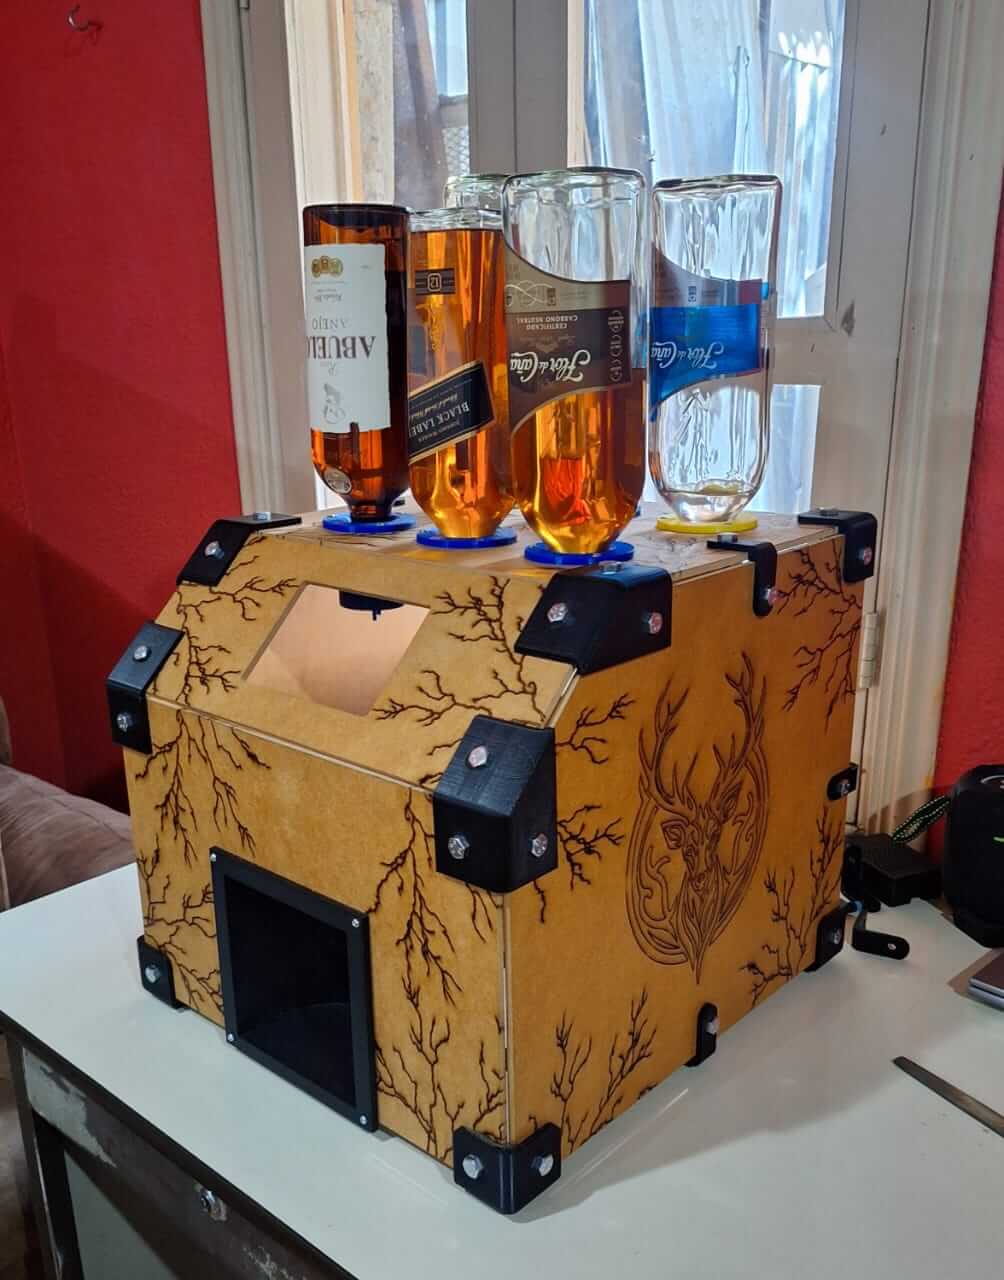
So, this is how it looks assembled and testing how the bottles fit. It looks pretty good.
I also started adding some details to make it look more like a commercial product. In this case, I added a switch with a connector and a fuse to turn the machine on and off.
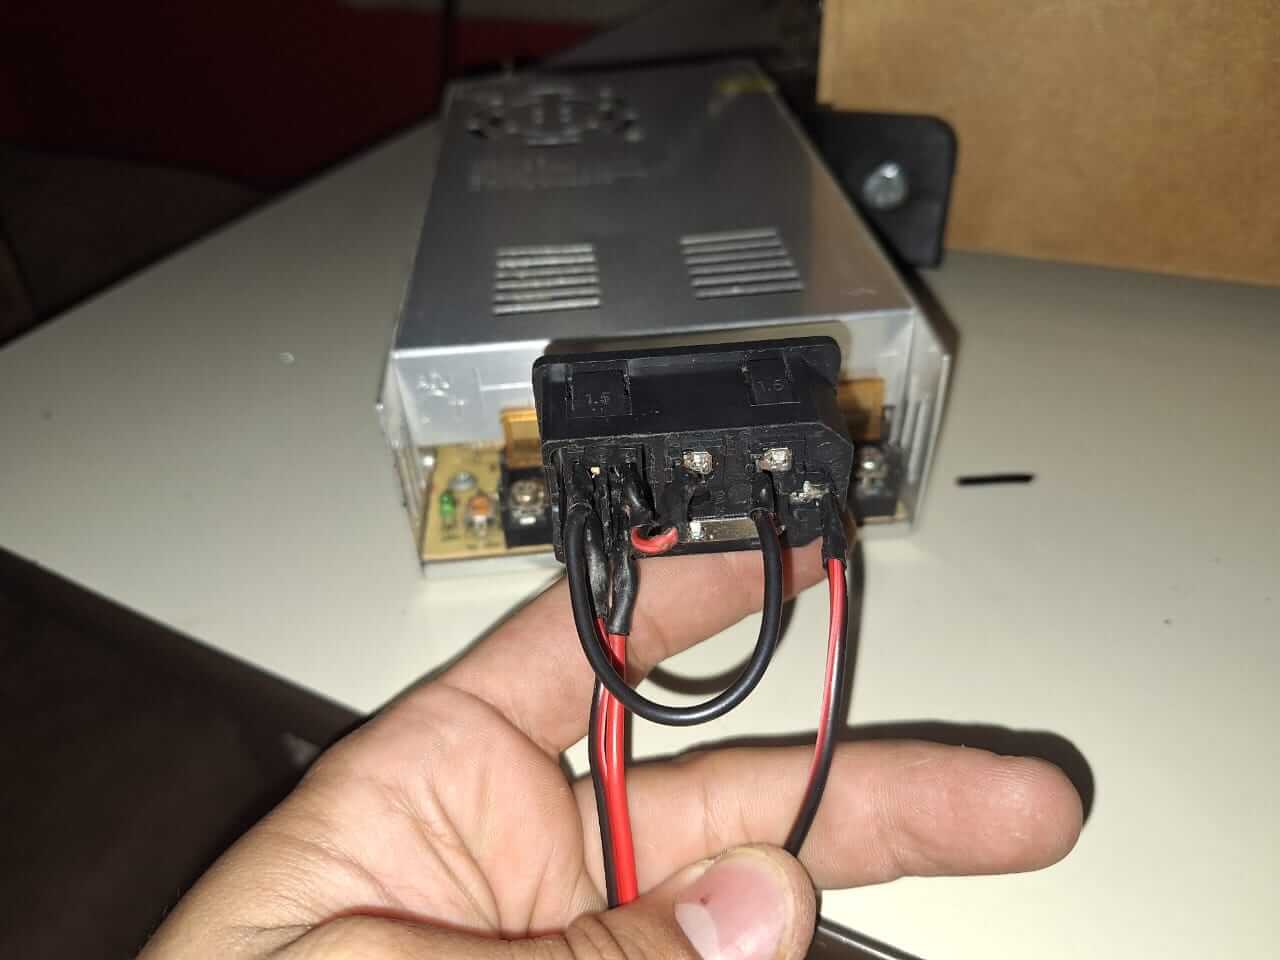
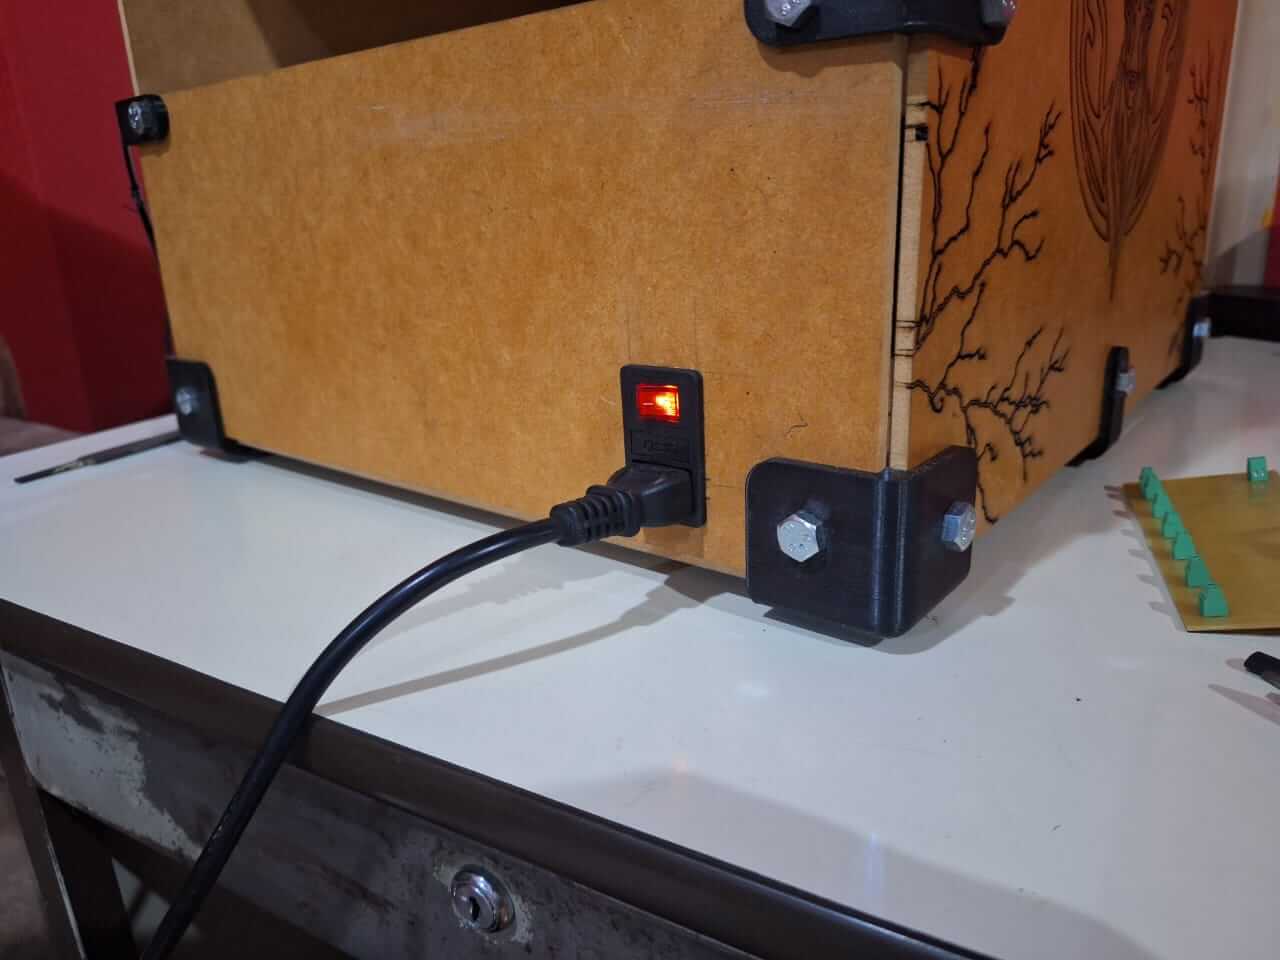
This helps us to turn on the power supply. It is a 12V unit with 30 amps. I used this large power supply because it was the only one I had available, and I couldn't purchase another one, so it was time to recycle, haha.
To complete the assembly, I added the hoses and solenoid valves. There are six in total, all connected together and leading to the extruder I 3D printed, which is located at the top of the cup holder.
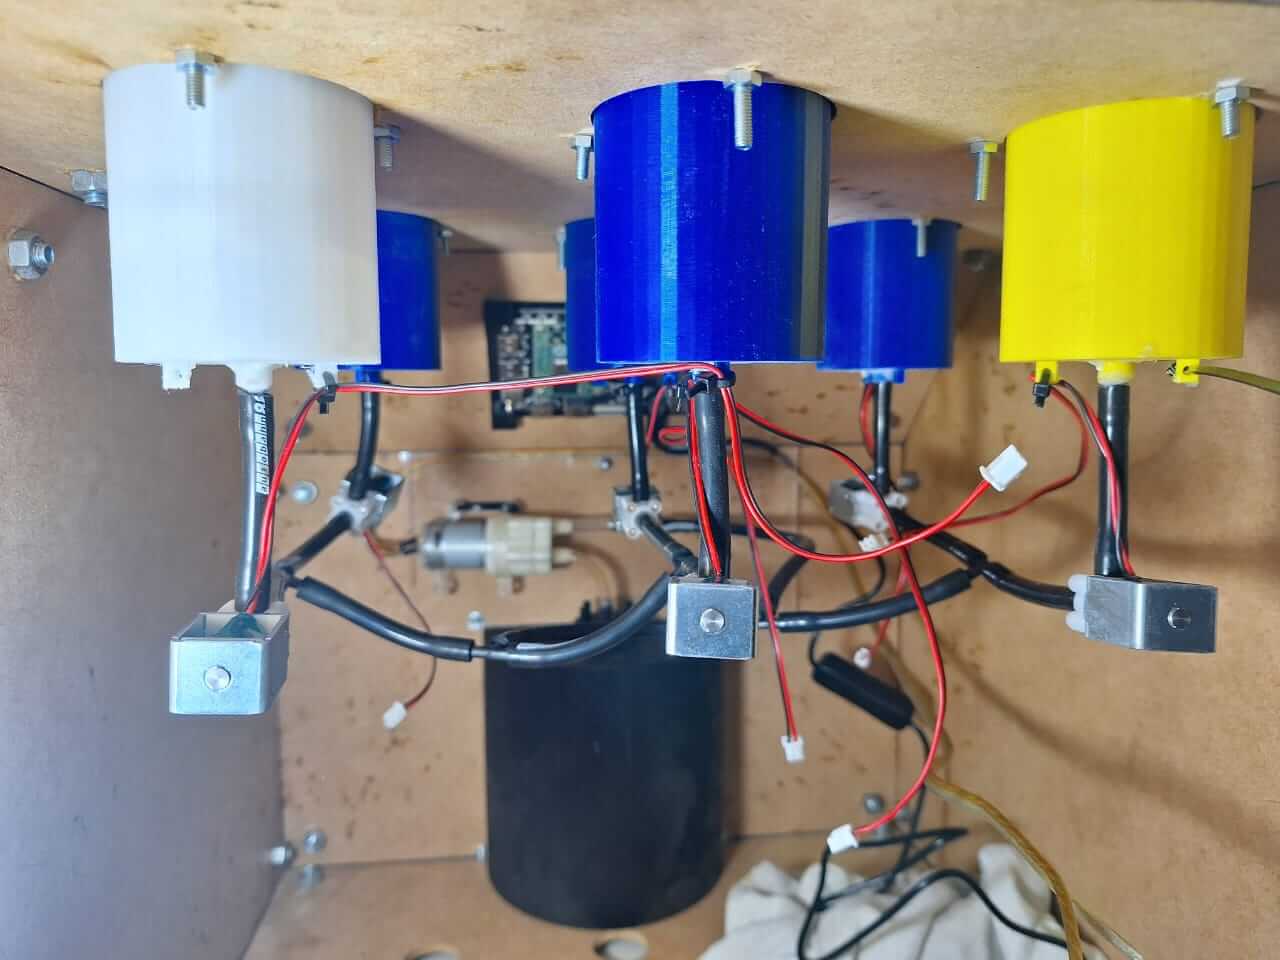
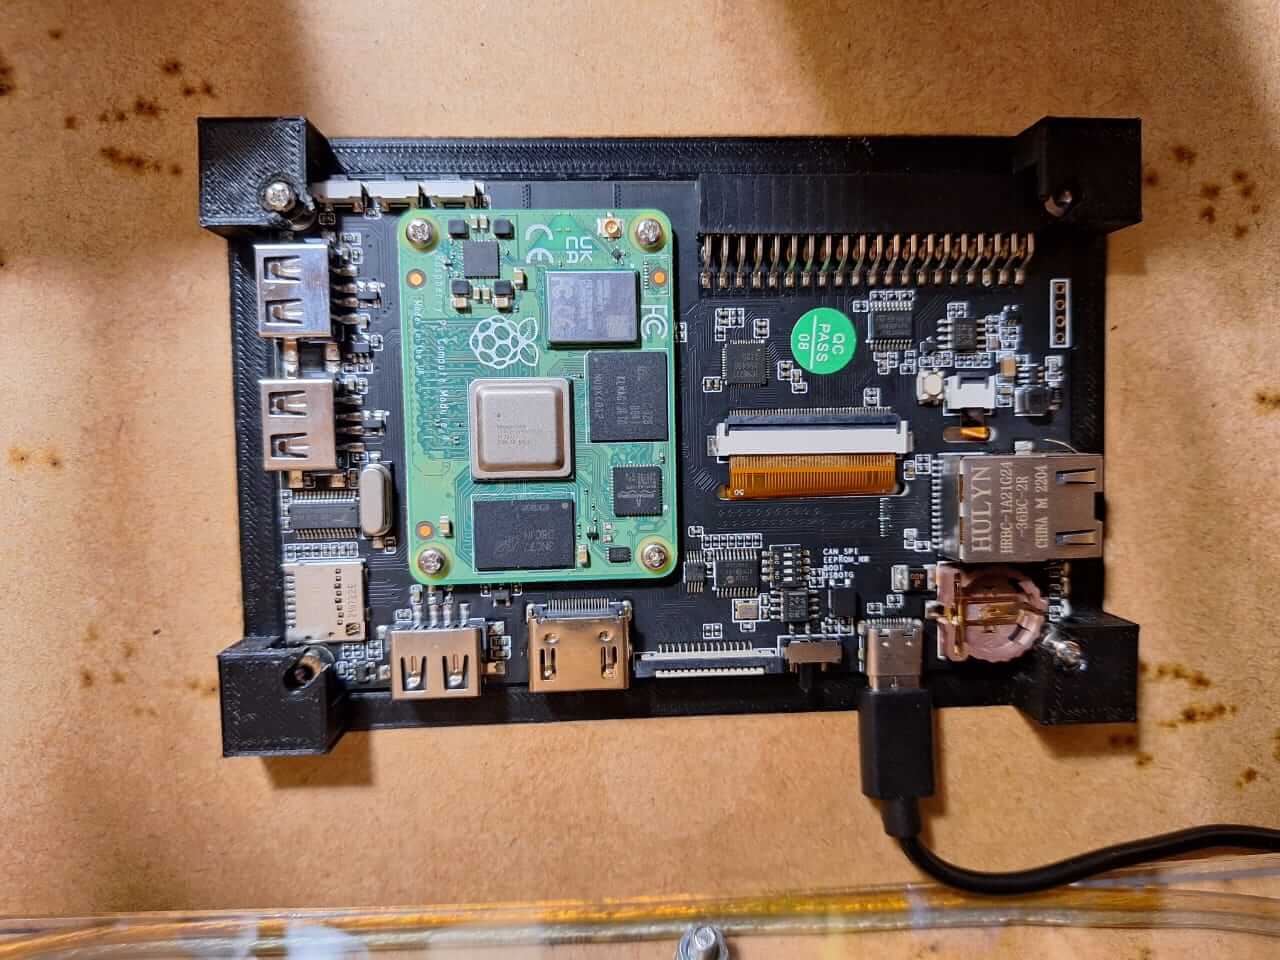
The last step was testing the PCB to see if we could control the solenoid valves with the Raspberry Pi. so, in the next video we can se how the pcb start working.
Results
Tasks Completed
- Final version of the 2D frame design completed and cut.
- Final version of the 3D parts design completed and printed.
- Electronics and electrical assembly completed.
- Hydraulic assembly completed.
- Tested the Raspberry Pi with GPIO and the final version of the PCB.
Tasks Remaind
- I need to test the machine at full capacity.
- Test the machine as a final user.
What has worked and what hasn´t?
The machine is completed and functional, but the interface still needs to be integrated. Currently, I have a basic interface, which is the first iteration working as a dispenser. This allows us to use the machine, test how the system operates, and identify any areas that require improvement.
What questions need to be resolved?
- How can I ensure there are no leaks?
- How can I ensure the liquid flows correctly?
- How can I make the backend run directly at boot start?
What have I learned?
Things I have learned throughout this process include the importance of good design and creating different versions of your parts to avoid wasting time and material. This approach enables you to create parts in fewer iterations and prototype more efficiently.
Issues
All the issues I encountered were related to 3D printing, such as power outages that required restarting the printing process. Additionally, the filament got stuck in the extruder, causing it to stop extruding material, which resulted in lost layers and failed prints. Lastly, one of the bottle holders failed to adhere to the print bed at the start, leading to a failed print.
Next Steps
Programming and Interface?
In this final step, the information and results are added to the Final Project page. Visit the page to see how everything comes together and learn about the plans for future work.
Project Files links
In the next links, you can download the files for the assignments.
- Bottle holder Solidworks
- Bottle holder STL
- Cup holder Solidworks
- Cup holder STL
- Extruder Solidworks
- Extruder STL
- Join 90 edge Solidworks
- Join 90 edge STL
- Join 90 degrees Solidworks
- Join 90 degrees STL
- Join 135 degrees Solidworks
- Join 135 degrees STL
- Join 135 degrees mirror Solidworks
- Join 135 degrees mirror STL
- Screen Holder Solidworks
- Screen Holder STL
- PCB Fusion 360 complete project
Conclusion
The integration and application of multiple disciplines allow us to realize that we are capable of creating amazing things. It also helps develop the ability to solve problems and think outside the box.
Resources