
Week 3
Introduction
This page outlines the steps followed during week 3 of the Fab Academy assignments.
The tasks for this week involved Computer Controlled Cutting and the following assignments:
- Do your lab's safety training
- Characterize your lasercutter's focus, power, speed rate.
- Kerf.
- Joint clearance and types.
- Cut something on the vinyl cutter
- Design, lasercut, and document a parametric construction kit, accounting for the lasercutter kerf, which can be assembled in multiple ways
- Extra credit include elements that aren't flat
group assignment:
Individual assignment:
Let's start.....................

Lab's safety training
1. Introduction to Lab Safety
- Purpose of Training: To ensure all users understand and follow safety procedures.
- Scope of Equipment: Introduction to machines such as the vinyl plotter and laser cutter.
- Responsibilities: Outline the safety responsibilities of both users and supervisors.
2. General Safety Guidelines
- Dress Code: Wear closed-toe shoes, avoid loose clothing, and use safety goggles.
- Housekeeping: Maintain a clean and organized work area.
- Signage and Labeling: Adhere to all lab safety signs and labels.
3. Operating Procedures
- Pre-Use Checks: Inspect machines for any issues before use.
- Usage Guidelines: Follow specific step-by-step operating procedures for each machine.
- Post-Use Procedures: Properly shut down and clean machines after use.
4. Specific Equipment Safety
Vinyl Plotter
- Handling Materials: Carefully handle blades and materials.
- Machine Settings: Adjust machine settings based on material type and thickness.
Laser Cutter
- Material Safety: Use only materials that are safe and avoid those that emit toxic fumes.
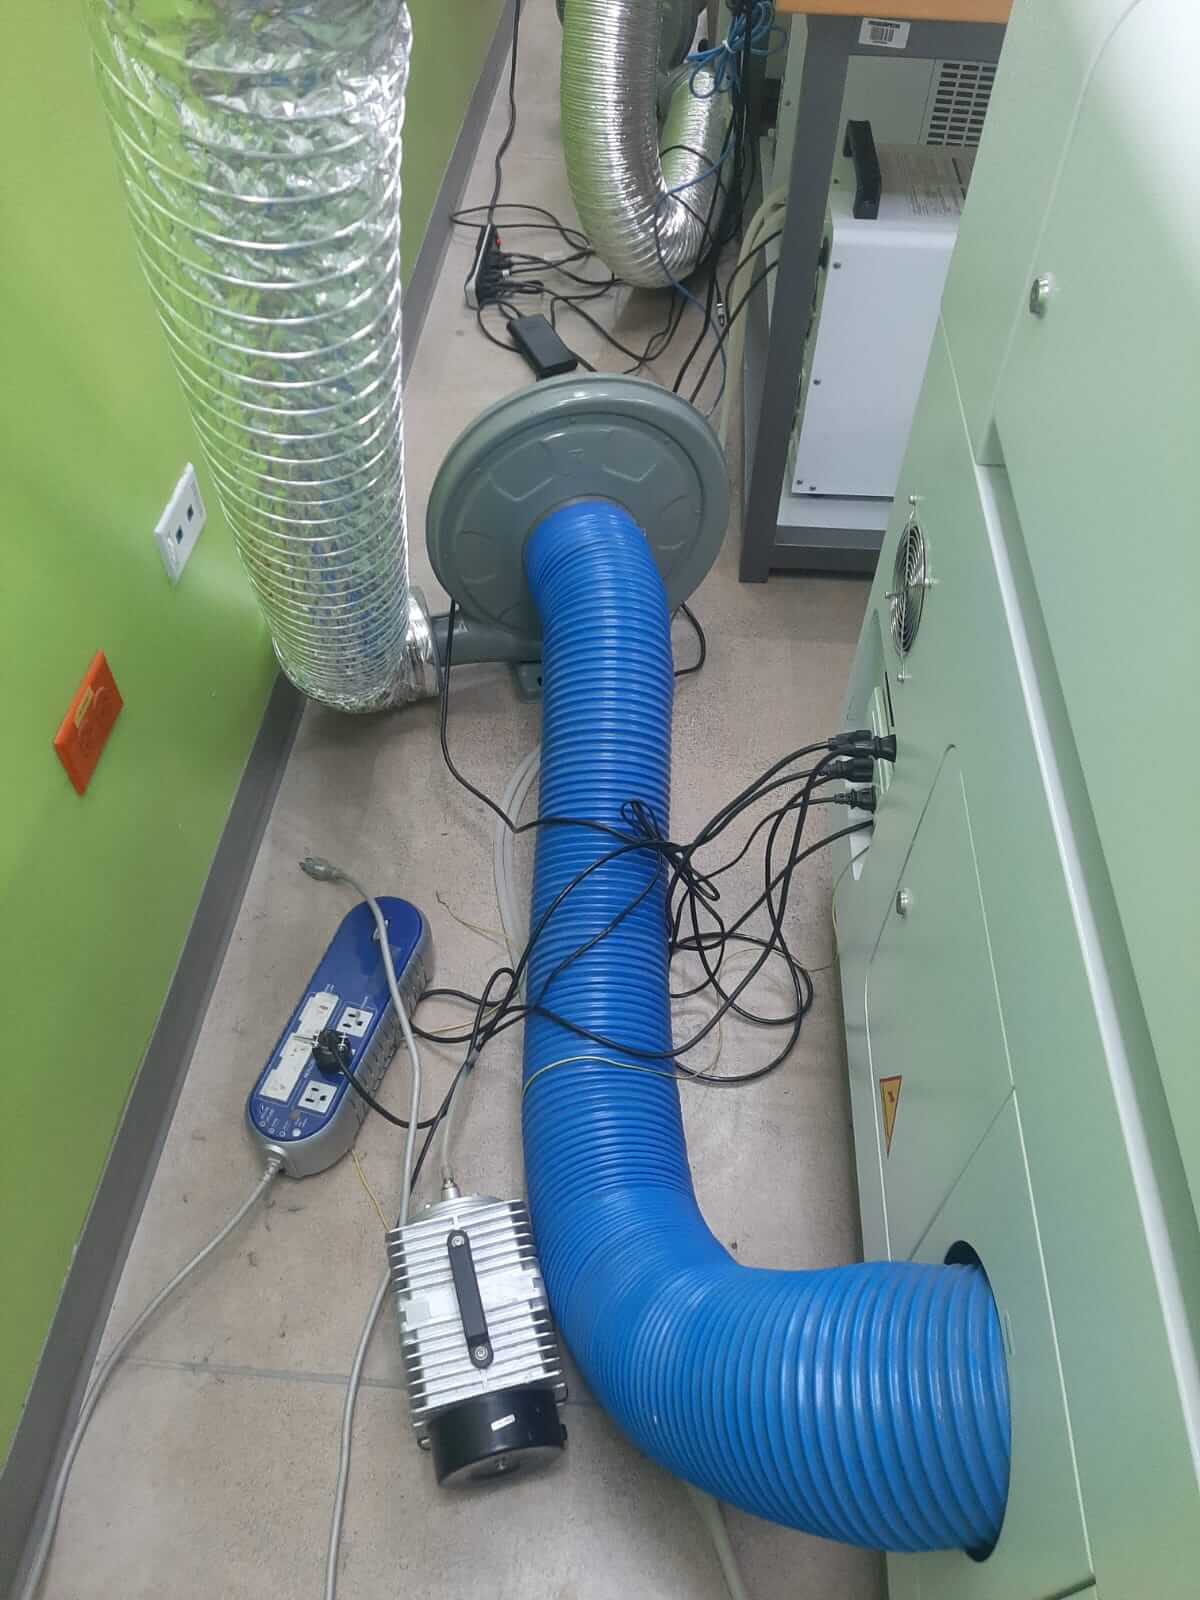
- Operational Safety: Always use exhaust systems and monitor the cutting process.
- Fire Safety: Know how to use a fire extinguisher and procedures for handling fire incidents.
5. Emergency Procedures
- Accidents and First Aid: Know the steps for injury response and the location of first aid kits.
- Fire Safety: Know the locations of fire extinguishers and emergency exits.
- Reporting Incidents: Report any safety incidents or near misses.
6. Training and Record Keeping
- Hands-On Training: Require demonstrations for all users.
- Documentation: Maintain records of who has been trained and any incidents.
7. Evaluation and Feedback
- Assessment: Conduct a quiz or practical test to assess understanding.
- Feedback Mechanism: Provide a way for users to give feedback on safety training.
Characterize Your Laser Cutter
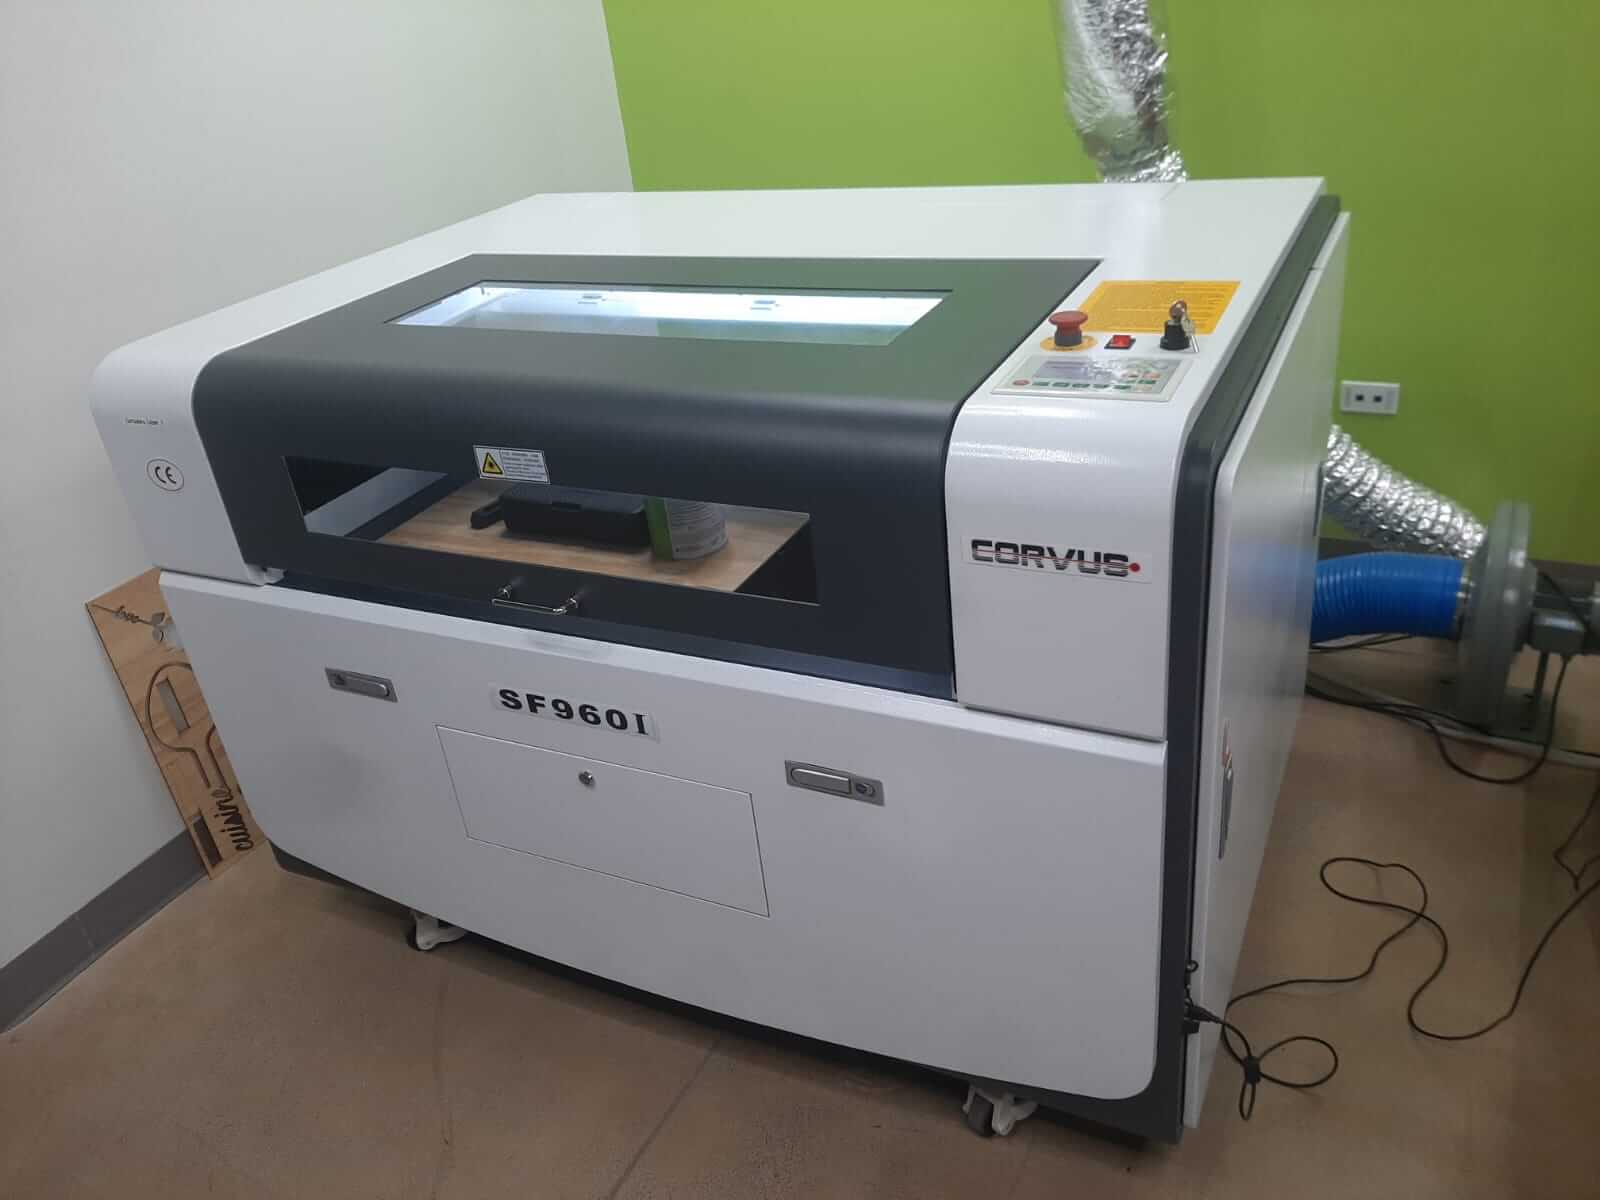
To begin characterizing our laser machine, first, we will talk a little about its use. In this case, the machine used was a 80W Corvus brand. The initial steps in the usage procedure are:
- Turn on the Machine
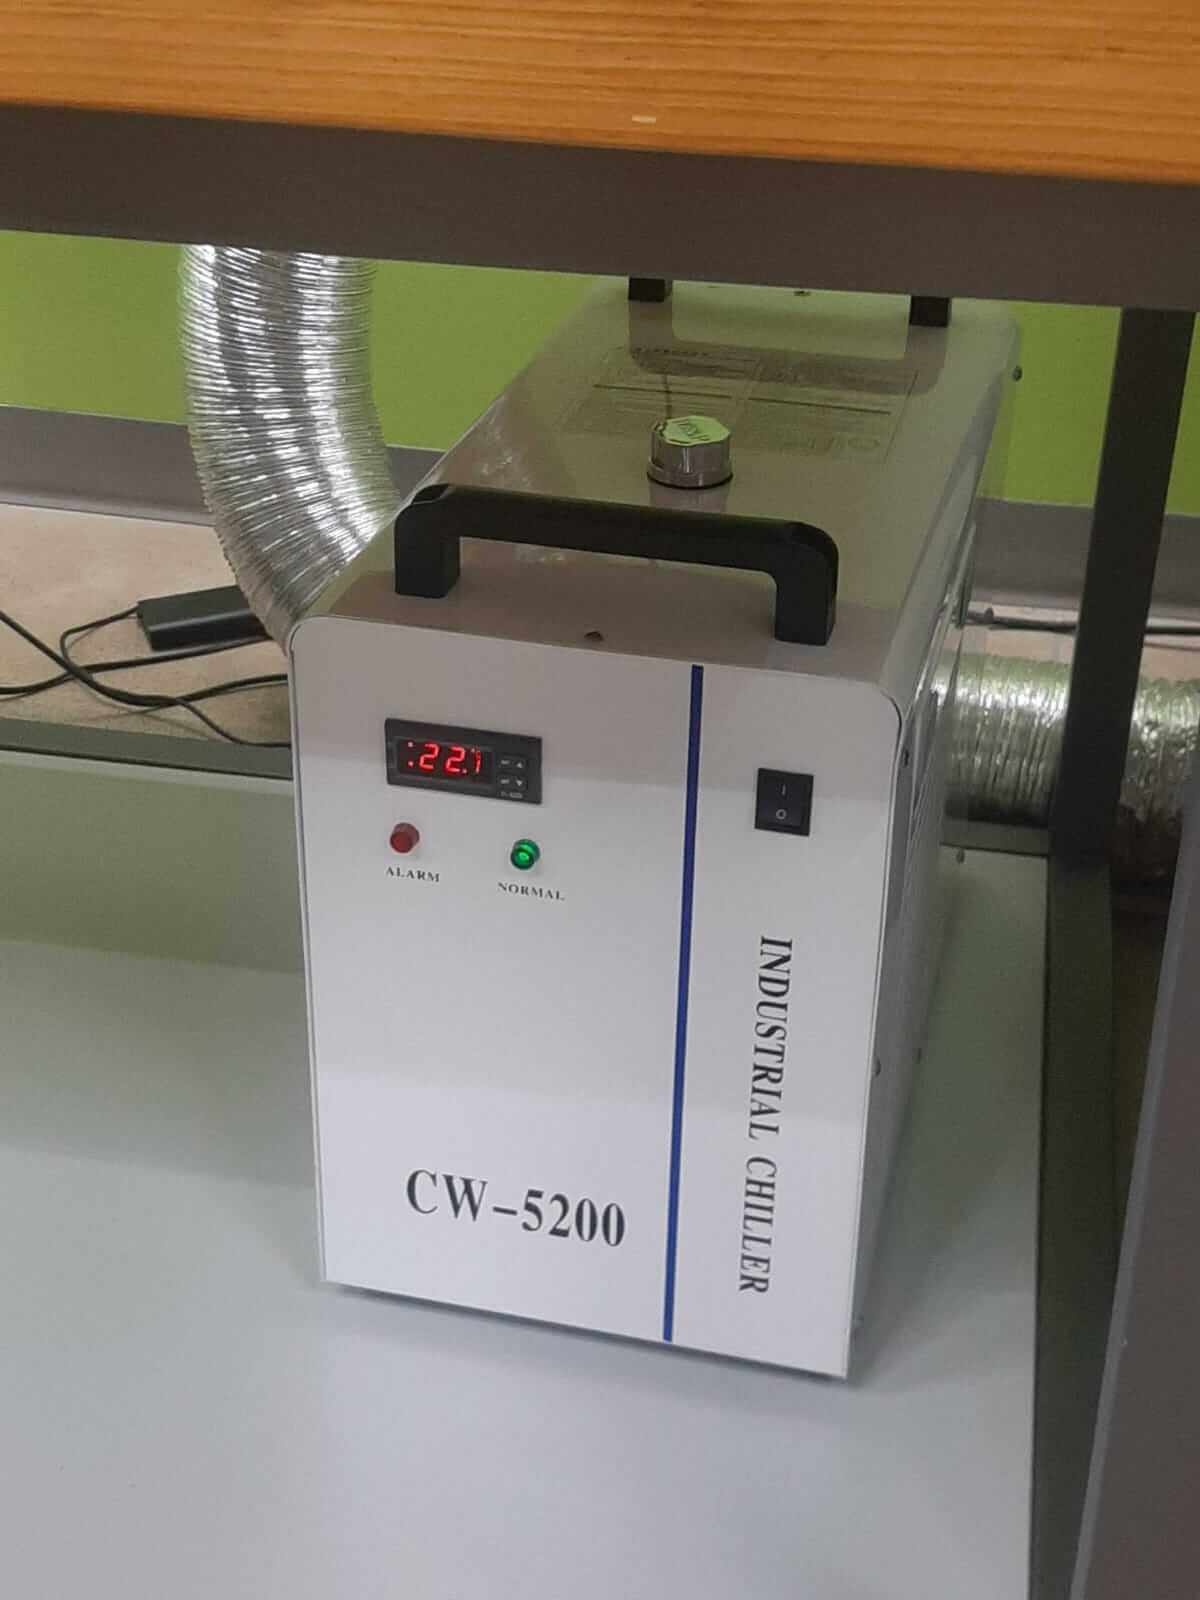
- Ensure the Cooler is turned on
- Ensure the Extractor is turned on
- Ensure the Air Pump is turned on
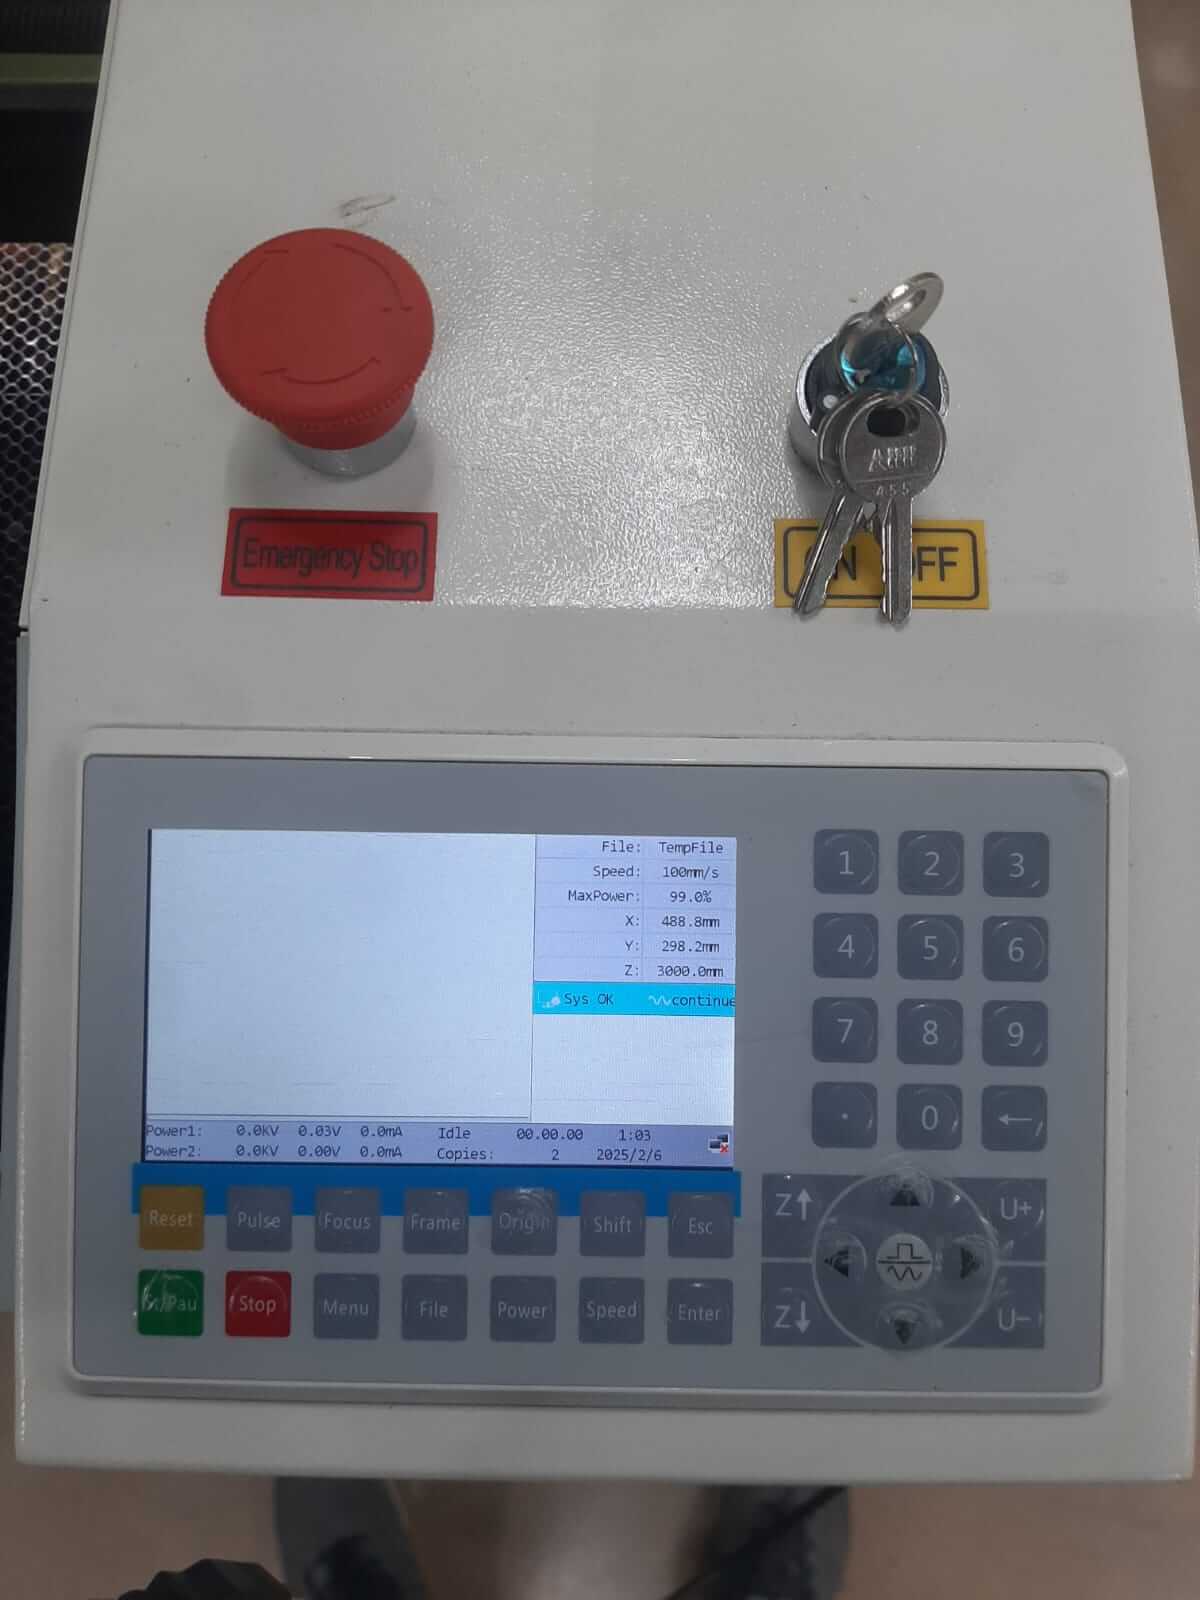
Once these steps are completed, we can proceed to connect the computer via USB. This particular machine uses the RDWorks program, which we will download from the main RuiDa page at the following link: RDWorksV8
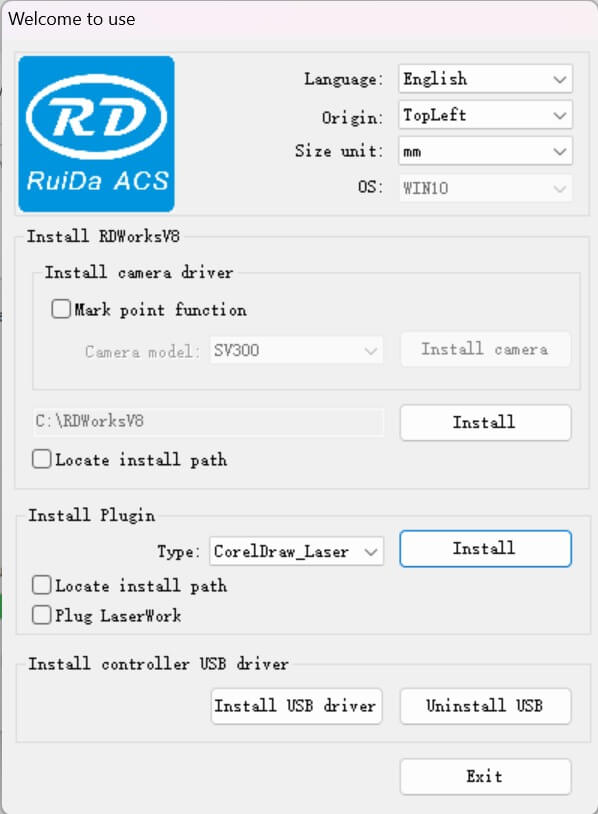
After downloading, we install the driver to allow the machine we will be working with to be recognized, and we perform a small test to see that everything works correctly.

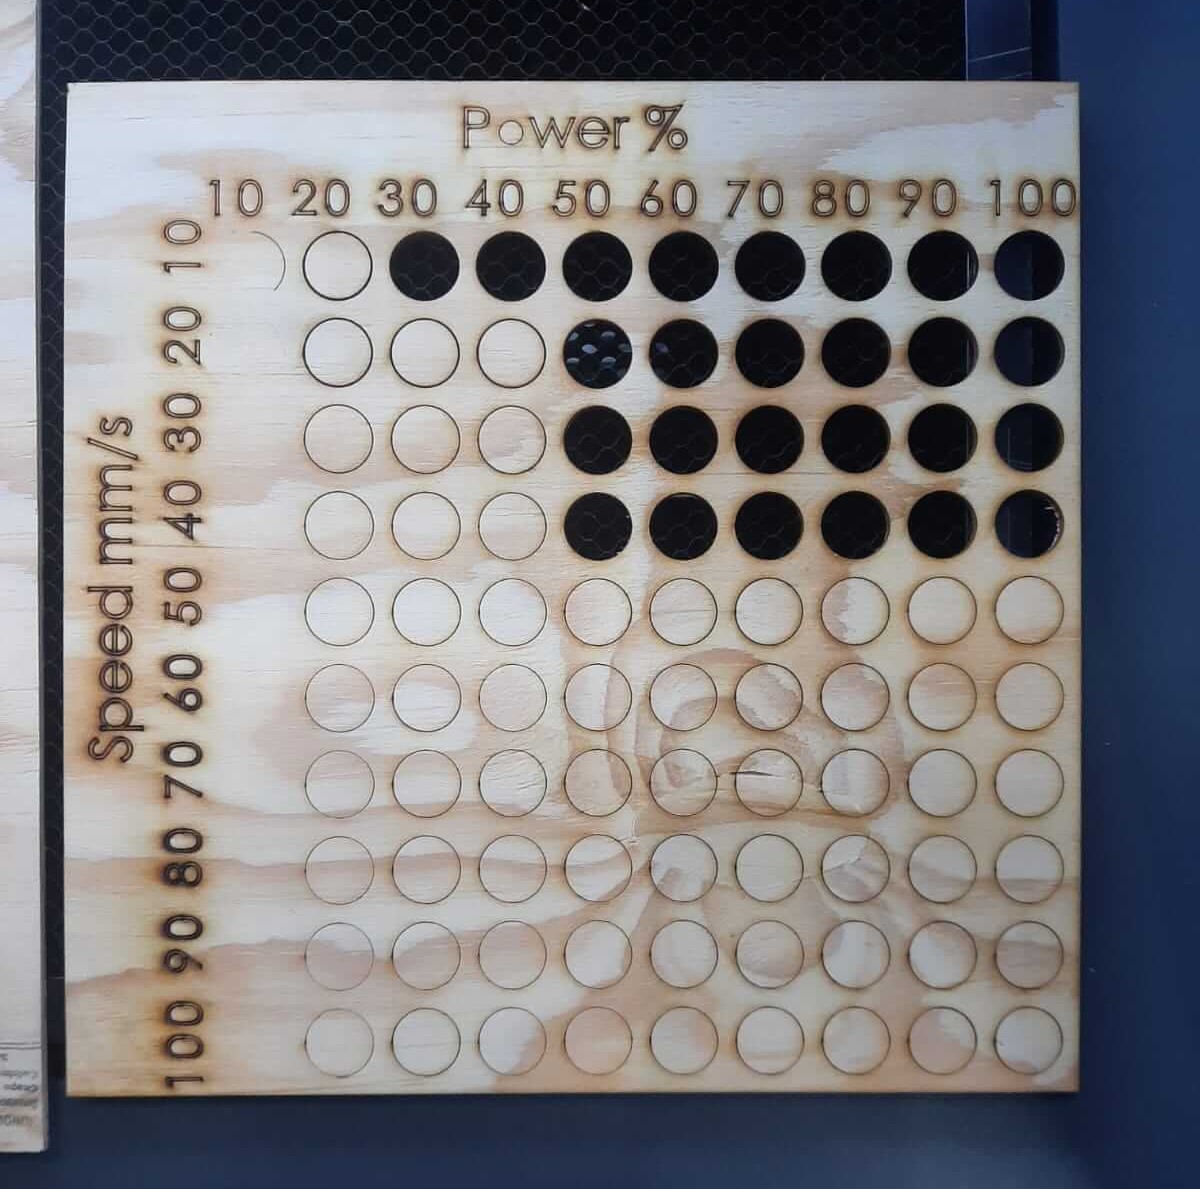
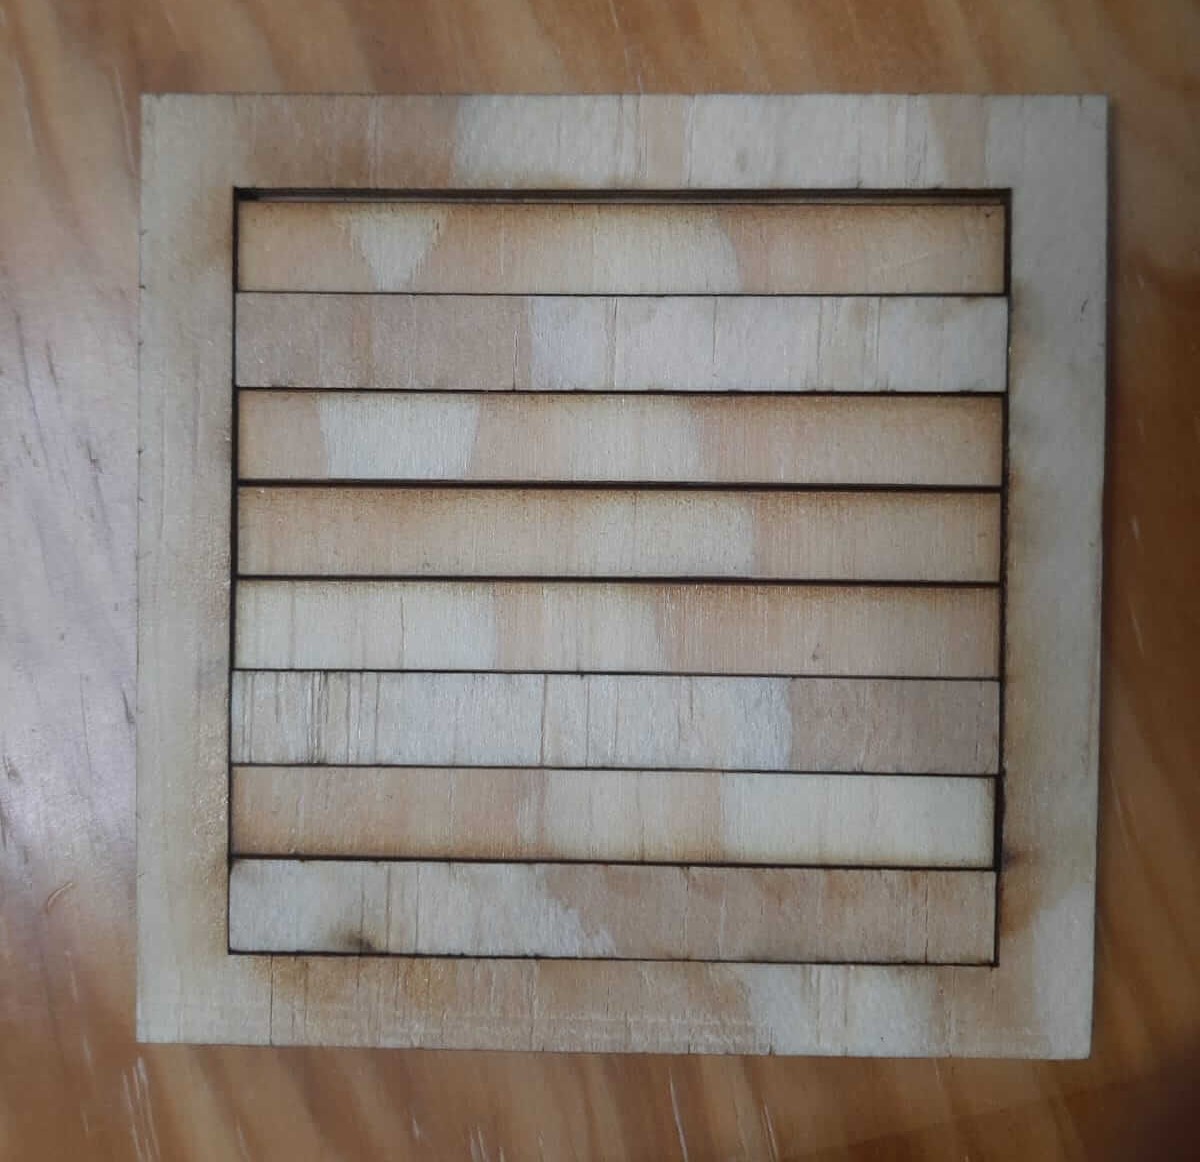
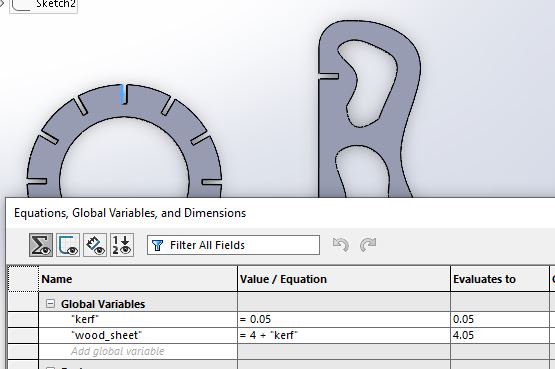
Before starting the assignments, we will design a parameter table in Solidworks, where we can define the machine's behavior when working with a 4mm thick material, setting power and speed values from 10 to 100, allowing us to observe how these parameters behave when modified together.


This table allows us to see at what speeds and laser power we are able to cut and engrave the selected material.
Kerf
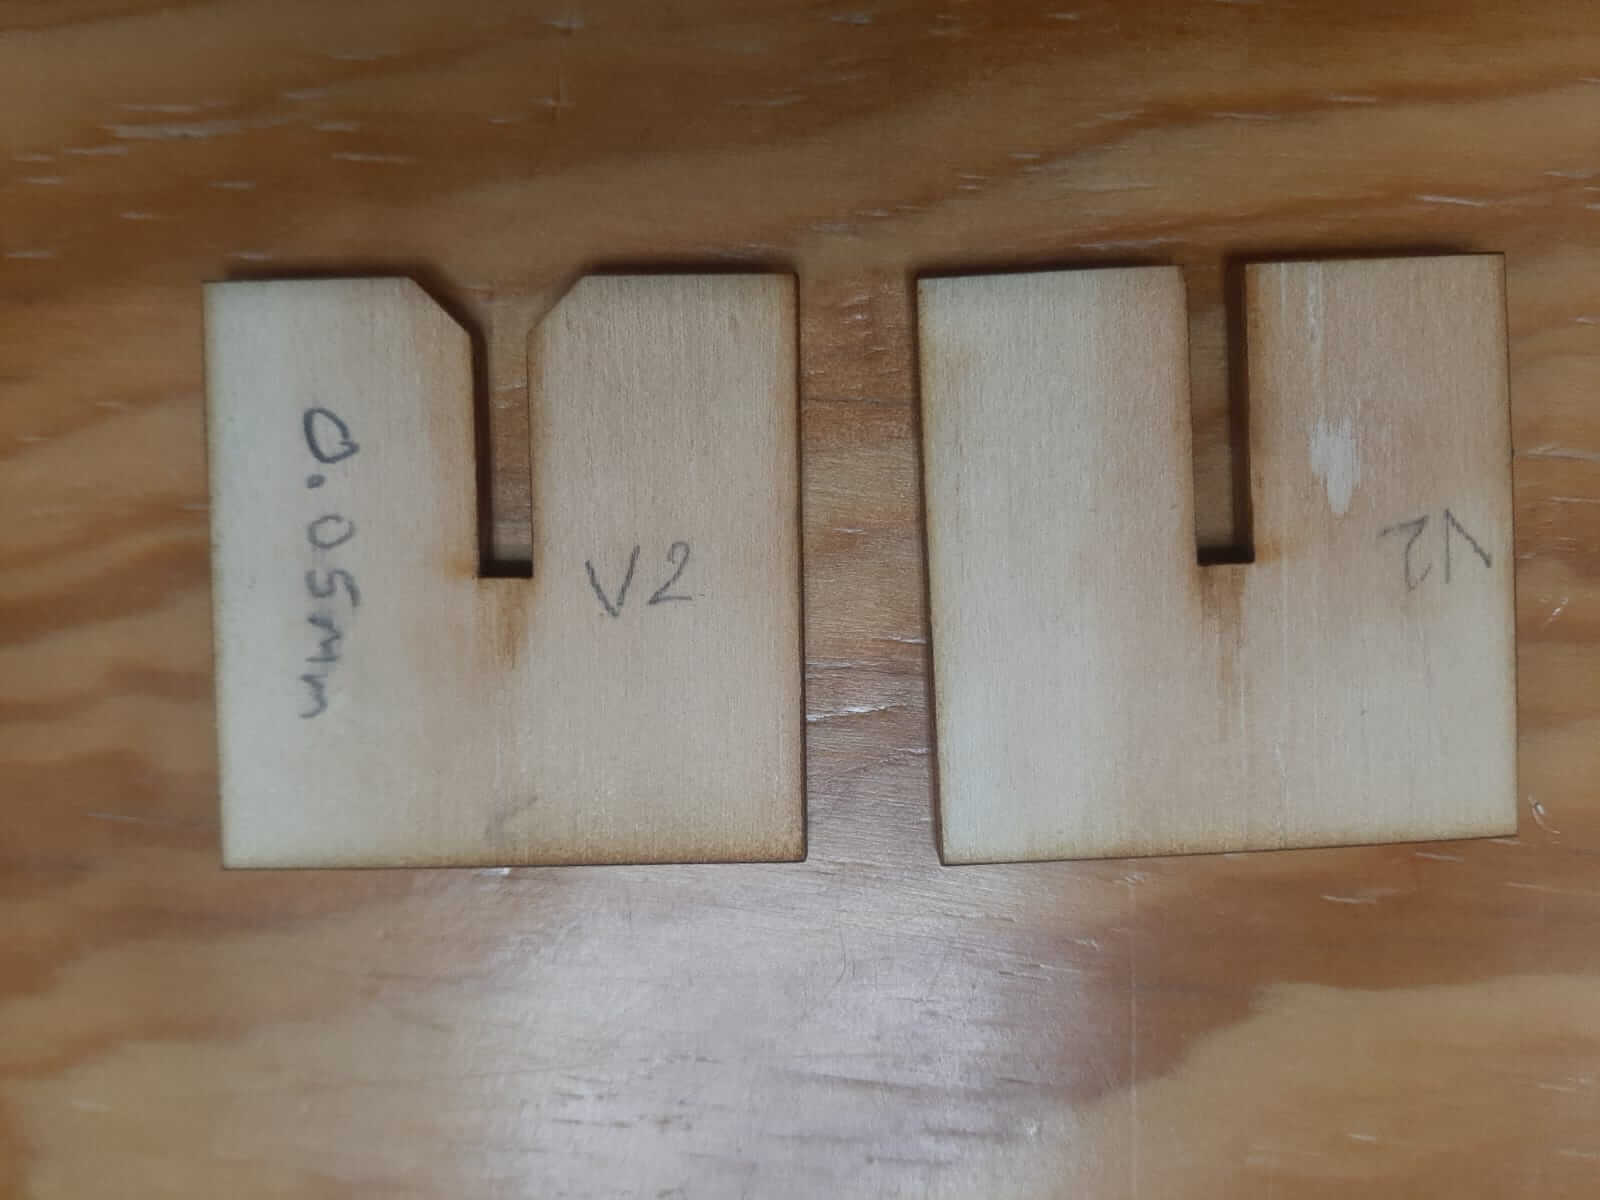
To determine the machine's Kerf, a table was designed in Solidworks, divided into 8 equal parts of 1cm. When cut by the machine, it was observed that the laser also provides its own thickness to the cut, which is considered Kerf. In this case, when the 8 pieces were assembled, it was determined that the total missing was 1.5mm, which divided among the 8 pieces gives us a value of 0.18mm of Kerf. This data will help us obtain more precise cuts and for the joints that we will be seeing in the next section.

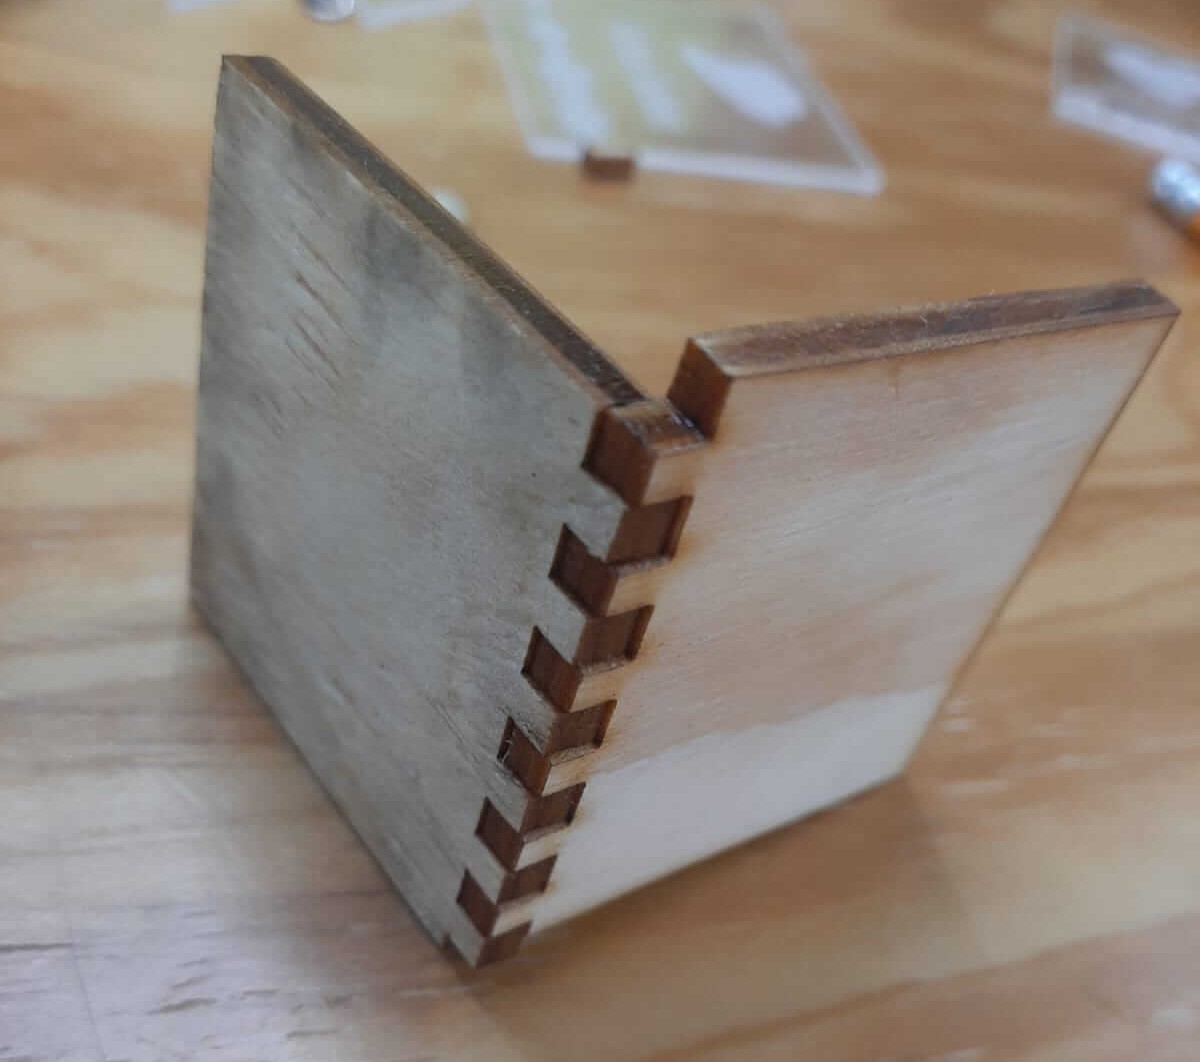
Joins
For the Joins, 9 different designs were created in Solidworks, taking into account the Kerf obtained in the previous exercise. We used global variables and equations allowed by Solidworks to modify the values, and the designs automatically adapted.
We based our joins design on the examples provided in the Fab Academy documentation, which can be found at the following link: Fab Academy Joins
However, the next image reflects the designs we created,

Image source: Own Design


Of these designs, cutting tests were conducted with 6 of the models. In the first iteration tested, it was found that the Join still had enough play to come loose on its own, so the Kerf was reduced a bit more from 0.18mm to 0.05mm. This adjustment made the models fit snugly, and the joins functioned effectively.


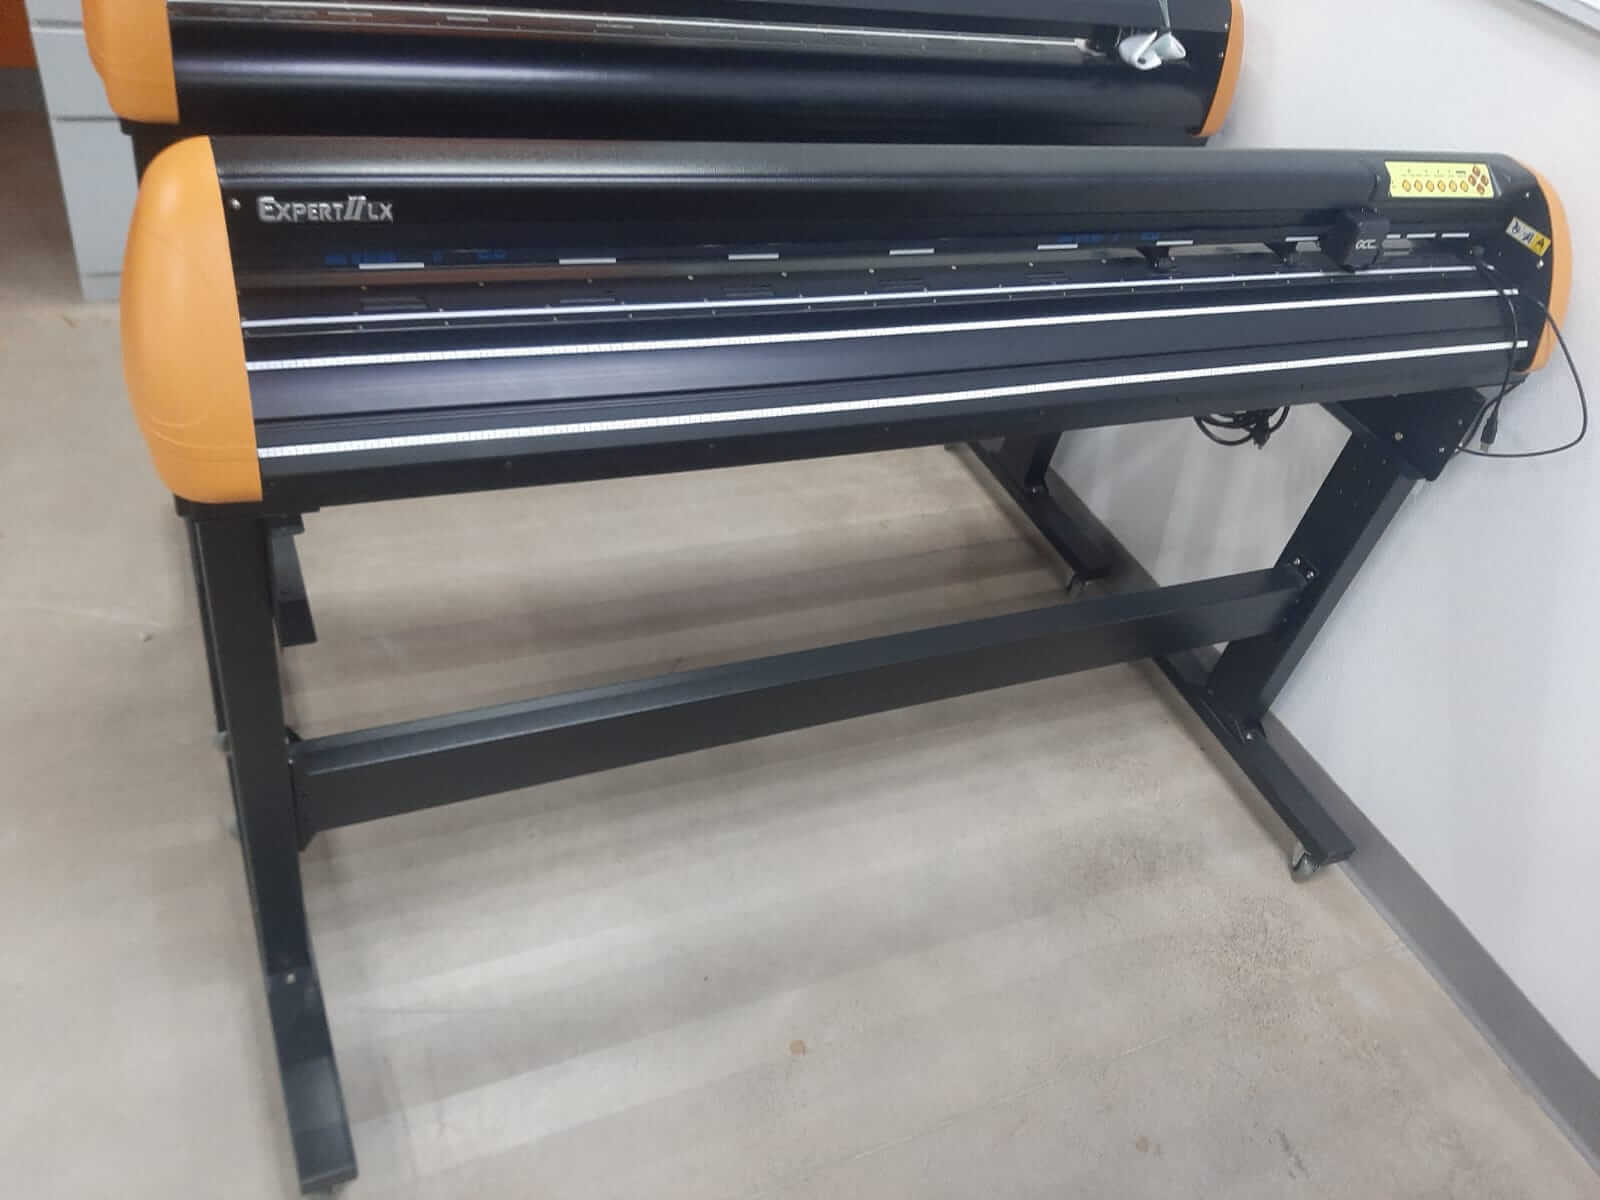
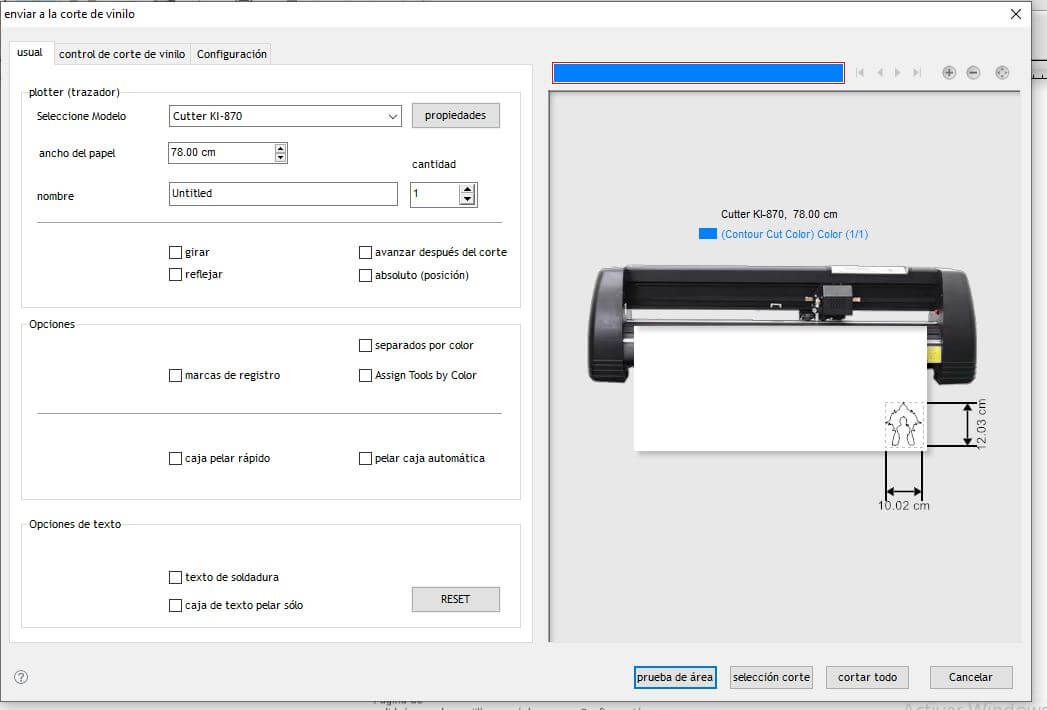
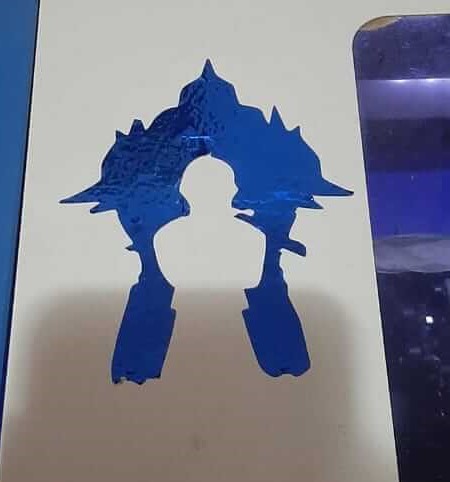
Cut Something on the Vinyl Cutter
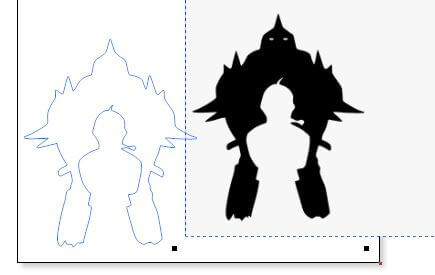
For the vinyl cutting assignment, we used a plotter that operates with the SignMaster program. It's worth noting that this specific software requires a subscription; however, purchasing the equipment provides us with a license for its use. Before starting the cut, we first designed what we wanted to cut using the InkScape program, allowing us to vectorize the image and save it in SVG format.
The image we used to create the vector is a design based in the anime Full Metal Alchemist, which is a representation of the Philosopher's Stone. The design was taken from the following link: FULL METAL ALCHEMIST

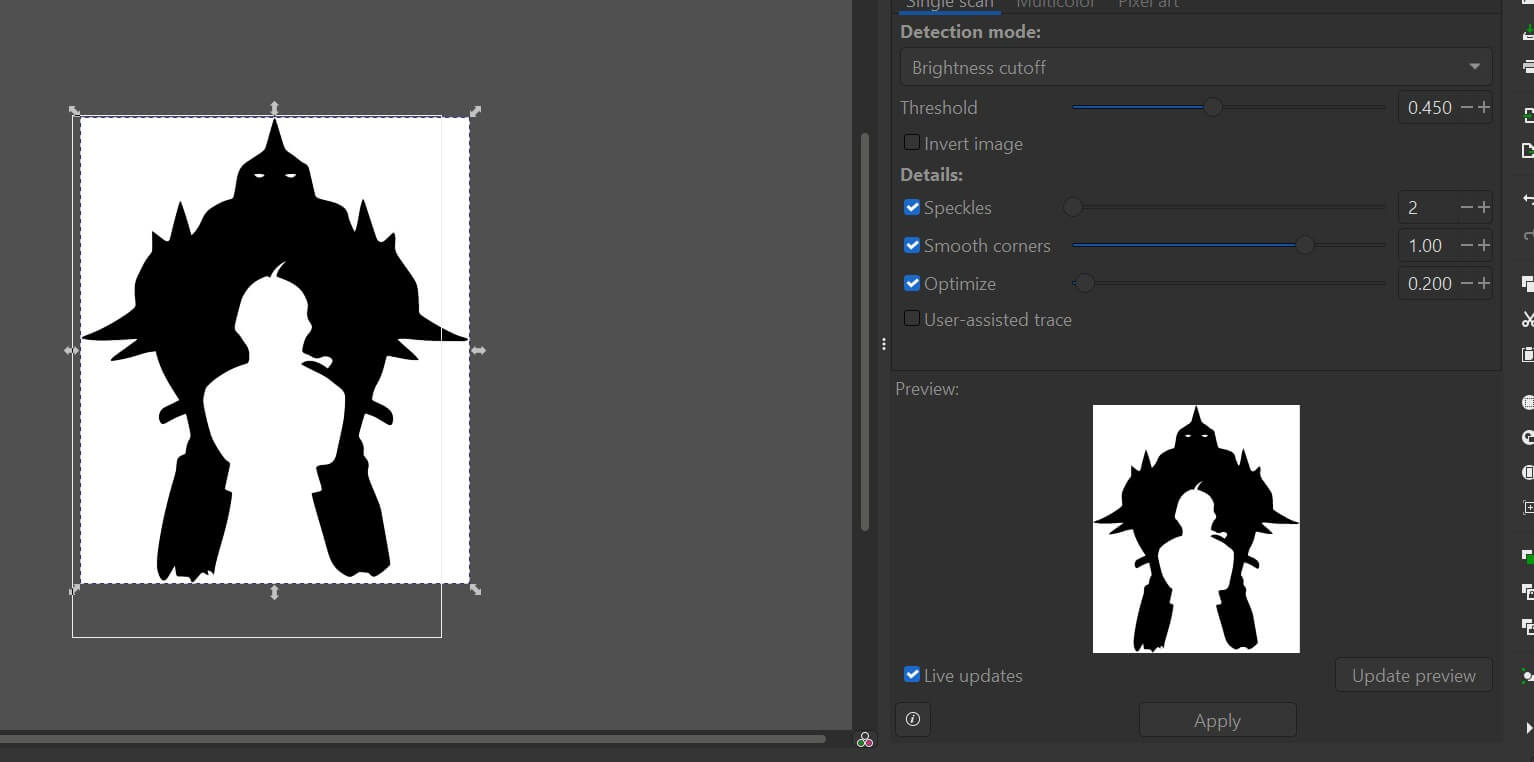
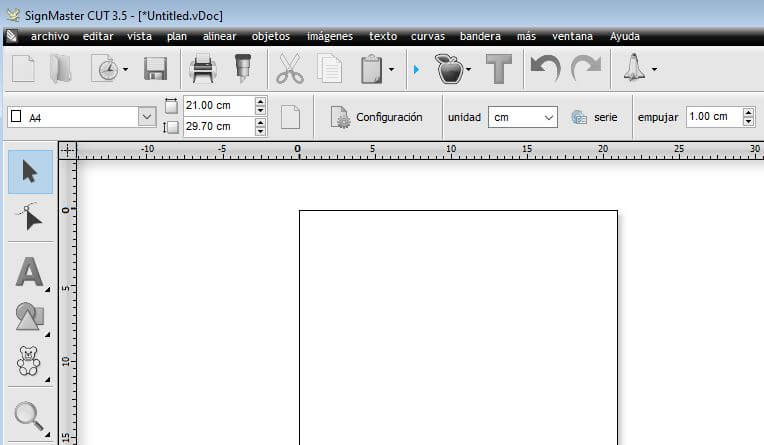
Once in the SignMaster program, we imported our SVG file to determine the desired cut size. Once set, the program creates a cutting path, which allows us to observe the path that the plotter will take to cut the vinyl. Once this is achieved, we can select the option to cut and wait to see how the cutting turned out once the machine finished.
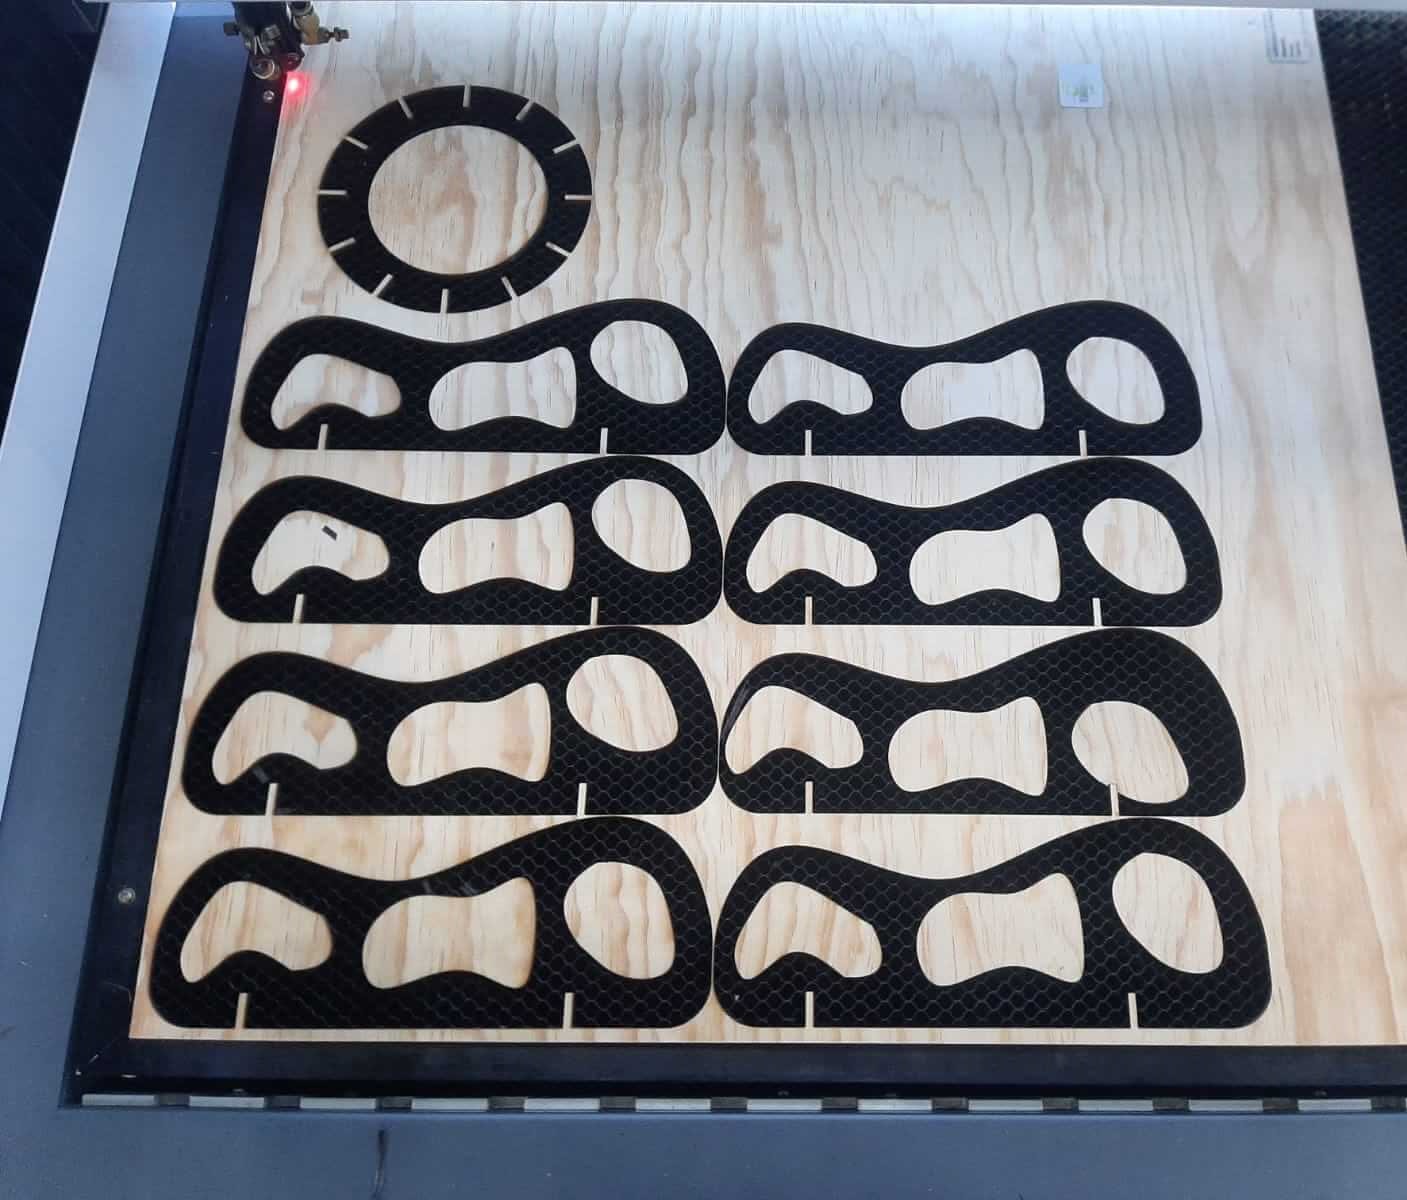
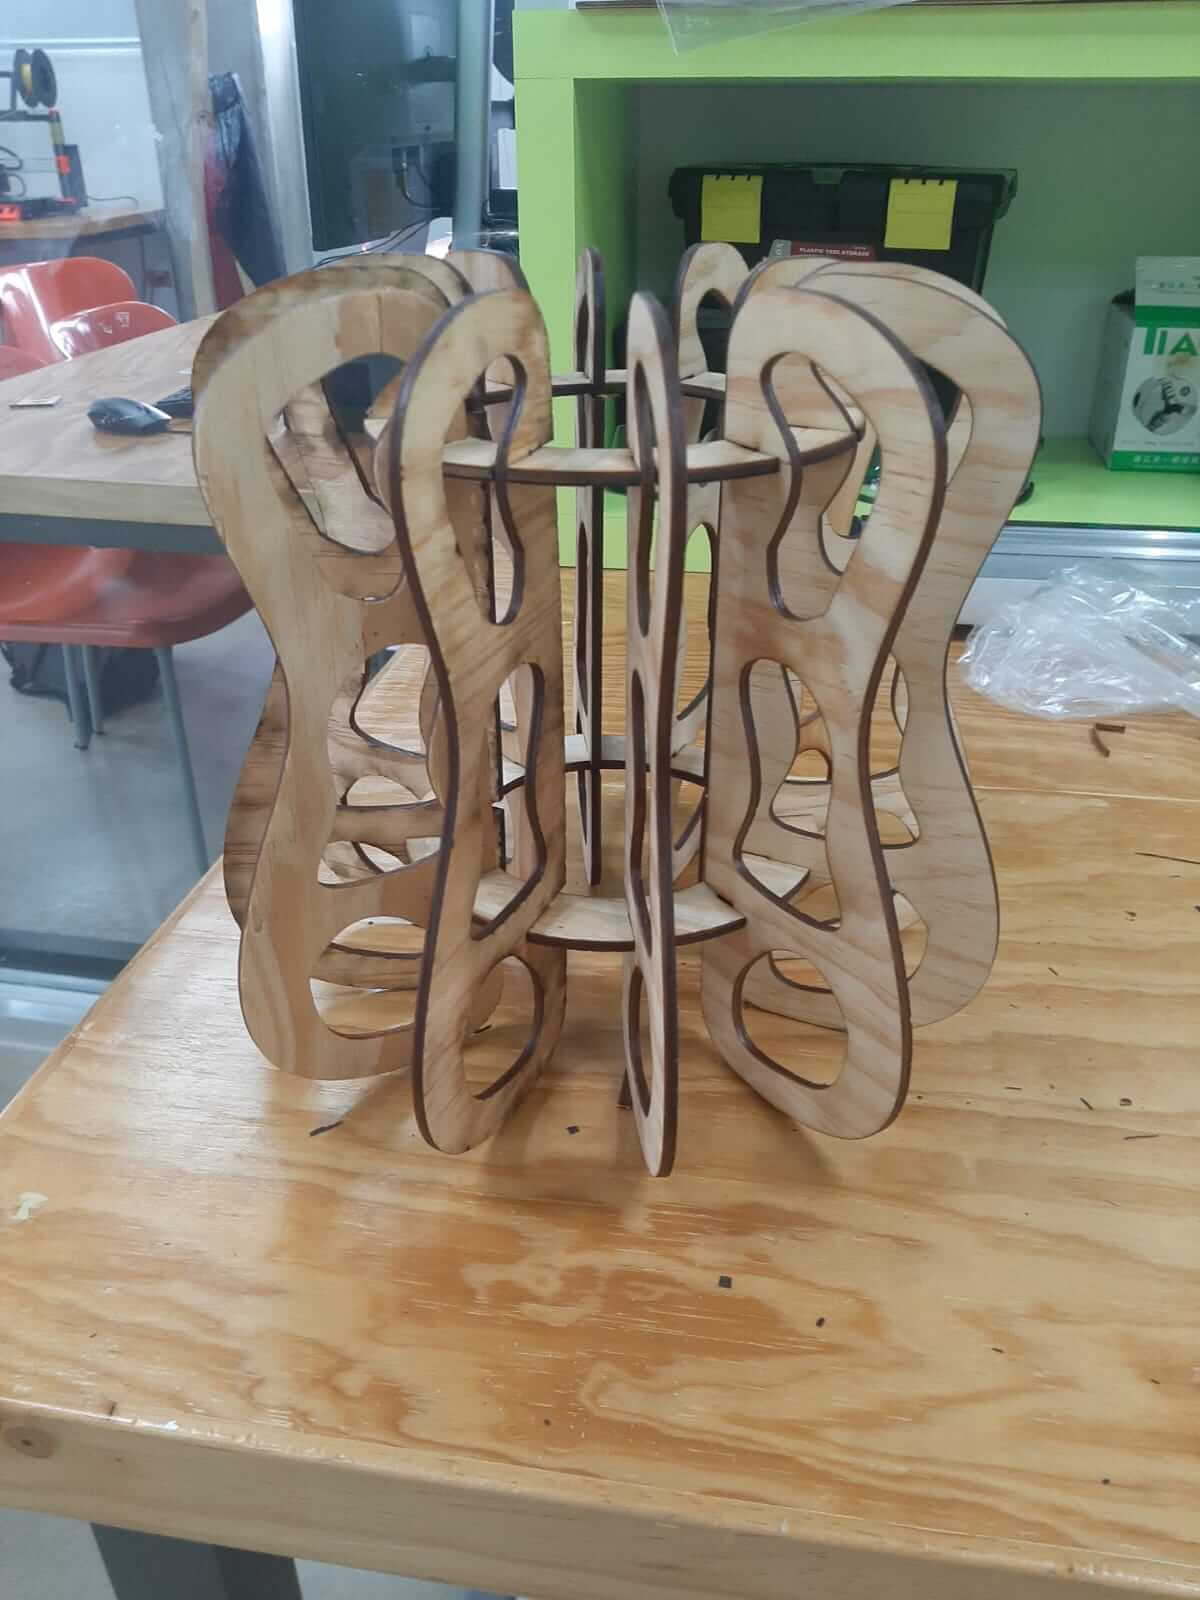
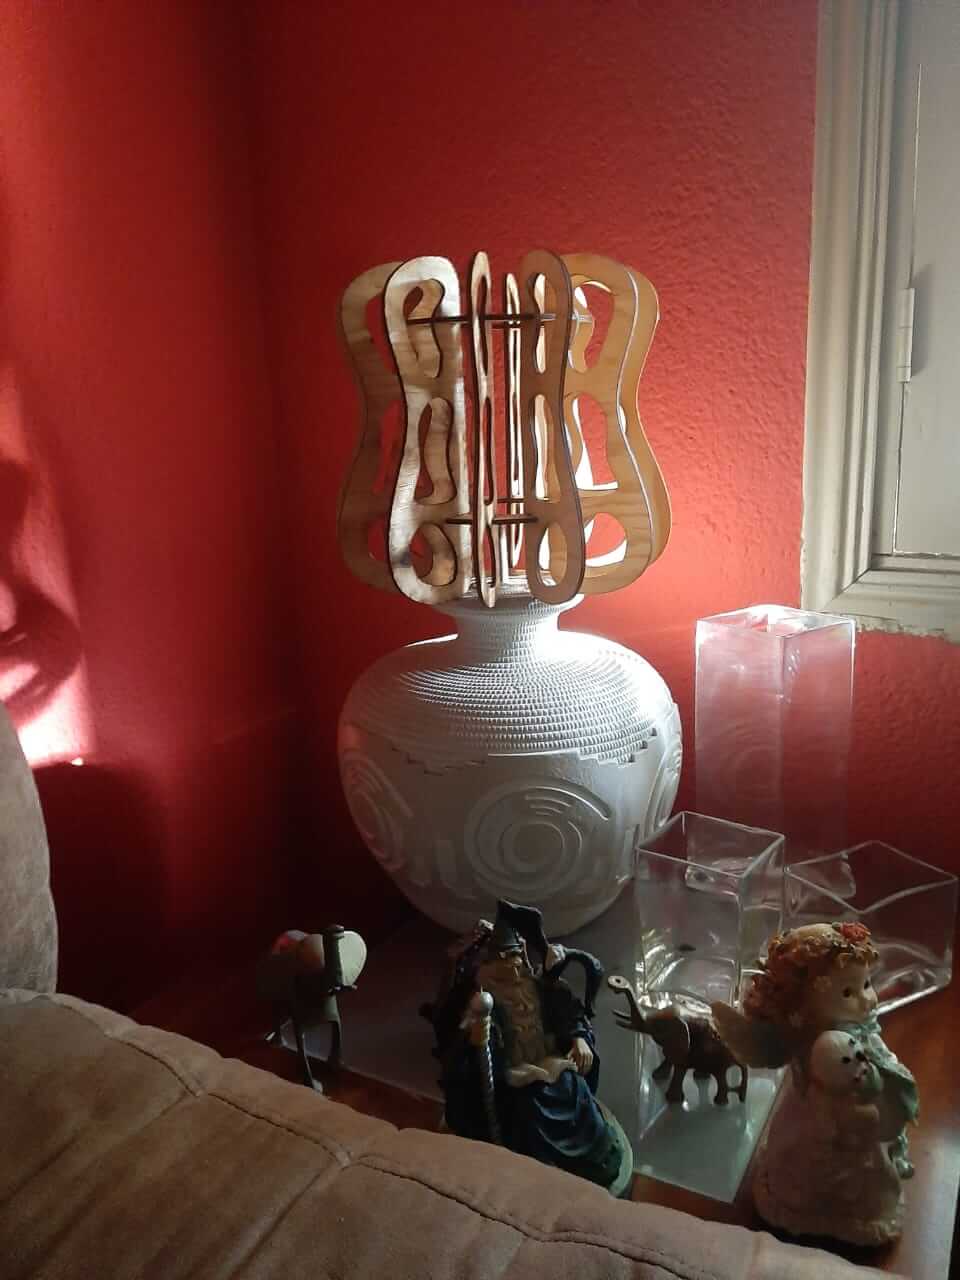
Design, Laser Cut, and Document a Parametric Construction Kit
For this task, a lamp was designed, consisting only of 2 main parts, which we replicated to obtain our final figure. It was also designed in Solidworks with the necessary global variables to adjust the material thickness and the Kerf found.


The design was made with the intention of being able to assemble it in different ways, allowing us to create different shapes and designs.
We take the Kerf into account, which we calculated in the previous exercise, to ensure that the pieces fit together correctly. Also to use different materials, we used the global variables in Solidworks to adjust the thickness of the material and the Kerf, allowing us to create different designs with the same pieces.
We create global variables for the material thickness and the Kerf, allowing us to adjust the design to the material we are going to use. In this case, we used a 4mm thick plywood sheet, which we cut with the laser cutter. The Kerf was set to 0.05mm, which was the value we obtained in the previous exercise.
However, we only consider the thickness of the material and the Kerf, because the main purpose of this exercise is to create a design that can let us assemble it in different ways.
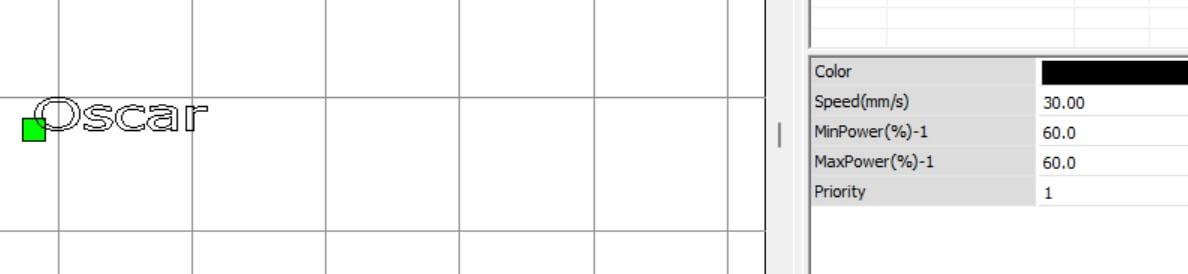
For Cutting, we used a 4mm thick plywood sheet material, which was cut at a speed of 30mm/s and a power of 60%. The machine used was the same as in the previous exercises, and the cutting was done in a single pass. This task also considered material optimization, allowing us not to waste material unnecessarily.
ISSUES
Also, an issue that arose during the cutting process was the material wasn't completely flat, which caused the pieces to be cut incorrectly. To solve this, we used a press to flatten the material, allowing us to cut the pieces correctly and assemble them without any issues.
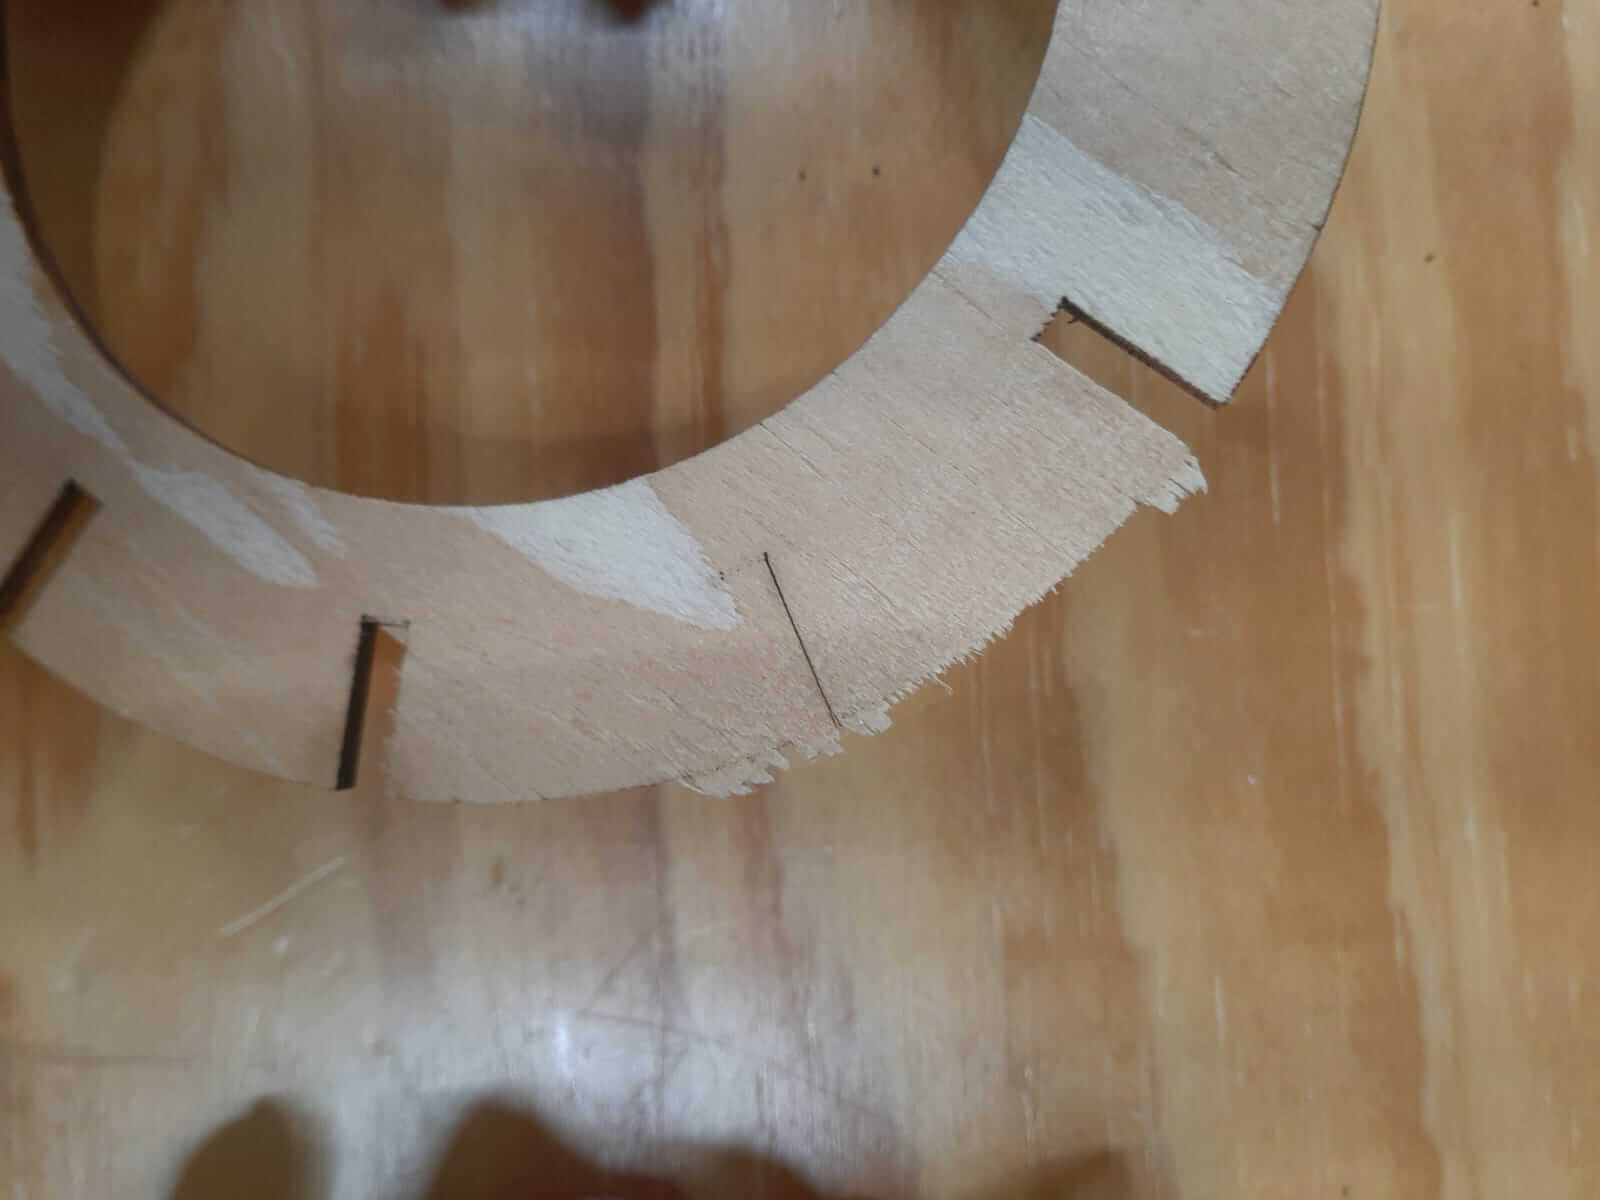
Similarly, calculating the Kerf allowed us to create a more rigid assembly and for the pieces to fit more appropriately, giving a nice final result.
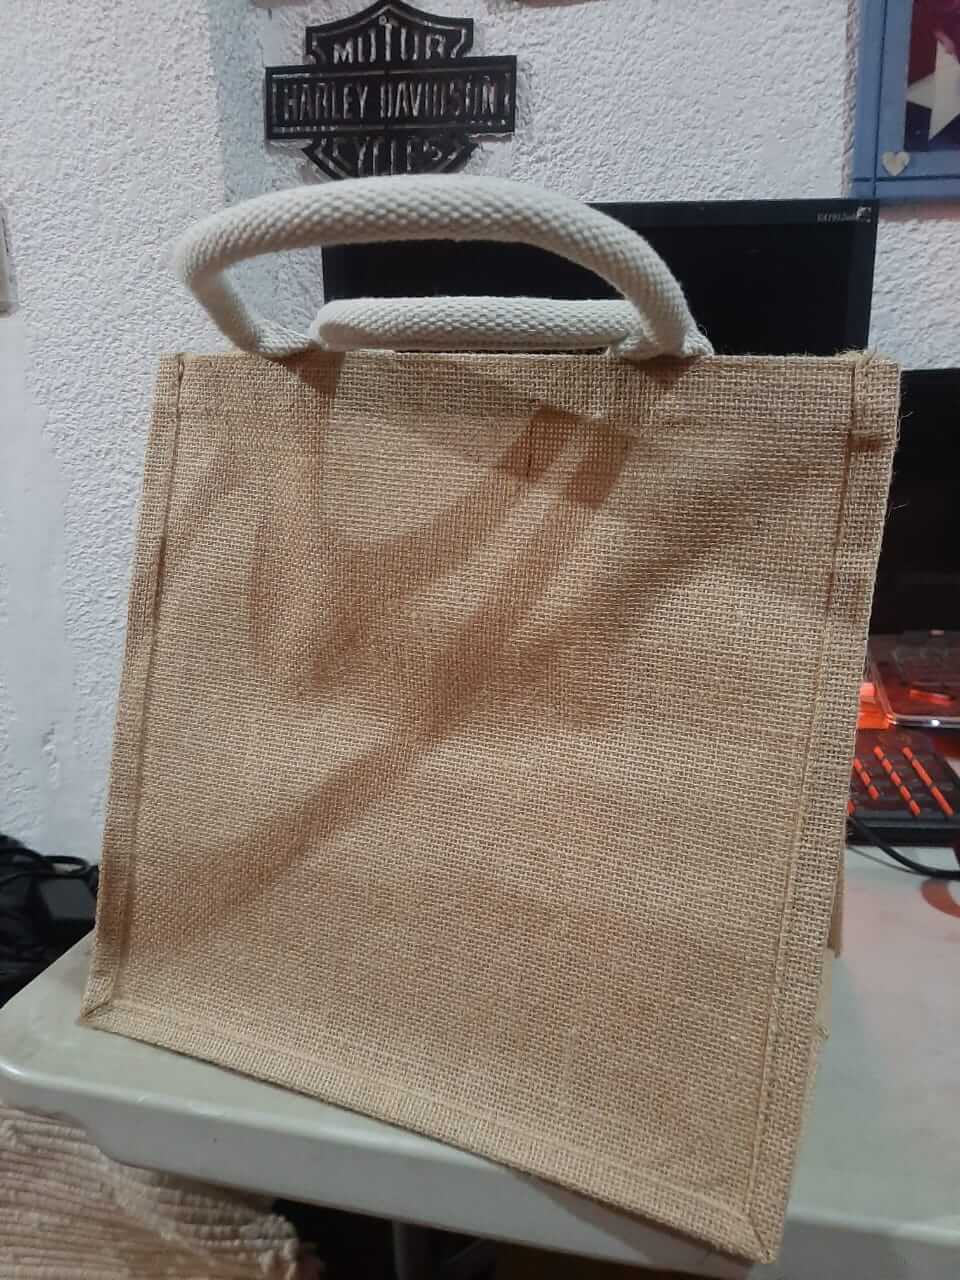
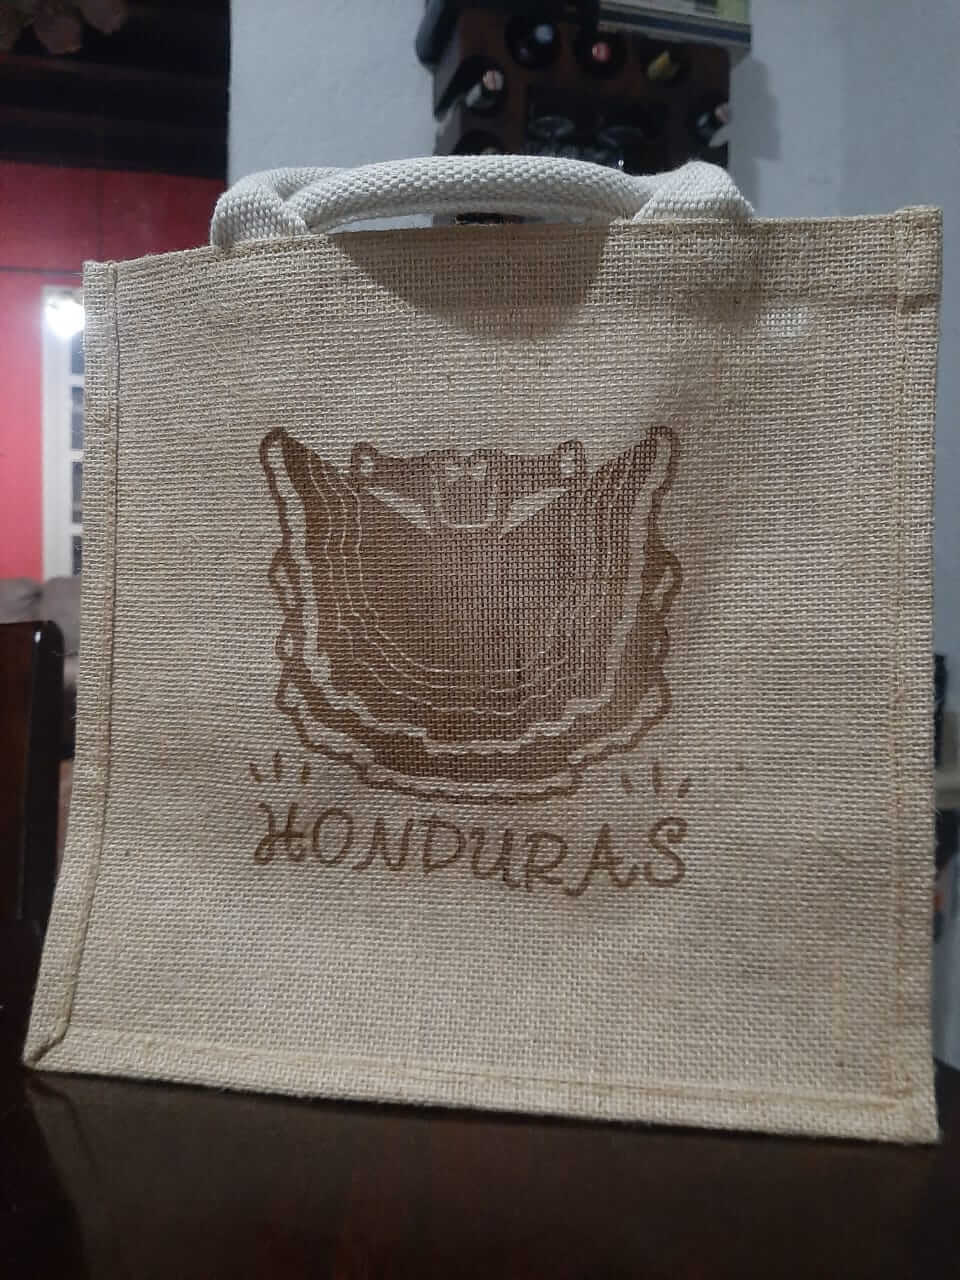
Extra Credit: Include Elements That Aren't Flat
For this exercise, a lamp design was considered, using a sheet that becomes flexible when cut. However, the design was not tested, something we hope to do in the future.

We also experimented with non-flat textile materials, allowing us to test different powers for engraving and see the differences between materials such as wood or jute in this case, as we used a bag made from this material, where we engraved a representative image to give an attractive appearance.
Project Files links
In the next links, you can download the files for the assignments.
Conclusion
This page has outlined the comprehensive approach taken during week 3 of the Fab Academy, focusing on safety training, characterization of laser cutting equipment, and the execution of precise cutting assignments. The experience highlighted the importance of thorough preparation and understanding of equipment capabilities and limitations. It also emphasized the value of safety in the operational environment, ensuring all users are adequately trained and aware of emergency procedures. The projects undertaken not only demonstrated technical proficiency but also creative problem-solving and efficient material usage.
Lessons Learned
The week was a learning curve in adapting to and managing advanced fabrication tools. The hands-on experience gained from characterizing the laser cutter and designing parametric models provided practical insights into material properties and machine dynamics. It reinforced the necessity of meticulous planning and adjustments in design parameters to achieve desired outcomes. Furthermore, the safety training was a crucial reminder of the ongoing responsibility to maintain a secure and efficient working environment, which is fundamental to successful project execution in any technical setting.
Resources
- Manuals: Access user manuals and safety guidelines for vinyl plotters and laser cutters.
- Material Safety Data Sheets (MSDS): Check out the MSDS Online Search for information on the materials you use.
- Online Safety Training Resources: Explore the OSHA Training Resources for comprehensive safety training materials.