
Week 4
Introduction
This page outlines the steps followed during week 4 of the Fab Academy assignments.
The tasks for this week involved Embedded Programming and the following assignments:
- Demonstrate and compare the toolchains and development workflows for available embedded architectures
- Browse through the data sheet for your microcontroller
- Write a program for a microcontroller, and simulate its operation, to interact (with local input &/or output devices) and communicate (with remote wired or wireless connections)
- Extra credit: test it on a development board
- Extra credit: try different languages &/or development environments
group assignment:
Individual assignment:
Let's start.....................

Group assignment
Embedded architectures
Embedded systems are specialized computing systems designed to perform specific tasks or functions within larger systems. They are typically used in applications where a general-purpose computer would be impractical or inefficient. Embedded systems are found in a wide range of devices, including consumer electronics, industrial equipment, medical devices, and automotive systems.
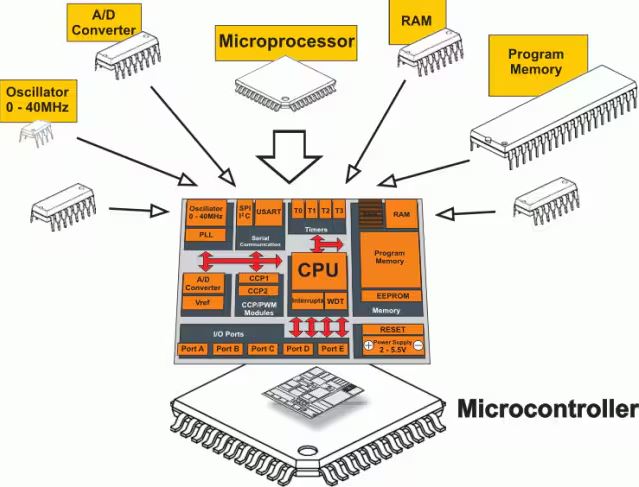
Image source MICROCONTROLLER
There are several popular embedded architectures used in the industry, each with its own set of features, advantages, and limitations. Some of the most common embedded architectures include:
- ARM: ARM processors are widely used in embedded systems due to their low power consumption, high performance, and scalability. ARM-based microcontrollers are commonly found in smartphones, tablets, and IoT devices.
- AVR: AVR microcontrollers are popular for their simplicity, ease of use, and low cost. They are commonly used in hobbyist projects, educational applications, and small-scale embedded systems.
- PIC: PIC microcontrollers are known for their versatility, reliability, and wide range of peripherals. They are commonly used in industrial automation, automotive systems, and consumer electronics.
- ESP32: The ESP32 is a powerful microcontroller with built-in Wi-Fi and Bluetooth capabilities. It is widely used in IoT applications, home automation, and wireless sensor networks.
- RP2040: The RP2040 is a dual-core microcontroller developed by Raspberry Pi. It is designed for low-cost, high-performance applications and is suitable for a wide range of embedded projects.
for this week's group assignment, we will demonstrate and compare the toolchains and development workflows for the ESP32 and RP2040 embedded architectures.
ESP32 vs. RP2040
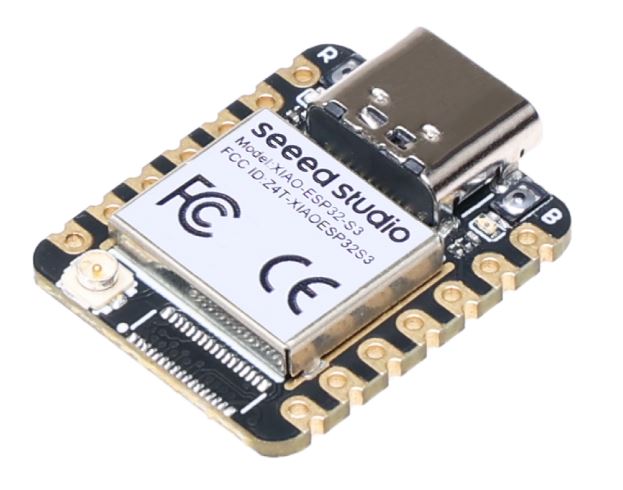
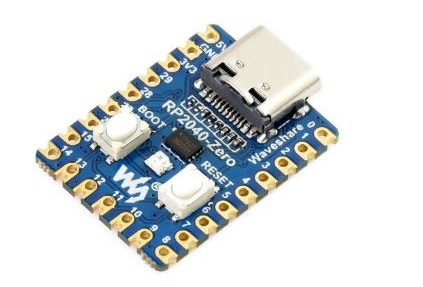
Image source ESP32
Image source RP2040
Ease of Setup
- ESP32: Easy setup with ESP-IDF and Arduino IDE. Plug-and-play with many examples available.
- RP2040: Programmable via C/C++ SDK or Arduino IDE. Supports MicroPython for rapid development and prototyping.
Development Tools
- ESP32: Primarily uses ESP-IDF, supported by PlatformIO and Arduino IDE, offering advanced features and optimized performance.
- RP2040: Supports C/C++, MicroPython, and CircuitPython. Compatible with Thonny Python IDE for easy Python development.
Community Support
- ESP32: Extensive community with vast tutorials, forums, and libraries due to support from Espressif.
- RP2040: Strongly supported by the Raspberry Pi community with growing resources and educational materials.
Cost of Development Boards
- ESP32: Affordable, with prices varying based on features like sensors or displays.
- RP2040: Highly cost-effective, especially suitable for educational purposes and bulk project applications.
Performance
- ESP32: Dual-core processor up to 240 MHz, suitable for complex and connectivity-demanding applications.
- RP2040: Dual-core ARM Cortex-M0+ up to 133 MHz, less powerful but efficient and suitable for many applications.
Peripheral Support
- ESP32: Extensive range including ADCs, DACs, SPI, I2C, UART, PWM, plus Wi-Fi and Bluetooth.
- RP2040: Good I/O options but lacks built-in wireless capabilities, limiting IoT applications without additional modules.
Power Consumption
- ESP32: Higher power consumption, but with various power-saving modes for optimized battery operation.
- RP2040: Designed for energy efficiency with support for dormant and sleep modes, ideal for battery-driven projects.
DataSheets Used for the Comparison
Toolchain and Development Workflow Comparison
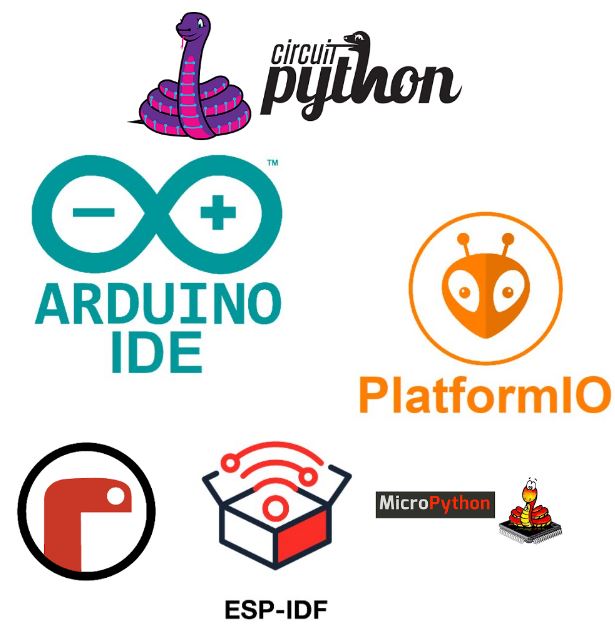
Image source IDE
Both the ESP32 and RP2040 offer versatile toolchains and development workflows, catering to different user preferences and project requirements. The ESP32 provides a robust development environment with the ESP-IDF and Arduino IDE, offering advanced features and optimized performance. It is well-supported by the community, with extensive resources and libraries available for developers.
On the other hand, the RP2040 supports C/C++, MicroPython, and CircuitPython, providing flexibility for developers to choose their preferred programming language. It is compatible with the Thonny Python IDE, making it easy to get started with Python development. The RP2040 is cost-effective and energy-efficient, making it suitable for educational and low-power applications.
Also we can us VS Code with PlatformIO to program the ESP32 and RP2040.
PlatformIO is an open-source ecosystem for IoT development with cross-platform build system, library manager, and full support for Espressif ESP32 and RP2040 microcontrollers. It is compatible with popular IDEs such as Visual Studio Code, Atom, and CLion, providing a unified development experience for embedded projects.
In conclusion, both the ESP32 and RP2040 offer unique advantages and are suitable for different applications. The ESP32 is ideal for projects requiring high performance, connectivity, and community support, while the RP2040 is cost-effective, energy-efficient, and well-suited for educational and low-power applications.
We will be working with the ESP32 microcontroller, writing a program to interact with local input/output devices and communicate with remote connections. We will also explore different languages and development environments to test the microcontroller on a development board.
Individual assignment
ESP32 Microcontroller
The ESP32 is a powerful microcontroller developed by Espressif Systems, featuring a dual-core processor, Wi-Fi, Bluetooth, and a wide range of peripherals. It is widely used in IoT applications, home automation, and wireless sensor networks due to its versatility and performance.
For this assignment, we will browse through the data sheet for the ESP32 to find detailed information about its features, specifications, and programming capabilities. We will then write a program to interact with local input/output devices and communicate with remote connections using the ESP32 microcontroller.
The module used is the XIAO ESP32, which is a compact and powerful microcontroller board based on the ESP32 chip. It features built-in Wi-Fi and Bluetooth capabilities, making it suitable for a wide range of IoT applications. The XIAO ESP32 board is designed for easy integration into projects, with a small form factor and a variety of GPIO pins for connecting sensors and actuators. It is compatible with popular development environments such as Arduino IDE and PlatformIO, allowing developers to quickly prototype and deploy their projects. The board also supports various programming languages, including C/C++ and MicroPython, providing flexibility for developers to choose their preferred programming language.
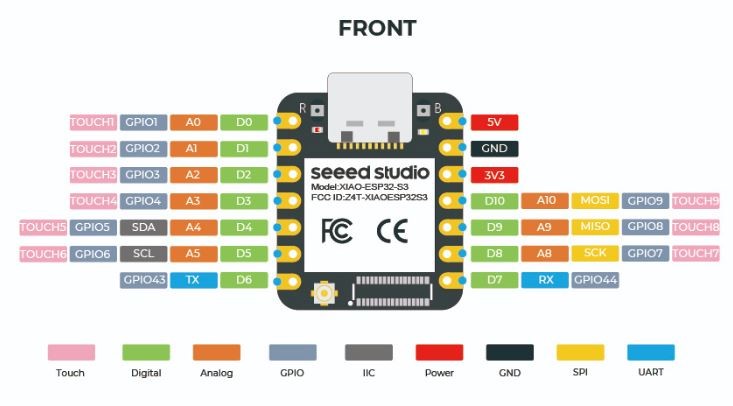
Image source XIAO ESP32
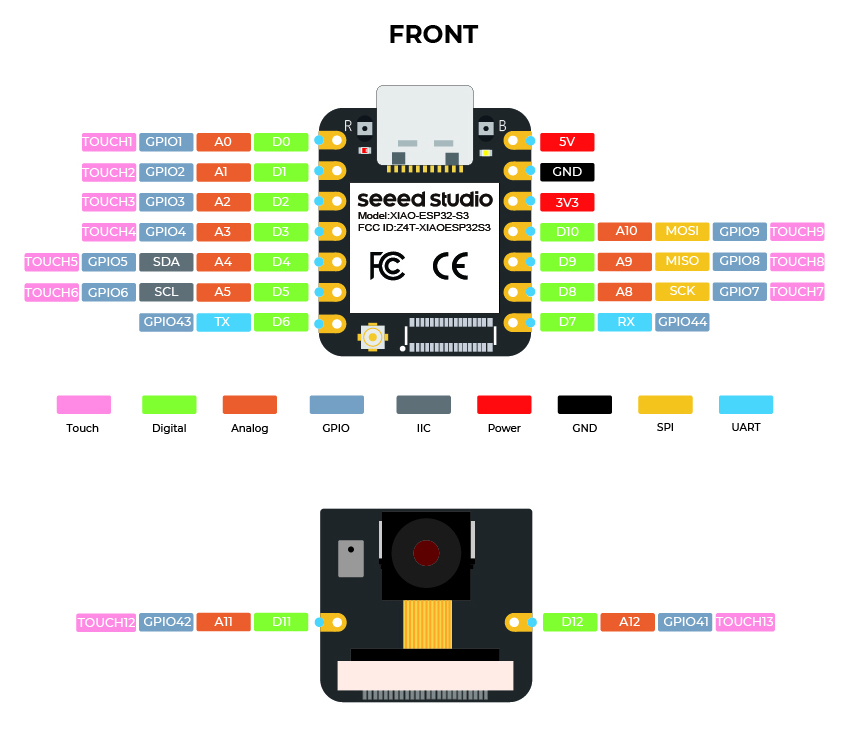
ESP32 Data Sheet
The ESP32 data sheet provides comprehensive information about the microcontroller's architecture, pinout, peripherals, and programming interfaces. It includes detailed specifications, electrical characteristics, and programming guidelines to help developers understand and utilize the ESP32 effectively.
Key features of the ESP32 data sheet include:
- Processor architecture and clock speed: The ESP32 features a dual-core Tensilica LX6 microprocessor with clock speeds up to 240 MHz, providing high performance for various applications.
- Memory and storage options: It includes 520 KB of SRAM, 448 KB of ROM, and support for external flash memory up to 16 MB, allowing for ample storage and efficient memory management.
- Peripheral interfaces: The ESP32 supports multiple peripheral interfaces such as GPIO, I2C, SPI, UART, ADC, DAC, and PWM, enabling versatile connectivity with various sensors and devices.
- Wireless connectivity: It offers integrated Wi-Fi (802.11 b/g/n) and Bluetooth (v4.2 BR/EDR and BLE) capabilities, making it suitable for IoT applications requiring wireless communication.
- Power management and sleep modes: The ESP32 includes advanced power management features with multiple sleep modes (light sleep, deep sleep, and hibernation) to optimize power consumption for battery-powered applications.
- Programming interfaces: It supports various programming environments, including the ESP-IDF (Espressif IoT Development Framework), Arduino IDE, and PlatformIO, providing flexibility for developers to choose their preferred tools.
ESP32 Program Development
Simulate its operation
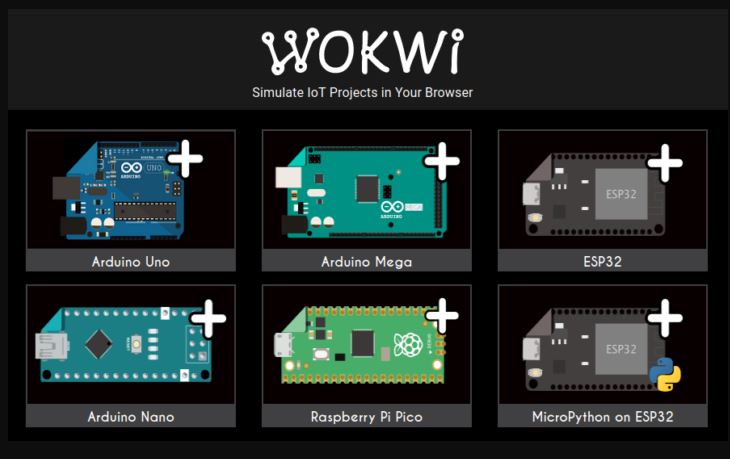
For the simulation of the operation of the ESP32 microcontroller, we will use the wokwi simulator. WOKWI is an online platform that allows you to simulate and test your Arduino and ESP32 projects in a virtual environment. It provides a visual interface to interact with the microcontroller and test your code without the need for physical hardware.
For this assignment, we will simulate the LED control program on the ESP32 using the Wokwi simulator. We will test the push-button switch functionality and observe the LED output in the virtual environment.
For our simulation I take this initial project to start with the ESP32 is already included in the wokwi simulator. The link for that specific project is: Wokwi XIAO ESP32 S3 LEDs
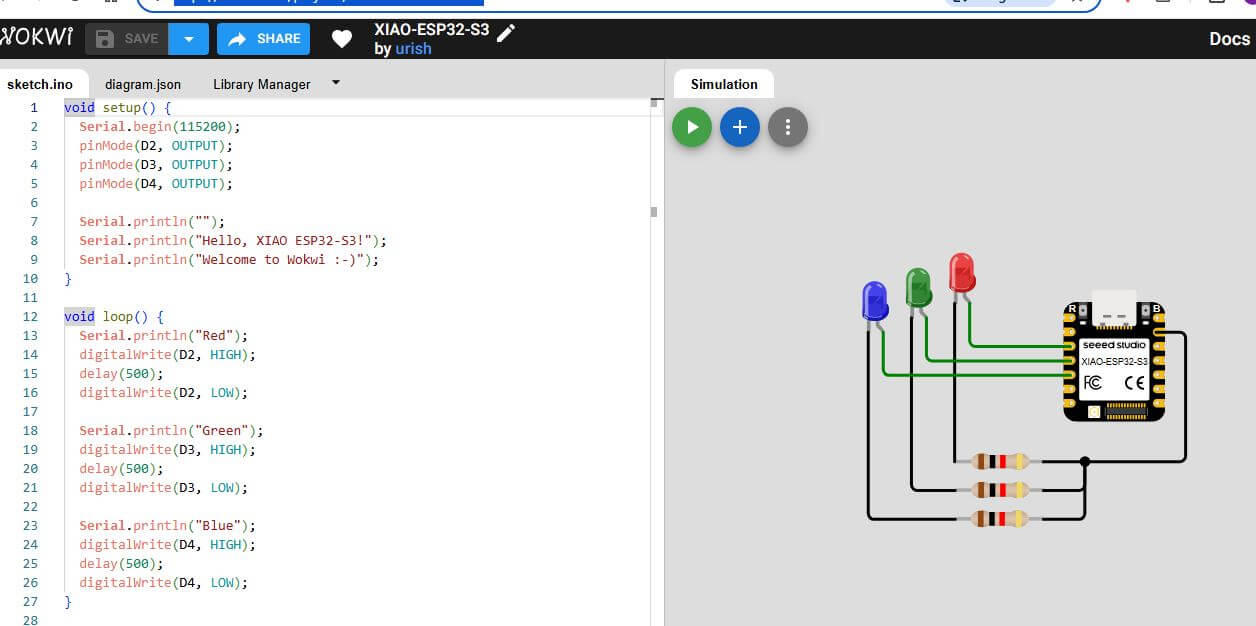
Our example code will control an LED with a push-button on the ESP32. The LED will change the state based on the push-button input, turning on when the button is pressed and off when is pressed again.
Code used to simulate
                        bool state=0;

                        void setup() {
                          Serial.begin(115200);
                          pinMode(D2, OUTPUT);
                          pinMode(D10, INPUT);

                          Serial.println("");
                          Serial.println("Hello, Fab Academy");
                        }

                        void loop() {
                          if(digitalRead(D10)){
                            while(digitalRead(D10)){
                              delay(10);
                            }
                            state=!state;
                            delay(10);
                          }
                          digitalWrite(D2, state);
                          delay(10);
                        }
Code source: Developed by Oscar Gomez
Wokwi simulation link
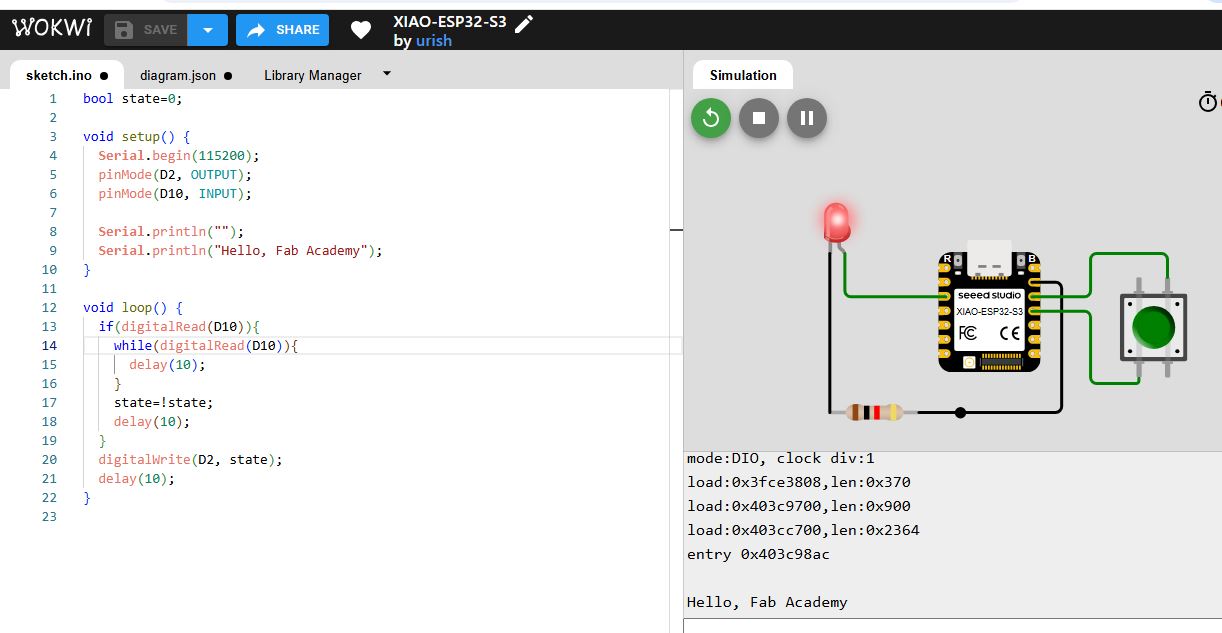
The main purpose of this code is to control an LED connected to pin D2 of the ESP32 microcontroller using a push-button switch connected to pin D10. I also include a button filter to avoid bouncing, which is a common issue when using mechanical switches. The code and the wokwi simulation are my own work.
Extra Credit
we are going to set up the development environment using PlatformIO and Visual Studio Codo to program the ESP32 microcontroller. With PlatformIO and Arduino core for ESP32, we can write, compile, and upload code to the ESP32 microcontroller using the Visual Studio Code IDE.
we are going to create a script to connect the microcontroller to wifi network to test the capability of the ESP32 to connect to a local network and communicate with remote devices, without adding any additional hardware.
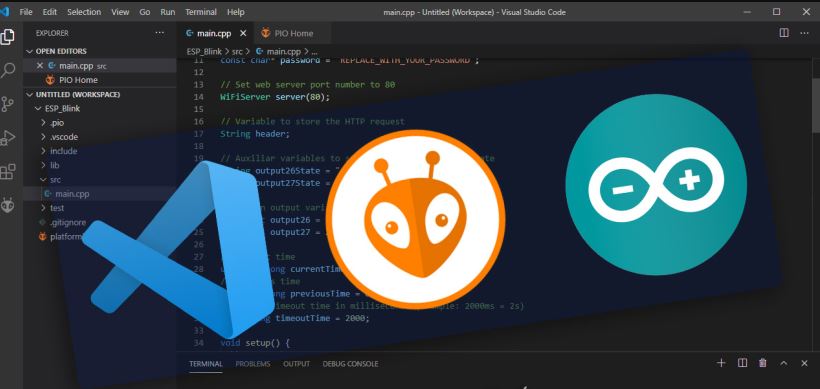
Image source IDEs
Development Environment Setup
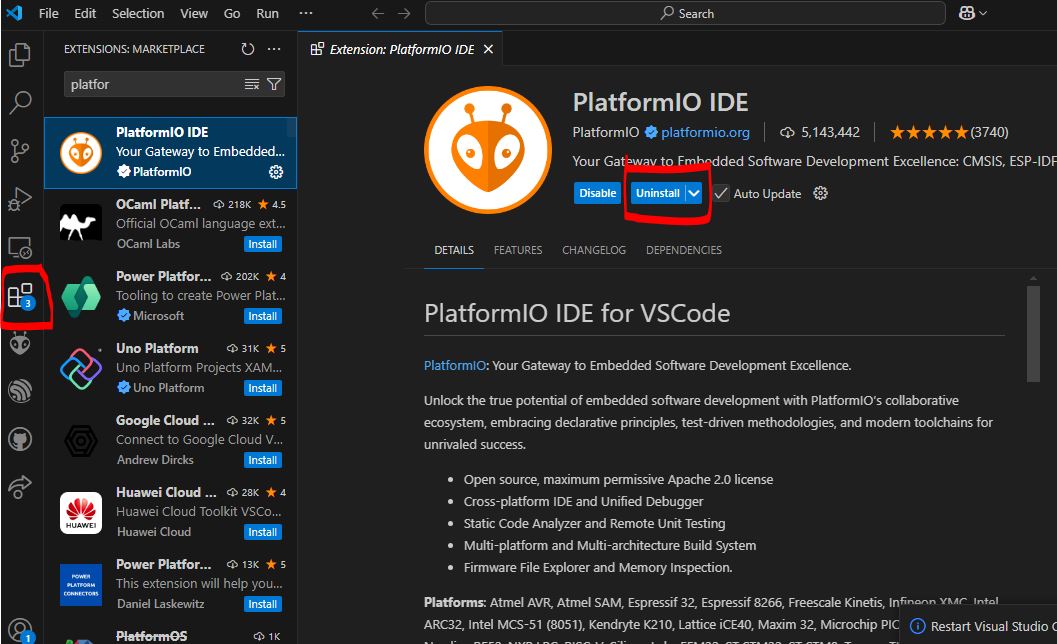
If you don't have Visual Studio Code installed, you can download it from the official website. Once you have Visual Studio Code installed, you can install the PlatformIO extension by following these steps:
- Open Visual Studio Code
- Go to the Extensions view by clicking on the square icon on the sidebar or pressing Ctrl+Shift+X
- Search for PlatformIO IDE and click Install
- Once the installation is complete, click Reload to activate the extension
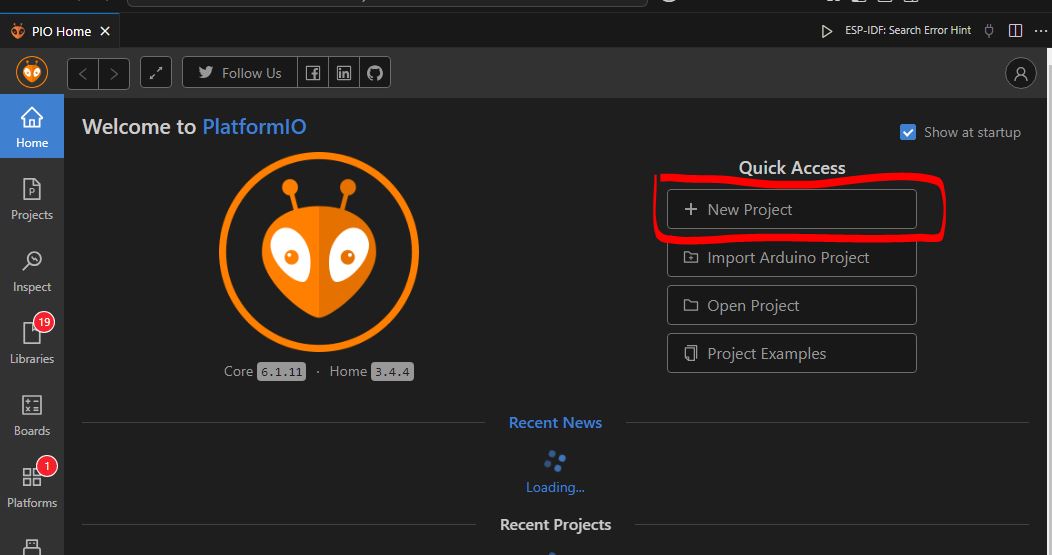
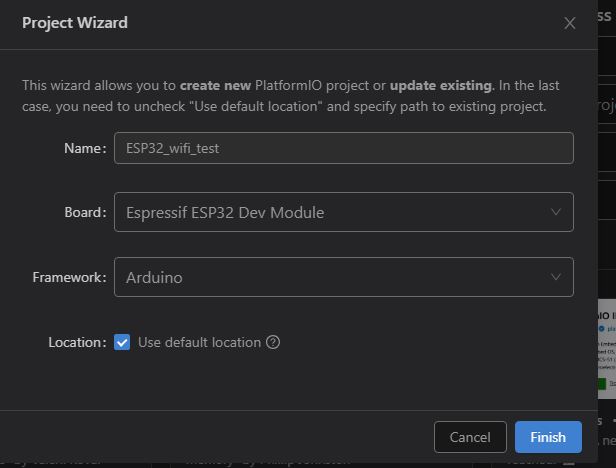
After installing the PlatformIO extension, you can create a new project for the ESP32 microcontroller by following these steps:
- Click on the PlatformIO icon on the sidebar to open the PlatformIO Home view
- Click on New Project
- Select Espressif 32 as the platform and ESP32 Dev Module as the board
- Choose a location for your project and click Finish
Once the project is created, you can write your code in the src/main.cpp file and compile/upload it to the ESP32 microcontroller by clicking on the PlatformIO icon on the sidebar and selecting the appropriate options.
Code used to WIFI Connect
#include "Arduino.h"
#include "WiFi.h"
const char* ssid = "your_SSID";
const char* password = "your_PASSWORD";
bool state=0;
void setup() {
Serial.begin(115200);
WiFi.begin(ssid, password);
}
void loop() {
if (WiFi.status() != WL_CONNECTED) {
delay(500);
Serial.print(".");
}
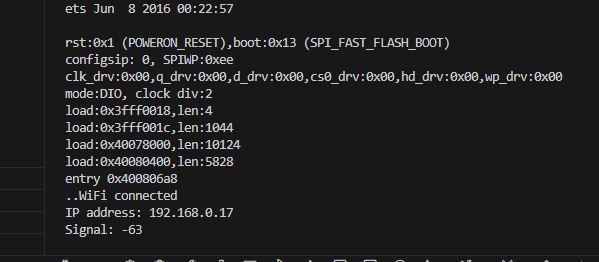
if (WiFi.status() == WL_CONNECTED && !state) {
Serial.println("WiFi connected");
Serial.print("IP address: ");
Serial.println(WiFi.localIP());
Serial.print("Signal: ");
Serial.println(WiFi.RSSI());
state = 1;
}
delay(1000);
}
Code source: Developed by Oscar Gomez
In this code, we include the WiFi library and define the SSID and password for the Wi-Fi network. In the setup() function, we initialize the serial communication and connect to the Wi-Fi network using WiFi.begin(). In the loop() function, we check the connection status and print the IP address and signal strength once connected.
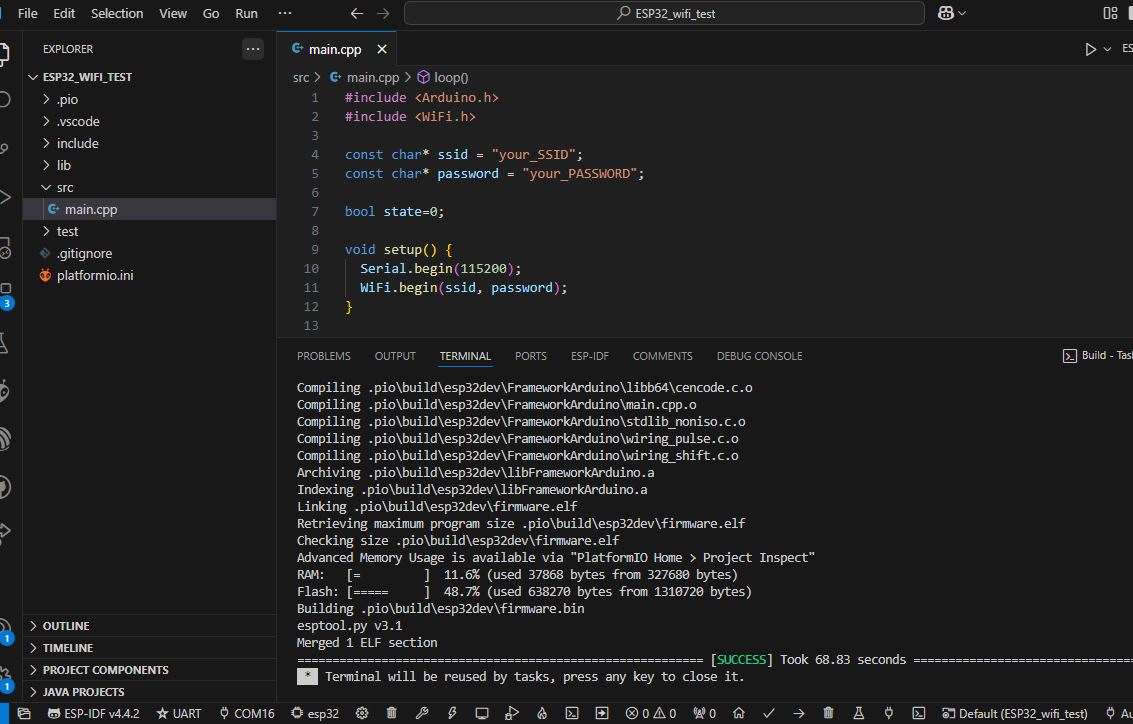
Once the code is uploaded to the ESP32 microcontroller, you can test the functionality by monitoring the serial output in the PlatformIO terminal and observing the behavior.
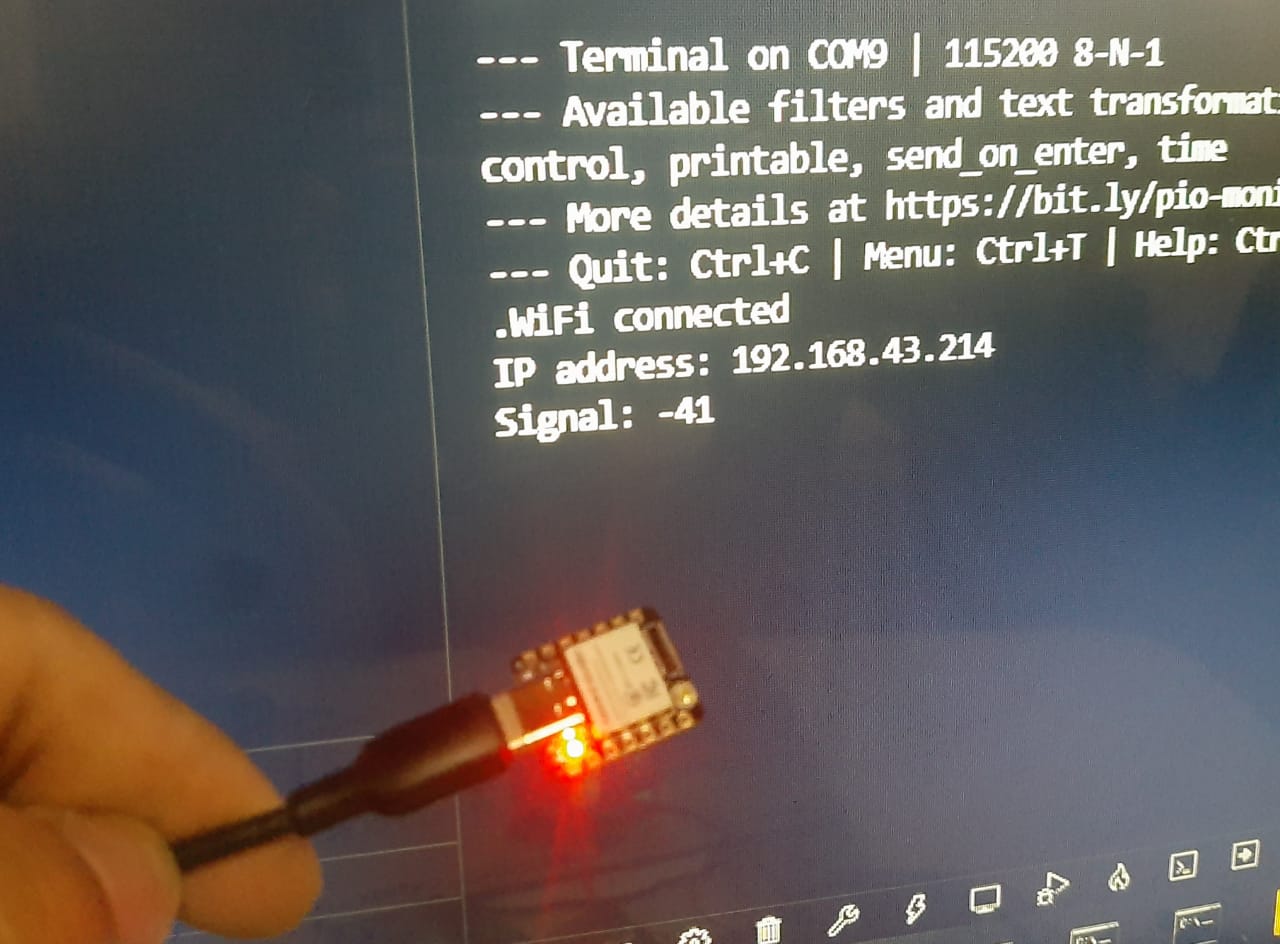
so as you can see we were capable of connecting the ESP32 to the wifi and see all the process in the serial monitor.
For this test, the code was written by me, based on the Wi-Fi library that is included in the Arduino core for the ESP32. The code is simple and straightforward. The main purpose was to connect the ESP32 to Wi-Fi and send a message to a server. However, that feature is more related to next week's assignments, so I decided not to include it here.
HERO SHOT
Project Files links
In the next links, you can download the files for the assignments.
Conclusion
This week we learned about embedded architectures, specifically the ESP32 and RP2040 microcontrollers. We compared the toolchains and development workflows for both architectures, highlighting their features, advantages, and limitations. We explored the ESP32 data sheet and wrote a program to interact with local input/output devices and communicate with remote connections. We simulated the operation of the ESP32 using the Wokwi simulator and tested the LED control program with a push-button switch. Overall, this week's assignments provided valuable insights into embedded programming and microcontroller development, enhancing our understanding of IoT applications and embedded systems.
Lessons Learned
- Understanding the features and specifications of microcontrollers is essential for effective embedded programming.
- Comparing different embedded architectures helps in selecting the right microcontroller for specific applications.
- Simulating microcontroller projects provides a convenient way to test code and verify functionality before deploying on physical hardware.
- Exploring different programming languages and development environments enhances the learning experience and broadens the skillset of embedded developers.
Resources
ESP32 Resources
- Espressif Systems: The official website provides comprehensive documentation, SDK setup, and tutorials for the ESP32.
- ESP-IDF Programming Guide: A detailed guide on getting started with the ESP32 using the IoT Development Framework.
- Arduino Community: The Arduino community forums and documentation offer examples and projects using the ESP32.
RP2040 Resources
- Raspberry Pi Documentation: Official documentation for the RP2040 by Raspberry Pi, including hardware, SDKs, and programming guides.
- Getting Started with Raspberry Pi Pico: Raspberry Pi's official book on using the RP2040, especially useful for beginners.
- MicroPython Guide: Guide for programming the RP2040 using Python. CircuitPython on RP2040: Resources for using CircuitPython on RP2040.