
Week 5
Introduction
This page outlines the steps followed during week 5 of the Fab Academy assignments.
The tasks for this week involved 3D Printing and the following assignments:
- Test the design rules for your 3D printer(s).
- Design and 3D print an object (small, few cm3, limited by printer time) that could not be made subtractively
- 3D scan an object (and optionally print it).
group assignment:
Individual assignment:
Let's start.....................

Group assignment
Design Rules
Before starting the group assignment, we need to understand the design rules for 3D printing. Design rules are guidelines that help ensure successful 3D printing by optimizing the design for the specific printer and material being used. Some common design rules for 3D printing include:
- Minimum wall thickness: The minimum thickness of a wall to ensure structural integrity and prevent warping or breakage. The minimum wall thickness varies based on the material and printer settings.
- Overhangs and support structures: Overhangs are horizontal features that require support structures to prevent sagging or collapsing during printing. Support structures are temporary structures that provide stability for overhangs and are removed after printing.
- Orientation and layer adhesion: The orientation of the object affects the strength and appearance of the print. Layer adhesion refers to the bonding between layers and is influenced by the printing temperature and cooling settings.
- Clearance and tolerances: Clearance is the space between moving parts to ensure proper fit and movement. Tolerances are the allowable deviation from the specified dimensions and affect the accuracy of the print.
- Surface finish and details: Surface finish refers to the quality and smoothness of the printed surface. Details such as text, logos, and fine features require high resolution and precision in the design.
Source Design Rules
Test Design Rules
To test the design rules for our 3D printer, we will create a test object that incorporates various features such as overhangs, bridges, and fine details. The test object will help us evaluate the printer's capabilities and identify potential issues in the printing process.
We already have all the files for the test, we just need to print them and see the results. The test files I'm going to use are the same provided by the Fab Academy Webpage program, which are created by Neil Gershenfeld, the link for the files is here.
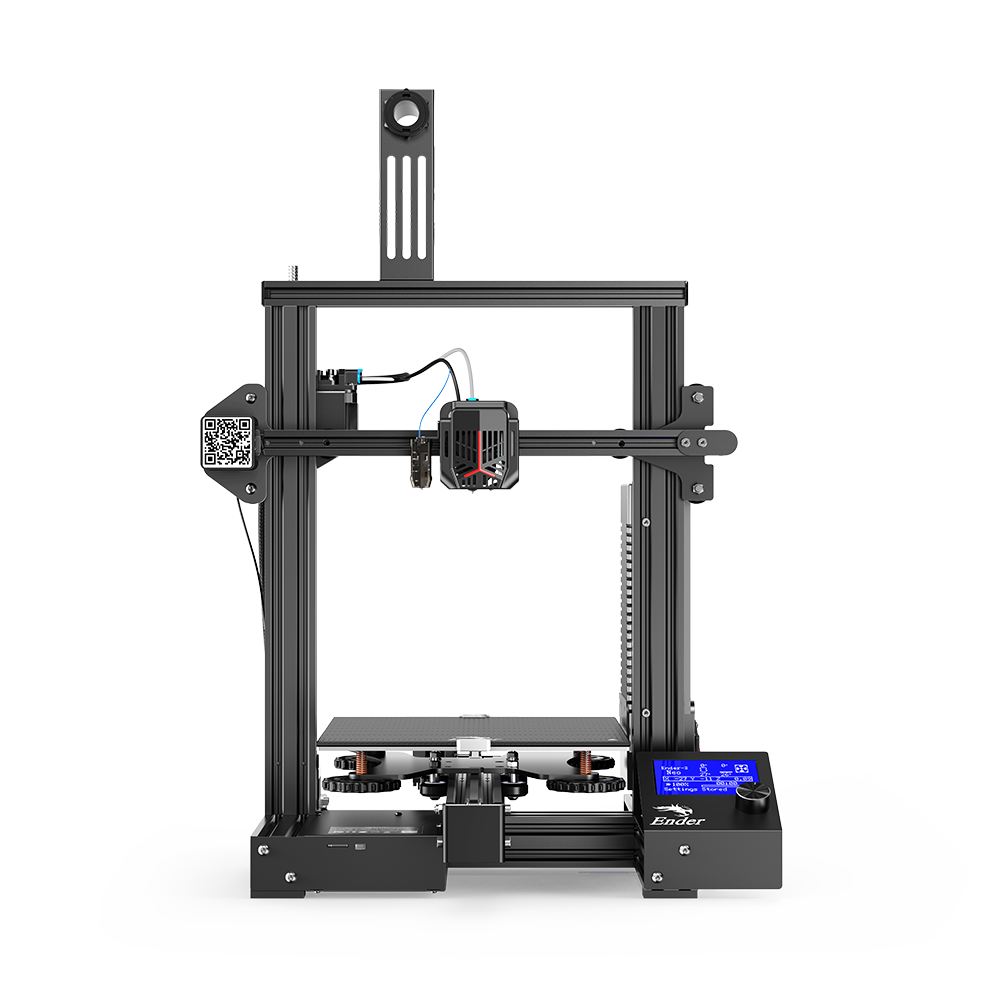
In this case we are going to use the Ender 3 printer, and the software Cura to slice the files and print them.


Image source ENDER 3
All the models were printed with a layer height of 0.2 mm, a print speed of 50 mm/s, and a temperature of 200°C for the nozzle and 50°C for the bed. Also using the tree support structure if the model needs it.
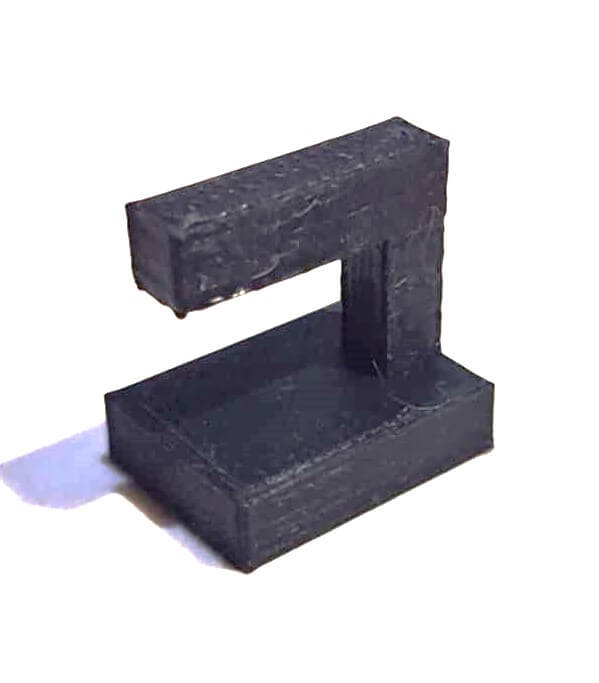
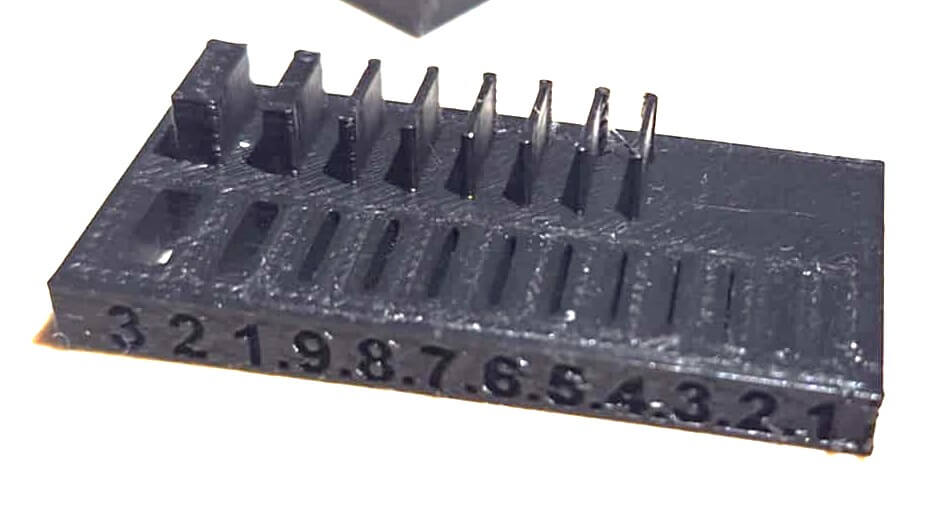
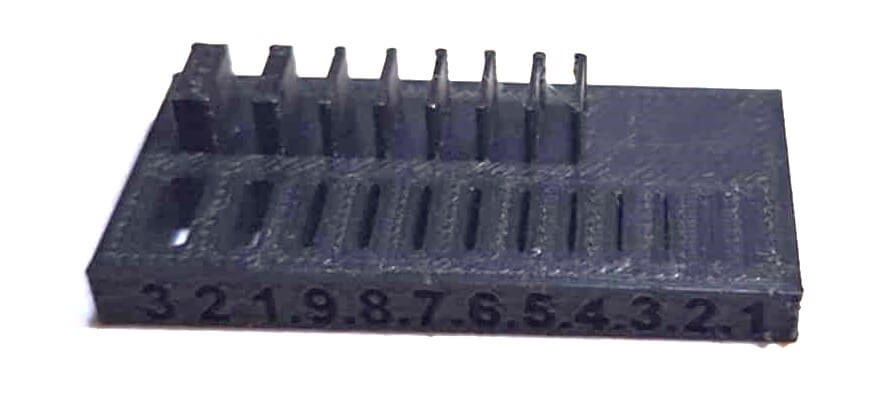
The first test is to print the model overhang, this test is to see how the printer handles the overhangs and if it needs supports to print them. we use the tree support structure to print the model.
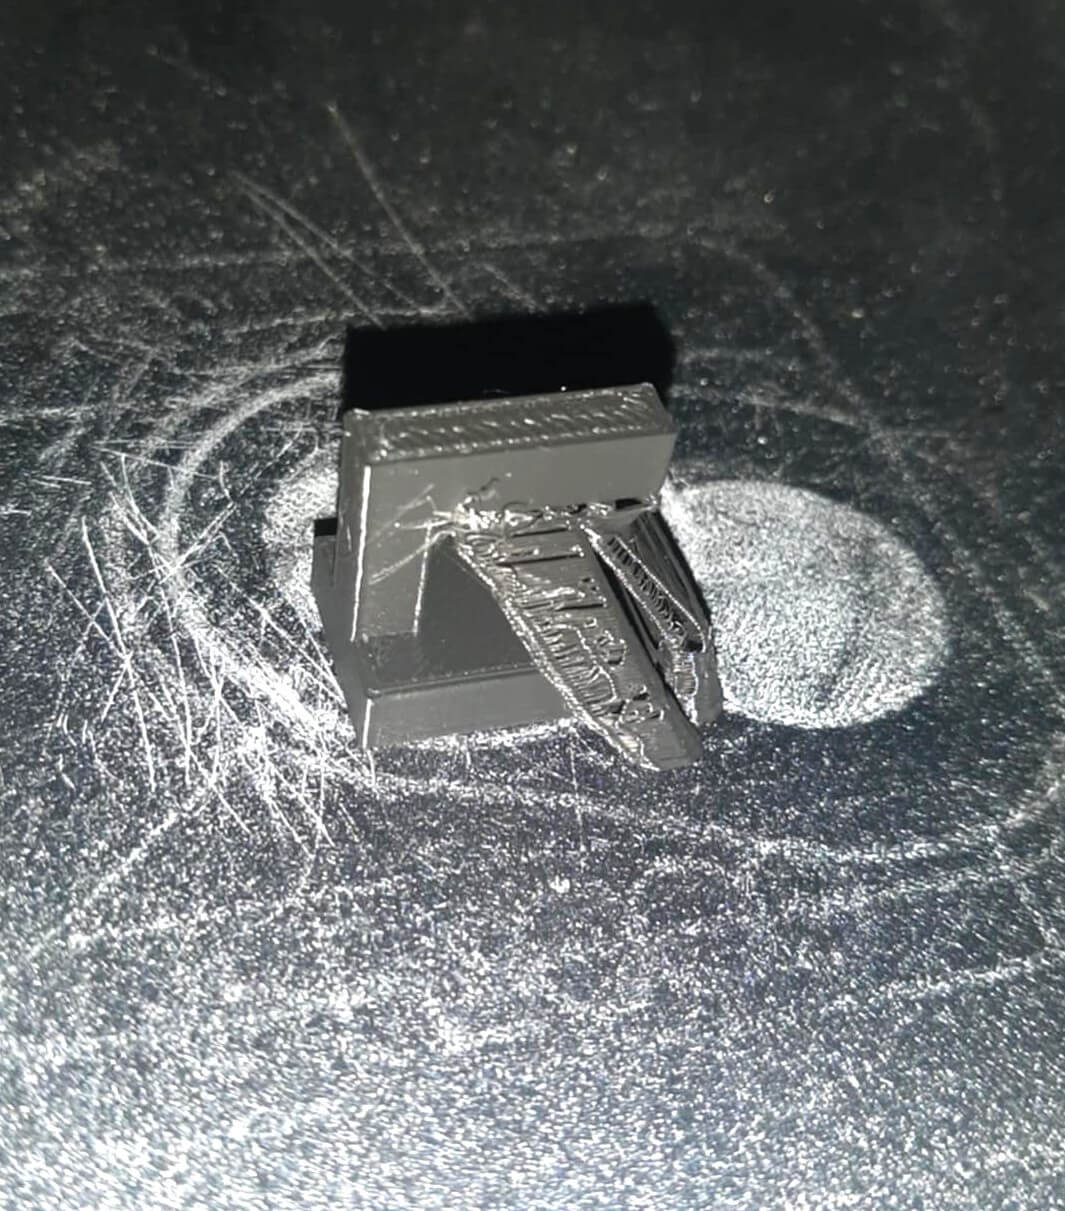
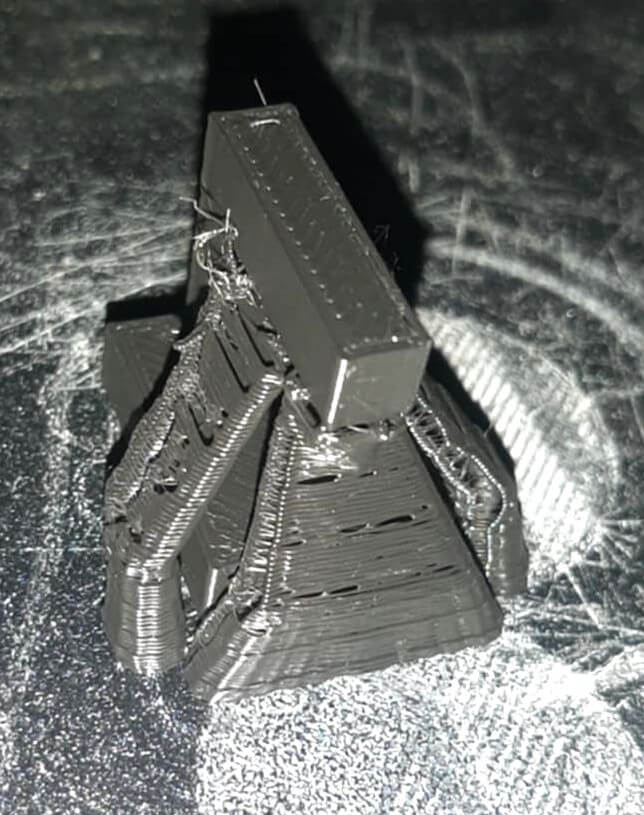
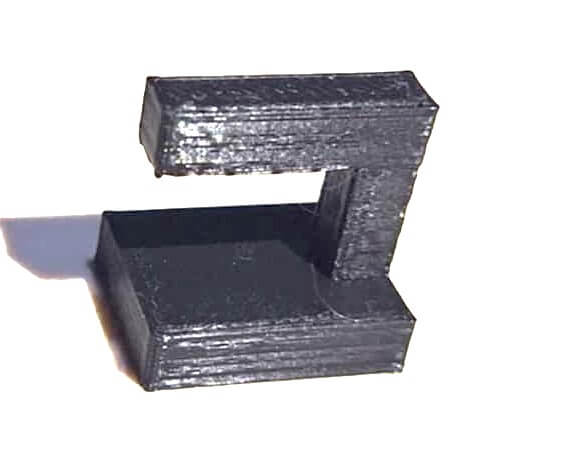
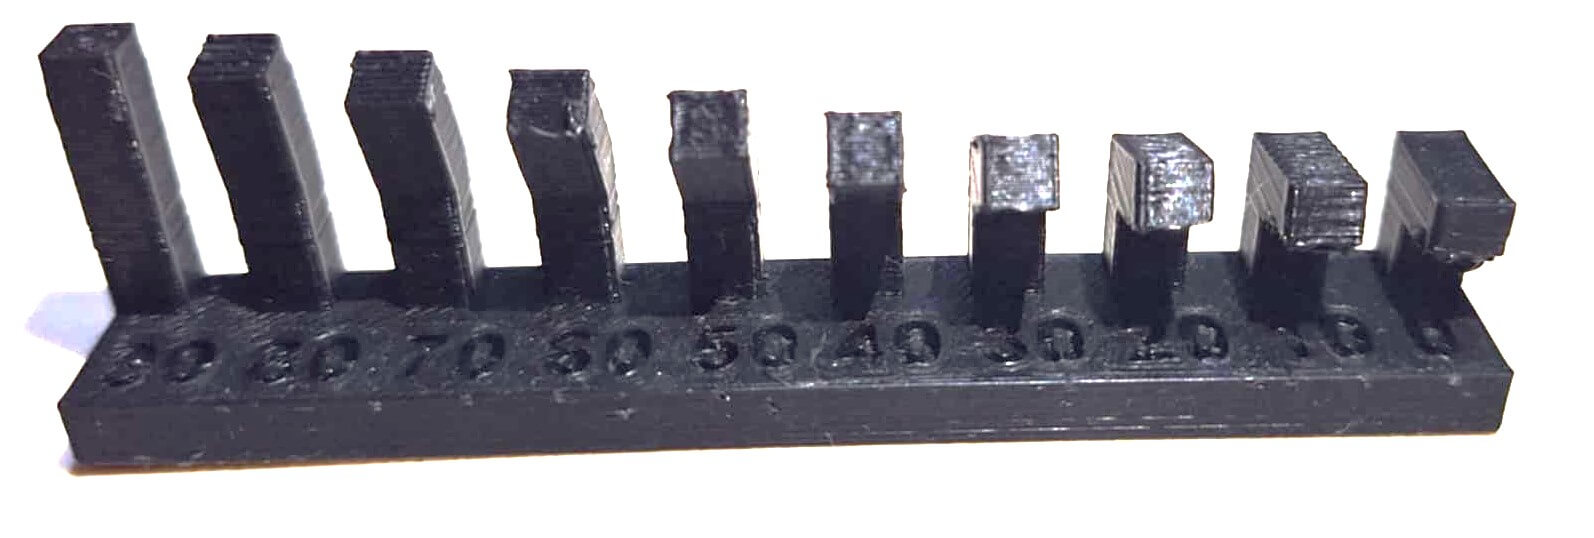
The second test is the angle test, this test is to see how the printer handles the angles without supports.
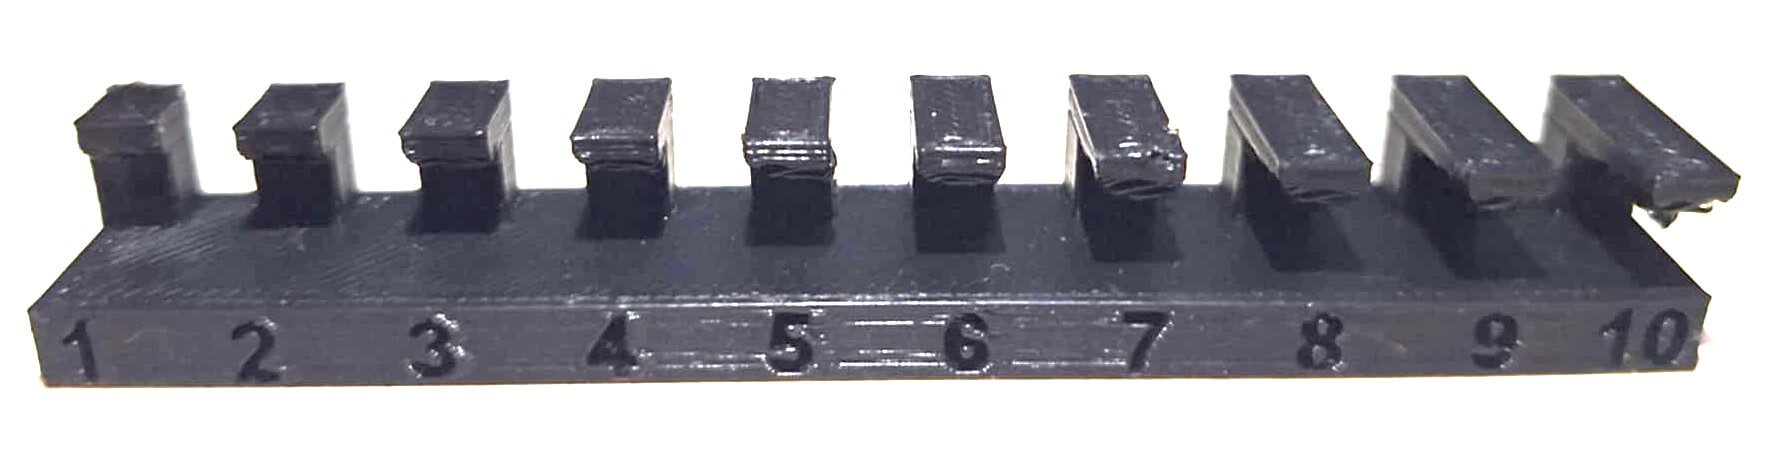
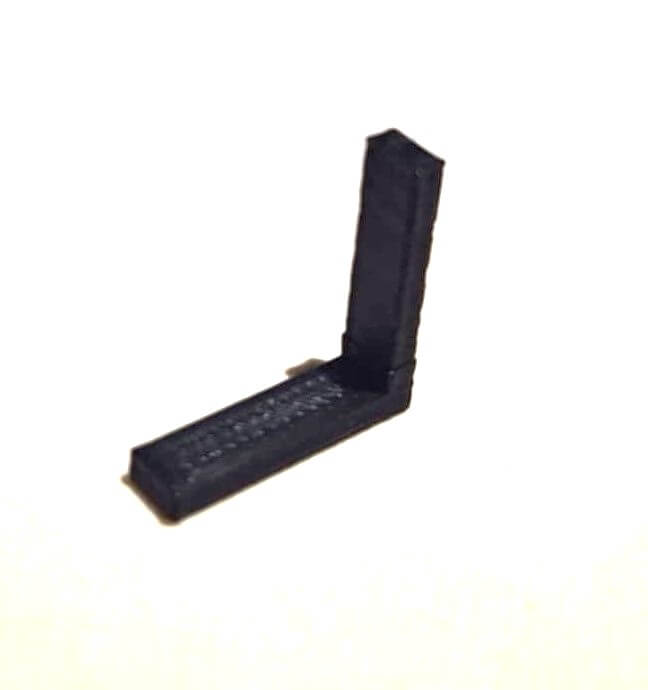
The third test is the bridging test, this test is to see how the printer handles the bridging without supports.
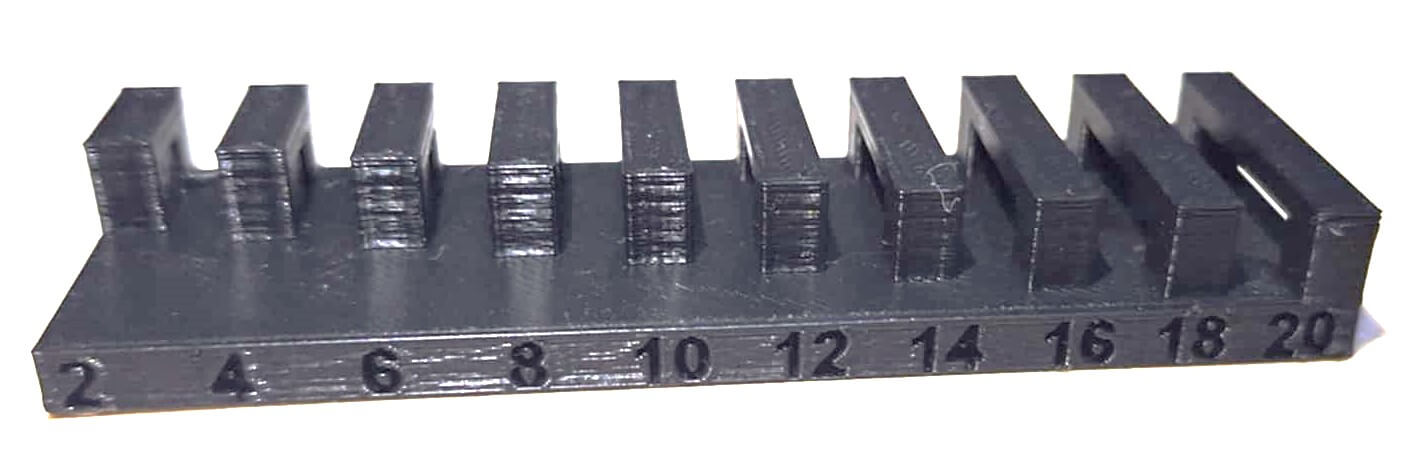
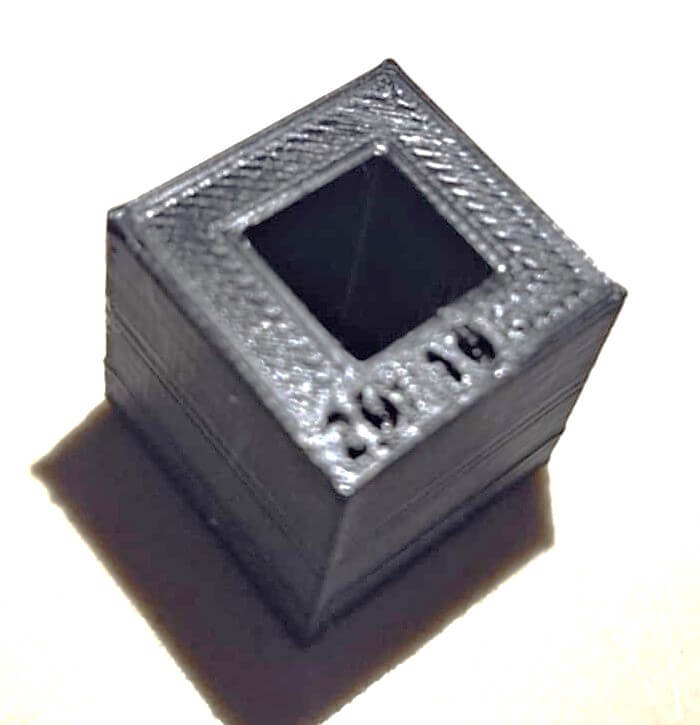
The fourth test is the wall thickness test, this test is to see how the printer handles the wall thickness.
The fifth test is the dimensions test, this test is to see how the printer handles the dimensions of the model.
The sixth test is the anisotropy test, this test is to see how the printer handles the anisotropy of the model.
The seventh test is the surface finish test, this test is to see how the printer handles the surface finish of the model.
With all the tests done, we can see that the printer handles the tests very well, and we can use it to print the models that we need.
The next step is to print the individual assignment.
Things I learn for the testing design rules
It is important to test the design rules for 3D printing before using a New printer. This helps to understand the capabilities and limitations of the printer, and to optimize the design for the specific printer and material being used.
This help us to save time and material, and to avoid potential issues in the printing process. By testing the design rules, we can identify potential issues in the design and make necessary adjustments to ensure successful printing. This is important for creating high-quality designs that meet the requirements of the project.
Individual assignment
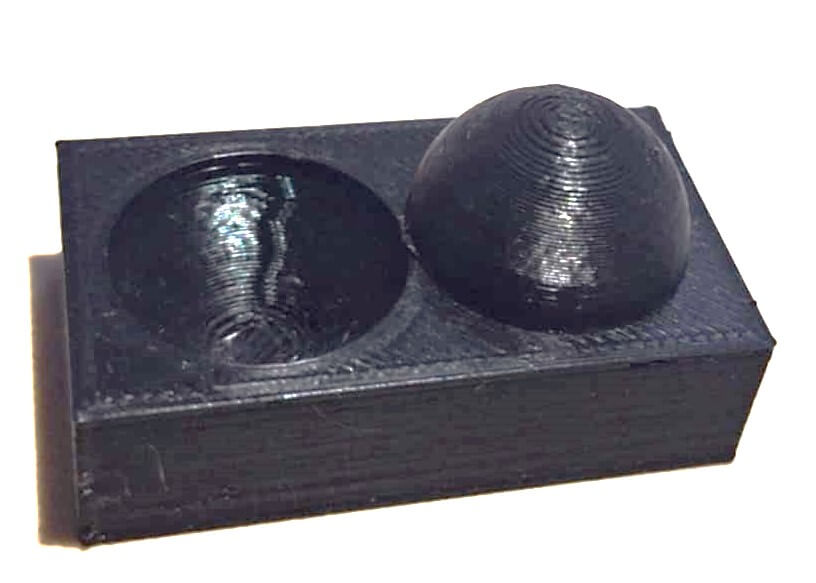
For the individual assignment, we need to design and 3D print an object that could not be made subtractively. This involves creating a model with complex geometries, overhangs, or internal structures that are difficult or impossible to achieve using traditional machining methods. The object should be small, a few cm3 in size, and limited by printer time and material constraints.
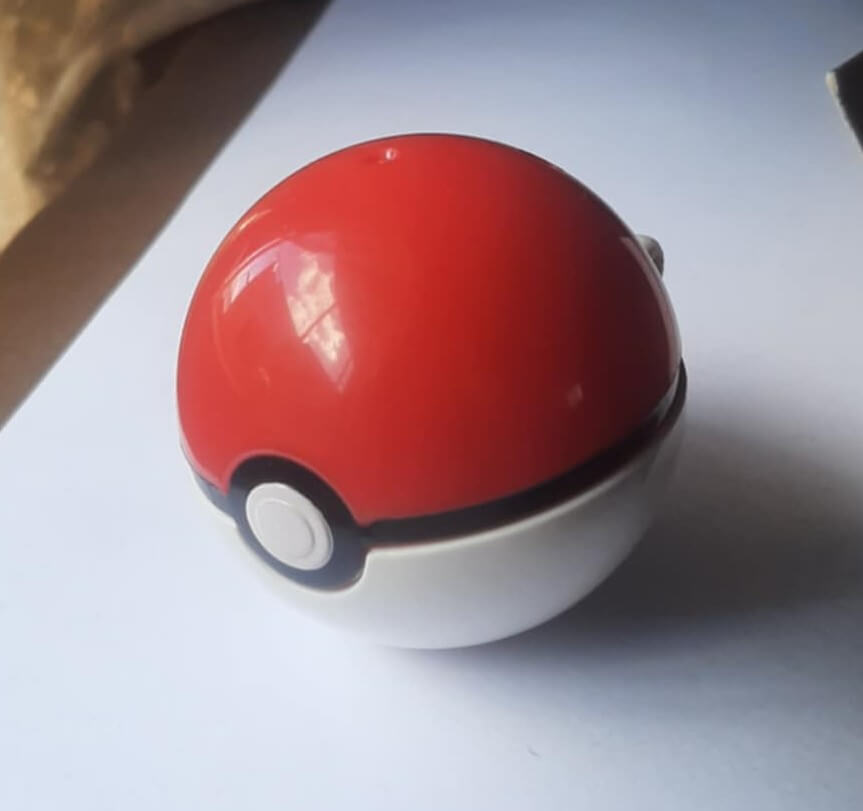
This is the image of the reference model I used to design the pokeball.
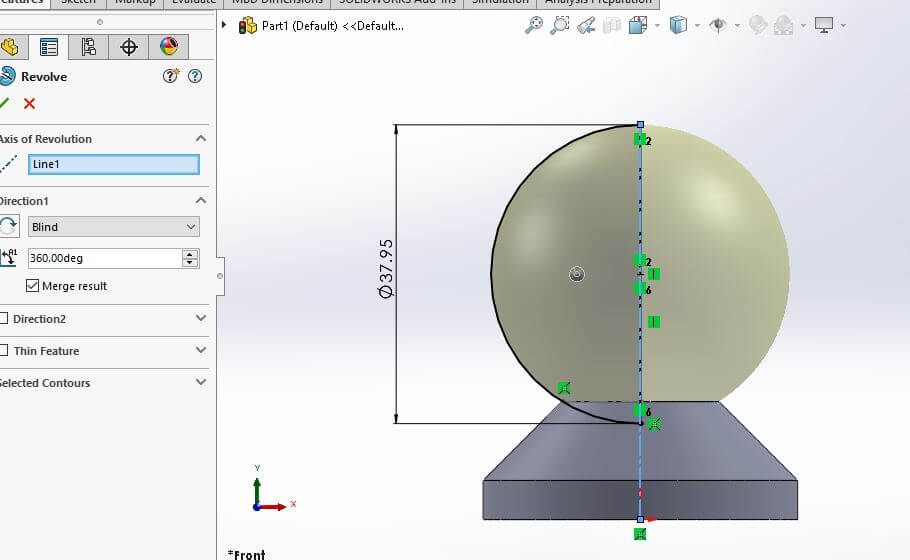
I designed a small Pokeball model using solidworks, the model has a diameter of 3.7 cm and a height of 5 cm.
Ones I have the base form of the model, I added the details of the pokeball.


The model is ready to be printed, I used the Ender 3 printer to print the model.
The model was printed with a layer height of 0.2 mm, a print speed of 50 mm/s, and a temperature of 200°C for the nozzle and 50°C for the bed. Also using the tree support structure to print the model.
This is the final result of the model.
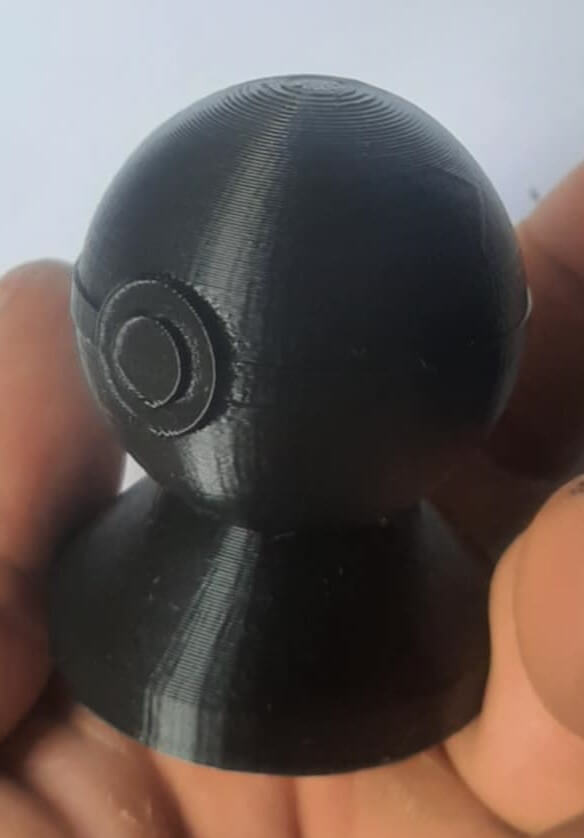
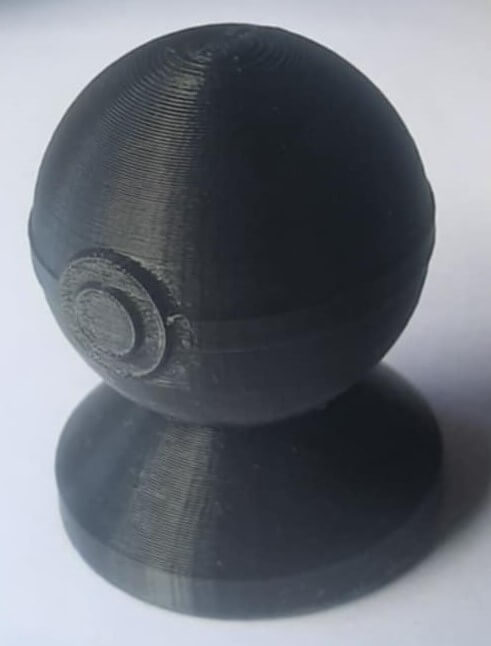
The model was printed successfully, and the details of the pokeball are visible.
3D Scan an Object
The next task is use a 3D scanner. 3D scanning is the process of capturing the shape and appearance of an object to create a digital model. The digital model can be used for various applications, including reverse engineering, quality control, and prototyping. 3D scanning is commonly used in industries such as manufacturing, healthcare, and entertainment to create accurate and detailed models of physical objects.
We will use a 3D scanner to capture the geometry of an object and create a digital model. The 3D scanner uses various technologies such as laser scanning, structured light scanning, or photogrammetry to capture the object's surface and generate a point cloud or mesh model. The resulting digital model can be edited, modified, and 3D printed to replicate the original object.
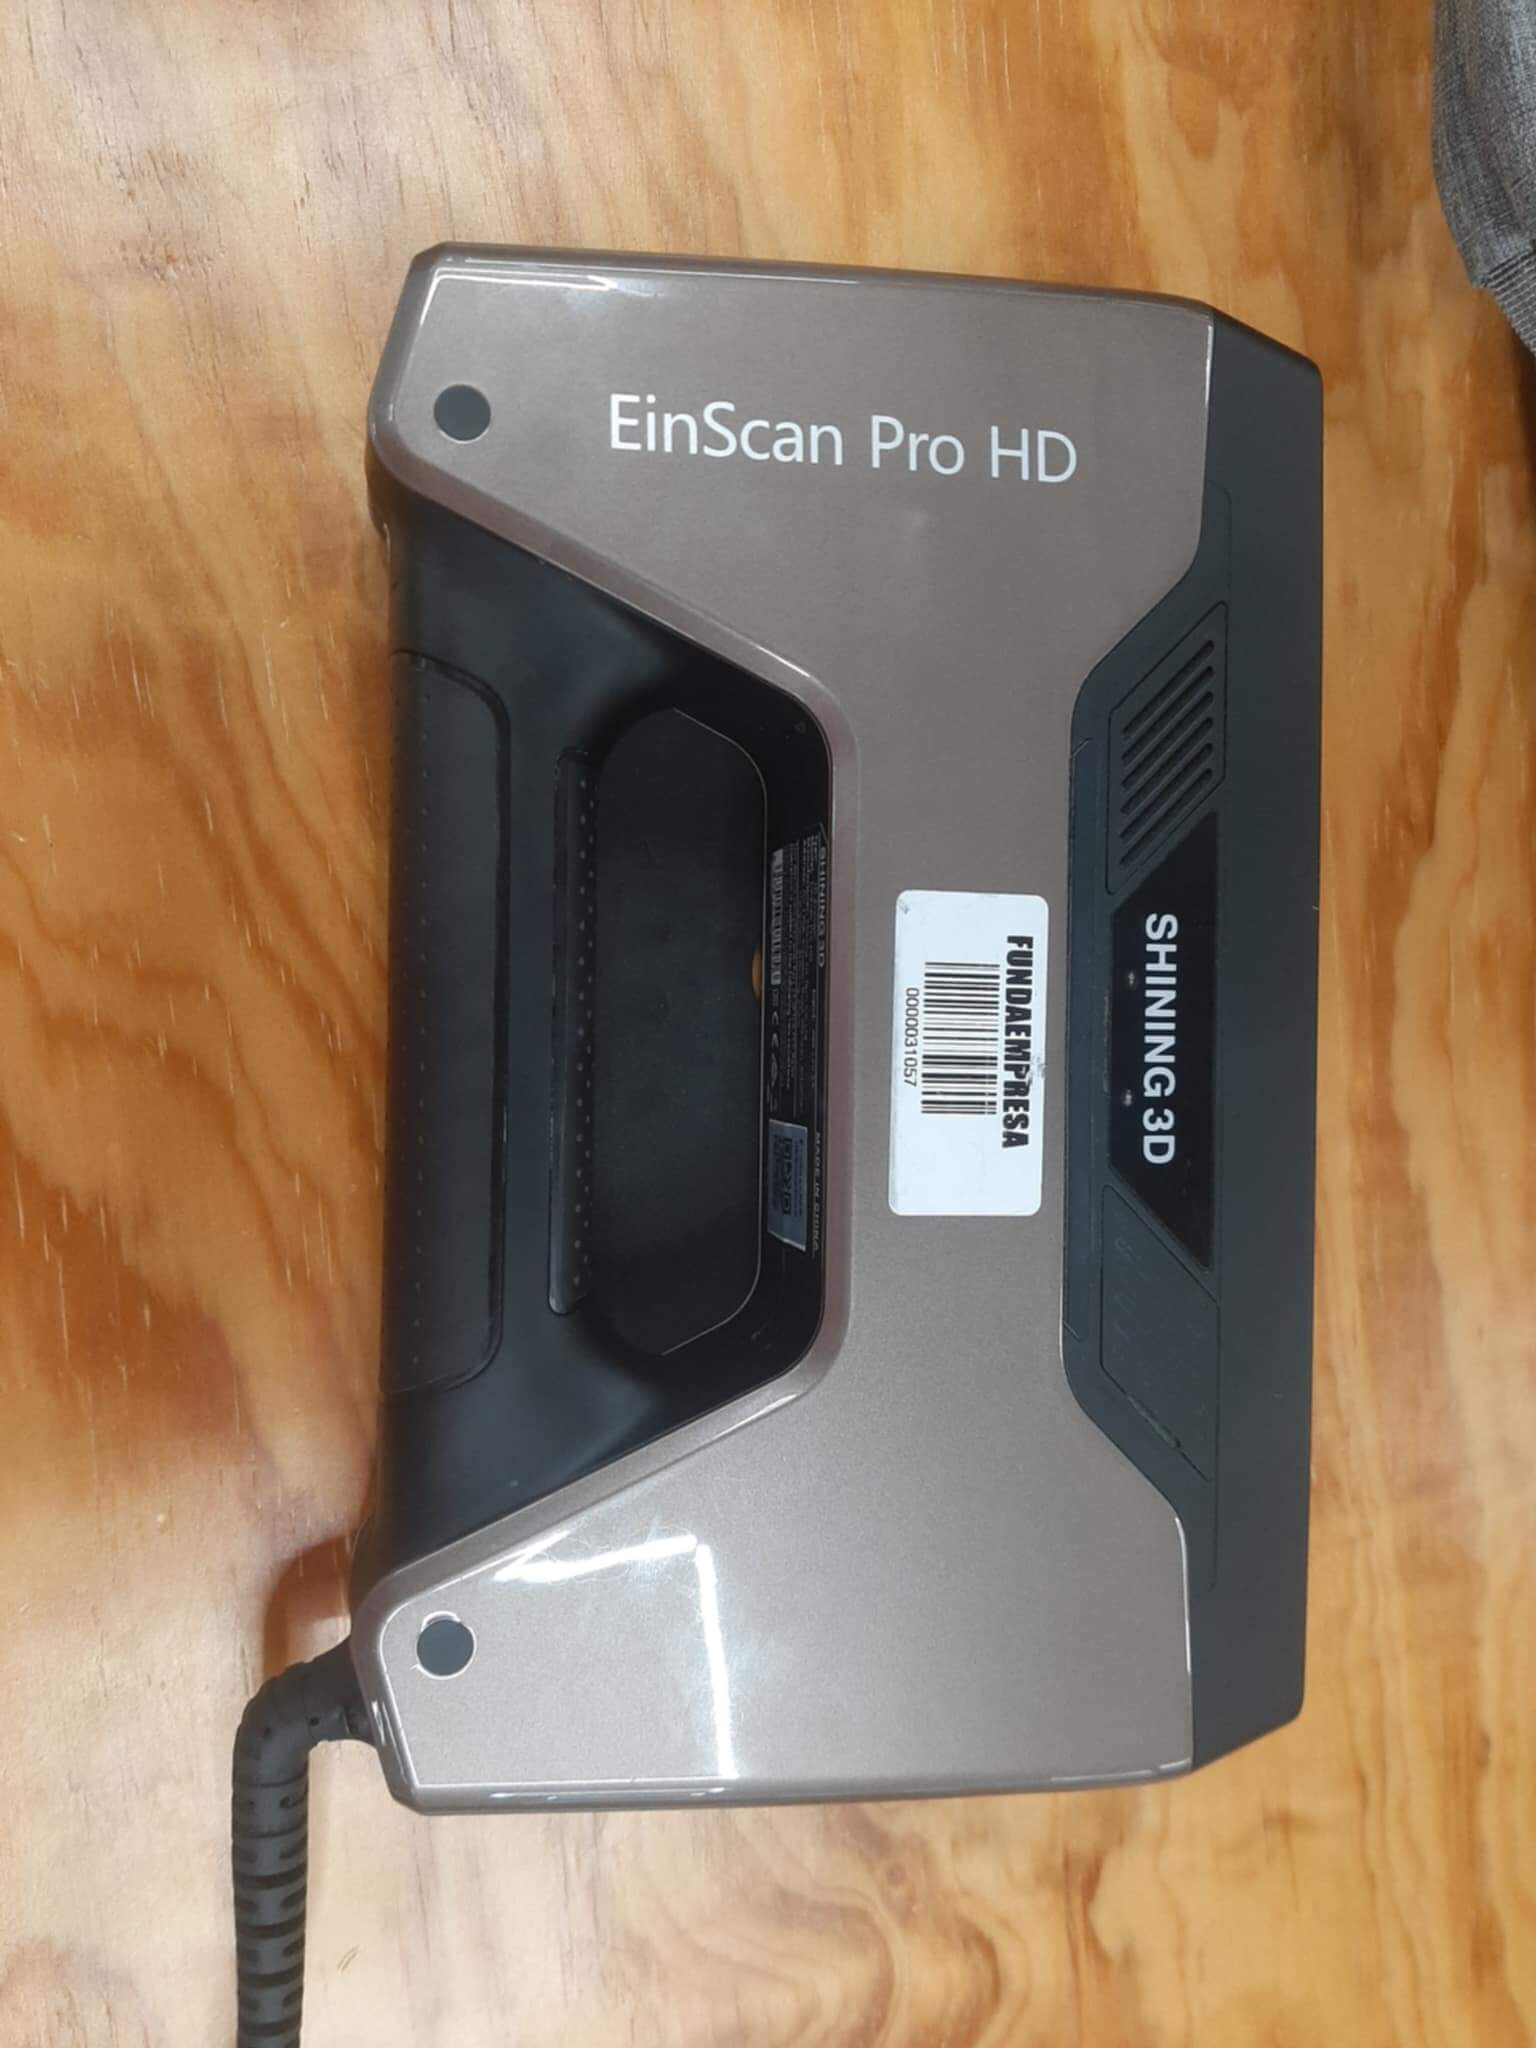
The scanner that I used is the EinScan Pro HD from Shining 3D.
The scanner has a resolution of 0.2 mm and a scanning speed of 1,200,000 points/s. also, the scanner has a scanning area of 310 x 350 mm.
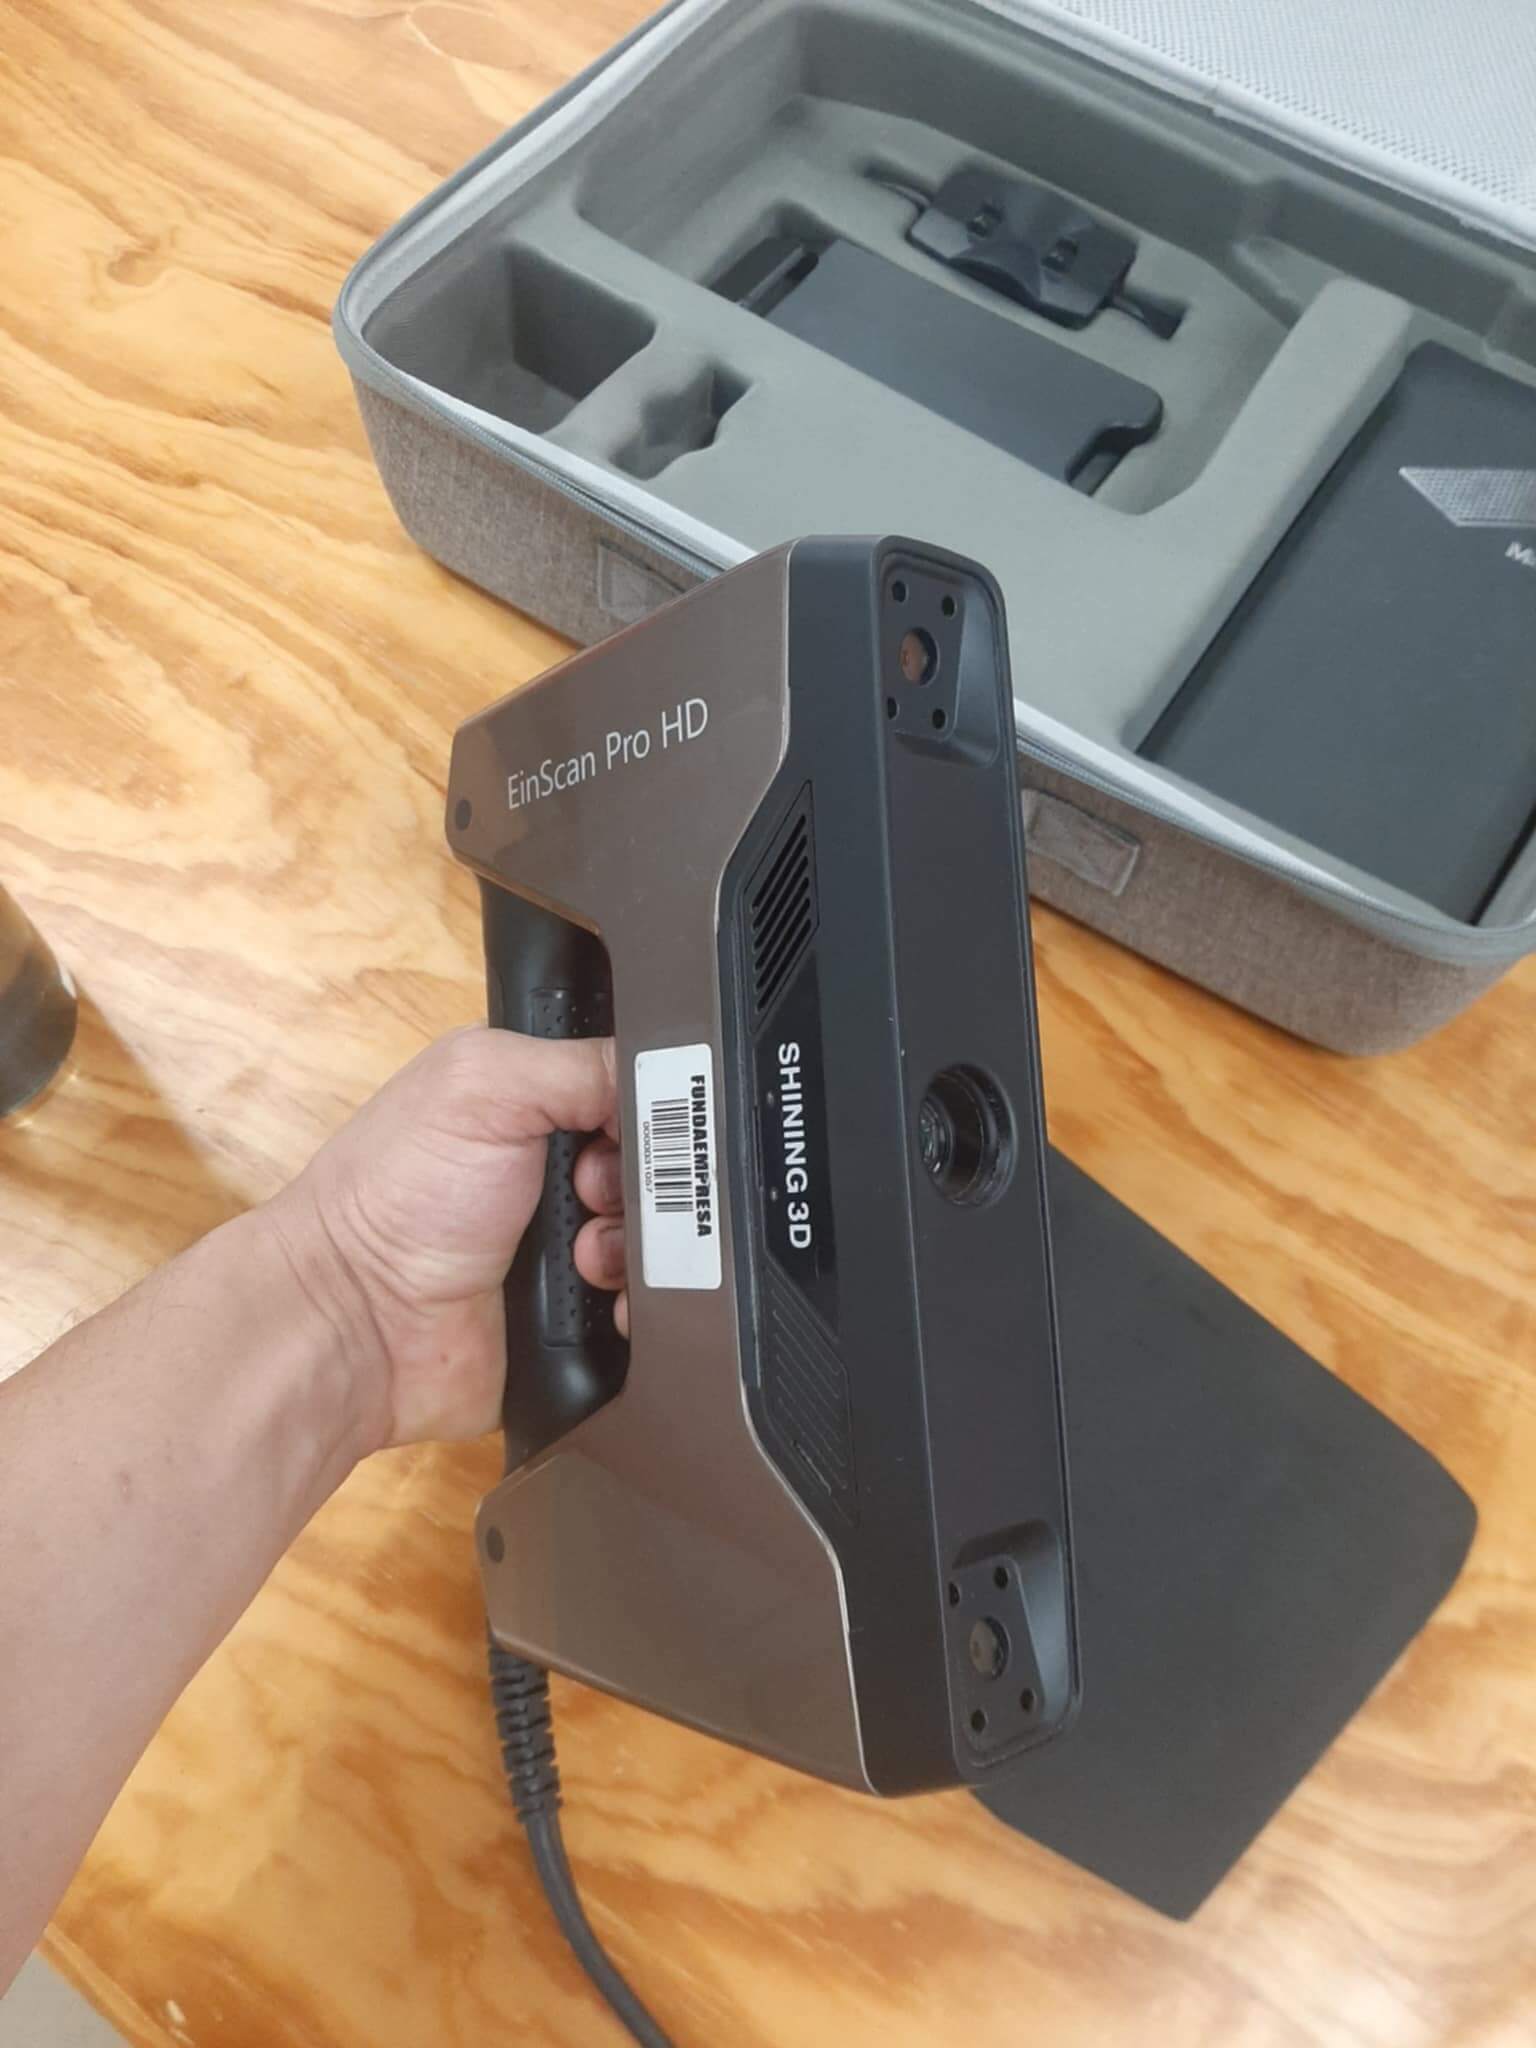
The software I used to scan the object is the EXScan Pro software. The software is very easy to use and has a lot of features to scan the object.
The object that I scanned is a small car, the car has a length of 20 cm and a width of 12 cm.
The scanning process is very easy, you just need to put the object in the scanning area and start the scanning process.
However, first, you need to calibrate the scanner to get the best results. Ones the scanner is calibrated, you can start the scanning process.

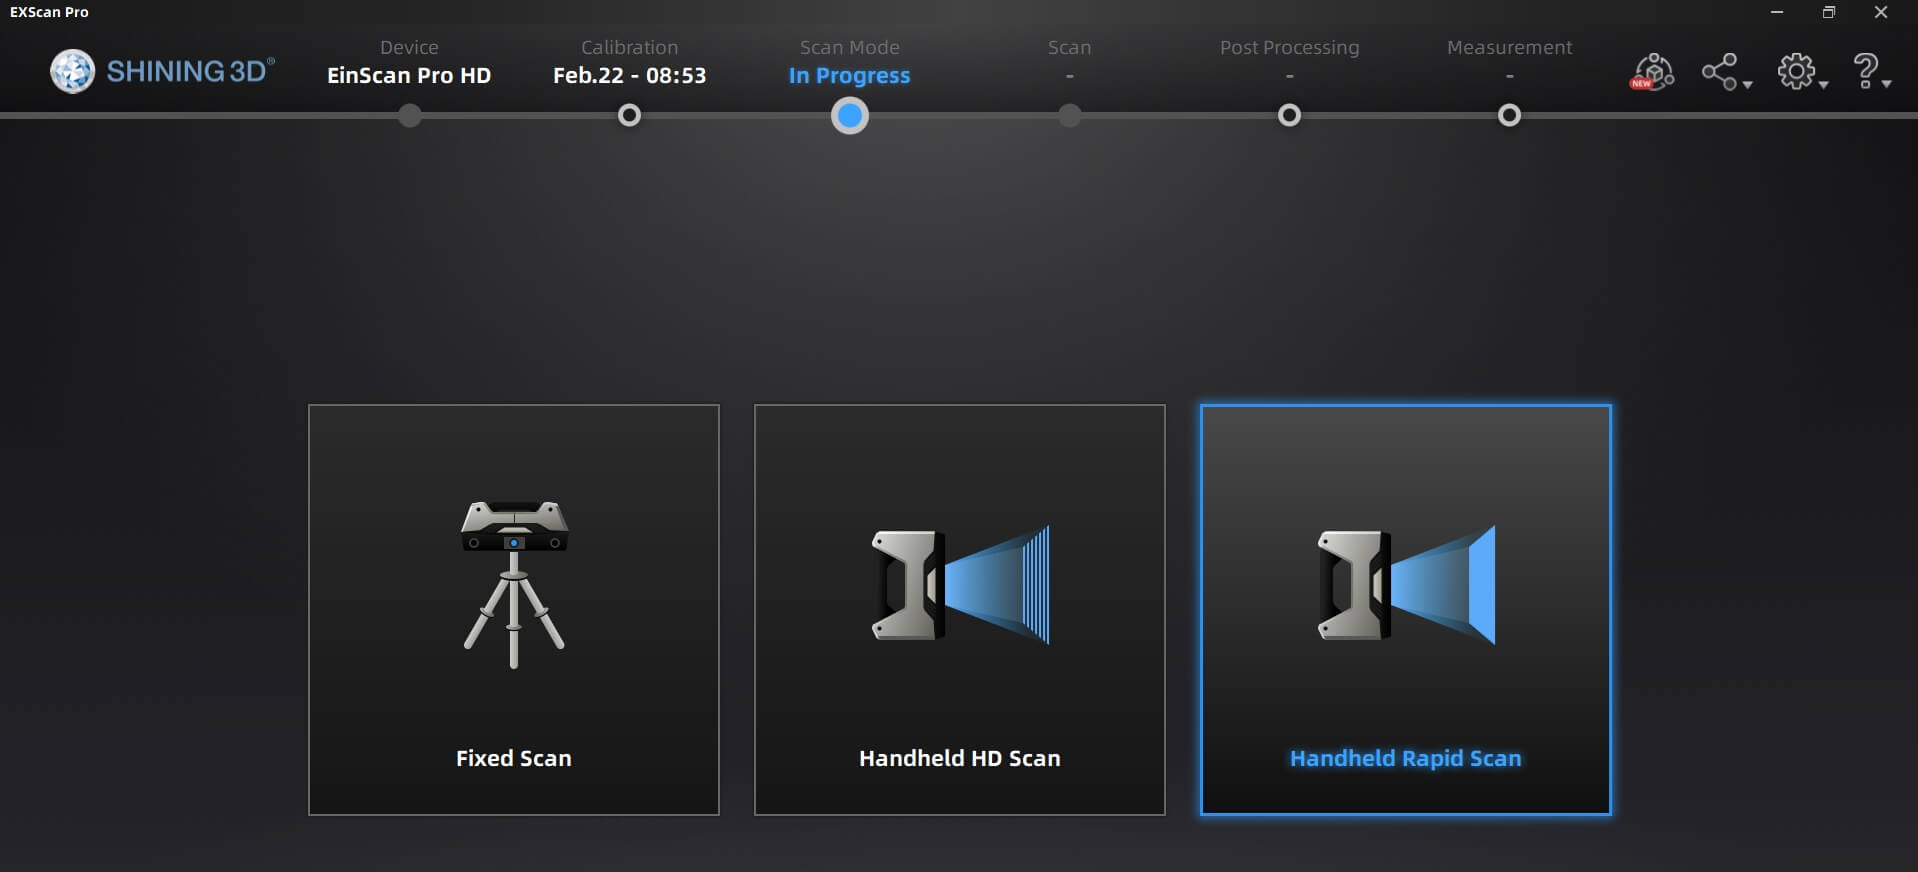
We need to connect the scanner to the computer and open the software to start the scanning process. The software gives you the option to Rapid scan, HD scan, and Fixed scan. In our case we used the rapid scan to scan the object.
Then we can select more options like the resolution of the scan, the color of the scan, and the texture of the scan.

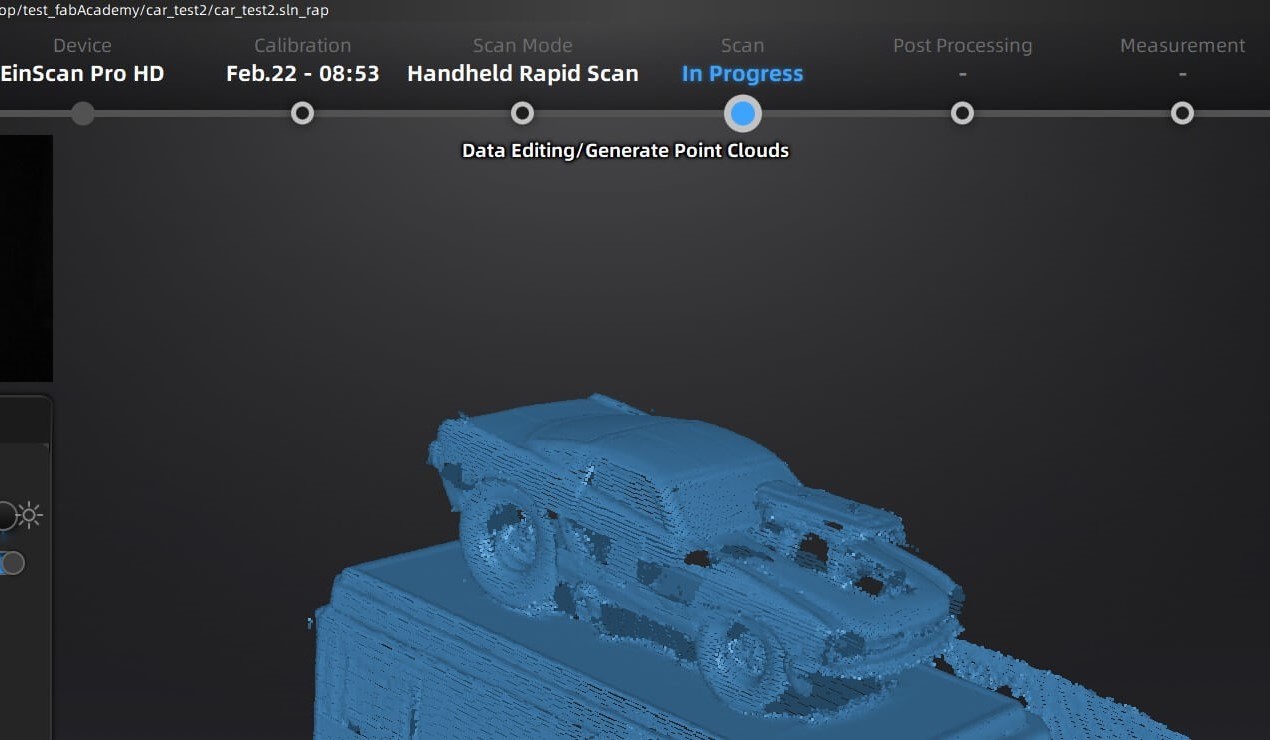
After setting all the environment, we can start the scanning process.
This can take a few minutes, depending on the resolution of the scan and the size of the object.
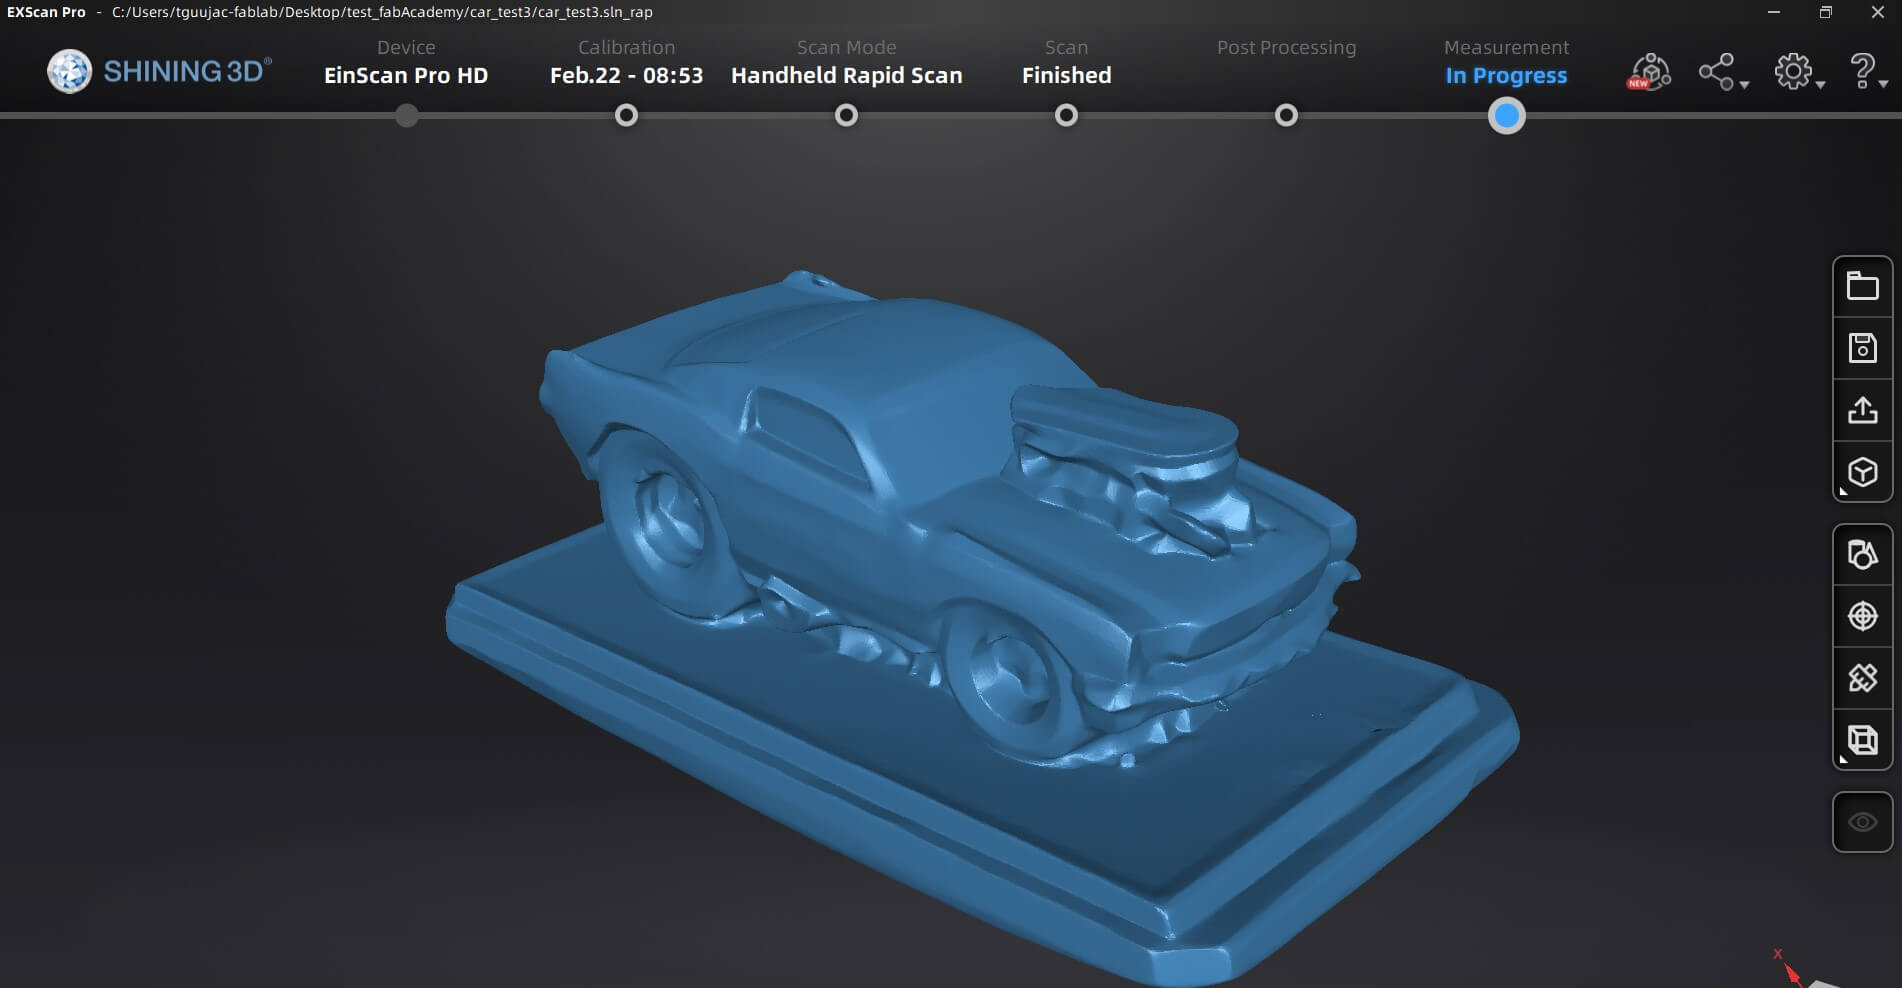
Here is a preview of the scan of the car.
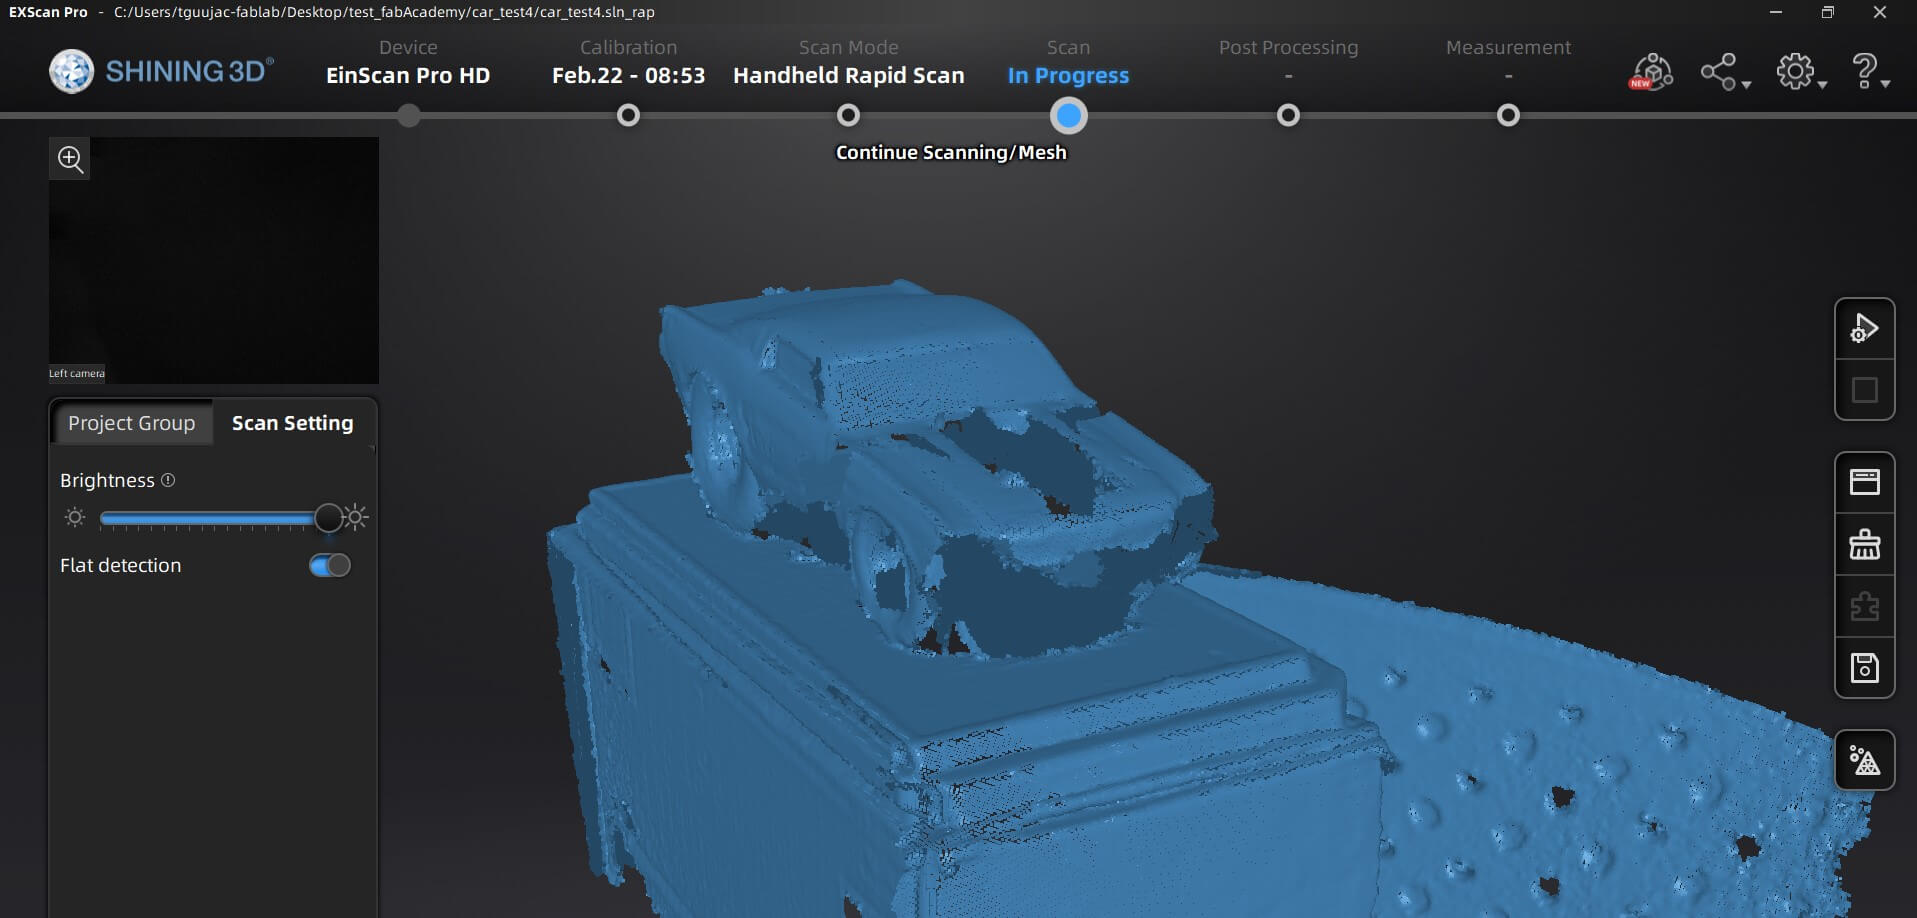
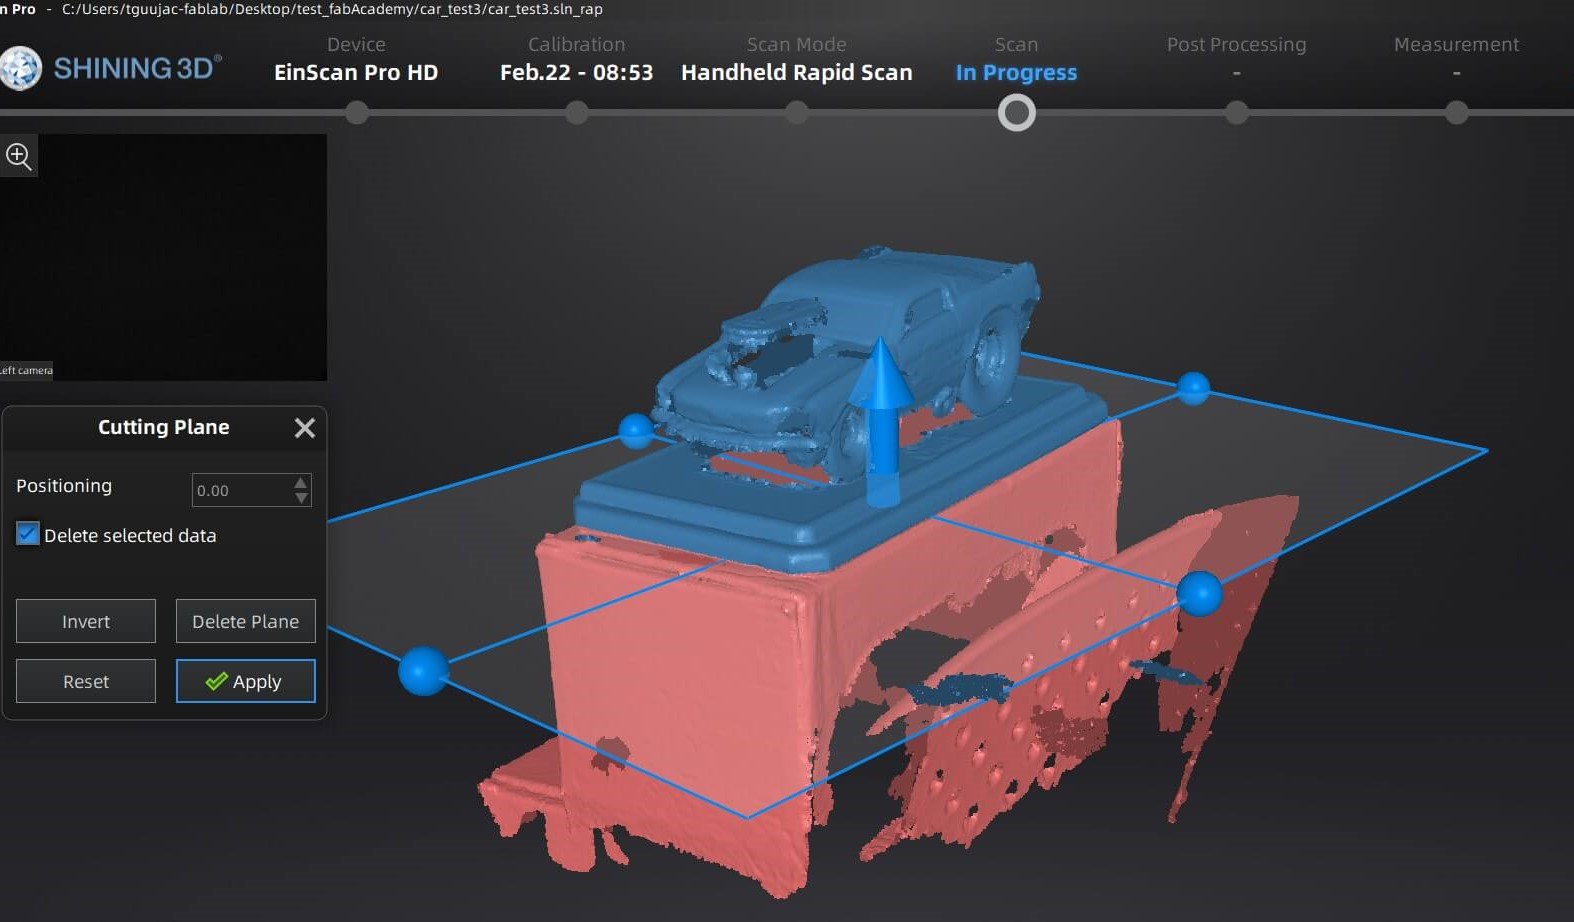
As you can see in this first test the scan loss some details of the car, but the same software has a lot of tools to improve the scan.
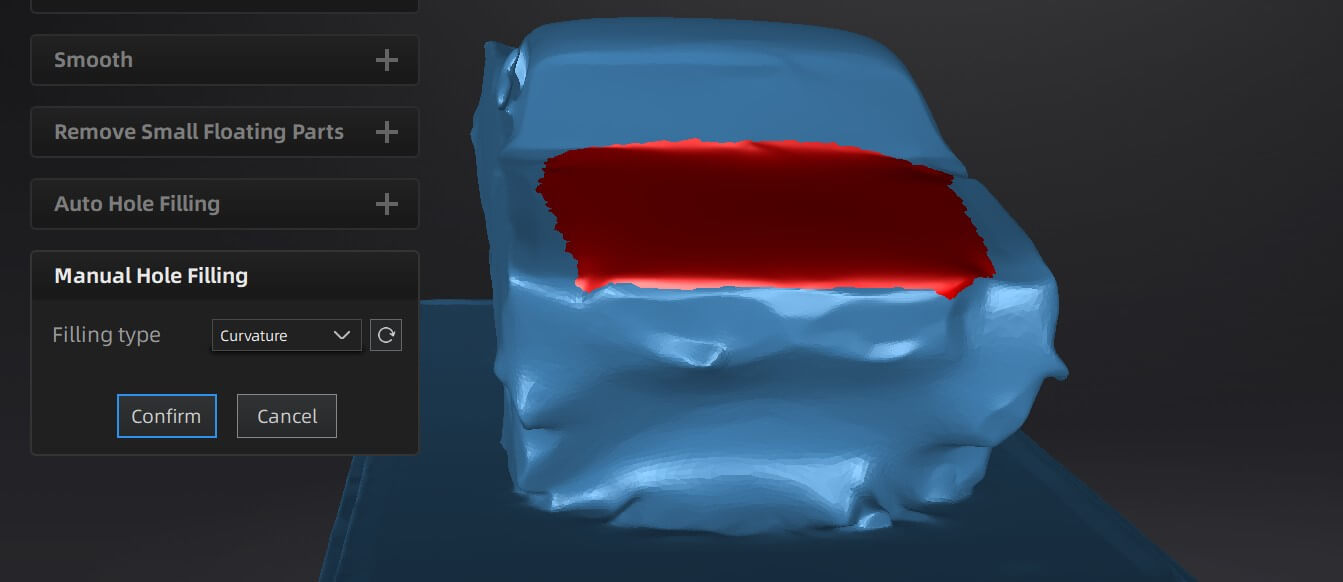
Options like fillin holes, smooth, and texture can help to improve the scan.
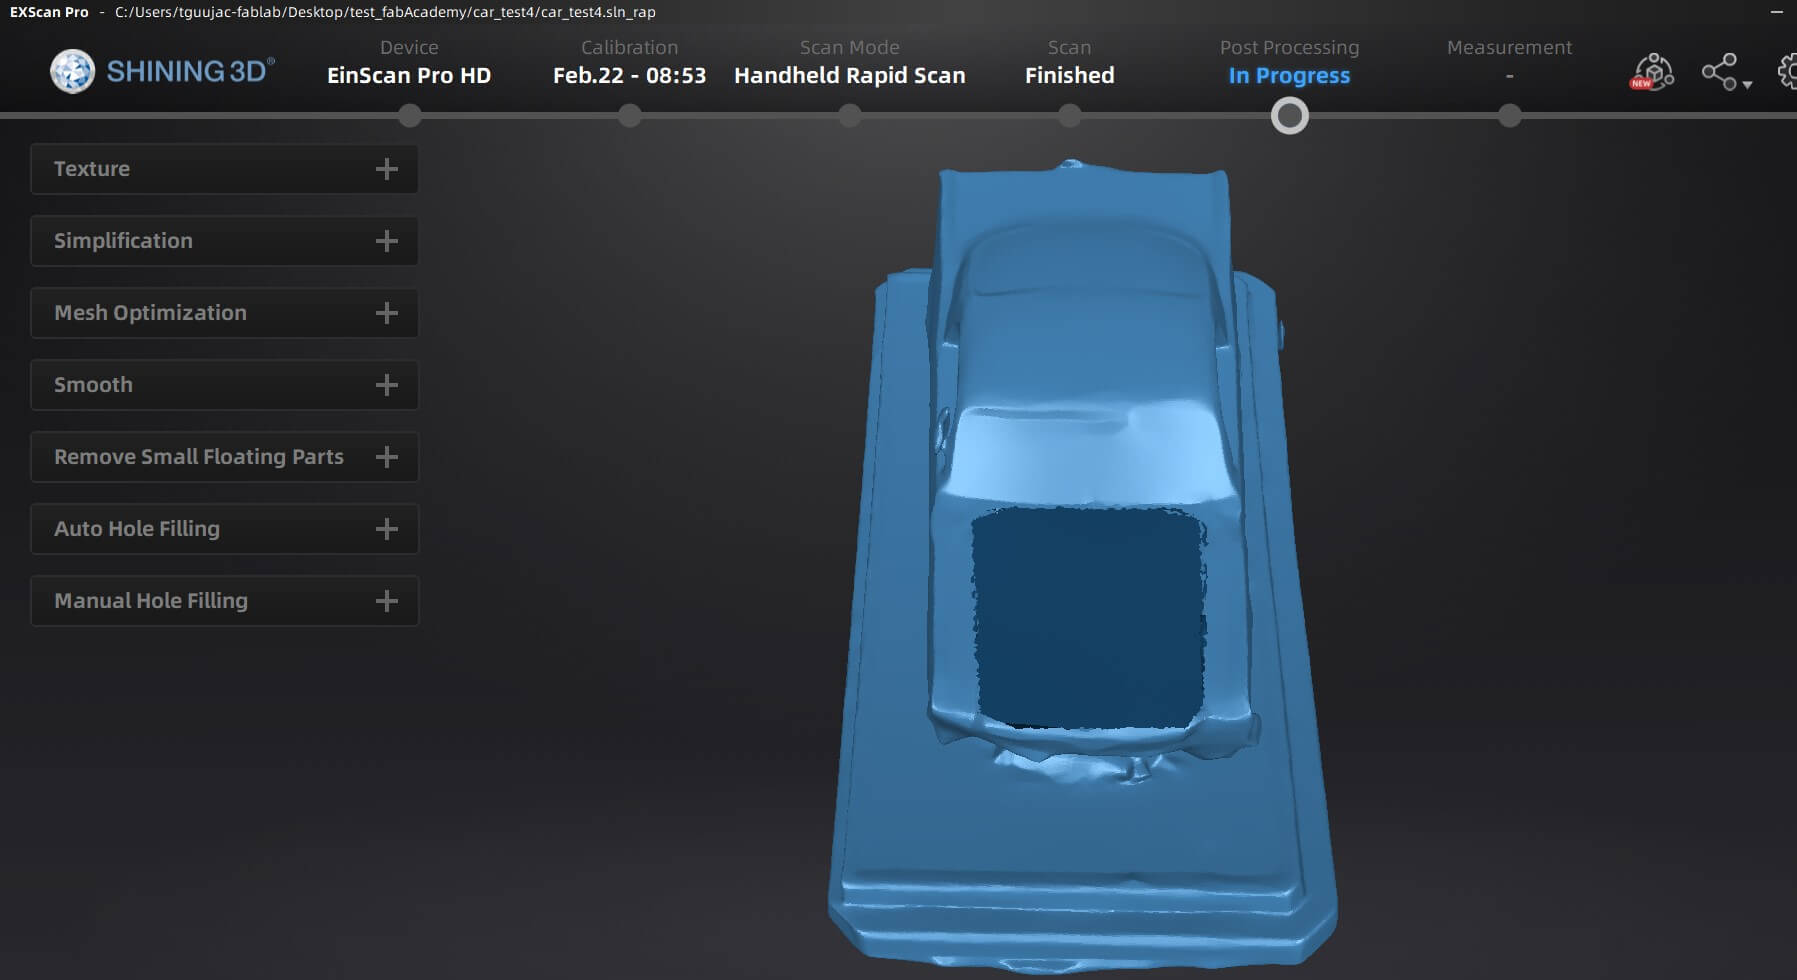
After using the tools to improve the scan, we can see that the scan is better than before.
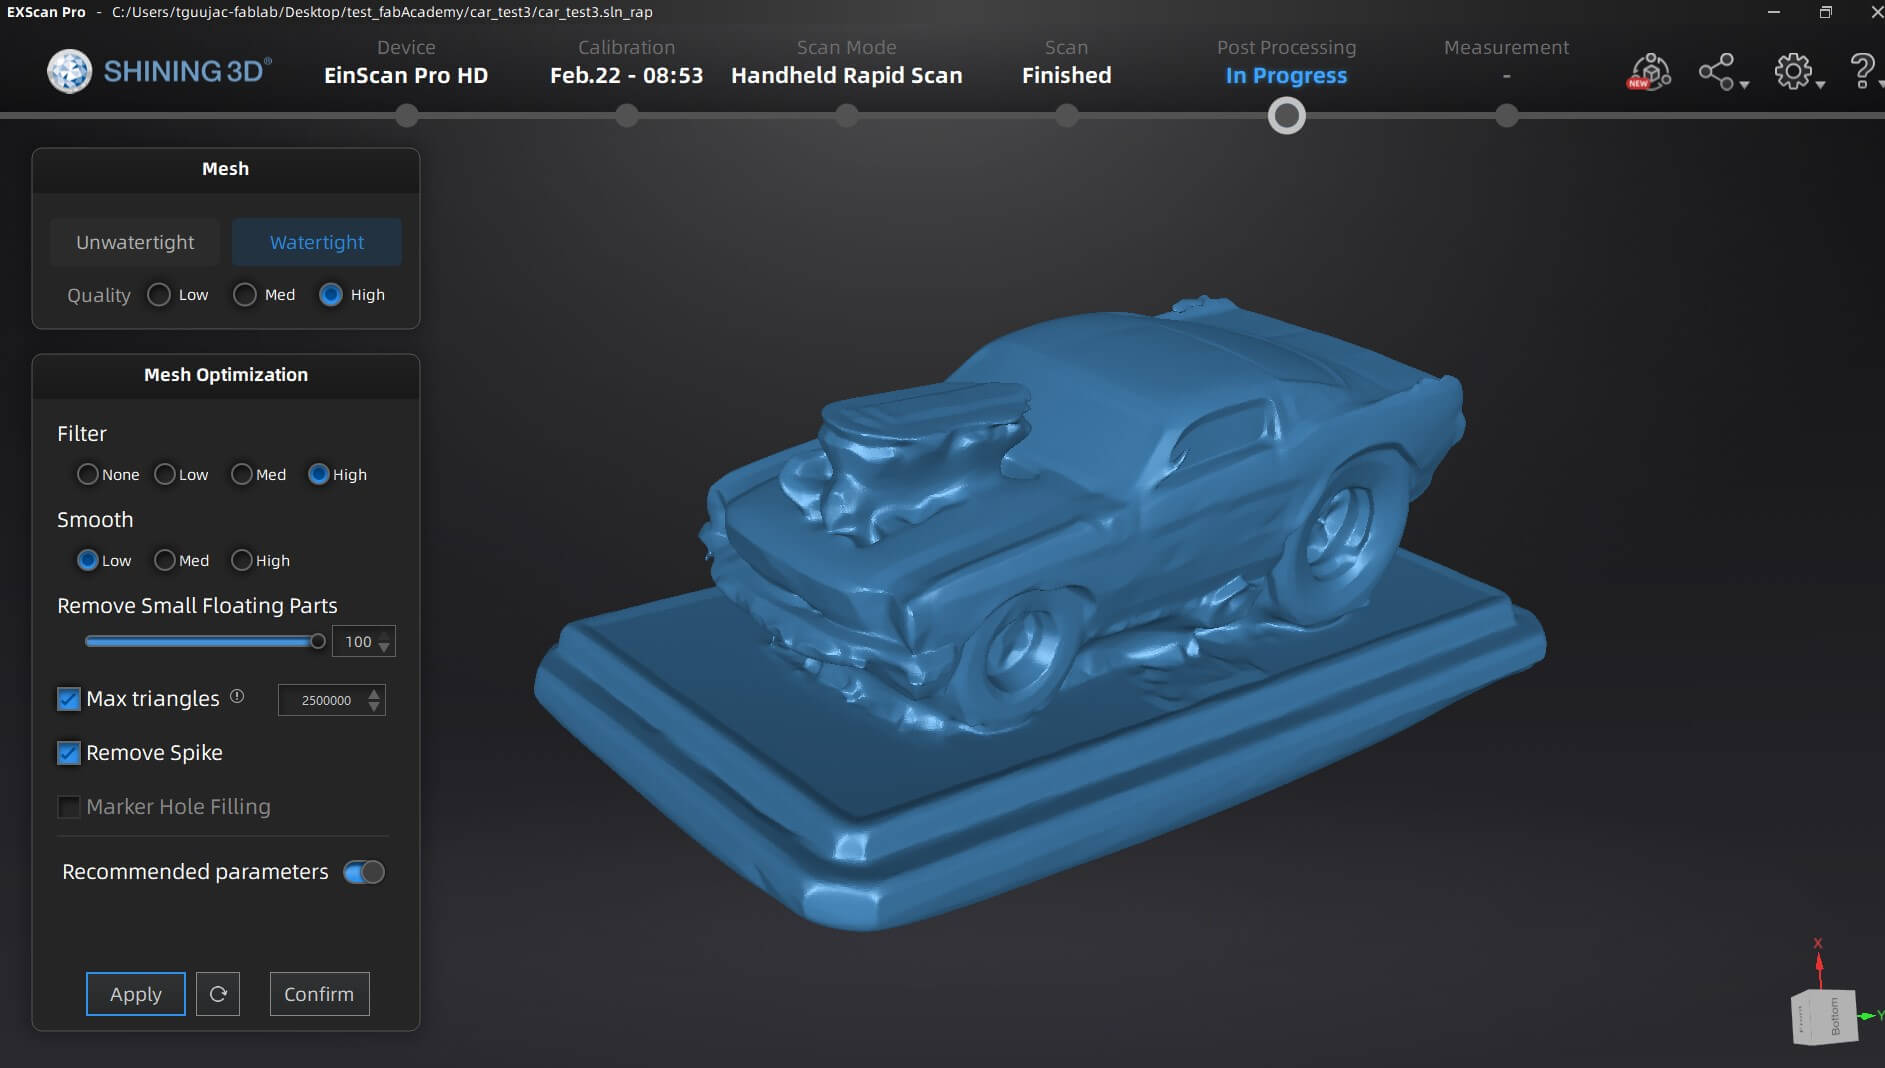
I made another scan of the car, this time I used the HD scan option to get a better scan of the car and capture more details.
The scan is better than the first one, and we can see more details of the car.
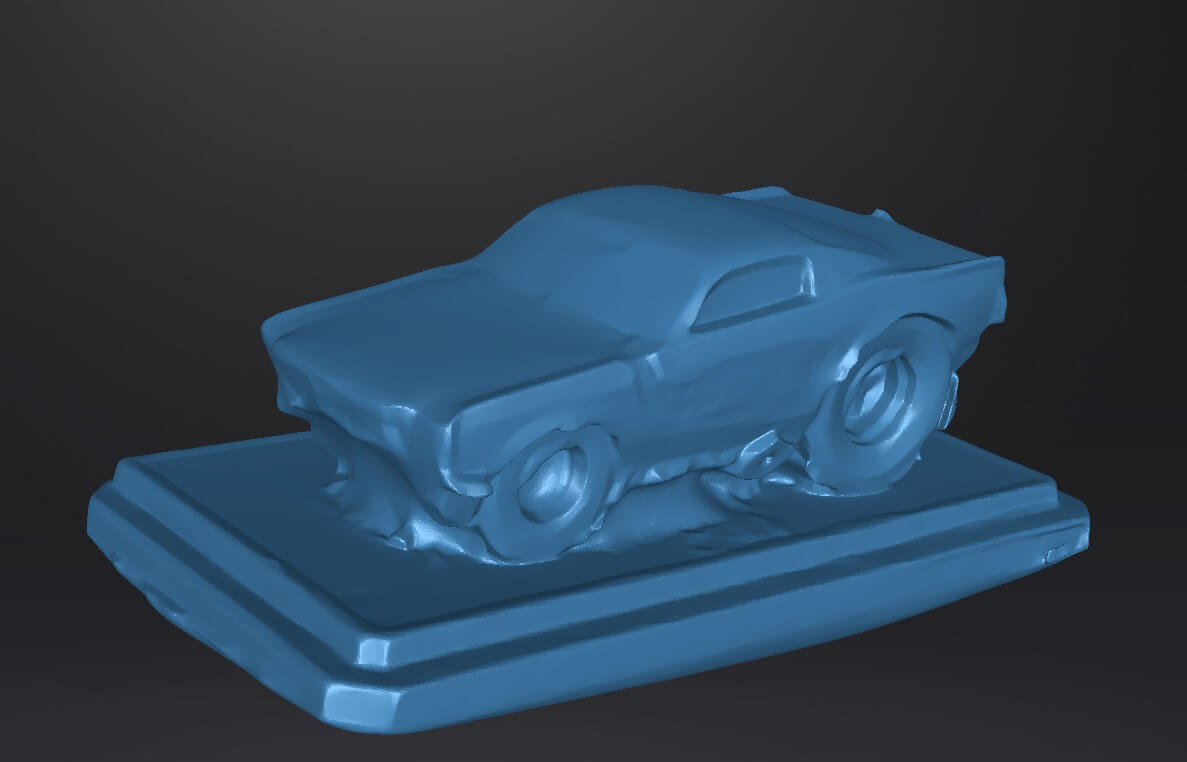
Adding the last filters and details, we can see that the scan is very good and we can use it to print the model.
The next step is to print the model, we need to use the same printer that we used to print the pokeball.
The model was printed with a layer height of 0.2 mm, a print speed of 50 mm/s, and a temperature of 200°C for the nozzle and 50°C for the bed. Also using the tree support structure to print the model.
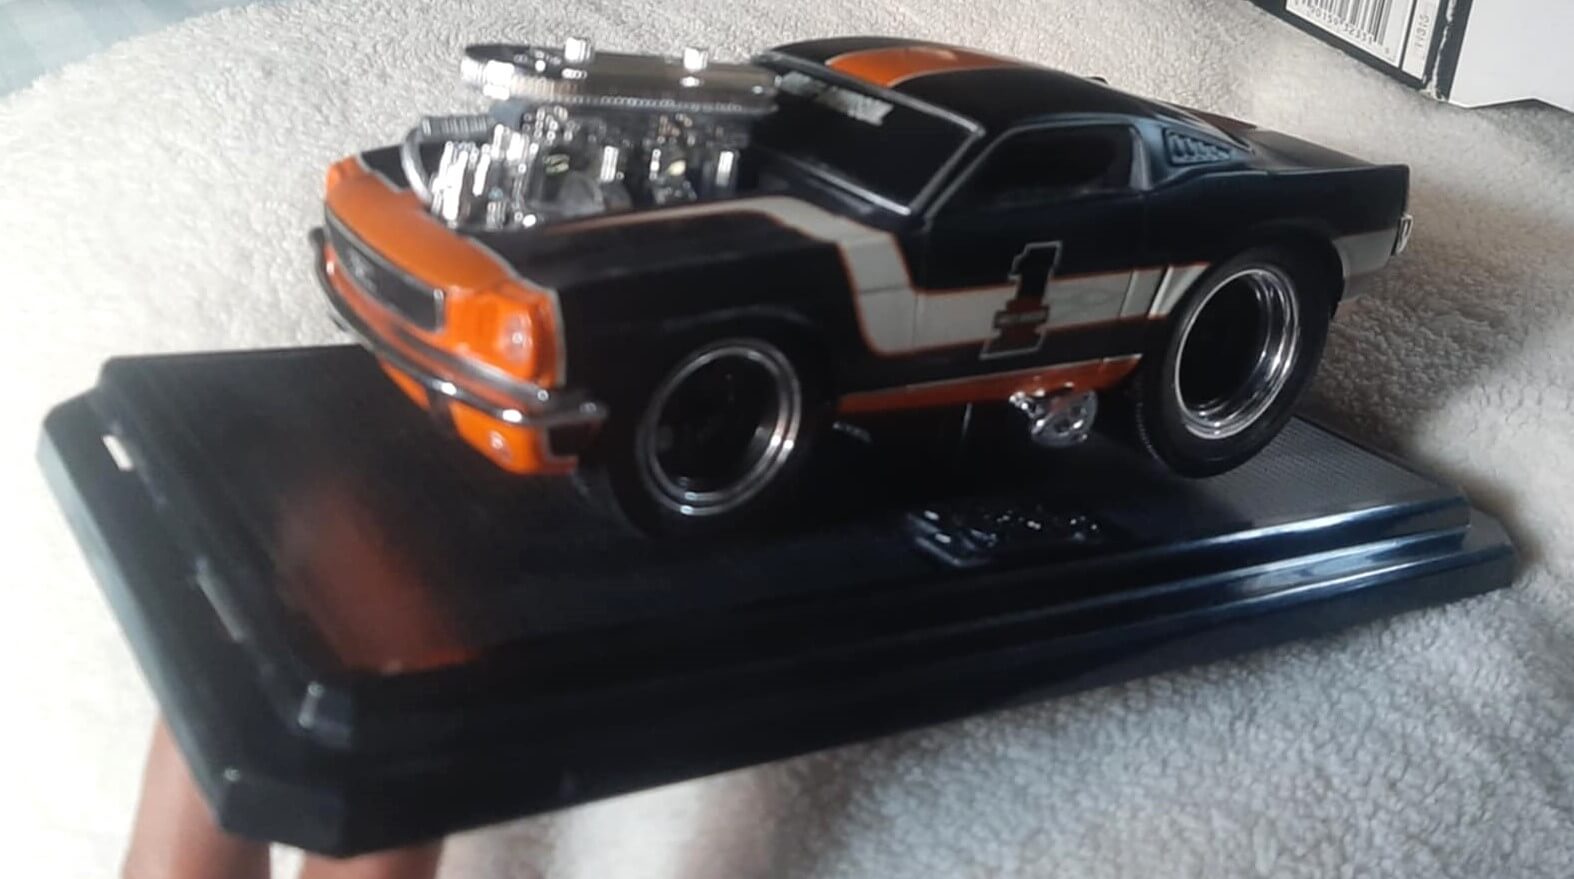
This is the final result of the model.
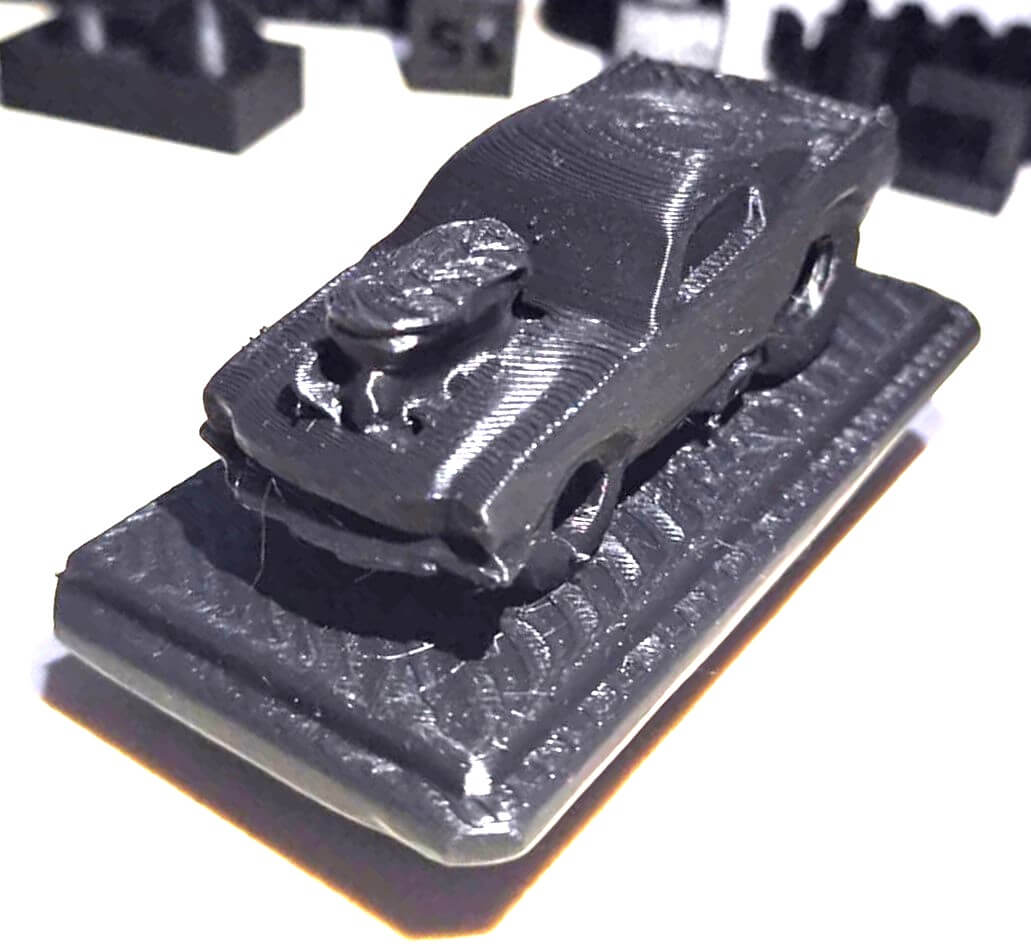
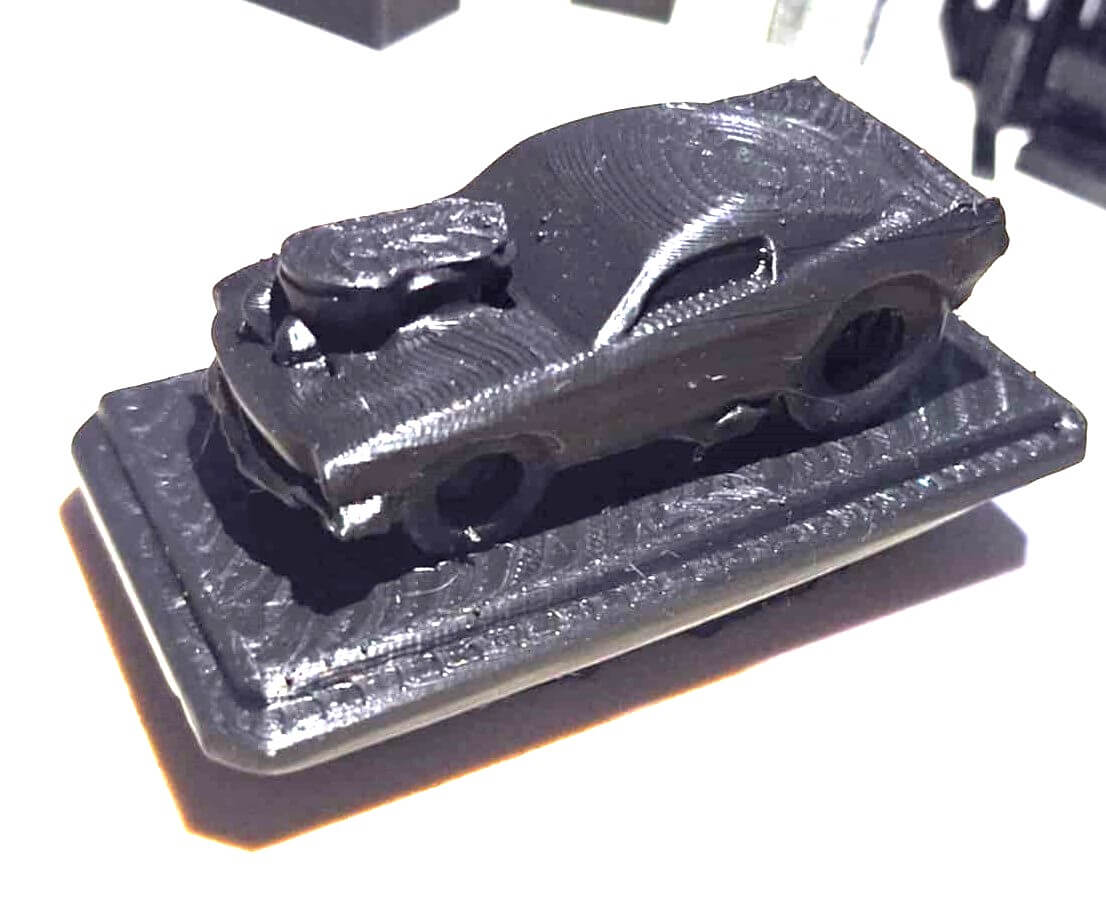
The model was printed successfully, and the details of the car are visible. I really like the result of the model, and I think that the scanner has a good resolution to scan the objects.
Project Files links
In the next links, you can download the files for the assignments.
Conclusion
By thoroughly testing the design rules, we ensure that our 3D printing projects are efficient, cost-effective, and of high quality. This process not only minimizes errors but also enhances our understanding of the printer's functionality, enabling us to push the boundaries of creativity and innovation in additive manufacturing.
This week's assignments provided hands-on experience with 3D printing and scanning technologies. By testing the design rules for 3D printing and creating complex models, we gained insights into the capabilities and limitations of additive manufacturing. The group assignment helped us understand the importance of design optimization for successful 3D printing, while the individual assignment allowed us to explore creative design possibilities using 3D scanning and printing. Overall, the assignments enhanced our skills in digital fabrication and provided a foundation for future projects in additive manufacturing.
Lessons Learned
Design Optimization: Understanding the design rules for 3D printing is essential for creating successful prints. By testing the design rules, we learned how to optimize our designs for specific printers and materials.
Resources