Group Documentation: Week 11, Group 1 (Tammi, Gillian, Hanna, Sierra S.)
Networking and Communications
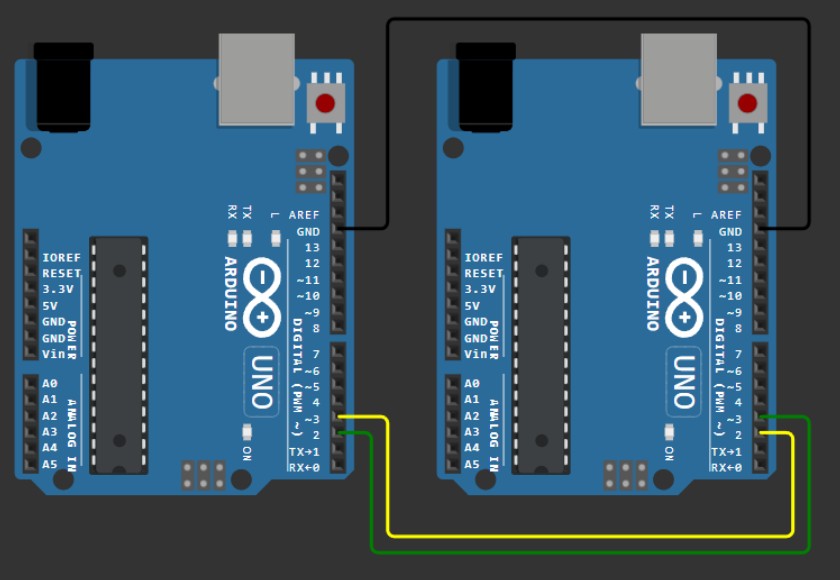
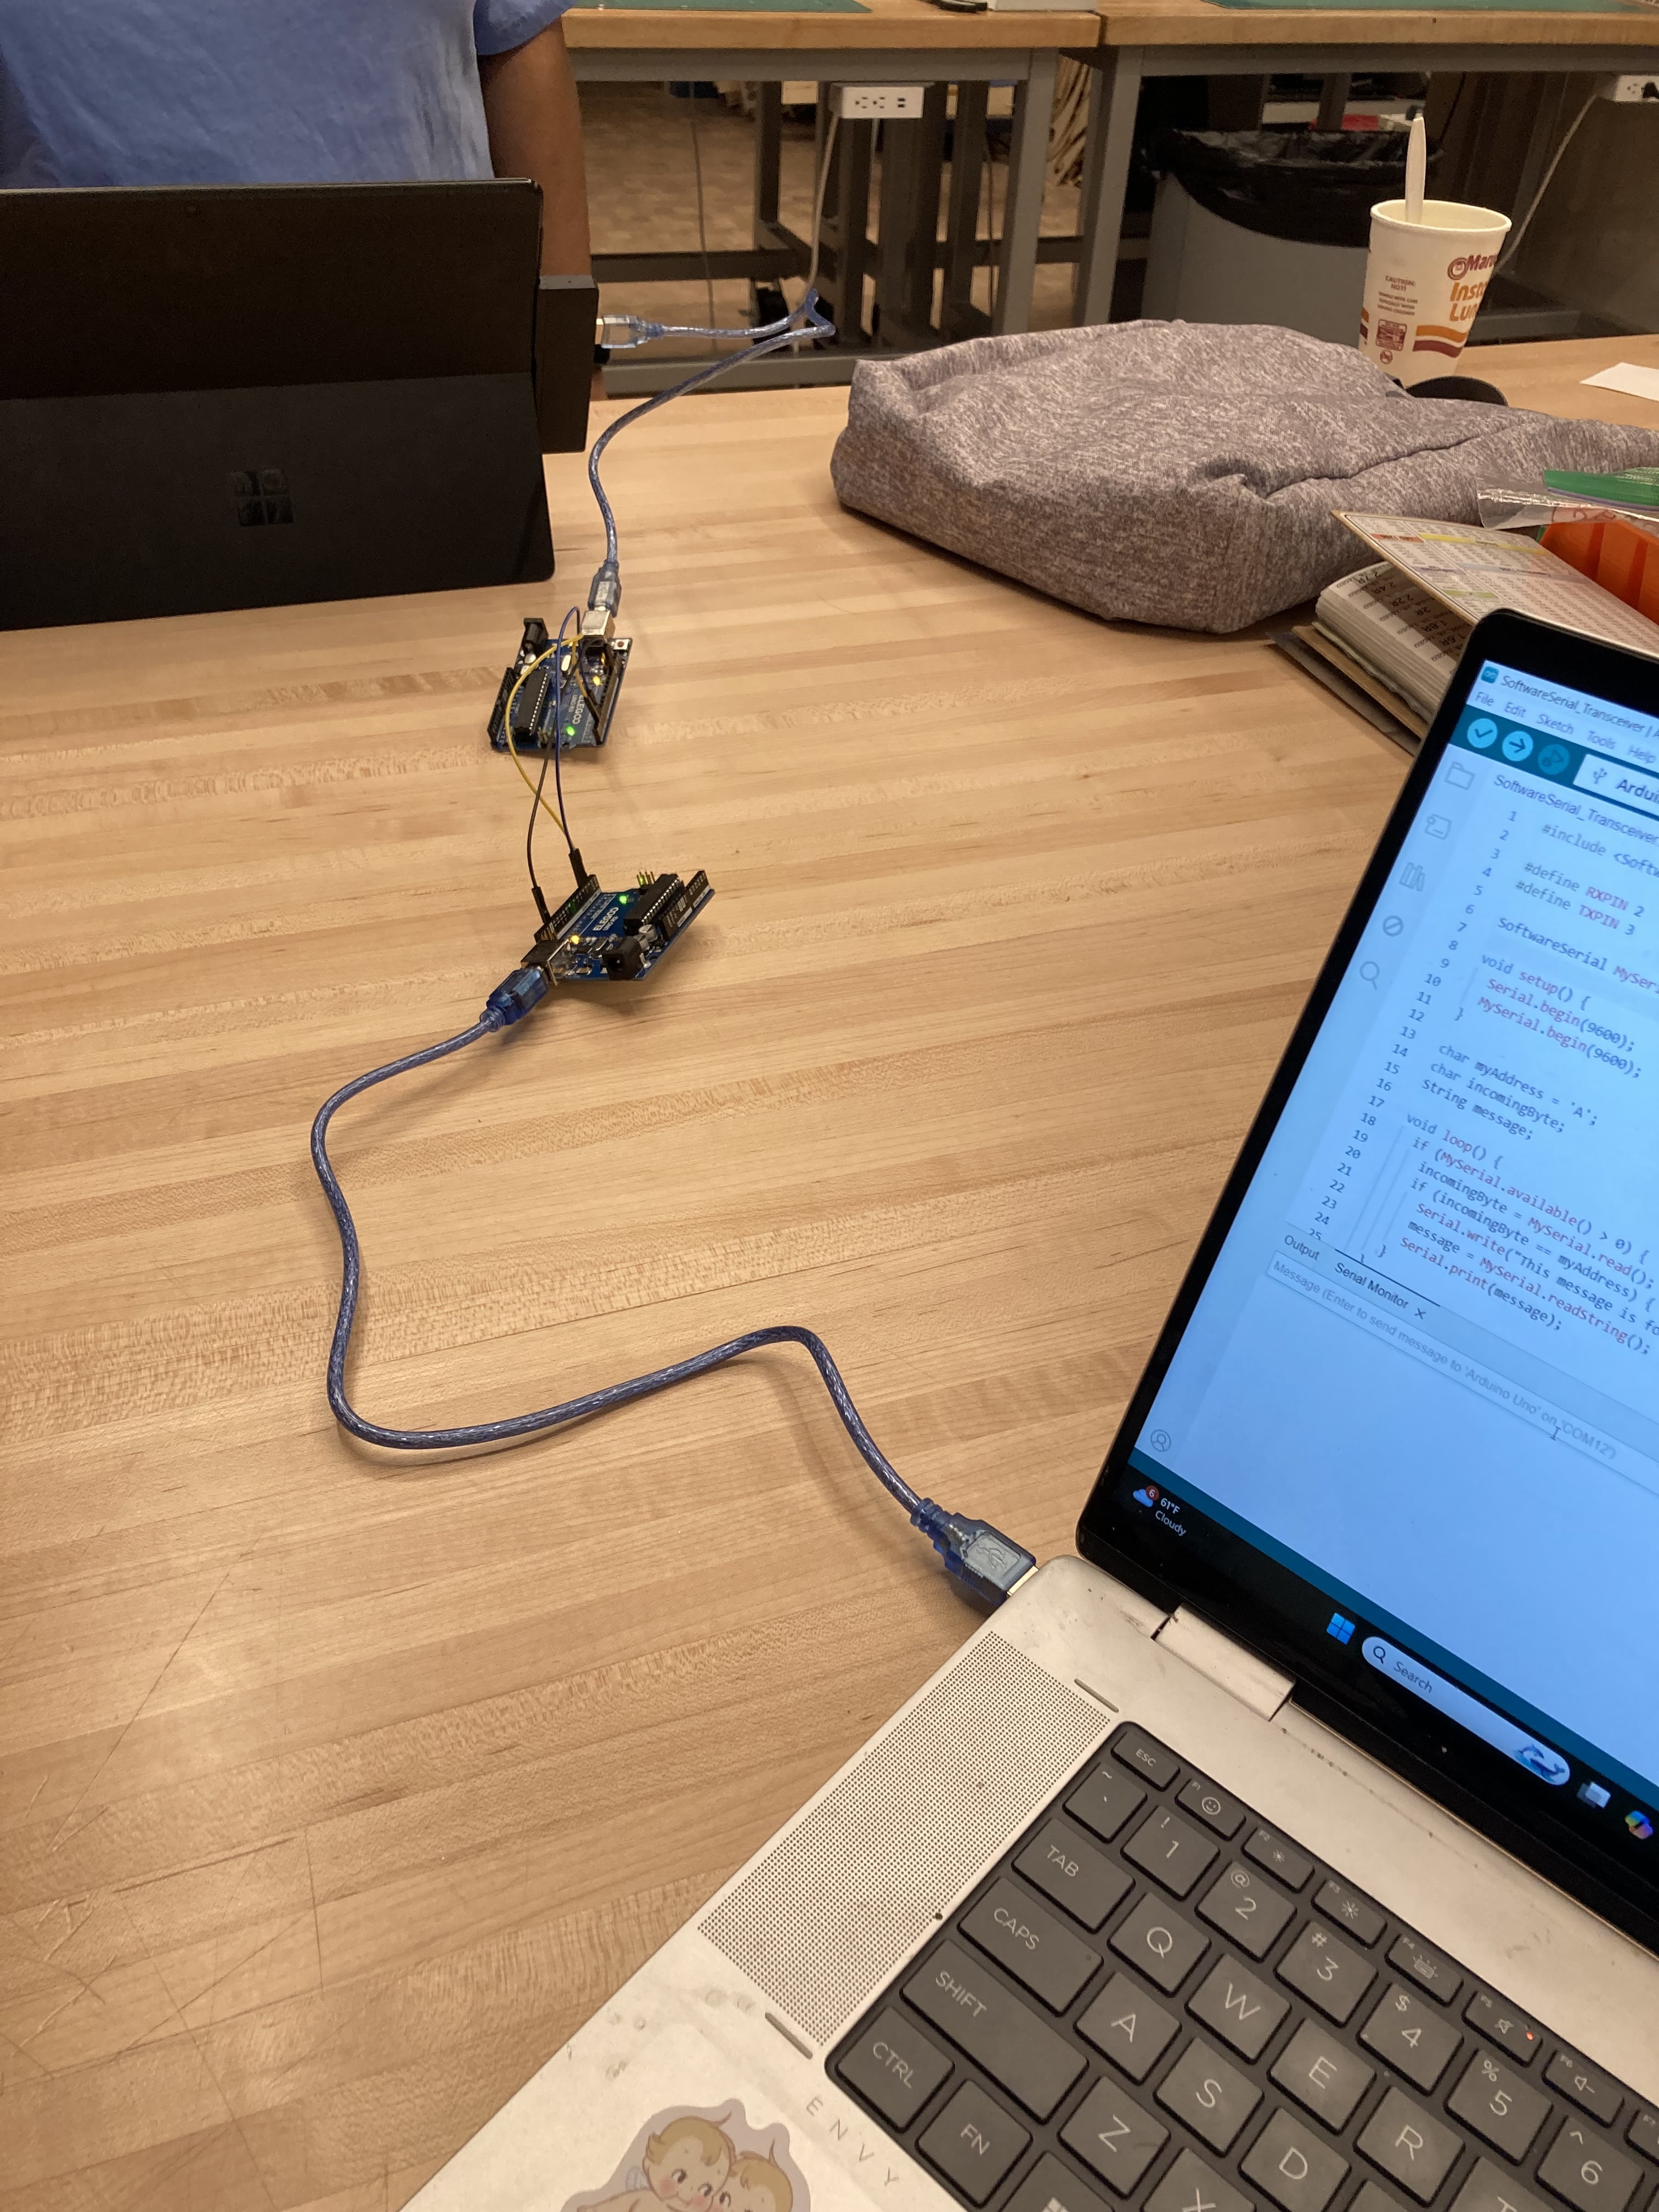
This week in the lab we learned to comminicate information between two projects. We connected two Arduino Unos together with each one connected to a different computer. Using the code below, the two computers could send and receive messages between each other. The code & diagram were provided by our local instructor, Jason Goodman. This type of communication is referred to as serial communication where data is sent bit by bit over a single line. For this type of communication we used the TX and RX pins on the Arduino Uno board. We crossed wires between the RX(receiver) pins and the TX(transmitter) pins. This allowed us to type messages to each other such as "Hello" and so forth back and forth between the two serial output panels in Arduino IDE.

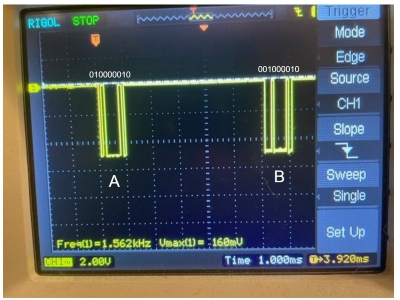
Examples of Serial Communication Outputs
We were able to see two different types of data outputs from the serial communication between boards. One type was revealed in the serial output panel within the Arduino interface and the other was a data output on an oscilloscope.
Communication between a raspberry pi pico & a computer using a bluetooth connection
The above was an example of communication between 2 devices. But what about communication between a pico and a desktop without any wires? We used a raspberry pi pico W for its Wifi capabilities for this activity. In Arduino IDE Tools Menu:
- Choose Raspberry Pi Pico W
- IP/Bluetooth Stack: IPV4+Bluetooth
            #include

              void setup() {
                SerialBT.setName("Xiao RP2040 JCG 00:00:00:00:00:00");
                SerialBT.begin();
                pinMode(LED_BUILTIN,OUTPUT);
              }

              void loop() {
                while (SerialBT) {
                  while (SerialBT.available()) {
                    char c = SerialBT.read();
                    c = toupper(c);
                    SerialBT.write(c);
                    digitalWrite(LED_BUILTIN,HIGH);
                    delay(5);
                    digitalWrite(LED_BUILTIN,LOW);
                    delay(20);
                  }
                }
              }
This code sends back text sent from the serial monitor back in uppercase.
For users who want to connect, do the following steps:
- In System Settings, open Bluetooth
- Look for a bluetooth device with a name like “Xiao RP2040 XXX XX:XX:XX:XX:XX”. Click Connect button
- In Arduino IDE, you should now see a new serial port /dev/cu.XiaoRP2040XXXXXXX…
- Use the Serial Monitor to send and receive text from your Pico!