Introduction
This week was different from the previous individual assignments because the main work was completed as a group machine-building project. Our team worked on a pen plotter machine, which is a drawing machine that moves a pen across a sheet of paper using controlled motion.
For my individual contribution, I focused on testing the machine and reporting problems back to my group. I was not the main person designing the mechanical parts or writing the main control software. Instead, my role was closer to quality control. I tested the plotter as a user, observed weak points, and wrote down problems that affected reliability, safety, and usability.
Assignment Context
The goal of Machine Building Week was to work as a team to design, build, actuate, and automate a machine. For our group, the machine was a pen plotter that could move a pen over paper and create drawings.
My page documents my own contribution instead of repeating the full group page. The complete design files, build process, and machine operation are documented on the group assignment page.
Machine week source / project page:
https://academany.fabcloud.io/fabacademy/2026/labs/hisar/site/
Project Overview
The machine we worked on was a pen plotter. A plotter is basically a drawing machine. Instead of printing like a normal ink printer, it moves a pen over a sheet of paper.
The plotter needed to do three main things:
- Move in the X direction
- Move in the Y direction
- Lift and lower the pen
Pen Systems:
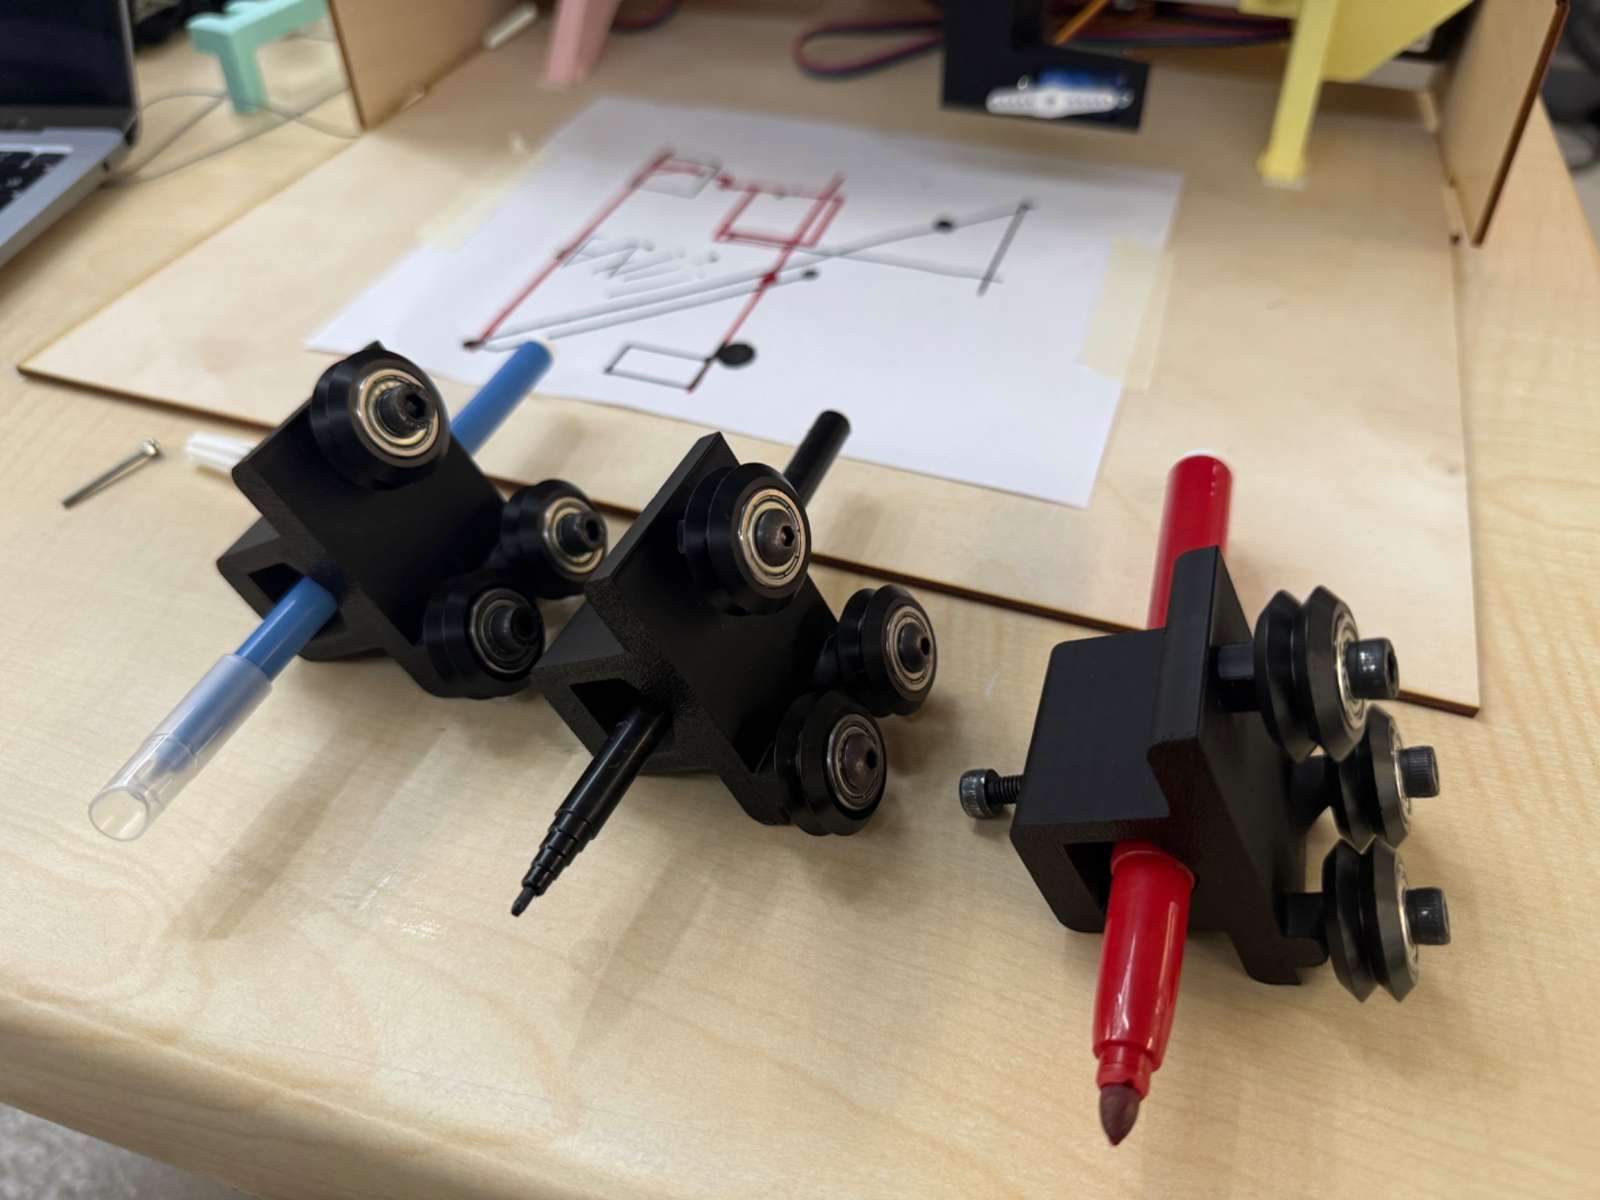
The control side of the machine included a webpage that could send commands to the plotter. This made testing easier because the user could control the machine through an interface.
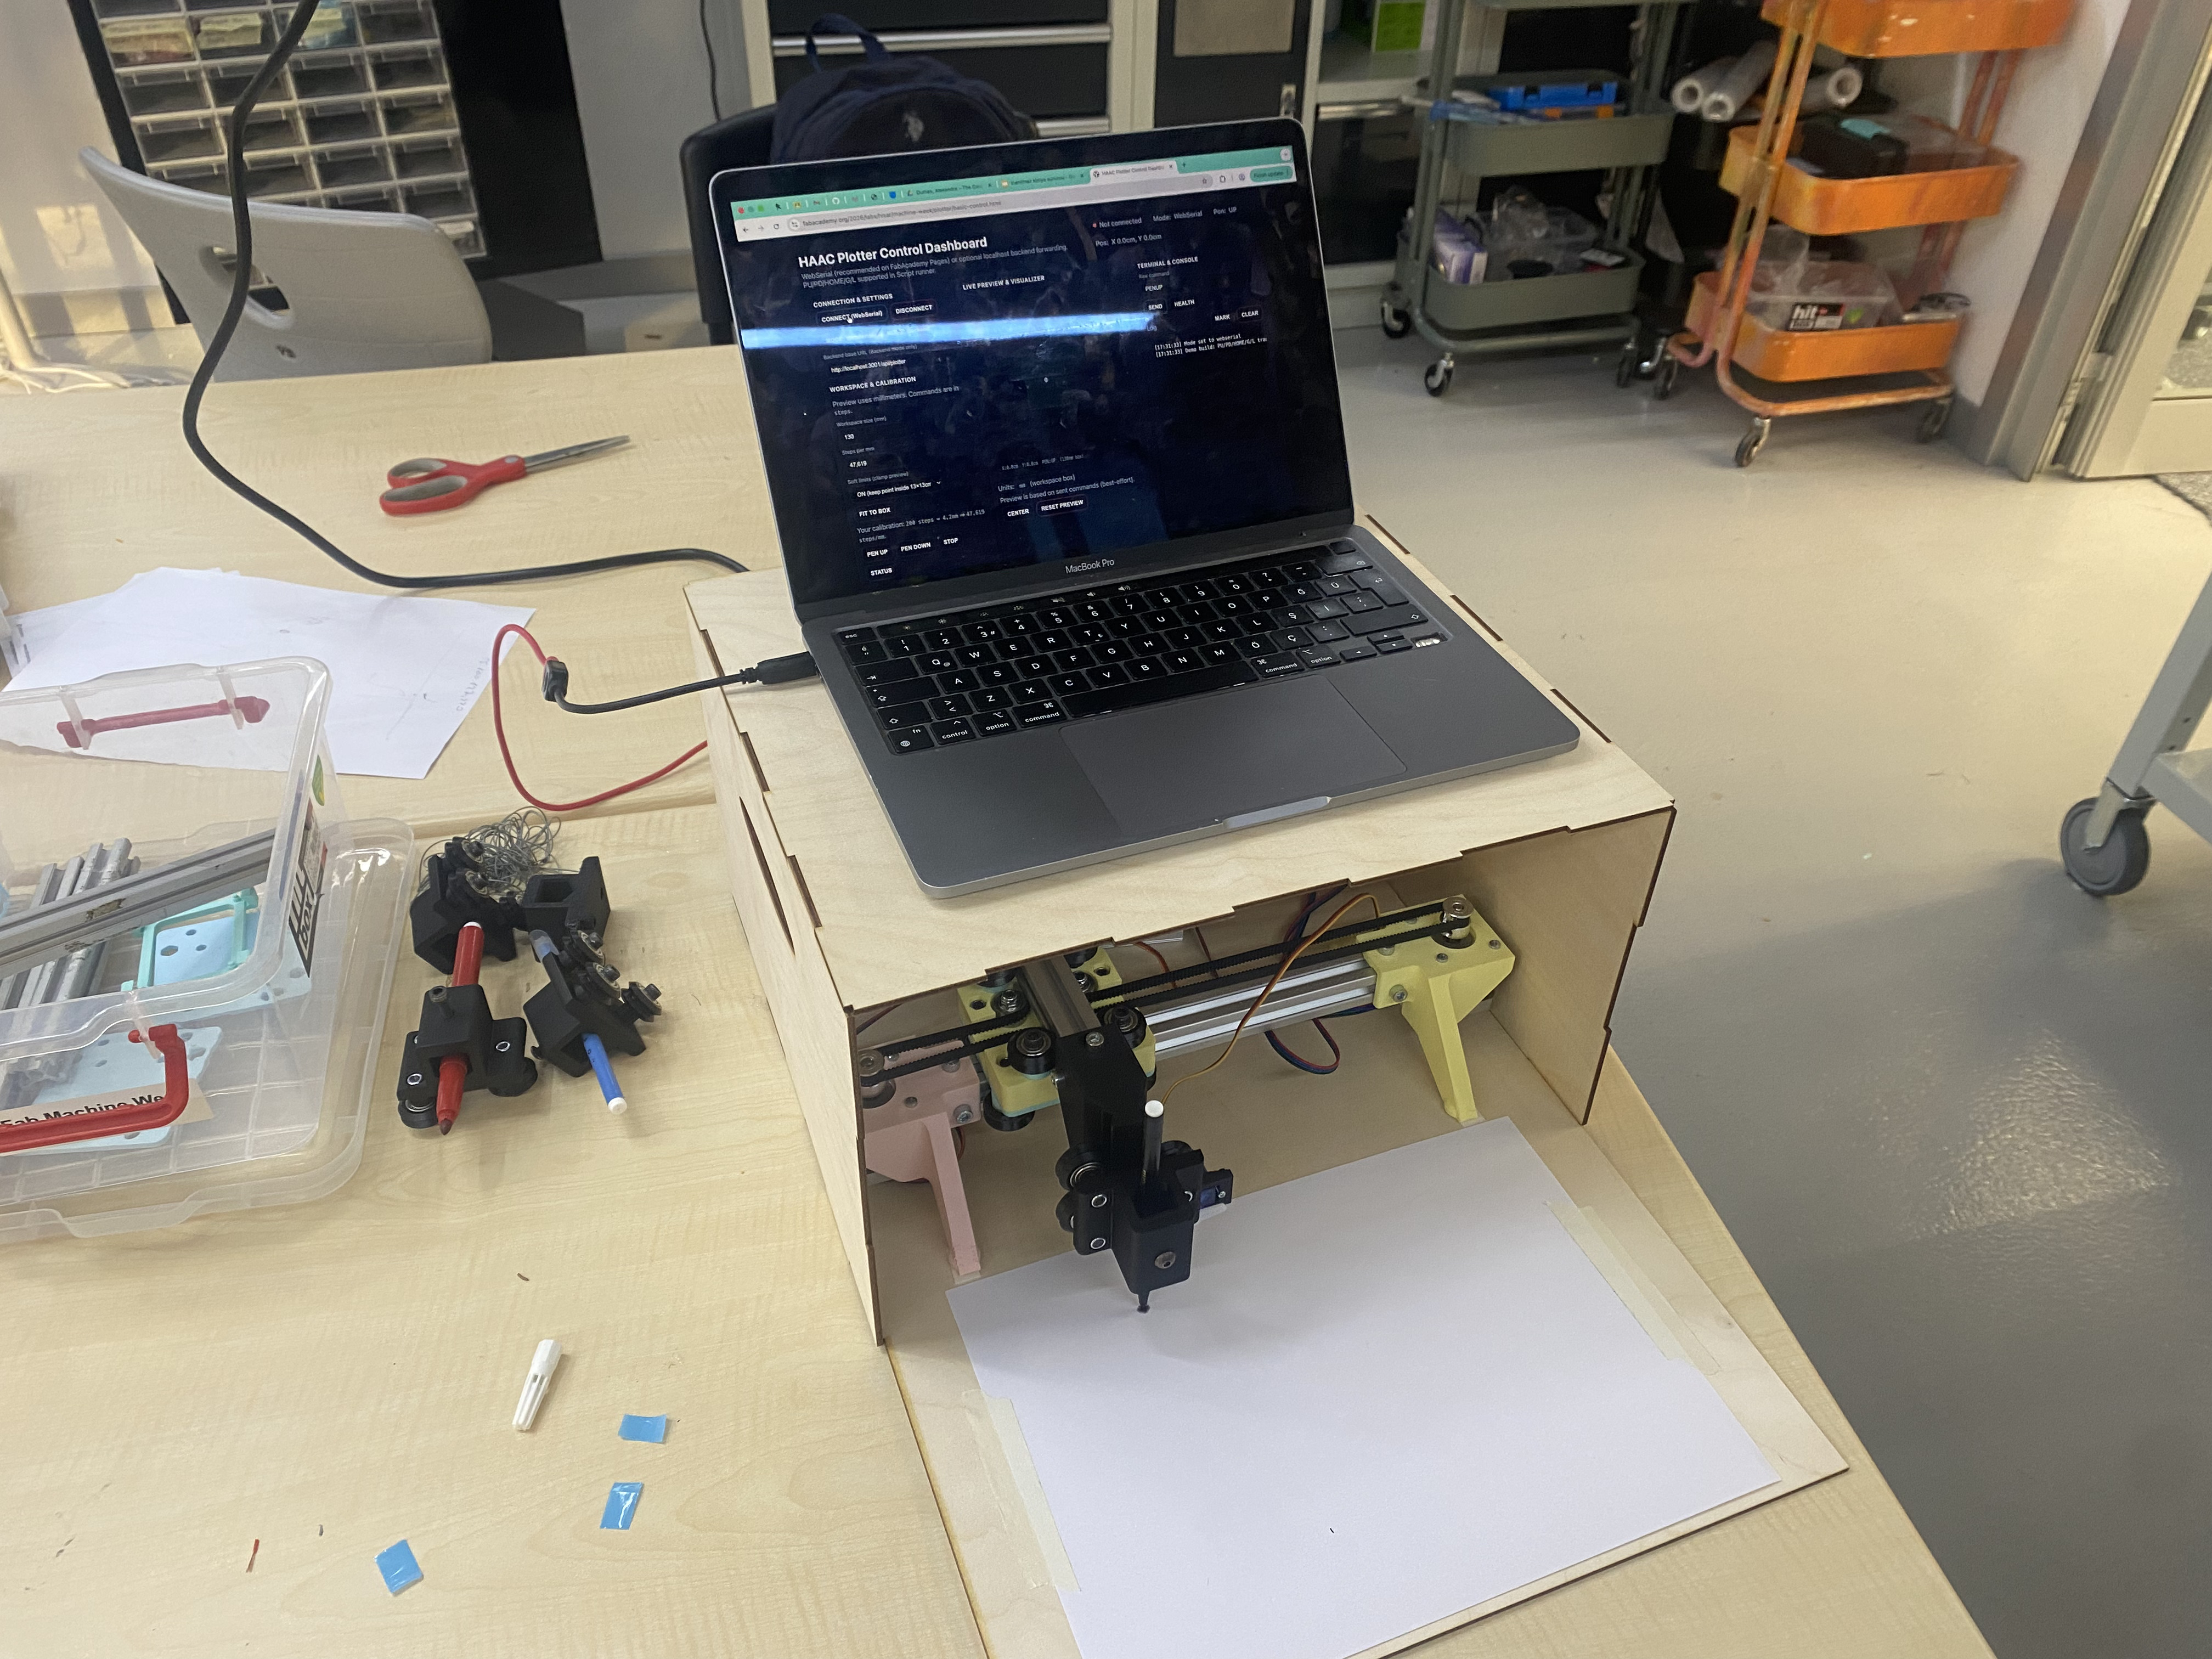
Hero Shot:
My Individual Contribution
My contribution this week was testing and reporting problems.
During the project, I tested the machine from the perspective of someone trying to operate it. This was different from only looking at the machine as a builder. I focused on what could go wrong during real use and what parts of the system made the machine harder to control or less reliable.
A video from one of my tests:
(A small but important thing is that the paper should be taped down perfectly, small bumps come in contact even when the pen machanism is up, creating a messy look.)
I mainly found problems in four areas:
- the control webpage
- the physical casing
- the internal wiring
- the lack of physical limit switches
I reported these issues to my group so they could be considered for improvements.
I think this role was useful because machine building is not only about making the motors move. A machine also needs to be understandable, safe, repeatable, and strong enough to survive normal operation.
Example Test Drawings:

Testing Method
I tested the plotter in several ways instead of only checking whether it could draw once.
Interface testing
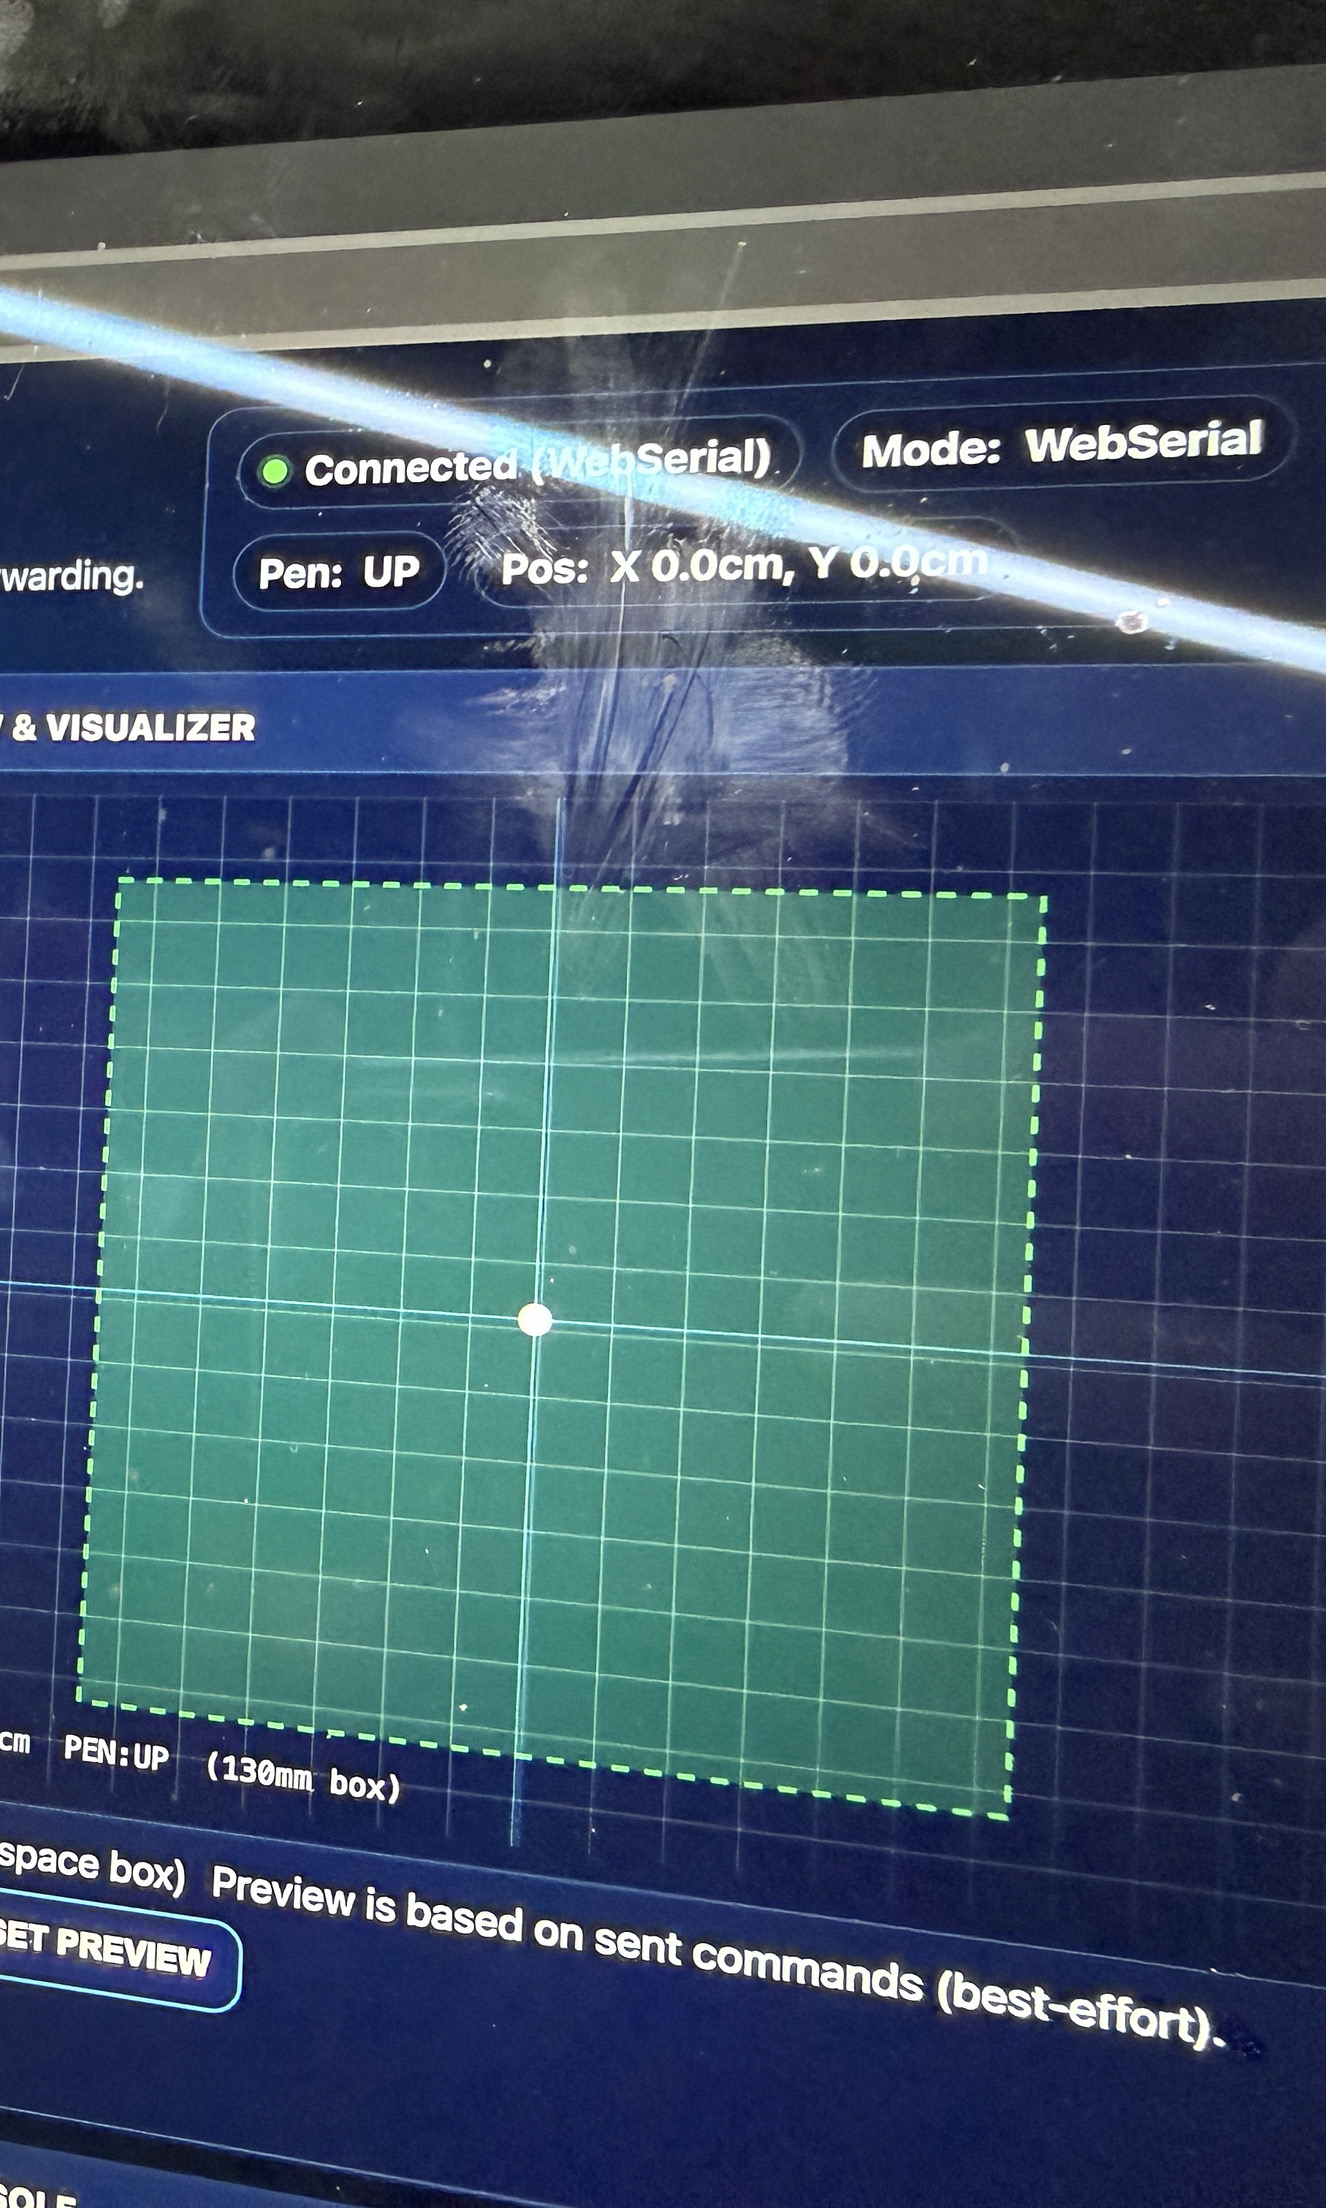
First, I looked at the control webpage and checked whether it gave the user enough control over the machine. I focused on whether the interface made it easy to start, reset, recover, and position the plotter.
Mechanical inspection
Then I inspected the physical structure of the machine. I checked whether the casing felt strong, whether the joints were holding properly, and whether the frame seemed rigid enough for a moving mechanism.
Wiring inspection
I also checked the wiring inside the plotter while the machine was moving. This was important because wires inside a moving machine are not passive. If they are not secured, they can move, pull, disconnect, or break.
Error-condition testing
Finally, I thought about what would happen if the machine made a mistake. For example, if the software lost track of position or if an axis moved too far, the machine needed a way to stop before damaging itself.
Problems I Found
Problem 1 - The control webpage did not have home or set-home buttons
One of the first problems I noticed was in the control webpage. The interface allowed the plotter to be moved, but the version I tested did not have clear buttons for setting the home position or sending the machine back home.

This is a usability problem because the operator needs a clear reference point before starting a drawing. If the machine does not know where its origin is, the drawing can start in the wrong place, go outside the paper area, or crash into the edge of the working area.
It also makes error recovery harder. If something goes wrong during a test, the user should be able to quickly reset the coordinate system instead of guessing where the machine thinks it is.
Suggested improvement
I suggested that the webpage should include controls such as:
- Set Home
- Go Home
- Reset Position
- Stop
User Friendliness:
A small position display makes the interface clearer because the user could see the current X and Y position before sending a drawing job.
Problem 2 - The axes did not have physical limit switches
The most important safety problem I noticed was the lack of physical limit switches on the axes.
The plotter could move, but if a software error happened or if the machine lost track of its position, there was no physical switch to tell the machine that it had reached the end of travel. This means the motors could keep pushing even when the axis was already at its mechanical limit.

When that happens, the motors can be placed under extreme load. Even if nothing breaks immediately, this is not a safe or reliable way to operate a machine.
Suggested improvement
I suggested adding physical limit switches to the axes. Ideally, the machine should have:
- one limit switch for the X home position
- one limit switch for the Y home position
- firmware support for a homing routine
- emergency stop behavior when a limit is triggered unexpectedly
This would make the machine much safer and easier to use.
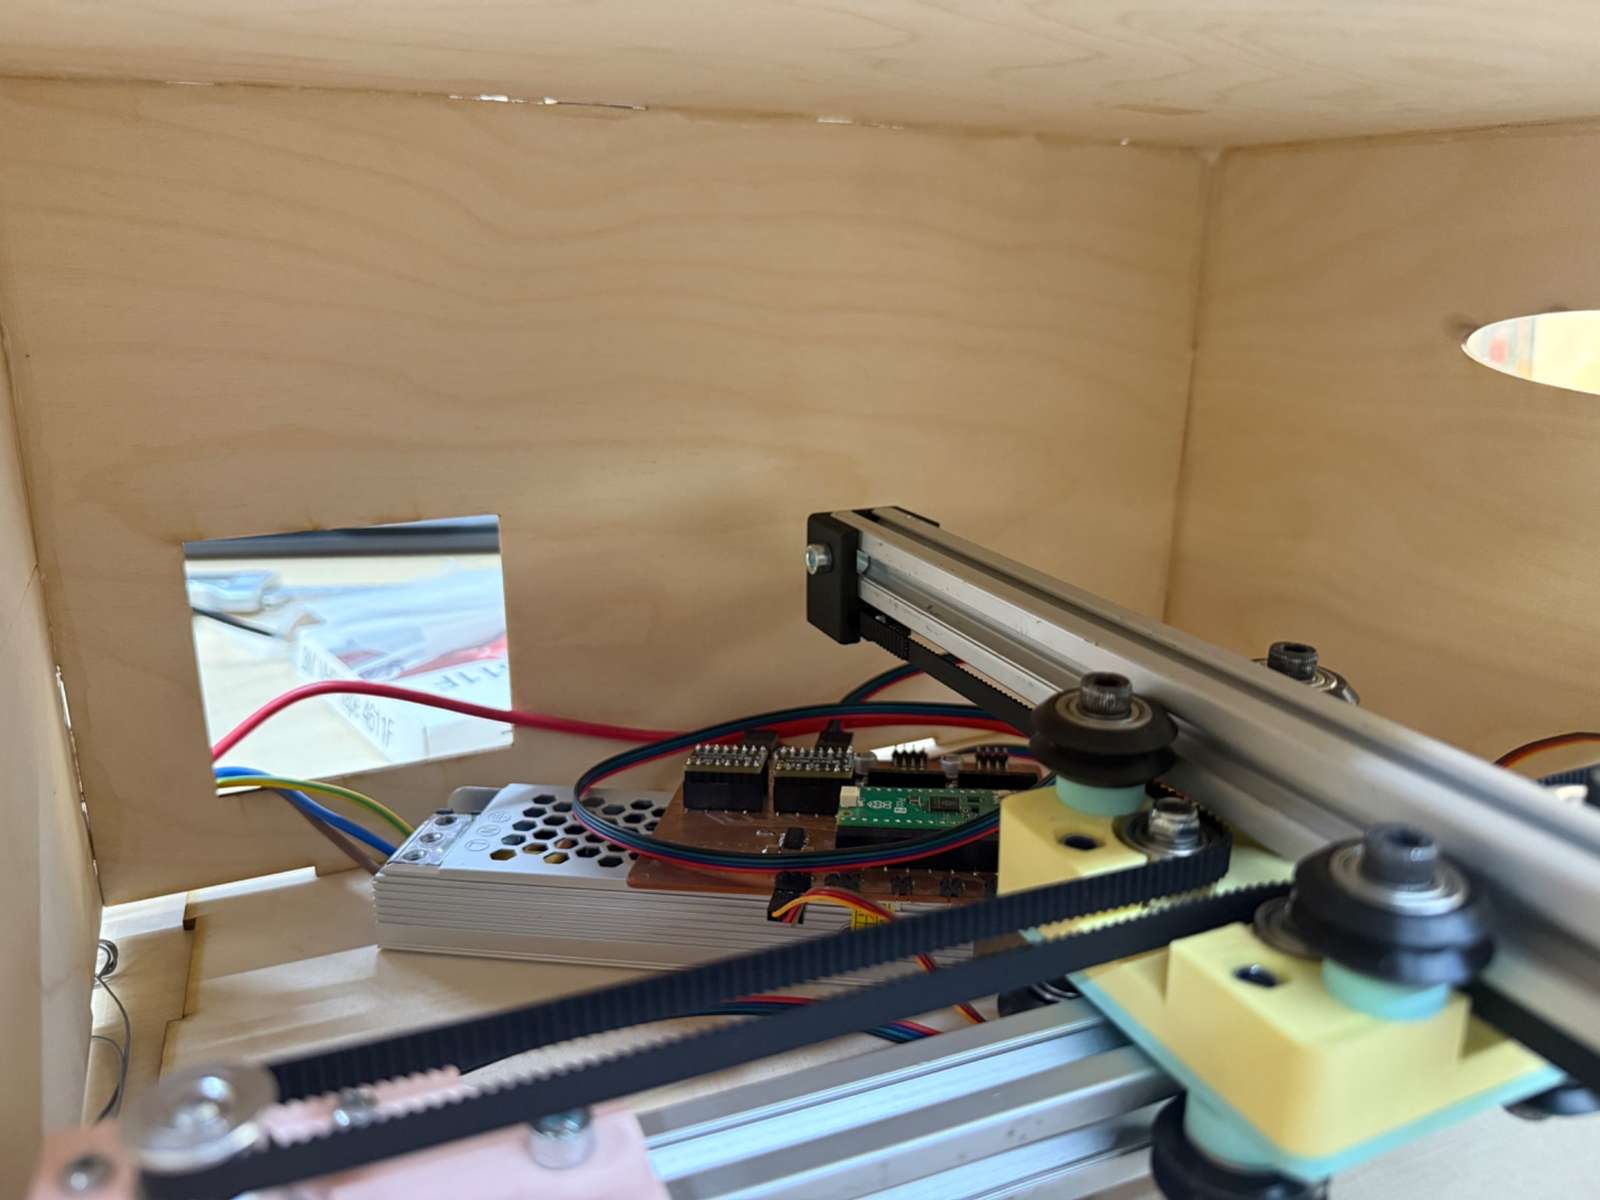
Problem 3 - The internal wiring was mixed up and moved during operation
The wiring inside the plotter was another issue I noticed. Some wires were mixed together and were not fixed properly to the structure. When the plotter moved, some internal components and wires also moved. In some cases, this could pull or stress the wiring.
This is dangerous for reliability because a moving wire can create communication problems. The machine might work once, then fail later because a wire became loose or broke. These problems are also difficult to debug because they can appear and disappear depending on the position of the moving parts.
Why this matters
Basically messy wiring can cause:
- broken wires
- loose connections
- components shifting inside the casing
- wires getting caught in moving parts
- inconsistent behavior during tests
Suggested improvement
I suggested organizing the wiring more intentionally. The improvements could include:
- cable ties
- labels on wires
- a fixed electronics area
- cable channels
- tape or clips to hold wires to the frame
- a drag chain or flexible cable guide for wires that need to move
This would make the plotter cleaner, safer, and easier to repair.
Problem 4 - The casing was weak and the joints lacked physical integrity
Another problem I found was related to the casing of the plotter. The casing helped the machine look more complete, but some parts of the structure felt weak. Some joints did not feel secure enough for a machine with moving parts.

If the casing flexes, shifts, or becomes loose, the motion system can lose accuracy due to the misaligned casing which would collide with the mechanism. Even a small movement in the casing can technically affect the path of the pen.
The casing is not only a visual part. It becomes part of the machine’s structure. If the structure is weak, the machine can still move, but it will not be reliable.
Suggested improvement
For the next version, I suggested making the enclosure stronger by improving the joint design. Possible improvements include:
- stronger press-fit tabs
- screws or bolts at corners
- corner brackets
- thicker material
- cross braces
- glue only where the machine does not need to be disassembled
- better tolerances for laser-cut joints
Summary of My Testing Report
| Area tested | Problem found | Why it matters | Suggested improvement |
|---|---|---|---|
| Control webpage | No clear home or set-home controls | Makes positioning and recovery difficult | Add Set Home, Go Home, Zero X/Y, and Stop buttons |
| Casing | Weak structure and joints | Reduces rigidity and motion accuracy | Strengthen joints and add brackets or screws |
| Wiring | Wires were mixed and moved during operation | Can break wires or cause intermittent failures | Add cable management and strain relief |
| Axes | No physical limit switches | Motors can overload during errors | Add limit switches and a homing routine |
What I Learned
This week helped me understand that machine building is a system-level task. In earlier weeks, I often focused on one part at a time, such as a board, a sensor, or an output device. In this week, every part affected the rest of the machine.
The biggest lesson for me was that testing is not just checking whether something works once. Good testing means asking what happens when the machine is used repeatedly, when something goes wrong, or when a new person tries to operate it.