Introduction
This week was Wildcard Week, which meant that I had to use a digital fabrication process that I had not used in the previous assignments.
For this week, I tried digital embroidery. I embroidered a custom design onto a cloth bag using an embroidery machine. The design said:
POY
Fab26
POY is the first three letters of my name, so I wanted the design to feel personal but still connected to Fab Academy. Under it, I added Fab26 to represent Fab Academy 2026.
The final embroidery used two thread colors:
- Blue thread for
POY - Glossy grey thread for
Fab26
I created and prepared the embroidery design in PE-Design 11, then used the embroidery machine to stitch it onto the cloth bag.
Goal of the Week
My goal was to learn how a digital textile process works.
In earlier Fab Academy weeks, I worked with materials like acrylic, plywood, PLA, copper boards, wax, silicone, and electronics. This week was different because the output was made on fabric using thread.
Embroidery is not just drawing on fabric. The design has to be converted into stitches, and the machine follows those stitch paths physically. This made the process different from printing, vinyl cutting, or laser cutting.
This process fits Wildcard Week because I used a digital design and manufacturing workflow that I had not used in previous assignments.
The important part is that the embroidery machine does not simply use a normal image file. The design has to become embroidery data, which includes stitch paths, stitch order, thread colors, and placement.
This made the workflow both digital and physical. The design was created on the computer, but the final result was produced through controlled needle movement and thread.
Machine Used
I used a Brother PR680W embroidery machine for this assignment.
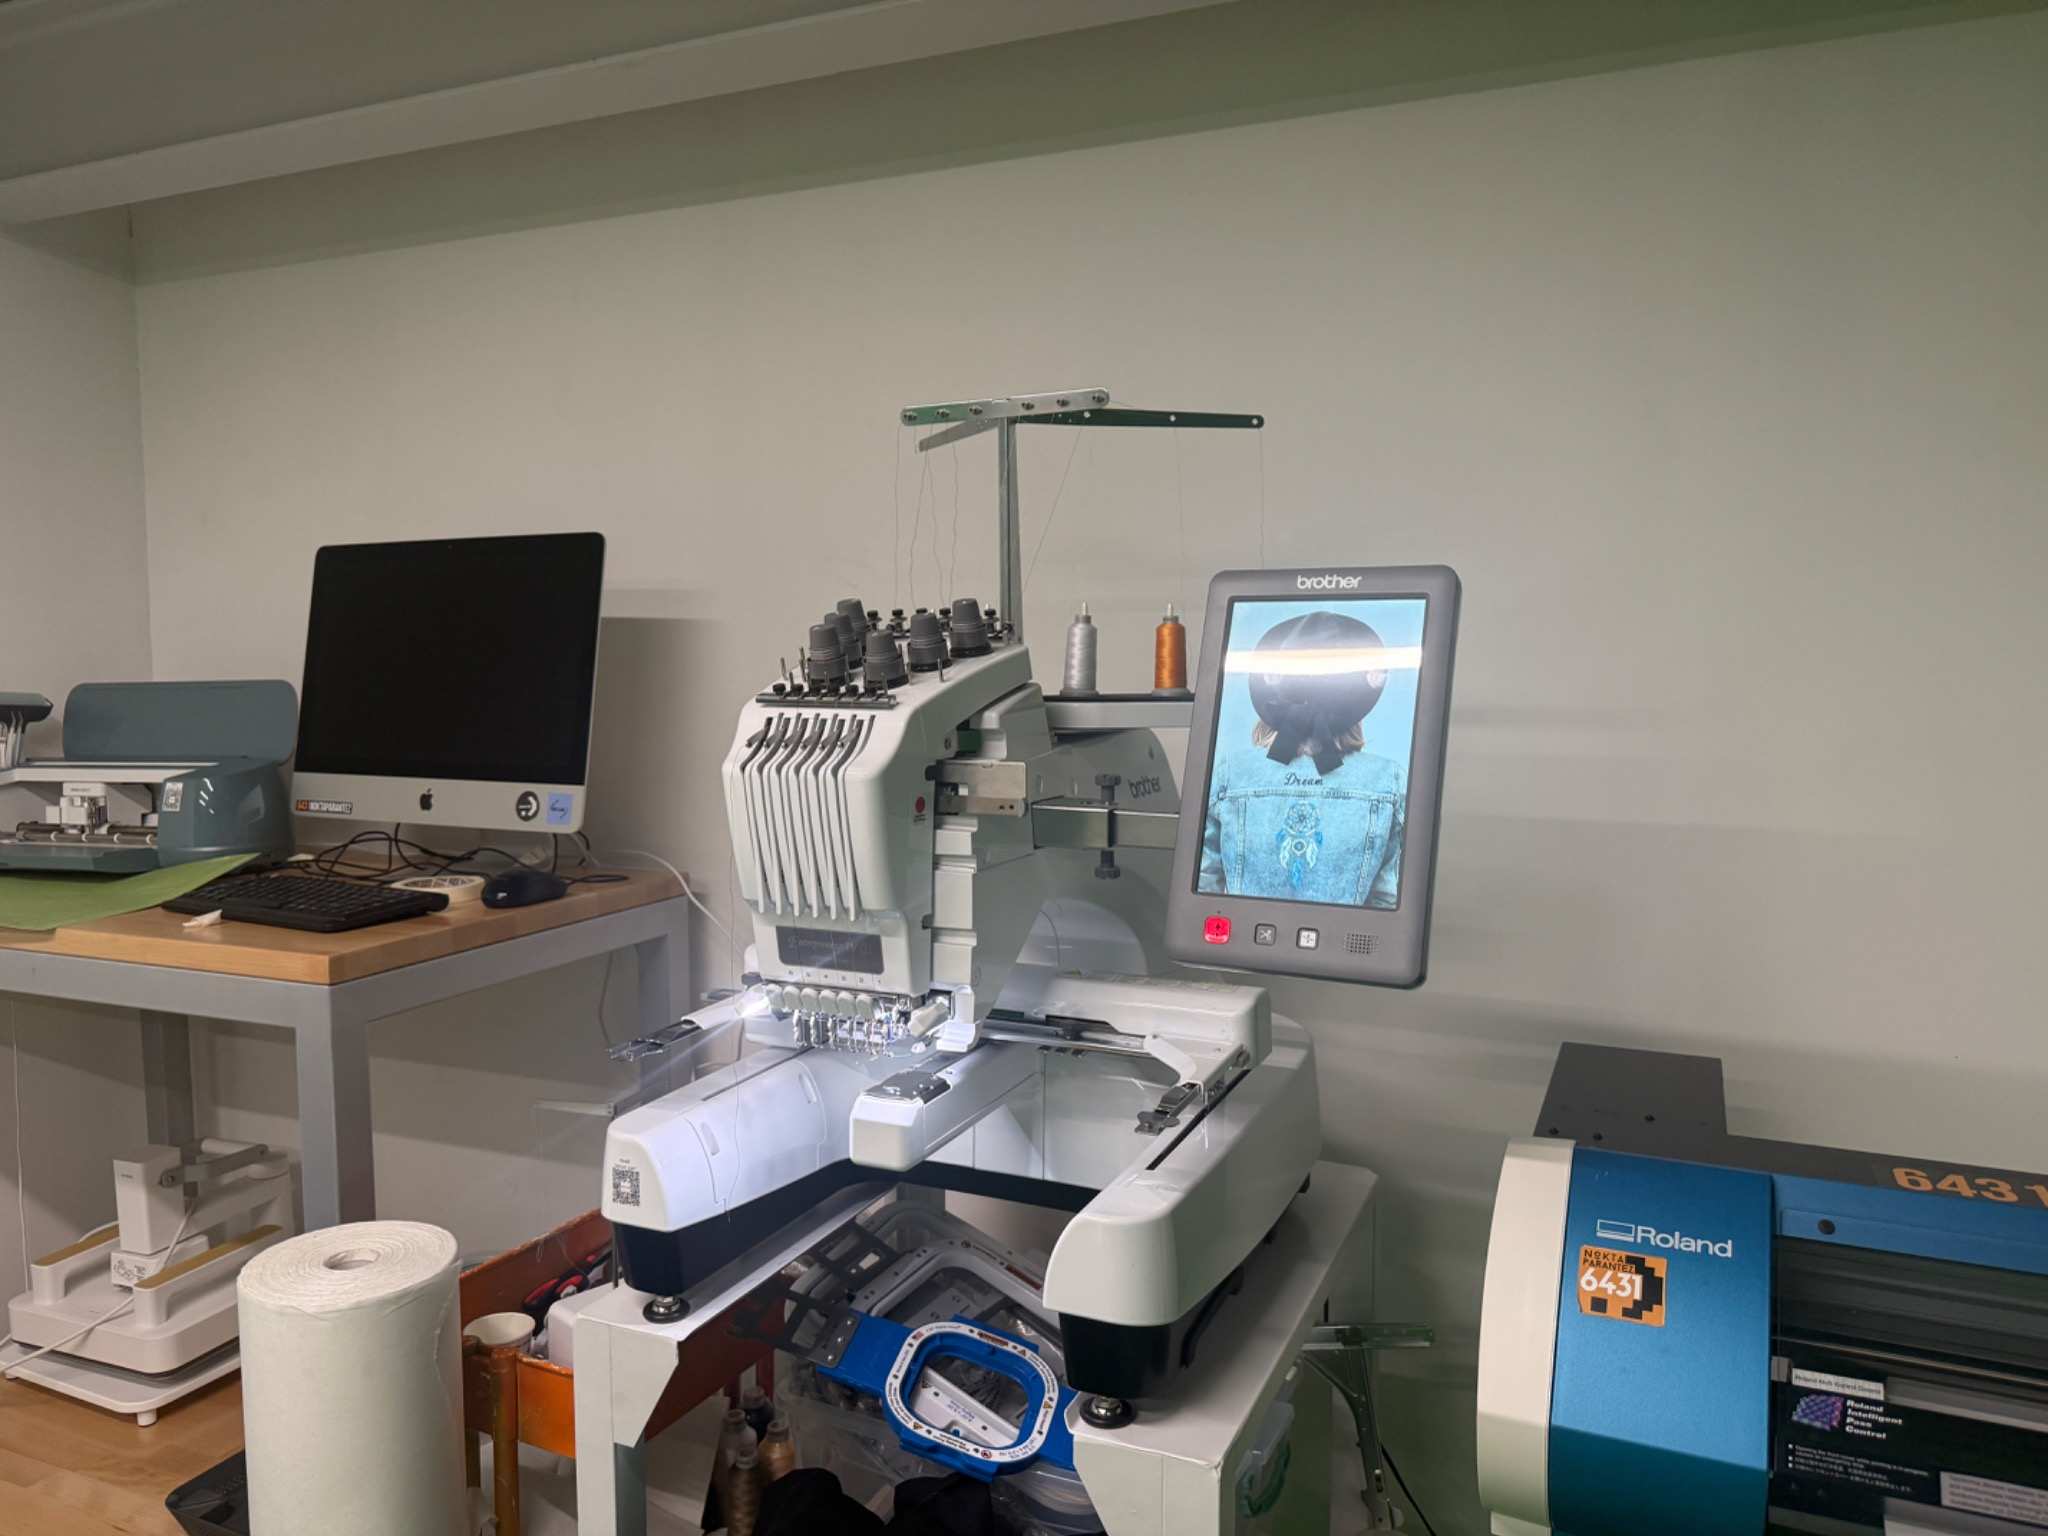
The machine can stitch digital embroidery files onto fabric.
The main parts of the machine workflow were:
- loading the embroidery file
- preparing the thread colors
- placing the cloth bag in the hoop
- checking the design position
- starting the stitching process
- watching the machine during the job (SAFETY!)
Materials and Tools
| Material / Tool | Purpose |
|---|---|
| Cloth bag | Final fabric object |
| Brother embroidery machine | Main fabrication machine |
| PE-Design 11 | Used to design and prepare the embroidery file |
| Embroidery hoop | Holds the bag flat and tight along with the cloth base |
| Blue embroidery thread | Used for POY |
| Glossy grey embroidery thread | Used for Fab26 |
| Backing material | Supports the fabric while stitching |
| USB drive / machine transfer method | Used to move the embroidery file to the machine |
| Scissors | Used for cleaning loose threads |
Design
I made the design in PE-Design 11.
The design was text-based and had two lines:
POY
Fab26
I made POY larger because it was the main part of the design. Then I placed Fab26 underneath it in a smaller size. This made the design look balanced because the top text became the main title and the bottom text became the subtitle.
The color choices were:
| Text | Thread color |
|---|---|
| POY | Blue |
| Fab26 | Glossy grey |
Preparing the Design in PE-Design 11
PE-Design 11 was the most important software step of this week. I used it to turn the text design into an embroidery-ready file.
A normal text design is not enough for the embroidery machine. The software needs to define how the machine will stitch the letters. This includes the stitch type, direction, density, size, and order.
In PE-Design 11, I checked:
- text size
- letter spacing
- placement of
Fab26underPOY - stitch preview
- thread color assignment
- whether the text would fit inside the hoop
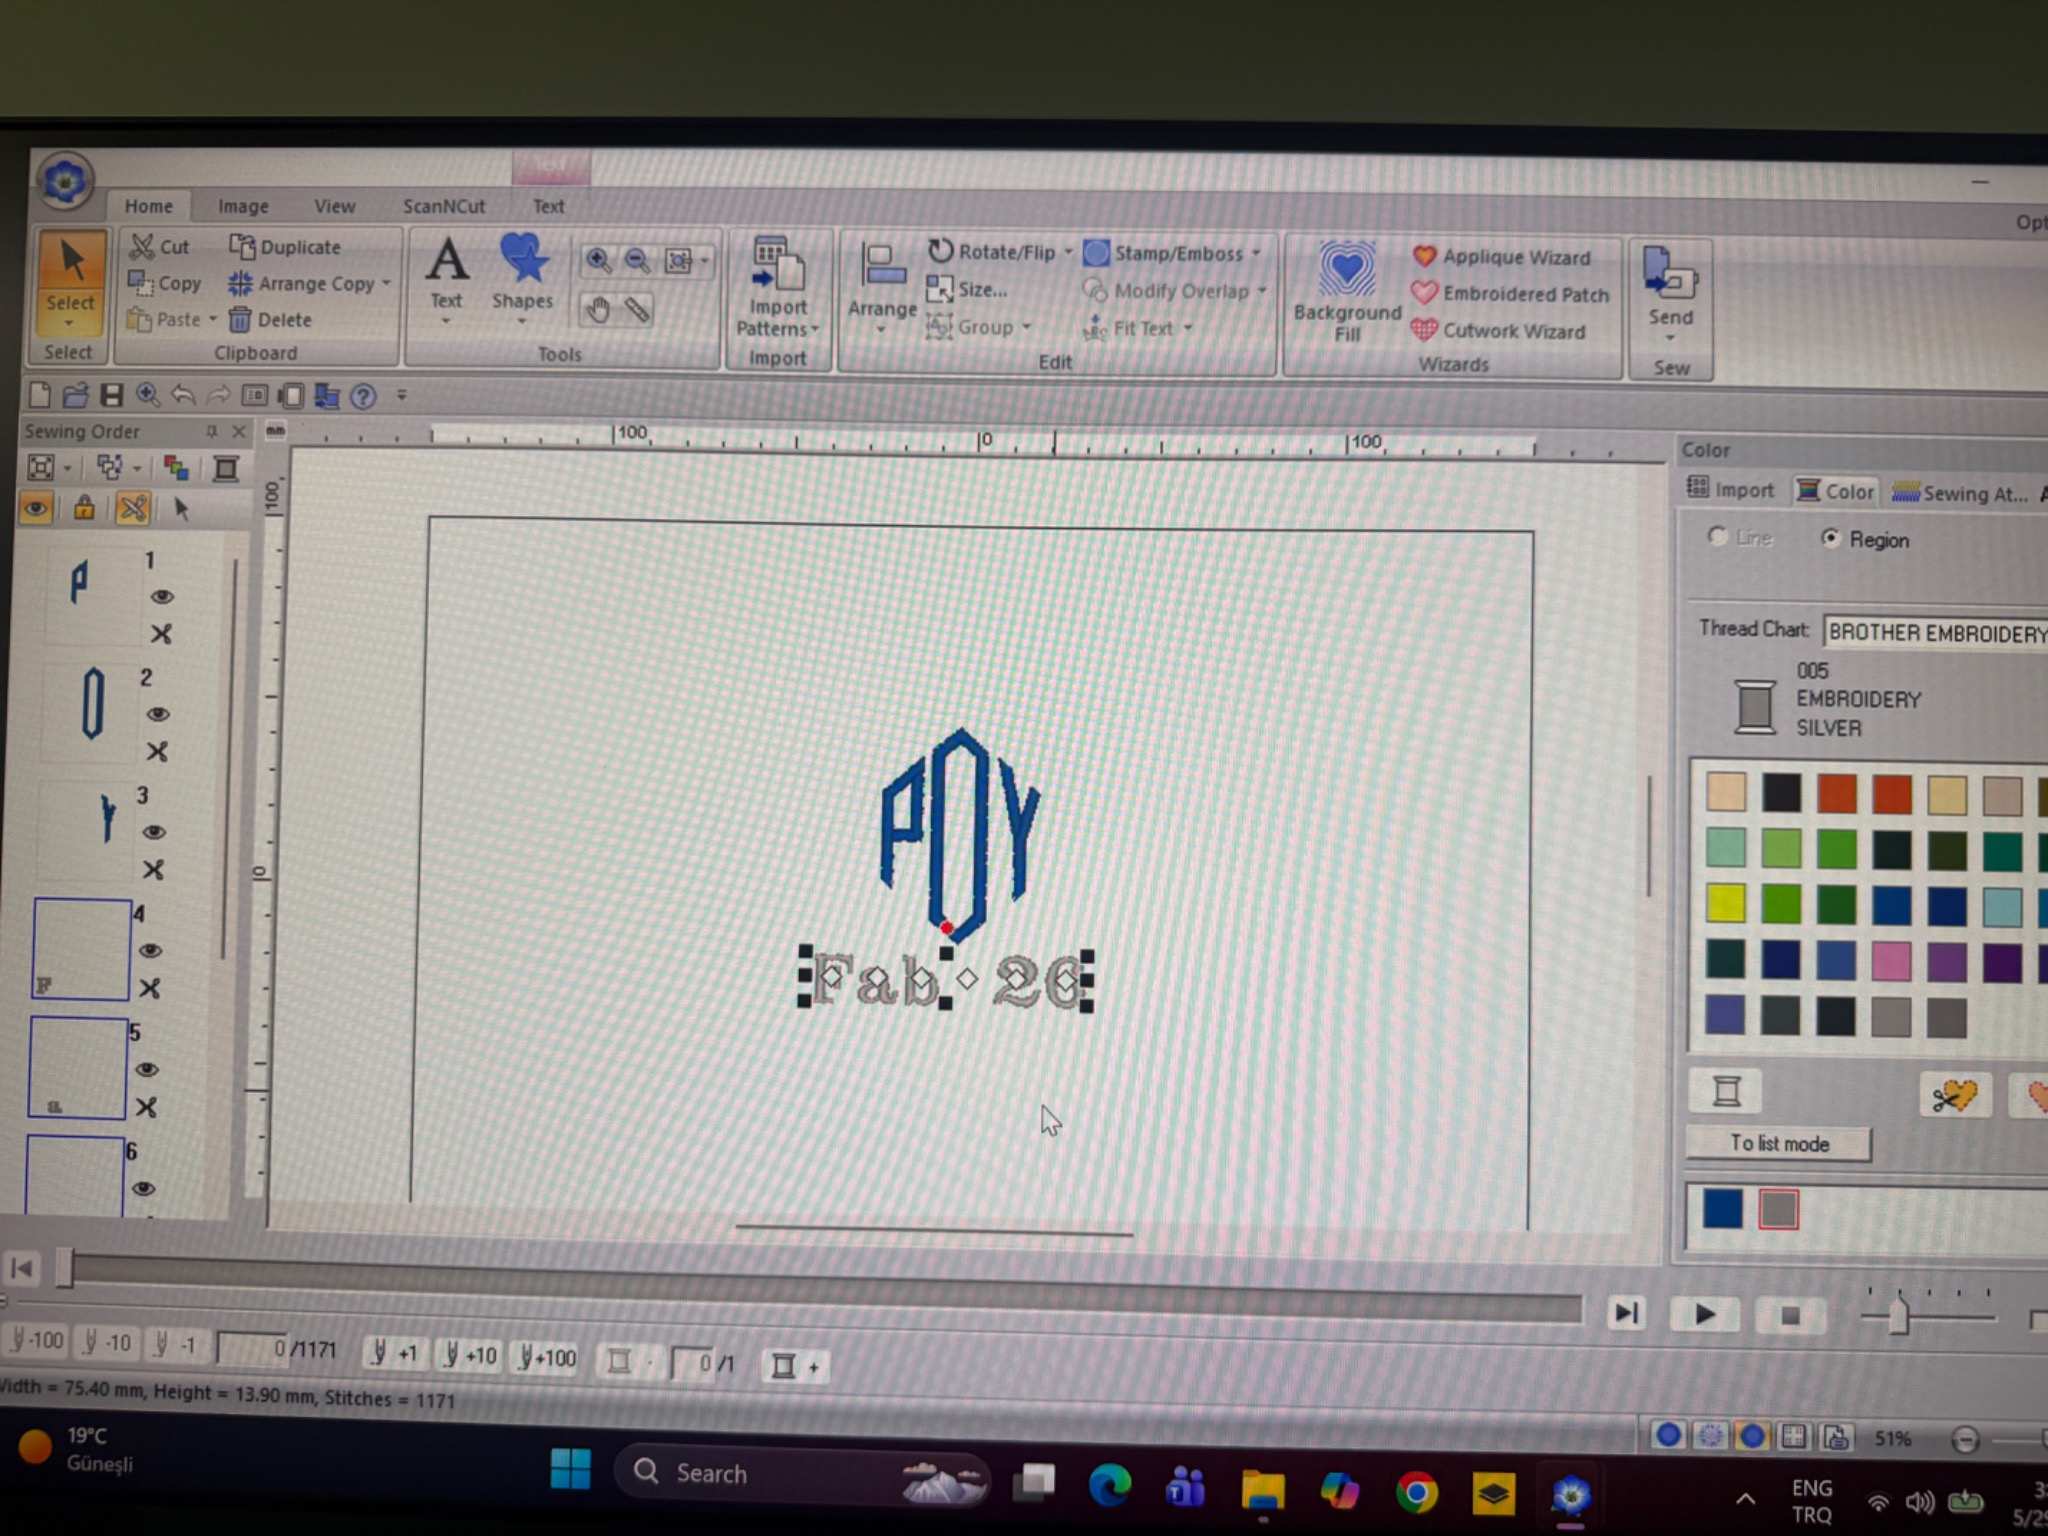
The stitch preview was useful because it showed how the design would be made by the machine. This helped me avoid making the text too thin or too small.
Since embroidery has physical limits, text cannot always be treated like normal digital typography. Very small letters can become messy because thread has thickness. For this reason, you have to keep the design simple and bold.
Preparing the Test Fabric
Before starting the embroidery, and preparing the cloth bag, I wanted to test the emroidery on a test fabric.
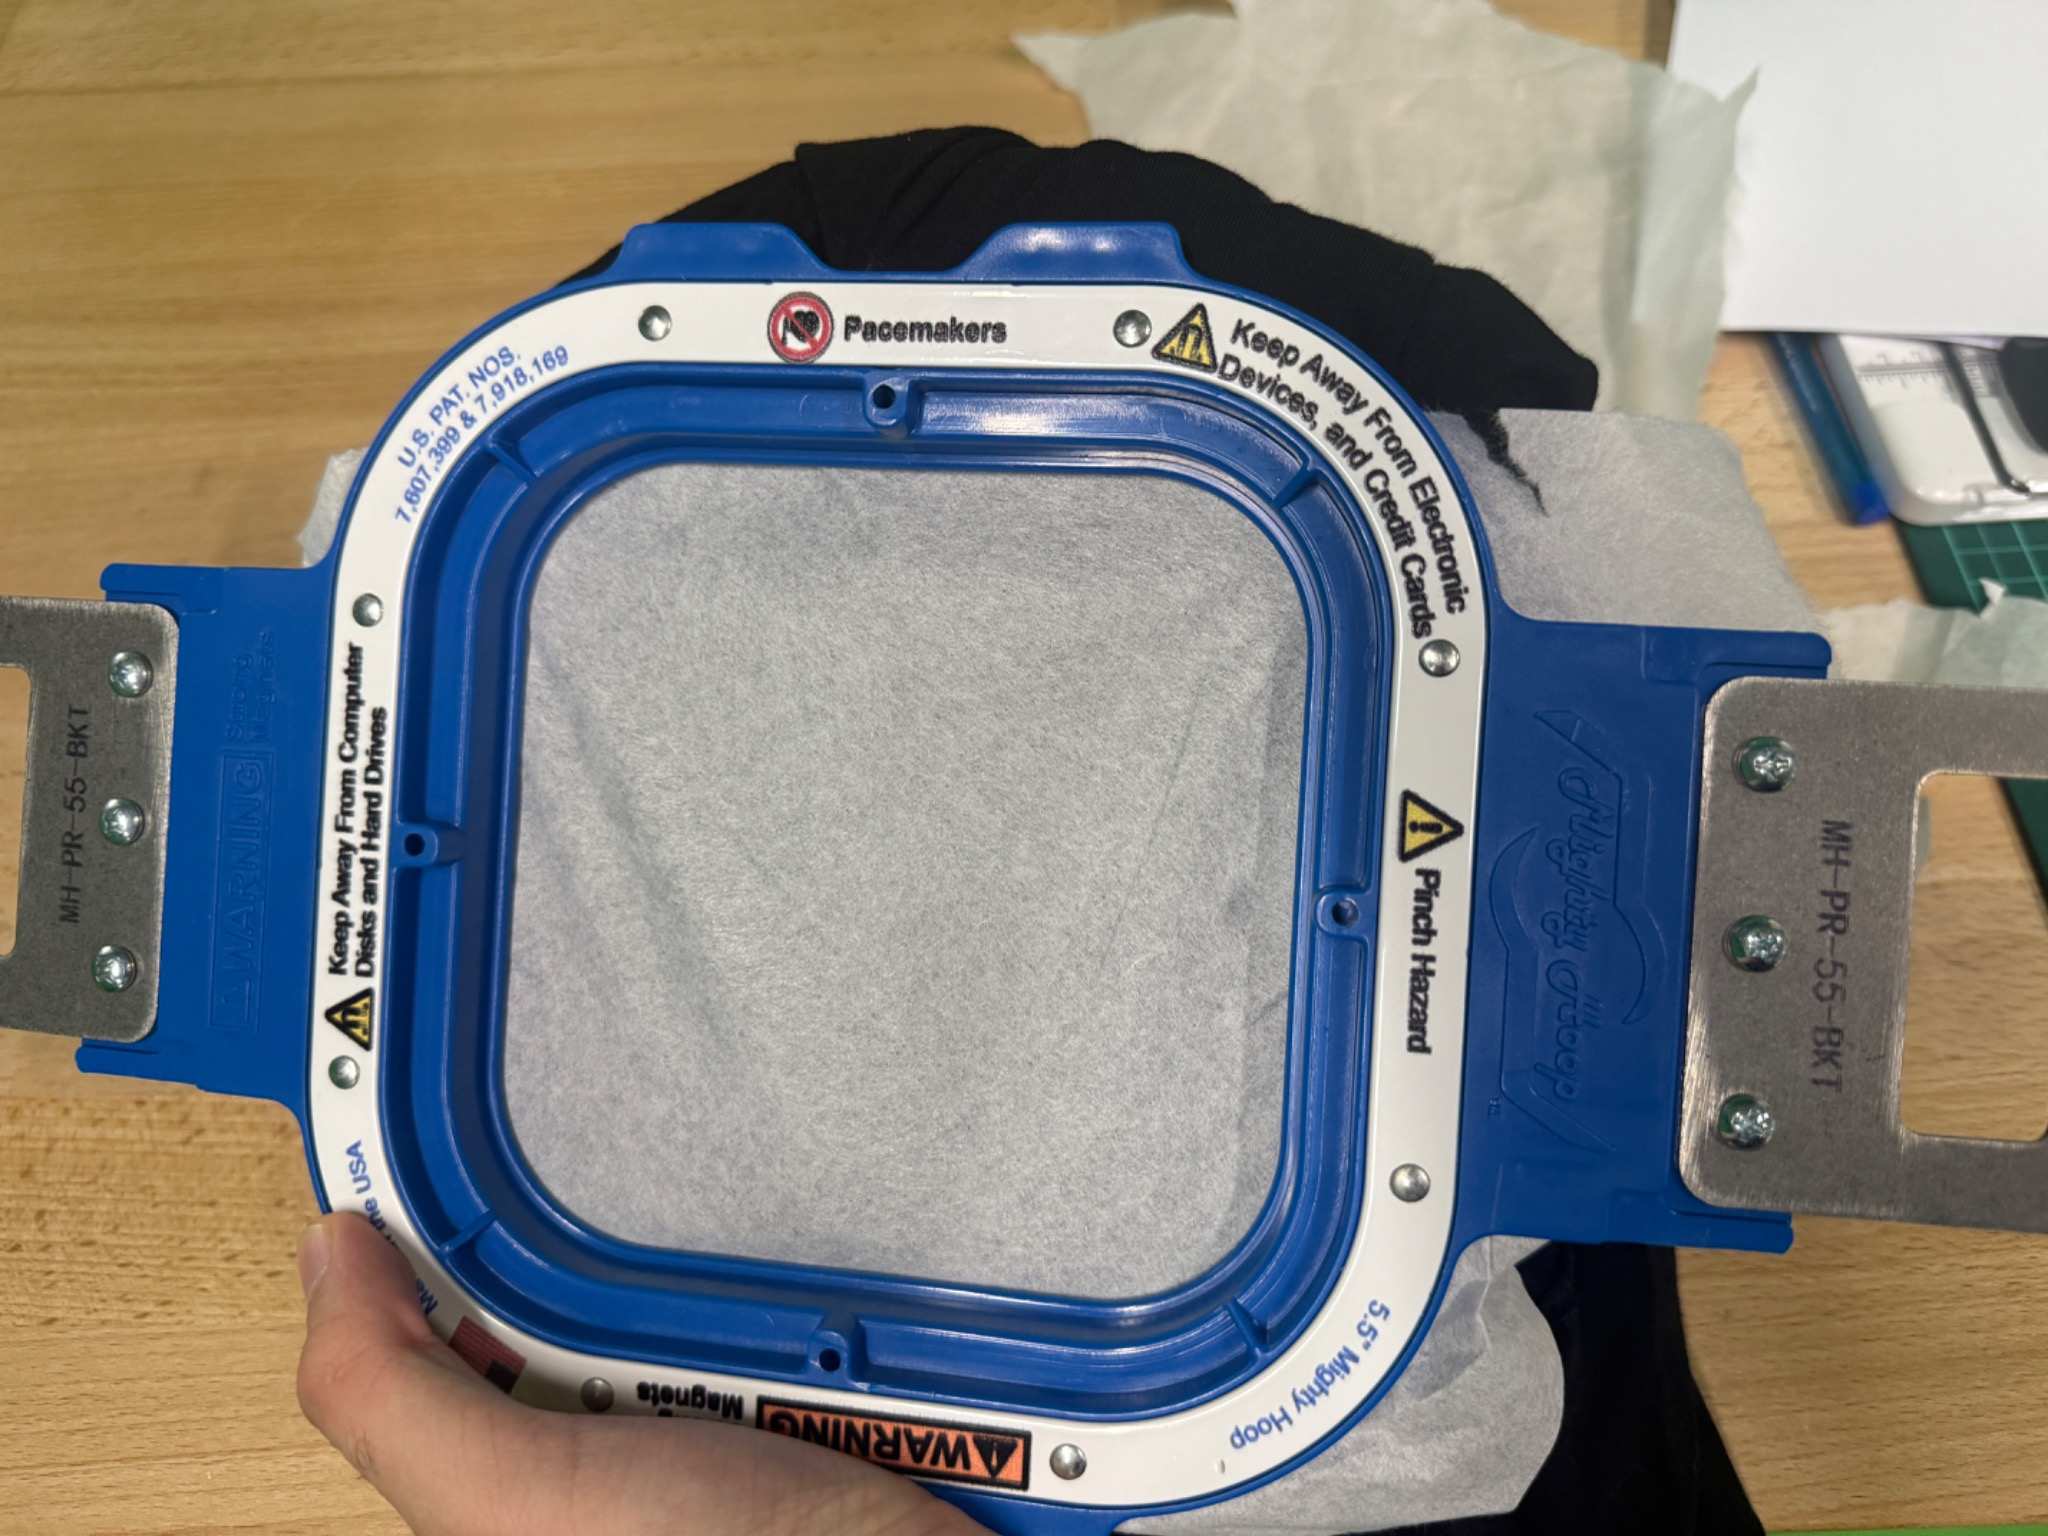
Securing the fabric in the hoop was important because it had to stay flat during stitching. If the fabric moves, the letters can become distorted or misaligned.
I placed base cloth behind the area that would be embroidered. The stabilizer helped support the fabric and reduced stretching while the needle moved up and down.
Then I placed the bag inside the embroidery hoop.
Embroidery Hoop:
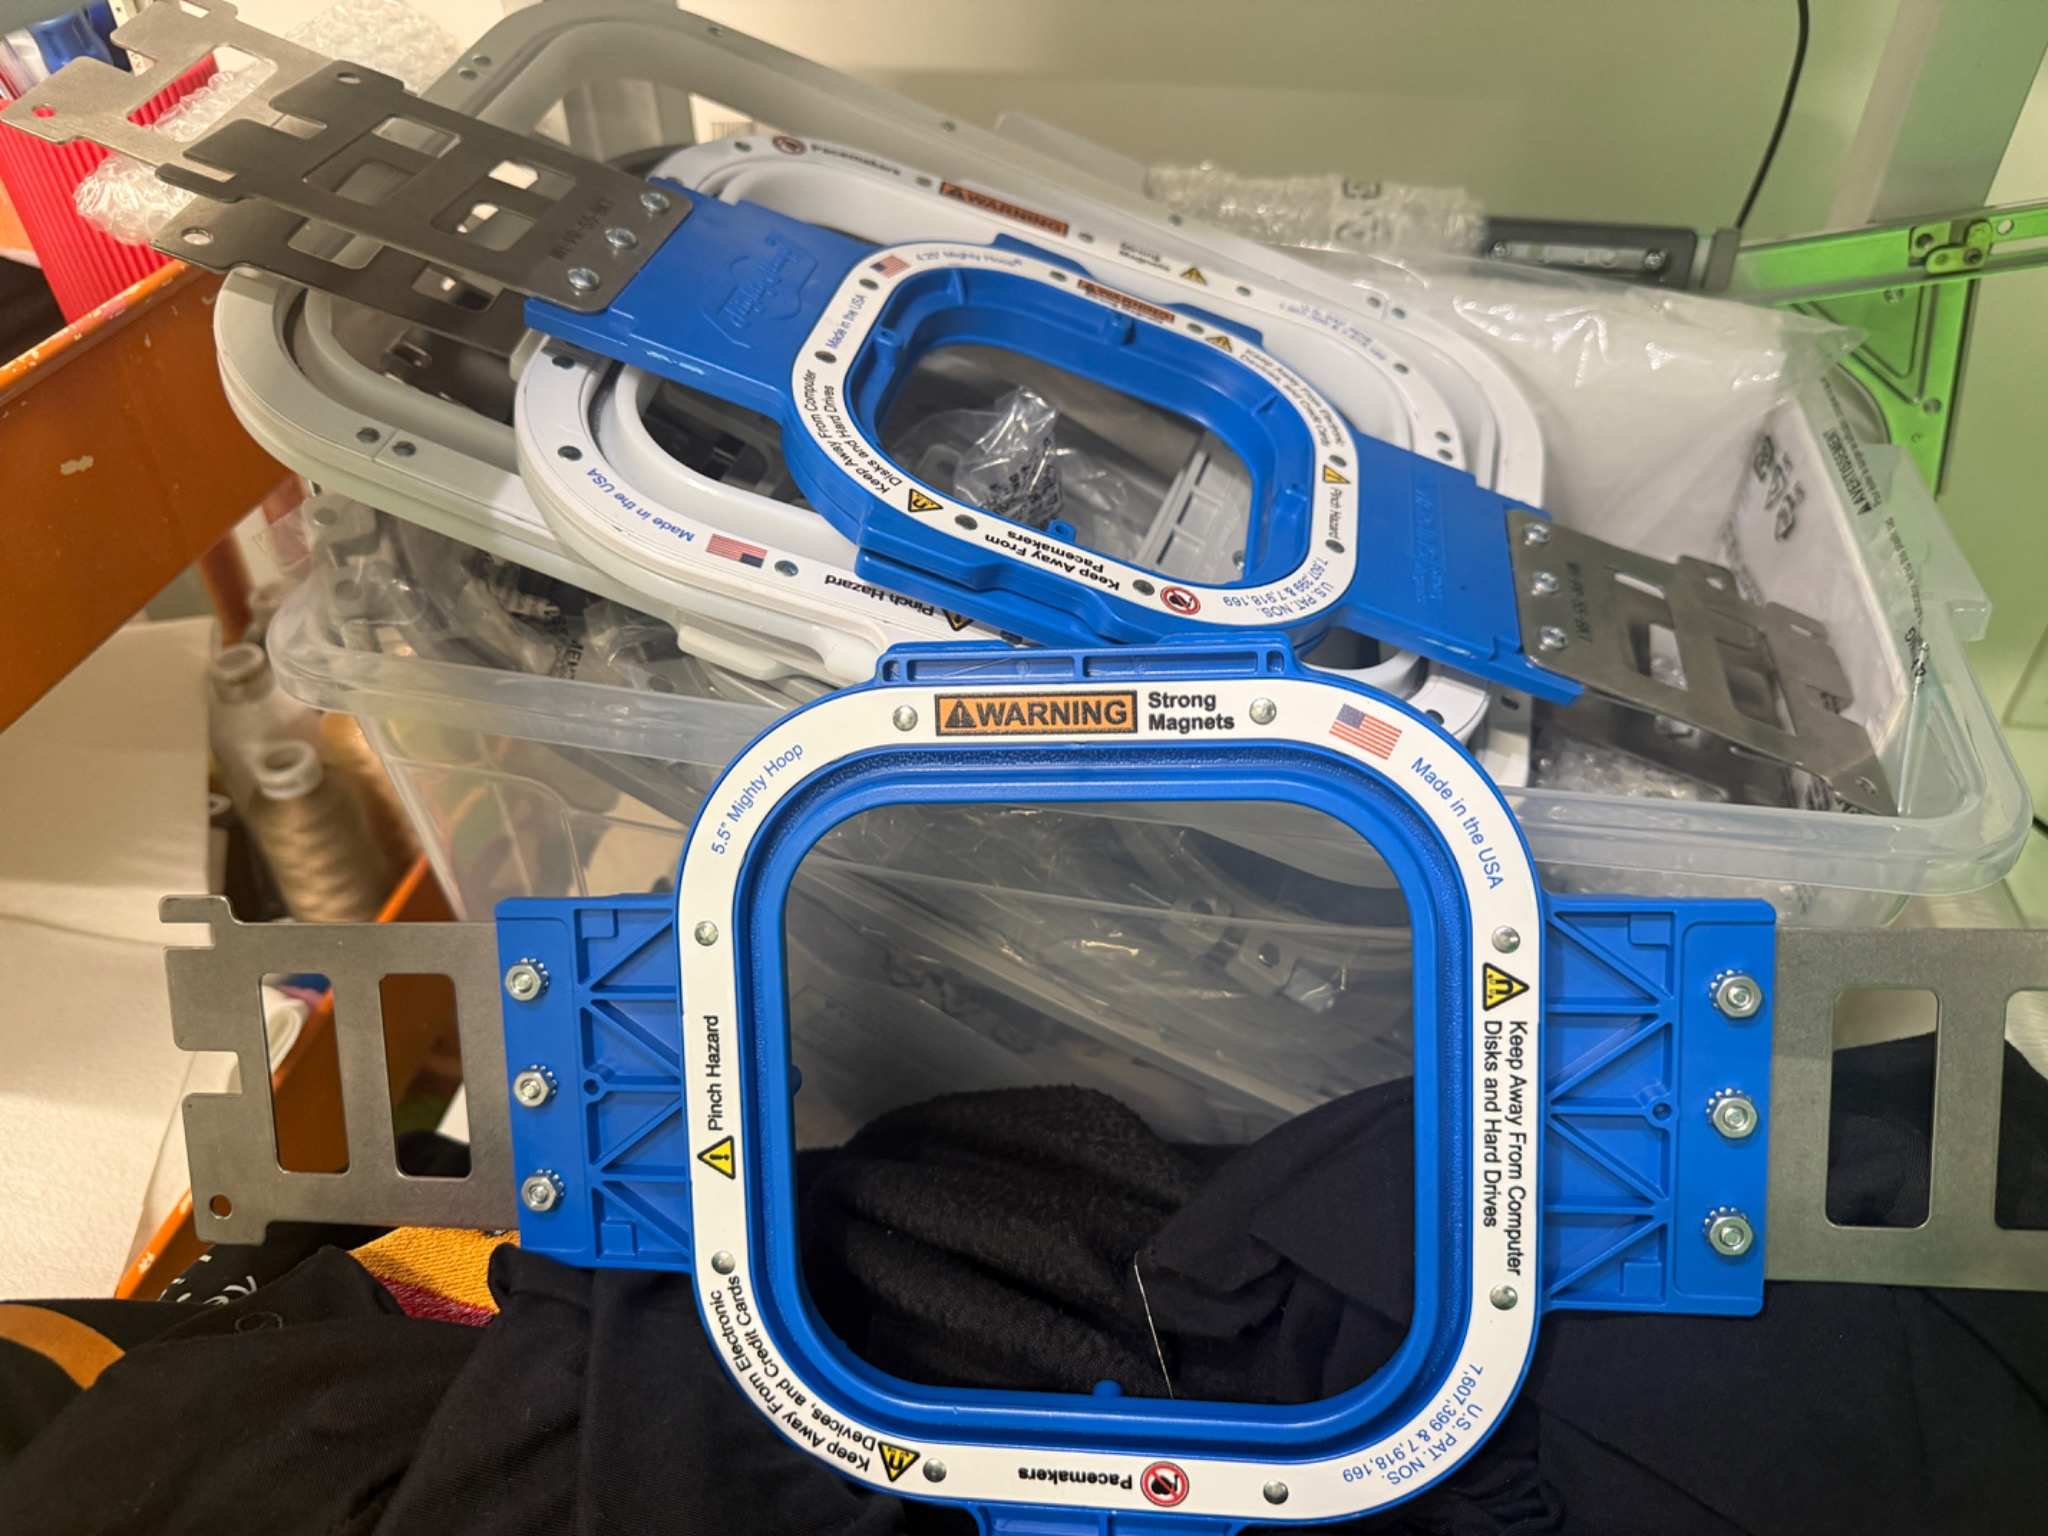
Fabric and base cloth secured with the hoop:
Before starting the machine, I checked that:
- the hoop was tight
- the design area was centered
- the fabric was not folded underneath
- the hoop was locked correctly
- the machine had enough space to move
This step took time because alignment matters a lot for text. If the fabric was slightly tilted, the final design would also look tilted.
Preparing the Threads
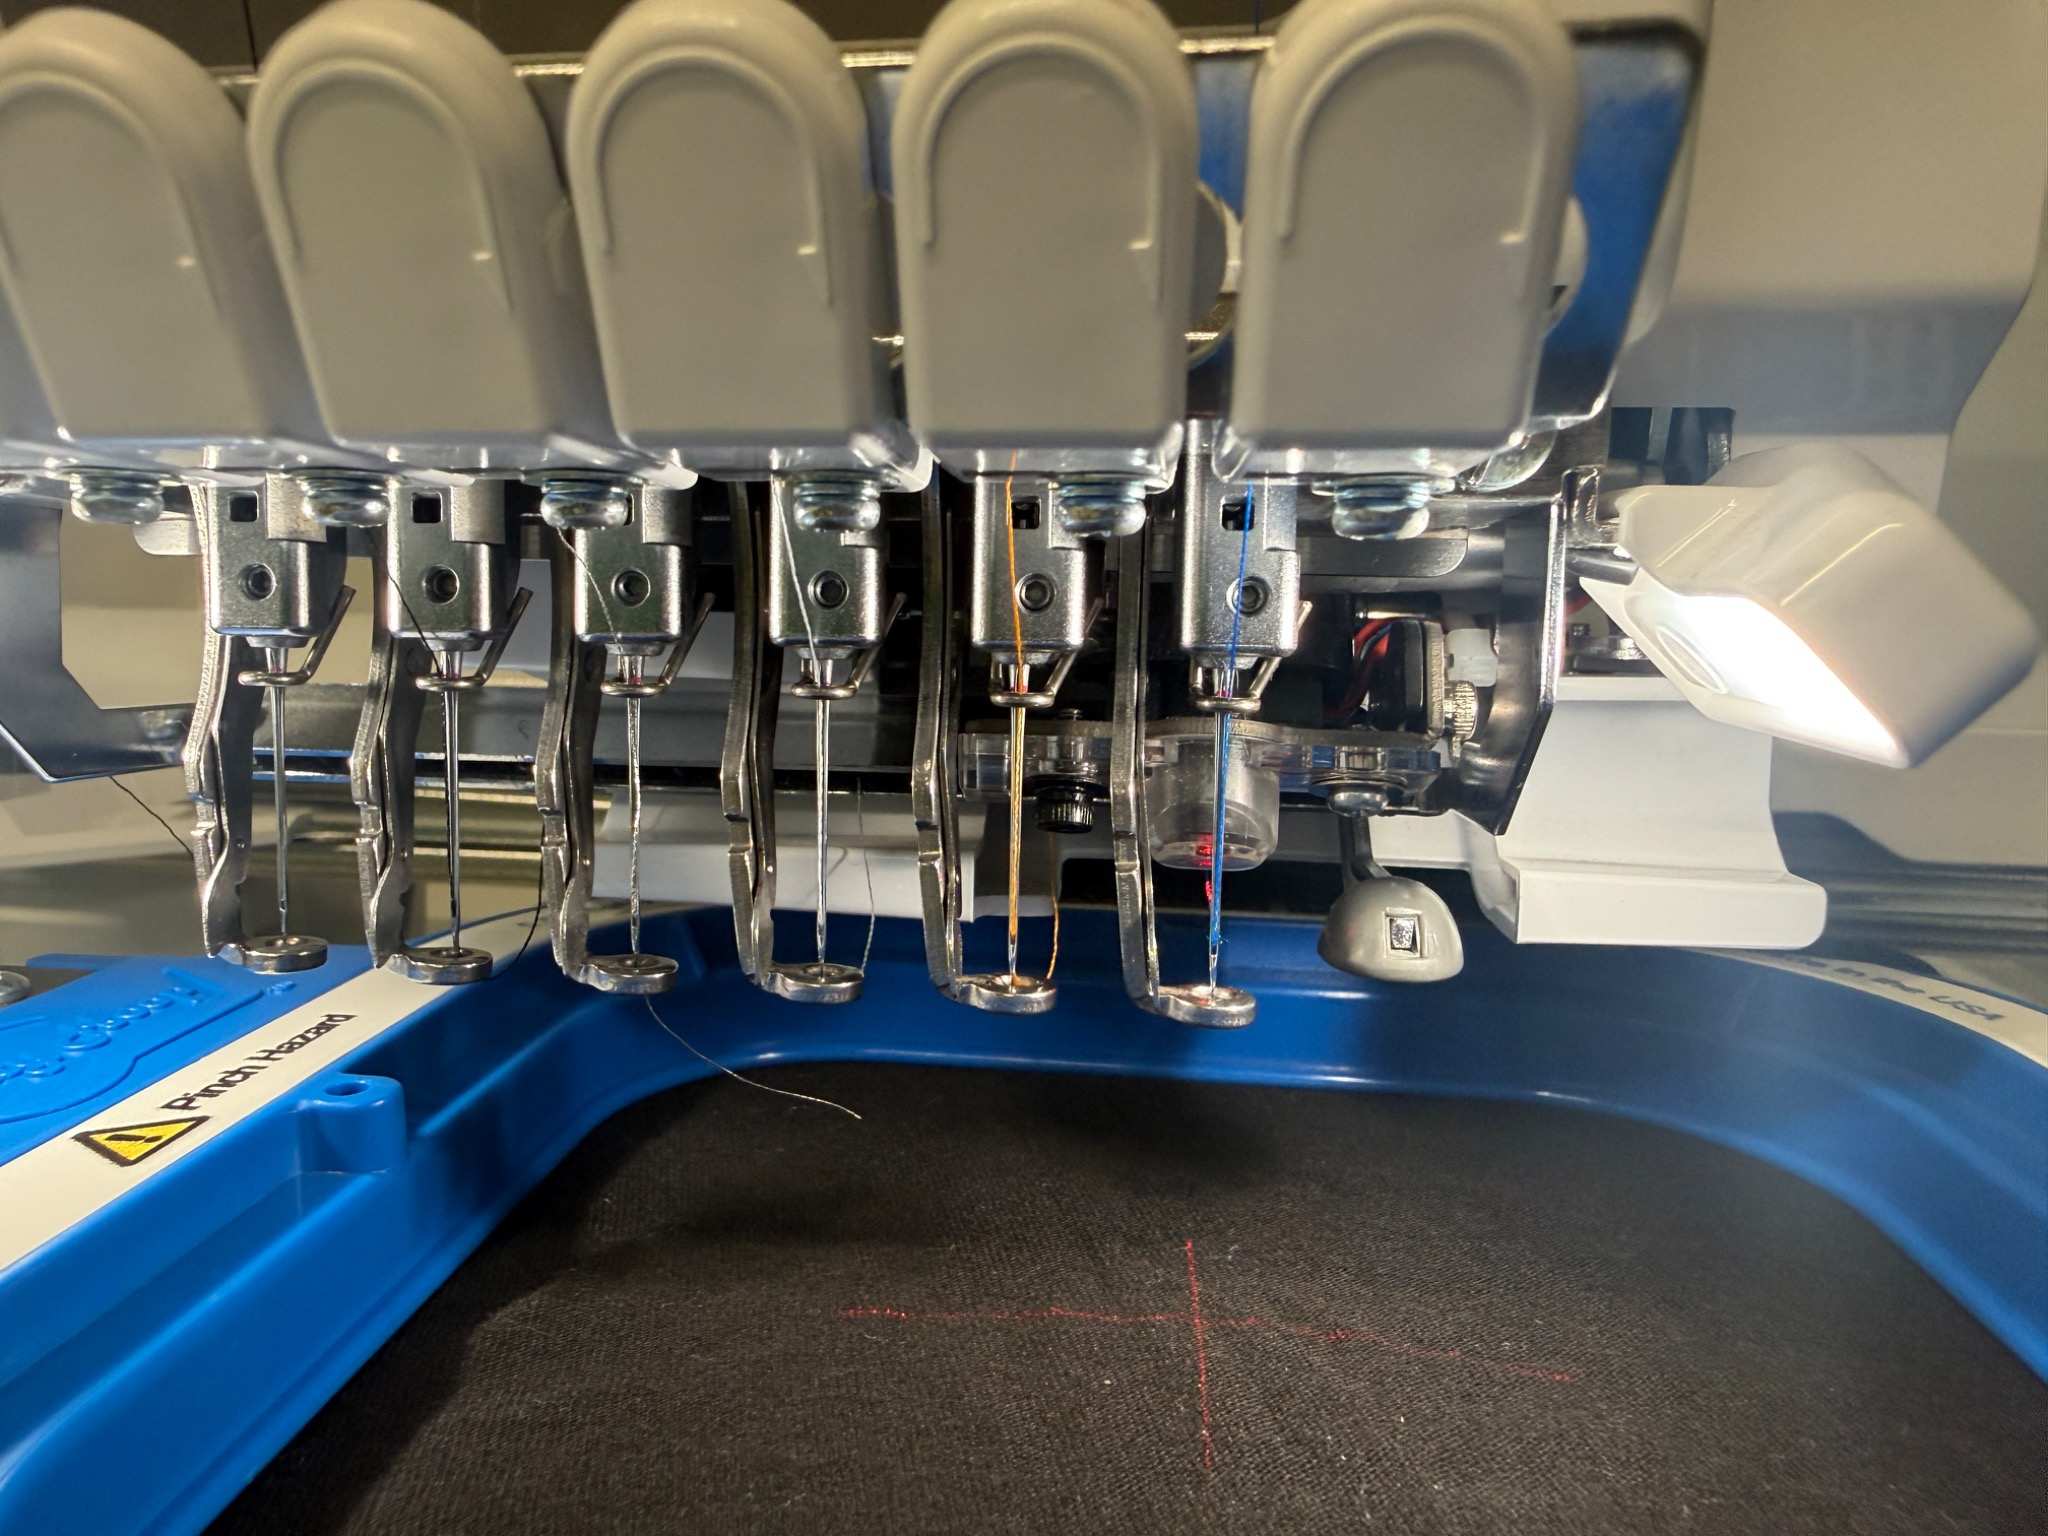
After choosing the colors, I loaded the threads into the machine and checked the thread path. This was important because embroidery can fail if the thread is not routed correctly.
I also checked the bobbin and made sure the machine was ready.

Embroidery Process
After the design file, bag, hoop, and threads were ready, I started the embroidery process.
The machine stitched the design based on the file exported from PE-Design 11. It followed the stitch path and created the text directly on the test fabric.
The process happened in two main color sections:
- The machine stitched
POYwith blue thread. - The machine stitched
Fab26with glossy grey thread.
During the process, I watched the machine carefully. This was important because embroidery can go wrong if:
- the thread breaks
- the fabric shifts
- the hoop becomes loose
- the thread tension becomes uneven
The machine completed the design successfully, and both text lines were readable but a point to keep in mind was that you should competely flatten the surface of the fabric as it won’t give healthy results like the wrinkles on the test fabric.
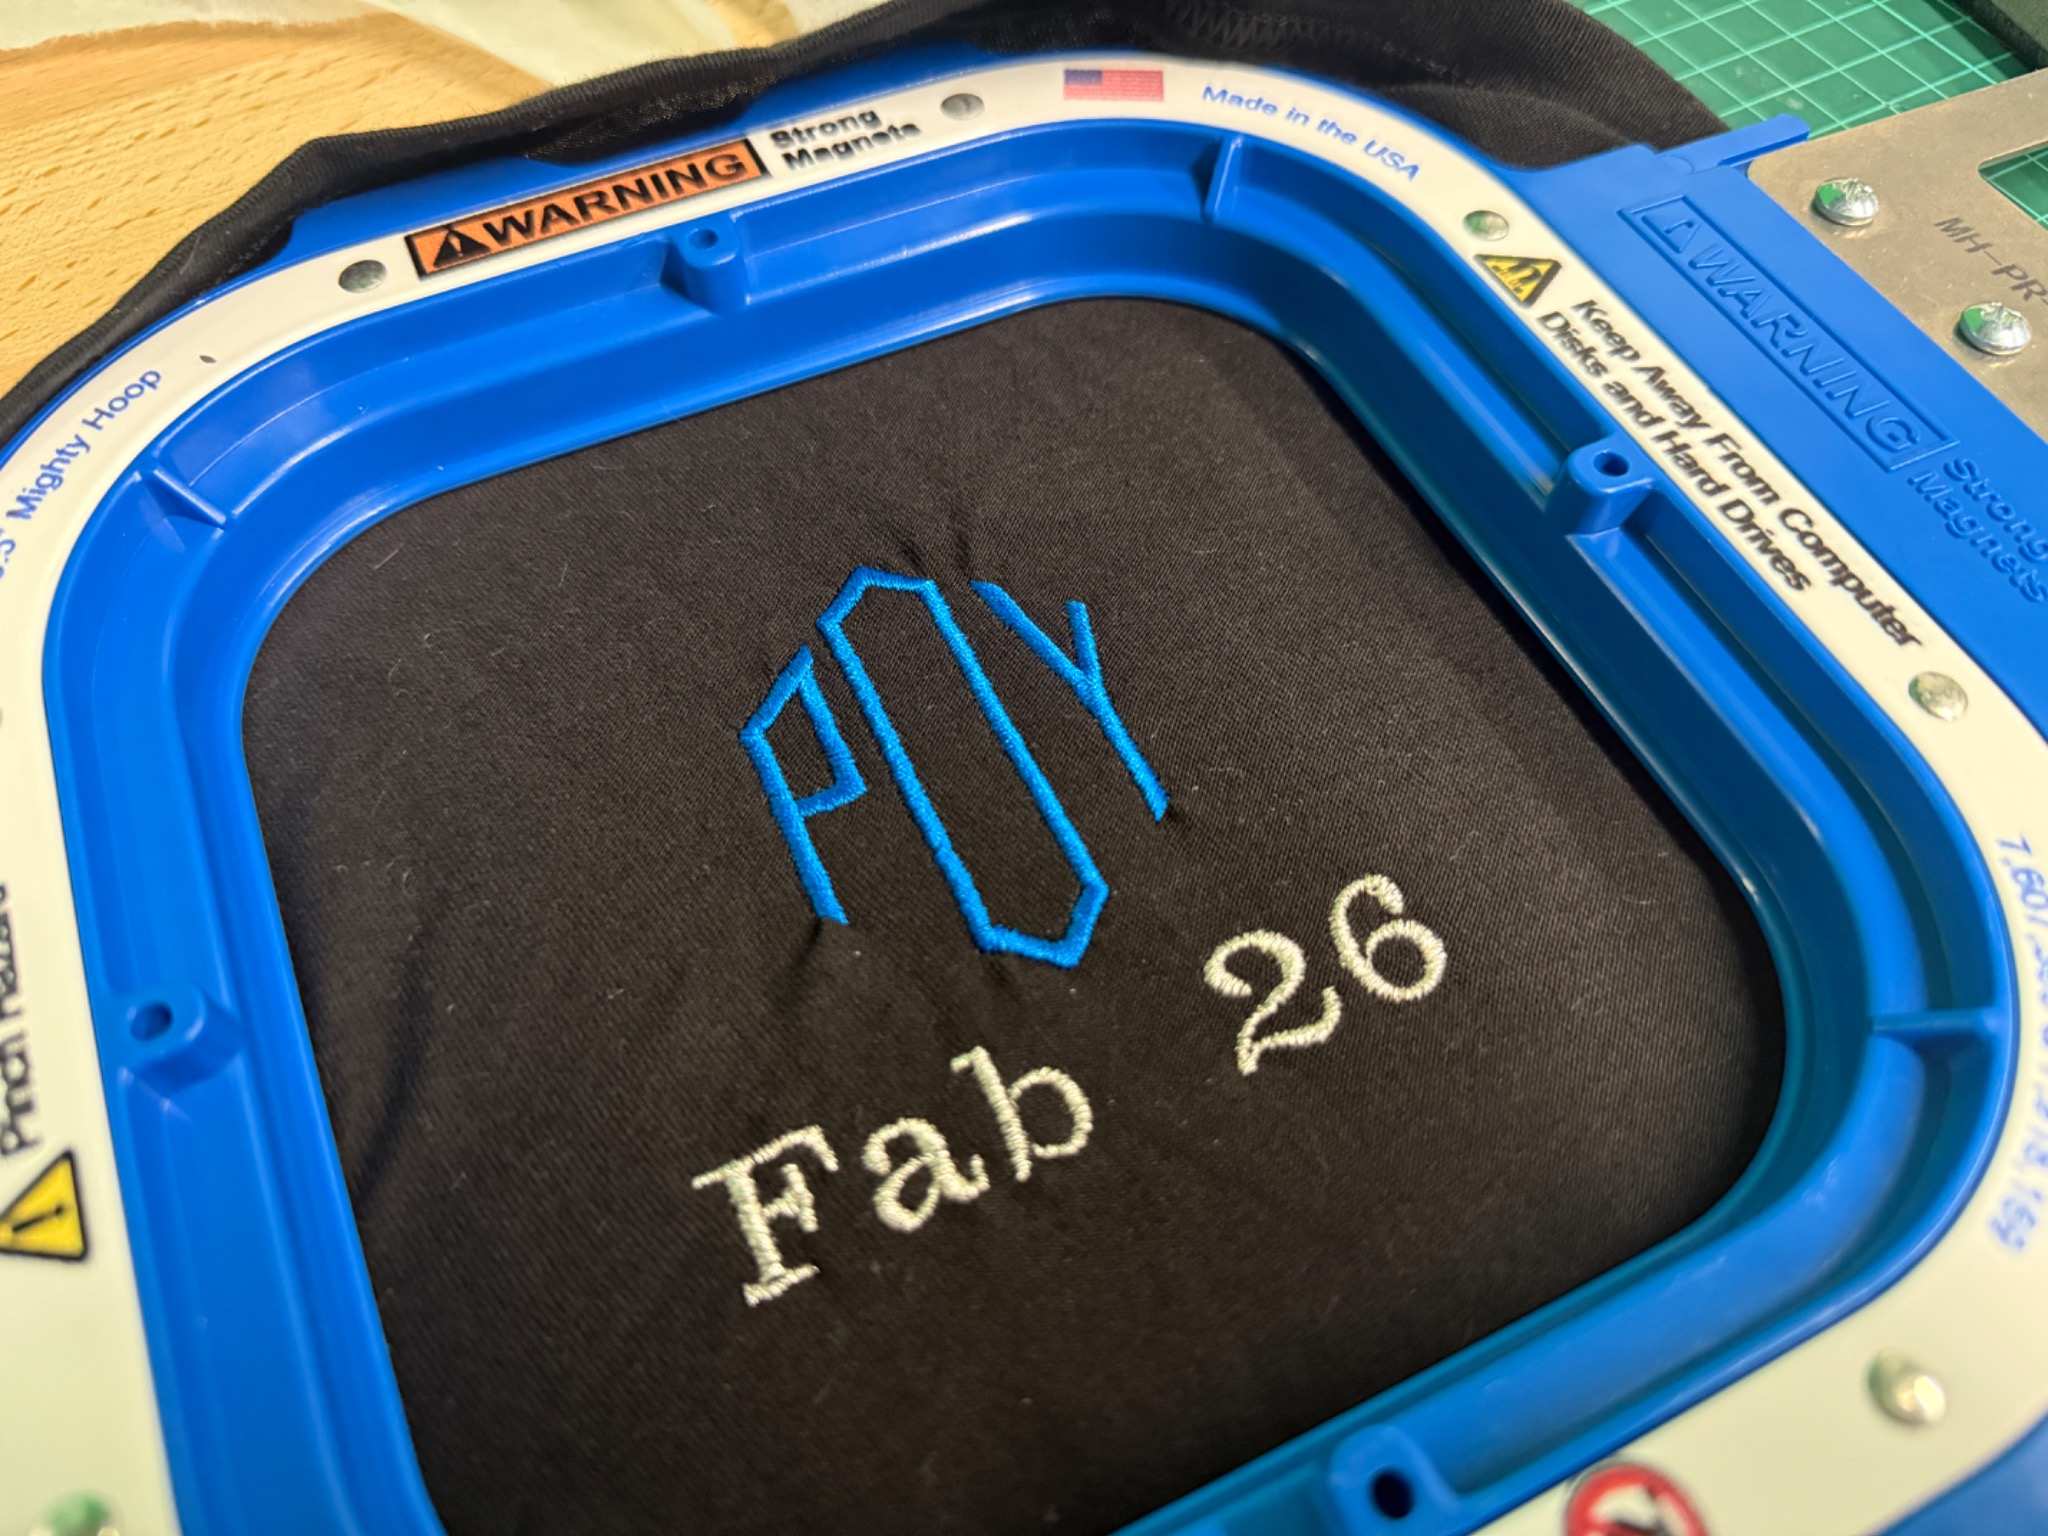
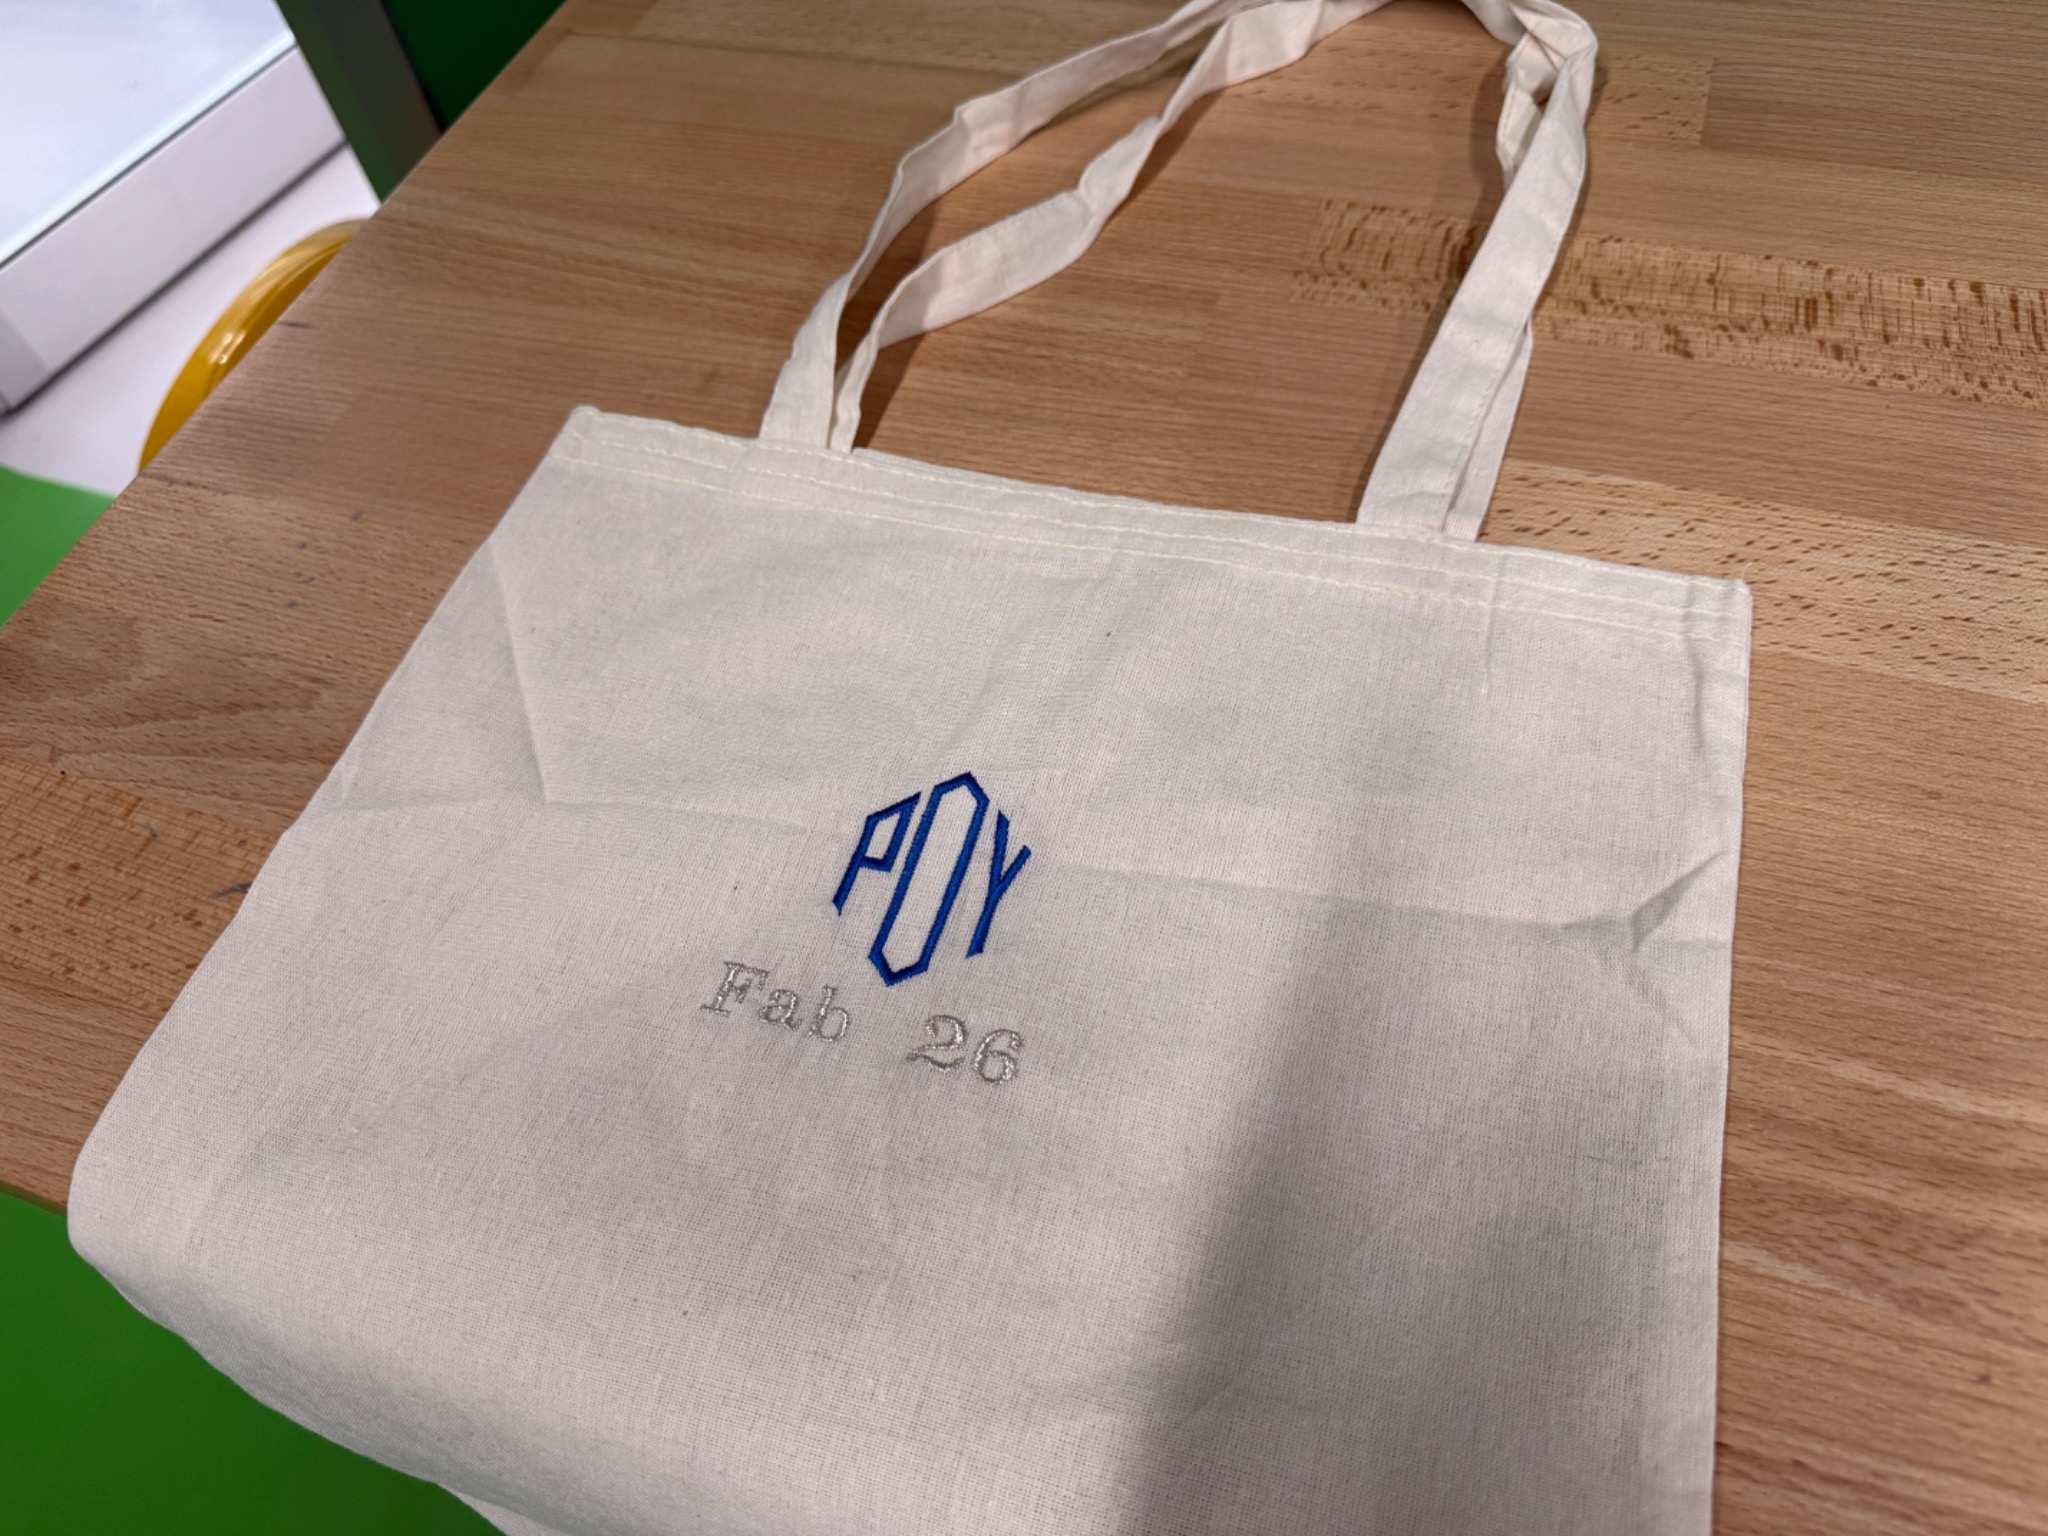
Final Result
I applied exactly the same process to the cloth bag.
The final result was an embroidered cloth bag with POY in blue thread and Fab26 underneath it in glossy grey thread.
The result worked well because the design was simple and clear. The large POY text was easy to read, and the smaller Fab26 text connected the bag to Fab Academy 2026.
The embroidery also gave the bag a physical texture. Compared to printing, embroidery feels more permanent because the thread becomes part of the fabric.
What Worked Well
The color combination also worked well. The blue thread made POY stand out, while the glossy grey thread made Fab26 visible without making it compete too much with the main text.
Using PE-Design 11 helped because I could preview the stitch result before using the machine. This made the process less risky because I could check the size, placement, and color order before stitching on the actual bag.
Problems and Fixes
Problem 1 - The wrinkles
A fabric that hasn’t been completely flatten in the hoop would couse wrinkles after stiching.
Fix
Pull thightly from all sides of the fabric until there are no wrinkles.
Safety Notes
The embroidery machine moves quickly and uses a sharp needle, so I had to be careful while operating it.
Important safety points:
- keep hands away from the needle while the machine is running
- do not touch the hoop while it is moving
- pause the machine before fixing any thread issue
- make sure the hoop is locked before starting
- keep loose fabric away from the moving area
- watch the machine during the job
- use scissors carefully when cleaning loose threads
Even though embroidery looks less dangerous than CNC milling or laser cutting, it still has moving mechanical parts and a sharp needle.
Reflection
Wildcard Week was interesting because it let me try a process that was very different from the rest of Fab Academy.
I liked embroidery because the result was both digital and handmade-looking. The design started in PE-Design 11, but the final object had a physical textile texture. This made the output feel more personal than a printed design.
My final cloth bag was simple, but it successfully showed the workflow. I designed the text, prepared the stitch file, selected thread colors, hooped the fabric, and used the embroidery machine to produce the final result.
Overall, this week showed me that digital fabrication is not limited to rigid materials. Fabric can also be part of a digital workflow when the design is converted into machine-controlled stitches.