Introduction
This week was about planning DESKO as a complete final project. At this stage, I was mainly working on the coding and integration side. I was trying to make the clock, e-paper display, NeoPixels, buzzer, buttons, alarm, countdown, stopwatch, and web interface work together in one program.
What will it do?
DESKO will be a multifunctional desk clock that combines time, light, and small productivity tools in one physical object.
It will:
- show the current time on an e-paper display
- work as a desk or bedside clock
- include ambient lighting with NeoPixels
- have different light modes
- include an alarm function
- use a gradual warm wake-up light before the alarm
- include a countdown timer
- show countdown progress with the LEDs
- include a stopwatch
- use a buzzer for alarm and timer feedback
- be controlled with physical buttons
- also be controlled from a browser through a local web interface
The main idea is to make a simple clock that is useful for studying, working, and daily routines.
Who has done what beforehand?
There are many existing alarm clocks, smart clocks, wake-up lights, Pomodoro timers, and desk lamps. Some products focus mainly on time display, while others focus on lighting or productivity.
The project is not meant to copy an existing commercial product. It is my own version of a personal desk clock with light and productivity features.
What sources will you use?
The sources I will use are:
- Fab Academy weekly assignments and documentation
- my previous weekly documentation
- XIAO ESP32-C3 pinout and board documentation
- Waveshare e-paper display documentation
- Adafruit NeoPixel library examples
- Arduino Wi-Fi and WebServer examples
- previous tests from input, output, interface, and system integration weeks
- examples from other Fab Academy students for documentation structure
The most important source is my own testing, because the final project depends on how the components work together in the actual DESKO setup.
What will you design?
I will design the main physical and digital parts of DESKO.
I will design:
- the clock enclosure
- the display opening and mounting
- the button placement
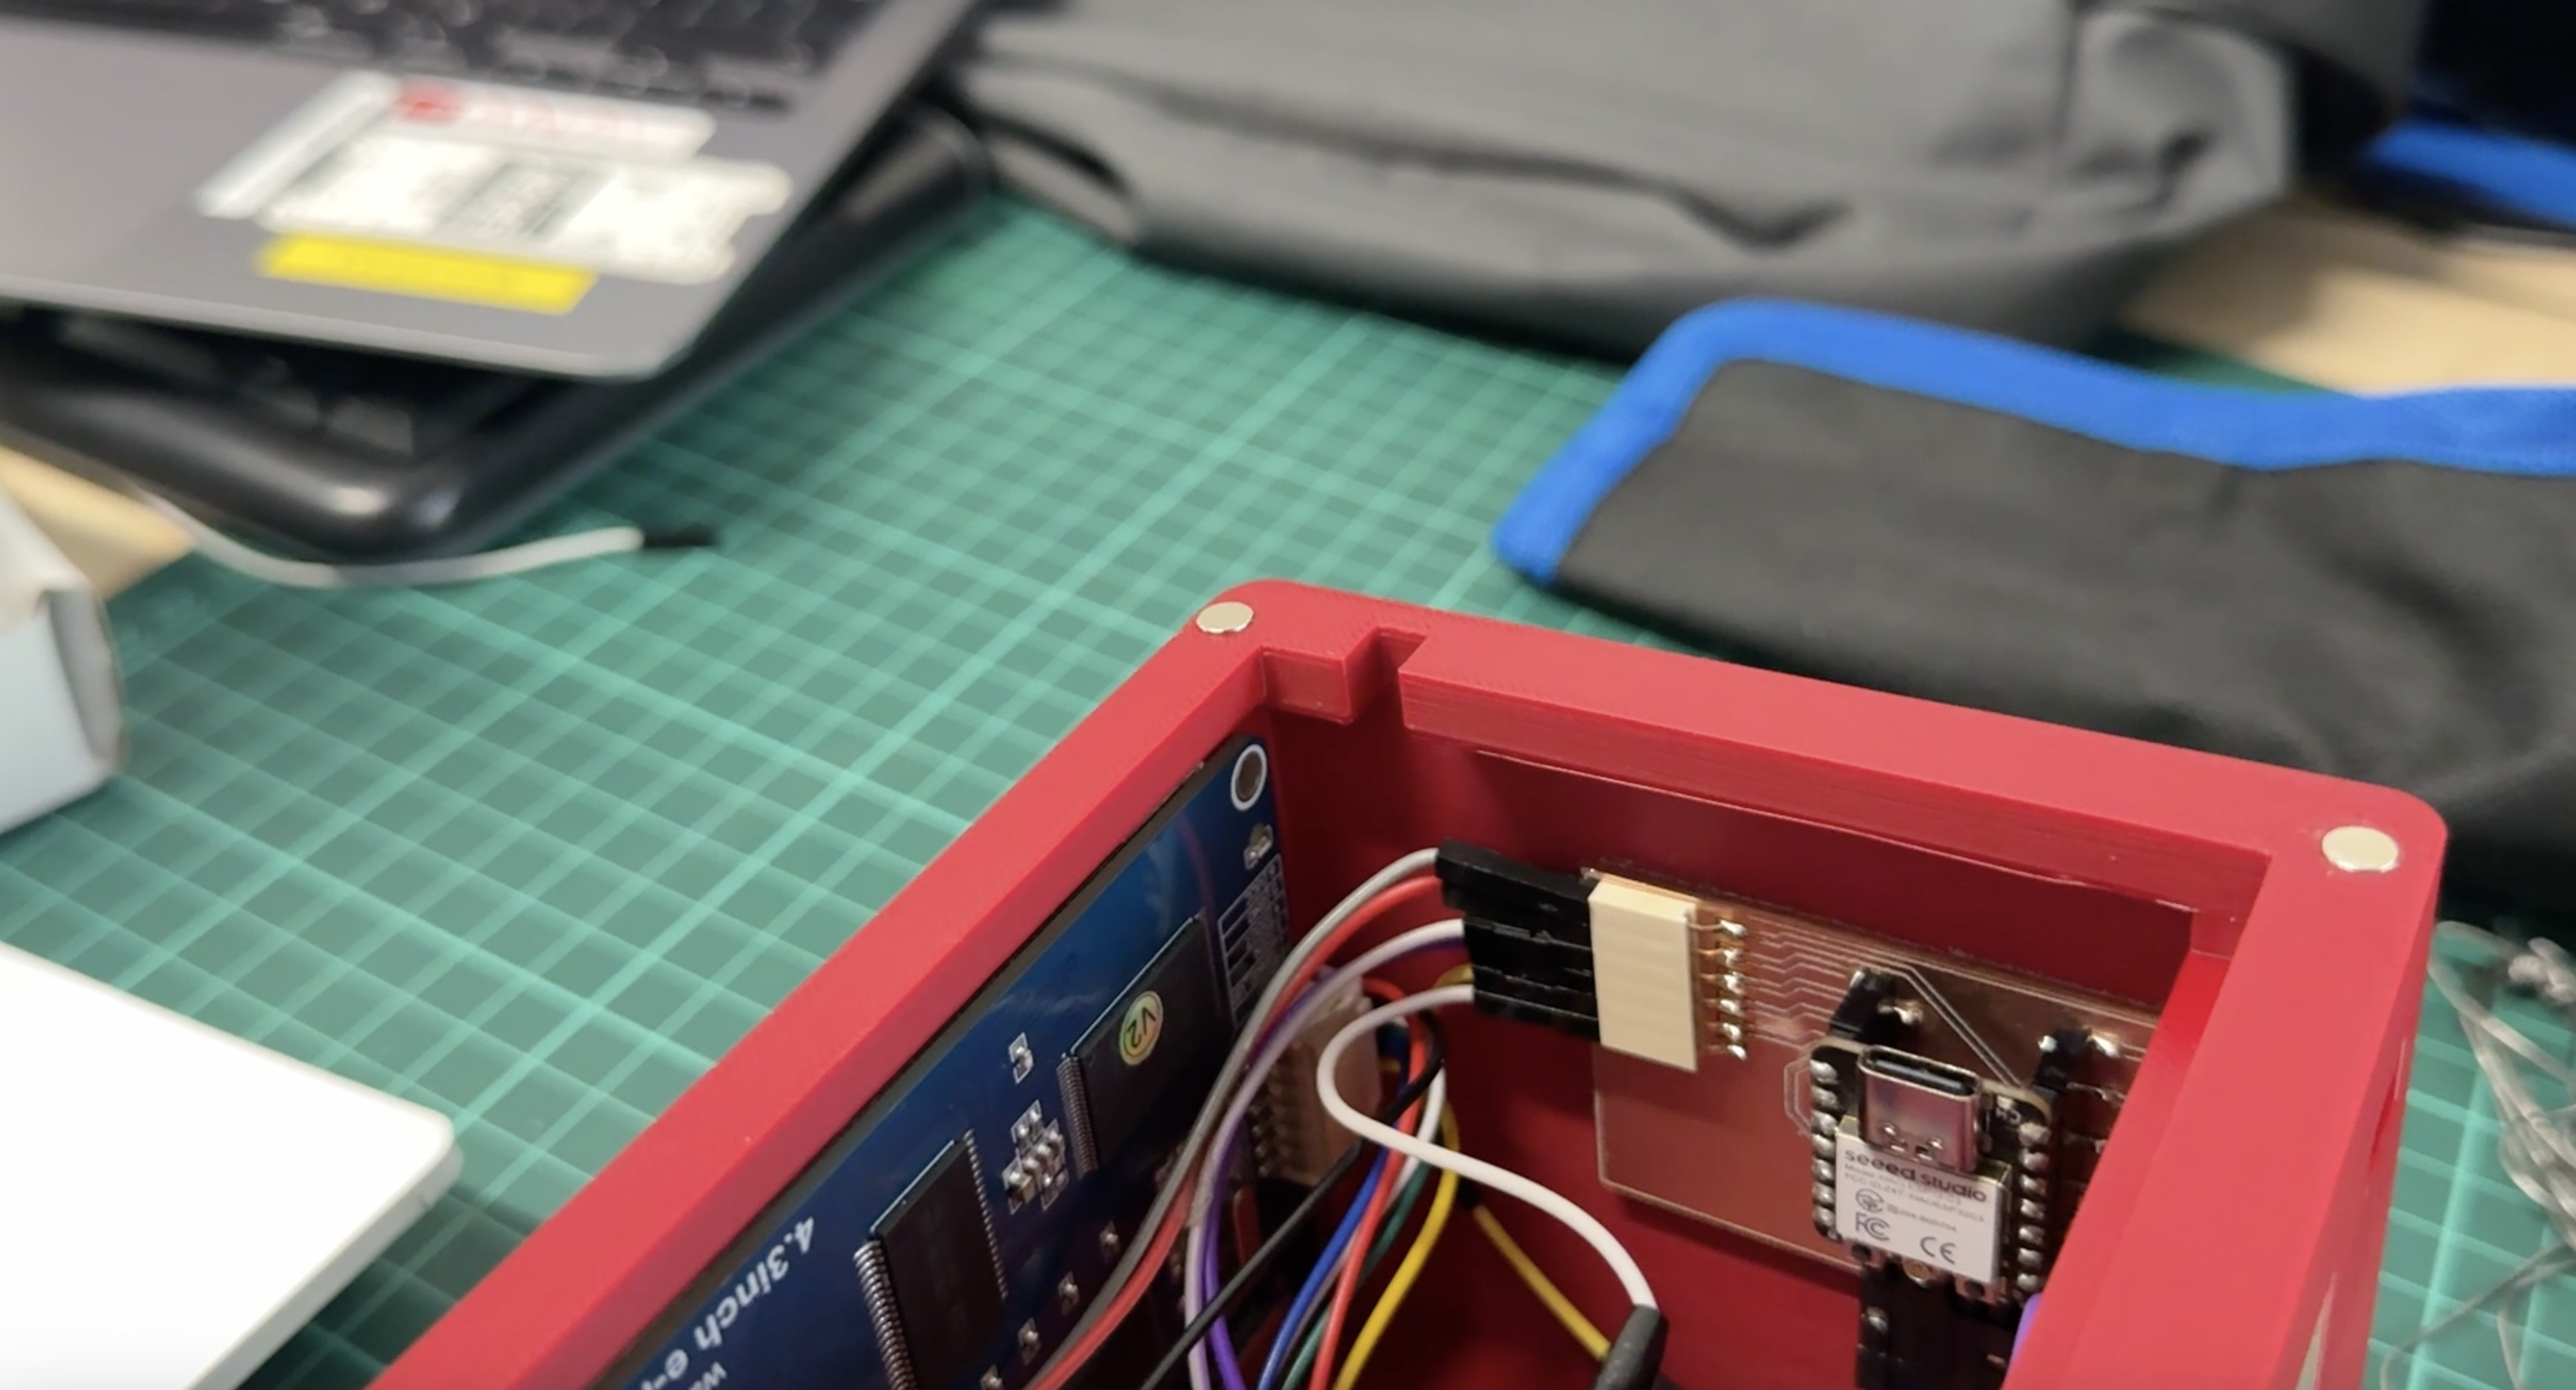
- the internal component layout and magnetic lid
- the NeoPixel placement
- the wiring structure
- the e-paper screen interface
- the menu system
- the browser-based control panel
- the final integrated code
The interface is an important part of the design. DESKO needs to be usable both from the physical buttons and from the web interface.
What materials and components will be used?
The main components and materials are:
| Part | Purpose |
|---|---|
| Seeed Studio XIAO ESP32-C3 | Main microcontroller |
| E-paper display | Clock and menu display |
| NeoPixel LED sticks 8 | Ambient light and timer feedback |
| Buzzer | Alarm and countdown sound |
| Push buttons | Physical control |
| 5V usb-c power supply | Power for the system |
| Wires and connectors | Internal connections |
| 3D printed parts | Enclosure or mounting |
| Laser cut parts | Structure or panels |
| Magnets / Mounting Tape | Assembly |
The ESP32-C3 is useful because it can control the outputs and also create a local Wi-Fi network for the web interface.
Where will they come from?
All of the electronic components come from the Fab Lab inventory or previously available project parts.
| Item | Source |
|---|---|
| ESP32-C3 | Fab Lab |
| E-paper display | Local Distributor |
| NeoPixels | Fab Lab |
| Buzzer | Fab Lab component |
| Buttons | Fab Lab component |
| Wires and connectors | Fab Lab inventory |
| 3D printing filament | Fab Lab |
| Laser cut material | Fab Lab |
| Magnets / small hardware | Fab Lab / available parts |
How much will they cost?
The cost depends on which parts are already available in the lab. An approximate bill of materials is:
| Item | Estimated Cost |
|---|---|
| XIAO ESP32-C3 | $6 |
| E-paper display | $35-45 |
| NeoPixel LEDs | $8-12 |
| Buzzer | $1 |
| Push buttons | $1-2 |
| Wires and connectors | $3 |
| 5V power supply | $5-8 |
| 3D printing material | $3-5 |
| Laser cut material | $5-10 |
| Screws / magnets / small hardware | $3-5 |
Estimated total cost:
Approximately $70-95
The e-paper display is the most expensive part of the project. The cost could be reduced in a future version by using a smaller display or a different screen type.
What parts and systems will be made?
DESKO will be made from several connected systems.
| System | Description |
|---|---|
| Physical enclosure | Holds the display, buttons, LEDs, and electronics |
| Display system | Shows time, menus, alarm, countdown, and stopwatch |
| Lighting system | Controls NeoPixel ambient modes and wake-up light |
| Alarm system | Stores alarm time and activates buzzer/light |
| Countdown system | Tracks remaining time and controls LED progress |
| Stopwatch system | Tracks elapsed time |
| Button interface | Allows direct control from the device |
| Web interface | Allows control from phone or computer |
| Power system | Powers the board, display, LEDs, and buzzer |
The most important challenge is making these systems work together without conflicts.
What processes will be used?
I will use several Fab Academy processes to make DESKO.
The processes include:
- 3D design for the enclosure
- 3D printing for the body or display holder
- laser cutting for the light diffusers
- electronics design and wiring
- embedded programming for the ESP32-C3
- output device control for the e-paper display, LEDs, and buzzer
- input device control for the buttons
- interface programming for the browser control panel
- system integration for combining all parts
- documentation with photos, videos, and final files
The project uses many of the previous weekly skills together in one final object.
What questions need to be answered?
Before the final presentation, I still need to answer these questions:
- Is the clock menu clear enough for someone using it for the first time?
- Is the web interface easier to use than only the buttons?
- Should the alarm be mainly controlled from the physical interface or the browser?
- Is the wake-up light bright enough but still comfortable?
- Can the wiring fit safely inside the enclosure?
- Will the system work reliably?
How will it be evaluated?
DESKO will be evaluated by whether the final integrated system works as planned.
The project will be successful if:
- the e-paper display shows the clock interface
- Ambient lightng features work
- the buttons can move through the menu
- the alarm can be set and triggered
- the wake-up light turns on before the alarm
- the countdown works
- the LEDs show countdown progress
- the stopwatch works
- the buzzer gives feedback
- the web interface connects and controls the device
- the enclosure holds the parts properly
- the final presentation can demonstrate the main features clearly
The most important evaluation point is integration. The parts should not only work separately. They should work together as one complete device.
Uploaded summary slide placeholder
I prepared a placeholder for the final project summary slide. The final version will be updated after the device is fully assembled and tested.
The slide should include:
- project name: DESKO
- clear images of the final object
- short explanation of what it does
- main components
- main features
- Fabrication techniques
File placeholder:
presentation.png
Uploaded video clip placeholder
I also prepared a placeholder for the final project video. The final video will be updated after the full system is working inside the enclosure.
File placeholder:
presentation.mp4
Checked final presentation schedule
The required final presentation files are:
presentation.png
presentation.mp4
At this stage, I am using placeholders. I will replace them with the final slide and final video after the final build is complete.
These files need to be placed in the root directory and linked correctly in the final presentation schedule.
Current Status
| Part | Status |
|---|---|
| Main ESP32-C3 code | In progress |
| E-paper display | Working |
| NeoPixel lighting | Working |
| Buttons | Working |
| Buzzer | Working |
| Alarm | Working, needs more testing |
| Countdown | Working |
| Stopwatch | Working |
| Web interface | Working, needs visual polish |
| Enclosure | In progress |
| Final wiring | Needs cleaning |
| Summary slide | Placeholder |
| Final video | Placeholder |
What has worked?
The main code structure works. The physical buttons can control the menu system, and the web interface can control important settings from a browser.
The NeoPixel modes work, including warm light, beige breathing, blue night, rainbow, and focus white. The countdown also uses the LEDs as a visual timer.
The e-paper screen works, but because it refreshes more slowly than a normal display, I need to be careful about when the screen updates.
Schedule before final presentation (Right now)
| Task | Priority |
|---|---|
| Finish code integration | High |
| Improve clock UI | High |
| Improve web interface design | High |
| Test alarm and countdown | Medium |
| Finish enclosure assembly | High |
| Clean internal wiring | High |
| Take final photos | Medium |
| Record final video | High |
| Prepare final slide | High |
| Upload final files | Medium |