3D Scanning and Printing
Week 6
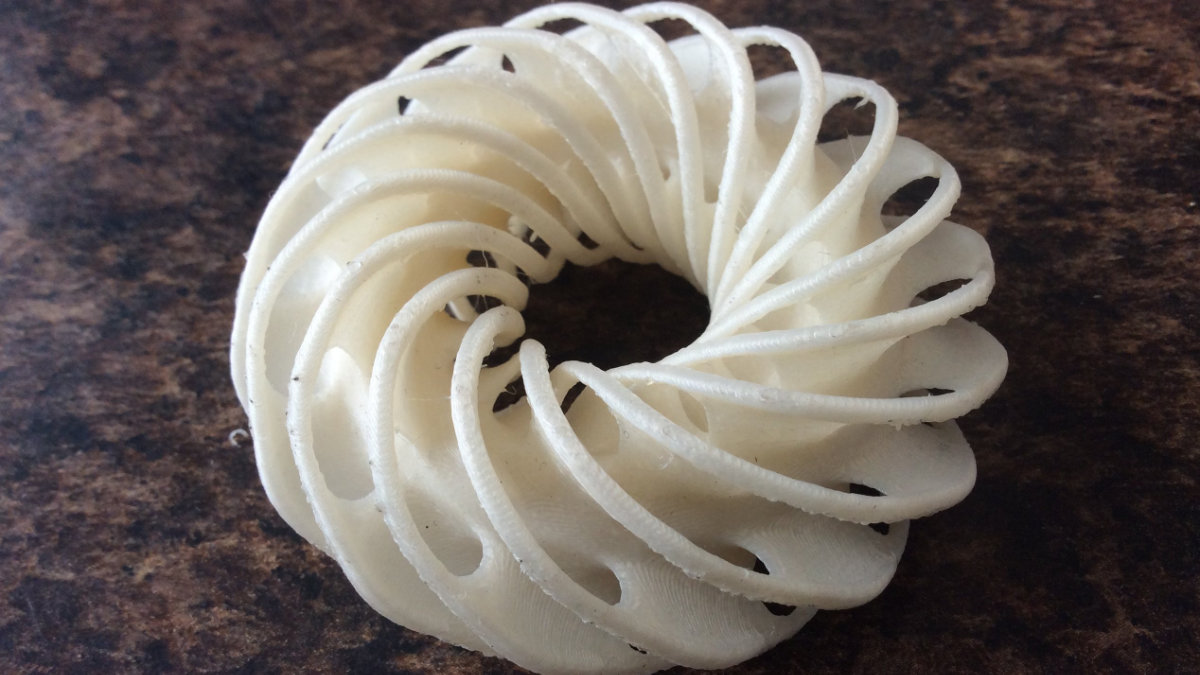
3D printing is the big selling point of setting up a FabLab in a library. It's other sibling, 3D scanning, is also a technology that people ask when they have a project in mind. The question is: Is 3D scanning as easy to use and can be a nice complement to 3D printing.
We'll see.
Individual Assignment:
Additive design
For this week assignement, I have to design a part that cannot be made with substractively. For this assignement, I'm free to do something artistic. I can use Blender to create something but I want to use another software that can creates very complex parts. Years ago, I made some parts with Wings 3D. to create such parts but the results were too thin and never corrected the problem. Now is the time to correct this mistake and do something wild that cannot be done any other way than with a 3D printer.
I checked my previous files and found that they were corrupted.
Good.
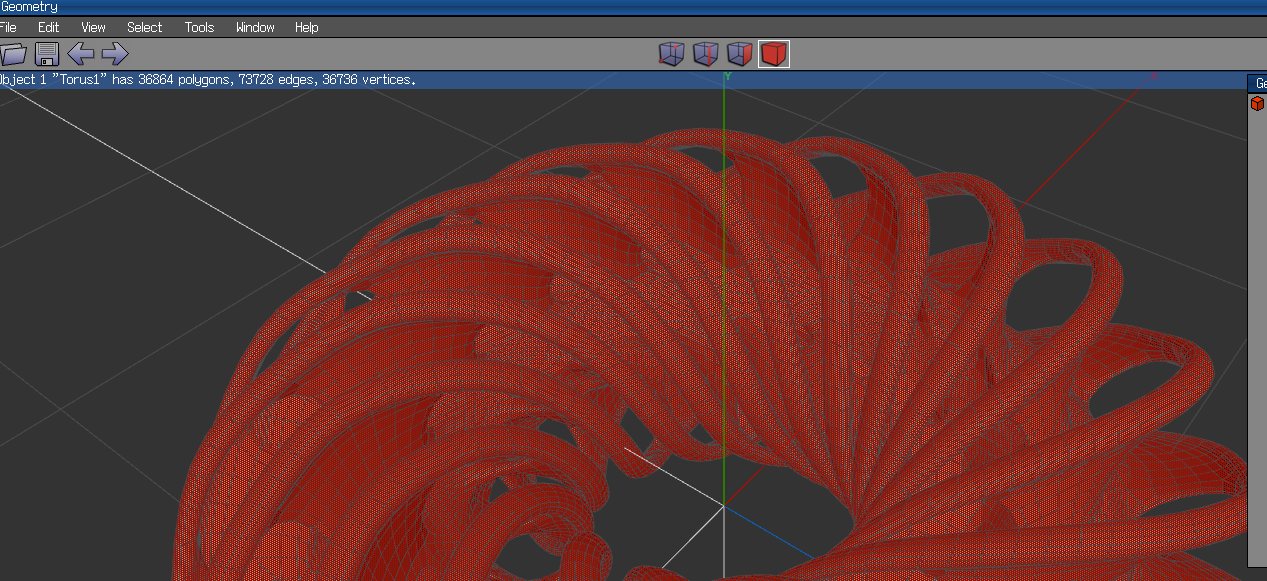
I have to start from scratch and renew with this software. So I made an initial torus.
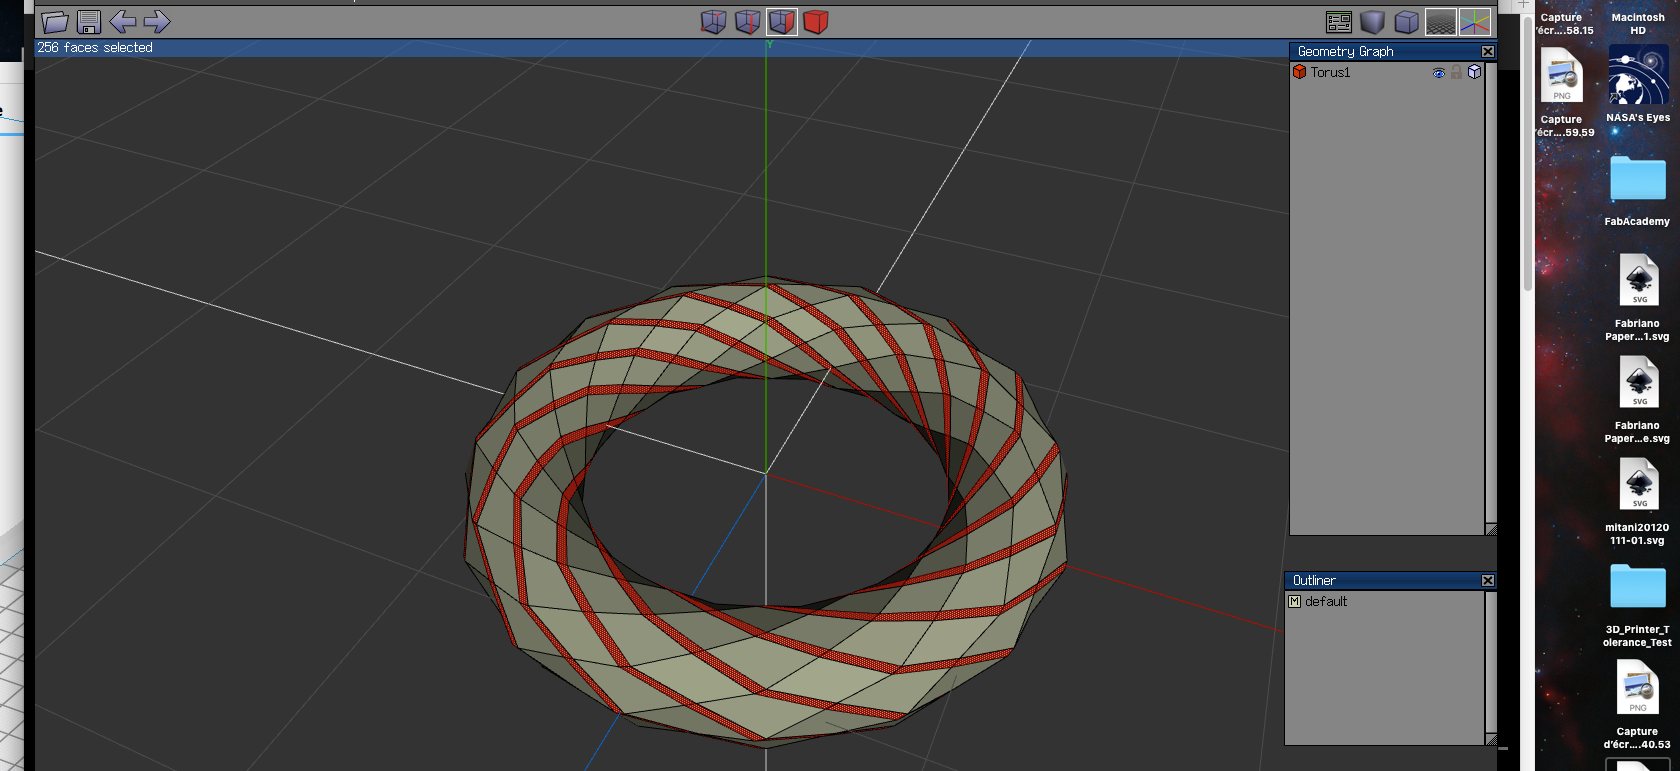
Inset the faces and collapse. Inverse the selection and delete all the vertical and horizontal edges. Select one edge then press G multiple times so it extends all around then L for loop until all is selected. Bevel to the maximum then extrude normals by about .300.
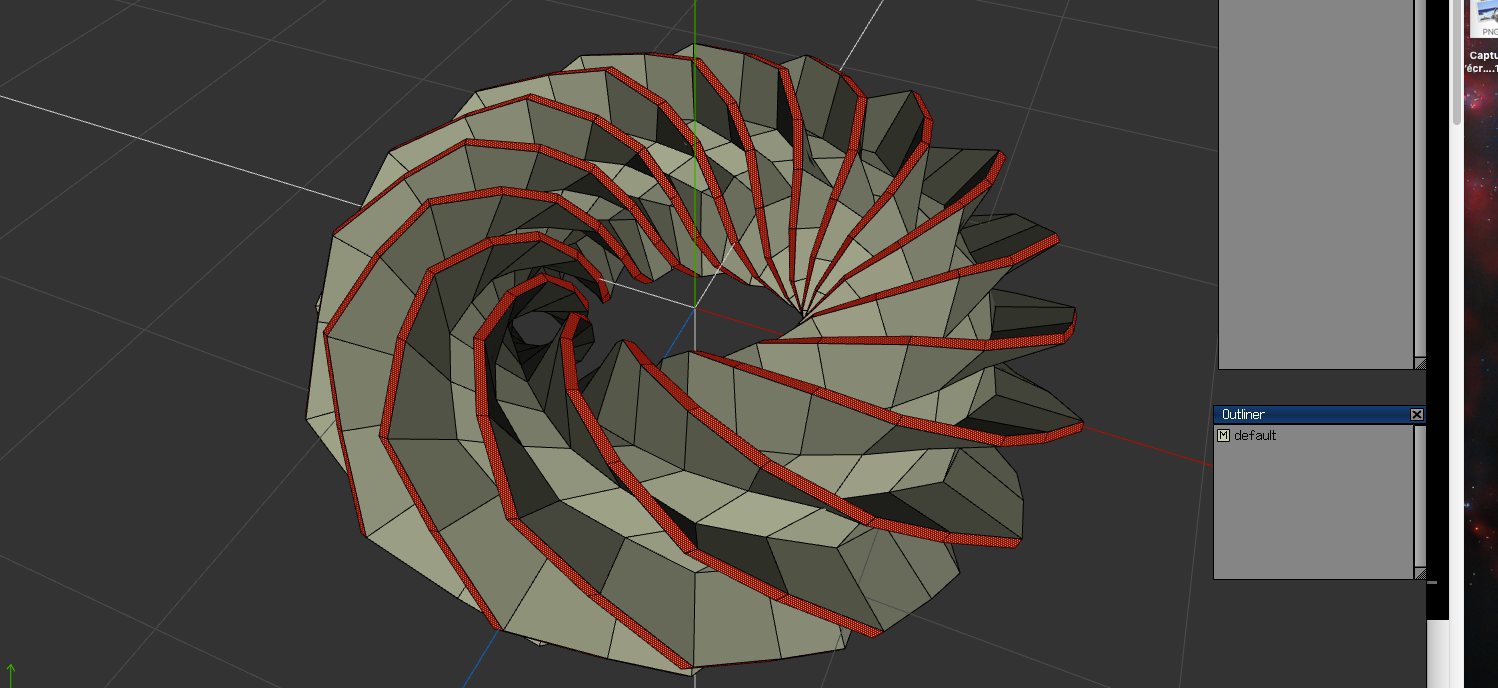
You keep the faces selected, you right click and select Shell Extrude and extrude them again by a small amount (0.05"). You press the "+" key to extend the selection. While the exterior surface are selected, you extrude the normals by .03". Be careful between Shell Extrude and Extrude between the previous operation and this one as it will gives you problems later on like it happened to me. We select the entire object, then "Combine". The exterior extrusion is now a new object.
On the right hand of the screen you click the new object so it is now invisible. You select an edge on the edge of the toroidal then select Edge Loop, Every Nth and type 4. Press "I" for identical, so everything is selected. Then select "Face" on the top of the screen.
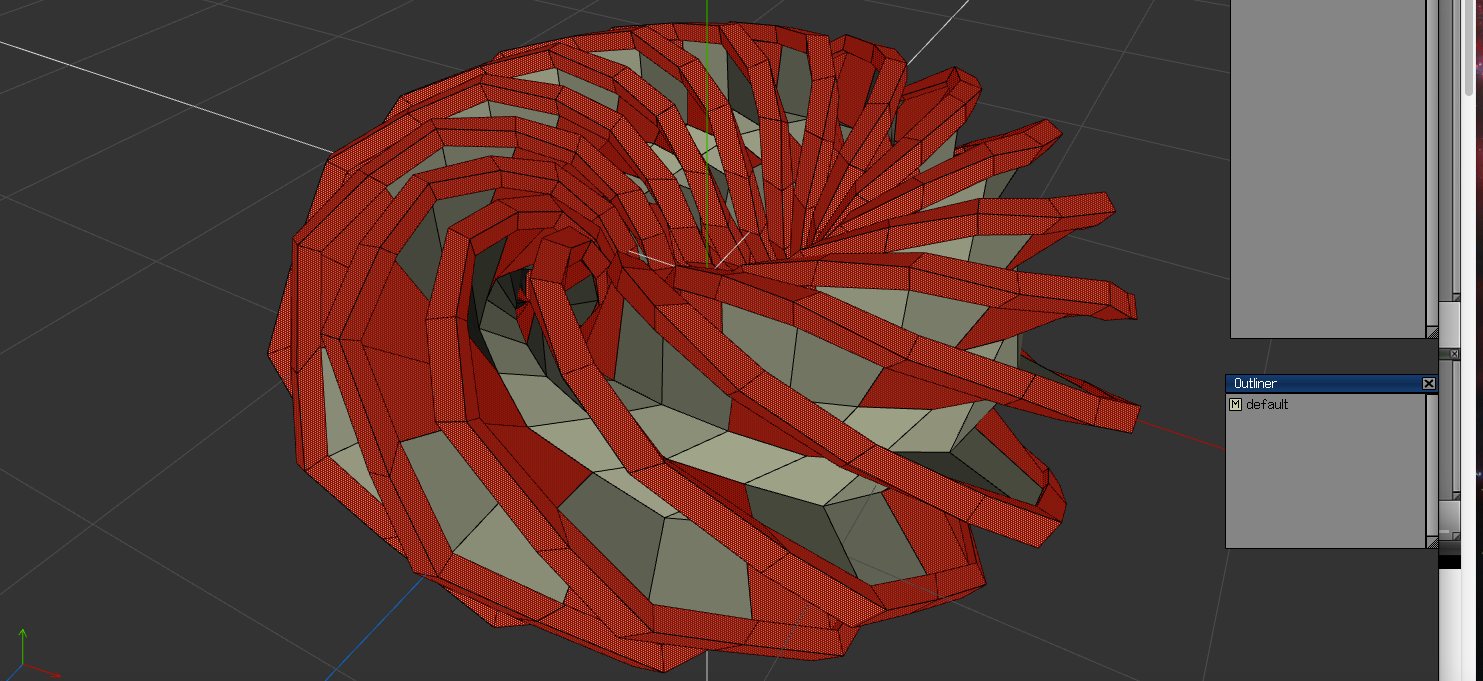
We now delete the interior faces, clean up the mesh and bring back the exterior spiral. We weld them together and the operation left to our mesh is to smooth them "S" to our taste. We export the mesh to an .stl file and it's ready for the printer.
Cura
Once imported, I had to carefuly look at the platter as the file is really tiny and almost invisible. As we have print a small object, I scaled it up, eventually choosing a scale of 2000% to make sure I have a printable object.
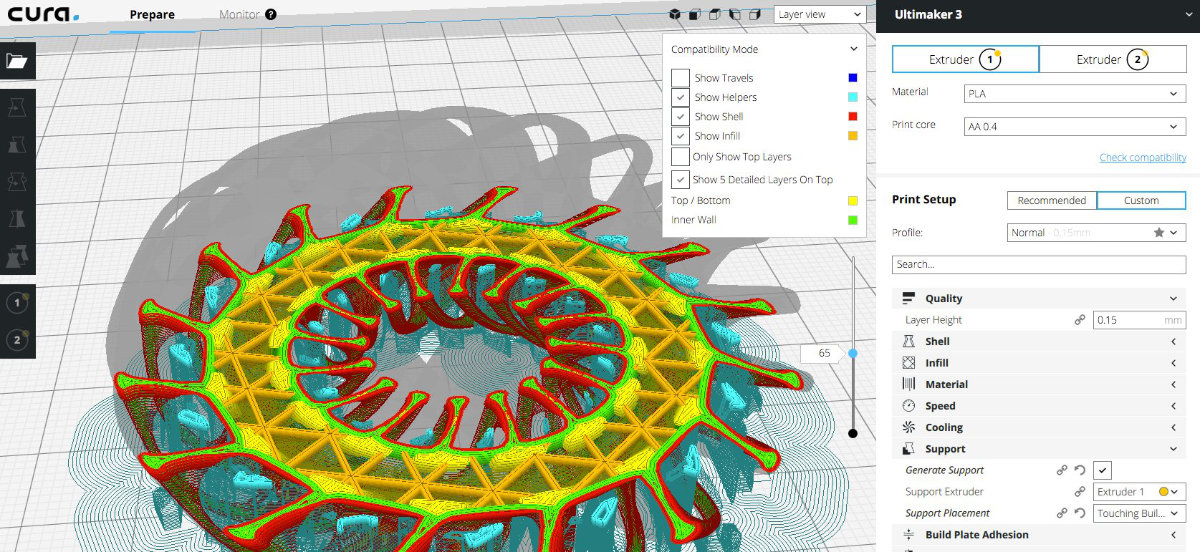
This part looks promissing. And this creation cannot be made subtractively.
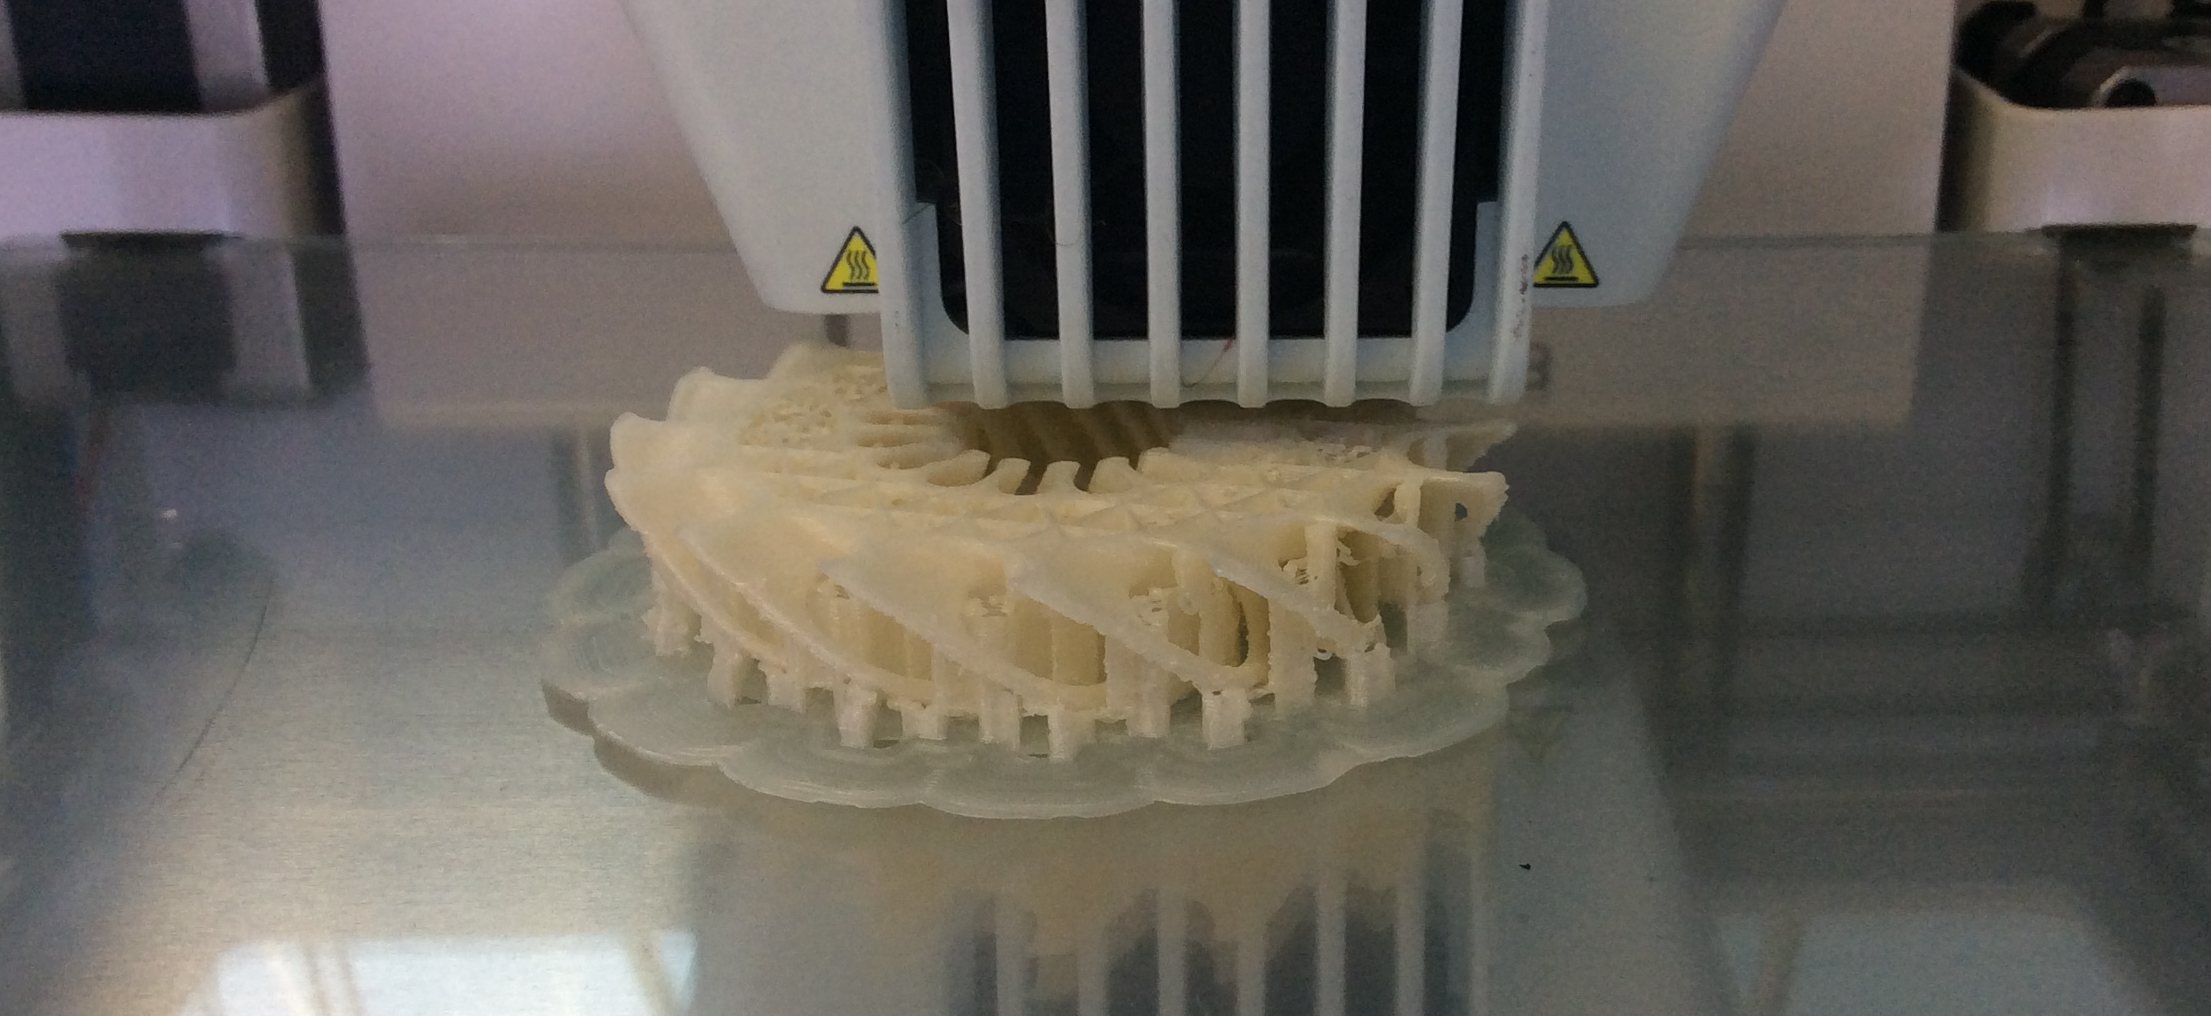
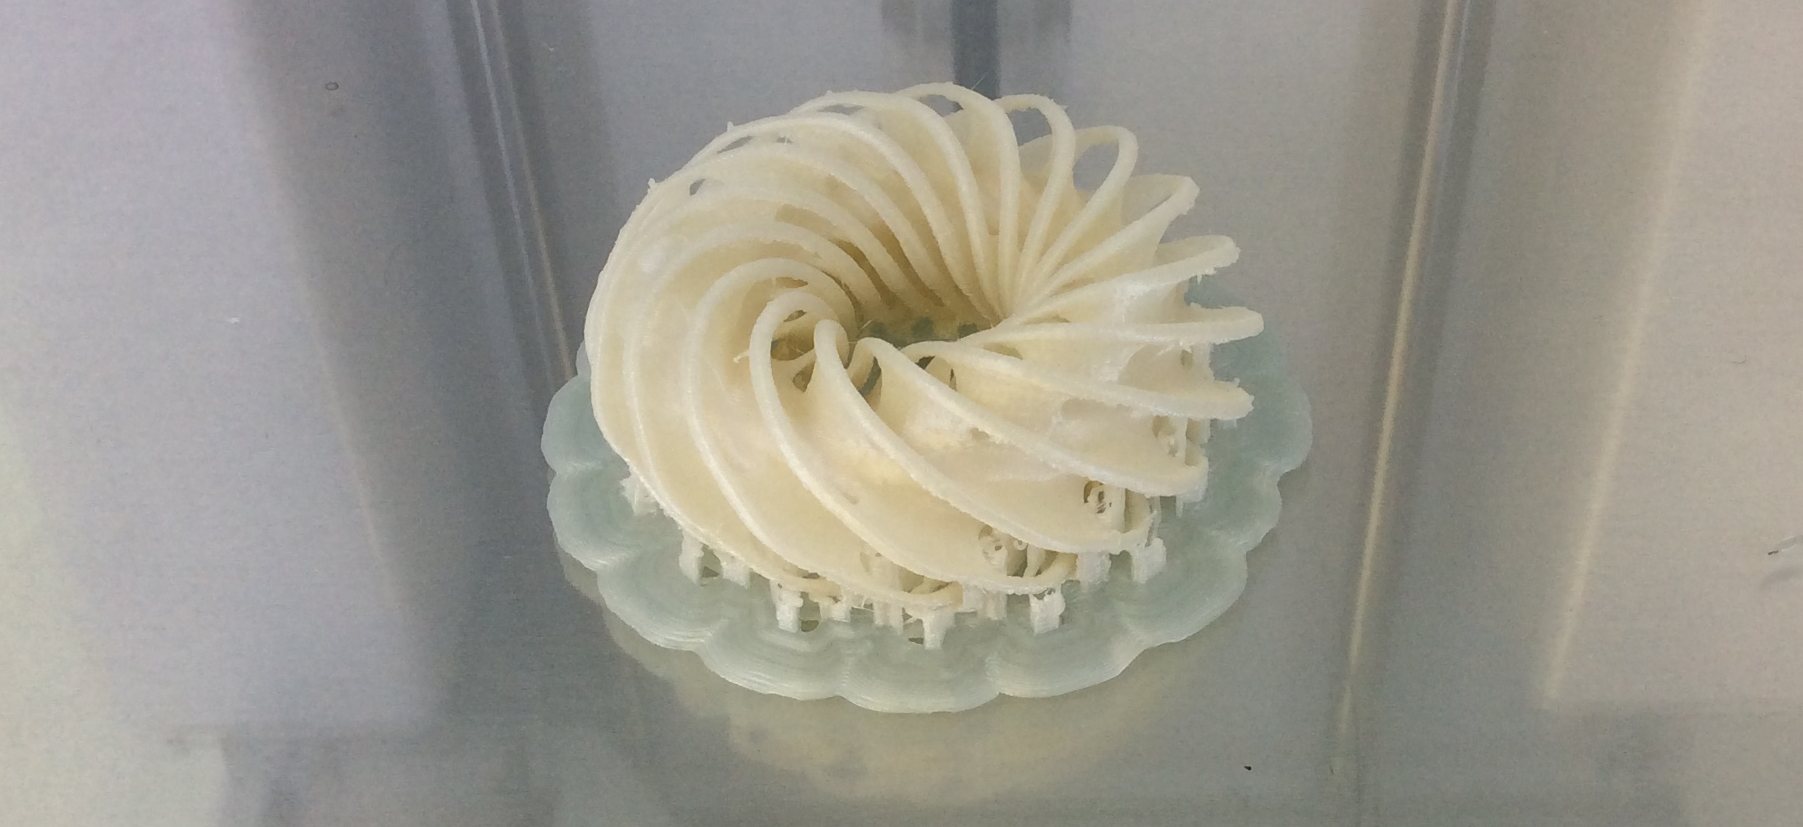
On the platter, it looks great but I still need to clean up the support. I had to be careful removing the supports. Based on my previous experience, with a small scale modal, I was obvious to me that I needed some sort of supports for starting the print but not too much as to not have to clean up the supports for hours. That's the reason behind choosing the option Touching Builtplate inside Cura. Ultimataly, that assumption proved to be correct.
I had to be careful with the cleanup process. The closeness of the sprirals and the relative solididy of the supports. With a small pair of rounded pliers, I carefully removed the base then the supports. From time to time, an X-acto was useful. I put a pair of gloves to protect myself when using the X-acto but found out that I was dirtying my model. For a while I used a glove and a paper towel but eventually I found out that the small plier was doing a great job and finished the cleanup process with the part in my hand. I made a few pass with the X-Acto with the help of my headband magnifier.
The finished part is one that can only be done with additive manufacturing.

Scanning a 3D object
I was really anticipating this exercise. I've been asked a few times about the availability of 3D scanning and could'nt offer this service for lack of scanner. I ordered one when we opened the lab but it's performance was less than stellar. Since the scanner that I use was a another model, I expected the performance to be an order of magnitude better than the one we had.
The initial setup
I found a plastic watering can. I knew that it was probably difficult to scan, and when Mathieu said to me to try it out, I knew that it wasn't gonna be easy. I went ahead anyway, more as a learning lesson than to make the assignement as fast as possible.
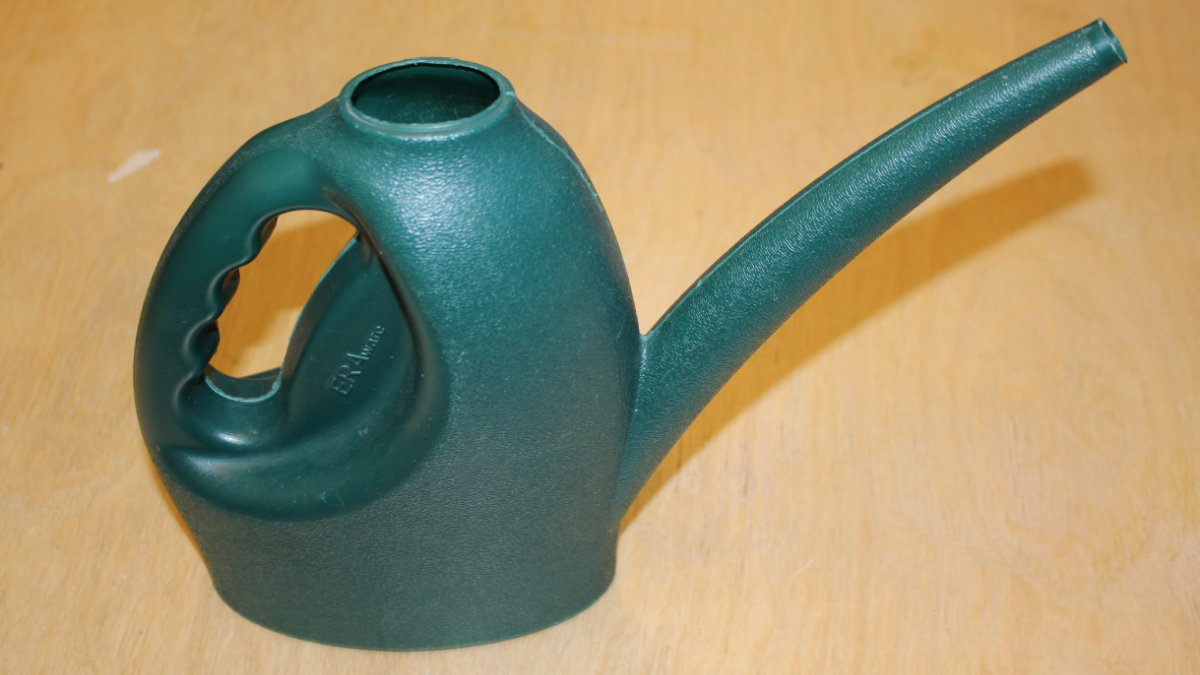
I cleared some space, picked up a garbage can and made an improvised stand. I tried my first scan with the computer held in one and and the scanner on the other. Not easy. I rapidly learned that doing the broadside was easy, turning around the can was the difficult part. Tried as I might, I hit the wall. Eventually, my arm was tired of holding the computer. I then tried to use a chair as I made the scan.
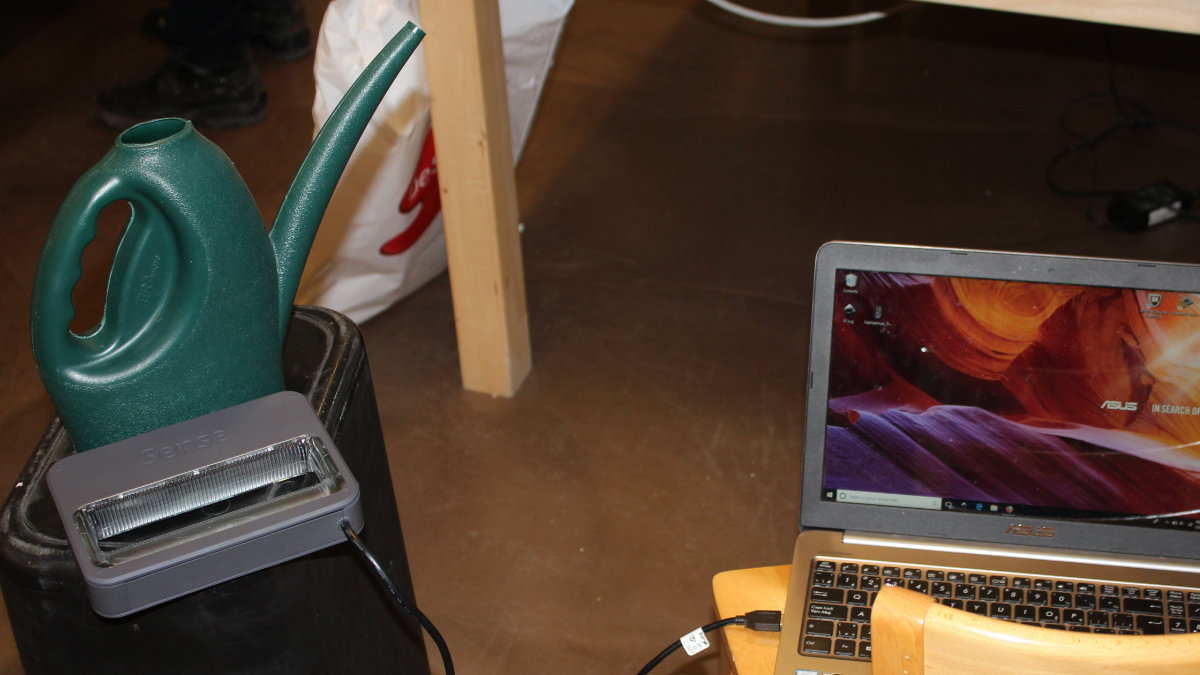
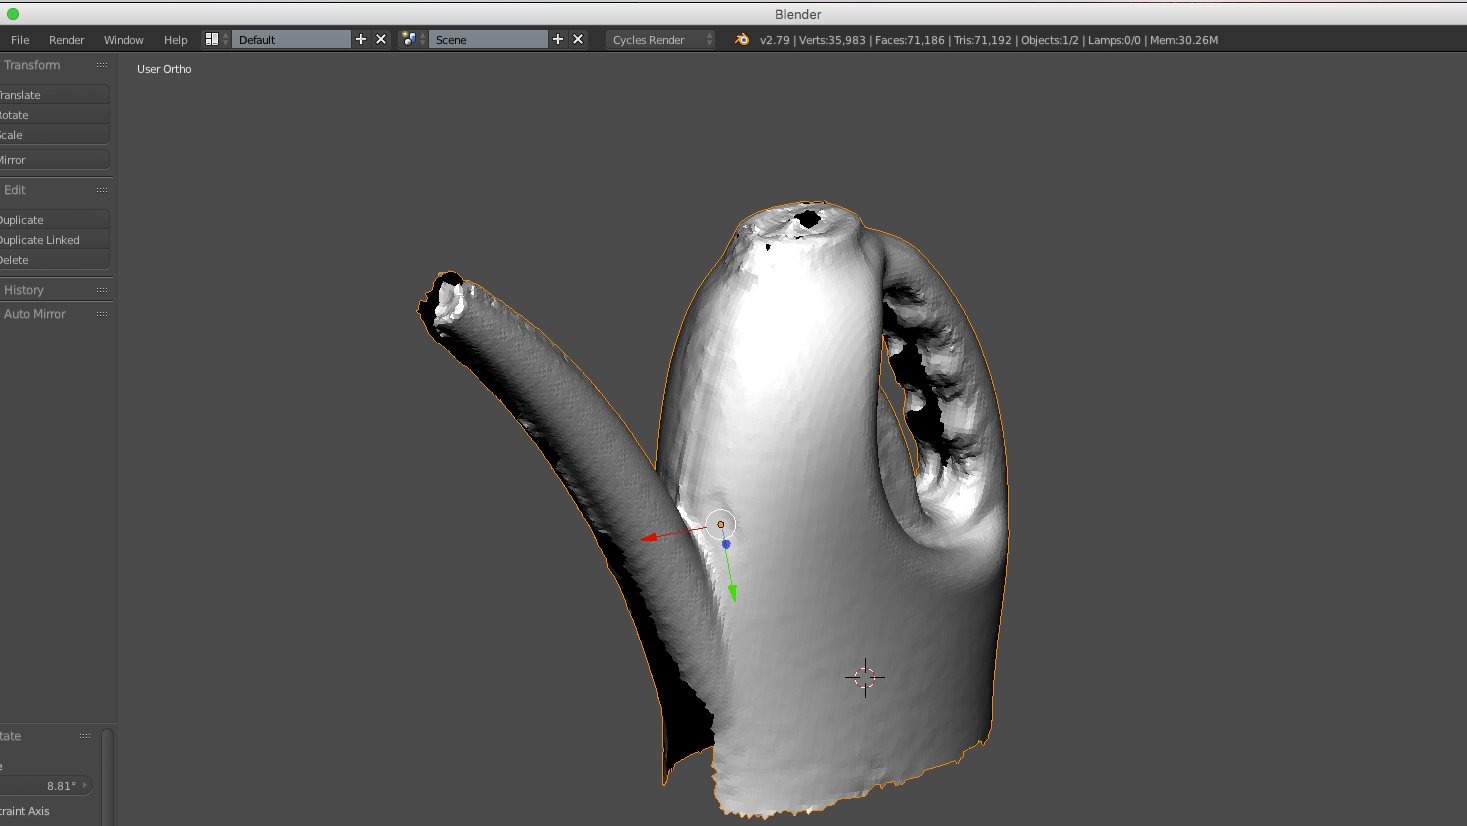
I made a first scan. About decent. But we're not talking about a watertight model here. The spout was about complete but some section underneat wasn't there. Same problem with the handle. Looking at the obj file, I think I got a pretty decent model for a first try.
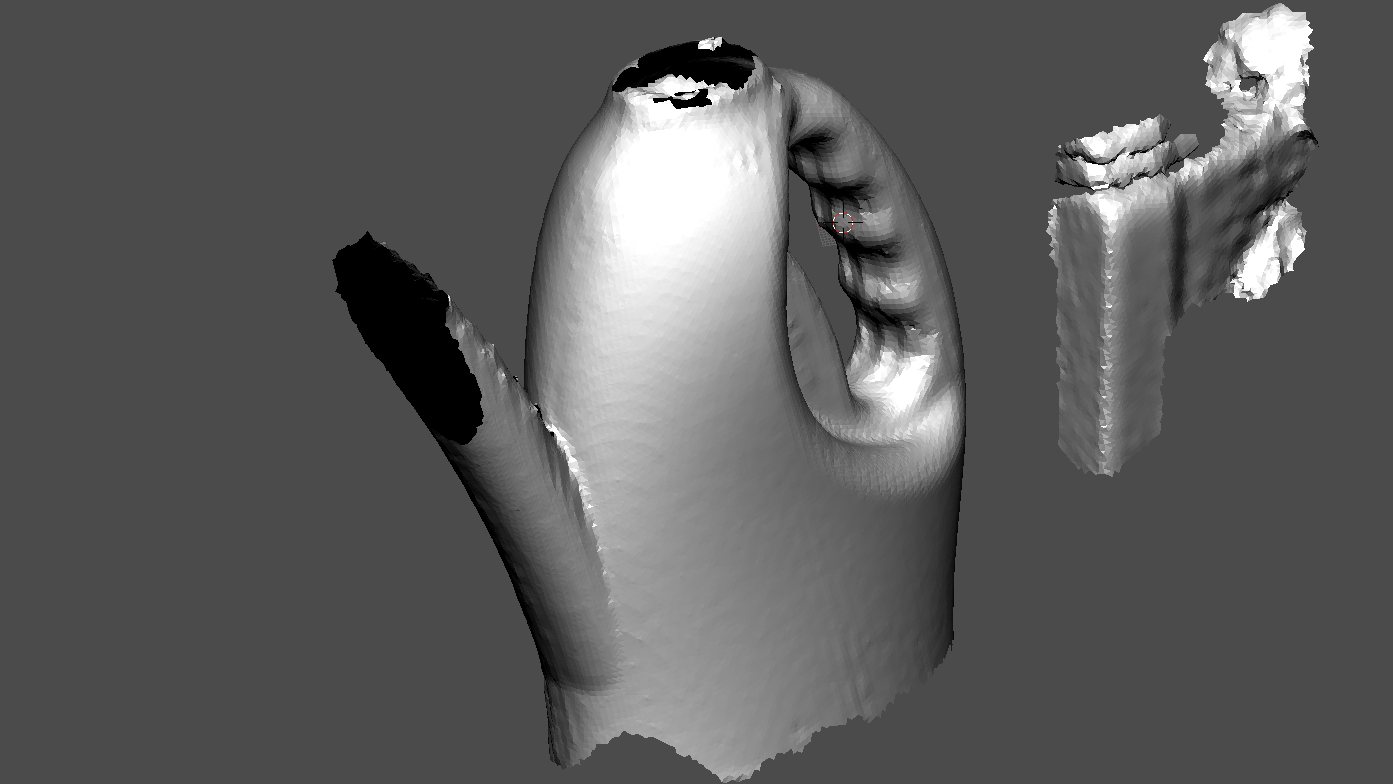
I was unsatisfied with the results. Since the underneat wasn't scanned, maybe it wasn't lighted enough. I had a headband magnifier with LED so why not try out with some more light? It did help getting a scan, sorts of. The scant went faster for the broadside and the handle but I never managed to have a correct spout. Because of the more lighted area, I was able to scan (by accident) part of the table. The base was also more rough at the edges, probably the result of specular reflection created by the LED lights bouncing off the plastic of both the can and the stand. I never managed to scan the extremity of the spout.
Those experiments were nice and fun but I stil got no scan. Time was getting short and I had to change my strategy and have a decent scan. So I change my prop to a coffee cup that was in the garbage. I thought that I would be finished real quick but I soon found that it was more difficult to scan that cup than the can. I thought that I was slow doing the scan of the can: it was much slower with the paper cup! And full of tracking, too slow or too fast scanning speed while I was almost standing still! I manage to get one scan, but it was a mess with a number of artifacts that I had to clean up to make it workable. And some areas weren't preoperly scanned.
Almost out of desperation to find a workable workflow, I tried a microwave turntable and turn it manually but this went so bad that I put it quickly where it belong, never to be touched again.
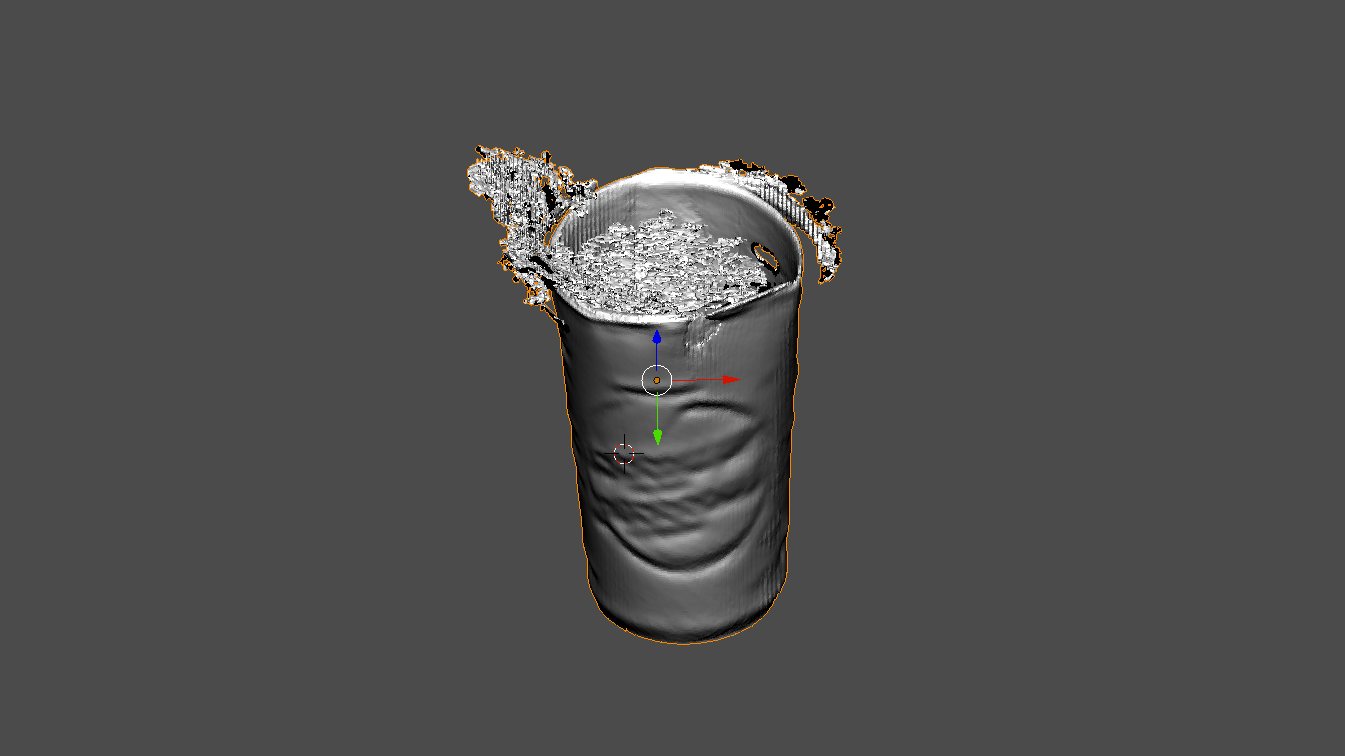
I was sharing my frustration and experience with the scanning unit with George that he suggested to put some something that cut off the shininess of the plastic. I had some paper left from the laser test and this paper is not glossy. On the first try, the scanner recognized the prop and put a square around it, which was never showned on any of my previous scans.
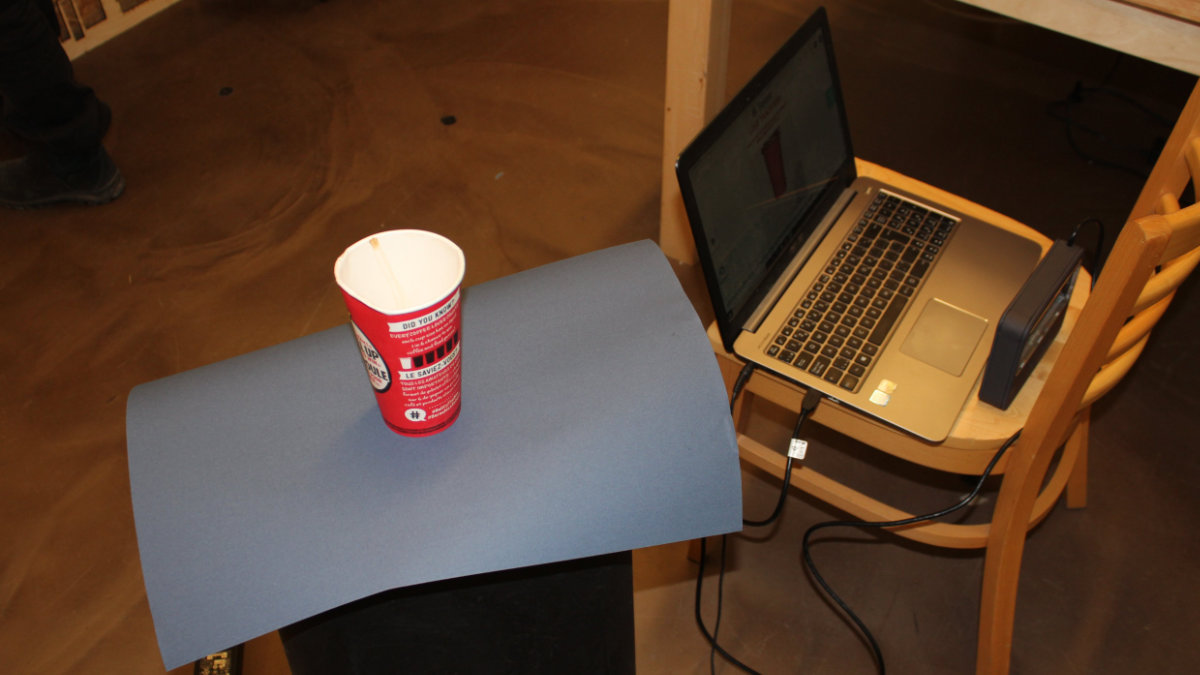
I made a first pass but wasn't really satisfied. For my best pass, I held the computer in my arm and the scanner in my other free hand. I made a first 360° pass and to my surprise, it went really well so I continued for a second pass and was done. The model was clean with complete walls, no artifacts and Mathieu was satisfied with it so it was a winner.
Lessons learned.
Scanning is really hard. My setup wasn't optimal and probably neither was my technique but I learned that you must be prepared to invest in an not so inconsiderate amount of time to get your object scanned. It may be easier with a scanner with some laser technology but you have to cough a fair amout of money for those and if you don't do this on a regular basis, it's a waste of money.
I wouldn't use a scanner to scan an ordinary object: taking pictures and create the mesh out of the profile would be a faster route. There are also alternatives and probably more will come. For me, a scanner would be useful for very unique objects. Otherwise, make it!
The second try on 3D scanning
Since I forgot to save the 3D files, I have to start again this assignment. This time, I use a different scanner, test TWO scanning software and learned a lot more about 3D scanning.
Structure Sensor
I almost bought Structure Sensor's scanner for our lab. I should have. This scanner attaches to an iPad as an accessory. Depending on your need, you can scan small objects or whole room. Let's dive in.
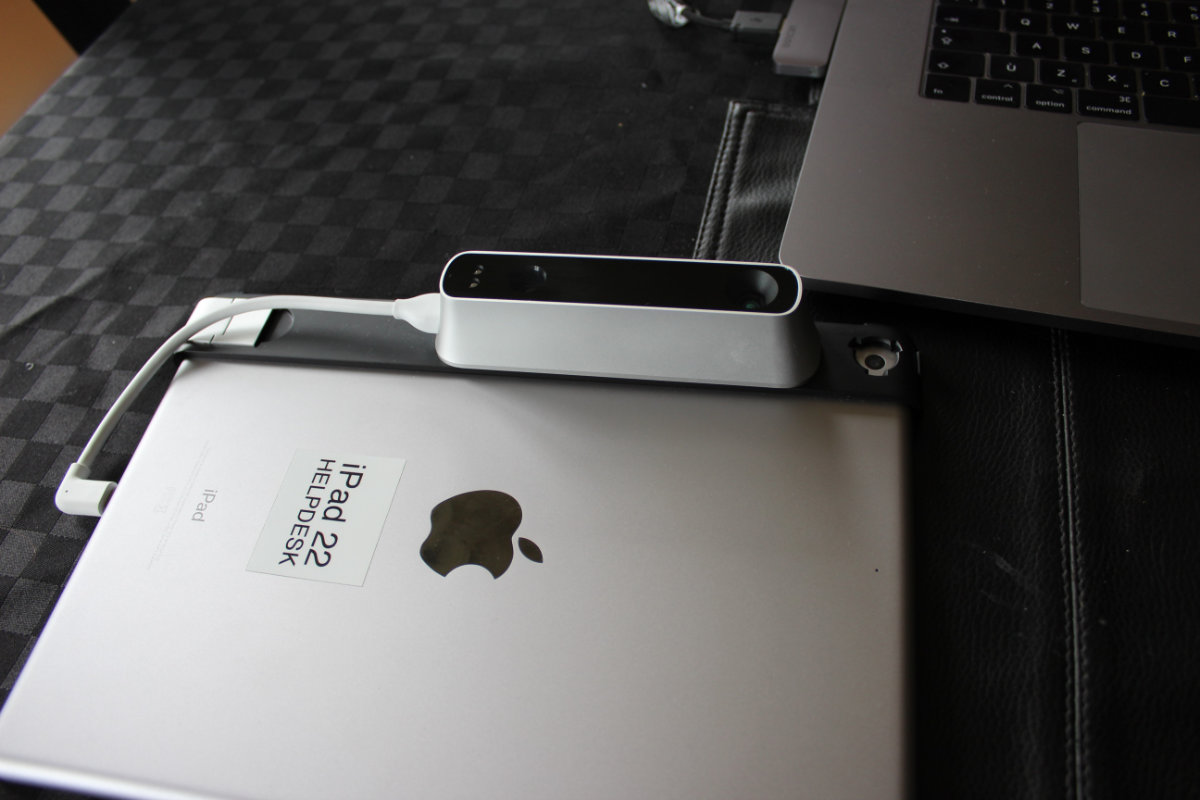
The set-up
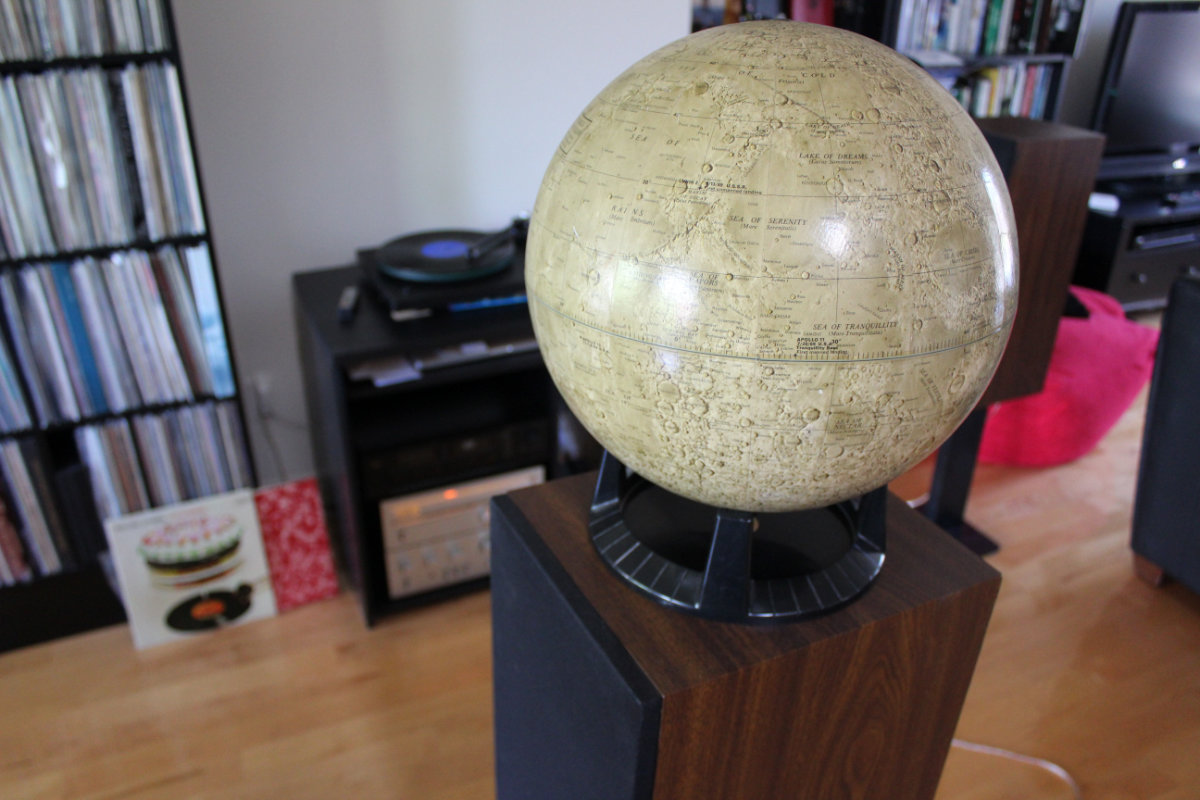
For this test, I made many setups. Whatever I was doing, I was limited in my mouvements. I finally fixed my problem by putting my prop (my old Moon globe) on one of my speaker.
Different softwares, different results
I made a few quick scans with this machine and was quite surprised by the results. Those scans, although not perfect, were quickly made with less pain than the previous scanner that I used. I used three software packages out of which I obtained differents results.
Skanect
This one is special in that it uses a network connection between the iPad and a computer, in my case a macBook Pro. This is an advantage as the mesh is downloaded into the computer where there plenty of CPU/GPU power. There's many options but there's a limit on them as this is a paid software (about $172 CAD). For this exercice, the most annoying thing is the limited amount of faces (5 000) that you can save. But you can limit the software to the appropriate limit and save as stl file.
This software proved to be easier to use than the previous one. I still got plenty of "going back the previous position", which sometimes was a little awkward when I was holding the iPad high up in the air. I made many attempts to create a complete mesh but I never realised one that really satisfied me.
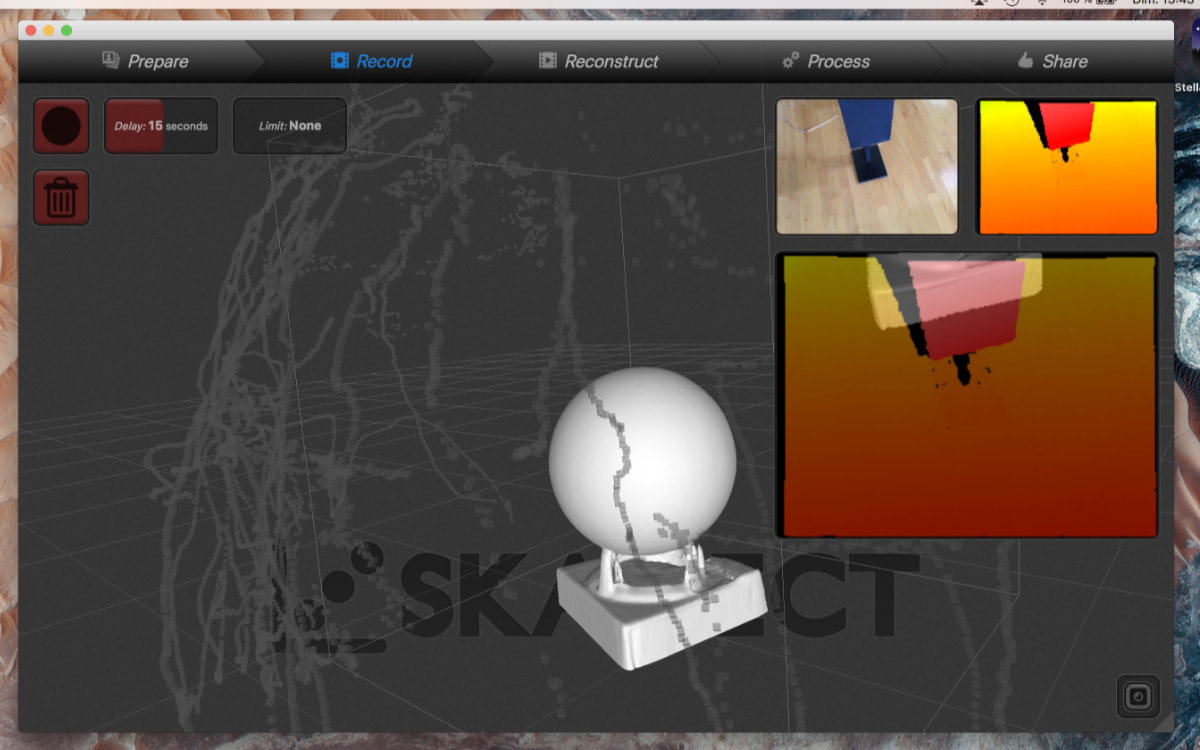
What bothered me most while using this software was that I was never able to make a complete scan of my set-up and the difficulty that the software had to scan the area around the four foot holders. This can be a configuration issue. I would invest more time to testing to make sure that this can be fixed before investing in the software.
Occipital's Scanner
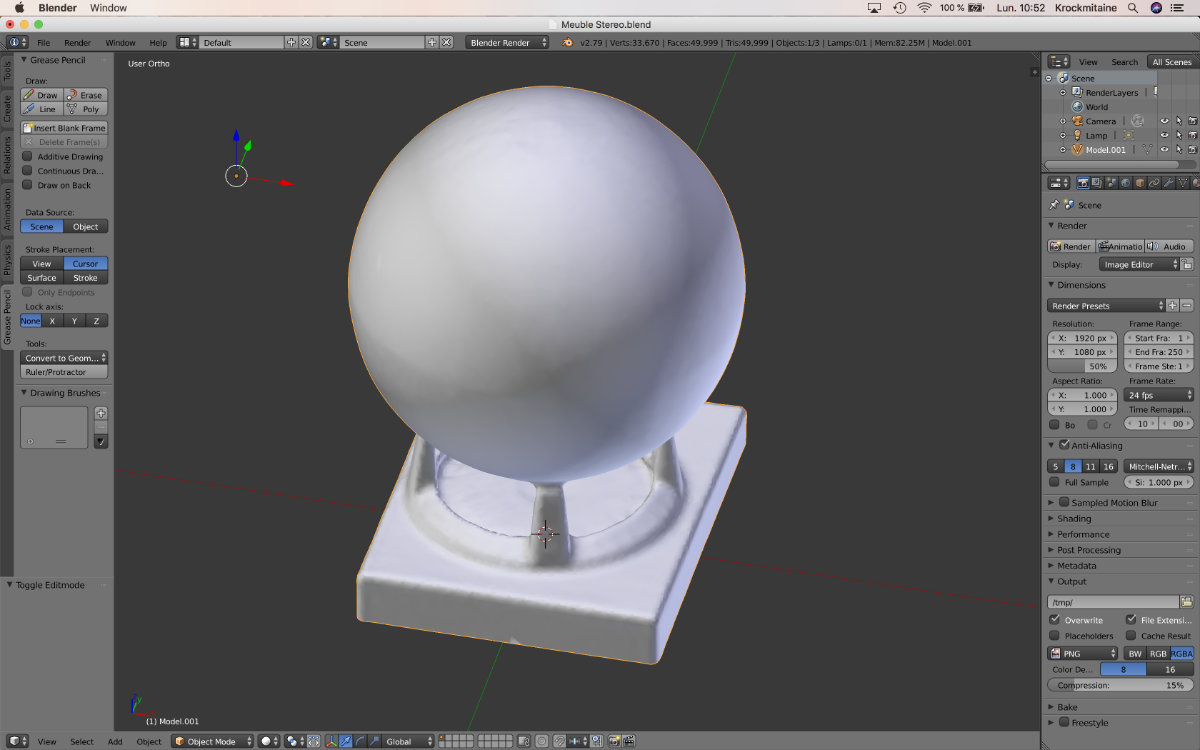
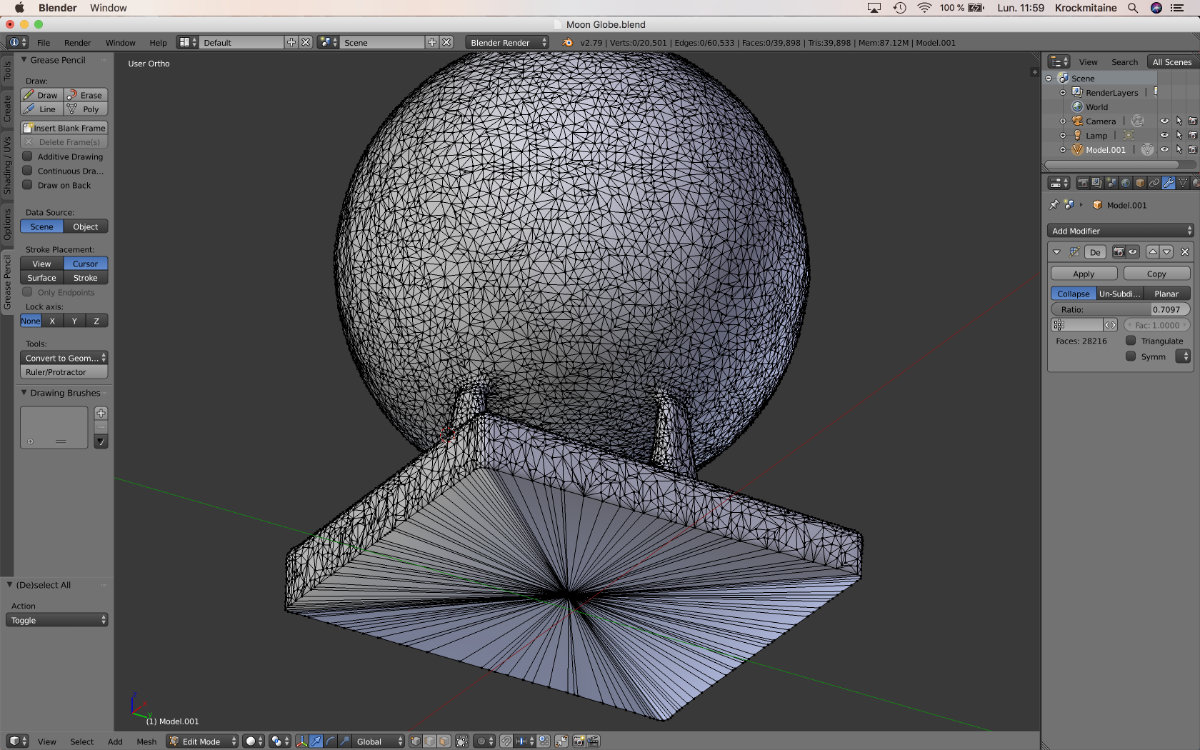
This free software is made by Occipital and got the job done way more faster and easier than all the softwares that I tested so far. This software is one of many specialized ones that you can download from the company's website, each one made for specific needs (design, mixed reality, eyewear). Making a scan of an object is straitforward: point and shoot. After many overlaps, sometimes real fast, I stopped the software and had a complete mesh with no artefacts that was send from the iPad to my computer via email. As this is an obj object, I used Blender to import the file, cleaned up the mesh and closed the base for a watertight model. I then export as an stl ready for 3D printing.
Group Assignment:
Print a test part for 3D printer.
We also have a group assignement with the printer to test their precision. We decided to print the tolerance test suggested by the FabAcademy (3D Printer Tolerance Test) but with two different printers (Ultimaker 3 and a Ditto pro). The part will be sliced at medium quality (0.15) with the latest Cura for the Ultimaker and Tinkerine Suite and see the differences. Alec will print the Ditto Pro test and I will do the Ultimaker one.
The test part was printed during the weekend while I was working. It took exactly 7 hours and 24 minutes to print. The finished part came out great but I didn't made any measurements on my part.
The parts
It came as no surprise that the parts, althout made at the same layer tolerance, came out with some differences.
The looks
The most obvious difference was the look of the base. We have a printer with a cold and a hot bed. The hot bed has a nice gloss finish while the cold platter is matte. We also see the imprint of the tape on the plastic. But the biggest defect came from the cold bed. there is a large area of hot plastic that contract while cooling, pulling the tape and creating a curved shape. It's a phenomenon that I observe too many time and I knew in advance that this part would have this defect. But by how much? By too much to be of use for precision work.
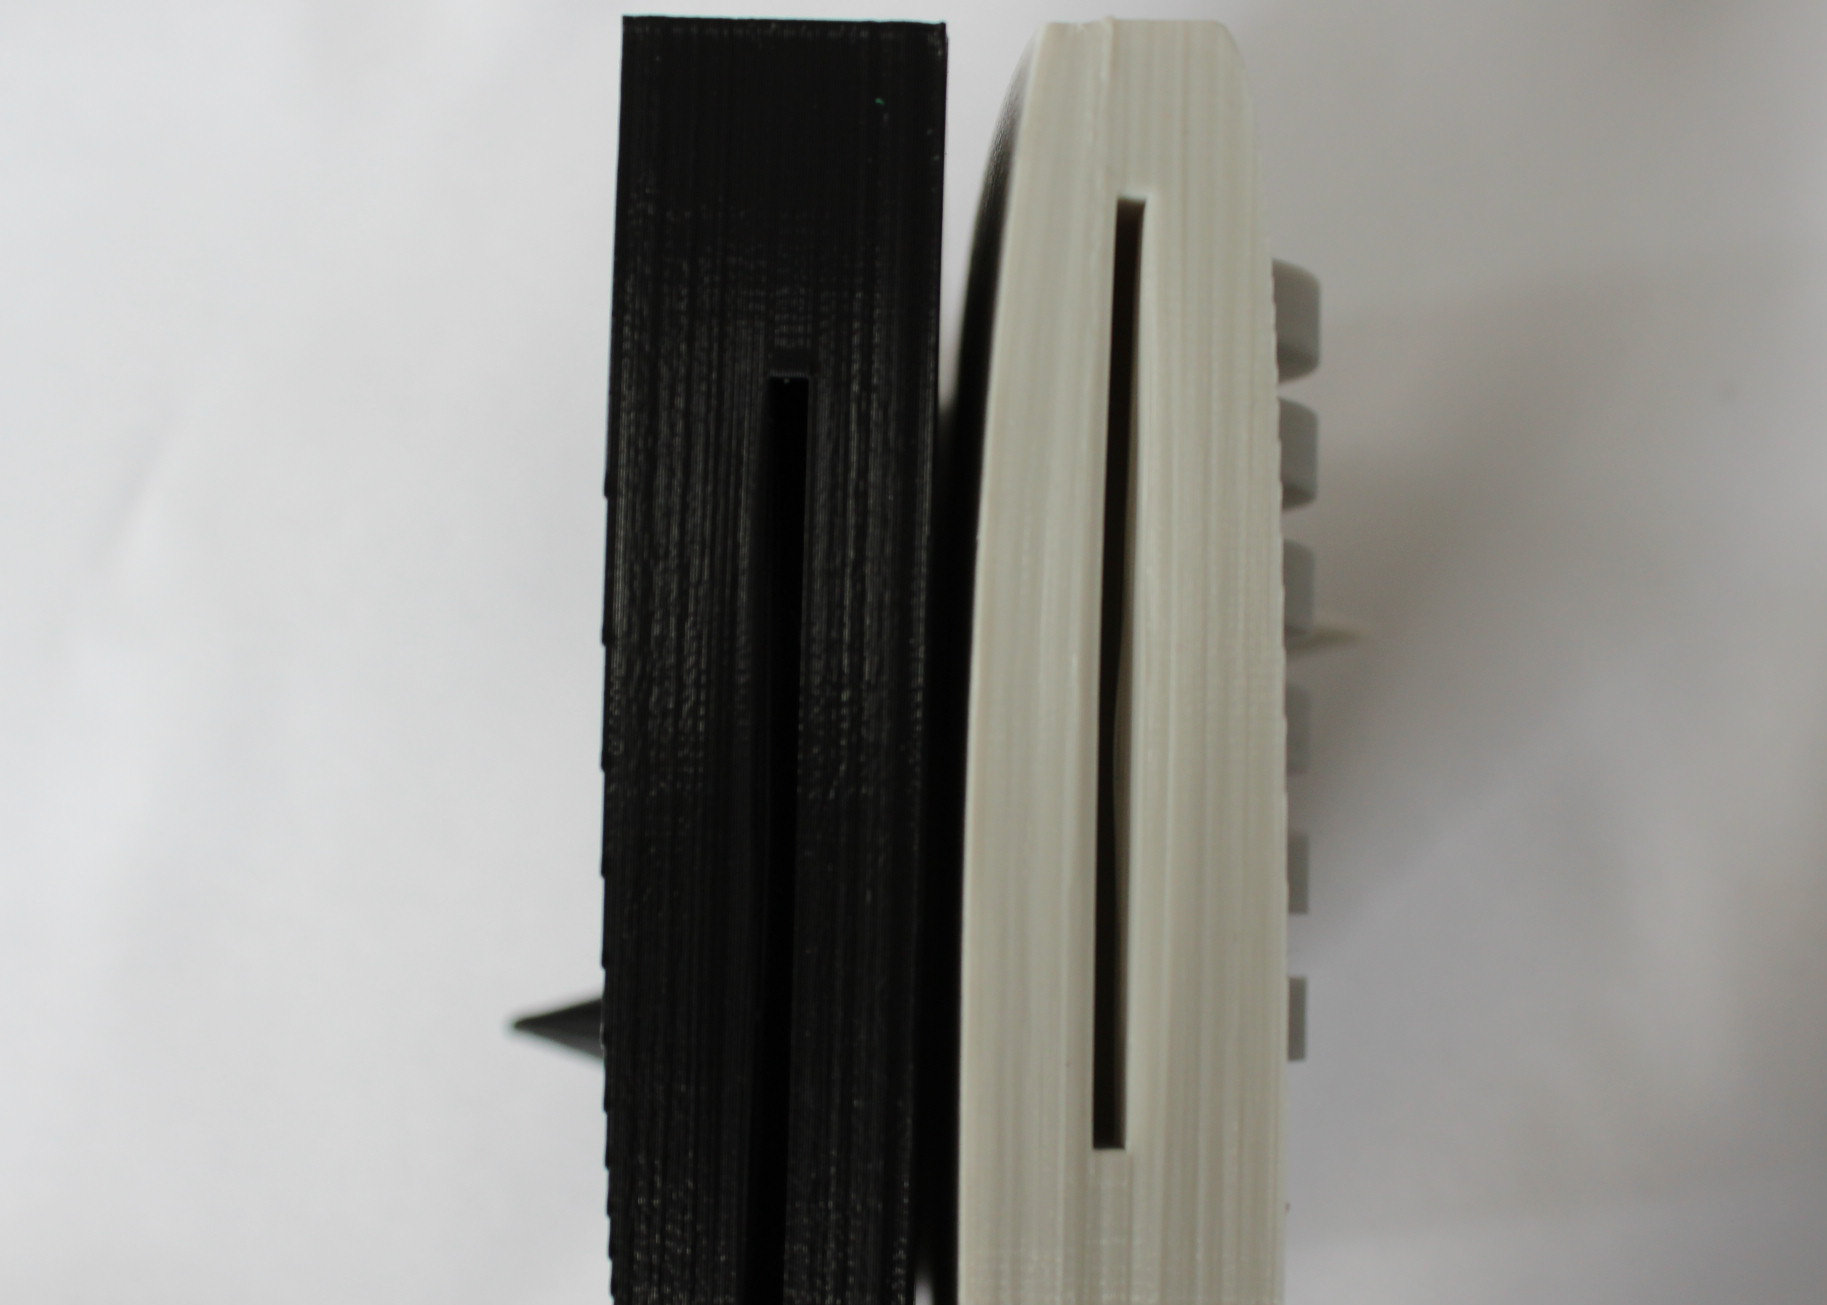
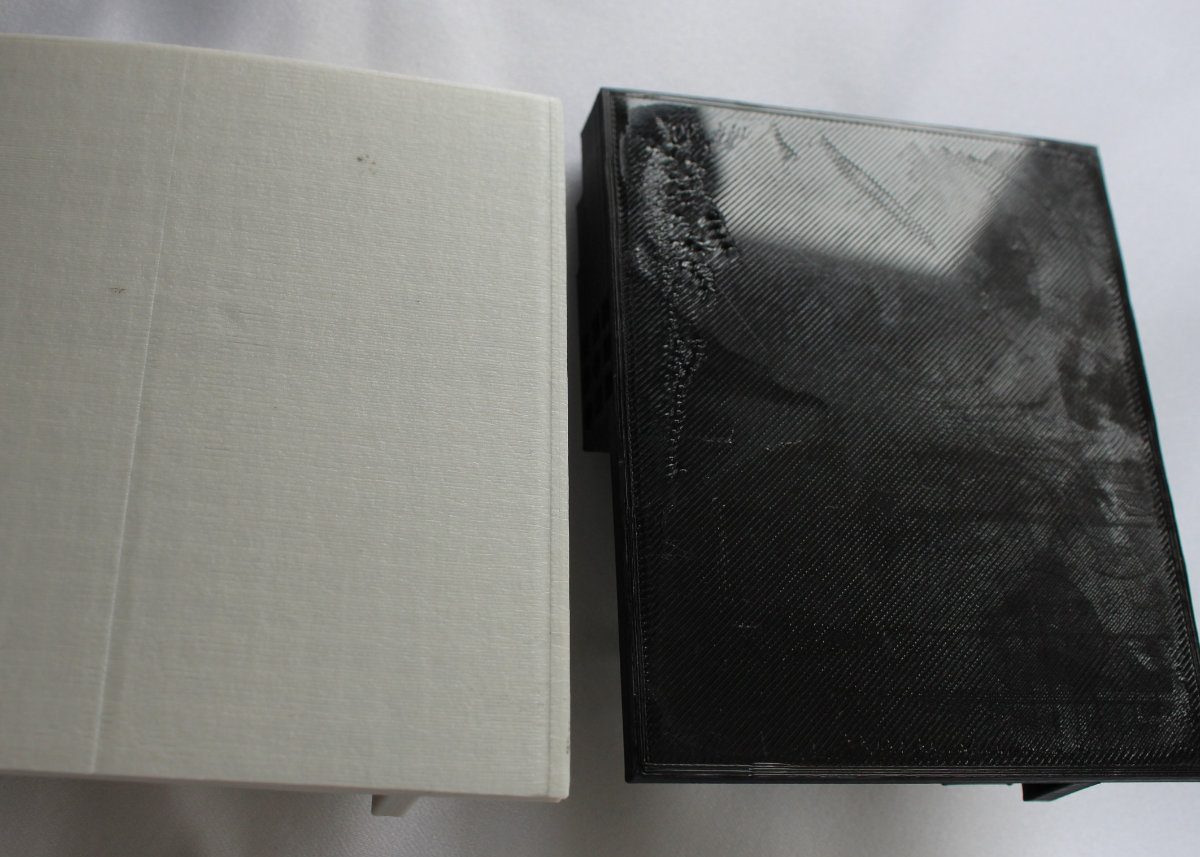
It's not a good start for the Ditto-Pro, and more to come.
Measurements
I took some measurements with my trusty caliper to get a feeling of the precision of both machines. If we take one measurement of the depth of one compound fillet we got one at 0.205" (Ditto-Pro) and the other at 0.206" (Ultimaker), not too bad. The height is not bad: 3.003" and 3.004".
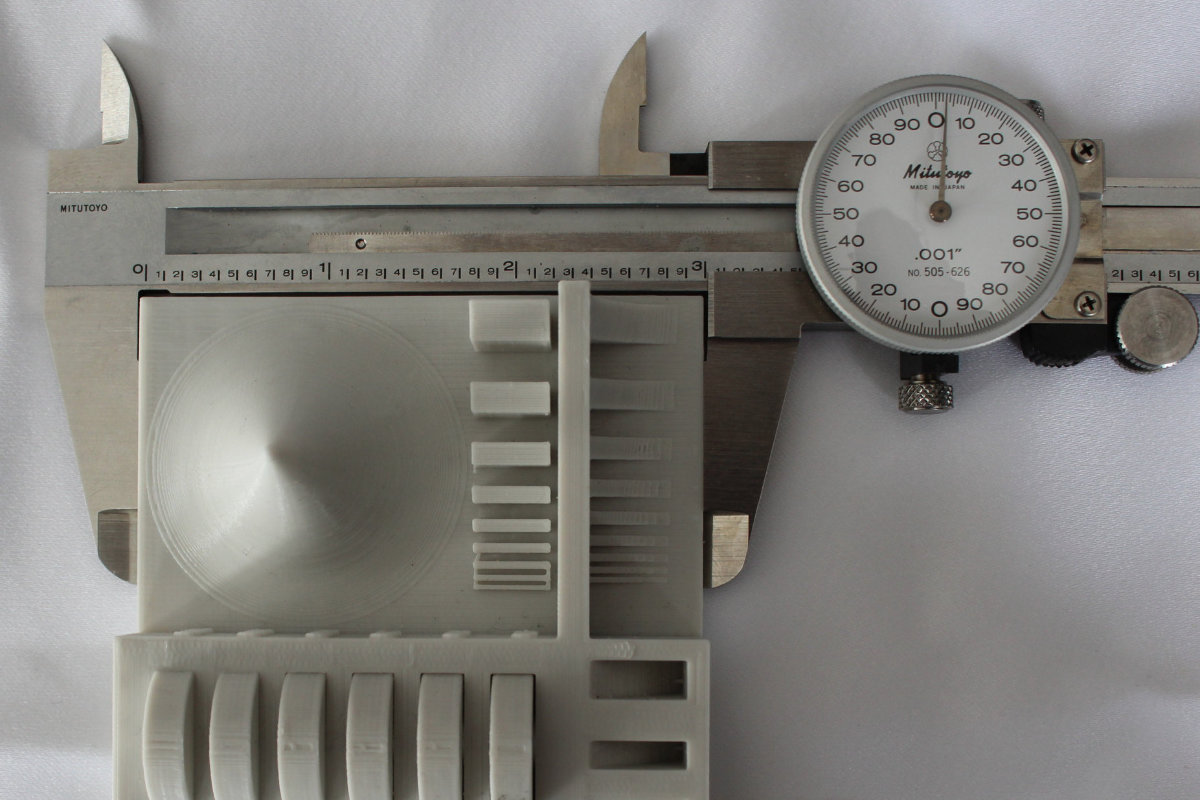
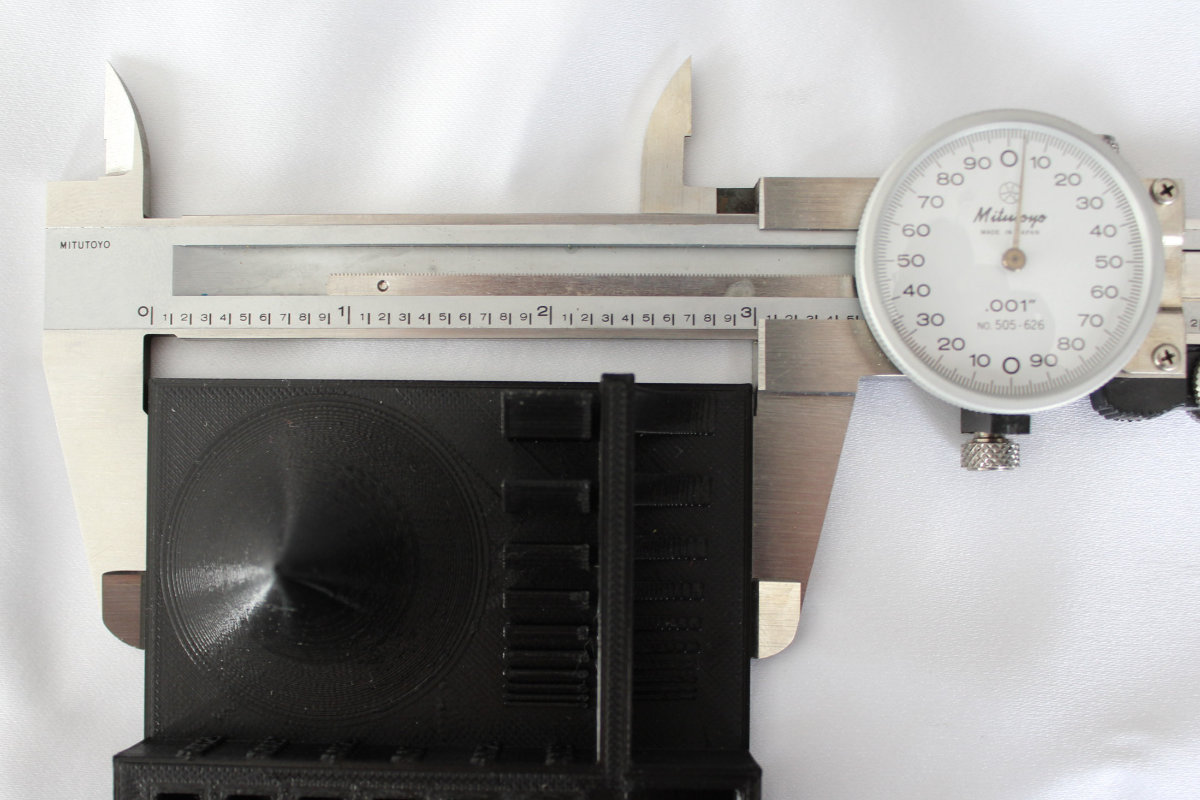
The devil is in the details
All was fine and to say frankly, I was expecting more discrepancy between the two printers. Then I noticed something: the numbers of the webs/holes/protuberances didn't match. As an example, the numbers of rectangular holes don't match: ten for the Ditto-Pro, eleven for the Ultimaker.
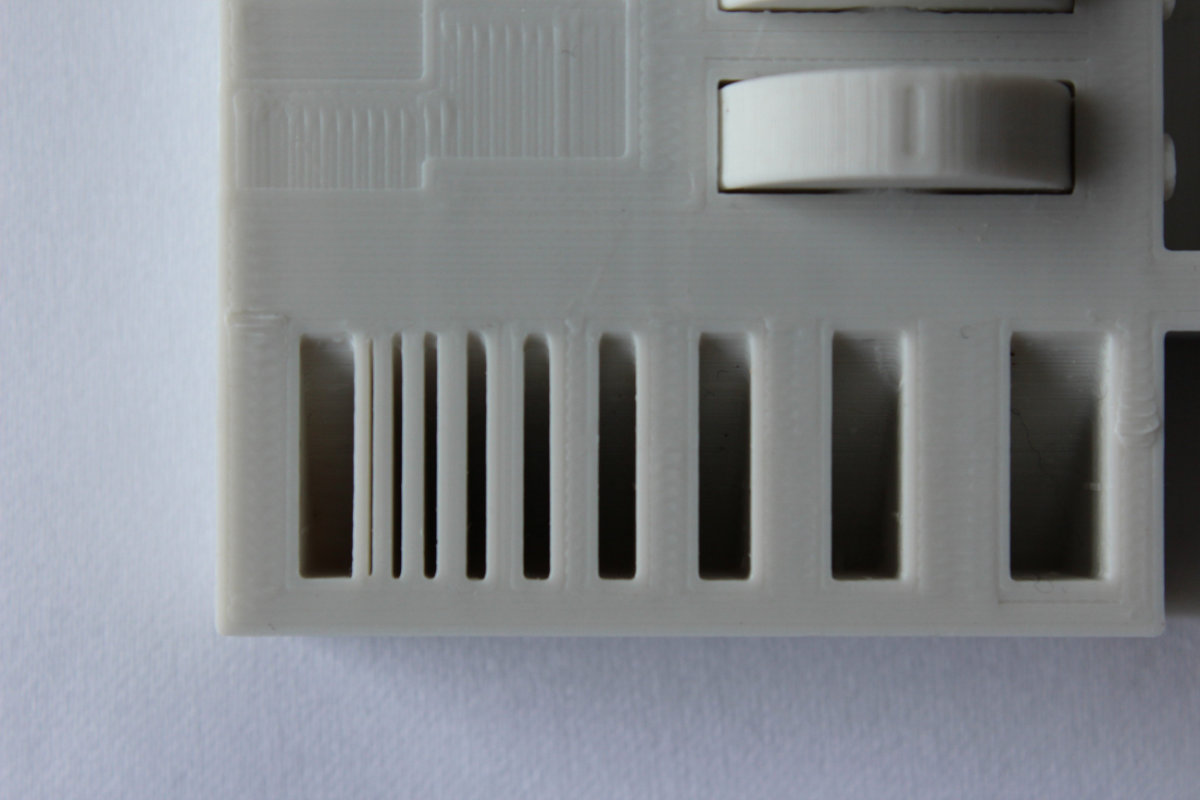
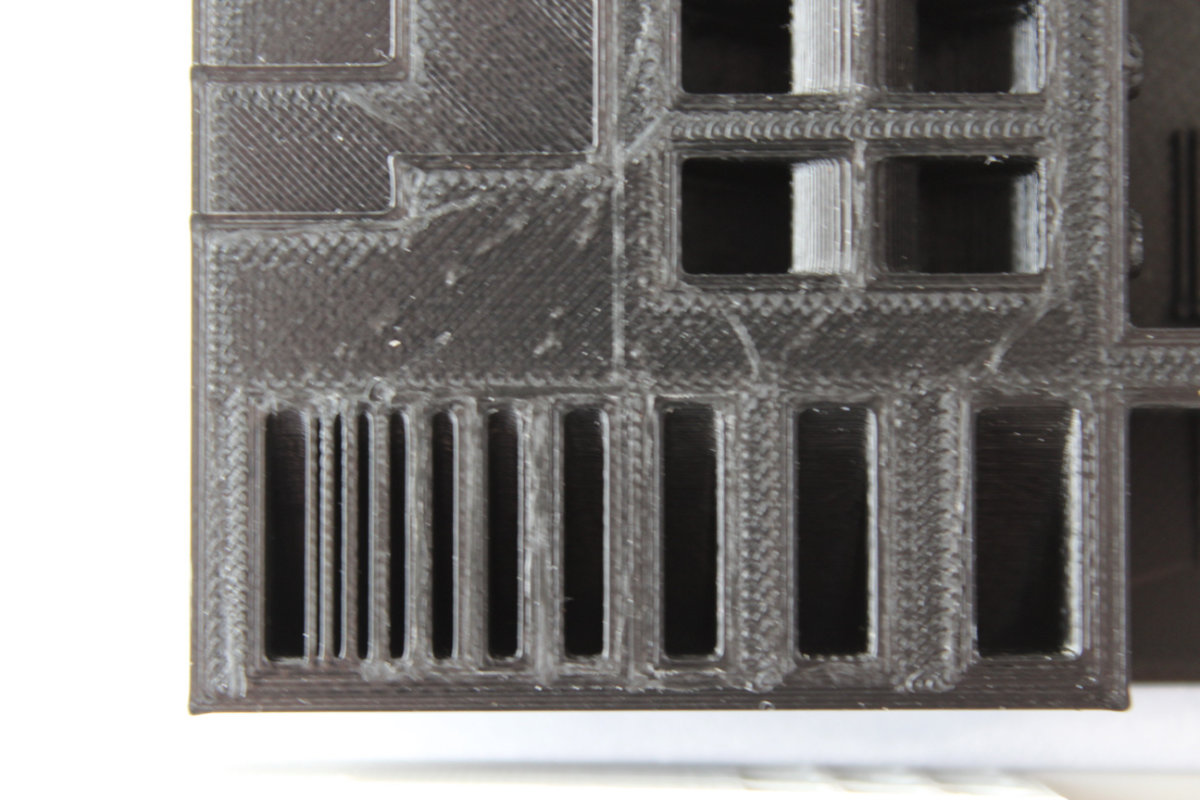
It should be noted that in the original file, the first rectangle includes finer sections that are impossible to print for both printers, even at the finest setting for the Ultimaker.
What does this all mean?
Not much I'm afraid. The test is fine to give you an idea but there's no reference chart like the famous 3D Benchy torture test that I should have used instead.
Both machines have differences, the Ditto-Pro have 1.75mm filament diameter and 0.4mm nozzle while the Ultimaker has a 3mm filament diameter and a 0.4mm nozzle. The main advantage of the Ultimaker is that this is a new model, Ultimaker 3 bought in July 2017, using the latest Cura 3.2.1 while the Ditto Pro (2015) is an old machine which run better with it's software (Tinkerine Suite), which haven't seen an update since 2015... I think this difference has a lot to do in explaining the discrepancy in the number of webs/holes between the two tolerance parts. Also another point that I should mention is that those parts were printed in a rush. I never took the time to measure the filament's diameter, make an average and modify the software accordingly.
In conclusion
This test indicated that there's much to learn about the machines and the software that drive them. The Ditto, an obsolete model with a slicer software that haven't been updated from an eternity (in Internet temporal timeframe) was already beaten before getting to the starting gate. As a machine printing small projects created by children/students, it's doing a fine job. But don't ask, and don't expect too much from this machine.
It's counterpart, the Ultimaker, is a new machine with new and constantly updated slicer software and firmware. It's a world of difference. I think the Ultimaker can best these numbers with a Benchy test. But I wonder how much it would stand against the Atom, a printer that I have at the lab. This printer has always made amazing output. Luckily for both contestants, the Atom is out of order, for now.
