Intro:
The process for creating a website.
The process for creating a website.
A little explanation about what is GitLab and version control.
A step by step guide for using GitLab, creating an account and Pulling, Committing and Pushing.
Description of the web tool I used for creating my website and how to connect it to my Git.
How to use Atom to edit the code for your website if needed, and the process of Pulling, Commiting and Pushing through it.
Some final comments and learnings about this process.
A little description about my final project, before going into the project management.
Here is how I used the learnings from each weak towards my final project development.
Here is the link to the signed Students Agreement.
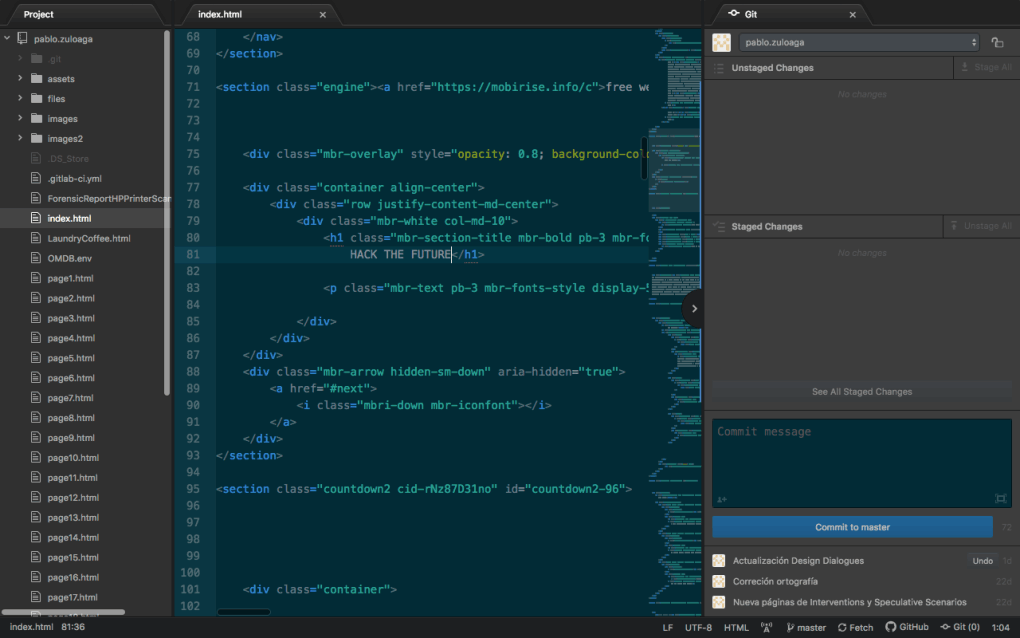
Create your account in GitLab.com, and then register a New Username.
In this case, I´m using "NAME.SURNAME" format and my email.
Add Git username:
git config –-global user.name “YOUR_USERNAME"
Configure email for uploading:
git config -–global user.email “username@mail.com”
Check if you have SSH KEY:
cat ~/.ssh/id_rsa.pub
(If you see a long string starting with ssh-rsa, you can skip the ssh-keygen step)
Generate SSH key:
ssh-keygen -t rsa -C "$your_email"
Check keygen:
cat ~/.ssh/id_rsa.pub
Copy your key:
pbcopy < ~/.ssh/id_rsa.pub
On your GitLab main page, on the right side, you will have a blue "CLONE" button.
Click it and select "Clone with SSH", and copy the URL.
It should look something like this:
git@gitlab.com:FOLDER_NAME/REPOSITORY_NAME.git
Create a folder in your computer where you are going to save your webpage.
A good tip is not to put it in a folder to deep into your computer, so the navigation through terminal is easier.
In the terminal, navigate to he folder, and use the next command to clone your repository to it:
git clone git@gitlab.com:GIT_FOLDER_NAME/GIT_REPOSITORY_NAME.git
While being inside of the folder, using the following commands:
ADD the new files you added to git
git add filename.extension (to upload file by file)
git add . (to upload all the files at once)
DOWNLOAD the last copy from the repository
git pull
MERGE to have a working copy of your repository
git merge
NAME the update you are pushing with the changes you did
git commit -m ‘UPDATE_NAME’ (the changes you are committing)
UPLOAD to the Repository
git push
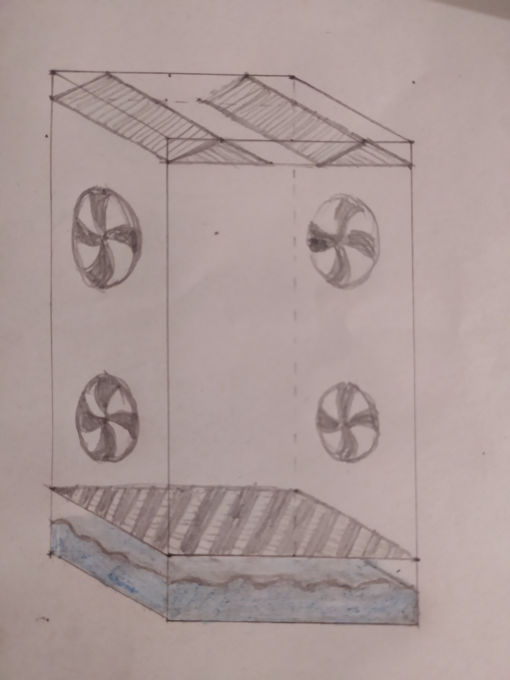
I visualize POWAR as a machine that could replicate different climatic characteristics like light, temperature and rain in its interior, and replicate different weathers around the globe, to experiment about how the plants that we grow nowadays will grow with our future predicted weather for 2050.
This will work as a plant observatory, in which 3 different simulations will be compared, changing only one variable at a time to detect which are the optimum conditions for each plants to grow, and generate a database that will in the future feed a machine learning system that could optimice the way we grow plants.
The variables that can be changed inside are:
- Temperature (Cold and Hot)
- Humidity / Rain
- Sunlight
This will work as a plant observatory, in which 3 different simulations will be compared, changing only one variable at a time, to detect which plant grows better than the other and with this it will generate a database that will help optimize it´s future cultive.

The site was started with Mobirise