State of the art, project management and documentation
For me, this medium functions as a digital journal, which I find interesting because the act of recording becomes part of the process, and for this type of material experimentation, it enriches the experience. In this first section, I present my main references and key inspiration, as well as the customization of the space and documentation.
1. Objective
weekly assignment
- Learn the process and tools used to document course work
- Acquire the necessary skills to publish projects, documentation and share the results of each assignment
- Acquire the necessary skills to resize, optimize and compress / zip images, videos and files
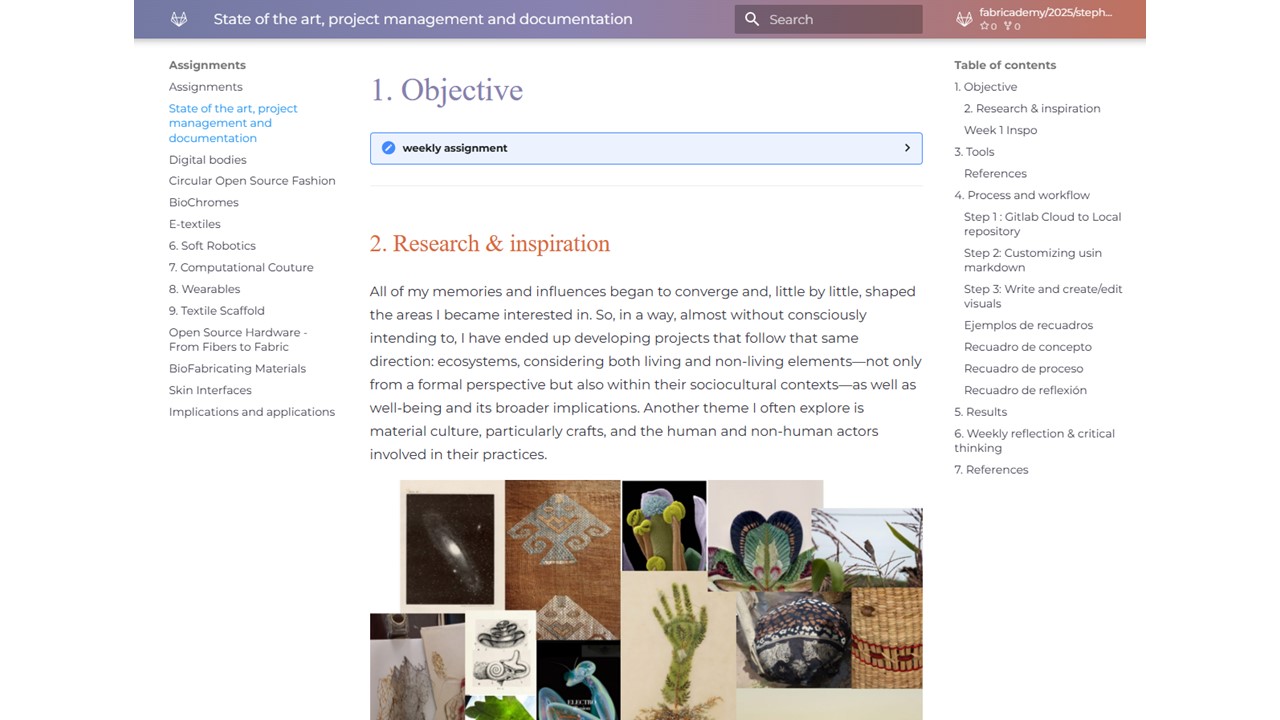
2. Research & inspiration
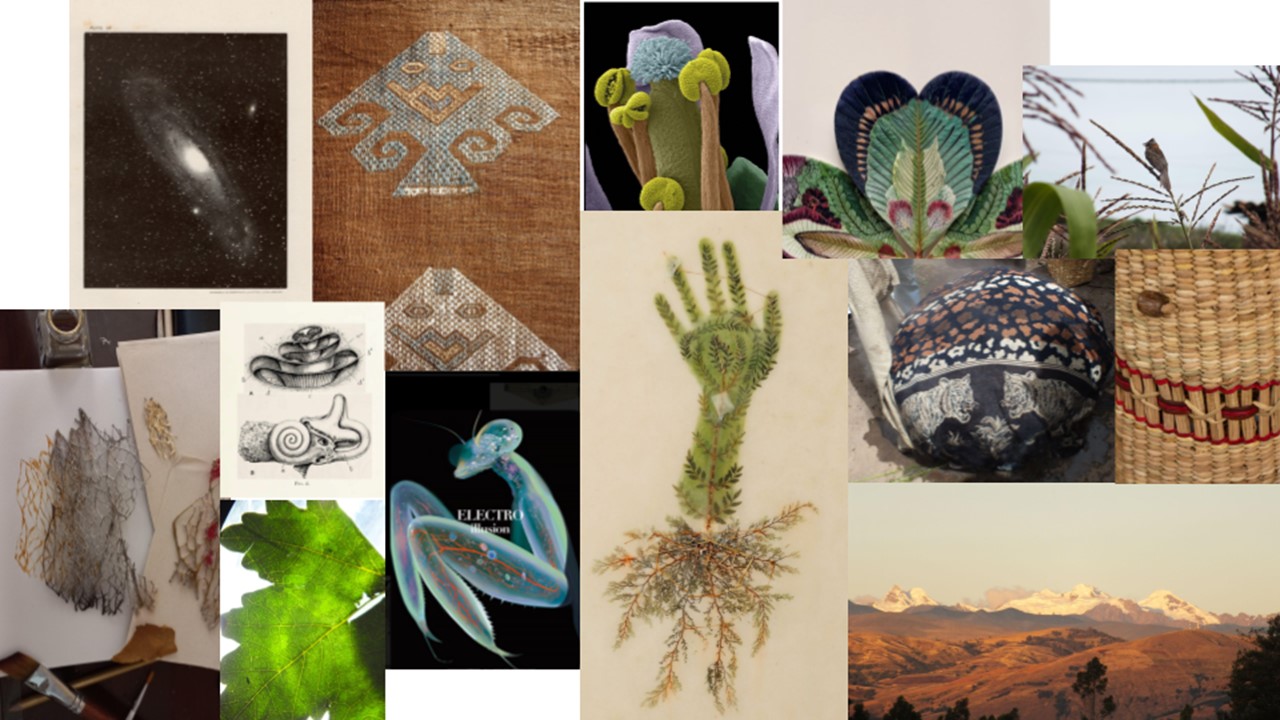
I would not dare to state this as something set in stone, but, in general, biomimicry guides part of my work at both a formal and functional level, considering its different dimensions: materials, territories, relationships, and ways of developing. While this could serve as a guiding framework for the development of the exercises, I also have in mind that I can broaden my perspective and continue developing different kinds of proposals.
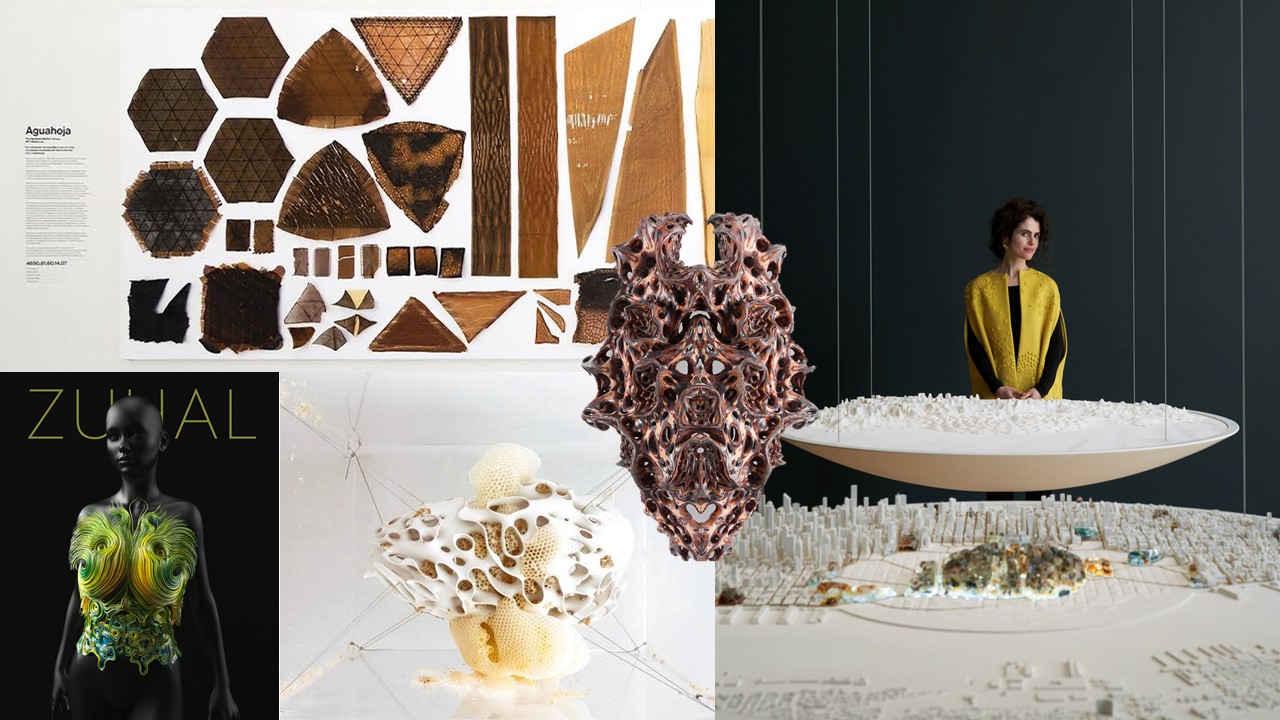
Along these lines, I particularly highlight the work of Neri Oxman and Jonathan Torres, each with their own distinct approaches and outcomes.
On the one hand, I find Neri Oxman’s work to be an excellent example of the intersection of art, technology, and design. The proposals she develops can be partly experimental and may function more as explorations of what the outcomes of working in collaboration with nature could look like, rather than as products intended for use today. Bacteria, bio-based materials, and the development of pieces involving living organisms that behave like them are some of the areas that stand out in her work.
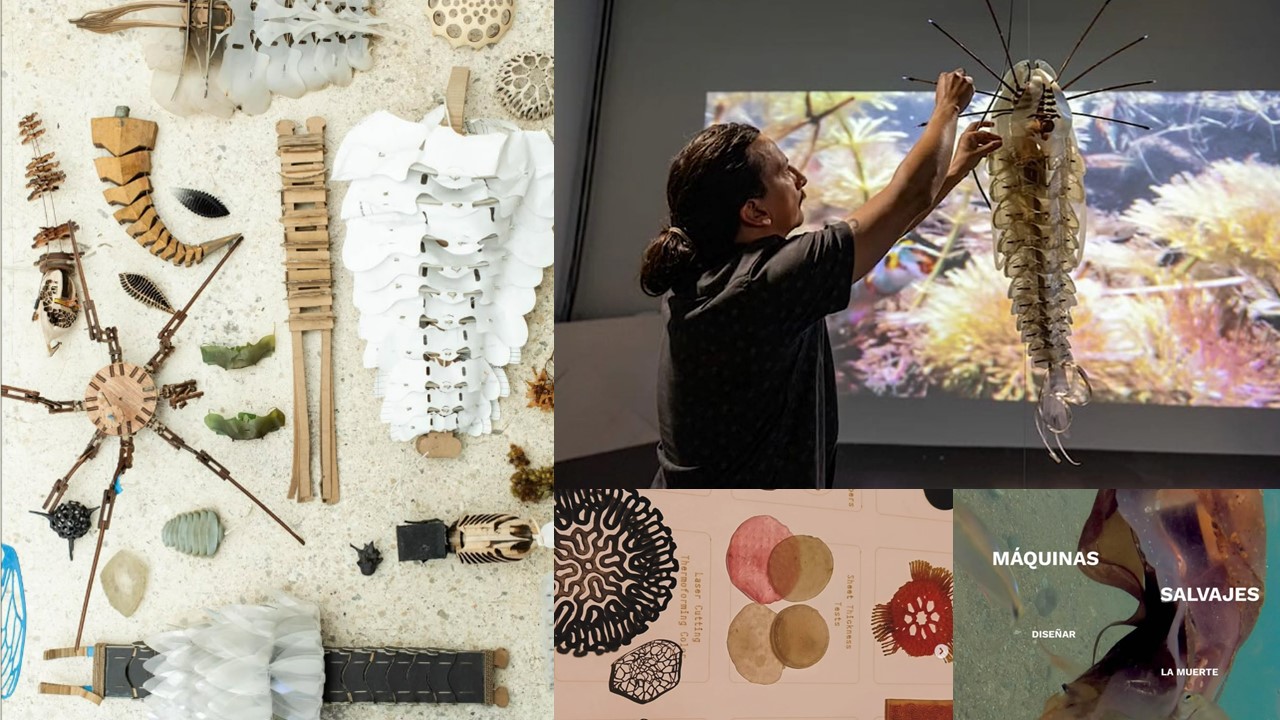
Jonathan Torres also draws on some of these concepts, but through a more meditative and reflective approach. Through his bio-inspired and biodegradable robotic sculptures, he recreates the movements of living organisms and, much like these organisms, his sculptures can eventually be seen decomposing at the end of their life cycle. He sources the materials from his own territory: specific ecosystems in Costa Rica. In addition, the electronic components are conceived using biopolymers and organic materials. Much of this experimentation resonates strongly with me in relation to the program, which is why I believe his work is a valuable reference for approaching this type of project.
Week 1 Inspo
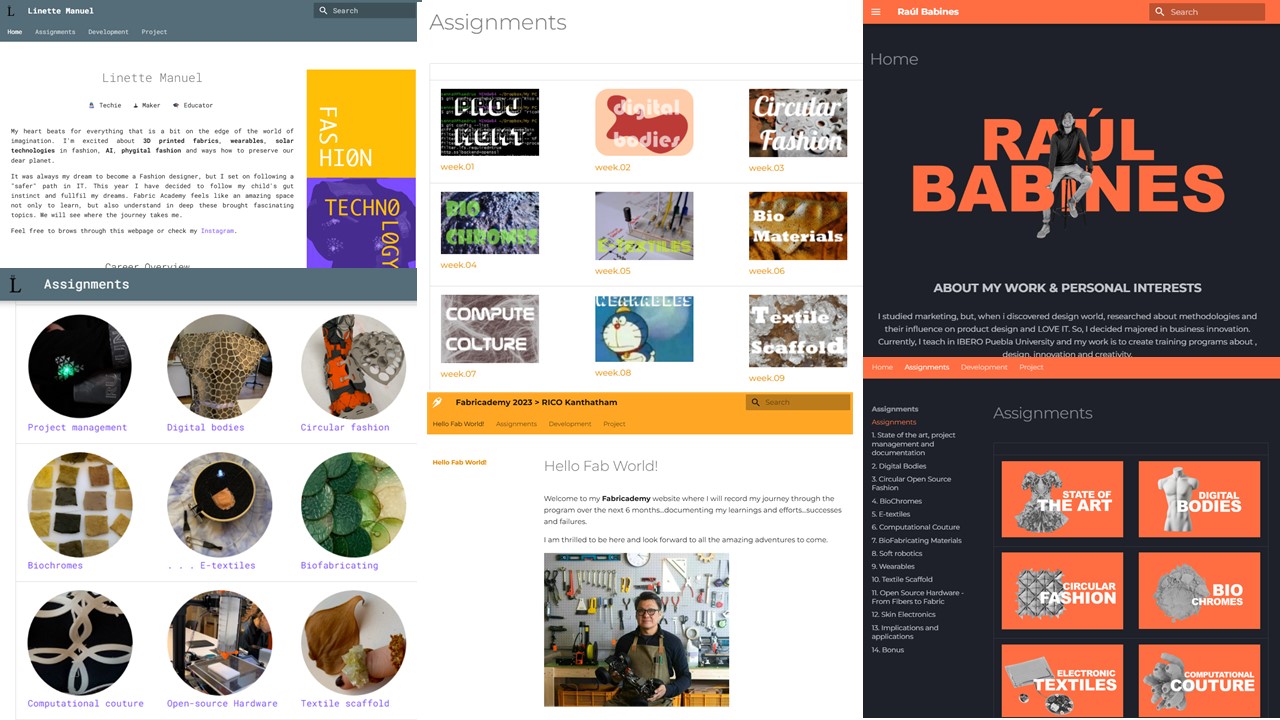
As references for this week, I reviewed the archives of participants from previous years. The quality and level of detail in their work are truly incredible, as is the way each person’s personality is reflected in their projects.
For this section, I selected three participants:
-
Linette Manuel for her graphic identity, completed projects, and attention to detail in her documentation.
-
Rico Kanthatham, for the level of detail and step-by-step nature of his documentation, which could practically serve as a manual; and finally.
-
Raul Babines, for his highly personal aesthetic and the important details regarding customization and how to upload different types of elements.
I find all of their work very inspiring, and I aspire to present my own work at that level.
3. Tools
Software & Programs
- Gitlab - Cloud repository
- Gitbash - Local to cloud file transfer
- Visual Studio Code - Desktop editor
- Photoshop / Affinity - Edit images
- Power Point / Canva - Organize images
4. Process and workflow
The repository
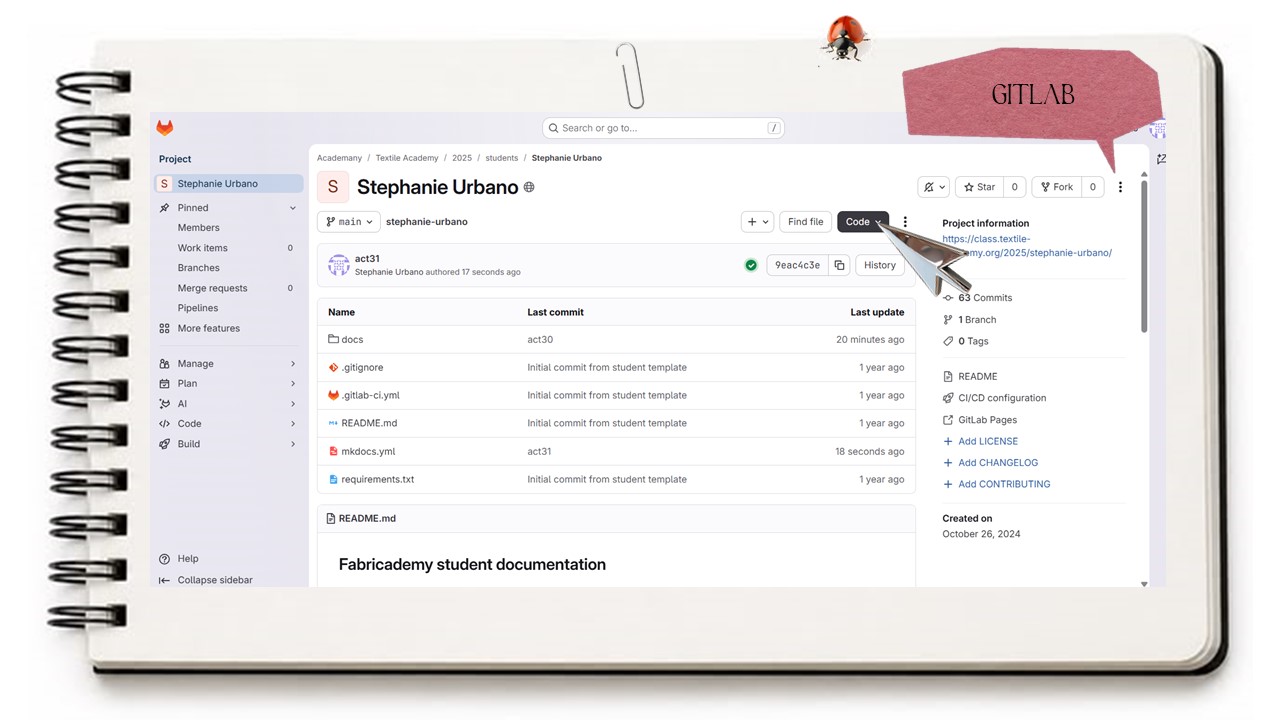
Moving on to the weekly assignment, the first thing we had to do was set up our personal space, which would serve as a platform for documenting the different activities and topics we would be working on throughout the Fabricademy program.
Step 1 : Gitlab Cloud to Local repository
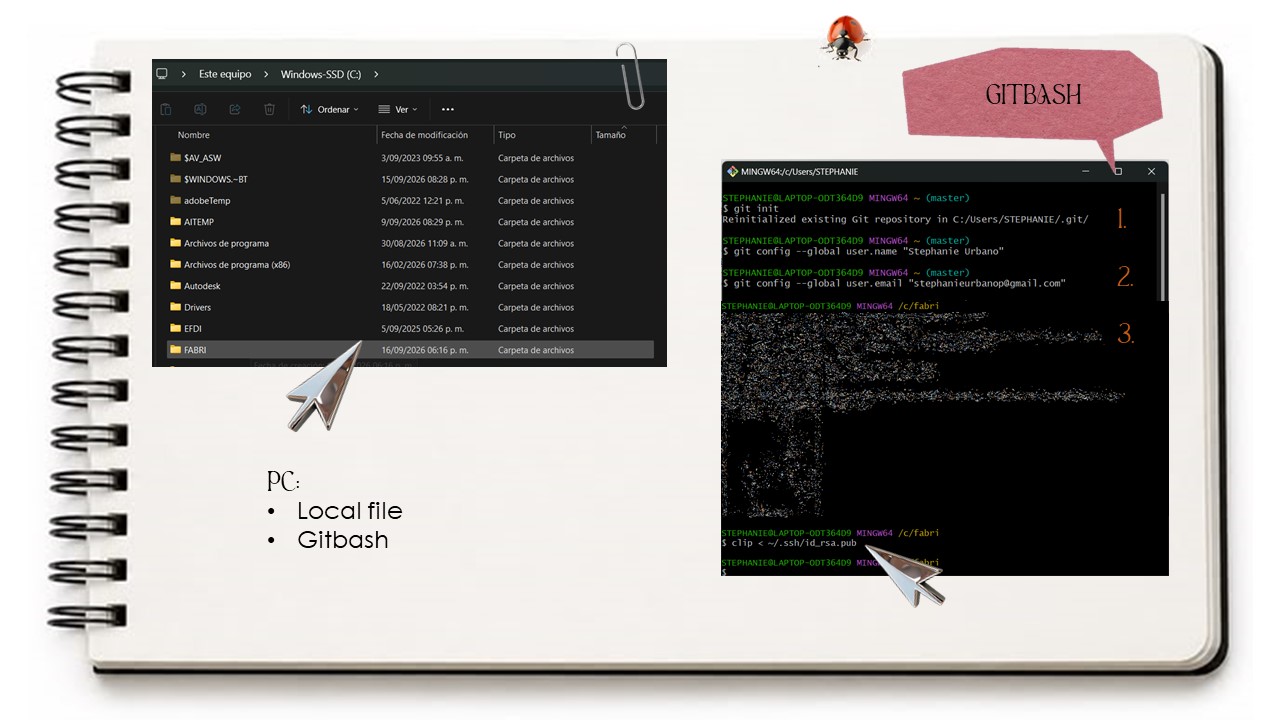
For this, I had to create a folder on my PC that would function as a local repository and contain all of this information. This way, I had a local copy of the files on my computer while also being able to synchronize them with the remote repository and work with them online.
I already had Git Bash installed, so I opened it and started by checking my user information and configuring the connection with GitLab. The idea was to link my computer to the remote repository where all the documentation would be stored and published.
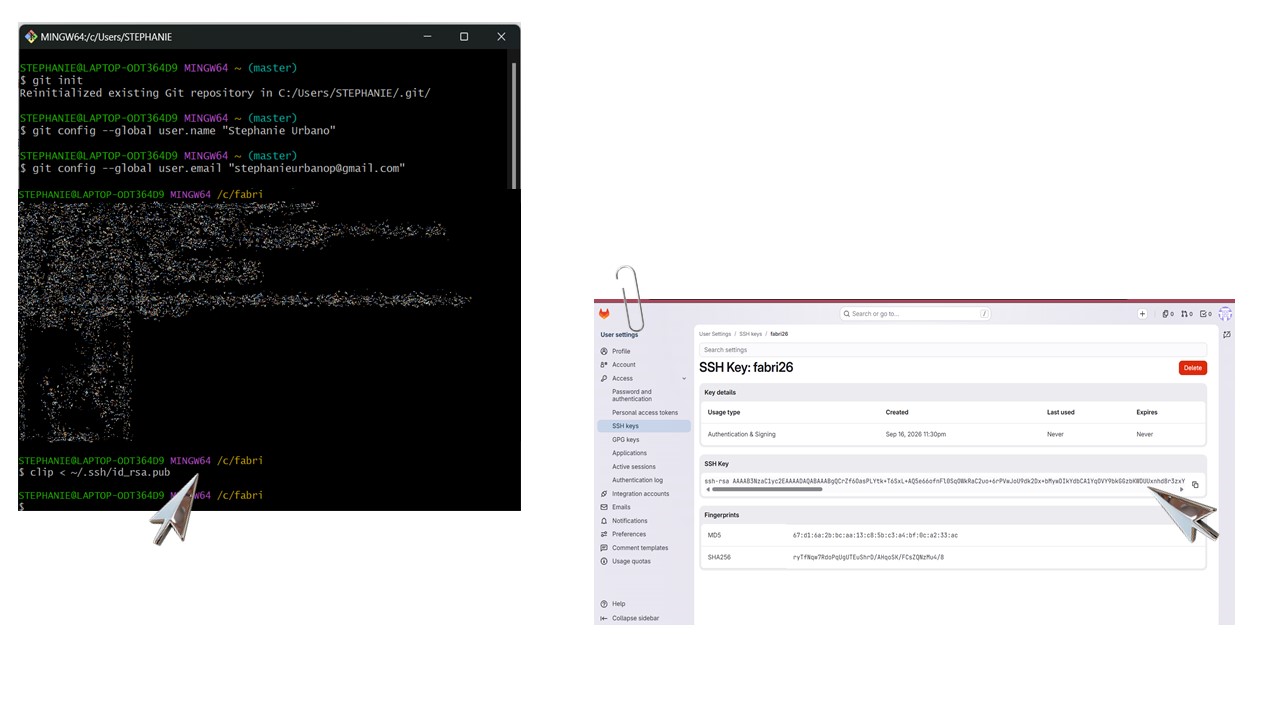
Step 2: Create the key
An important step was setting up the SSH key, which would allow me to establish the connection between my computer and GitLab. I first generated the key and then verified and configured it through Git Bash.
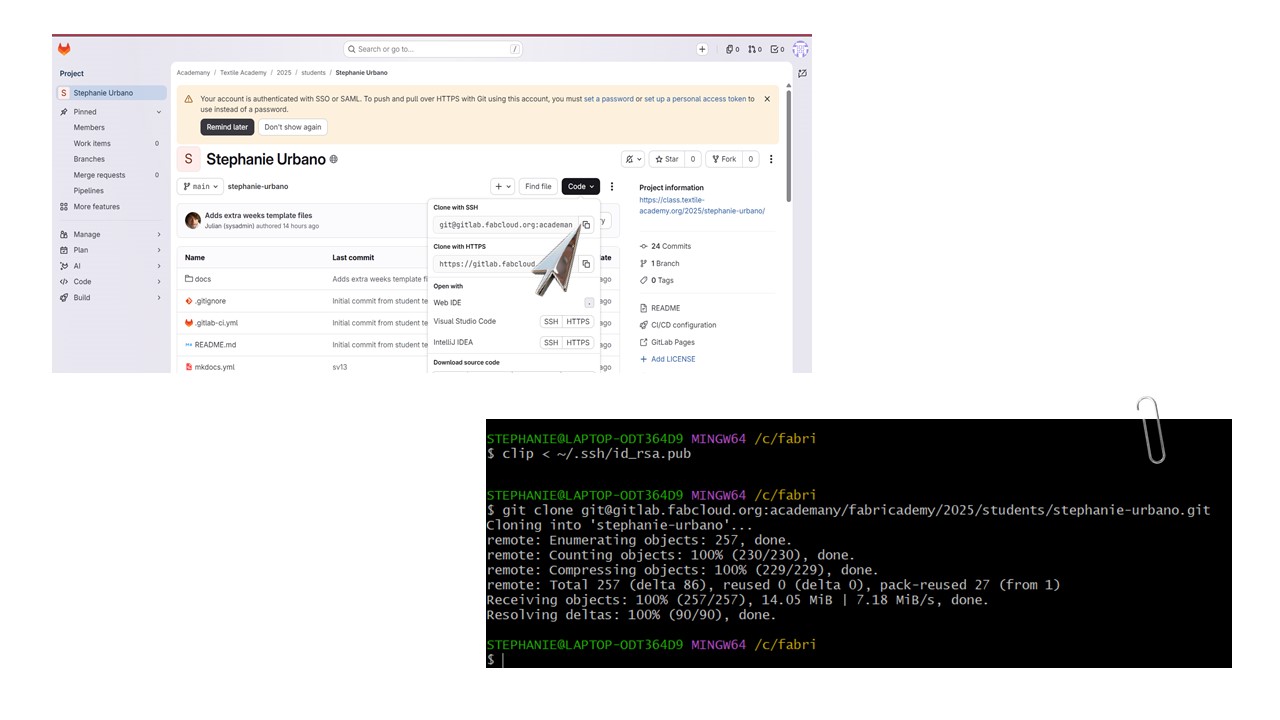
After that, on GitLab, I selected the “Clone with SSH” option and copied the repository address into Git Bash. This allowed me to clone the repository and transfer all the information from GitLab to my computer so that I could work on it locally.
Step 3: Visual Studio Code
The changes and editing of the files were carried out through Visual Studio Code. On this platform, we can create scripts in a user-friendly space.
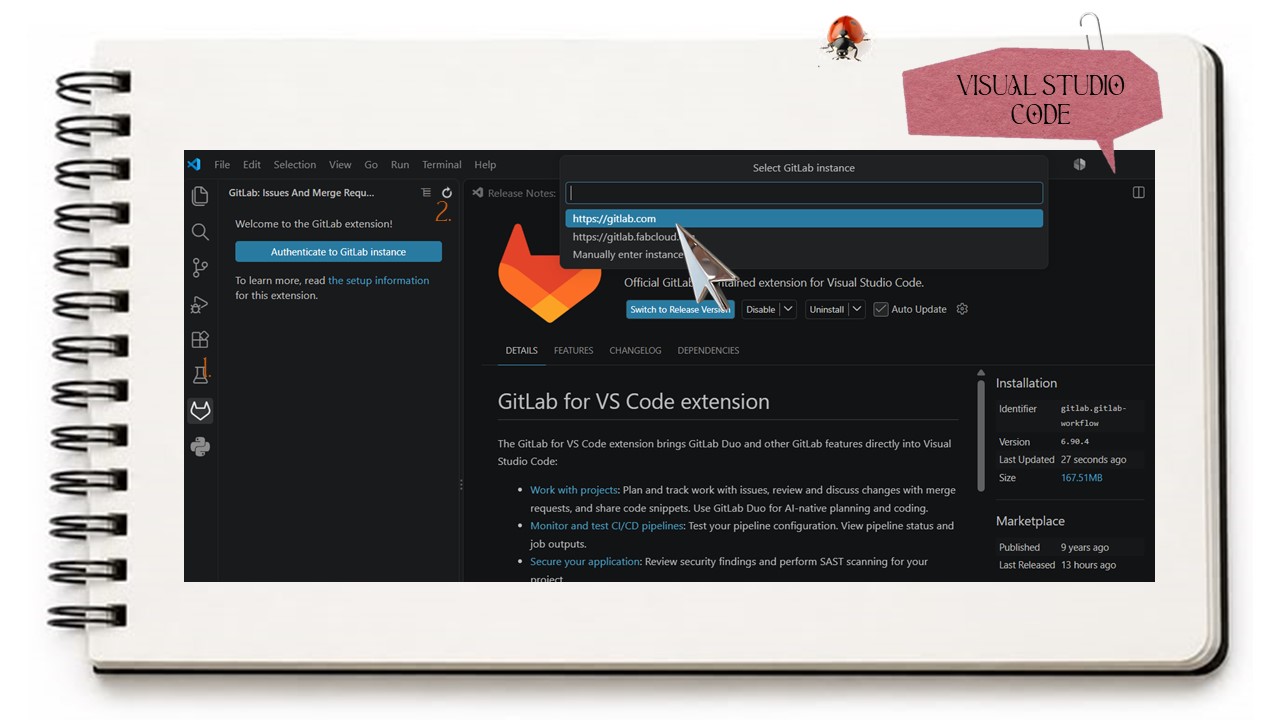
After installing VSC, I looked for the GitLab integration in order to connect the repository. During this process, I was asked for an access token, so I went back to GitLab and navigated to Access → Personal Access Tokens to generate one.
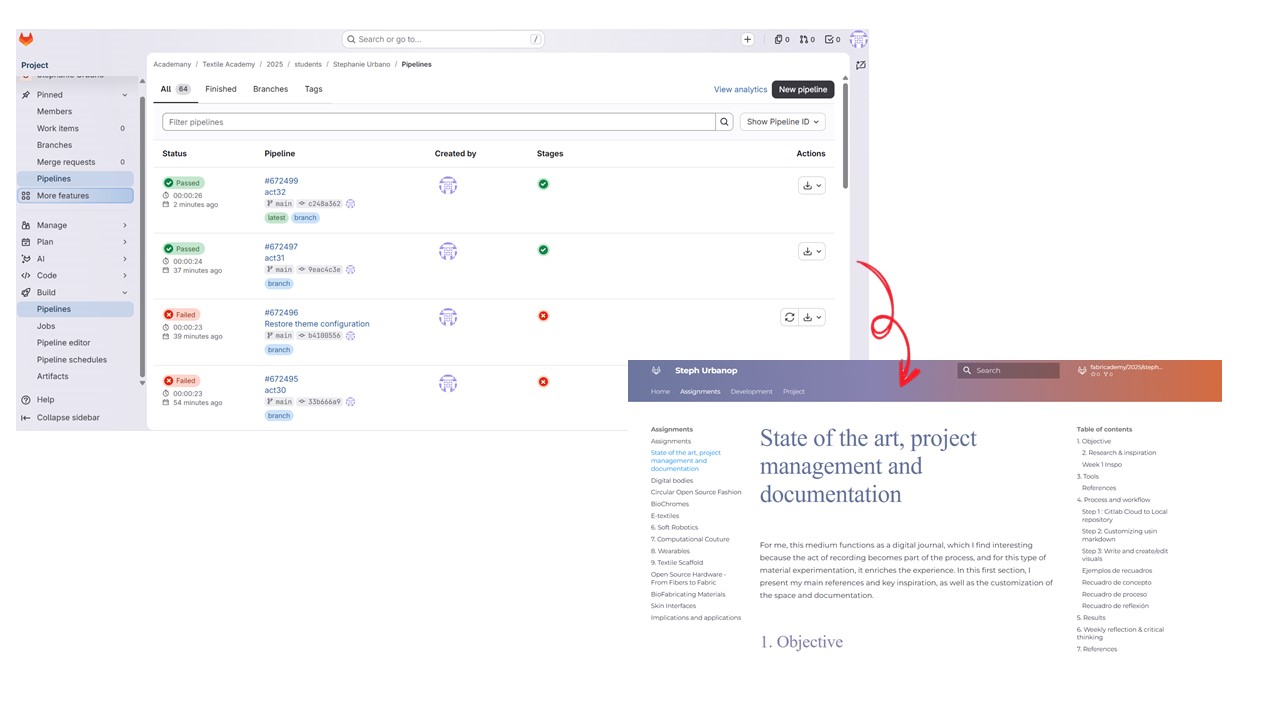
Once those changes were synchronized with the repository, they could finally be viewed on my personal Fabricademy website.
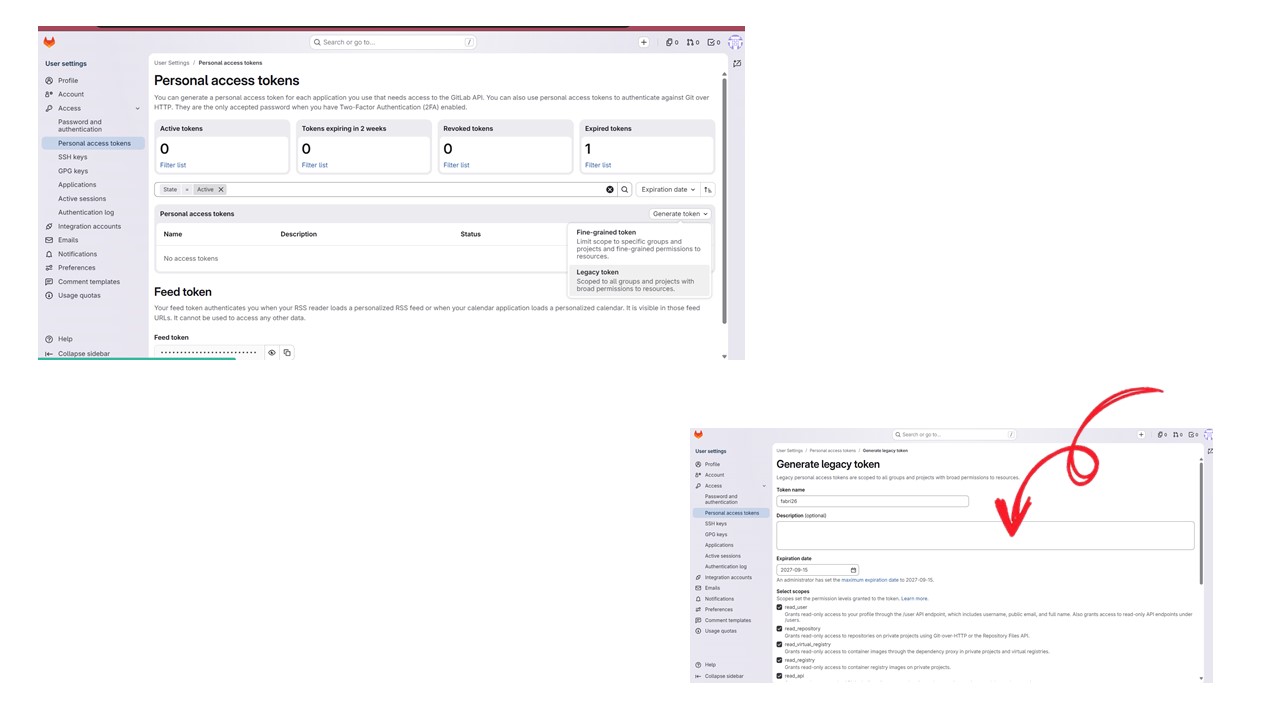
Once both the SSH connection and token-based authentication were configured, I had everything ready to start editing and working on the files for my site.
Customizing wth markdown
Regarding the customization process, I felt it was important to have a visual reference from which I could develop and articulate all of these aesthetic decisions.
Color palette
To decide the color palette, I used an illustration as a reference of Park Inju from which I took inspiration for the tones I wanted to use. I also took some pictures and included them in my color palette moodboard. I have always liked gradients, not only because of their visual quality, but also because they remind me my home sky, and relate to a practice that I personally identify with: I do not work within a single discipline, but rather move between different areas. Even though these areas may be diverse, there is ultimately something that connects them and gives them a sense of unity.
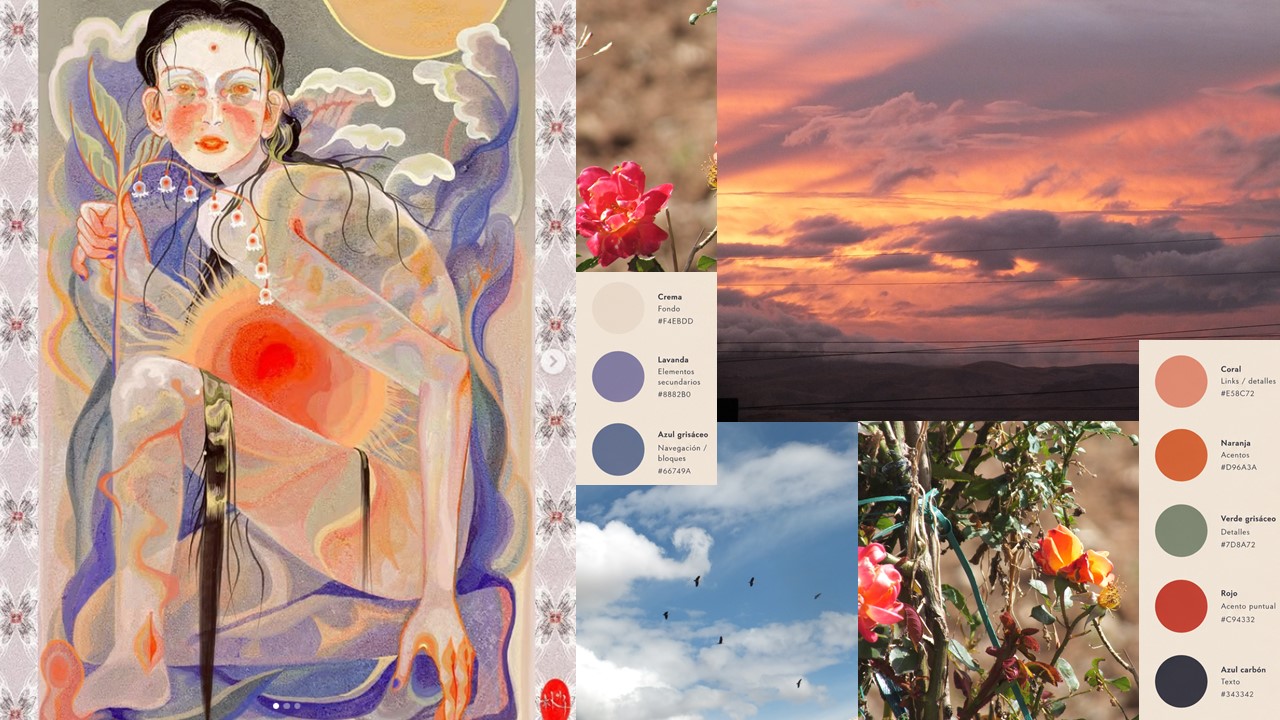
I therefore wanted to recreate that effect on my site as well. I chose two main accent colors: a medium blue with violet undertones and orange. From these two colors, I developed the rest of the color palette.
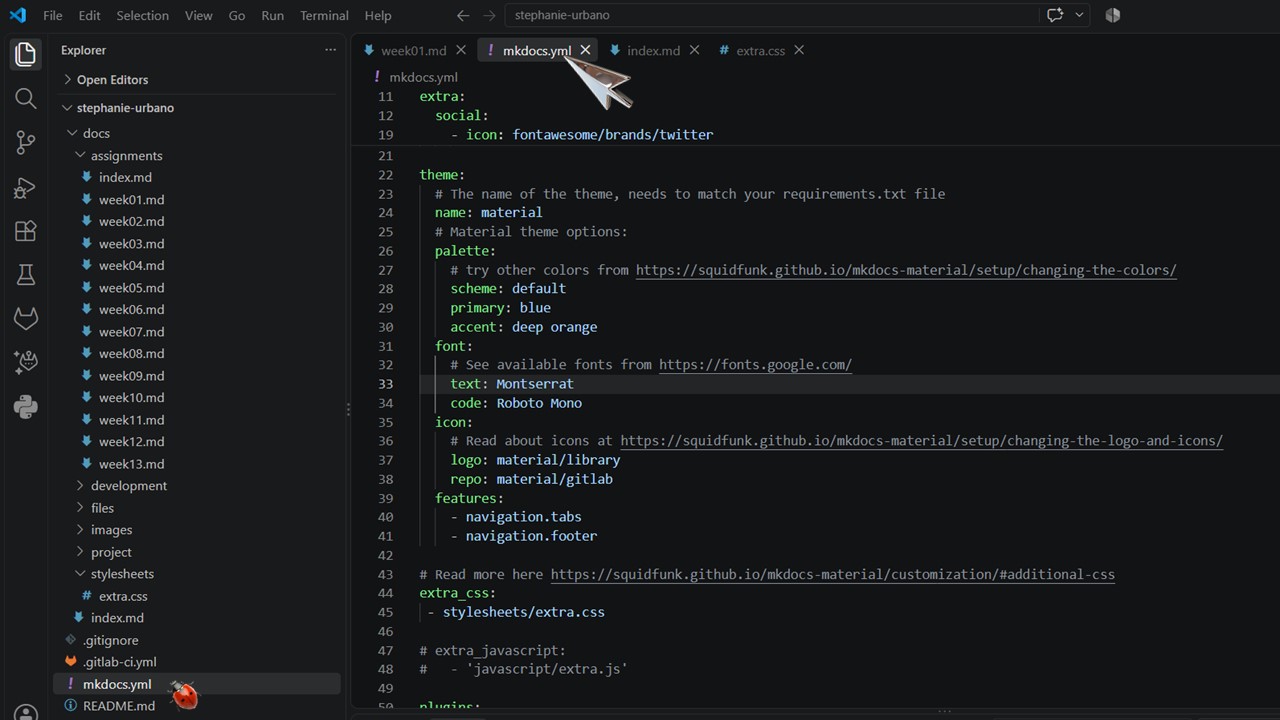
When I reviewed the MkDocs configuration, I found that there was already a theme that I could use as a starting point. However, in order to customize it further, I had to enable the option for additional CSS stylesheets using extra_css. This allowed me to add CSS code to define the color palette, background colors, and other visual aspects.
To get the color codes, I run the moodboard through CHATGPT using the prompt: “Analyze this image and give me the codes for the main accent and complementary colors in Markdown.”
This was the result I got:
Typography
Typography was another element I was particularly interested in customizing. I looked through references on Google Fonts, and the typeface I liked the most was Playfair Display, a serif typeface. I felt that it worked well with Montserrat, which I was already using, so I decided to use both for my documentation.
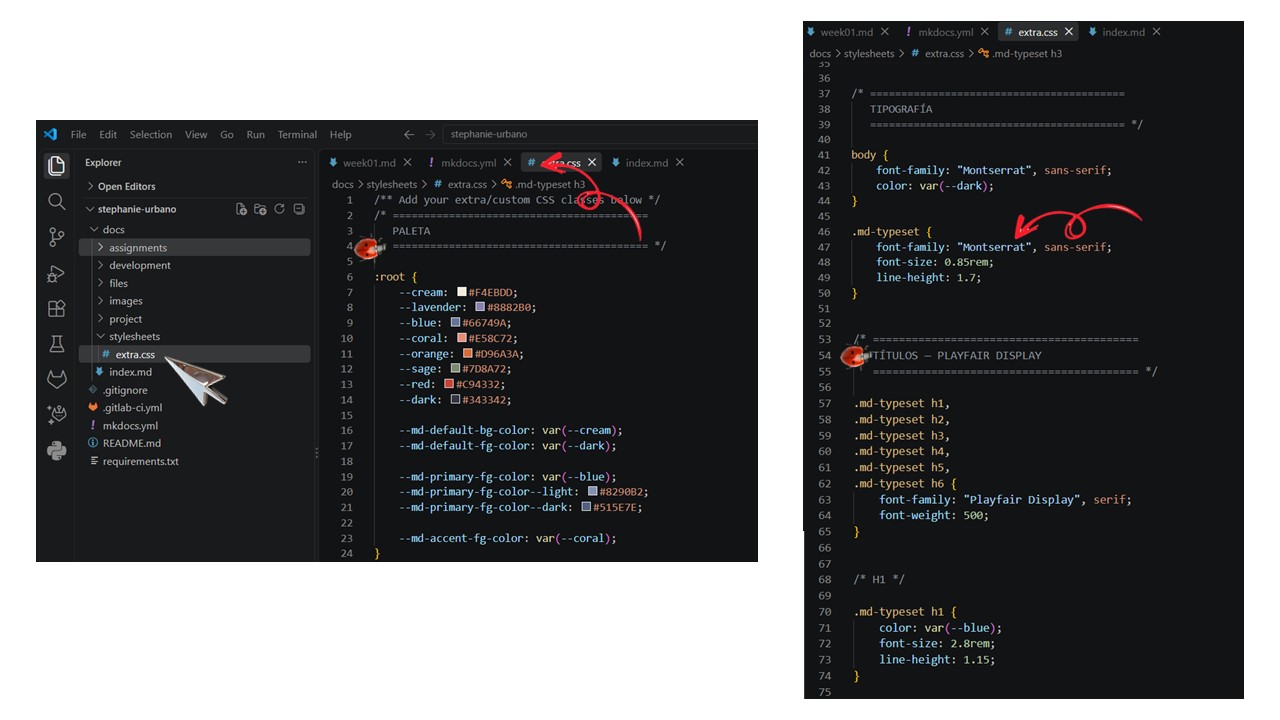
Finally, I established Playfair Display for the headings and Montserrat for the body text, creating a typographic combination that clearly differentiates between the two levels of information.
Images
Prepare images and visuals
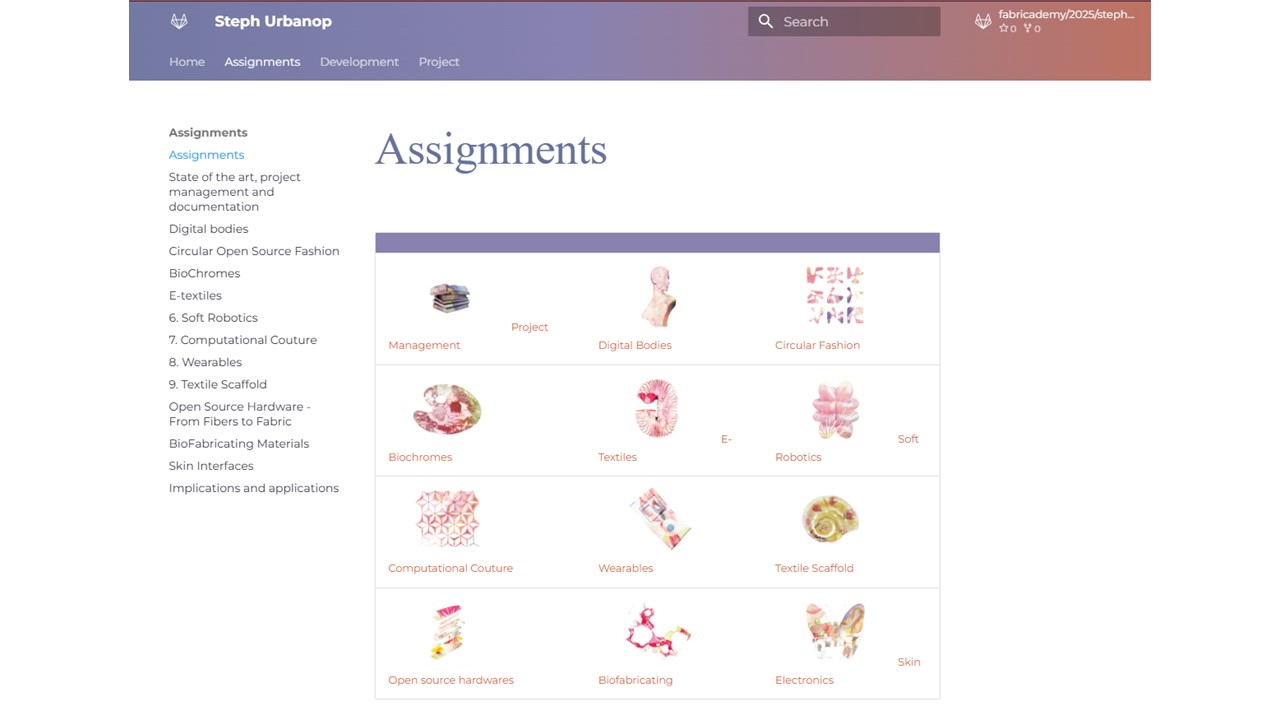
Another aspect I wanted to customize was the icons for the different weekly assignments. I already had an illustration that I had created by hand using watercolors, so I decided to use it as a starting point.
First, I scanned the illustration and then looked for different icons or silhouettes that could convey the topics we would be exploring each week. Since I am already quite familiar with Photoshop, I decided to use clipping masks to integrate my illustration into these different silhouettes.
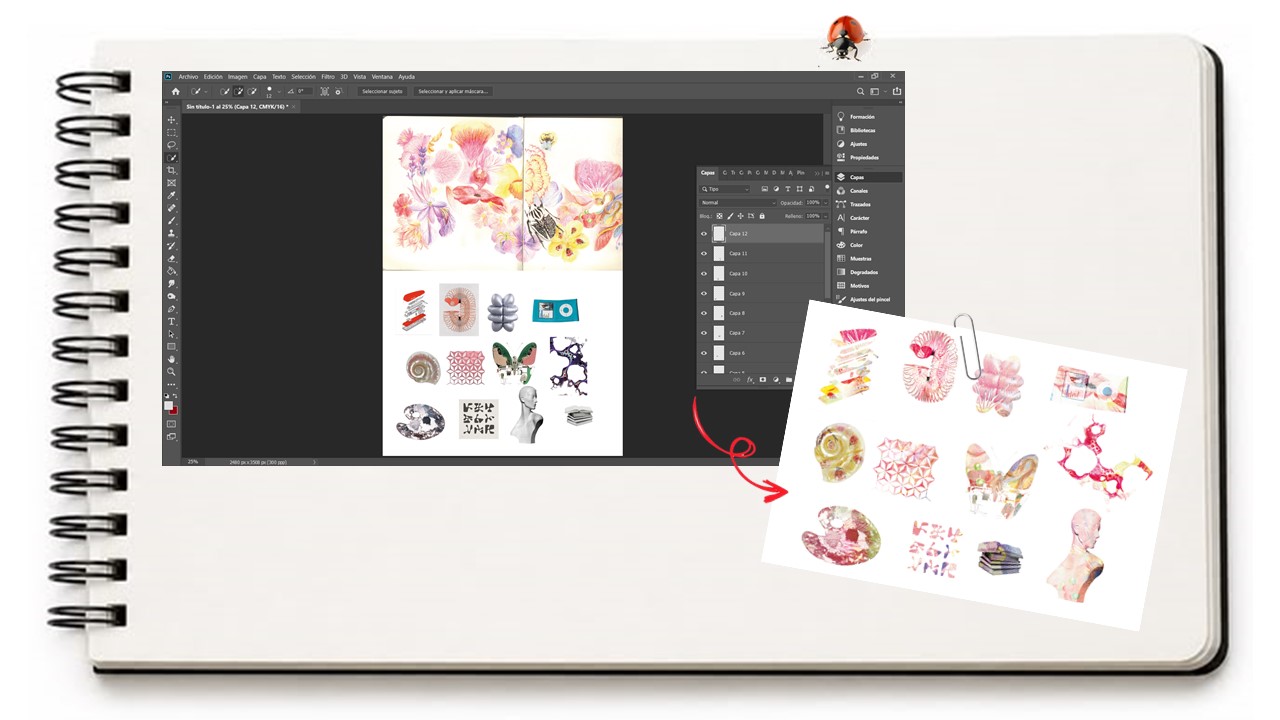
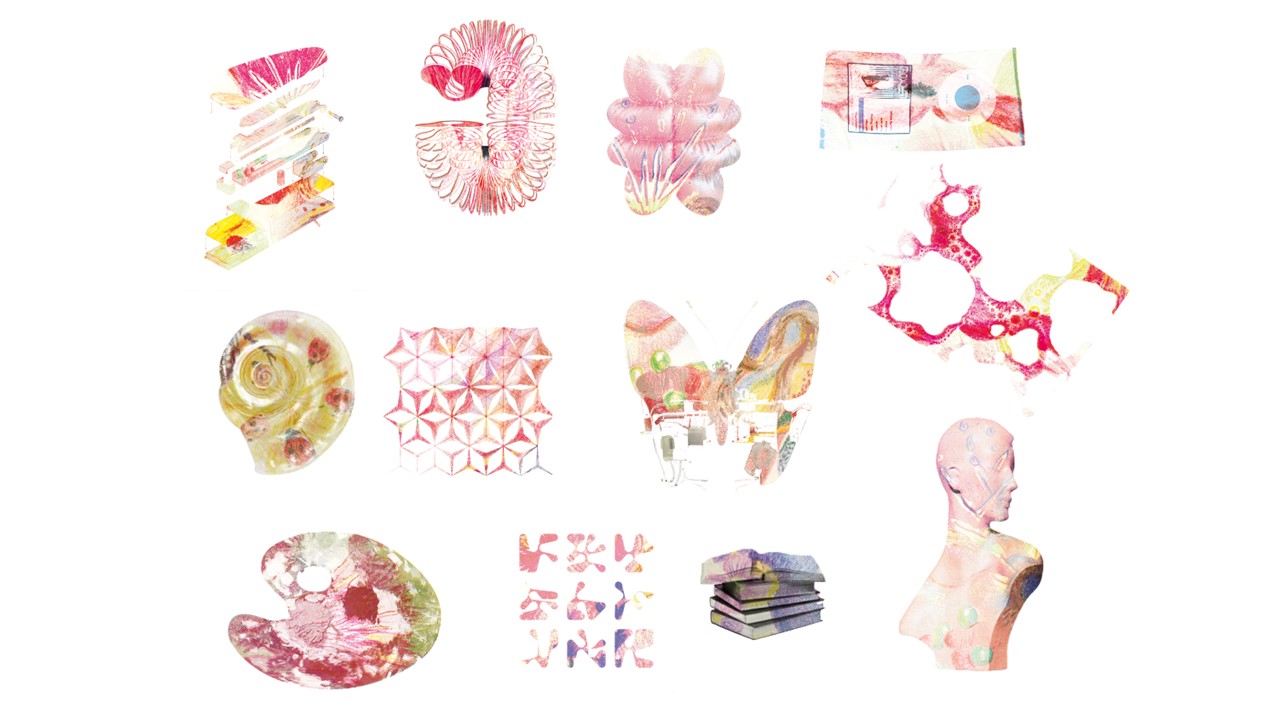
After that, something that has been quite useful for me has been organizing these visual resources in PowerPoint.
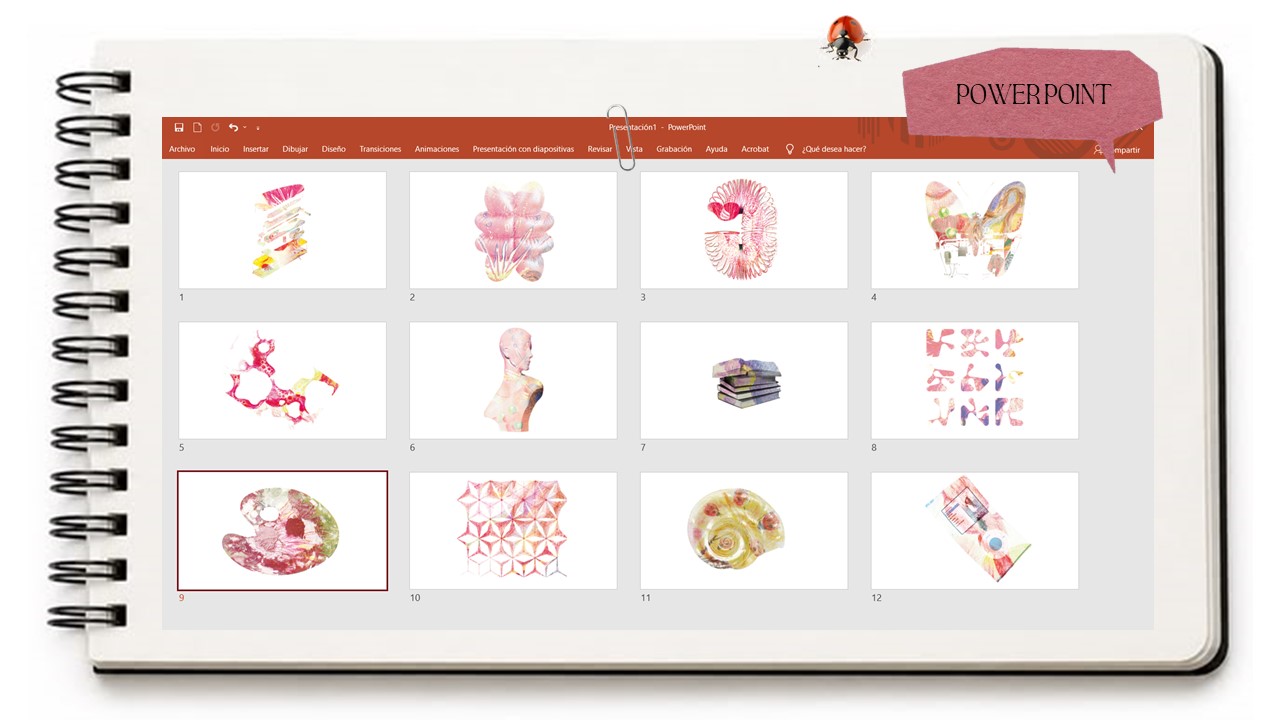
This allows me to easily arrange the sequence of images and save each slide independently, using the appropriate size and file format. This makes it much easier to later insert the images on the website.
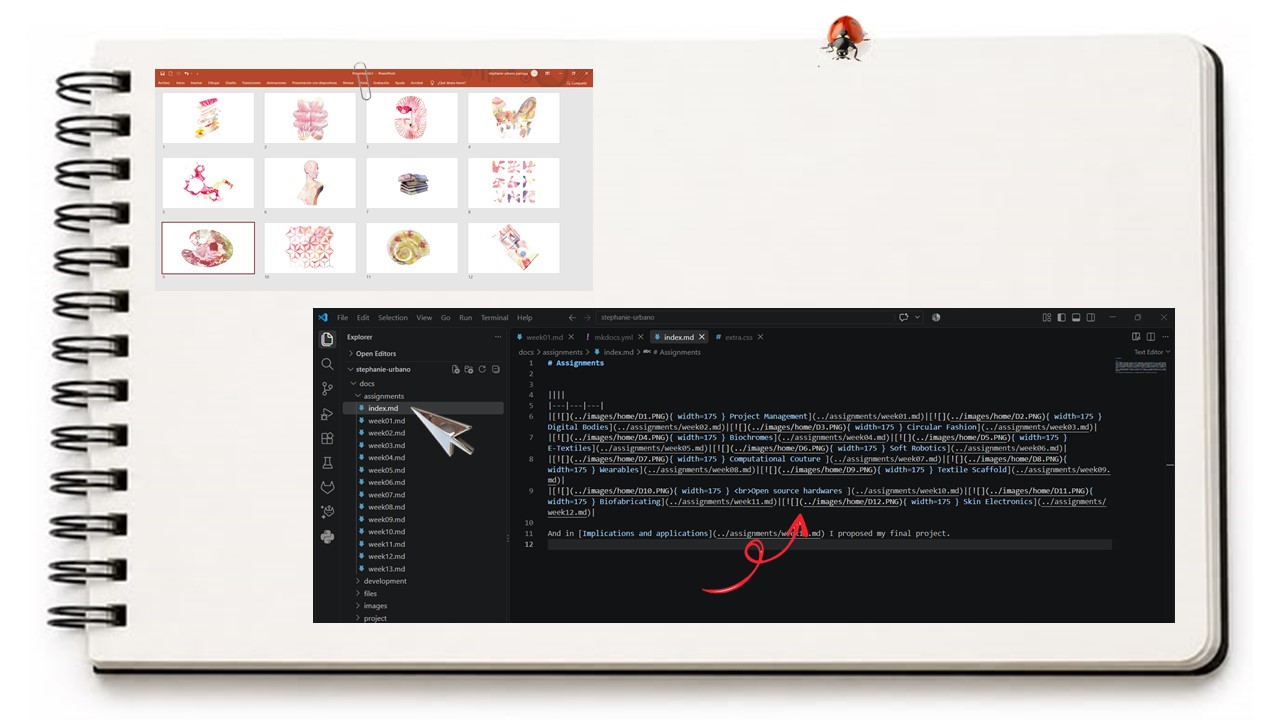
For this process, it is important to keep in mind that all the files used on the website need to be saved within the folder we initially created on the computer, since this is the location from which the site’s files are managed. In my case, I've created folders inside Docs > images > folder
Visual codes
To insert different types of elements, we can use some of the following codes
| Element | Code |
|---|---|
| Image |  |
| Image wt size | { width=400 } |
| Alined image | { width=400 align=left } |
| External video | <div style="text-align: center;"> VIDEO CODE </div> |
| Link | <a href="LINK">TEXT to identify the link</a> |
<iframe src="./documents/archivo.pdf" width="100%" height="600"></iframe> |
Texto y recuadros
It is also possible to customize the titles and create highlighted sections for different projects. In the Stylesheet section, I specified the color settings for each type of title and section. If one wants documentation that is more visual and organized, I think this is a good option to consider.
Boxes:
<div class="recuadro recuadro-concepto">
Text
</div>
CONCEPT BOX
PROCESS BOX
REFLECTION BOX
Text code
Markdown allows you to structure and format a page using simple codes written directly into the text. It can also be combined with HTML and CSS to customize its appearance.
Conceptually, it would be: * Markdown → basic structure and formatting * HTML → elements and advanced structure * CSS → appearance, colors, and styles
| Formato | Código | Ejemplo |
|---|---|---|
| Negrita | **Texto** |
Texto |
| Cursiva | *Texto* |
Texto |
| Negrita + cursiva | ***Texto*** |
Texto |
| Código | `Texto` |
Texto |
| Tachado | ~~Texto~~ |
~~Texto~~ |
| Subrayado | <u>Texto</u> |
Texto |
| Color | <span style="color:#E58C72">Texto</span> |
Texto |
| Color + negrita | <span style="color:#E58C72"><strong>Texto</strong></span> |
Texto |
| Color + cursiva | <span style="color:#8882B0"><em>Texto</em></span> |
Texto |
| Enlace | [Texto](URL) |
Texto |
This information is part of the Markdown Guide, which can be viewed in detail at the link provided in the references.
Edit and Upload
The general workflow for uploading the different graphic assets or edit elements is as follows
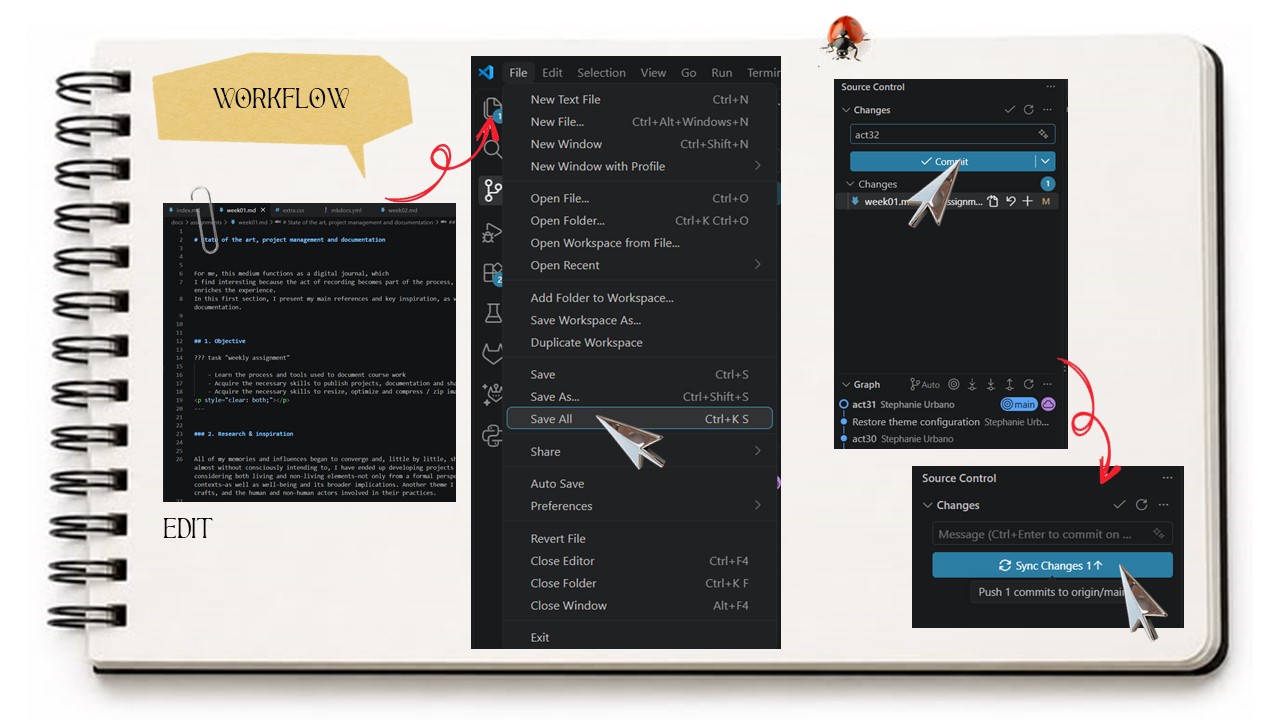
Likewise, it is important to verify in GitLab that the file has been uploaded correctly so that we can finally see the changes reflected on the website.
5. Results
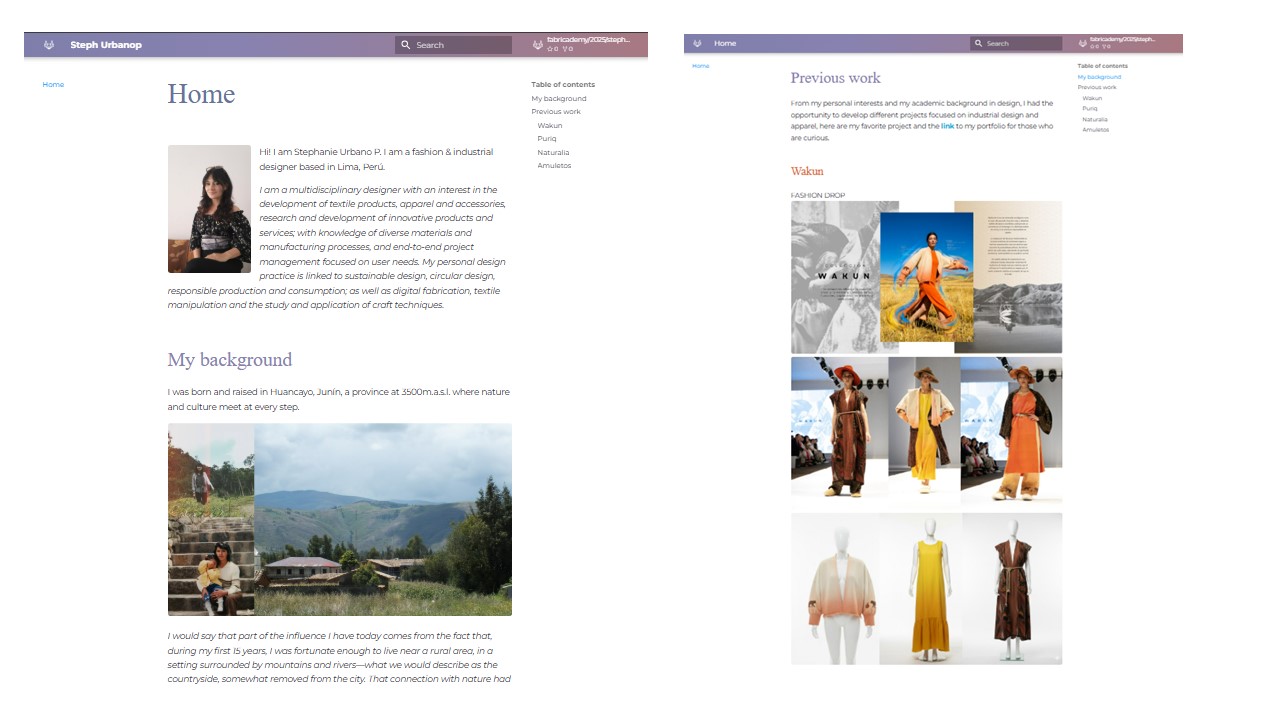
As a result, I was able to publish the website with the requested information and, more importantly, I gained a better understanding of the workflow required to manage it. I also learned how to upload images, videos, organize the files, and then customize different aspects of the website’s visual appearance.
One thing I consider important for future updates is to properly check the size and format of the images, as well as to include and describe the references used throughout the design process. Finally, I think this first version can continue to evolve, since there are still many possibilities for further modifications and personalization as the program progresses.
6. Weekly reflection & critical thinking
I found it particularly interesting how working through a digital medium, and having to personalize and edit it, ultimately led me to engage in a kind of personal introspection. The process made me prioritize the tastes, references, and interests that I consider most relevant and that I genuinely want to share.The idea is that, through this process of collecting and publishing information, someone can get a glimpse into my inner universe and, to some extent, understand how I see the world at this particular moment and how I am translating that perspective into a visual language. In that sense, I feel that building the website has been more than just a technical exercise. It has also been a way of reflecting on my own creative identity and on the references that are shaping the way I approach design.
One area that I feel I still need to explore further is working with code and understanding the different workflows involved. So far, much of the process has involved trial and error, complemented by different guides and references obtained through chatgpt. However, I believe this is something I can gradually improve as I continue working with these tools.
I hope that by documenting this process, this information can also be useful to someone else who may be going through a similar experience or who is just beginning to explore this type of workflow.