This week's assignment is to design and produce something with a digital fabrication process not covered in other assignments.
* This week's assignment is to work with a digital fabrication process not covered in other assignments.
* All readable and original editable files can be downloaded here.
Paste extrusion printing
Individual assignment - Food printing/Clay printing using a syringe
Paste extrusion works by dispensing any paste material through a user-filled syringe, and we can print edible materials like icing sugar, Nutella, or polyurethane silicone. In the 5th week, we had Secil Afsar as a guest instructor who gave us an interesting session explaining how she prints pottery-like models with FDM printers, using a variety of materials such as clay or edible materials (I tasted them, pretty good!). Since I was super curious about the multiple tests she did during her process of calibrating the printer, I convinced her to print one of my models, then I could document the process. She also helped me study the Grasshopper file she used to generate .gcode files. Thanks, Secil!
Designing with Grasshopper
My biggest problem with the way we're doing paste extrusion printing at Fab Lab Barcelona was that I'm not comfortable with Grasshopper. To be honest, I didn't think any of the models I've had designed with other software was suitable for this technique. Viscosity and curing time are very important aspects to consider when designing for paste extrusion. Thick paste materials are heavy and are very likely to fall down during the process if there are overhangs. They also take hours or even days to be dry and solidified, therefore support structures might not be possible. In the end, I quickly created a very simple star-shaped pattern:
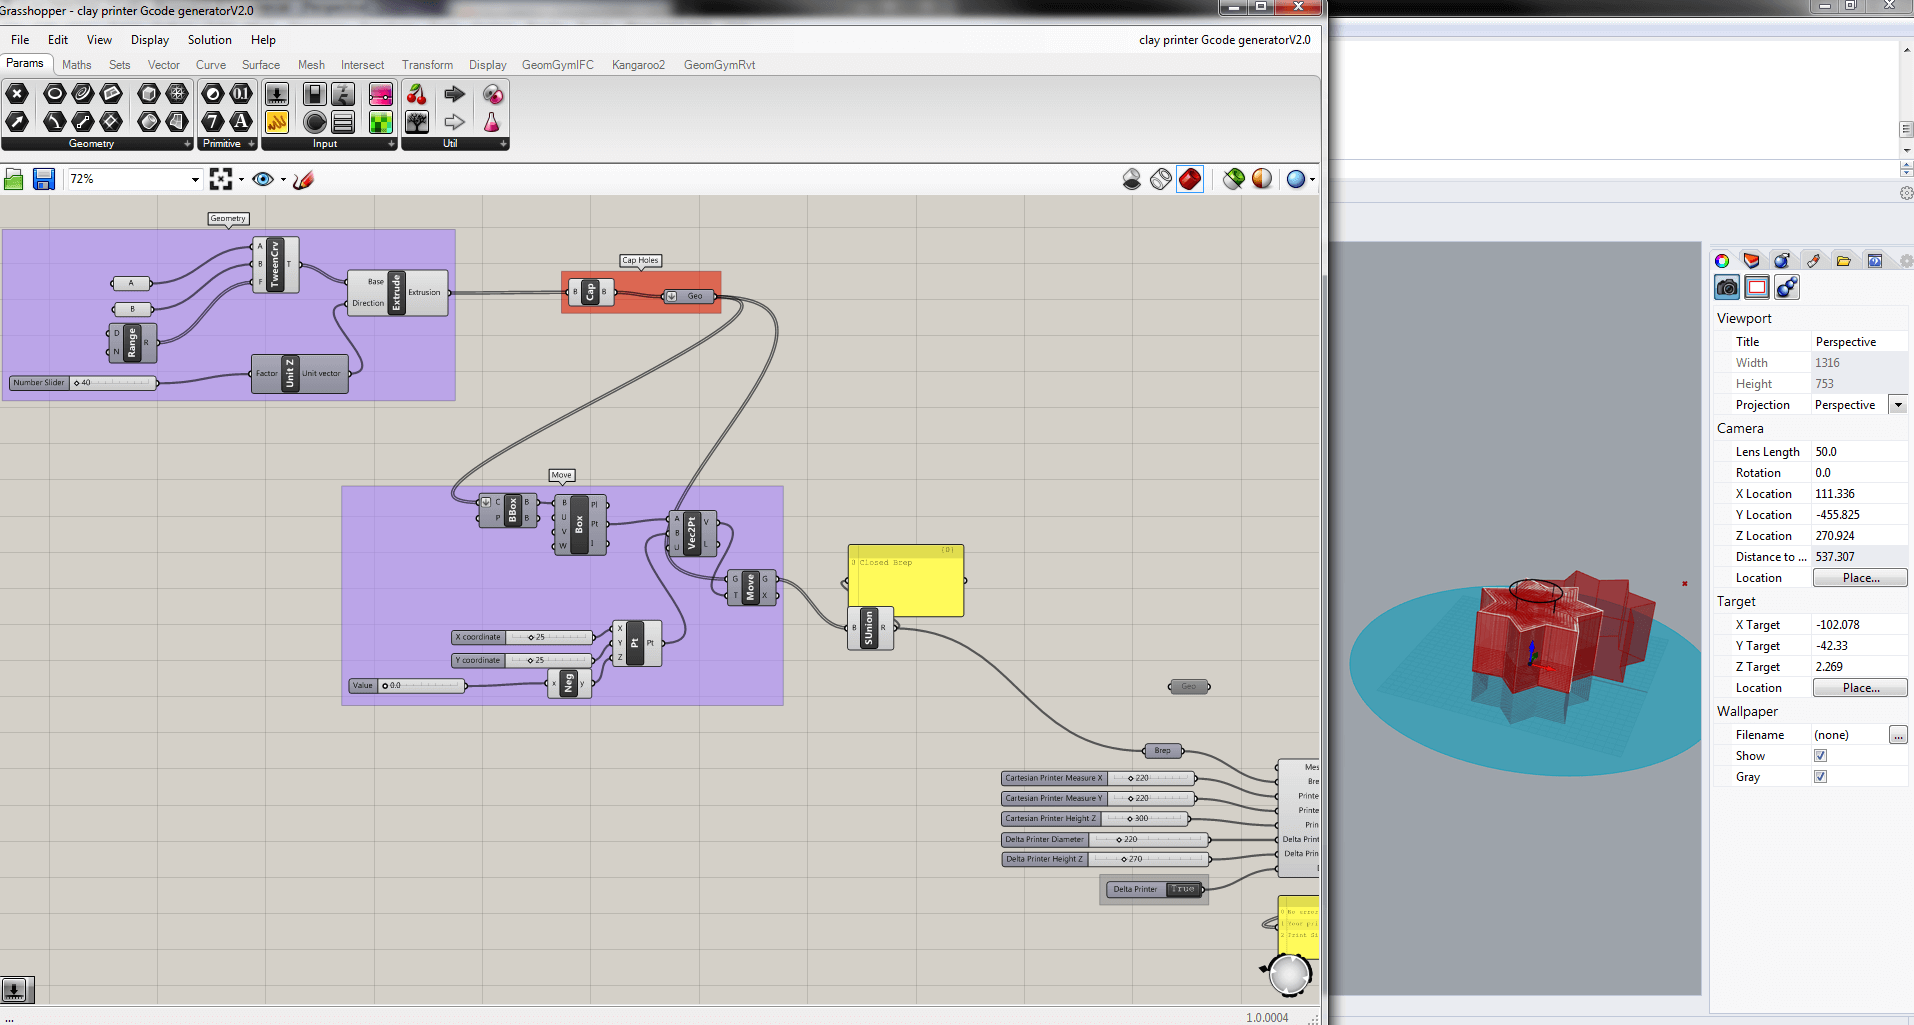
In order to generate a custom G-CODE, we used a Grasshopper file from Eduardo in which he already prepared the scripts. I added my design as a Brep into Eduardo's, and modify some parameters. I tried this technique with 2 FDM printers, but here I only documented the 2nd try with the Anycubic Kossel Plus delta printer. I also modified the Delta Printer Diameter to be 220 and Delta Printer Height to be 270.
Slicing with Grasshopper
The slicing process this time was different since the material we used is not required to be melted, therefore we didn't need to deal with factors like material temperature or infill density. Also, because we used a syringe as the extrusion head, we would like to customize the settings, especially the nozzle diameter and printing speed. Speed, air pressure, and nozzle play a very big role in paste extrusion. The syringe can swell under the pressure of a thick mixture. If there is too much pressure, we need to slow the print speed and/or increase the nozzle diameter.
Eduardo guided me through the whole process. First, we needed to find the "fake" Z0 by manually controlling the FDM printer using Repetier Host. In order to do that, we sent several G-CODE commands with the format G1 F400 Z[some negative number] until the nozzle gently touched the bed. After calibrating, we could know it's Z-23. Here you go a series of quick calculation:
- Measure the Nozzle Diameter. In this case, the nozzle diameter is 1.8.
- The Slicing Distance is more or less 60-70% of the nozzle diameter, and I put here 1.1-1.2
- Z Height Offset is an important number, and we should make sure Z Height Offset - Slicing Distance to be a bit less than Z-23 (we can check the generated G-CODE to know). Hence, I put Z Height Offset=23.8.
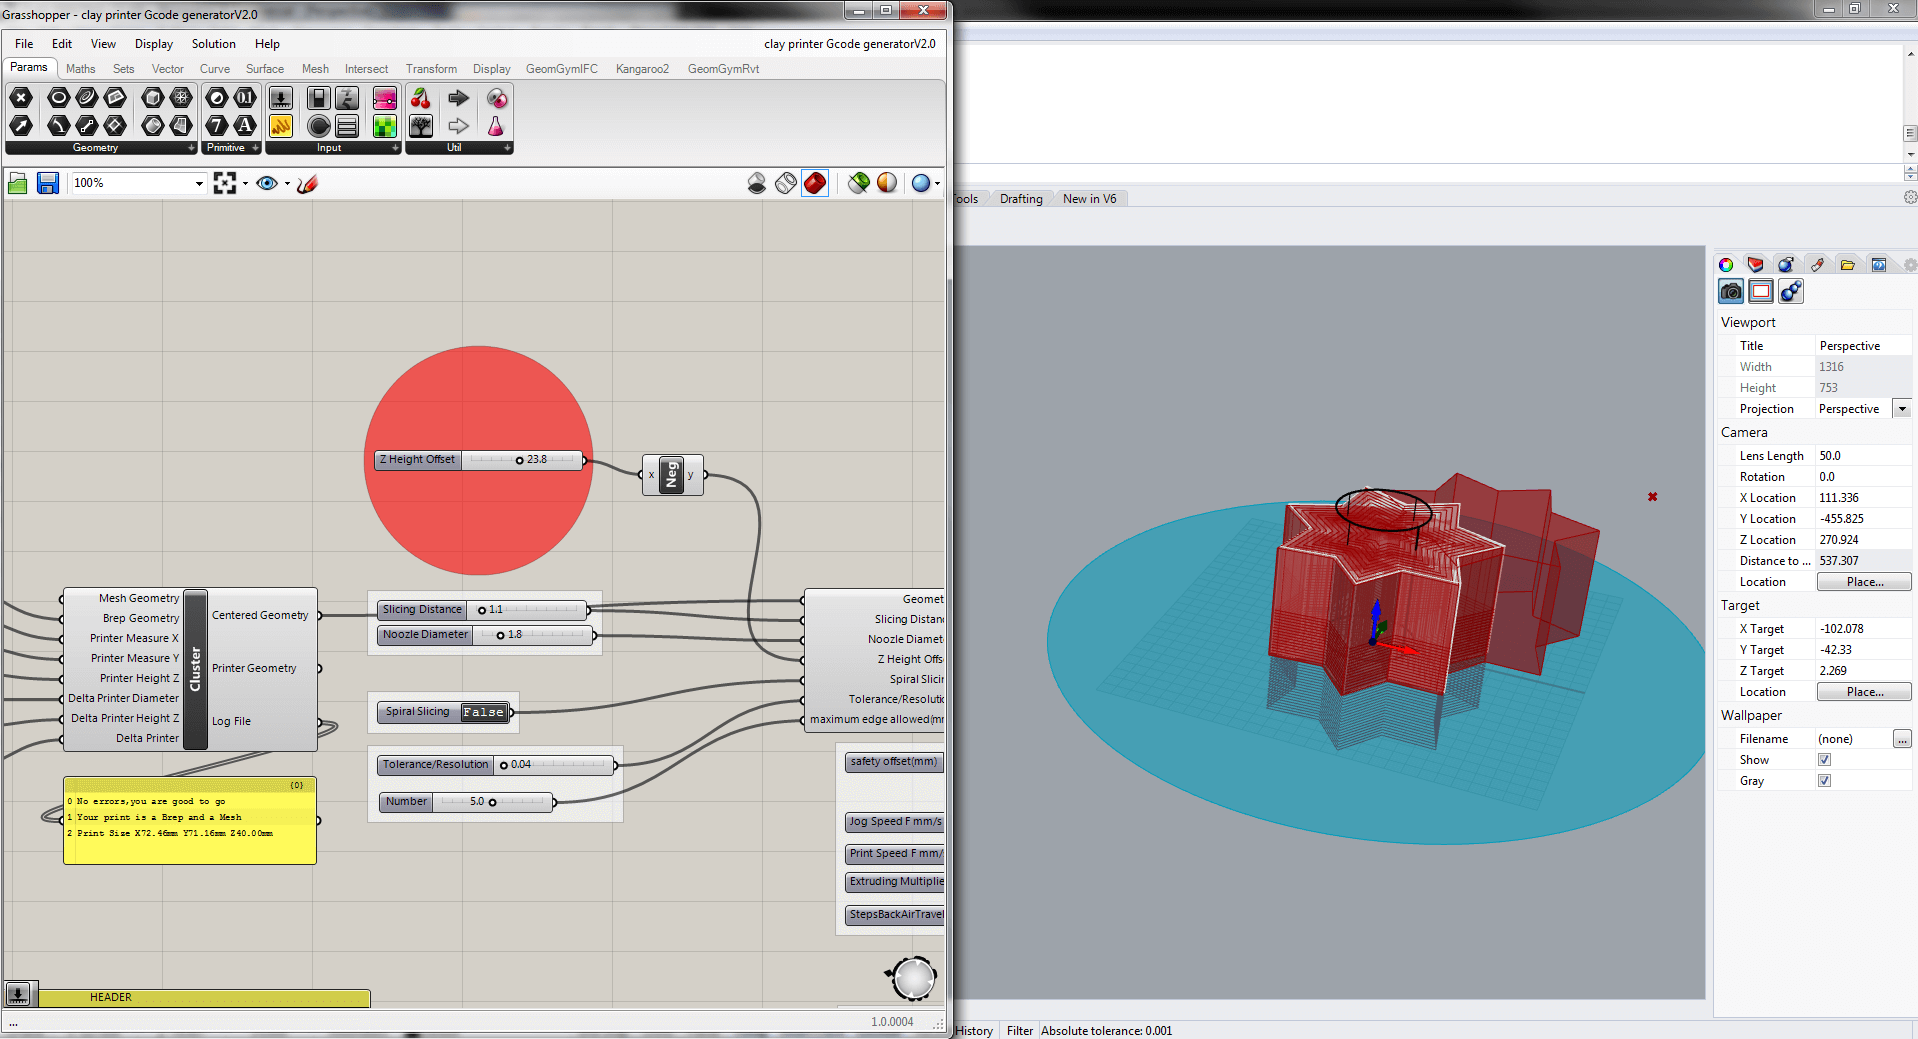
Then the most important parameters that we should pay attention to while extruding paste:
- Printing Speed: we can modify this parameter via Grasshopper or override it in Repetier Host. I put 800 in my case.
- The air pressure will be manually controlled via the air pressure valve system. In Grasshopper, we can modify Extrusion Wait which is the waiting time between an extrusion and the next.

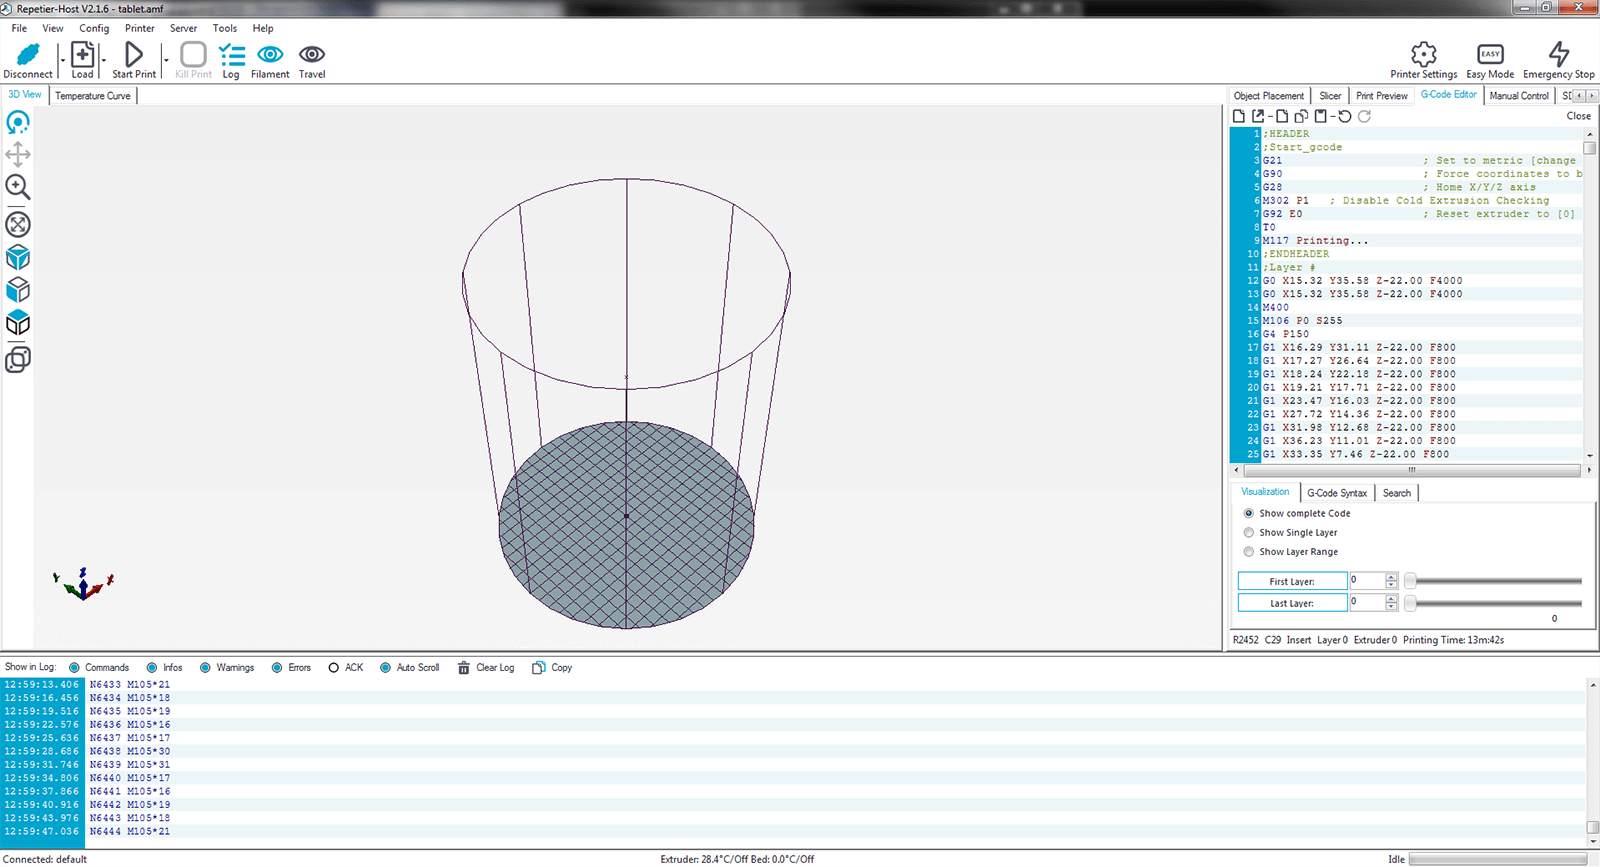
The final G-CODE was generated and ready to use. We could Copy Data Only and print now!

Printing edible paste with Repetier Host
I tried to print an edible paste similar to peanut butter first. Secil helped me with the process. To run the custom G-CODE, we connected the printer to the computer and pasted the G-CODE into the G-Code Editor tab of Repetier Host:
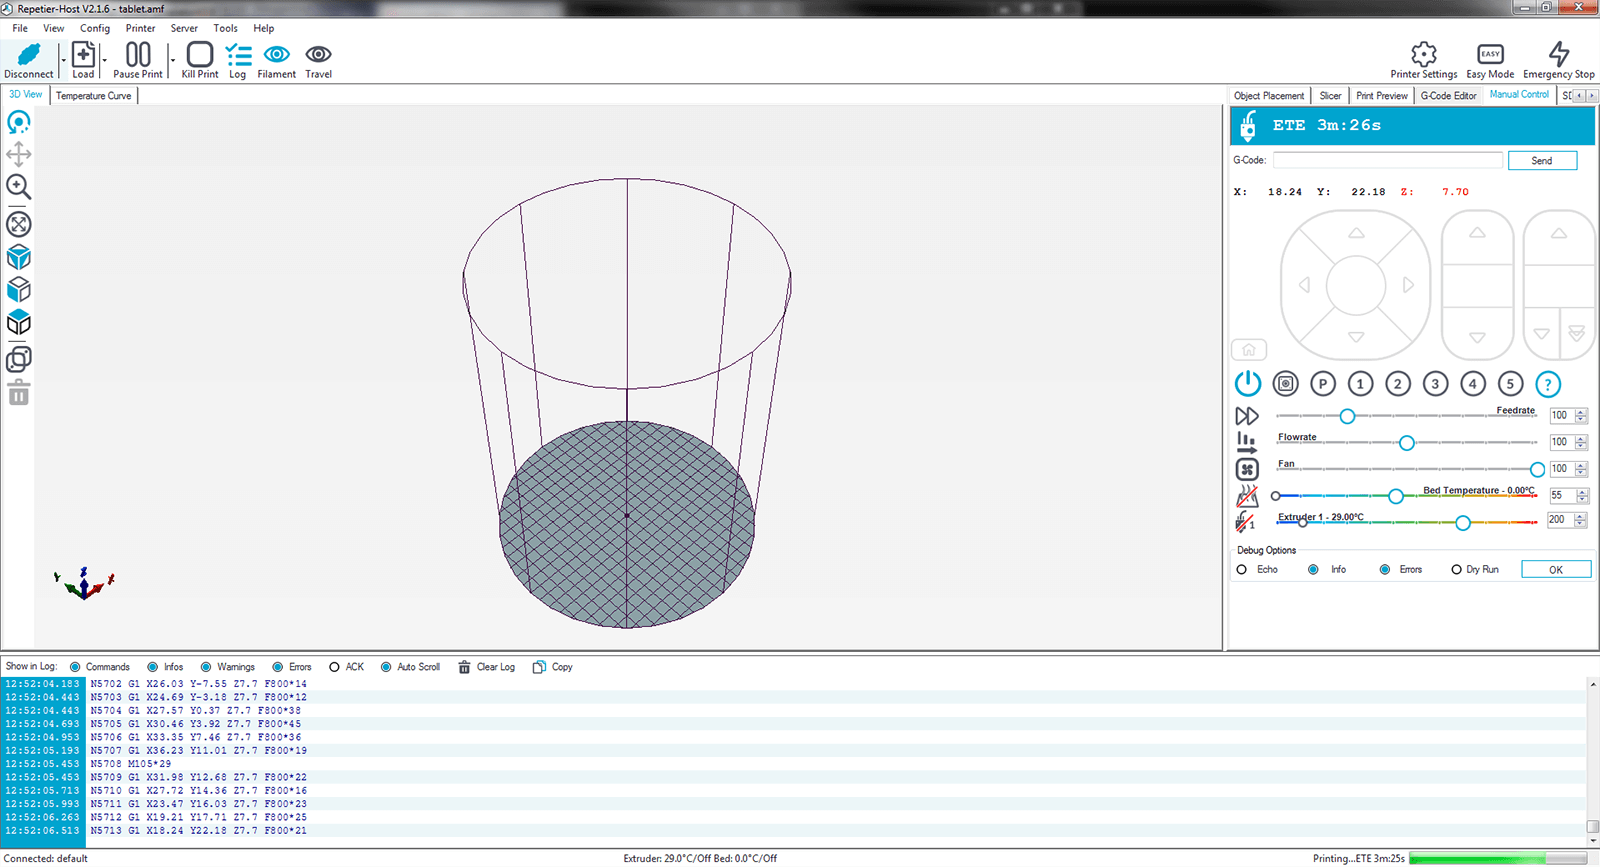
We could also manually control the printing process through the Manual Control tab. The Feedrate section here means how many percentages of the printing speed (the speed we fed in Grasshopper) that we wanted to use. By turning the Fan on/off, we could immediately start and stop pressing the syringe.
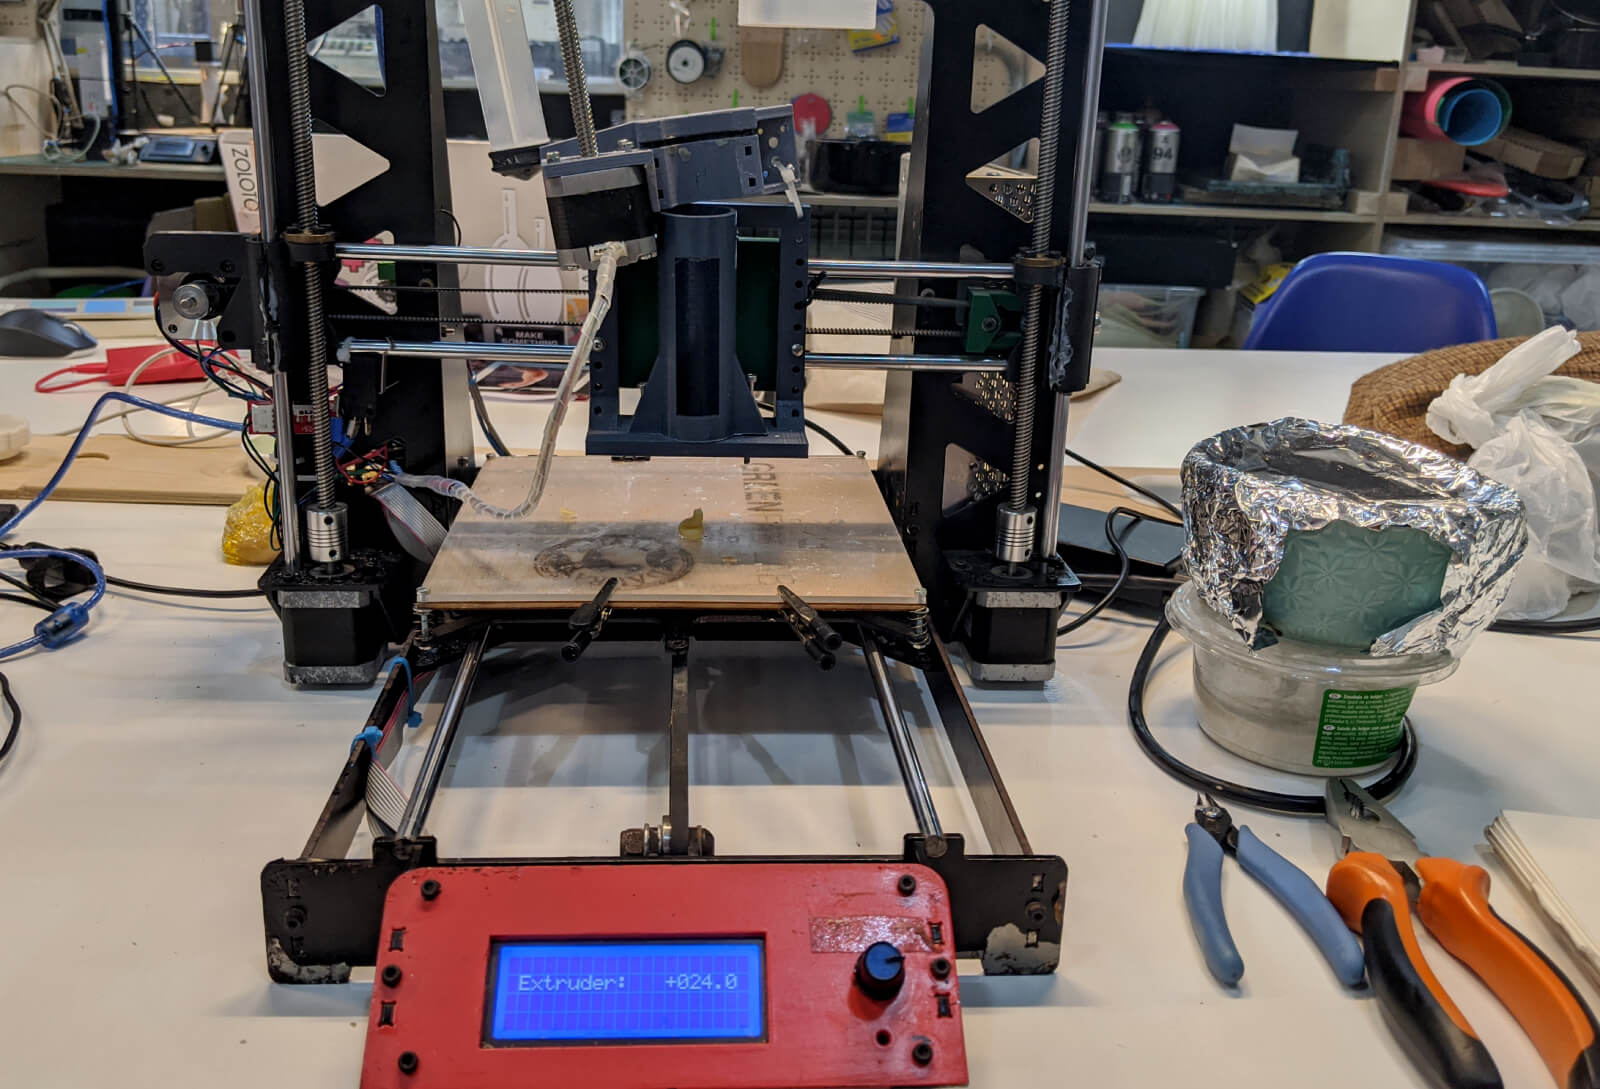
We used the Prusa i3 MK3S printer to print the model (I'm not sure about the correct version of the printer though). The customized extruder consists of a syringe that has been created to fit the original FDM 3D printer. Some basic specs of the machine:
- Printing technology: FDM
- Printing size: 250 x 210 x 200mm
- Maximum extruder temperature: 300ºC
- Firmware: Marlin
- Printing method: SD card, USB
After sending G-CODE to the printer, the extrusion head started to move correctly in accordance with the pre-defined paths, but the syringe didn't pump properly. After investigating for a while, it could be some issues with the motors of the machine. We decided to leave it like that, then Secil could continue calibrating the printer.
Printing clay with Repetier Host
When I got back to the lab after the COVID-19 lockdown, Eduardo helped me to resume the process using the Anycubic Kossel Plus printer. I also try a different material, which is clay. The good thing about printing with clay is that we can add water to adjust the viscosity to help get you the print we’re after. As it’s a thicker mixture, we could include overhangs and longer bridges while printing at a slower speed.

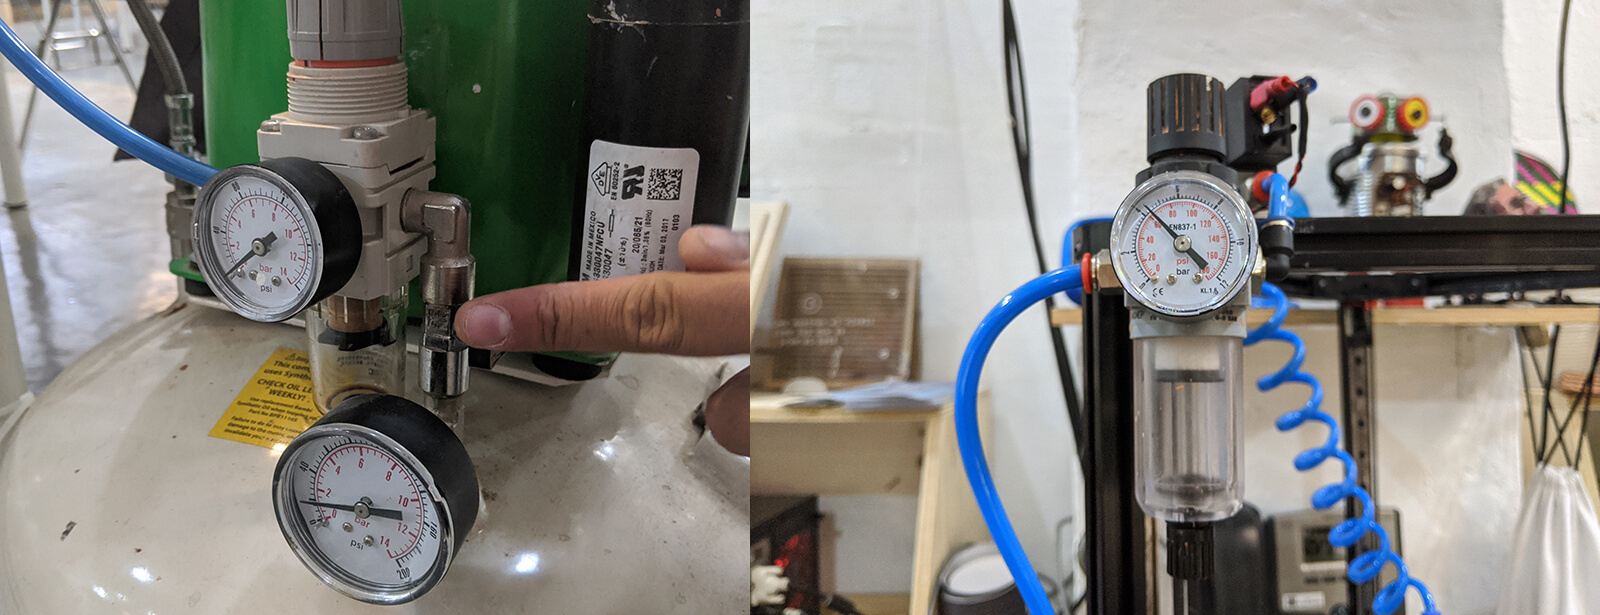
At Fab Lab Barcelona, we used a system consisting of 3 pressure regulators. We mostly worked with the pressure regulator attached to the 3D printer, and this one directly controls the pressure applied to the syringe.
The next important step was mixing material. I tried to ask for a formula before mixing, but the answer I got from the people at IAAC was "Just feel it!". So...let's give it a try! It took me plenty of time to mix the clay and to reach a good level of viscosity, but there is nothing much to say about the process.

Below is a video recording the printing process:
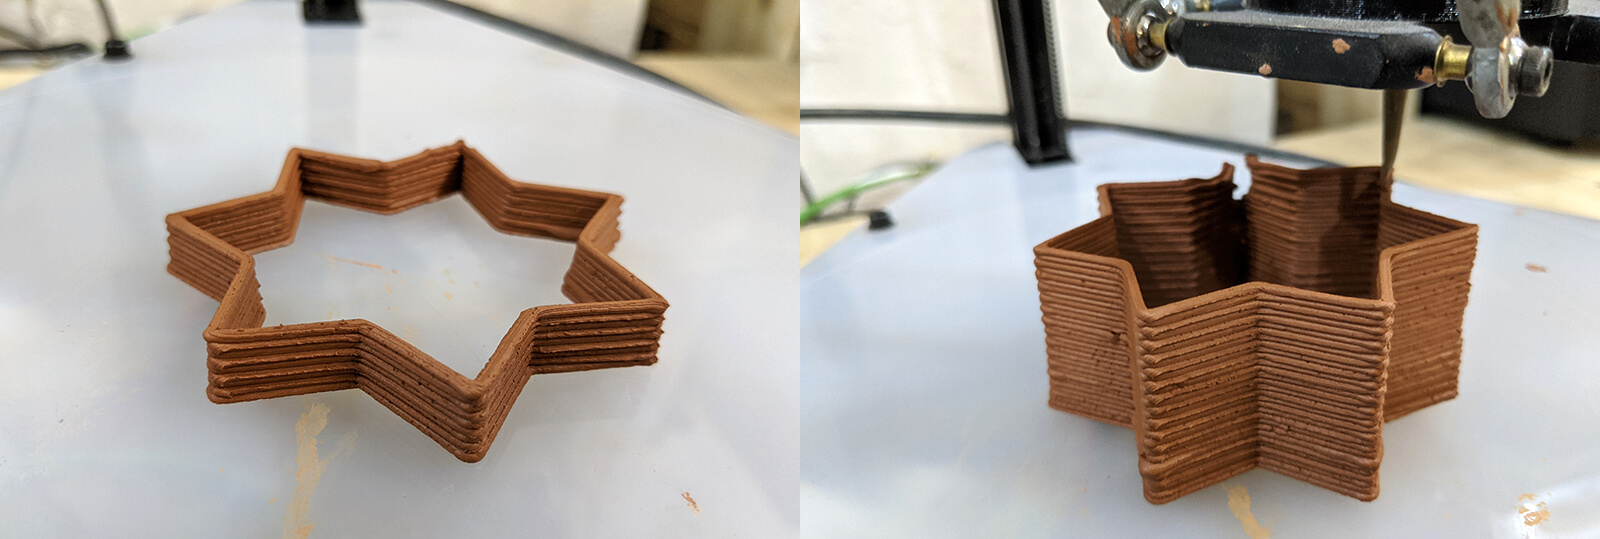
Paste extrusion might sound simple but it actually wasn't. If the pressure gets too high, the printing result could be destroyed. If the pressure gets too low, the extrusion process might be interrupted and layers would not be smooth and even. Here I have an example of how a high air pressure destroyed a corner of my star-shaped object:
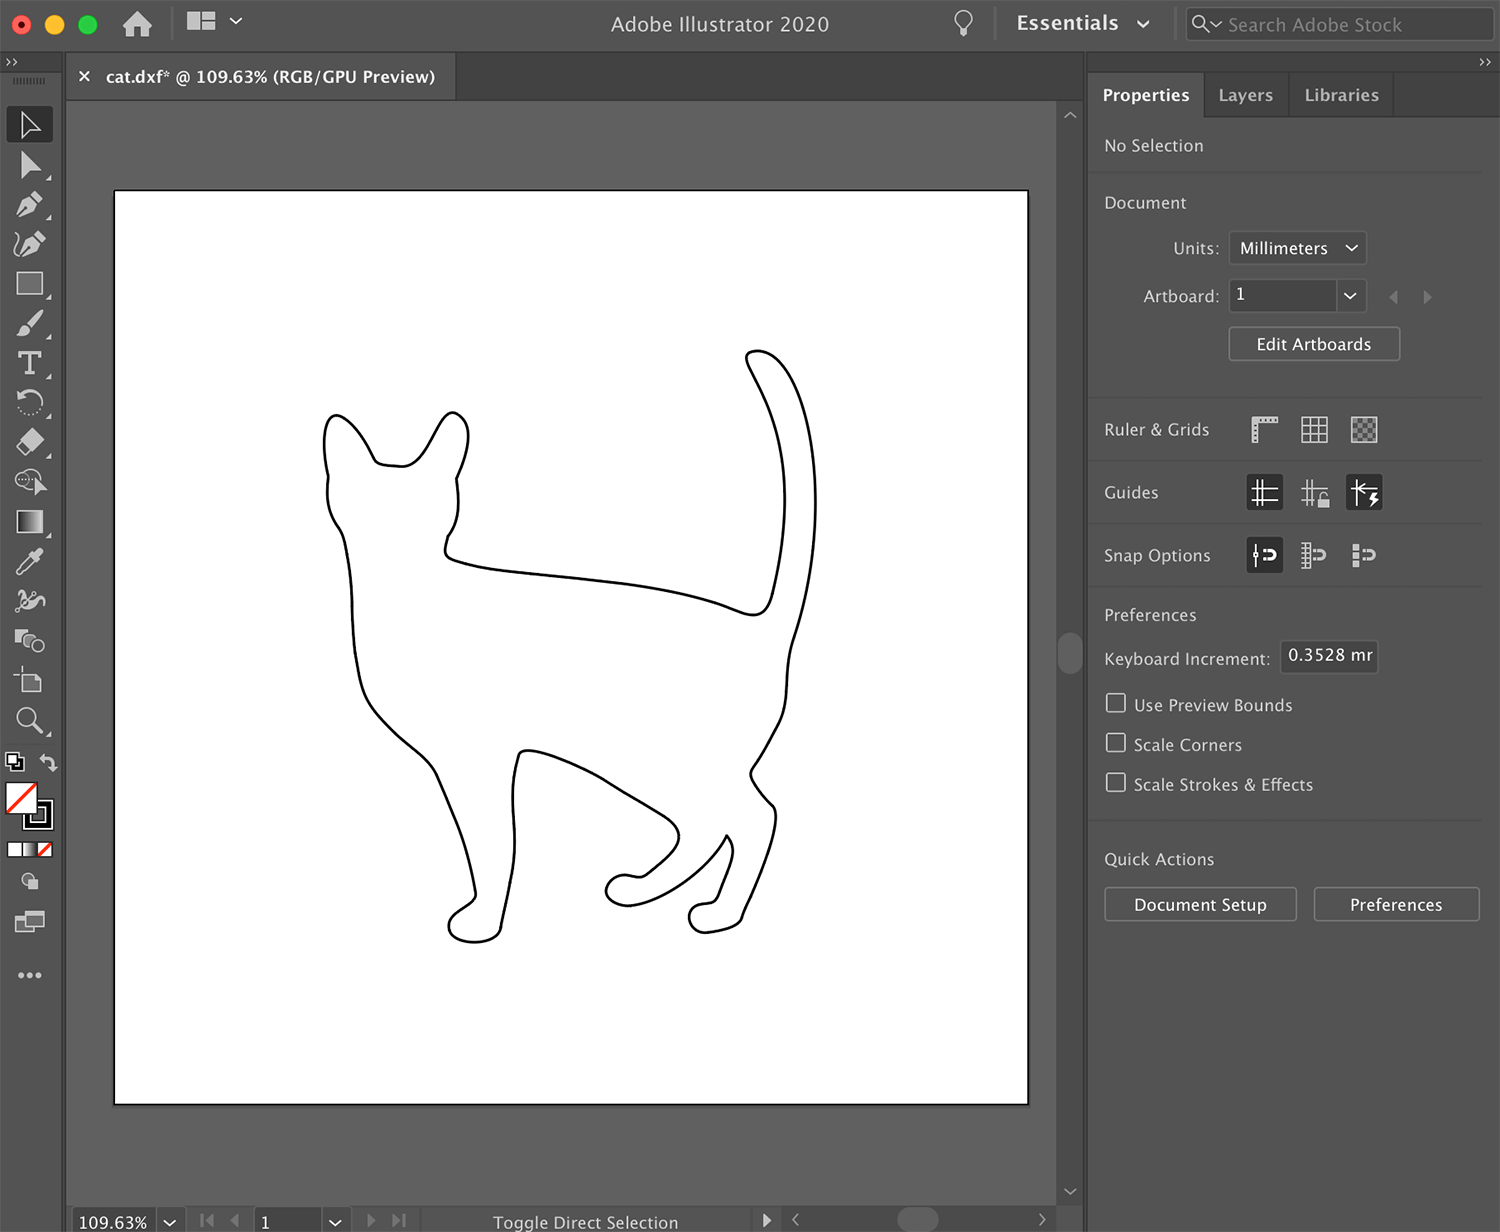
After the first attempt, I still had much material left. In honor of my fatigue arms, I tried to print something else. I decided to print a cat and quickly drew it with Illustrator:
In order to keep the printing and let it dry later, I put a piece of plywood on top of the printing bed. Then I made a huge mistake: I didn't re-calibrate the Z0, and the nozzle hit the bed so hard that it was destroyed. I had to replace the nozzle with a new one, put a piece of paper on top of the printing bed instead, and started printing again.
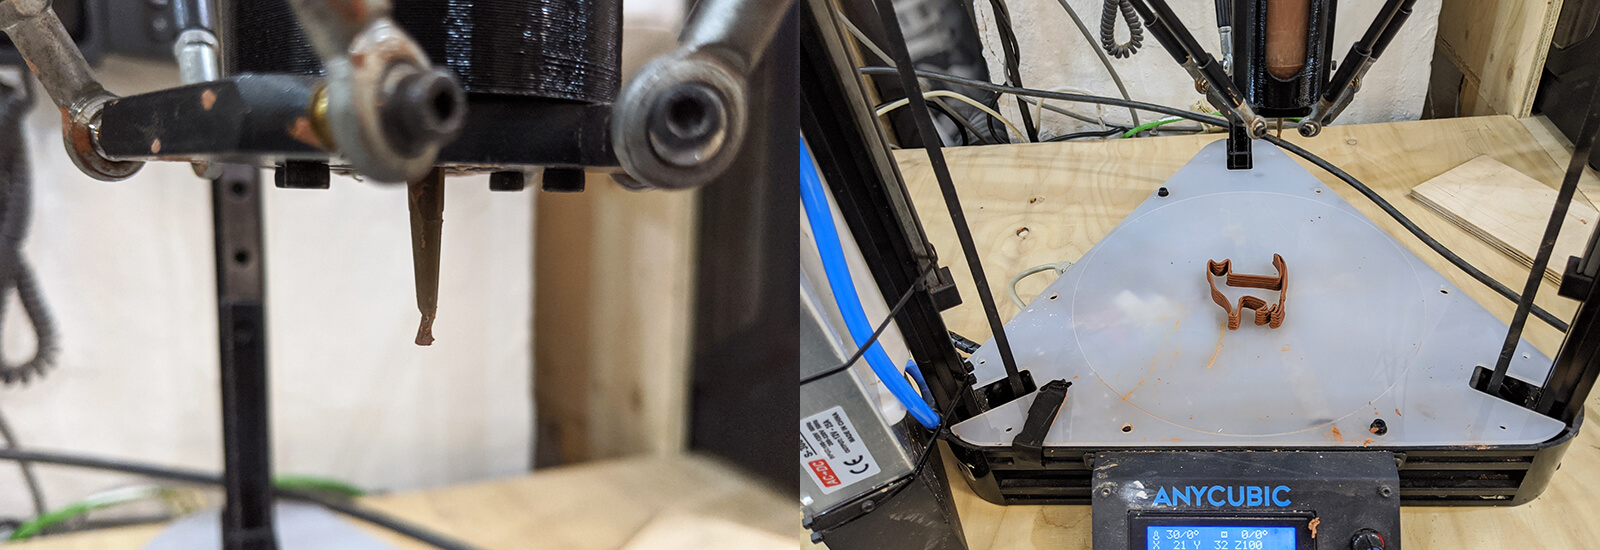
In this 2nd printing attempt, I reduced the air pressure, and I have another example of how a low pressure made my final layer slightly smudged. Anyway, I was already happy with the final result!
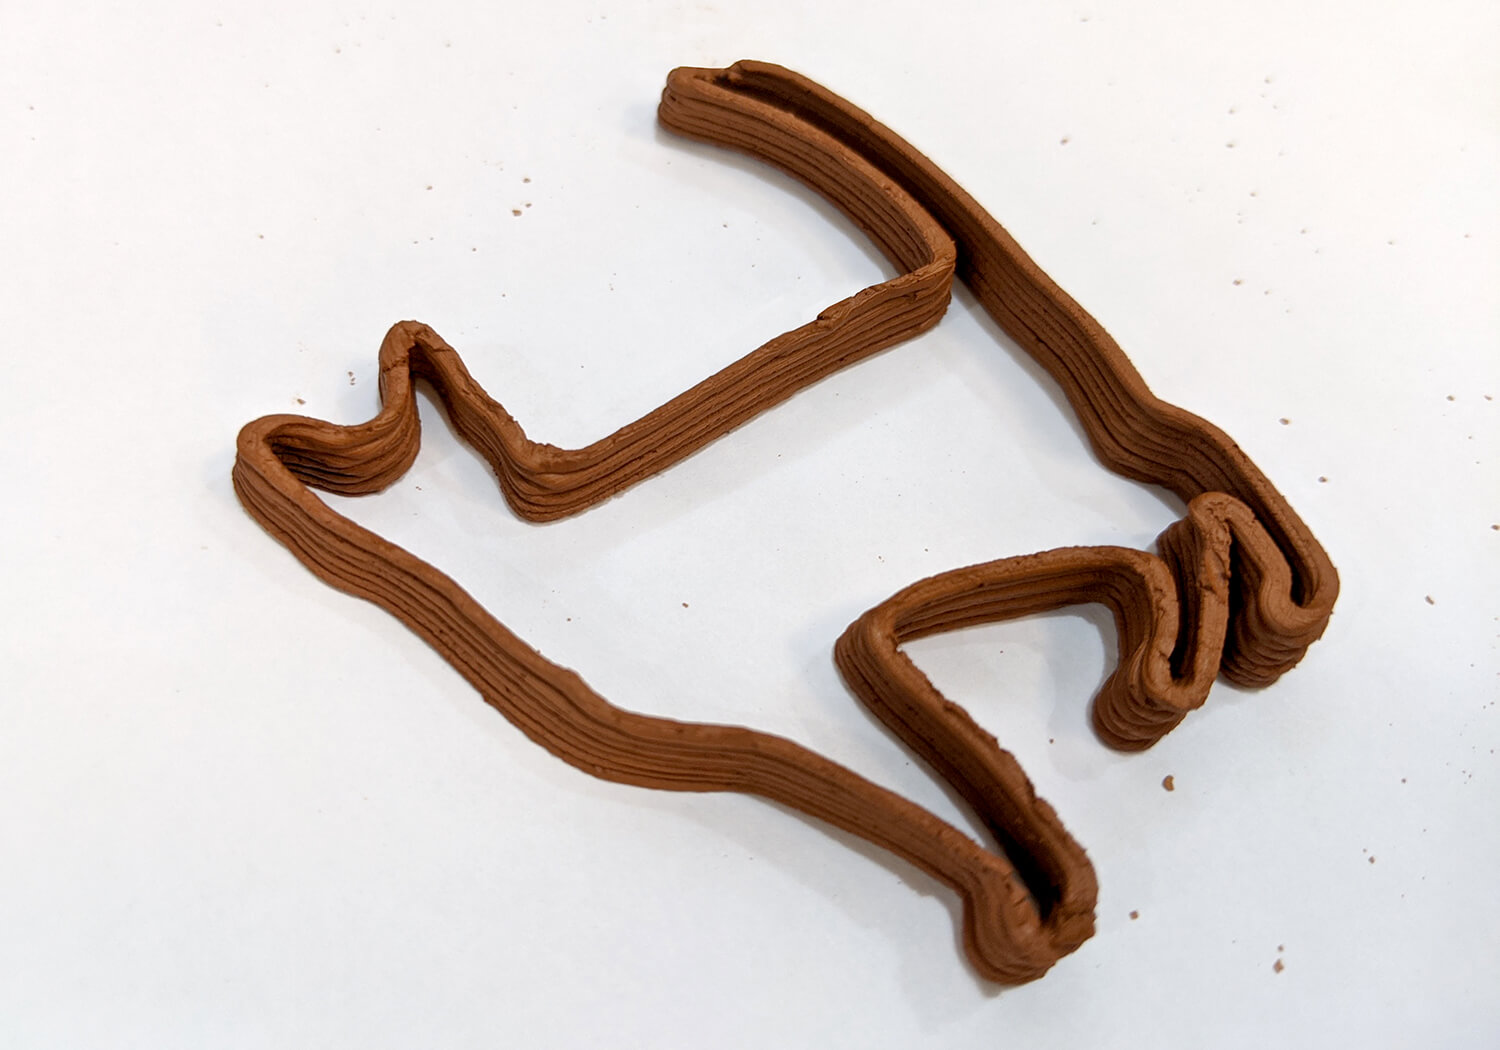
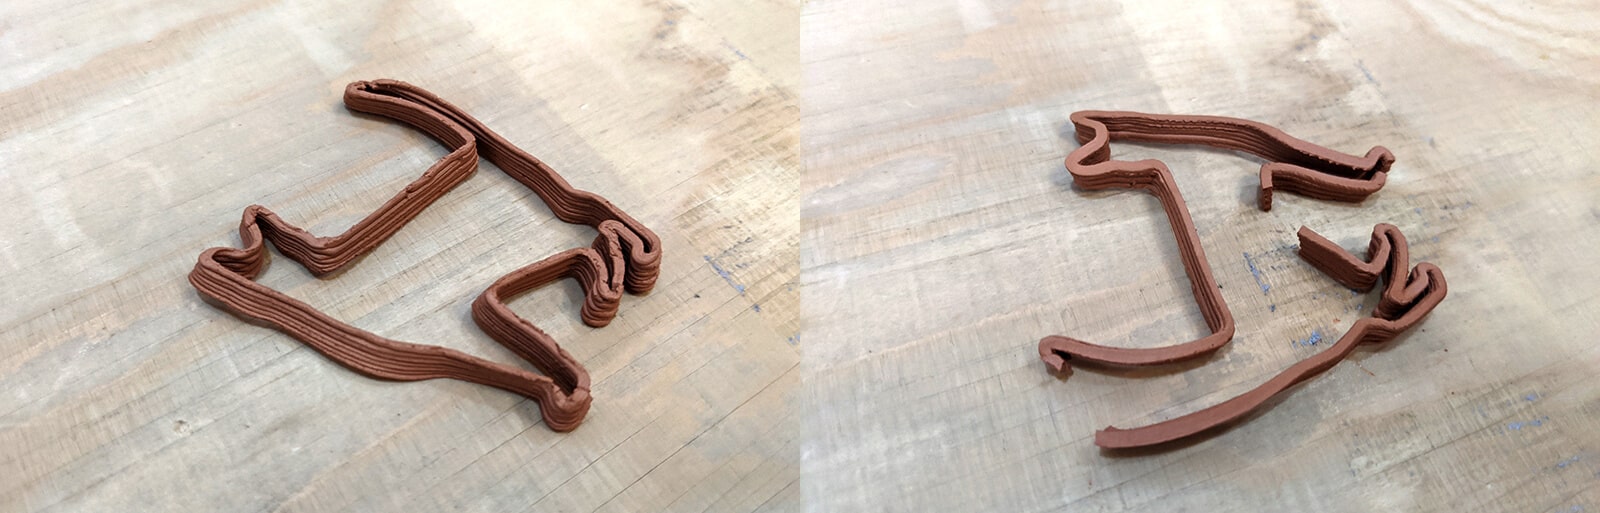
After half a day, my cat was dried. In theory, we should cure the clay by baking it in an oven, so that the final result won't get too brittle or won't be melted under high moisture. Unfortunately, the oven was not in the lab at the moment. I thought I had gone through the most important part of paste extrusion printing, so I stopped the process here. And...ouch! The cat was broken, as expected!
Conclusion
I'm personally very fond of paste printing since it allows us to mix hard and flexible materials in a single design all with existing FDM 3D printers. I started trying this technique before the lockdown, and I was quite happy that I could manage to finish it at the end. However, it was a pity that I couldn't try other "wild" techniques mentioned by Neil. 6 months was not enough to learn everything I want to learn!