AIeye Assistent
Content
About Team
We are a multidisciplinary and fun-loving team, passionate about what we do. Creativity, collaboration, and enthusiasm define us as we turn ideas into useful and exciting realities.
Our approach always strikes a balance: we design projects that are not only innovative and enjoyable but also functional and beneficial for everyone. We believe the best way to make a positive impact is by combining utility with a touch of joy in everything we create.
We love working together to transform ideas into solutions that make a difference!

Silvana Espinoza Gomez

Hi, I'm Silvana, I'm from Fab Lab Peru, I'm an electronic engineer, I work as a teacher and training all of Peru on technology, making it possible for children and young people to have access to these technological tools. Fab Academy 2024
Maria Angela Mejía

Maria Angela passionate about exploration and innovation, I’ve managed sustainable architecture and landscaping projects, taught Interior Design, and mentored in programs like Fab Lab Peru’s Innova Fab Women.Fab Academy 2024
Luis Ernesto Flores

Eng. Electronic, fabacademy 2014, bioacademy 2015
Cristian Loayza Egoavil

Hi! I am Cristian Loayza Egoavil. I am an architect based in Lima, Perú. I graduated from a master's degree in Systems Engineering with a major in Information Technology Management. I love play basketball. Fab Academy 2024
Project
A device that uses artificial intelligence to recognize various electronic components used in electronic construction projects.

Main Objective: To facilitate the recognition and classification of electronic components for students, makers, and professionals.
Motivation: To reduce errors, improve efficiency in component identification, and provide an interactive learning experience in the Fab Lab.

1. Sketches
Initial diagrams of the device

Sketch 1

Sketch 2
2. 3D Design:
The bracelet is modeled in Autodesk Inventor, detailing dimensions and functionality. The design is optimized for additive manufacturing.
You can view the design in Onshape by clicking the link below:

3D Design of the bracelet
3. 3D Printing:
Initial prototypes of the bracelet are 3D printed, evaluating the shape and ergonomics of the design.

3D Printing Prototype 1

3D Printing Prototype 2
4. Electronic Design:
Using EasyEDA, electronic circuits are designed to integrate key components such as the control module, sensors, and voice interface.
NeoPixel

Camara

OLED Display
Tools and Materials
Hardware:
- Camera to capture component images
- Xiao Esp32 S3 Sense
- Xiao Esp32 S3
- OLED
- NeoPixel
Software:
- Machine Learning Models: SenseCraft AI Models
- Computer Vision Algorithms In process...
Materials:
- Xiao Esp32 S3 Sense
- Xiao Esp32 S3
- OLED
- NeoPixel
- 3D printer filament
- Other components to be recognized
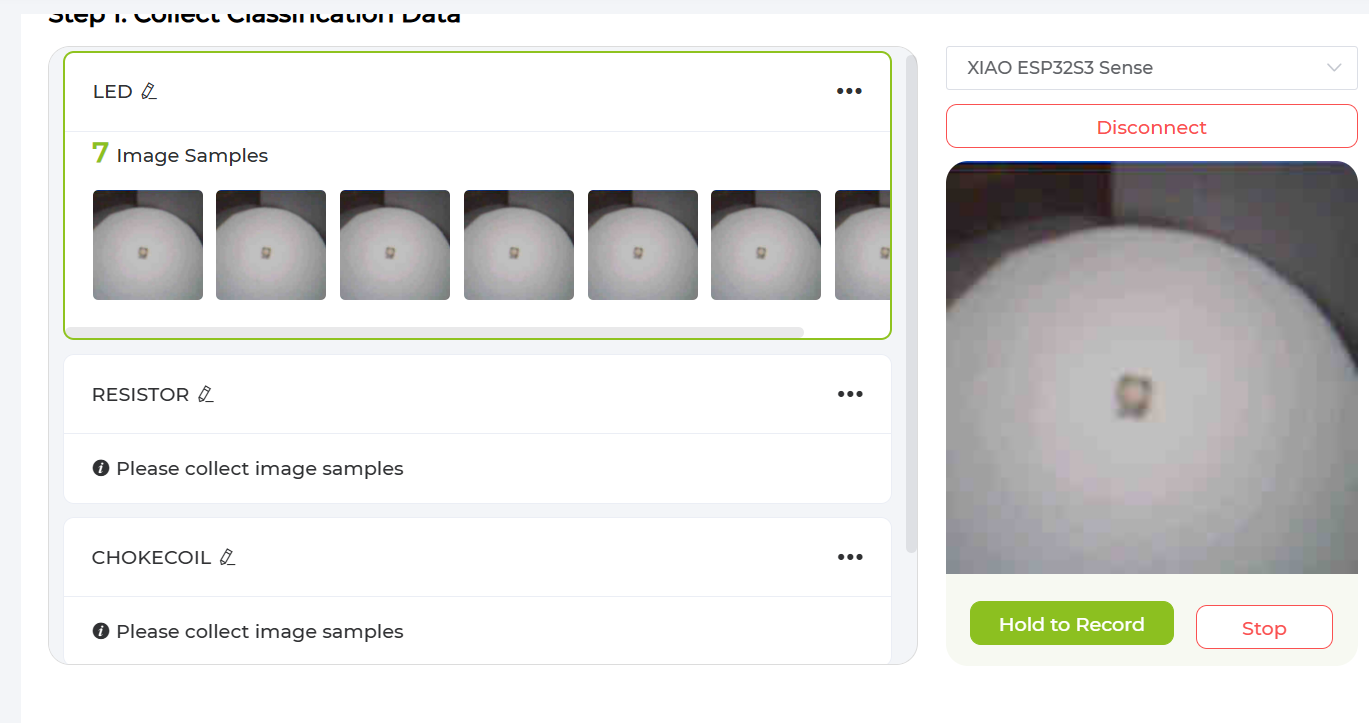
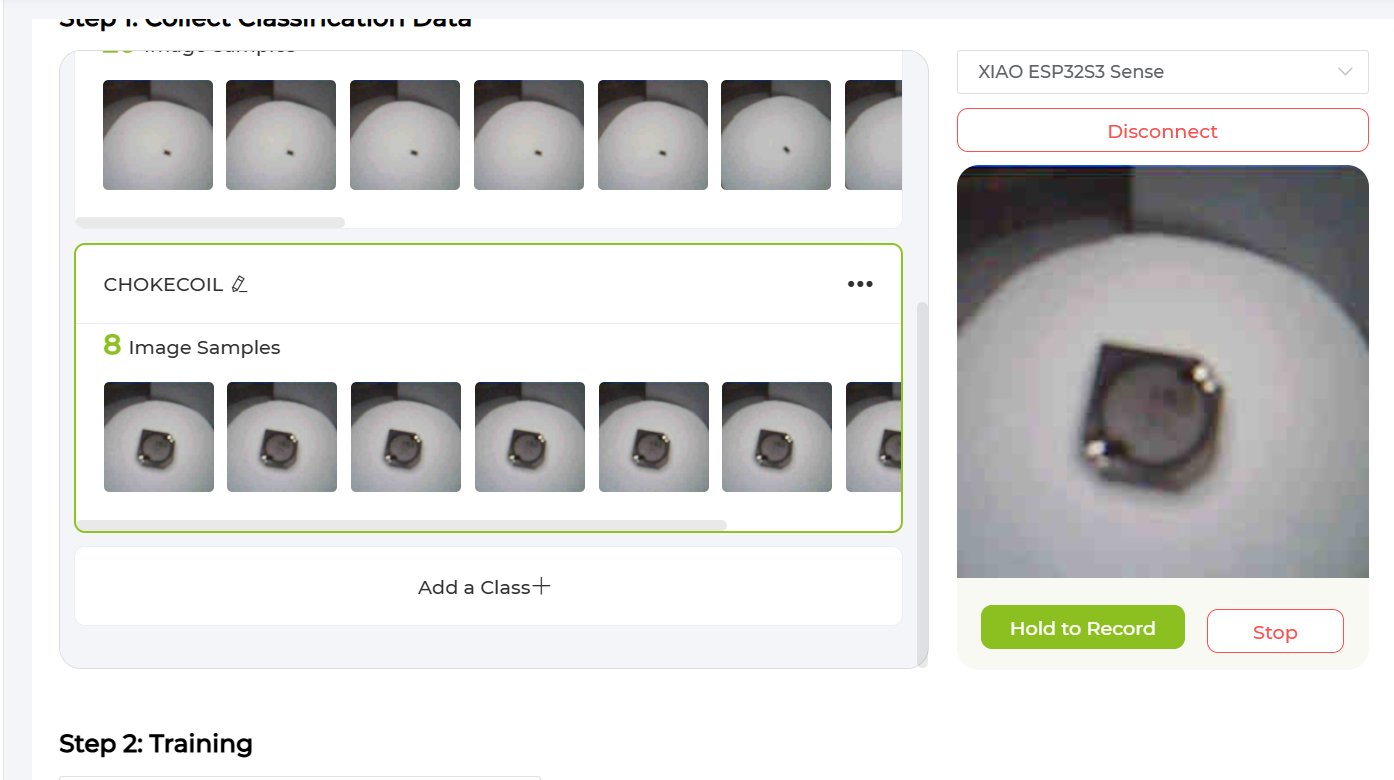
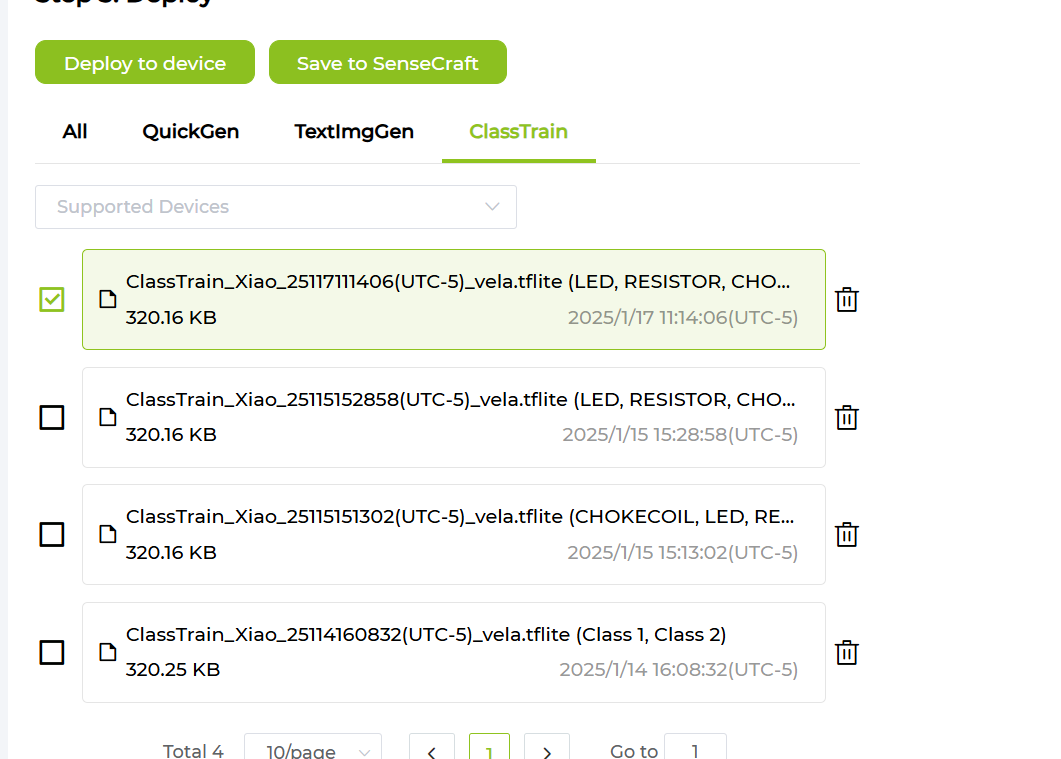
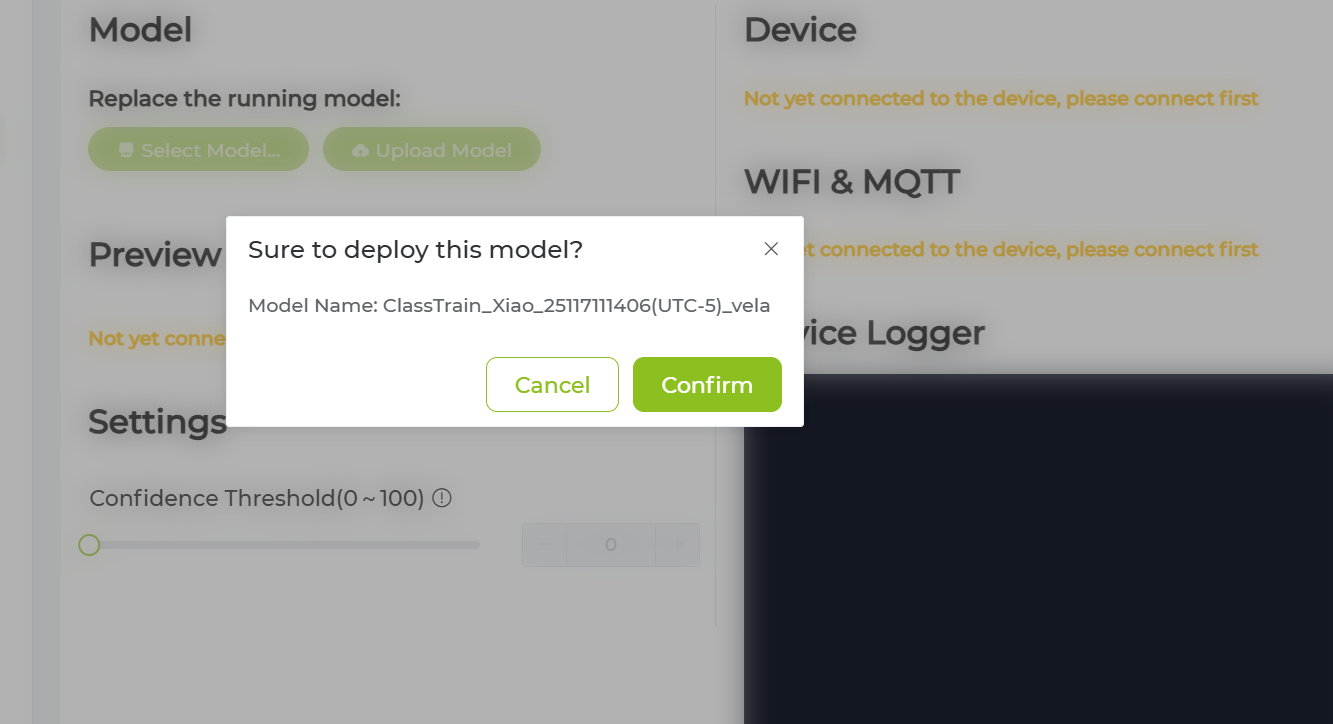
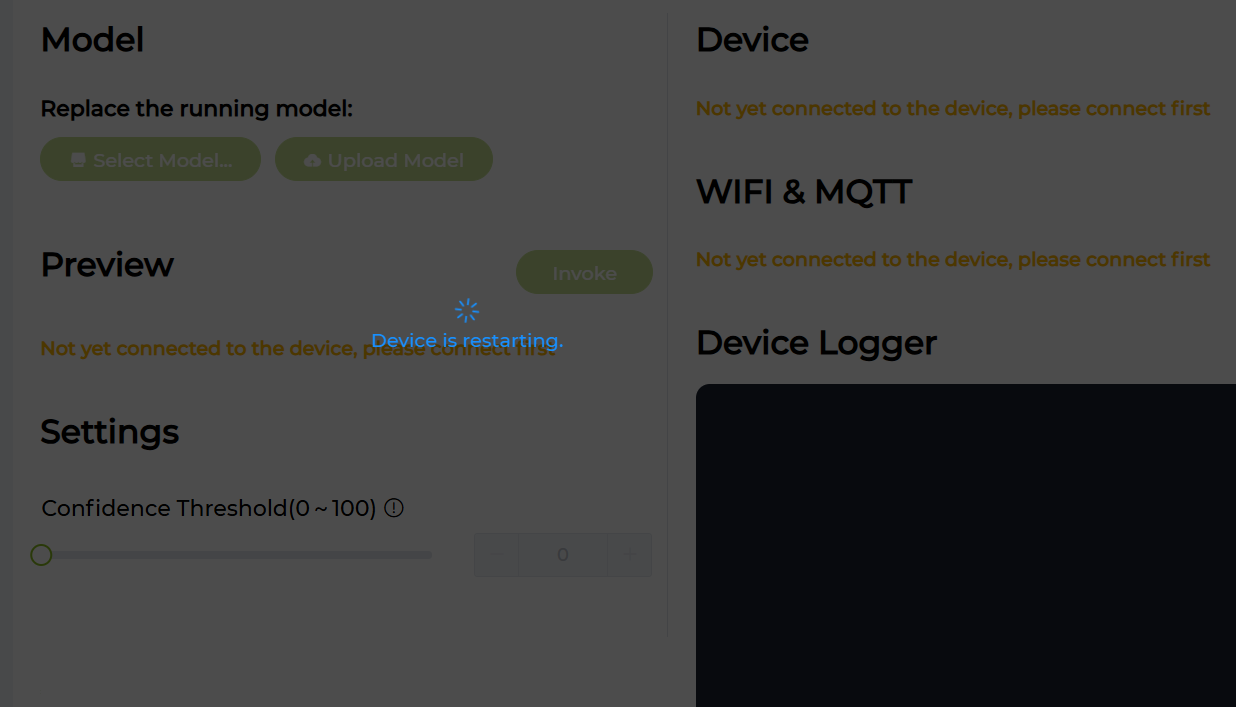
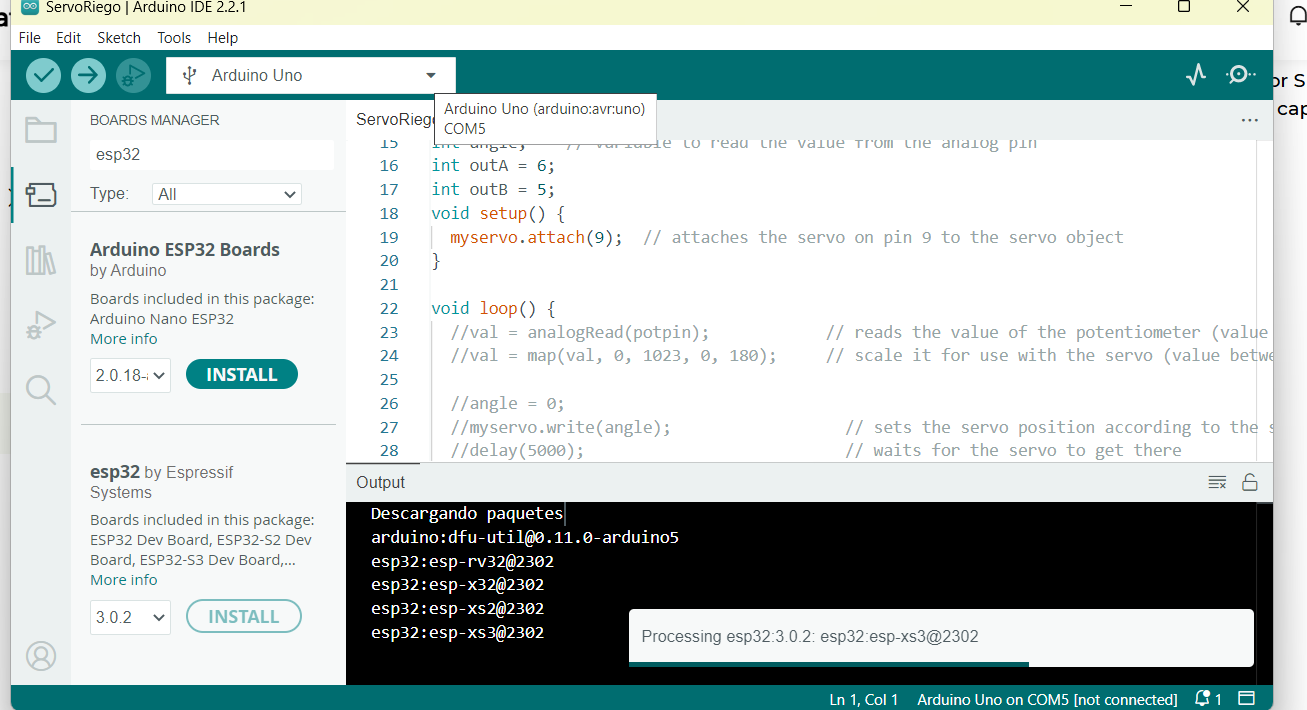
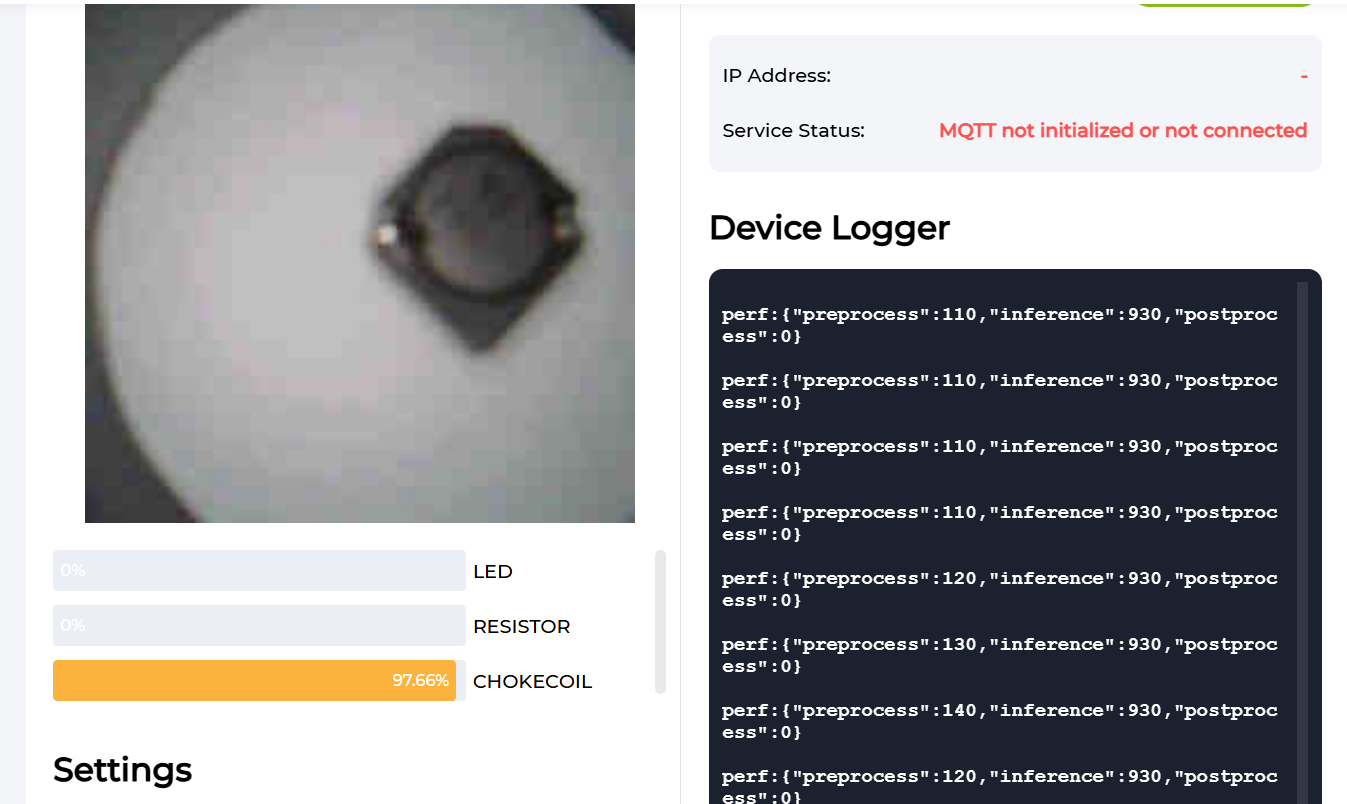
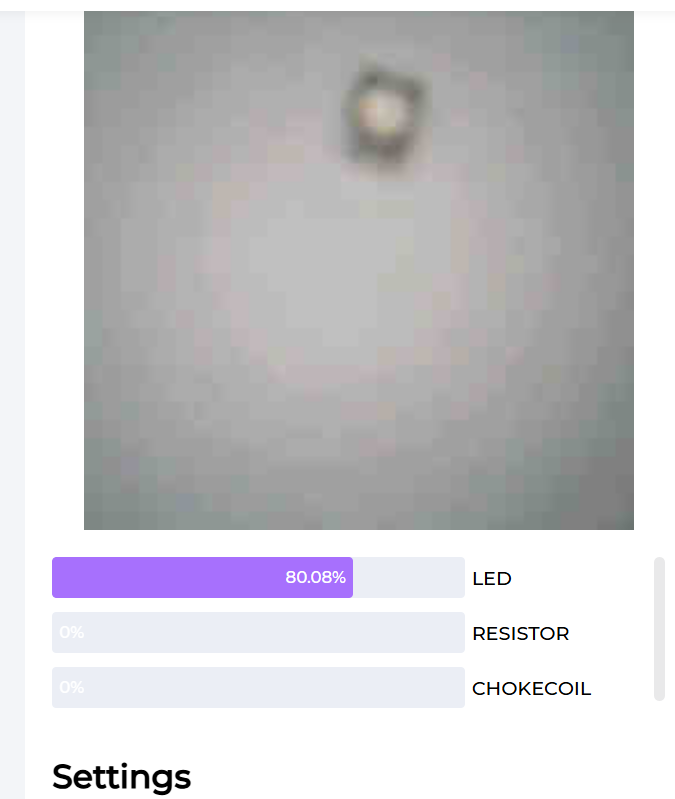
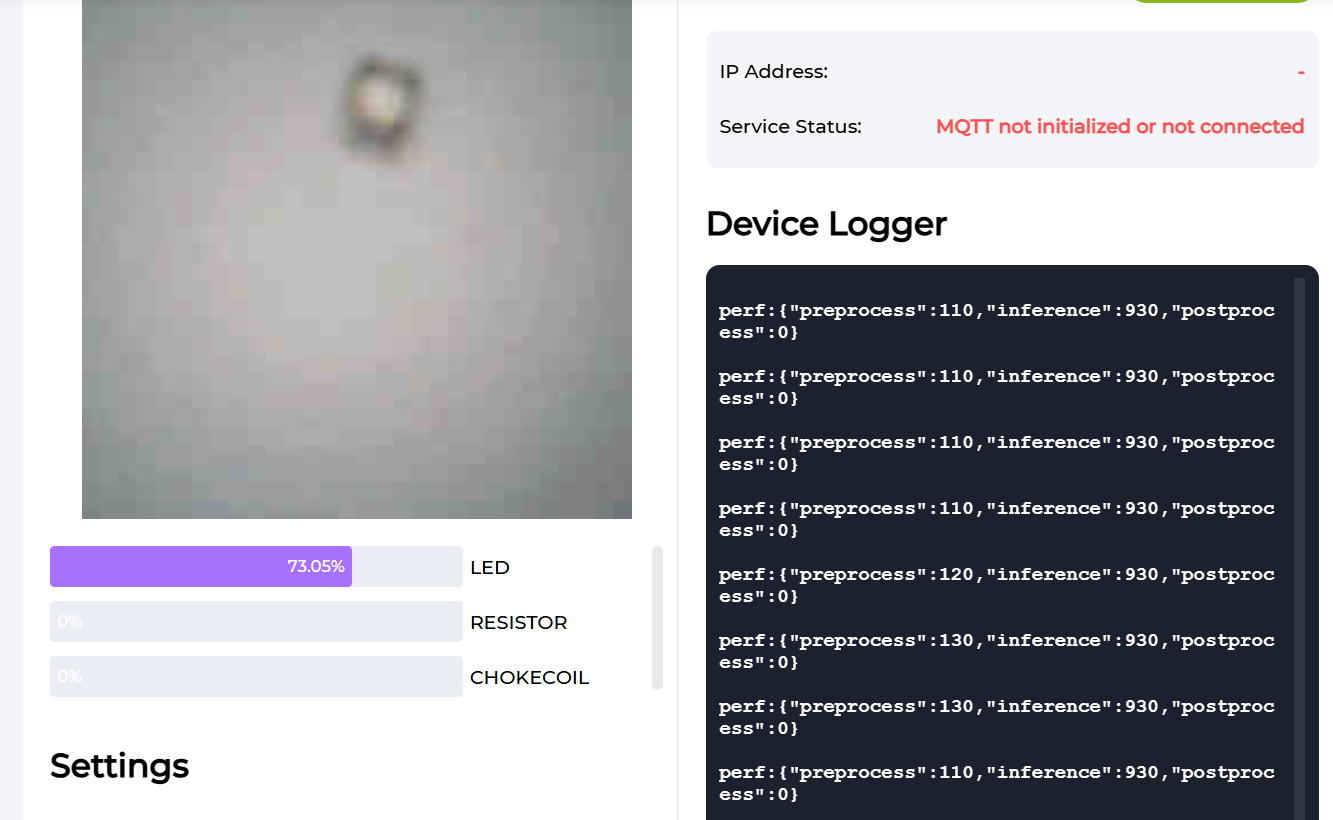
5. Trainer IA:
Preparation 1. Grove Vision AI V2 or XIAO ESP32S3 Sense was connected 2. The device has been connected to the port via USB Configuration Not yet connected to the device, please connect first

Screenshot 1

Screenshot 2

Screenshot 3

Screenshot 4

Screenshot 5
6. Programing:
#include <Adafruit_NeoPixel.h>
#include <U8g2lib.h>

// NeoPixel configuration
#define NEOPIXEL_PIN D6  // Pin connected to the NeoPixel ring
#define NUM_LEDS 16     // Number of LEDs in the ring
Adafruit_NeoPixel strip = Adafruit_NeoPixel(NUM_LEDS, NEOPIXEL_PIN, NEO_GRB + NEO_KHZ800);

// OLED display configuration
U8G2_SSD1306_128X64_NONAME_F_HW_I2C u8g2(U8G2_R0, /* reset=*/ U8X8_PIN_NONE);

void setup() {
  // Initialize OLED display
  u8g2.begin();
  u8g2.clearBuffer();
  u8g2.setFont(u8g2_font_ncenB14_tr);
  u8g2.setCursor(0, 20); // Initial position of the text
  u8g2.print("It works! _o/");
  u8g2.sendBuffer();

  // Initialize NeoPixel ring
  strip.begin();
  strip.show(); // Make sure the LEDs are initially off

  // Set all LEDs to white
  for (int i = 0; i < NUM_LEDS; i++) {
    strip.setPixelColor(i, strip.Color(255, 255, 255)); // Full white
  }
  strip.show(); // Apply changes
}

void loop() {
  // Do nothing in the loop, initial state is already set up
}
Schedule
This section provides a detailed overview of the bootcamp's schedule. Explore the timeline of sessions, workshops, and activities that guided our learning journey. Stay updated on the topics we've covered and what's coming next as we progress through this enriching experience.

Topic Learning
This section covers the key topics and learnings from the bootcamp. Explore detailed insights into digital fabrication, cutting-edge tools, and techniques we've mastered. Each topic includes summaries, challenges we faced, and how we overcame them, providing a comprehensive view of our learning experience.
Topics Bootcamp 2025
Record of Bootcamp 2025
Gallery
Welcome to our gallery! Here, you'll find a visual showcase of our journey through the bootcamp. From hands-on activities to project milestones, explore photos and videos that capture the creativity, collaboration, and innovation behind our work.
Resource
This section compiles all the resources that supported our learning throughout the bootcamp. From tutorials and guides to reference materials, find the tools and information that empowered us to succeed and innovate.
Contact us
Have questions or want to collaborate? Feel free to reach out to us! Whether you're curious about our work or interested in sharing ideas, we'd love to connect. Visit this section for our contact details and social media links.