Week08 | Electronic production
Group members
Group assignment | Electronic Production
• characterize the design rules for your in-house PCB production process • submit a PCB design to a boardhouse
Generating gerber file
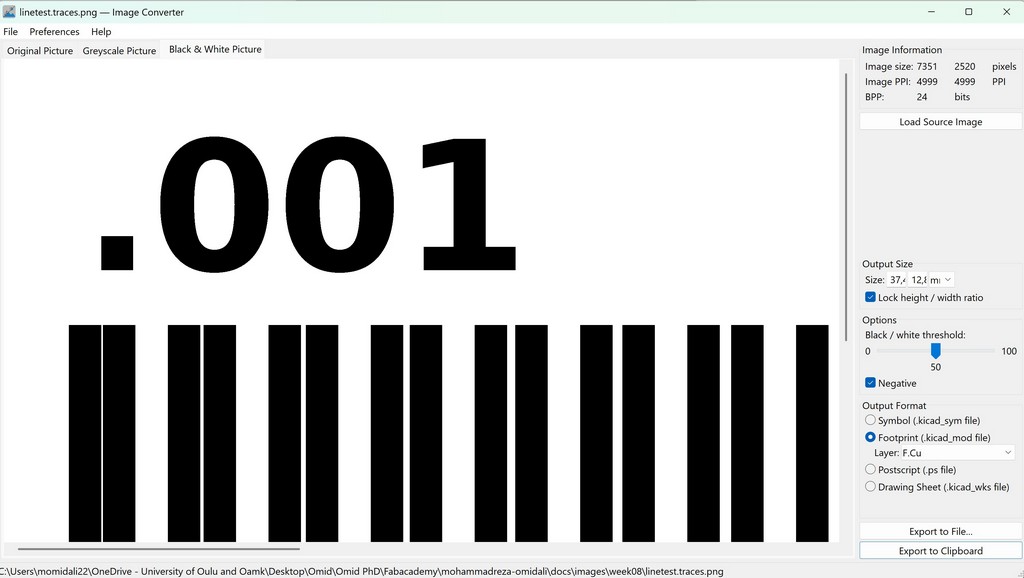
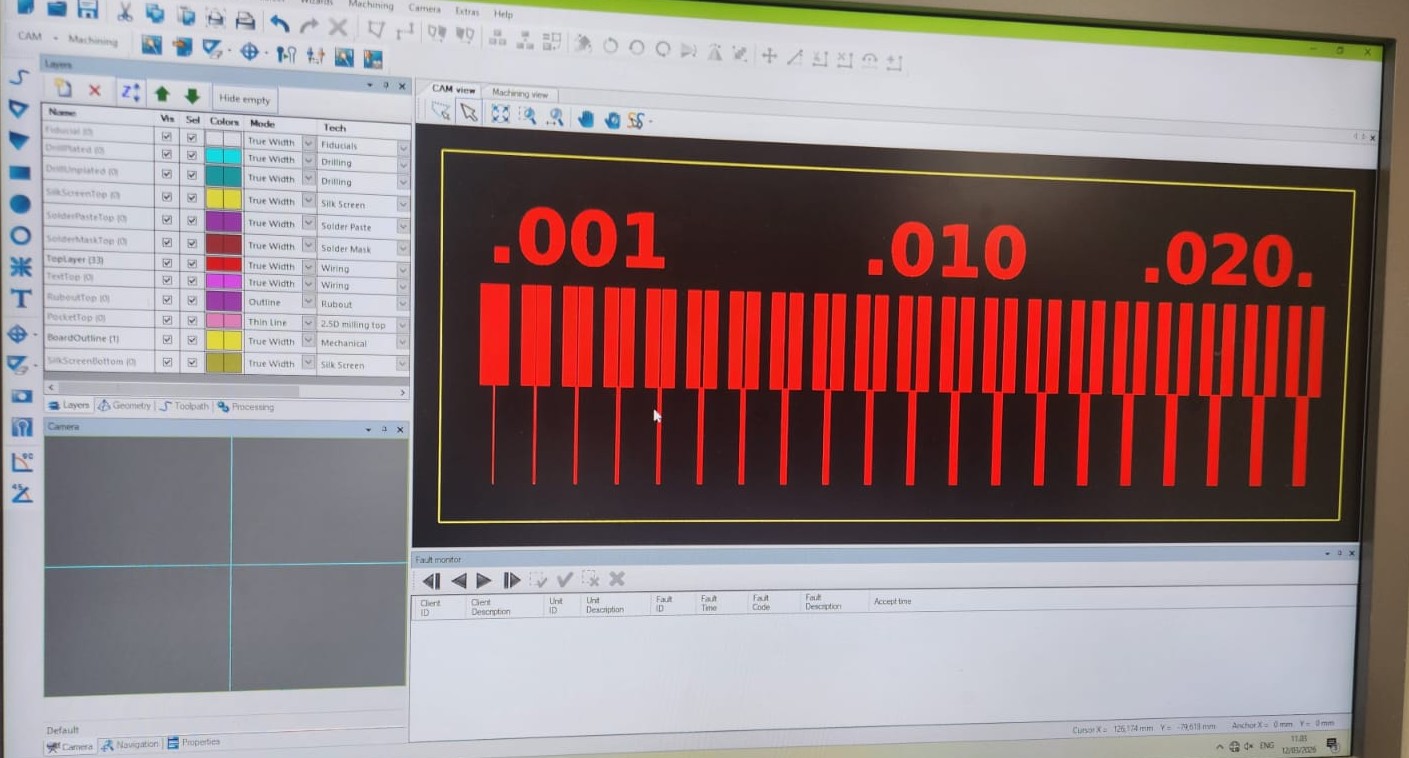
We prepared a PCB from png that was a layout design including various trace and isolation widths.

We imported the png file to Kicad and converted to Gerber format and used our LPKF machine for milling it.
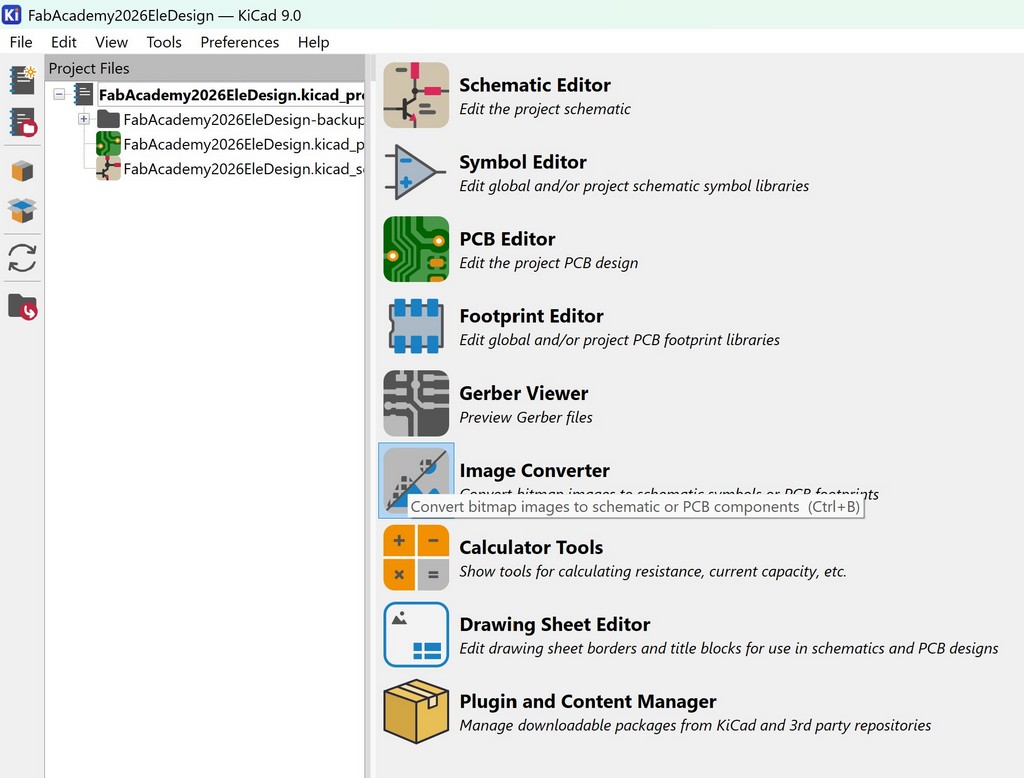
We opened the KiCad's and selected the Image Converter:
Selected Negative and Footprint as the output format and clicked Export to Clipboard:
Next, we went to PCB Editor, pasted the image we just converted, and chose the Edge.Cuts layer, and drew the board outlines:

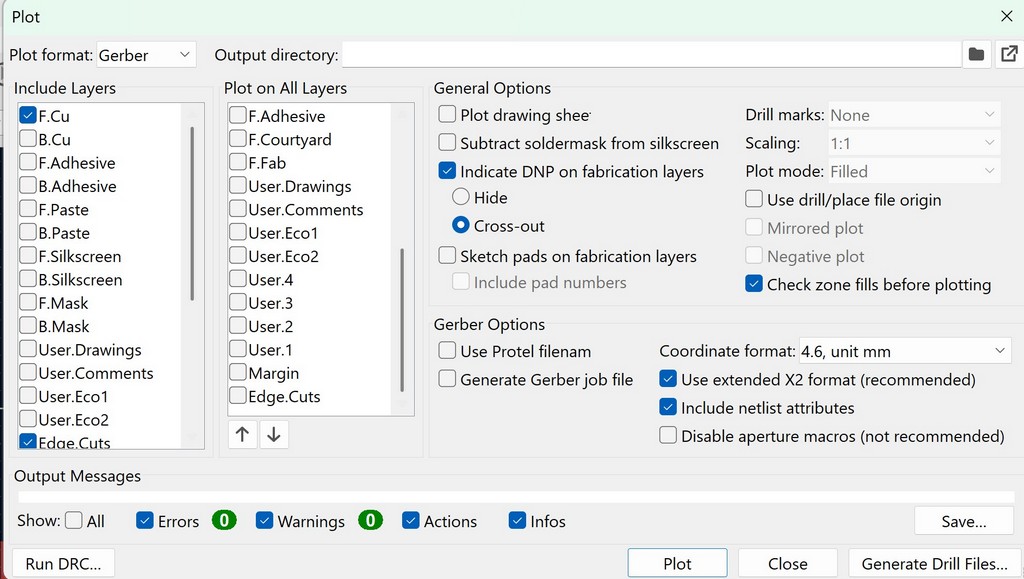
To generate the gerber file, there are few ways to chose the plot for generating the gerber file:

In the Plot settings, we selected F.CU and Edge.Cuts under "Include Layers" and then pressed the Plot.
We verified the Gerber files in Gerber Viewer in KiCad before went to PCB milling machine.
PCB milling process
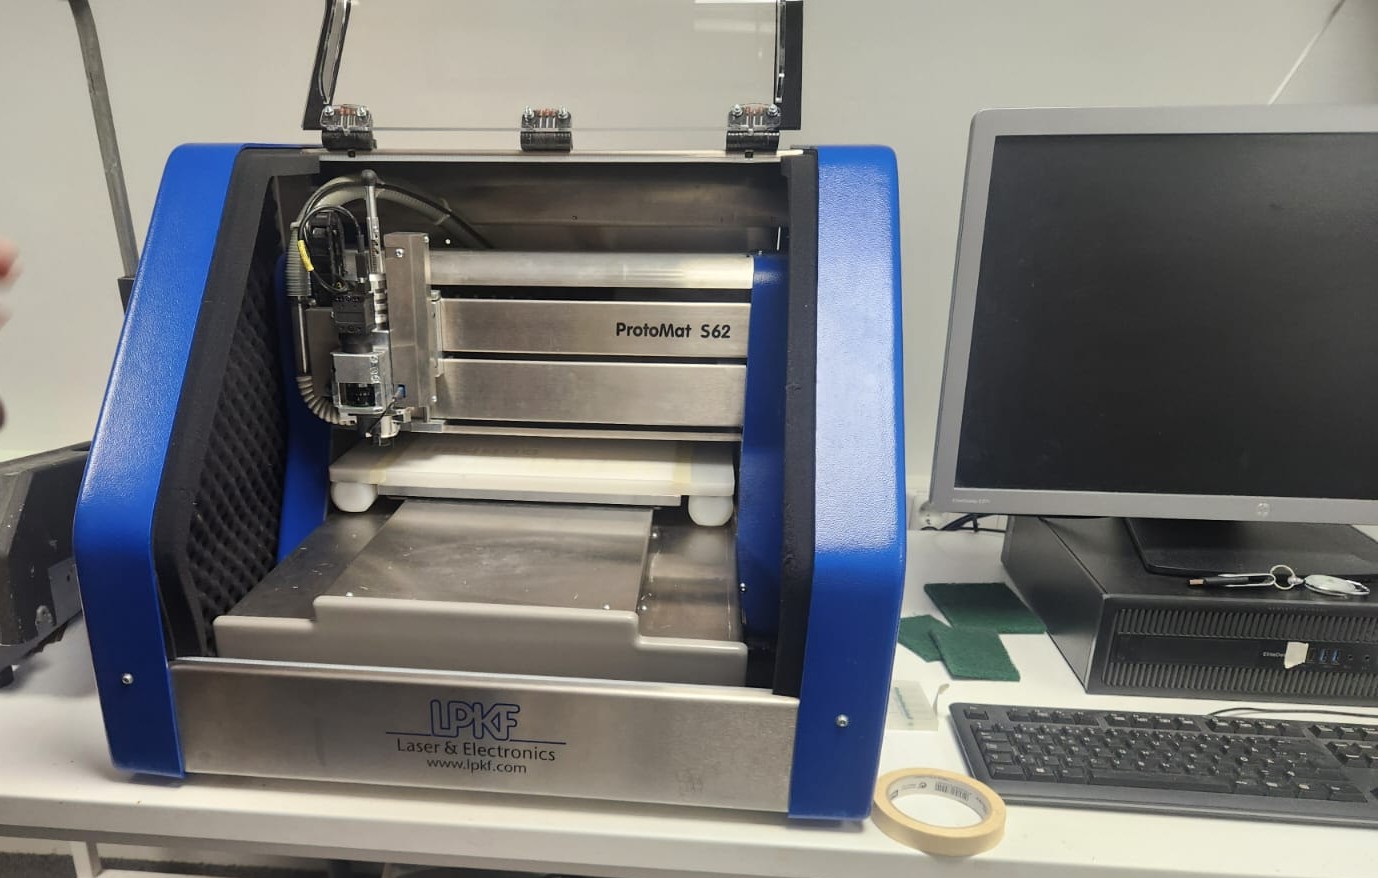
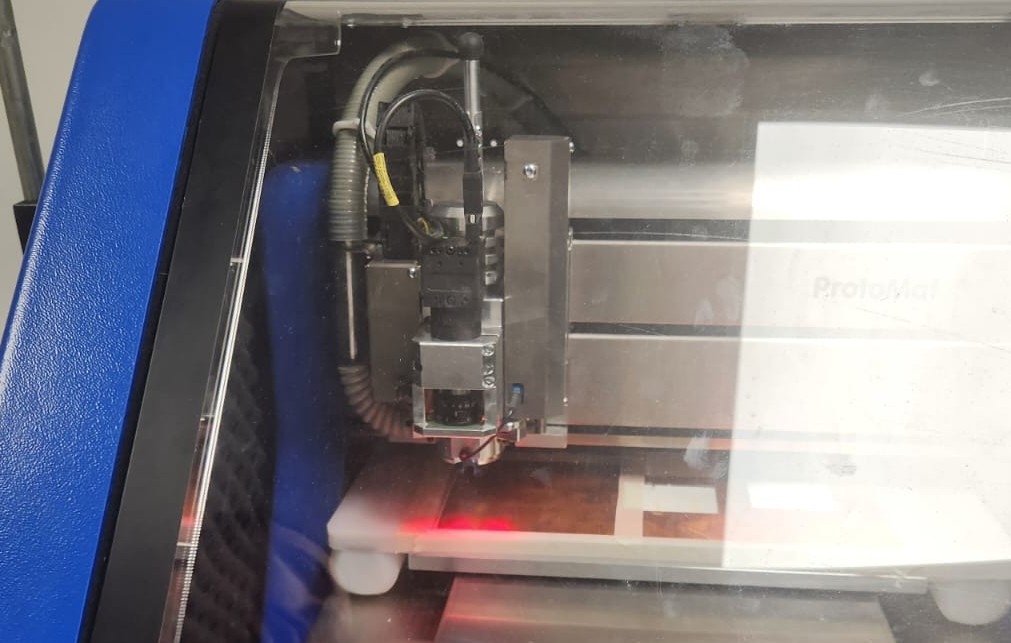
We used LPKF machine, available in Oulu Super Fablab:
 |
 |
 |
 |
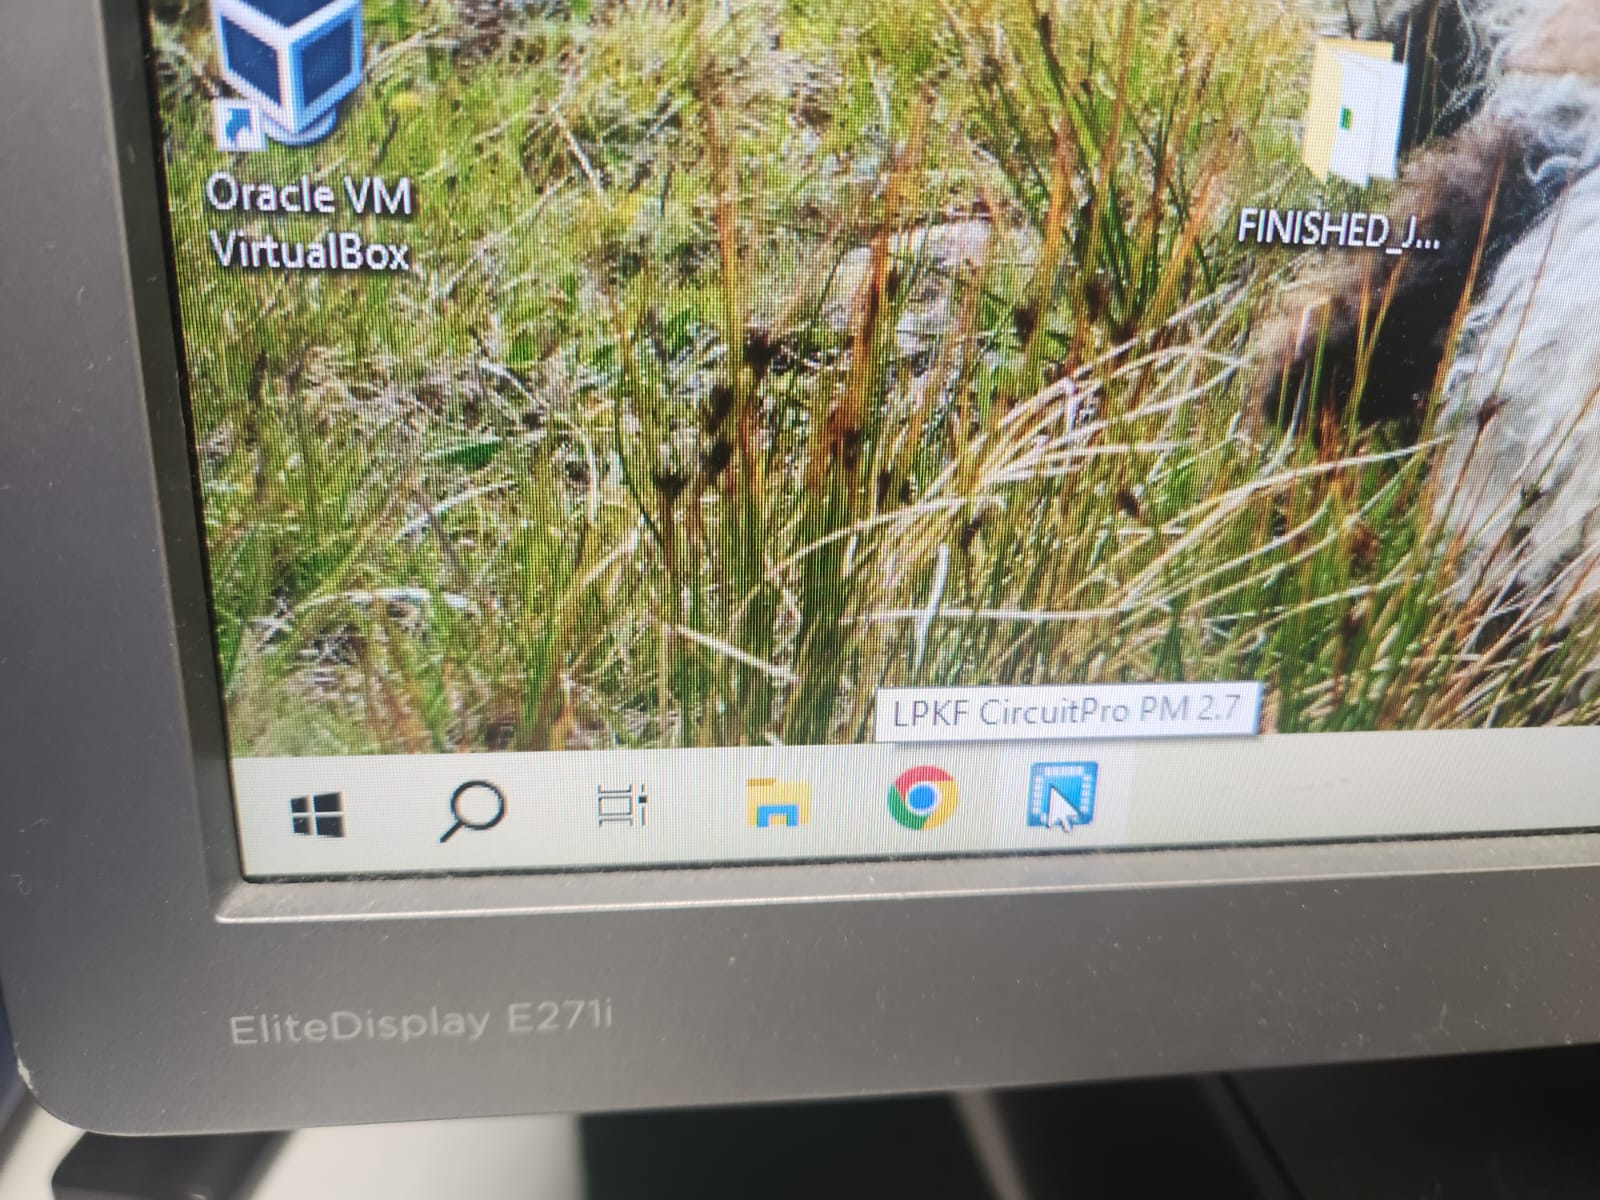
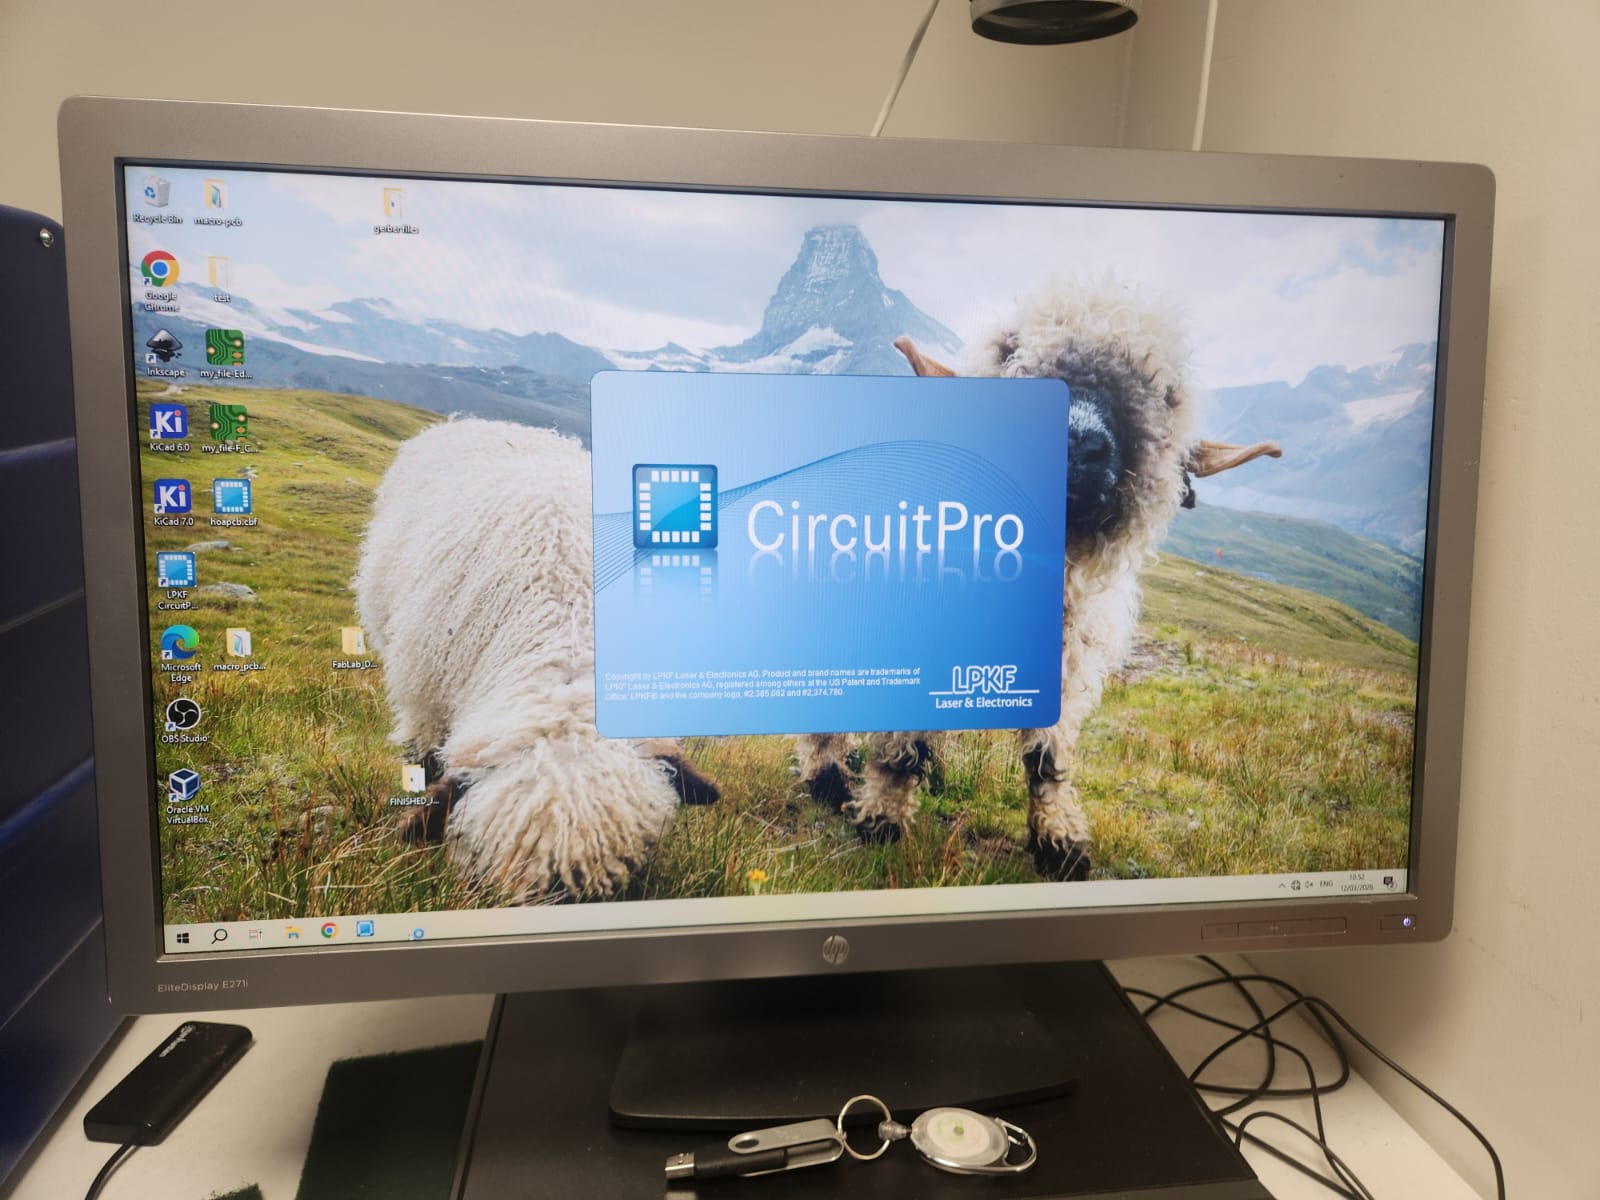
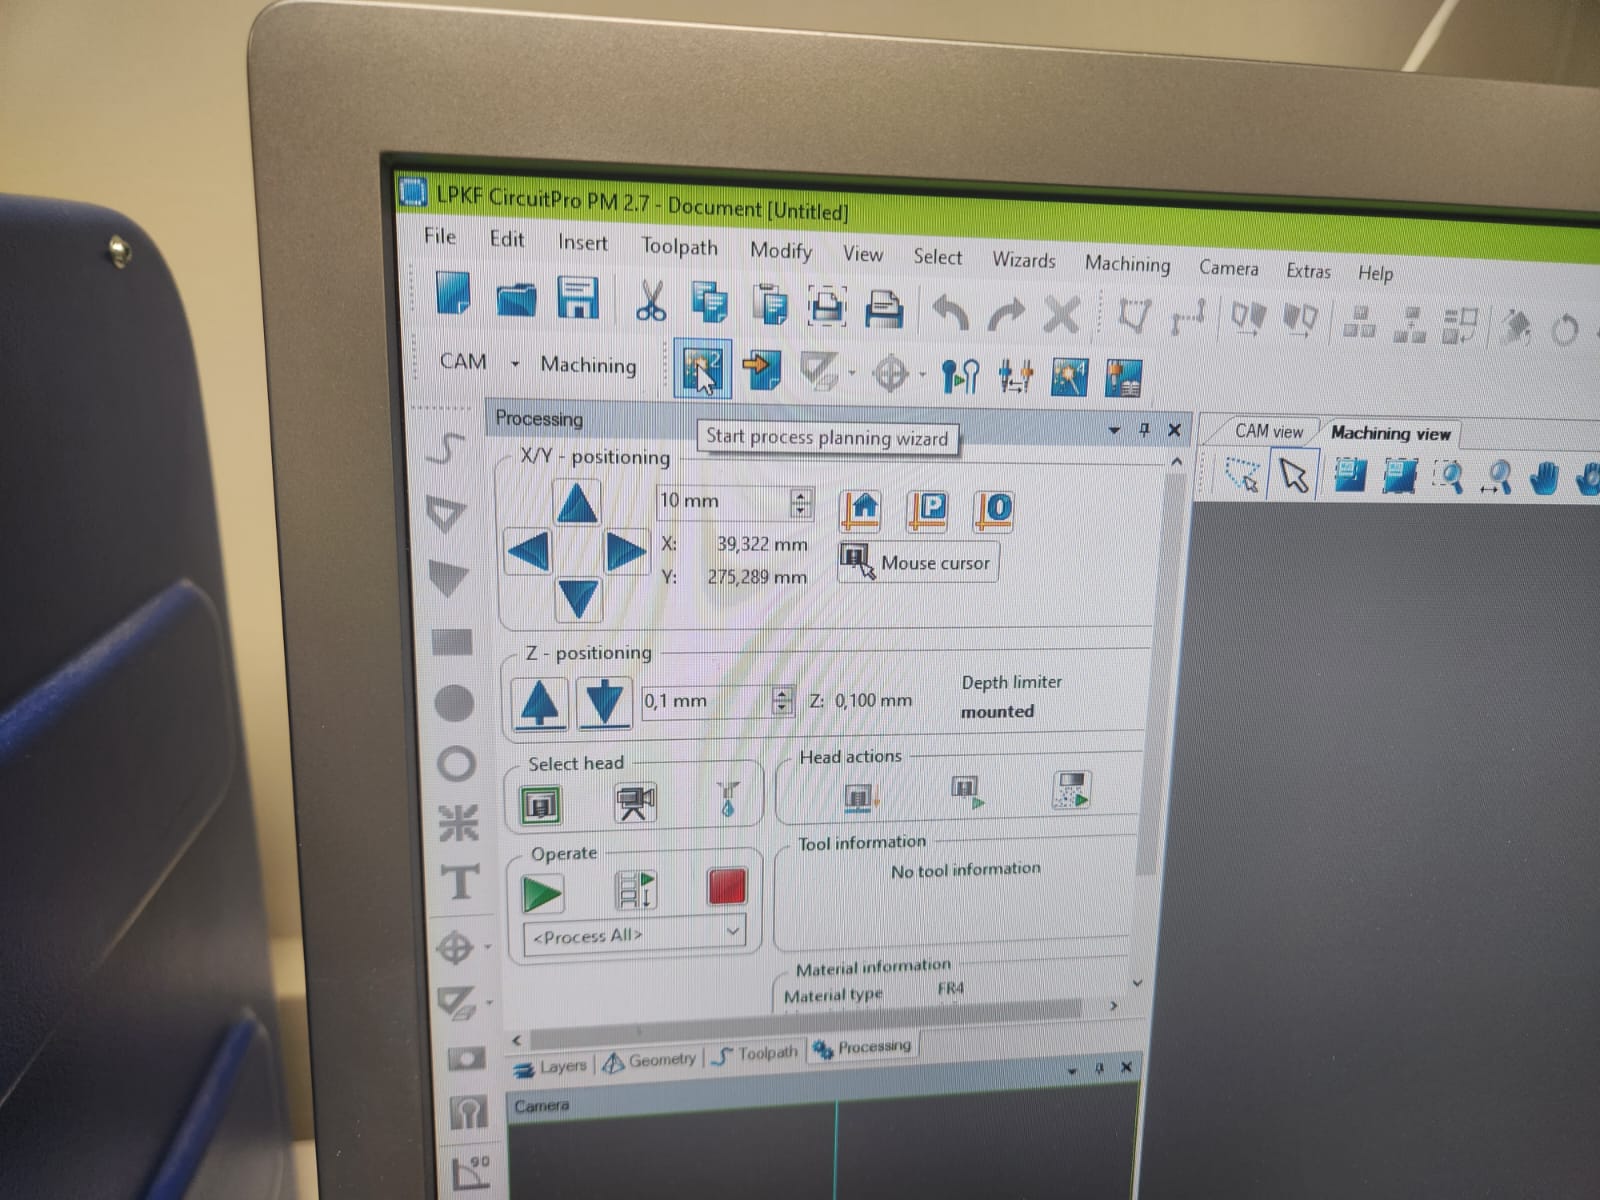
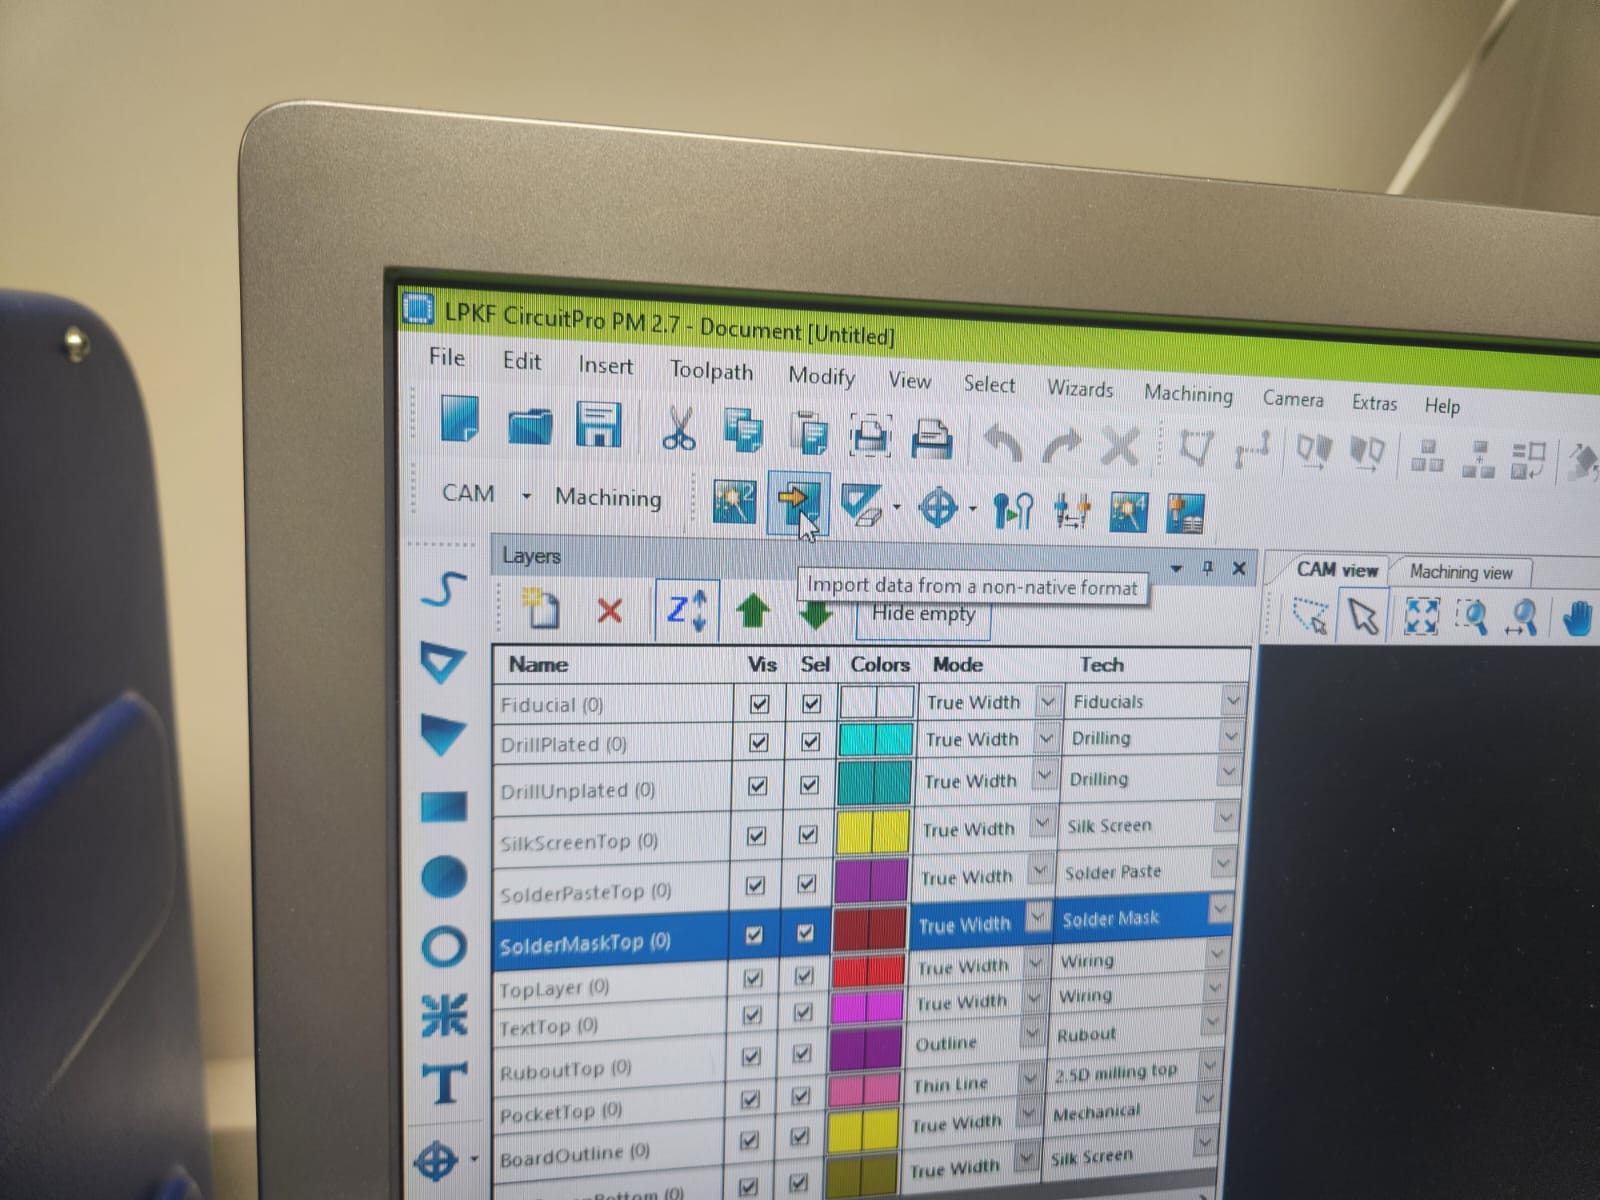
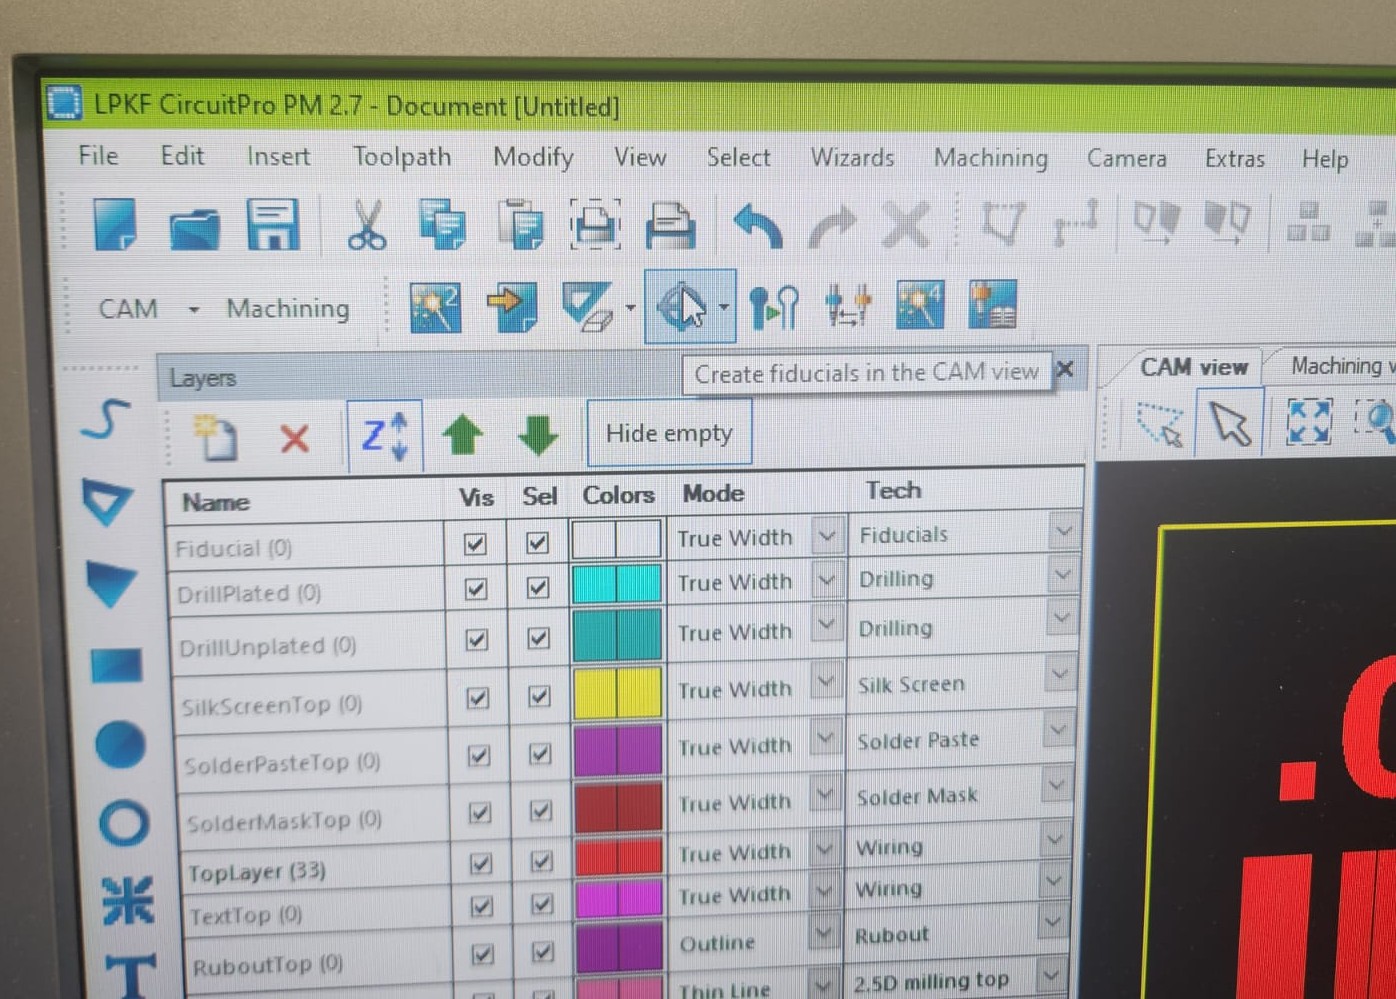
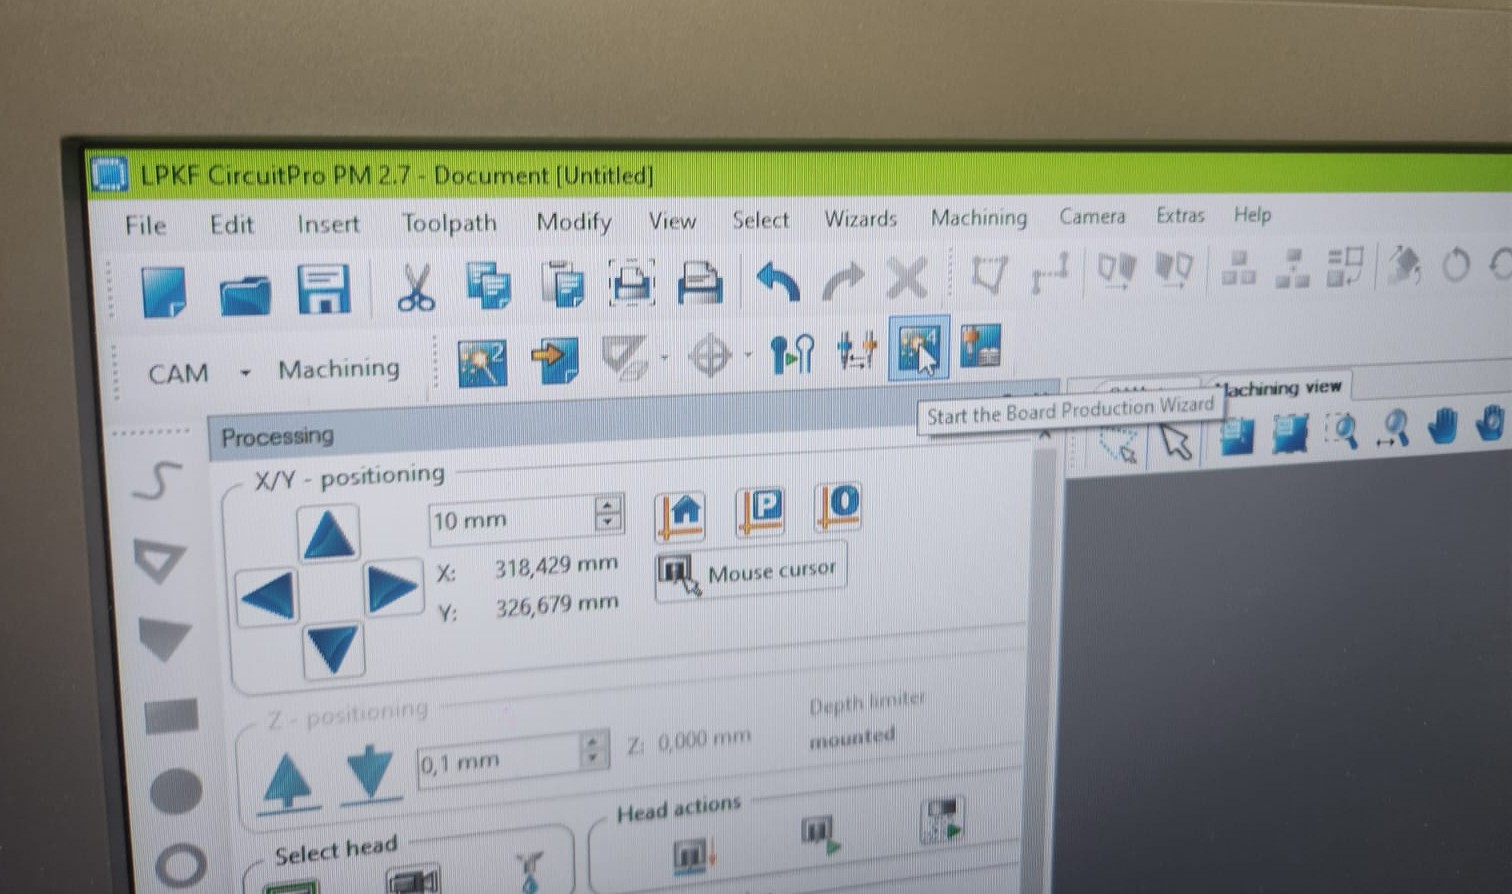
We opened up the CircuitPro software on the computer for milling machine:
 |
 |
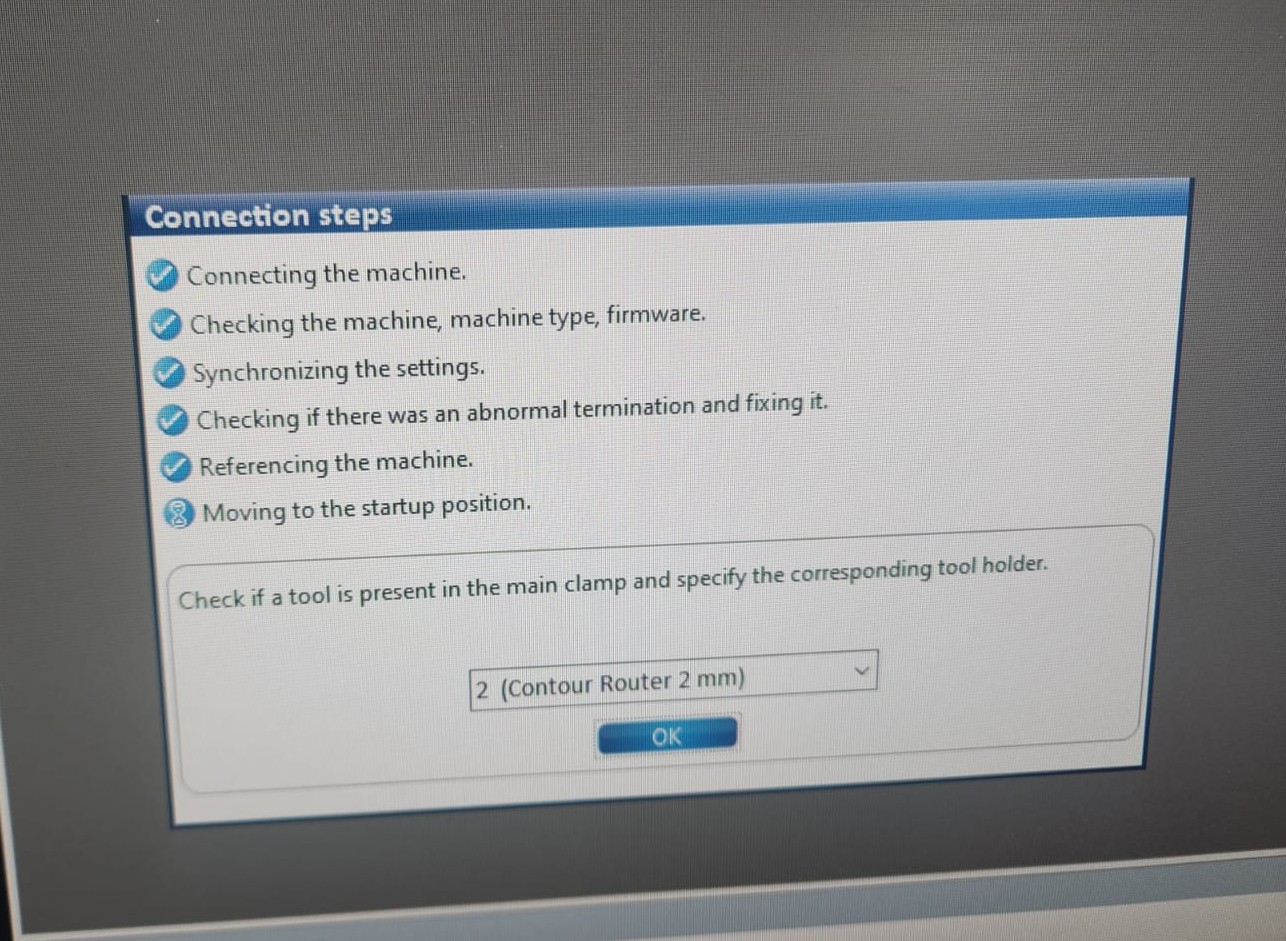
Now the process for connecting the machine. We had to first turn on the machine, otherwise this connection will fail.
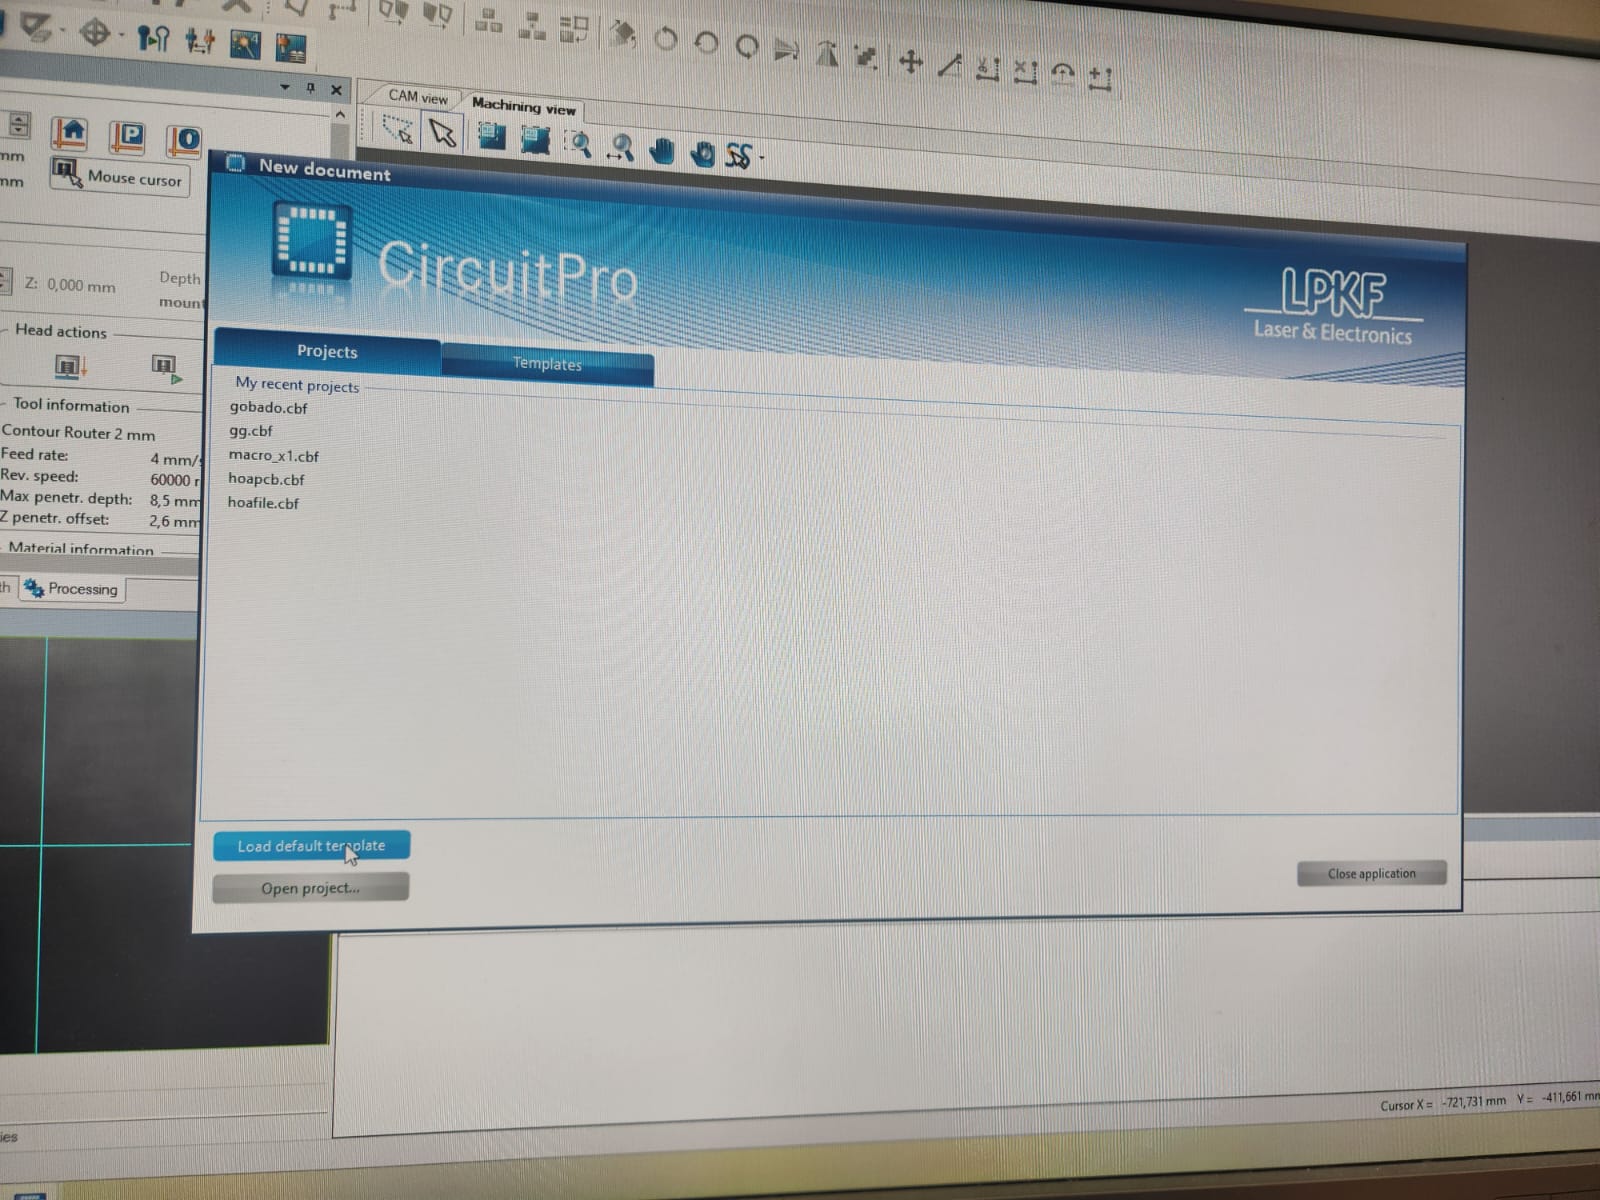
Then we loaded the default template:
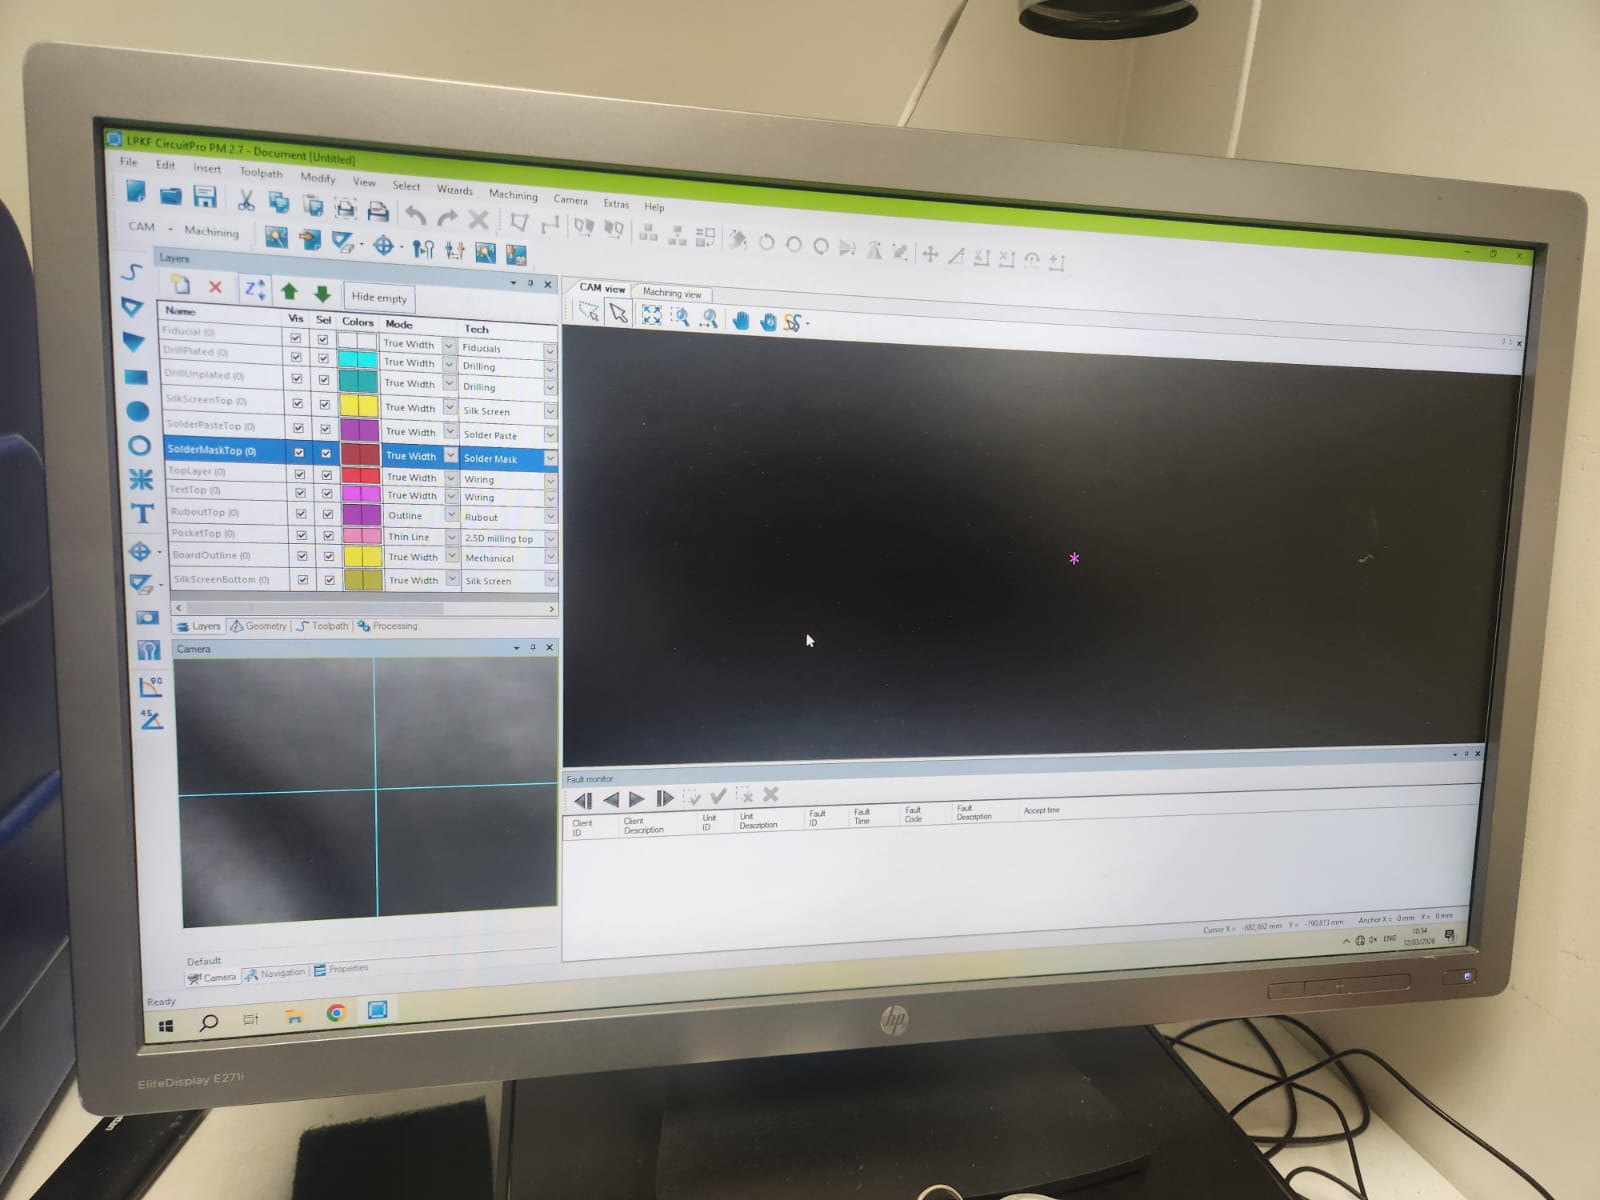
This is the software environment:
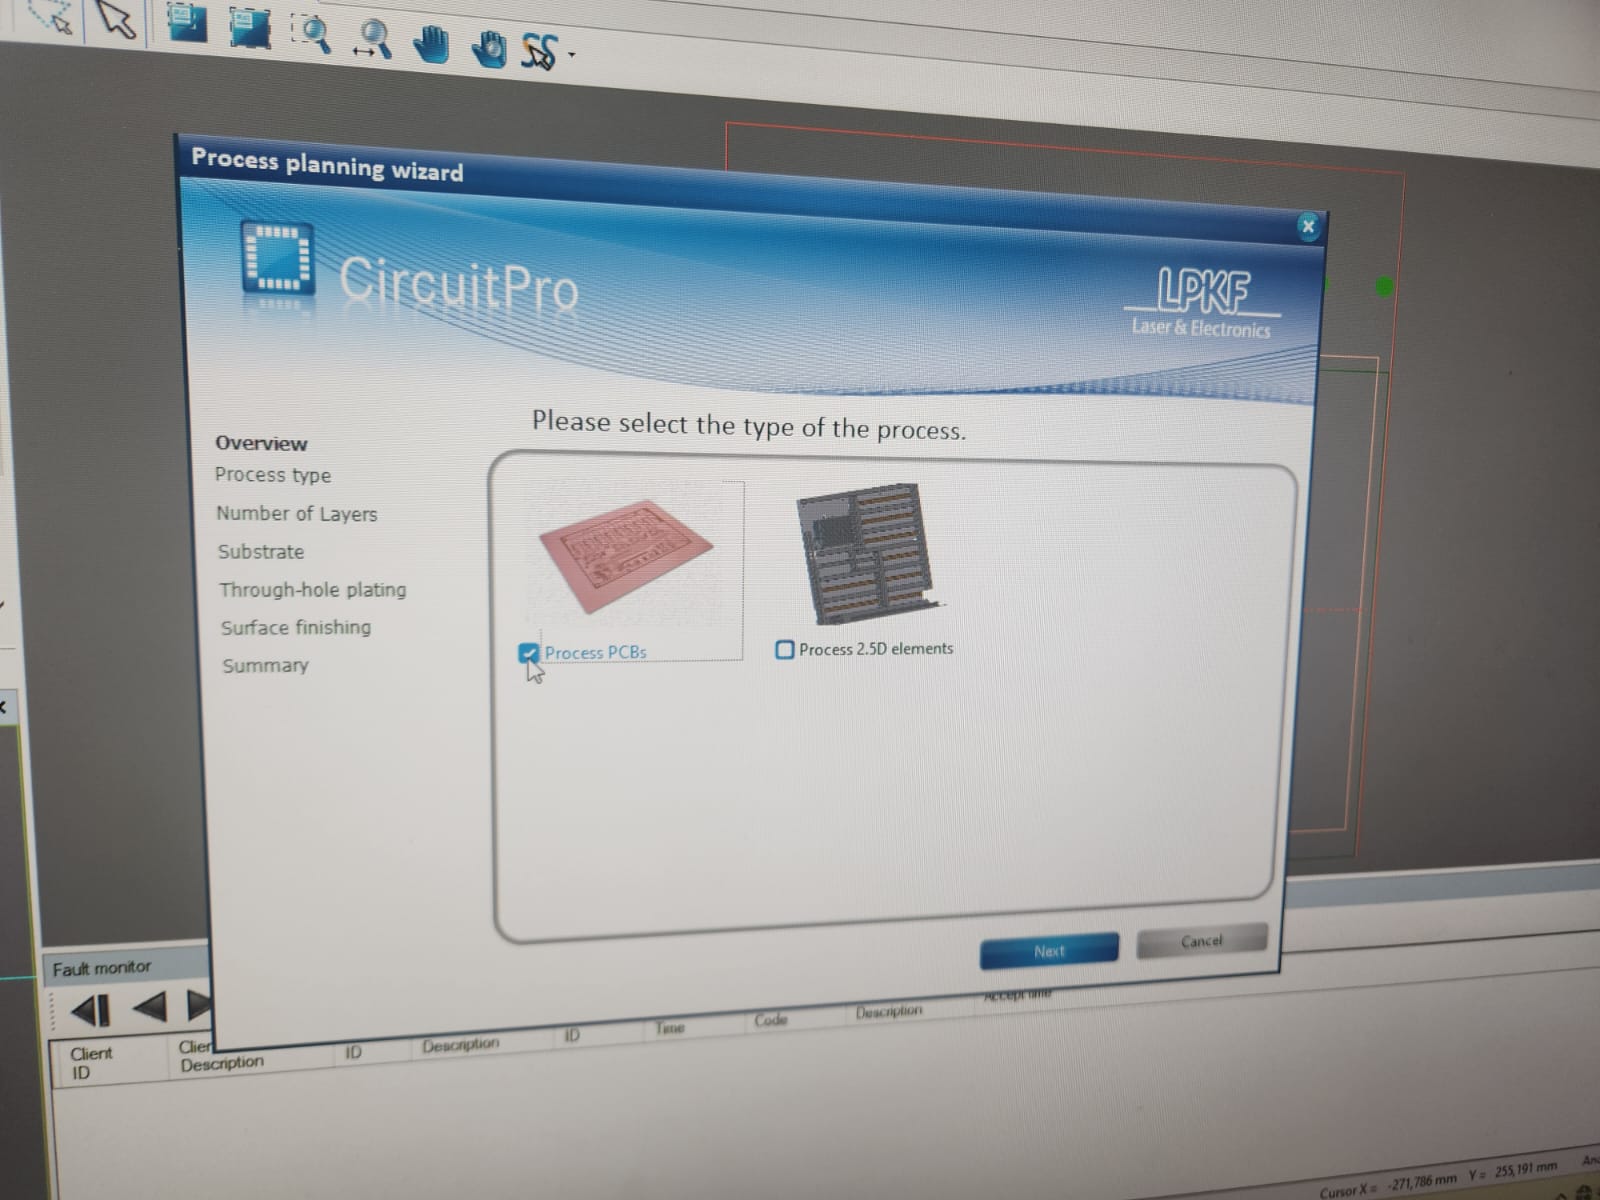
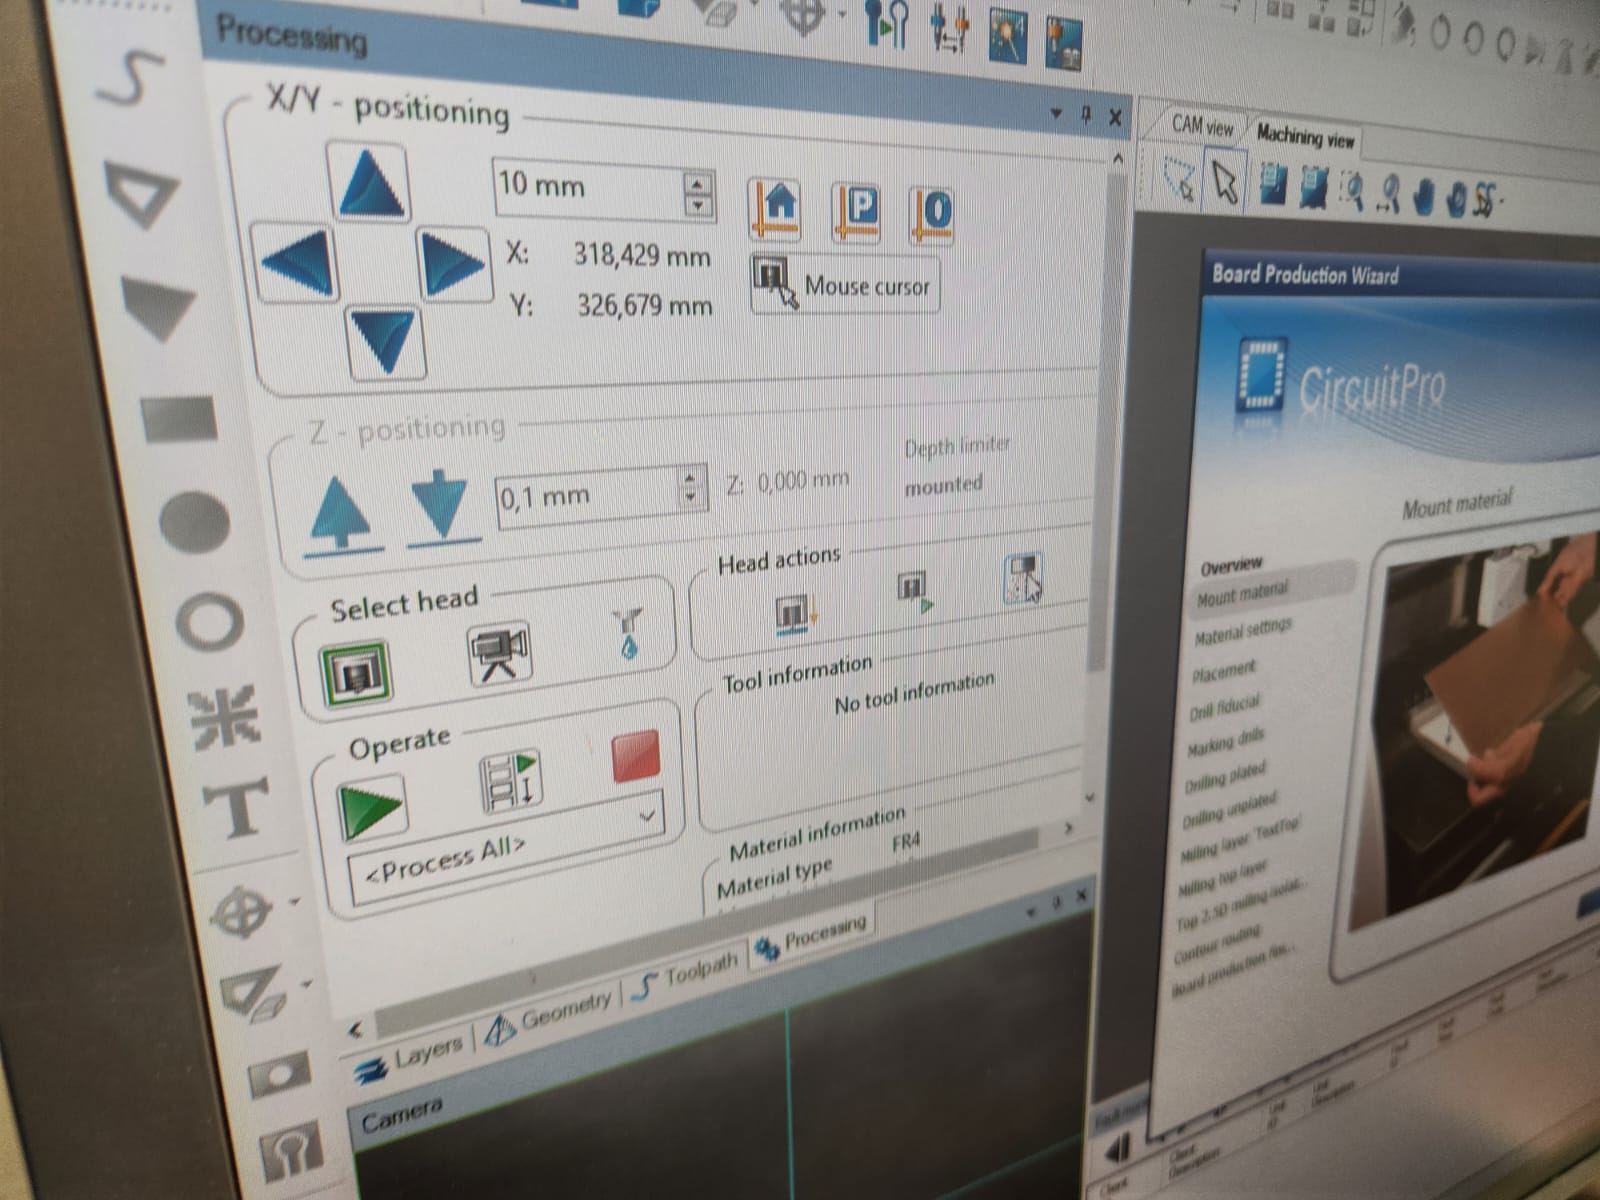
To start setting up the process, we started Process wizard and chose a single side PCB:
We selected type of the processed:
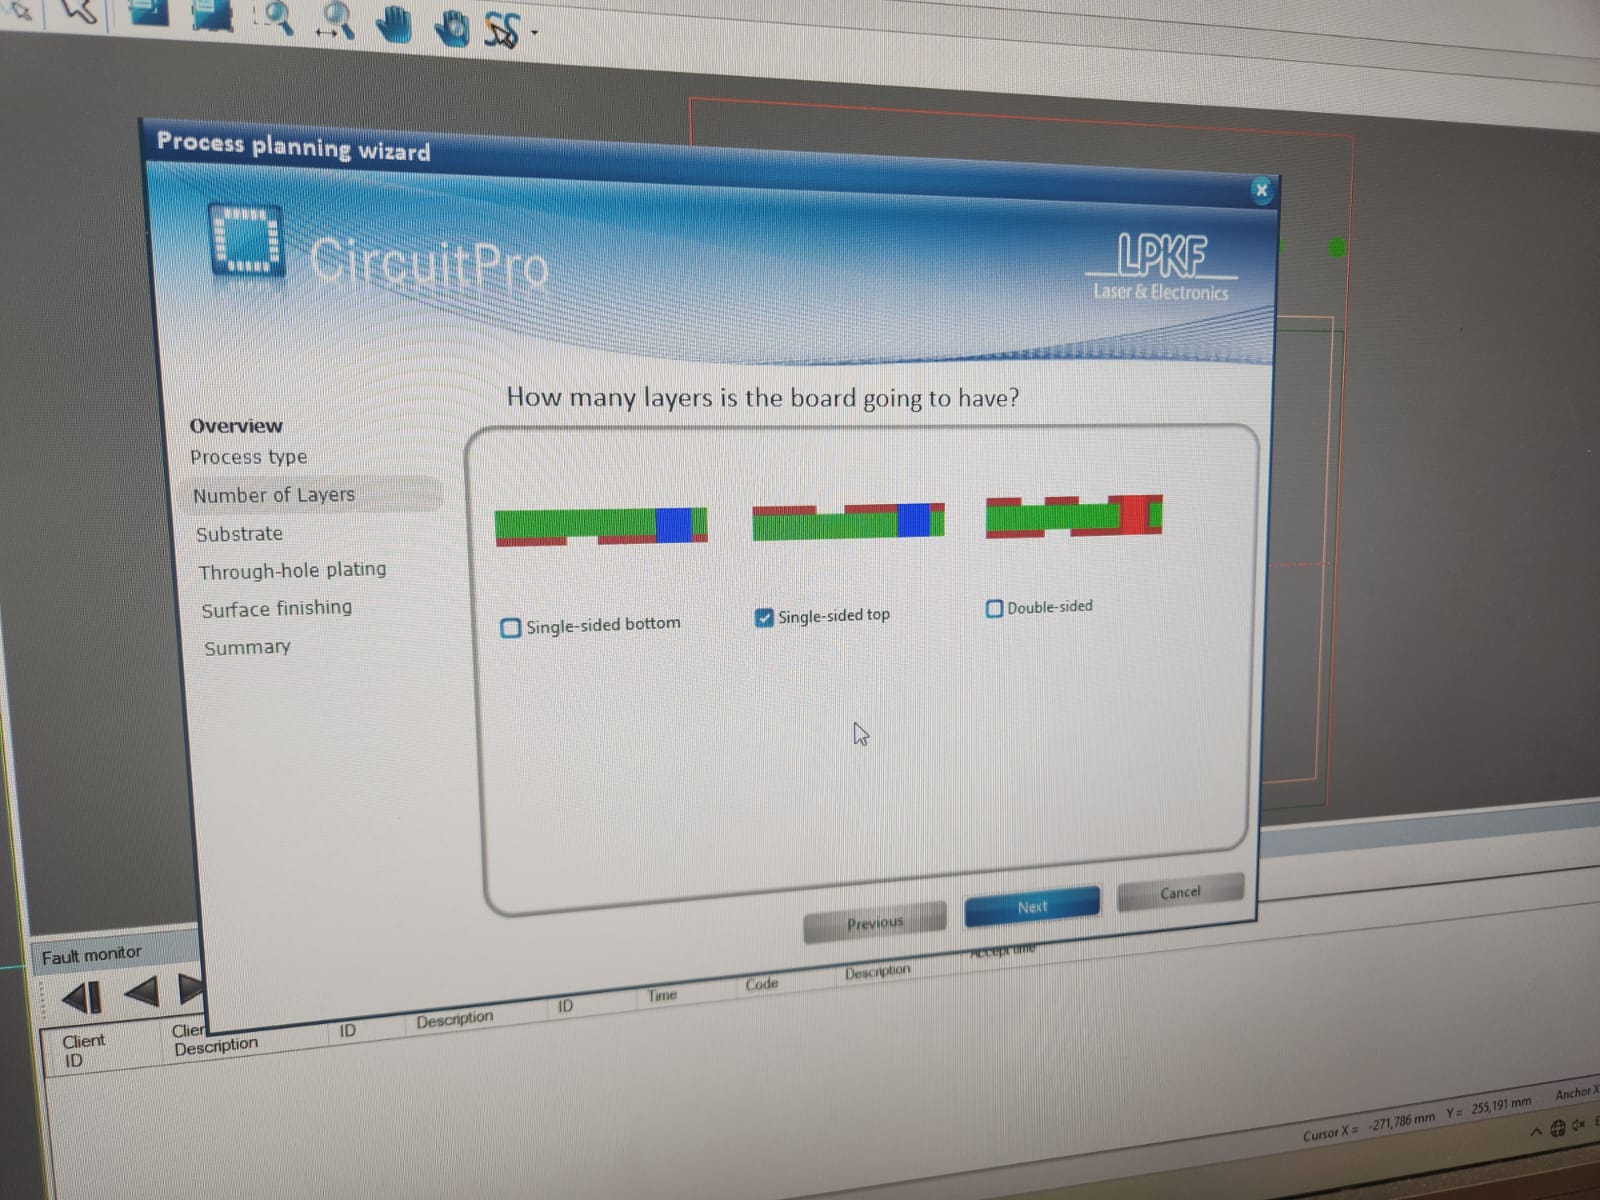
And chose the single layer top board:
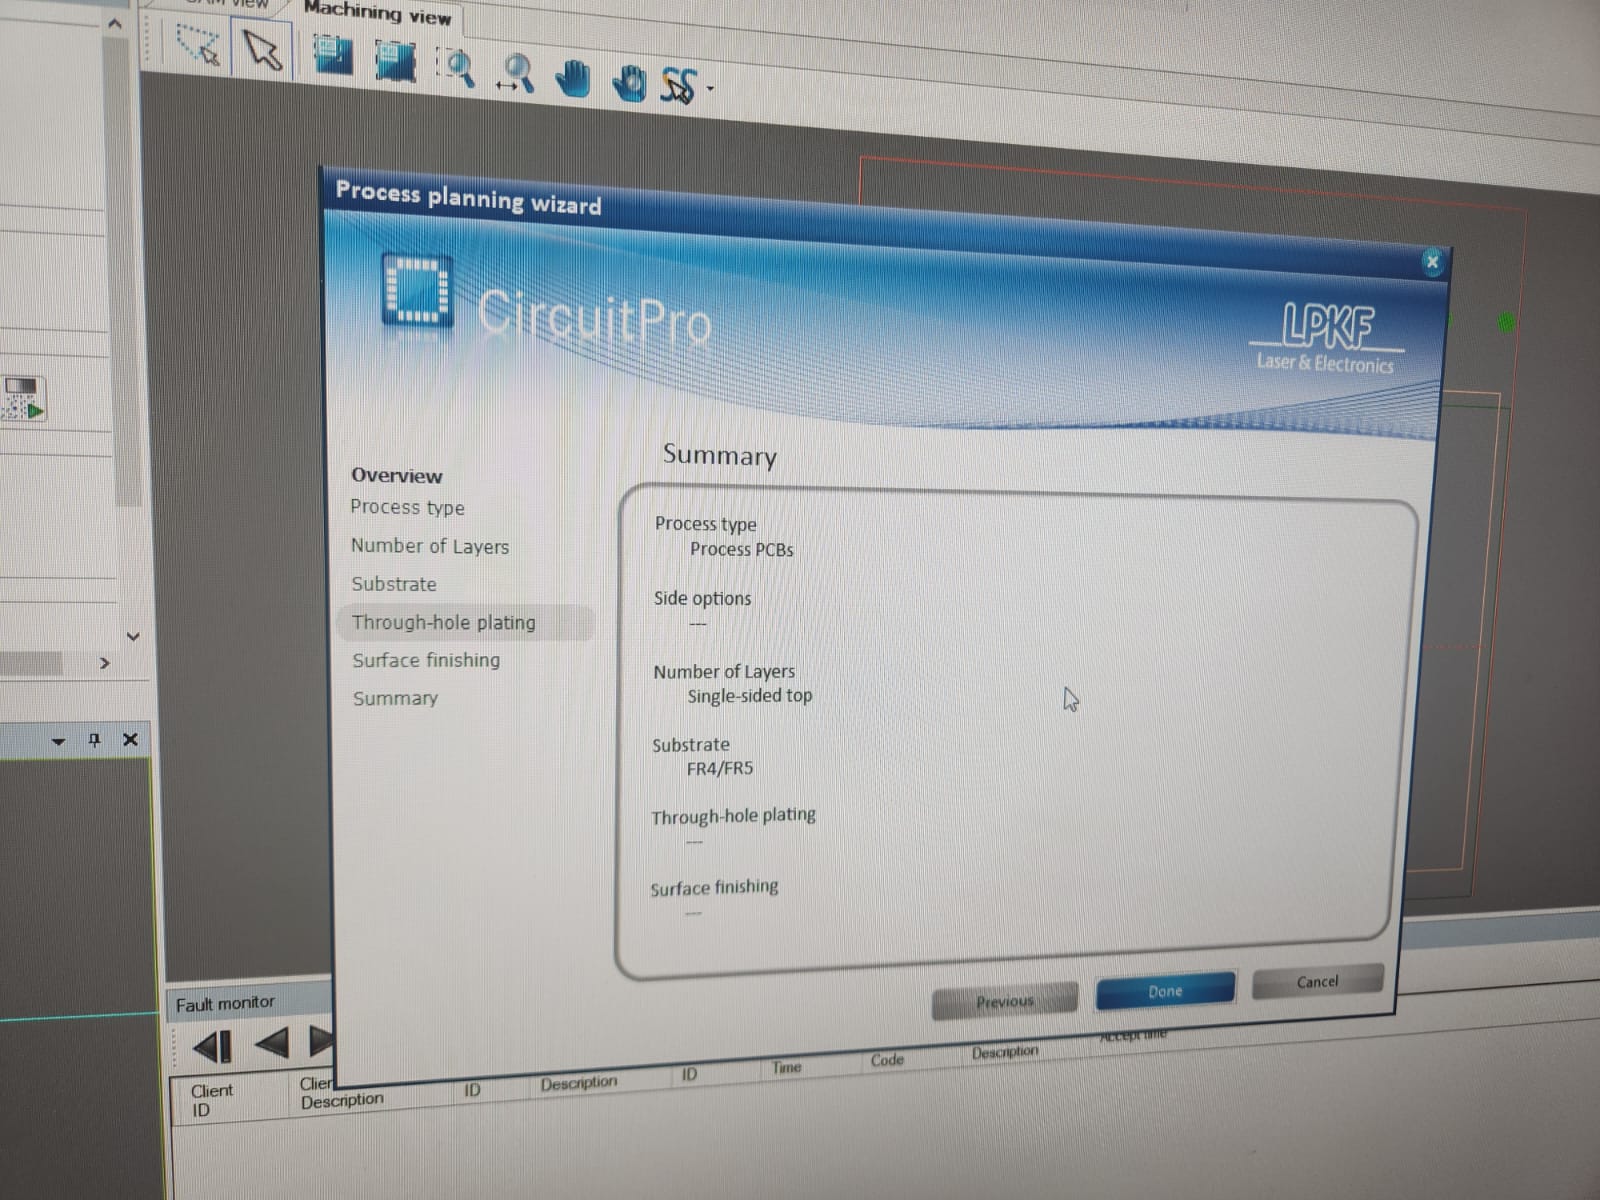
We selected the FR4:

And now the wizard planning process done:
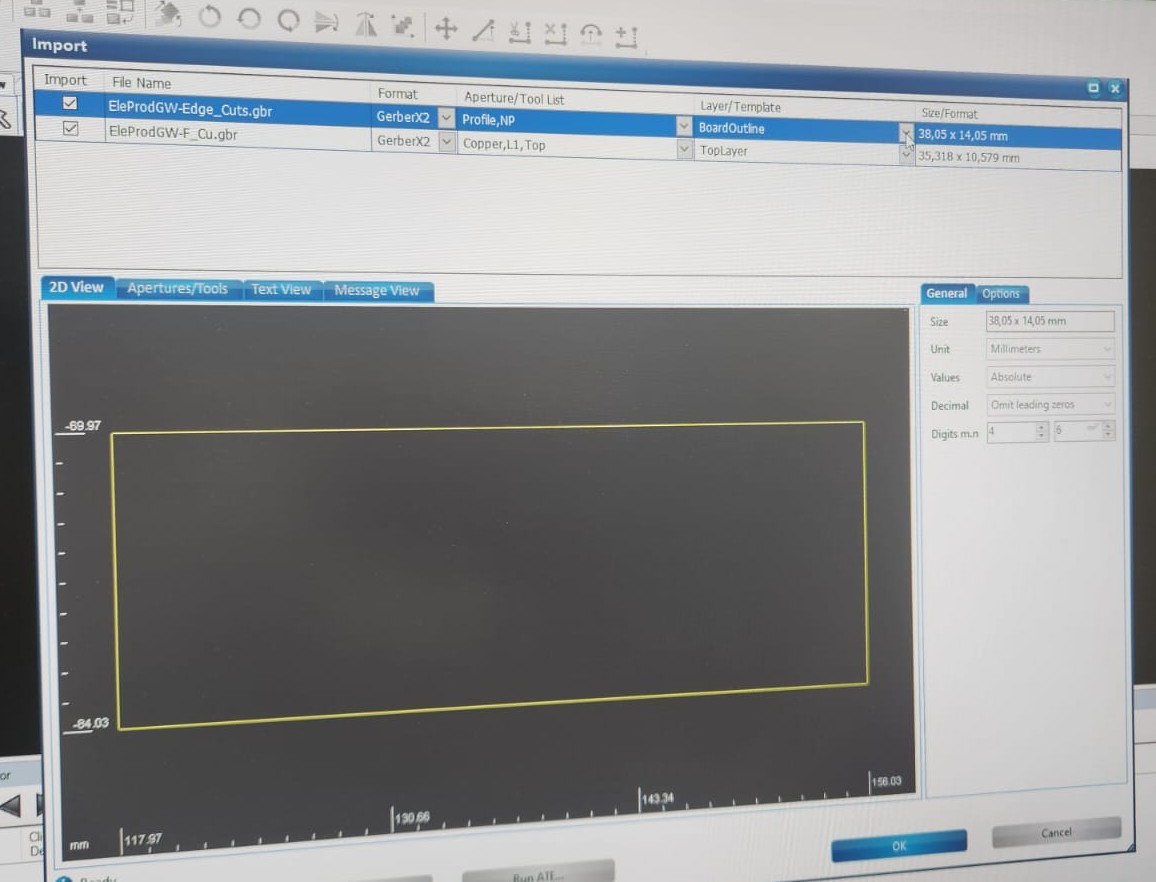
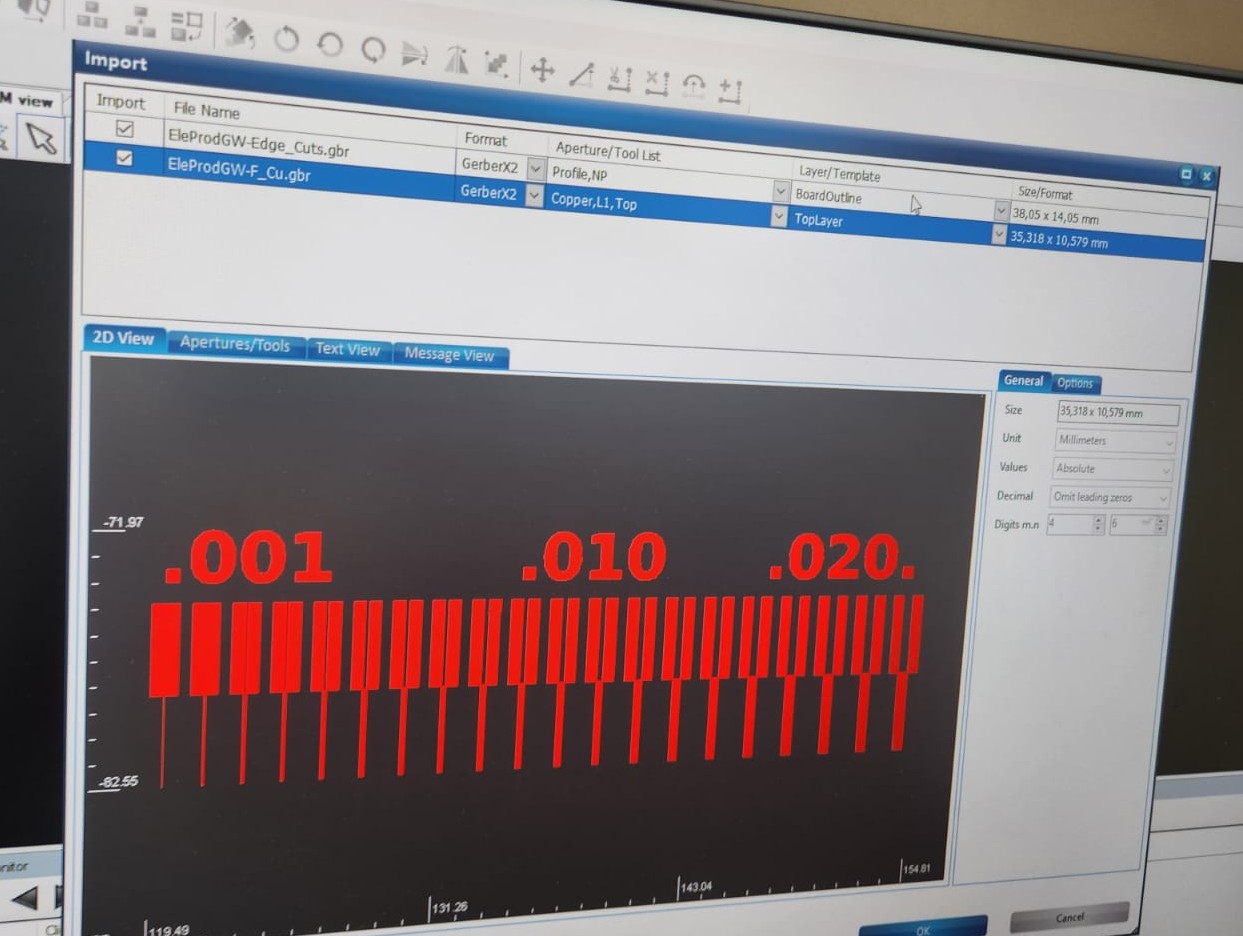
Next step, we imported the gerber files:
 |
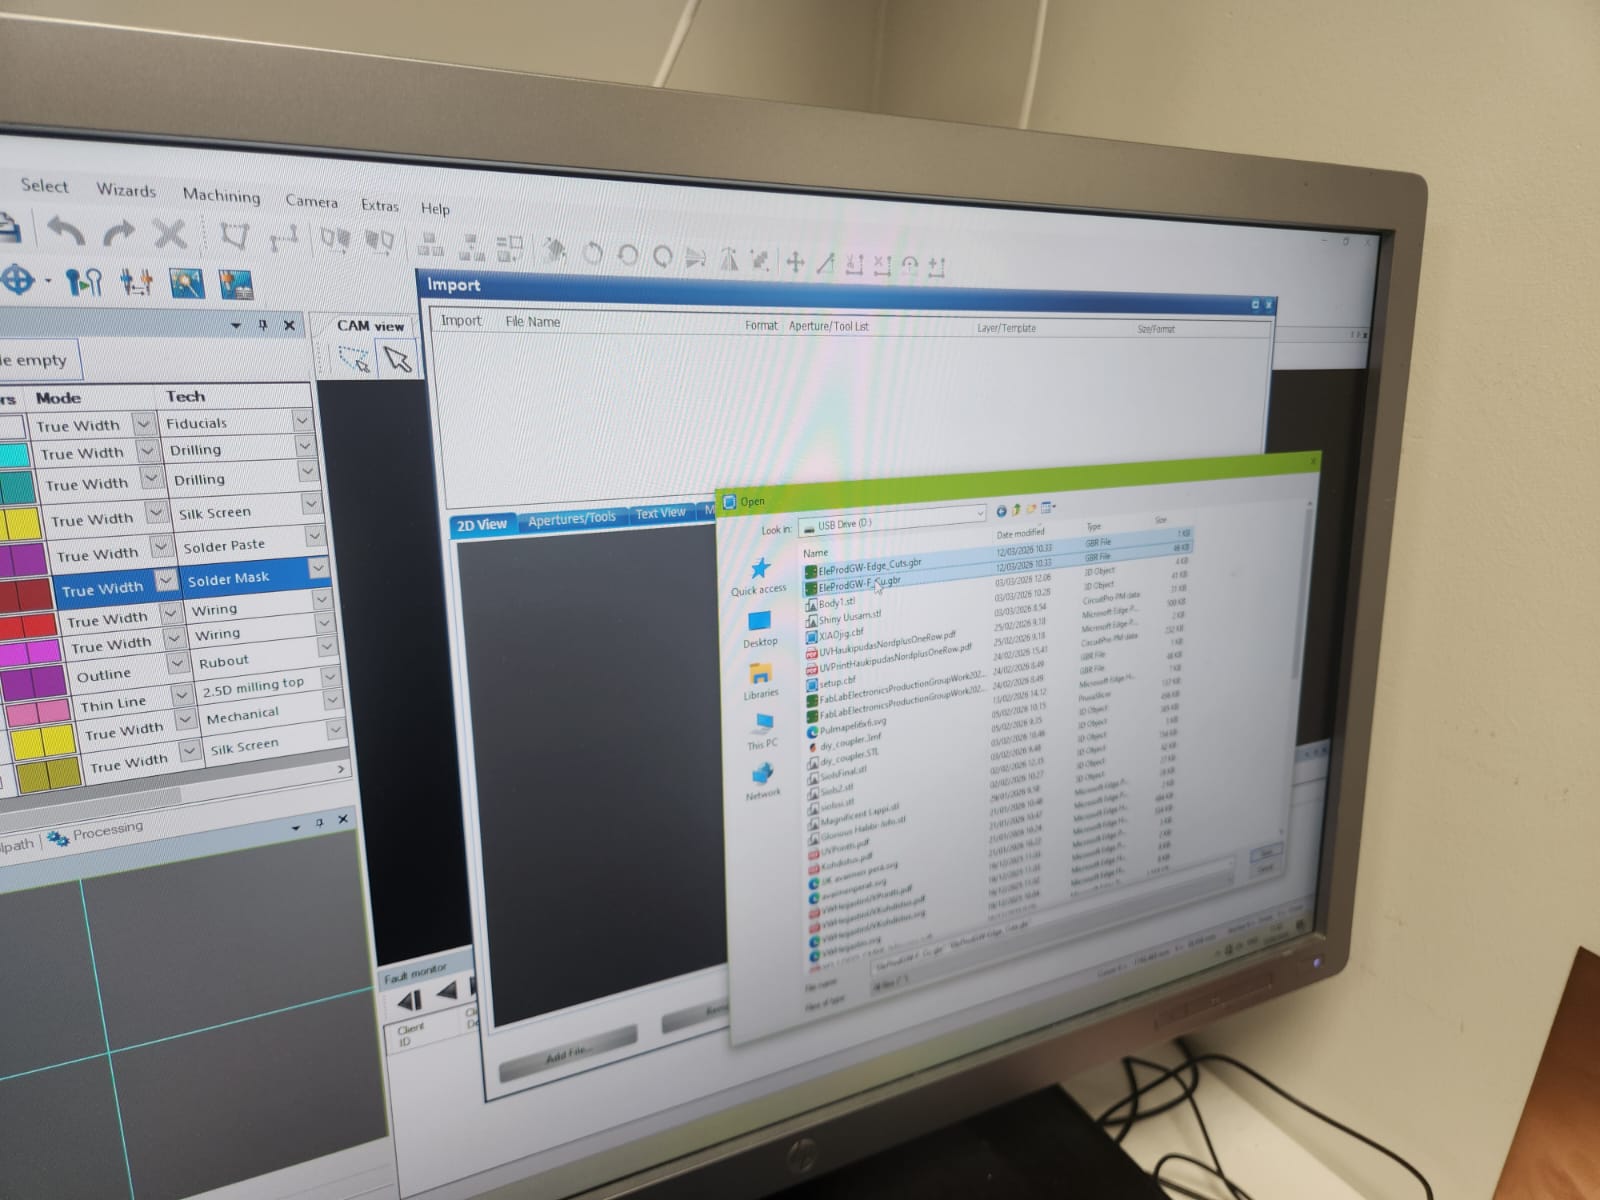 |
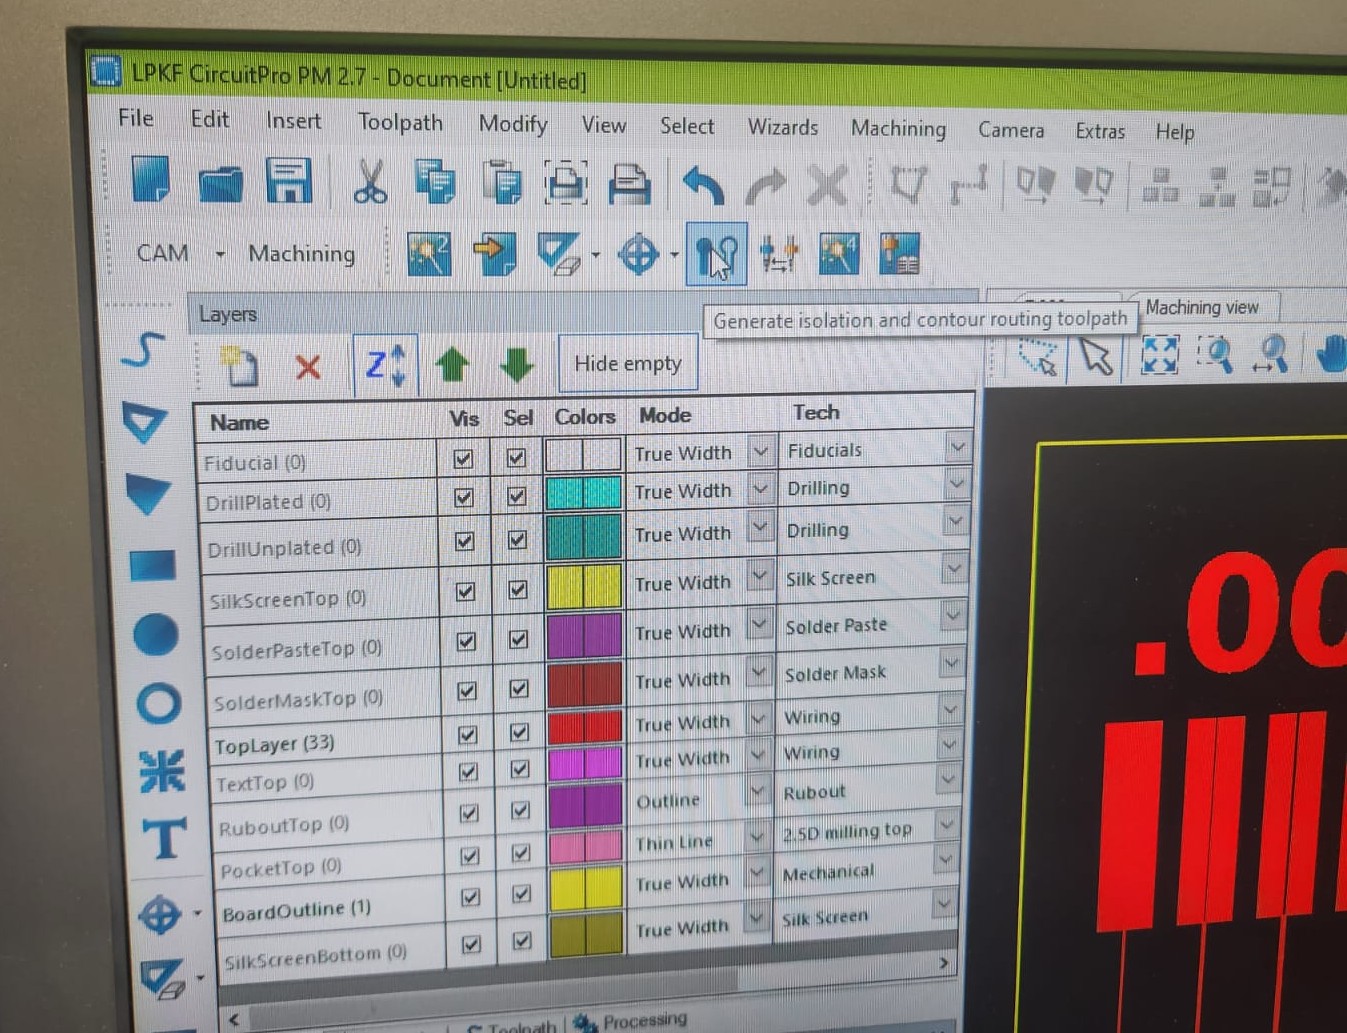
After importing the gerber files, we checked the layers setting:
 |
 |
We did not use Fiducial, as it is for double sides board:
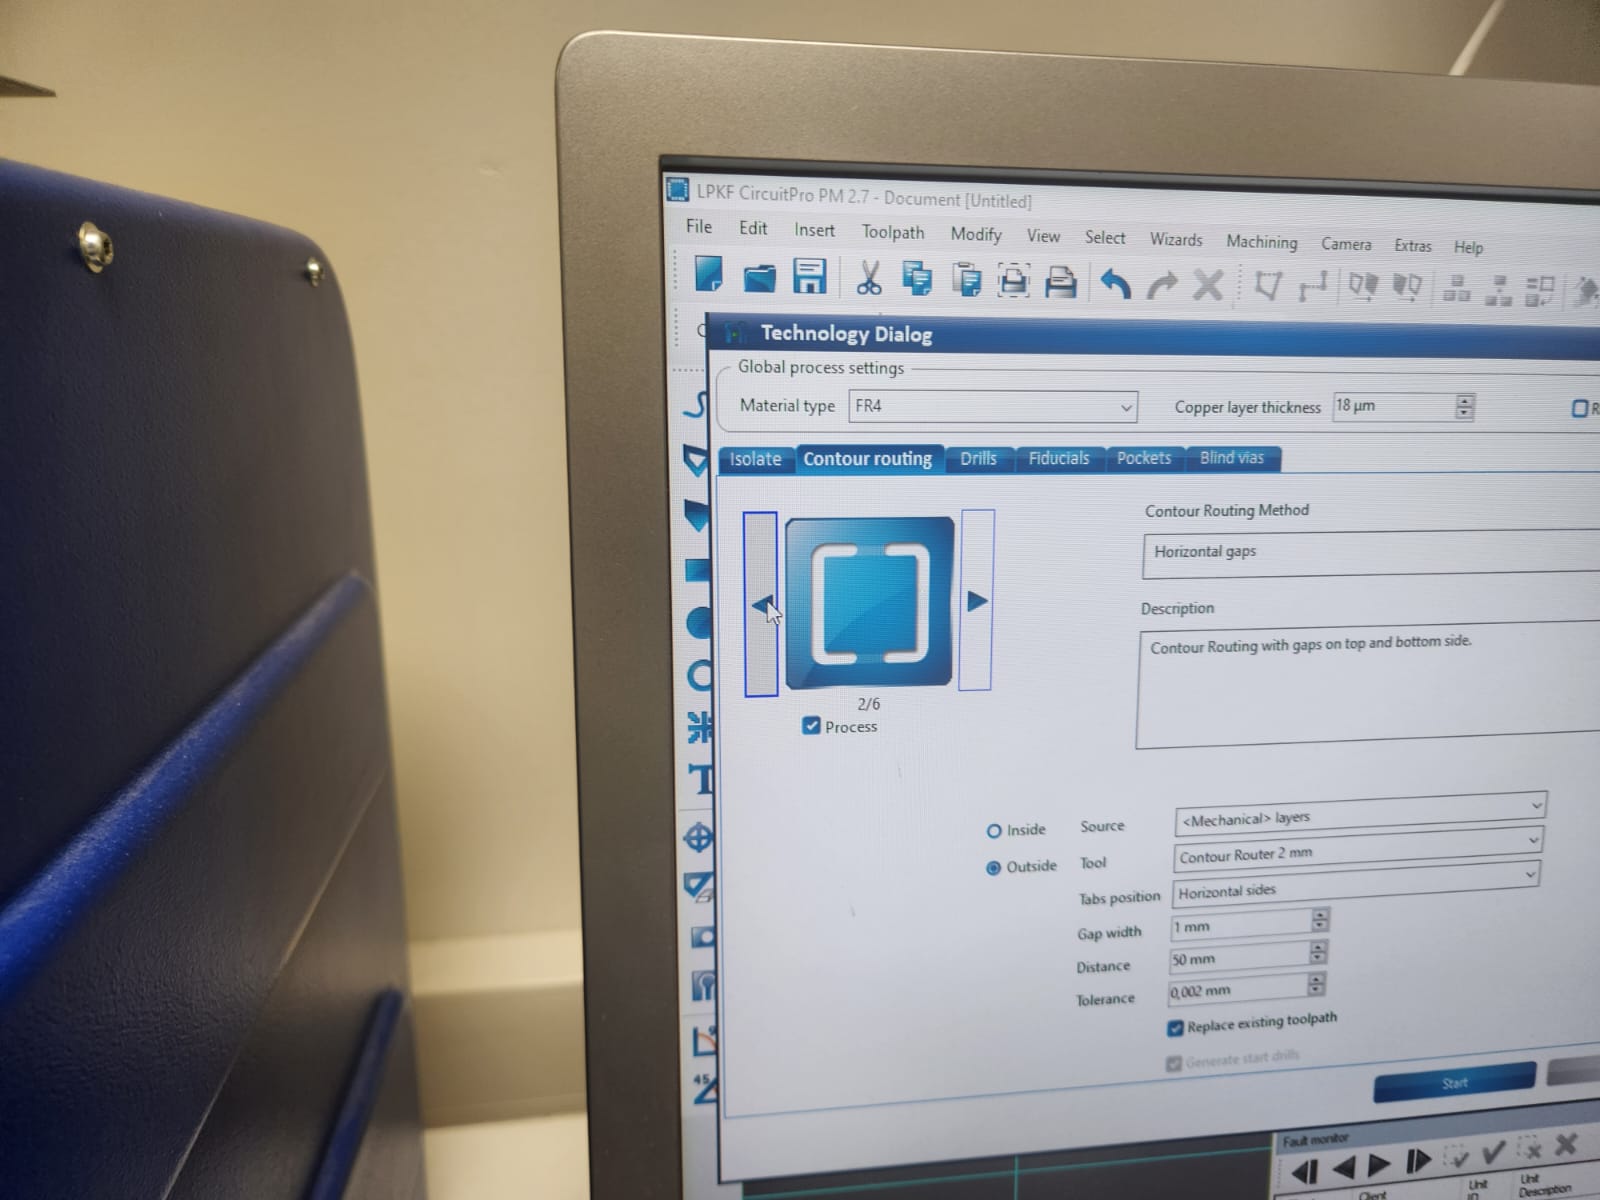
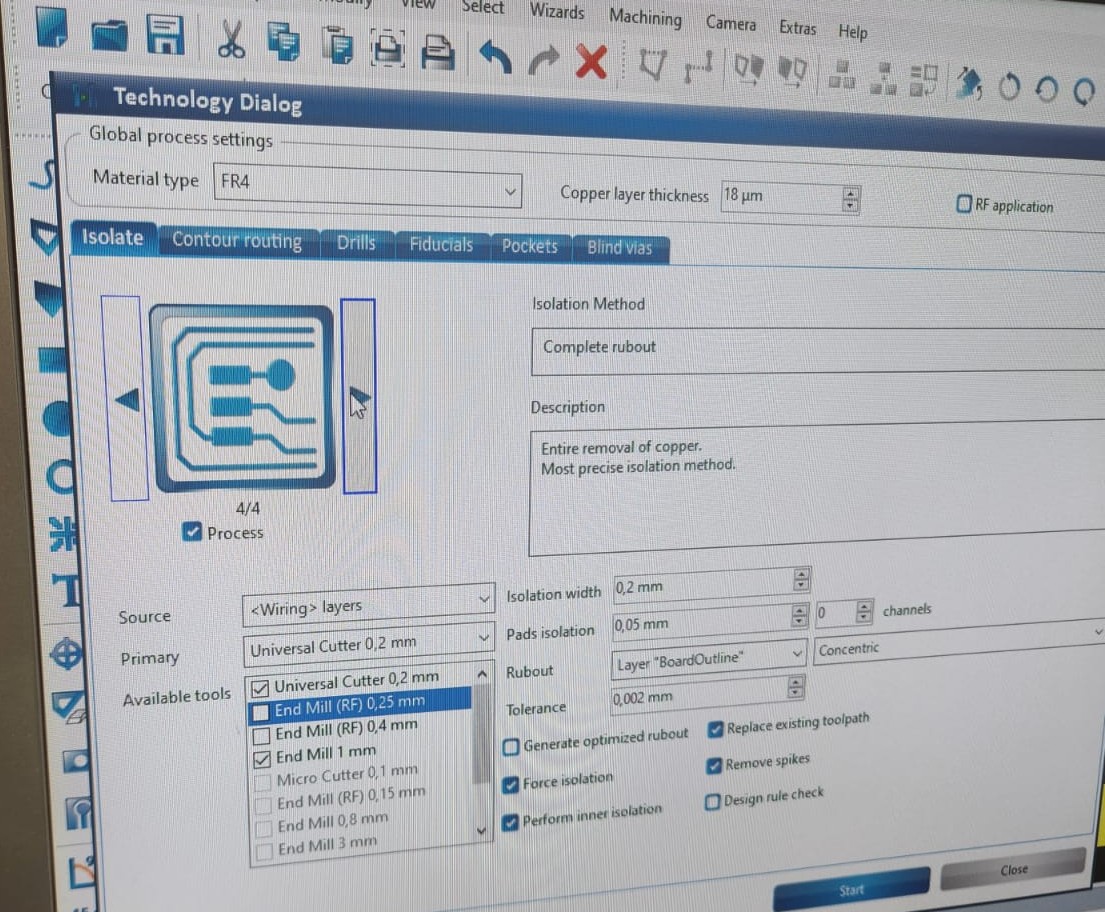
Next, was setting up for contour routing toolpath and generated isolation:
Selecting the contour routing shape:
Required tools for milling:
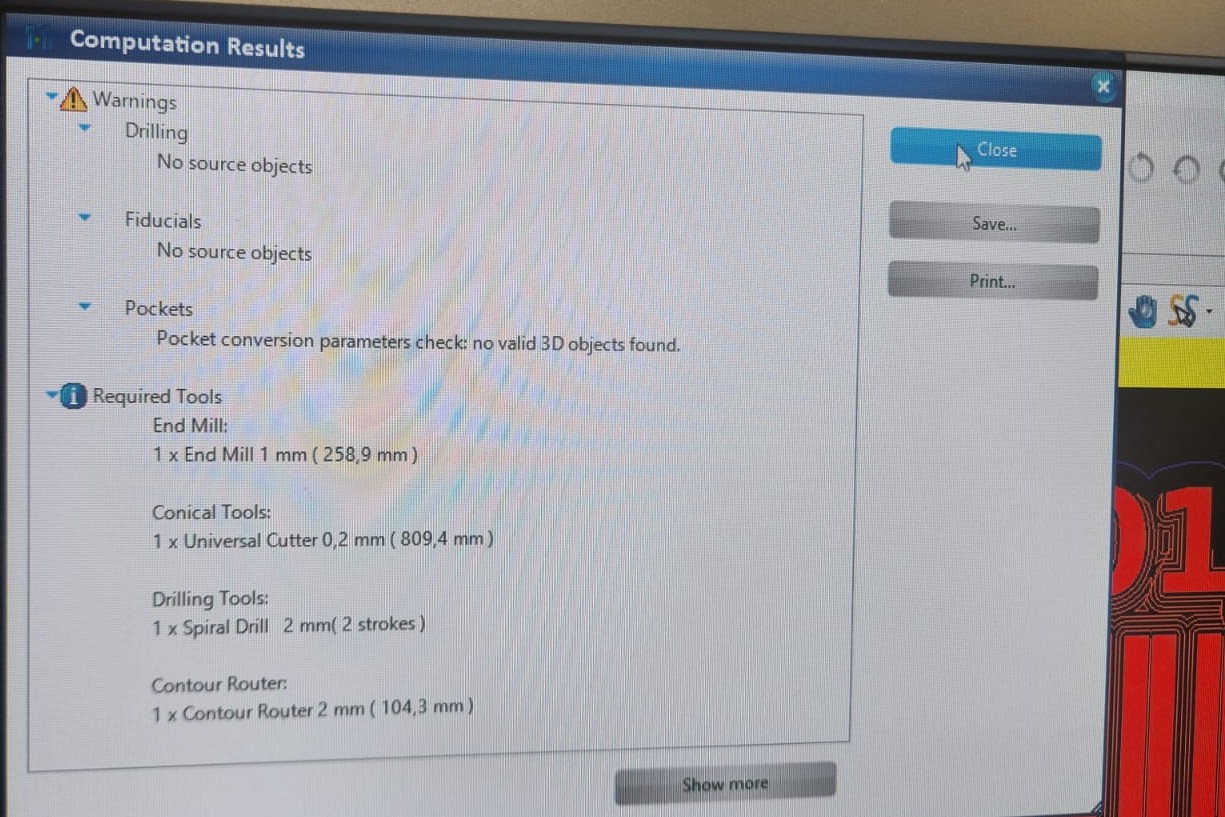
Selected how the process for isolate should be:
Checking the milling movement:
 |
 |
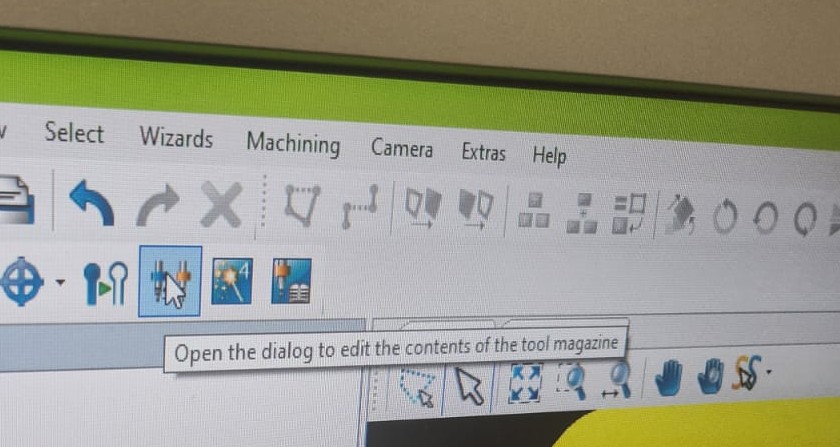
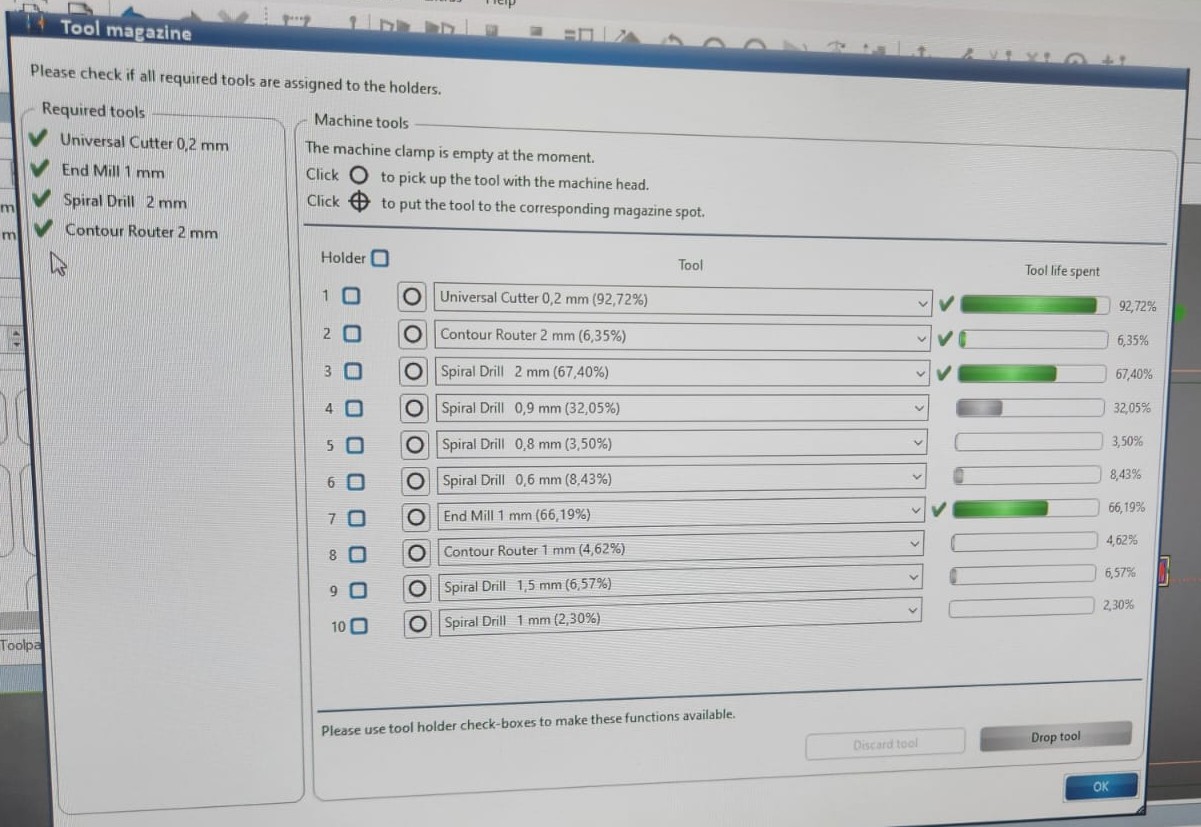
Then, checked the tool magazine:
 |
 |
We chose and fixed the FR4 board in machine plate, and we taped it for not moving. The machine has also vacuum.
 |
 |
The going to board production wizard tab:
 |
 |
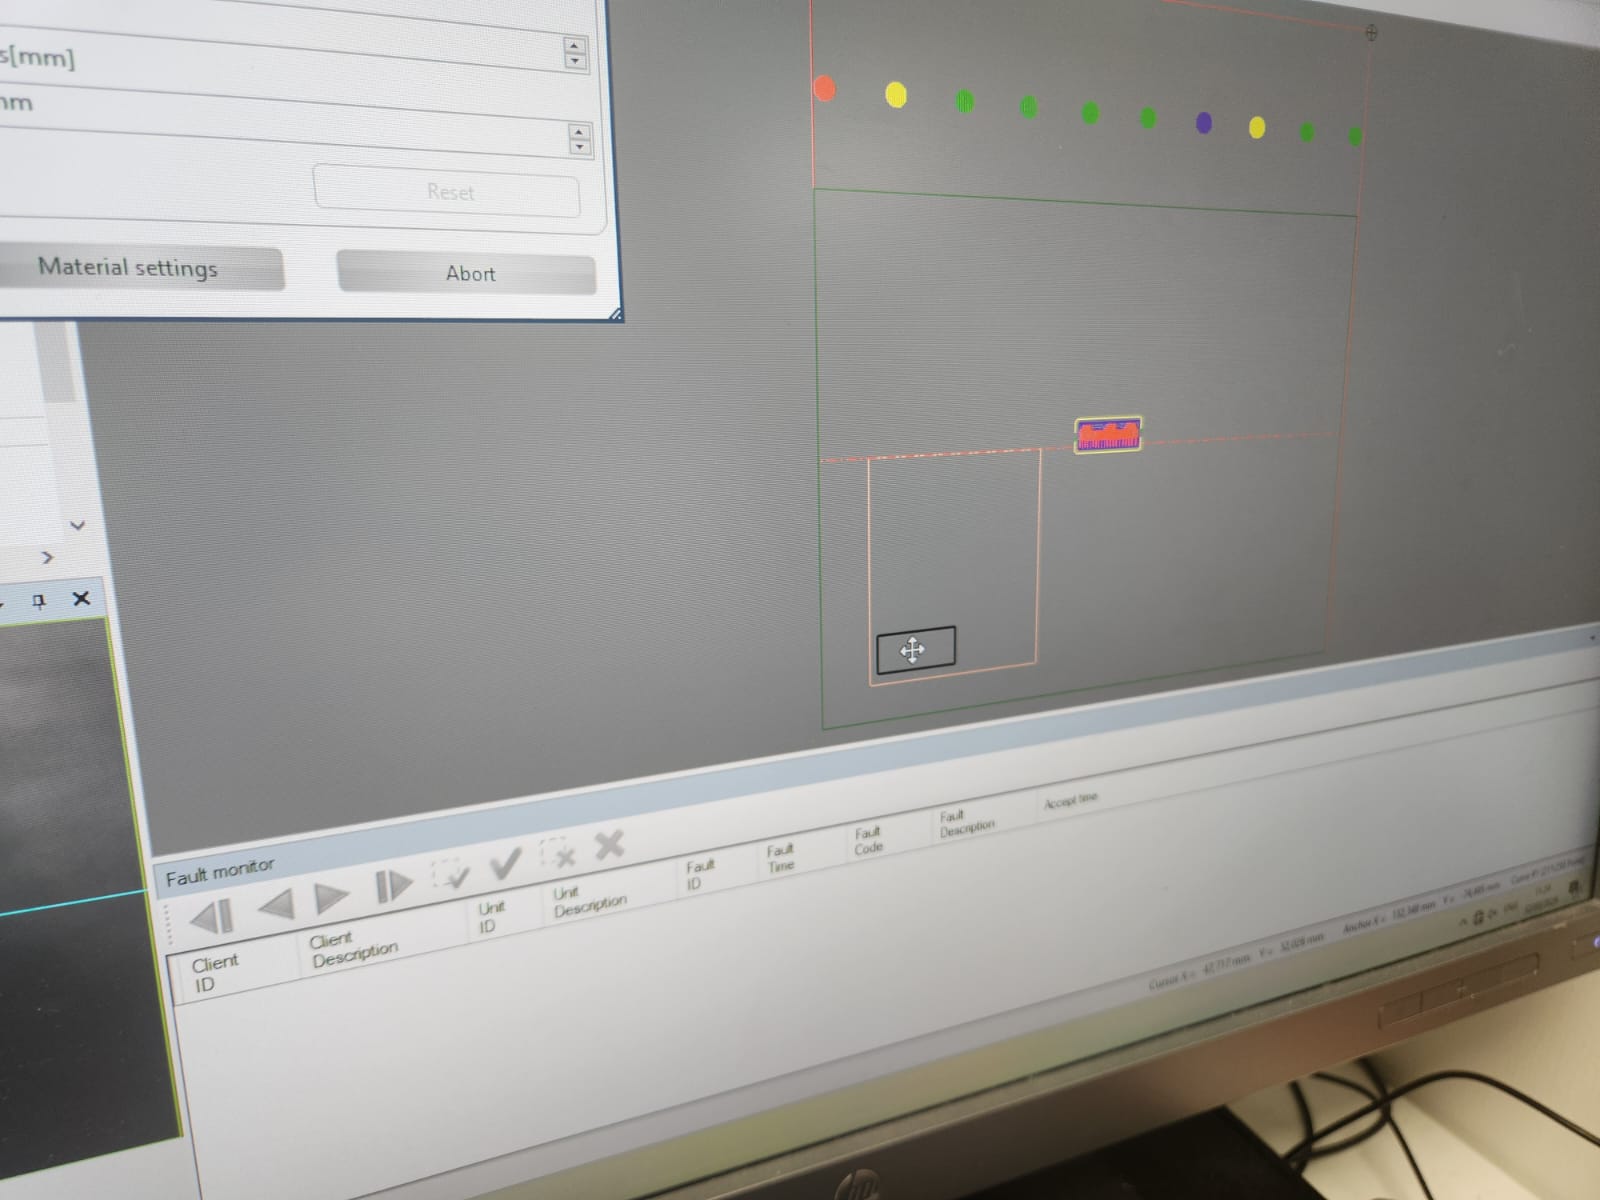
Selecting the location of the board for milling:
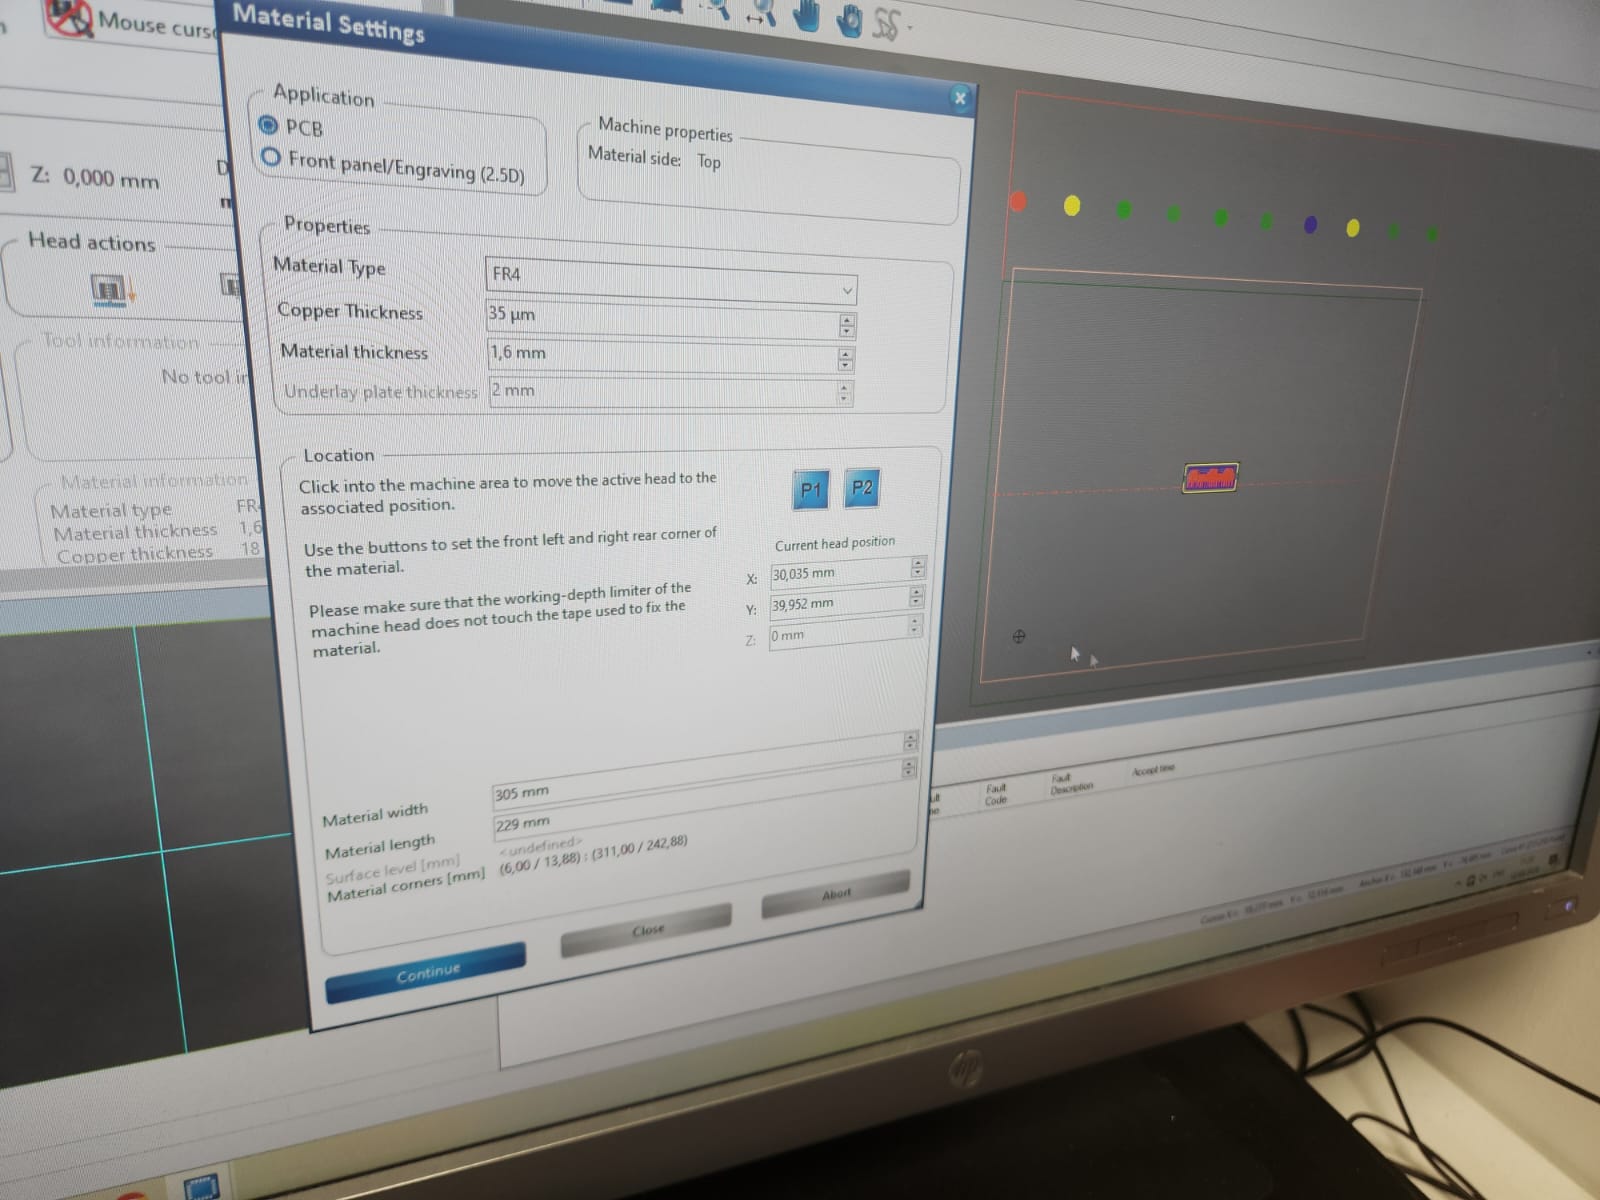
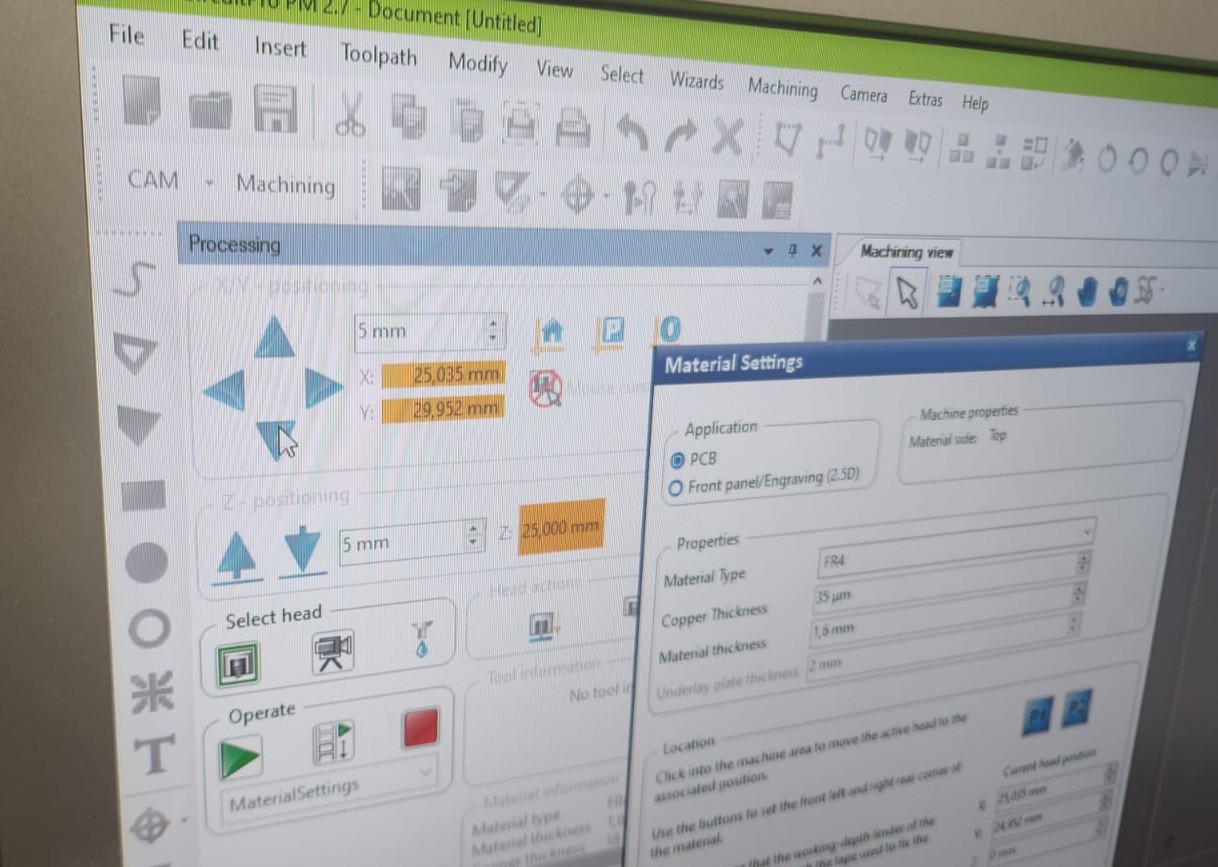
Material setting was next step, material thickness 1.6 mm and copper thickness was 35 um.
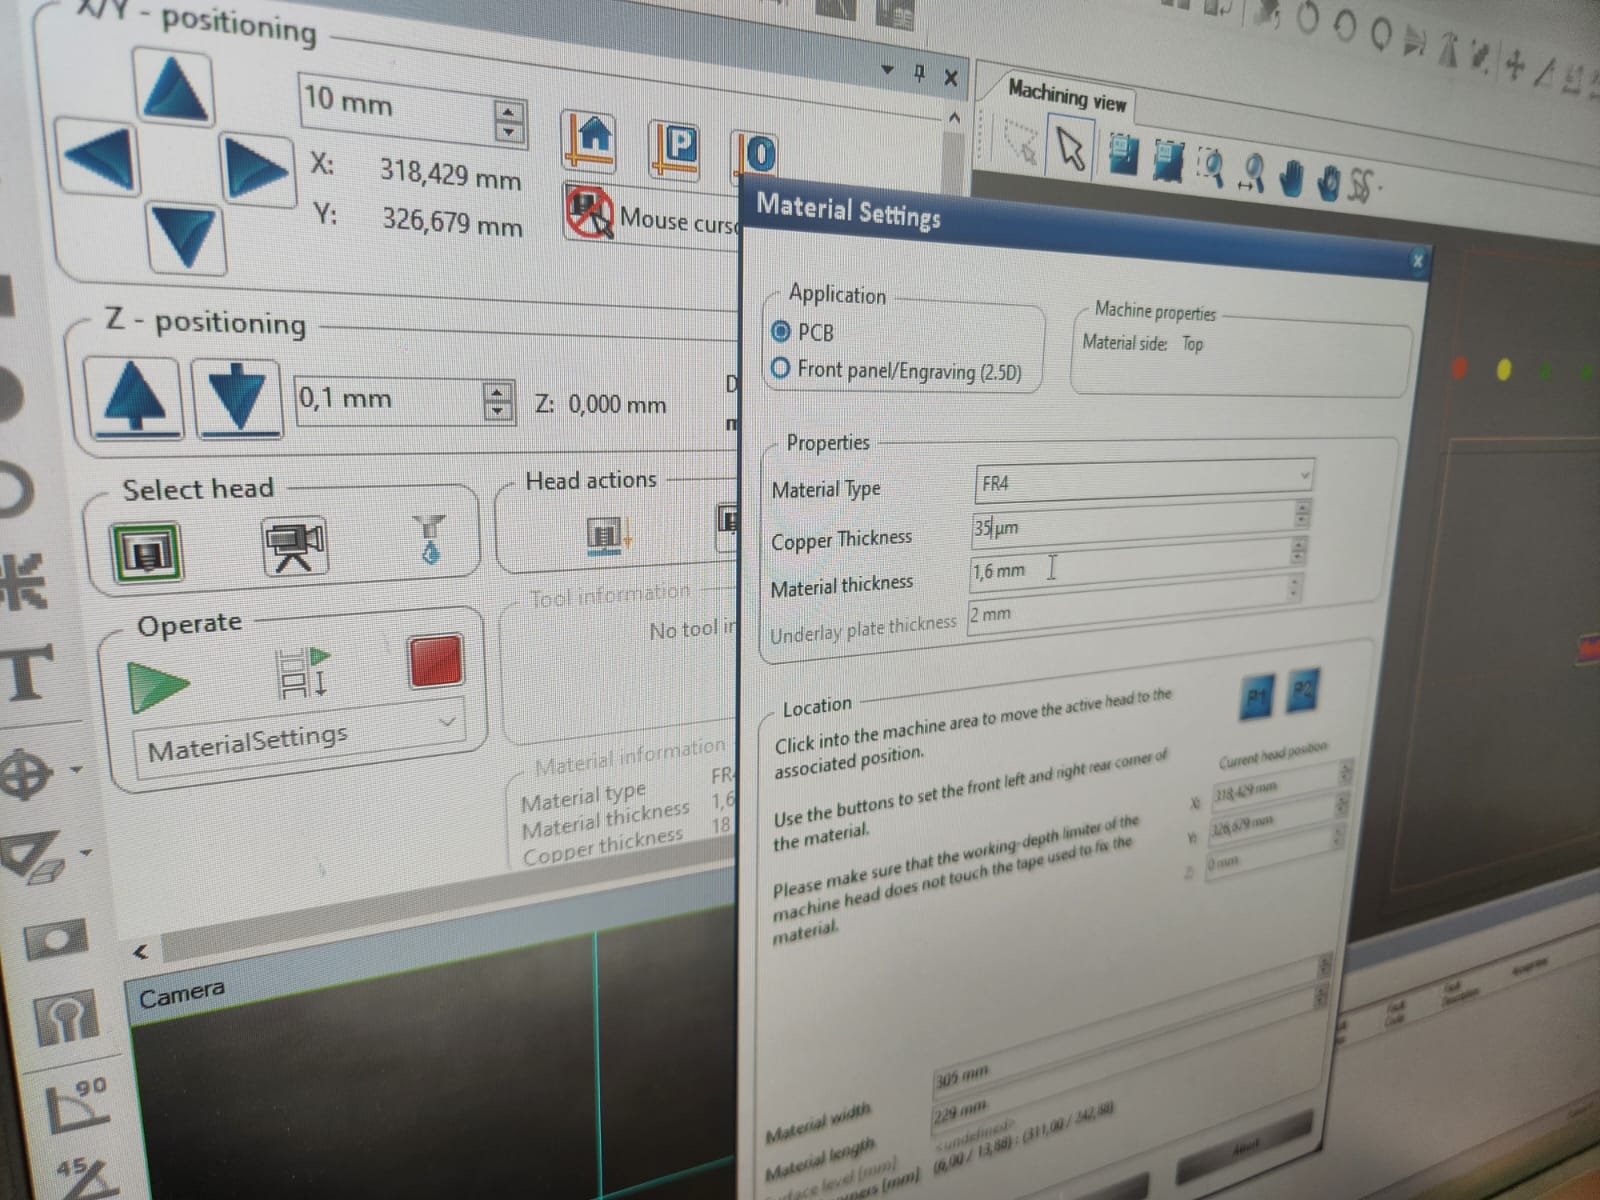
X-Y position located:
 |
 |
After positioning, clicked the operate to continue:
 |
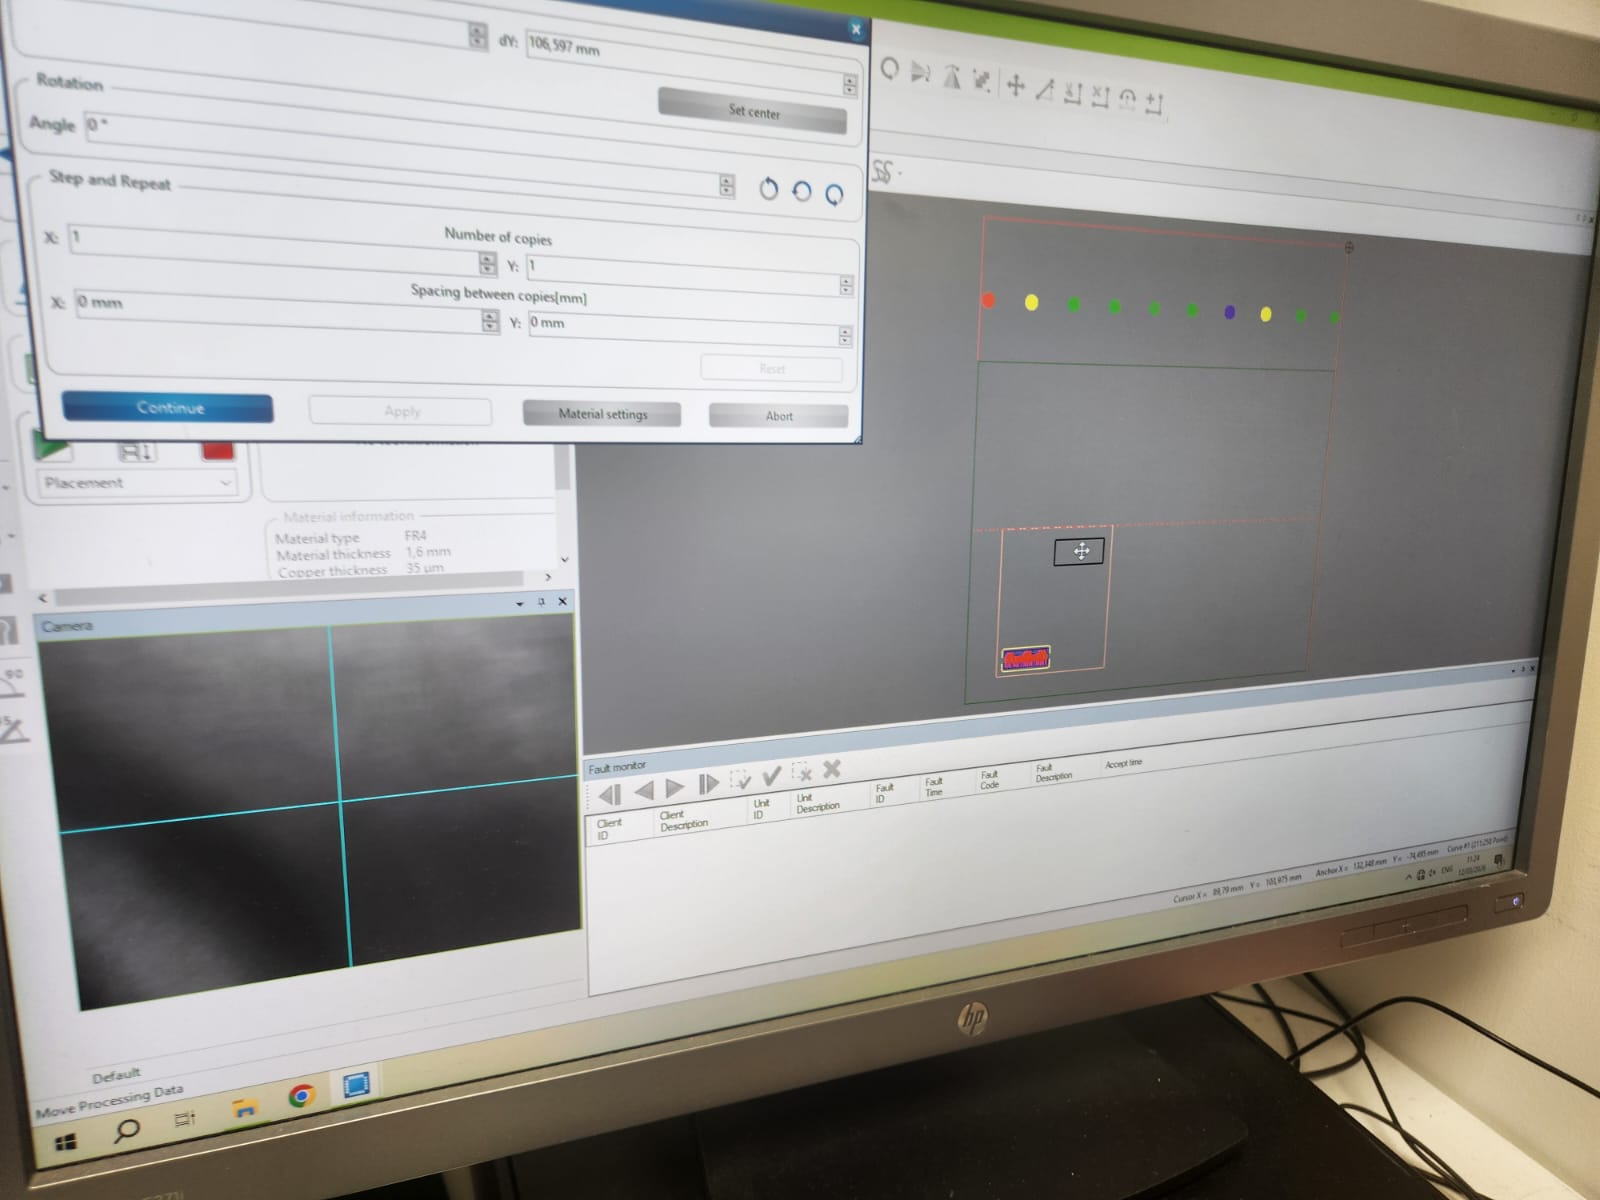 |
Dragged and placed the board in the left down corner that is same as machine bit tip:
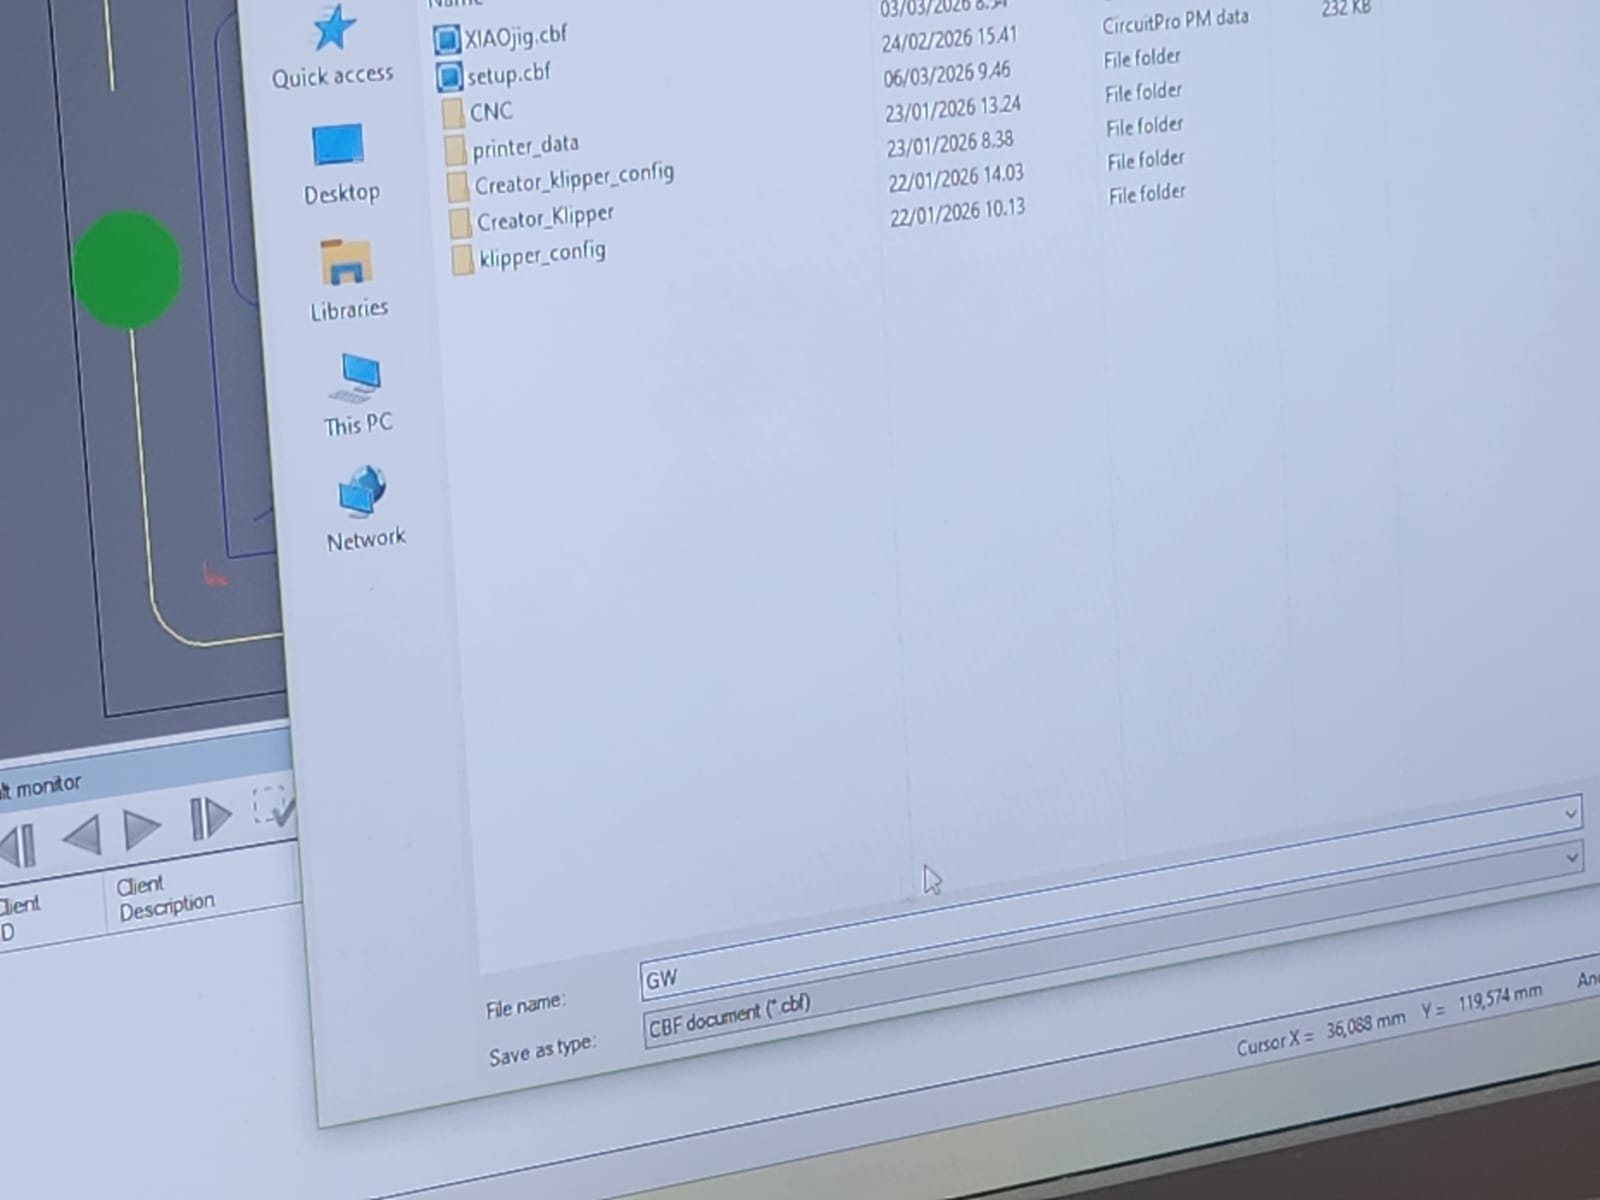
We saved the setting file, all the steps for time that we need to have another same board.
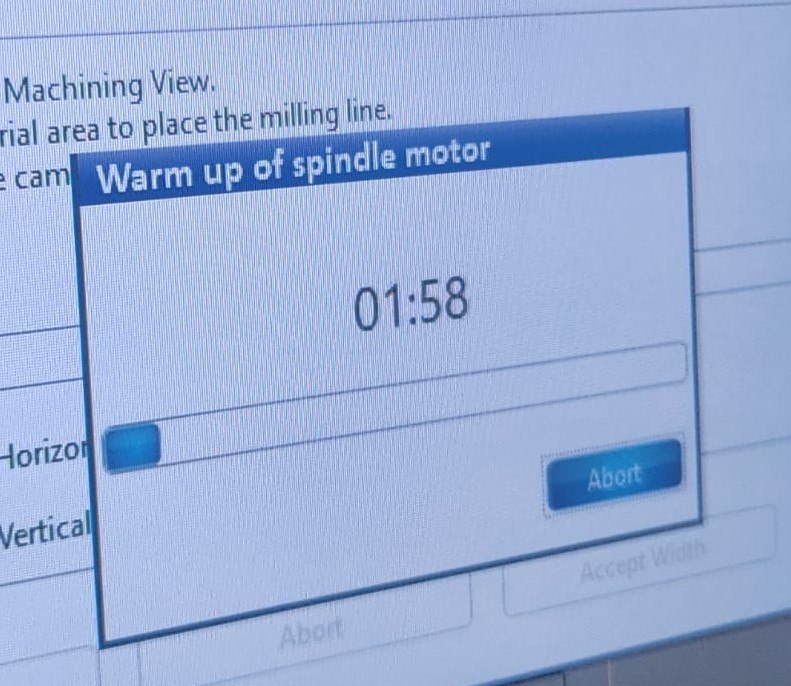
2 minutes took time to warm up of spindle motor:
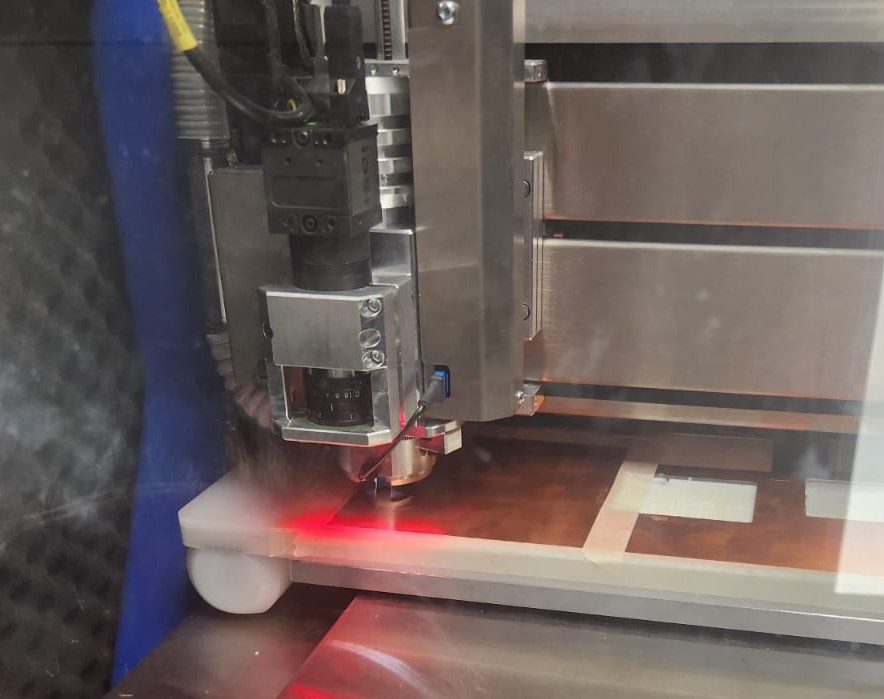
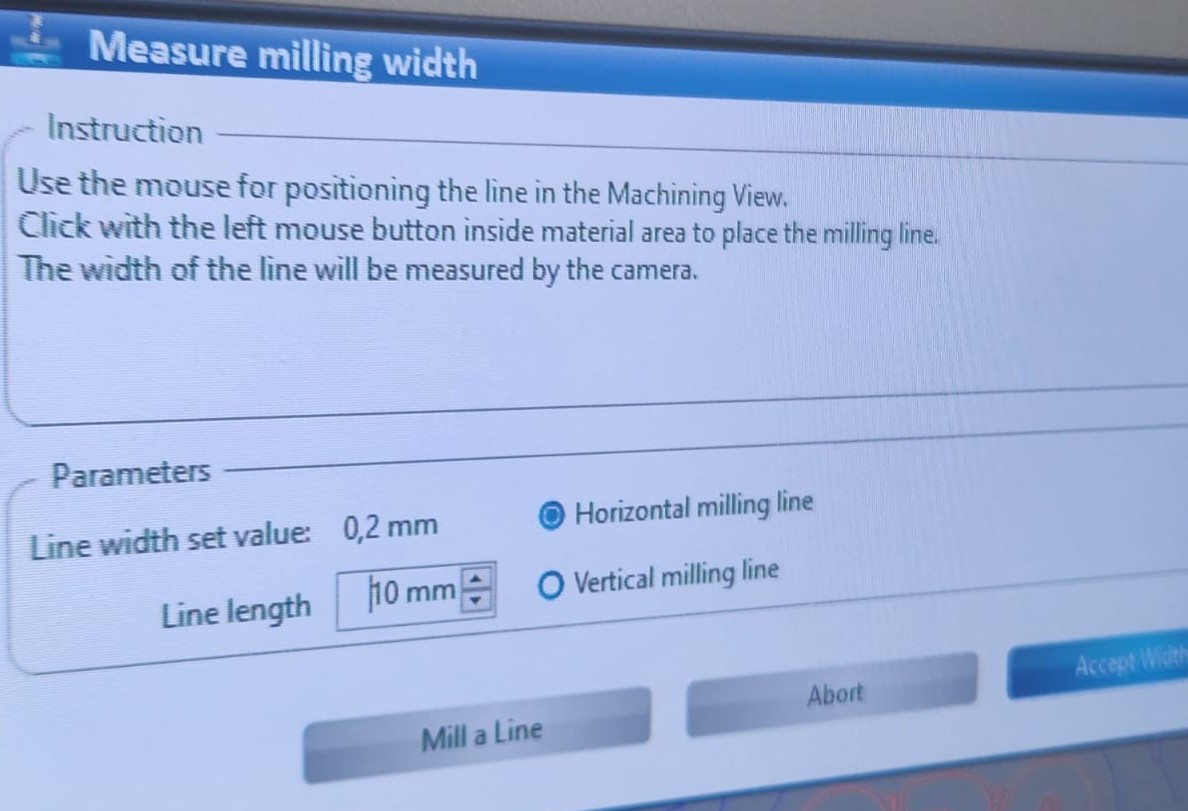
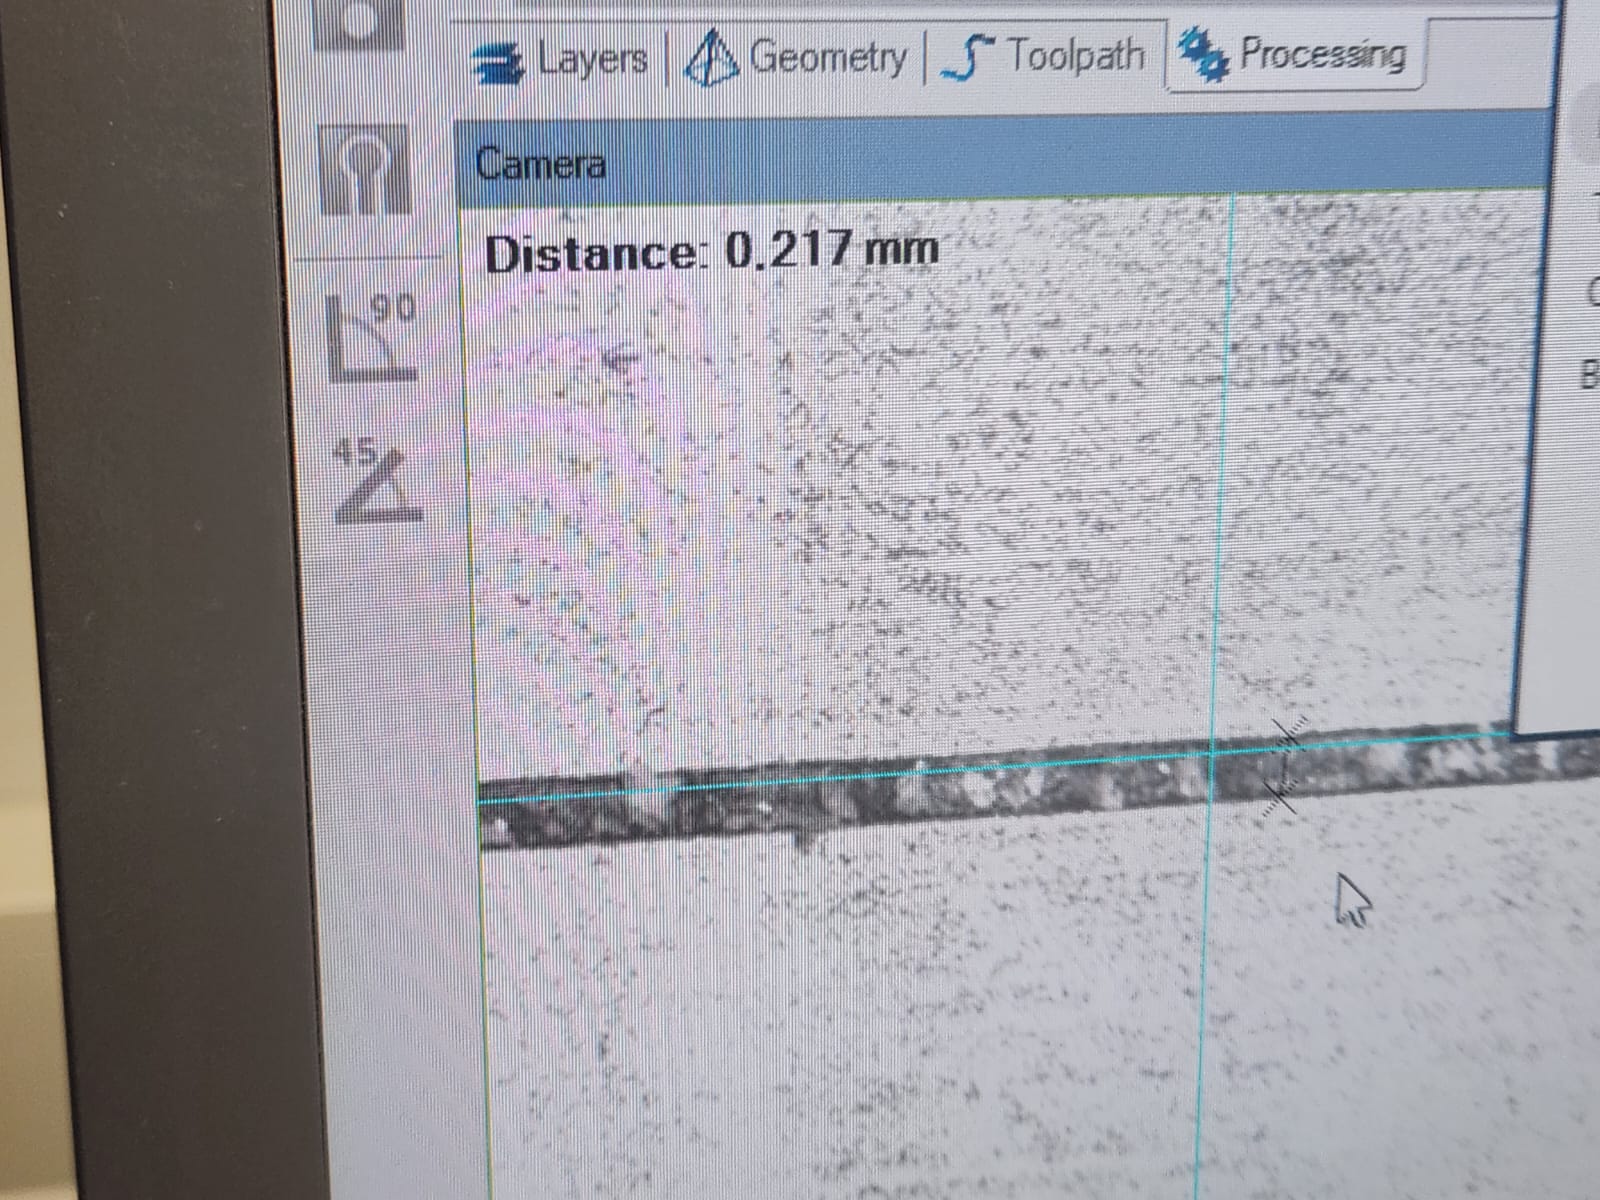
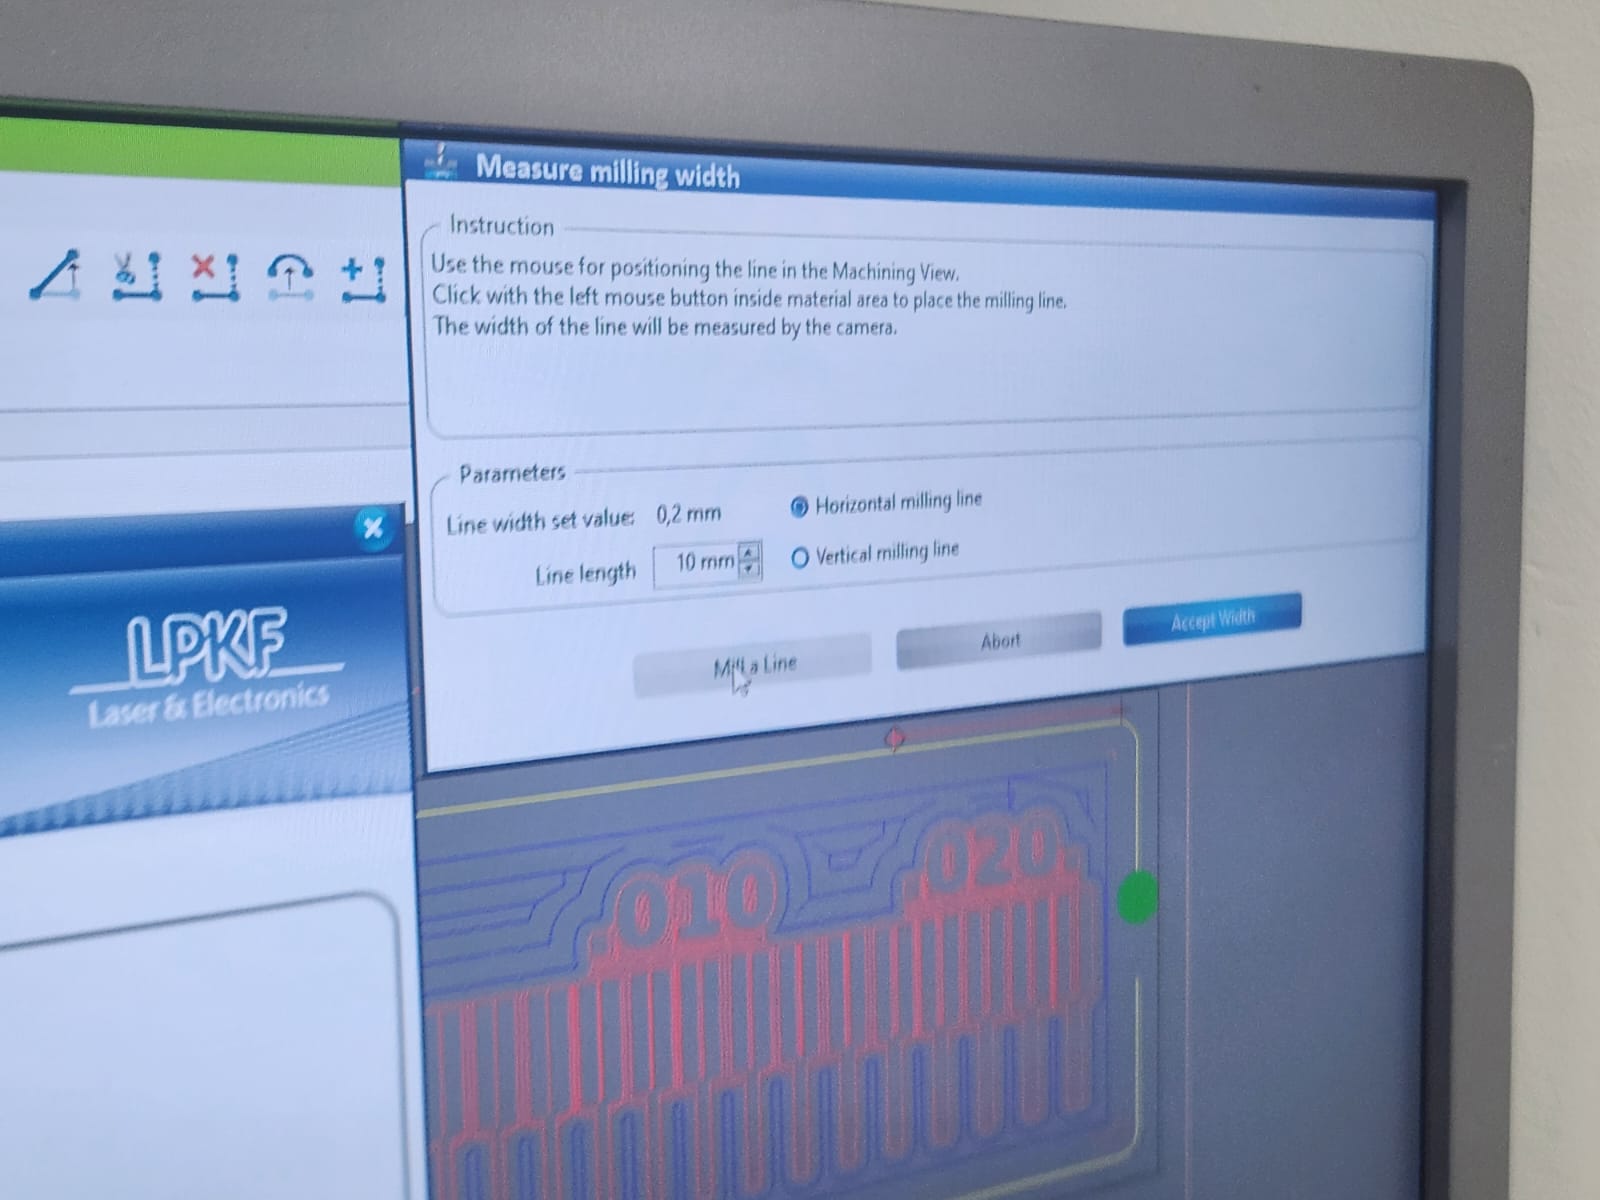
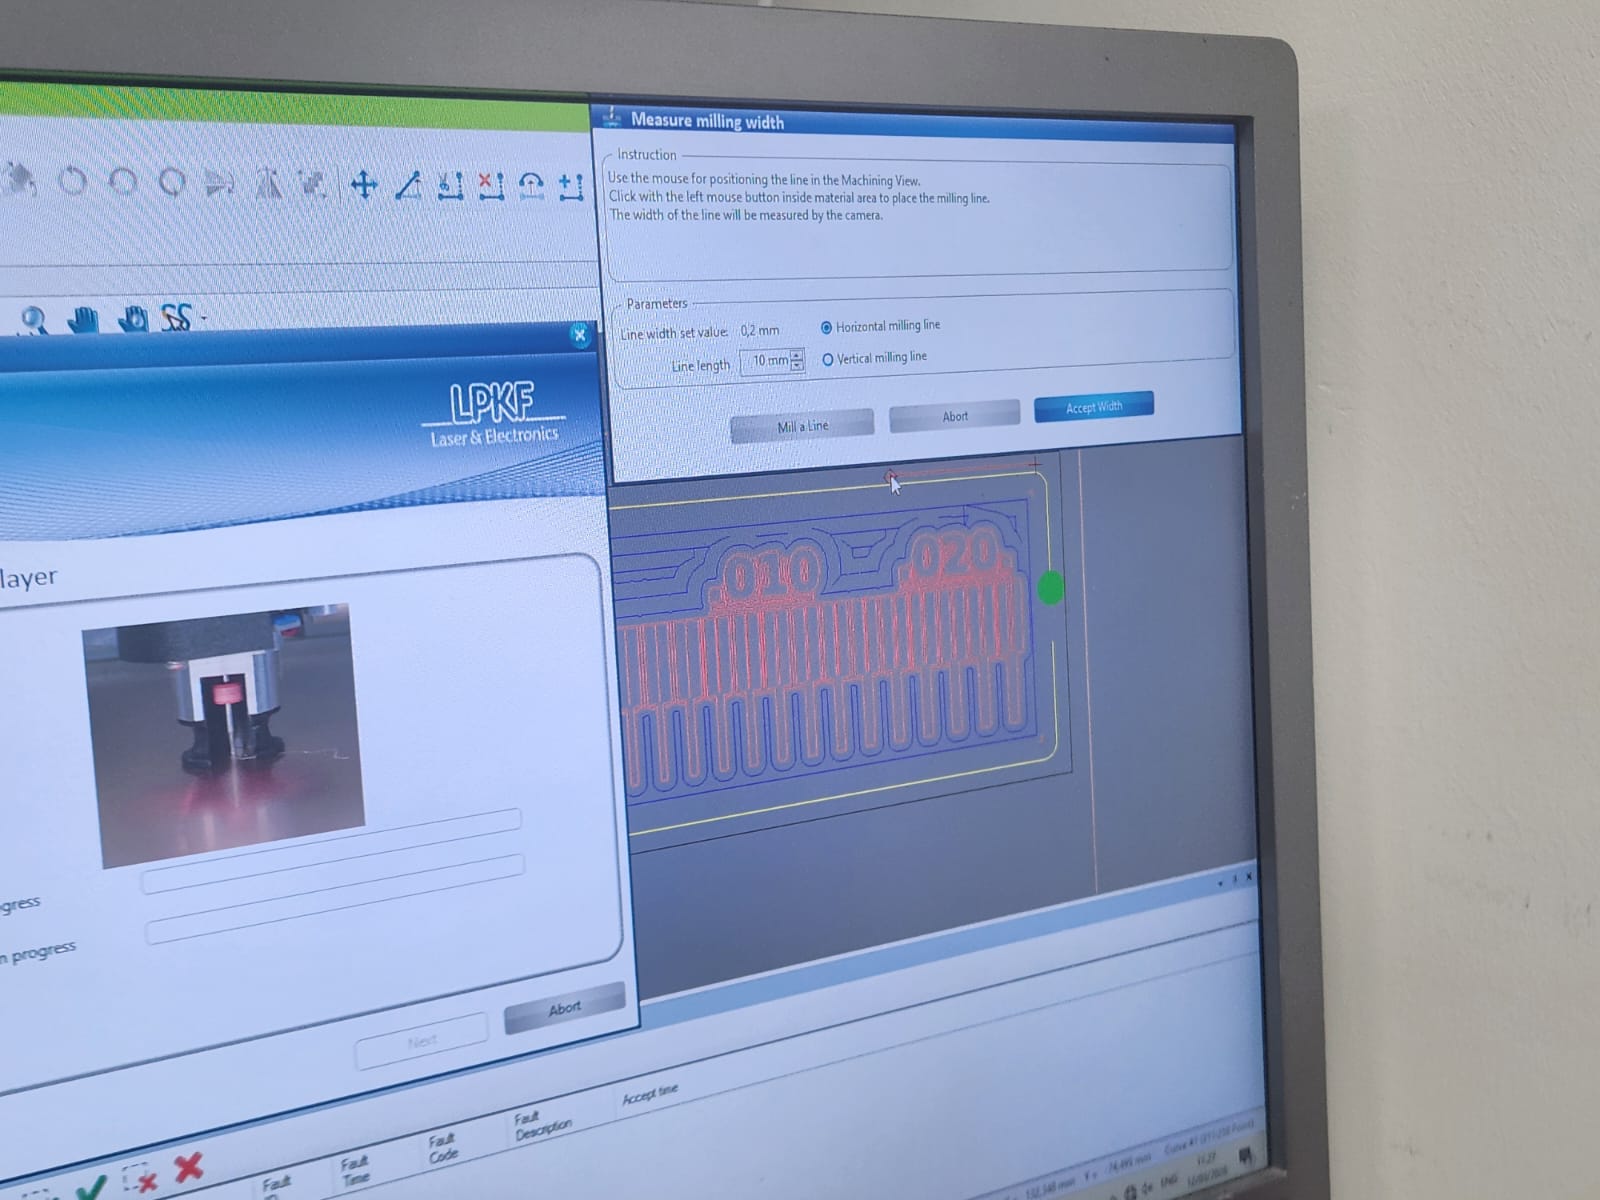
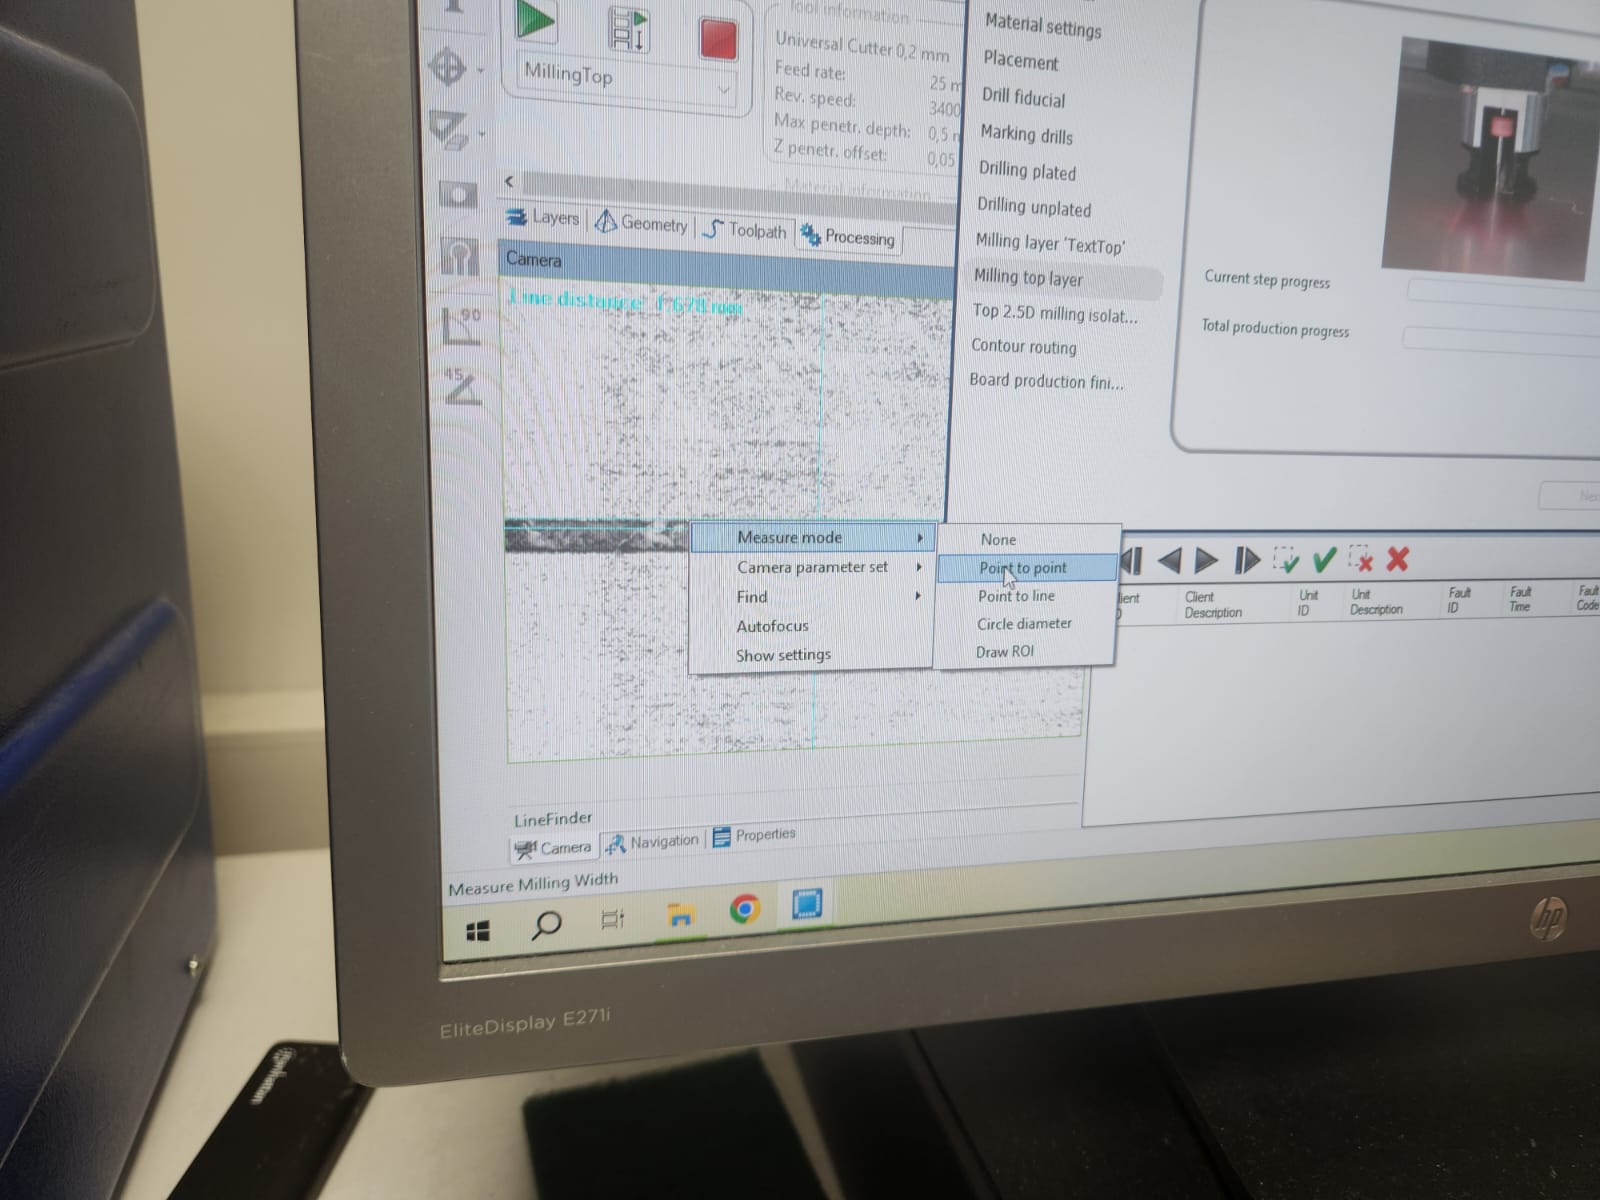
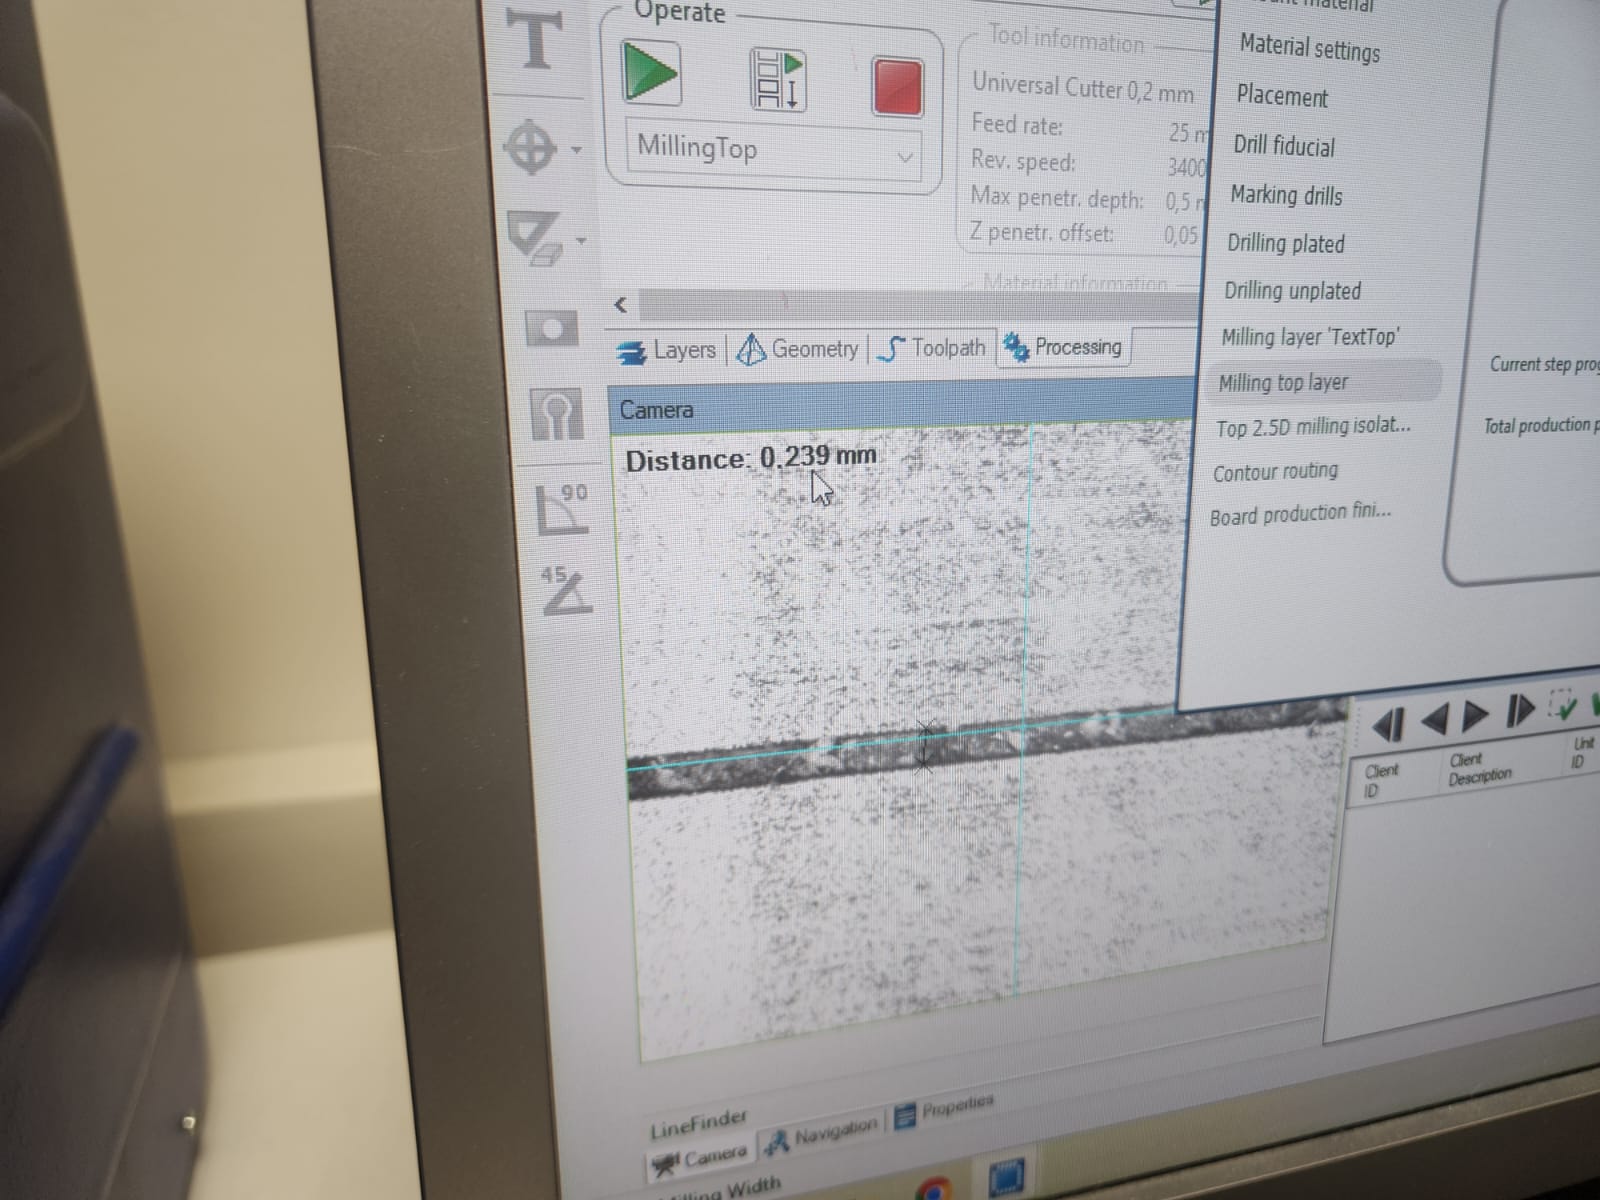
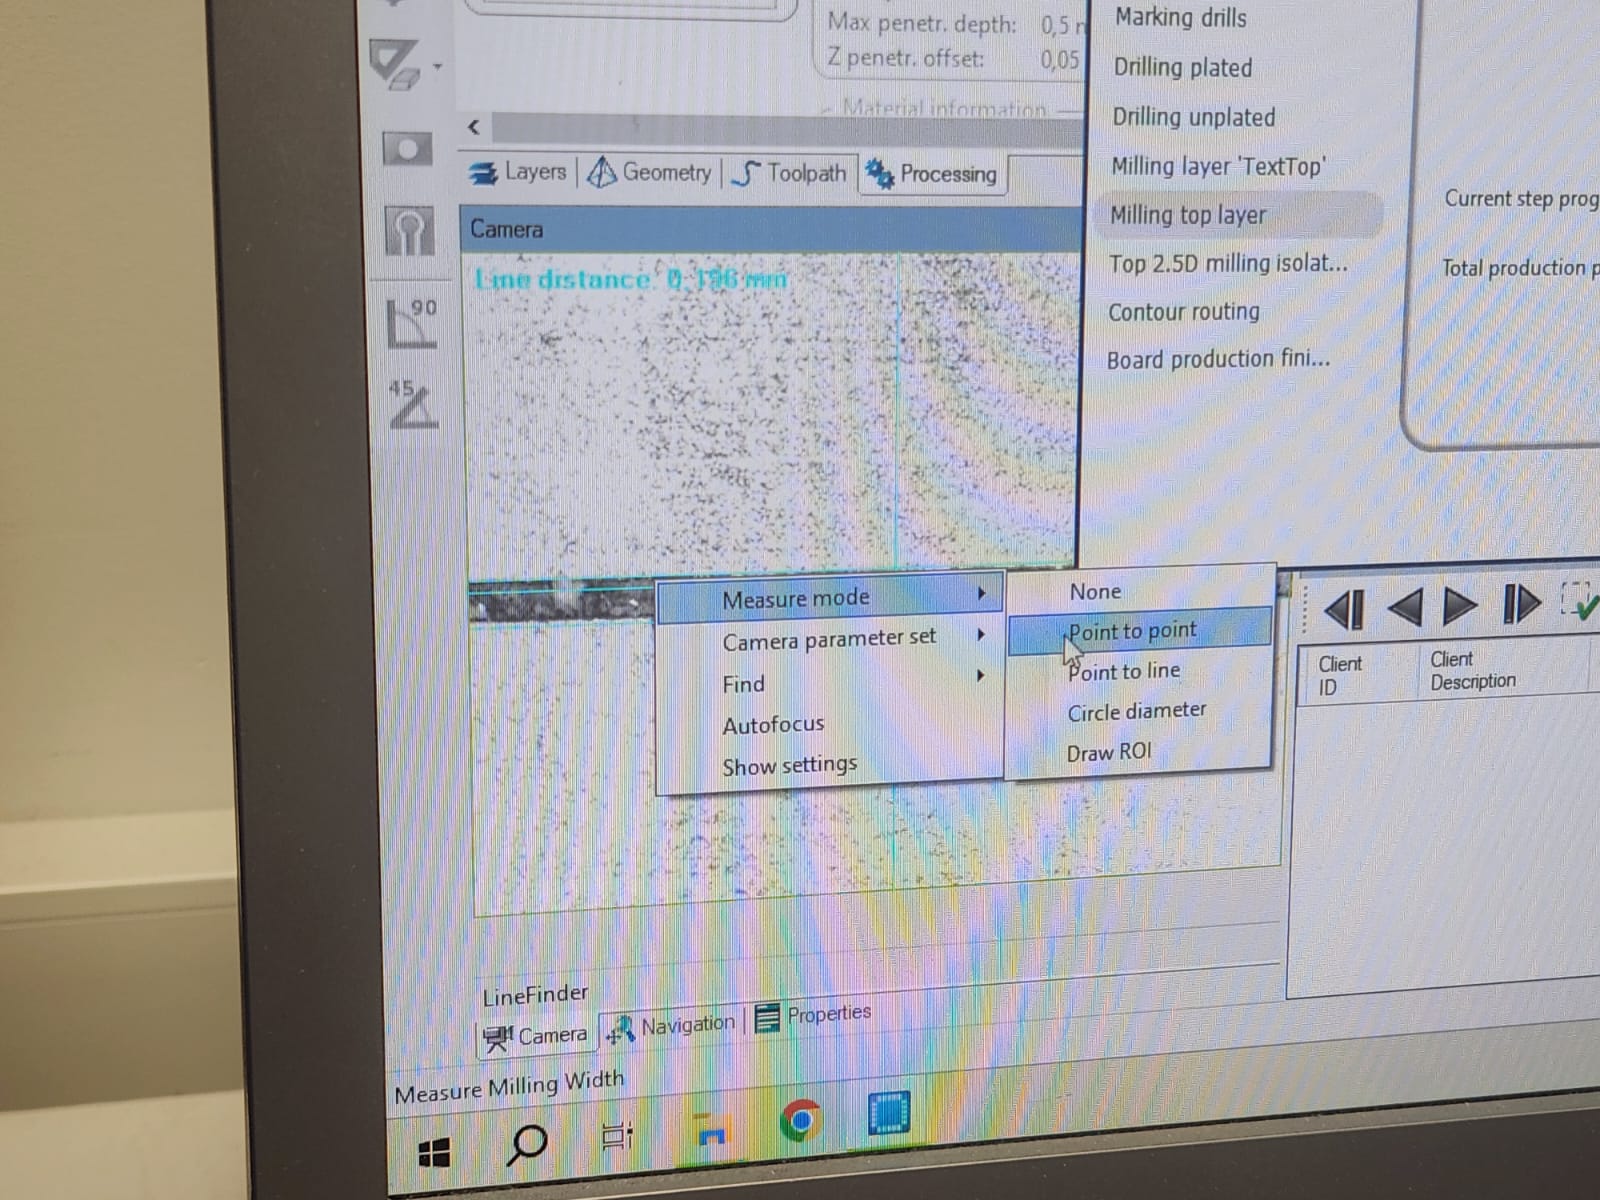
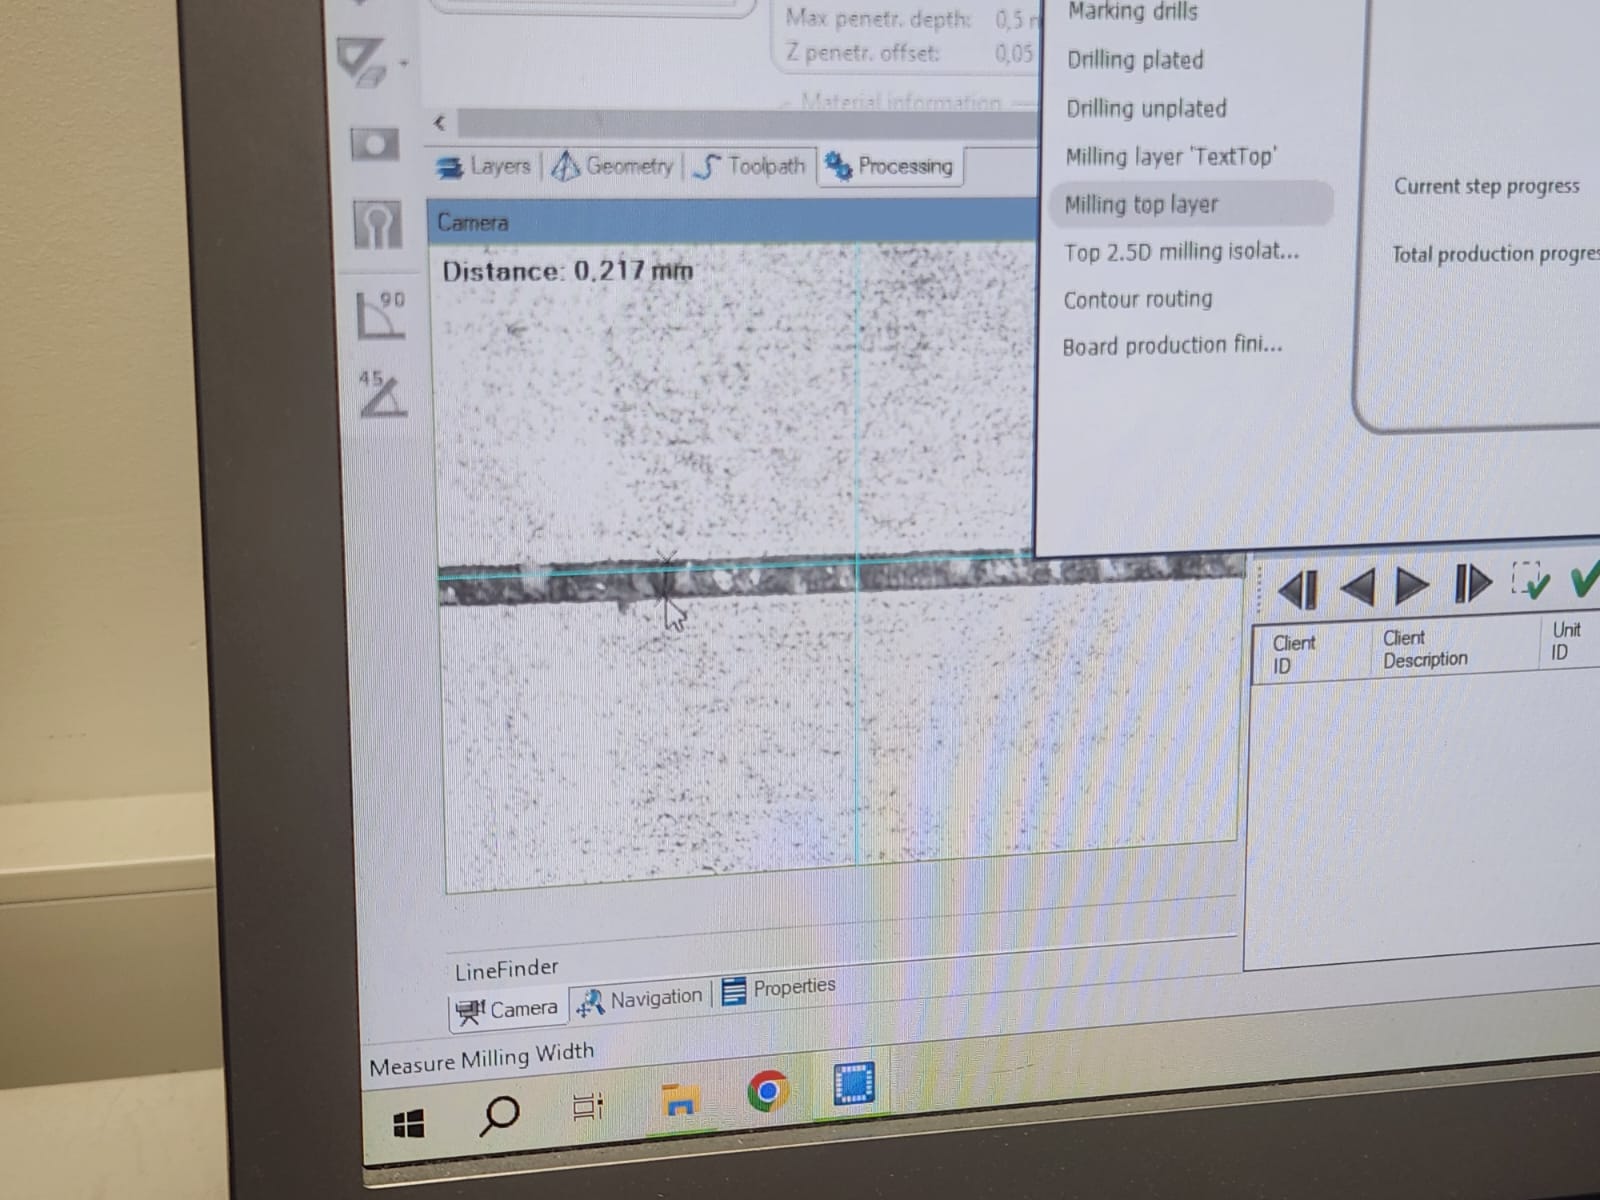
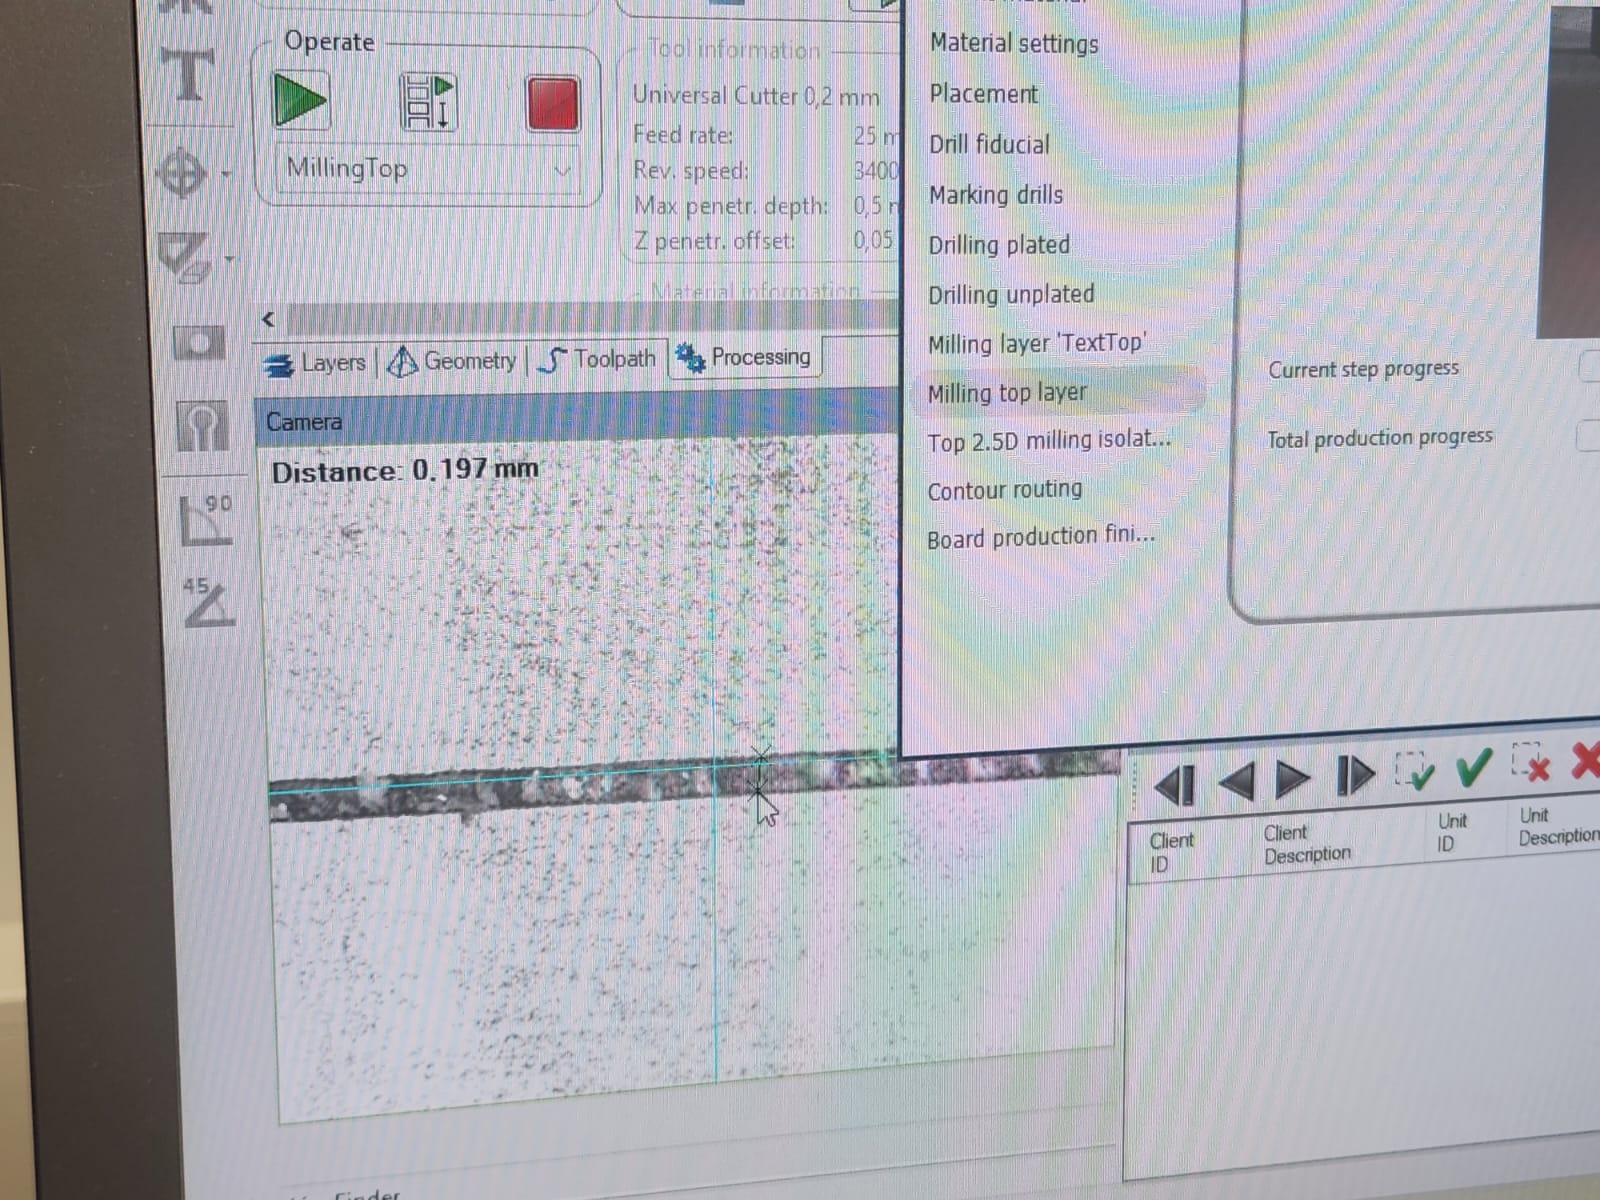
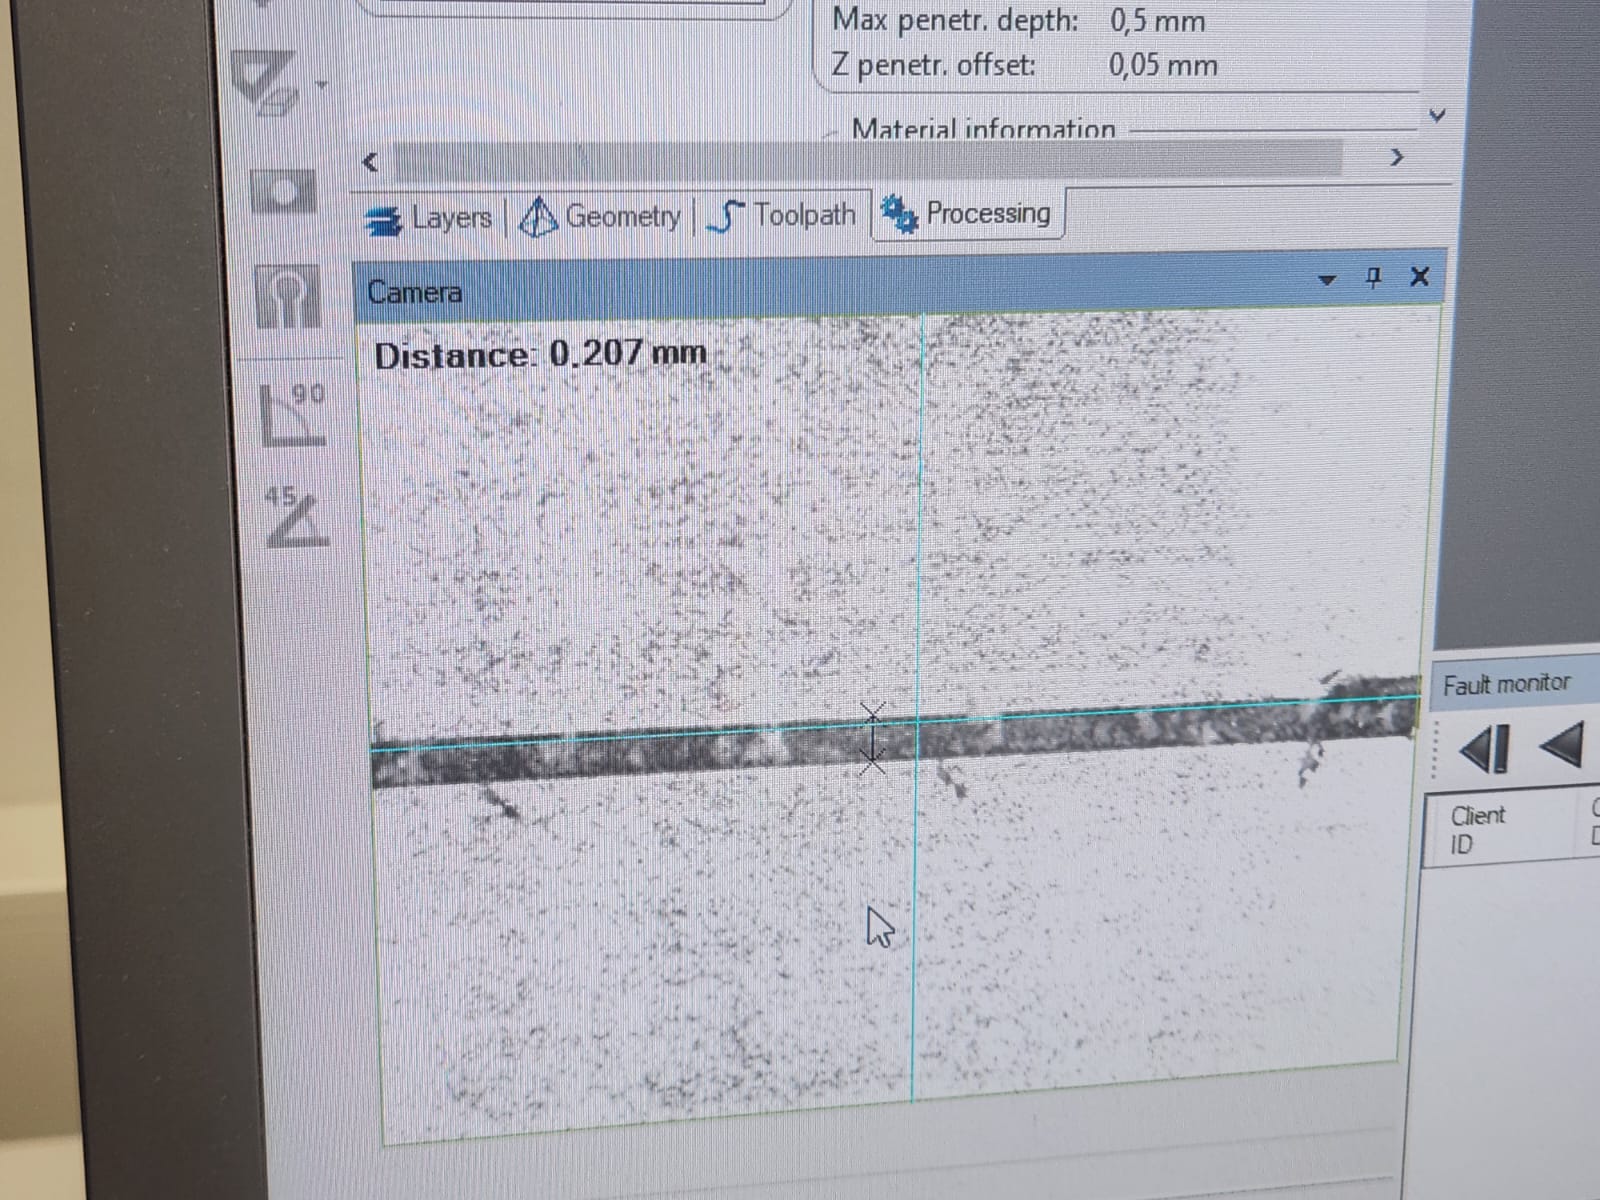
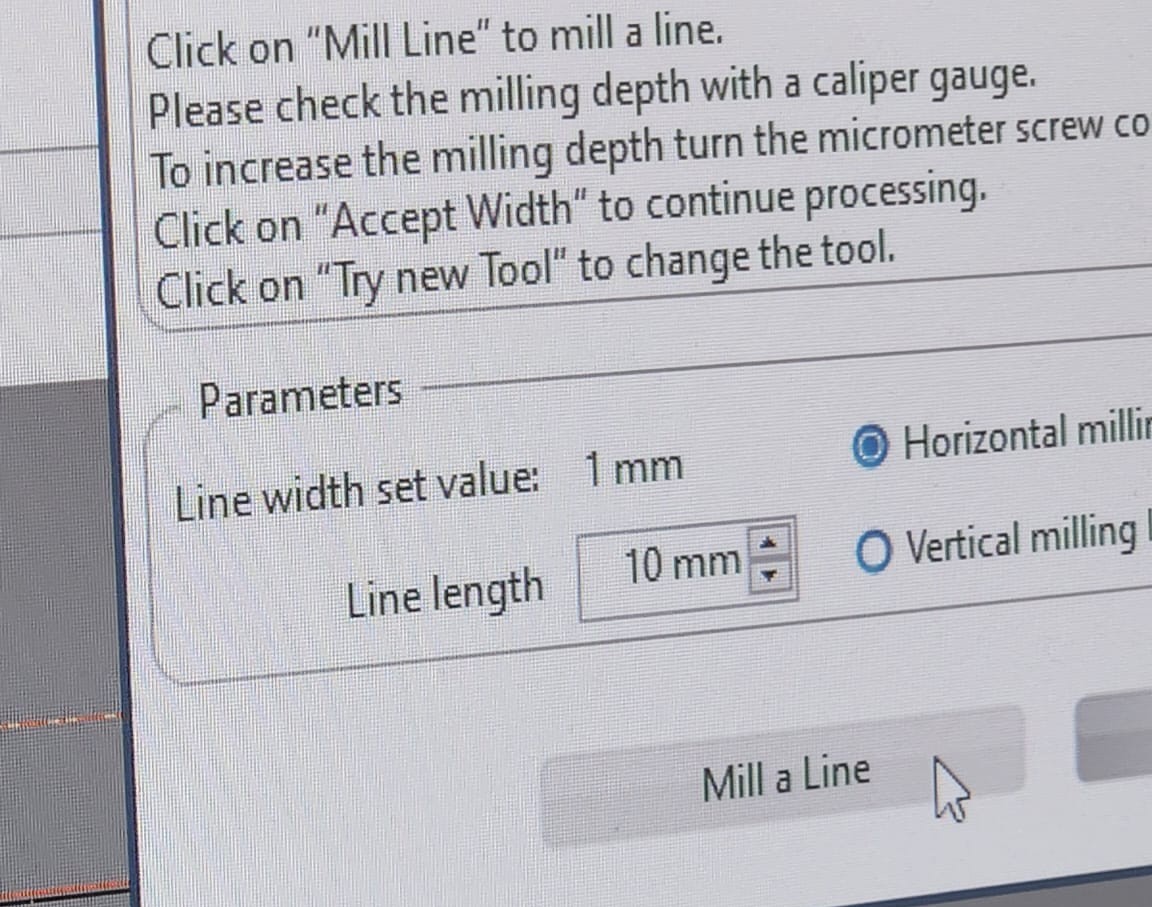
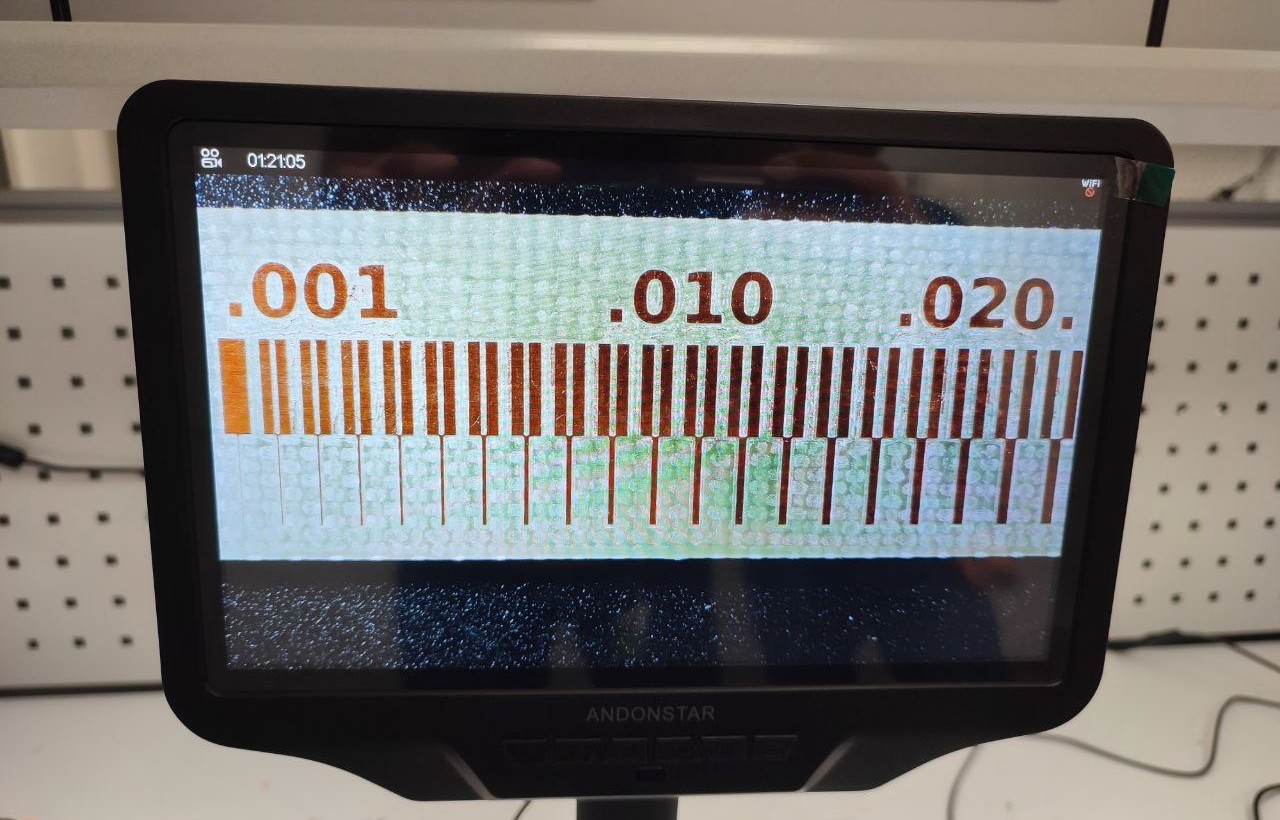
Before started the milling we measure the milling bit that needed to be 0.2 mm.
 |
 |
 |
 |
 |
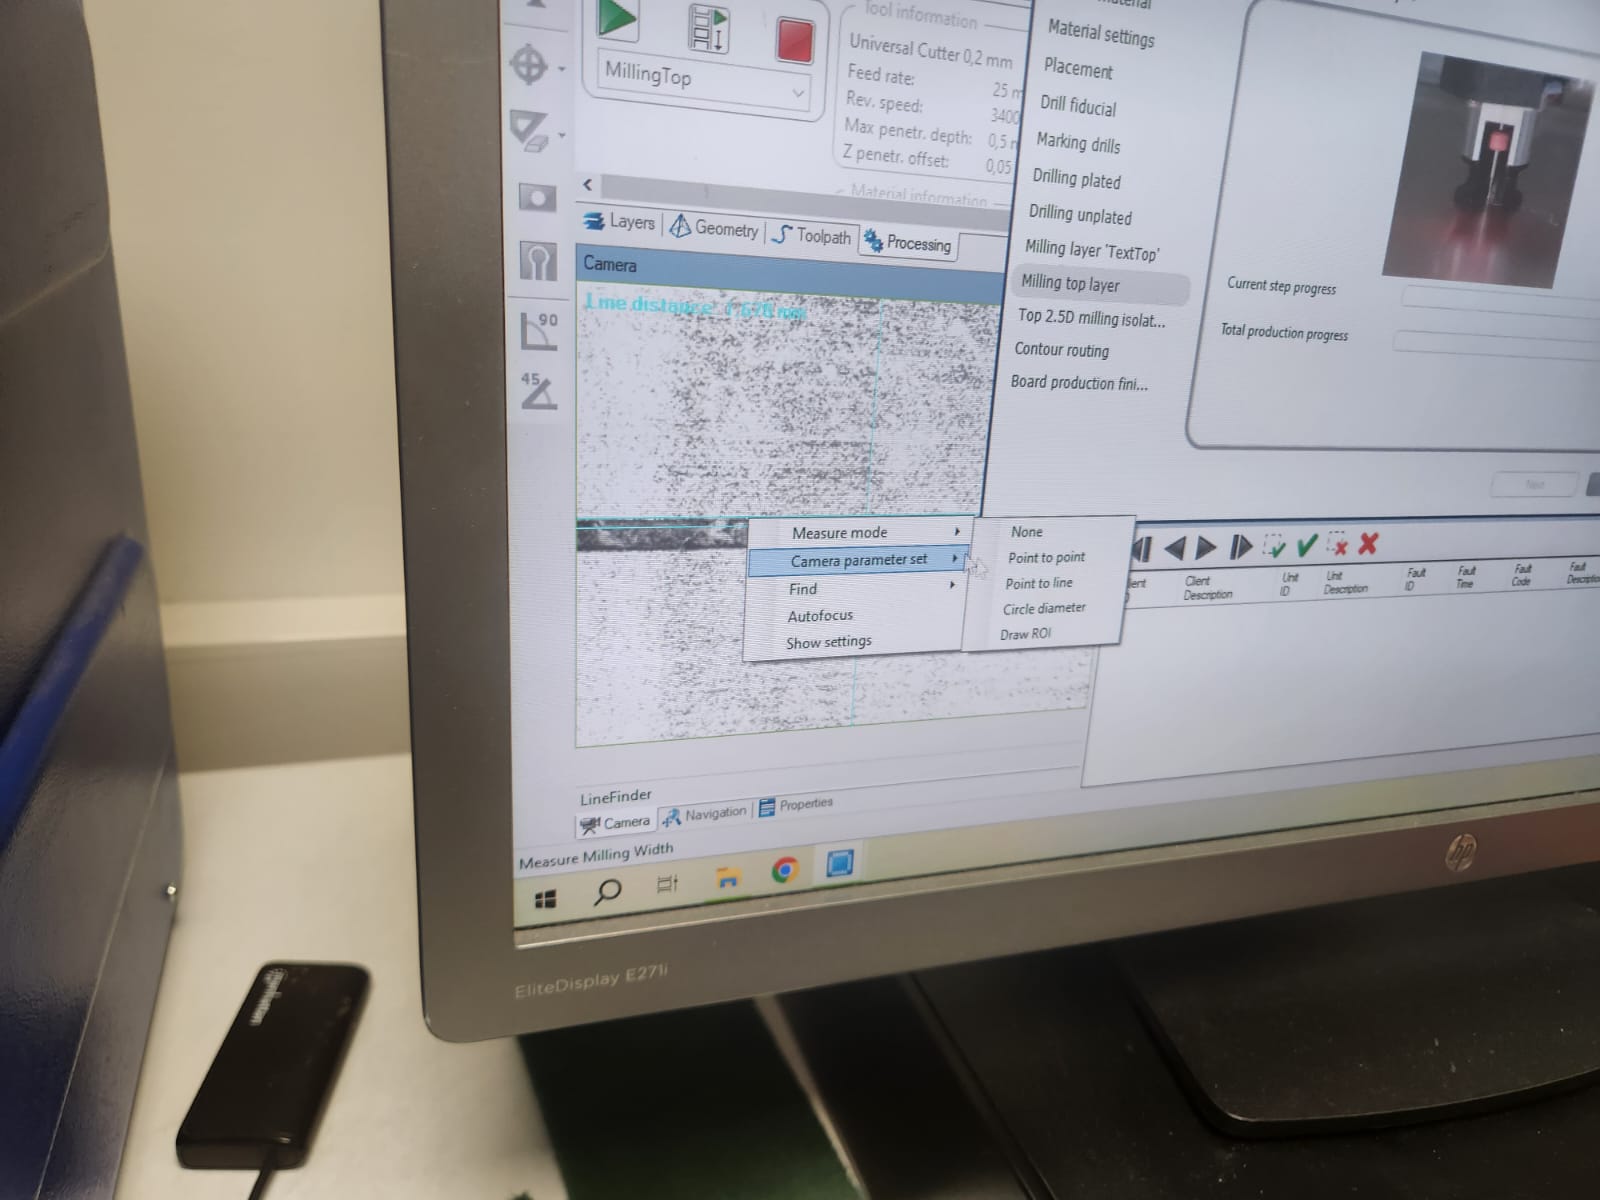 |
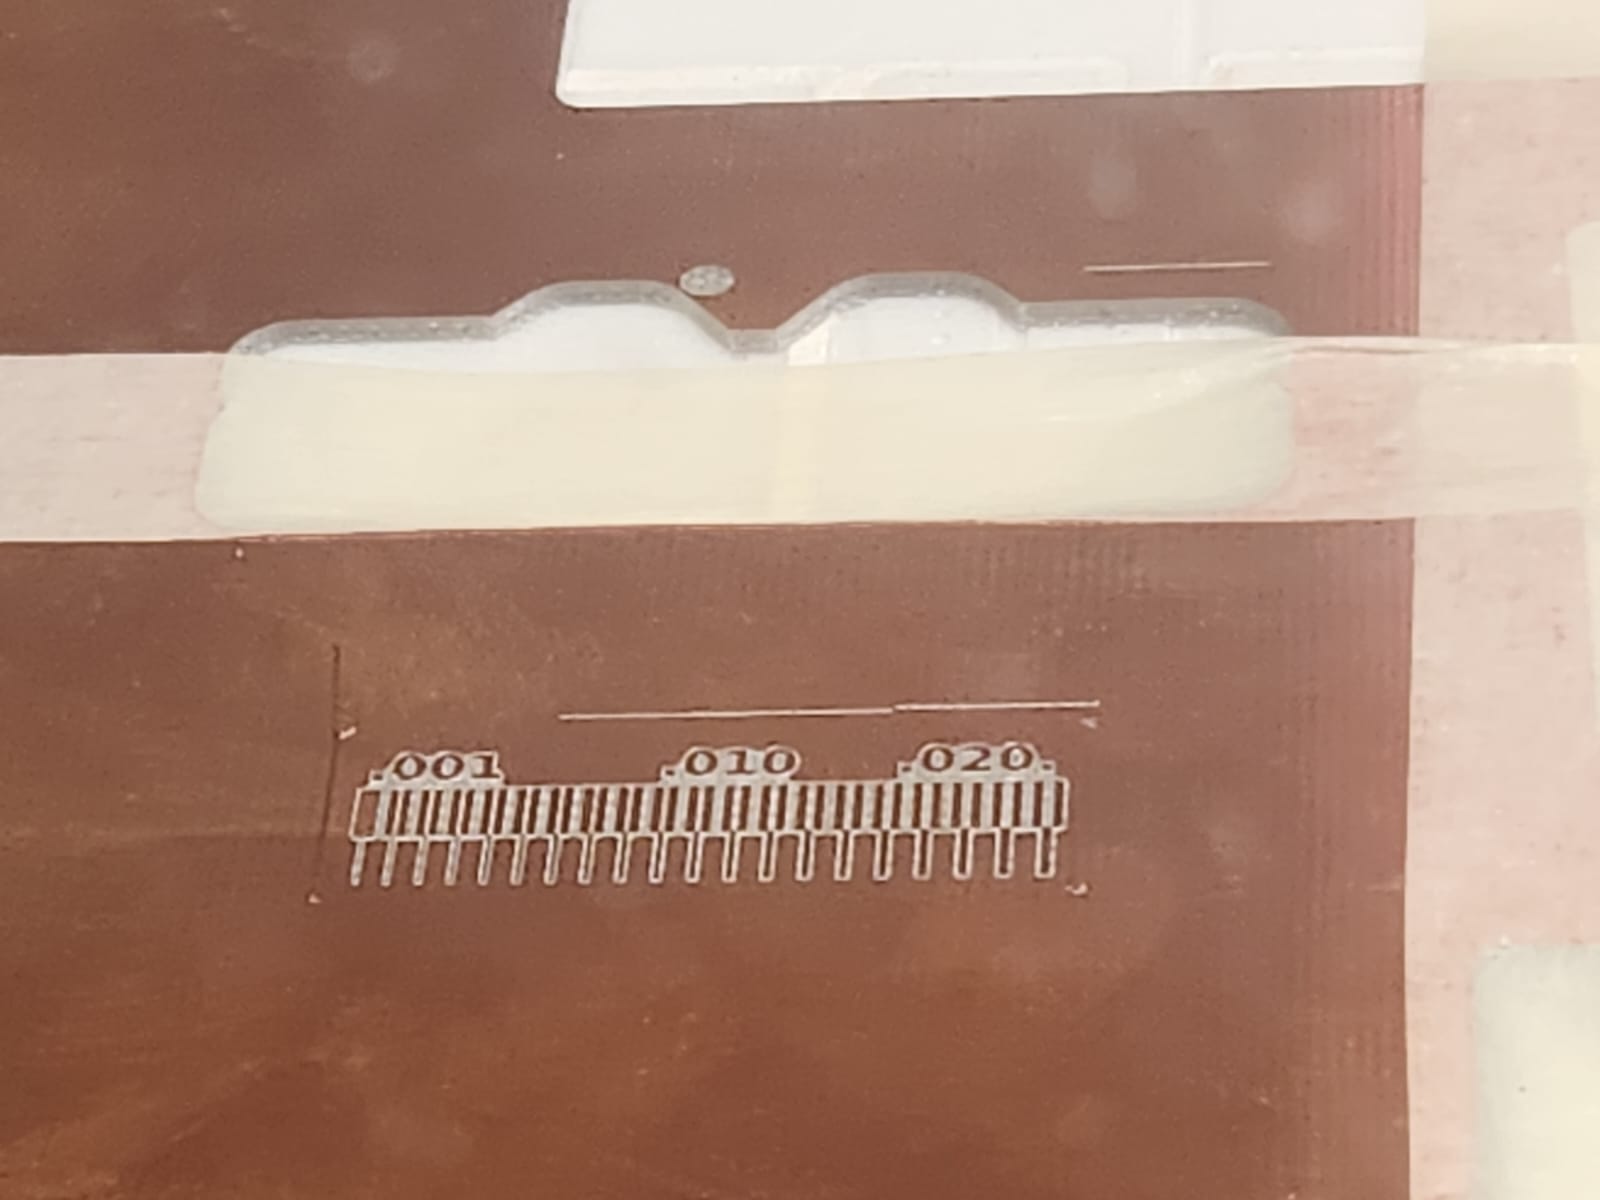
We measured a few times to be sure that milling width is 0.2 mm:
 |
 |
 |
 |
 |
 |
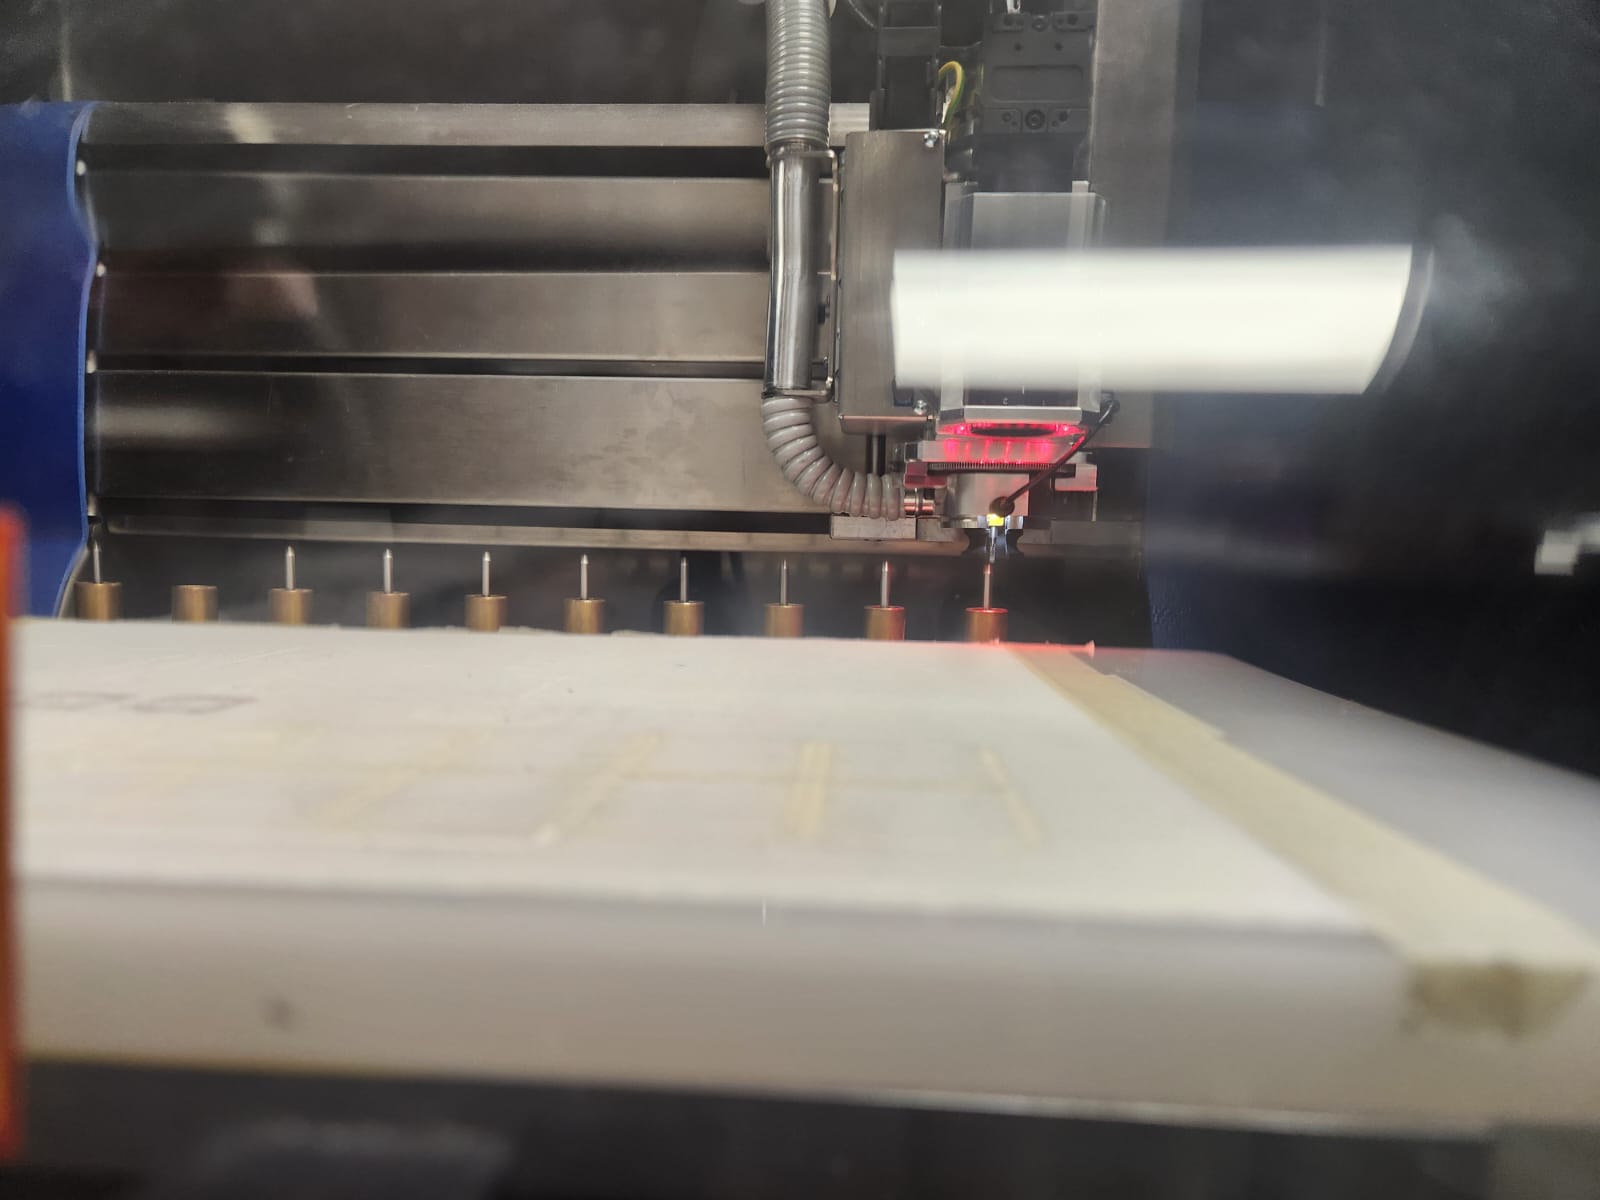
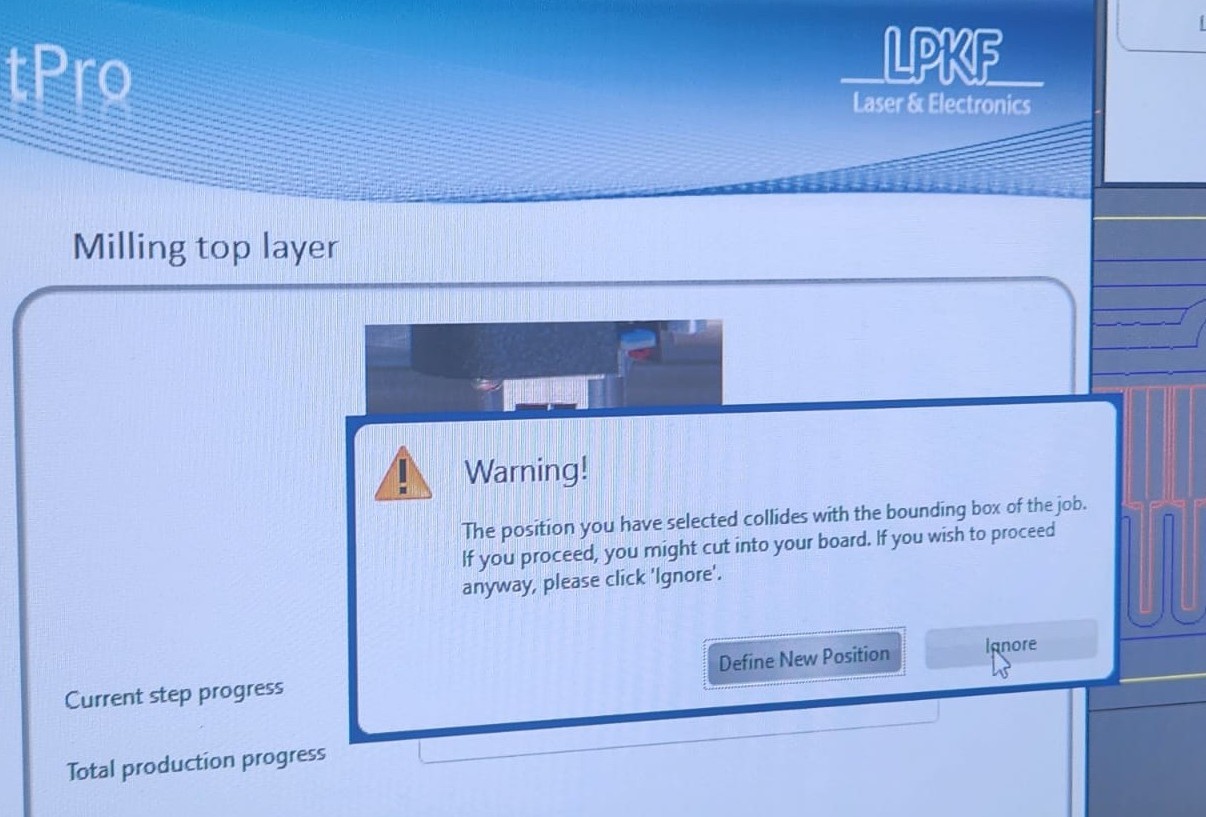
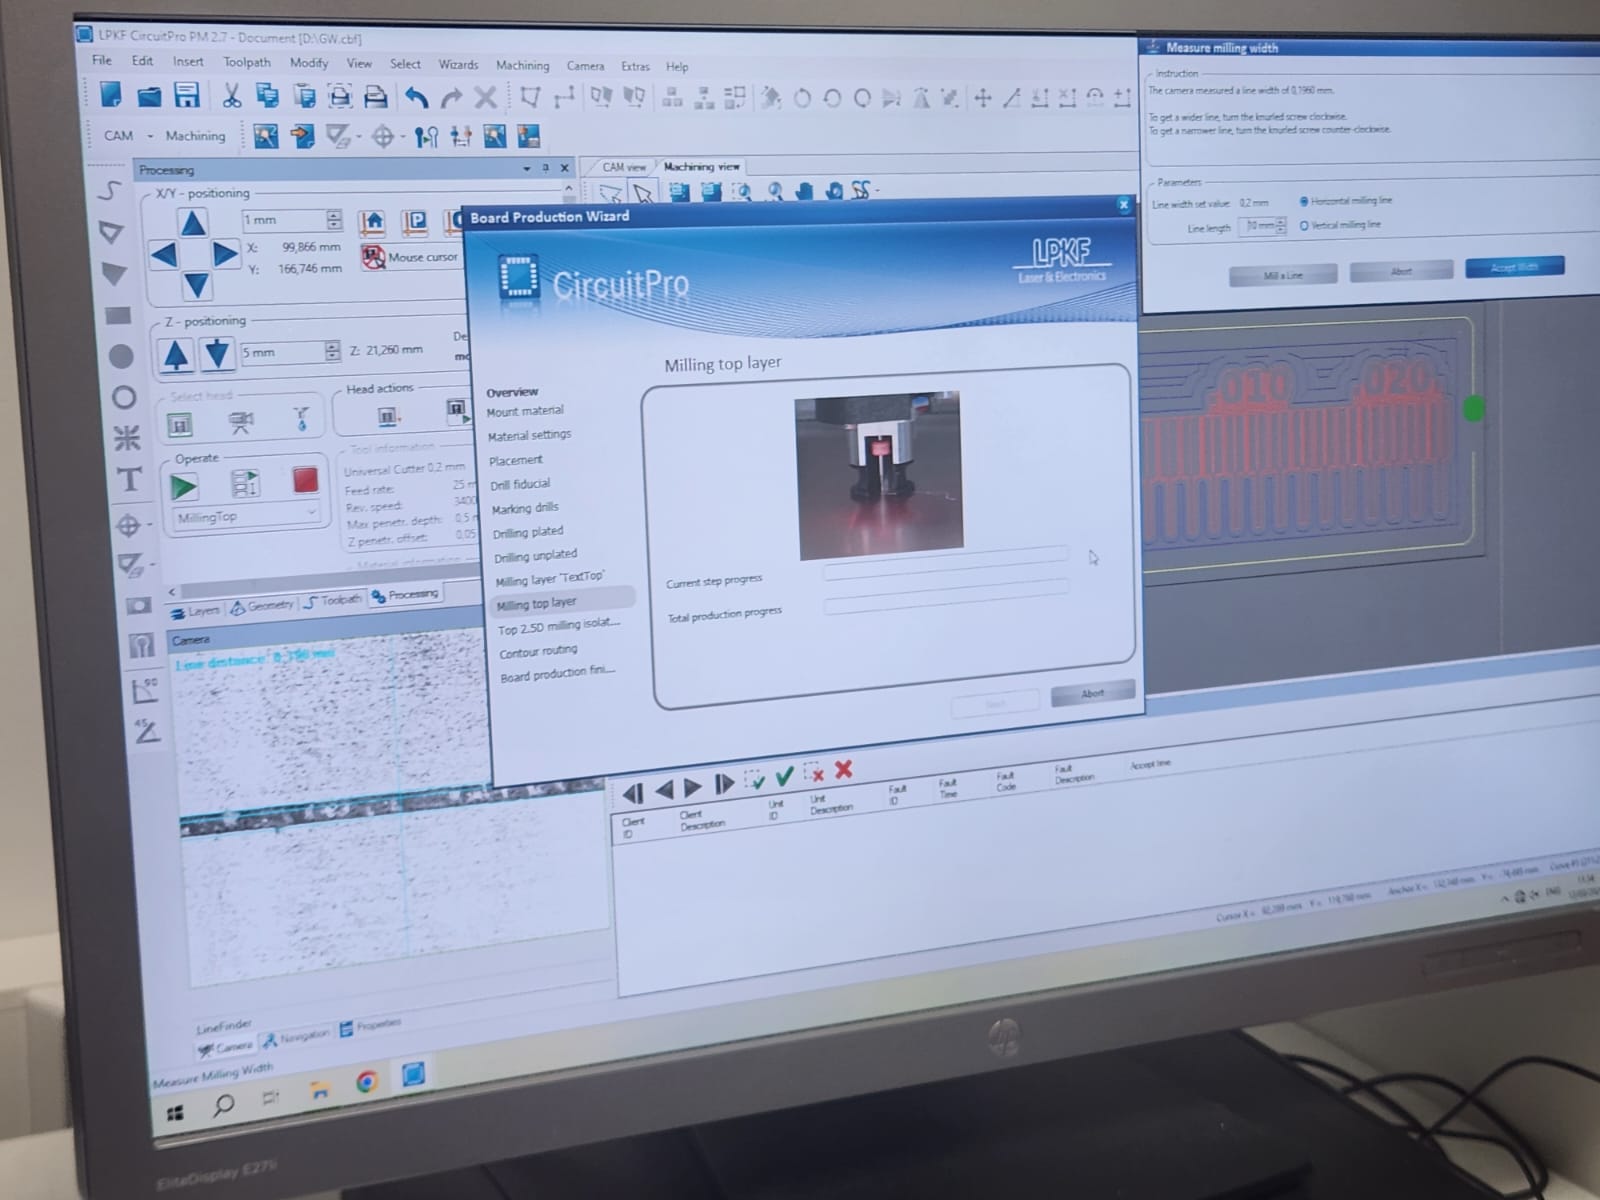
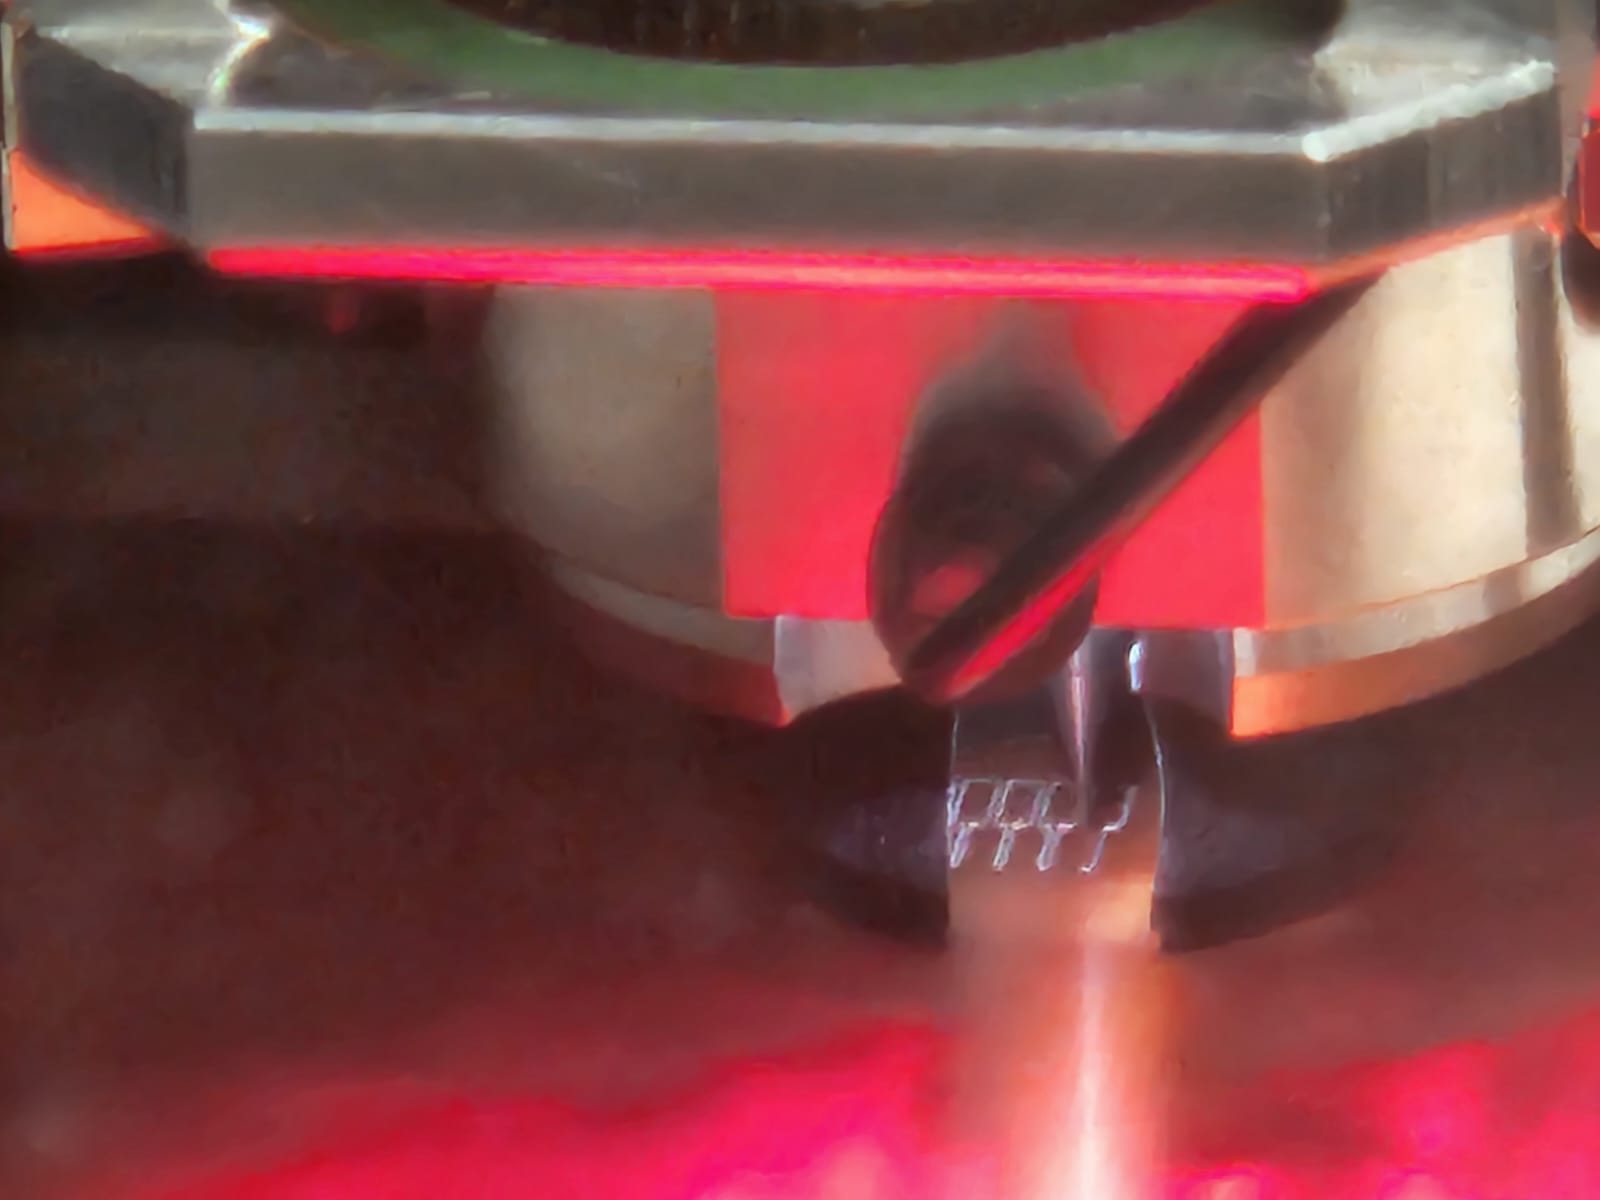
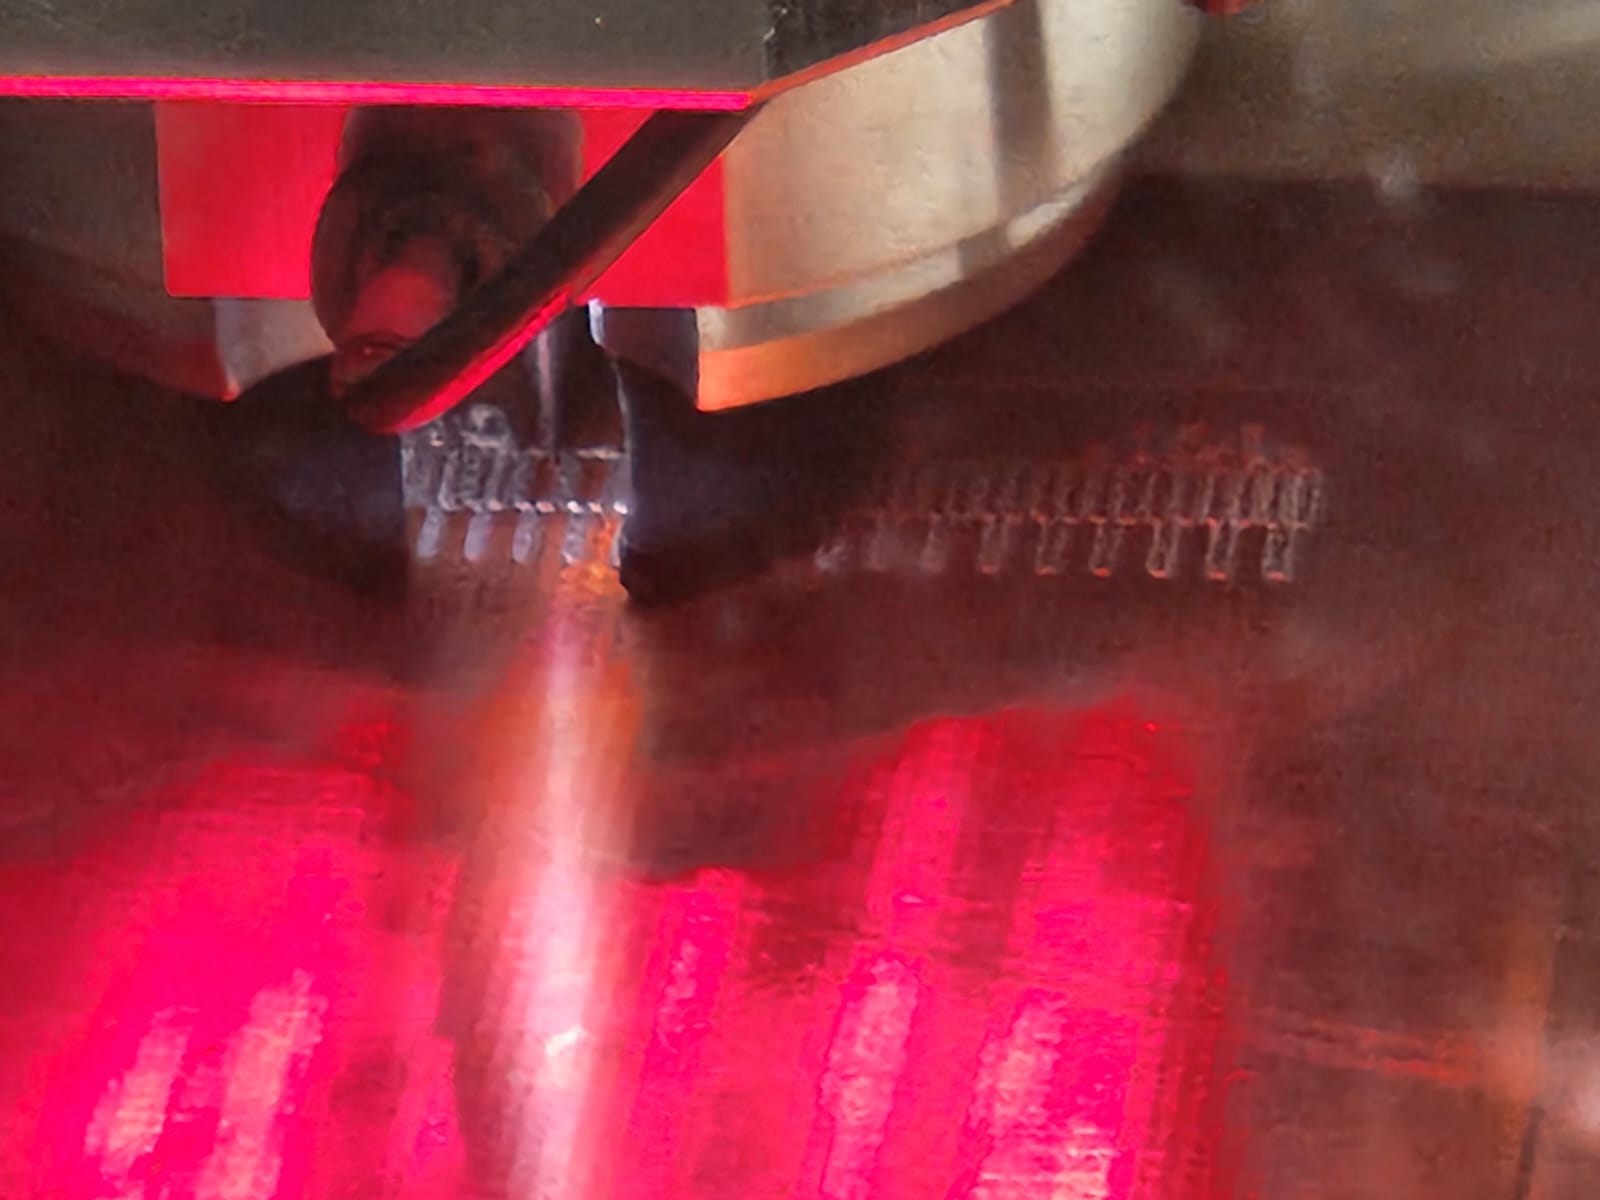
After set the milling bit to 0.2 mm, milling process started:
 |
 |
 |
 |
 |
 |
 |
 |
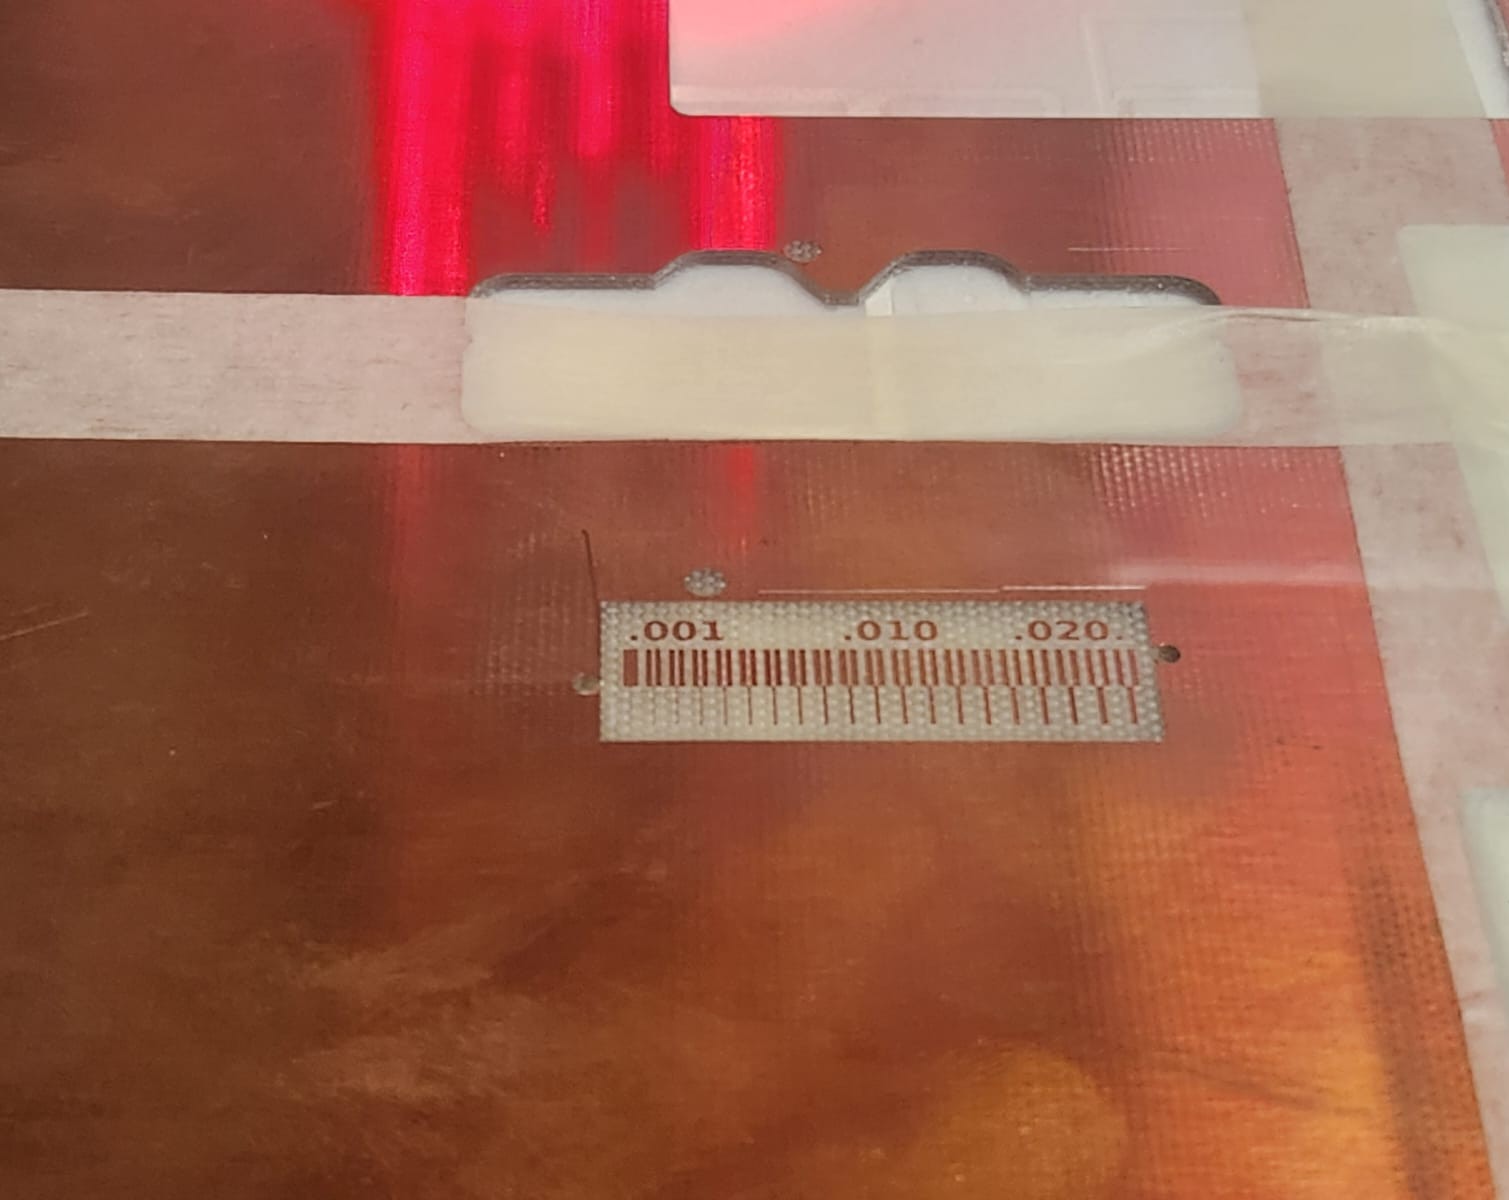
After milling the PCB, cutting or milling the outline or contour:
 |
 |
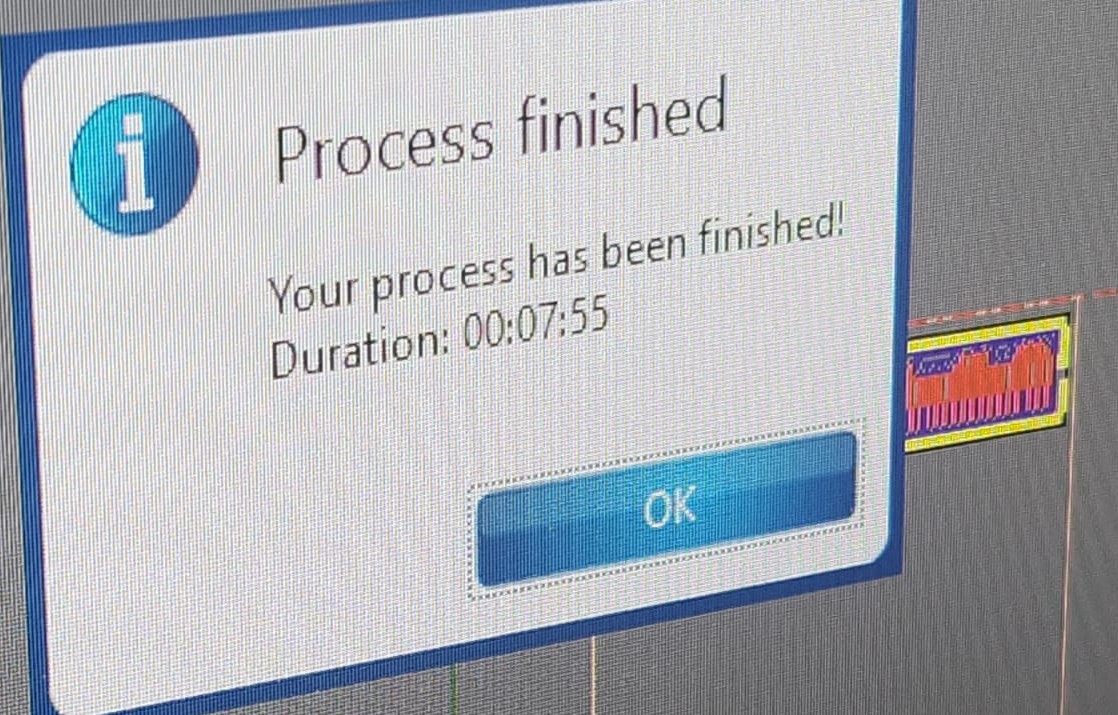
Milling processed just took 7.55 minutes, BUT Omid did documentation and it took 7.55 hours.
2 minutes took time to warm up of spindle motor:
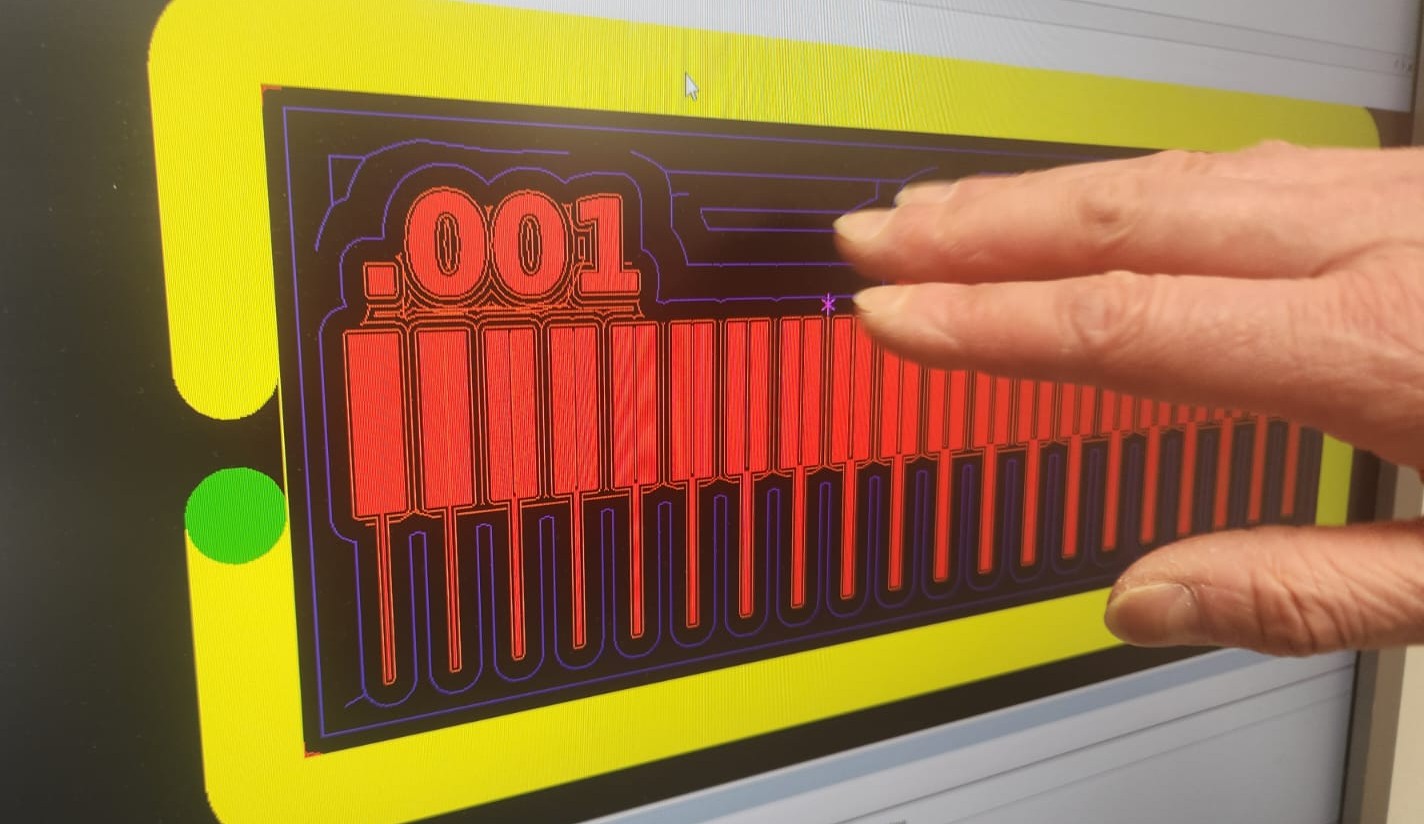
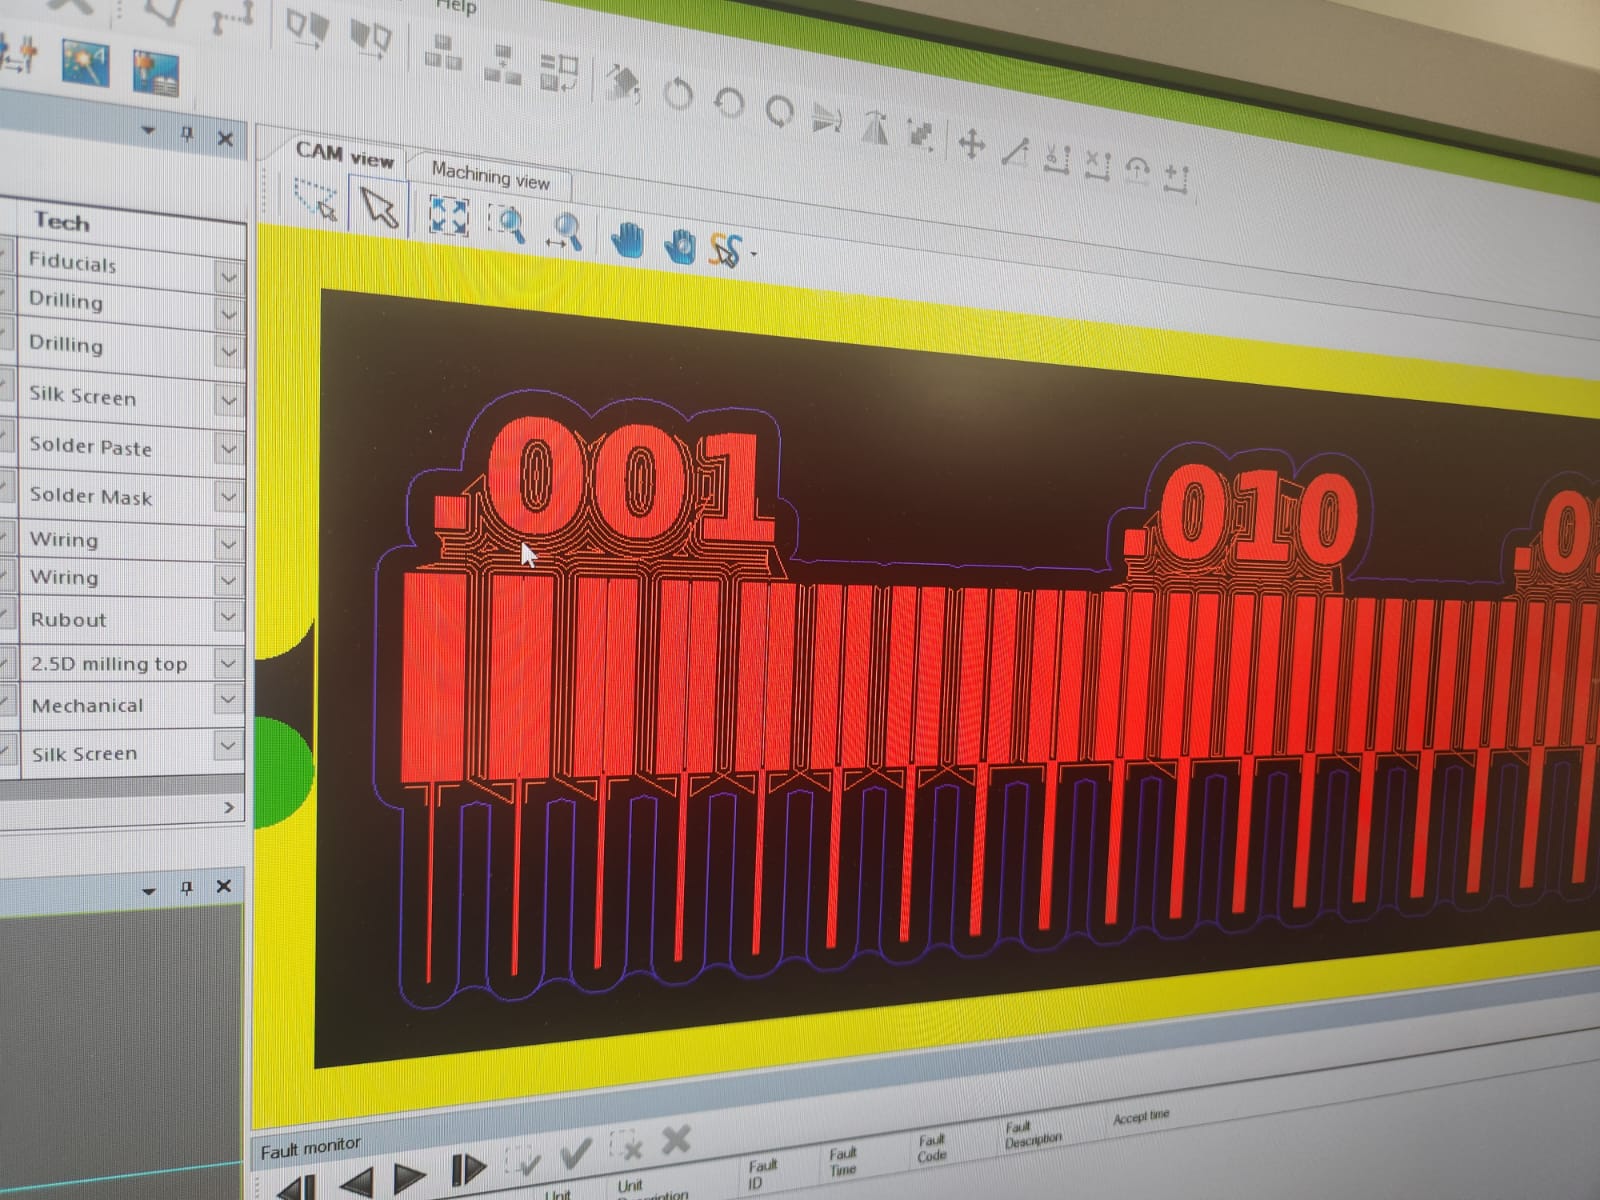
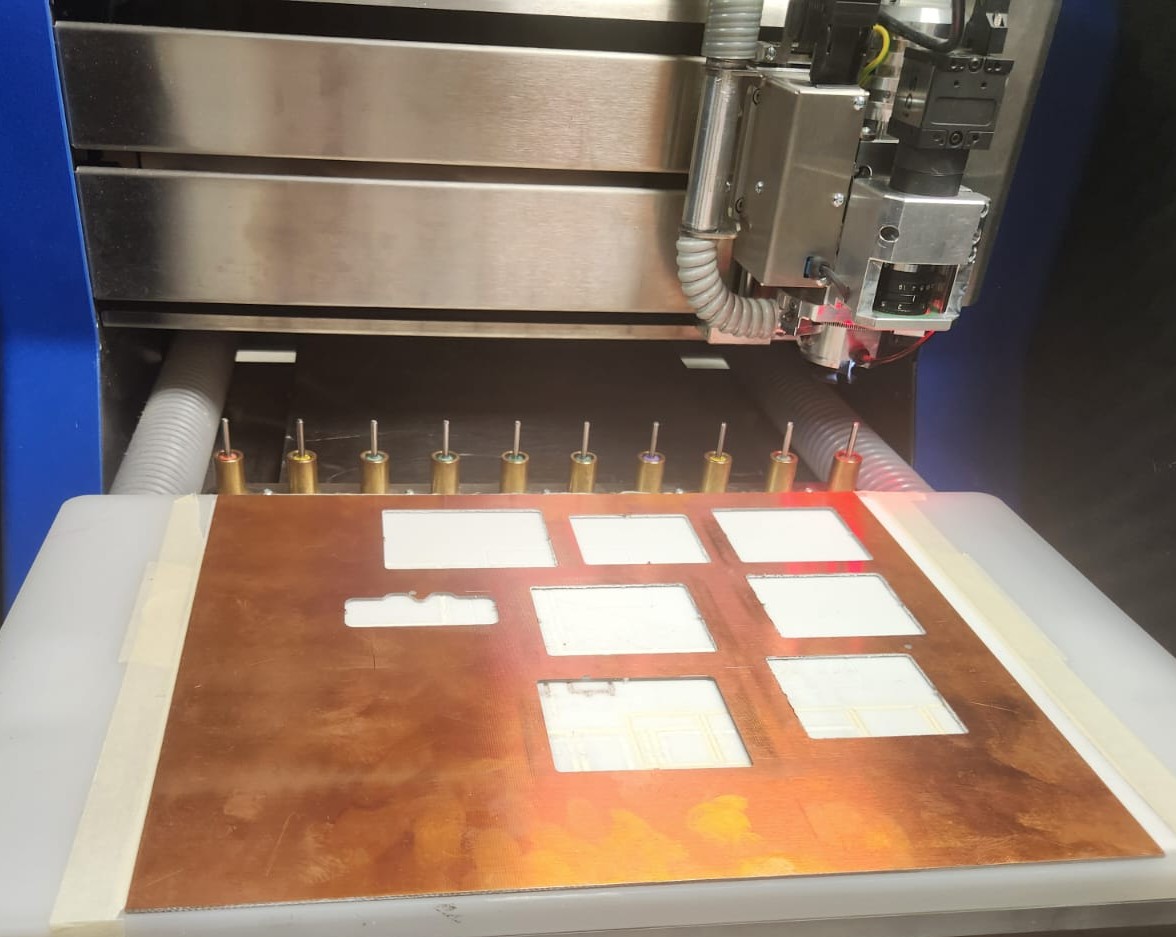
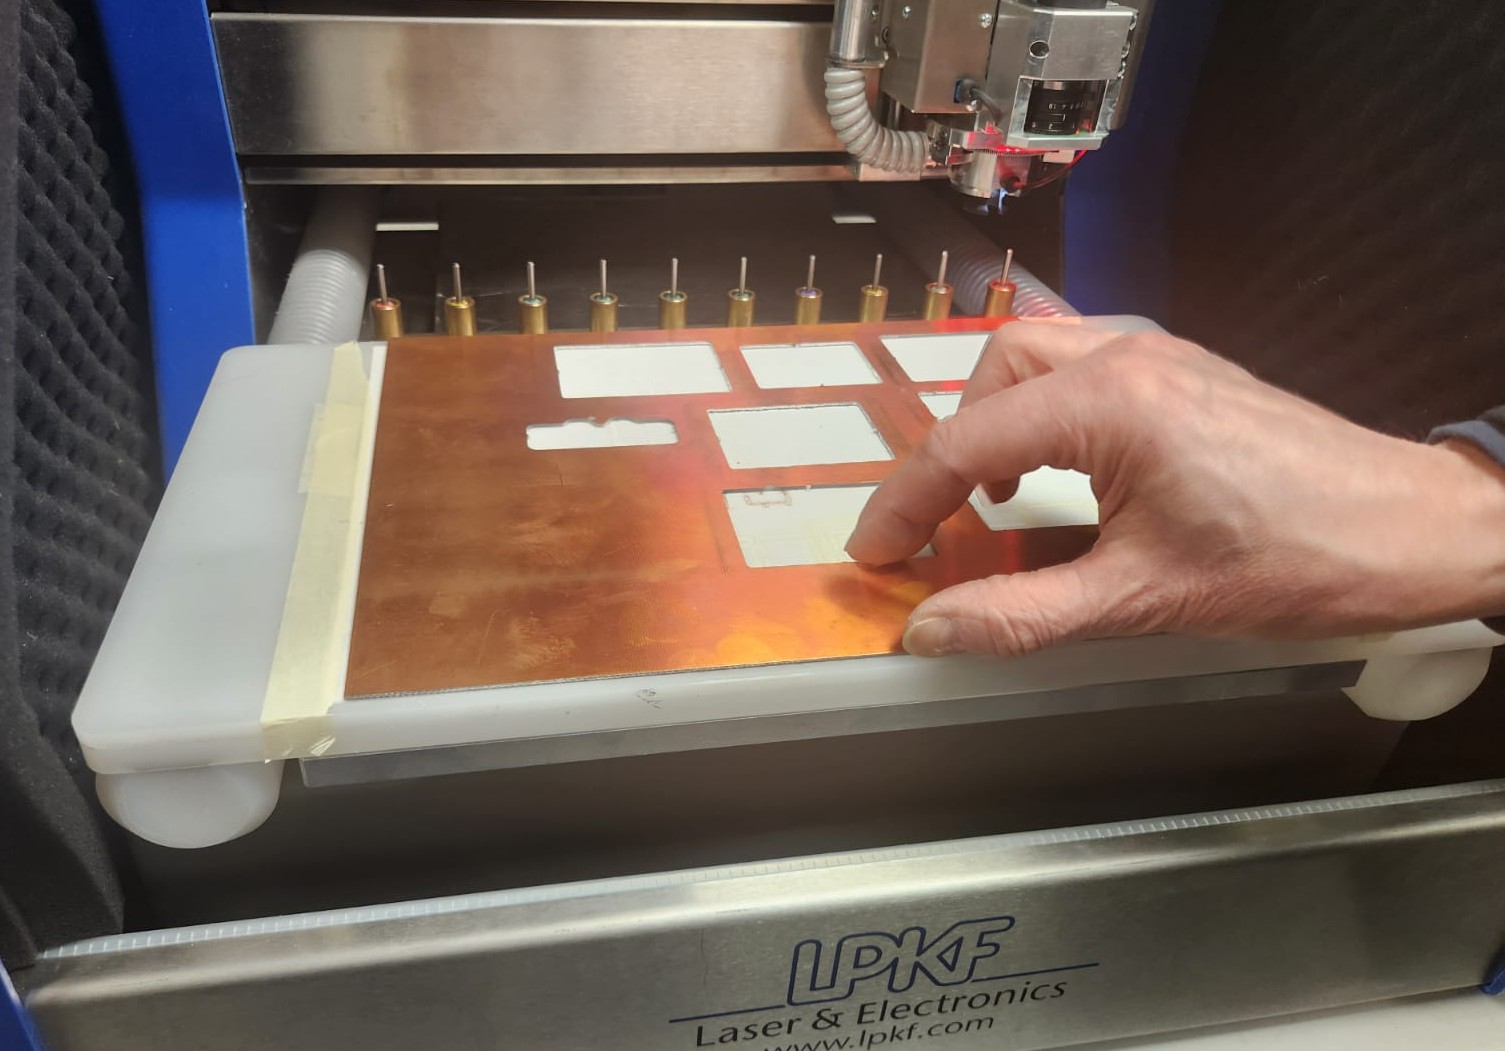
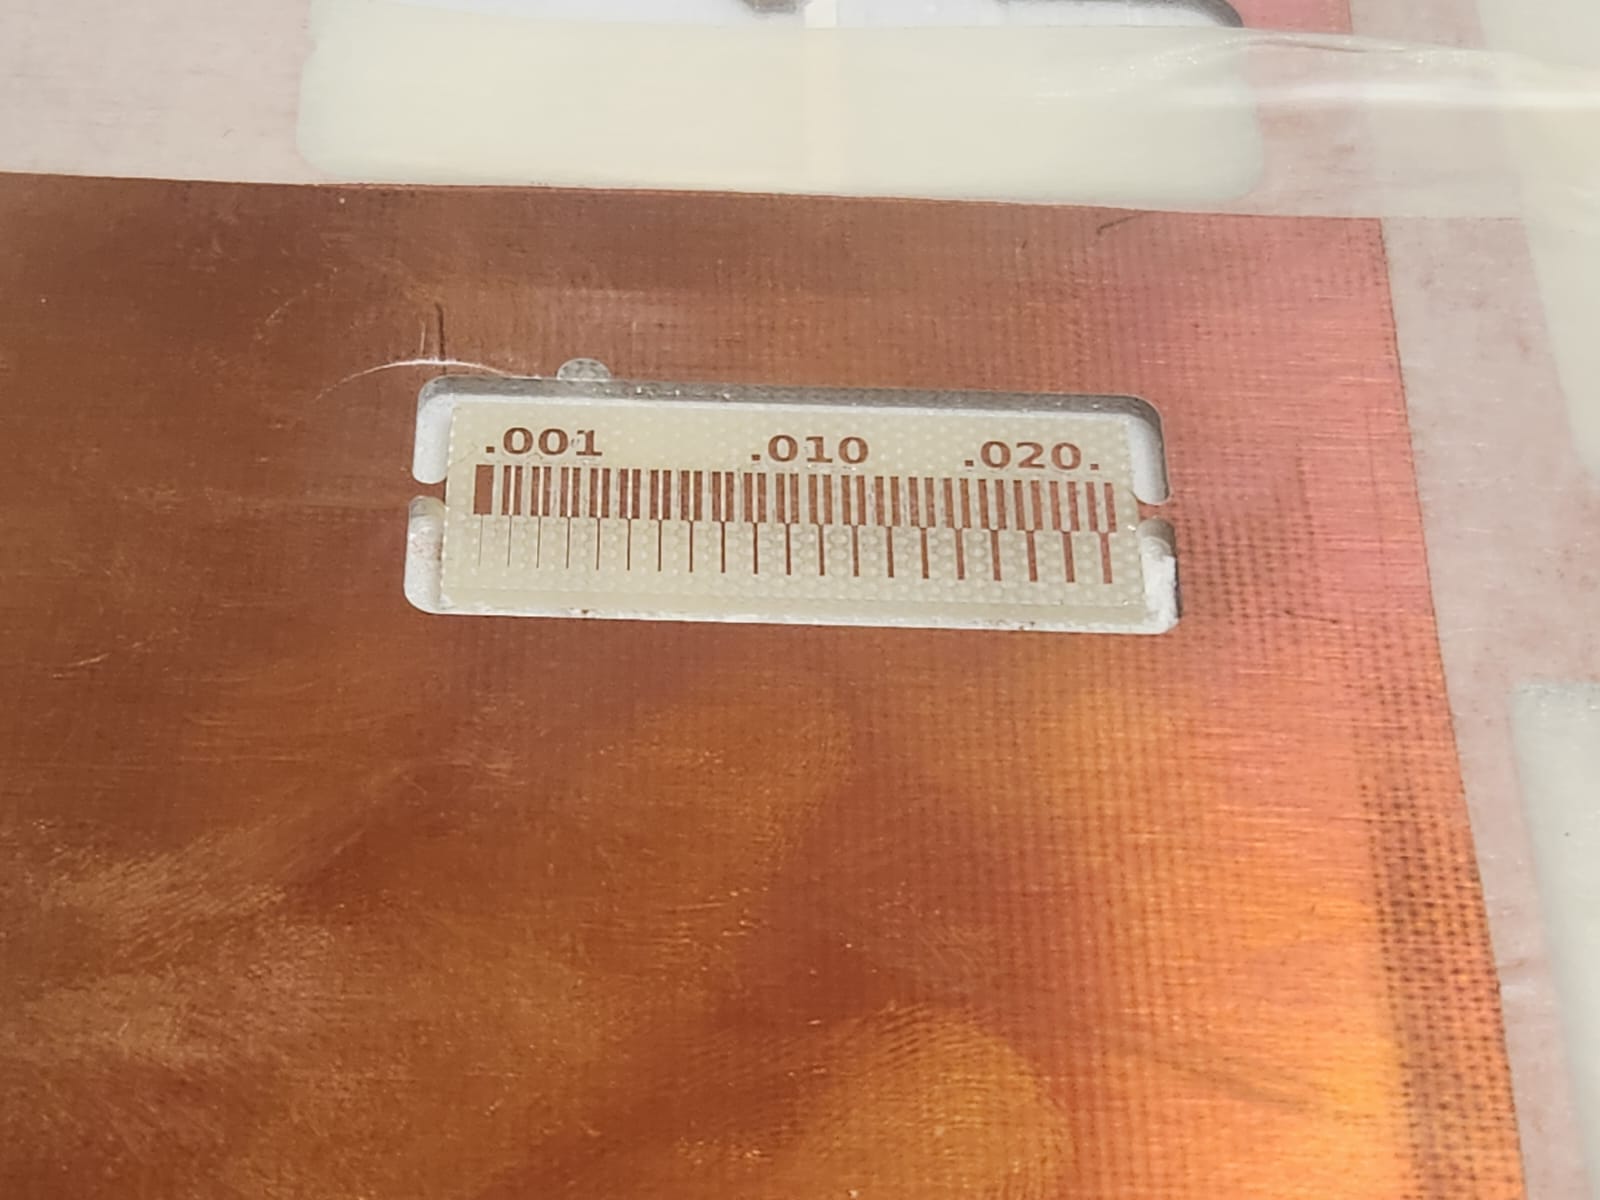
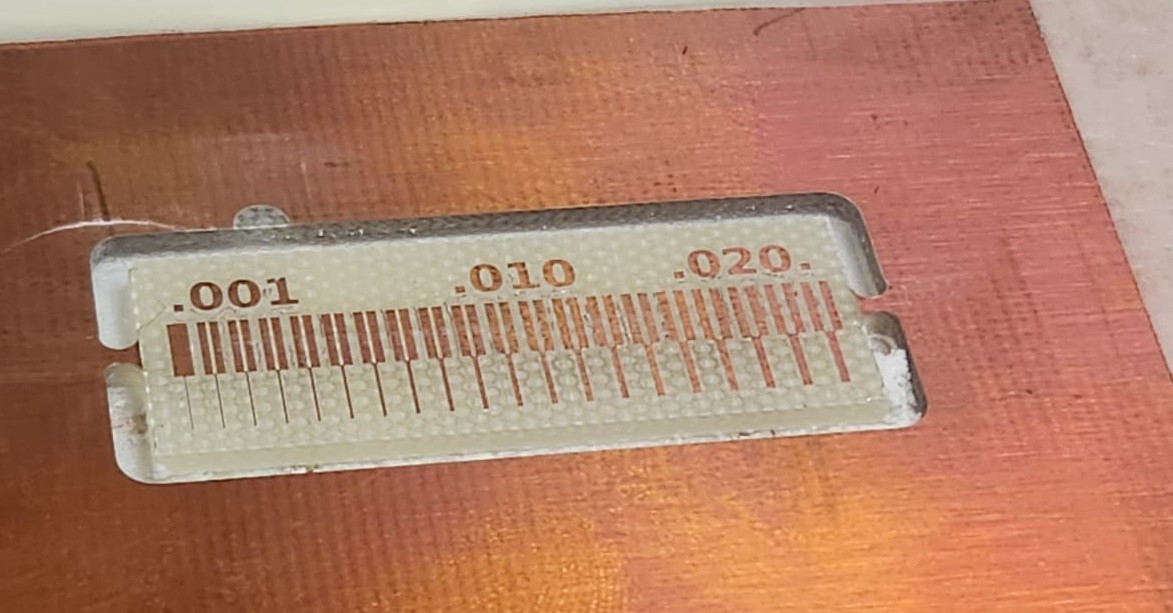
And this our PCB board:
 |
 |
Process of submitting a PCB design to boardhouse
From our local lecture, Antti introduced the PCBshoper website, which is really nice to chose the company for your needs.
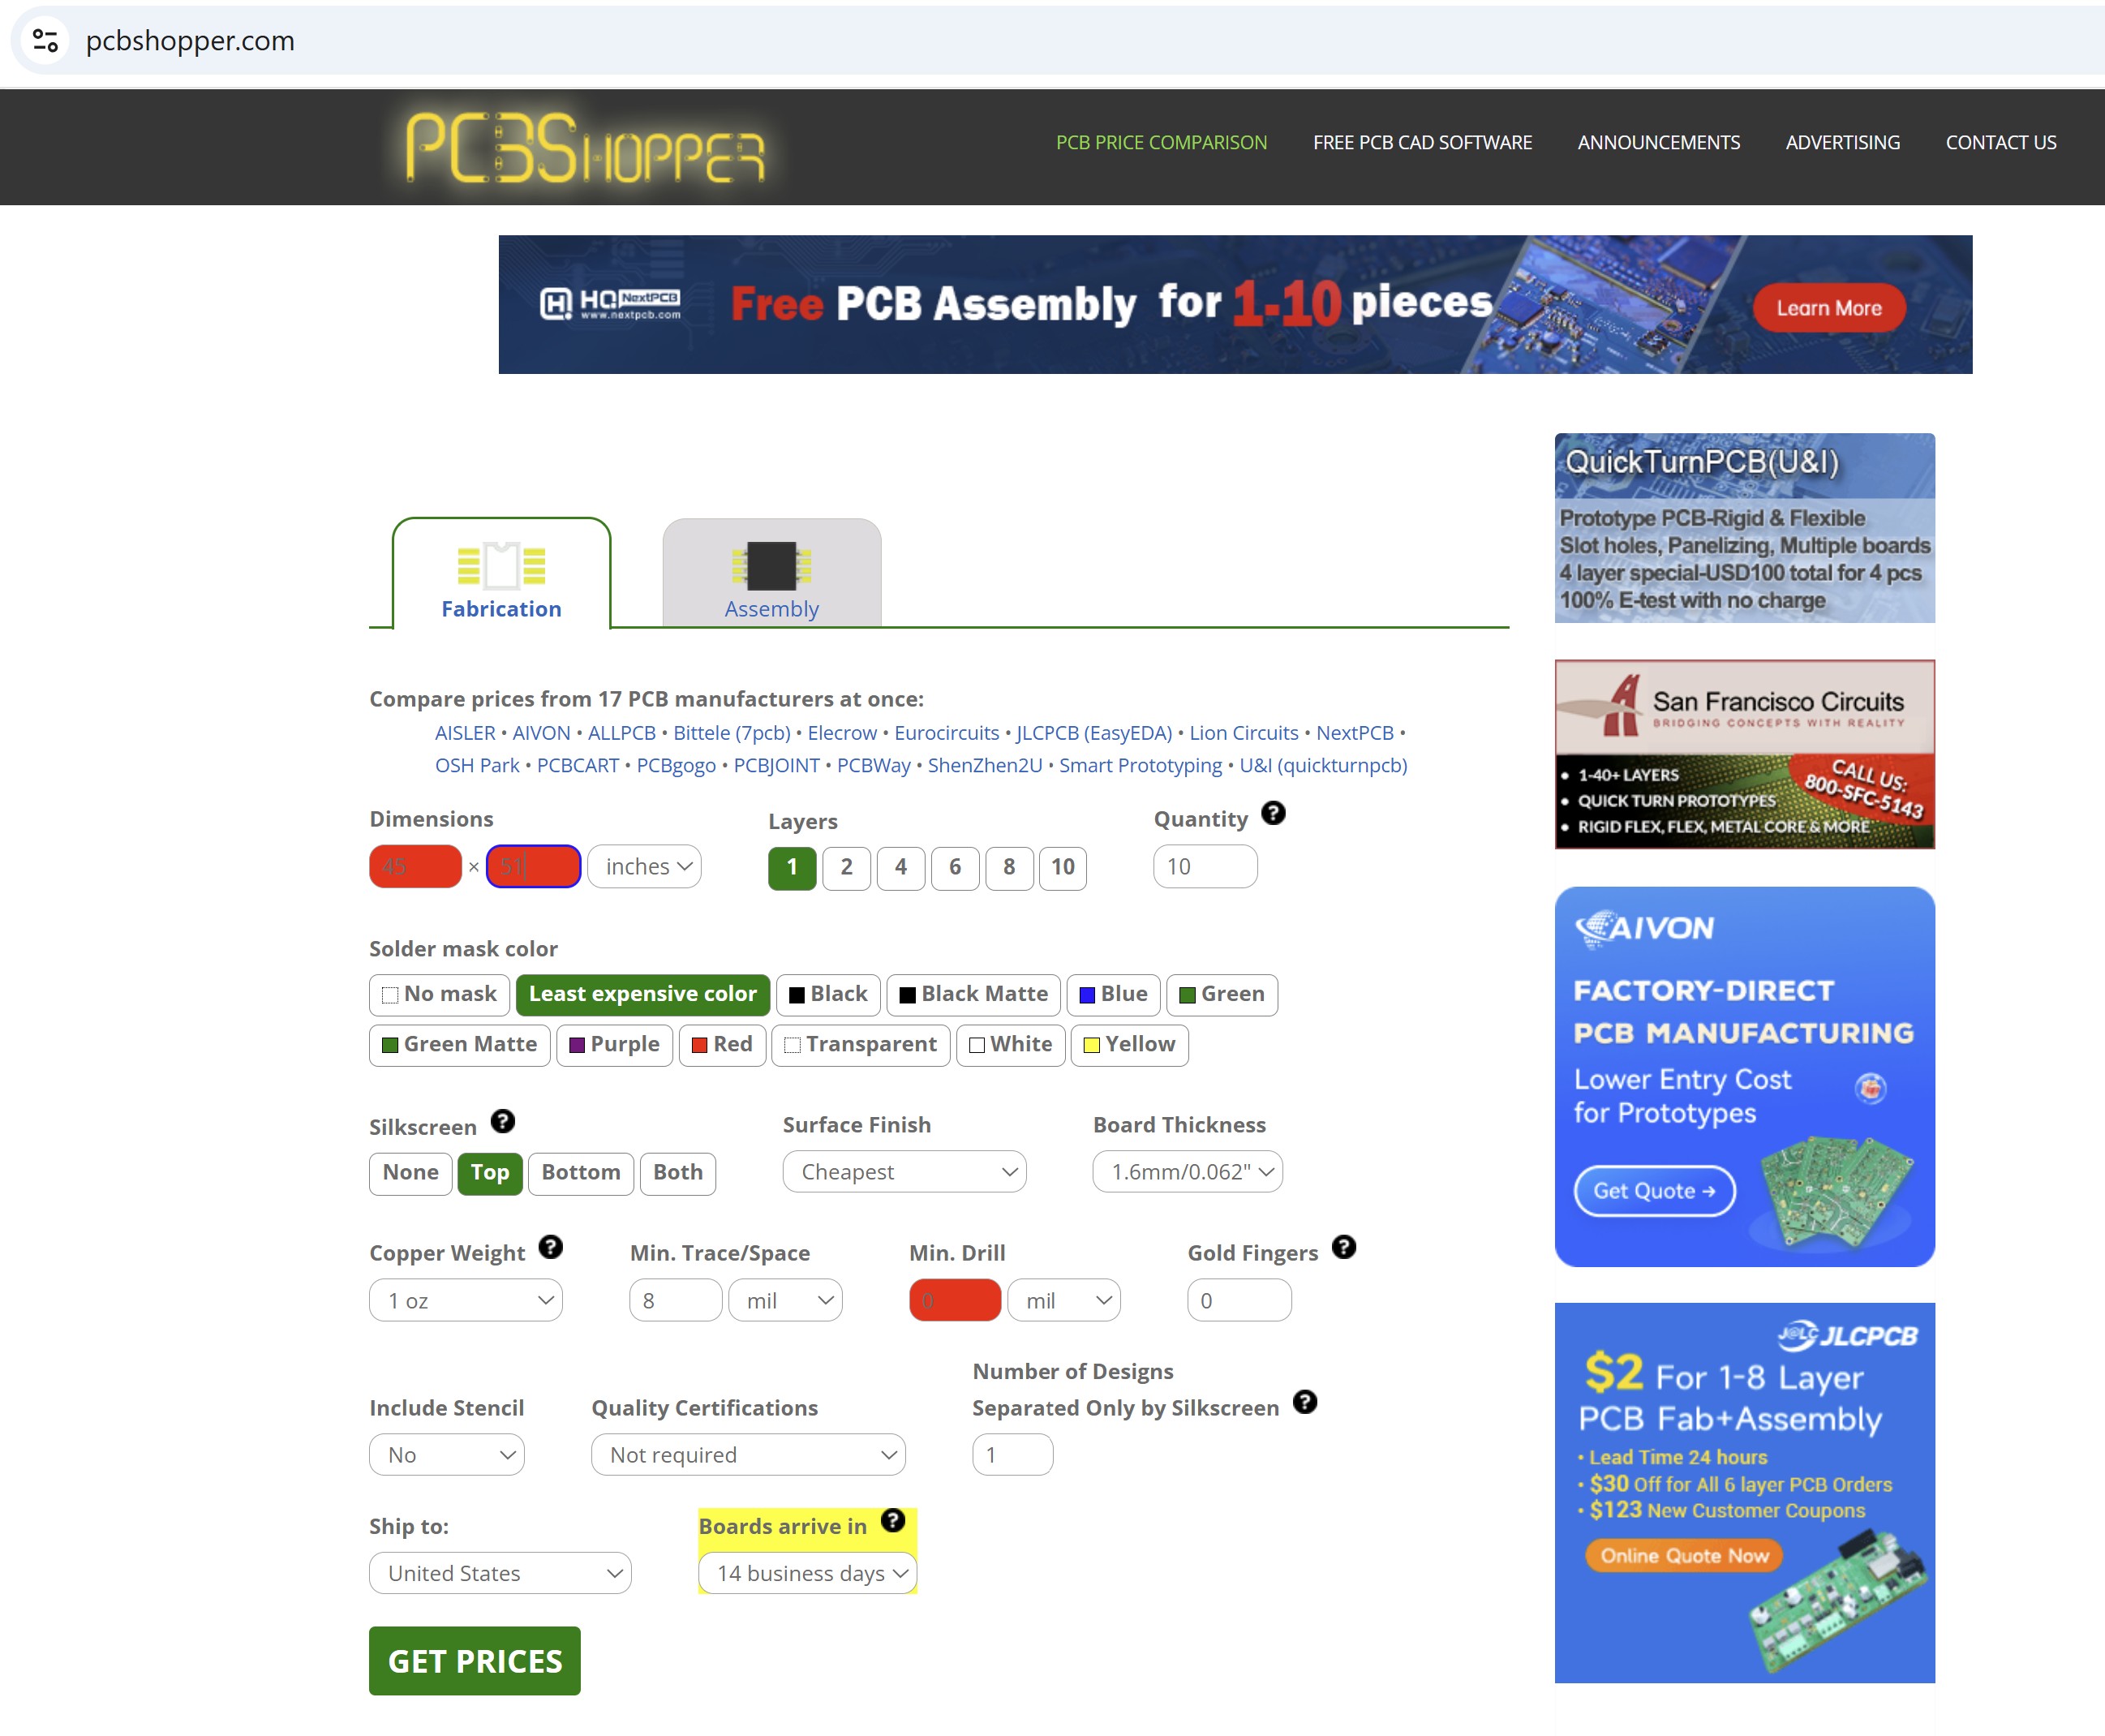
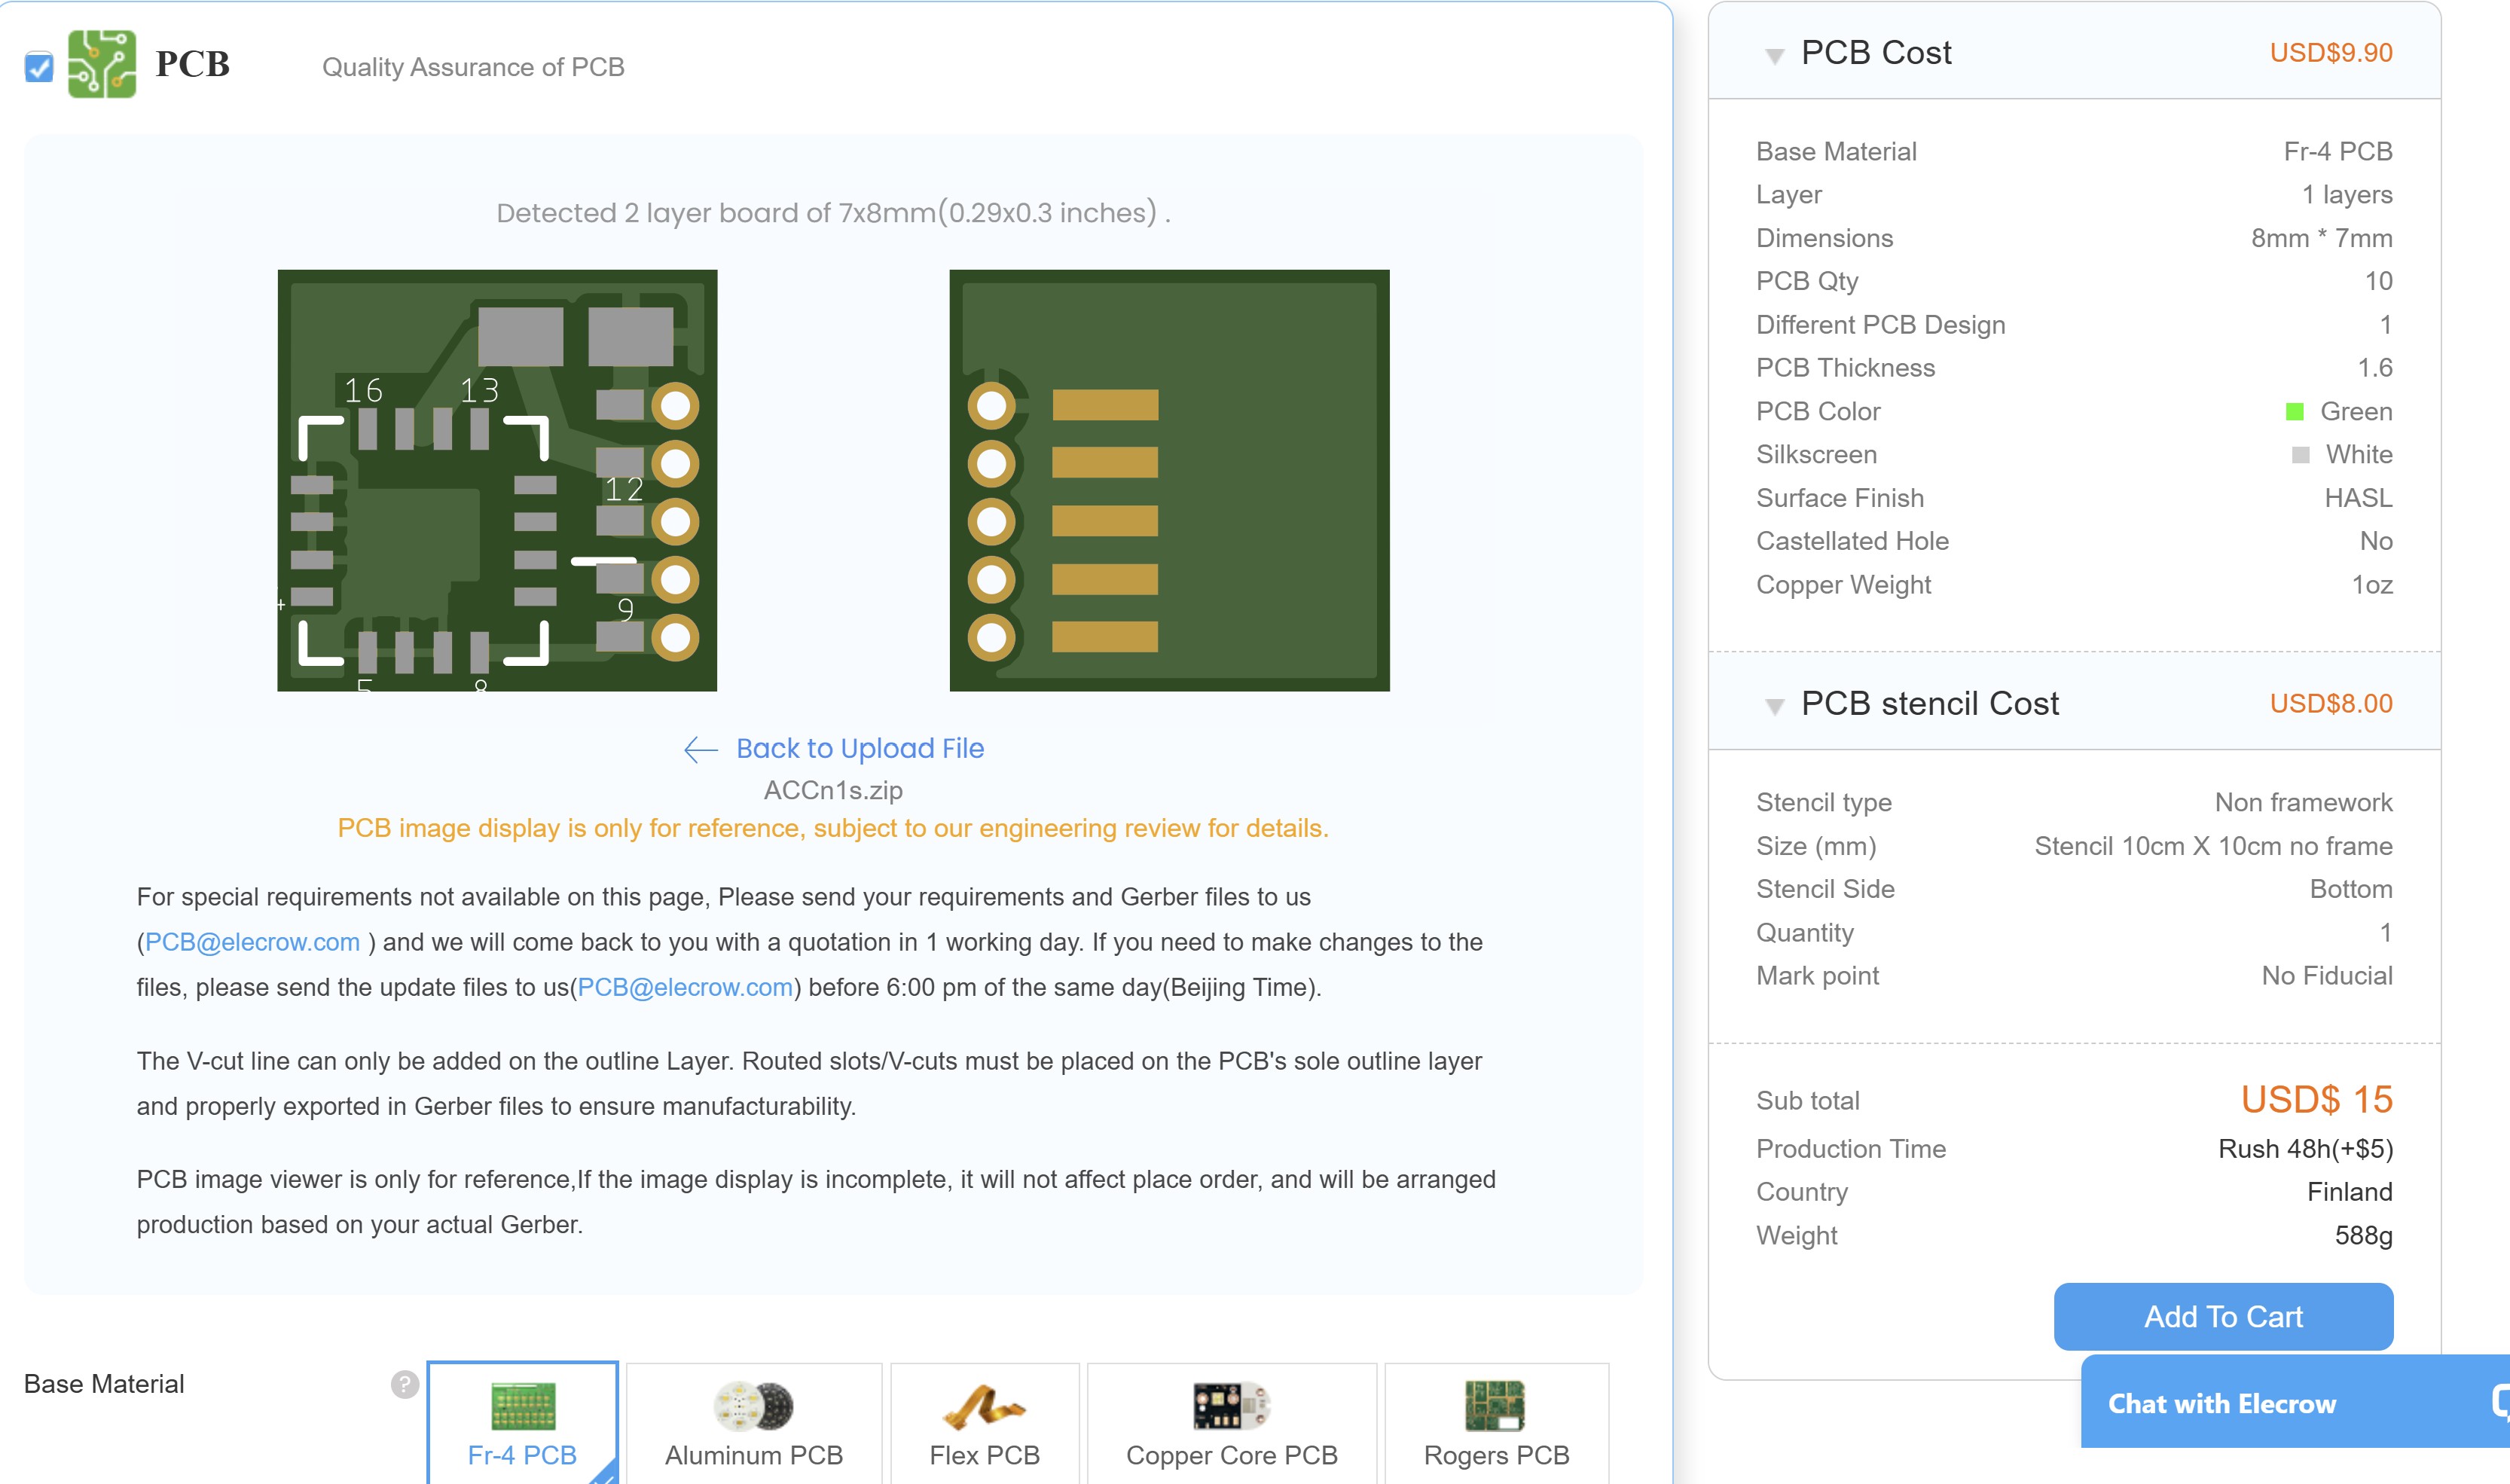
As it can be seen in the above image, all the board information needs to be filled, but we did not put the exact dimension of the board.
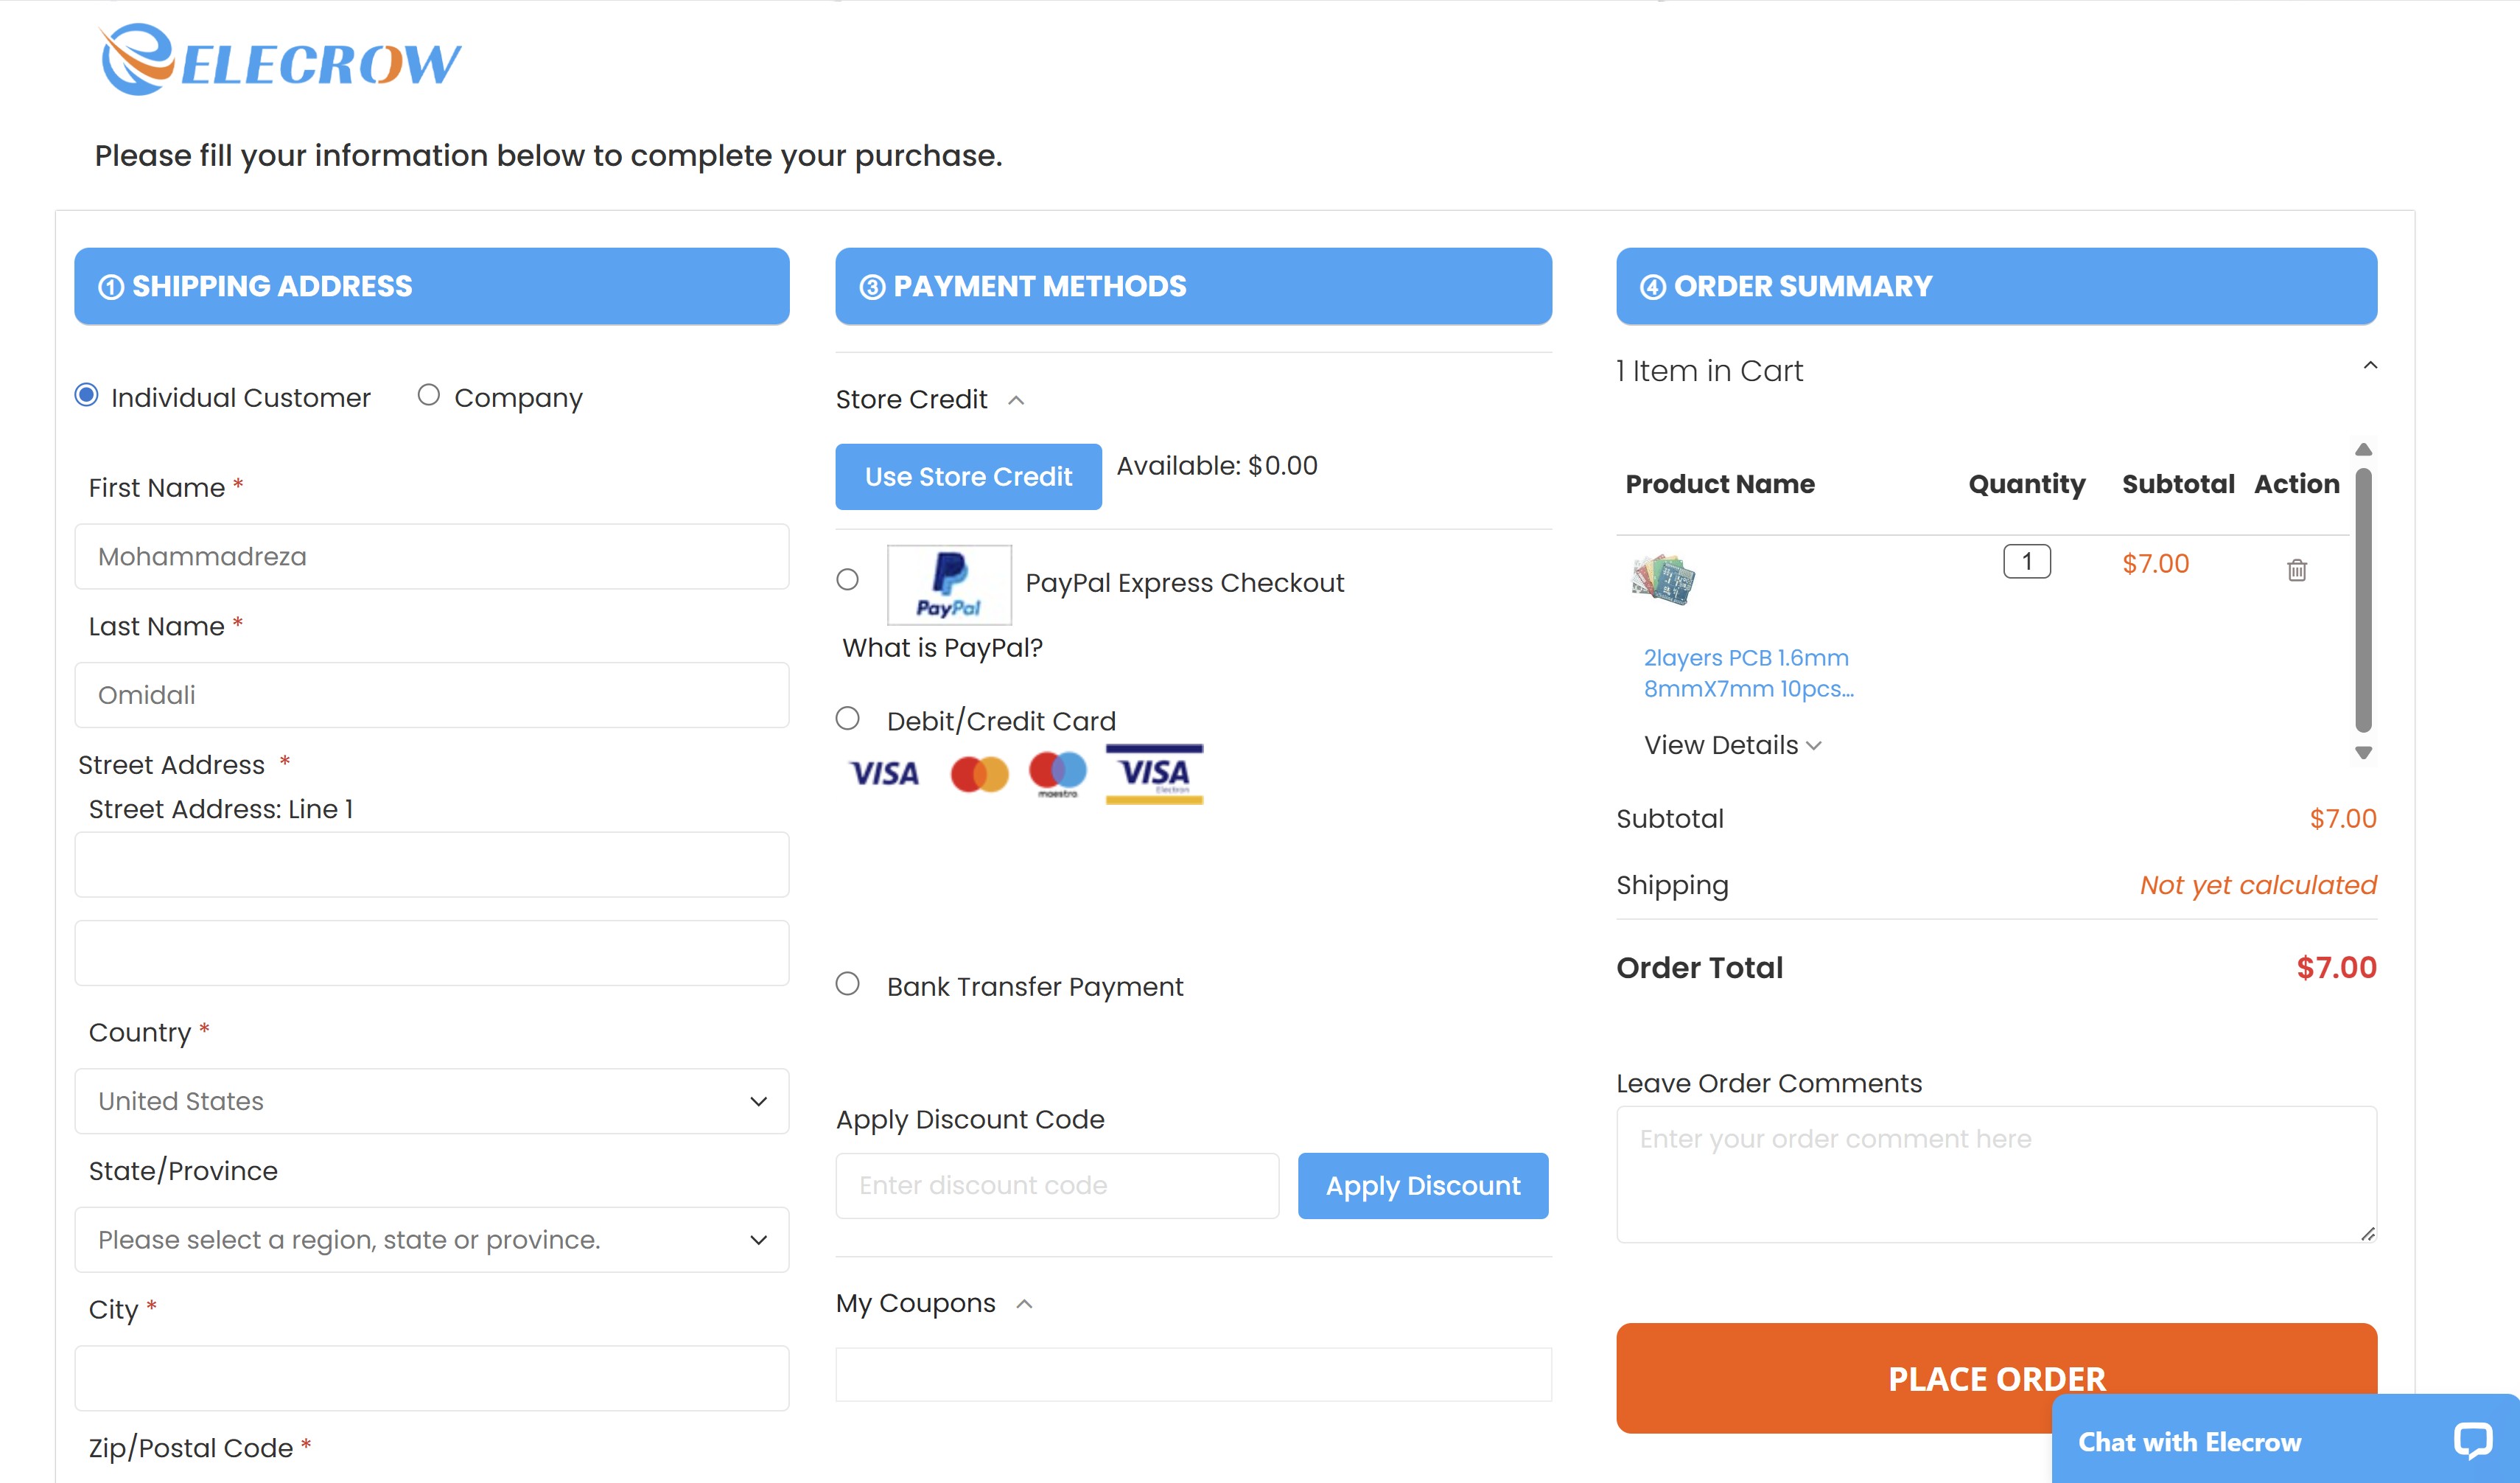
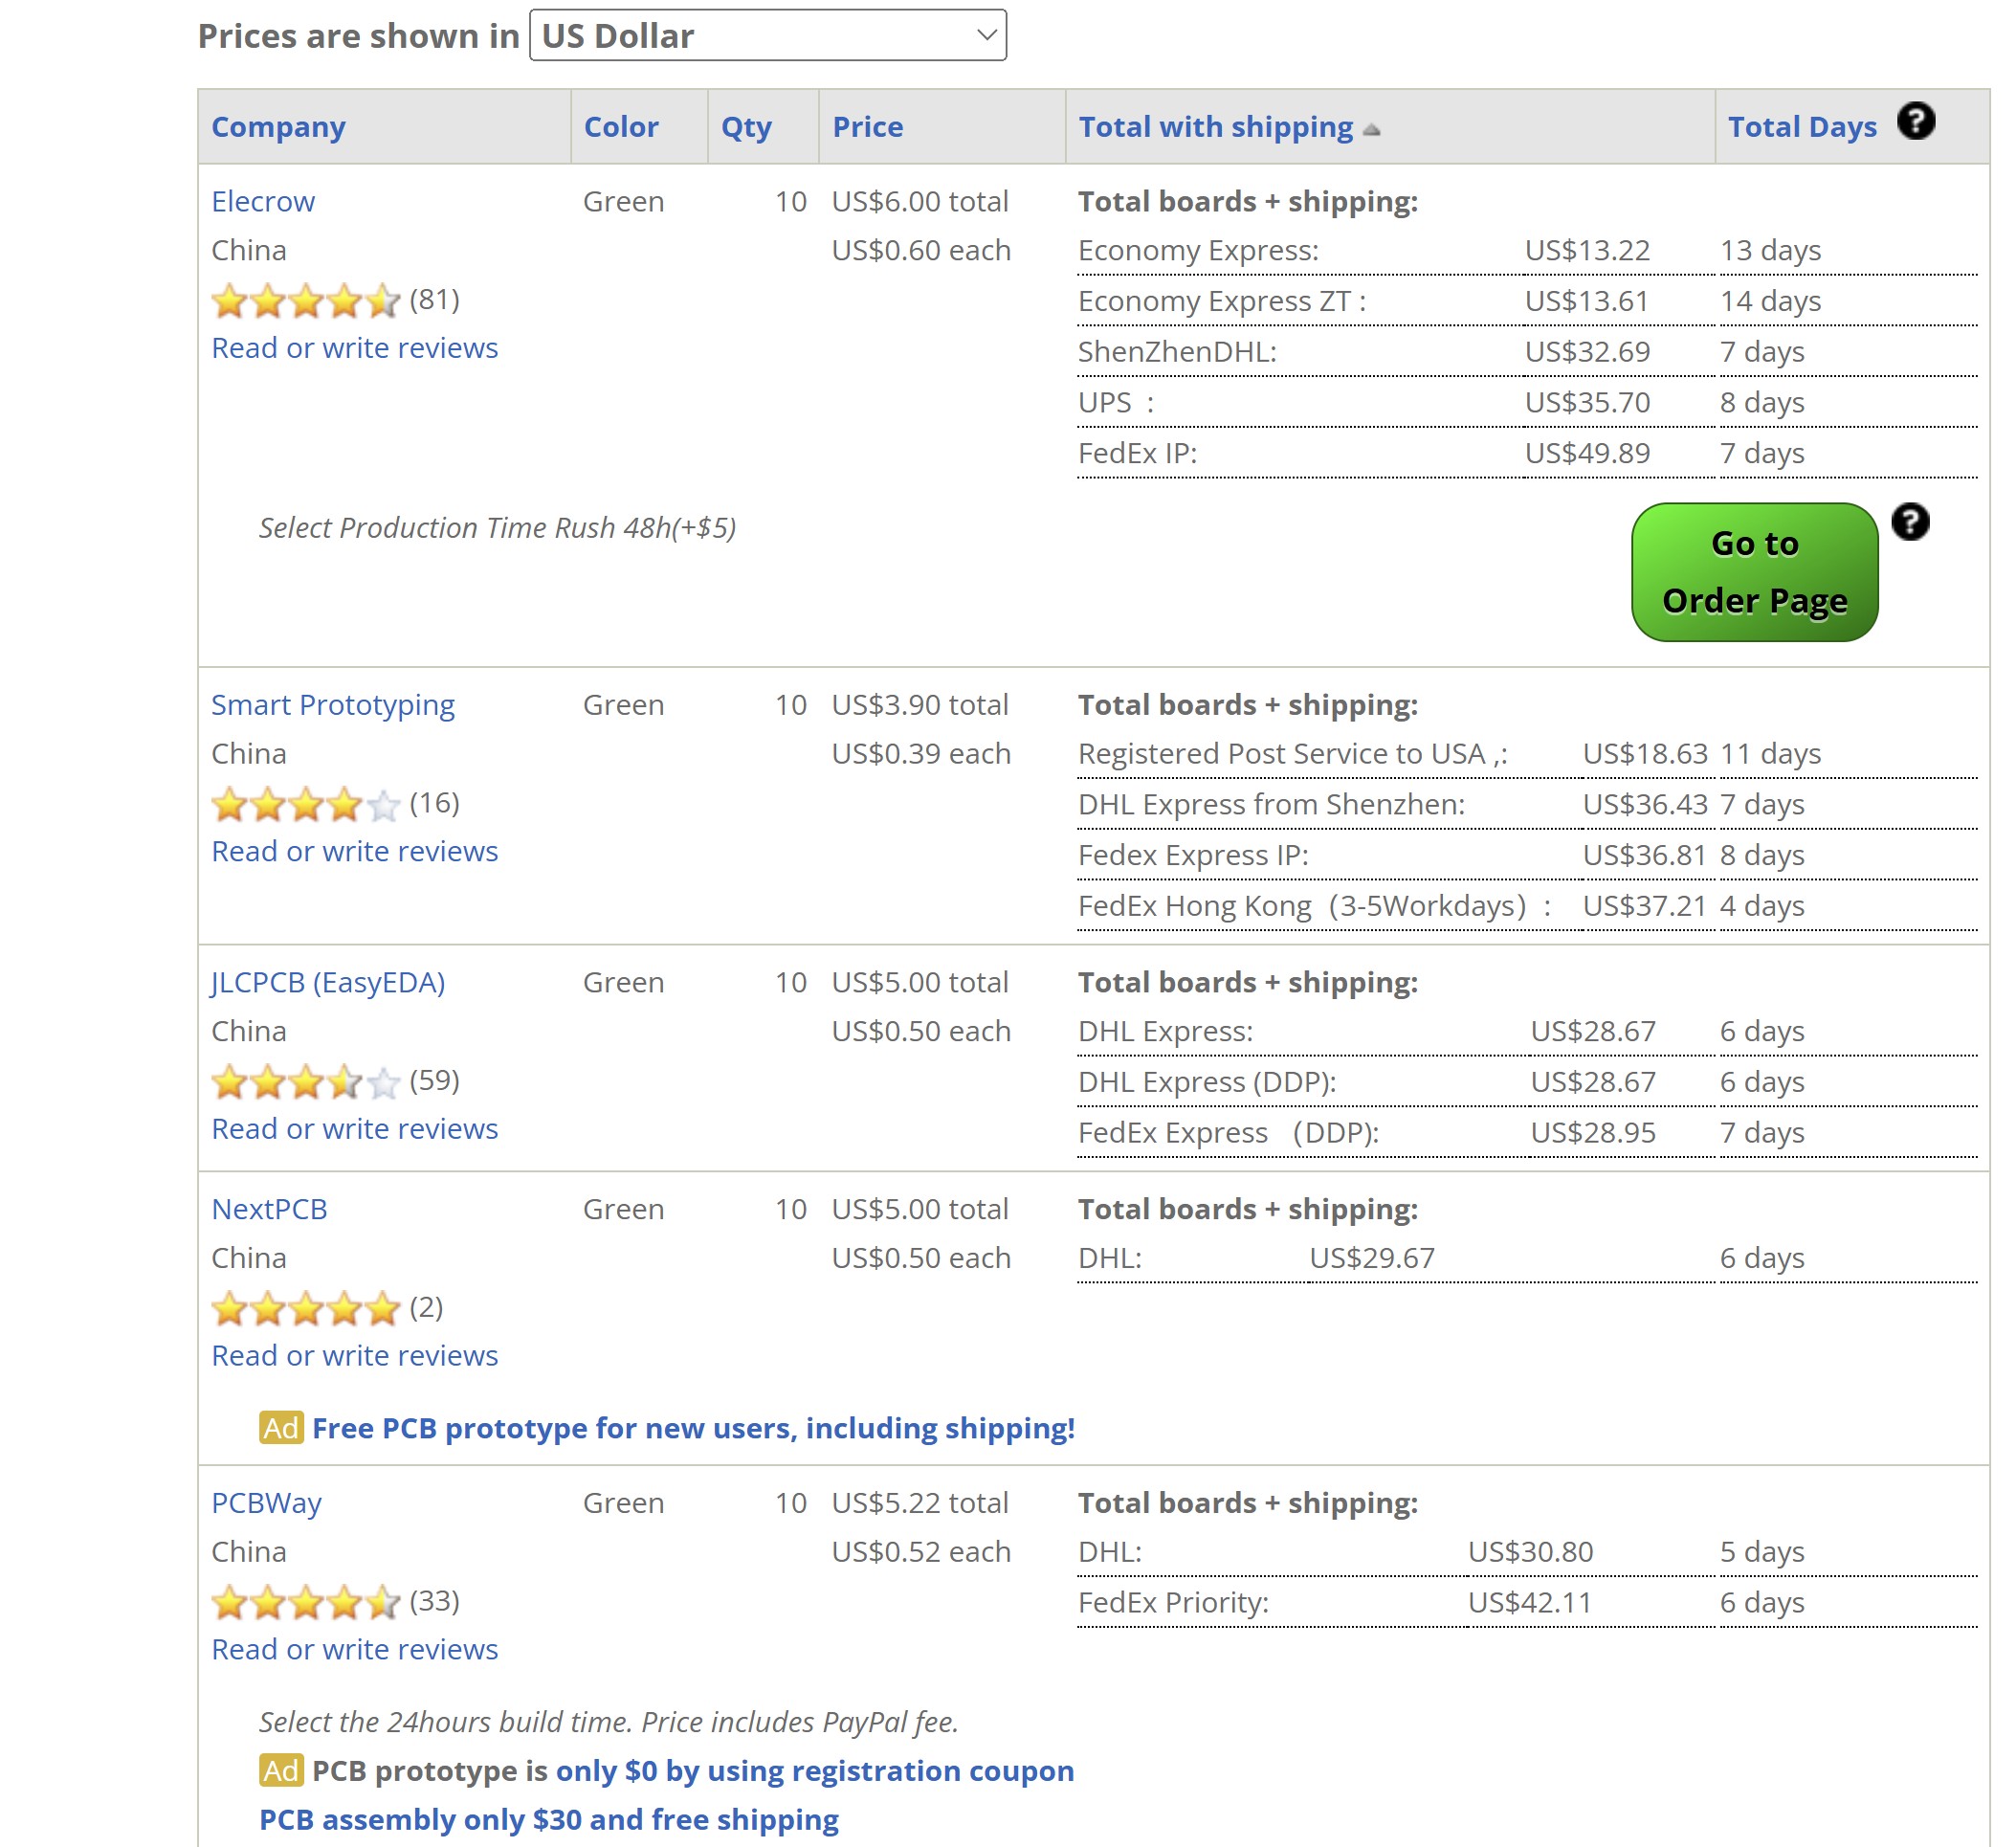
Then we just review the price of PCB from different companies and delivery time. We selected the elecrow company.
Then we uploaded the greber file as in one ZIP file.
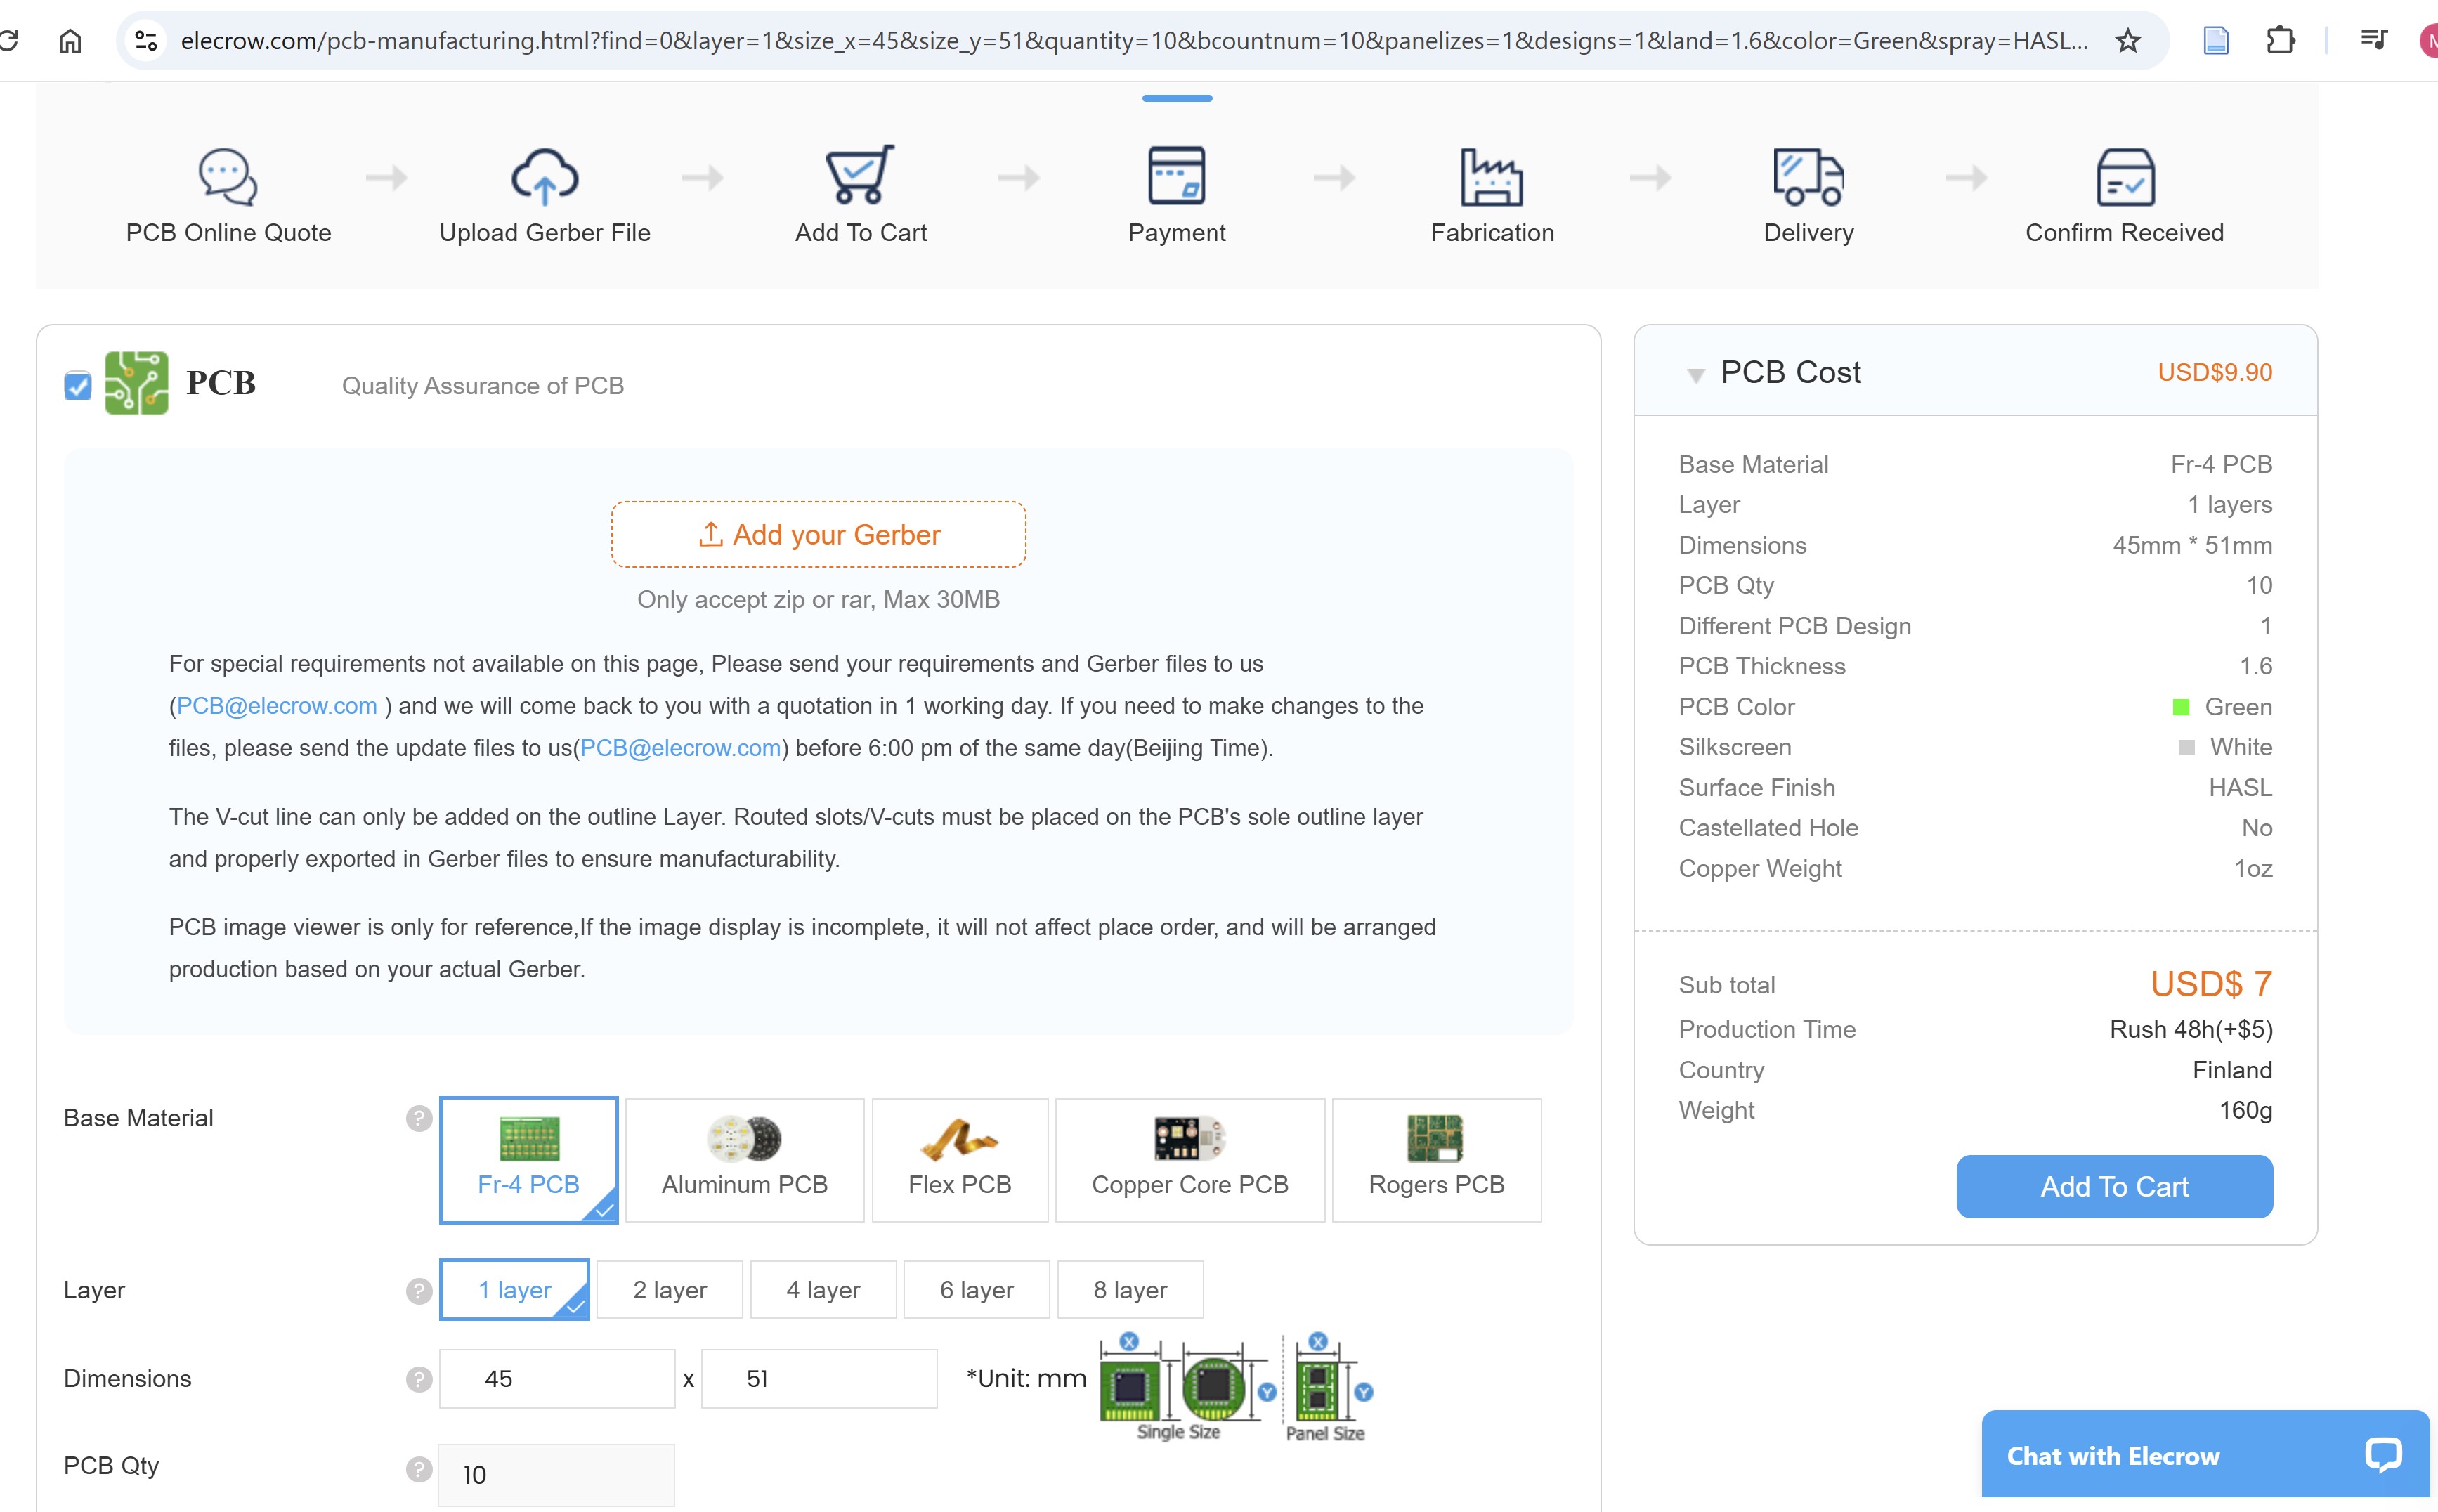
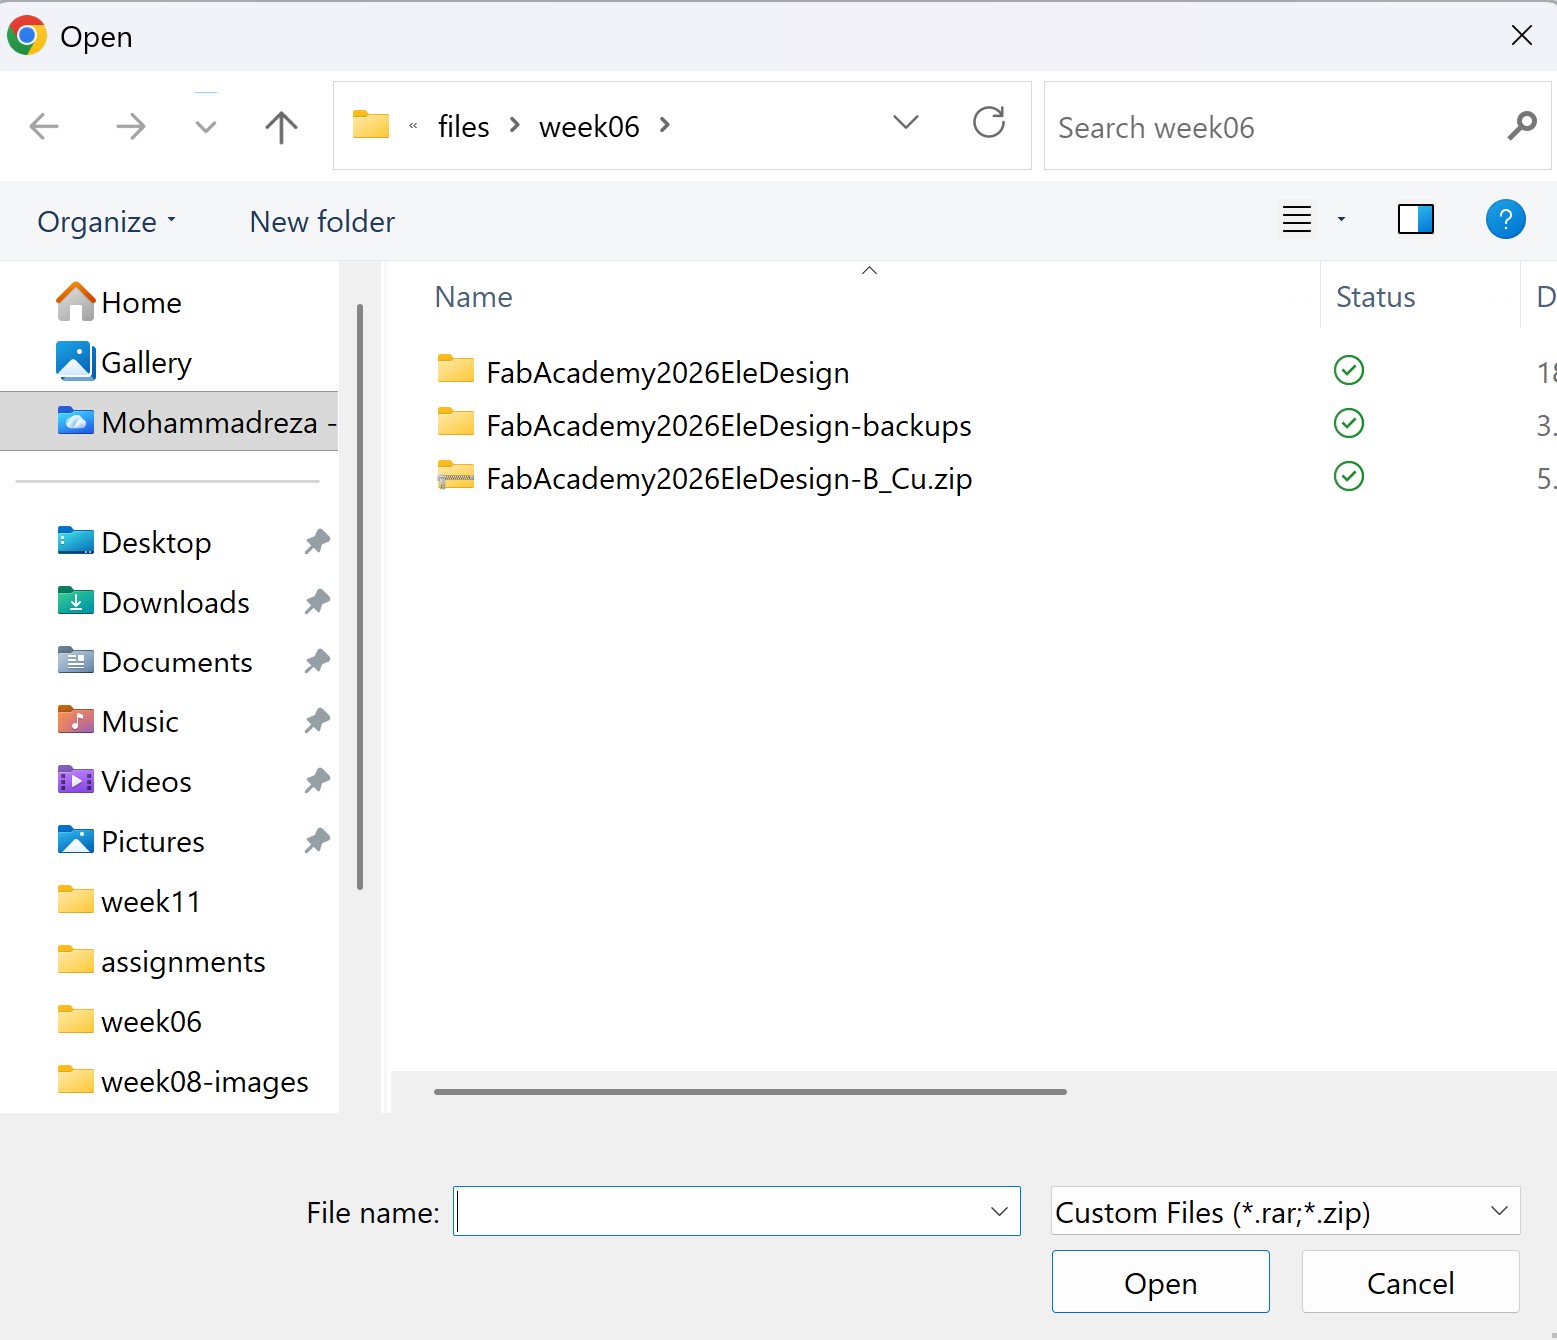
After uploaded, the board number of layers, and dimension appeared. Our board did not have any drill, so there was an error message:
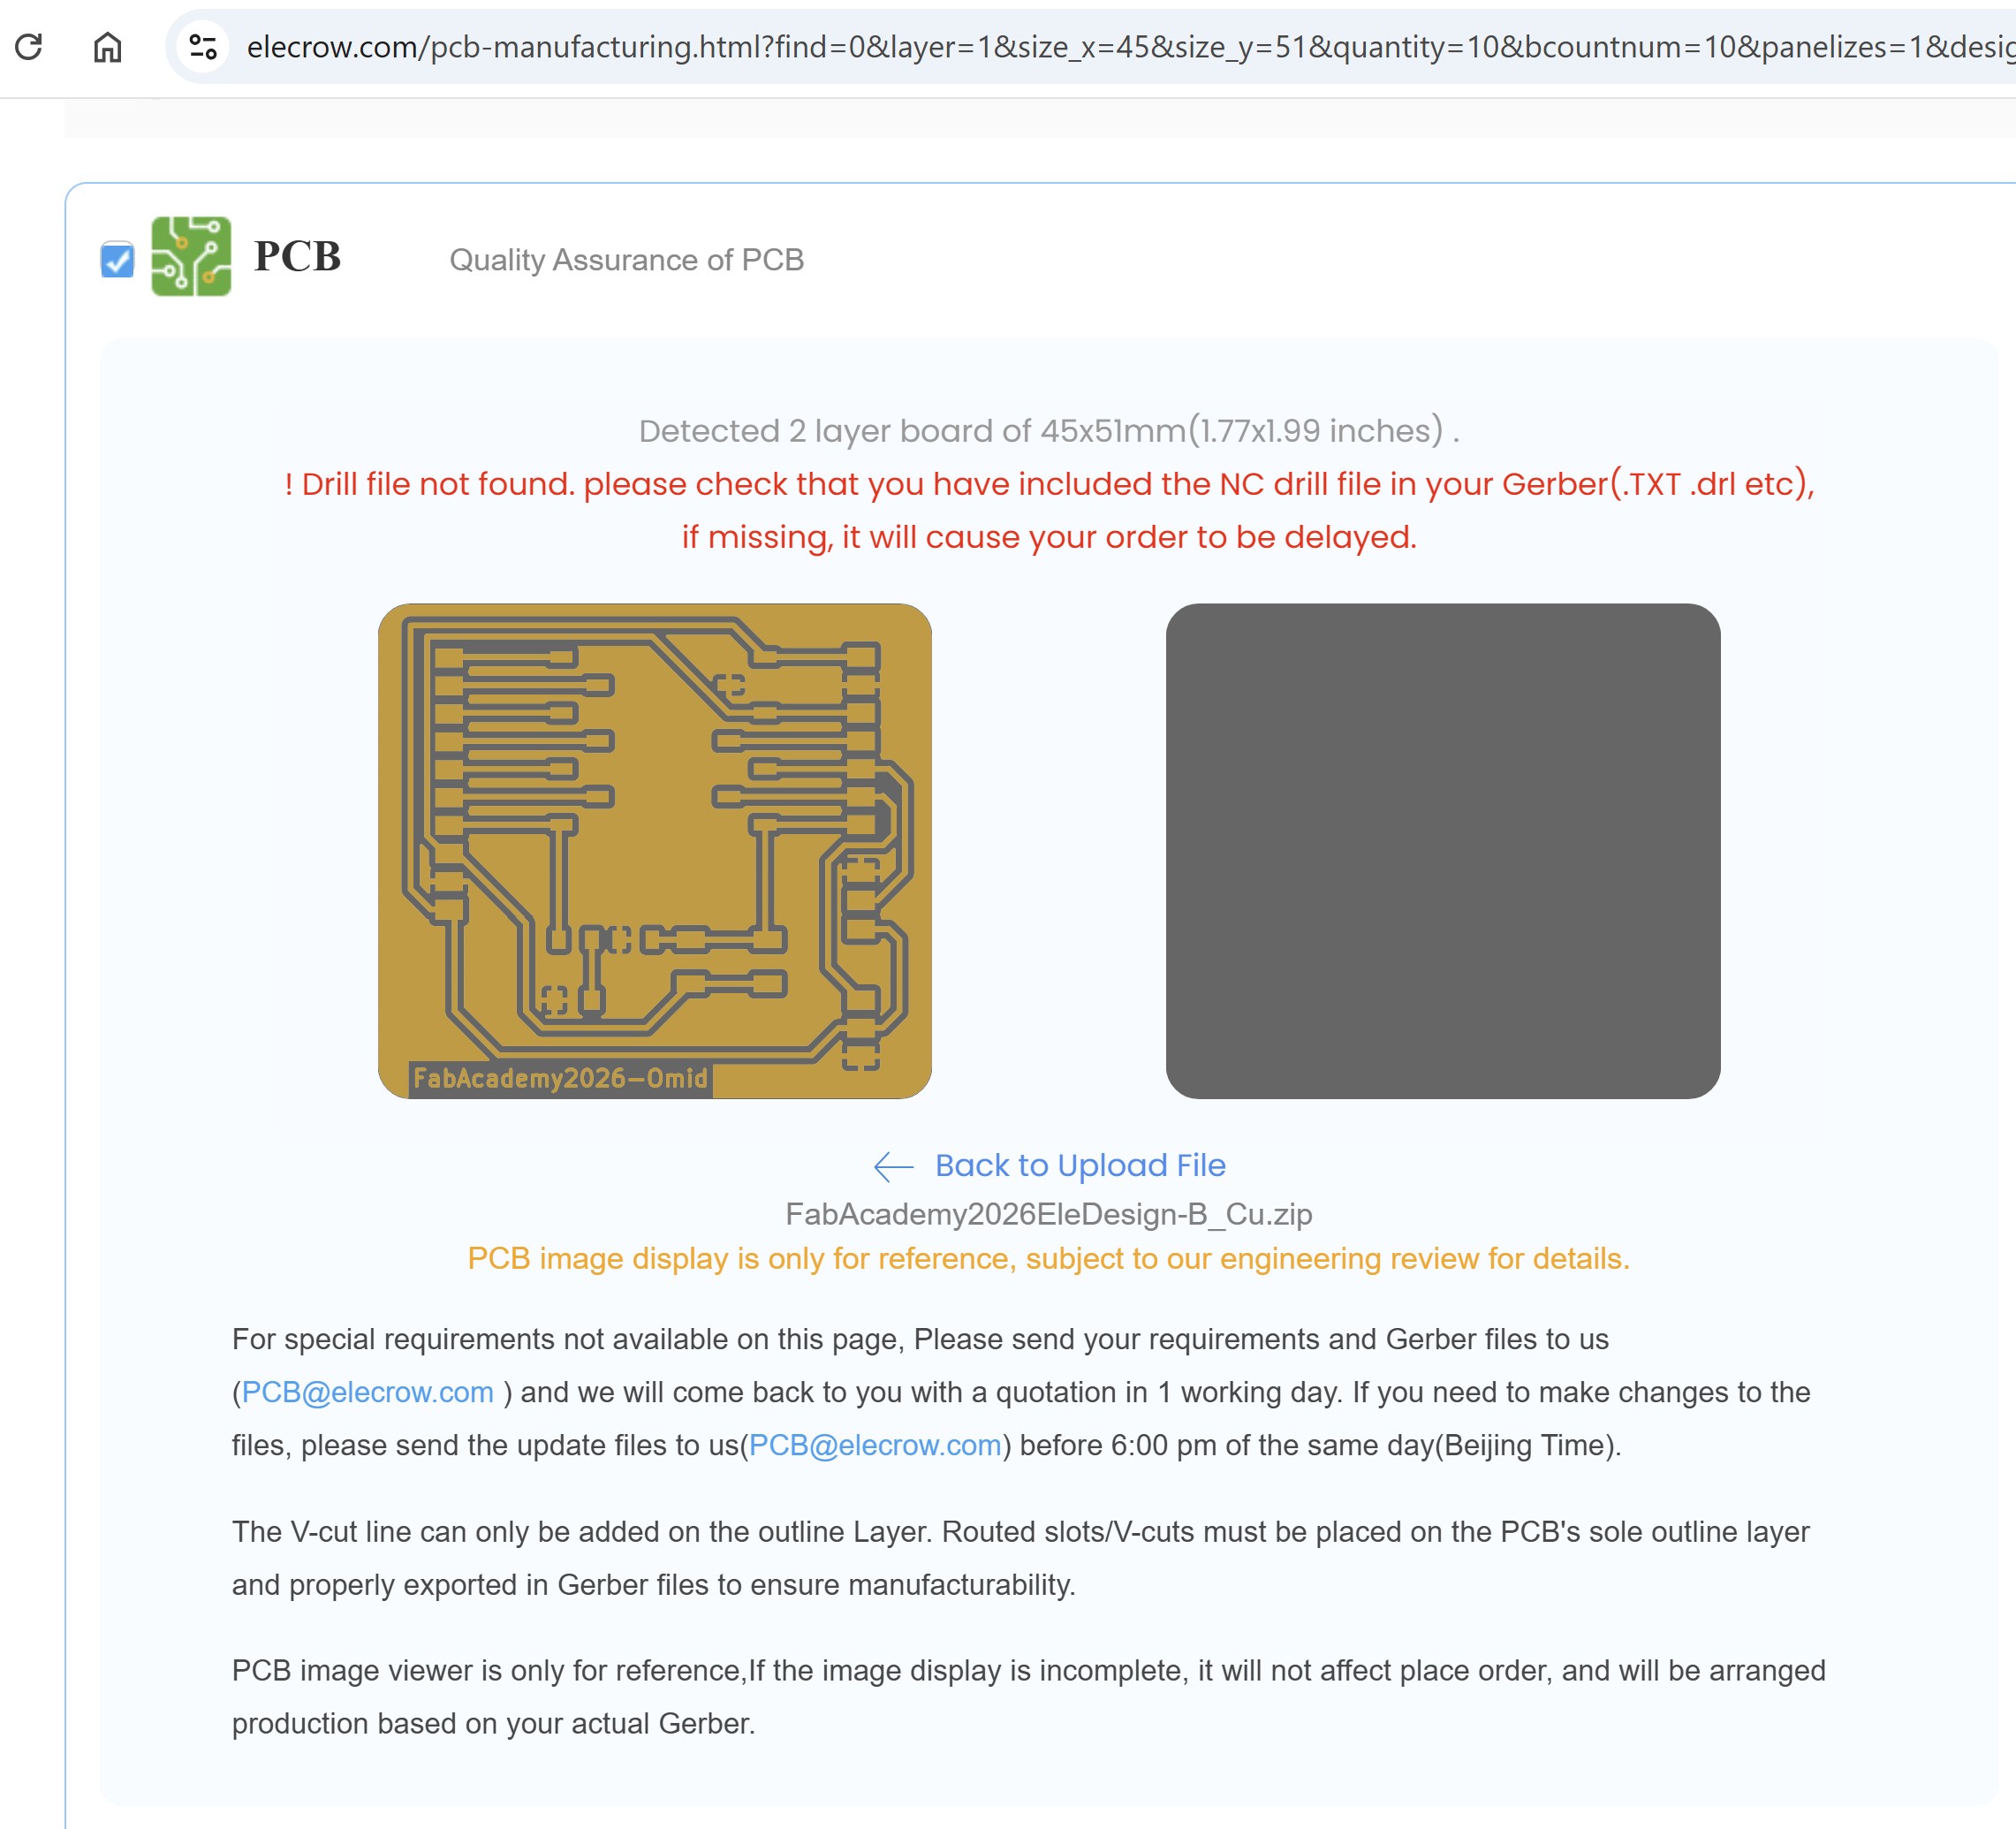
Because of the error message. The Add to Cart bottom did not work. So We went back and uploaded another grbere file from one of my colleague. After repeated the steps for another smaller PCB:
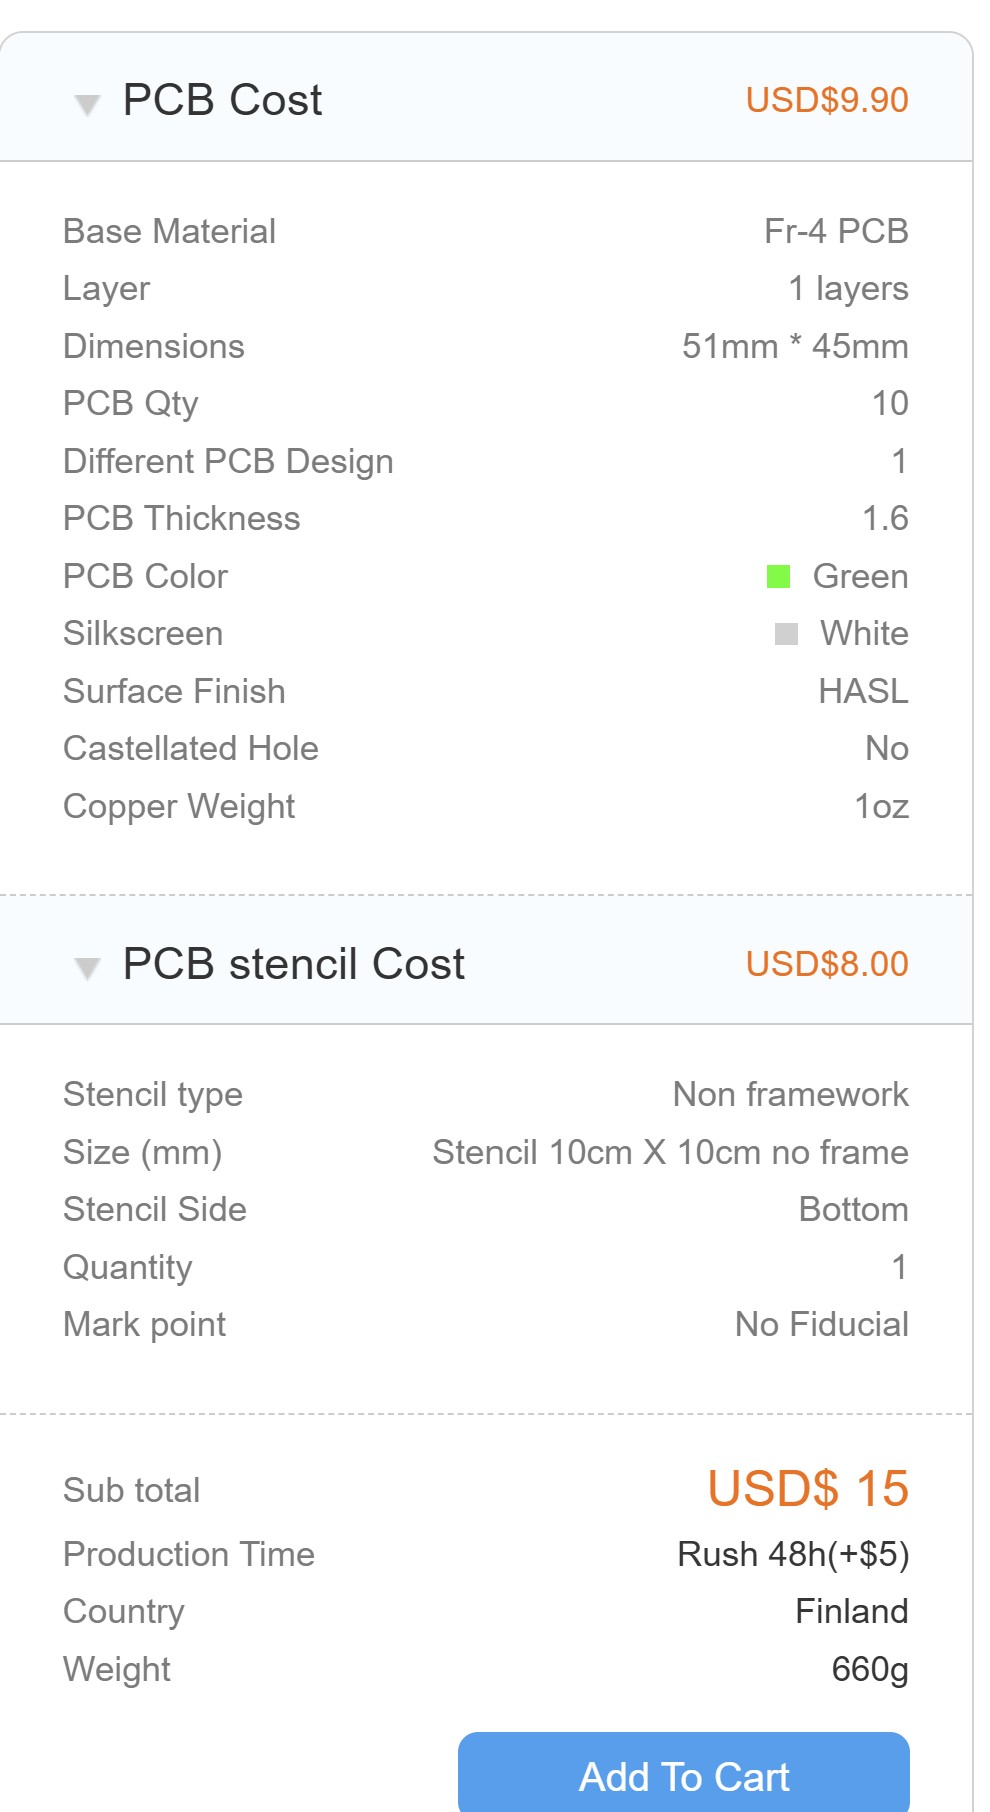
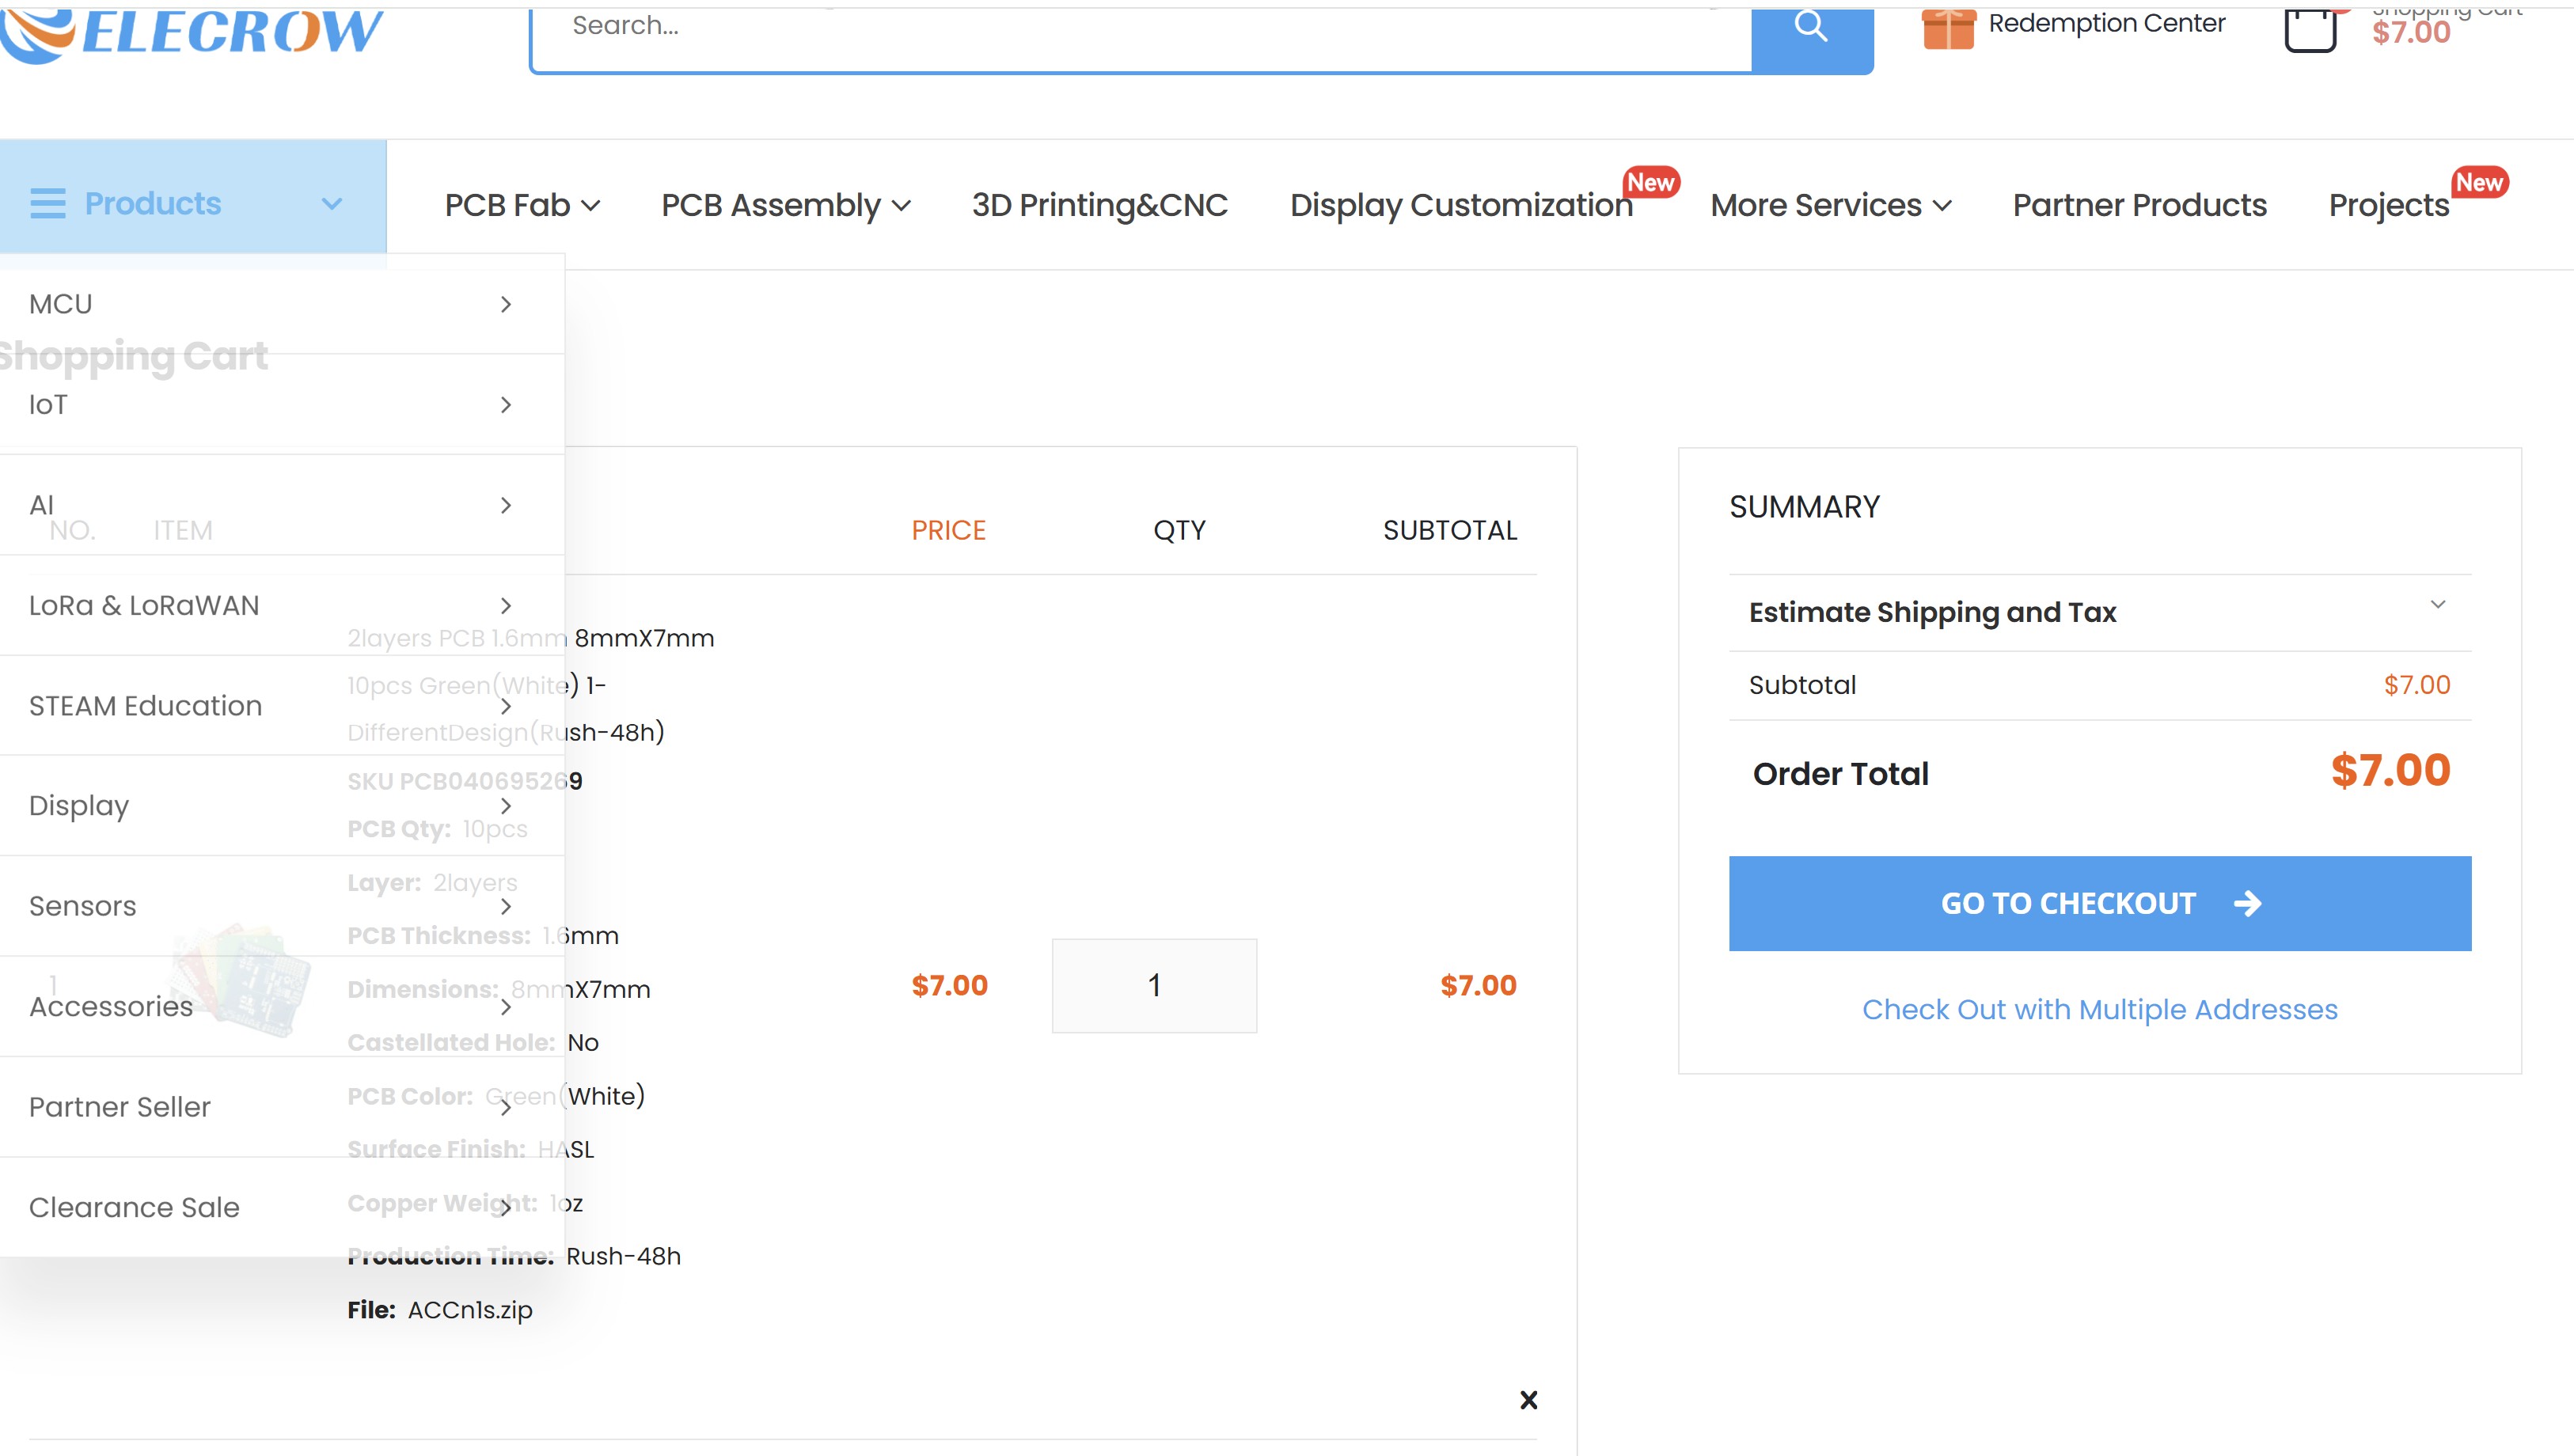
By pressing the Add to Cart. In the basket the total price can be rechecked, and we could select how many we wanted to order:
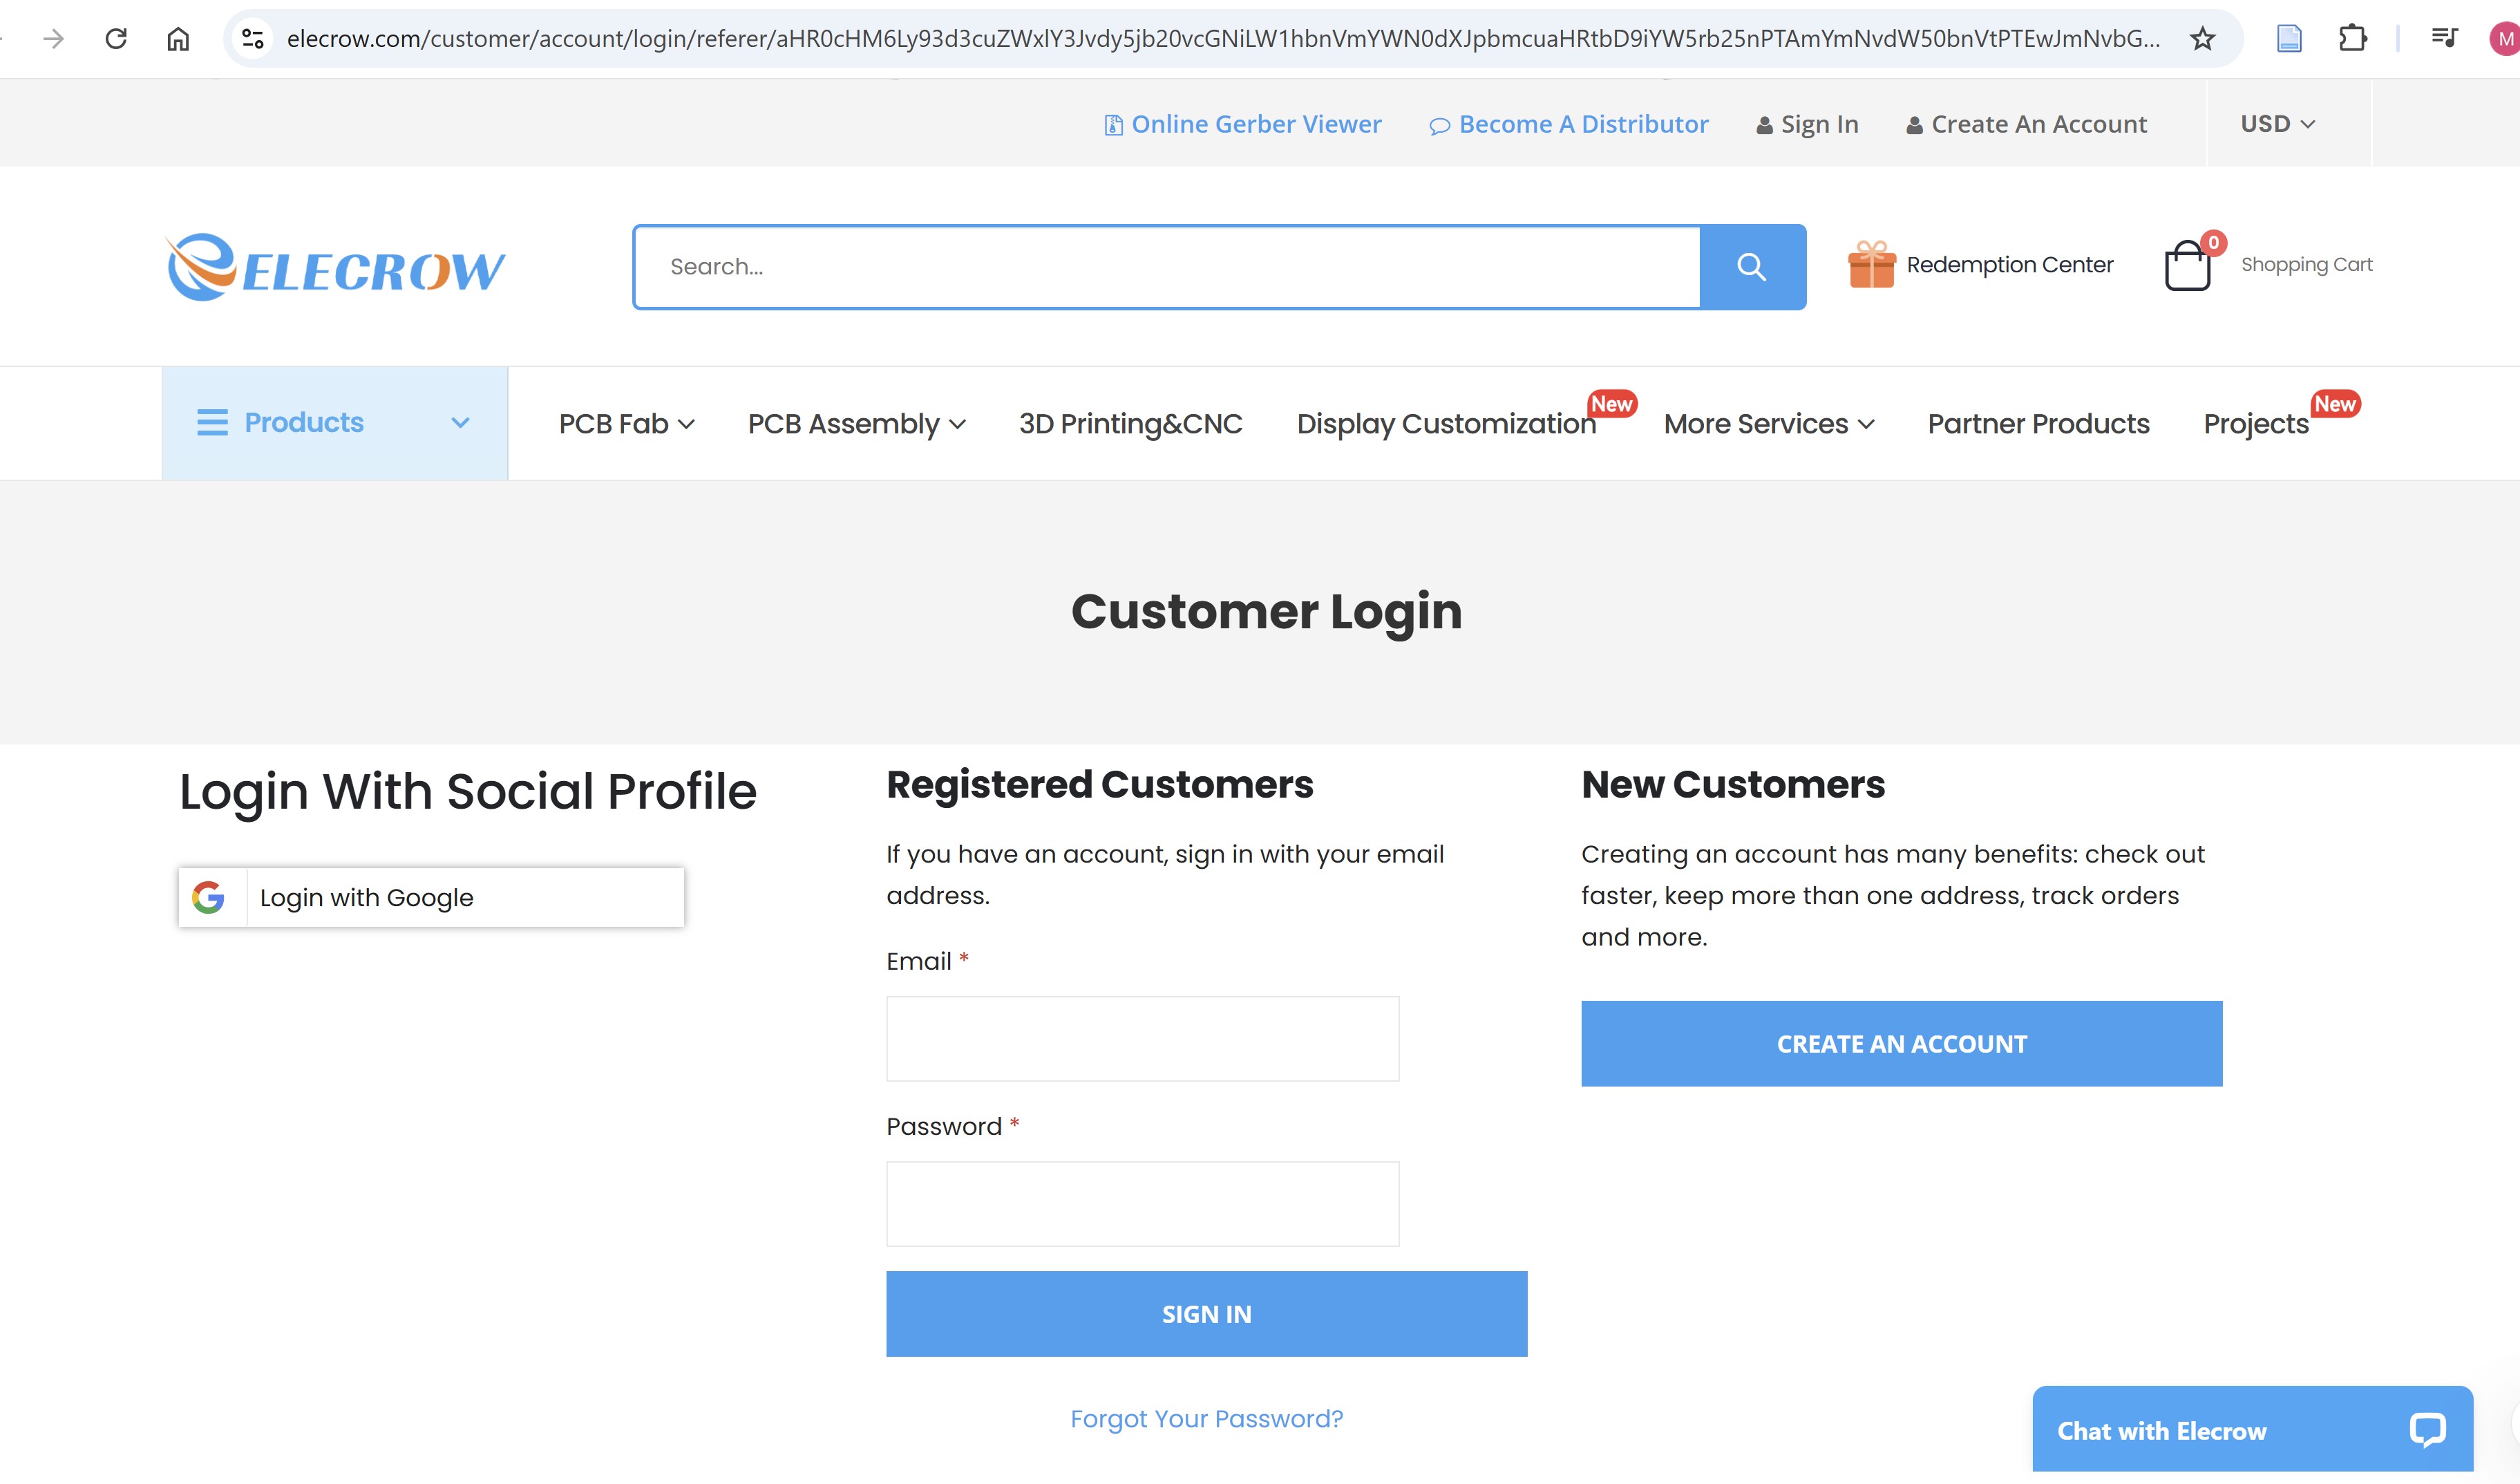
By pressing the go to checkout, we understood that we need to log in on the website to place any order:
All of this was to NOT place the order😁😂.