
Our current fashion system is built on the traditional linear system of “take, make, and dispose of”. In this system we are using up our planet’s resources with increasing speed, and selling them to our customers as disposable commodities. At a time where over-consumption is already putting a huge strain on our environment, can we still accept a wasteful business model like this? It`s high time we took a closer look at a new concept for our times: the circular economy. This week explored about Circular fashion just like circular economy, a recent term in fashion. This week was about designing a modern reconfigurable seamless garment. It started from understanding designing a garment to observing seamless joints and holds.
"Exploring Materials and seamless designs was real fun , more than that bringing the pieces together."
Nishtha Kaushik


Steps
Step 1: Exploring Soft robotics
This week focussed in the study of a specific field in robotics, the soft robotics. Unlike rigid robots we are mostly used to, soft bodied robots have similarities and performance characteristics similar to living organisms or the human body. Soft-robotics are based in Bio-inspired design or biomimicry and have applications in wearables, rehabilitation prosthetics, surgical robots, rescuing and others. We will focus on the fabrication of soft actuators, sensors and grippers using novel materials, artificial muscles and performative locomotion design. Soft robotics draws heavily from the way in which living organisms move and adapt to their surroundings. In contrast to robots built from rigid materials, soft robots allow for increased flexibility and adaptability for accomplishing tasks, as well as improved safety when working around humans.
Below image shows different kinds of Soft robotics we were introduced to in the lecture. This is a real new skill addition to my skillset.>
Step 2: Concept development
After a suggestion from fiore to try one of the more iterations available in the week I tried Wrist brace design. Its perfect documentation is avaiable HERE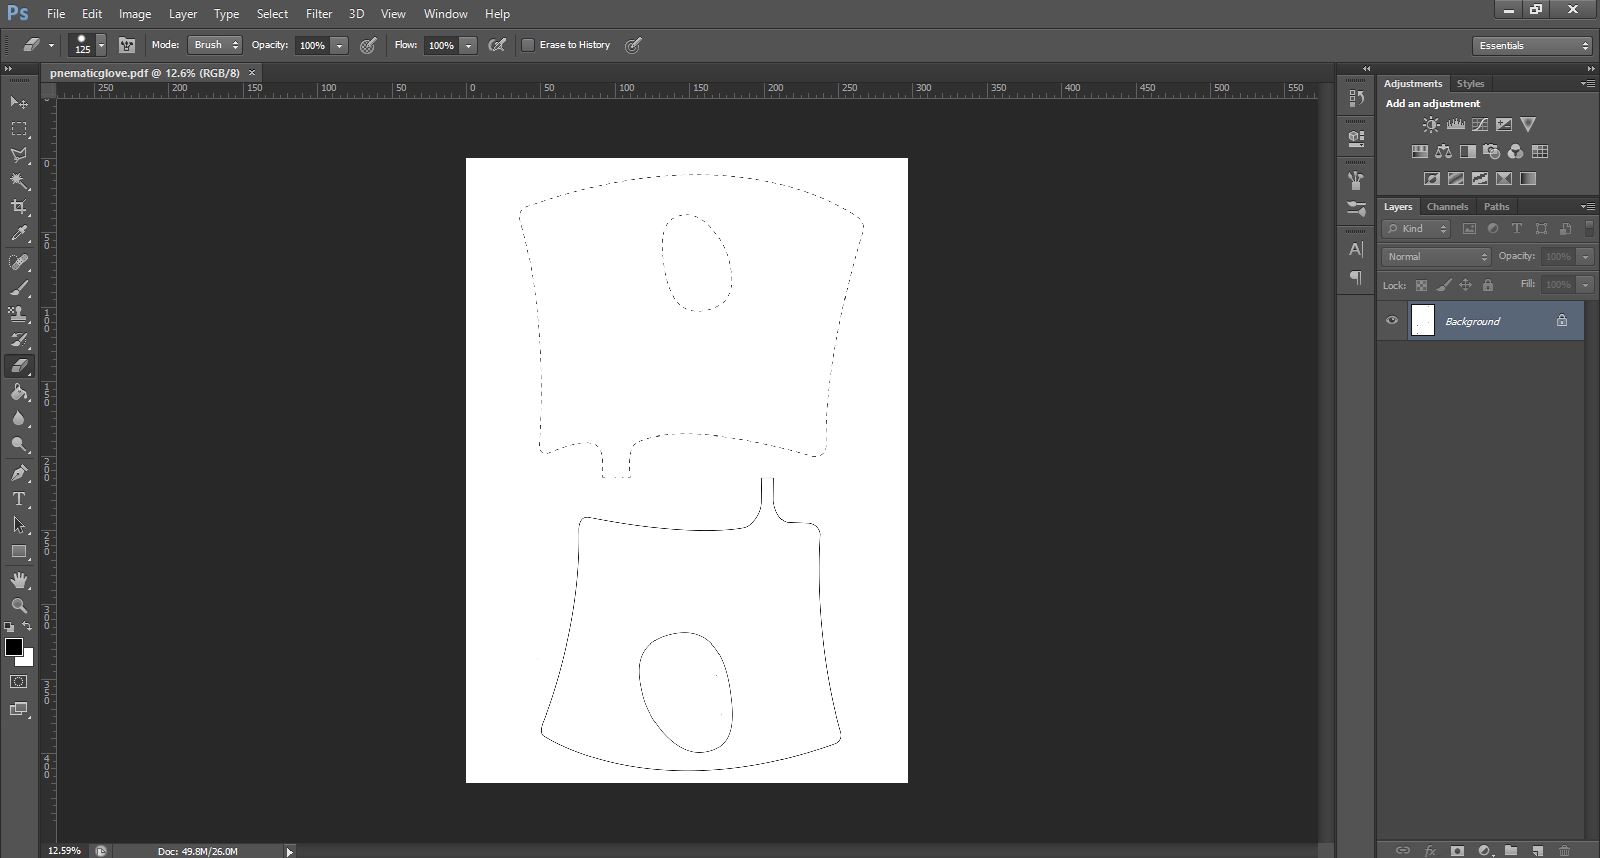
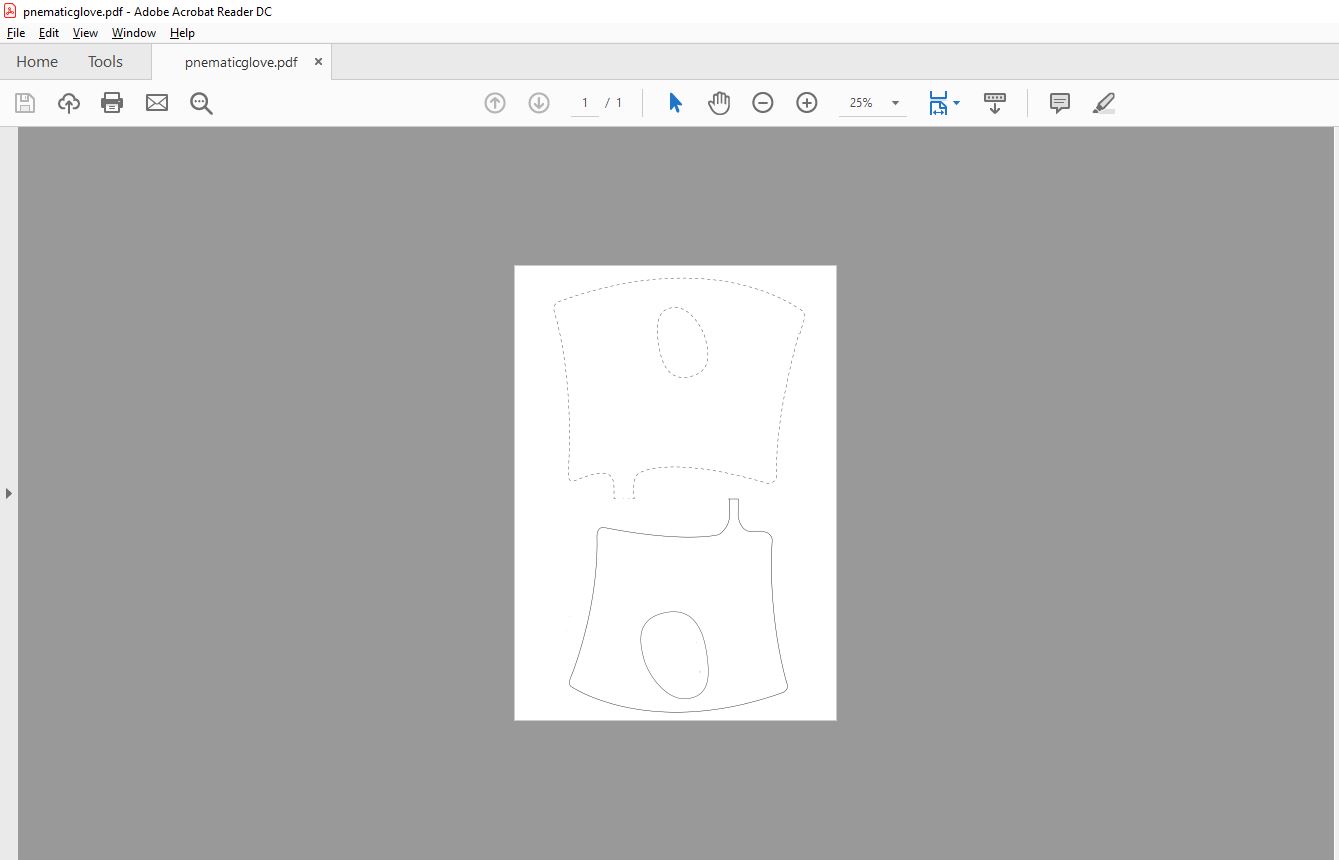
I started by downloading the design. Editing it in photoshop to generate the pdf.
I used Photoshop to convert Black and white image to this below, keeping 3 things in mind, firstly, which part I plan to fill air.
Secondly, to make sure ends are close when I use baking paper and Vinyl.
Thirdly to keep space for air blowing in the position which directs air to the right place.
Step 2: Laser cutting and Vinyl cutting
After Photoshop, I exported it to RD works, a software we use for laser cutting, took a piece of baking paper, attached to the bed with magnets and continued laser cutting. Below you can see SPeed and power set for baking paper, i.e Speed is 100 and power is 20. I began with laser cutting the baking paper and then Vinyl cutting the Vinyl paper.
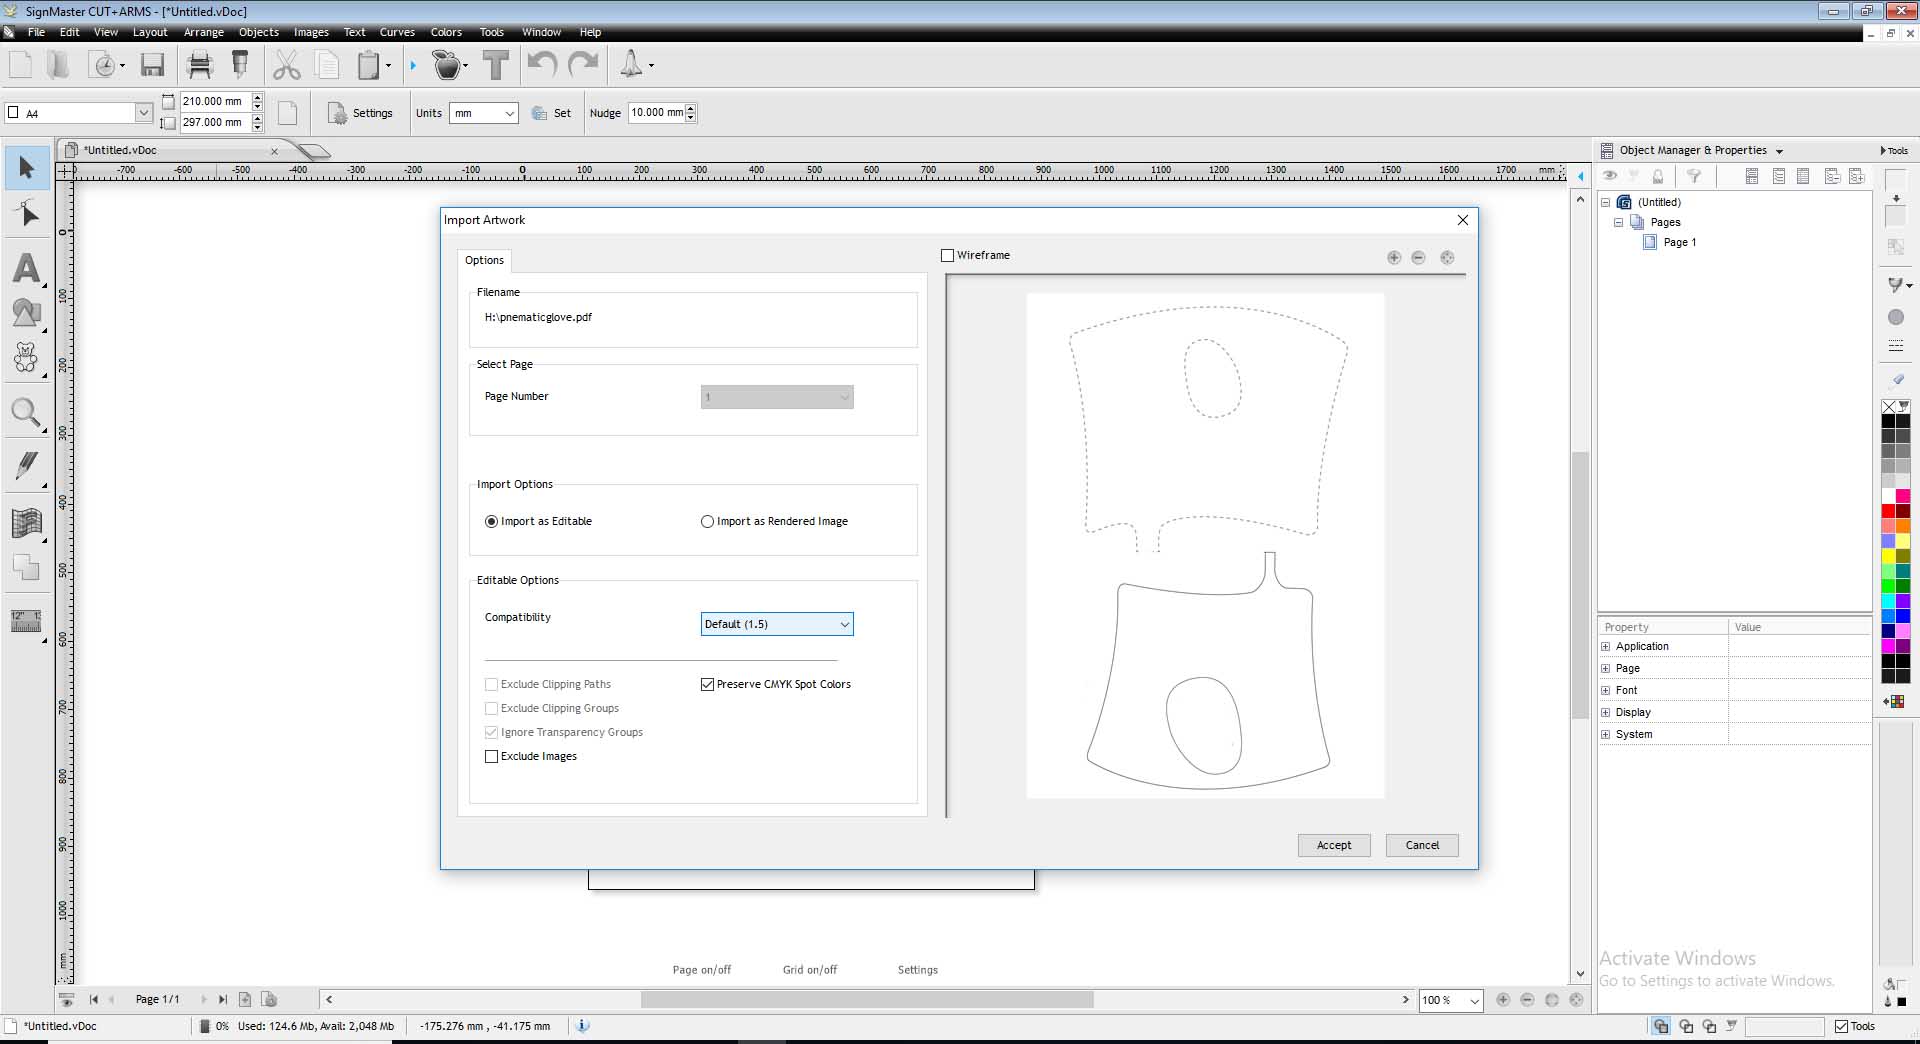
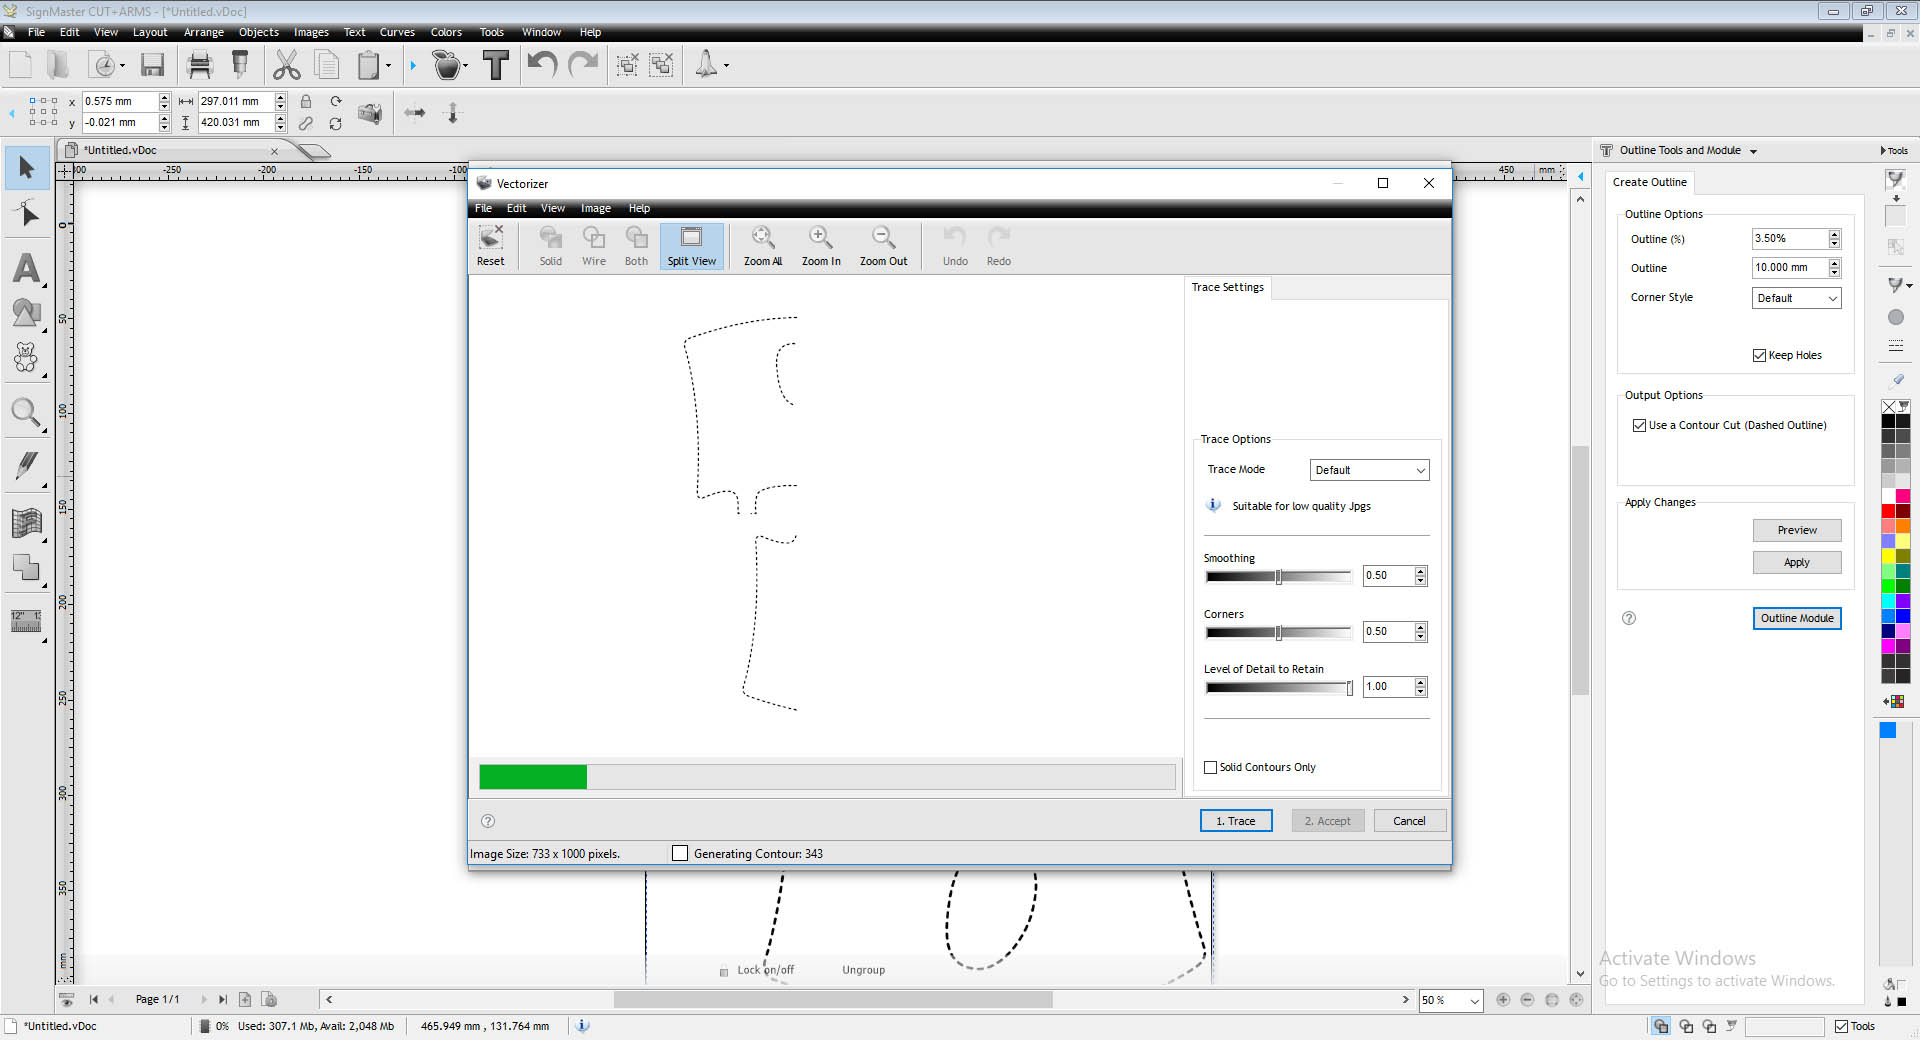


Importing the file, import as editable nd preserve spot colors and accept
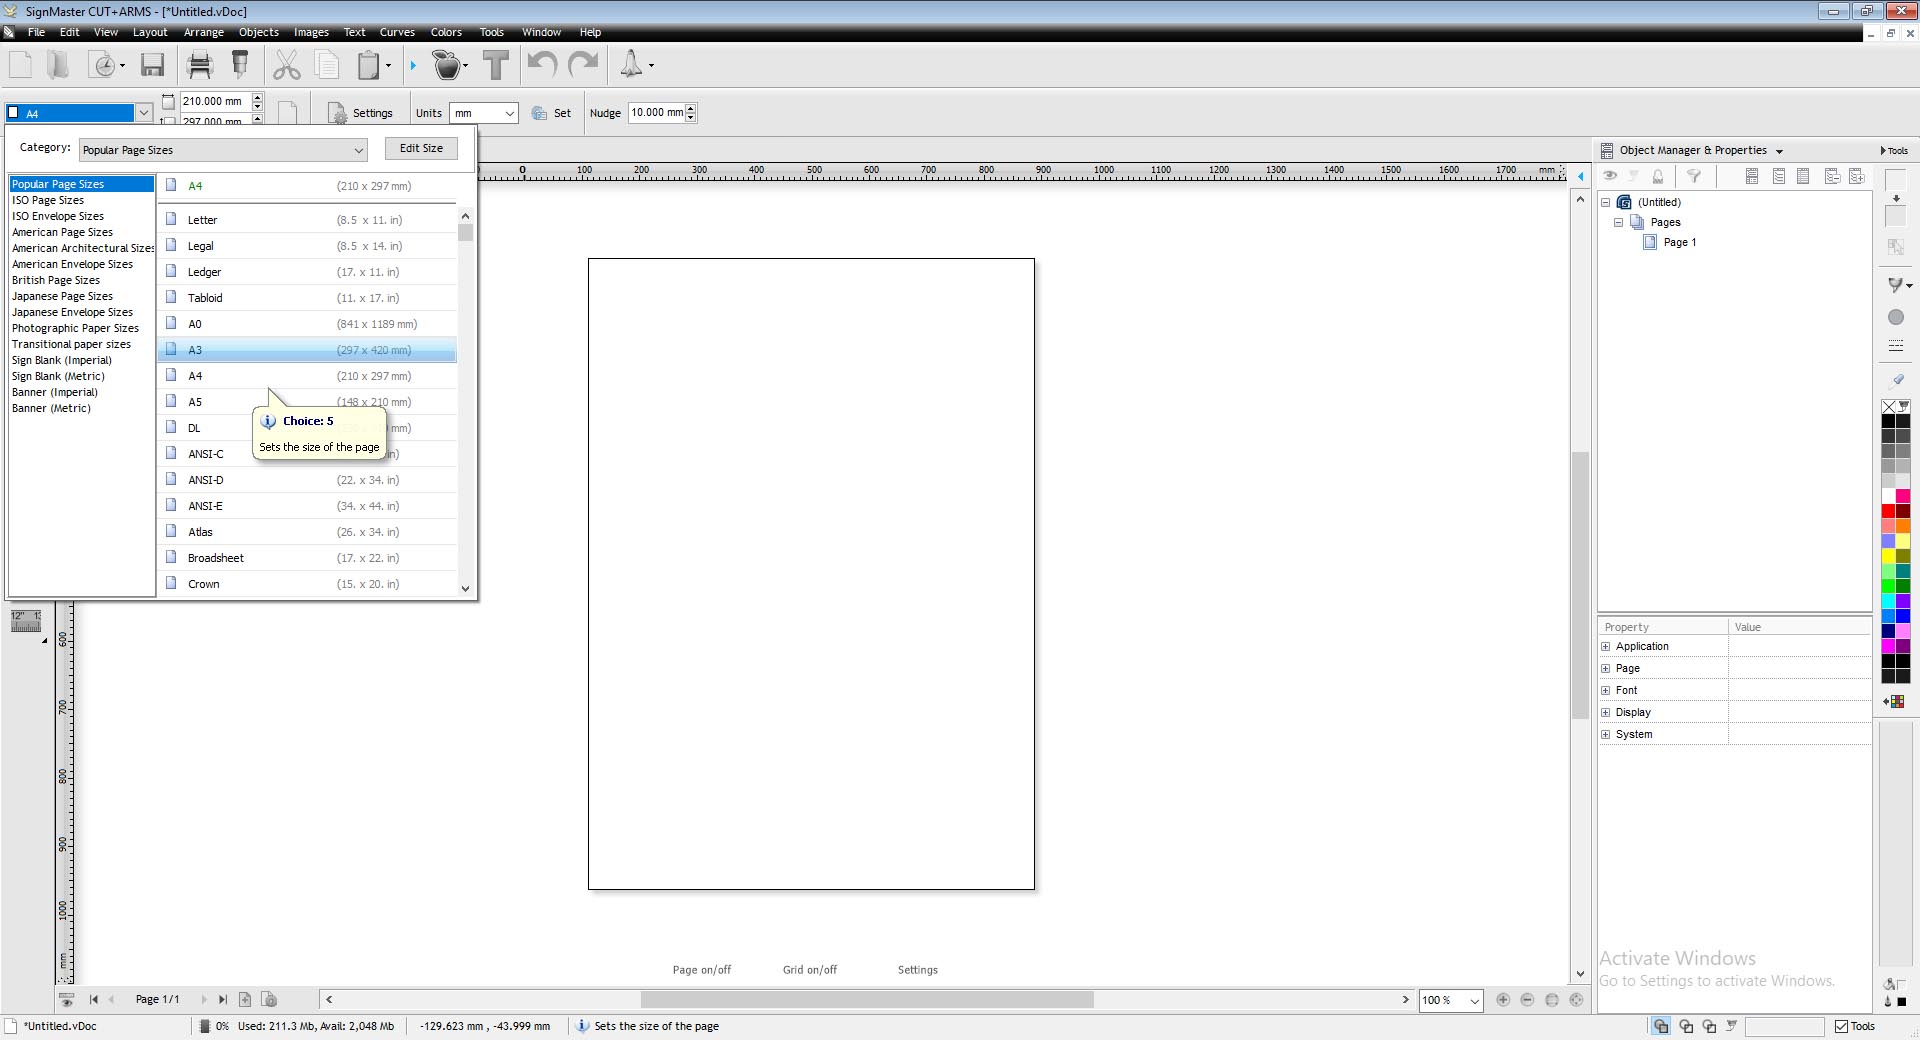
Setting the size of the page that is A3 in my case.
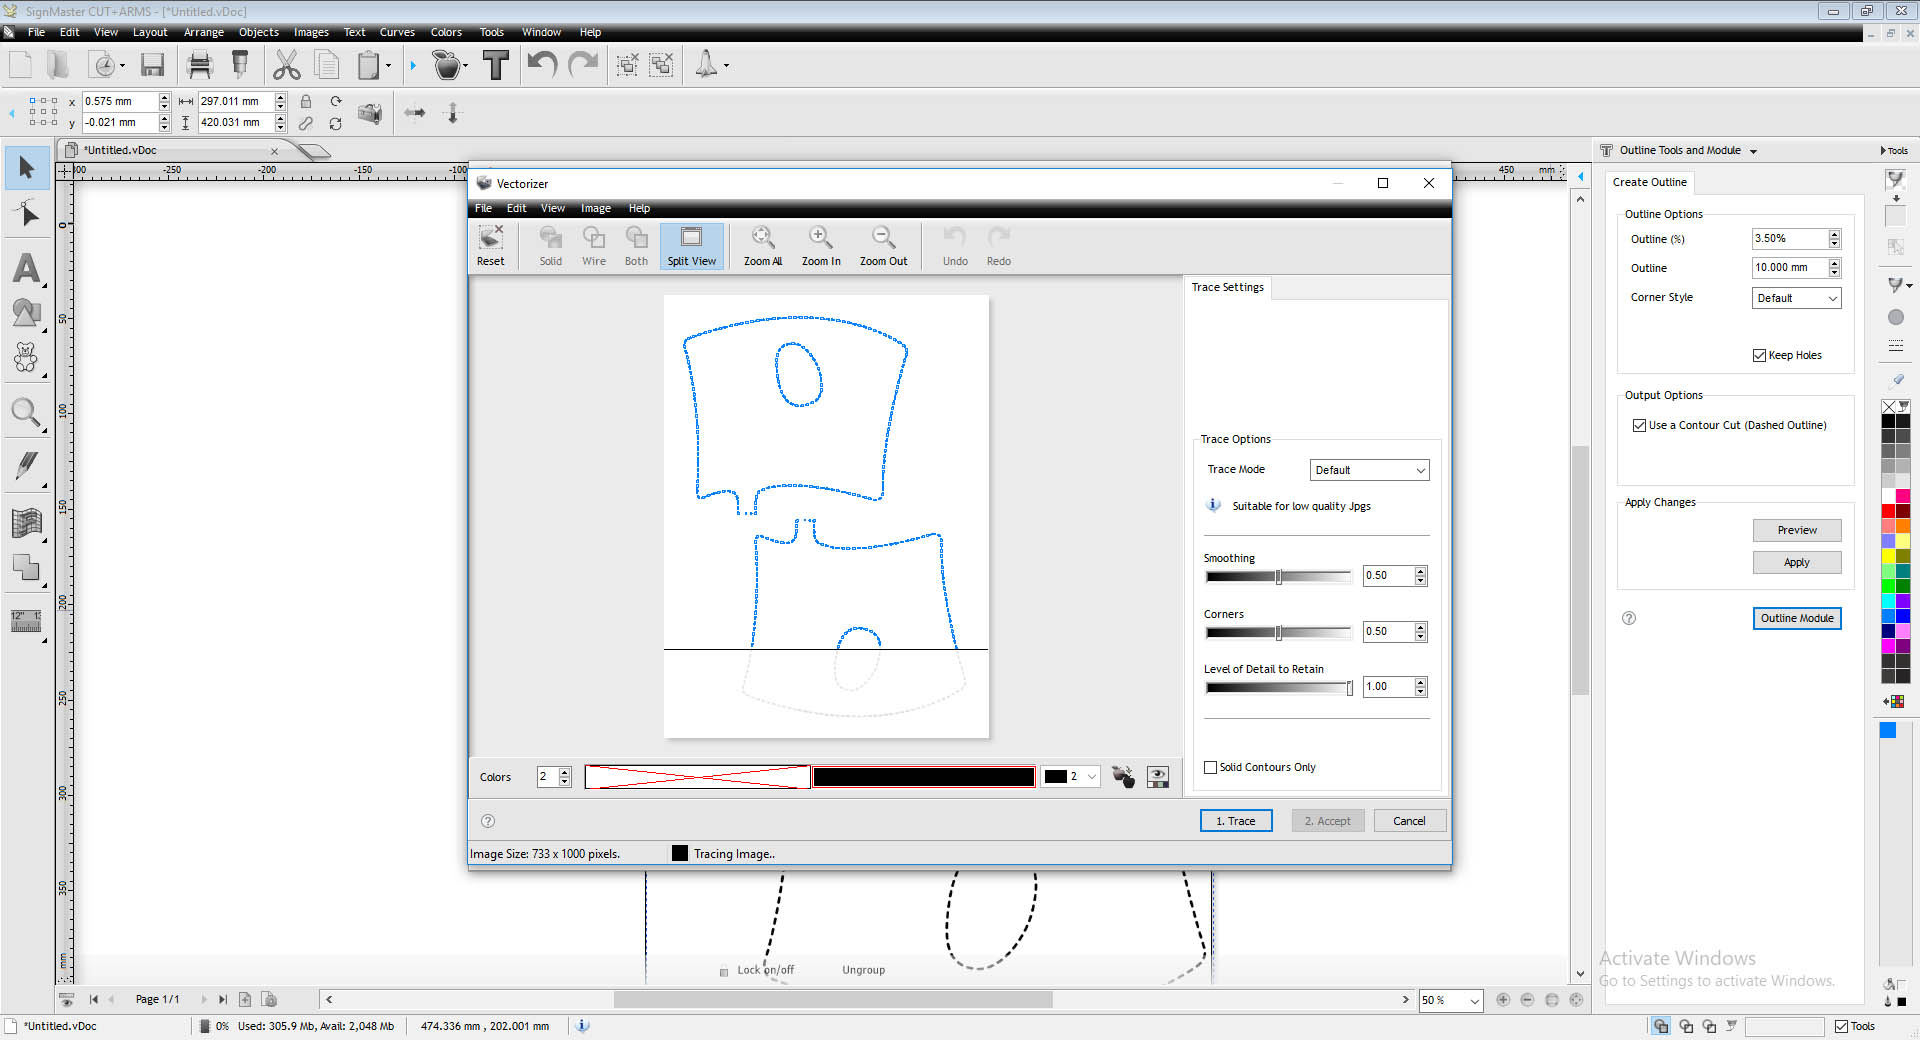
Vectorizer helps edit the traces for the vinyl cut
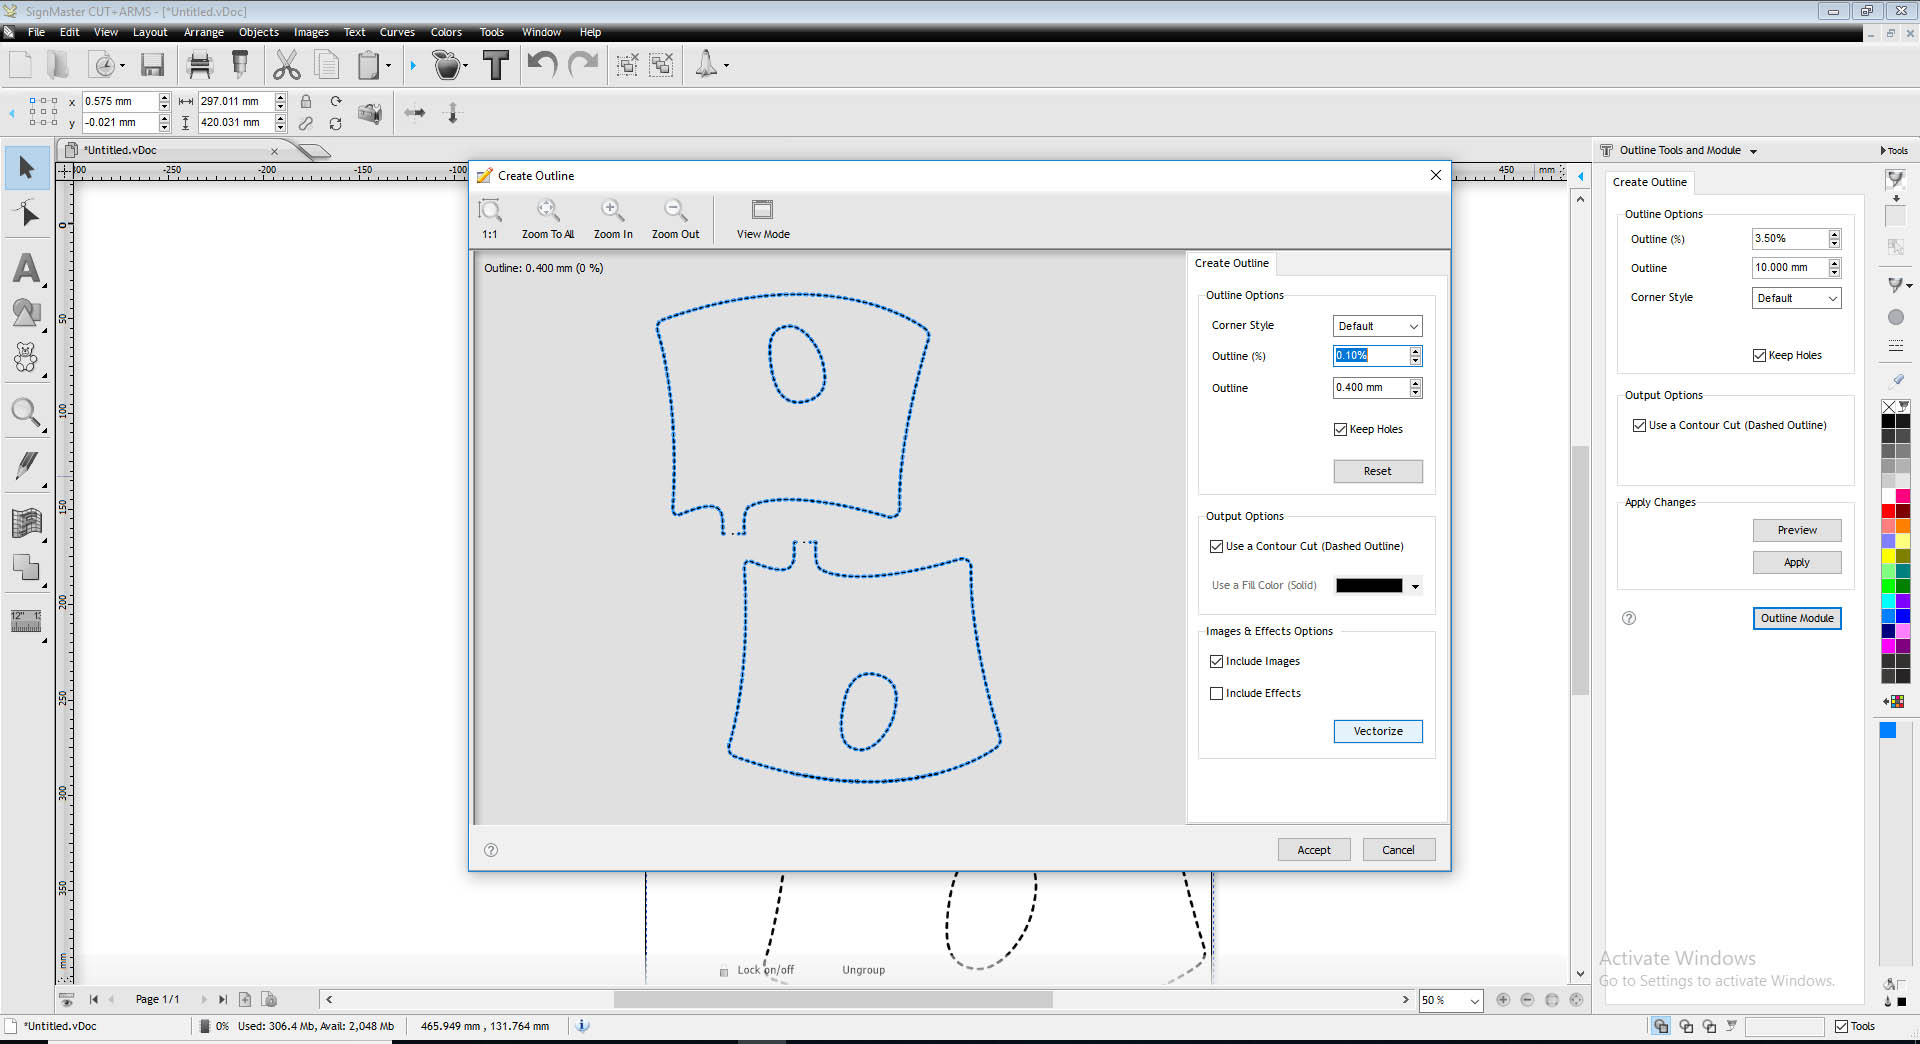
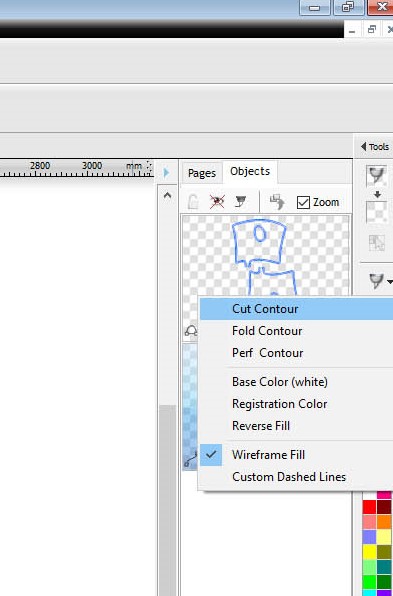
Create outline and vectorizing the outline and select cut contour and select wireframe fill
Next task was to carefully take out the vinyl sheet. Now here if you look carefully.
Step 4: Assembling
After laser cutting, I basically tried first on a small piece to understand which side reacts to heat and which doesn't.


My learnings:
- Do not Iron piece directly on Ironing table/cloth. use Baking paper as base first so that vinyl doesnt stick to the cloth.
- While you haven't seprated the Vinyl and its protection sheet, you will see one matte side and other glossy. So after peeling , it becomes the opposite, so use glossy side inside (after peeling glossy sie) and other towards outside as it doesnt stick. Below you can see I have Baking paper below and then vinyl and then baking paper and then vinyl again, Make sure after you peel off Vinyl sheet, to have Vinyls shiny side inside and matte side facing outside.
-Ironing it with less temperature and keep moving it around for 15 minutes. I actually started to see the baking paper through after ironing as if it started melting.
All layers are welded together with an iron to melt the coated edge of the fabric together. Special attention must be paid to ensure that the hole for the inflation tube is not sealed shut. The parchment paper ensures that the fabric only bonds on the bladder's perimeter, allowing air to fill the brace's body.
Making holes to join the ends to give it a shape of a brace
I wanted to try on my hand and i could feel how comfortable it was for my tirng hands but later went it overdid , it affected my blood circulation :P.
Another one: Concept development
After an amazing lecture, I went through articles and practices under this and eventually I started designing. Due to my more than I can handle deadlines with other things , I wasnt able to try many iterations which I will as per my project needs later. I started by taking an image of my mother like aunt who has been an ideal person around me for many personal and professional things in life. She's also a well known child psychologist who supports our STEM activities in the lab with her expertise and I am sure she wont mind me using this image for learning something new.


I used Photoshop to convert Black and white image to this below, keeping 3 things in mind, firstly, which part I plan to fill air with so that the basic features of her face comes out.
Secondly, to make sure ends are close when I use baking paper and Vinyl.
Thirdly to keep space for air blowing in the position which directs air to the right place.
Preparing files and Laser cutting
After Photoshop, I exported it to RD works, a software we use for laser cutting, took a piece of baking paper, attahed to the bed wth magnets and continued laser cutting. Below you can see SPeed and power set for baking paper, i.e Speed is 100 and power is 20.
Laser cutting has always bee my favourite, but I should also bring to the notice that safety is important while ou using it. Like, we wear laser protection glasses, secondly we this small laser cutter in our lab has a sensor which doesnt start th machine until the door is closed. Most importantly, ventilation is most important.
Assembling
After laser cutting, I basically tried first on a small piece to understand which side reacts to heat and which doesn't.
Below you can see I have Bking paper below and then vinyl and then bking paper and then vinyl again.My learnings:
- Do not Iron piece directly on Ironing table/cloth. use Baking paper as base first so that vinyl doesnt stick to the cloth. - While you haven't seprated the Vinyl and its protection sheet, you will see one matte side and other glossy. So after peeling , it becomes the opposite, so use glossy side inside (after peeling glossy sie) and other towards outside as it doesnt stick.
-Ironing it with less temperature and keep moving it around for 15 minutes. I actually started to see the baking paper through after ironing as if it started melting.
You can easily see the baking paper sticked very well to heat transfer vinyl.
Soft Robotics
I had a lamp next to it so I cptured this image to show the direction of my design
Here is the final video of Soft robotics working, This can be used for following applications:
-Medical
-Cosmetics
-Arts and Design
I am using a straw to manually blow Air in it and it gives a perfect picture