Fab Academy 5

3D Printing

INDEX:

Here you will find an Index with links to easily navigate through the section content.

1

Intro:

The process for creating a website.

2

3D Printing:

A little explanation about what is GitLab and version control.

- 3D printing Methods.
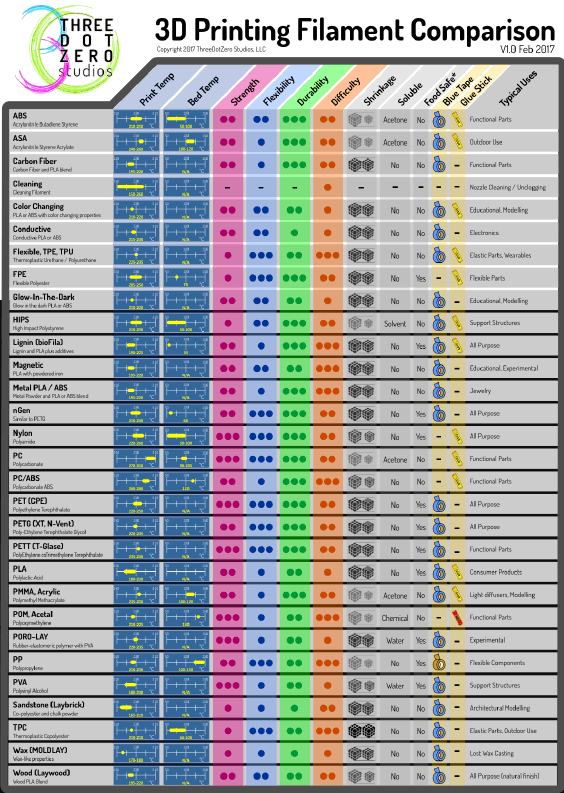
- 3D printing materials.

3

Building the printer:

A step by step guide for using GitLab, creating an account and Pulling, Committing and Pushing. 

4

Slicing: Ultimaker Cura:

Description of the web tool I used for creating my website and how to connect it to my Git.

5

3D printer test:

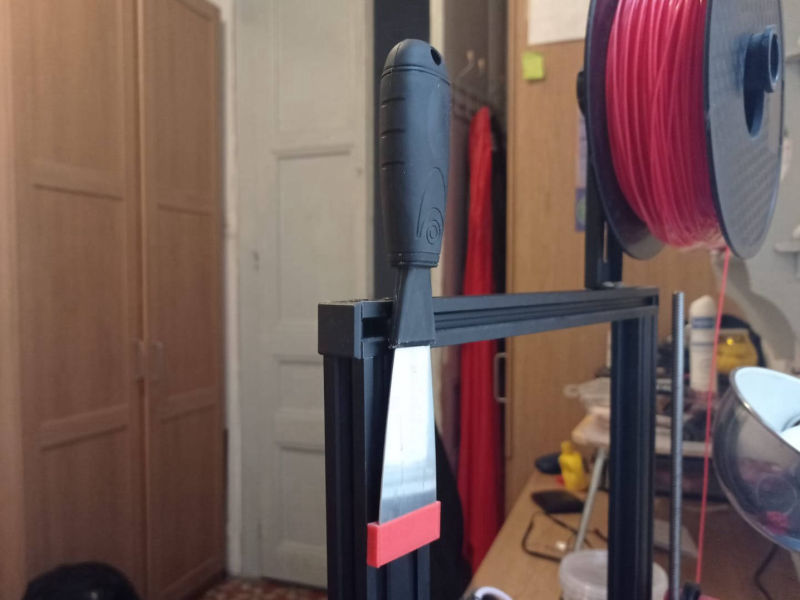
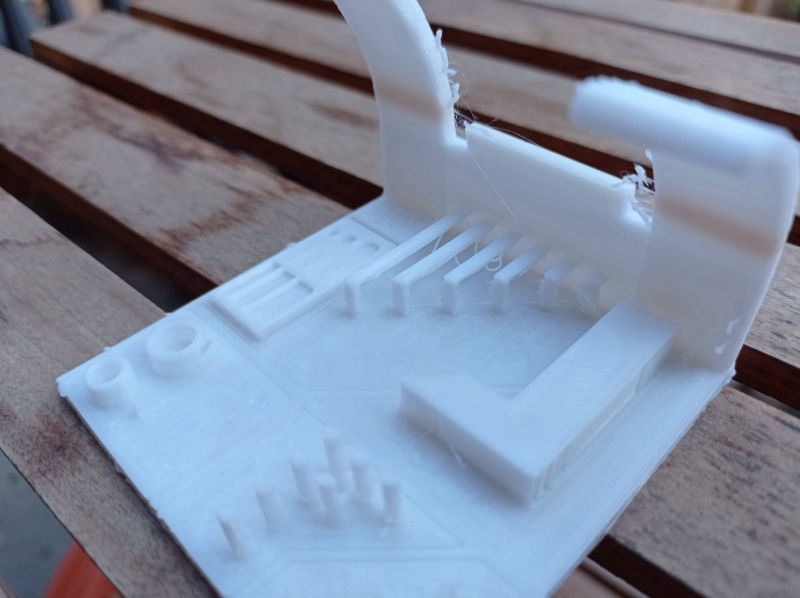
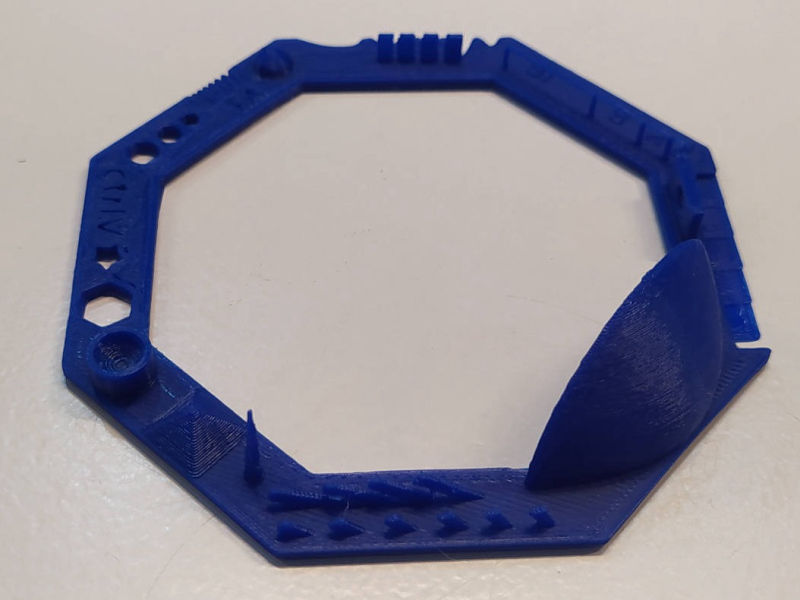
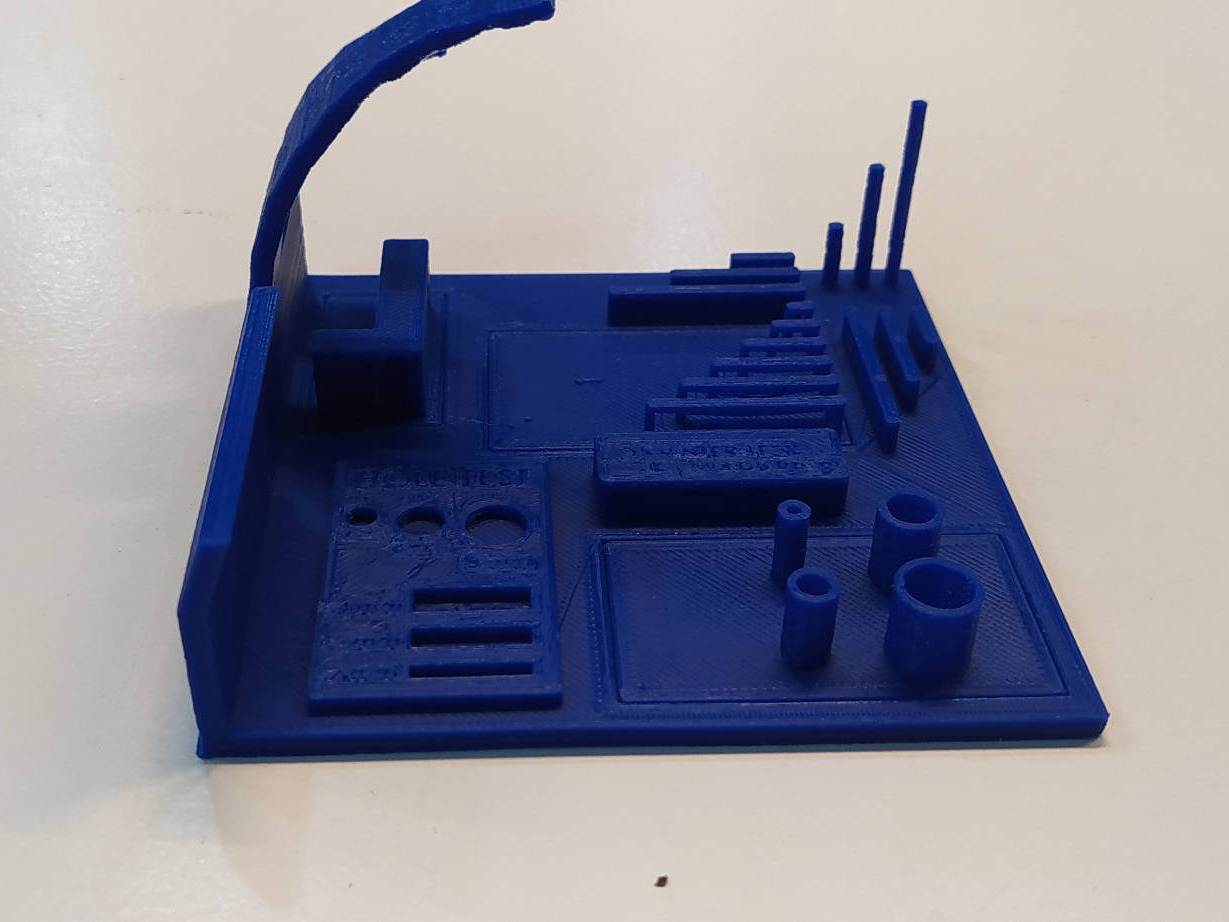
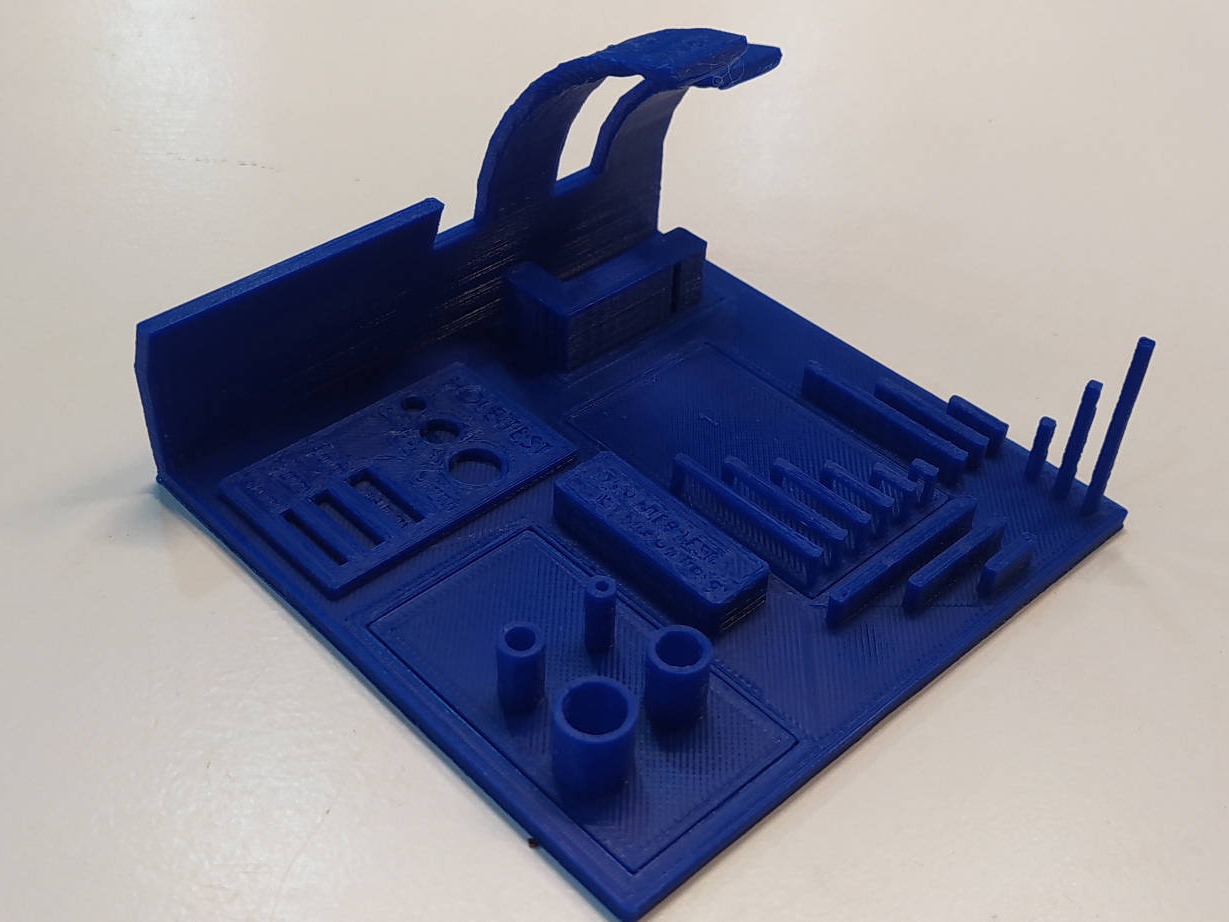
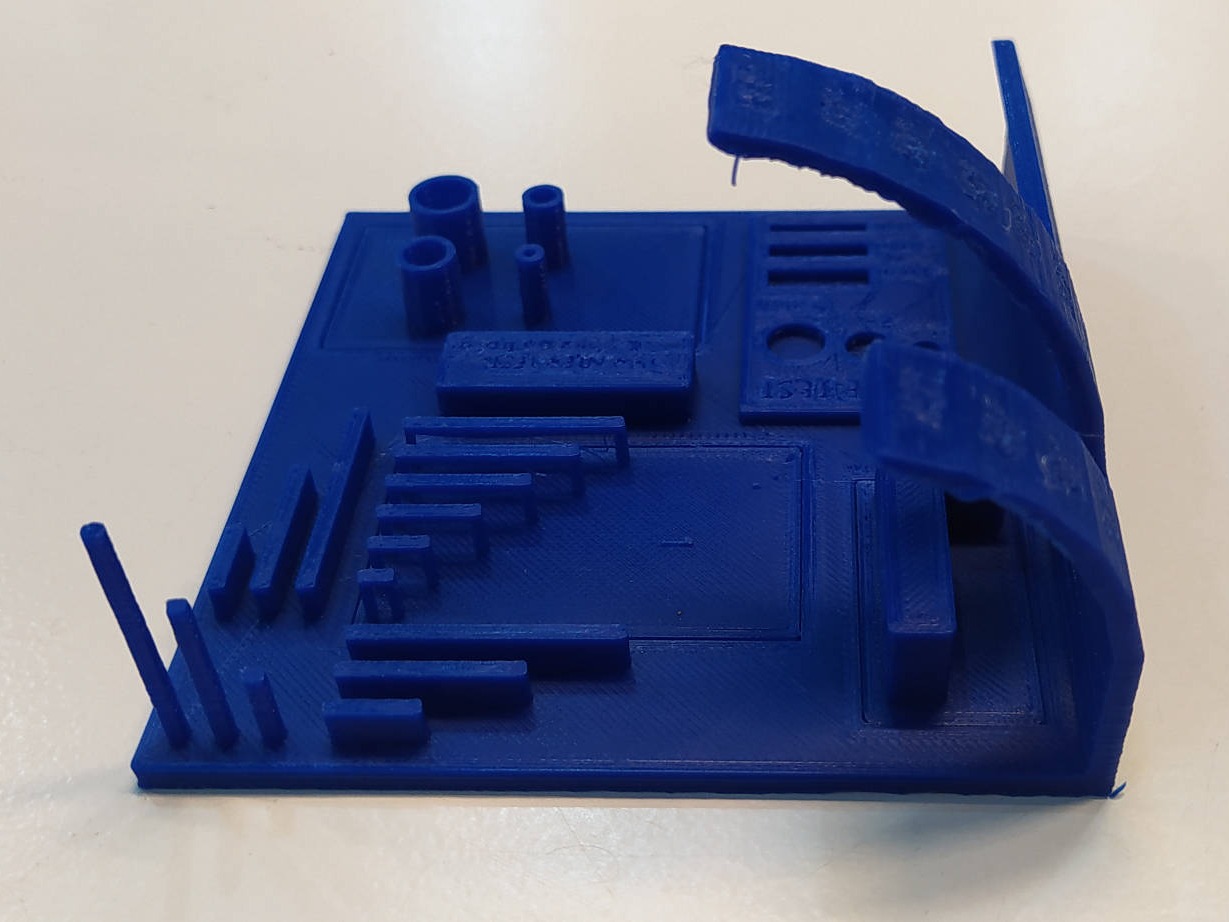
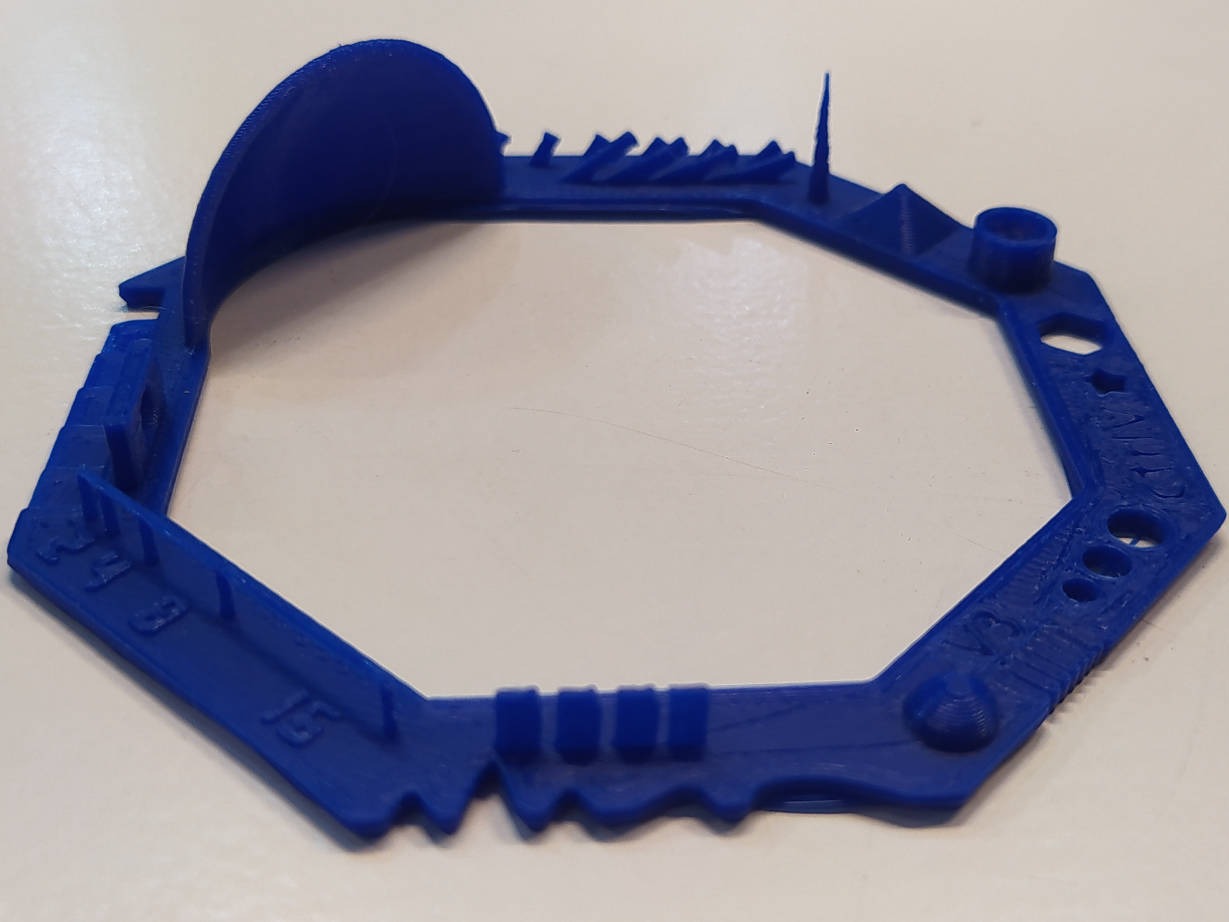
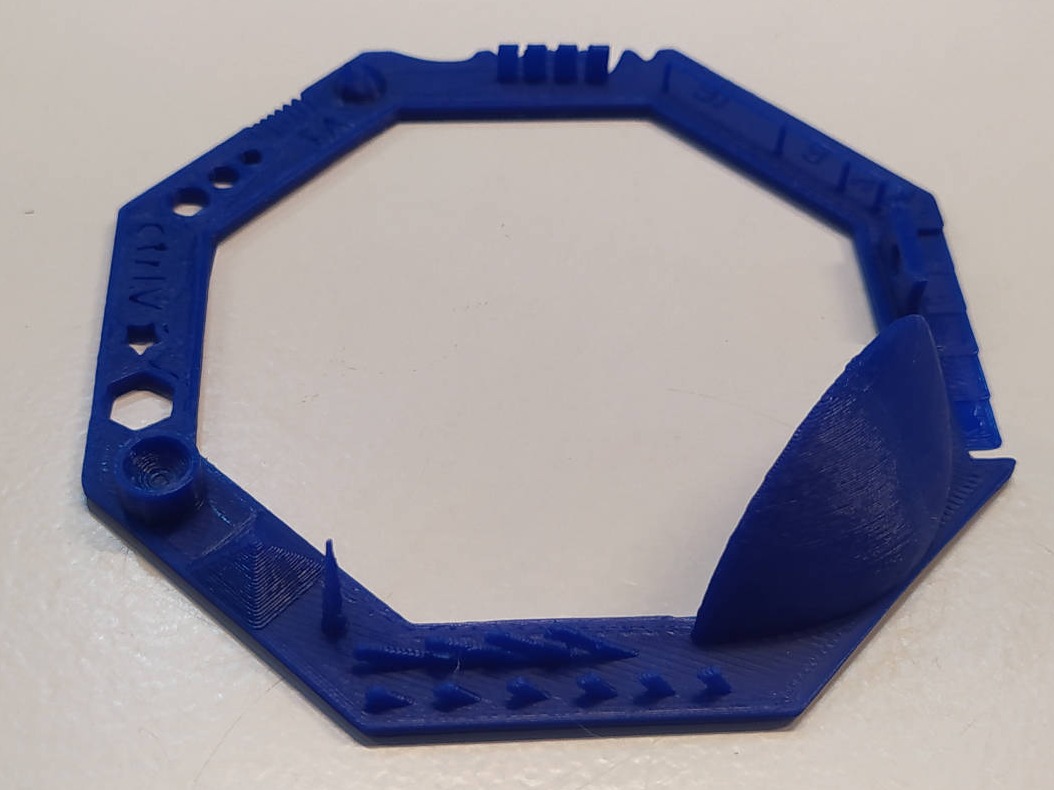
Here are some test I did with the printer, to get from it some design rules I should apply either to my design or my printer settings.

6

My First 3D Print: Arduino Case:

Some final comments and learnings about this process.

7

More 3D prints:

A little description about my final project, before going into the project management.

8

3D Scanning:

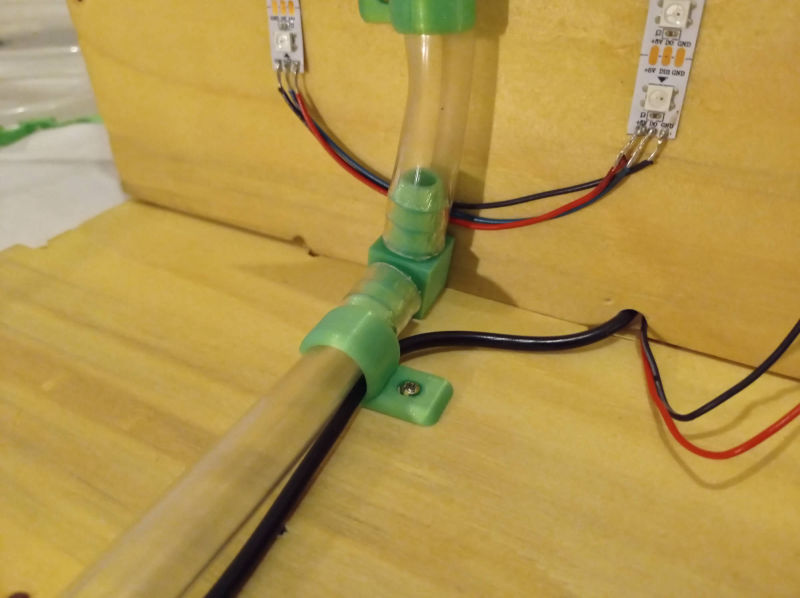
Here is how I used the learnings from each weak towards my final project development.

1 - INTRO:

In this first week, we are going learned the basic concepts around 3D printing, the materials, how the machine and design work, and also how to 3D scan.

3D printing is an cartesian axis, additive fabrication process which creates an object based on a predesigned or scanned 3d model by pouring or adding material together, the total oposite of the substractive process in which you remove material from a bigger piece in order to create something.

3D scanning is the process of capturing the volume of an object in a 3D image, and it is created by mixing a lot of different points of view of the same object, to simulate the information between those images and generate the 3D file.

Mobirise

2 - 3D Print:


3D printing is a group of additive manufacturing technologies capable of creating a three-dimensional object by superimposing successive layers of a certain material. A process by which physical objects are created by layering a material from a digital model. 

The first thing we need to print an object in three dimensions is a file created with some 3D modeling software. The next thing is to use the ideal material for its manufacture. Thermoplastic materials are generally used, but there are also 3D printers capable of using other materials such as metal, resins or polymers.

3D Printing Methods:

Some use methods of melting the material to form the layers, such as SLS or FDM, while others deposit liquid materials that are solidified with different technologies. The one I have used the most is the FDM, which would be considered as the "common 3D printing". Anyway, among the most used methods are:

Injection printing
In this method, the printer creates the layer model by spreading a layer of the part section. This process is repeated until all the layers are printed and is the only one that allows the printing of full color prototypes.

Fused Deposition Modeling (FDM)
As its name indicates, this method deposits a molten material on a layer-by-layer structure that is subsequently synthesized by a laser for solidification. This method also includes metal synthesis by laser or DMLS.

Stereolithography (SLA)
Stereolithography or SLA technology is one that uses photopolymeric liquid resins that solidify with the use of light emitted by an ultraviolet laser. In this way, layers of solid resin are created until the object is formed.

UV light curing
On this occasion, the photopolymerization by ultraviolet light or SGC, uses a container of liquid polymer that is exposed to the light of a projector under certain conditions. In this way, the polymer hardens as the mounting plate moves down very little by little to create the different layers as the polymer solidifies.

Mobirise

3D Printing Materials:

Based on the methods used for 3D printing, we have seen that different materials can be used. And it is that a printer cannot use any material to print but has to use some compatible with the type of printer and technologies used. Some materials also need different bed or noozle temperature.

There is a wide variety of materials used for printing objects in three dimensions, from liquid, solid, flexible, transparent, opaque, colored materials, etc. And also there is a lot of experimentation with new materials like cells for printing body parts, chocolate, clay for printing buildings, mycelium, casein an other natural materials.

Polylactic acid (PLA)
It is a polymer made up of elements similar to lactic acid and with properties similar to those of polyethylene terephthalate (PET) that is commonly used to make packaging. A thermoplastic made from cornstarch, cassava, cassava, or sugar cane.

Laywoo-D3
Material formed by the mixture of a polymer, similar to PLA, and wood powder in different percentages and that offer a result with a similar appearance to wood and that can be easily painted and sanded.

Acrylonitrile butadiene styrene (ABS
On this occasion, it is a very resistant plastic that withstands high temperatures. It offers some flexibility and is easy to paint.

High impact polystyrene (HIPS)
It is a variety of polystyrenes, a polymer that is quite brittle at room temperature and that it modifies by adding polybutadiene to improve its resistance.

Polyethylene Terephthalate (PET)
It is a type of plastic widely used for beverage containers. Chemically it is a polymer that is obtained from the polycondensation reaction between terephthalic acid and ethylene glycol. It belongs to the group of synthetic materials called polyesters.

Thermoplastic elastomer (TPE)
They are a type of polymers or mixture of polymers that form thermoplastic and elastomeric materials. That is, they combine the advantages of elastic materials such as rubbers and plastic materials.

Filaflex
It is an elastic filament with a polyurethane base and other additives that together offer great elasticity. Printing with this type of material is slower but it is very useful for certain objects.

Laybrick
It is a material that results from the mixture of various plastics and plaster. This makes objects look like stone and can be easily painted and sanded.

Nylon
Synthetic polymer from the group of polyamides. An elastic and resistant textile fiber widely used for the manufacture and manufacture of fabrics and fabrics.

Amorphous Metals (BGM)
Amorphous metals with those that have a disordered atomic level structure, which allow various forms for their solidification.

Mobirise
Material settings chart (PDF)

3 - 3D Printer Building:

During the Lockdown, I had a class with Nadya Peek as part of my master, and she was telling us how she made her students at Washington university to buy and build their own 3D printer not only for having a tool for working, but also to learn exactly how it is build, how it works and how it is repaired. So I started looking for a 3D printer and after some reviews and recommendations, I've got an Creality Ender 3 Pro 3D printer which now I totally love.

In this section, even dough it is not a fab academy assignment, I want to share some pictures of the process and some learnings and reflections after using it, failing and printing many times. From this process of building my own 3D printer I learned a lot much more that the few times I was able to use it in the Fab Lab, and you loose the freight of breaking or damaging it what make you a lot more confident with the machine (and less anxious after the first 100 printings).

One of the most important things I learned was hot to properly calibrate it, which I thing is one of the most important settings in order to get a good quality printing, plus having your printer bed pretty clean.

CALIBRATION:
In the beginning I started calibrating it with some calibration printed tests, but this process takes to long because you will have to wait for the print to finish, calibrate and test it again a lot of times, so I prefer to do the paper test:

1 - I move the noozle to automatic home and then disable the stepper motors so I can easily move it in any direction.

2 - I move the noozle so that it is right on top of one of the calibration springs and knots in the corners.

3 - You pass a piece of paper between the noozle and the bed, and star adjusting the knob until the paper slightly pases between them with a little bit of force.

4 - You repeat the same process in the four corners many times, because when you calibrate one, the others will decalibrate, so you have to repeat it many times.

CLEANING:
Some people add hair spray to the bed so that the object sticks better to it, I personally have never used it outside of the lab, but I discovered in some tutorials that cleaning the bed with a cloth and a little bit of alcohol works very good, since it removes the dust that might be over the bed and that would interfere in the sticking process.

The noozle might also get stuck or dirt, for what I would recommend to first heat it up so that it is easier to remove the resting parts of the last used material so that it does not contaminates your new print.

NOOZLES:
My printer comes with 0.3, 0.4, 0.5 and 0.6 noozles. I mainly have printed in PLA of 1.7mm, for what I usually use my 0.4 noozle, which I thing gives me a good balance of quality and speed. I could go to a higher speed with a 0.6 noozle or even force the machine speed a bit bi turning the control knob, but that will give me a not that good detail, so it also depends on what you are printing.

The opposite happens with the 0.3 noozle which will give you more details with less speed, but it is pretty good when you have to print small details that might not be printed using the 0.4. You can check this when you do the slicing in cura and check that in every layer, every part is printed correctly, because sometimes parts might appear in red and not in yellow, what might indicate that the printer can't print it with that size of noozle.

MACHINE UPGRADES:
I've found a lot of upgrades for my 3D printer on Thingiverse and have already printed some like knobs for the extruder, pulling handles for the heating plate, cases for tools and others. For doing this I recommend to look for a file that has a lot of downloads or reviews, and personally I choose the same color for every tool so that it combines with my printer (RED).

I also changed the mainboard for a silent one, which reduced a lot the noise of the printing. Now only the ventilators make noise, which they told me you can also upgrade with silent ones. The only problem in changing the board was that the connections where glued with hot glue.

One of the upgrades I want to add is the BLTouch sensor for auto leveling the bed, which I find kind of expensive but really useful for the leveling process. The other one is the new WiFi connection that will connect the printer wireless to the slicer and send it directly.

4 - Slicing: Ultimaker Cura:

Slicing is "the conversion from a model in STL format to printer commands in g-code format in fused filament fabrication and other similar processes. The slicer first divides the object as a stack of flat layers, followed by describing these layers as linear movements of the 3D printer extruder, fixation laser or equivalent. All these movements, together with some specific printer commands like the ones to control the extruder temperature or bed temperature, are finally written in the g-code file, that can afterwards be transferred to the printer."

This process basically divides the object in a stack of layers that are later transformed intro printing information for the machine. In this process is where you also define most of the printing configurations like the infill, the profile, the support, wall thickness, movement speed, extruding speed, fan speed, layer height, etc. There are more complicate adjustments that will help you better results depending of what you want, but the three most common ones to adjust are:

Infill:
Solid objects need a large amount of valuable material (filament, ...) and print time. The slicer can automatically convert solid volumes to hollow ones, saving costs and time. The hollow object can be partially filled by internal structures, as internal walls, to provide additional robustness. The amount of these structures is called infill density, this parameter being one of the adjustments to be provided to the slicer.

More Infill requires more time but also gives the 3D printed part more rigidness.
Less Infill requires less time and gives less structure.

In the infill you can also select different kind of designs for the structures, which also affect the structure of the whole piece, but personally I haven't experimented much with it yet. 

Supports:
Most of the 3D printing processes create the object layer by layer, down to up, with the layer under construction being deposited over the previous one. As a consequence, all object parts must overlie, at least in some part, over another one. In the case of an object layer that is floating (by example, the flat roof of a house or an horizontally extended arm in a figure), the slicer automatically can add supports for it. The support touches the object in a way that is easily detachable from it at the finish stage of the object production.

You can generate normal supports or tree supports. I personally like more the trees because they waste less material and seem to be easier to detach from the object. Also they can get into inner, more complicate parts without having to print the whole structure to get there.

Rafts, skirts and brims:
The slicer can automatically add some detachable structures to minimize problems related to the initial surface sticking to a bed.  Usual types of these base structures are a skirt (a single band around the base of the object without touching it), a brim (several lines of filament around the base of the object, touching it but not under it, and radiating outwards) and rafts (several layers of material that form a detachable base, with the object printed over it).

I usually go with brims, but if it is for a very high part or with little support, I would prefer using rafts than skirts. The problem with rafts is that they take a lot of time and material, but they are easily removed. Actually I love the flexibility that the raft removable pieces have, since they are thick but flexible. Would love to print in the future something like that on purpose.

Mobirise

5 - 3D printing Test:

To test different characteristics of each 3D printer, there are a lot of free open source test that you can download depending of what you want to test. There is the XYZ calibration cube, the All In One 3D printer test, the Calicat, the Test your 3D printer and others, with which you could test different things like the hanging degrees which means the inclination in which your printer starts to print in the air; the length in the air, which is the flying distance from point to point that the machine and filament can handle without hanging, the tall, the minimum width, the accuracy and others.

I have tried with all of the test I reference above and each one gave me different information, not only about the machine I was using, but also about the material quality's. Each of the test could help improve a lot of stuff in the printing process, if you know which adjustments to do on the settings or the machine to fix it the most. Some of this test come with explanation of what you can test and how to adjust it

Mobirise

TEST FILE:

Most of the test files I used, have been created by Marián Trpkoš and she has a really nice documentation an explanation of her test in: https://3dnation504795197.wordpress.com/guide/

This one I describe, is the 3D Printer Test (mini), and it is mainly for testing:

- Scale accuracy
- Overhang
- Hole test
- Diameter test
- Bridging
- Support test
- Tolerance

Mobirise

Printer Settings:

I did this test with a 0.4mm noozle with the standard quality settings:

- Wall thickness: 0.8mm (the double of the noozle)
- 100% Infill, is the recommended infill for this test.
- No supports.
- Layer Height: 0.2mm (the smaller the layer height, better quality it will have)
- 0.4mm Line thickness (noozle size).
- 0.8mm superior and inferior thickness (2x noozle)
- 50mm/s printing speed.
- 150mm/s traveling speed.
- 25mm/s wall speed.
- 20mm/s first layer and skirt speed.
- 0.4mm infill line distance.
- 30% infill overlapping.
- 6.5mm retraction at 25mm/s.
- I like adding a skirt, to clean a little bit the noozle before printing.

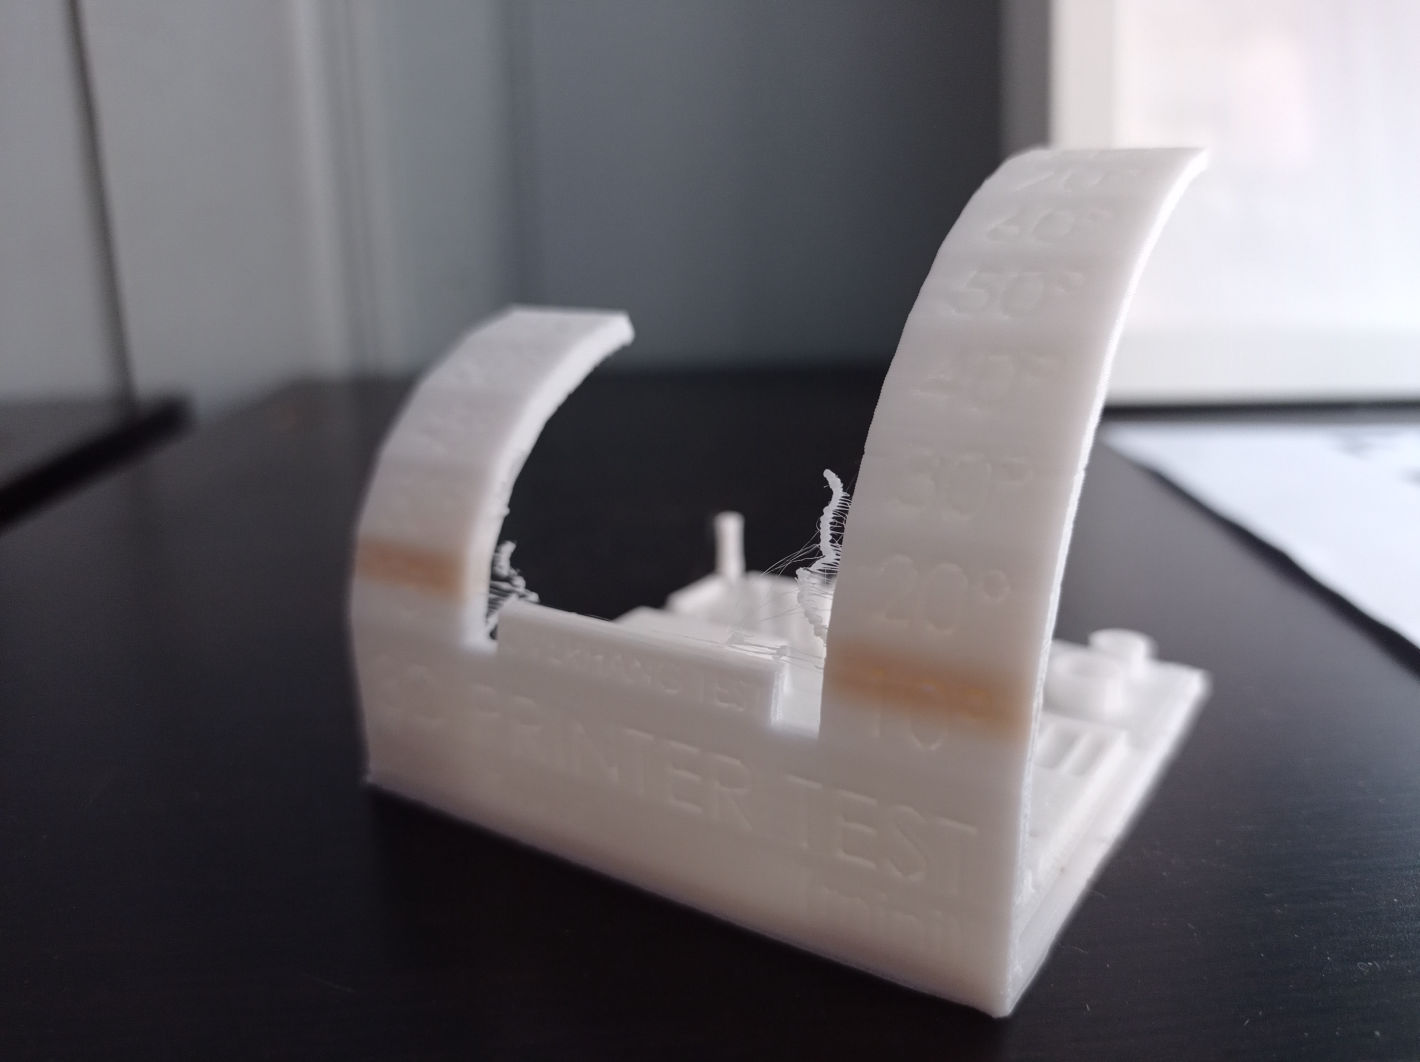
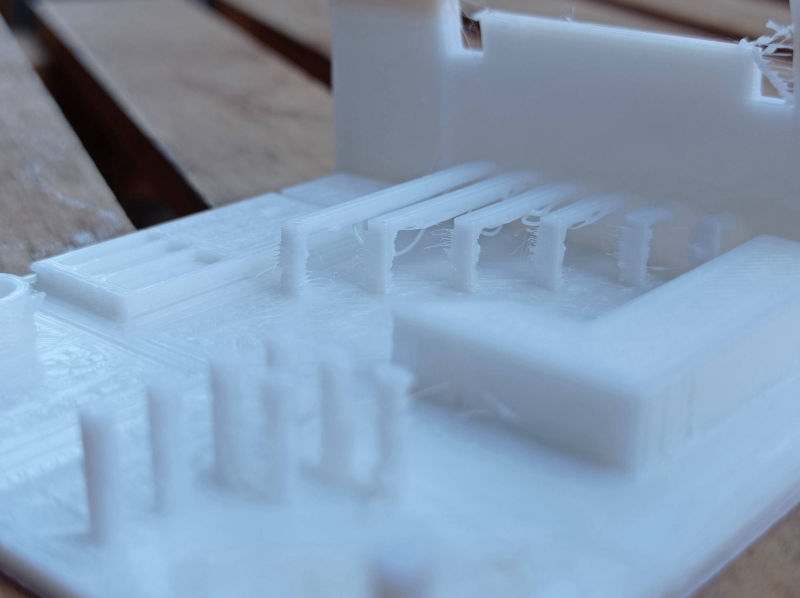
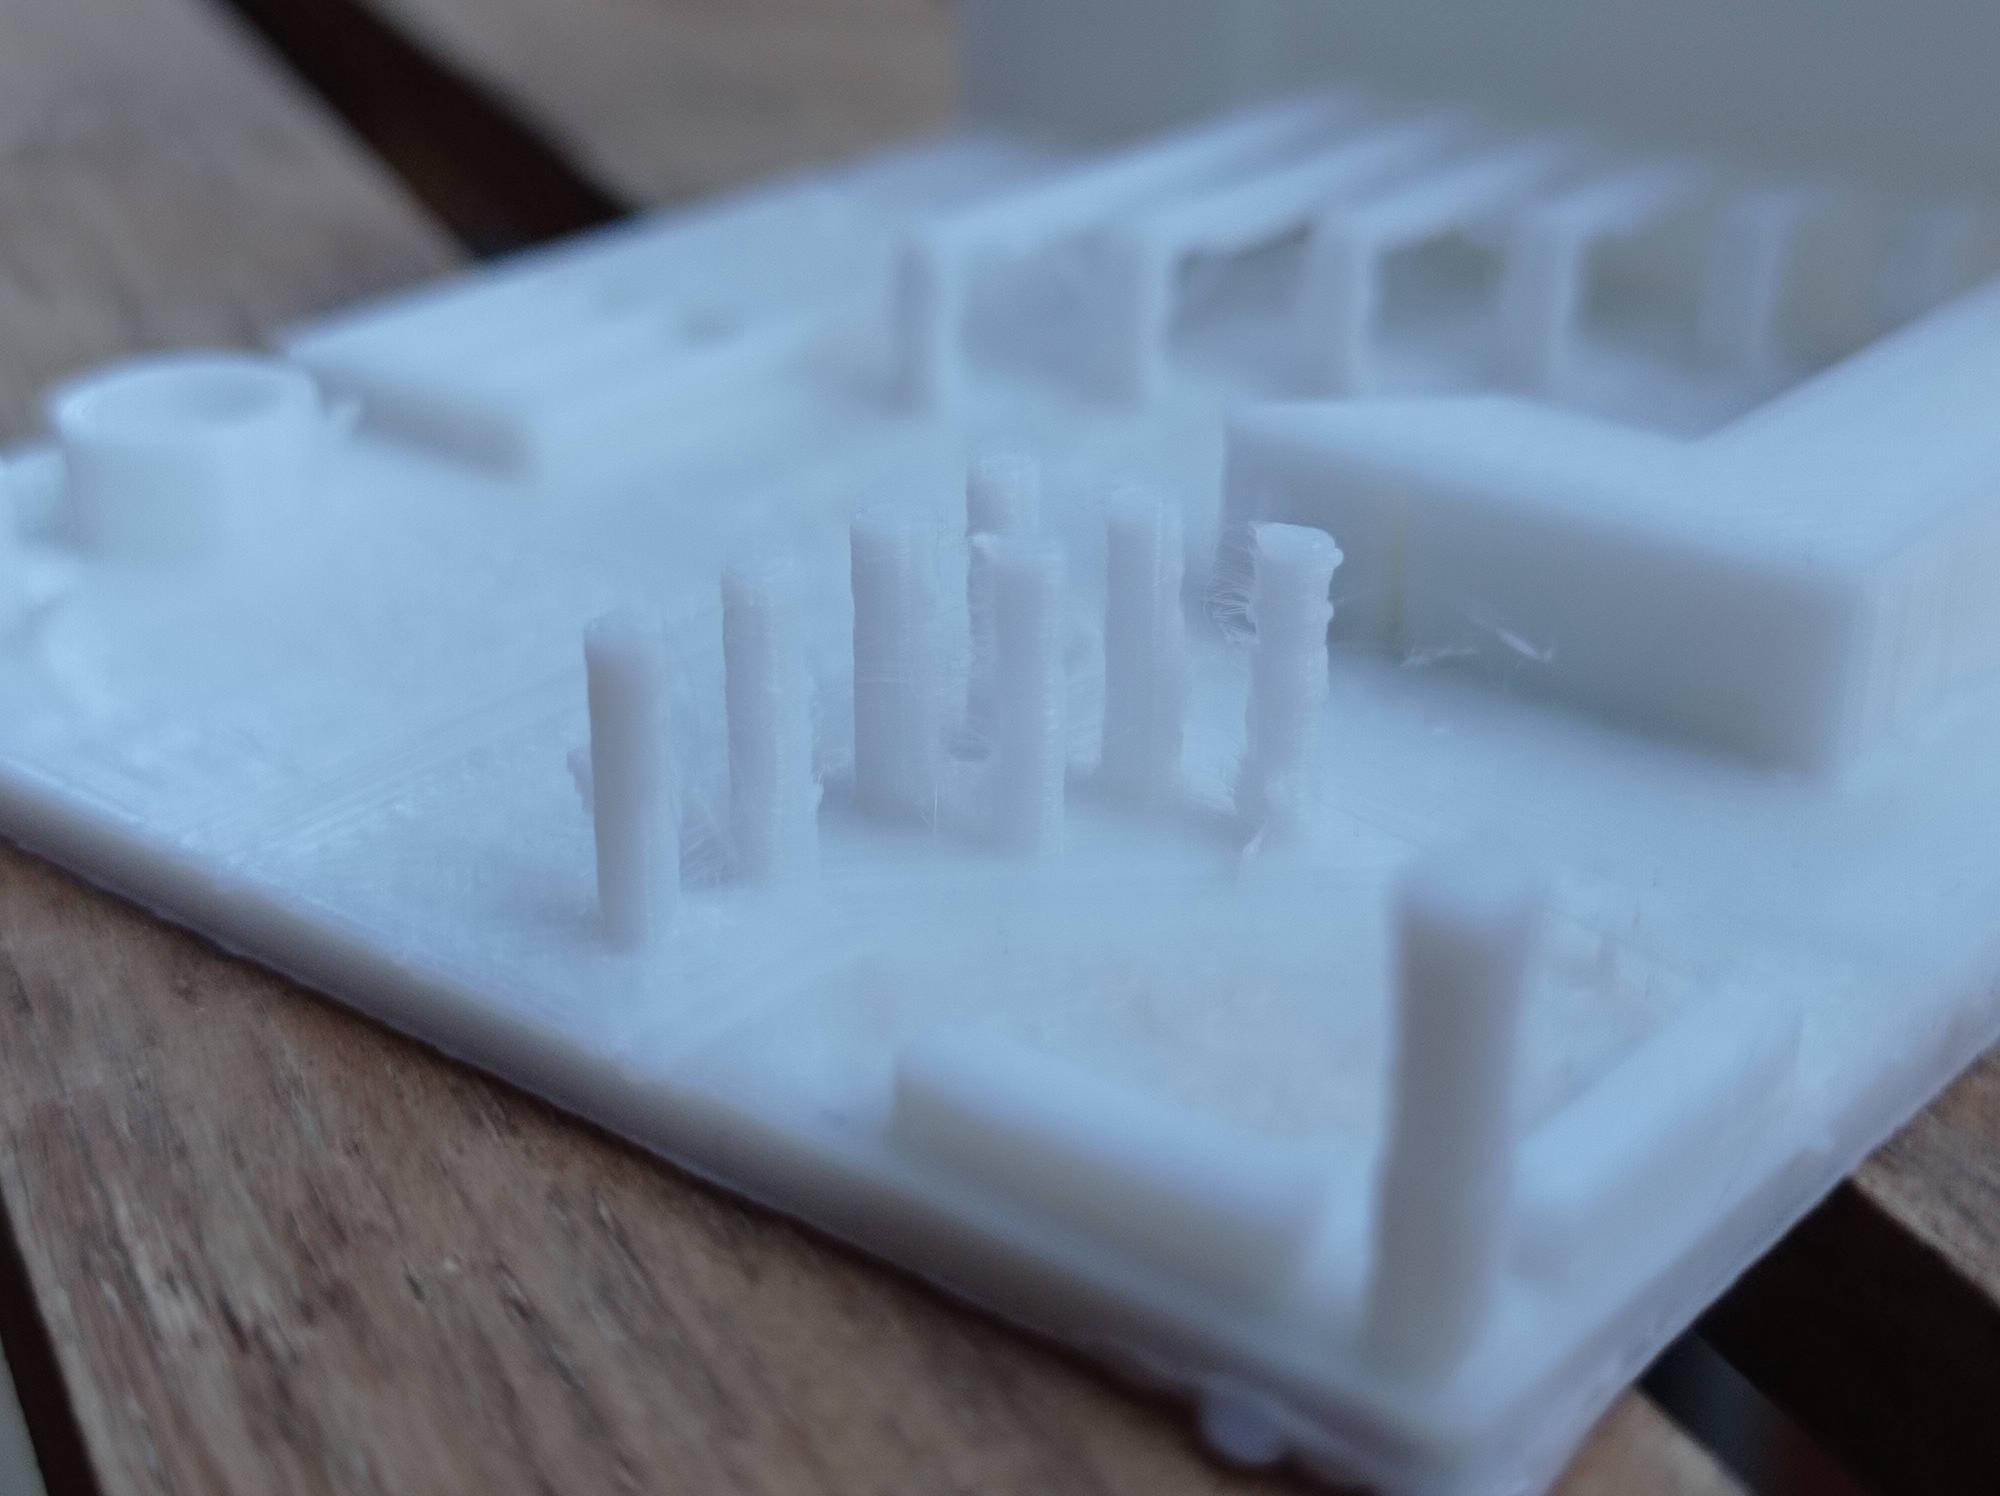
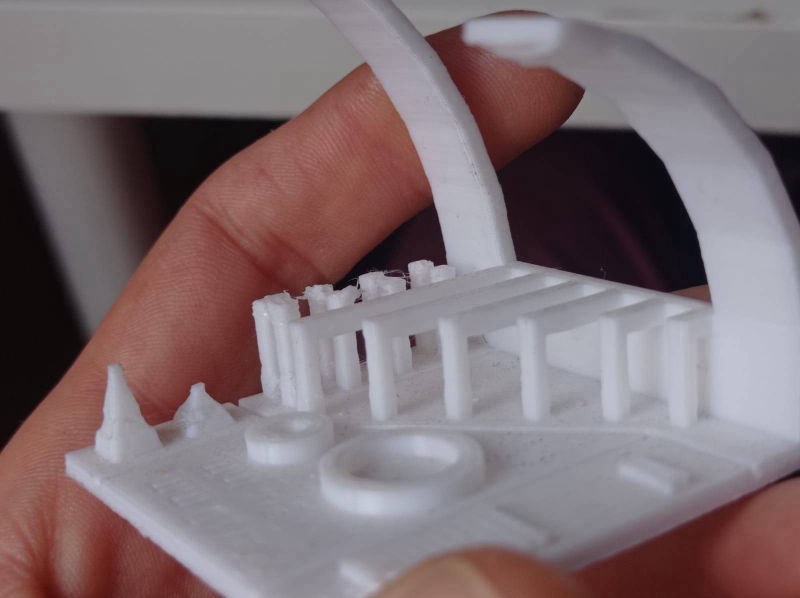
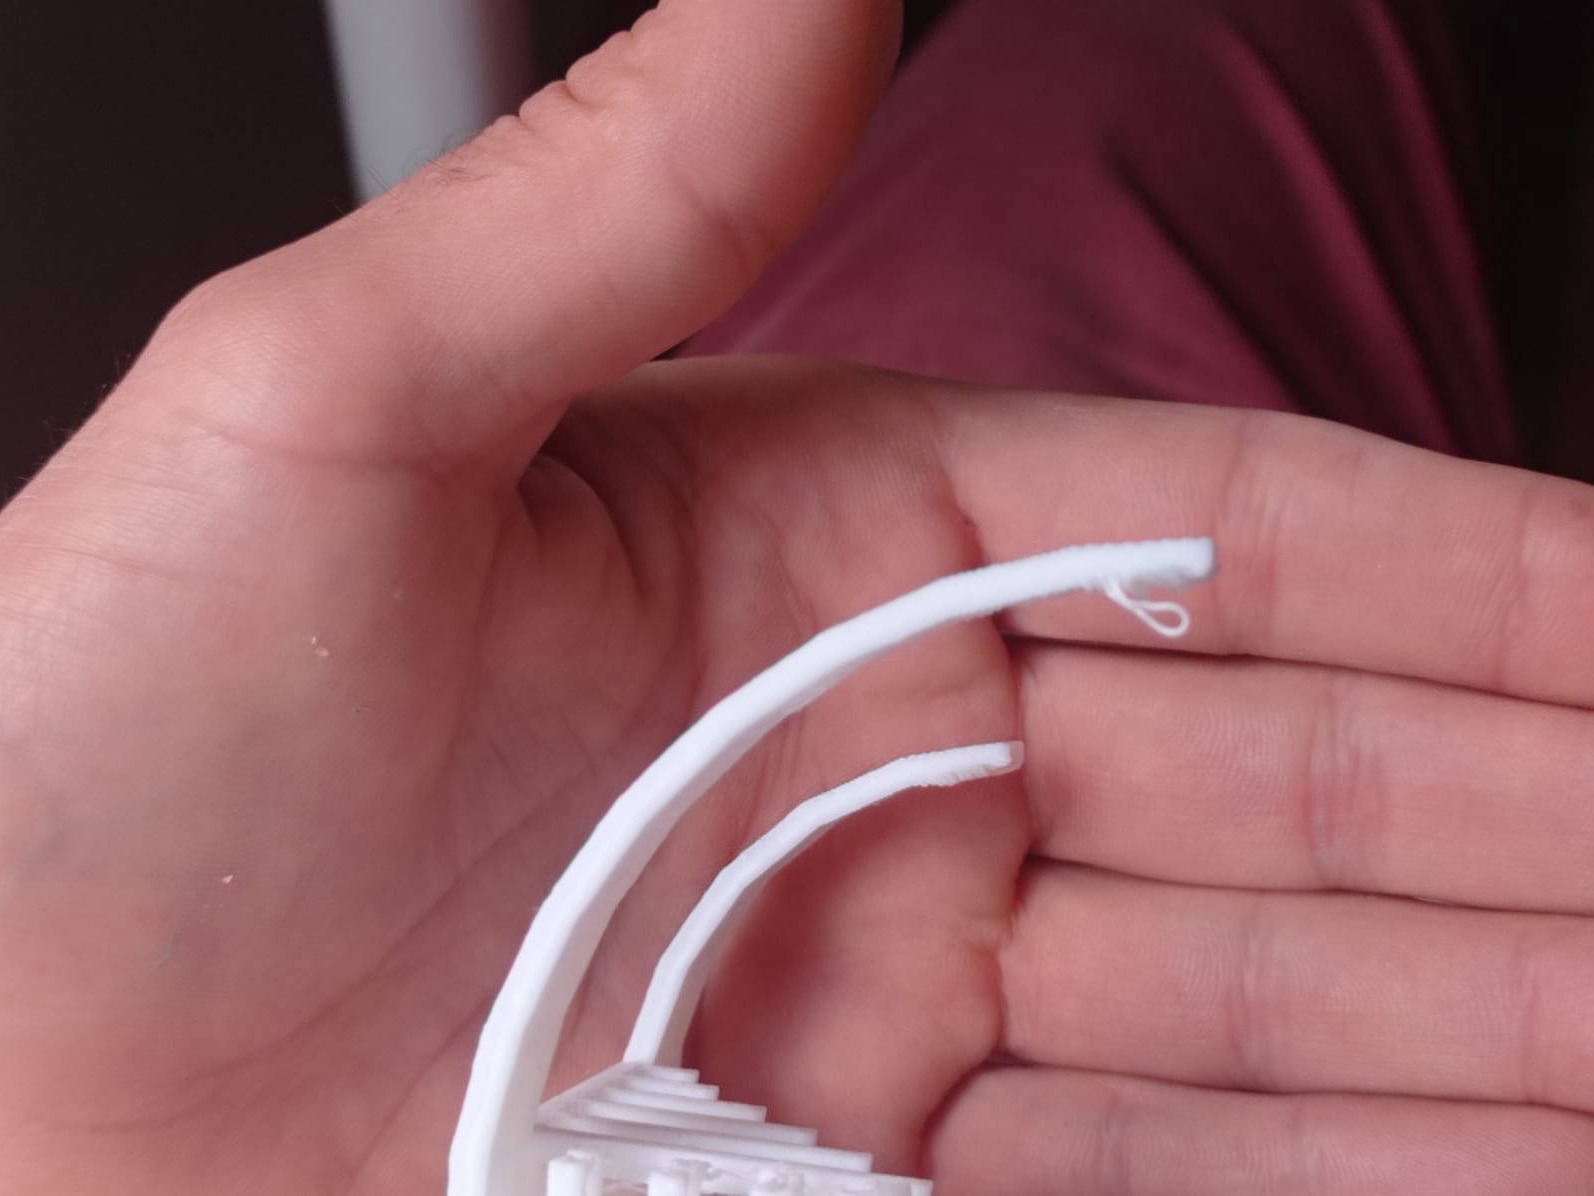
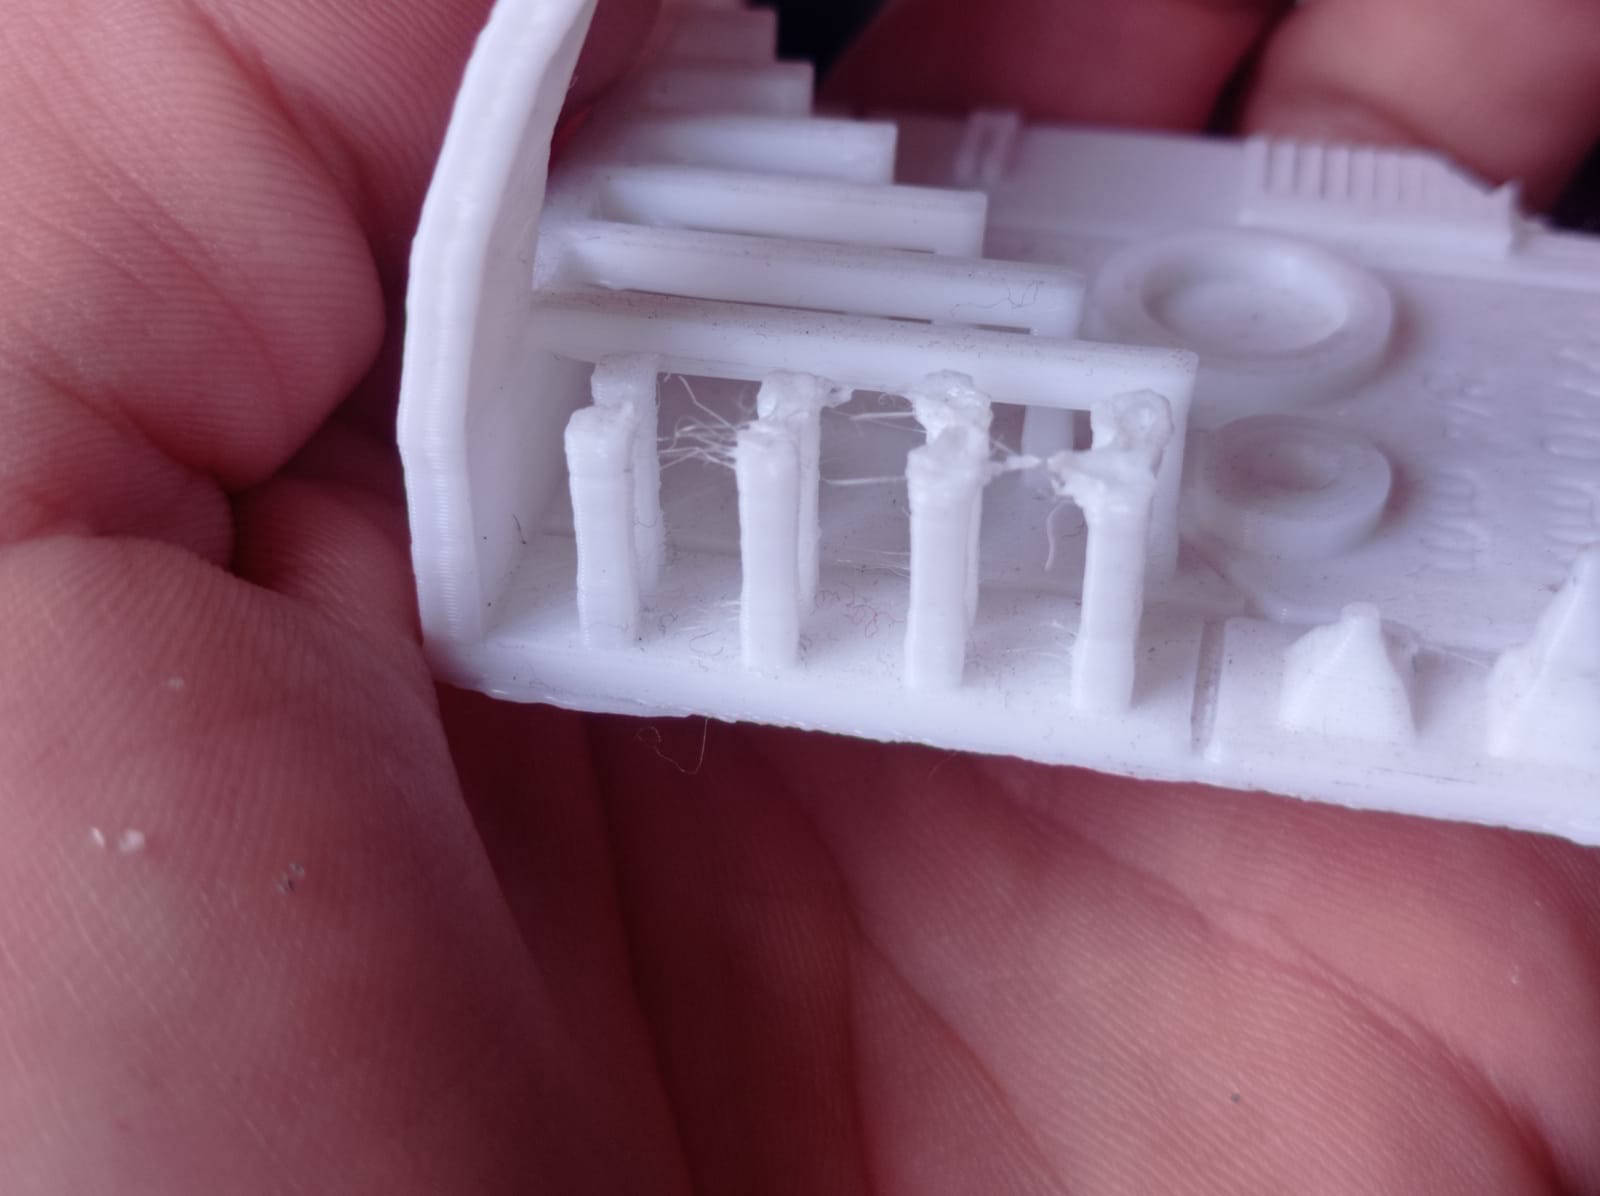
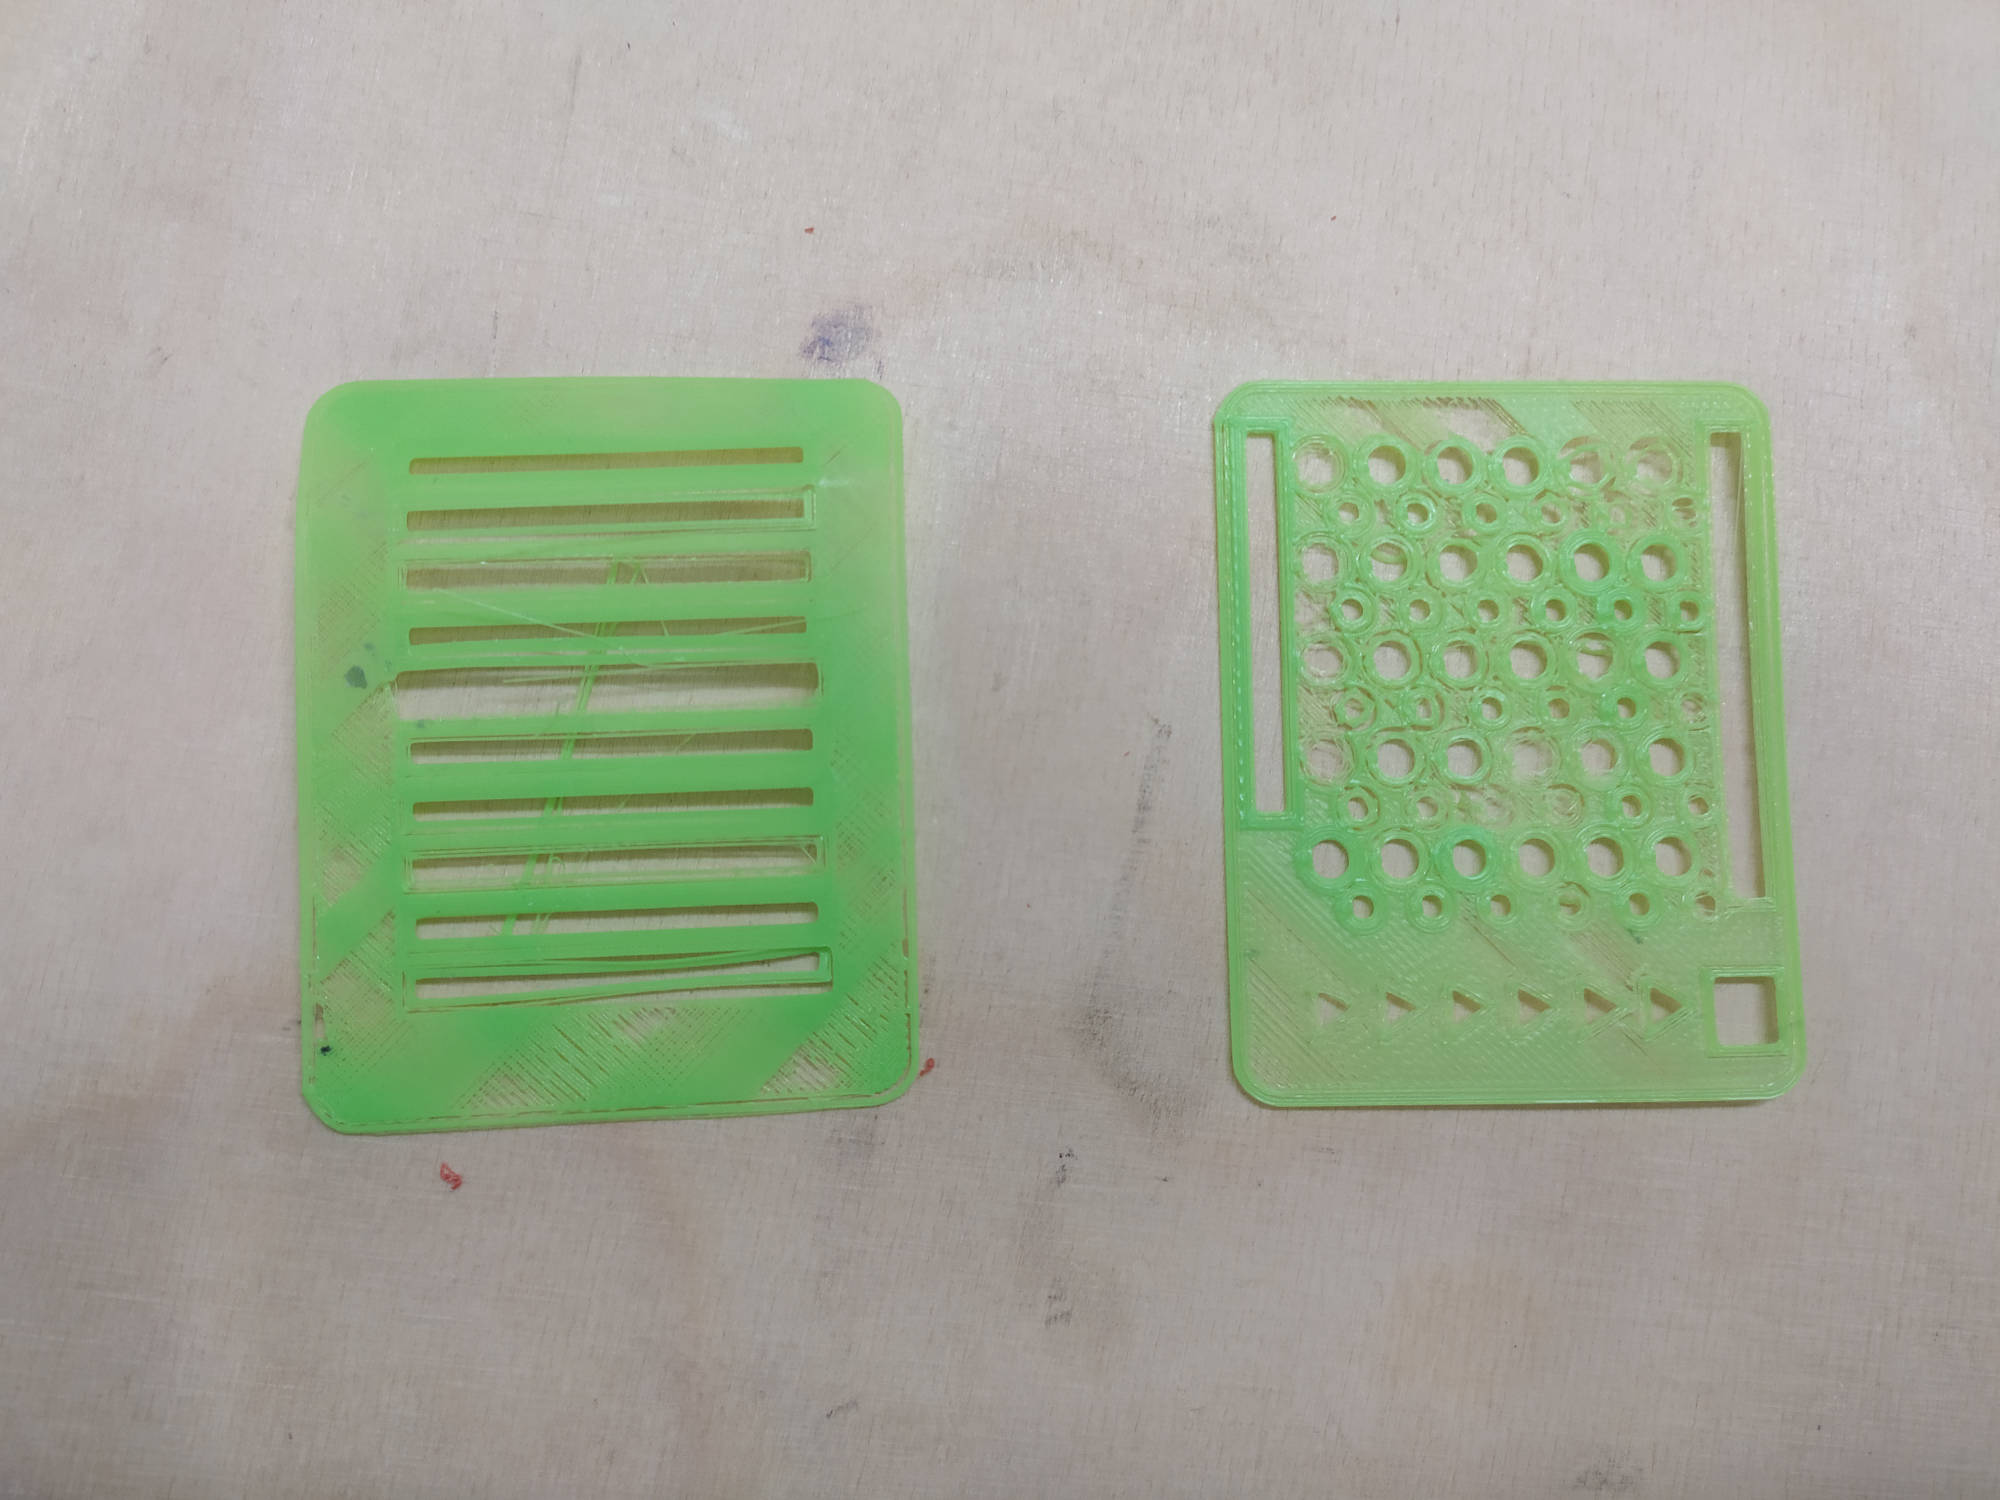
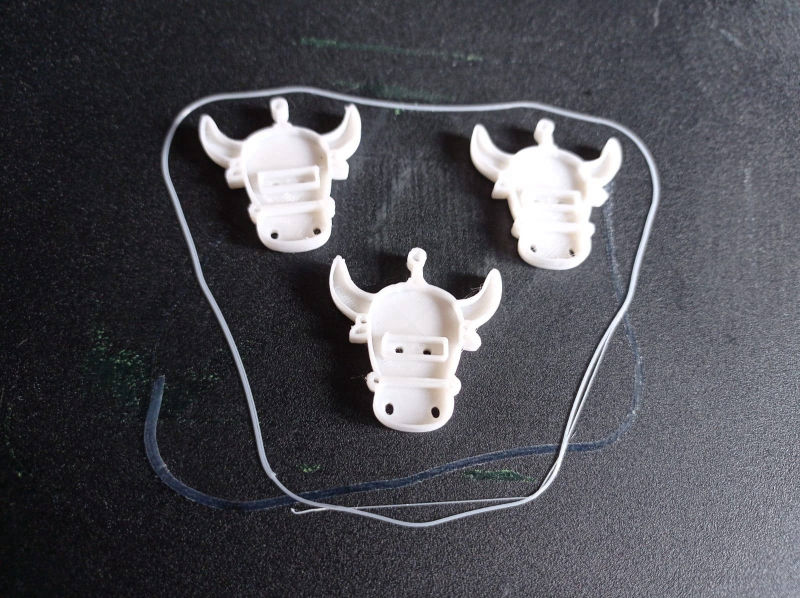
One of the most common issues in this test is the stringing, but it can easily be solved by adjusting 3 majors values: retraction, temperature and travel speed. There are some stringing test you can do, and start with a 2mm retraction and a 30mm/s retraction speed and start changing. Also adjusting the travel speed will help, since it will pull out less material.

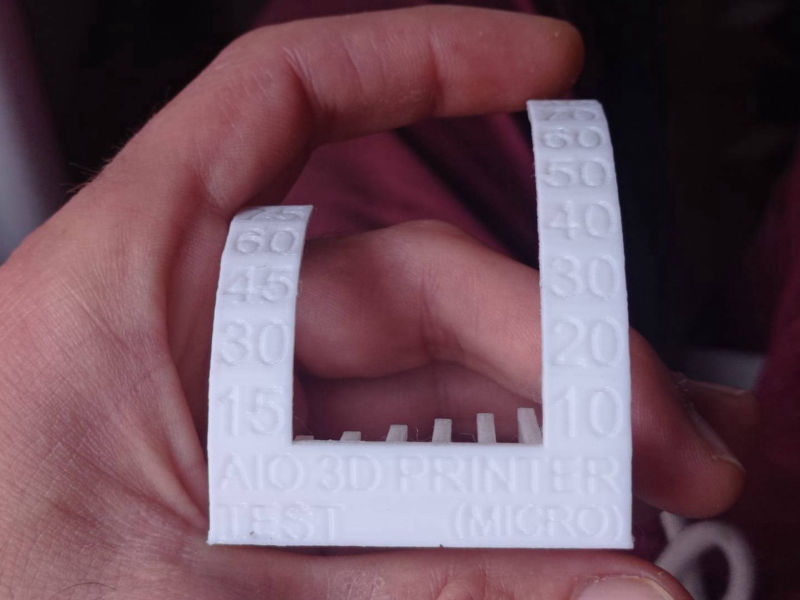
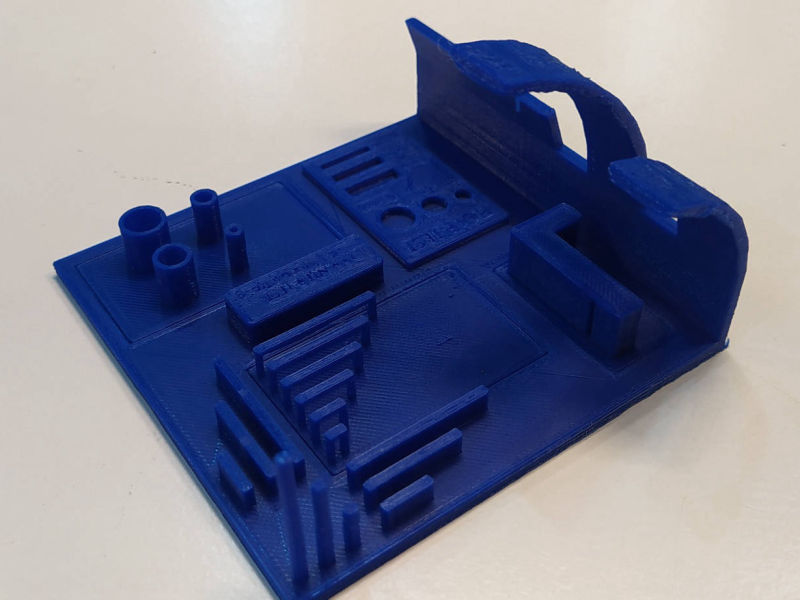
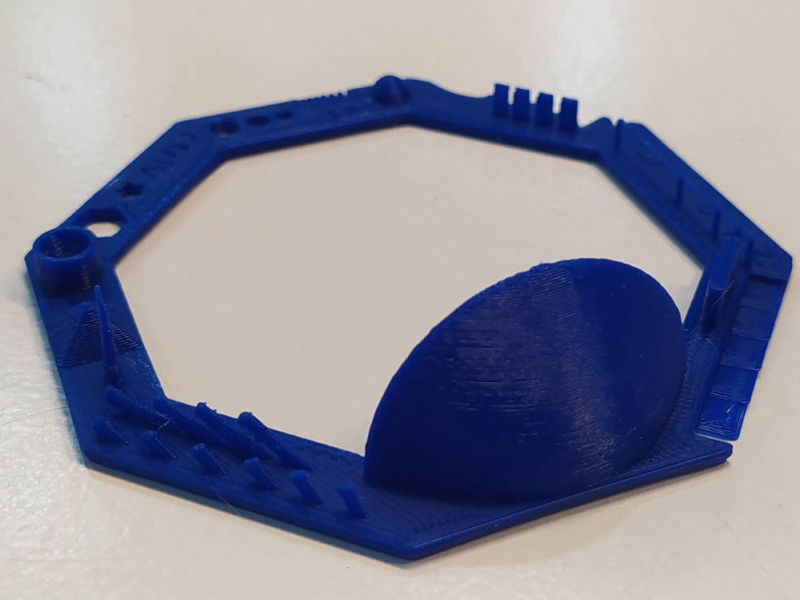
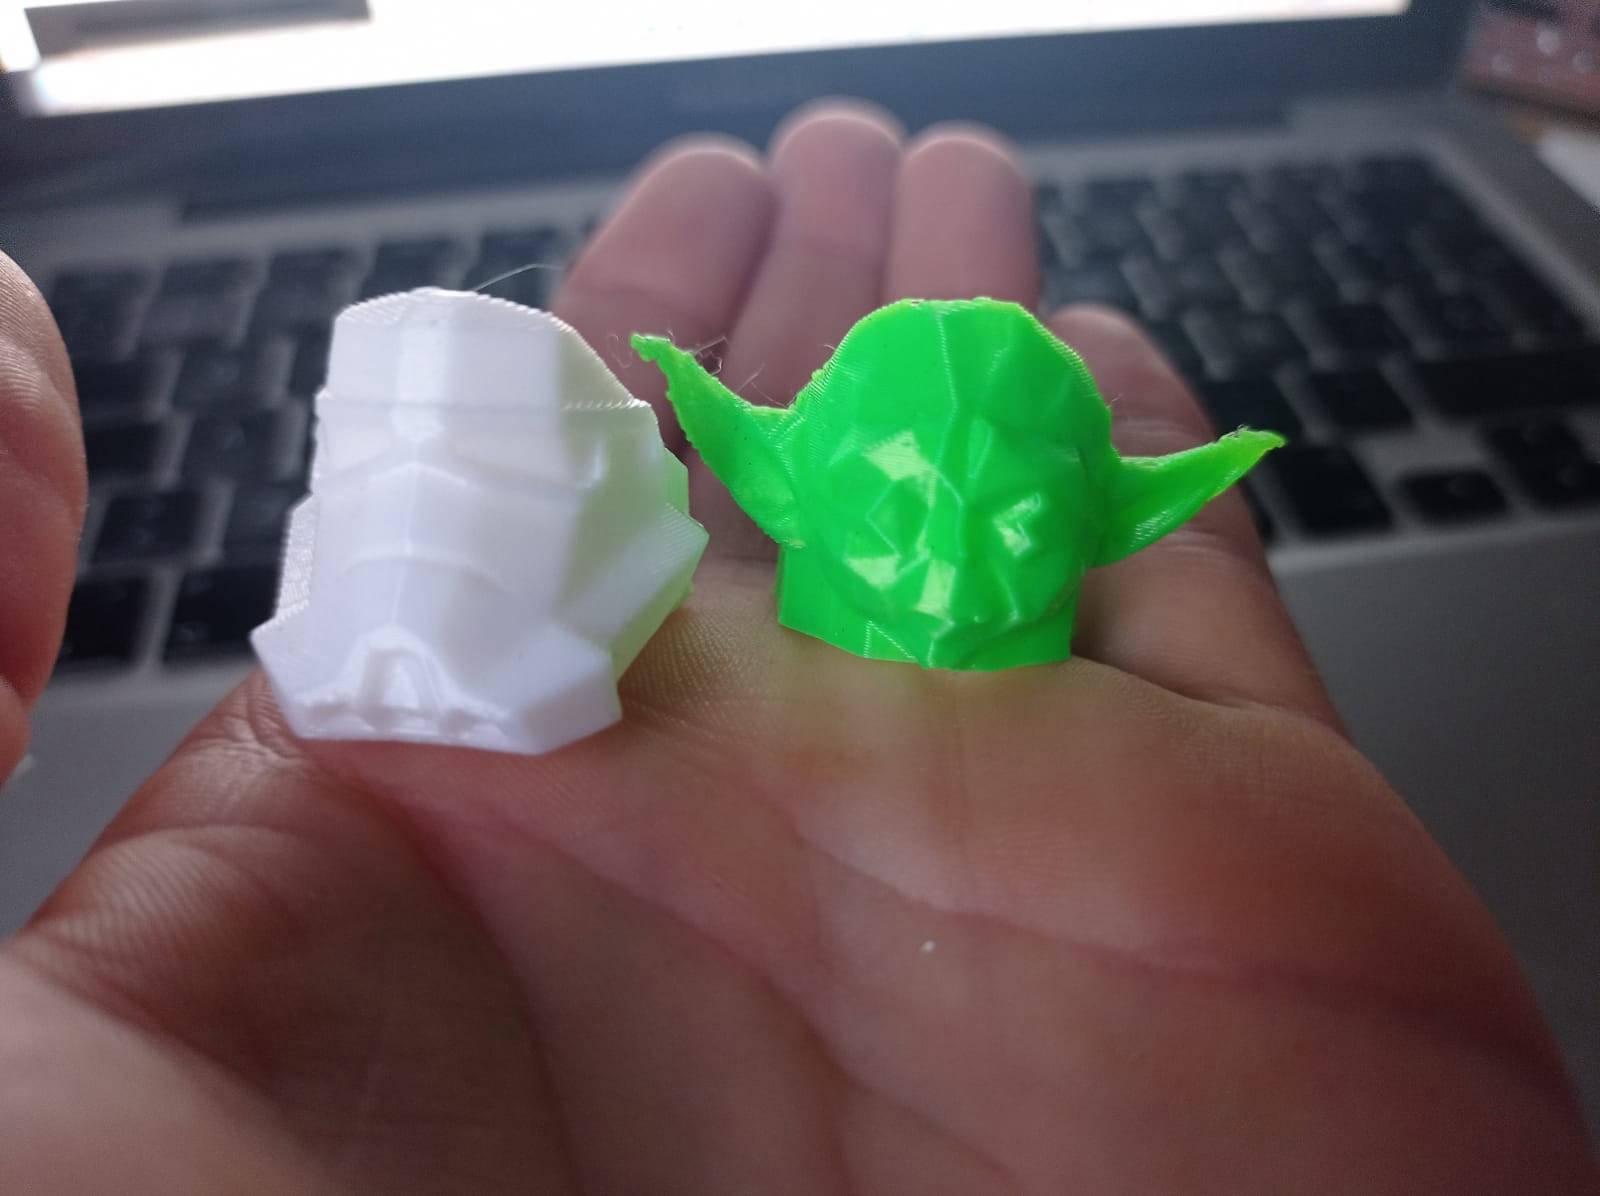
The Overhang goes pretty well up to 45º starts generating troubles after 50º... but it can go up a bit higher, like 60º.

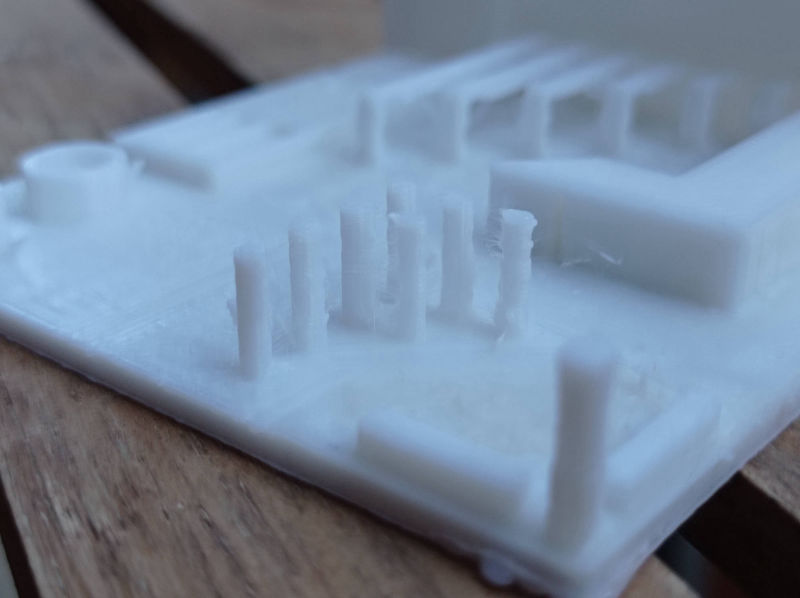
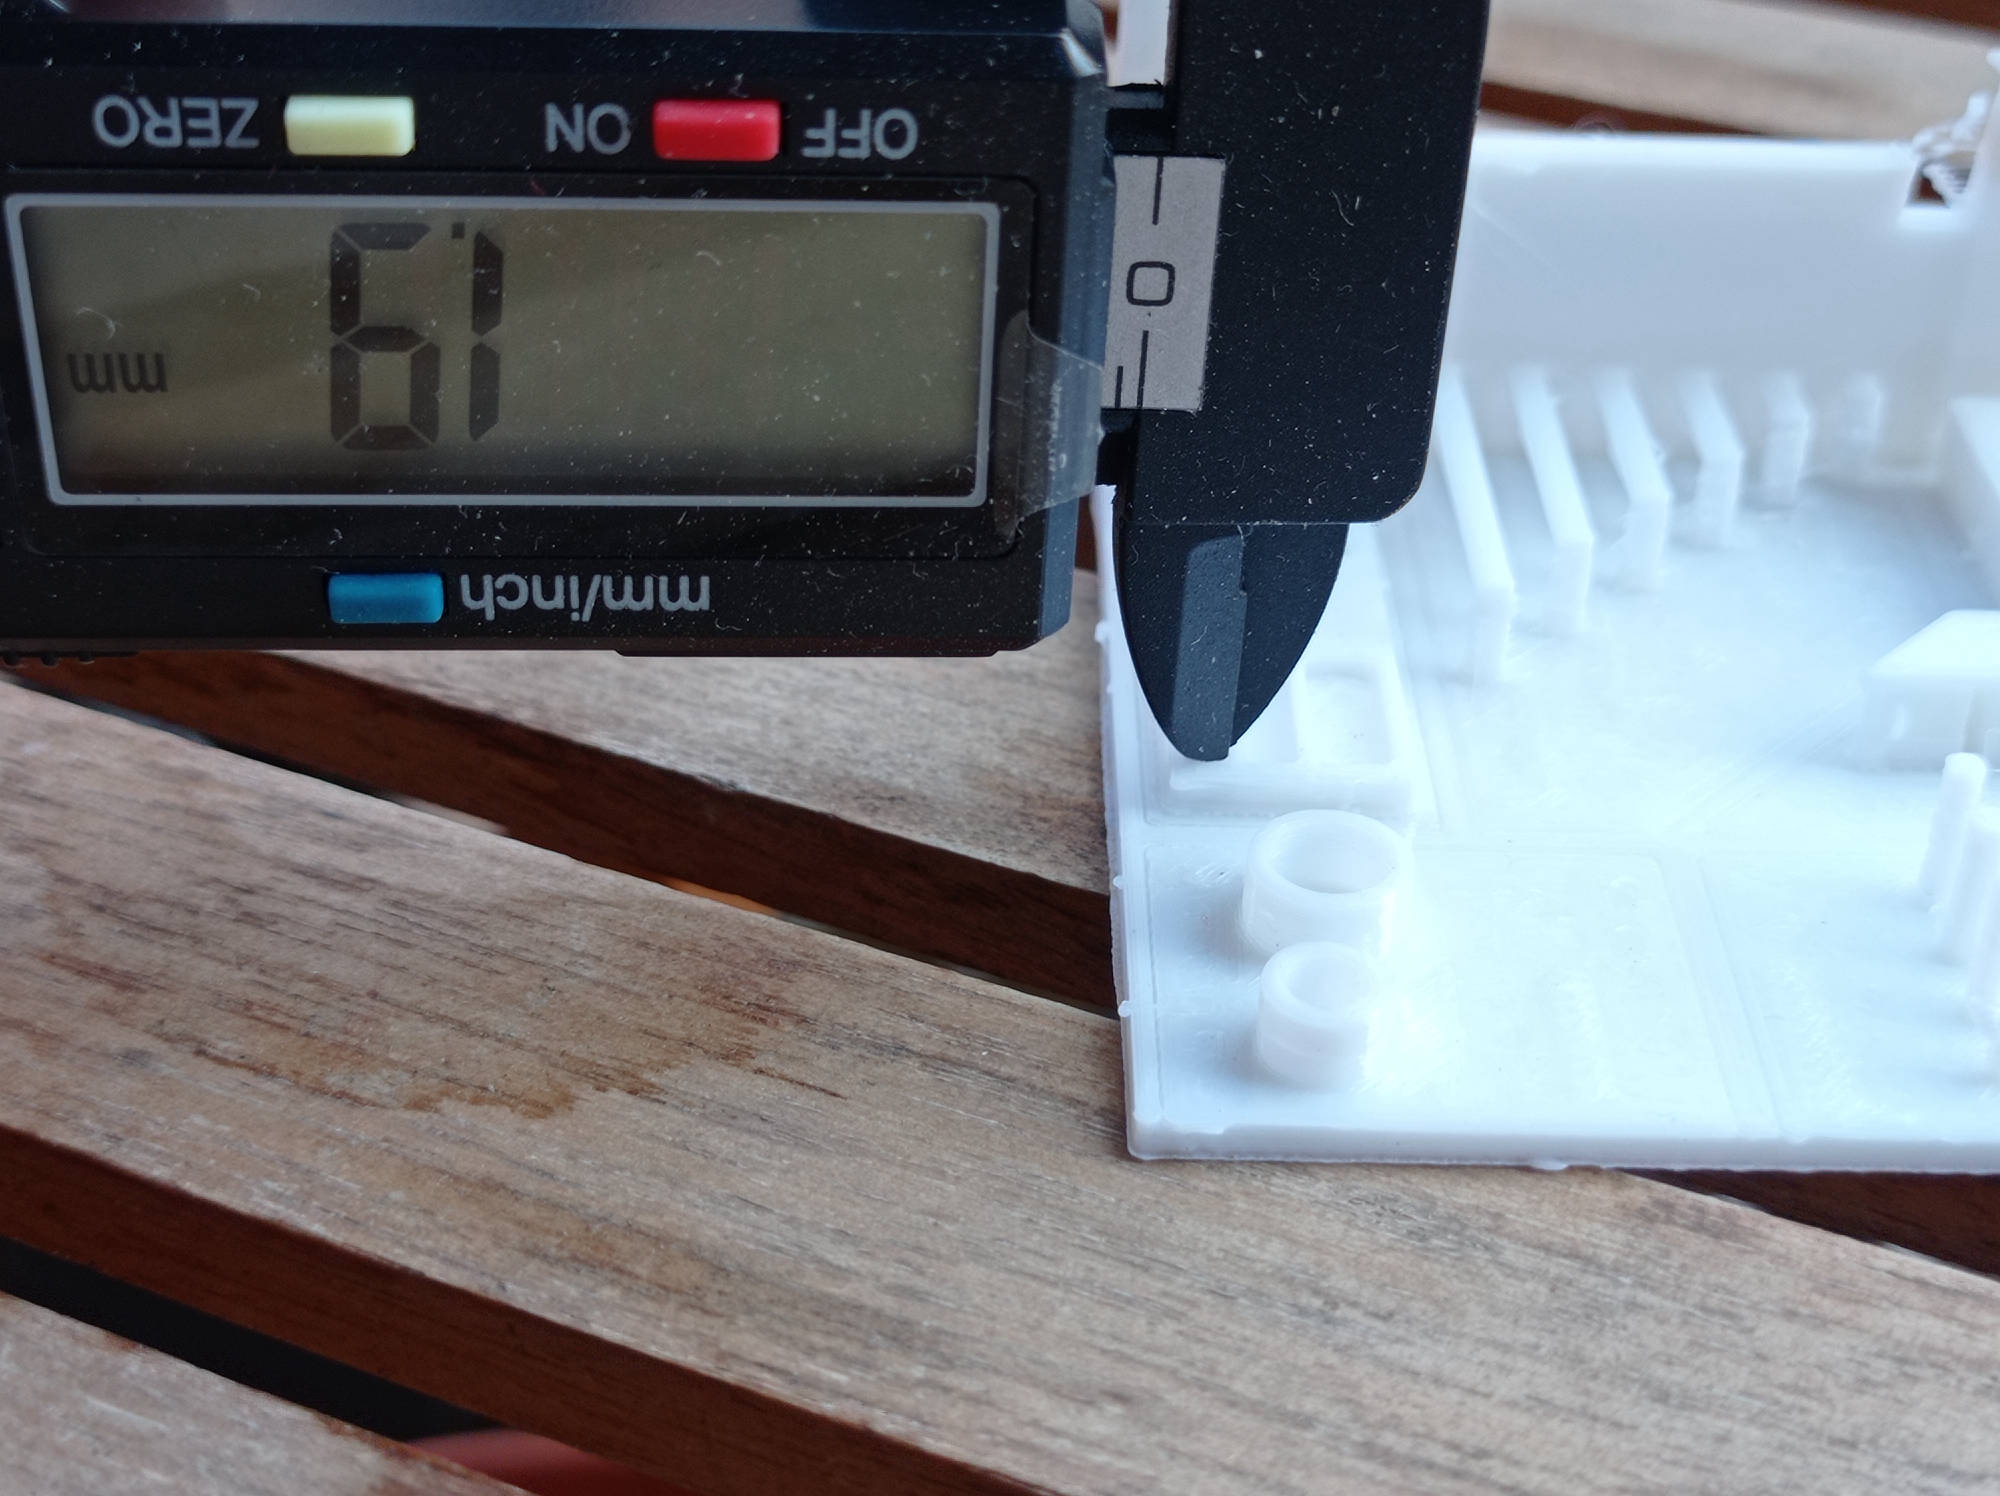
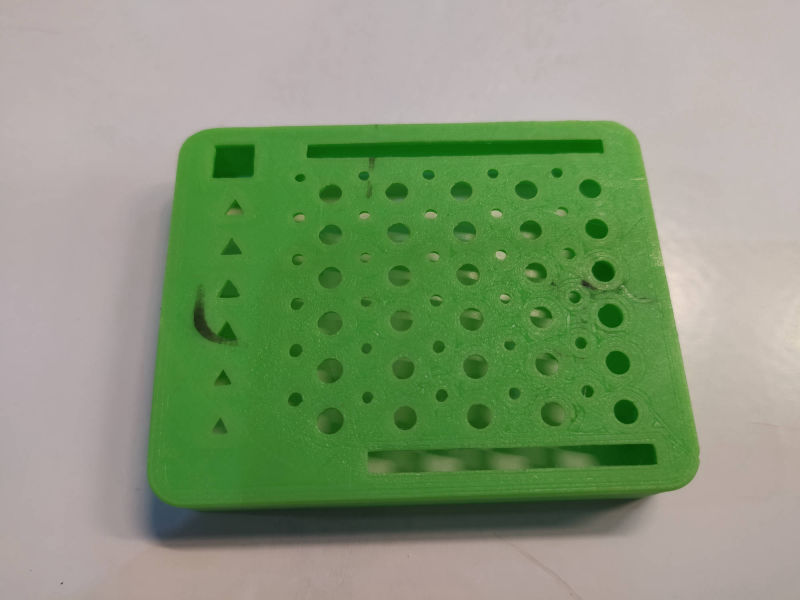
Holes go well down to 2mm diameter, for doing smaller holes, you will need to use a smaller noozle and a better printing quality in the settings (like 1.2 or 1.6).

The Bridge test passed up to 25mm, even dough it leaves a little stringing, but might be because of other setting.

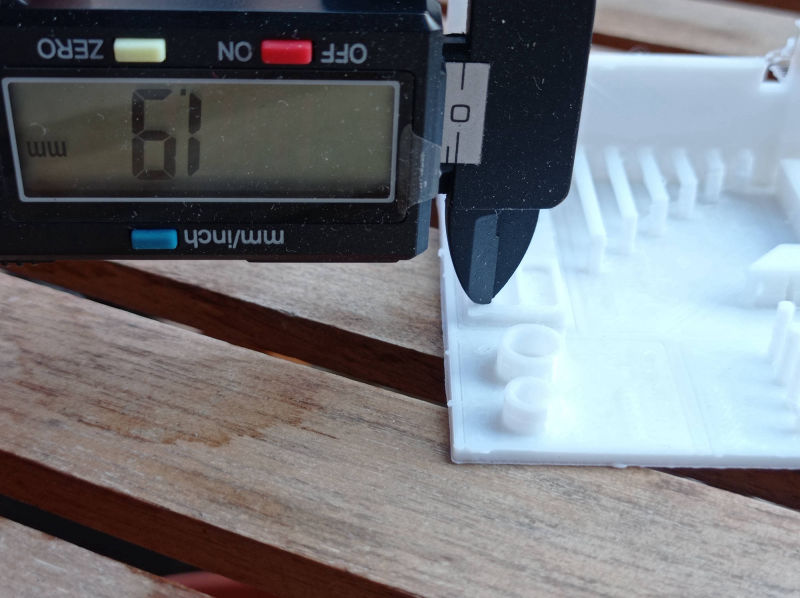
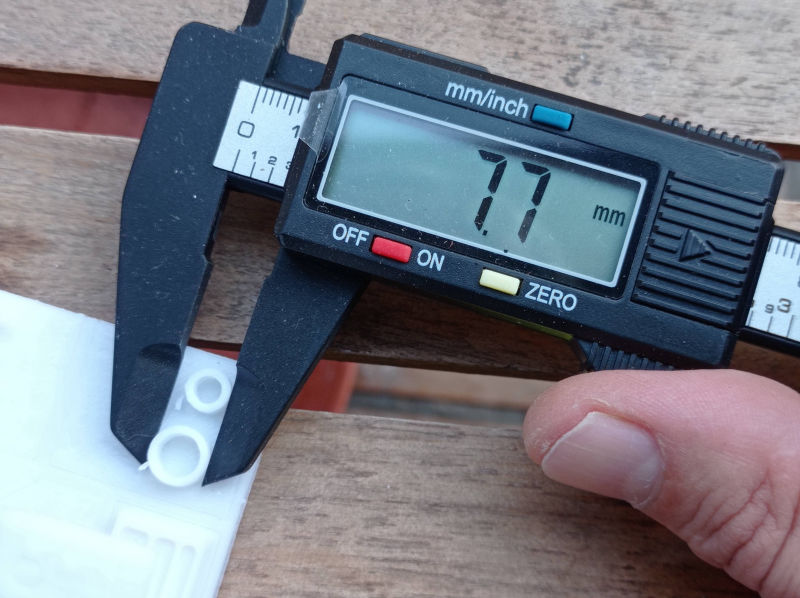
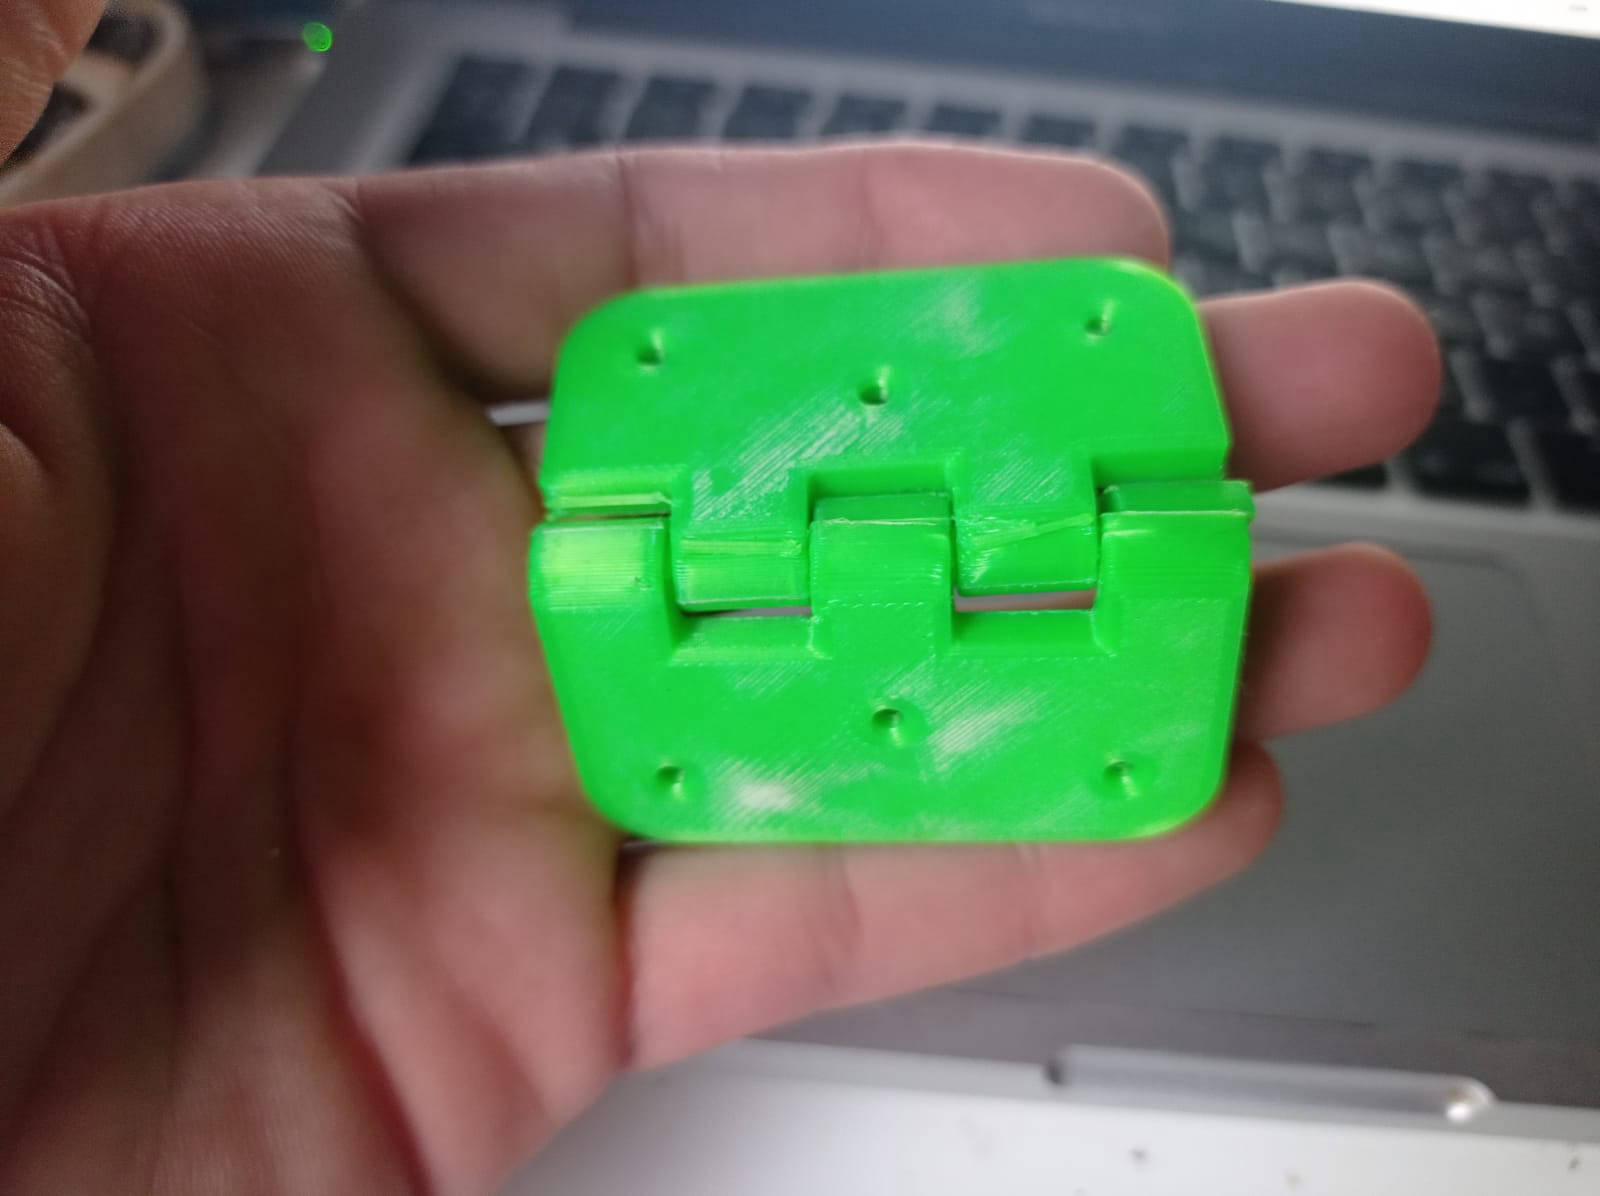
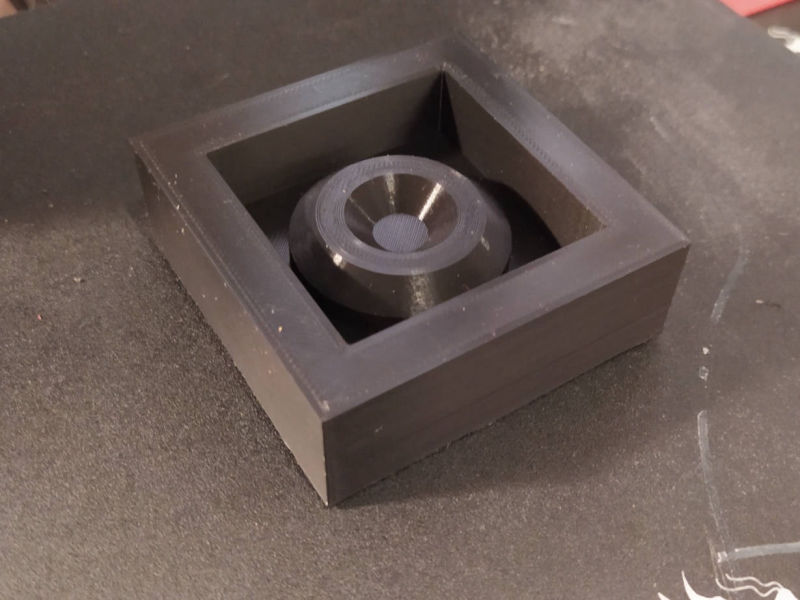
The tolerance (calculated by measuring holes' diameters): 0.15 - 0.25mm, which means minimum clearance is around 0.3 - 0.5mm

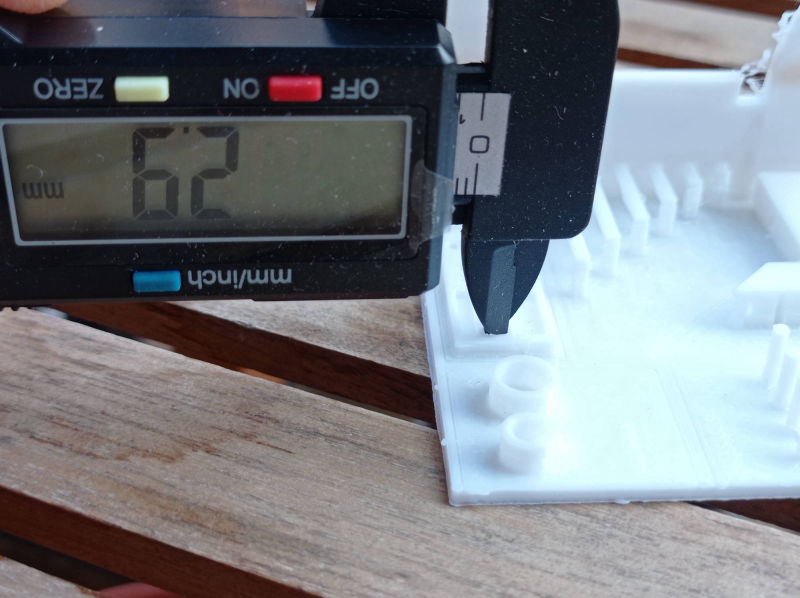
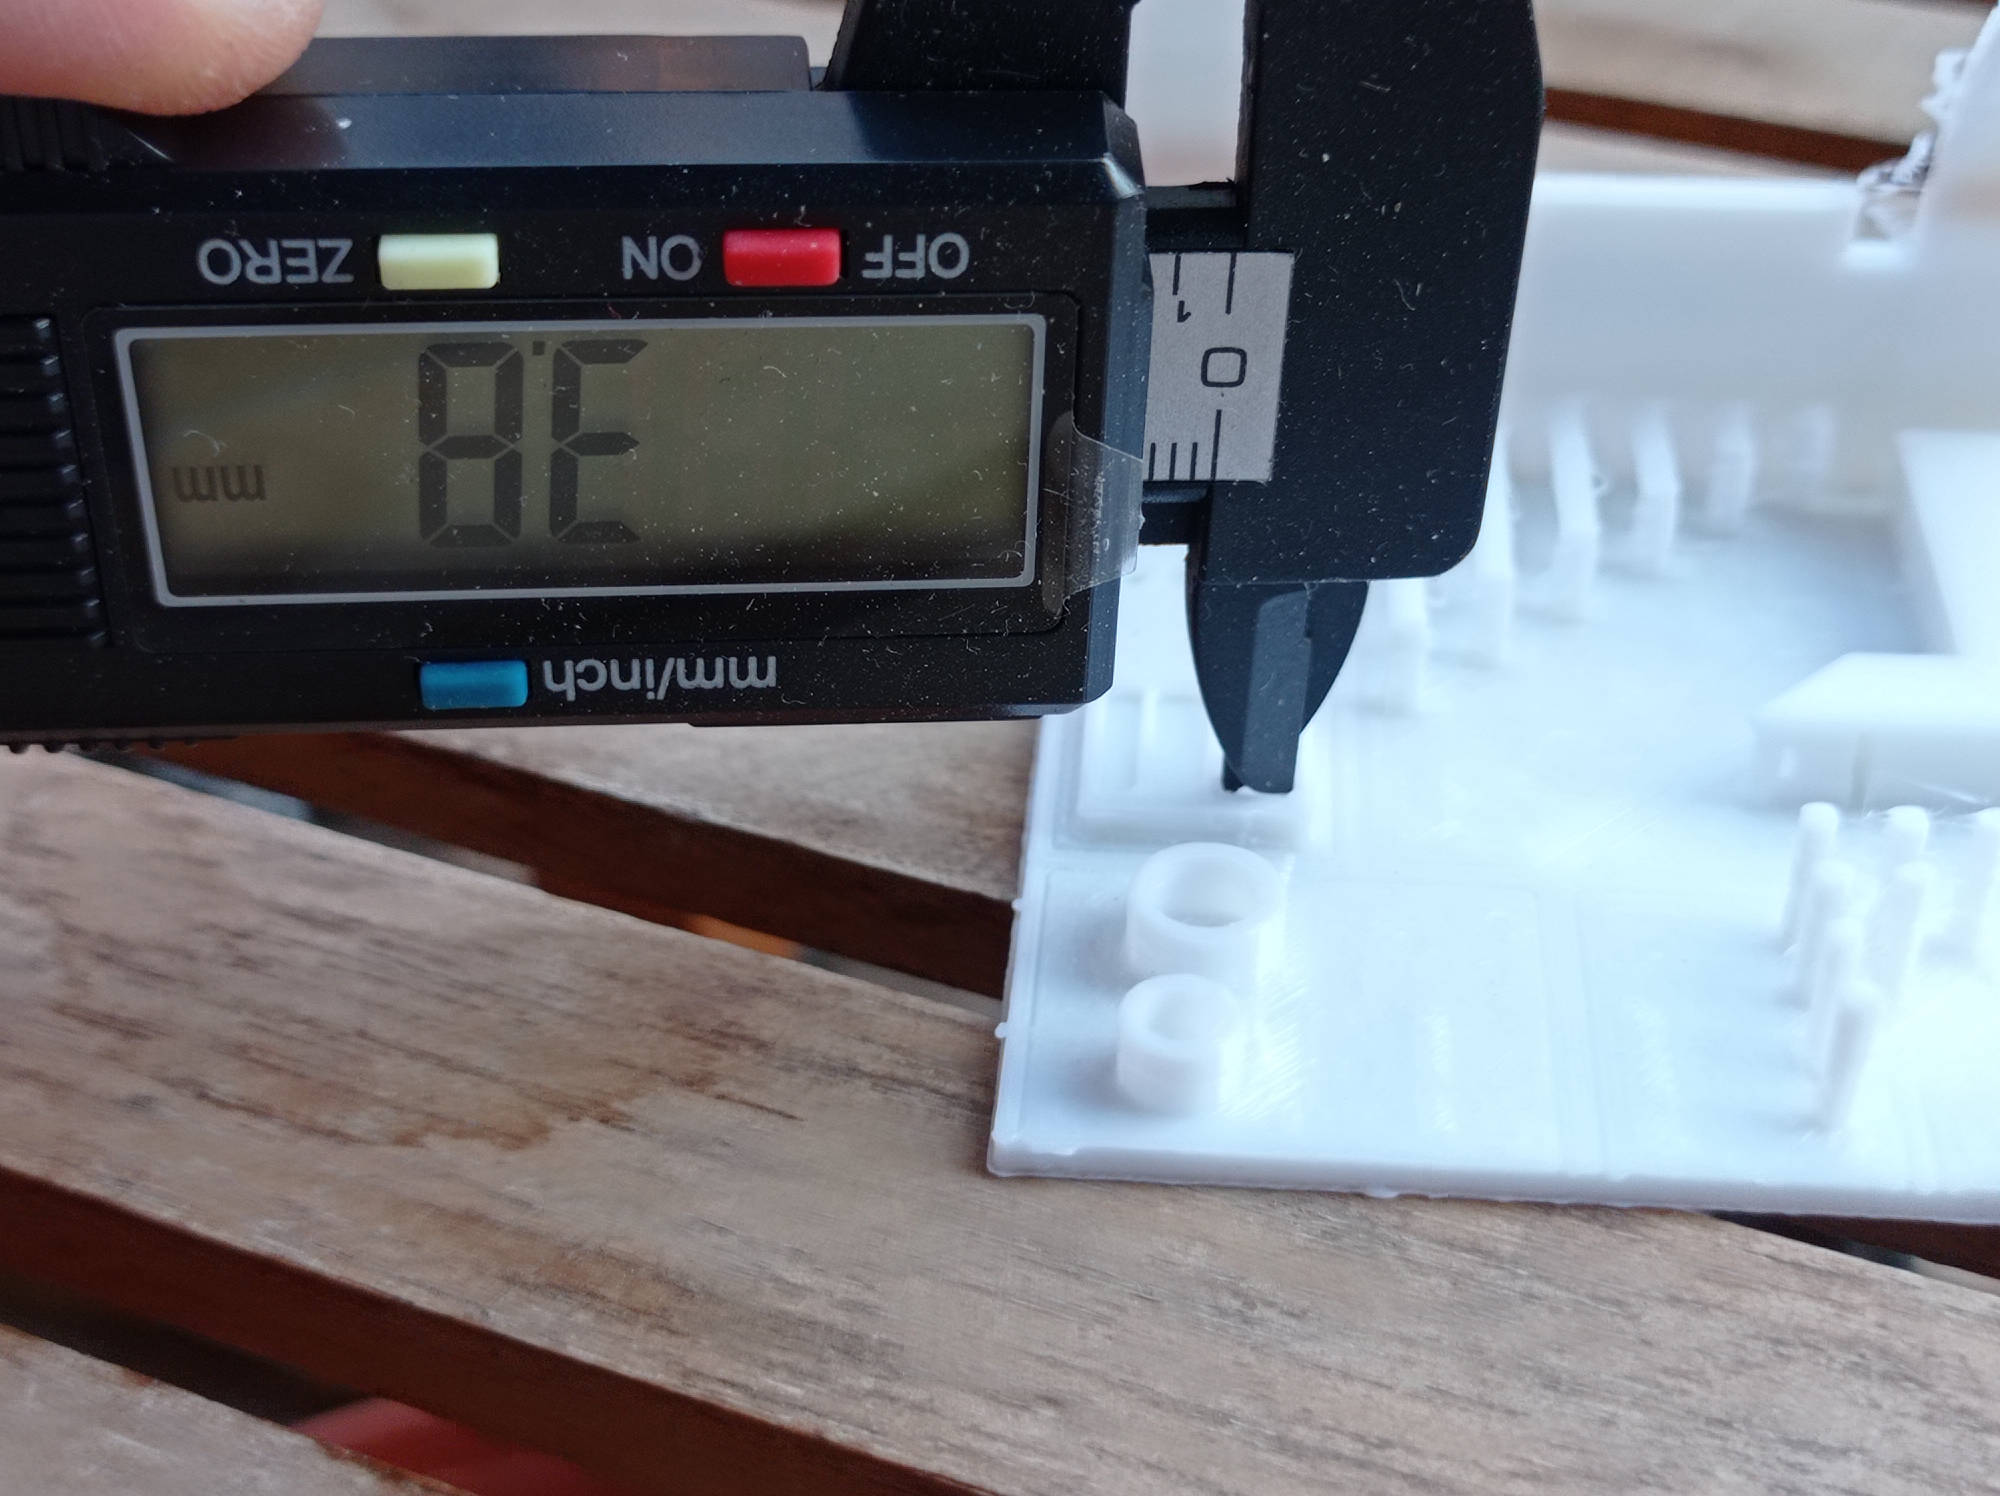
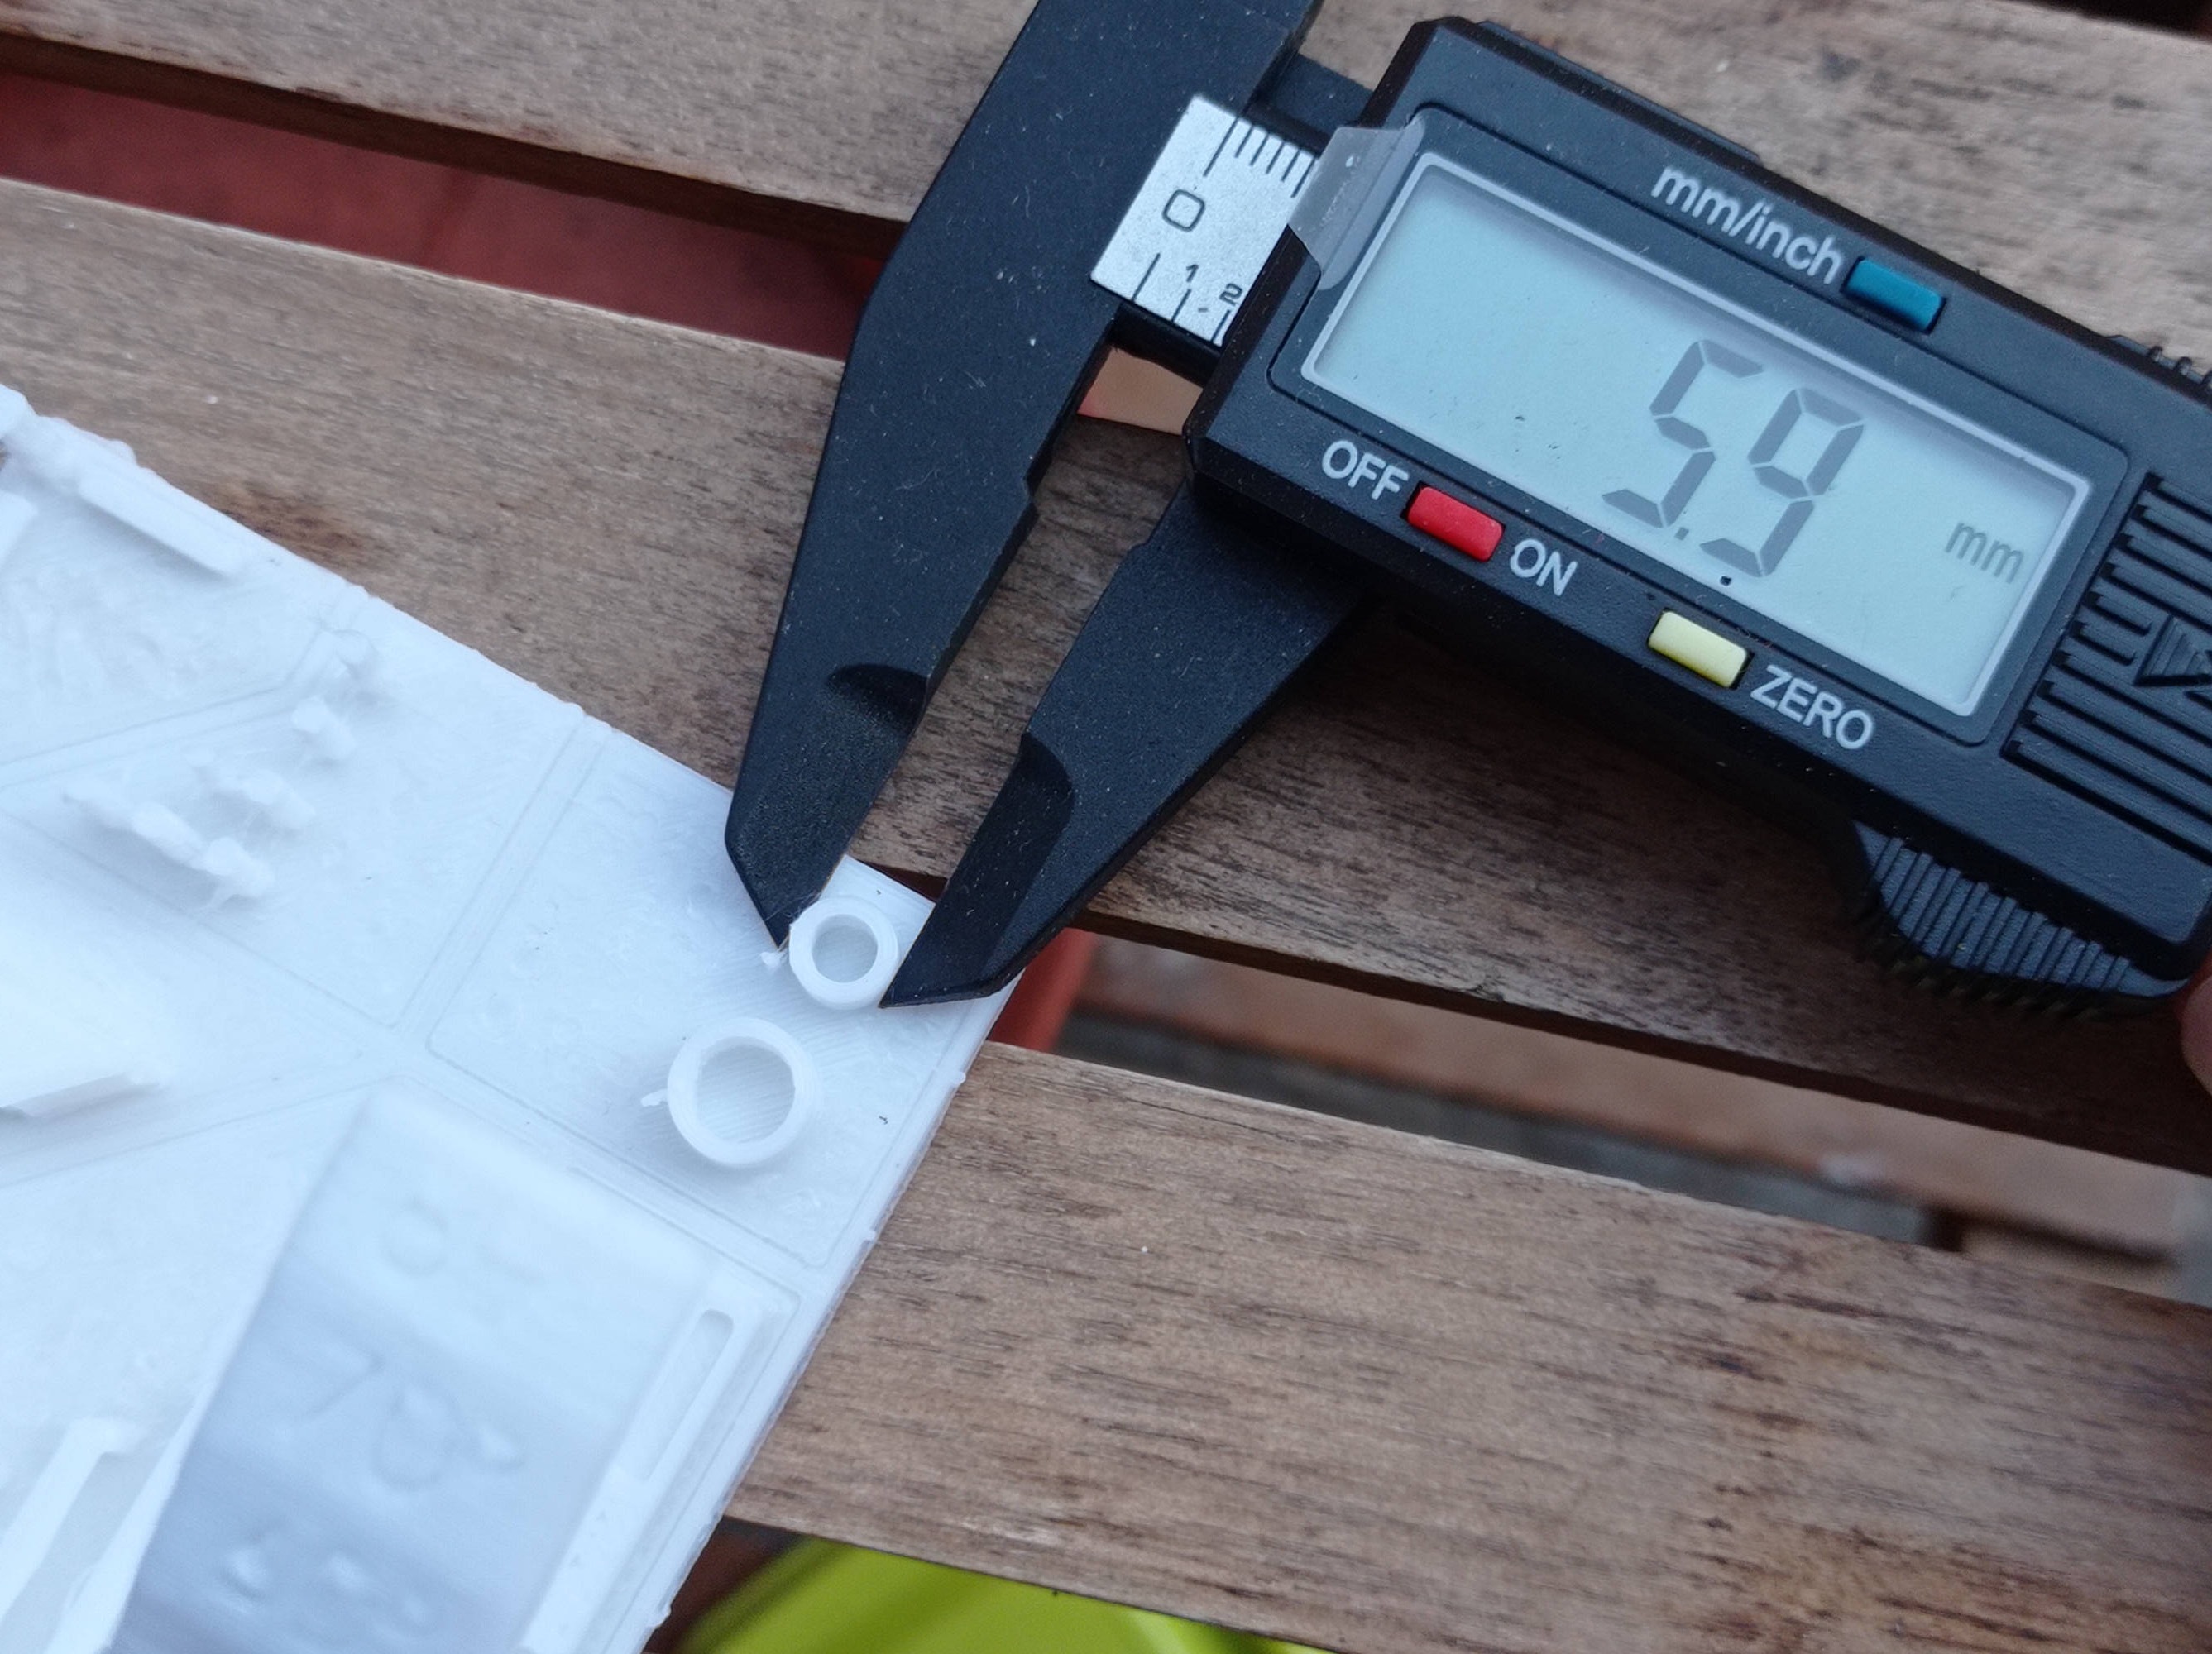
Dimension accuracy: - 0.2 mm in X and Y. The cylinder that should measures 8 was 7.8/7.7 and the one that was 6, measures 5.8/5.9. The same happened with the box test which gave me -0.2mm in all the boxes, so you should keep that in mind when designing the clearance of an object that fits into other.

The wall thickness was accurate, 1mm as designed in the test.

Scale is perfect in X and Y, but in Z it measures a bit less (like 9.8-9.9 instead of 10) which is not that bad.

6 - My First Print:
Arduino Case:

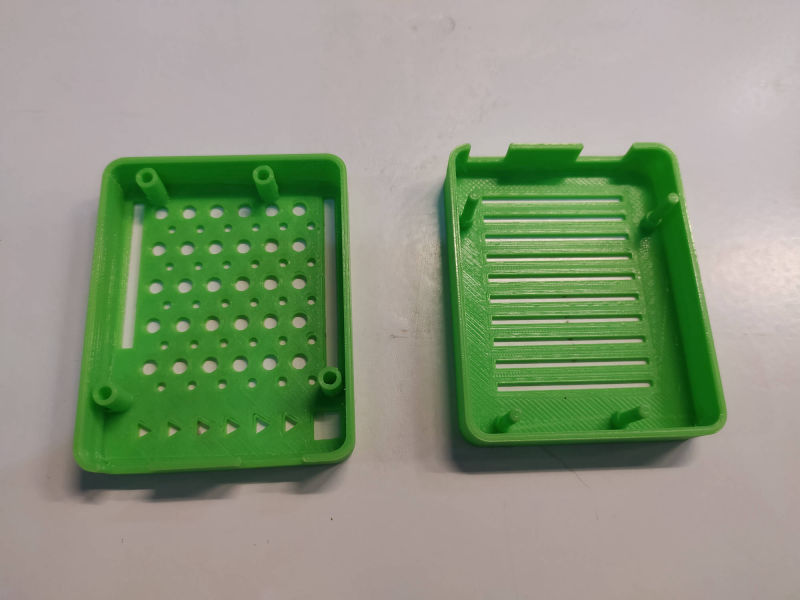
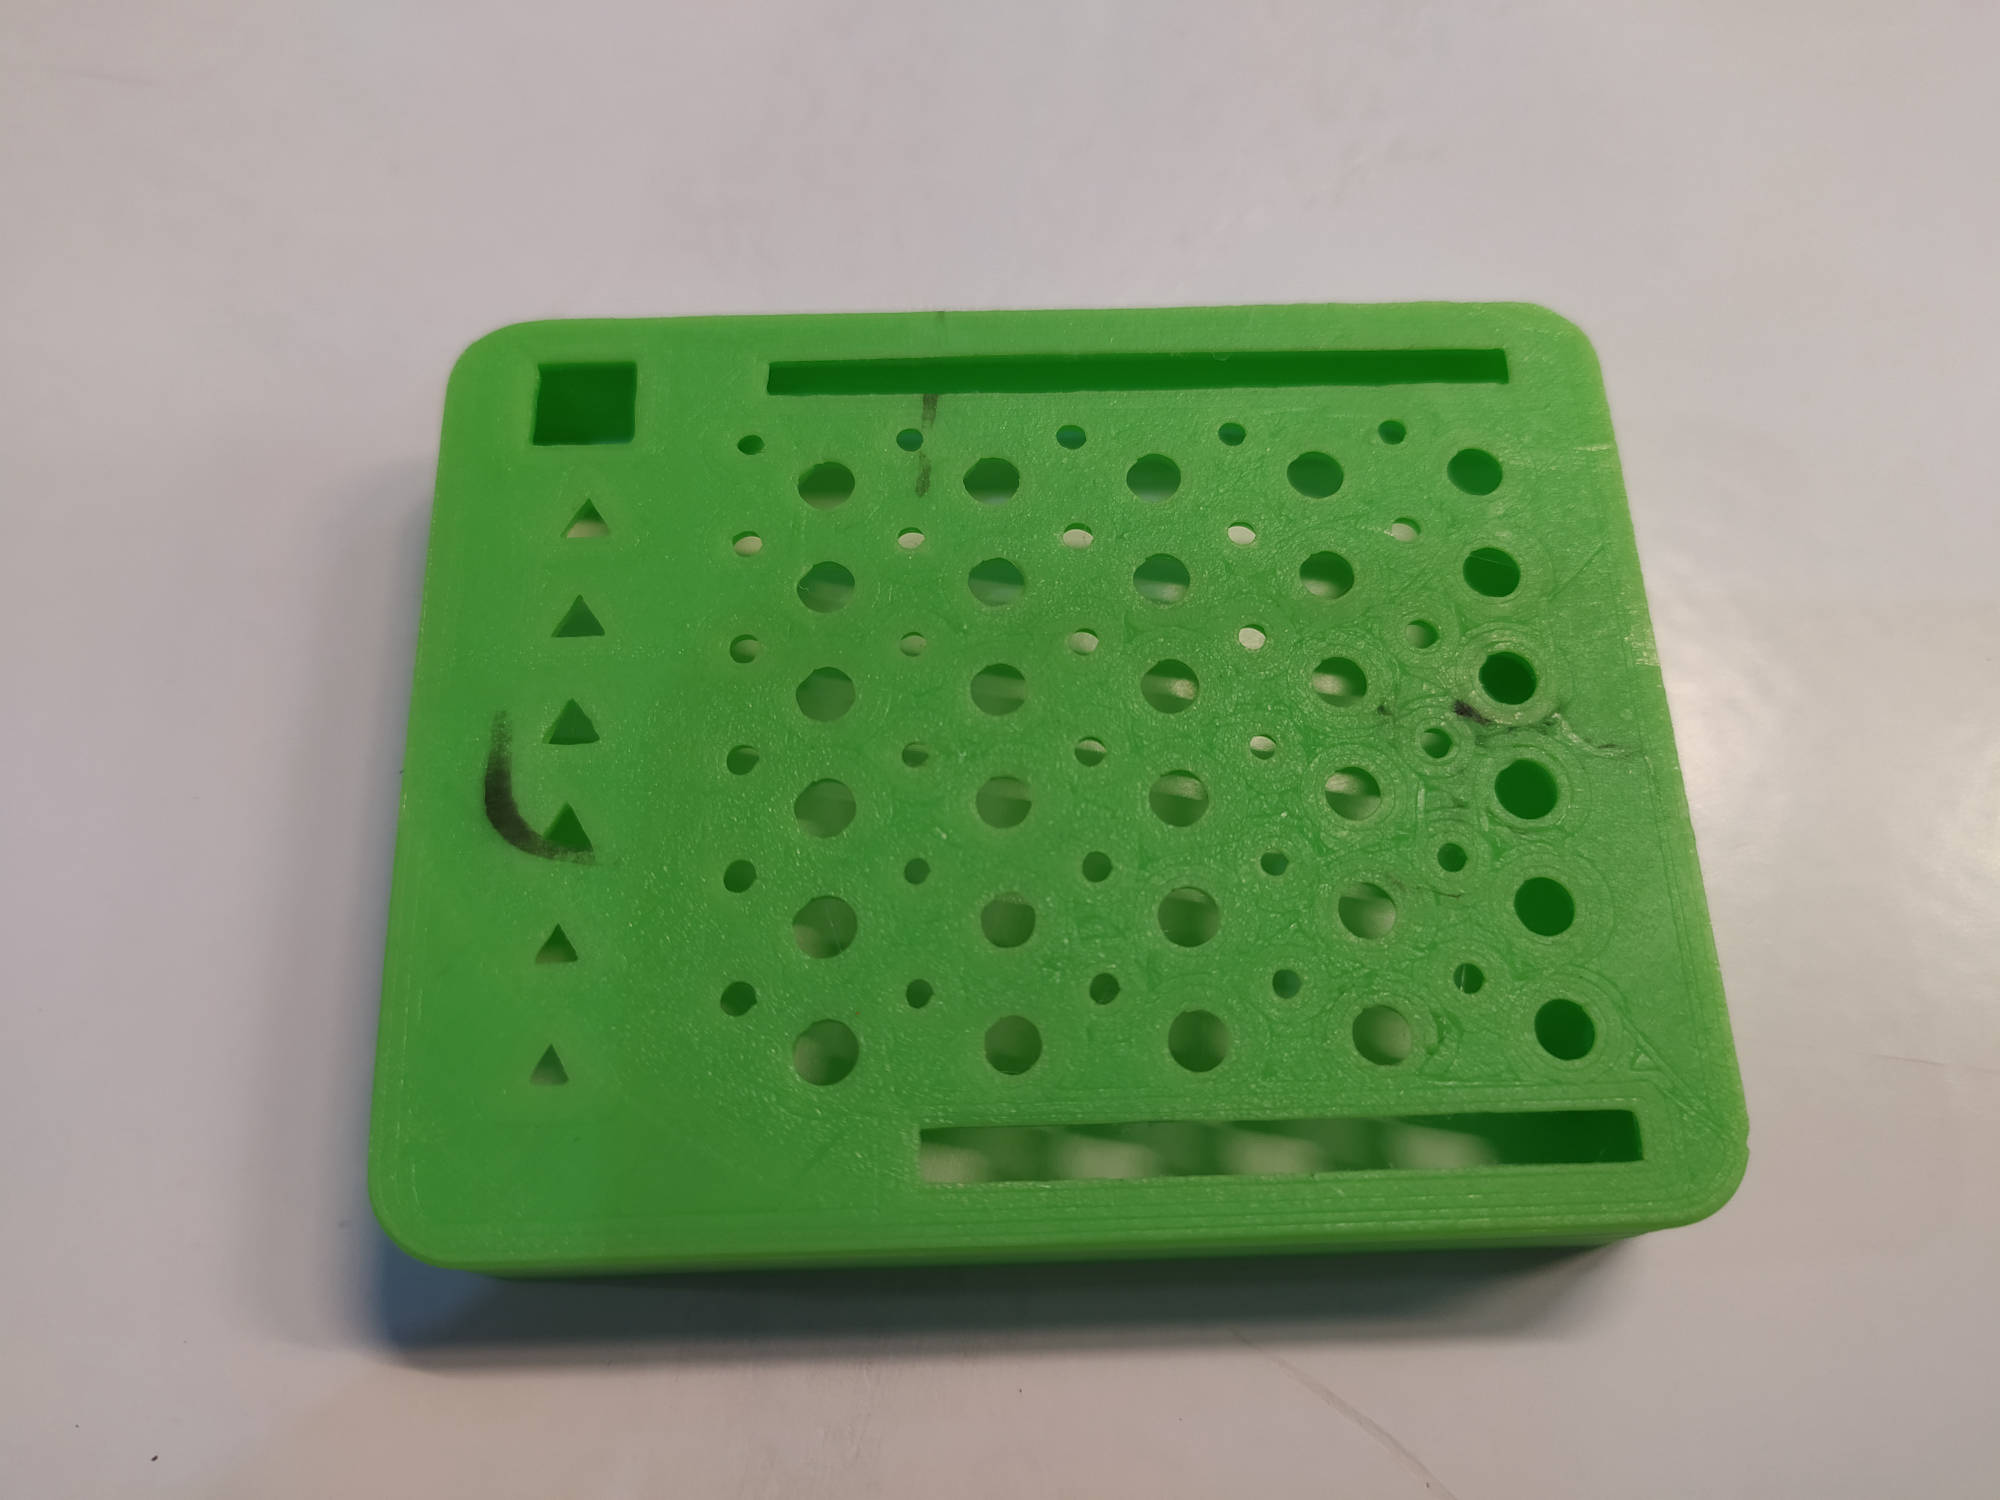
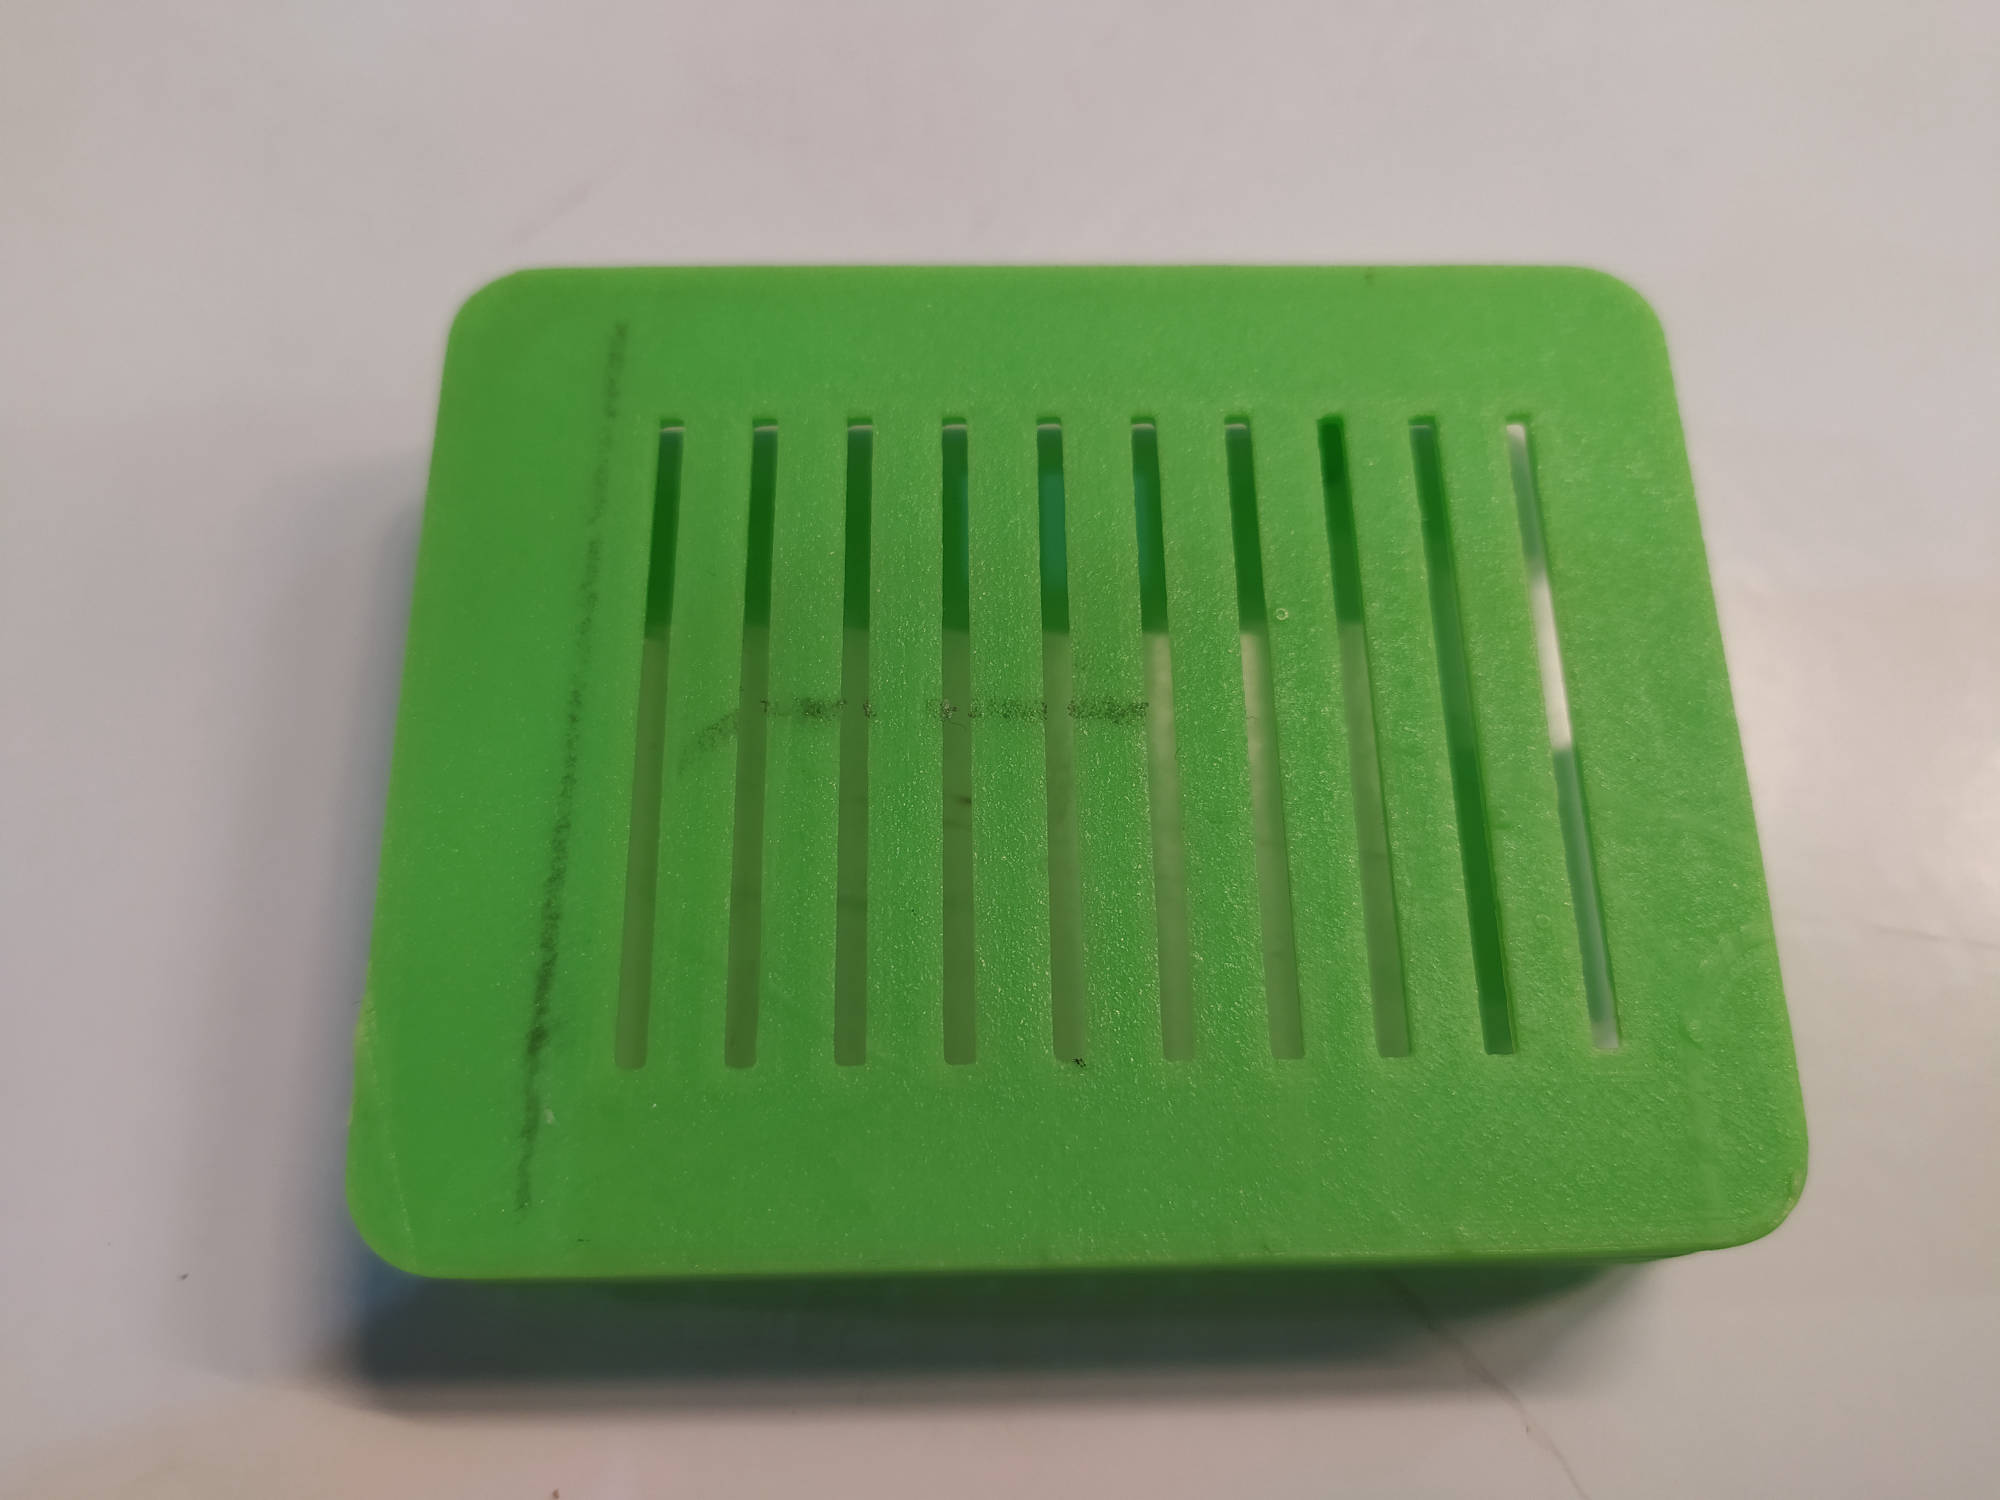
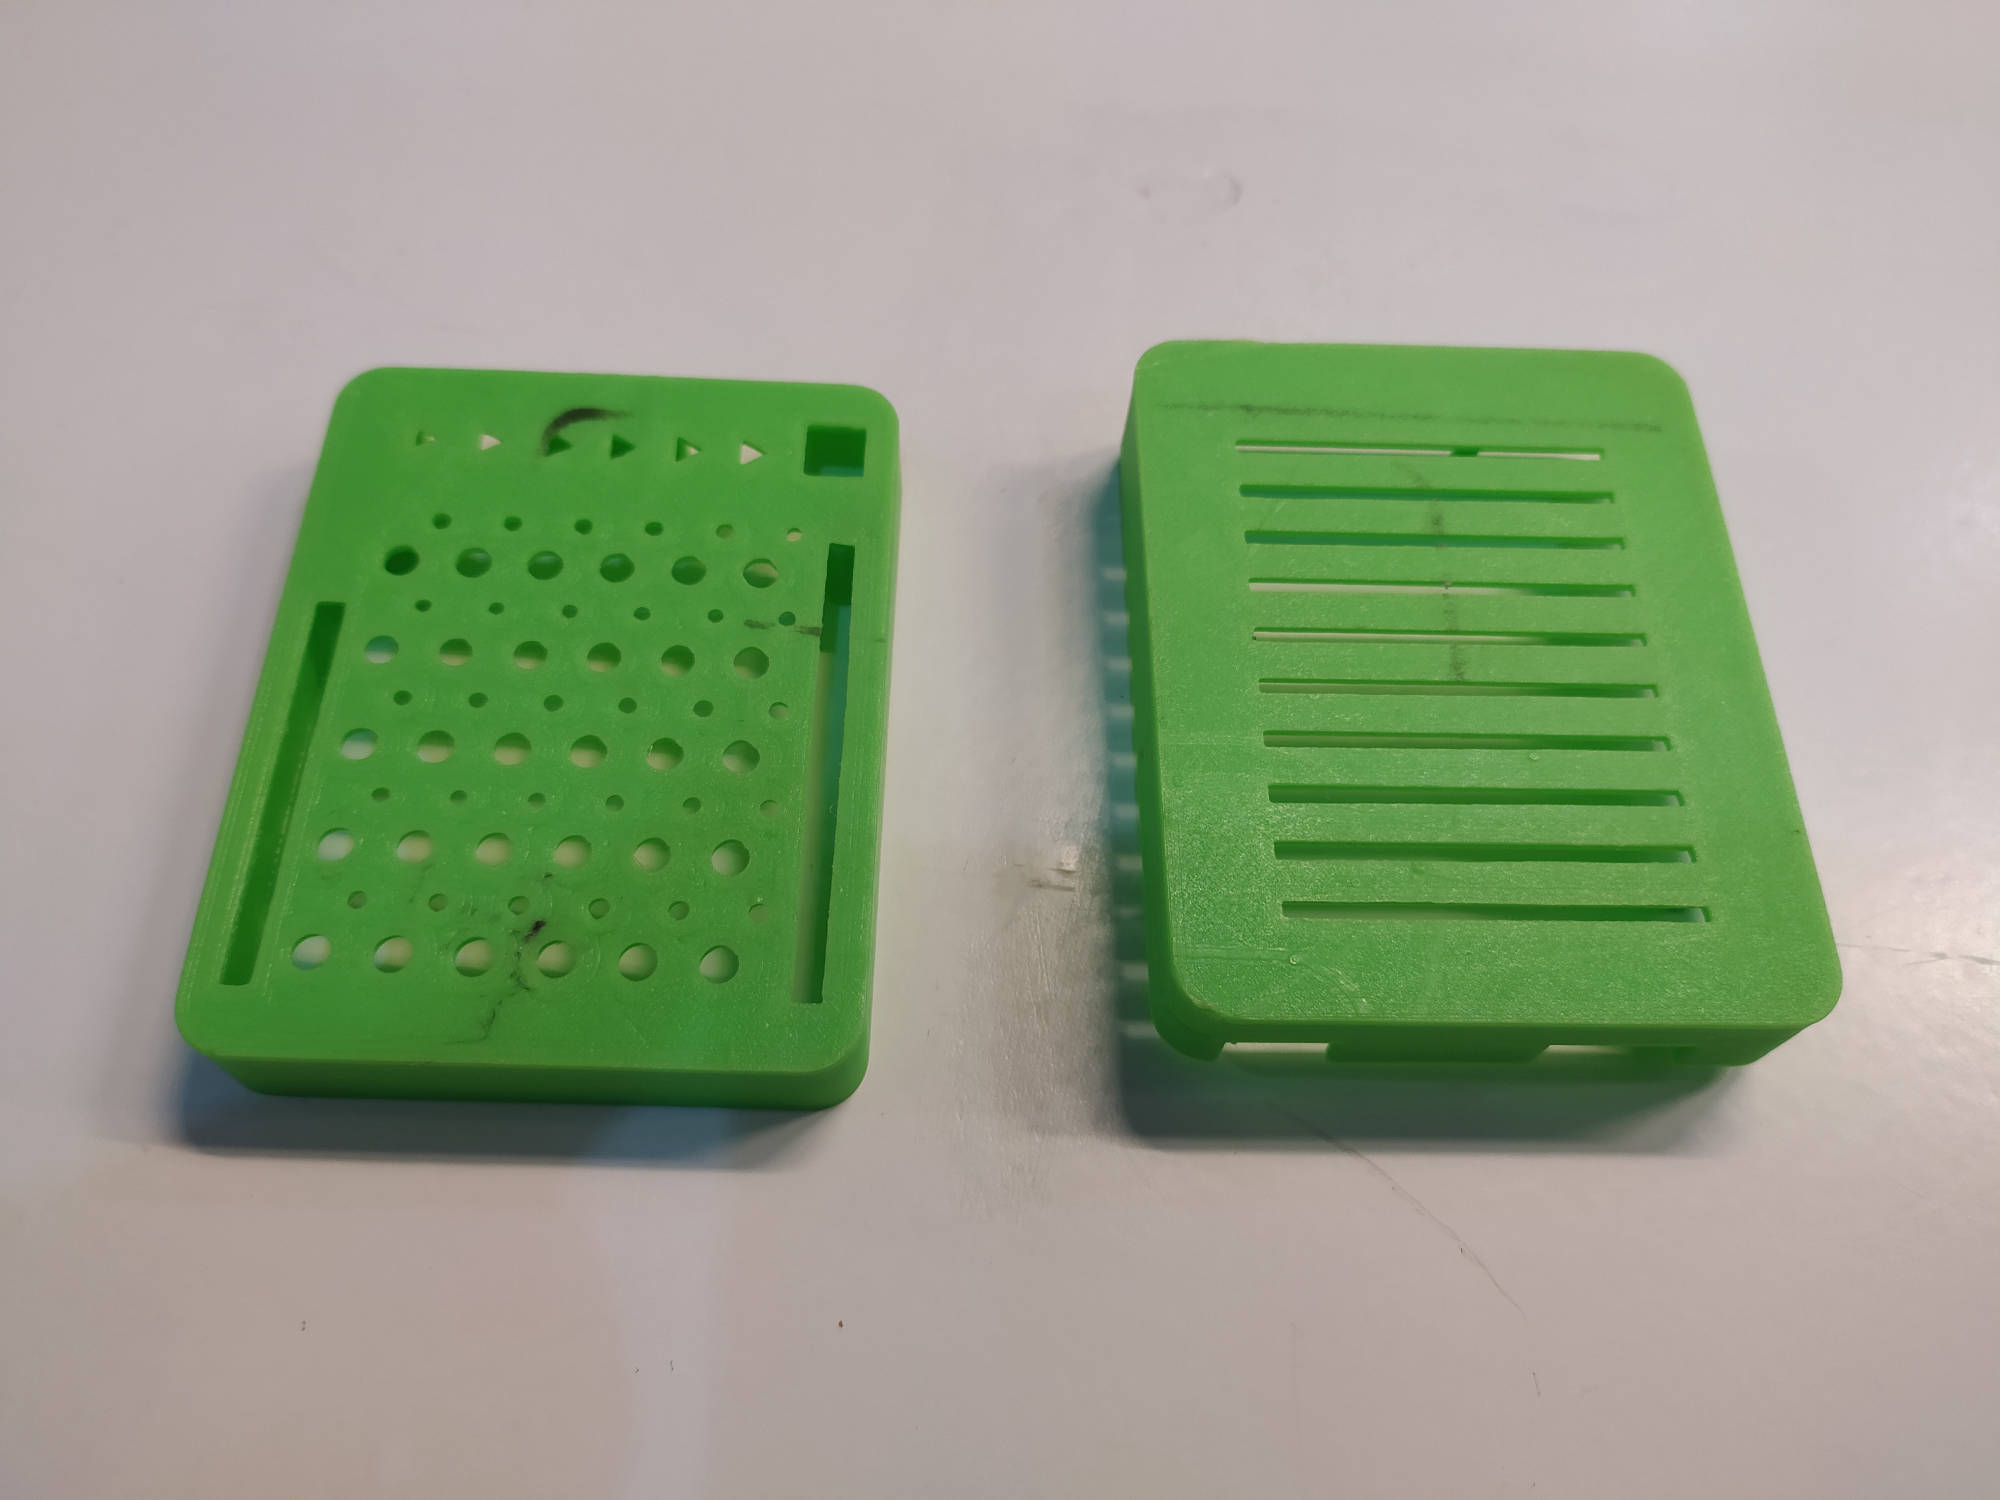
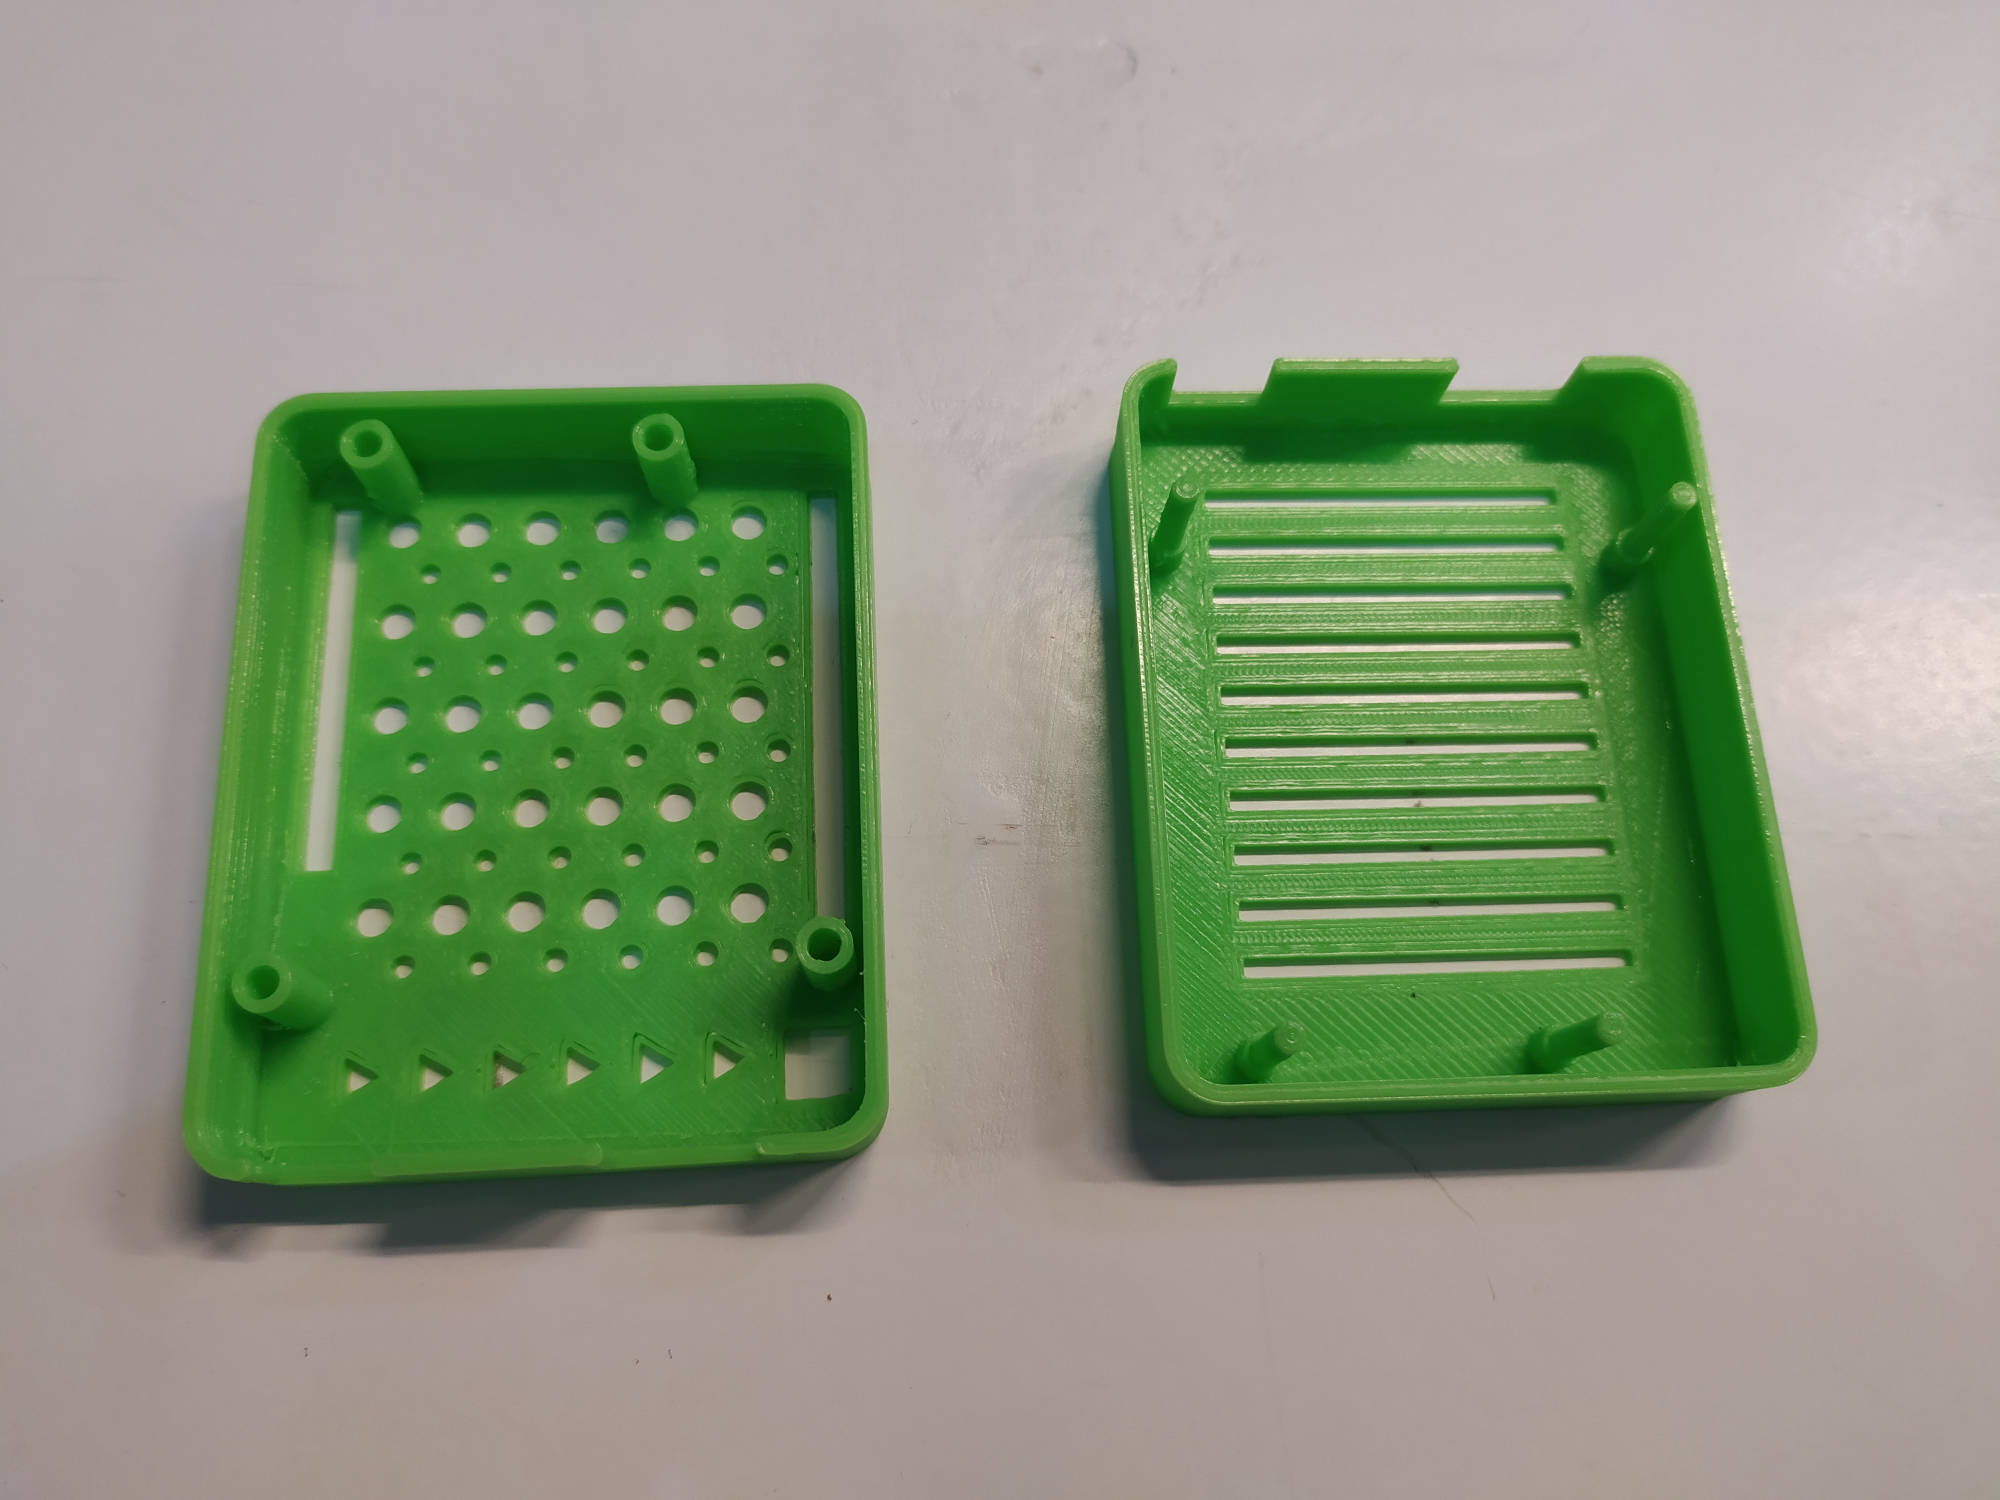
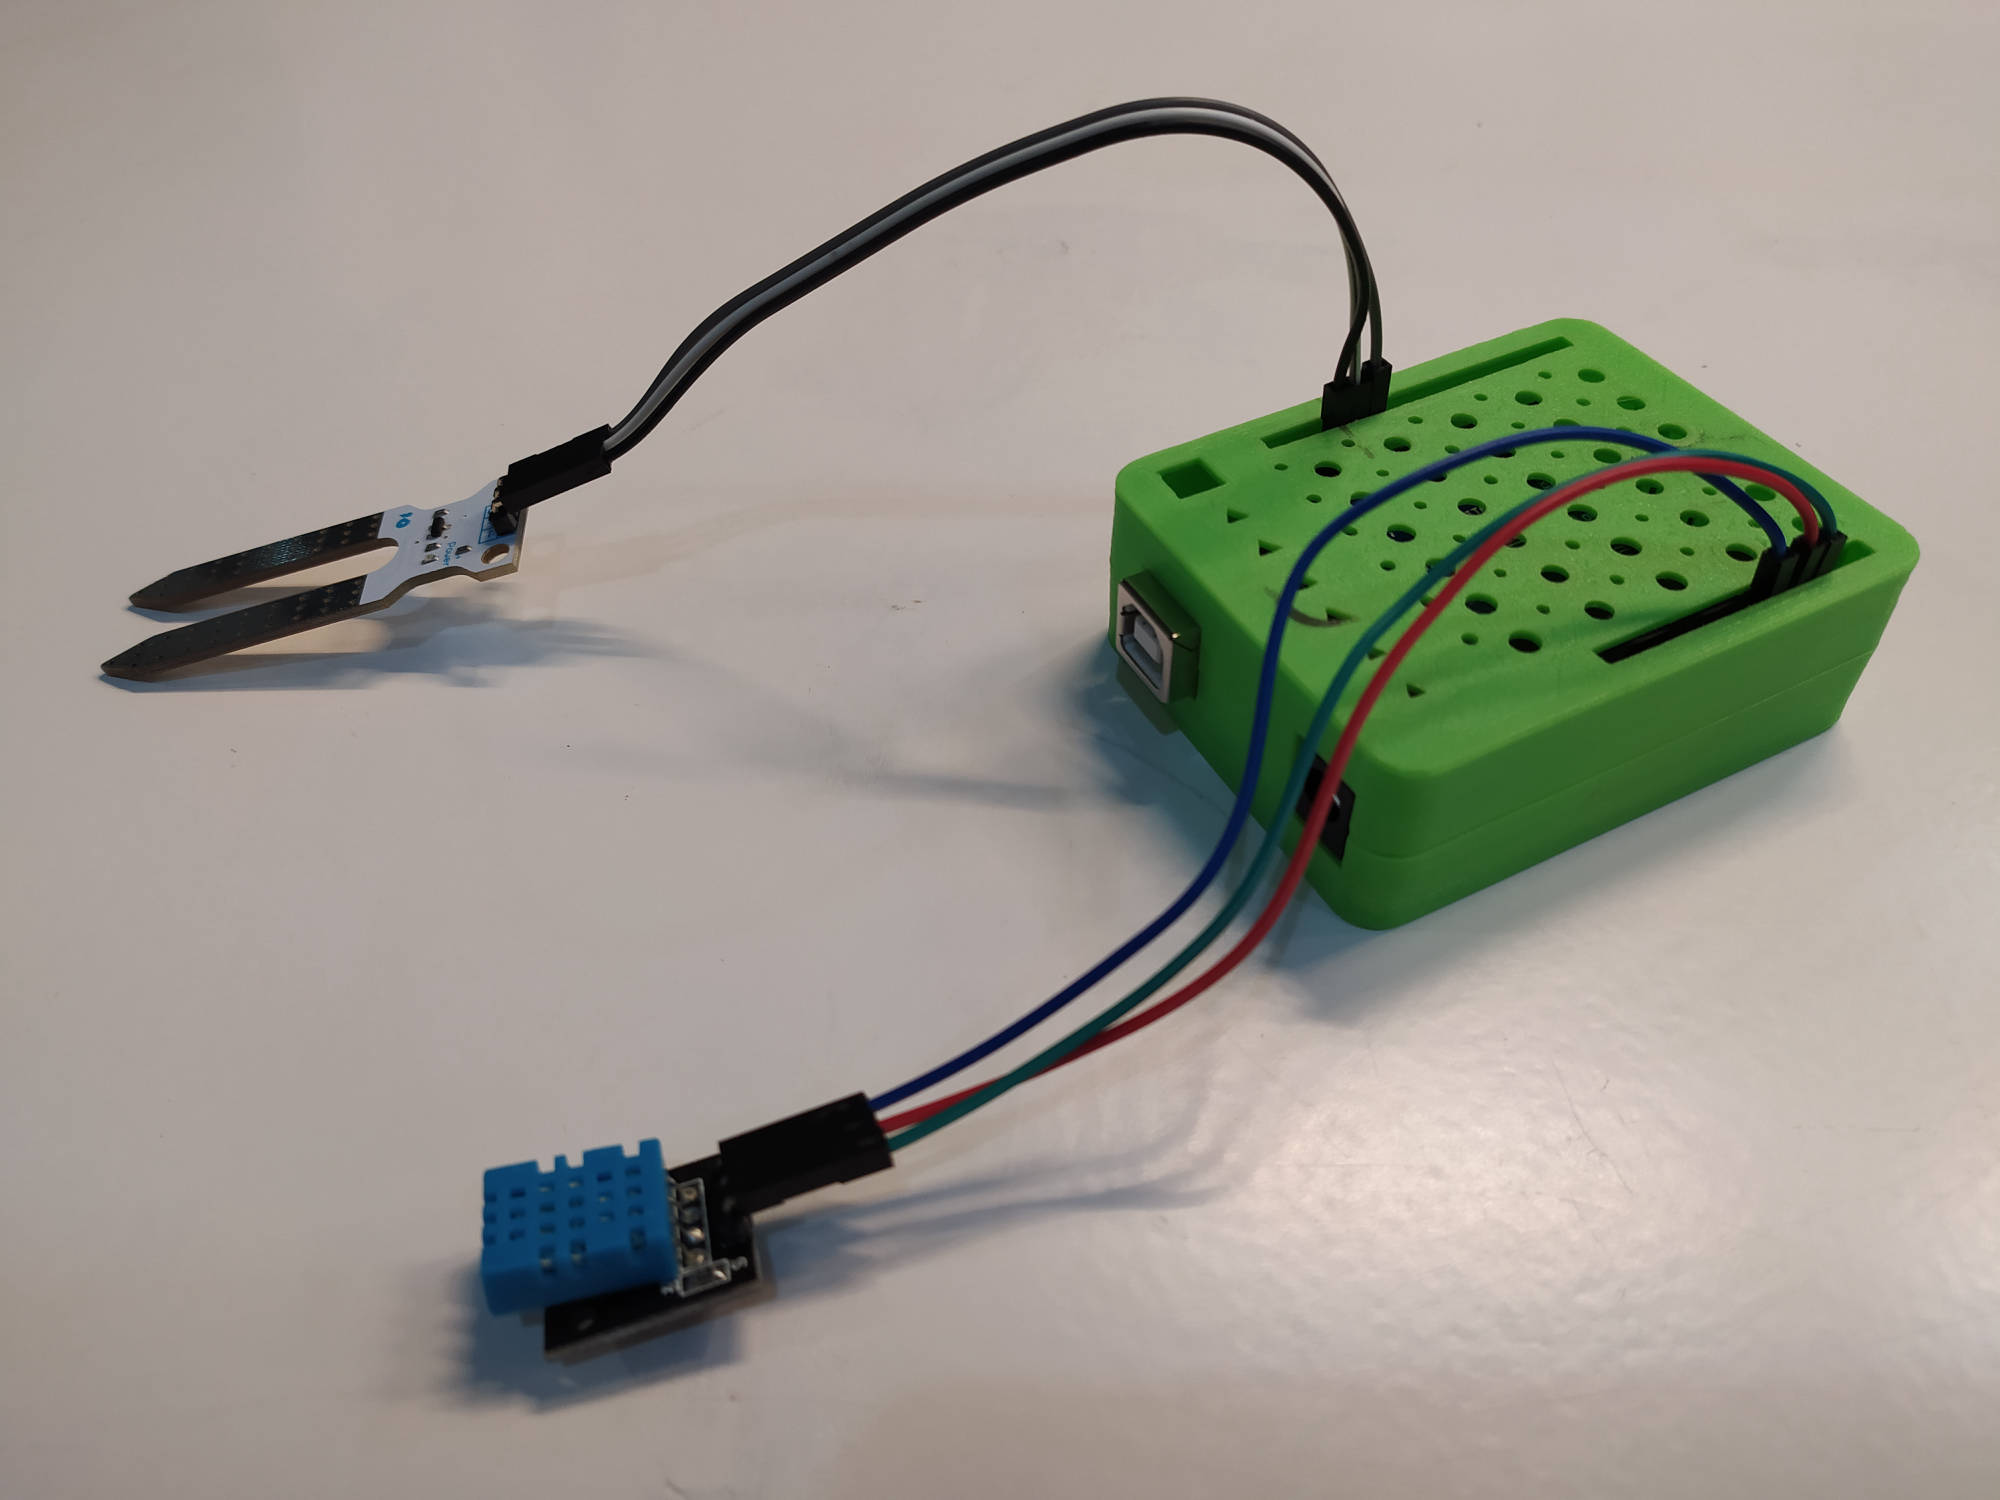
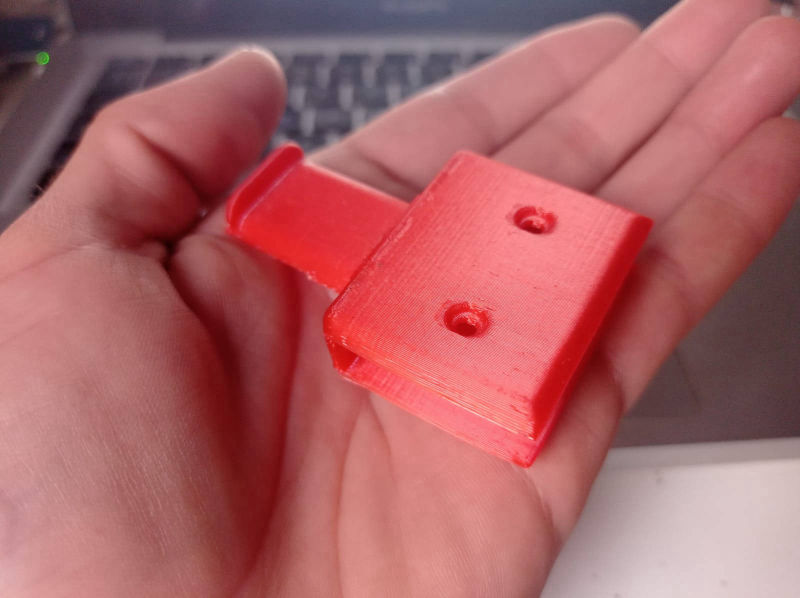
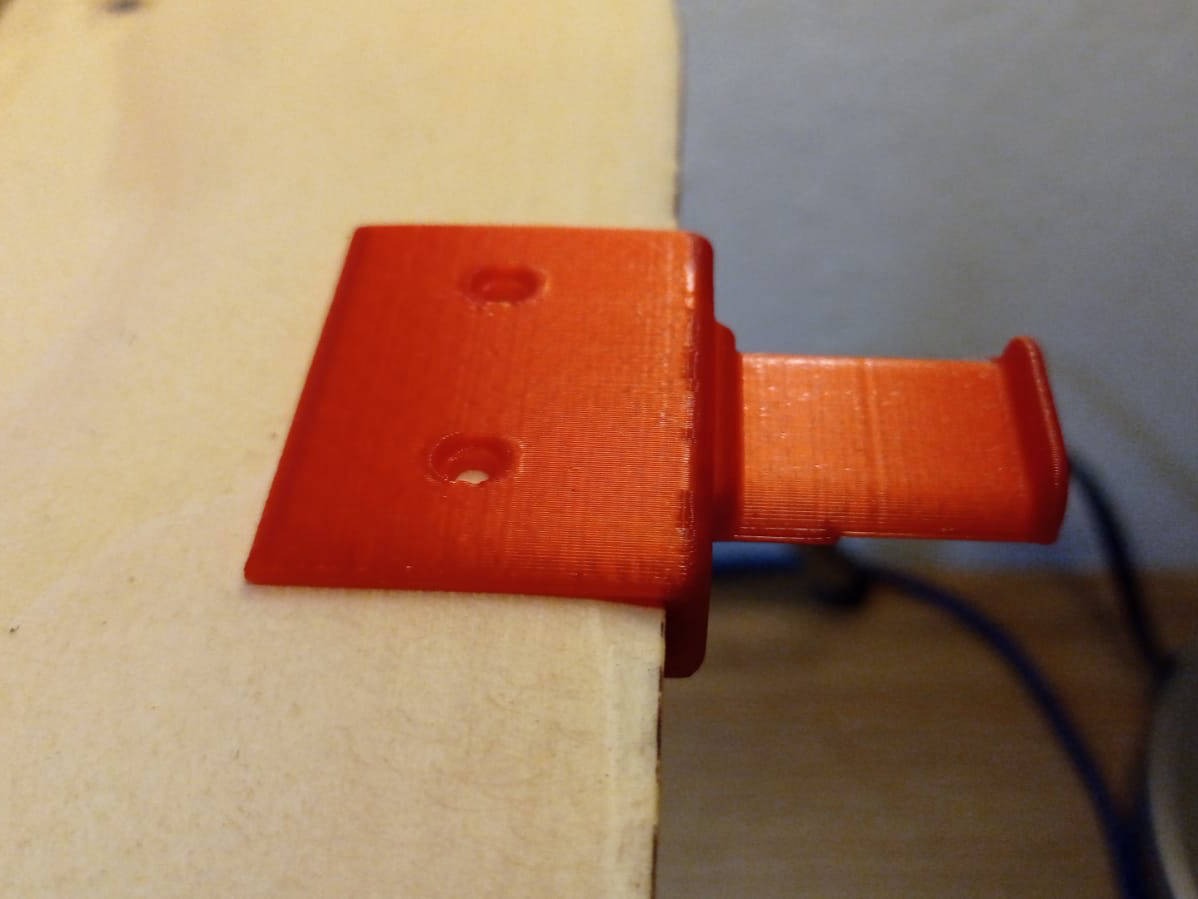
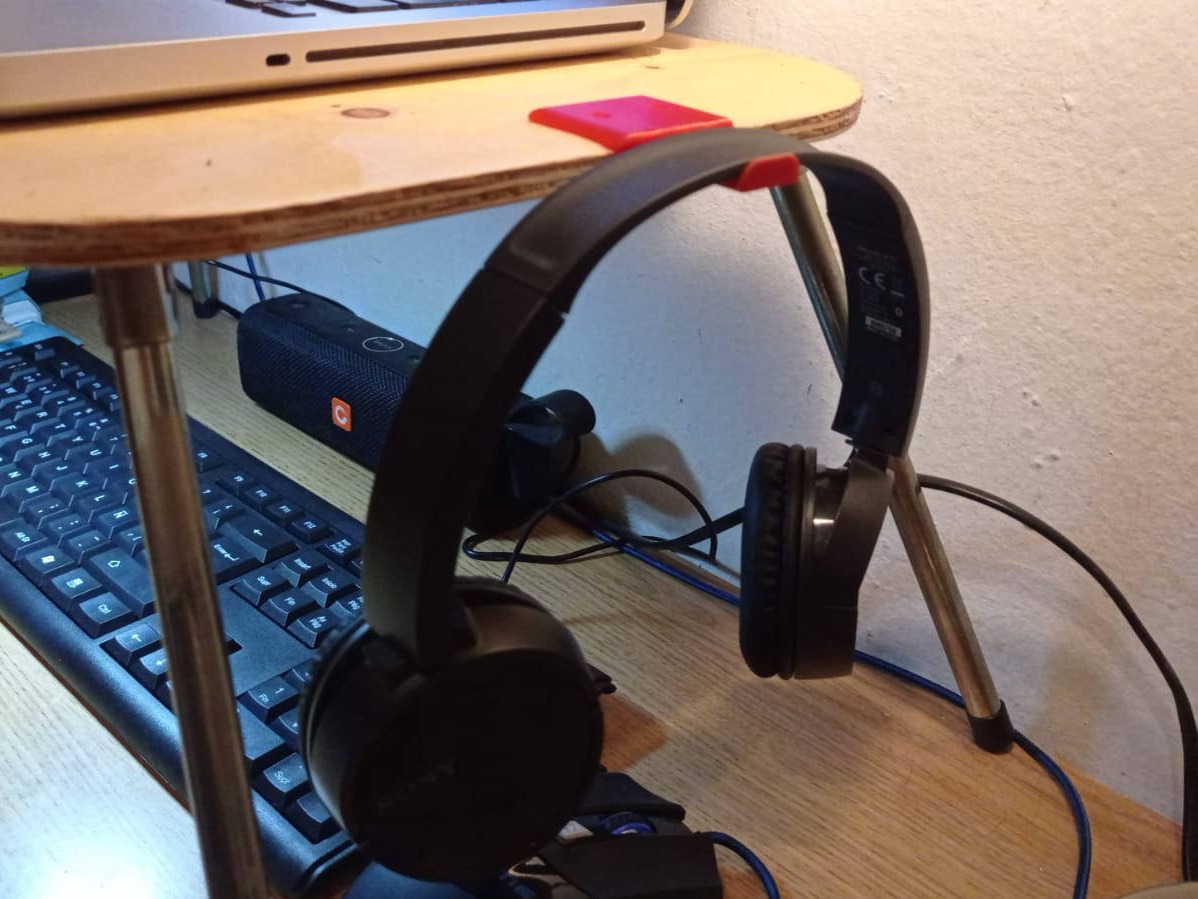
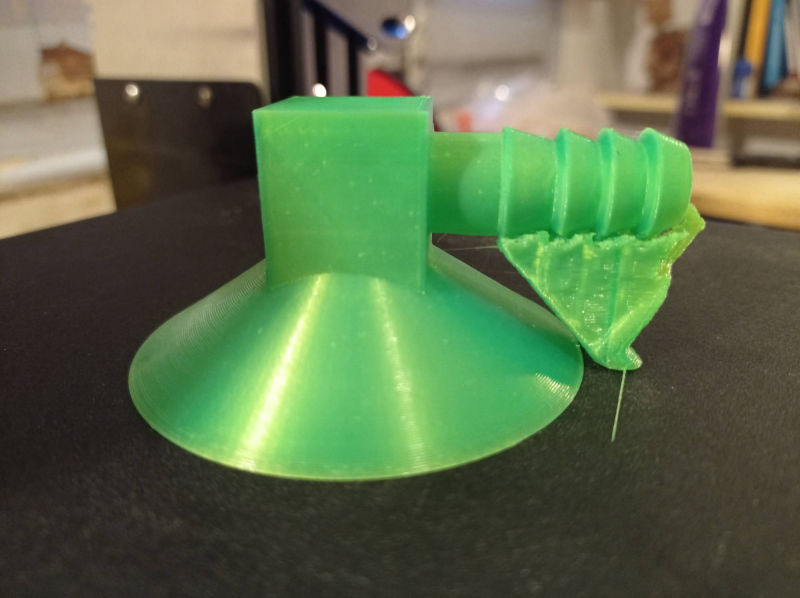
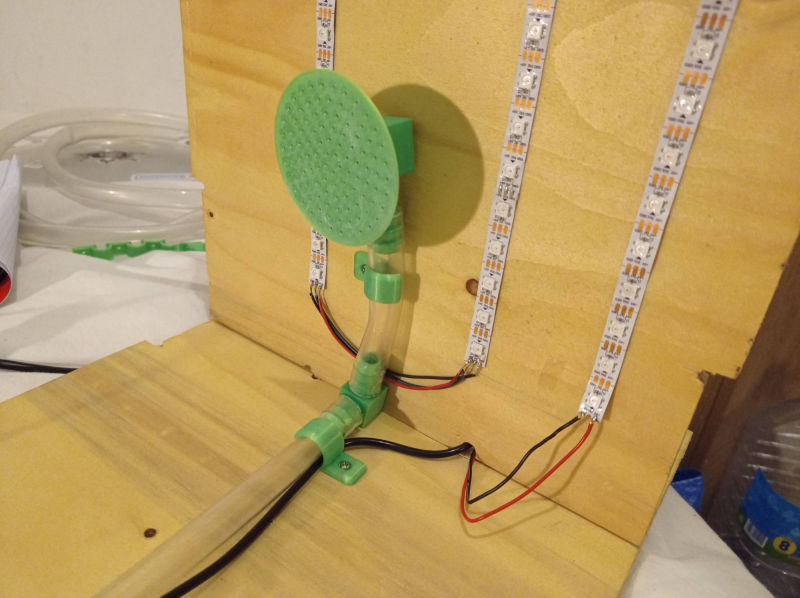
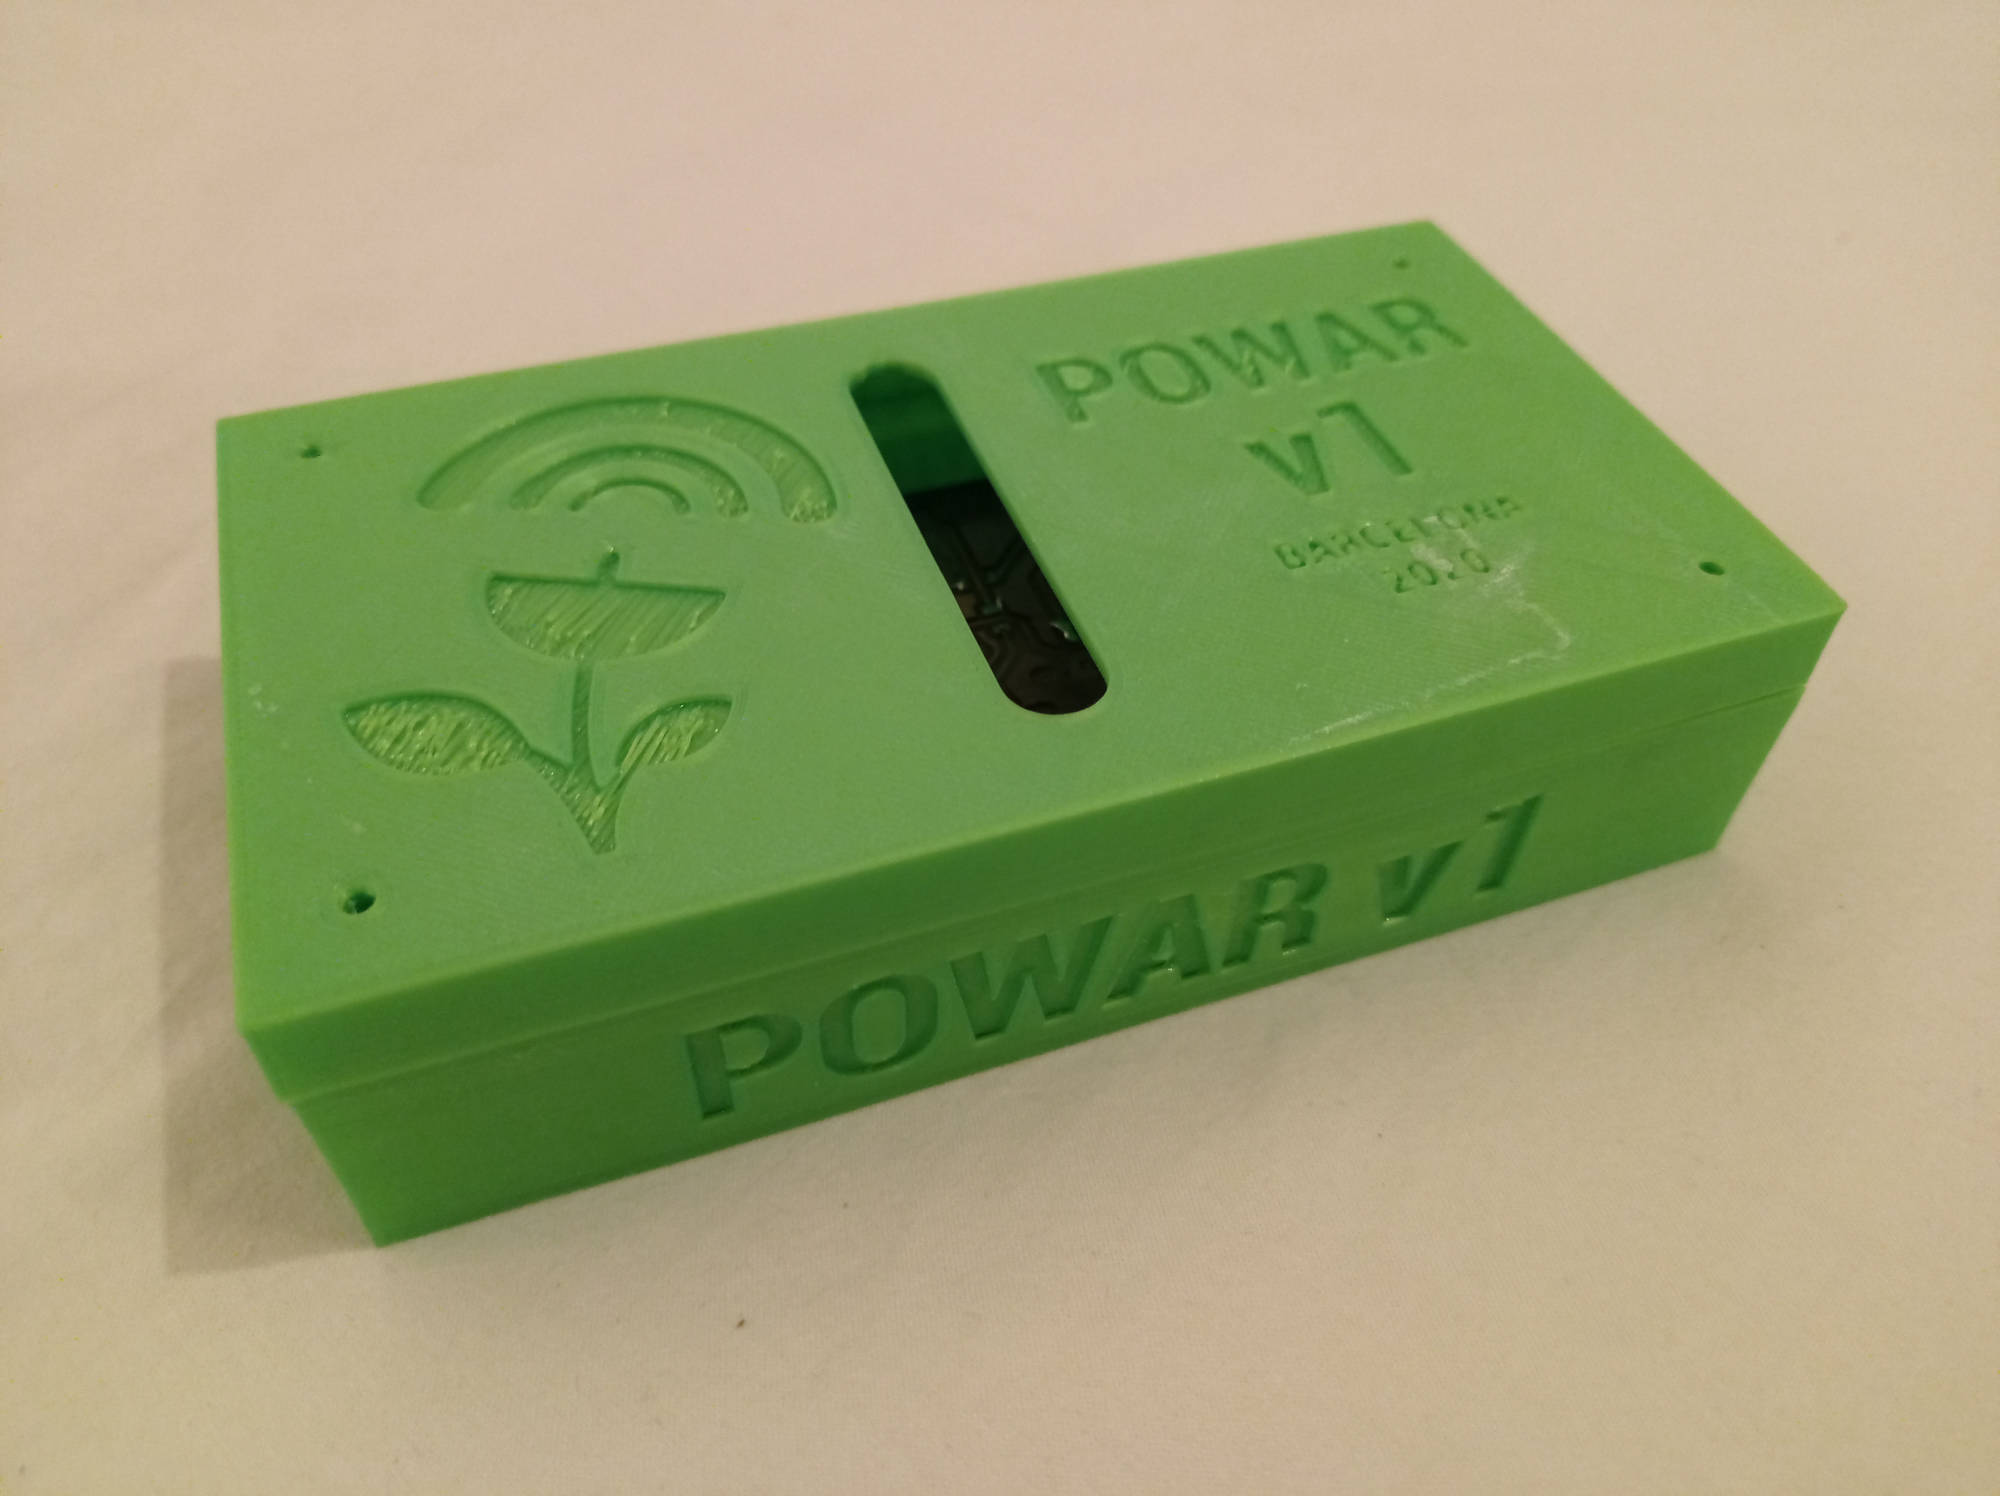
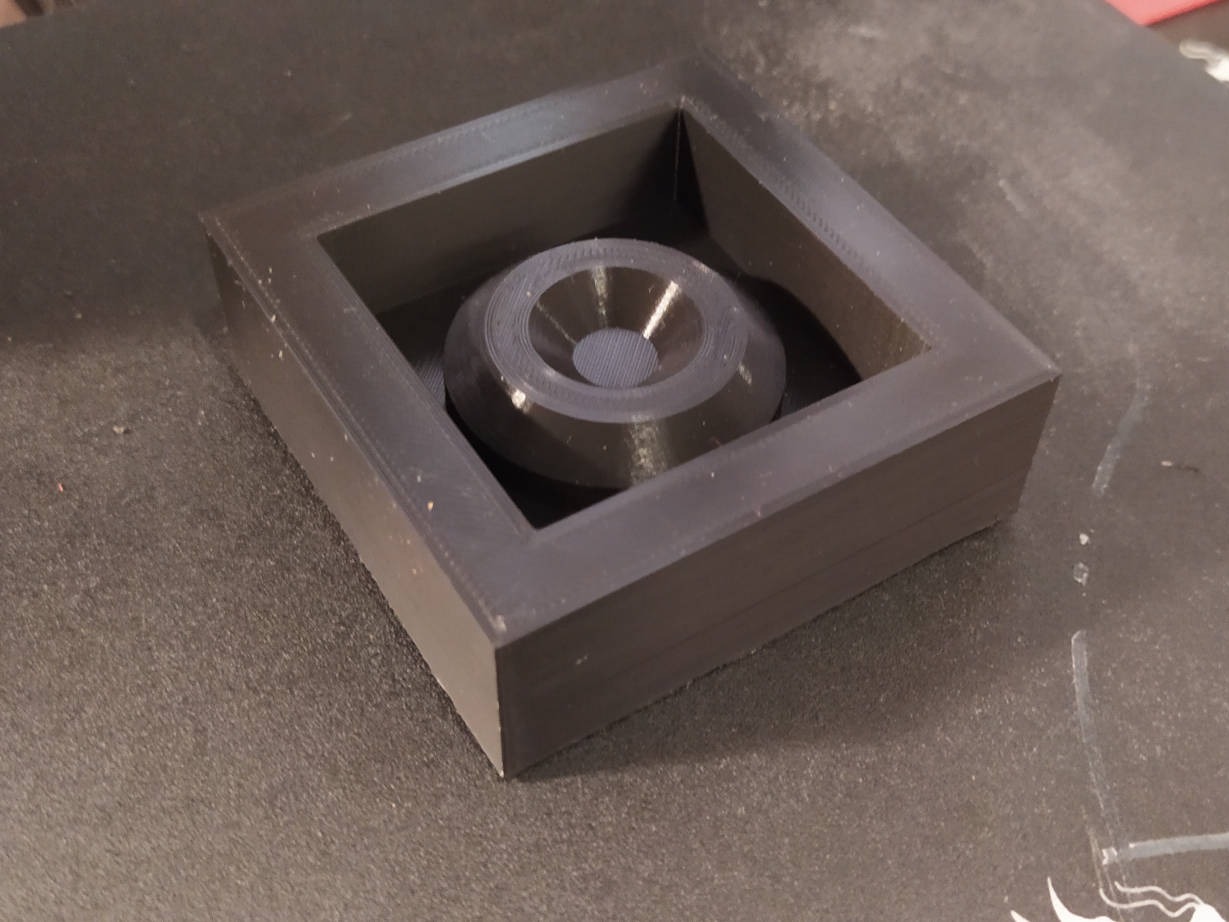
For this week we have to 3D print something that wasn't possible to be made in subtractive mode, so my first mistake was making something that could be made in a CNC, but anyway I want to show it and upload it because is something that works for my final projects, and because I had a really big learning in the process of 3D modeling and printing it.

I created it in Fusion 360, a software that I have never used before, by following this tutorial, but changing it a little bit to personalize it. There where some thing, like the main design that I wasn't able to change because it depends of some measurements of the Arduino itself.

TUTORIAL LINK


STL FILES:

Case Upper Side File

Case Lower Side File


FUSION 360 FILES:

Whole Project

Case Upper Side File

Case Lower Side File

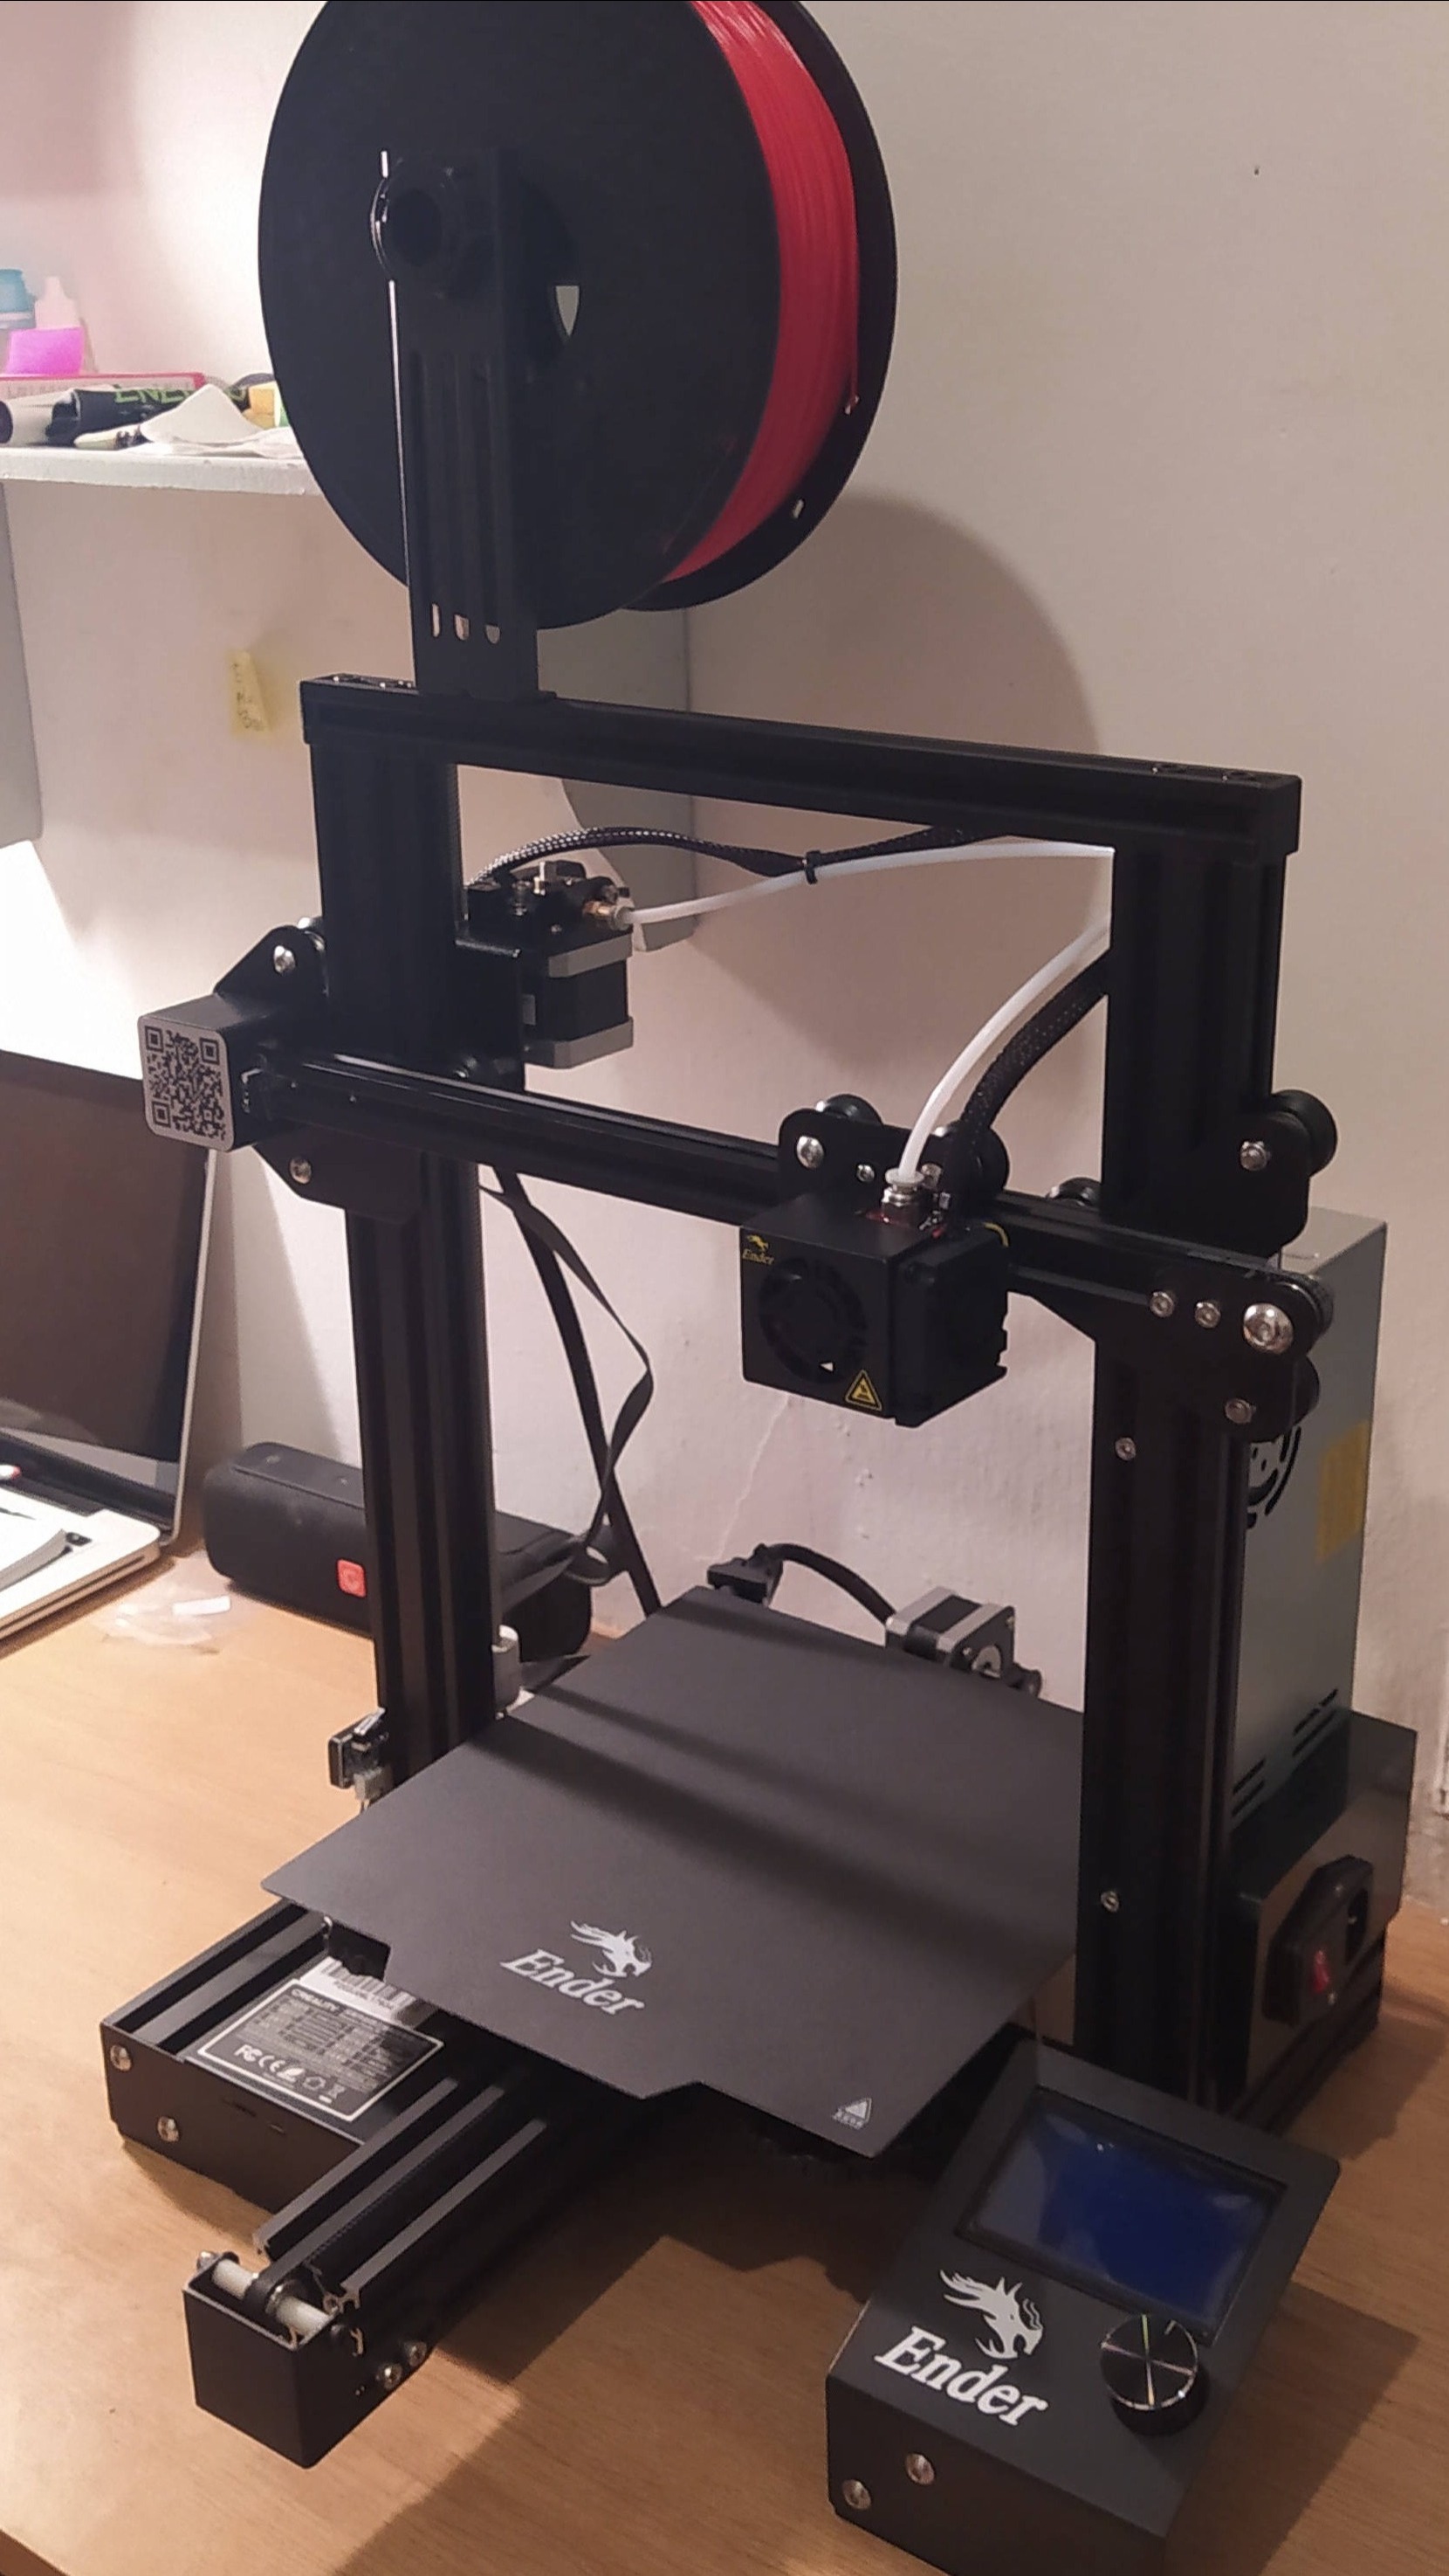
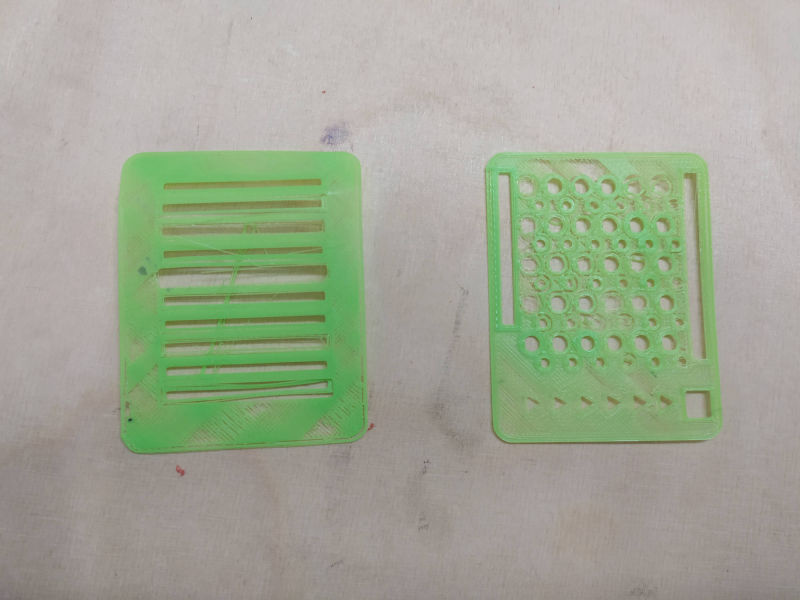
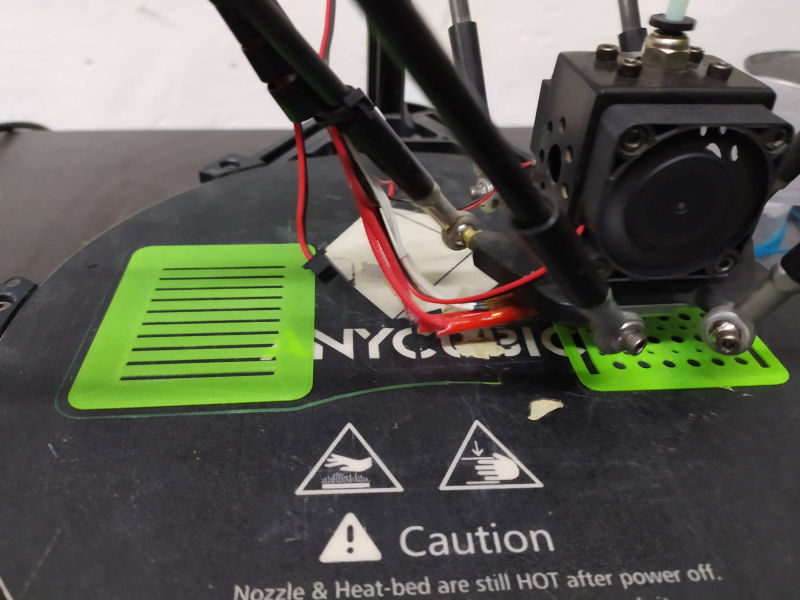
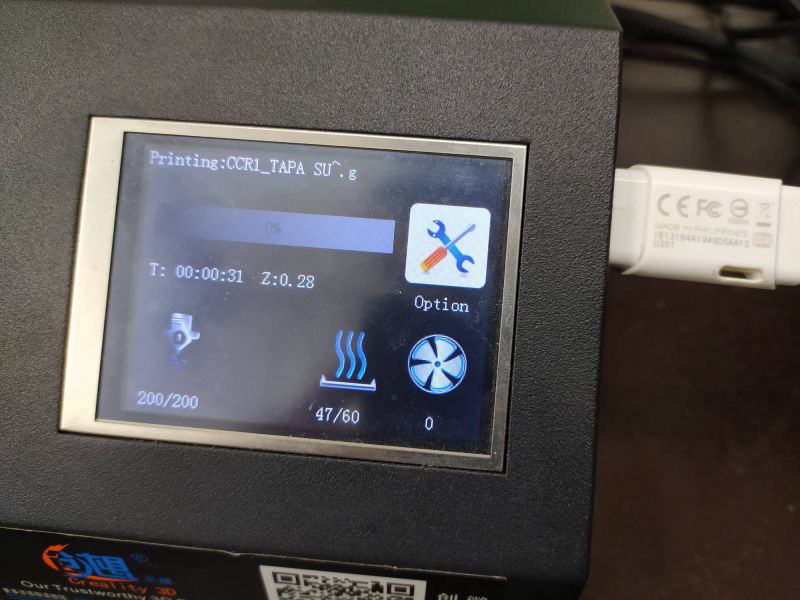
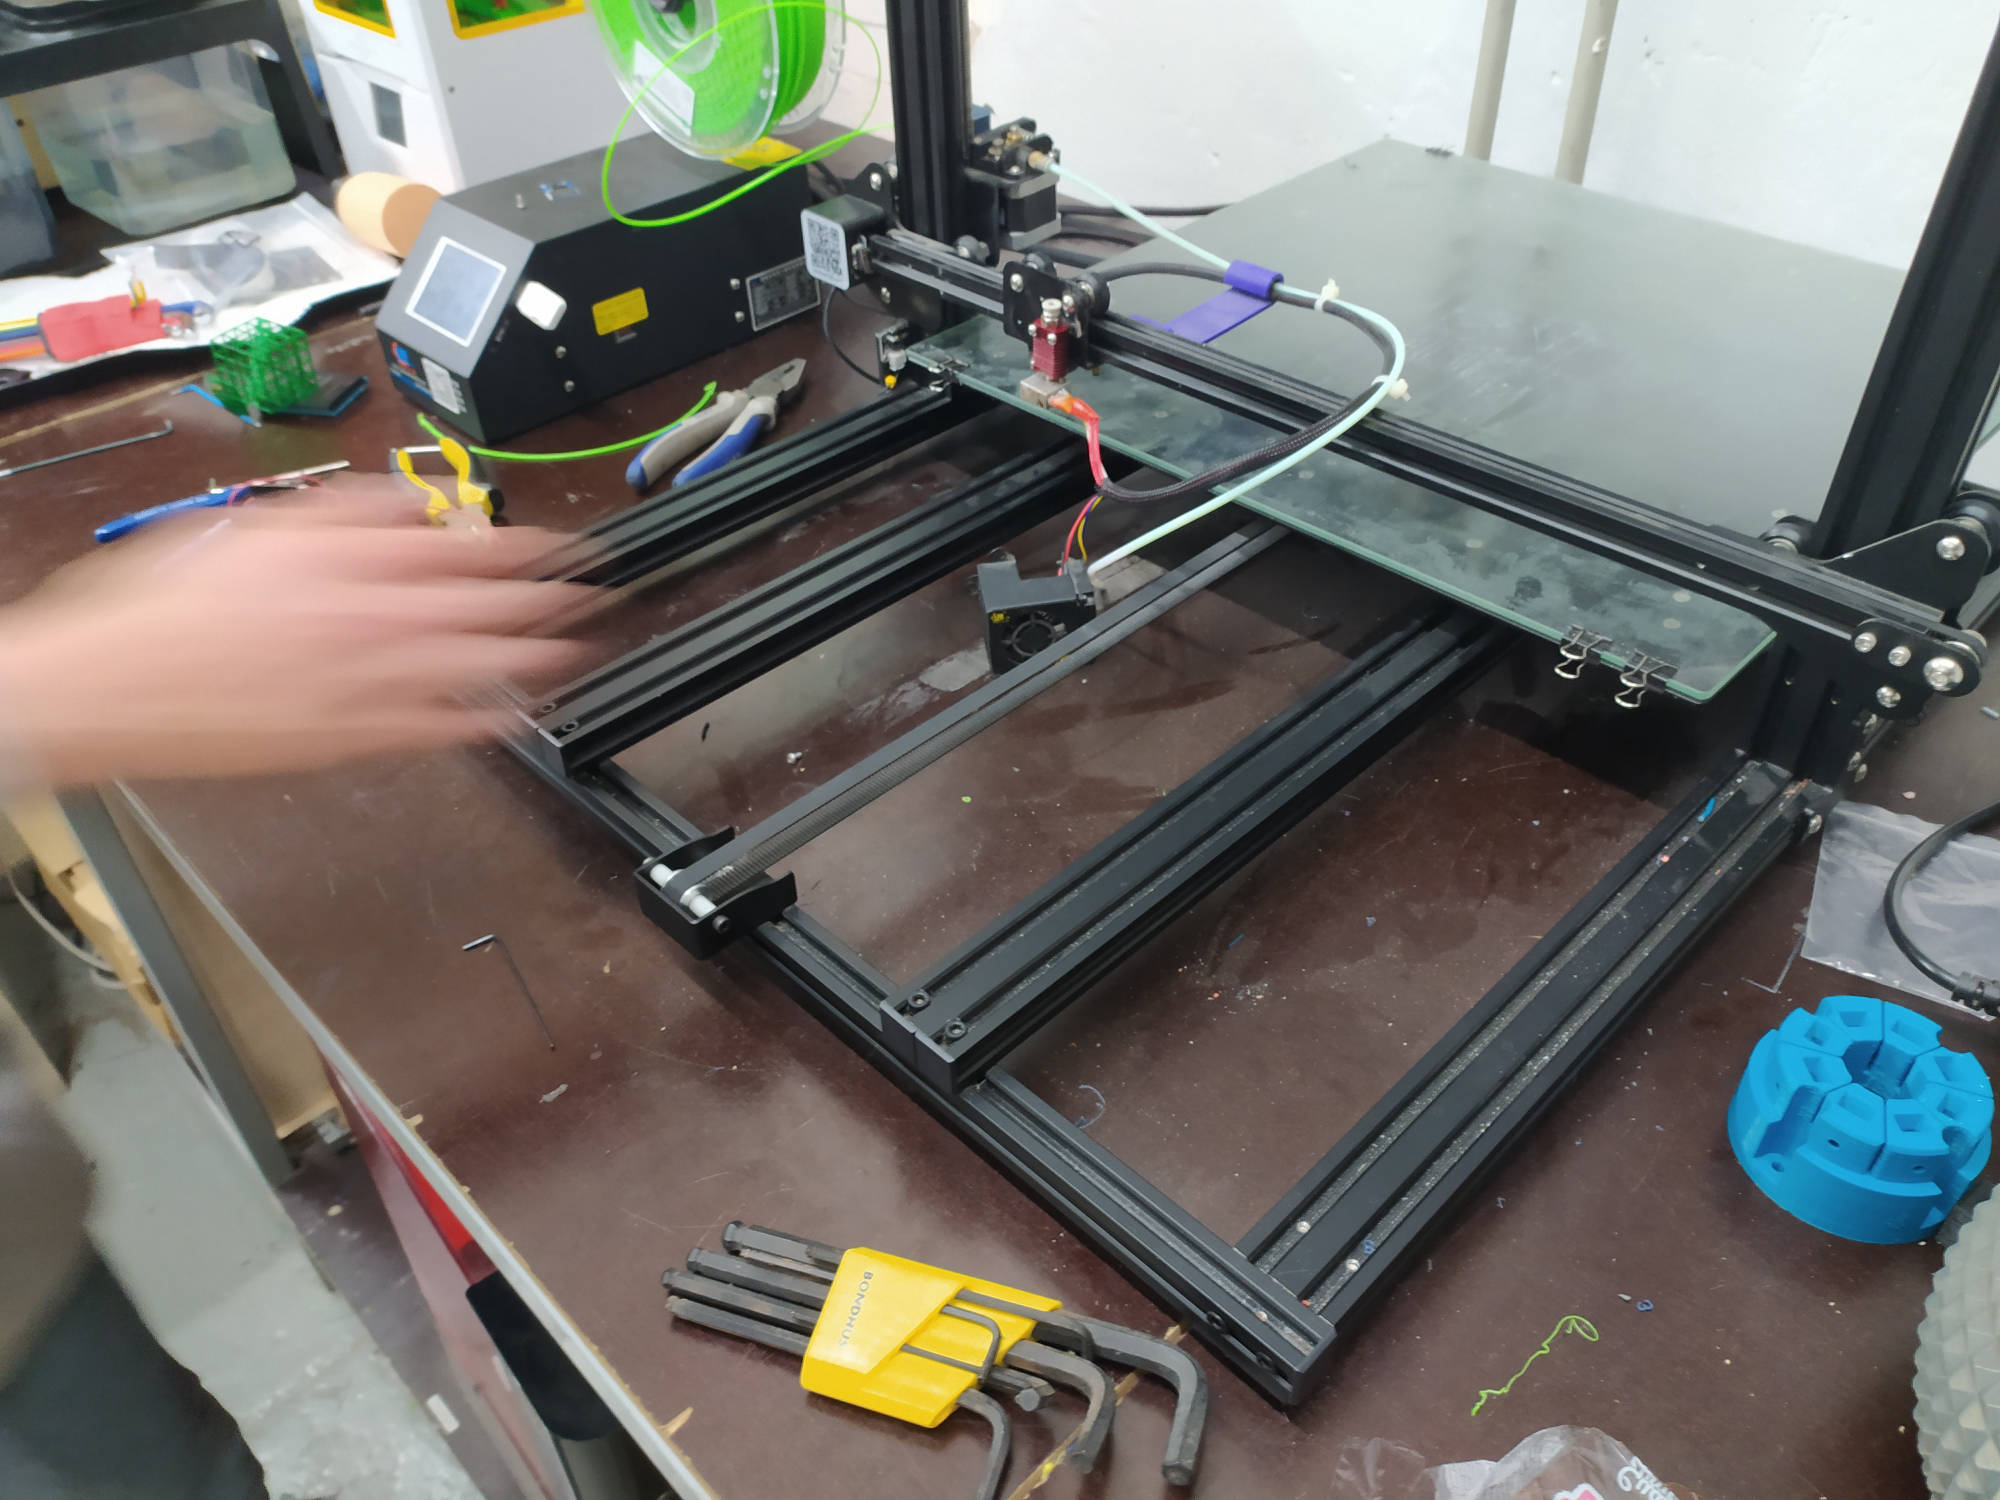
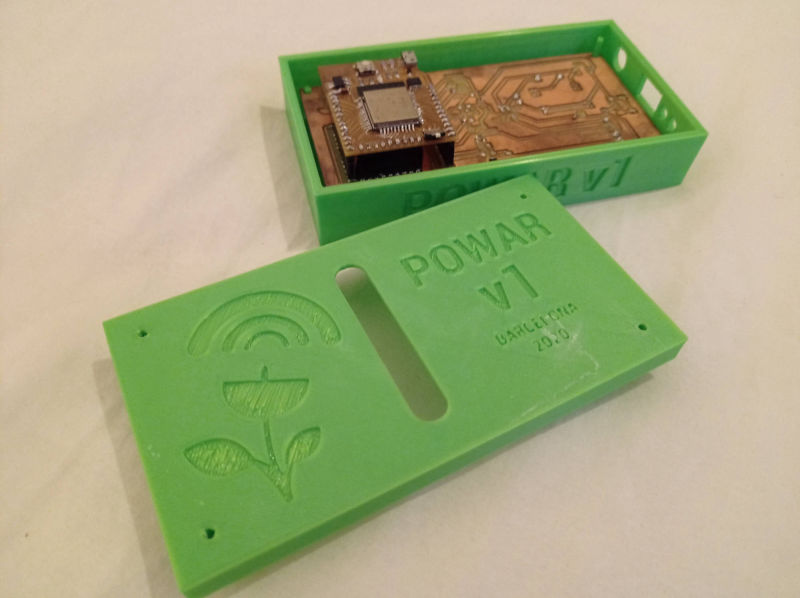
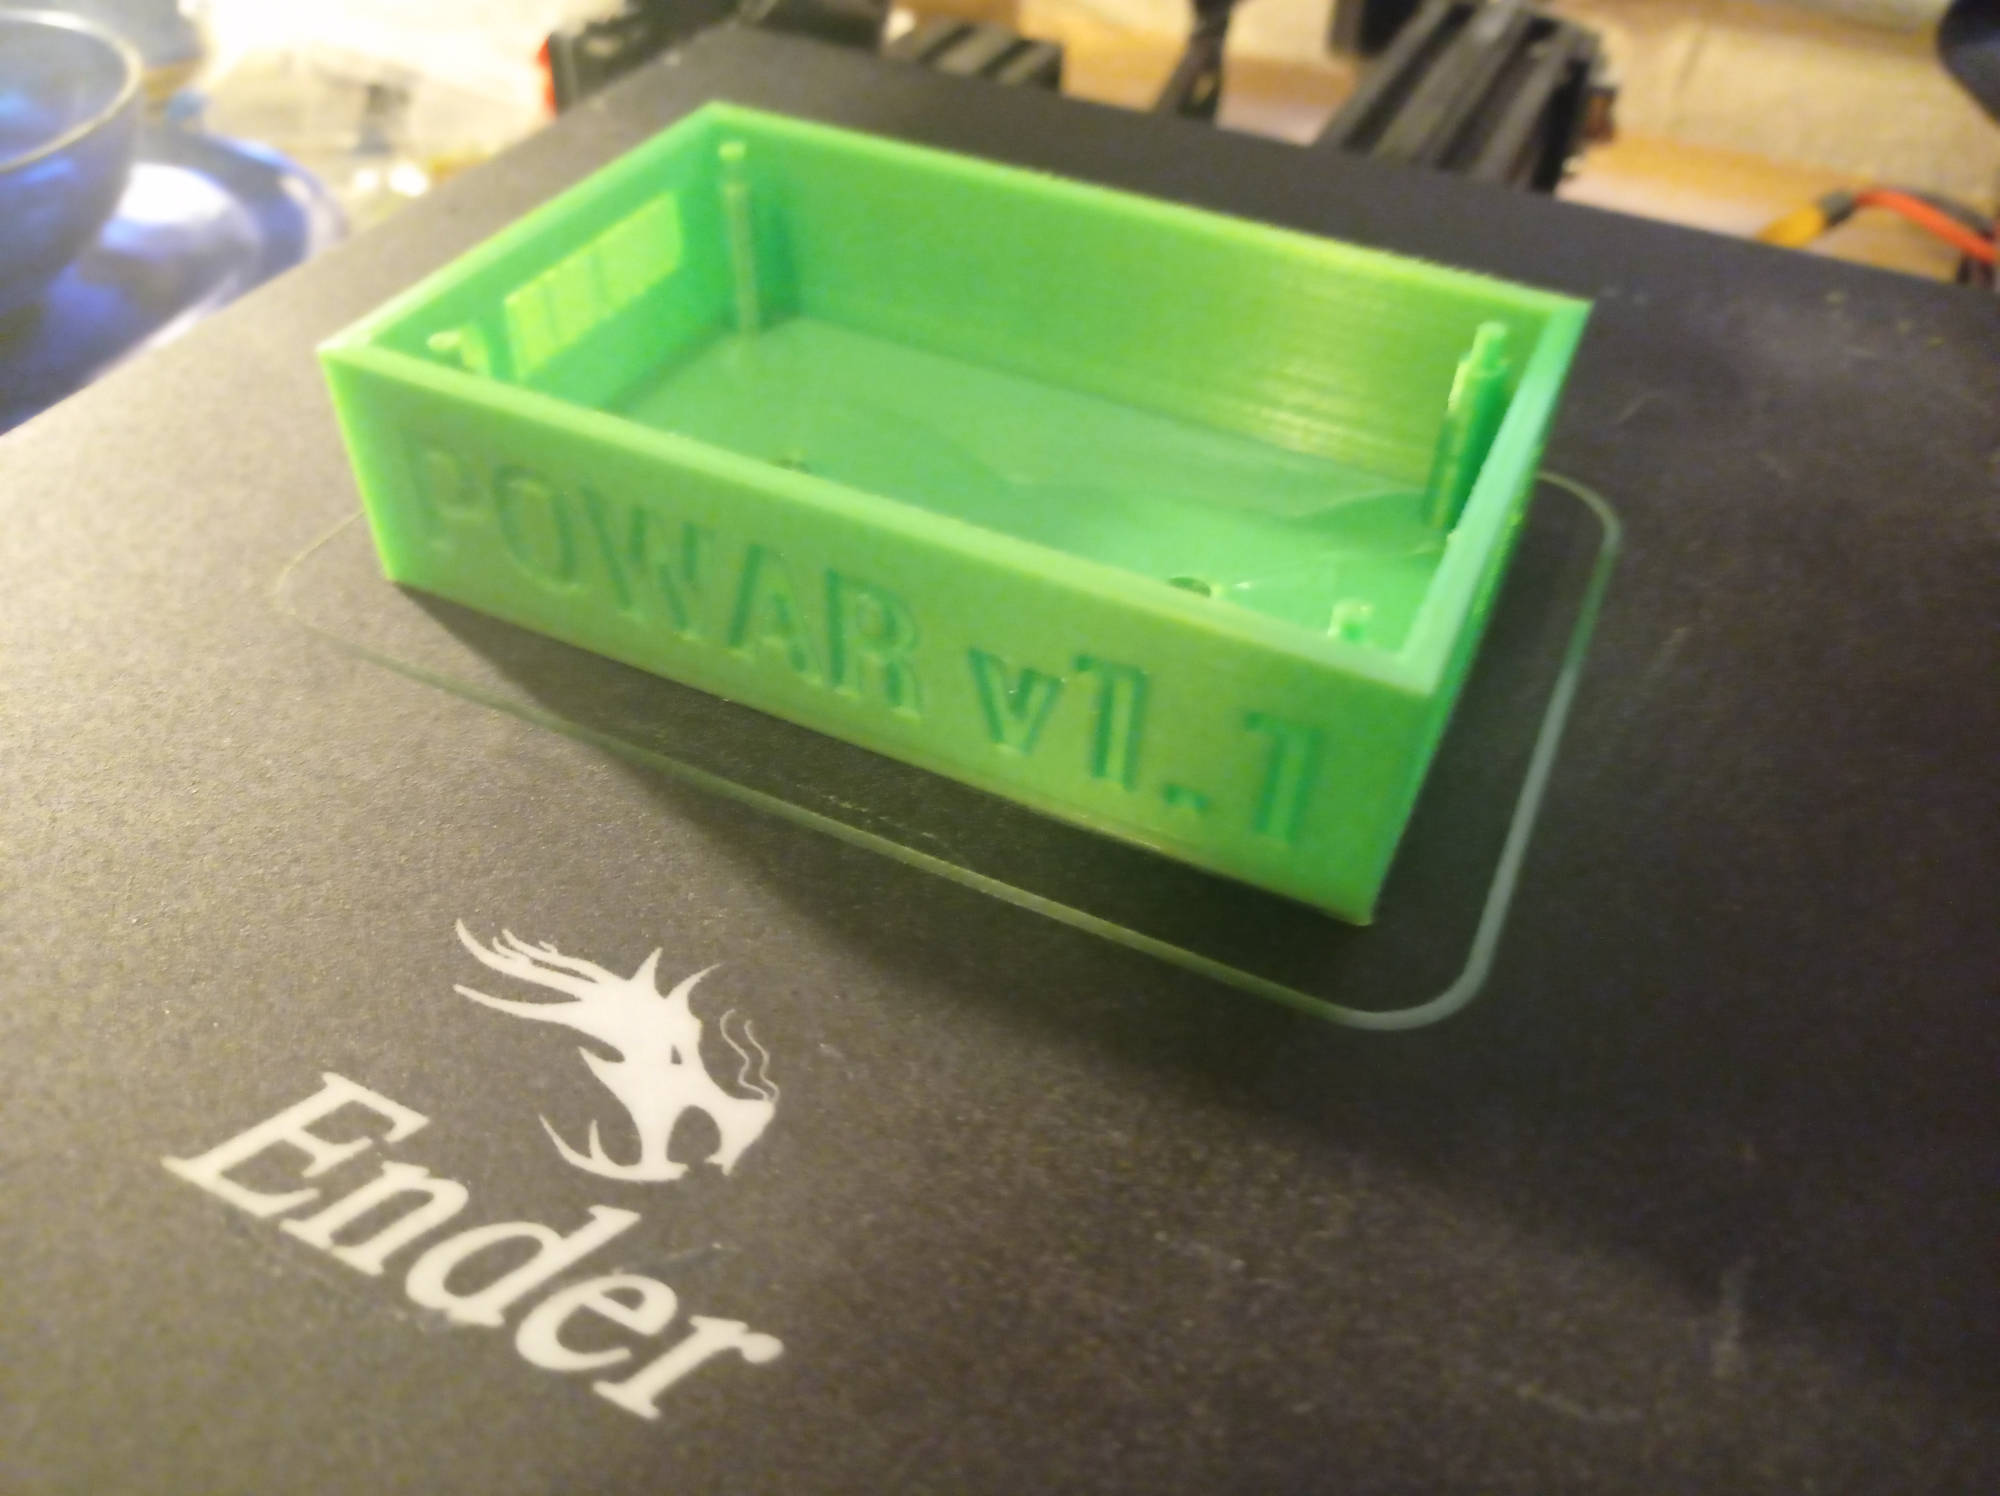
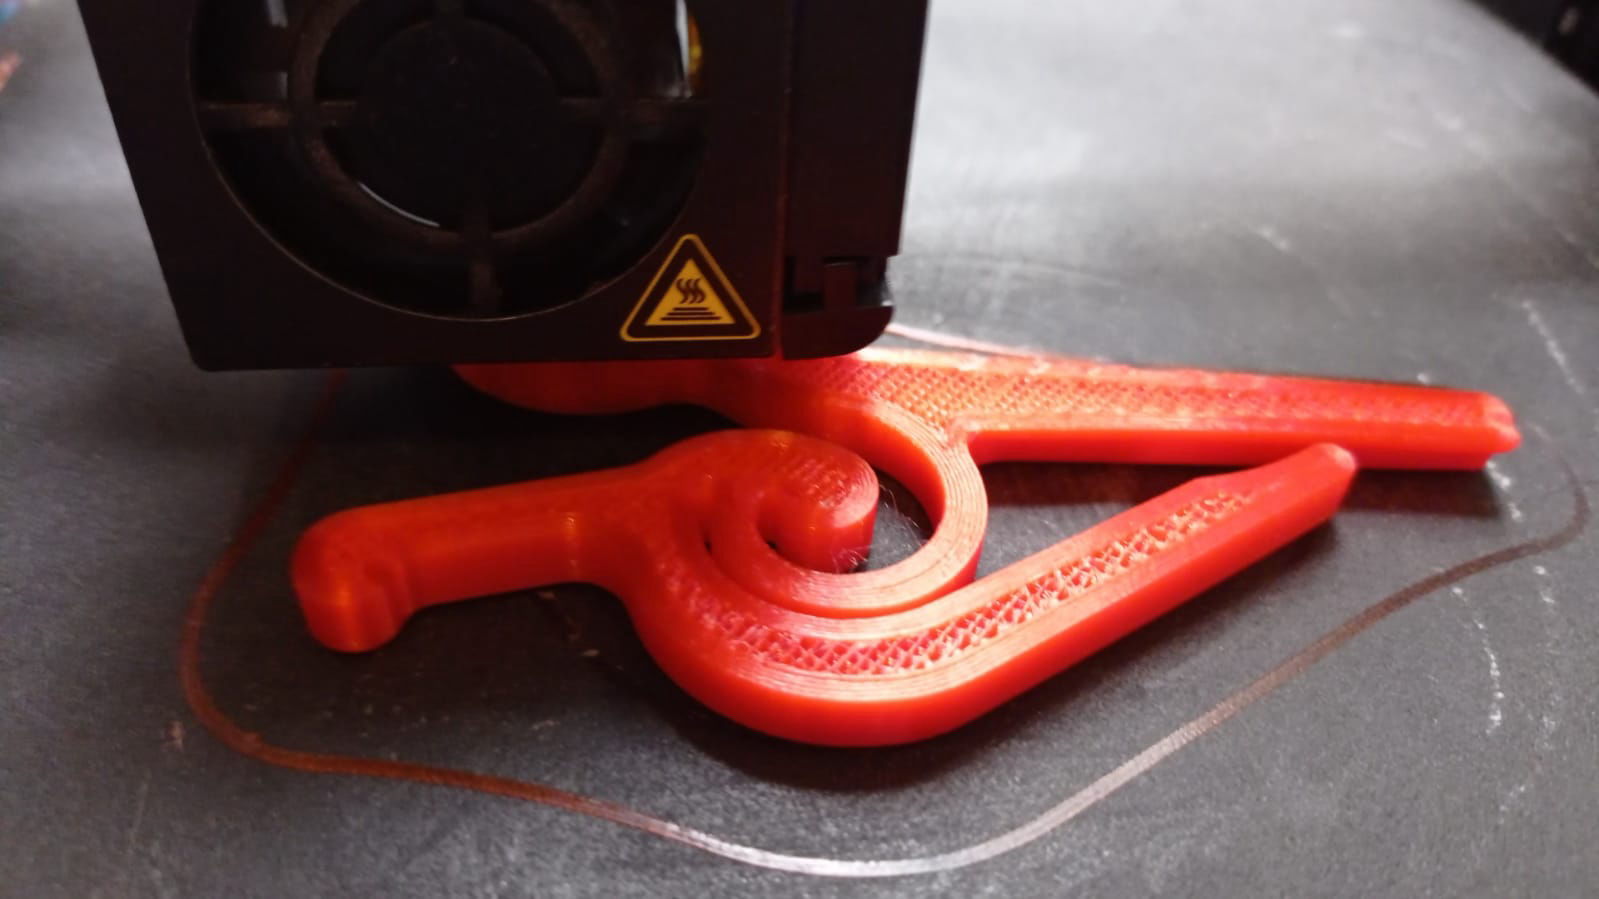
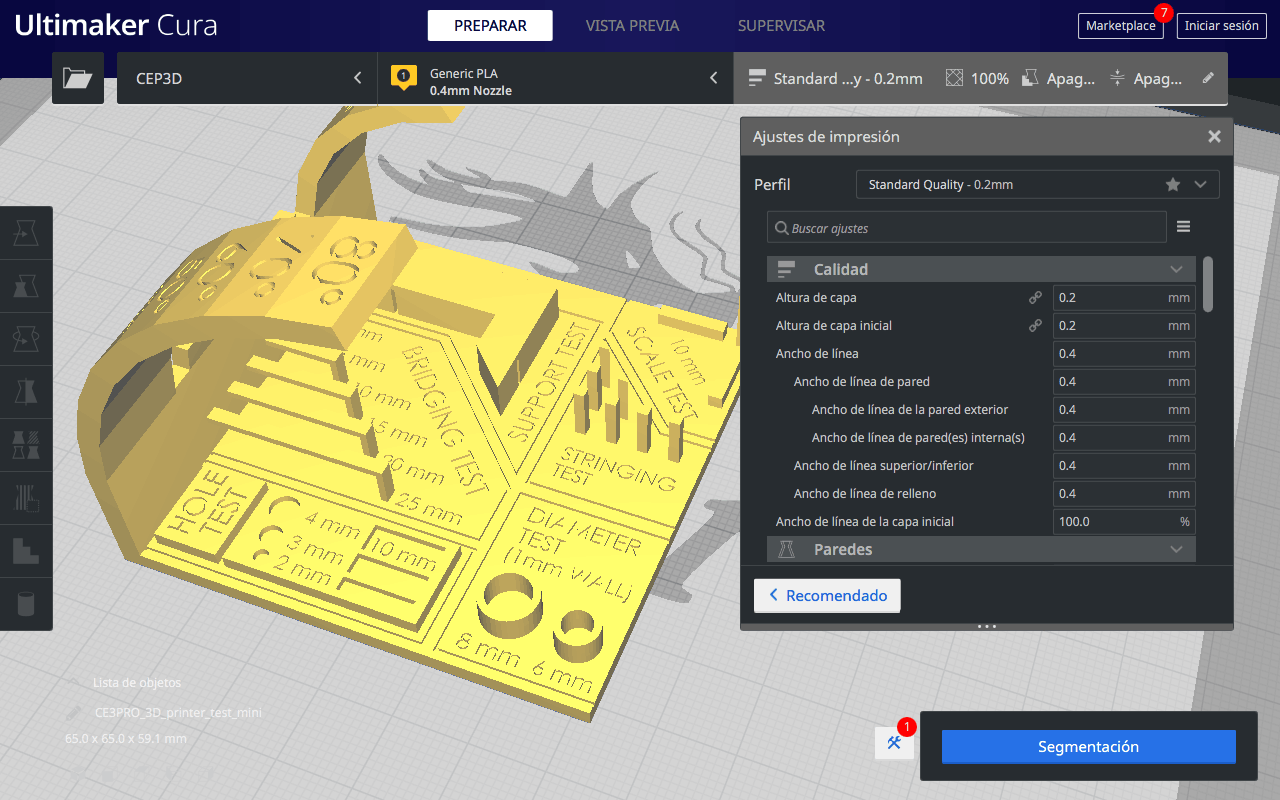
I had some troubles printing first in the Reprap, Medium FDM printer (flexible), because it was set only for flexible material, so I lost a lot of time looking for the material, until Mickel told us that we had to change material. After that I changed into the Big Plate 3D printer, and started printing 4 times on it, but in the beginning, I had a problem in the cura settings, because it was on mold, so it started printing only the sides or molds of te project. The it wasn´t filling the whole mesh, so we we checked it again, and the noozle was kind of stuck, so we unmounted the nozzle, cleaned it and then saw that the fan was also missing one blade. So we started for the third time, and then it didn't worked again, so we changed into the Delta FDM 3D printer, and everything worked well, even when the first layer wasn't sticking to the bed.

NOZZLE:                                  0.4

BED HEAT:                              60

NOZZLE HEAT:                      200

MATERIAL:                             PLA

MATERIAL THICKNESS:     1.7

LAYER HIGHT:                       0.2

INFILL:                                     Progressive


7 - Other 3D prints
I have done:

Here are some pictures of different things I have printed. Some of them are designs of mine, and others are downloaded from Thingiverse or other STL libraries. One of the most amazing things that has happened to me since I have the 3D printer, is having the possibility to think in something I need, like the headphones holder, and take some measures, design it and be able to print it. This capacity of being able to design and fabricate whatever you need is just amazing

8 - 3D Scanning:

"3D scanning is the process of analyzing a real-world object or environment to collect data on its shape and possibly its appearance (e.g. colour) to construct digital 3D models." 

This can be done with different technologies, each one with its limitations, like photography or thermal imaging. Photography has problems when scanning transparent or shinny objects, while thermal images can help to reverse engineer a house construction for example.

The resulting 3D images could have different applications like making animations, movies, gesture recognition, video games, virtual or augmented reality simulations, or creating files to work with as 3d objects to print or model.

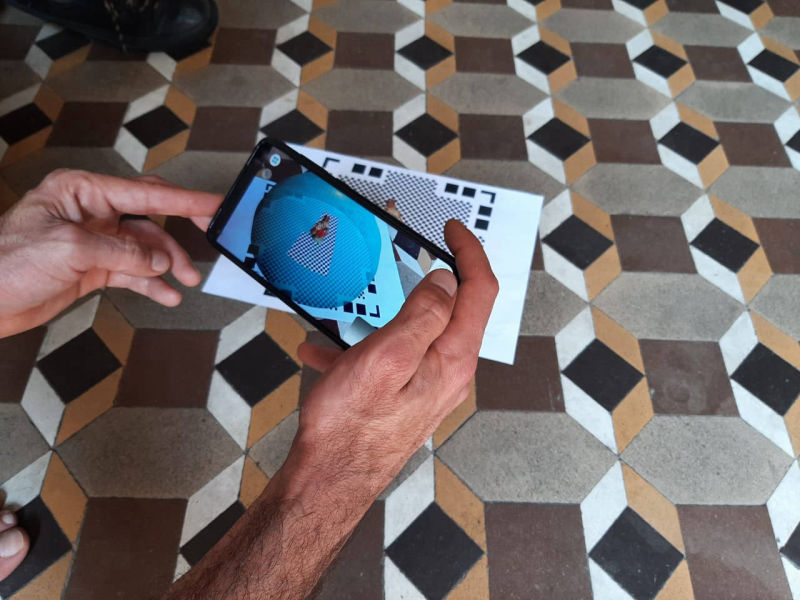
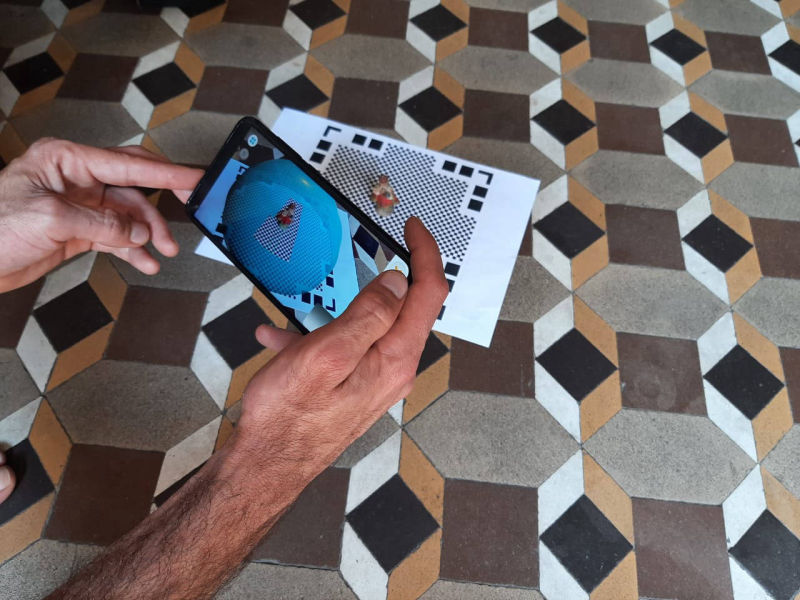
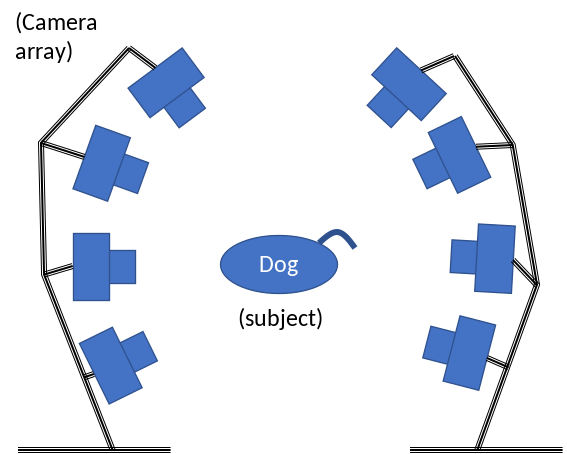
The process of 3D modeling basically consists of having many points of view of an object, and the processing software tries to generate, based on the information it gets, the missing information, saying that the more images or POV's you have to generate the image, the more accurate it will be, since the software will have to "invent" less information.

Mobirise

For the 3D Scanning, I started using Qlone, a free android app for your phone that helps you to generate a 3D file from a variety of pictures. And it has a pad that can be printed to use as base for the 3D scanning, that helps the software recognize the orientation where the image is taken.

To software works good, but I feel that it also needs the object to be very well illuminated and all the pictures to have the same distance so that they match between each other and the software can recognize them, so in the end the resulting 3D file has a lot of problem with details. I tried turning it around with an option that the software has, but the object deformed.

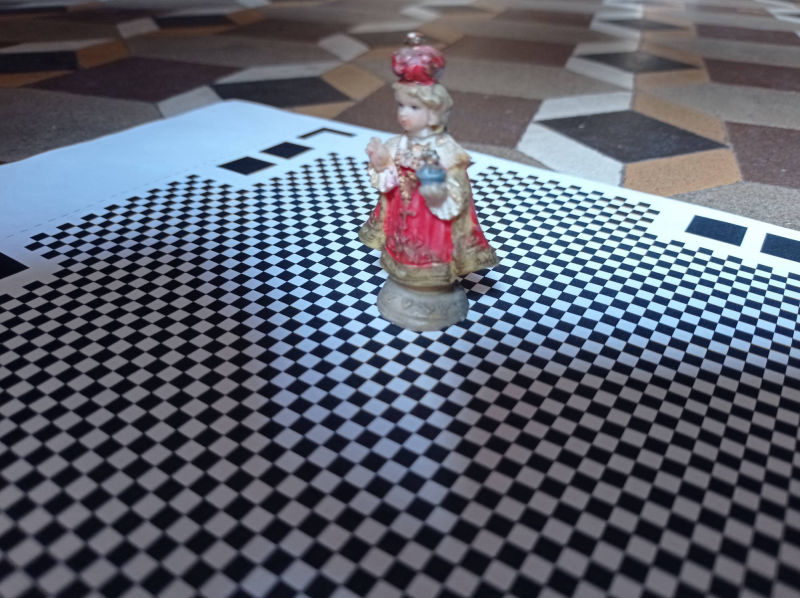
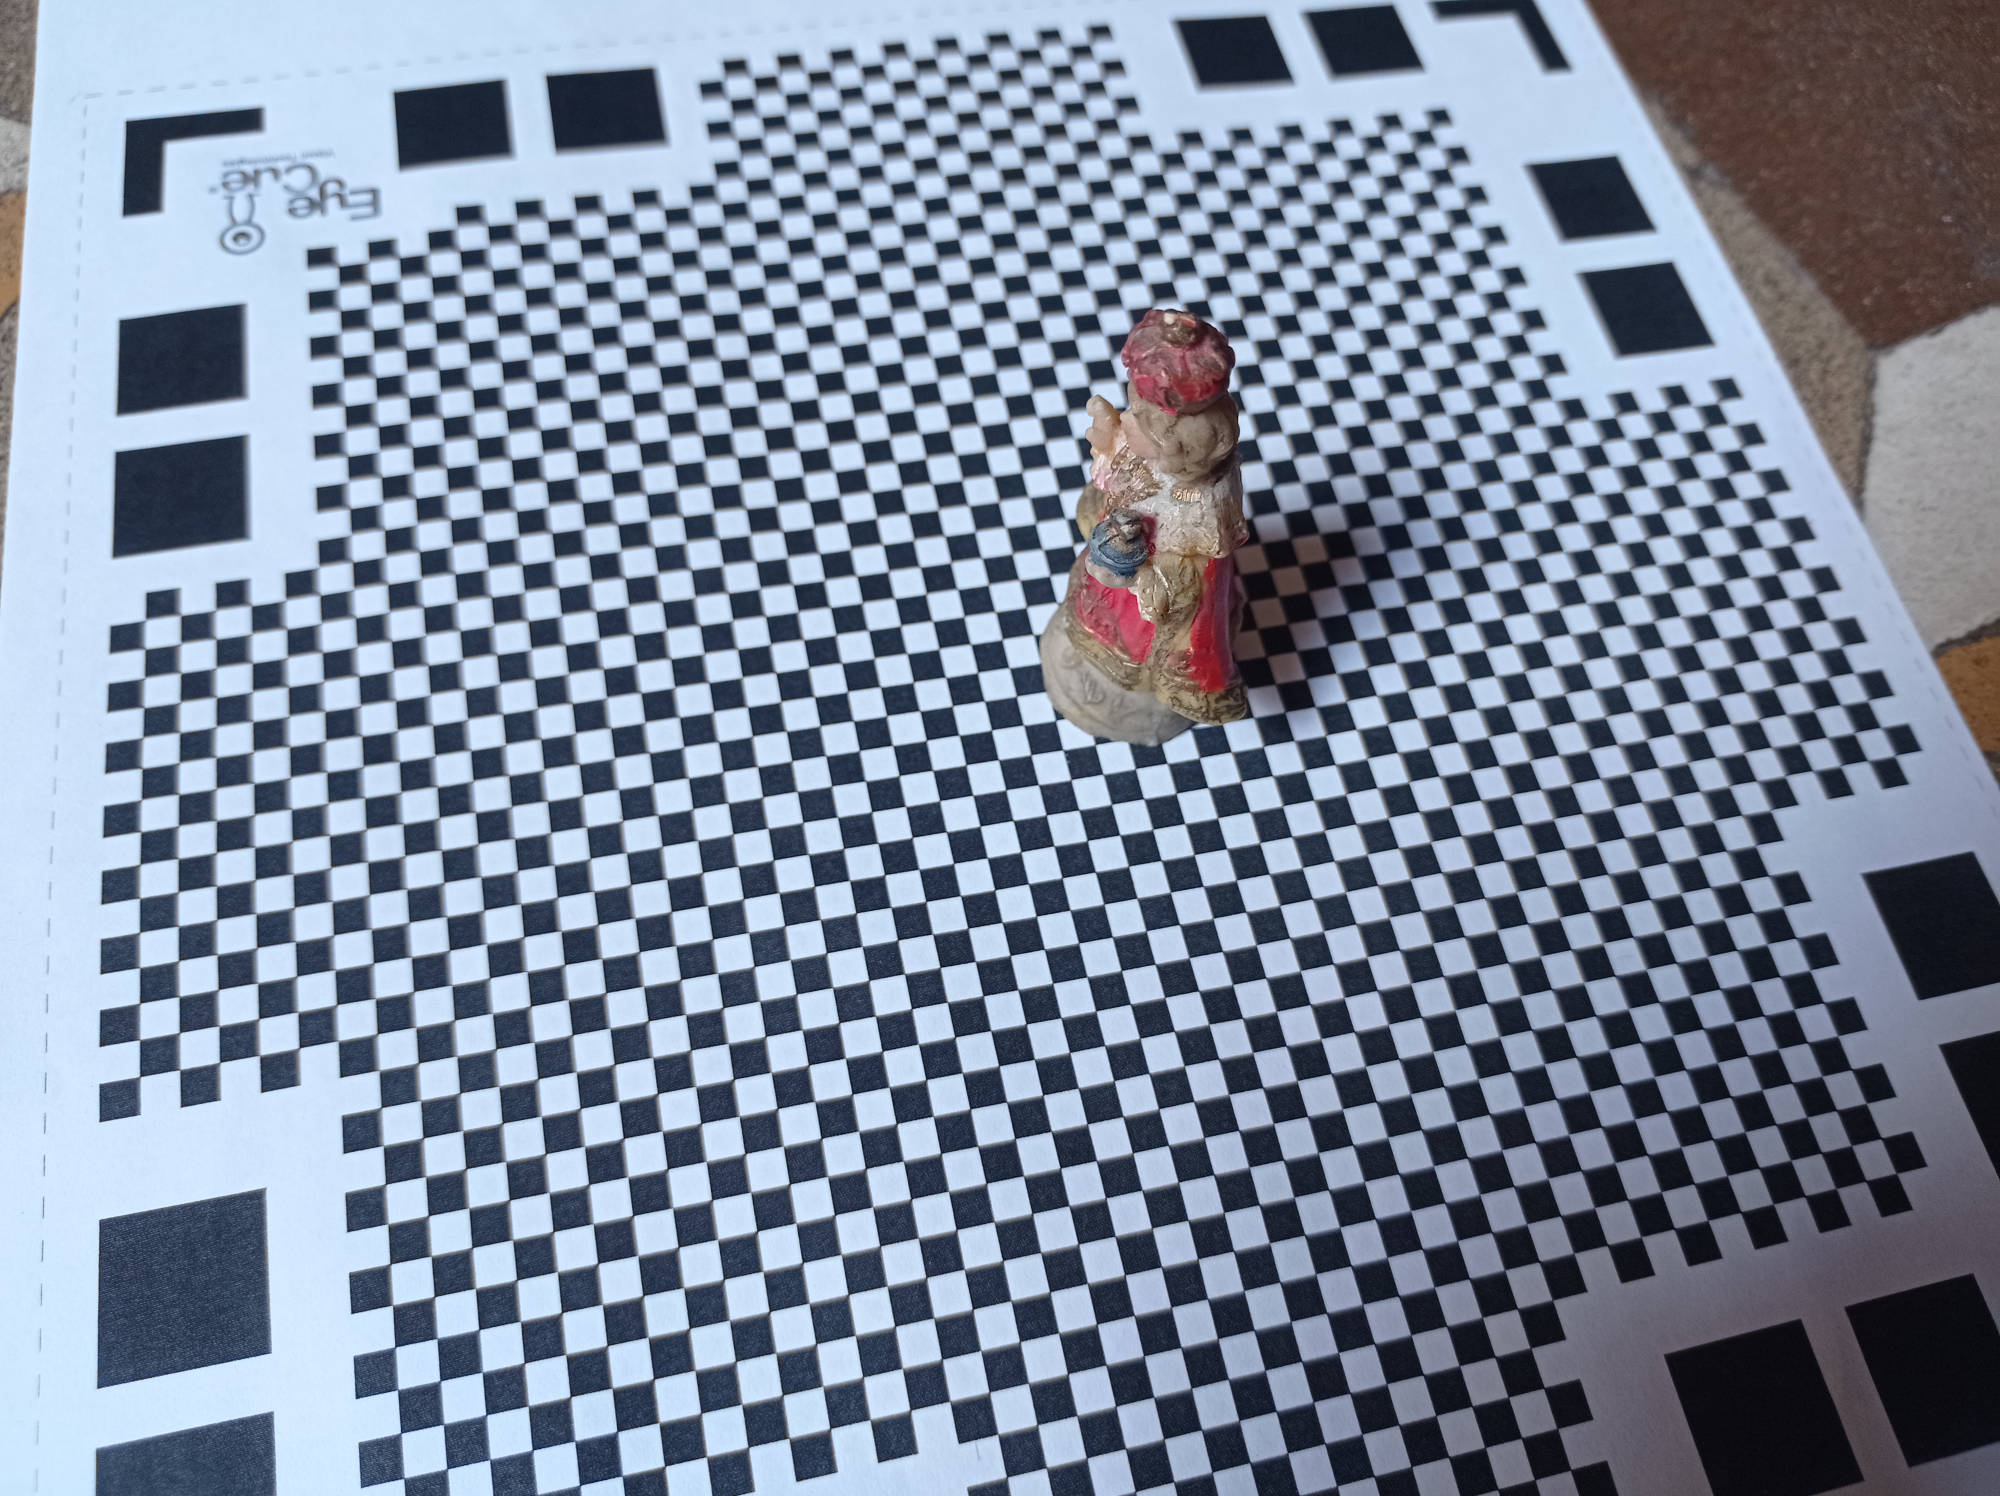
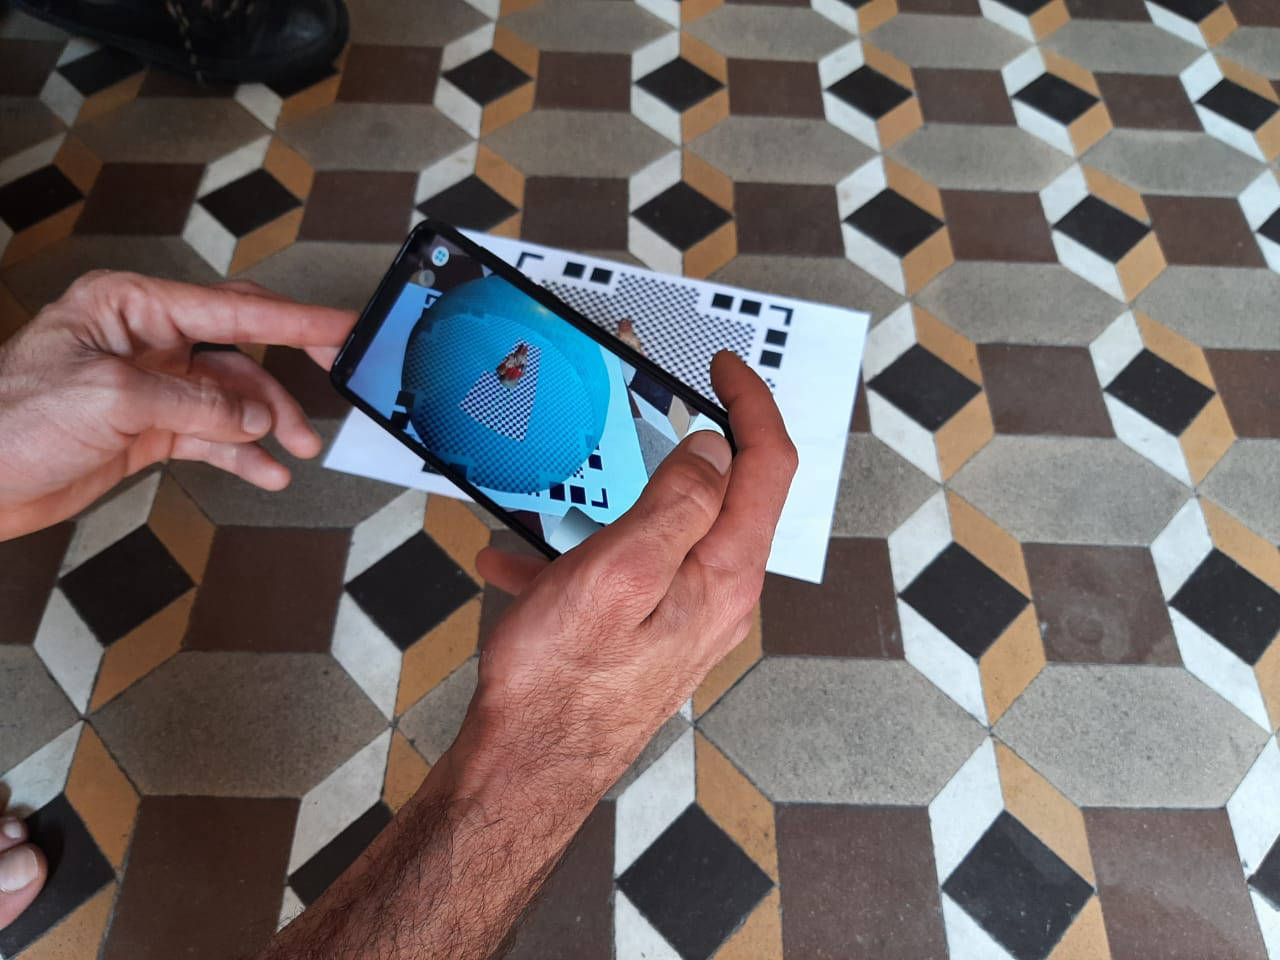
I also tried with a small saint, "El niño de Praga" (Il bambini di Prague), but I missed one step, so it has a very poor definition in my opinion. In the end, I feel that this free apps to do so are not that good for the same reason that they are free, and if you want to export the 3D generated file into a more sophisticated format you will have to pay.

I believe that a pretty good option, or at least a better one, is the 3D scanning with the kinnect or this new cameras that are made for doing so, but to achieve an even better result, you would need to have a stable lighting and maintain the same distance alway from the camera and the objective. For doing so, in Thingiverse you could find and print a turntable that even comes with a piece that helps you to hold the cellphone correctly while the objective turns in the middle.

Mobirise

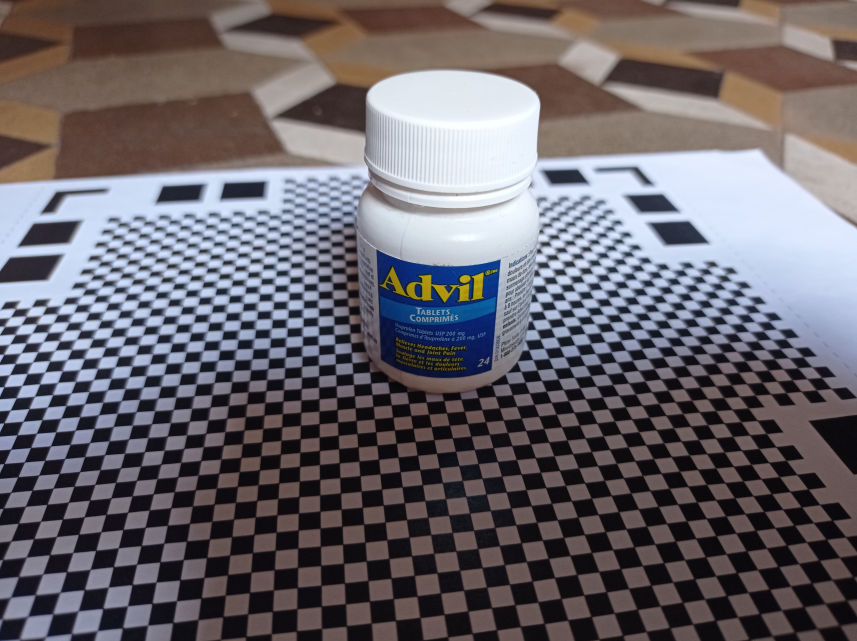
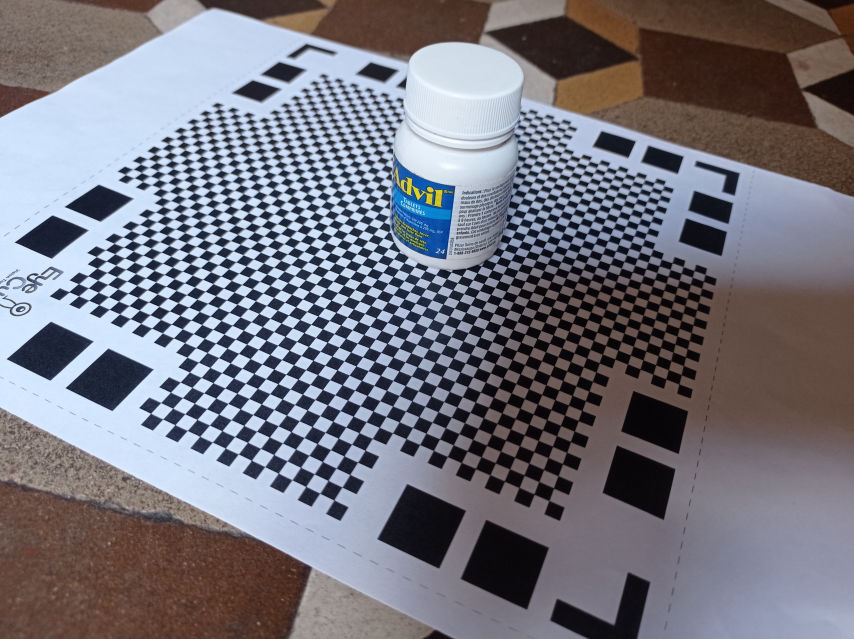
I also tried with Metashape, a software for generating 3D files with your computer, but it takes so much time trying to process the images (more than an hour), so I stopped before it finished adding the textures. Maybe that would be a good option too, but you also need to have the same tips that with the other softwares to get a quality image:

1 - Proper lighting, balanced from all the different sides.

2 - Good amount and quality of Images (even dough this will require more processing capacity).

3 - Same distance between the camera and the subject always.

So far this have been my experience with the 3D scanning, but I would love to experiment with it a lot more in the future, maybe with a better technology (or at least a better computer).

Voltio

Created with Mobirise - Read more