4. Computer controlled cutting
1. Assignment && week workflow planning
Group
- characterize your lasercutter’s focus, power, speed, rate, kerf, and joint clearance
individual
-
cut something on the vinylcutter
-
design, lasercut, and document a parametric construction kit, accounting for the lasercutter kerf, which can be assembled in multiple ways, and for extra credit include elements that aren’t flat
2. How i did it
2.0 HeroShot of the week
- Vinylcutter
- LaserCutter
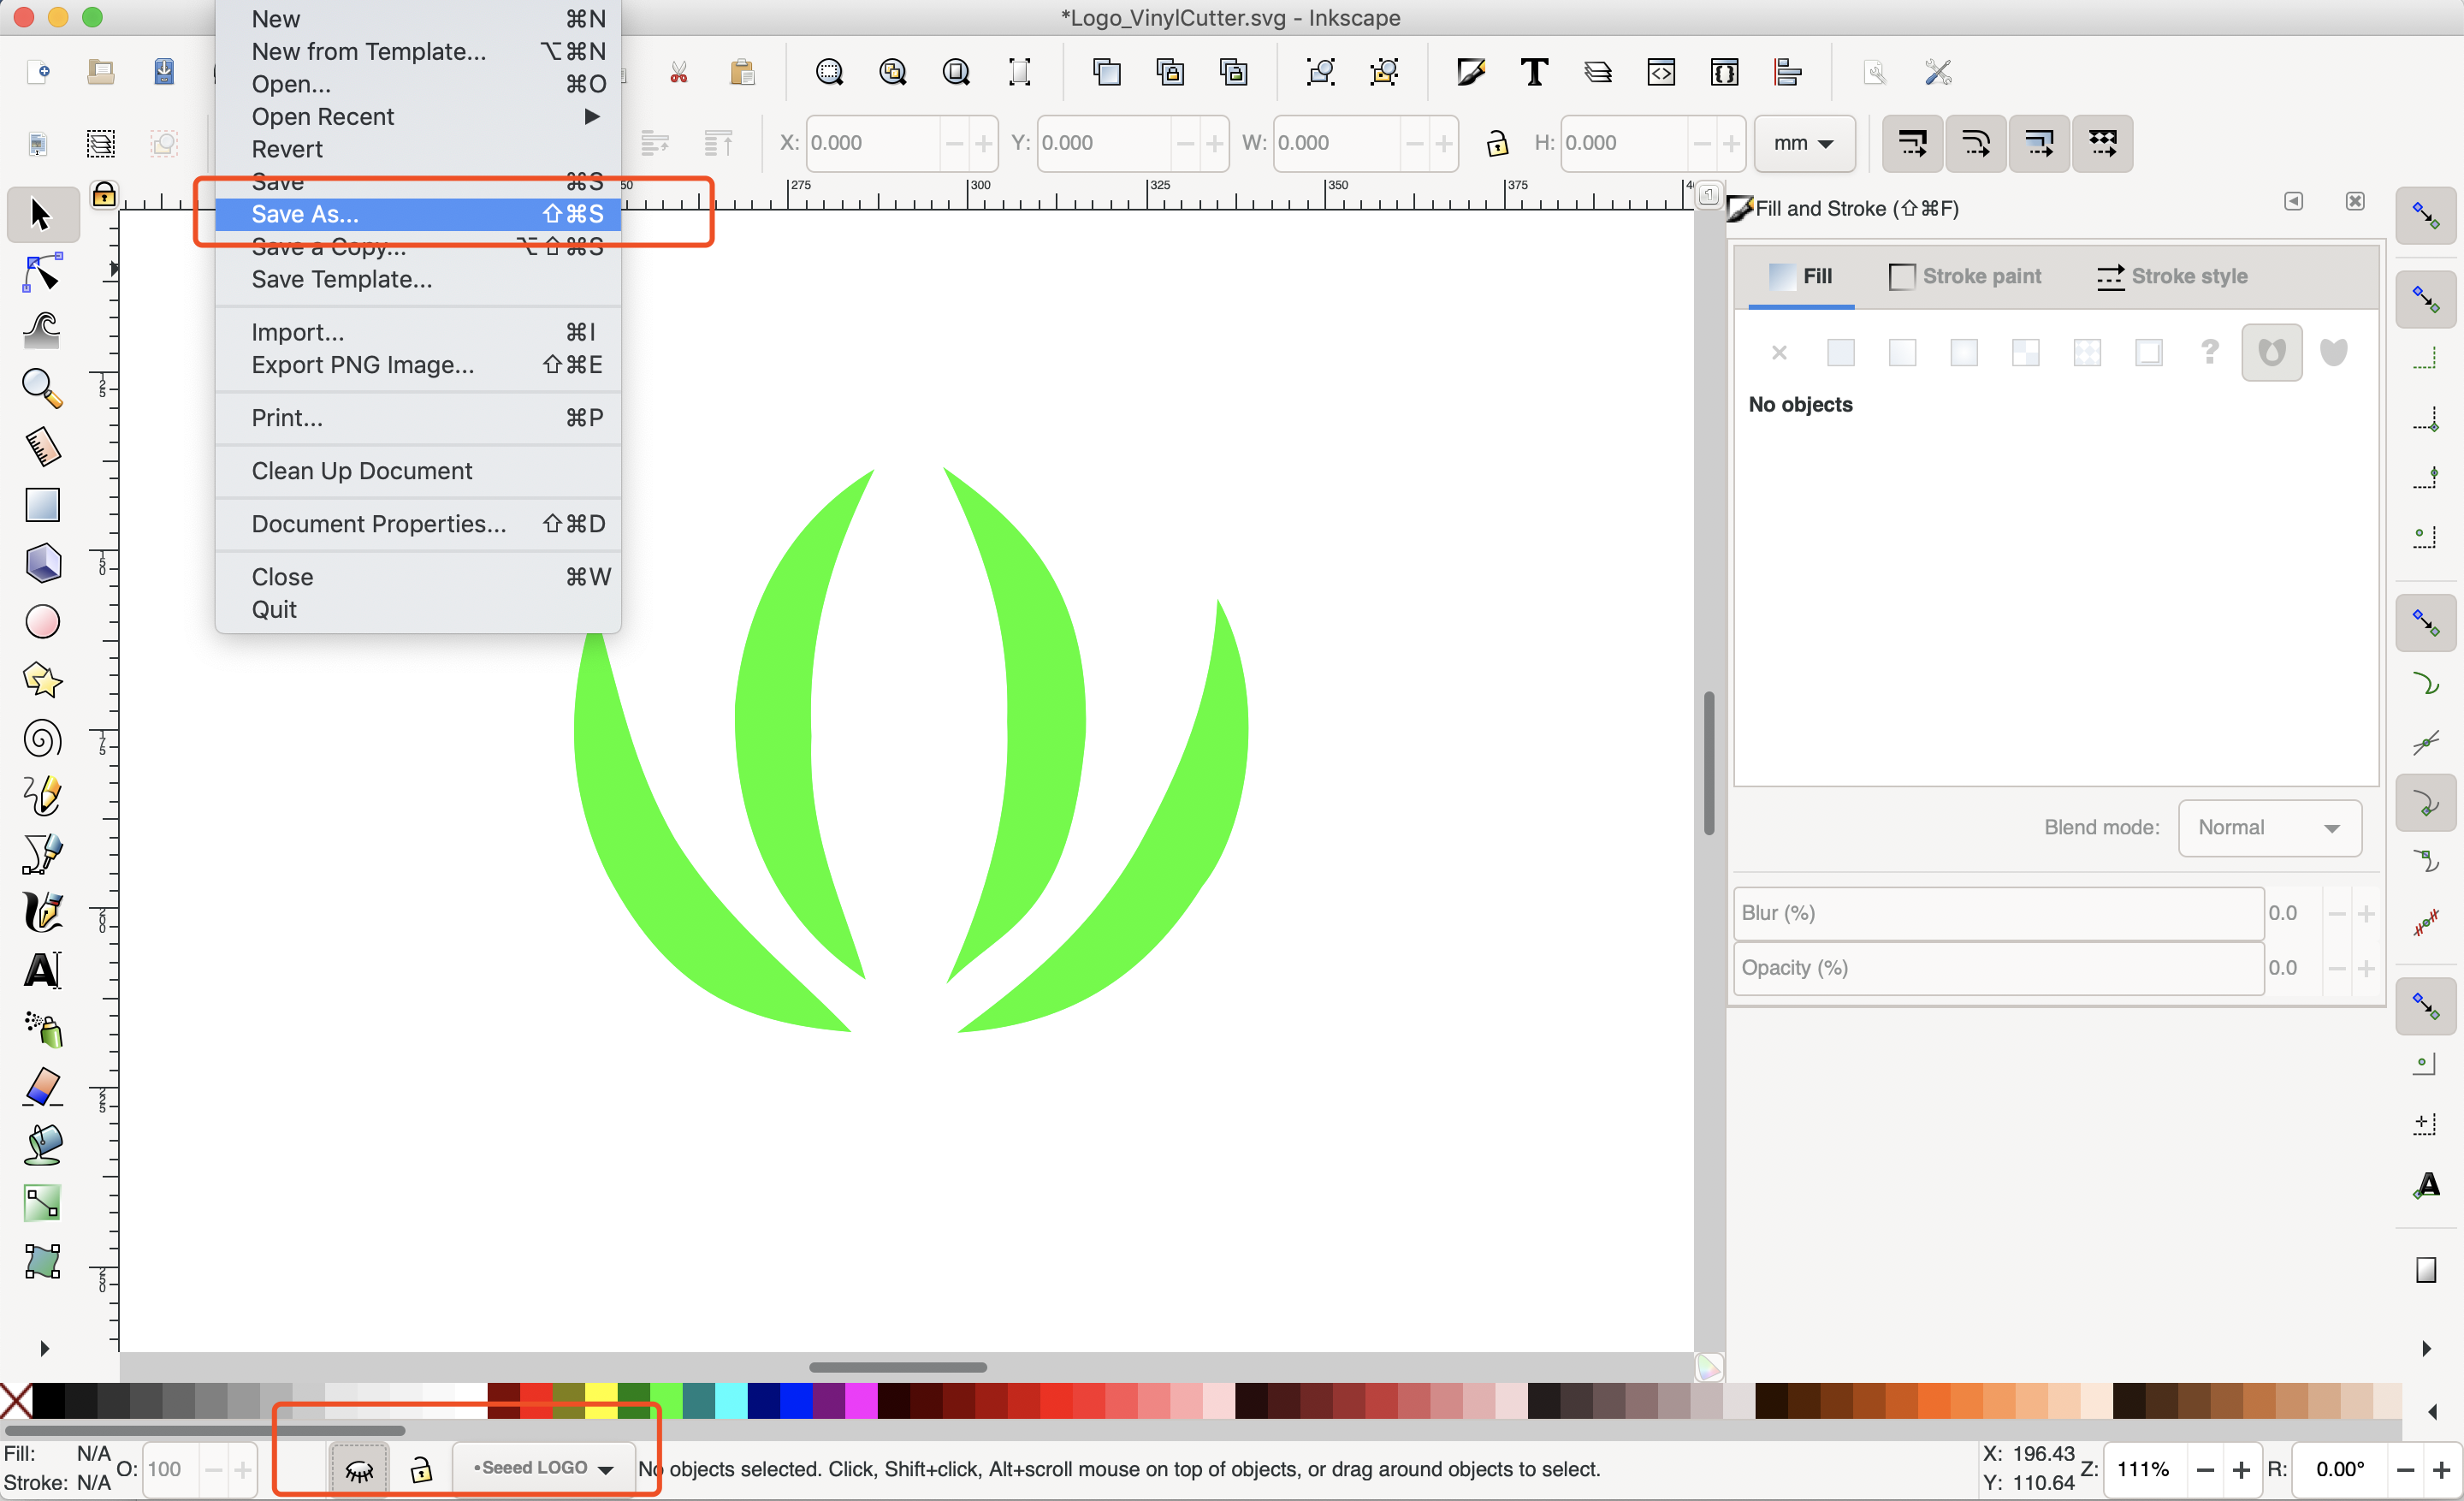
2.1 InkScape
-
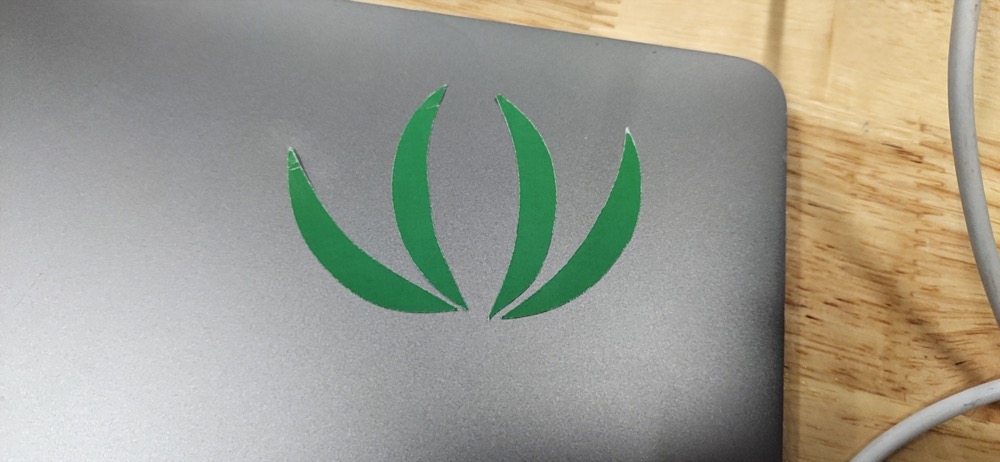
I plan to use it with as logo design for further cutting on a vinylcutter - A logo for company sticker.
-
First i copy and paste the Seeed company logo into InkScape

- Then i create another layer and and draw the skeleton with Bezier pen, modified then to make my drawings to cover the company logo pasted earlier in the first layer.
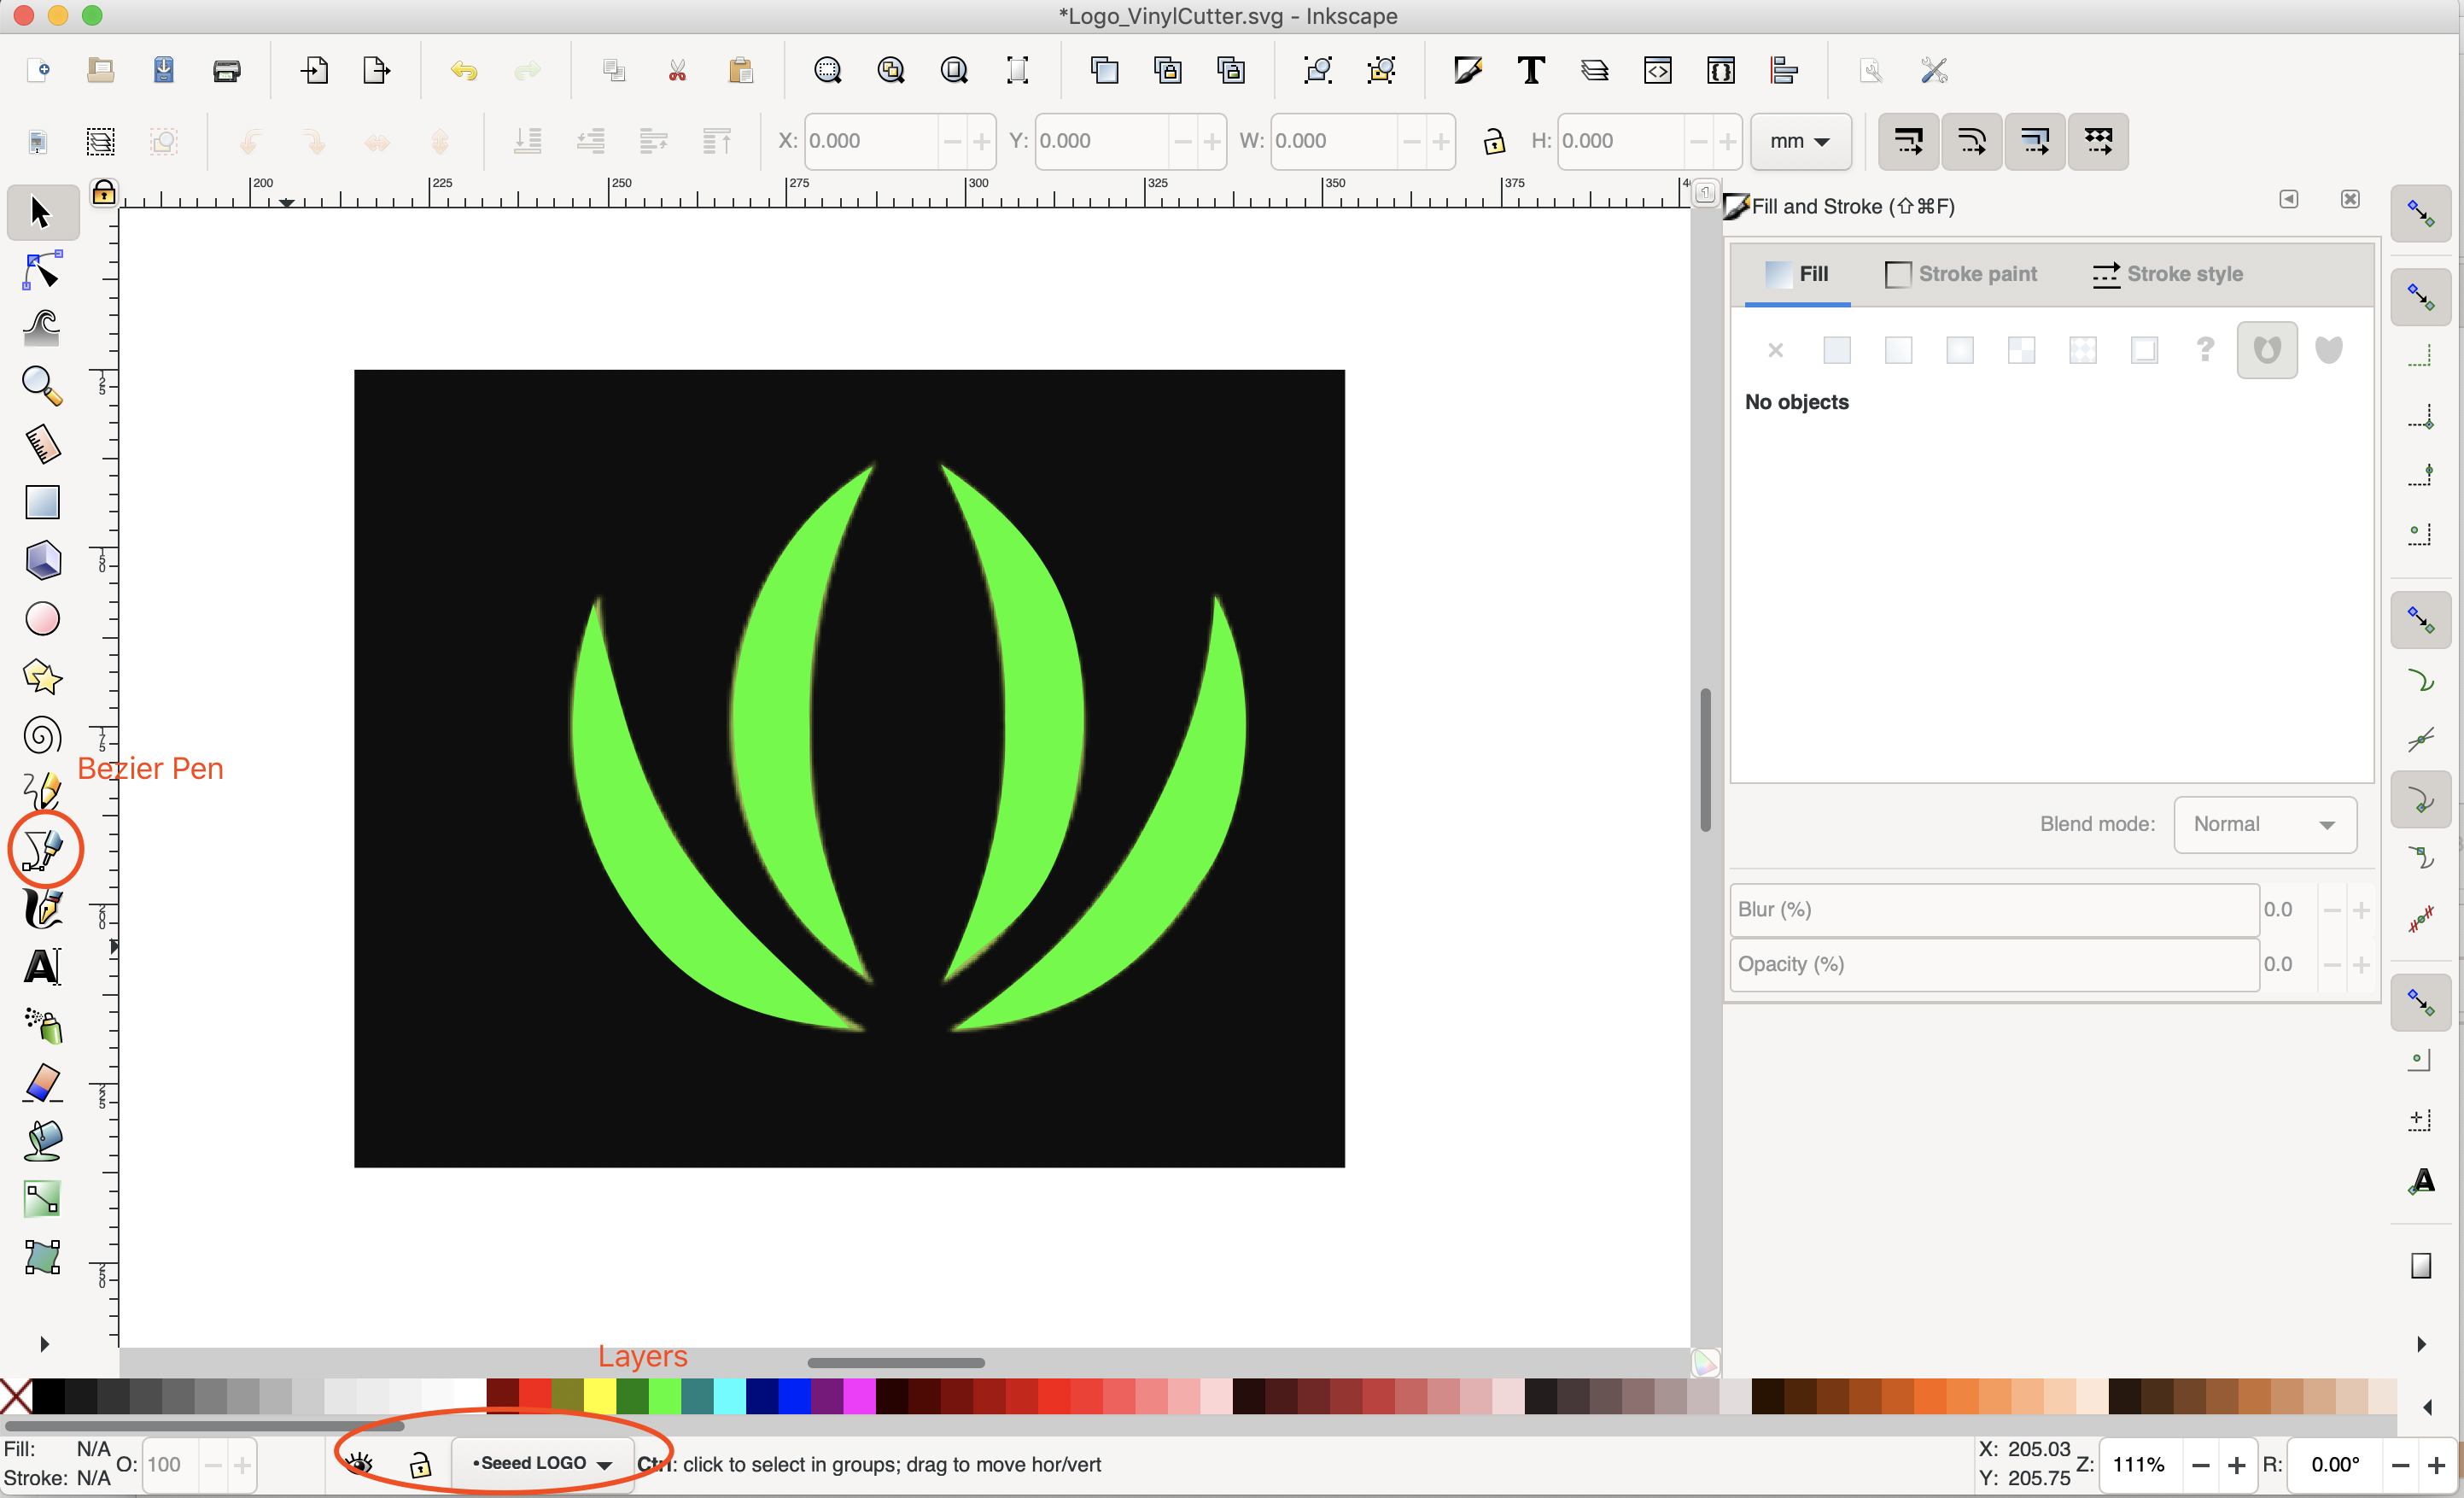
- Hide the first layer and save the file, done.
2.2 Fusion360
Downloaded Fusion 360 and plan to use it with 2D design for further cutting on a Laser Cutter
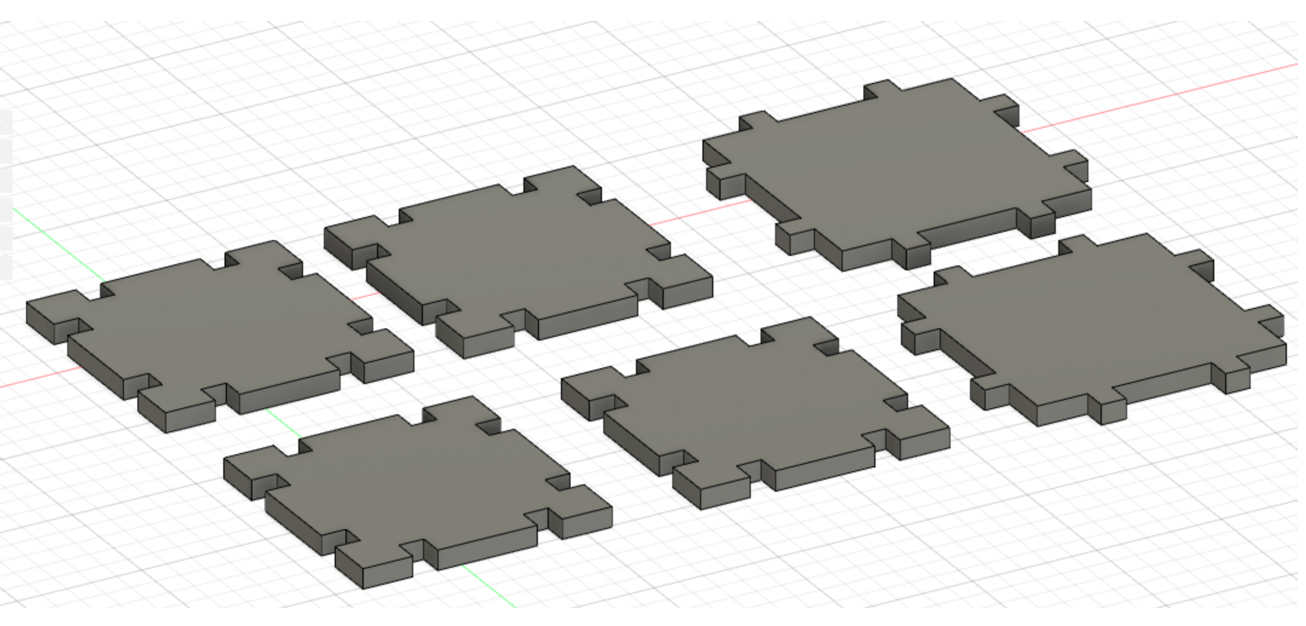
I decided to go with Fusion 360 First to make a simple case. I found a website makercase where you can quickly find some design samples and i chose following
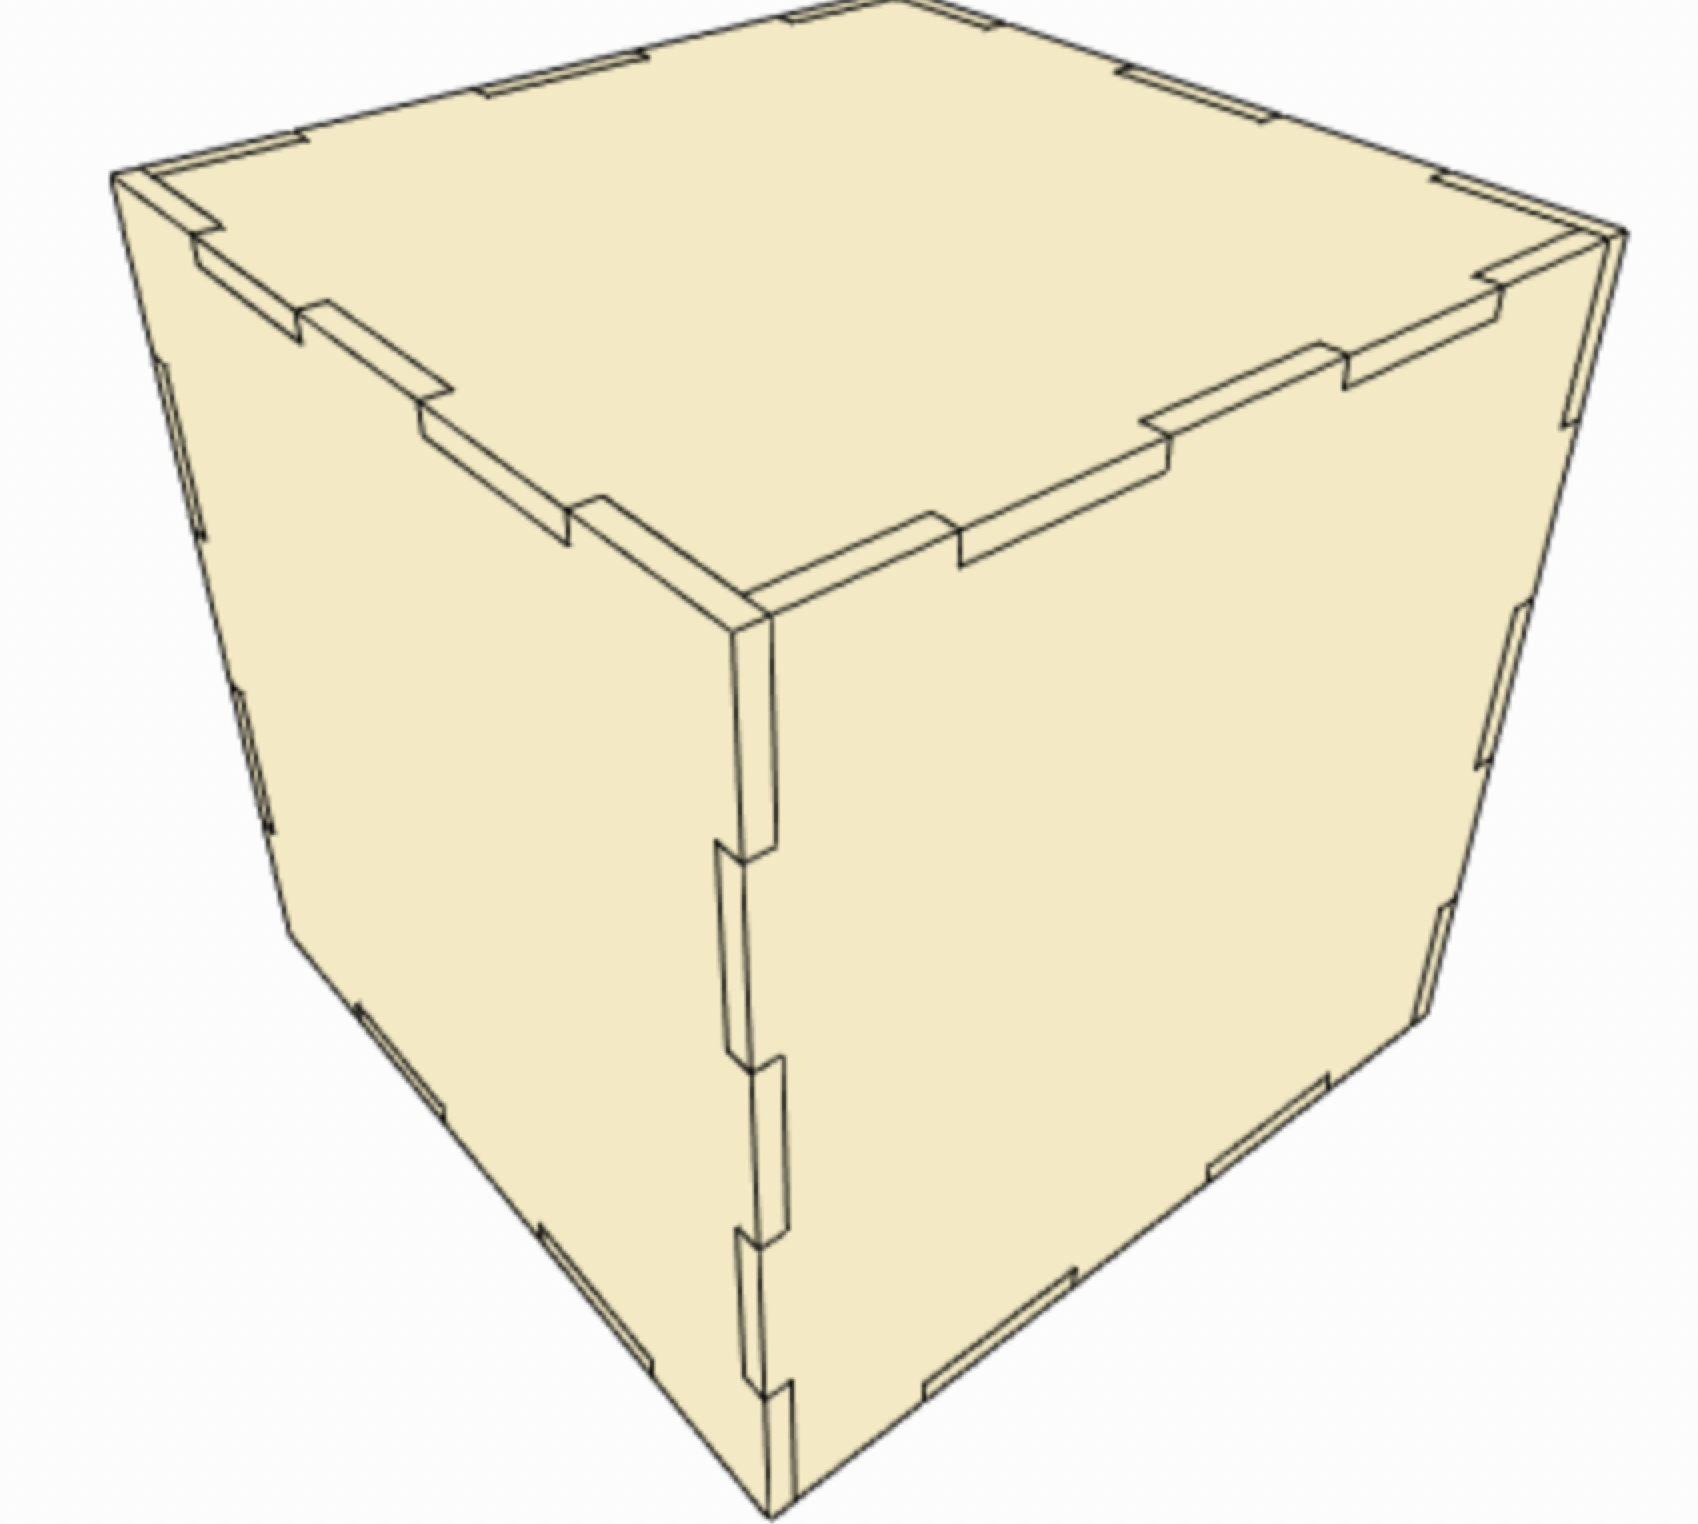
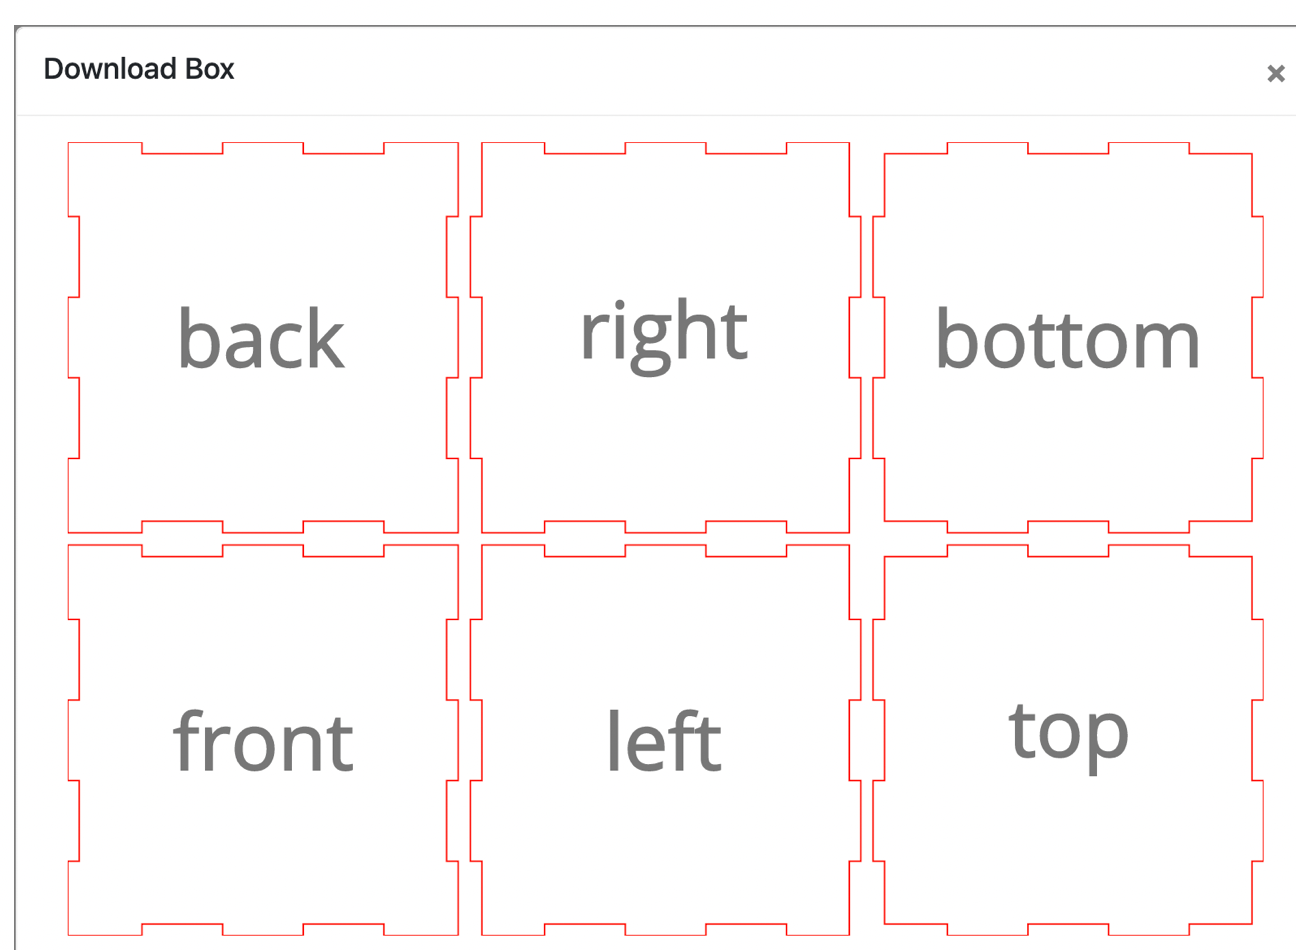
In order to make this case i’m supposed to have 2D design for the 6 parts and then entrude them to 3D, determine those parameters(So called a parametric design).
- I made my initial sketch(1/4 of a squre), Using “Circular Pattern” to make kit a big part, and then copy and paste to 4 exactly same part. The other 2 did the likewise. I set the parameters and constraints, making sure i can easily adjust the numbers according to the materials later i will be using from the lab.

- Extrude the sketch and make it 3D, in order to prepare for assembly testing and Animation.
- Assembling before using machine
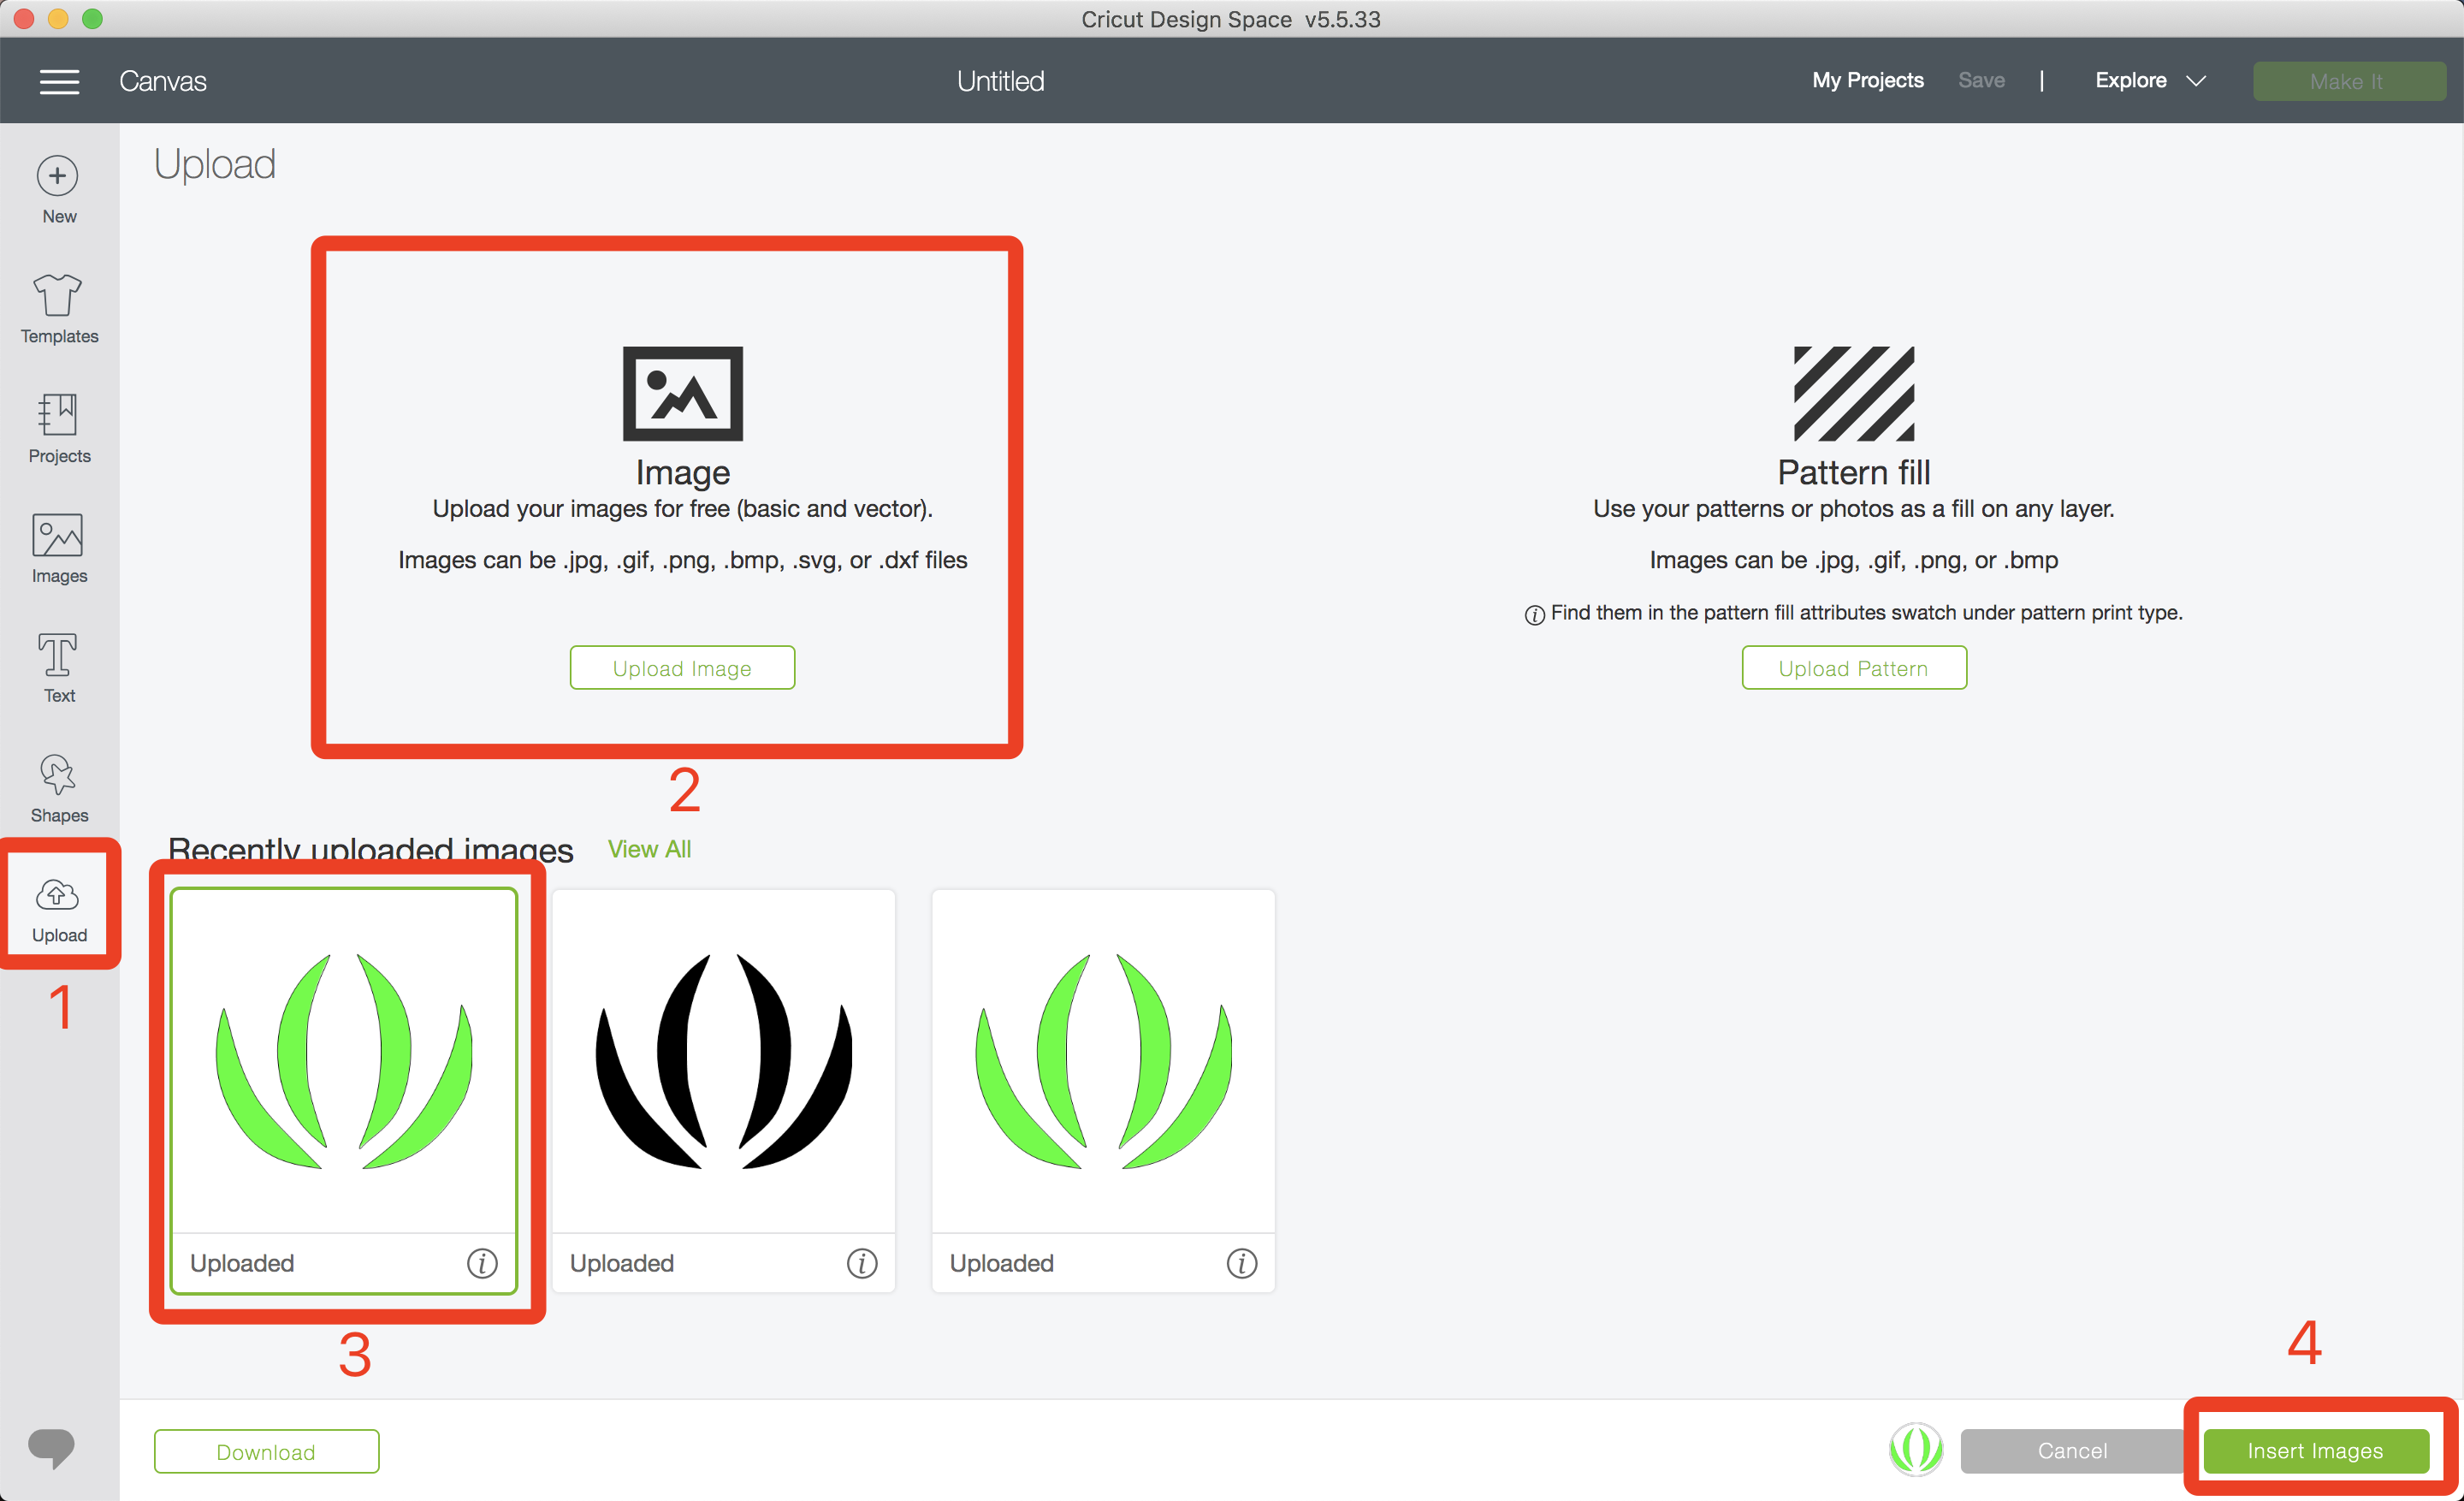
2.3 VinylCutter
- Exported the file as PNG
- Upload to the software that our vinylcutter use
I’m using “Design” vinylcutter and the software came with the manufacture was “Circuit Design Space”,an online tool.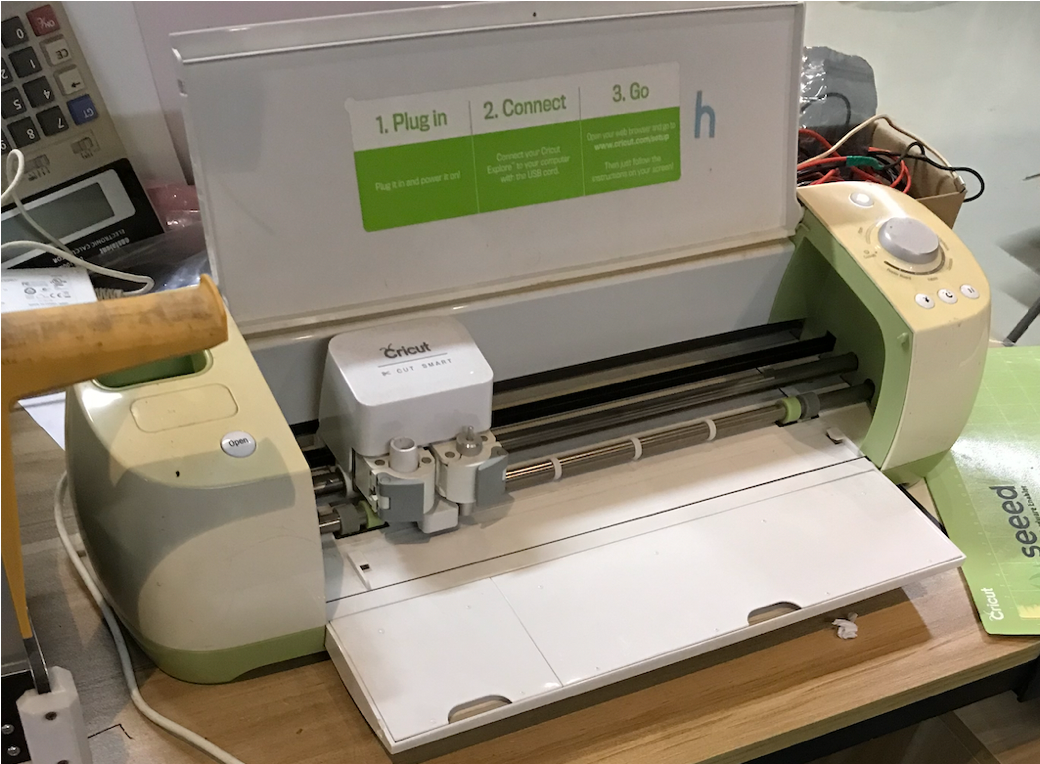

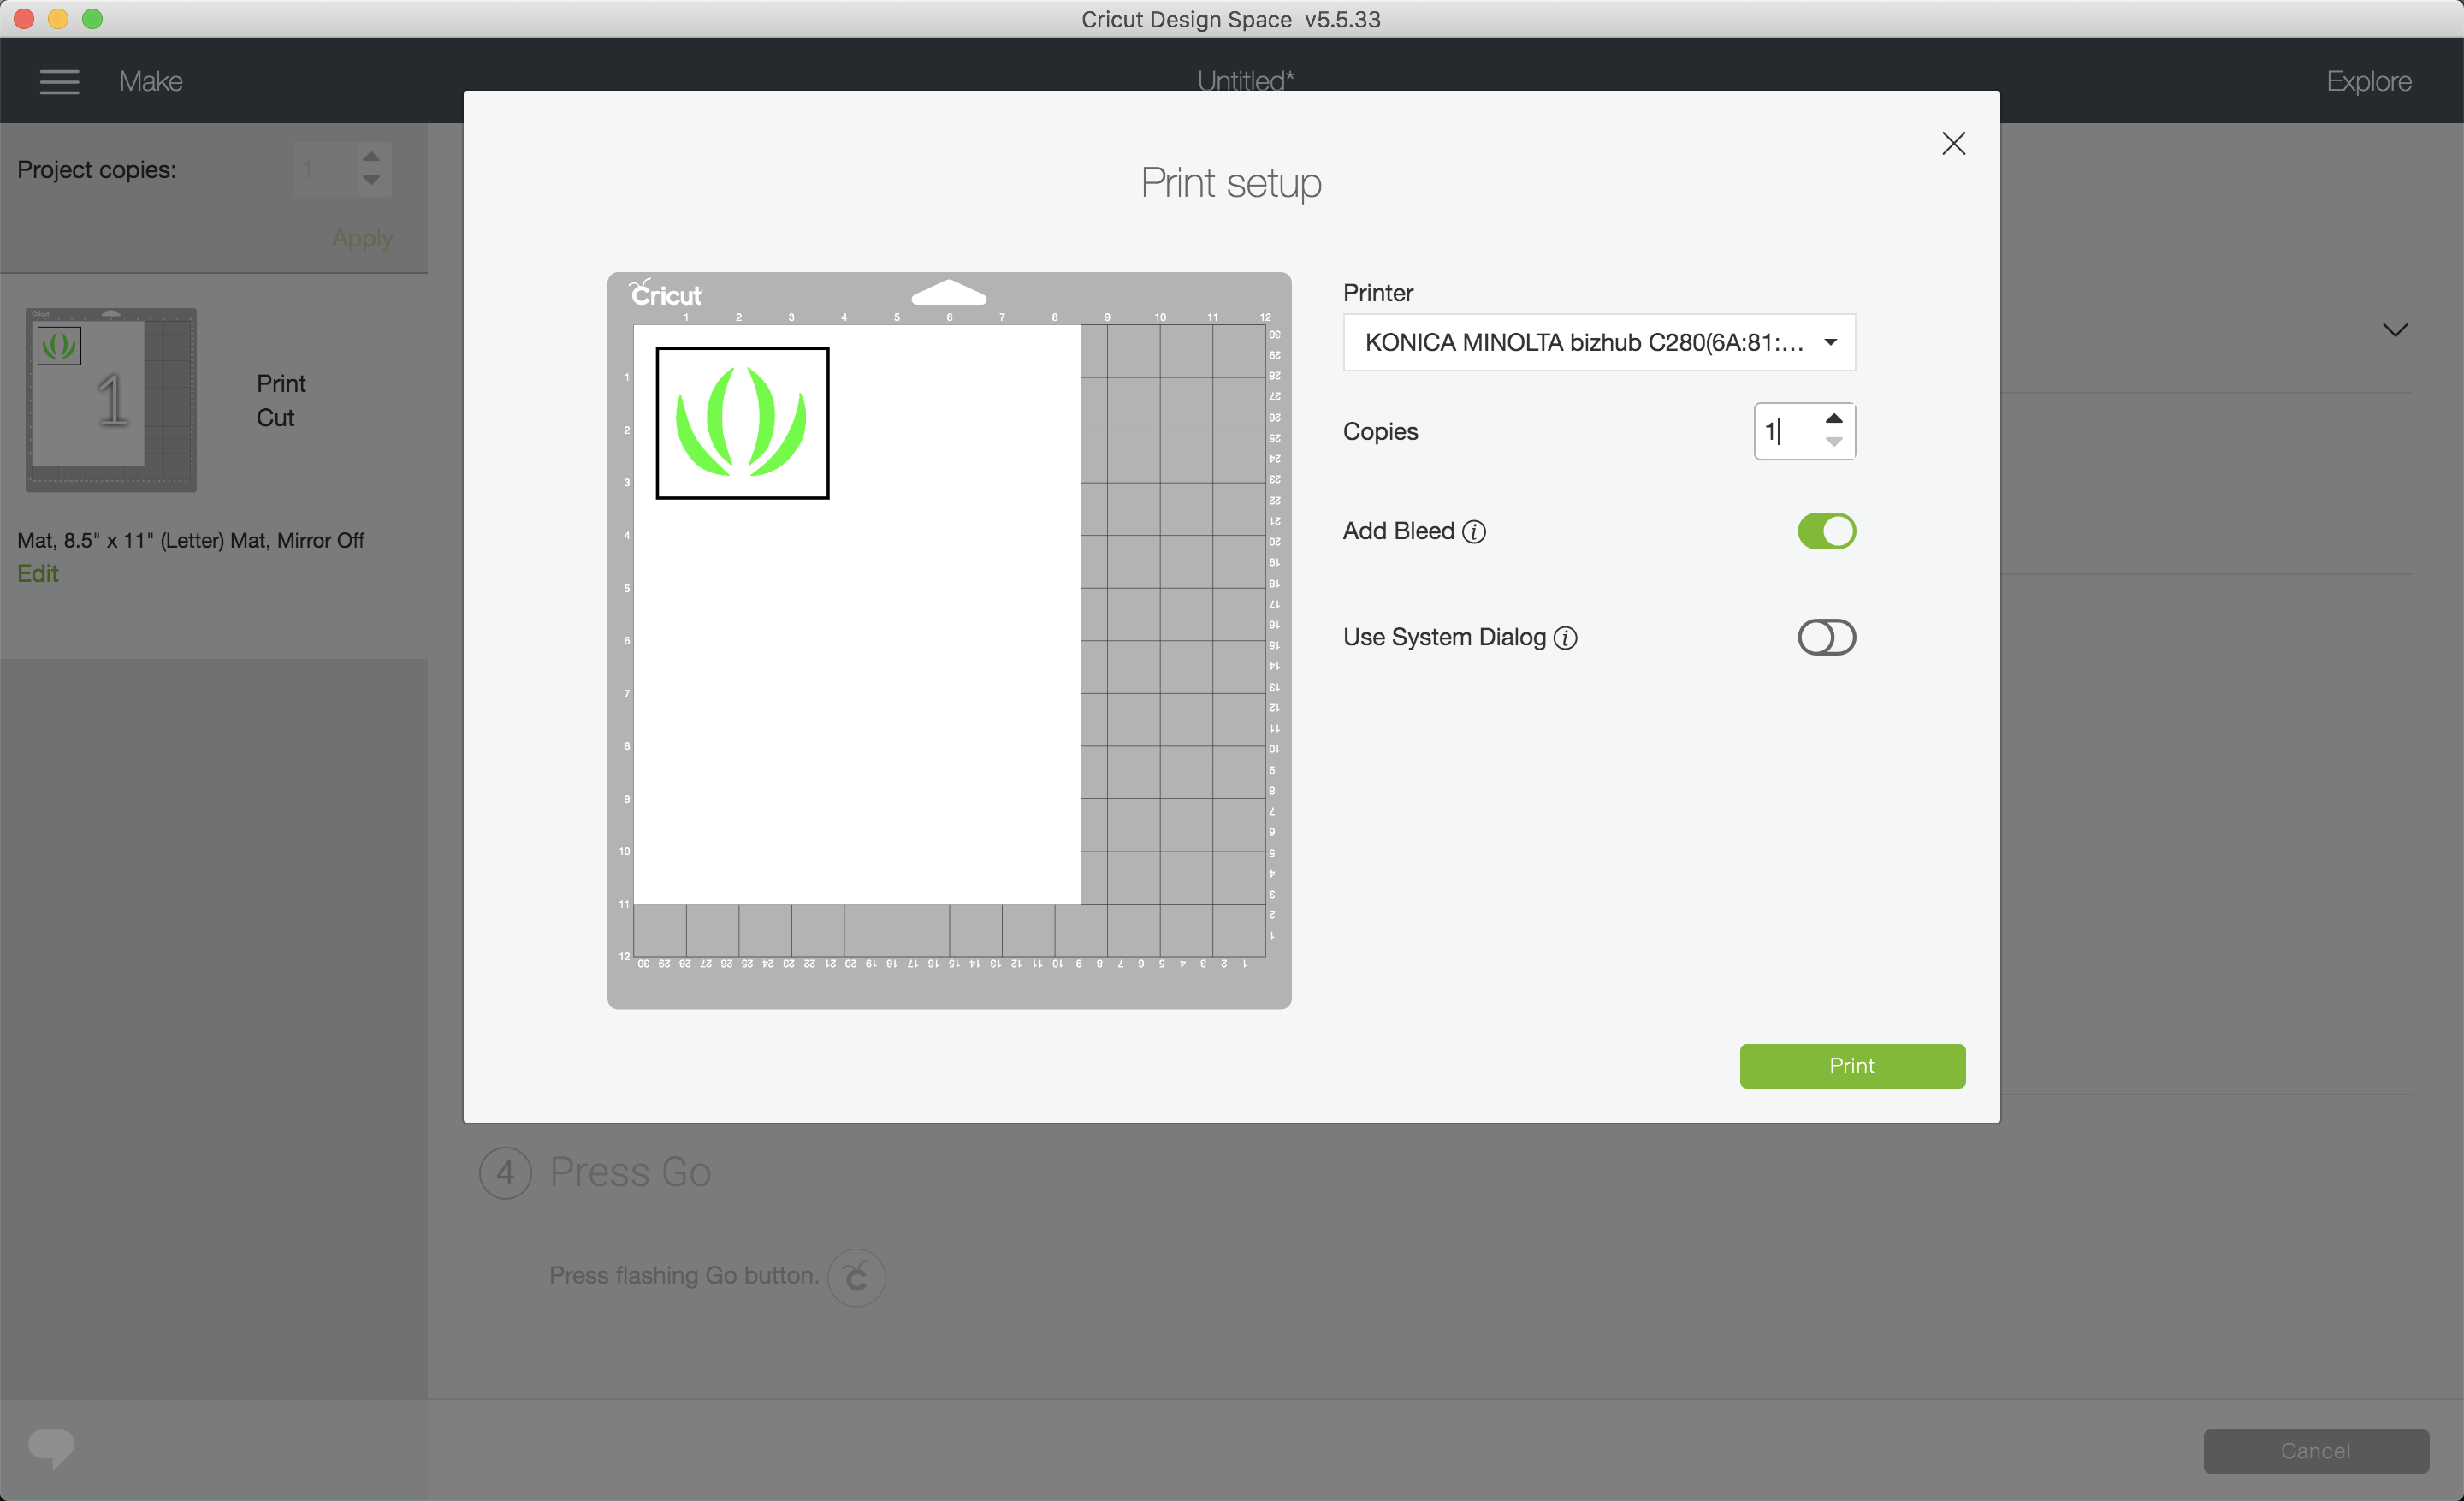
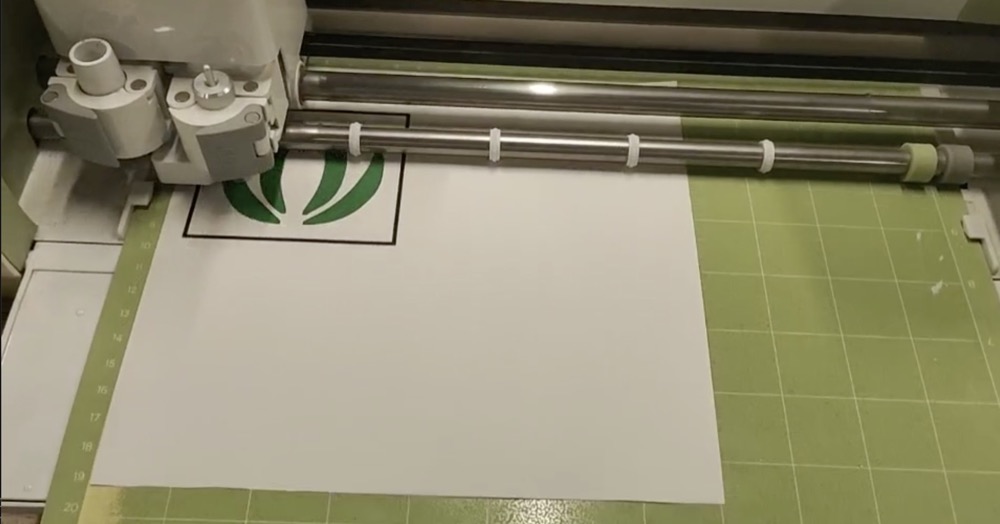
- Get the printed papper and put it on the mat
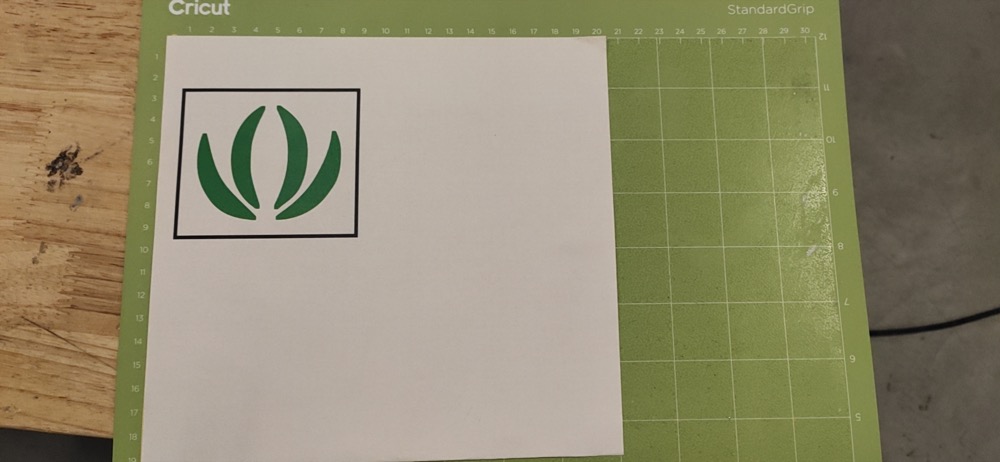
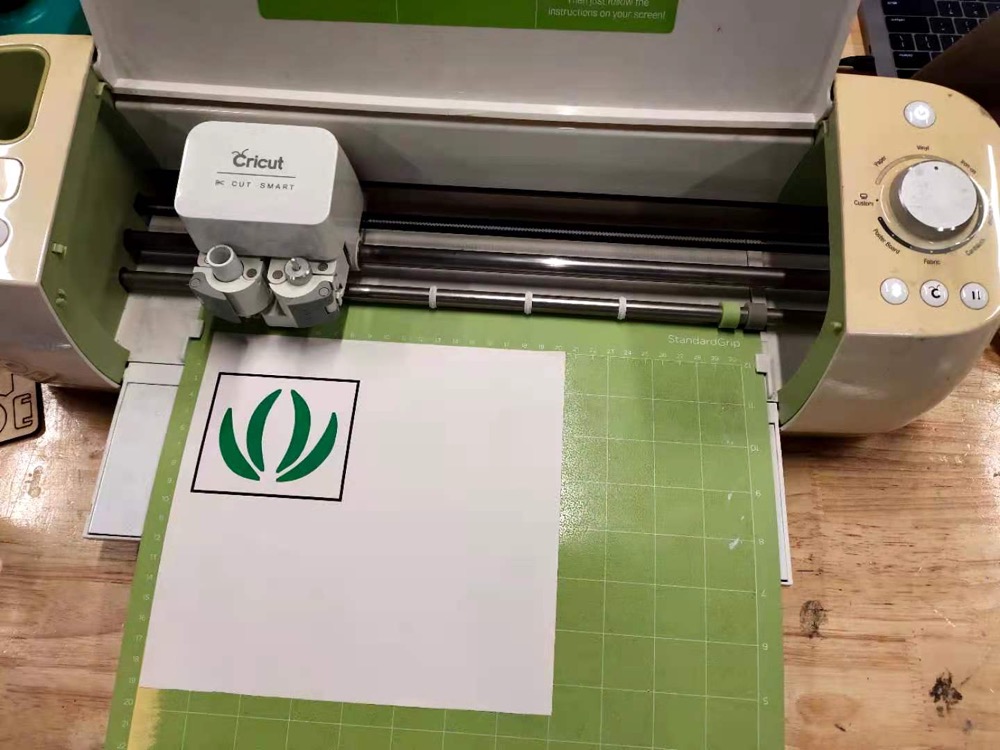
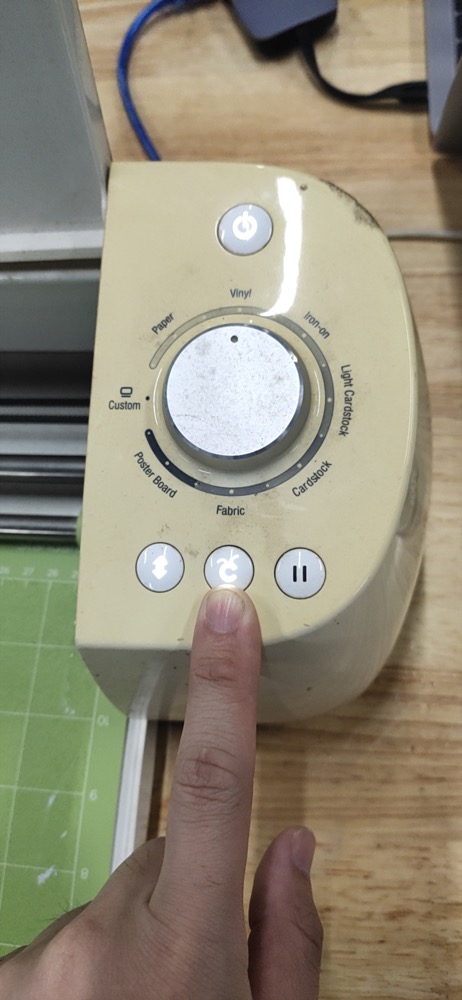
- Put it to the vinyl cutter and load the mat by clicking the first button
-
Adjust the Rotary to “Vinyl” - on this machine i do not need to set up the speed or pen-force, it is quite a ready out-of-box machine
-
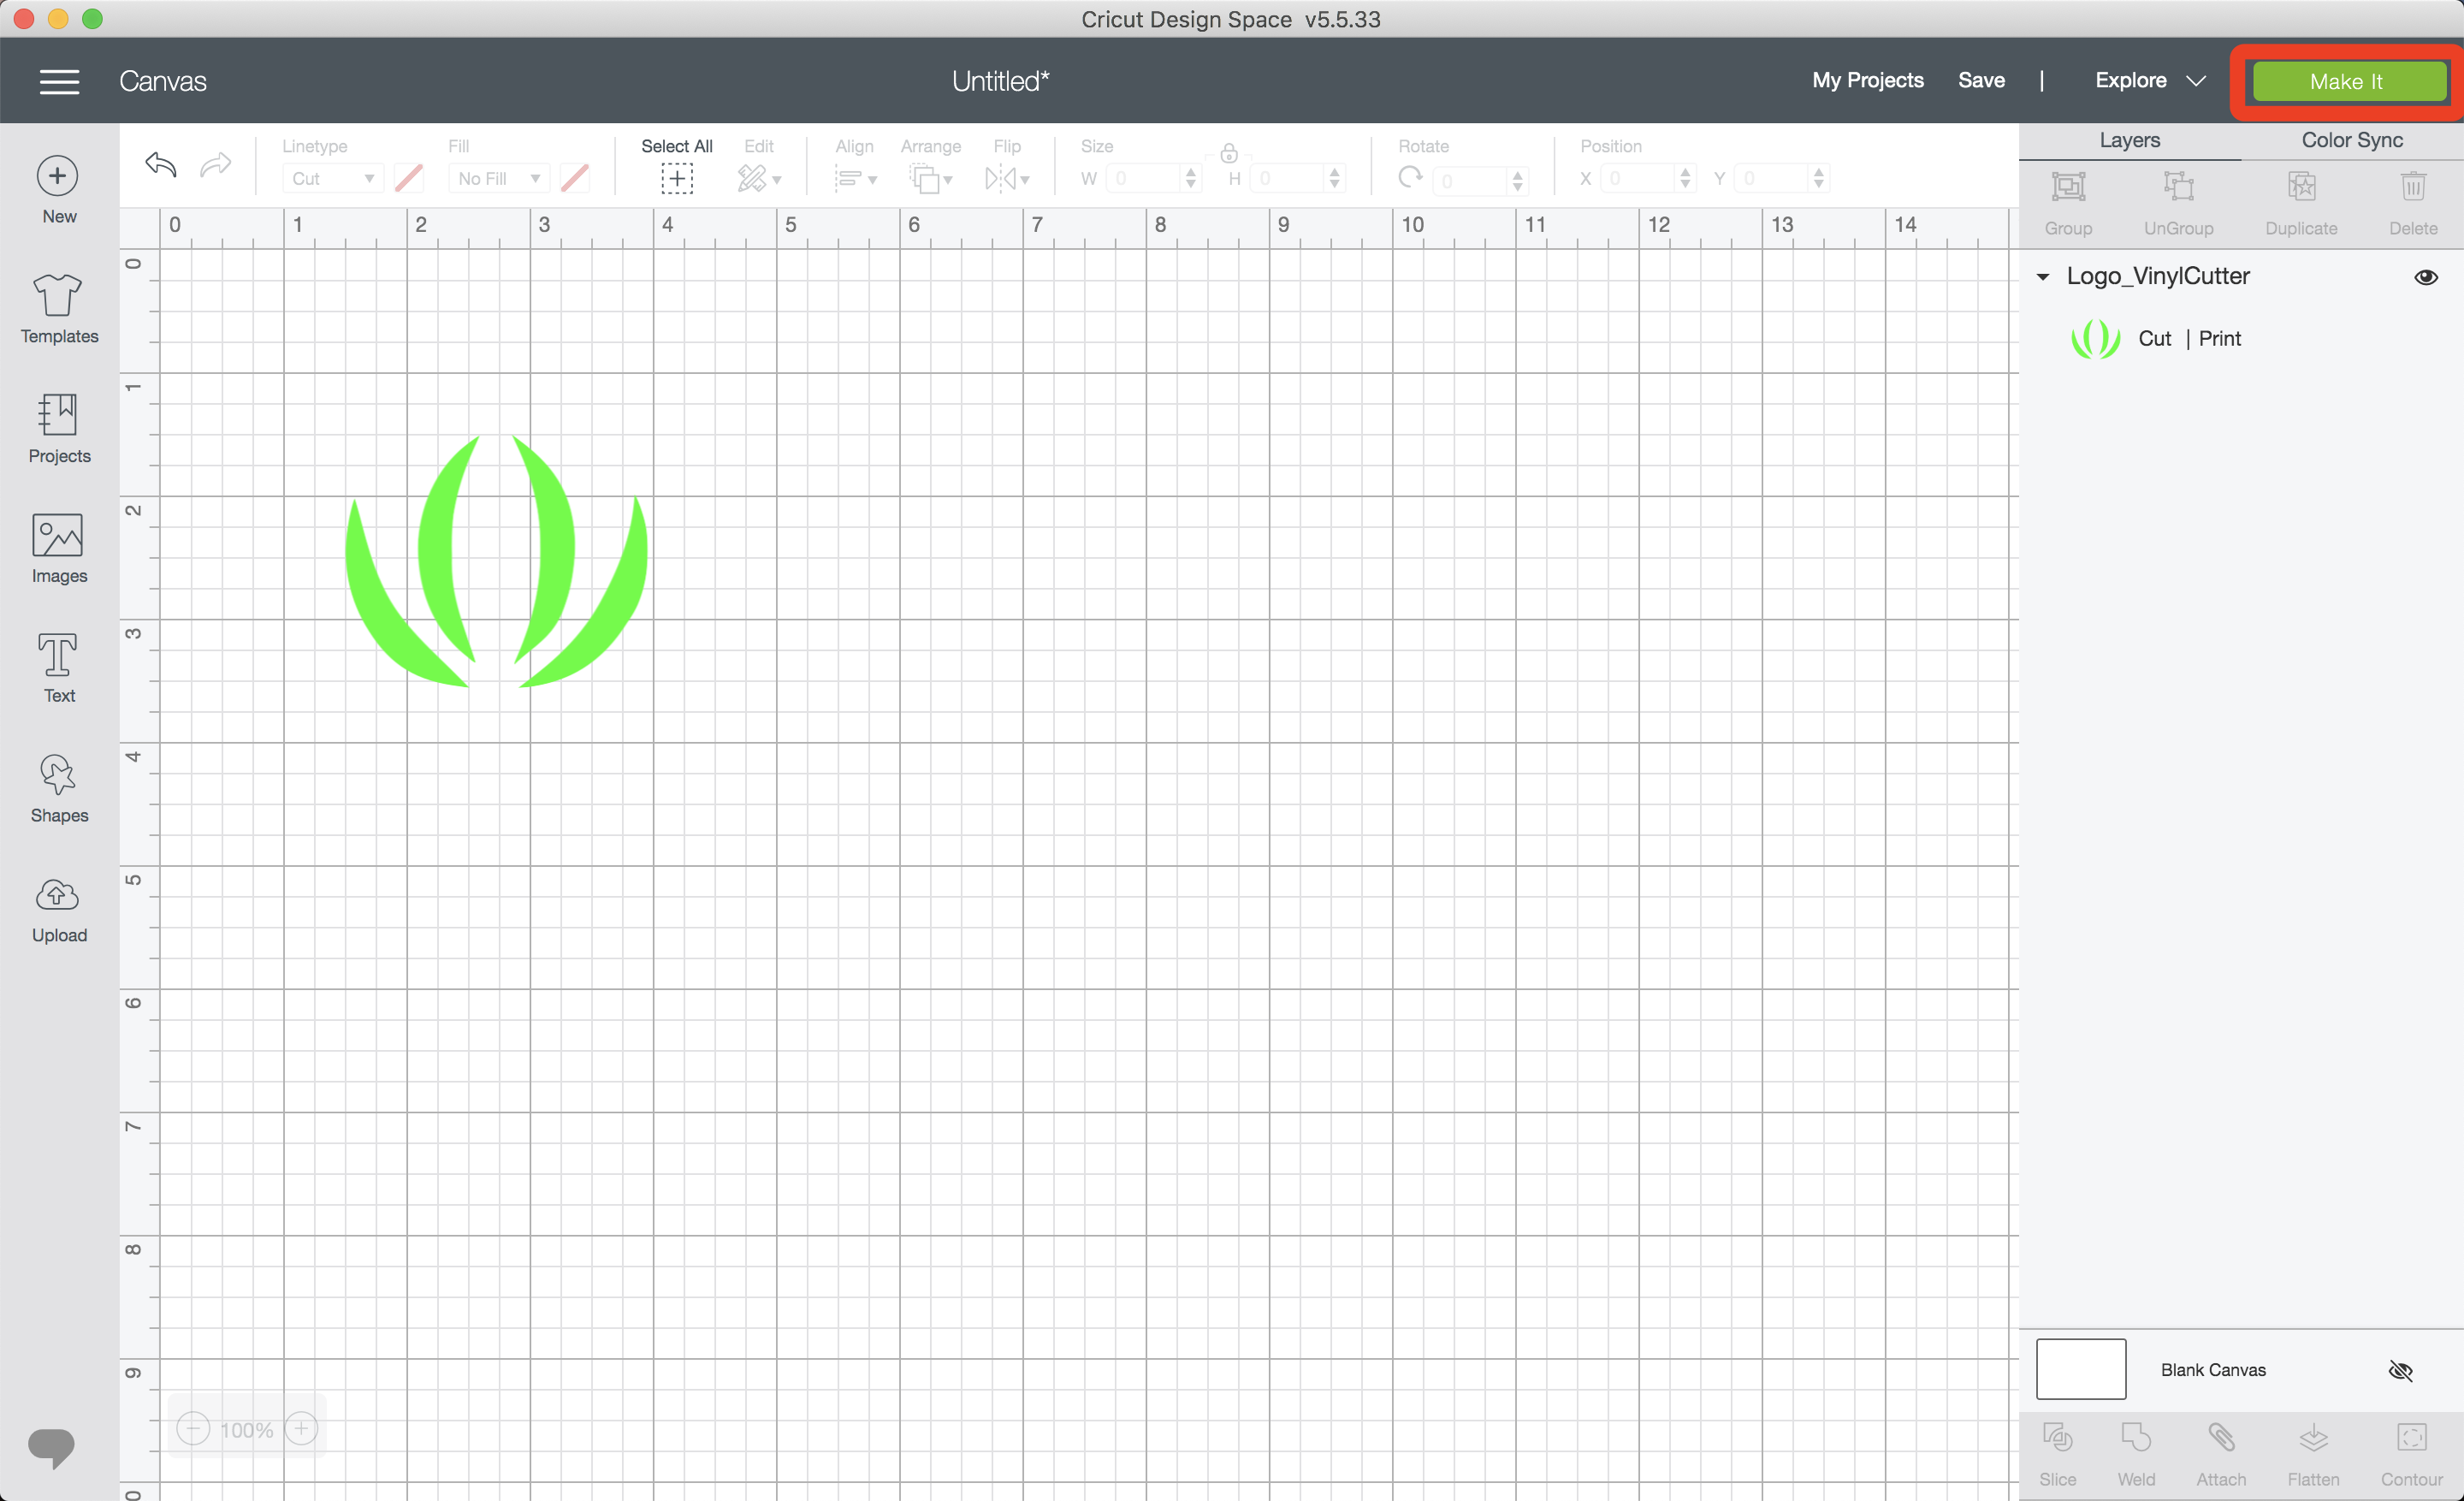
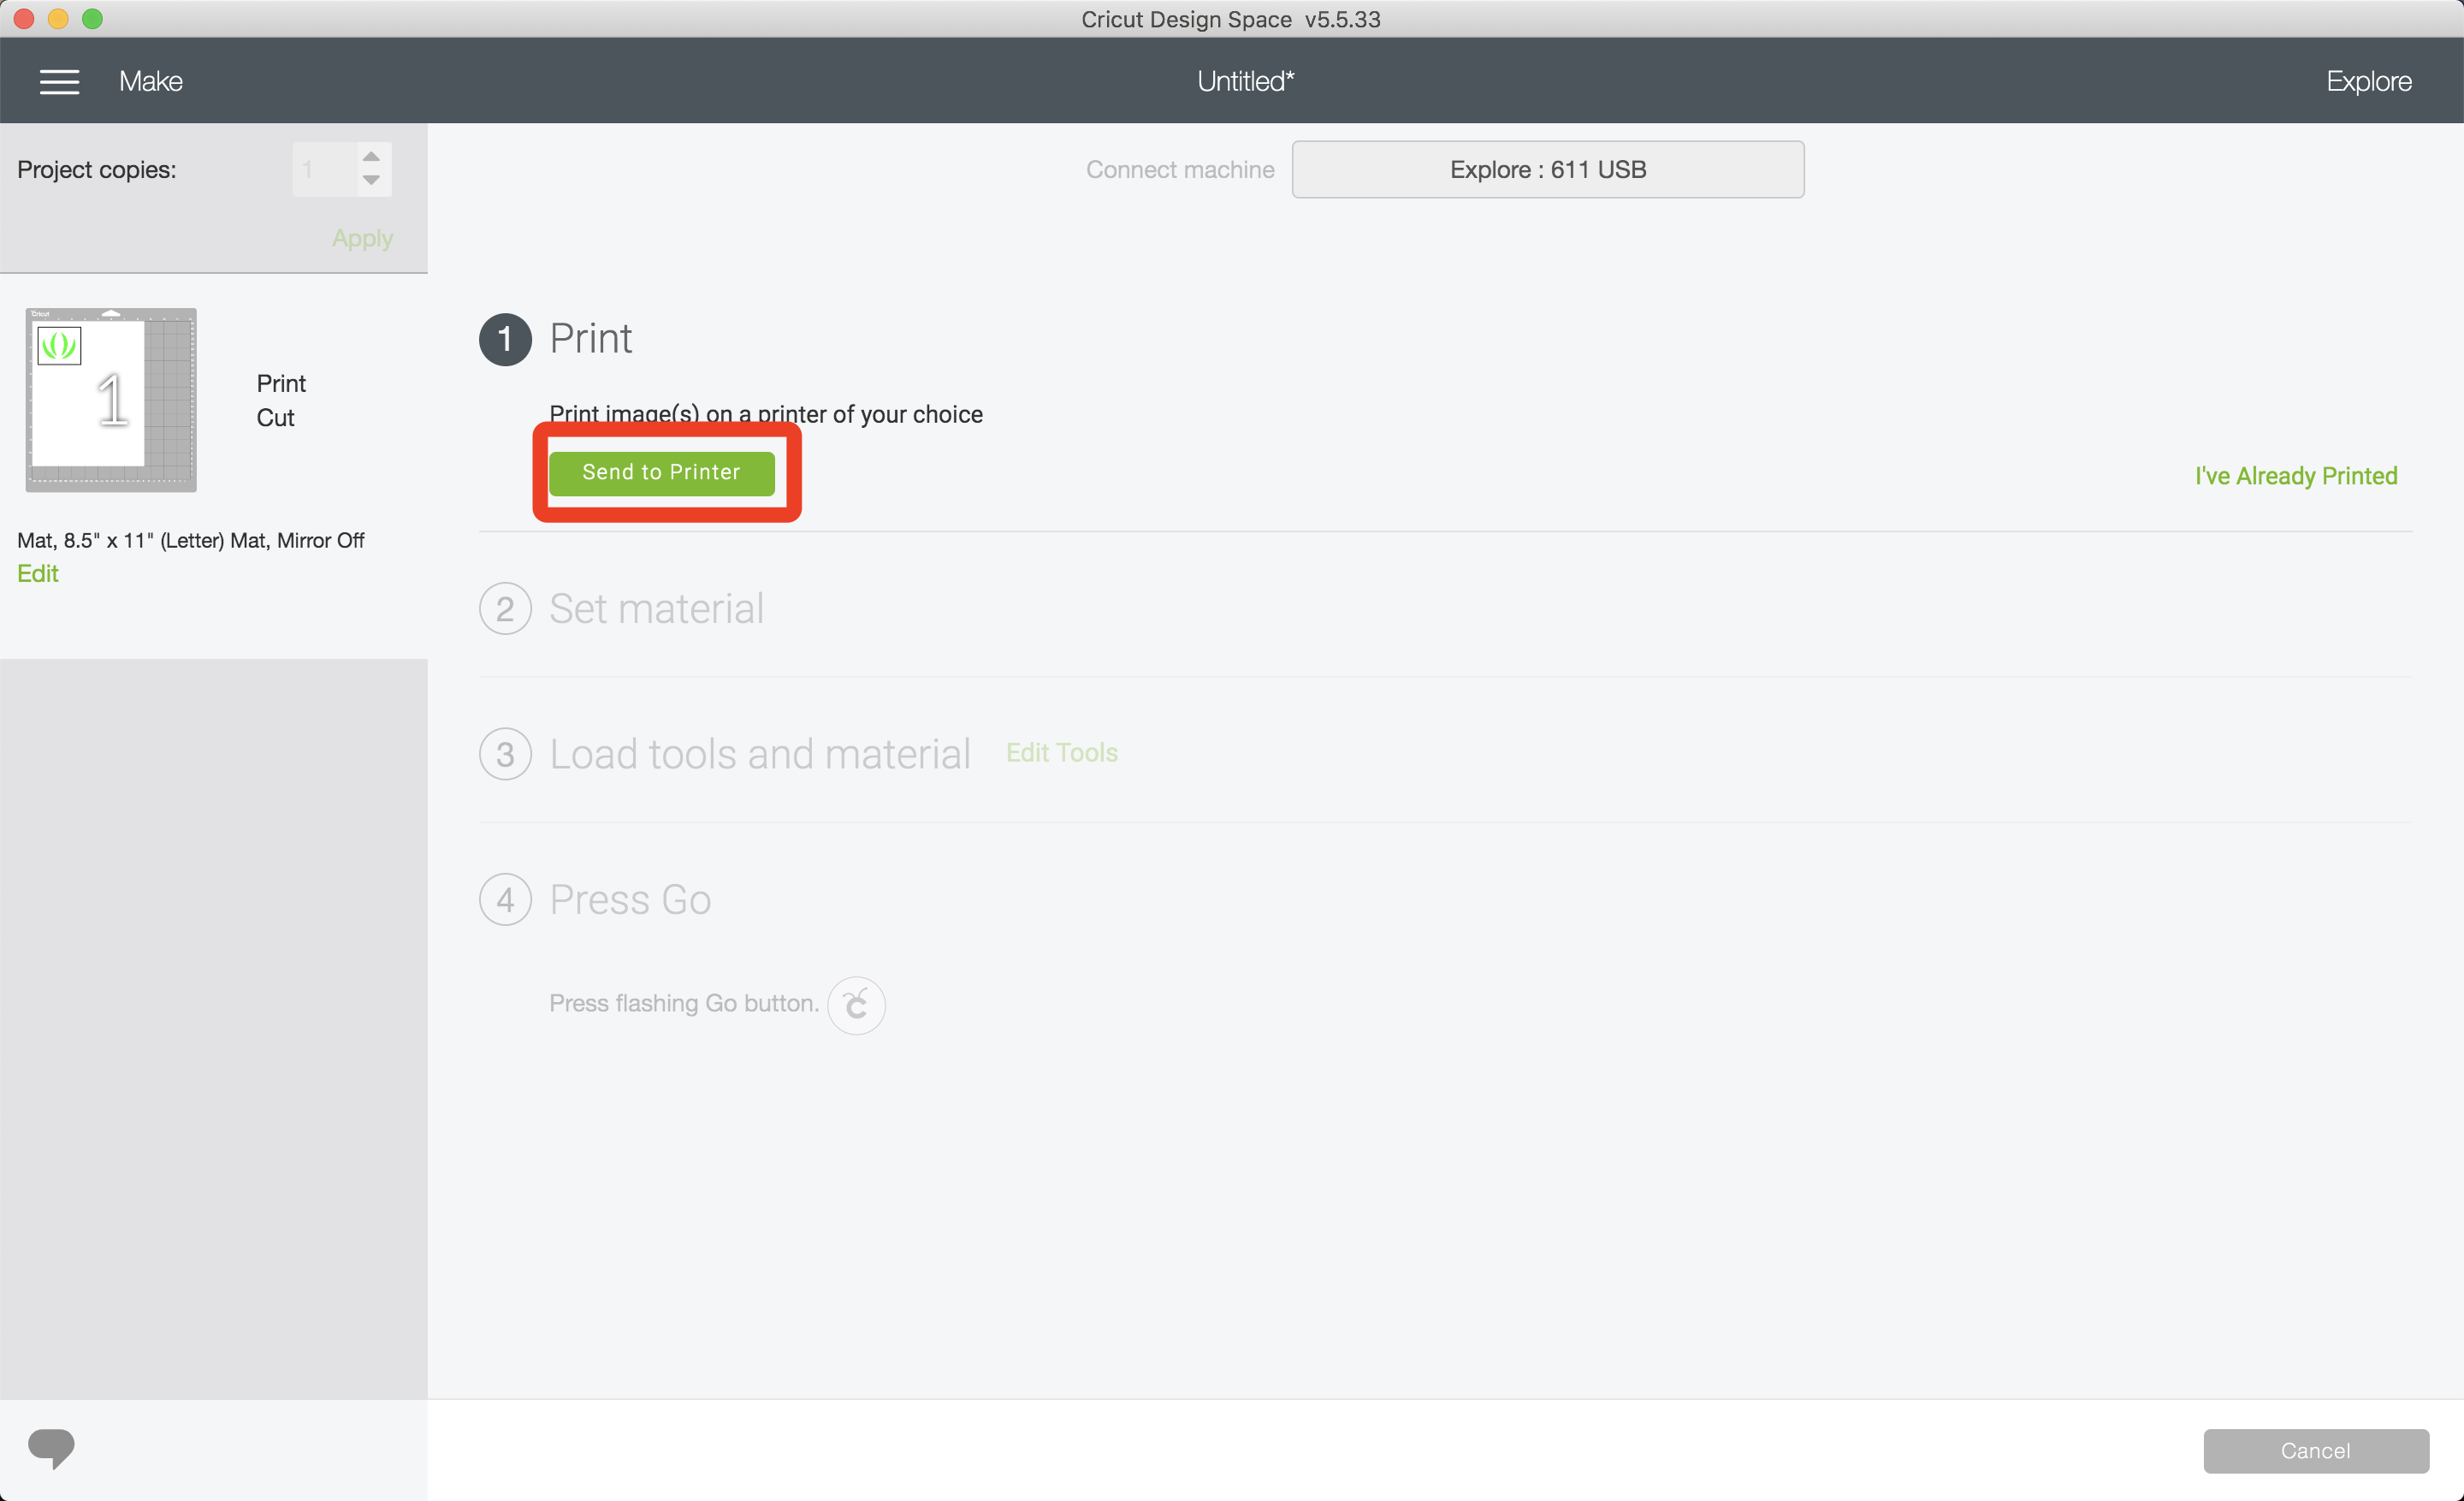
Click the 2nd button, and start cutting
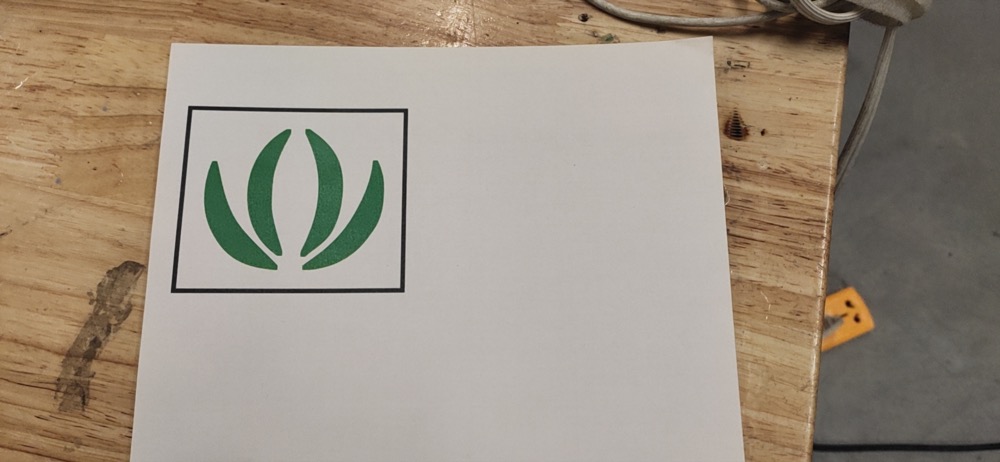
- My logo is on the way…
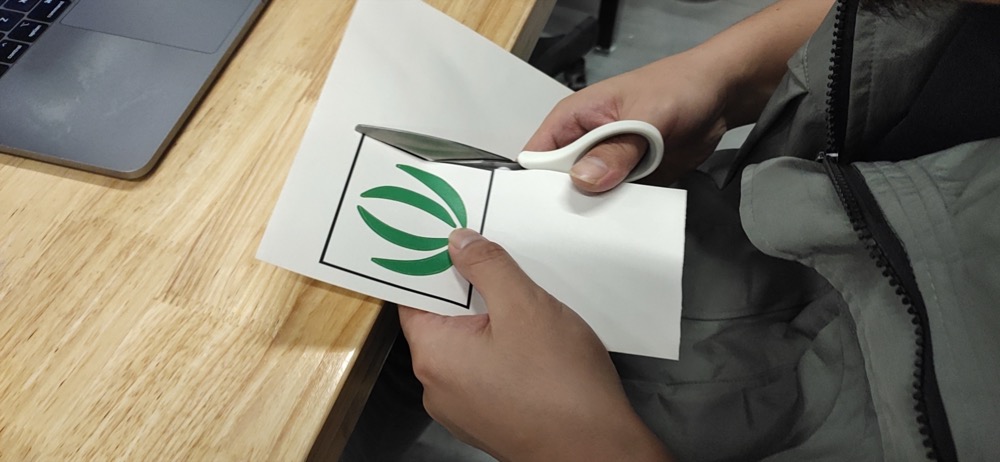
- Scissor and Weedding

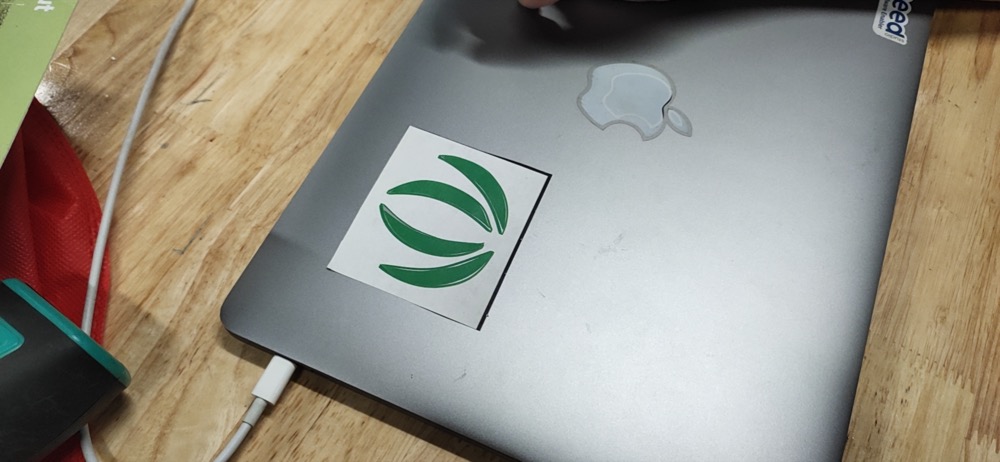
- Take the white part out and Done
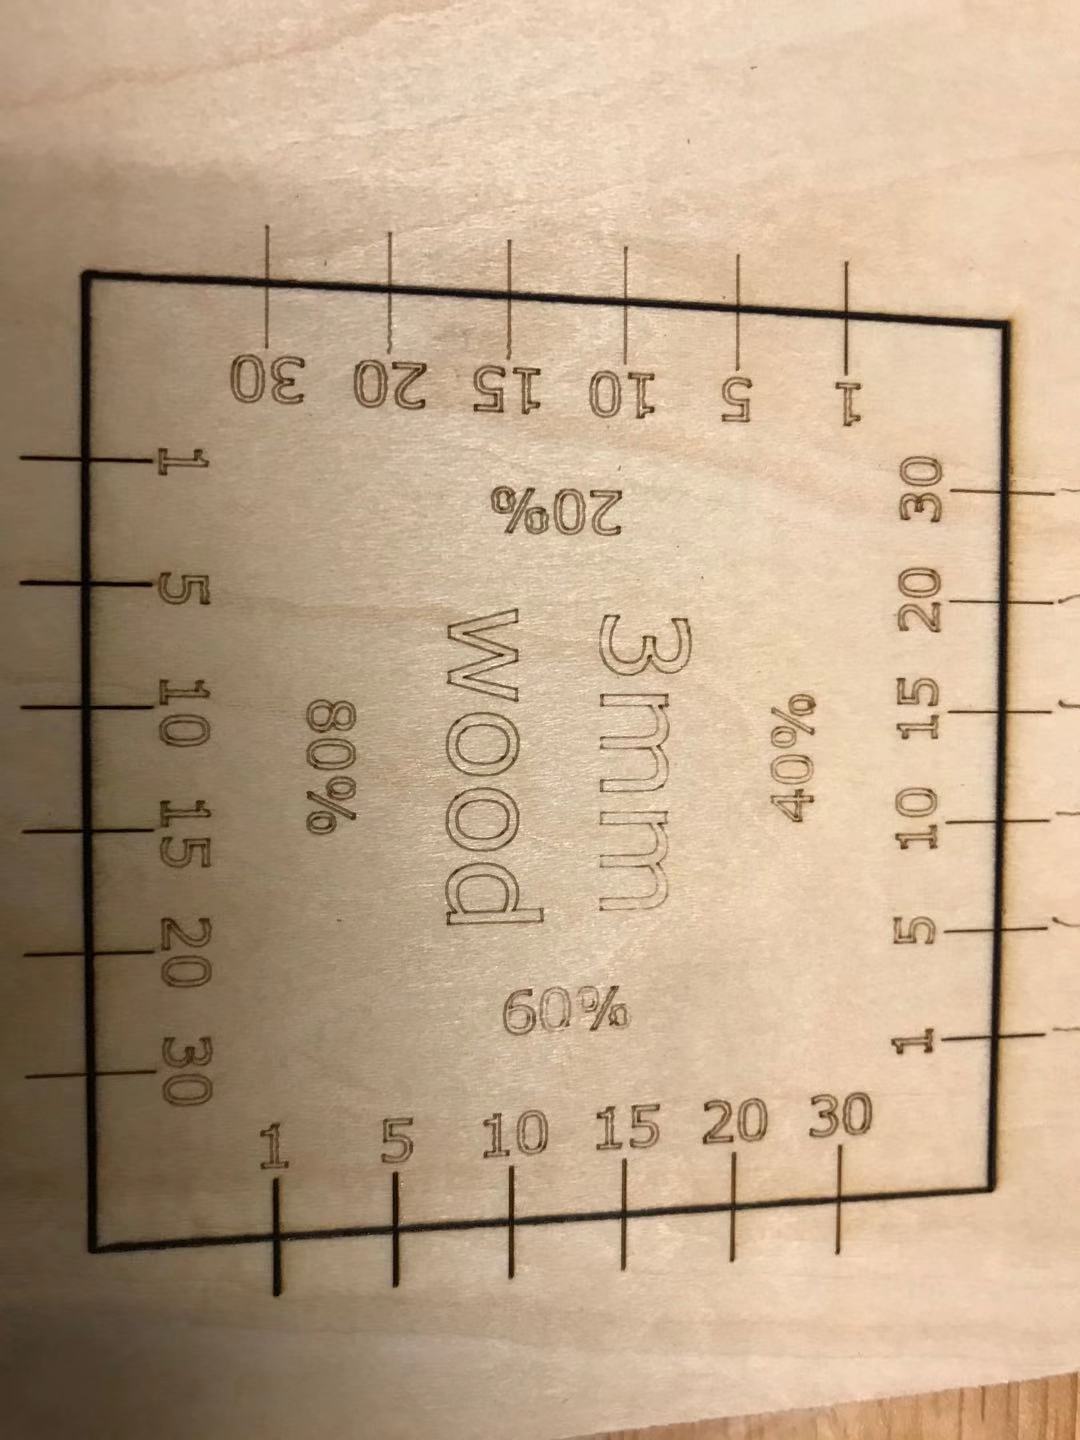
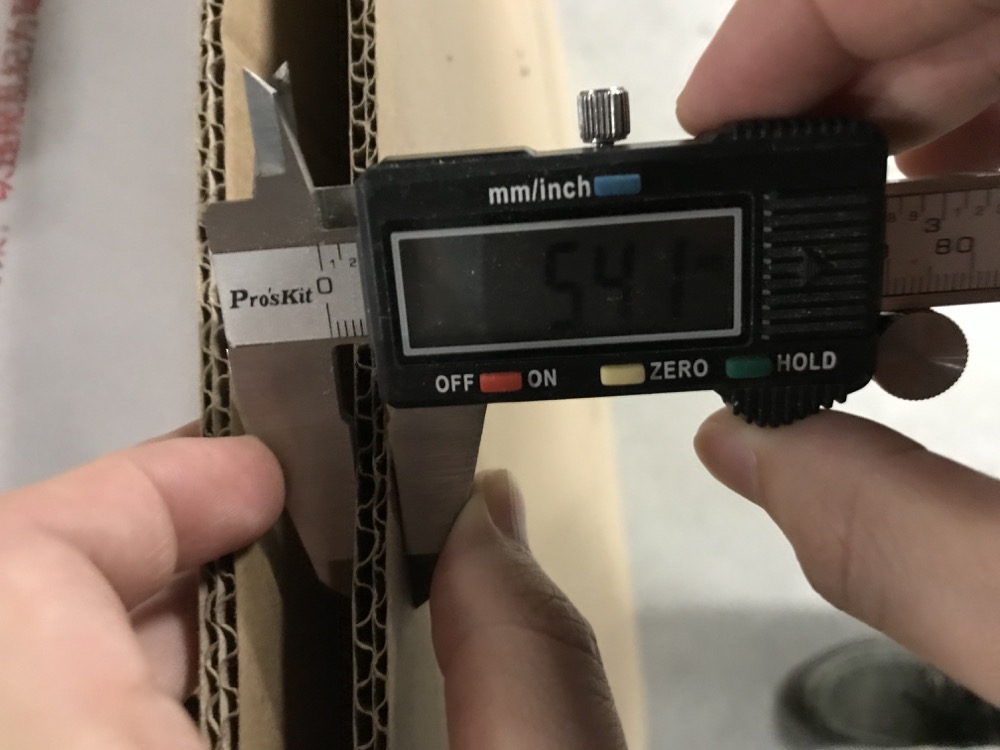
2.40[updated: 1130]LaserCutter_Kerf
This part is added after a few month later the initial assignment i had done on the laser cut. Today when i was doing it the laser cutting machine has a problem of the machine, and need the manufacturer engineer to fix and could not done by today. Here i will record the process as i planned to test out the kerf and result turned out throughout the testings:
- I designed a squared board, using differnent combinations of different parameters, to test out the kerf our machine cut out on a 3mm basewood.
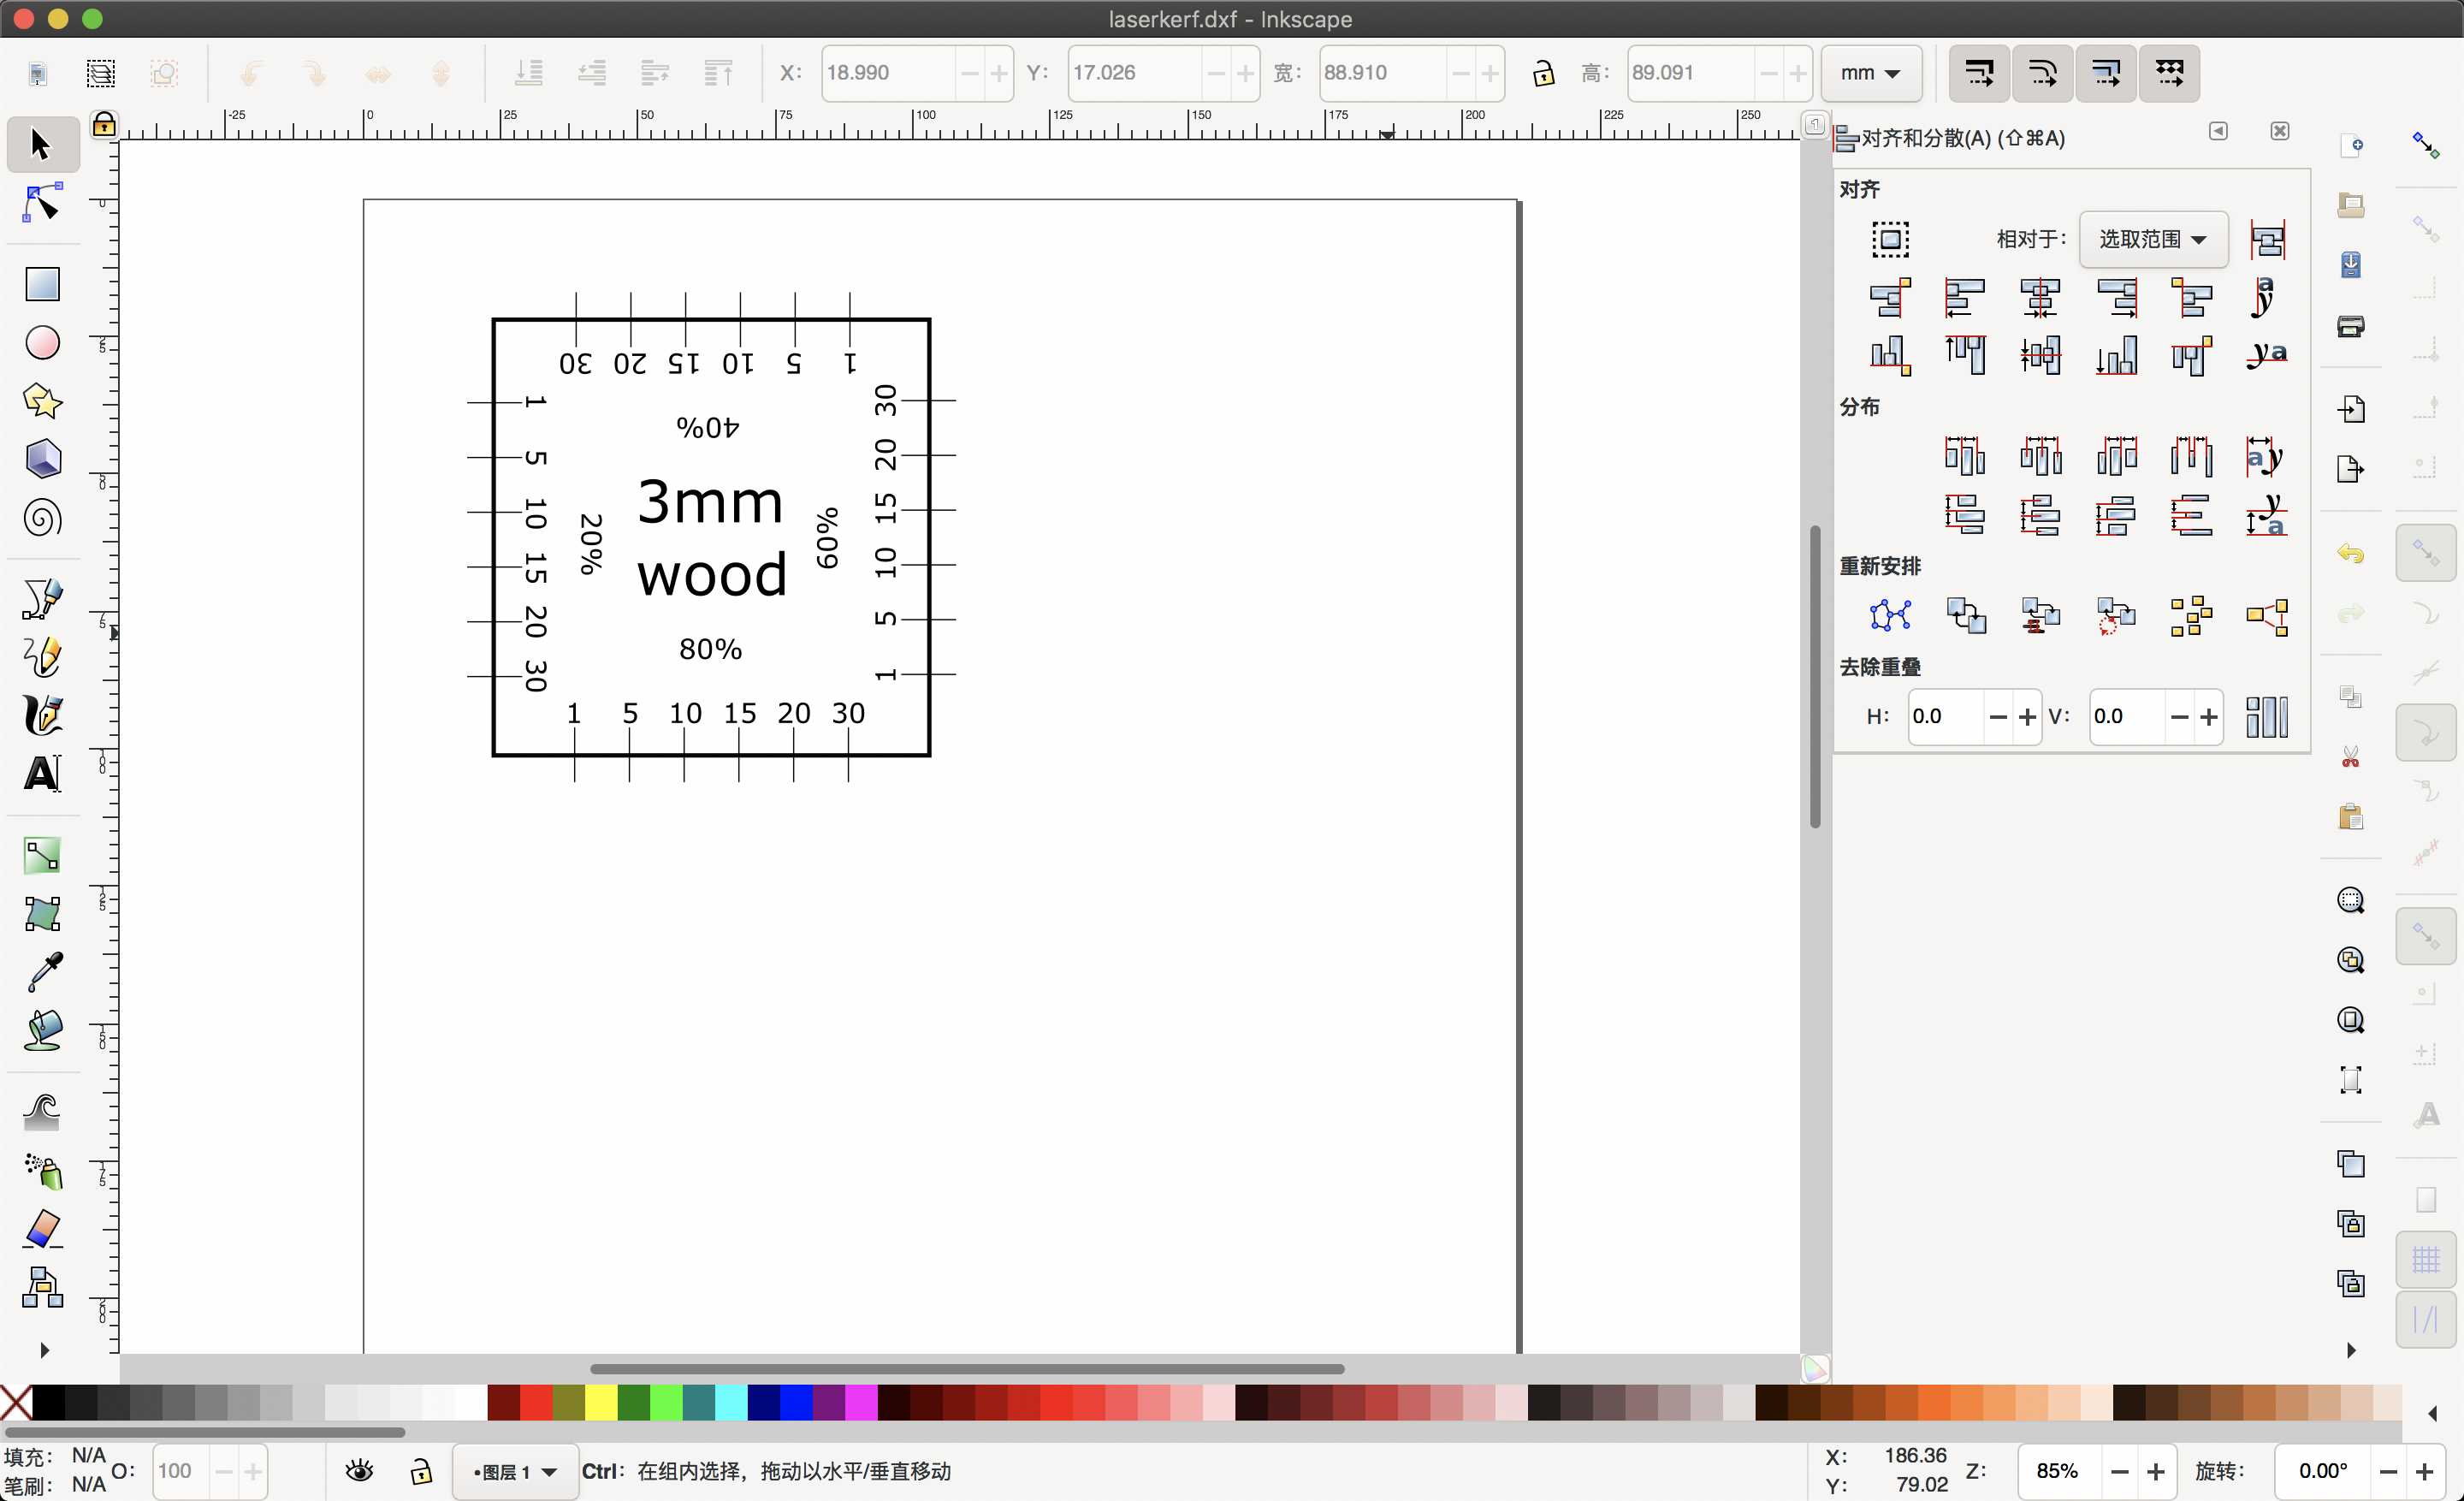
- I assign different speed and powers to the specific toolpath that i drew.
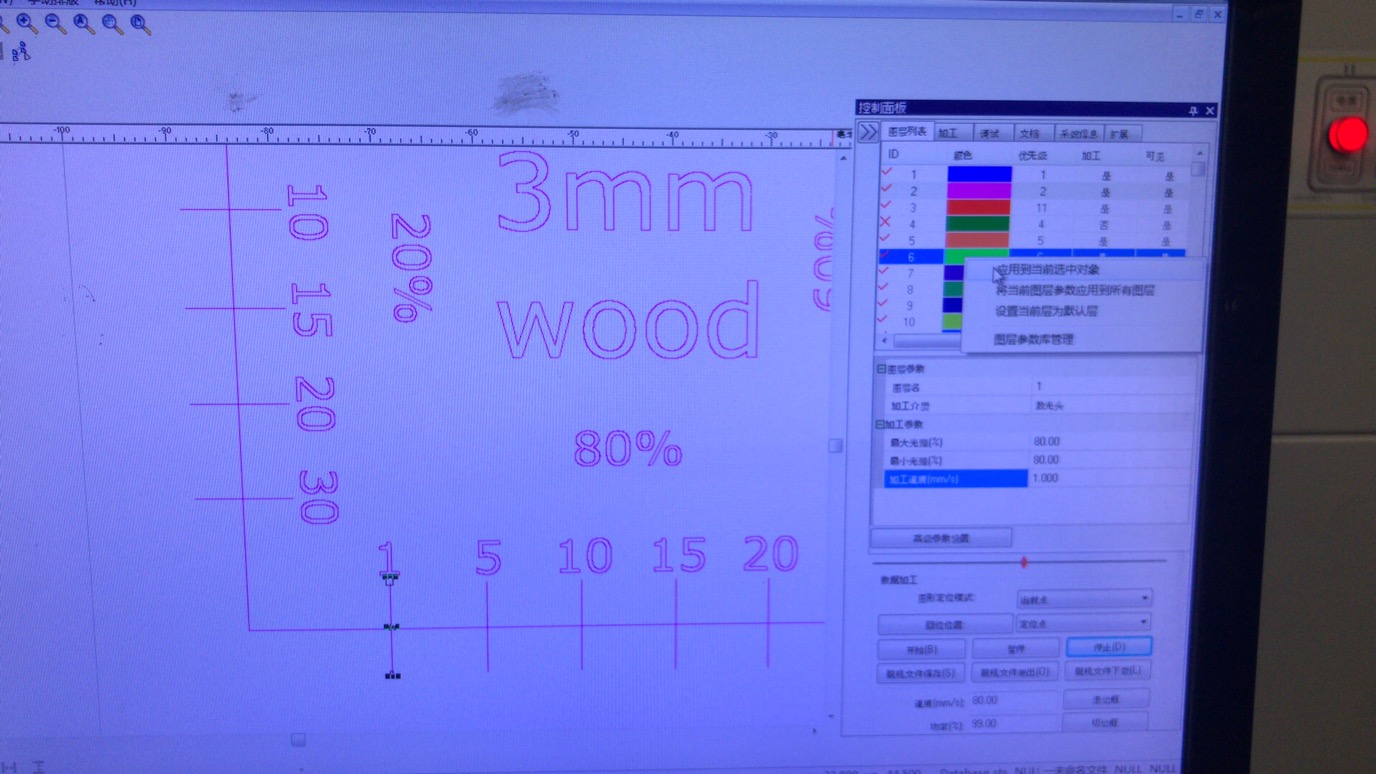
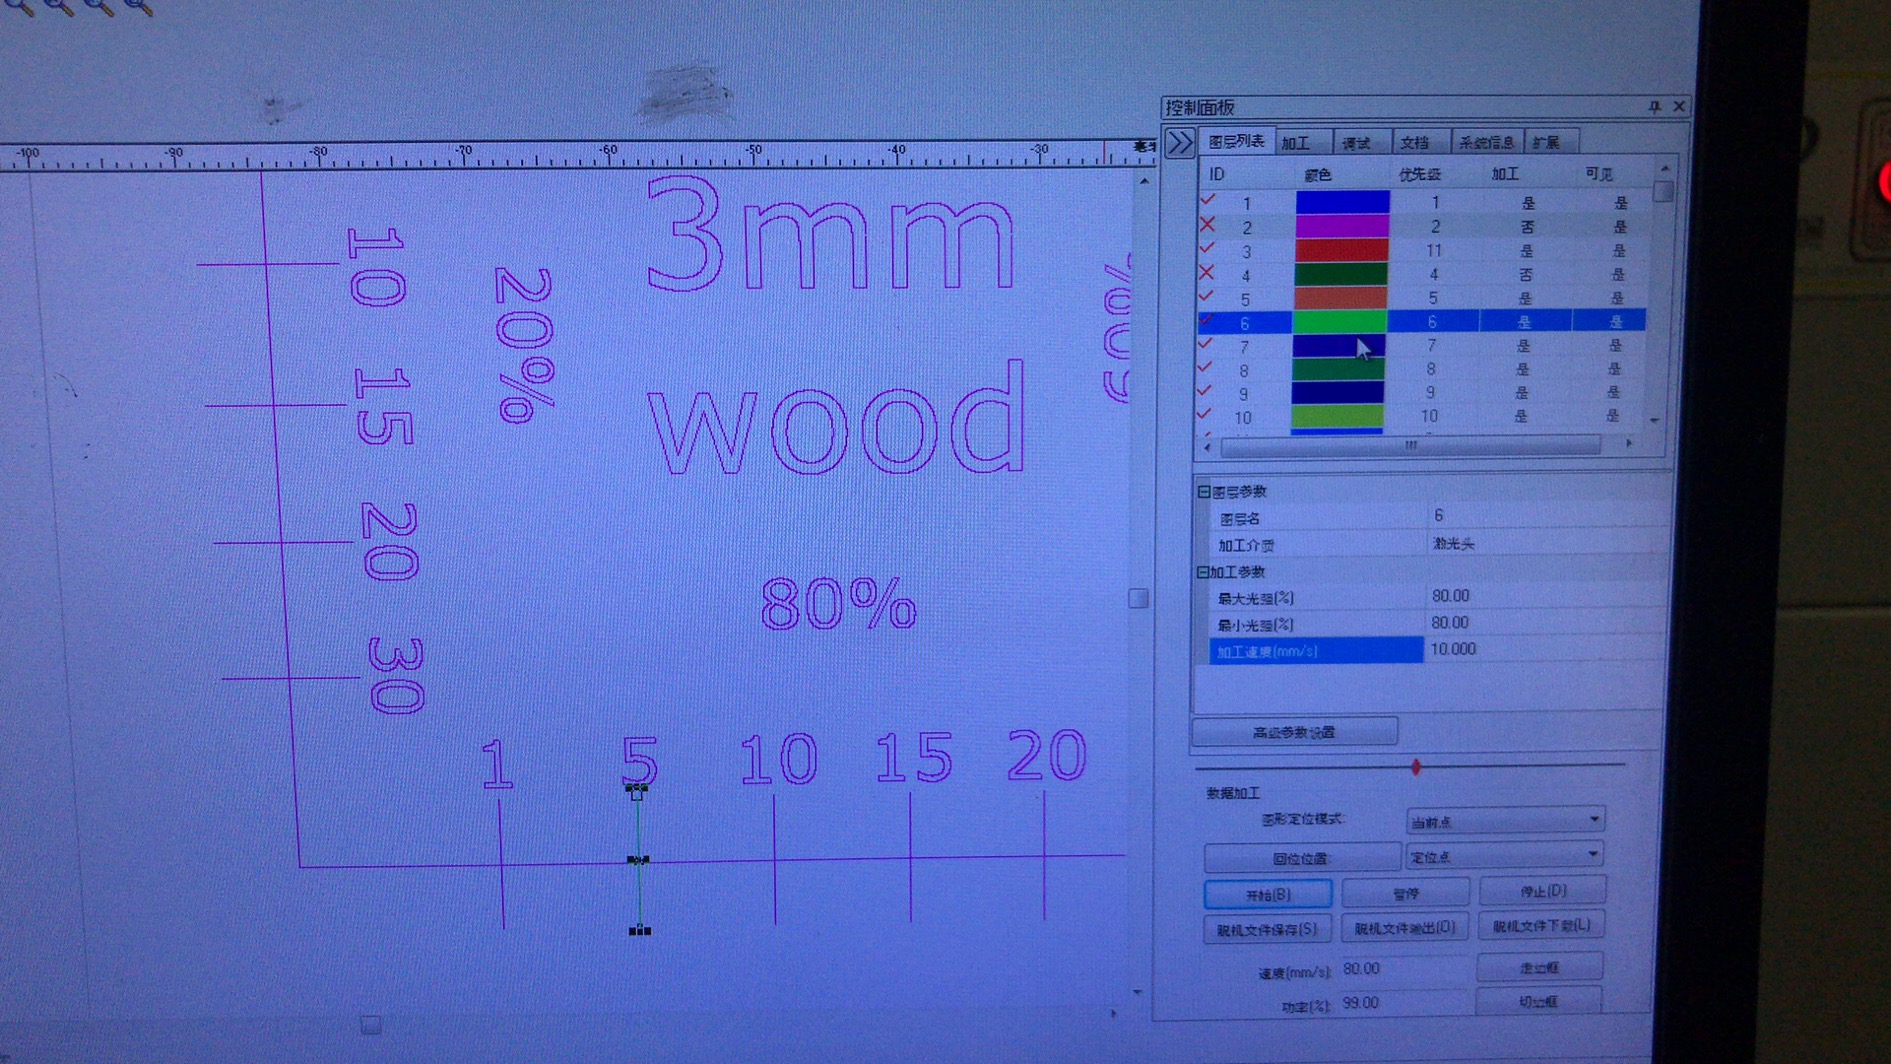
- After cutting the final result looks like following
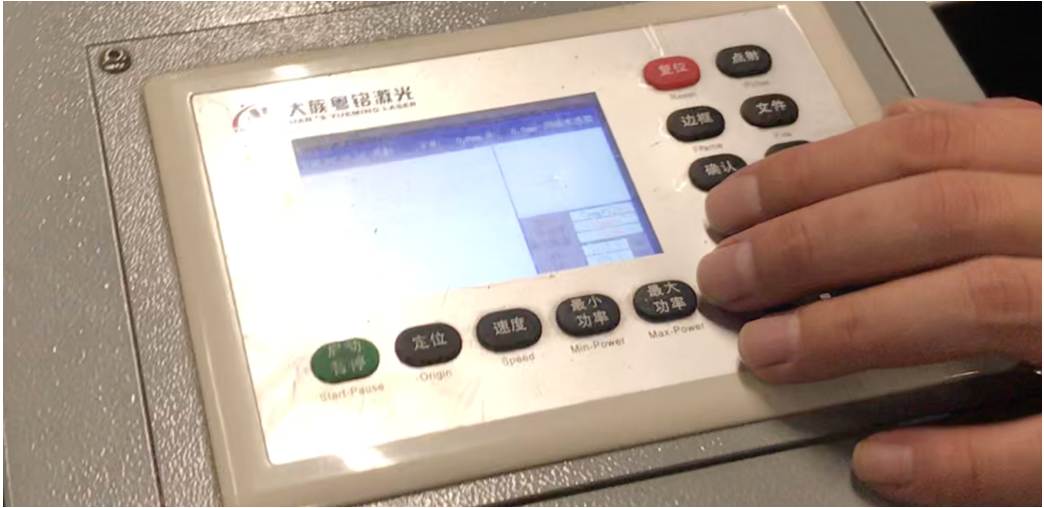
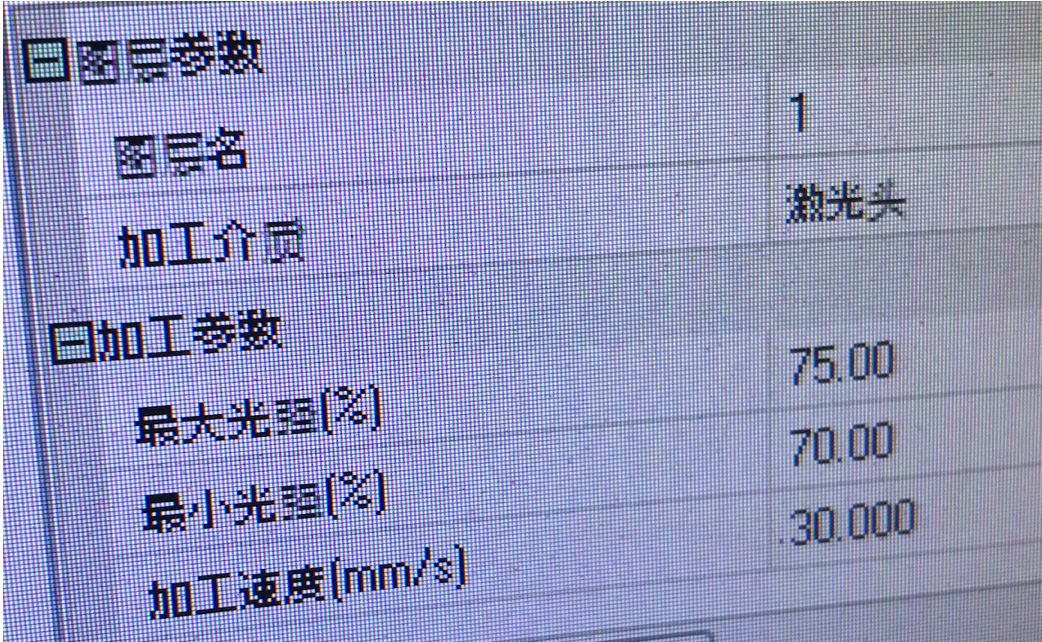
2.4 Laser Cutter
-
Exported my sketch file as DXF
-
Checking Speed, Power
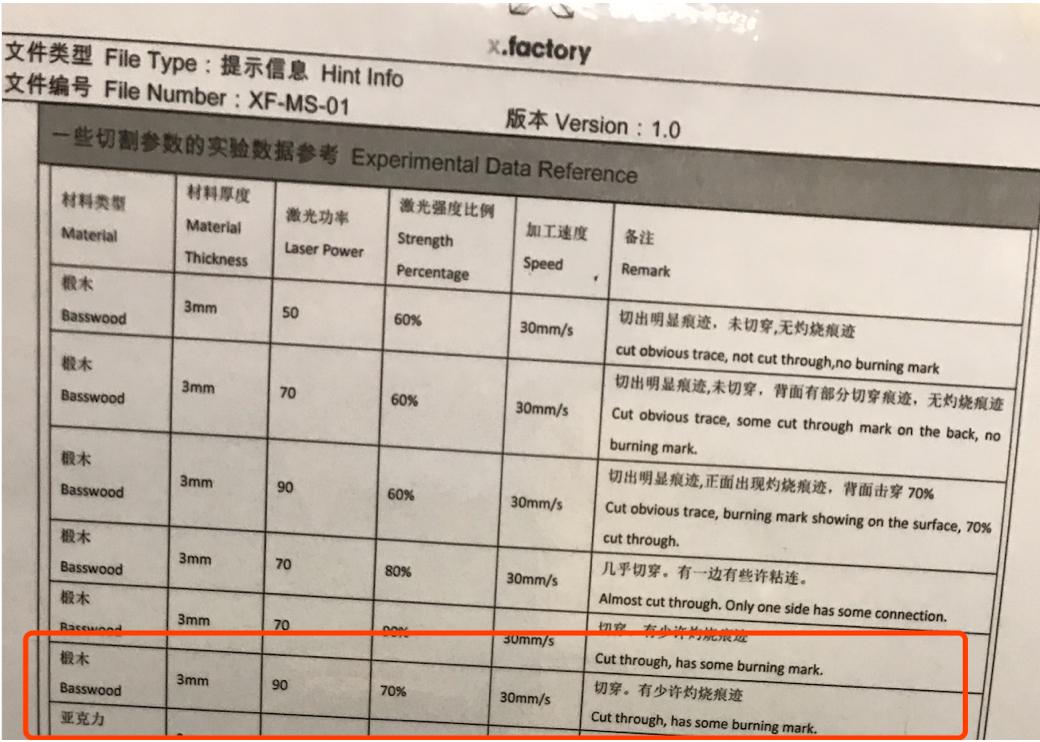
- I tried 2 types of materials, 3mm basewood, and 5mm cardboard. With many tries i figured out the relatively good setup as following
| 3mm basewood | 5mm cardboard | |
|---|---|---|
| Power | 90 | 70 |
| Speed | 30mm/s | 15mm/s |
| Strength percentage | 70% | 70% |
-
Import the DXF to the computer connected to the laser cutter
-
Cut Turn on the LaserCutter and wait for it selfchecking Fan and the water barrel for evacuating the poison air and cooling down the pipe.
Put the wood, set the focus
Navigate the “knife”, simulate the size Turn on the laser, put down the slid of the laser cutter Start and cut!

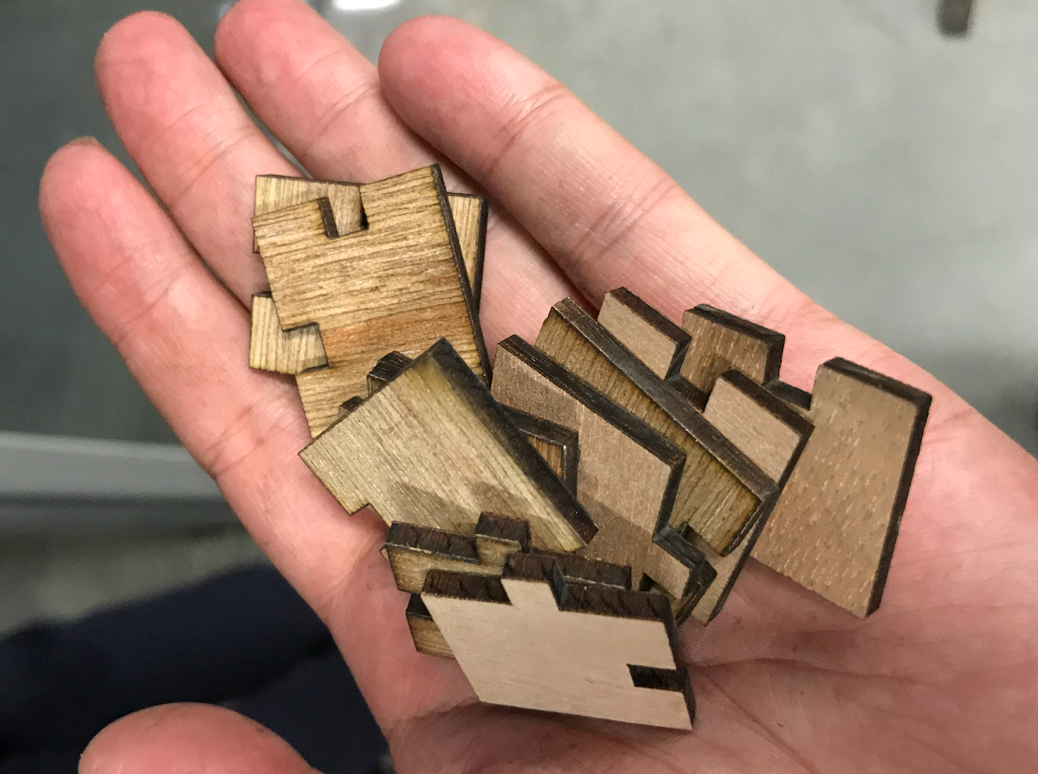
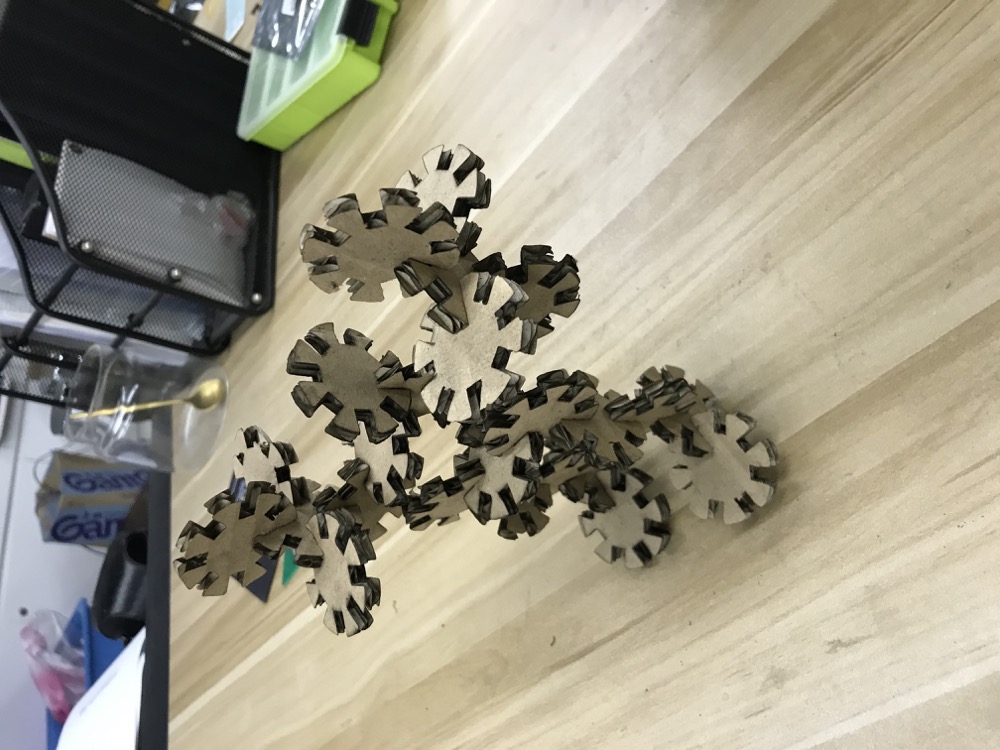
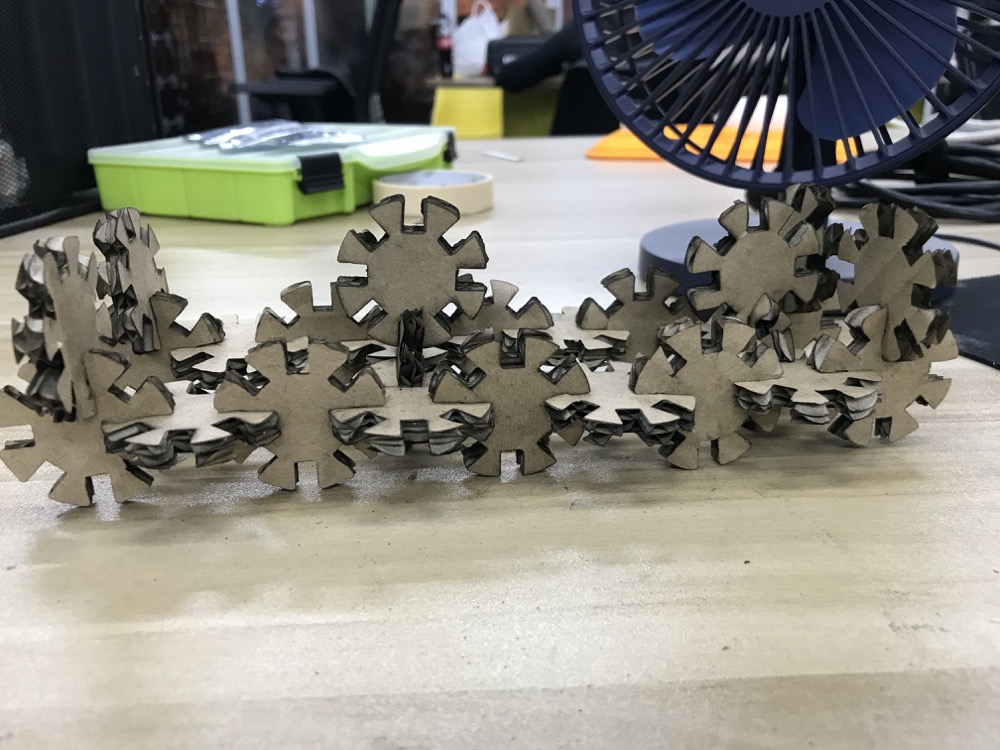
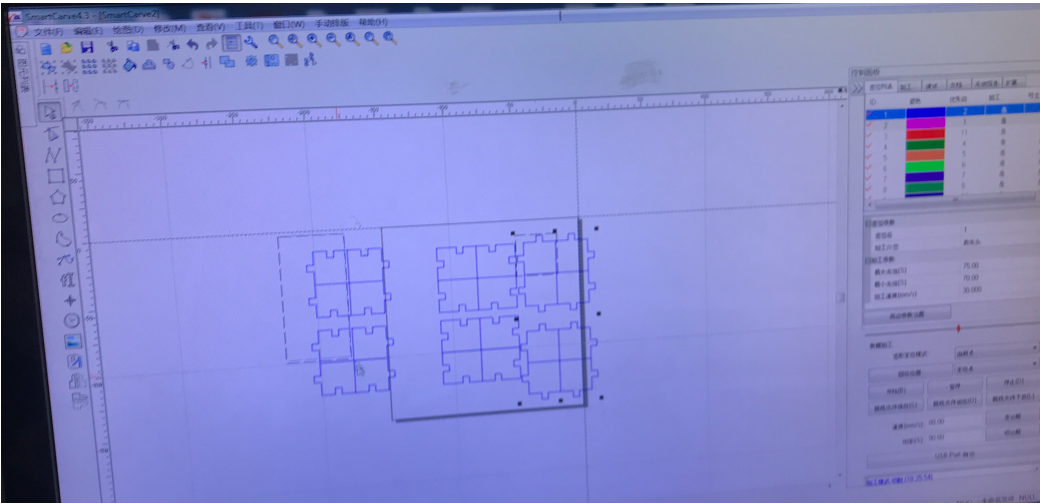
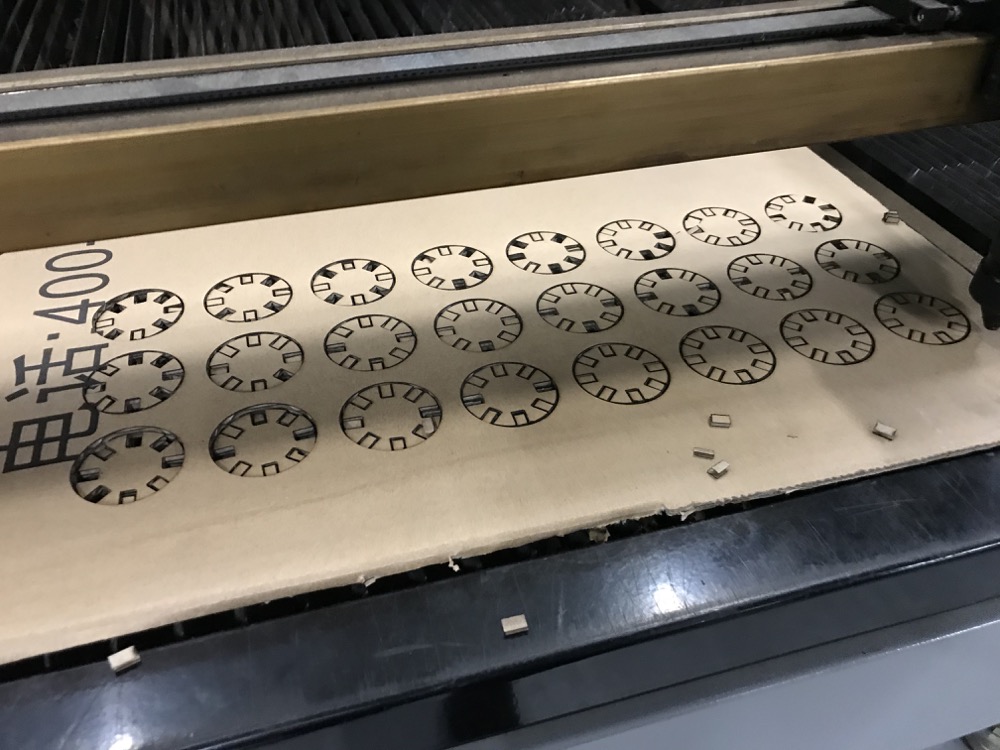
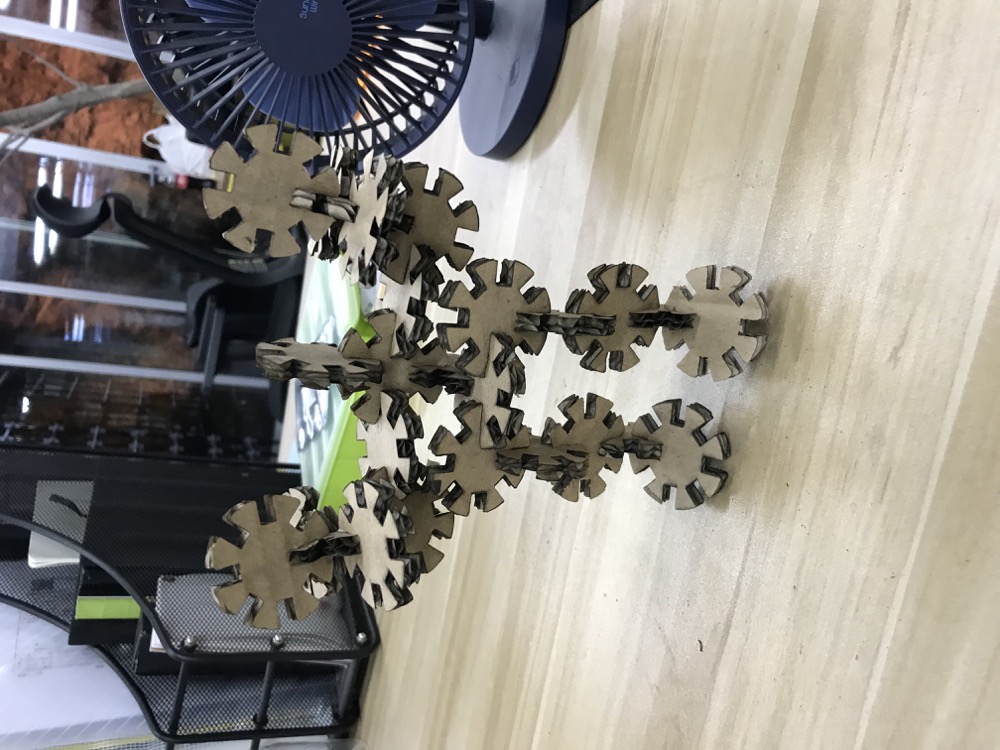
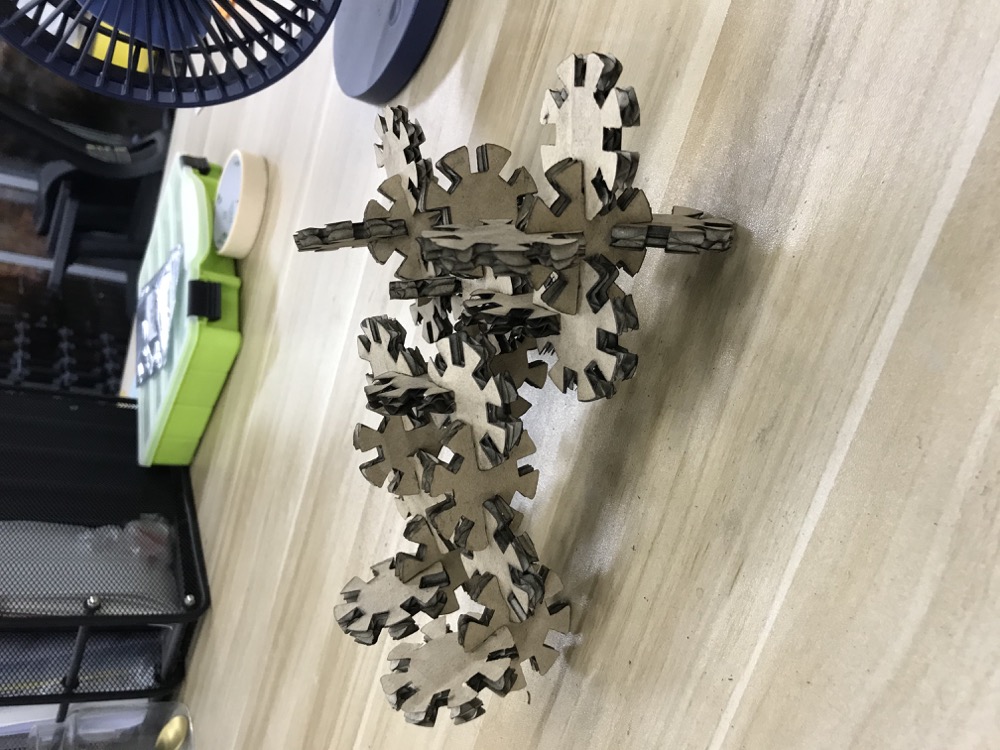
2.5 UPDATE: Apr.14th, 2020 - press fit kit
Designed a press fit kit with parametric designs.
The initial sketch
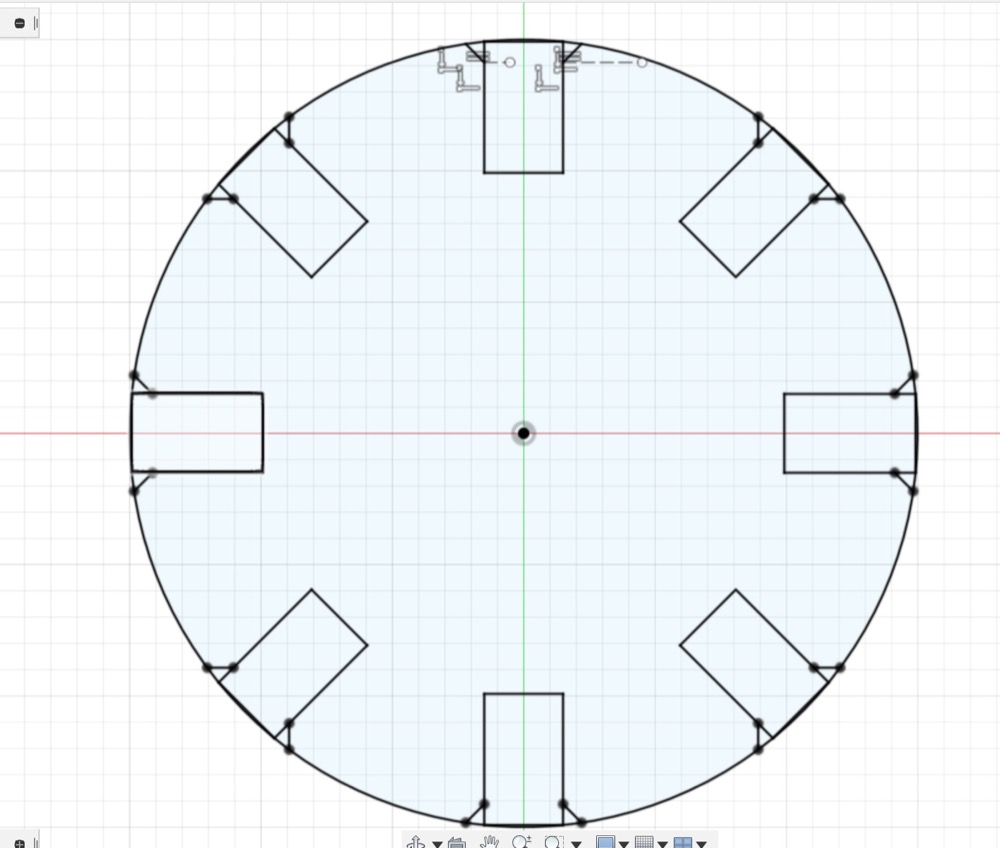
The parameter i set
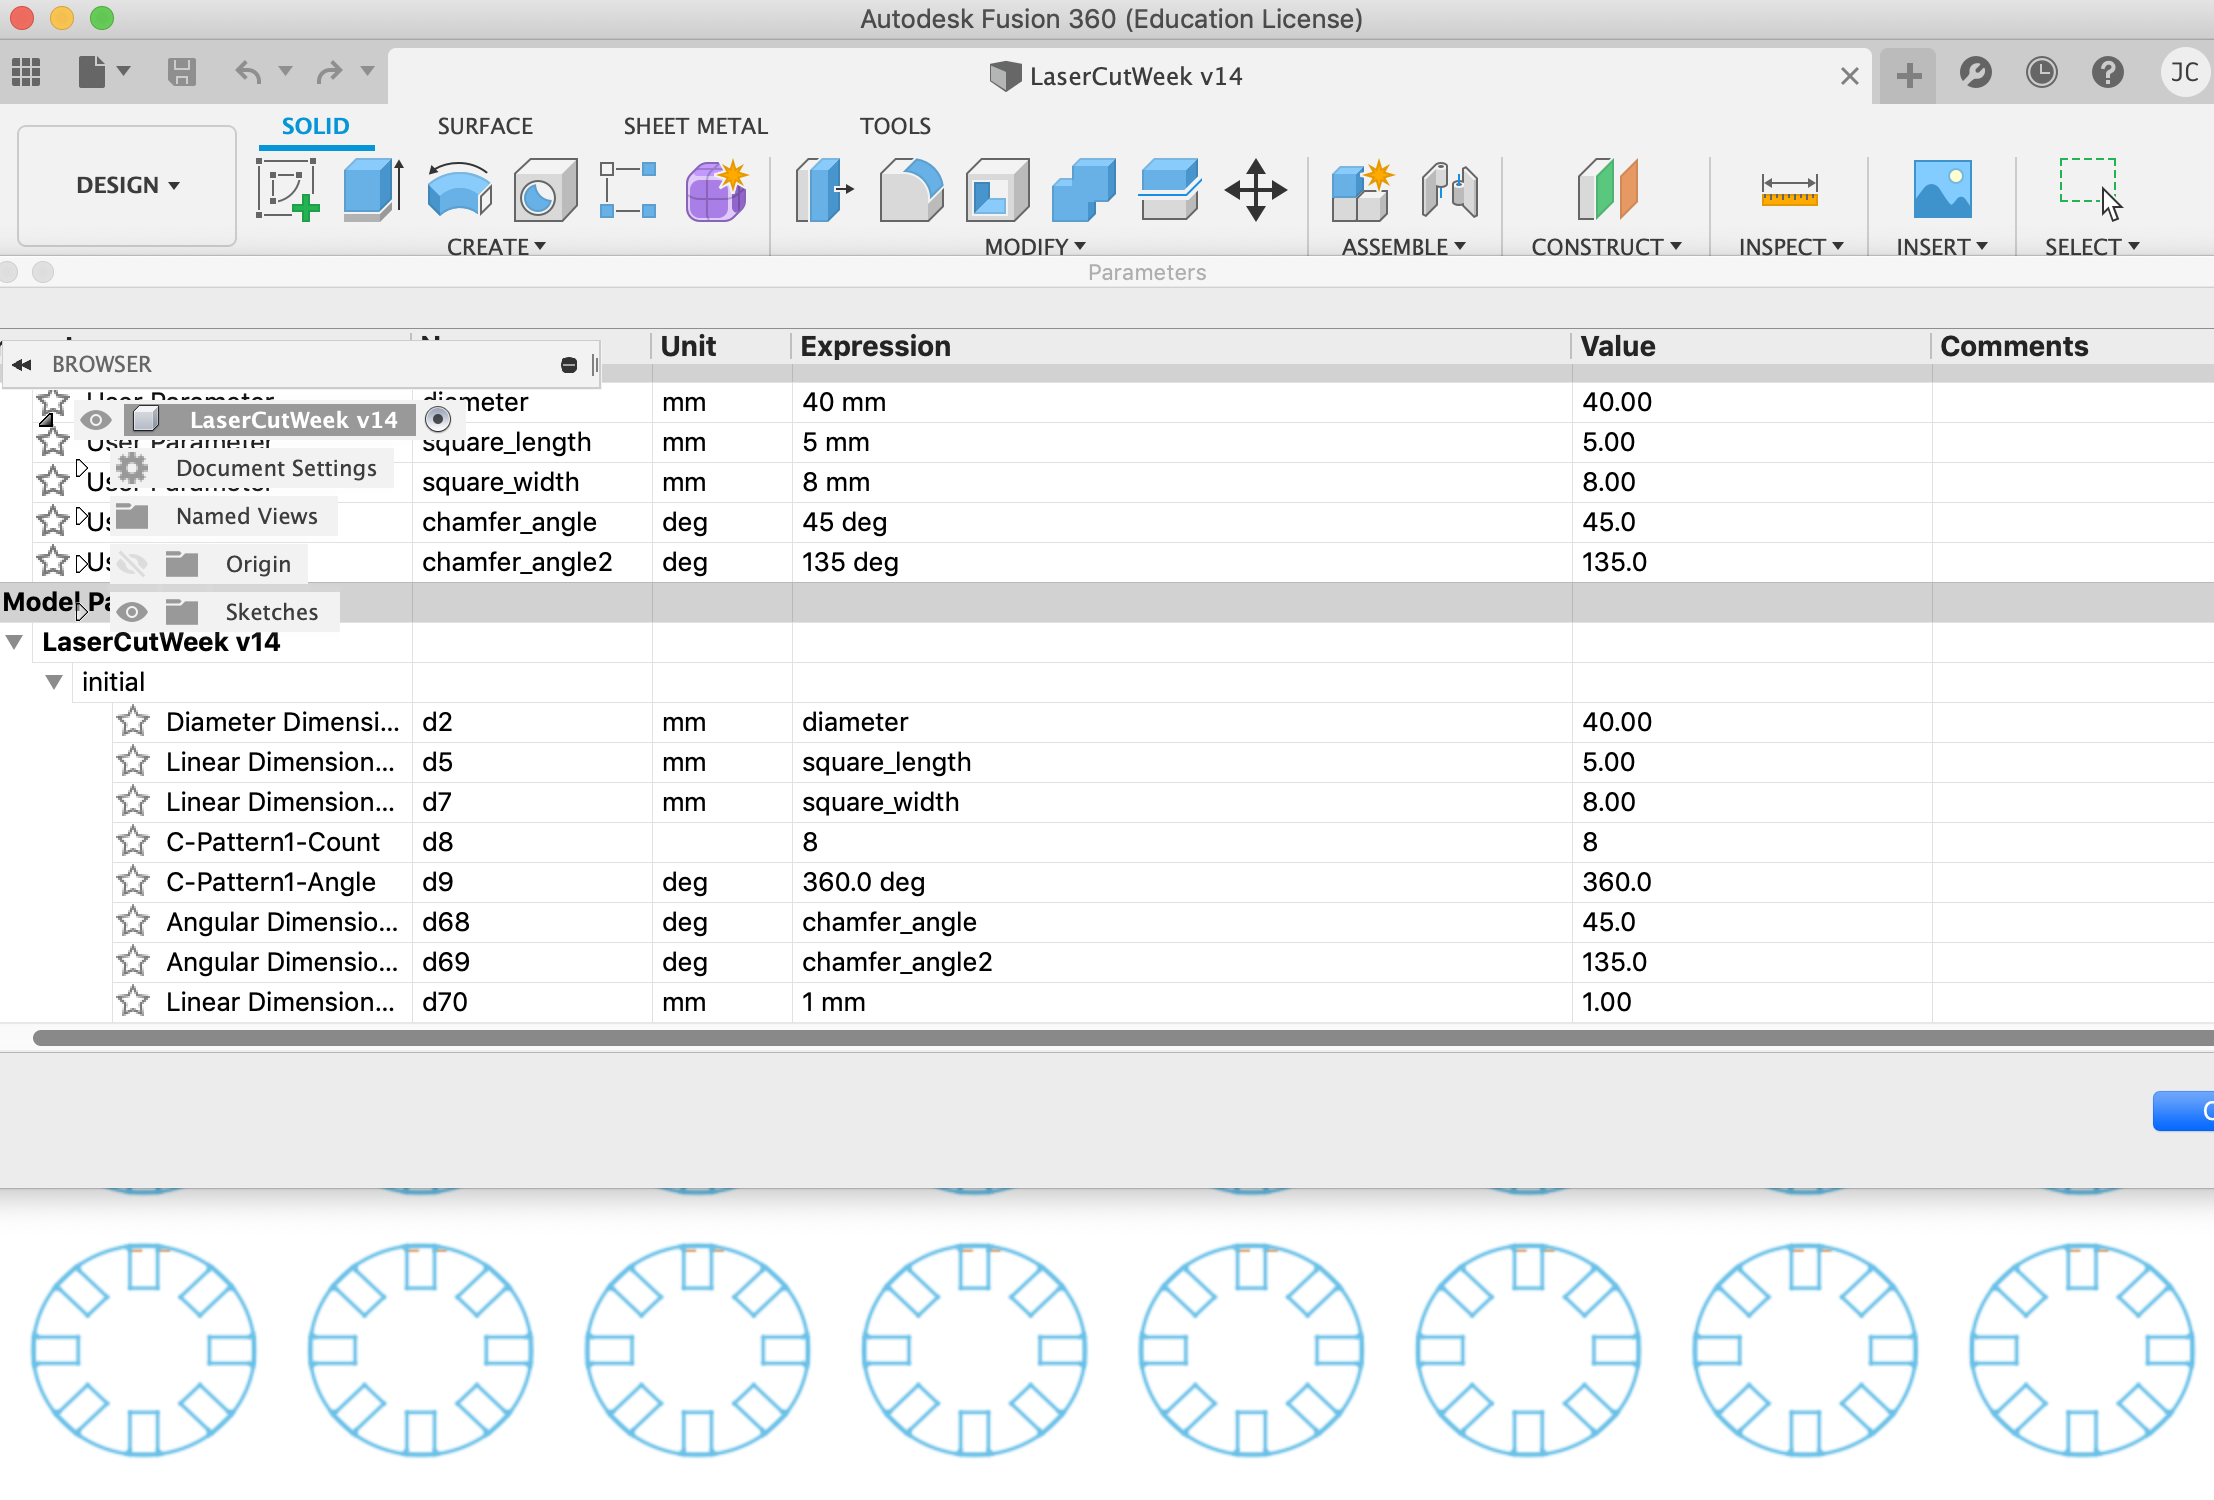
Copy and paste
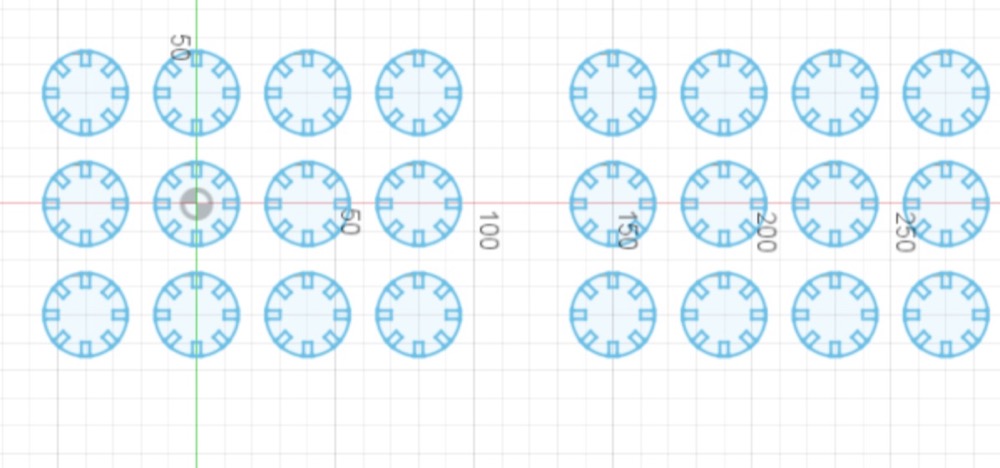
Export to DXF and then go to laser cutter.
This time i went with 5mm thickness cardboard.
Tried with many different parameters, turned out speed 15 and power 70, cutting twice a better option as other combinations either burned the cardboard or couldn’t cut it through.

Problems Occurred & Solutions
-
What is A vinyl cutter?
Vinyl is a material like wood, that can be used for cut as a sticker. Vinylcutter is the machine that can do the task. -
Gitpush oversize, what to do next?
I faced a big problem this week, i couldt push my local repo to my class page anymore due to one of my commits was oversize. The first time i posted an Issue on IssueTracker and quickly i got the answer the next day from XXX that i should be using Git Rebase command to solve my problem. Read loads of documentation and Videos the following days about git and finally i understood how to solver my issue, and my issue is solved now. By solving this problem i learned a lot deeper about the concept of Git and how it runs, great experience! Ok following is my solution to my problem:
I previously add some videos(The reason it is oversized) to my workplace and i added and committed it. Later i did a couple of more commits and finally when i wanted to push to my Repo, i couldn’t. No matter if i delete my videos in my local folder or commit again with smaller files, it didn’t help out but the same error kept occurring the whole time when i tried to push again. It was because git will save all of my commits in the history. If i really want my whole local repo to be smaller, i would need to go back to the commit that caused the oversizing problem. Unfortunately i didn’t record the whole thing but i ran following commands.
Git log --oneline
Git rebash -i Head~4
#Then a can-be-modified file poped up and i did "drop" to the commit, save and quit
Git rebash -skip
- Embed videos to my class page(Not using Youtube codes)
I found it difficult to embed videos(Other than video links) to my class page. What i’m guessing is that MKDOCS that supporting my class page, does not support the HTML5 codes.