3. Computer Controlled Cutting
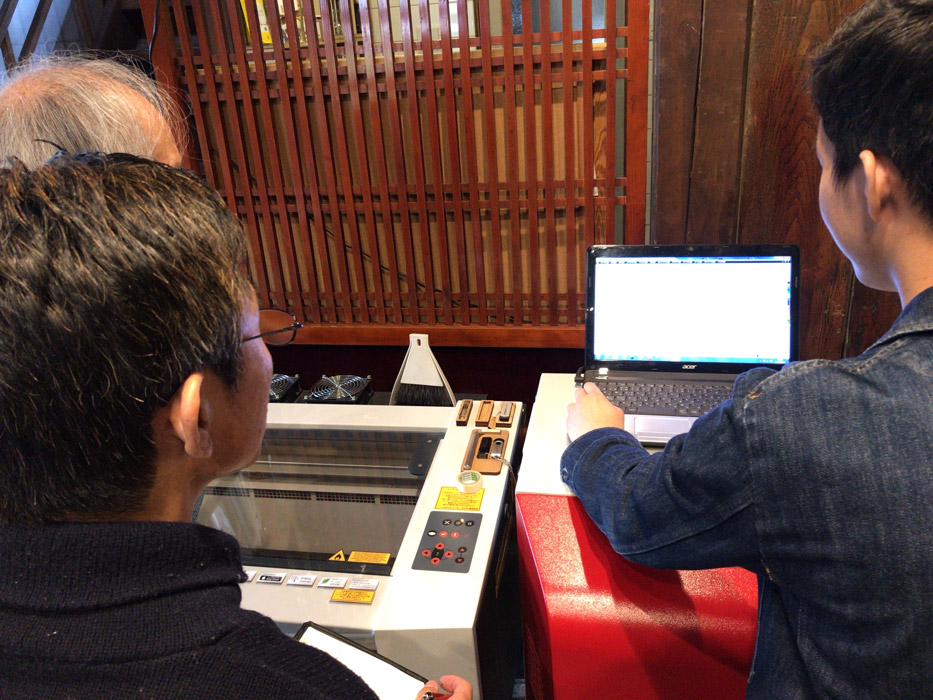
This week, I used two digital cutting machines: Laser Cutter and Vinyl Cutter. In the vinyl cutter, I made a sticker. And in the laser cutter, I tried making a photo stand with a parametric design by cardboard.
Assignments
group assignment:
- Characterize your lasercutter’s focus, power, speed, rate, kerf, and joint clearance
individual assignment:
- Cut something on the vinylcutter
- Design, lasercut, and document a parametric construction kit, accounting for the lasercutter kerf, which can be assembled in multiple ways, and for extra credit include elements that aren’t flat.
1. Vinyl Cutter
Materials
-
Seal
-
Transfer seal
Tools
-
Vinyl Cutter: Silhouette Cameo (To use it, it needs to install a driver.)
-
2D design tool: Illustrator
-
Cutter (No digital)
-
Cutting mat
Working Flow
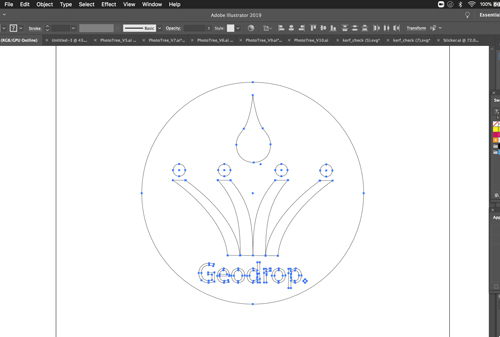
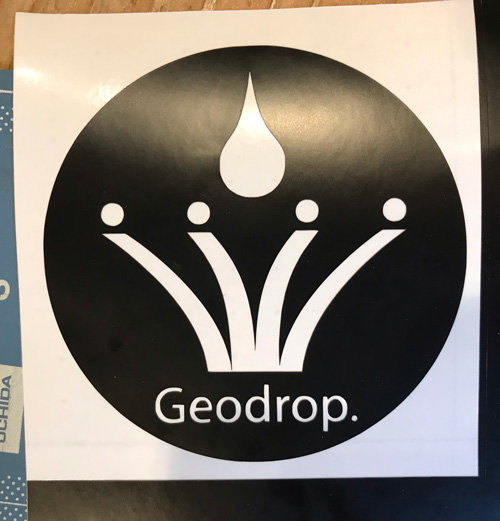
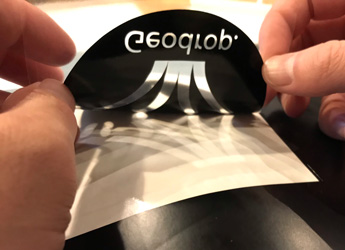
1. Sketch a logo
Before I make a sticker, I sketched a logo for my final project by Illustrator.

Note
I colored my sketch. But for cutting, it is not needed because the color of a logo is decided by the seal paper you selected.

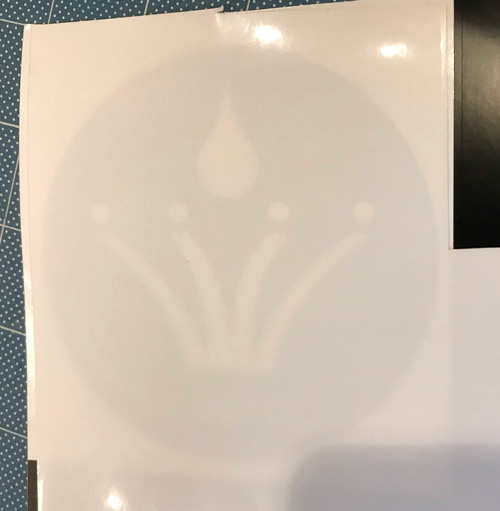
2. Export a sketch with SVG and import it to a vinyl cutter
Export my sketch with SVG format and import it to Vinyl Cutter.
Note
When you export your sketch, please make sure that you made a outline to your sketch. Vinyl cutter cuts the outline of your sketch, not your sketch. So you need to create the outline on your sketch.
If you use Illustrator, you can make the outline by going main menu -> view -> Outline.
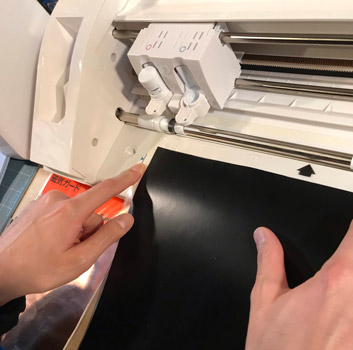
3. set up the conditions
Before using the vinyl cutter: Silhouette Cameo, I needed to install a driver. Here is the link to download page.
First, set the seal paper on cutting machine. Make sure that the paper is inserted in vertical to the cutting place like below images:
 ___
___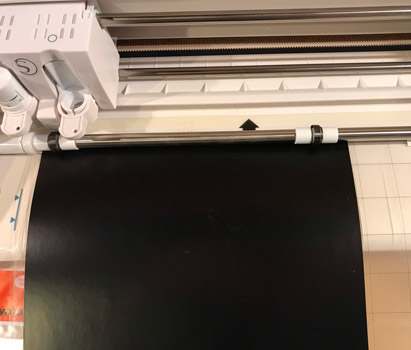
Connect your PC with a vinyl cutter, and open its driver.
Open your sketch and adjust the place where your sketch is cut by dragging and dropping your sketch.
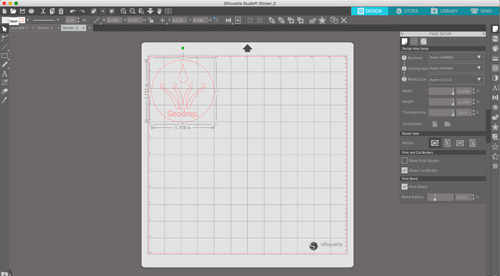
Move to SEND mode by clicking SEND button on the right-top.
In SEND mode, you can set up the cutting condition.
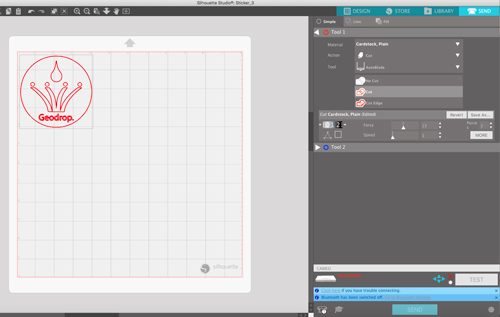
I adjusted the below factor:
-
Tip length of a cutter
It can be adjusted at dial part. “1” means the tip length is 0.1 mm. “10” is 1.0 mm. I set it up as “1”. -
Force
I’m not sure about this factor but one of the students told me the appropriate value is 20. -
Speed
Means the cutting speed on your sketch. I set it up as the value “4”.
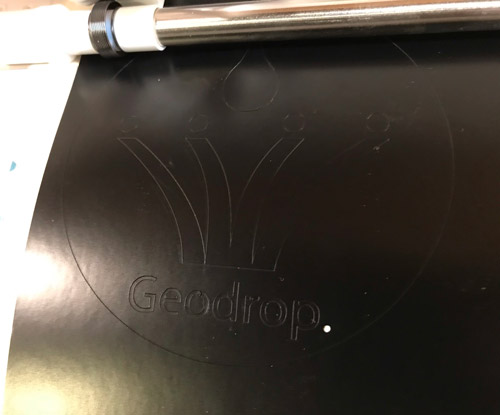
4. Cut
Click “Press to the printer” button in the tool bar.
Just cut!! Funny sound ~ ^^
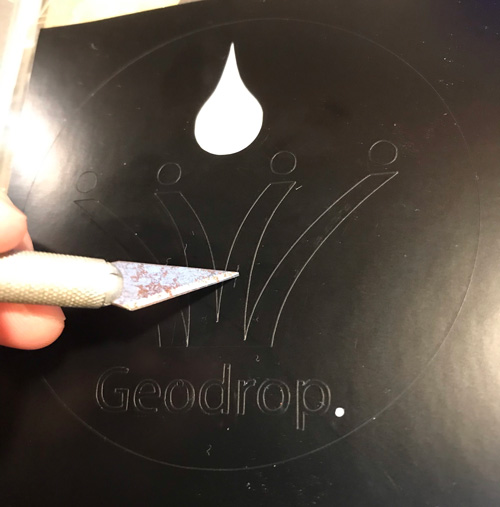
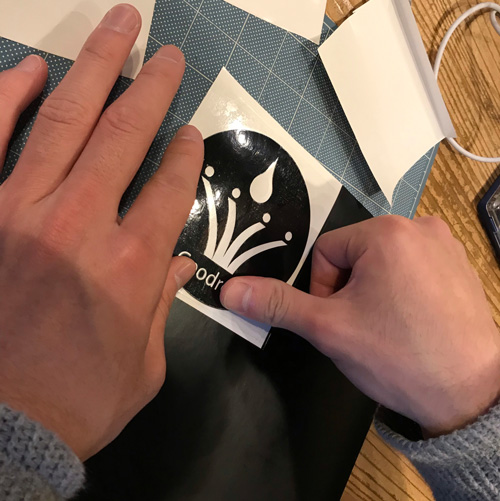
5. Finish (Transfer a seal)
Peel off the seal. Use a cutter (analog).
Tips
One of the students, Toshiki Tsuchiyama told me how to peel off easily and cleanly.(Thank you) That way is that you cut somewhere you’d like to peel off first and insert the tip of a cutter and then peel off from that position. Not peel off from the edge of your sketch. It might damage your sketch.
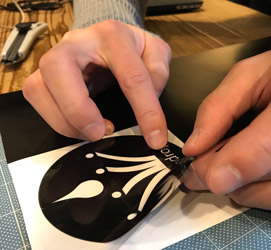
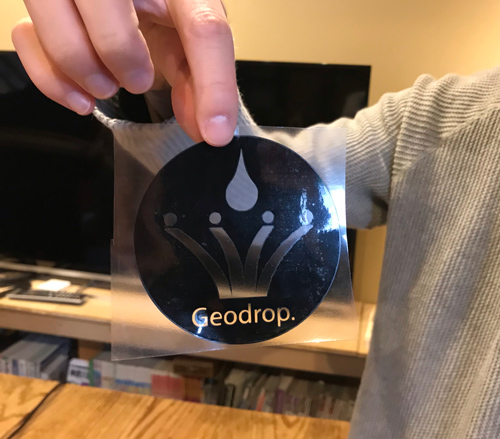
Put the transfer seel on your sketch seal.
Note
Make sure not to put air bubbles between a transfer seal and your sketch seal as possible. The transfer of your sketch seal to the transfer seal might not work well.
Peel off the transfer seal.
 __
__
And…Finished!!
My thoughts
That was the interesting tool for me. Next, I’d like to challenge to use the papers different colors and make a colorful sticker.
2. Laser Cutter
Materials
- Cardboard
Tools
- Laser Cutter
- 2D Design Tools
Fusino360 (2D sketch), Illustrator, Corel Draw - Caliper
Working Flow
1. Sketch the final object
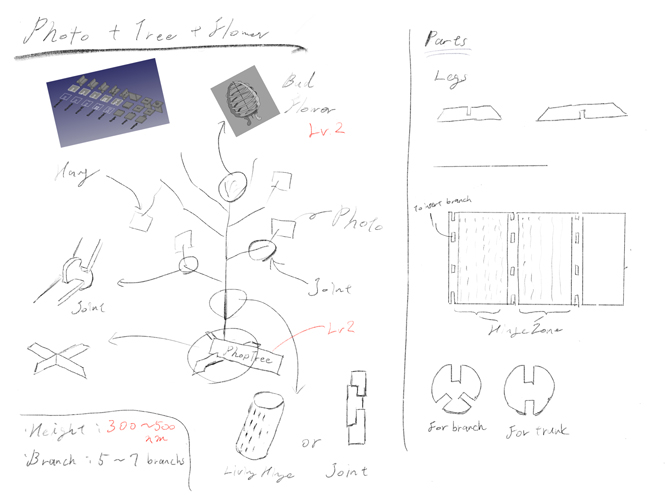
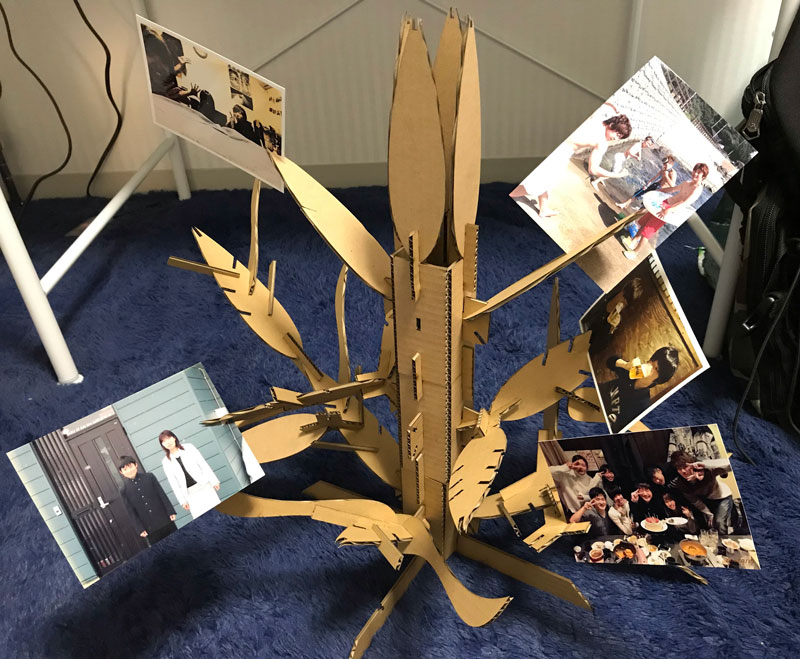
Before modeling, I roughly sketched the overview of the objects that I’ll make by laser cutter. I made a photo stand with the shapes like a tree (I called as Phototree).
Uhhh…
2. Modeling
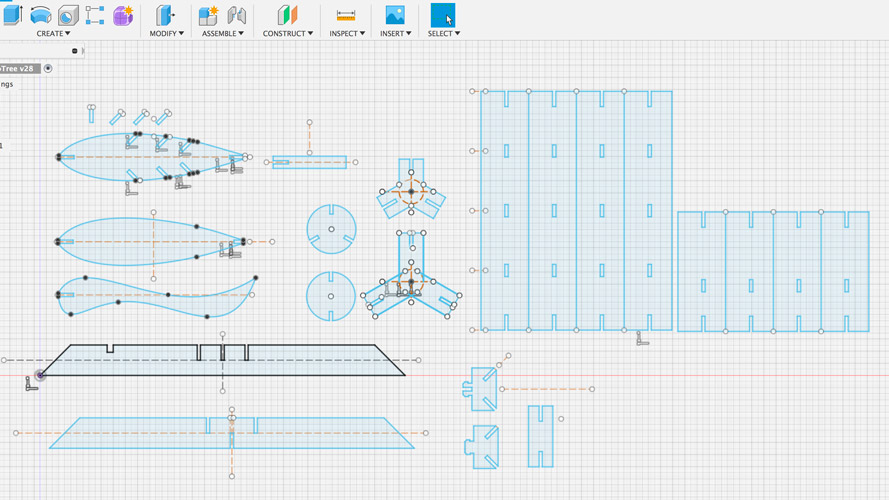
I modeled the components with the 2D sketch of Fusion360 based on my sketch.
Components
-
Legs
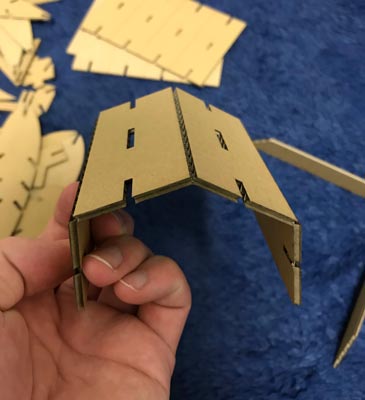
Two leg parts are crossed each other with making a joint to hold the body of tree. -
Trunks
Bend the plate of a cardboard by controlling the parameters of laser. -
Branches
Insert a branch to a trunk and then combine a branch with another one. -
Joint Parts
To combine a branch with another one and a trunk or change the angle of a branch.
X. Parametric Design
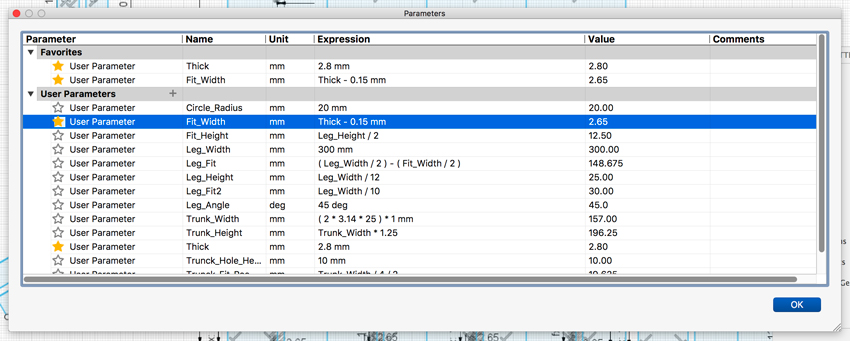
Parametric design is one of the 3D designing methods, which makes the shapes by assigning the variables or add constraints to the size of a model. For Fusion 360, parametric design can be applied by inputting the variables on the spreadsheet. You can go to the spreadsheet by clicking “Sketch” -> “Modify” -> “Change Parameter”.
I applied the parametric design to my model.
I assigned a thickness of a cardboard 2.8 mm to the variable: Thick and 2.65 mm (2.80 - 0.15) to the variable: Fit_Width. 2.65 mm is the width value of press-fit considering the kerf that Hiroaki Kimura measured in group assignment. (Thank you)
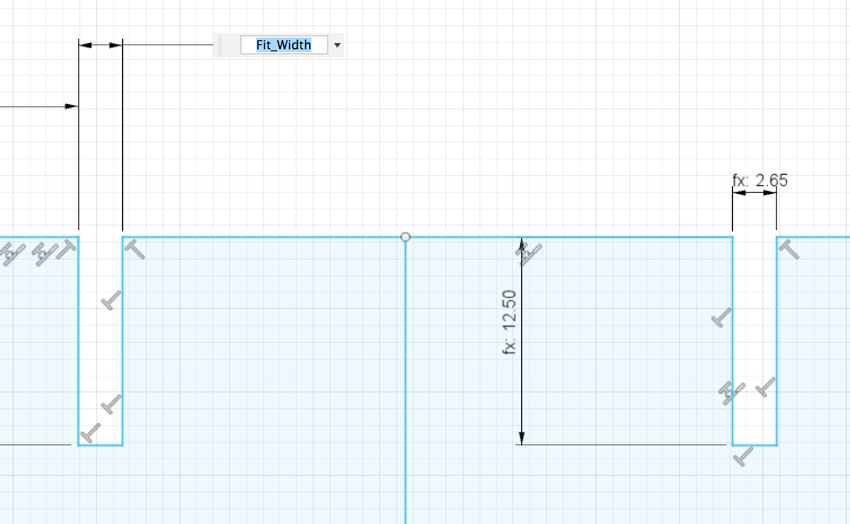
I inputted “Fit_Width” to the size of joint parts in my model like this:
By using the parametric design, you can address the change of the size of your model even you use the cardboard with the different thickness.
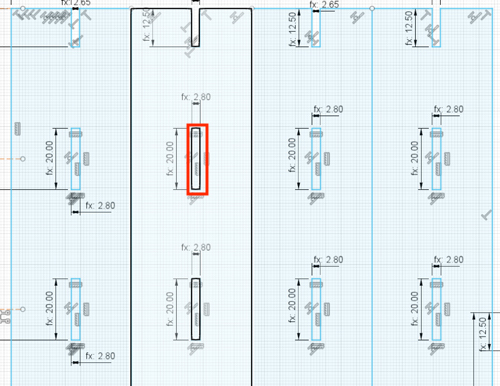
Next, I’d like to explain that once changing the parameter in a variable, that change propagates through your model. I tried to change the size of joint part in the image from 20.00 to 10.00.
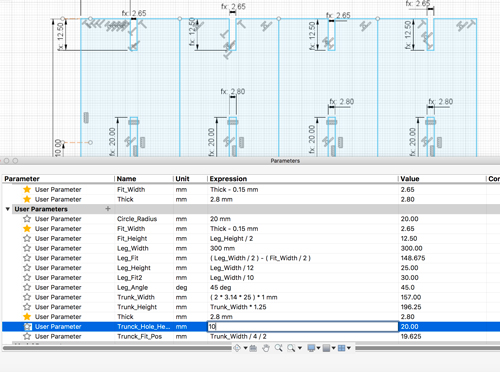
In spreadsheet, I changed the variable: Trunk_Holl_Height to 10.00.
So…
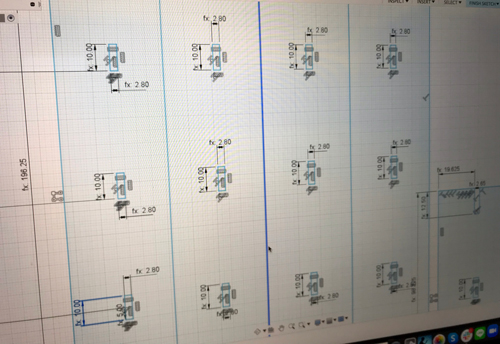
All the sizes of joint parts have changed!!
3. Laser cutting
After finishing the modeling of my sketch, I exported it with DXF format by moving a mouth cursor to Sketch and right click and click ” Save as DXF ” button.
Before cutting, I organized the space, color, stroke of my sketch with Illustrator. Saved it and sent it to that PC. These factors affects the operation of laser cutter.
-
Space
Laser cutter cuts the objects at the same positions as they are positioned in a modeled DXF file. -
Stroke
Laser cutter cuts only lines with a very thin stroke. I set 0.03 pt to object’s stroke. -
Color
Laser cutter identify object’s stroke color so that you can assign the cutting parameters with the stroke color of the object.
Setup
Corel Draw was already installed in lab’s PC, so I used it.
Opened my file and double-clicked on the bottom to change the outline color of my sketch (Show the image).
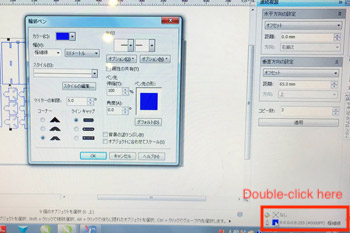 __
__
Note
Laser cutter identify object’s stroke color and you can assign the parameter to each color. So I use blue and red outline. Blue line is for completely cutting the cardboard. Red line is for cutting at only one side of surface of cardboard.
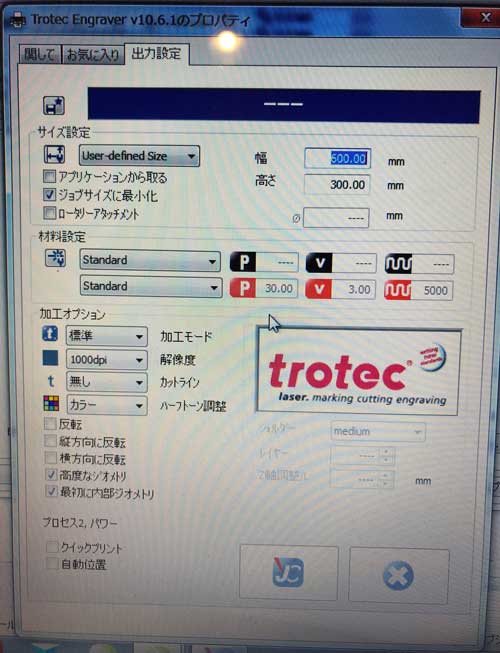
Set the size of the workspace in laser cutter. Width is 600 mm and Height is 300 mm for us in Kamakura.
(Sorry for only Japanese image)
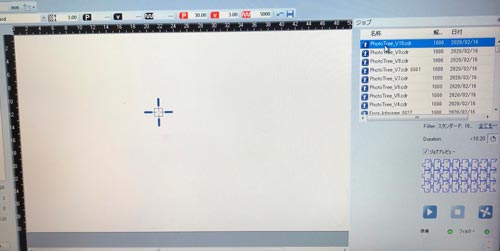
Send it to the driver of laser cutter (Click JC icon in below)
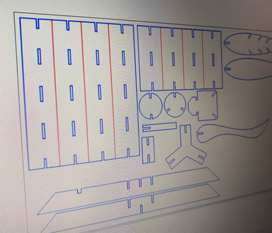
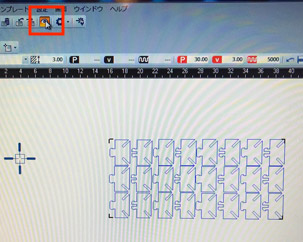
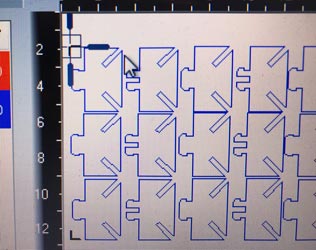
Open my sketch file and then drag and drop it from the right side tab to the workspace.
Tips
When you dragged and dropped the sketches, the rectangular box are shown by default. If you’d like to see the actual sketches you designed, push the eye icon on the top of the menu. You can change its view mode.
 __
__
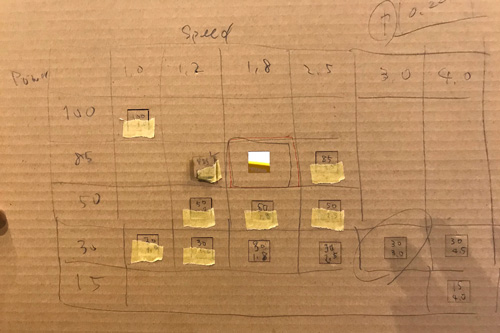
Next, I set up the factors: Speed, Power, Rate. In group assignment, we created the conditioning table. I wanted to cut both completely through the cardboard and one side of cardboard. Hideo Oguri who is one of Fab Academy students in Kamakura told me the laser conditions (Thank you).
Complete cutting: Speed = 1.8 , Power = 85 % , Rate = 5000 Hz
One side cutting: Speed = 3.0 , Power = 3.0 % , Rate = 5000 Hz
Move to laser cutter control panel.
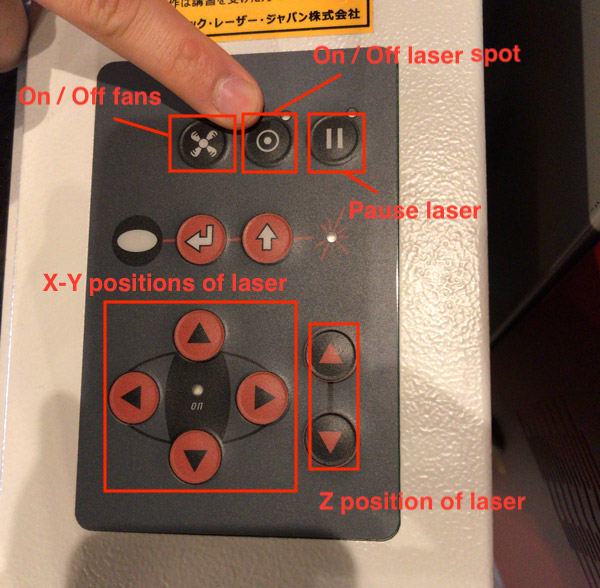
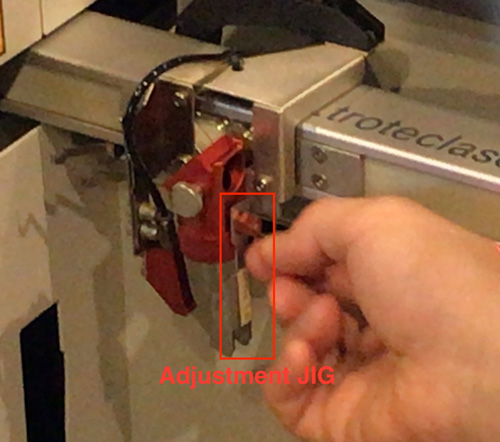
First, set material and adjusted Z position with JIG which comes with the laser cutting machine.
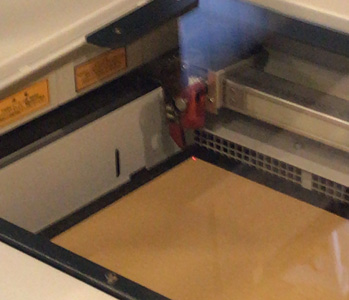
When laser cutter turn of, the laser for visualize the current position (not cutting)would be seen, and the cursor which shows the current position of laser are also shown in display.
Set the laser position to the corner of the material and I dragged and dropped my image to the cursor. Laser cutter cuts the place where the image is set.
 __
__
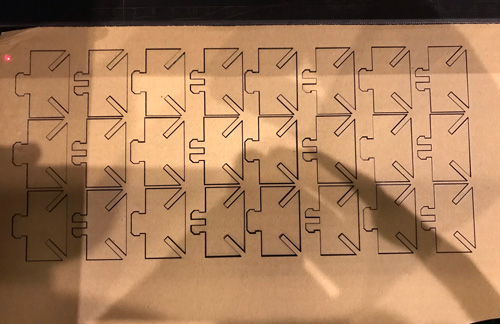
Lastly, Cutting!!
Finished!!
5. Assemble
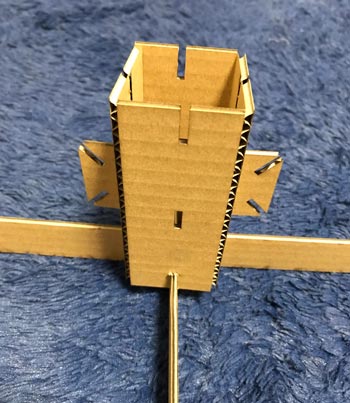
Legs

Trunk
By controlling the laser output, I can fold a cardboard! And joint it!
 __
__
By add joint parts to the trunk, the branch can be freely added as your imagination works.
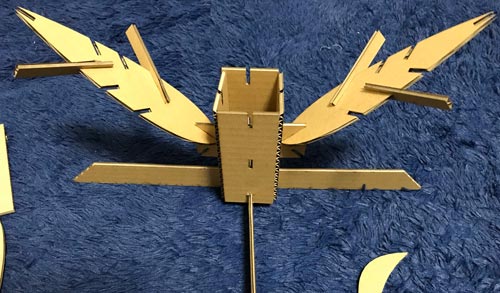
Also, the branch can be linked to another one by using joint parts.
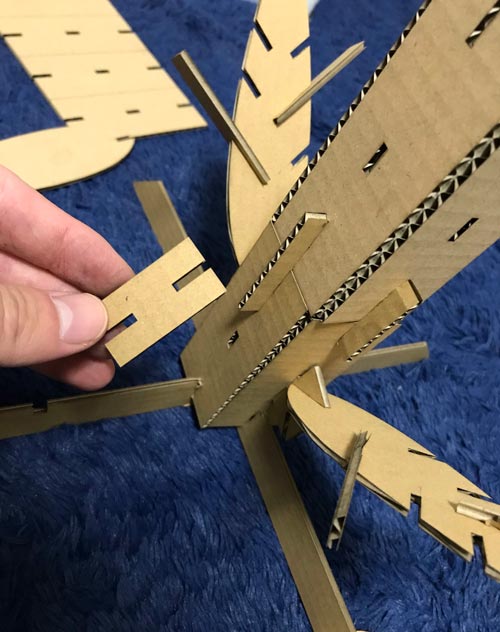
Finished!!
but super chaotic…
My thoughts
The quick cutting and easy operation of laser cutter help us rapid prototype something. But, I’d like to adjust the Z depth direction (Vertical to the material) for the material. It can’t. It is difficult to shave into z direction at precise depth for laser cutter.
3. Conclusions
Submission
- Vinyl Cutter - 2D Sketch of the Sticker: ai
-
Vinyl Cutter - 2D Sketch of the Sticker: svg
-
Laser Cutter - 2D models for Press-fit kit: f3d
- Laser Cutter - 2D models for Press-fit kit: ai 1, dxf 1
- Laser Cutter - 2D models for Press-fit kit: ai 2, dxf 2
-
Link - Group Session Week03
Self-reviews
1. This week’s work
Idea for my press-fit kit objects was good. The final objet was also good. But it took a lot of times to decide the final sizes of all the parts for press fit kit… and I couldn’t find out the optimal size of Snap joints. So I need to forcefully insert joints. If I selected a wood for material, it cannot be inserted…
- Importance of Prototyping
If you have enough material, you should deploy your idea to the real world! Prototyping is helpful for me to catch my image quickly. Actually, I was thinking about how much does the length is needed for one side of the parts. It took about 15 minutes to decide it, then tried cutting. But it didn’t fit…
I should’ve prototype it at that time so that I don’t waste my time.
2. Project Management
I could perform Spiral Development this week. For the first time, I have a lot of things I wanted to: color to my cardboard objects, put the dorm on top of the trunk, try to use the different joints. But Kae Nagano who is one of my instructors, told me that “you have to do spiral development for it. FIrst, make the essential parts to meet the requirement. And then, make the shape of tree. and then, color or make the dorm. prioritize your task!” So finally I could finish to make the PhotoTree, not completely though(Thank you). That was very great experience for me!