17. Mechanical Design, Machine Design
Assignments
group assignment:
- Design a machine that includes mechanism+actuation+automation.
- Build the mechanical parts and operate it manually.
- Document the group project and your individual contribution.
- Actuate and automate your machine.
- Document the group project and your individual contribution.
X. Group Assignment
Link to group session page.
X. Individual - My contribution
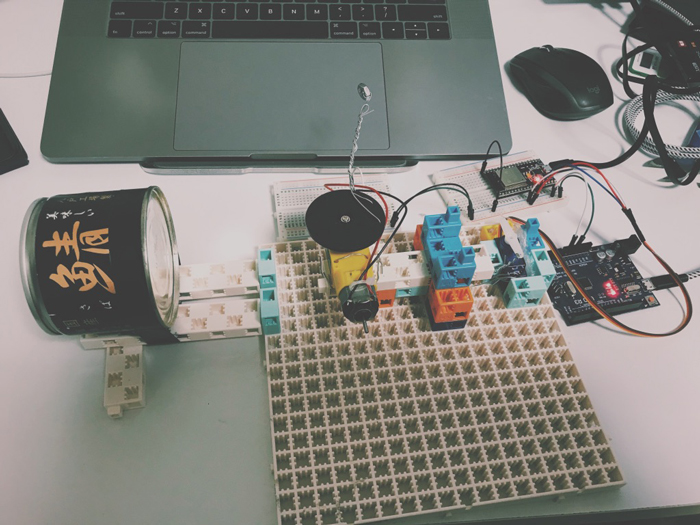
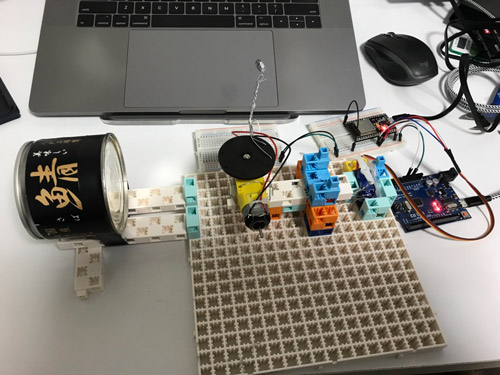
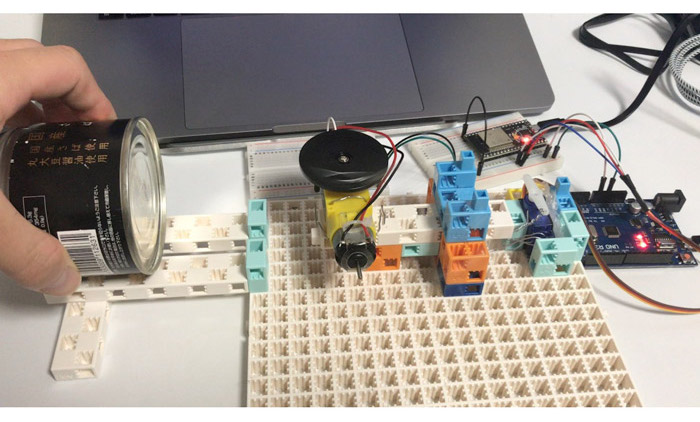
My contribution is to make a drum machine that connected with the other machines through MQTT in machine orchestra. Due to the impact of corona virus, we have to make the machine by using only the things in a home. So I tried making the machine by Block set for learning gear and link and a fish can.
1. Mechanism of the machine 
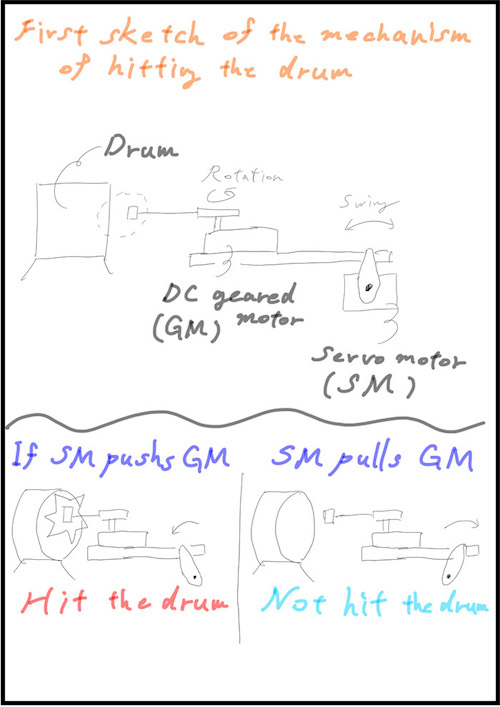
Before I started building the machine, I roughly sketched the design of my instrument that hits the drum by using DC geared motor and servo motor.
If servo motor pushes the position of DC geared motor, the object that attaches at DC geared motor and rotates hits the drum, and if servo motor pulls DC geared motor, the object doesn’t hit the drum.
The below are the structure of the machine that I made.
1 Nut Swing
The geared motor swings the nut tied by a wire. It makes a sound by hitting the nut to a fish can.
The length of the wire is arranged to be able to hit a fish can when the motor is close to a can.
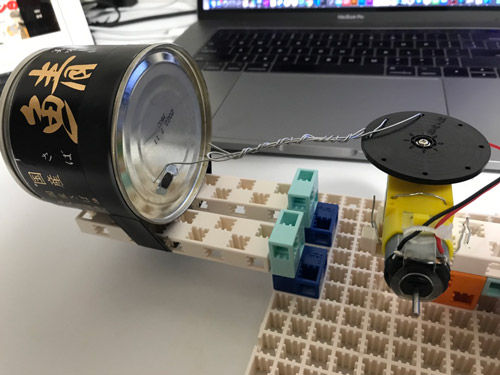
2 Piston
To close the geared motor to a can, the servo motor provides the piston movement.
These component is fixed by blocks.

Finish making the mechanism!
2. Operation DEMO of MQTT using ESP32 module 
Next, I tried to use ESP32 module for driving the machine. But before doing that, I tried confirm if ESP32 can be operated and received the rhythm signal from MQTT properly.
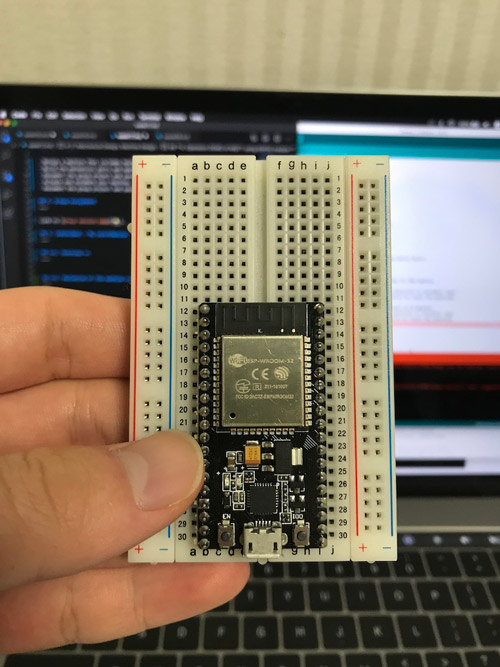
I could confirm it by opening and seeing the serial monitor.
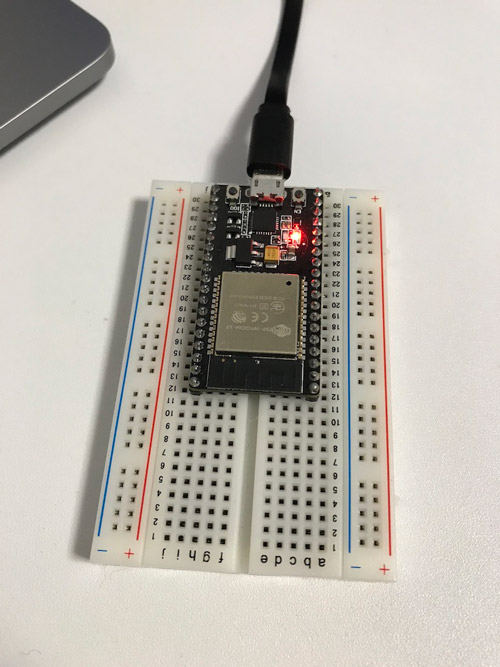
To compile code 2 shown in the below, I simply connected ESP32 with my PC.
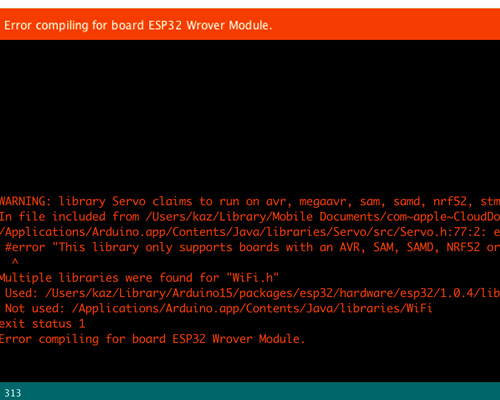
Failure
Error message
I took the error message when I mistook the wiring of the electronic circuit and wrote the wrong code. But that error message somehow pointed out the multiple libraries.
Actually, when I don’t change any libraries but just revised my code, the code could be compiled properly. (I’m confused…)
If the signal from MQTT is received to ESP32 properly, the serial code is shown like this;
3. Drive the machine by ESP32 module
Finally, I arranged the electronic wiring.
Here is the circuit diagram.
(Some code like the private key is hidden by ***.)
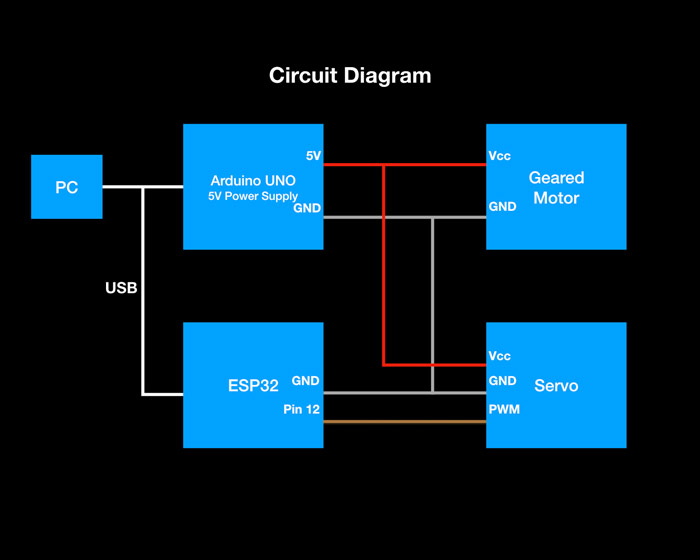
Pinout of ESP32

Overview is the below.
Showed the code that operate those motors with the MQTT signal.
Code - MQTT_AWS_MUSIC_MACHINE
#include <Servo_ESP32.h>

/*
 * Description:
 * Example for setting the minimal and maximal angle.
 */

static const int servo1Pin = 12;//printed G14 on the board


Servo_ESP32 servo1;

/*
This is a sample template program for ESP32 connecting to
AWS IoT over MQTT to make distributed machine device for group
project of Machine design and mechanial design in
FabAcademy 2020 (students at Fablab Kamakura and Kannai).

As this code contains certification information, PLEASE
DO NOT UPLOAD THIS SOURCE CODE to ANY SHARABLE PLACE
DIRECTLY(including FabAcademy page). If you need to upload
this to sharable place, PLEASE MAKE SURE YOU DELETE
VALUES OF rootCA, certificate and privateKey CHARACTORS.

For preparation, please find PubSubClient.h in youf local
library and chhange #define MQTT_MAX_PACKET_SIZE 128 to 512.

For using this, please update as follows.
1) Set your ssid and password
2) Configure your topic (or for your use to publish/receive message)
3) Specify your topic name to subscribe in connectAWSIoT()
4) Write your logic on receiving message in mqttCallback()
5) Write your logic for publishing message in mqttLoop()  // <-optional
*/

#include <WiFiClientSecure.h>
#include <PubSubClient.h>
#include <ArduinoJson.h>

#include <ESPmDNS.h>


// pin assignment for LED blink
//const int S1 = 4;
//const int S2 = 16;
//const int S3 = 17;

// 1) set your ssid and password ----------
char *ssid = "***";
char *password = "***";
// 1) end ---------------------------------

// AWS_IOT endpoint setting (fixed)
const char *endpoint = "a2toz7cb5zl4er-ats.iot.ap-northeast-1.amazonaws.com";
const int port = 8883;
//char deviceId[4]; // random device ID in 4 digit hexadecimal (max: ffff)
byte mac_addr[6];
char deviceId[20];

// 2) configure your topic (or for your use to connect to other people) -----
// Topic name needs to be format in "fa2020jp/topic[*]"
// Topic for publishing (if you do not need to publish, you do not need pubTopic.
char *pubTopic0 = "fa2020jp/topic0";

// Topic for subscribing
char *subTopic0 = "fa2020jp/topic0";

// 2) end -----------------------------------------------------------

const char* rootCA = "-----BEGIN CERTIFICATE-----\n" \
***
"-----END CERTIFICATE-----\n";

const char* certificate = "-----BEGIN CERTIFICATE-----\n" \
***
"-----END CERTIFICATE-----\n";

const char* privateKey = "-----BEGIN RSA PRIVATE KEY-----\n" \
***
"-----END RSA PRIVATE KEY-----\n";

WiFiClientSecure httpsClient;
PubSubClient mqttClient(httpsClient);


void setup() {
    Serial.begin(115200);
    pinMode(12, OUTPUT);

    // Start WiFi connection
    Serial.println("Connecting to ");
    Serial.print(ssid);
    WiFi.begin(ssid, password);

    // wait until WiFi connected
    while (WiFi.status() != WL_CONNECTED) {
        delay(500);
        Serial.print(".");
    }
    Serial.println("\nWifi Connected.");

    // Configure certification and MQTT Client
    httpsClient.setCACert(rootCA);
    httpsClient.setCertificate(certificate);
    httpsClient.setPrivateKey(privateKey);
    mqttClient.setServer(endpoint, port);
    mqttClient.setCallback(mqttCallback);

    // Set device Id from Mac Address
    WiFi.macAddress(mac_addr);
    sprintf(deviceId, "%02X:%02X:%02X:%02X:%02X:%02X", mac_addr[0], mac_addr[1], mac_addr[2], mac_addr[3], mac_addr[4], mac_addr[5]);

    connectAWSIoT();
    servo1.attach(servo1Pin);


}

void connectAWSIoT() {
    while (!mqttClient.connected()) {

        if (mqttClient.connect(deviceId)) {
            Serial.print("mqtt Connected - deviceId: ");
            Serial.println(deviceId);
            // QoS 0 is sending message only 1 time (the fastest)
            // QoS 1 is returning puback to publisher after send message successfully
            // QoS 2 is sending message only 1 time with validation (the slowest)
            // AWS IoT only allows QoS 0 or 1.
            int qos = 0;

            // 3) Specify your topic name to subscribe -----------
            mqttClient.subscribe(subTopic0, qos);
            // 3) end --------------------------------------------
            Serial.println("Subscribed.");
        } else {
            Serial.print("mqttClient.connect() Failed - deviceId:");
            Serial.println(deviceId);
            Serial.print("Error state=");
            Serial.println(mqttClient.state());
            // Wait every 5 seconds until connect to MQTT broker
            delay(5000);
        }
    }
}


int t4;
int t5;
int t6;

void mqttCallback(char* topic, byte* payload, unsigned int length) {
    DynamicJsonDocument doc(256);

    // Write serial monitor
    Serial.print("Received. topic=");
    Serial.println(topic);

    // deserialize
    DeserializationError error = deserializeJson(doc, payload);
    if (error) {
        Serial.print("deserializeJson() failed with code ");
        Serial.println(error.c_str());
        return;
    }

    // 4) Write your logic on received message -----------------

    // dump Json in readable format
    serializeJsonPretty(doc, Serial);
    Serial.println();
    // parse Json (retrieve int value from for each track)

    int seq = doc["seq"].as<int>();
    int interval = doc["interval"].as<int>();
    int overhead; // overhead for each beat (returned by pushSolenoids())

//    int t1 = doc["t1"].as<int>();
//    int t2 = doc["t2"].as<int>();
//    int t3 = doc["t3"].as<int>();
//    int t4 = doc["t4"].as<int>();
//    int t5 = doc["t5"].as<int>();
//    int t6 = doc["t6"].as<int>();

//    switch (t4) {
//        case 0:
          delay(400);
          servo1.write(20);
          delay(100);
          servo1.write(80);
          delay(100);
          servo1.write(30);
          delay(100);
          servo1.write(80);
          delay(100);
//        break;

//        case 1:
//        break;

//    }

    // 4) end -------------------------------------------------
}


void mqttLoop() {
    if (!mqttClient.connected()) {
        connectAWSIoT();
    }
    mqttClient.loop();

    // 5) ----- Write your logic for publishing message from here -----
    // (If you are not pubishing anything, you can delete following code)

    // Publisher publishes folowing element
    // seq: sequence status (start from 1 when start sound)
    // count: count (start from 1 when start publisher process (on Node-RED in RaspPi)
    // t1: melody1 (in MIDI note name)
    // t2: melody2 (ex. harmony, in MIDI note name)
    // t3: code,  (in MIDI note name)
    // t4: rhythm1 (8 beat, front)       1, 0, 1, 0, 1, 0, 1, 0
    // t5: rhythm2 (8 beat, back)        0, 1, 0, 1, 0, 1, 0, 1
    // t6: rhythm3 (8 beat, variation)   1, 1, 0, 1, 0, 1, 1, 0
    // interval: interval in delay

//    mqttClient.disconnect();
    // 5) end---------------------------------------------------
}


void loop() {
   // server.handleClient();
  mqttLoop();
}
Point is 1) set the WiFi ssid and password and 4) Write your logic on received message in mqttCallback def.
My logic in the above code is driving the servo motor to the rhythm sent from MQTT system.
This drum machine need to drive DC geared motor and servo motor. But the power of DC geared motor are supplied from the power supply directly so it drives constantly without programming code.
For driving servo motor, Servo_ESP32.h are used and simply I arranged the timing of driving the servo motor with the code: delay() and servo1.write().
The movie that could be operated properly is here and on the group assignment page.
Please check it!!
X. Conclusions
Submission
- Code - MQTT_AWS_MUSIC_MACHINE: .ino
MEMO
What I wanted to learn more
None