2. Project management
- Work through a git tutorial.
- Build a personal site in the class archive describing you and your final project.
2.1. Git tutorial
Thanks to the git tutorial, I discovered the steps I had to take to work my repository locally. Although I had to dig through google to understand the concepts.
Extra info:
- Info about git concepts (Spanish)
- Video tutorial Git with GitLab
2.1.1. What is Git? GitLab?
Git is a free and open source distributed version control system designed to handle everything from small to very large projects with speed and efficiency. (https://git-scm.com/).
I will use Git to locally control my remote repository located in GitLab.
GitLab is a web version control and collaborative software development service based on Git. My website is located in my remote repository within GitLab.
2.1.2. How does Git work?
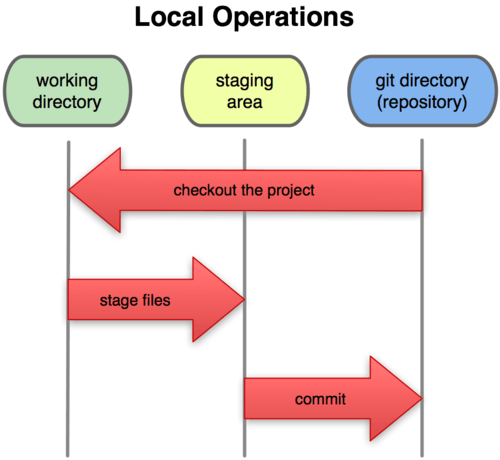
As we can see in the diagram, when we work in our local repository we go through 3 phases: - Working directory. Here we can make any changes in the files of the local repository and these will go to the modified state. To pass the modified file to the staging area use:
$ git add nameFile
- Staging area. Here the file has changed from the modified state to the prepared state. We are ready to make the new version with a comment that defines it. To pass the prepared file to the git directory use:
$ git commit -m "version name"
- Git directory. Here the file has changed from the prepared state to the confirmed state. We are ready to synchronize with the server. To do it use:
$ git push
2.2. Build my personal site
2.2.1. Initial configuration
2.2.1.1. User configuration
I use Git Bash for Windows. The first time I open it, I have to configure my user by typing in the console:
$ git config --global user.name "Your Name Comes Here"
$ $ git config --global user.email you@yourdomain.example.com
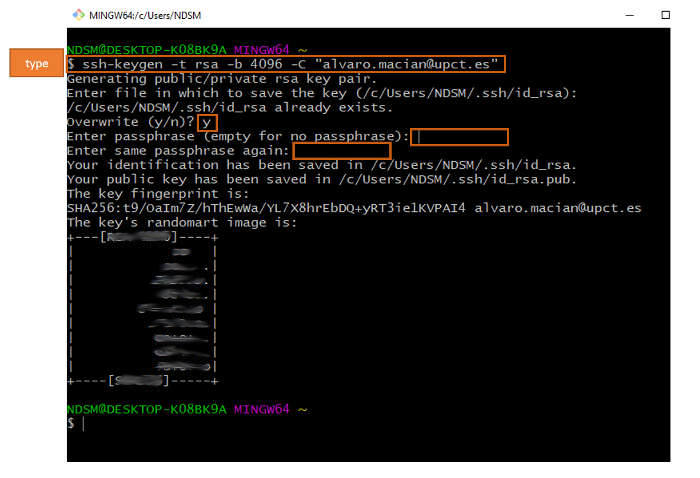
2.2.1.2 Generating a new SSH key
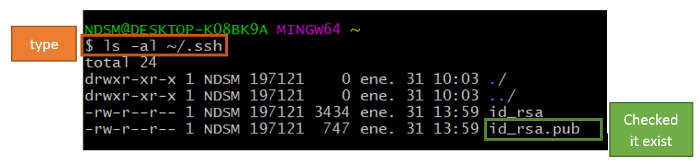
2.2.1.3 Checked for existing SSH keys
2.2.1.4. Adding your SSH key to the ssh-agent

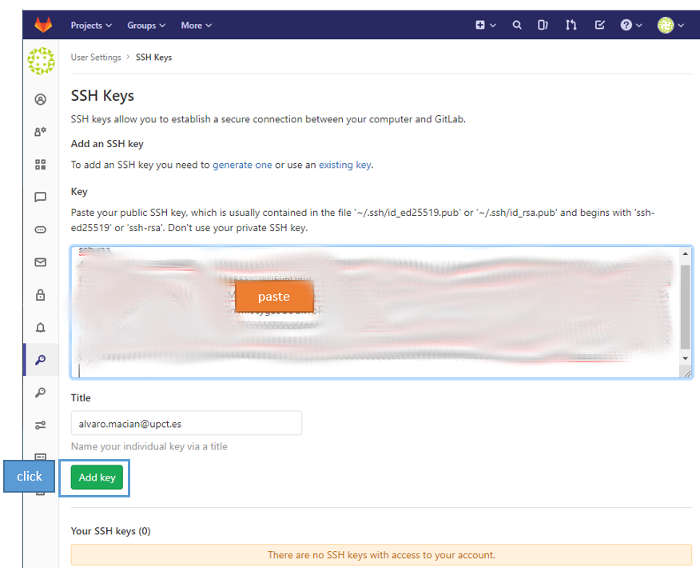
2.2.1.5. Adding a new SSH key to your GitLab account

2.2.1.6. Clonning my repository GitLab
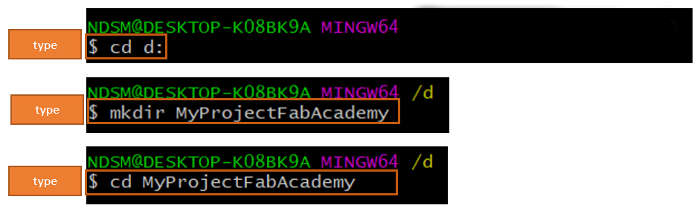
In the GIT BASH console, I first go to the location where I want to save the repository copy.
And I use the command “cd”. I create a folder that I will call MyProjectFabAcademy. I use the command “mkdir”.
Now I will try to clone my repository to work locally. I go to my repository in GitLab. Click on clone with SSH and the address will be copied to the clipboard.
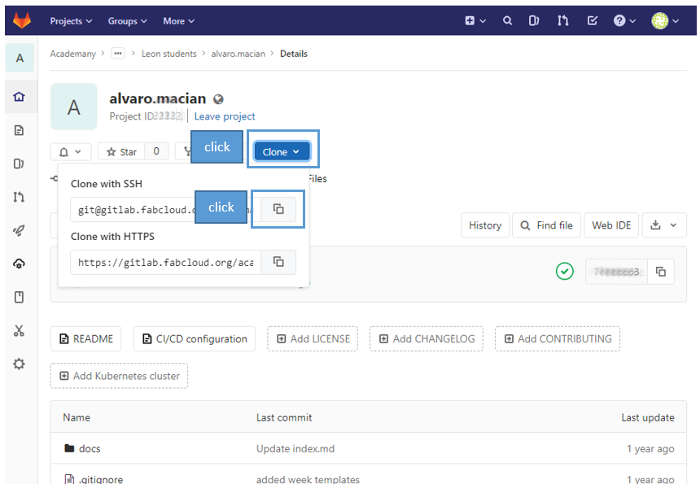
Now I write in GitBash “git clone” and then paste the previously copied address.
I enter the passphrase for my SSH key, previously configured, to allow me to clone it.

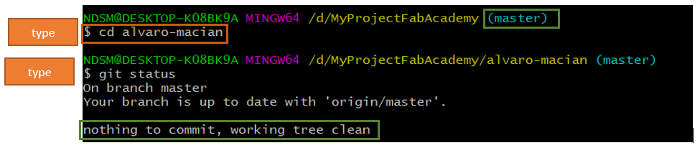
He says there is nothing to commit.
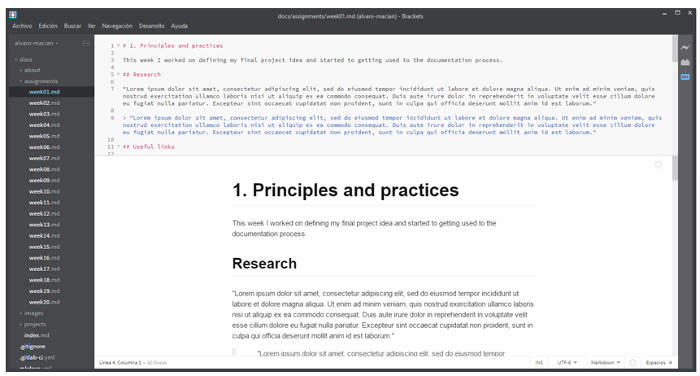
2.2.2. Editing my web site
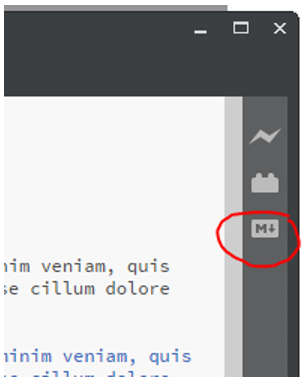
Now I go to Brackets and open my project to edit it. Initially I’m going to work in markdown language until I learn html. Markdown is a lightweight and easy-to-use syntax for styling all forms of writing on the GitLab platform. To be able to preview my.md file I have to install a plugin. To do this I click on the button that shows the following image.
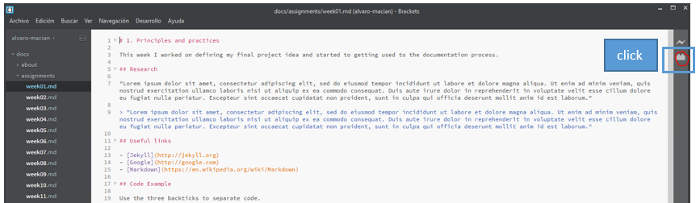

Now a new button appears.
Clicking on this button divides the window showing a preview of the file.
2.2.3. Uploading my web site
After making changes to the project in bracket I return to GitBash. And I look again at the state.
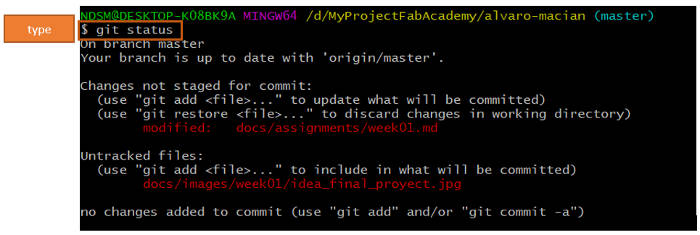
As I can see, they seem to be changes to update.
First, I do git pull

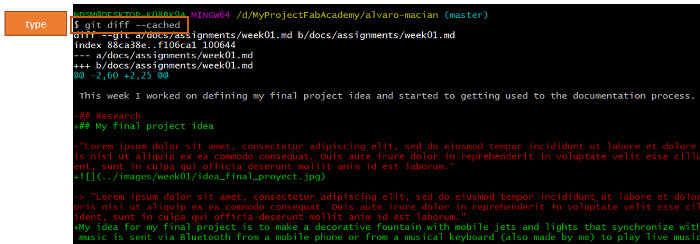
I add them to the staging area to prepare them for commit.

And now I check the status again.

I can see that it has been modified from the files as shown in the following image.
Now I do “git commit” to update the local repository with the changes.
Notes:
‘i’: to insert the comment.
Esc: to stop writing.
‘wq’: to save and exit.

Now I use “git push” to publish my local commits.

I’m done!!! I have published the latest version of my website.