16. Wildcard week
Design and produce something with a digital fabrication process (incorporating computer-aided design and manufacturing) not covered in another assignment, documenting the requirements that your assignment meets, and including everything necessary to reproduce it. Possibilities include but are not limited to wildcard week examples:
I have chosen fabric composite and vacuum forming; other options in this lab were food printing and chocolate molding, but these are technologies rather similar to some assignments I have already done and I wanted to try new machines and fabrication techniques.
How [not to] make composite
Well! this week wasn’t so easy… Corona restrictions, limited access to the lab, and nobody seems to know how a composite is supposed to be properly done in a FabLab, then I checked some other people documentation, some YouTube videos, then I tried to make it based on the principles of composites: Resin layer > Fabric > Resin layer.
Since I didn’t have access even to the proper tools such a vacuum machine and I received some fabrics without instructions, a [very old] crystallized resin, and some transparent film.
Test piece
As usual, it’s recommended to make a test piece to have a first experience with the fabrication technique and the materials.
-
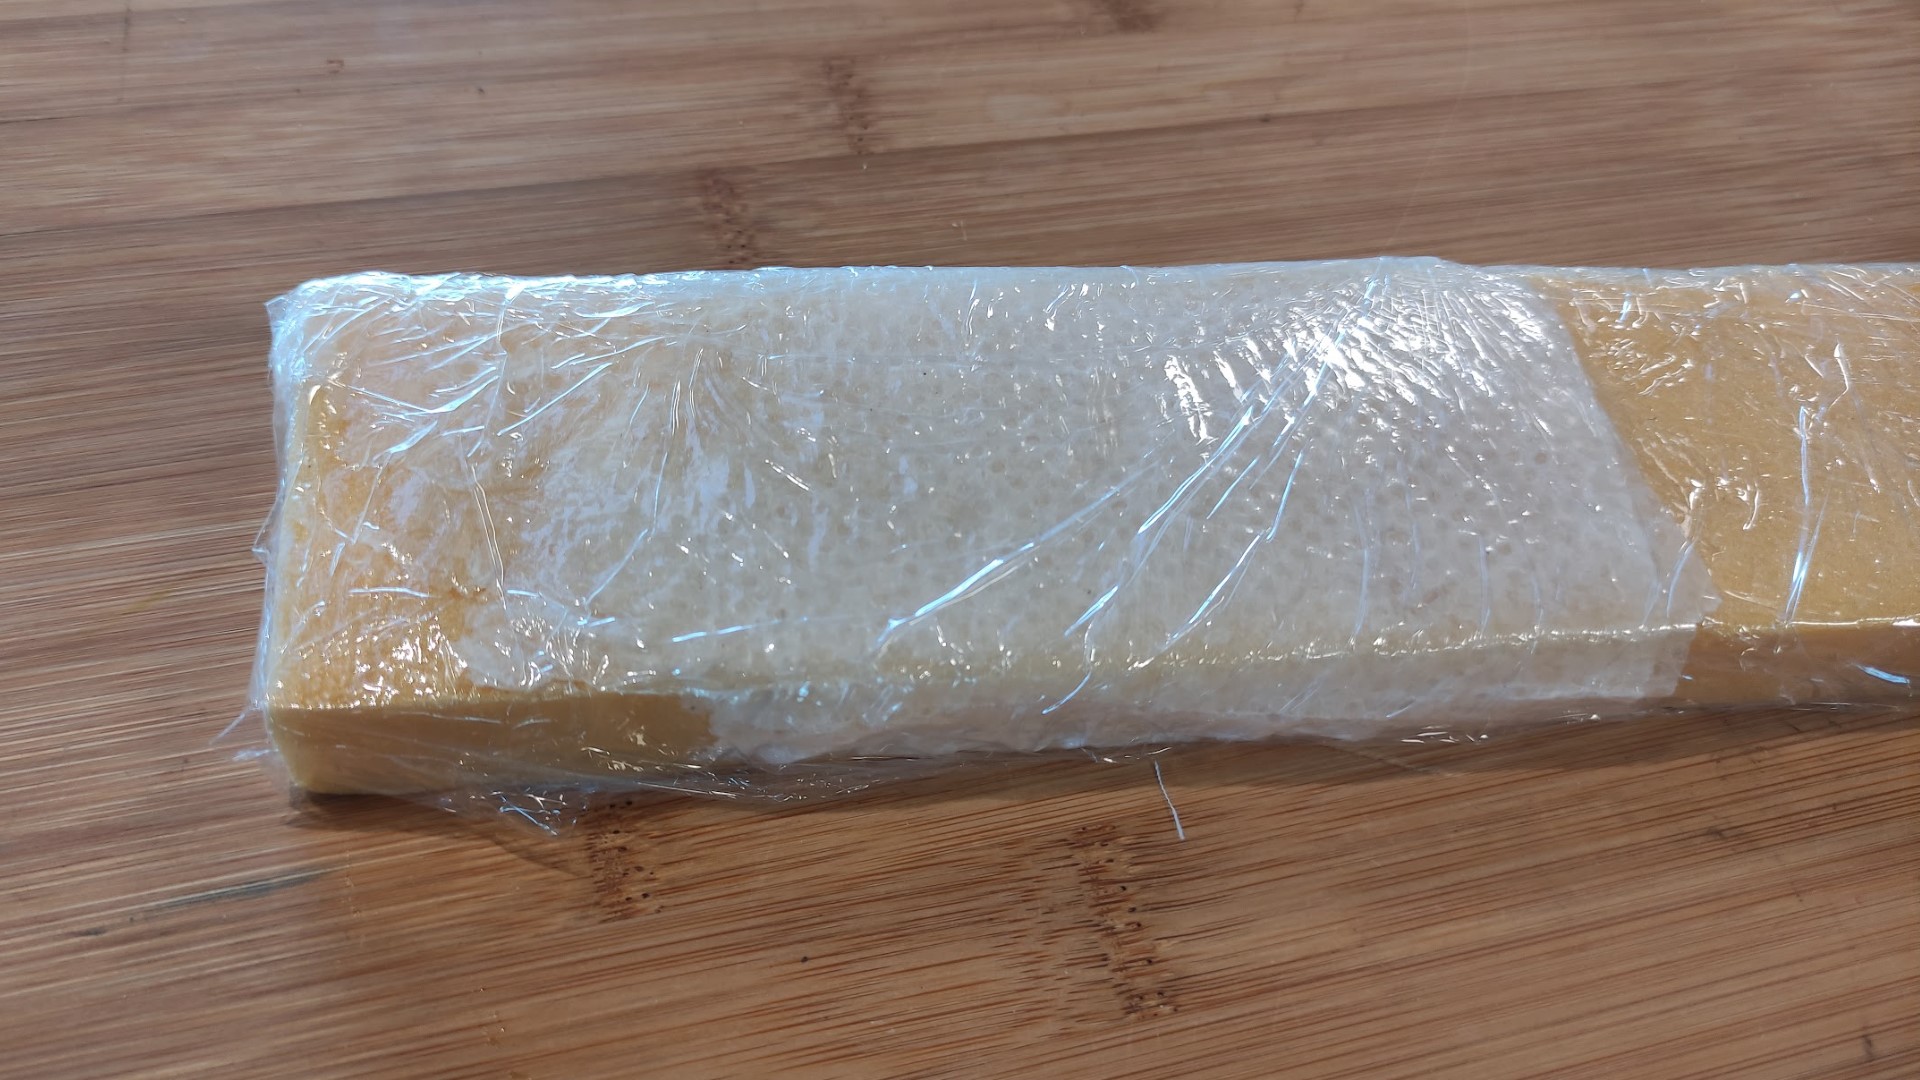
I made a first test using a piece of foam as mold; the composite was made of resin and paper towel, I also used the transparent film to wrap it and keep all together:
-
I left it curing the whole night and came back to it the next day. The mold peeled off when trying to remove the composite from it:
Lection: Use a separating layer.
Bowl
-
I started just cutting and sanding some foam till I got a bowl-shape mold:

-
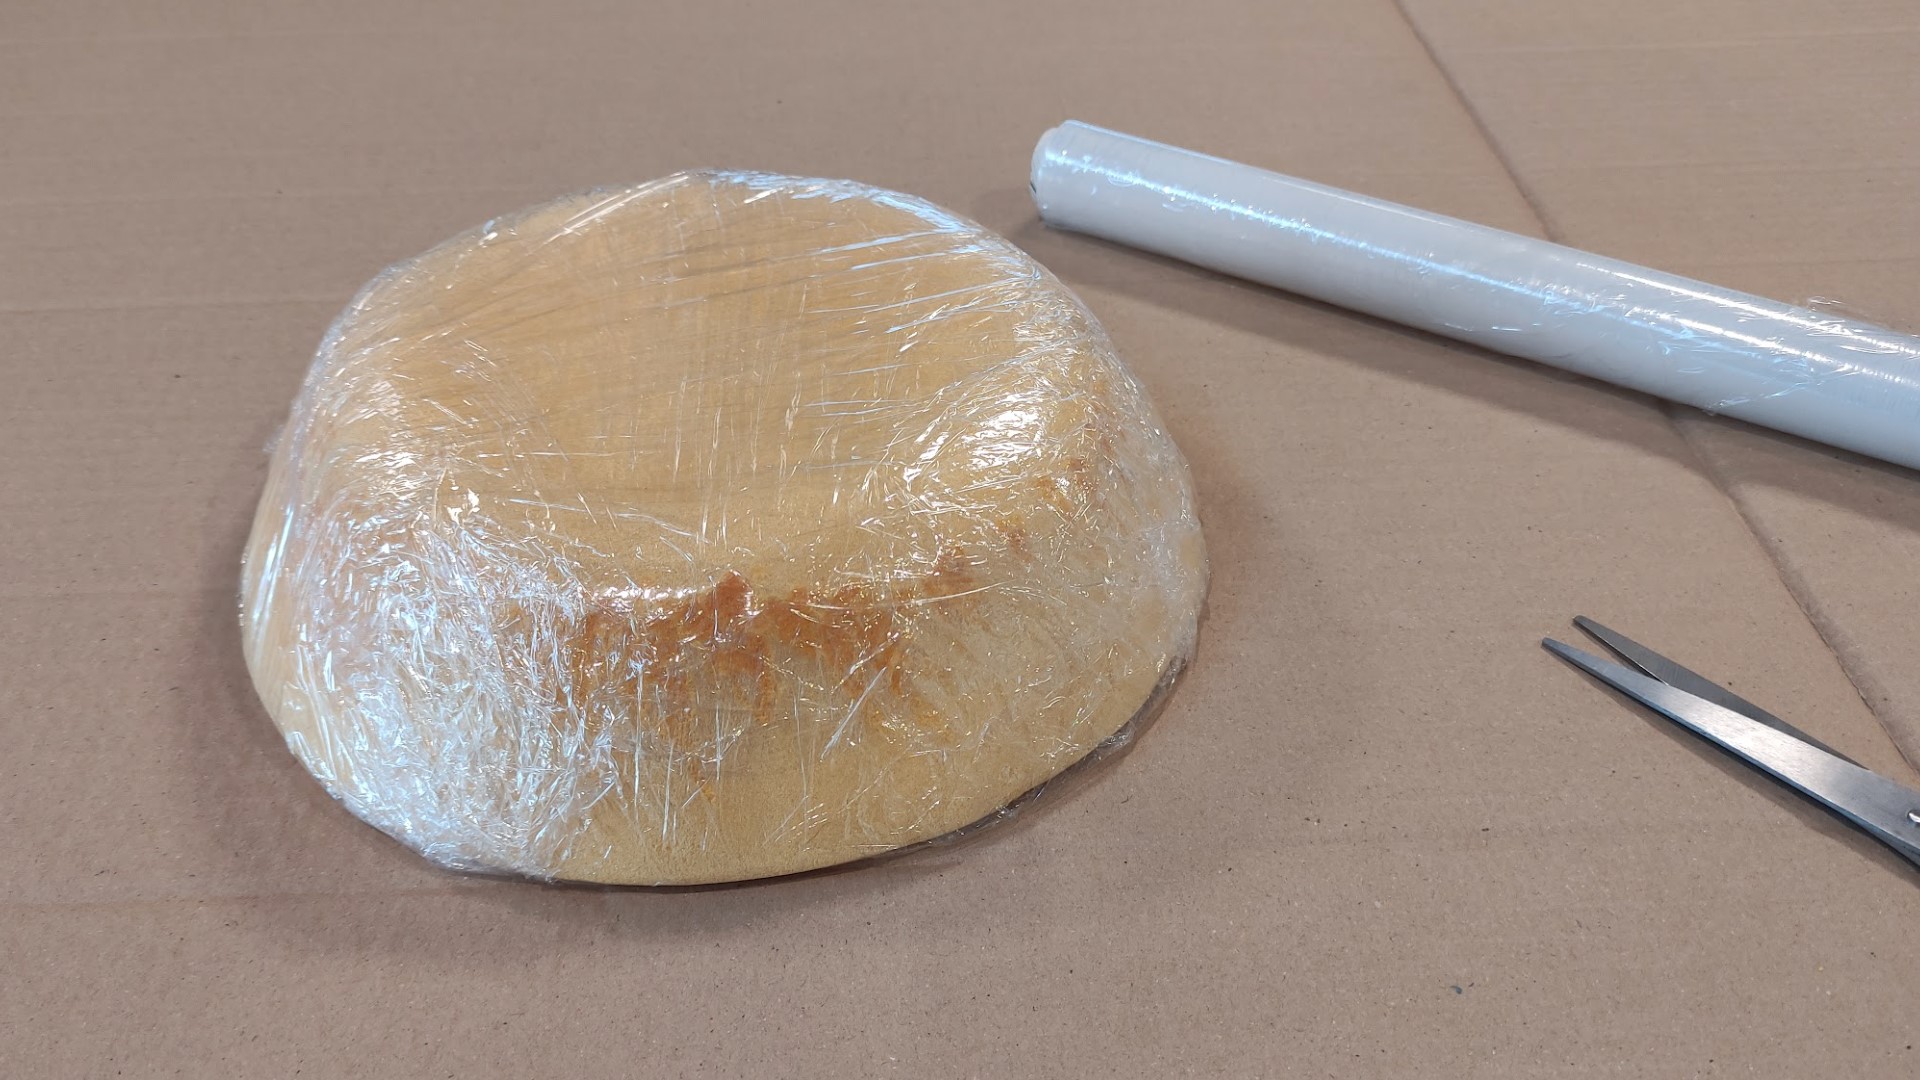
I wrapped the mold with transparent film as separating layer, to avoid the composite to stay glued on it. I put some cardboard to protect the table:
-
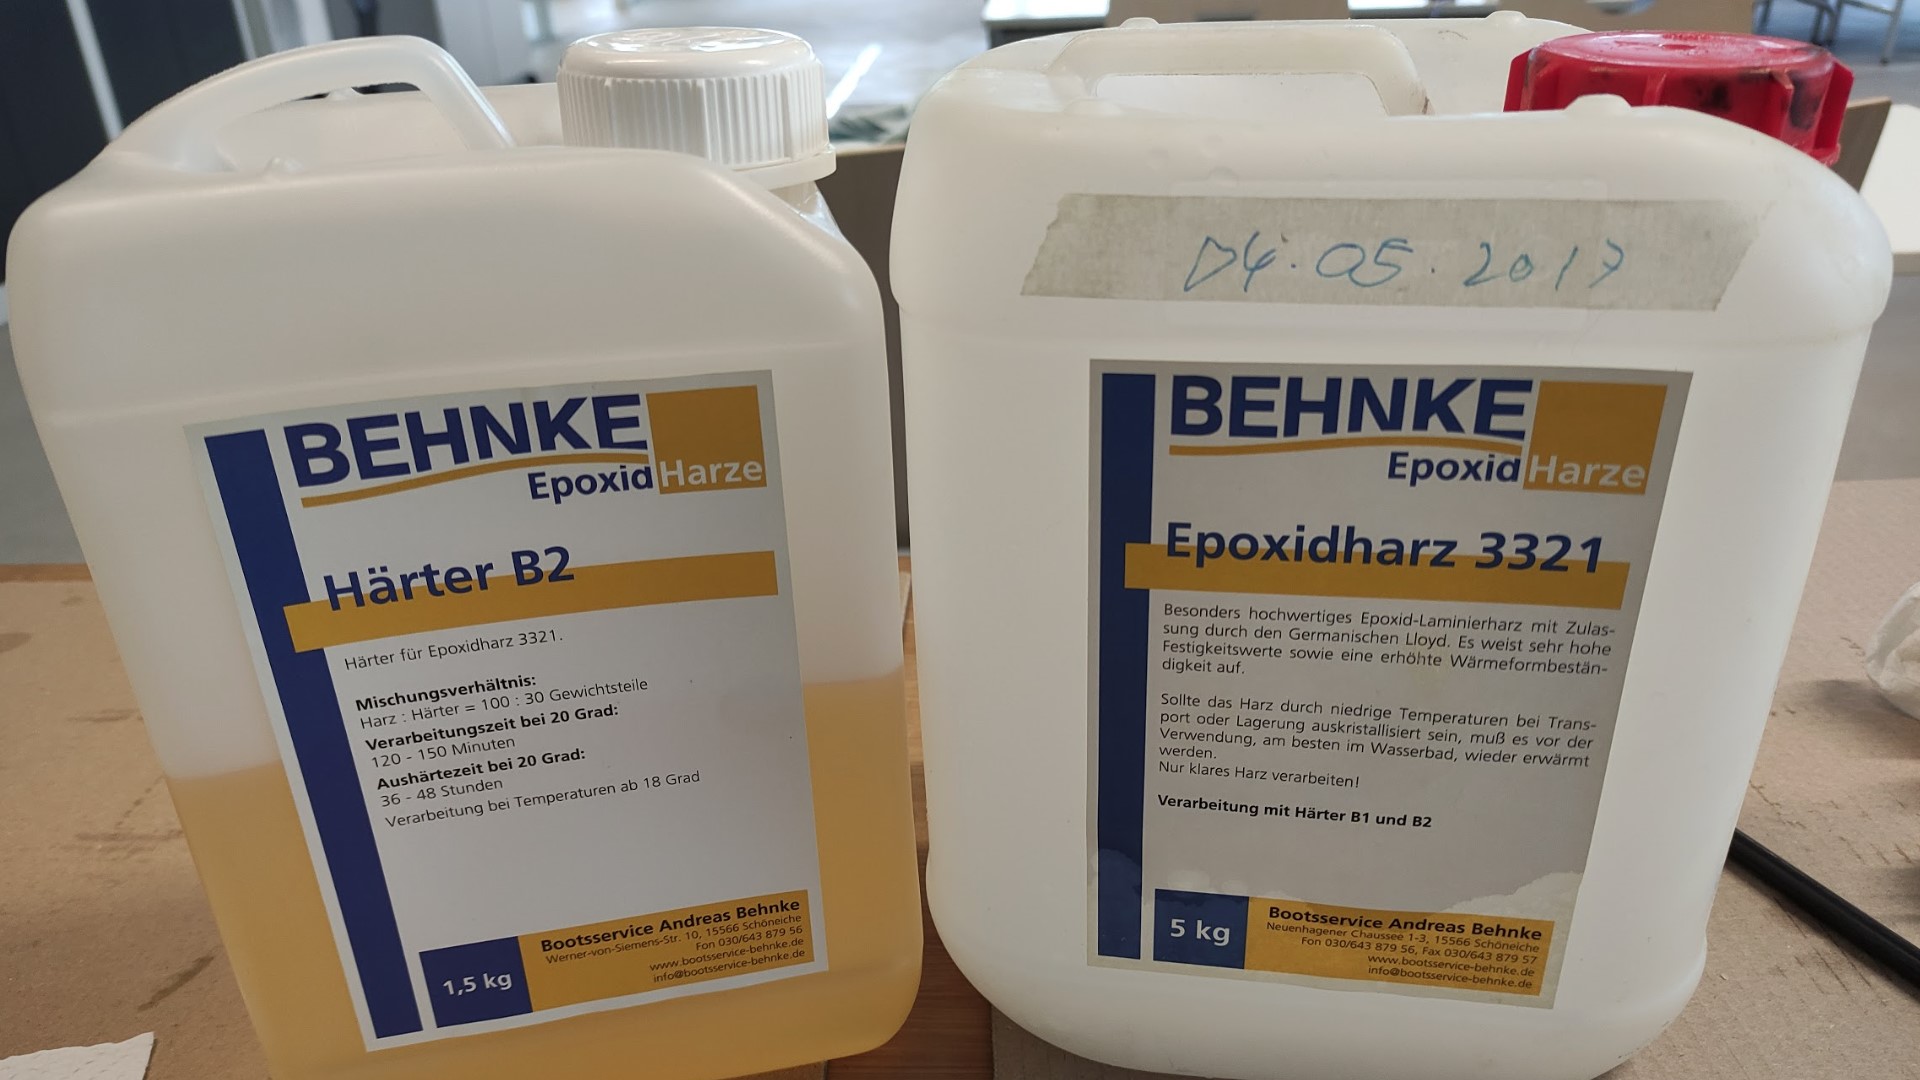
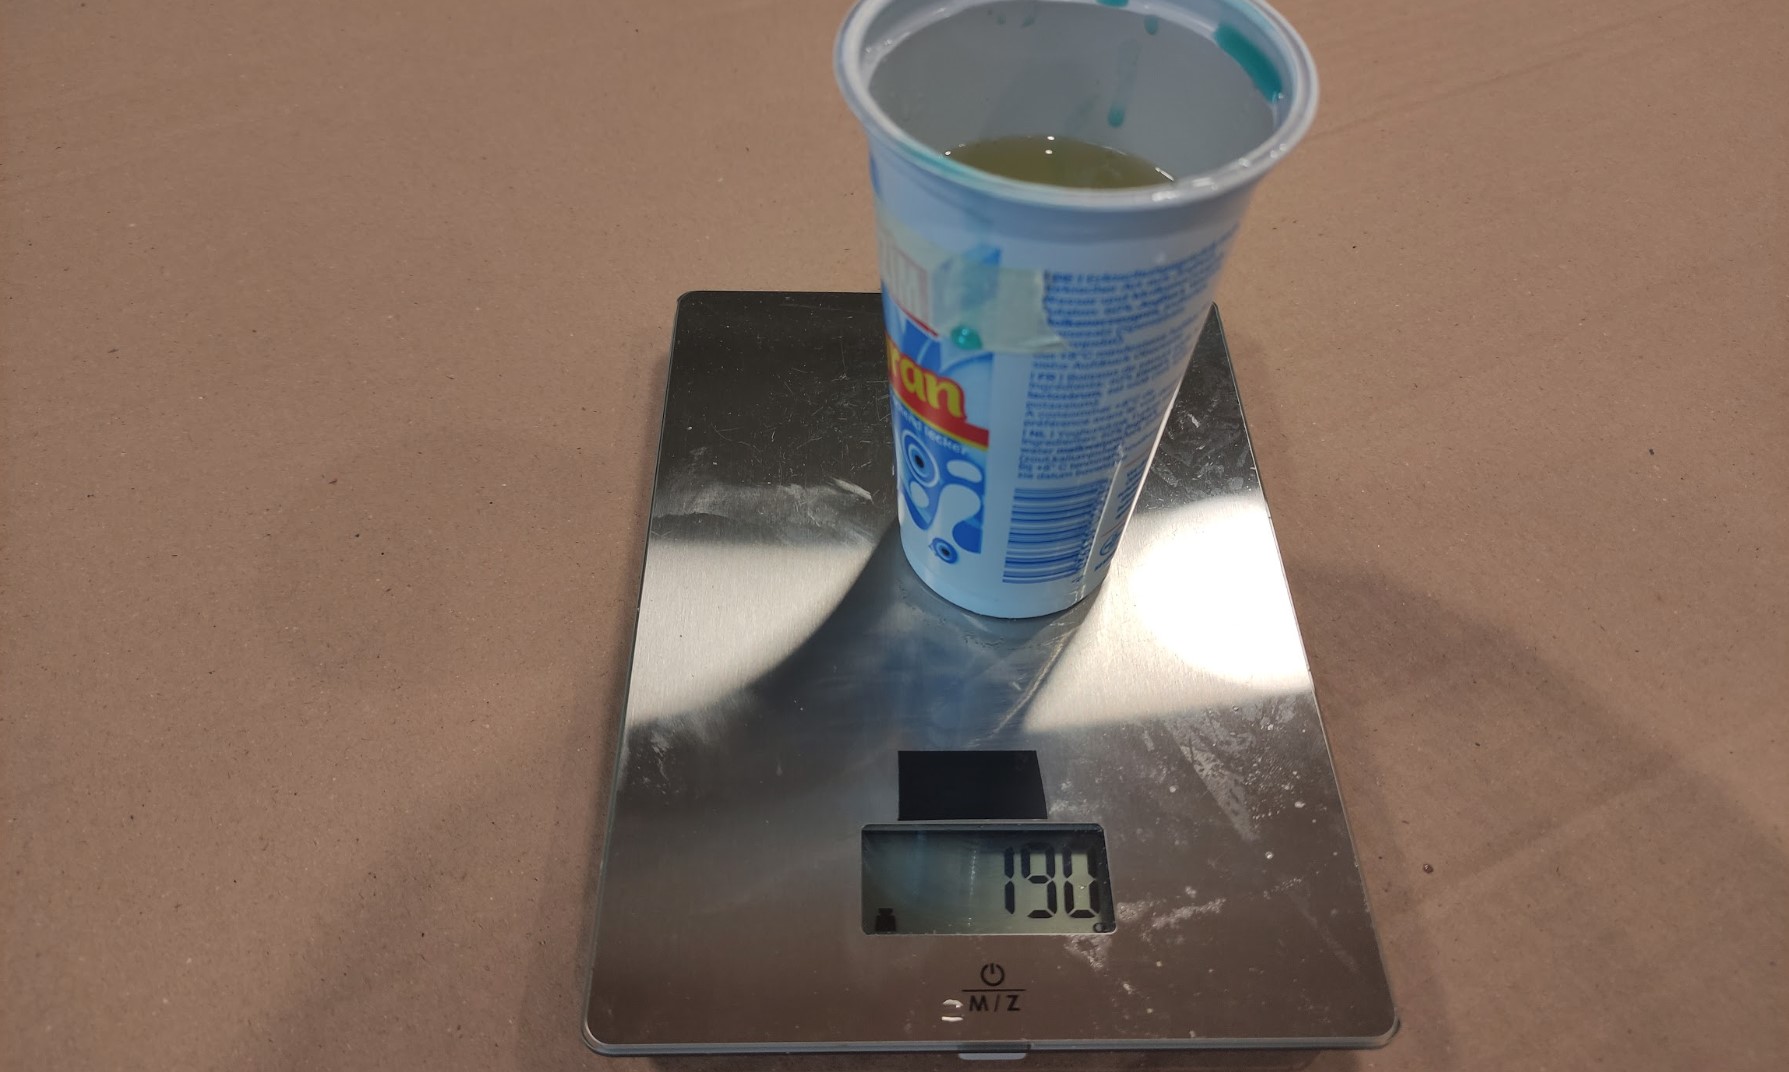
As a solution to the crystallized resin, I put the container in a hot water bath that helped me to make it liquid again; then I made the resin mix (as indicated in the datasheet 100A : 30B). I used an scale to weight it:
-
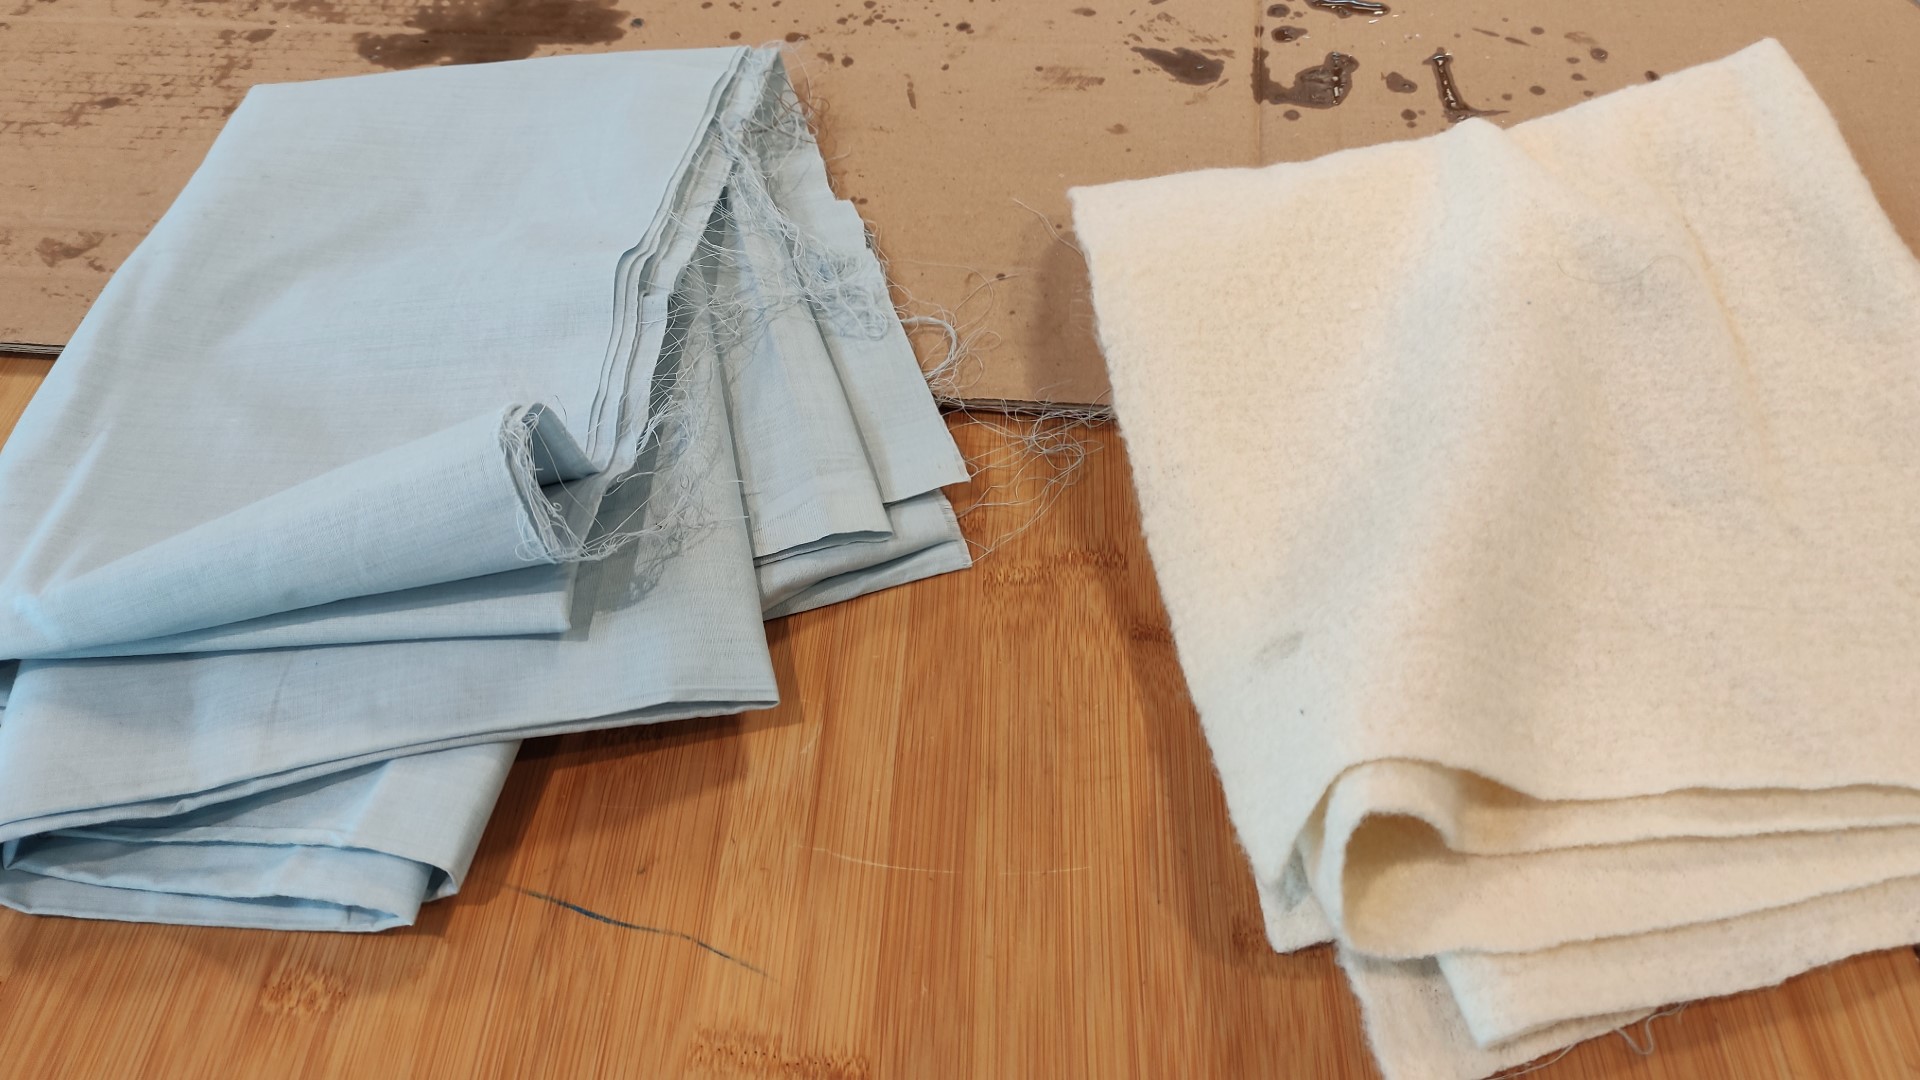
I made the composite with the the fabric that I received, so I just started adding the layers: resin > blue fabric > resin > yellow fabric > resin > [and since I had some extra resin, I added a layer of paper towel] > resin. At the end I also wrapped it with transparent film:
-
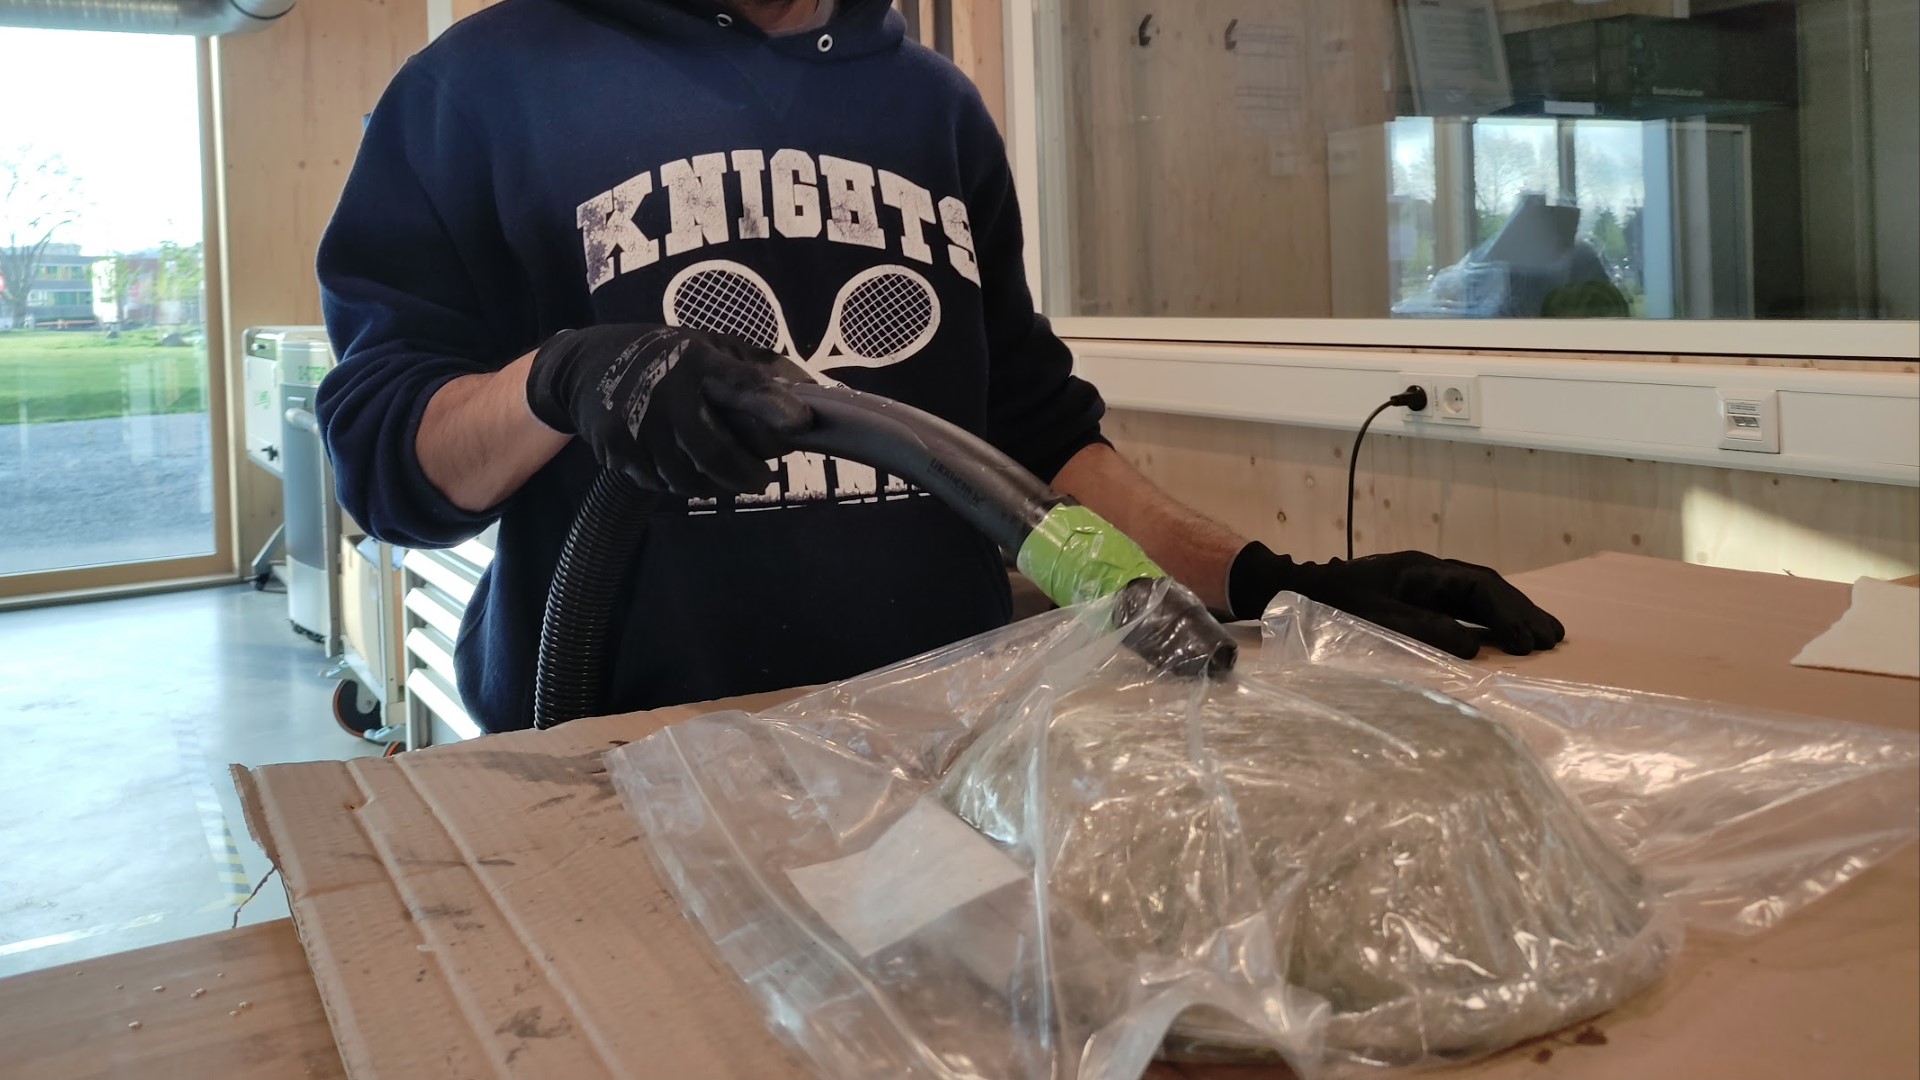
I used a sealable plastic bag (or ziploc) and a vacuum cleaner to make the composite fit the shape of the mold better, but of course it’s not the same as a proper vacuum machine, it won’t hold the vacuum the time needed and it doesn’t have the same vacuum strength:
-
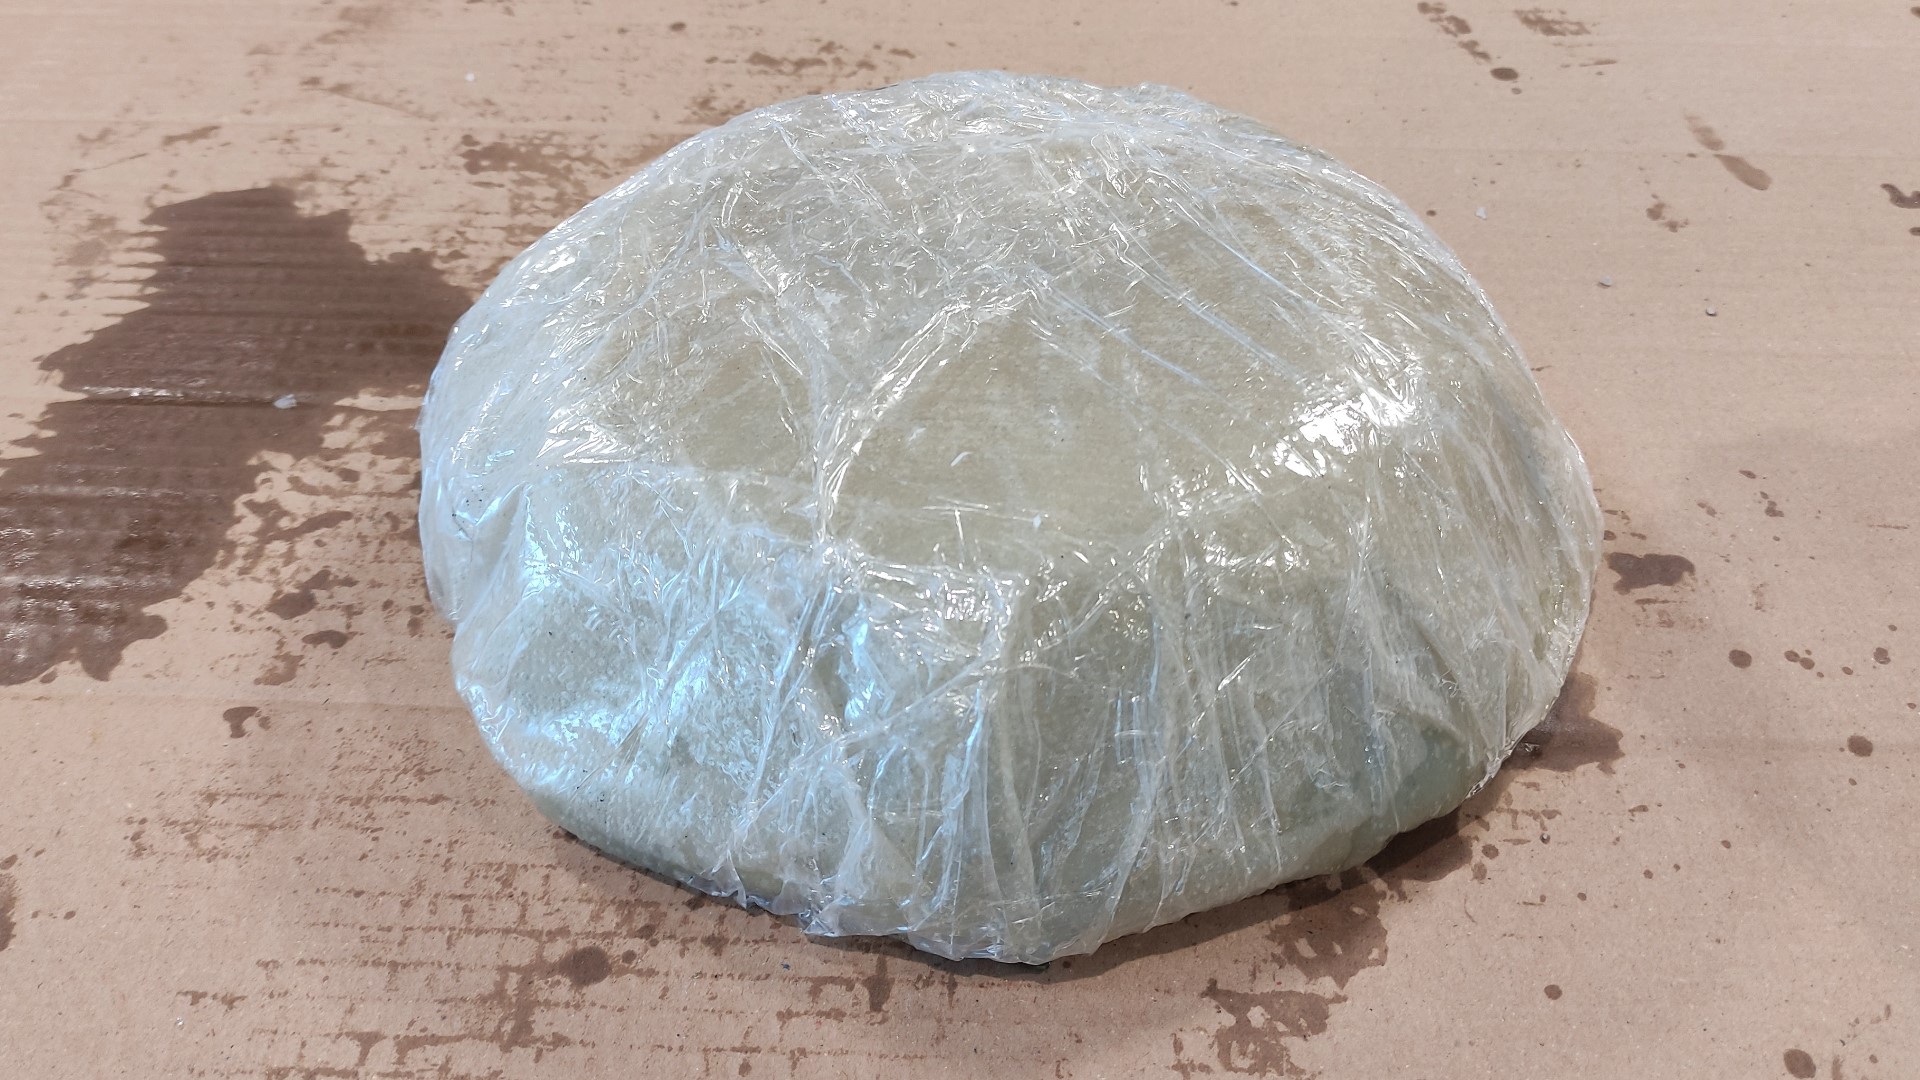
I left it curing the whole night and came back to it the next day, doesn’t look that bad at this point:
-
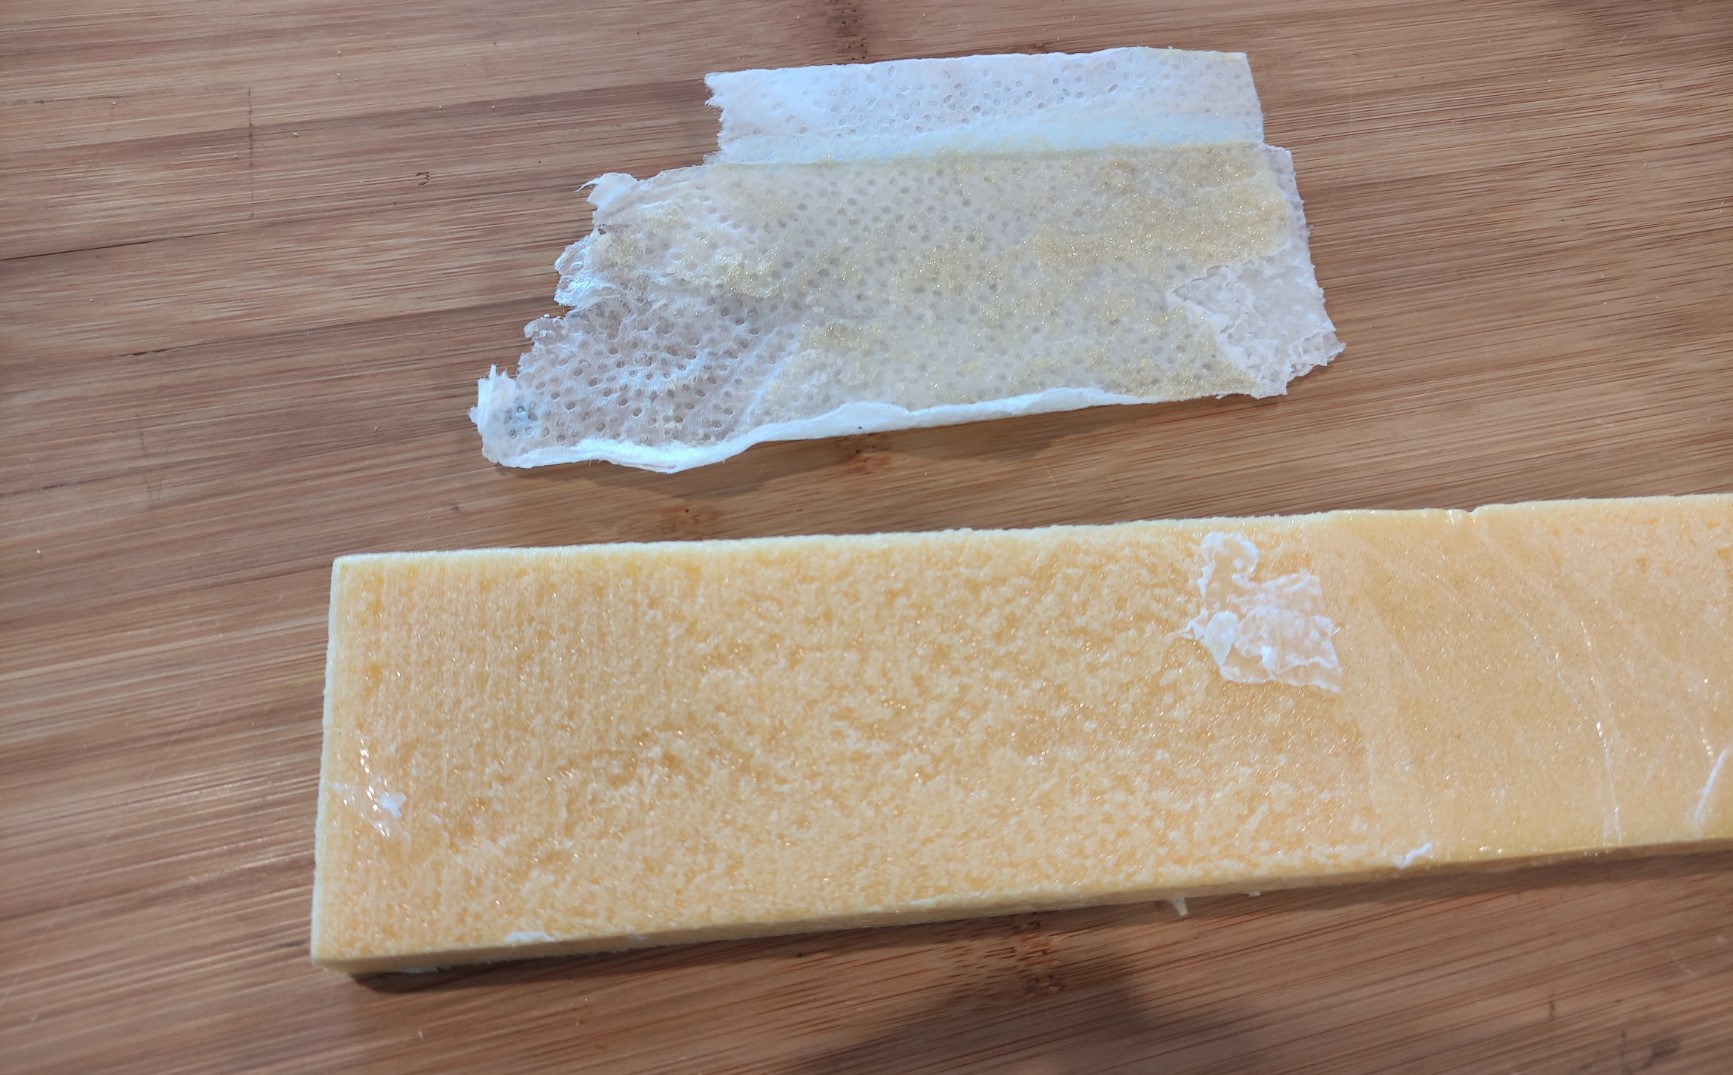
I started unwrapping the film and the paper towel peeled off (what was not supposed to happen):

Performance
This is what it looked like after completely remove the paper towel layer:
The demolding was impossible, because before putting it in the my vacuum bag I folded the rest of the composite under the mold.... that wasn’t a good idea at all 😅, then I made the impact test with the foam mold inside:
The most important aspect to test on a composite is the impact resistance, to make sure that the resulting piece is strong enough:
Vacuum forming
First attempt
Mold
As I have been a member of the Green FabLab’s work team, the piece I wanted to work on was its logo:

Image taken from HSRW website
-
I modeled the logo as a negative mold in Fusion 360:
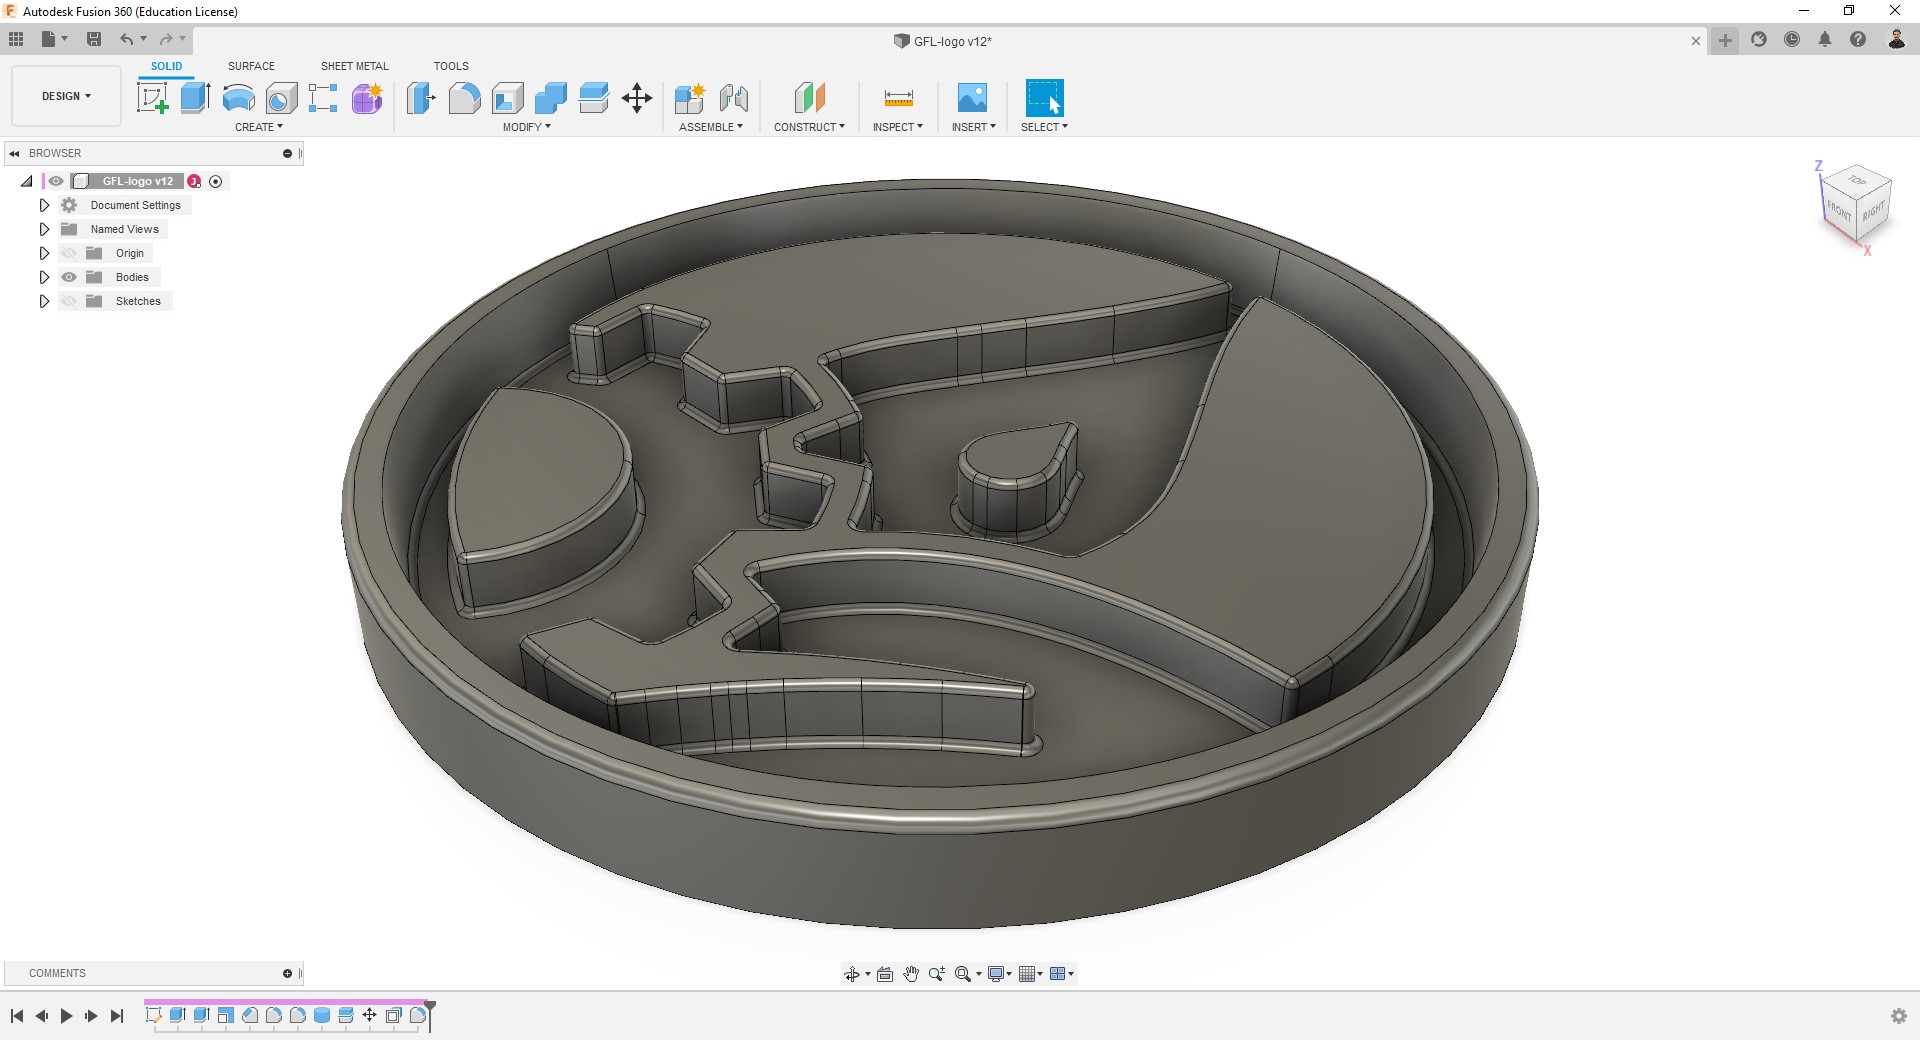
-
I made the g-code using the Manufacture workspace on Fusion 360 using 3D-Adaptive clearing and 3D-Parallel strategies/toolpaths:
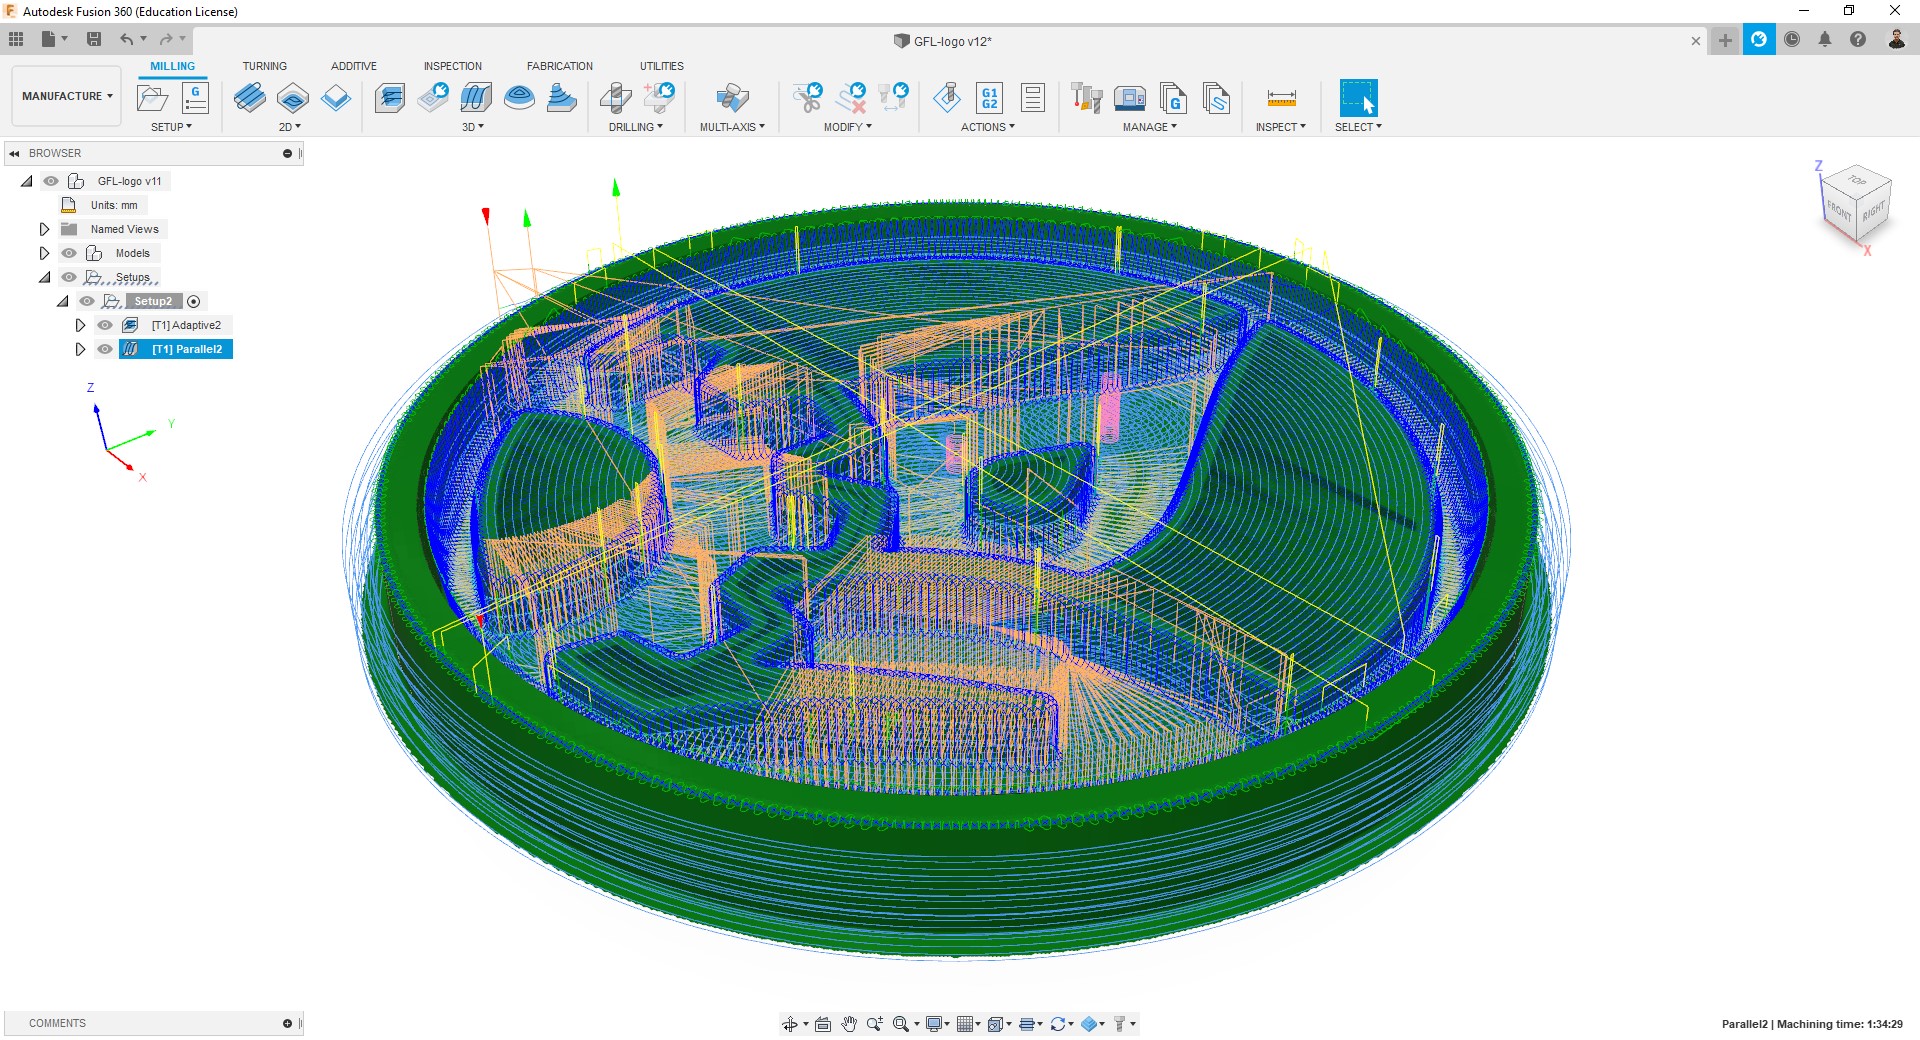
Further details on How to do it in the G-code generation section of my Molding and casting assignment.
-
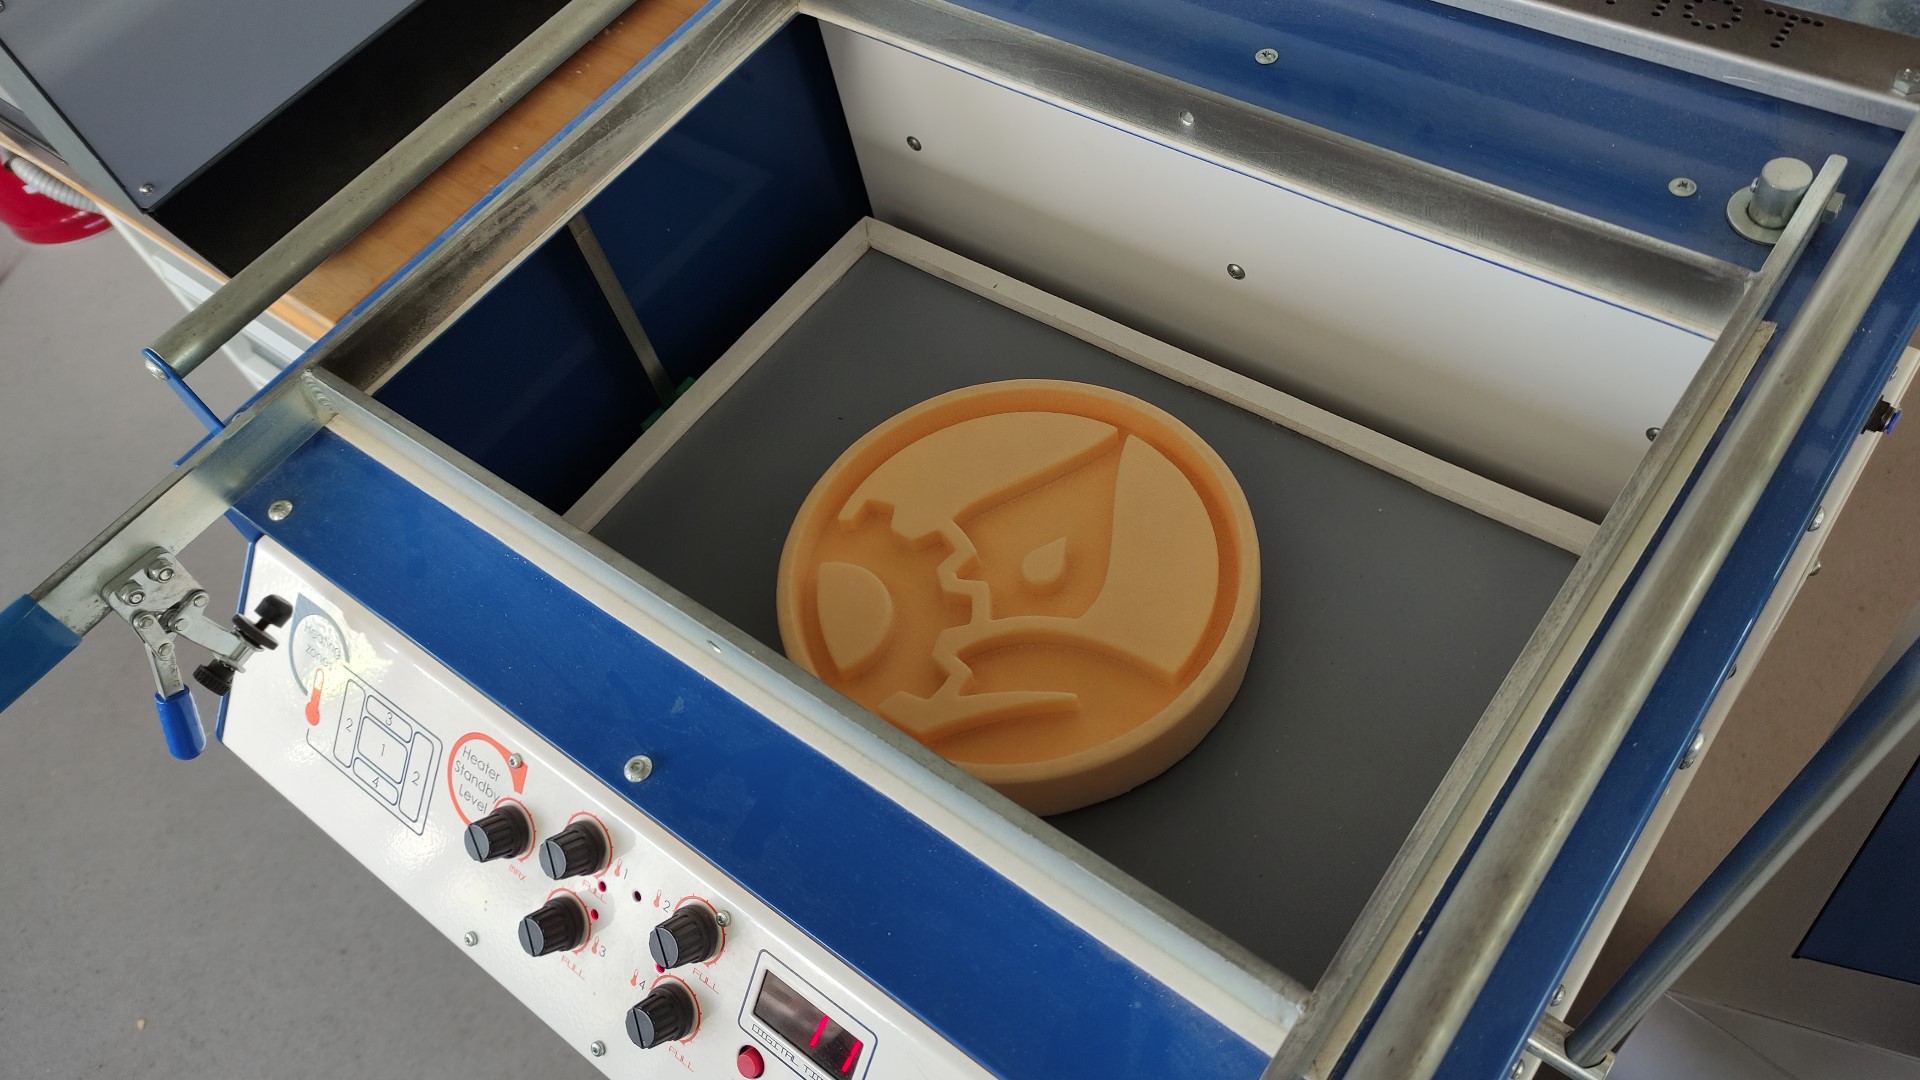
I have used a piece of foam and milled it with a Roland MDX-40:
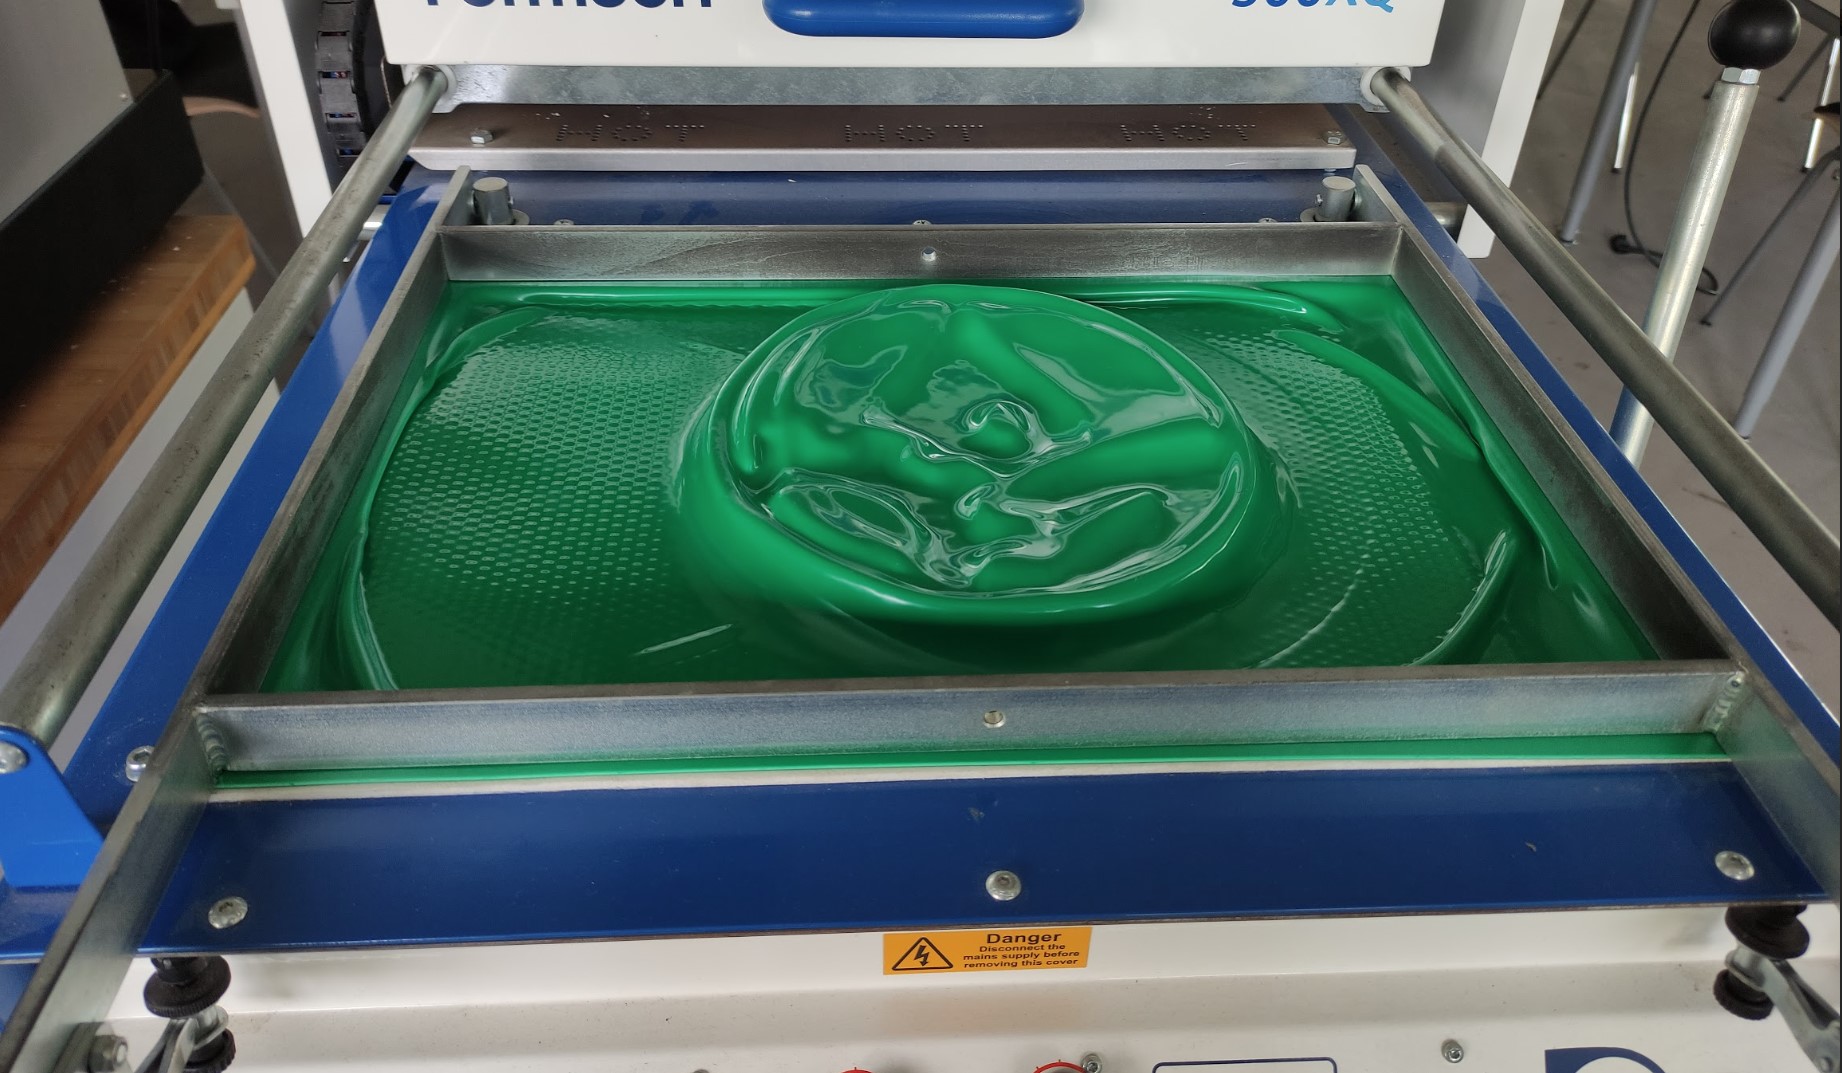
Making the piece
The machine that we have in the FabLab the Formech 300XQ Desktop Vacuum Forming Machine.
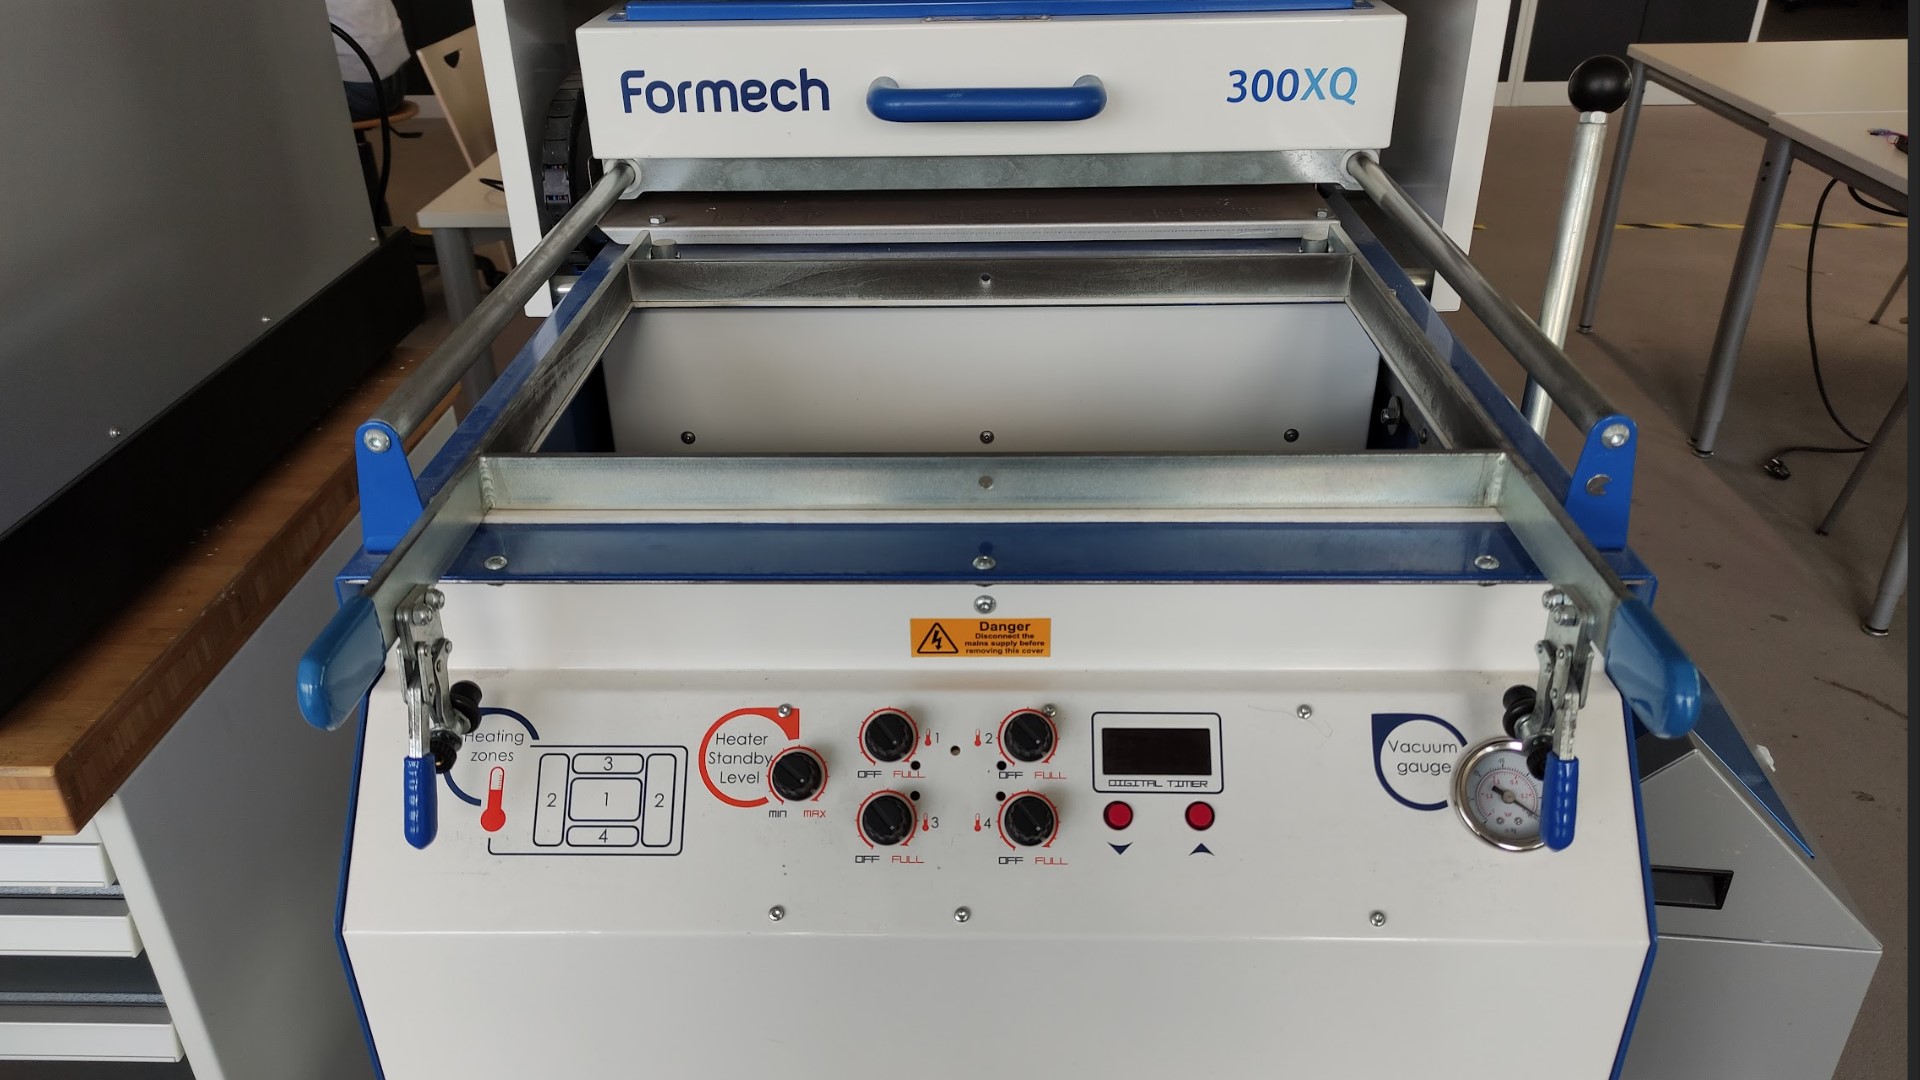
-
I started by turning on the machine and activating the heating zones. Then I put the mold on the forming are:
-
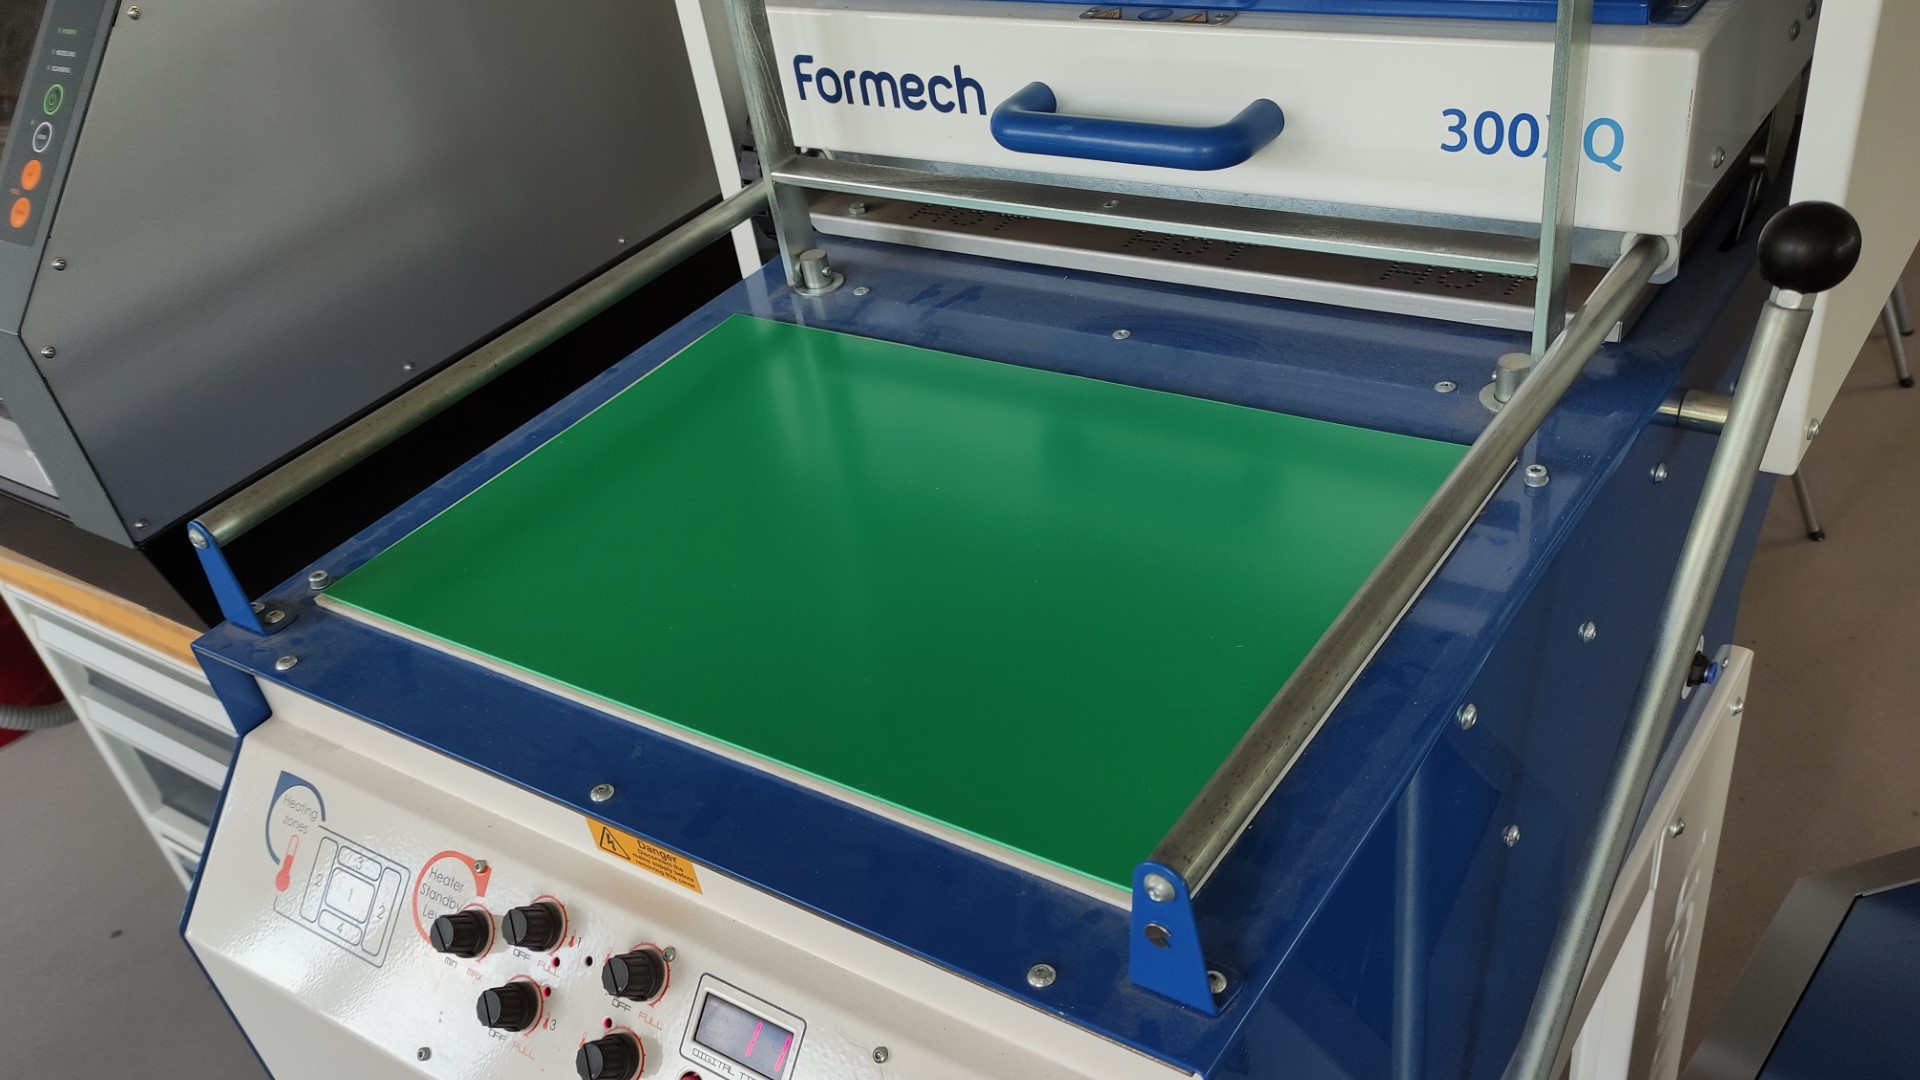
I put the HIP (high impact polystyrene) 1.5mm sheet on:
-
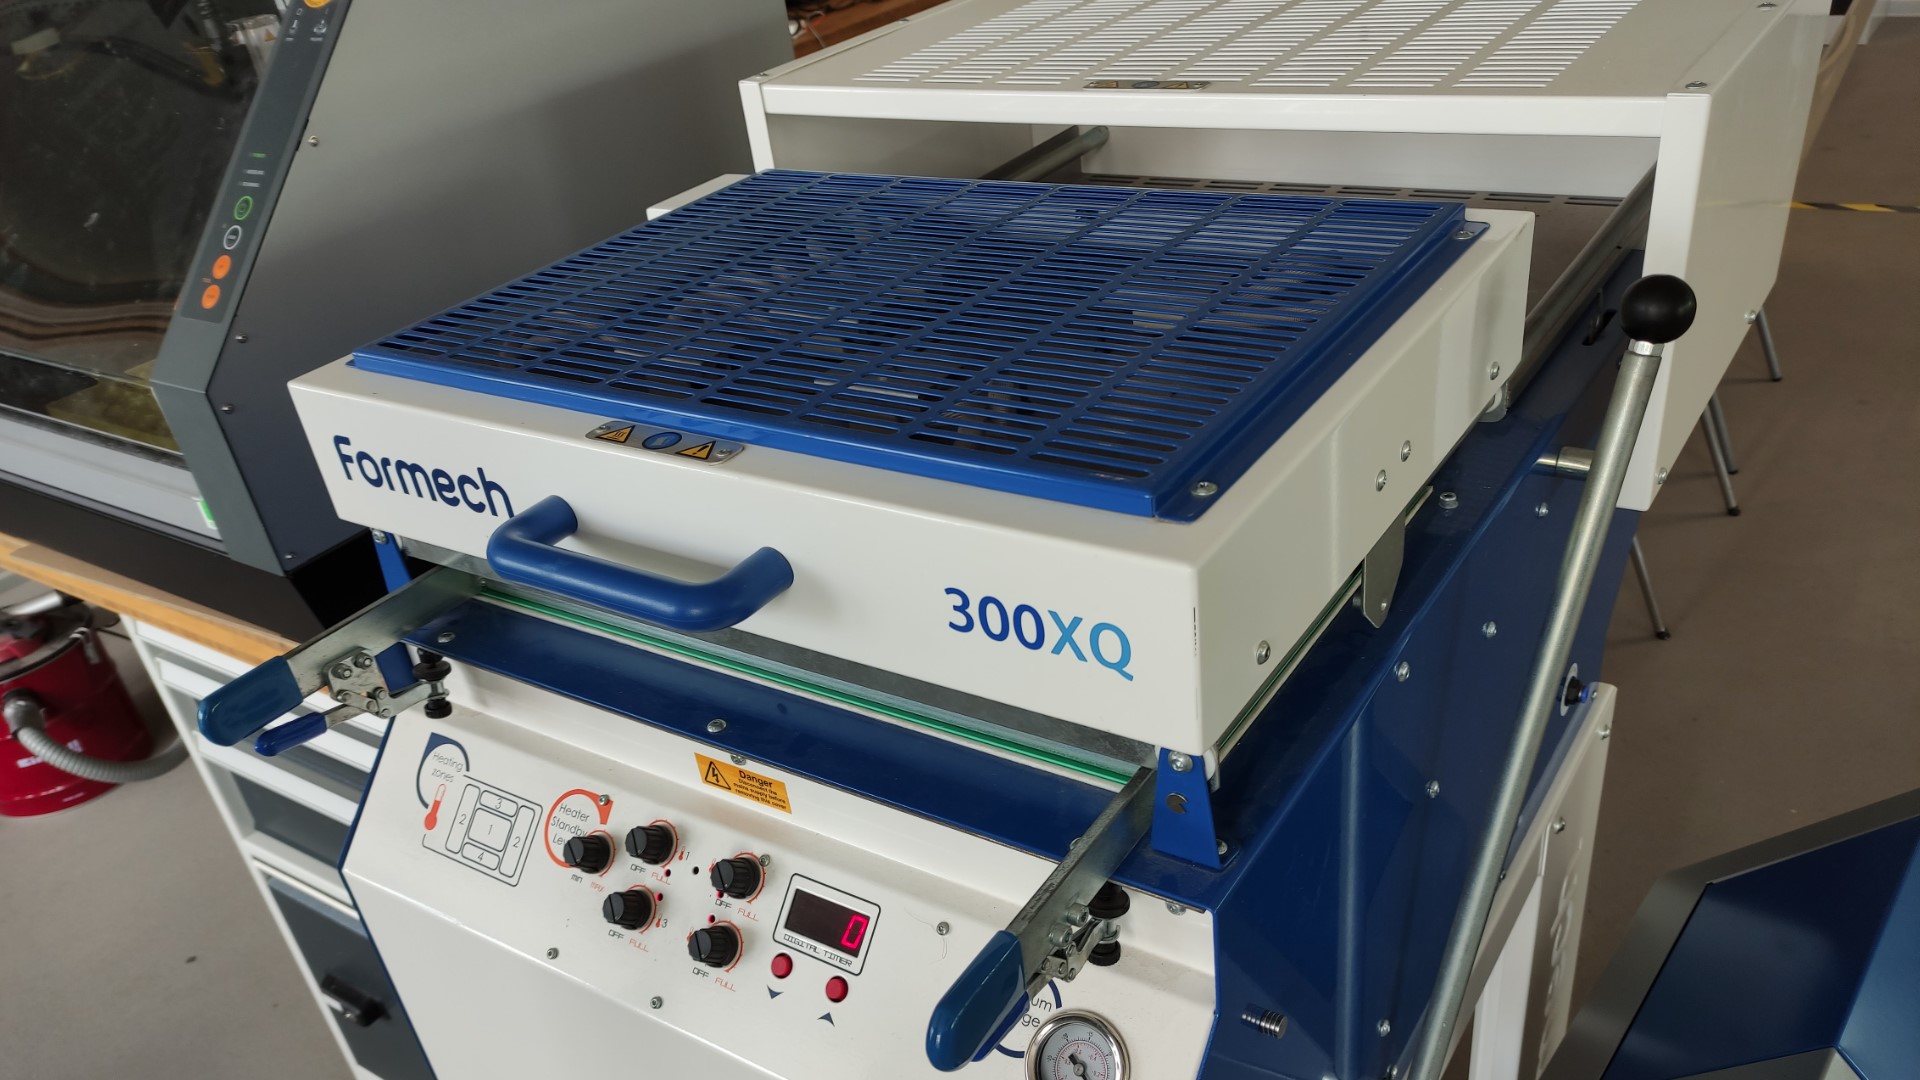
I pulled the heaters forward and waited for 60 secs (the recommended time for this material using this machine):
-
I pushed the heaters back, turned up the forming table, turned on the vacuum.
- A couple of seconds later I turned off the vacuum and turned down the forming table:
 [I’ll add a new photo here]
Result:
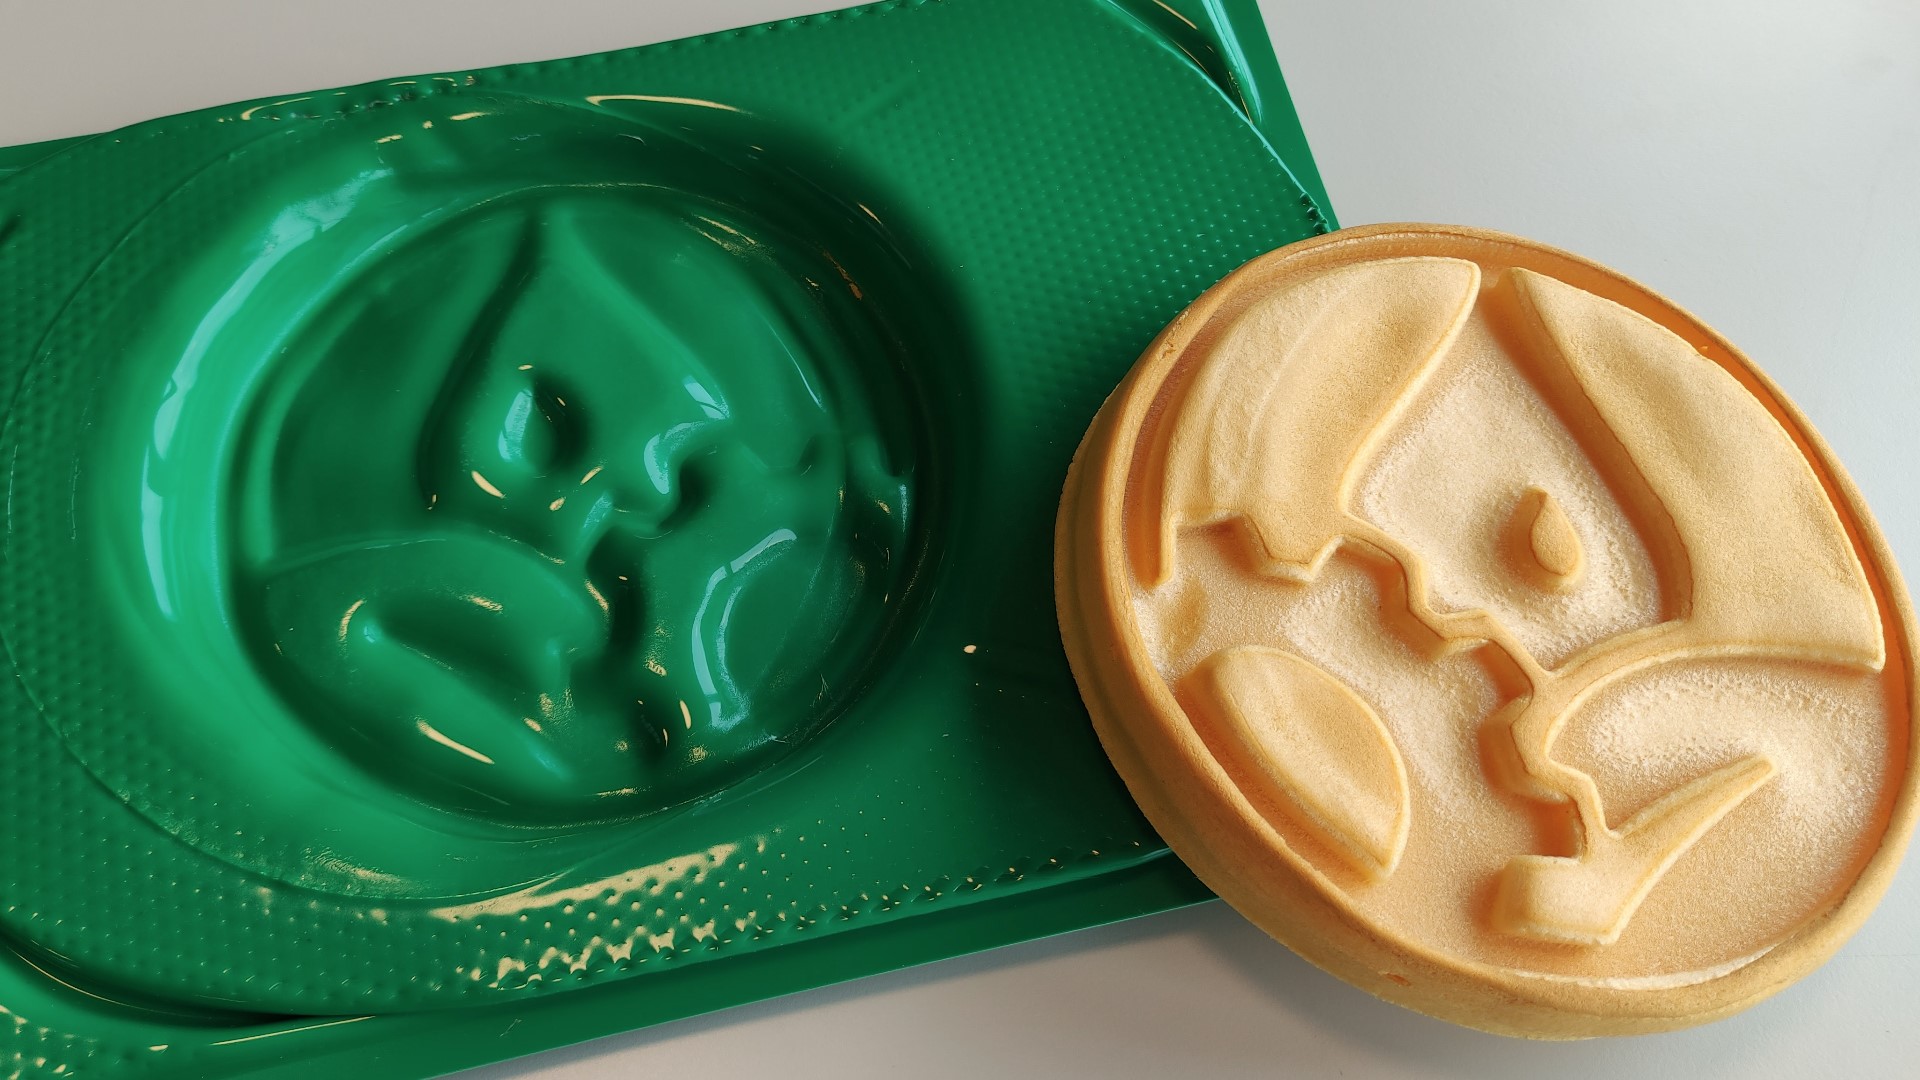
The foam mold melt during forming 😅
Hypothesis:
- Forming temperature was exceeded, this can be confirmed by checking the forming temperature in the material datasheet and using a laser temperature sensor.
- A possibility that my instructor told me: The foam I used was very low density for this application, I needed a high density foam.
Second attempt
Mold
This time I have laser cut the mold in wooden materials.
I cut a circular plate and the features separately and, eventually, I glued them together.
Making the piece
- I followed the same steps as in the first attempt and this is what it looked like:
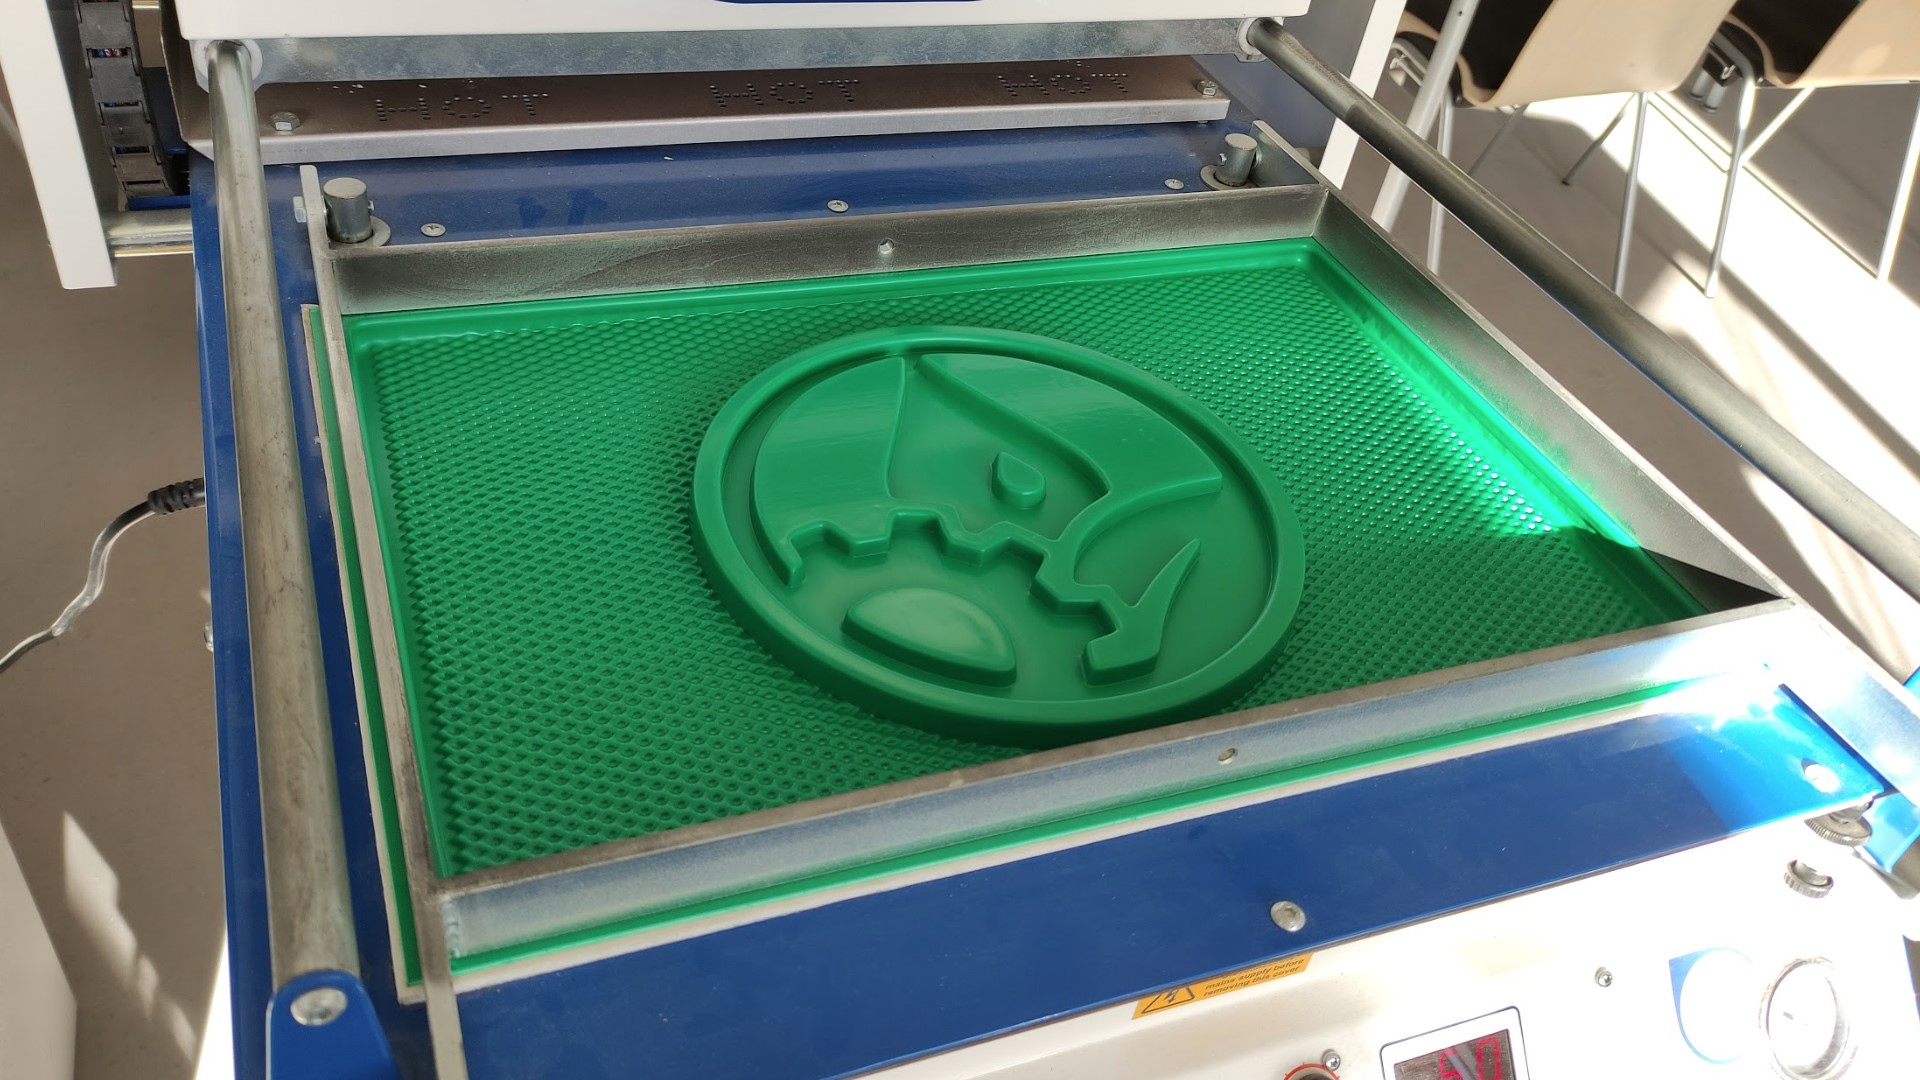
Very nice and detailed I should say 😄
Result:
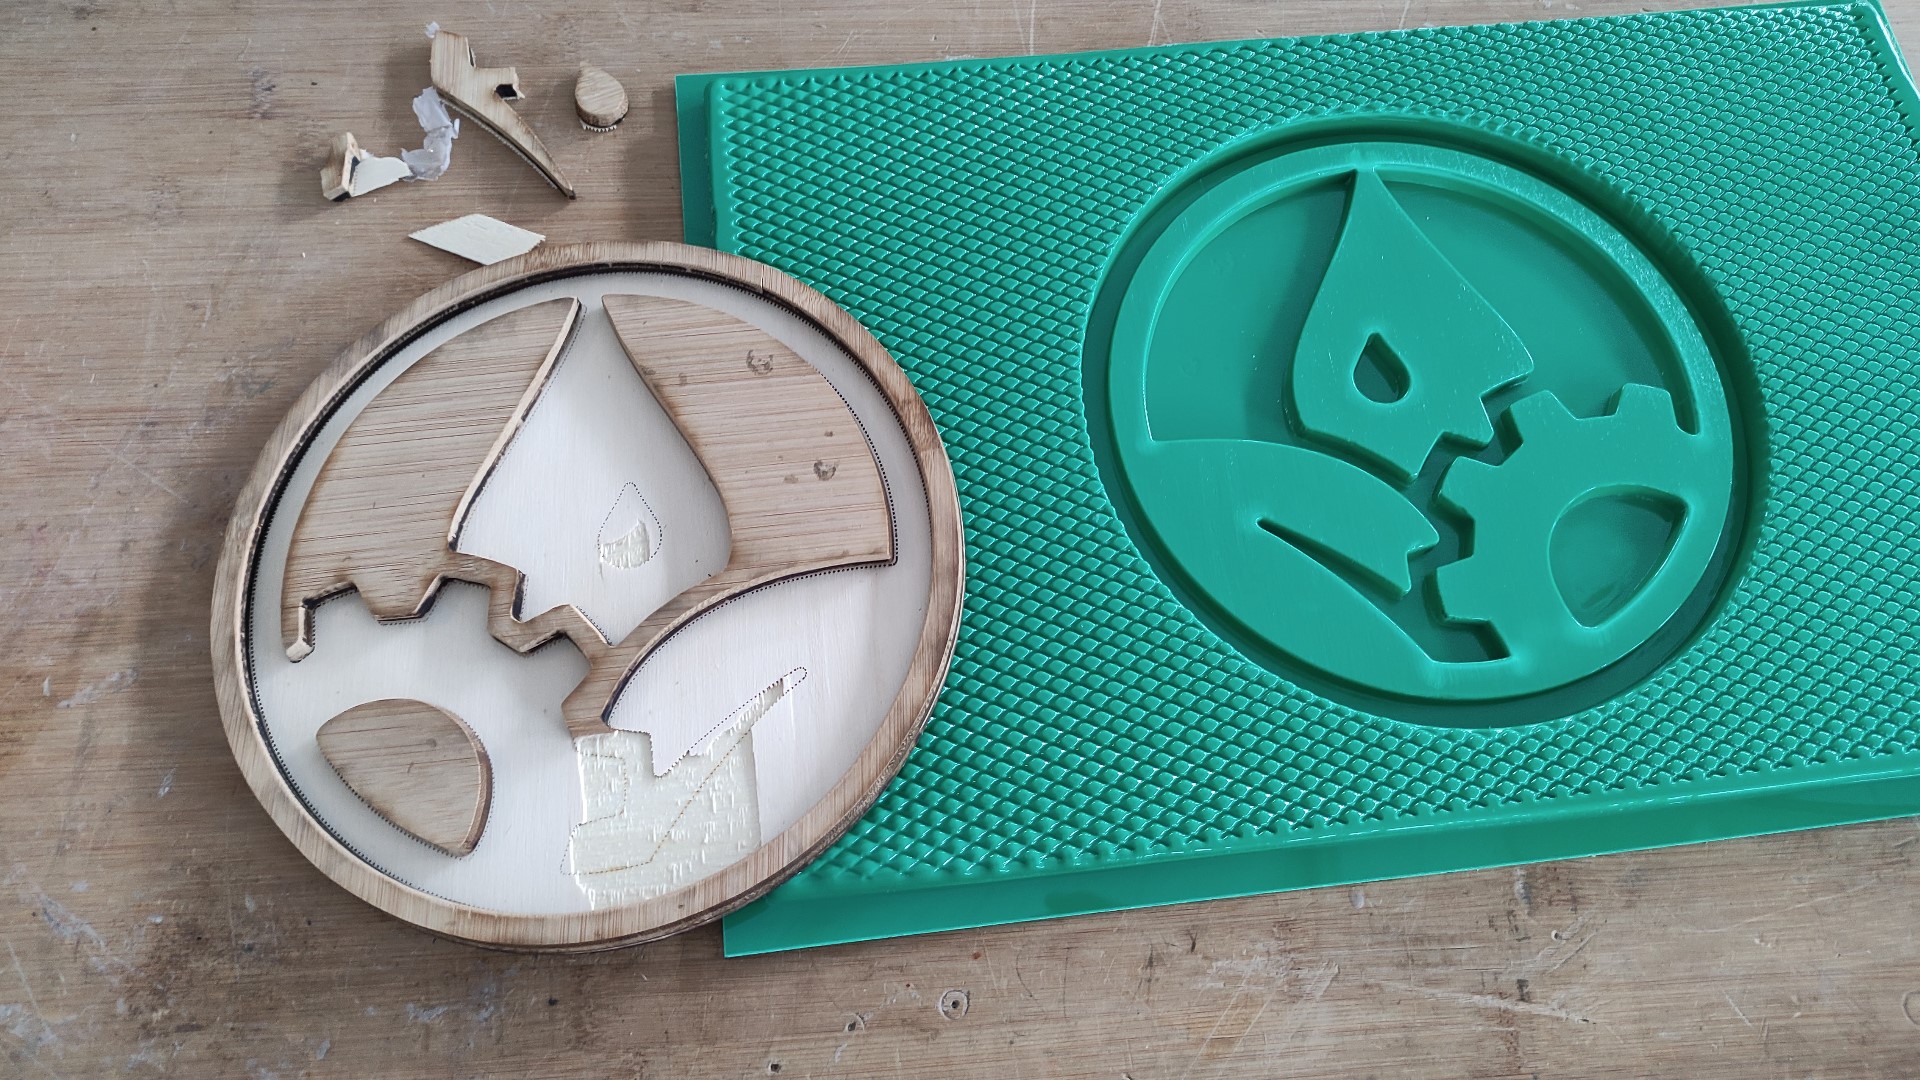
The wooden mold broke during demolding 😅
My idea was getting the wooden mold completely useful at the end, so I can use it to try Composite again, but it got stuck in the plastic piece.
Hypothesis: I would say that it was my mistake when choosing the material, I took two different materials and used a very weak piece for the base.
Carbon fiber Composite
I have already had some experience in fabric composite, described in the How [not to] Composite section.
One week later I got more access to the FabLab and had my instructor with me 😄, then since I already tried some composite with fabrics, this time I wanted to try something different so I went for carbon fiber.
Even when I got more access to the FabLab, the time was still limited so I didn’t make any test piece this time.
Mold
I have used the result piece from my Vacuum forming practice.
Making the composite
-
I started by cutting two square pieces of carbon fiber, but ☝🏼 a previous step is putting tape on the cutting lines to avoid it to unravel:
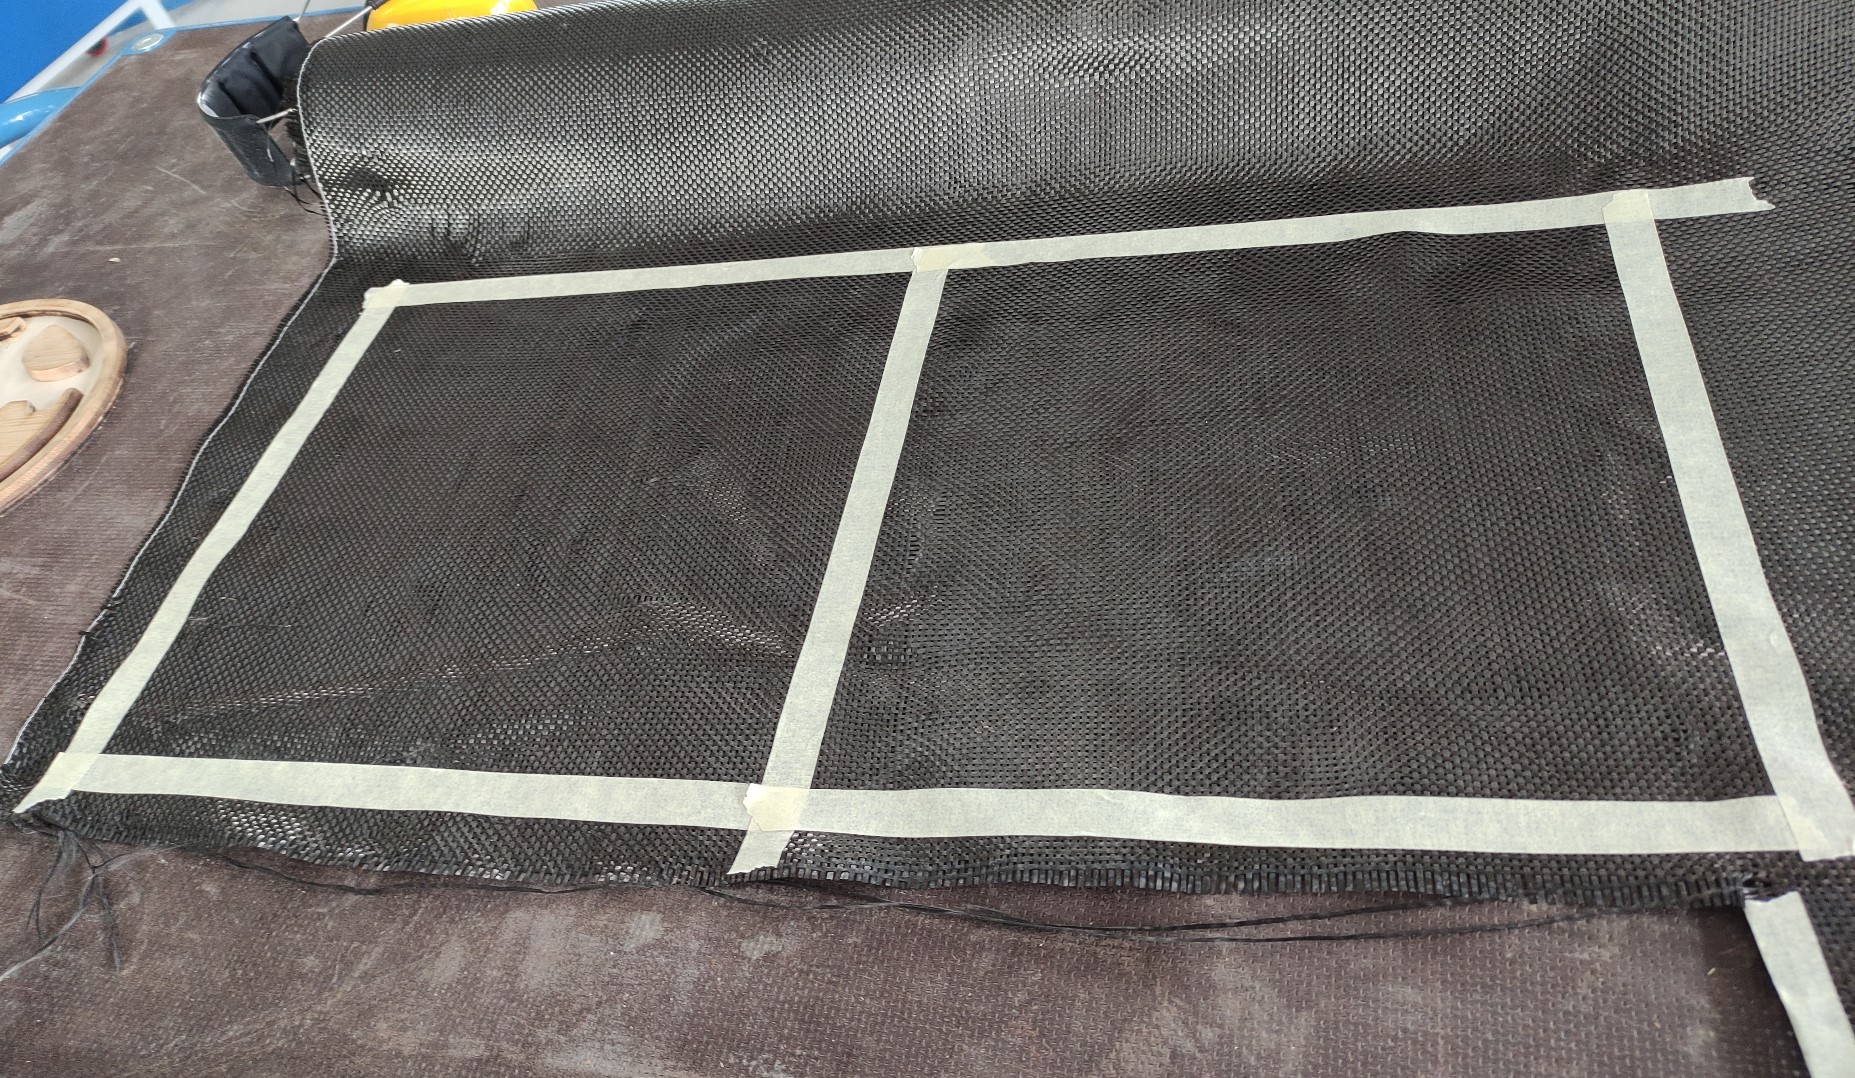
-
We applied a release agent spray on the mold.
-
I prepared the resin mix and started adding the layers: Carbon Fiber > Resin > Carbon Fiber > Resin:
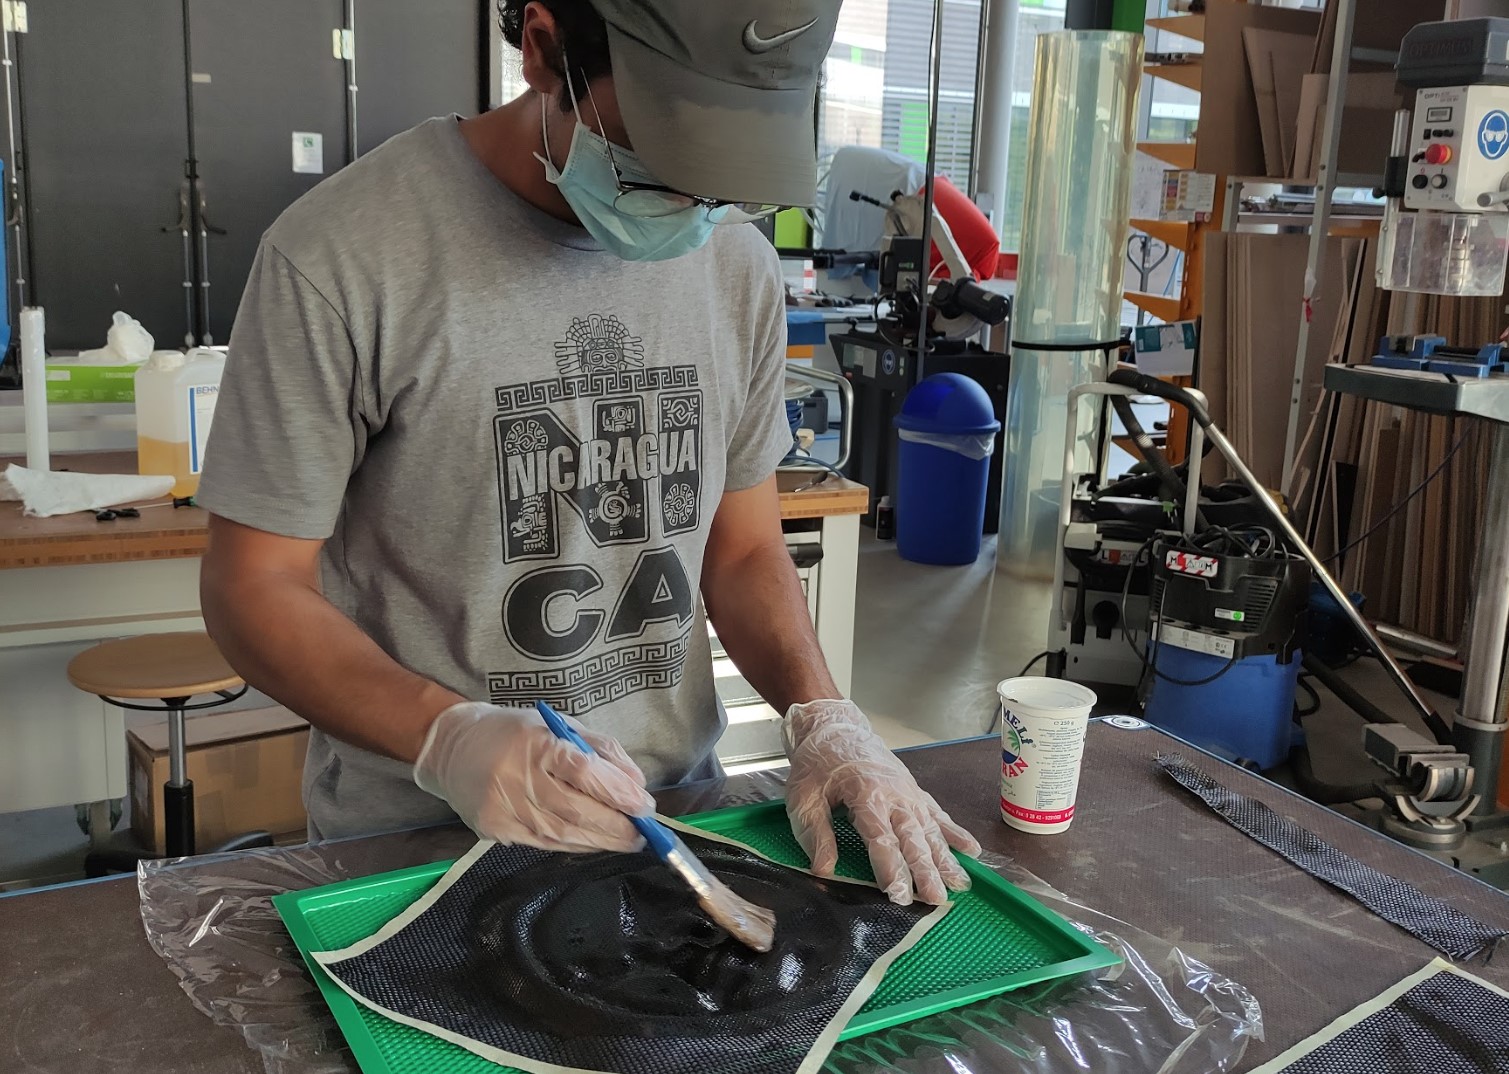
The second carbon fiber layer was rotated at 45 degrees.
-
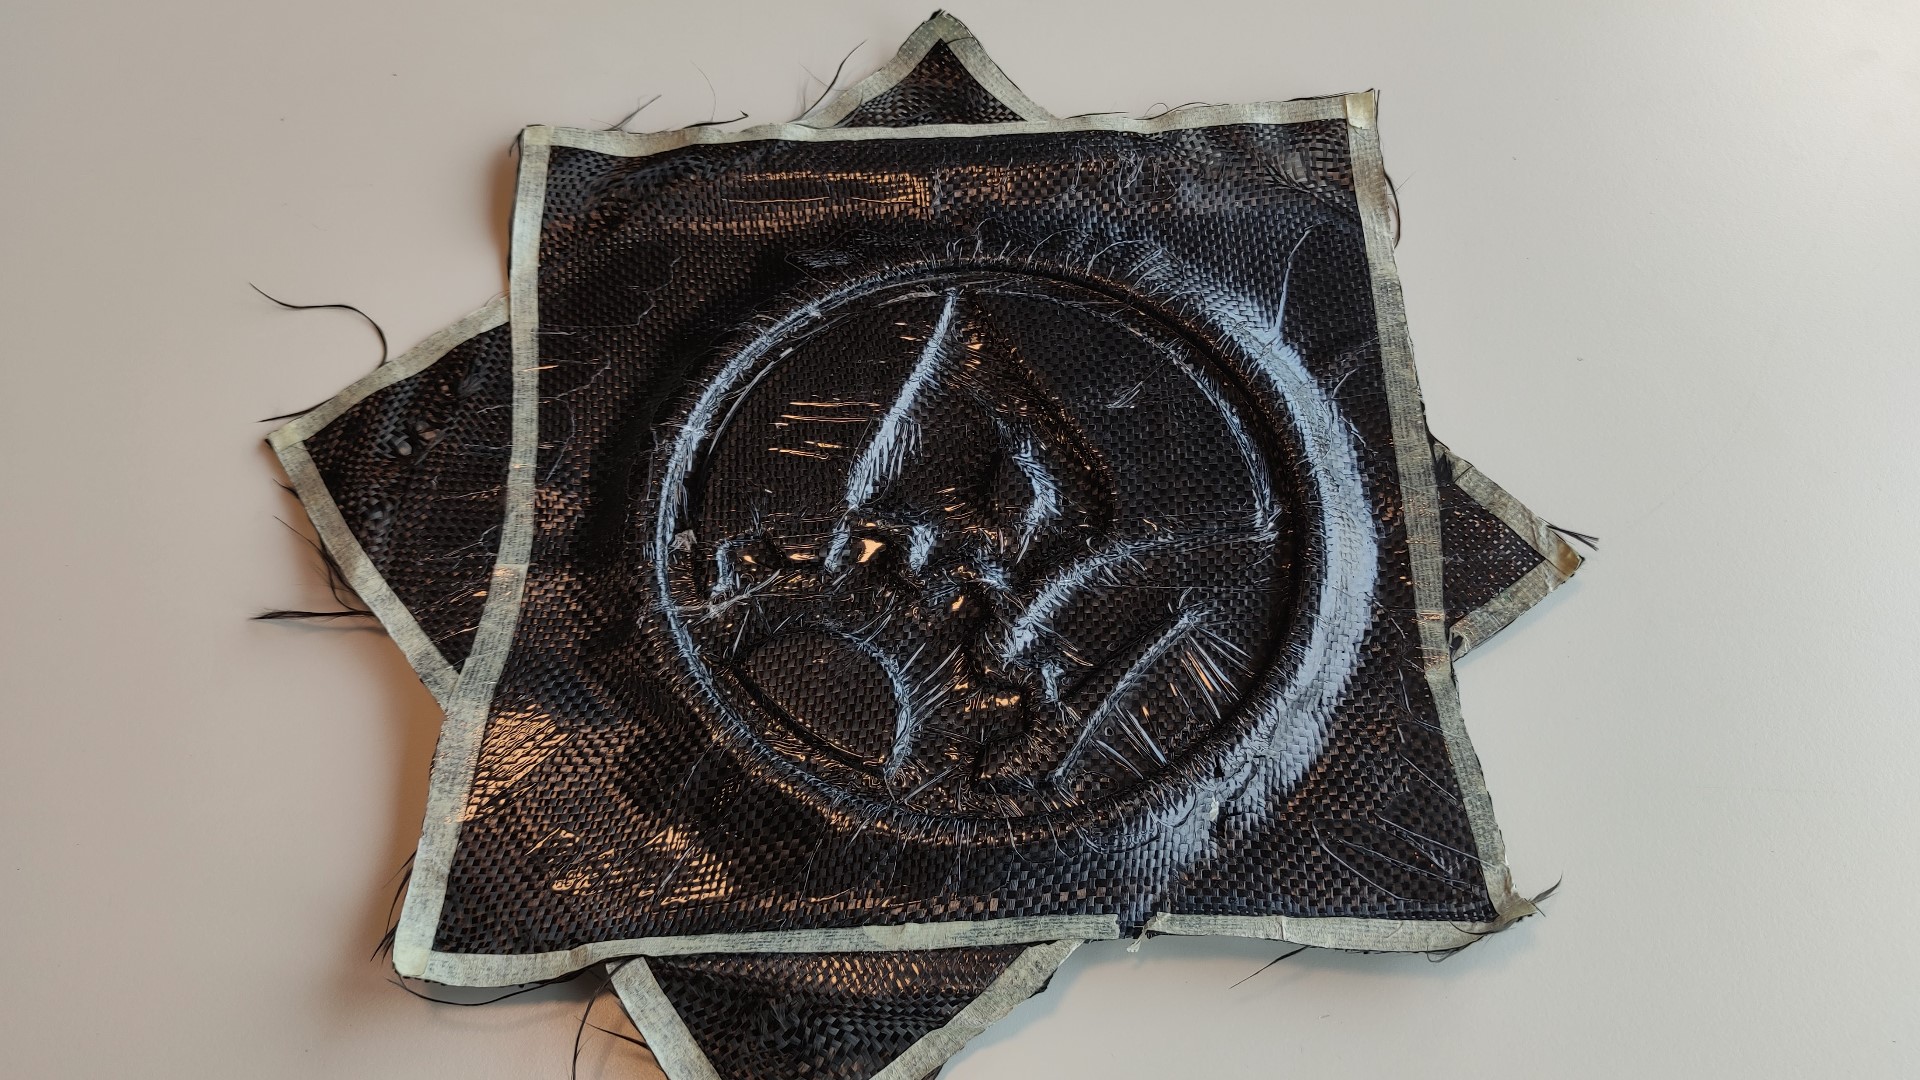
After finishing with the layers, we put some transparent film to prevent the resin from spreading in the vacuum press:
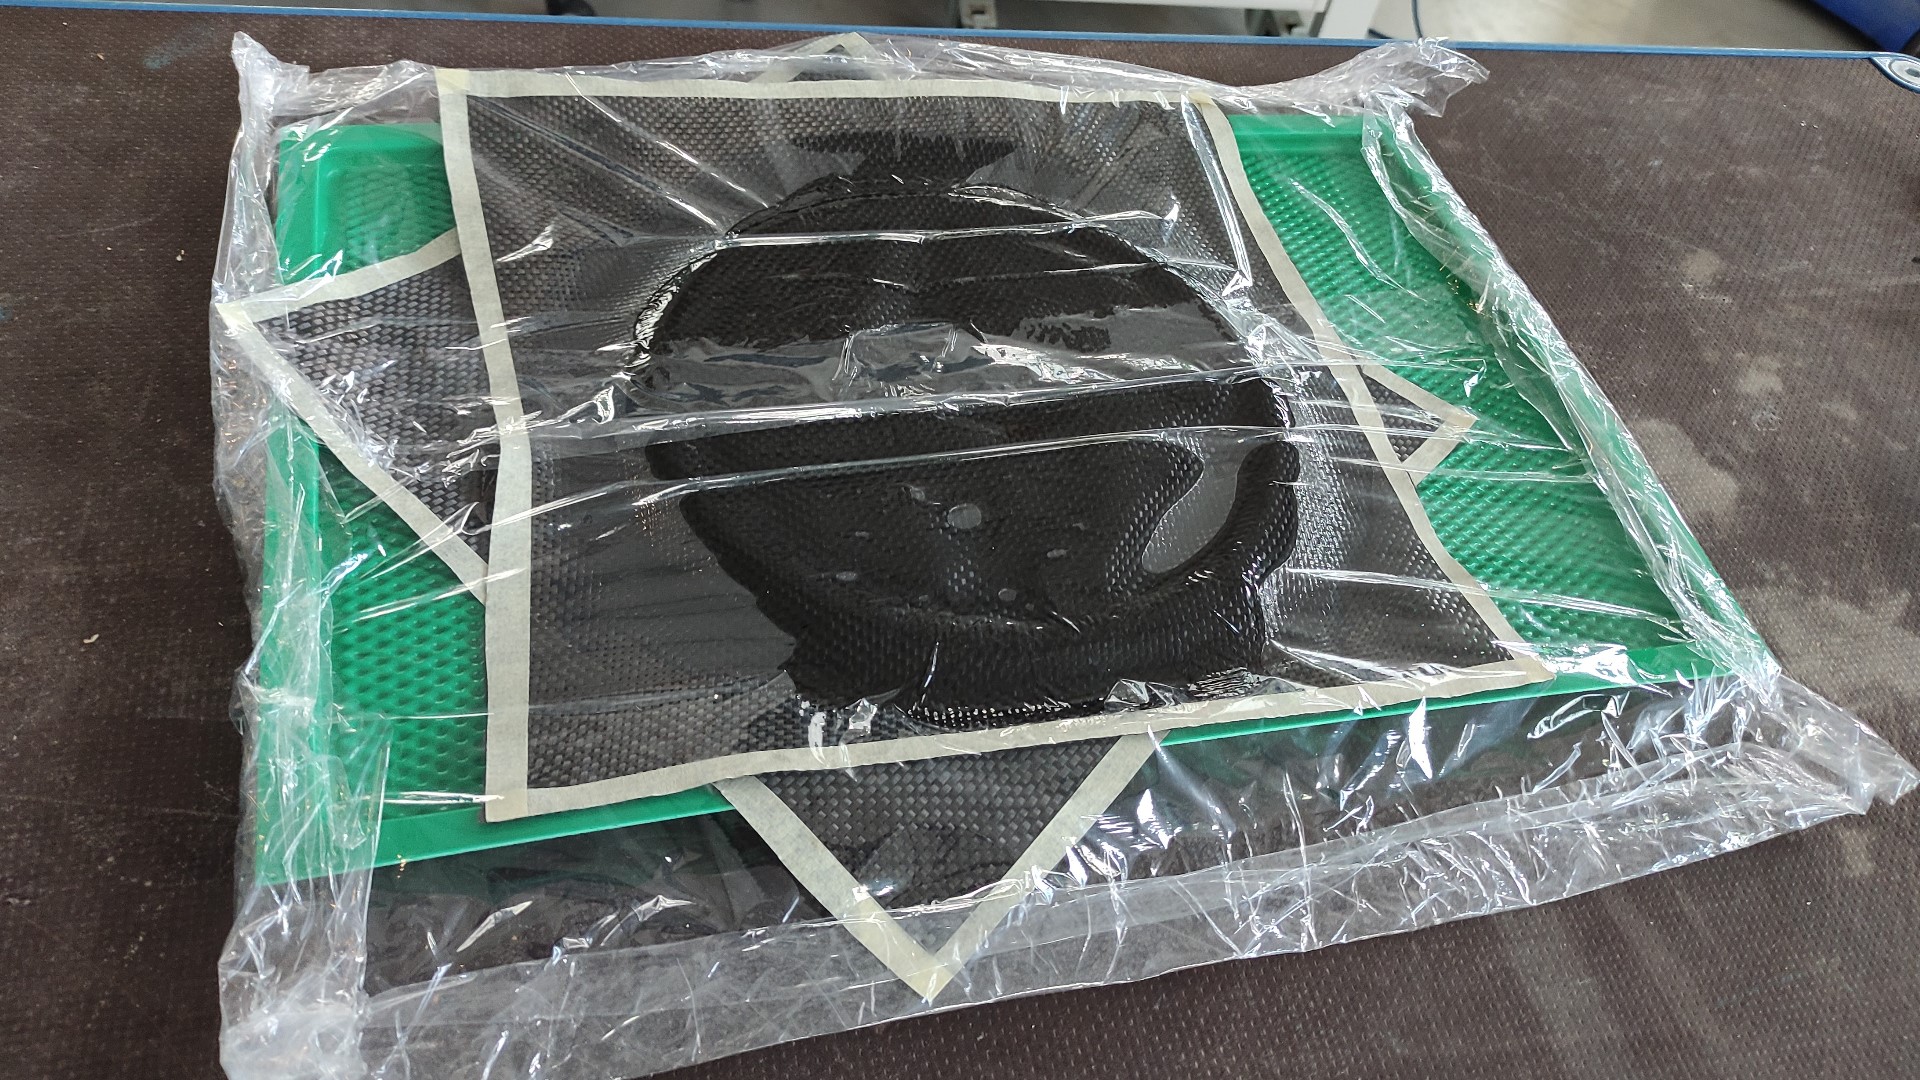
-
We put it in the COLUMBUS COMBITHERM vacuum press covered by a fabric to protect the machine from the sharp edges of the plastic, also put a cardboard to protect the machine:
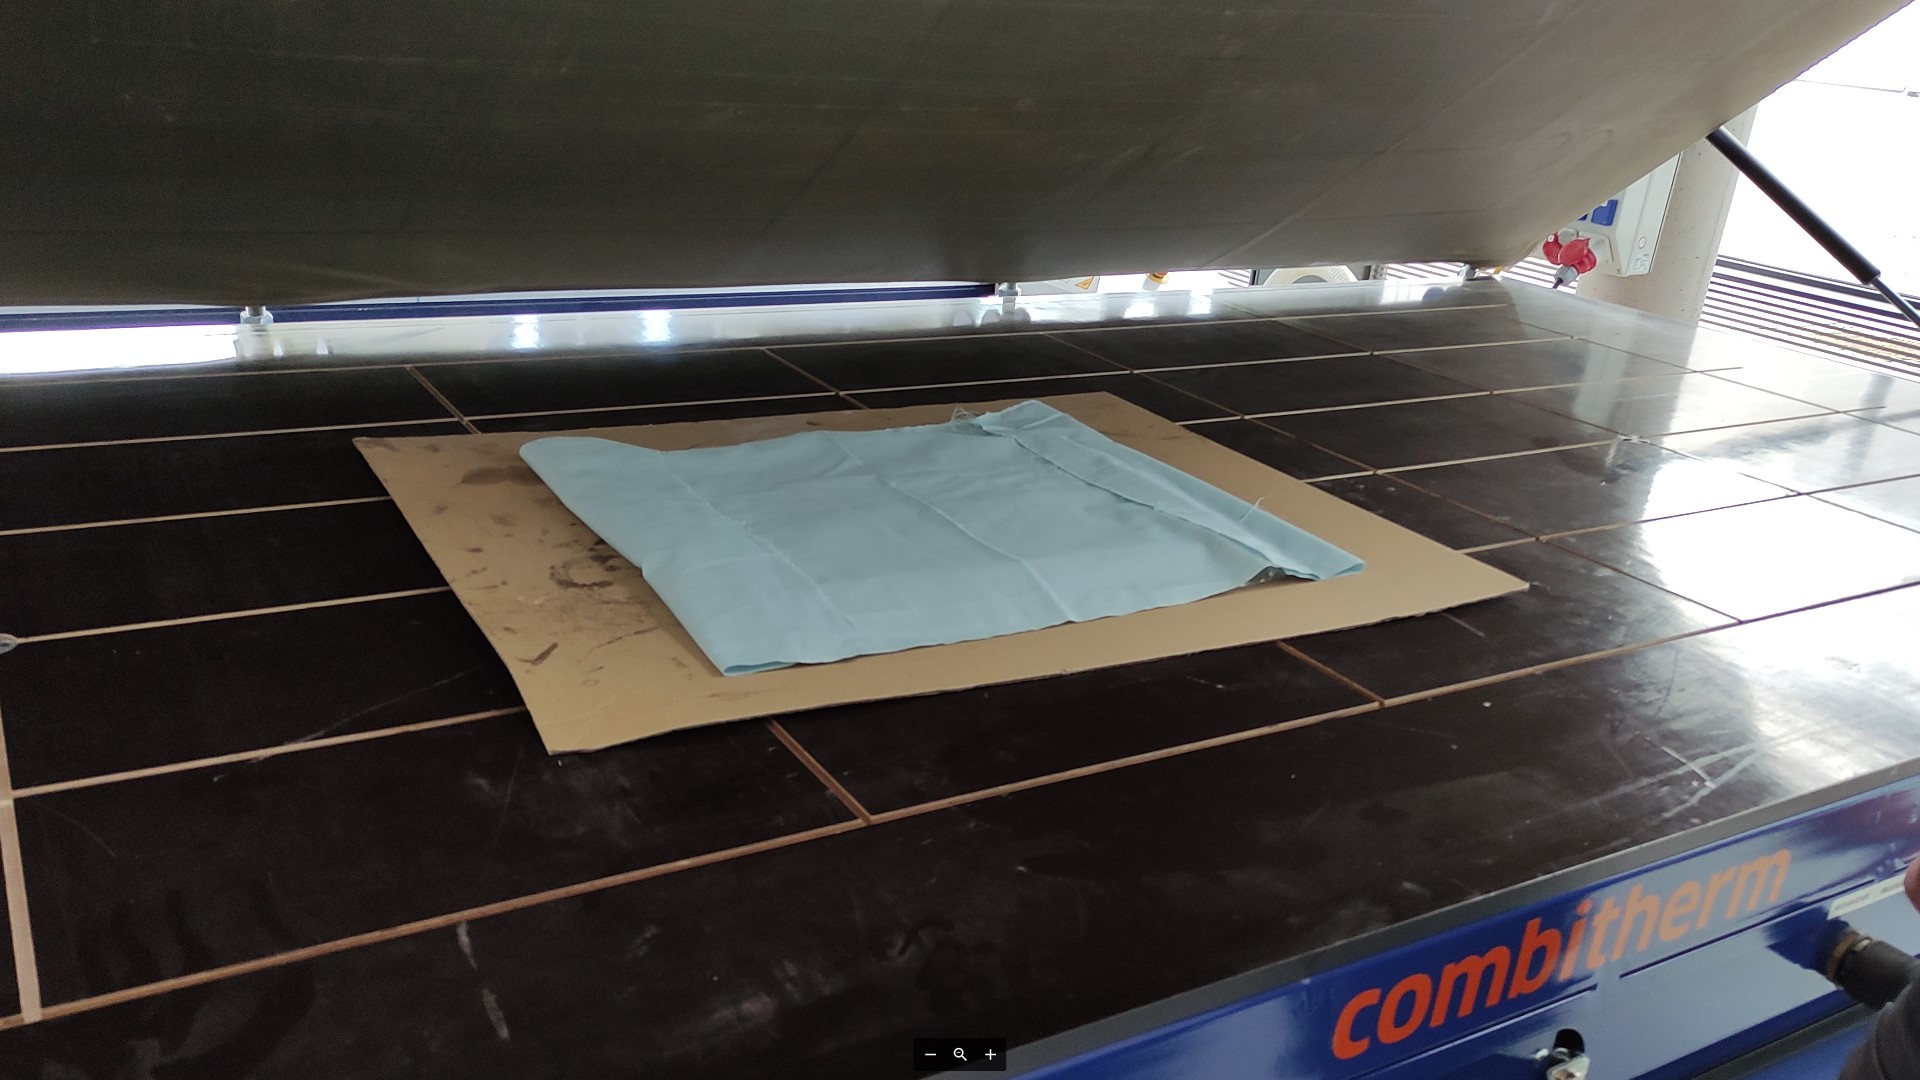
-
We turned on the vacuum.
-
We left it cure for a couple of days (cause well, it was Friday afternoon, I couldn’t come back until Monday). Also, since it was going to be a long time, we left the machine off.
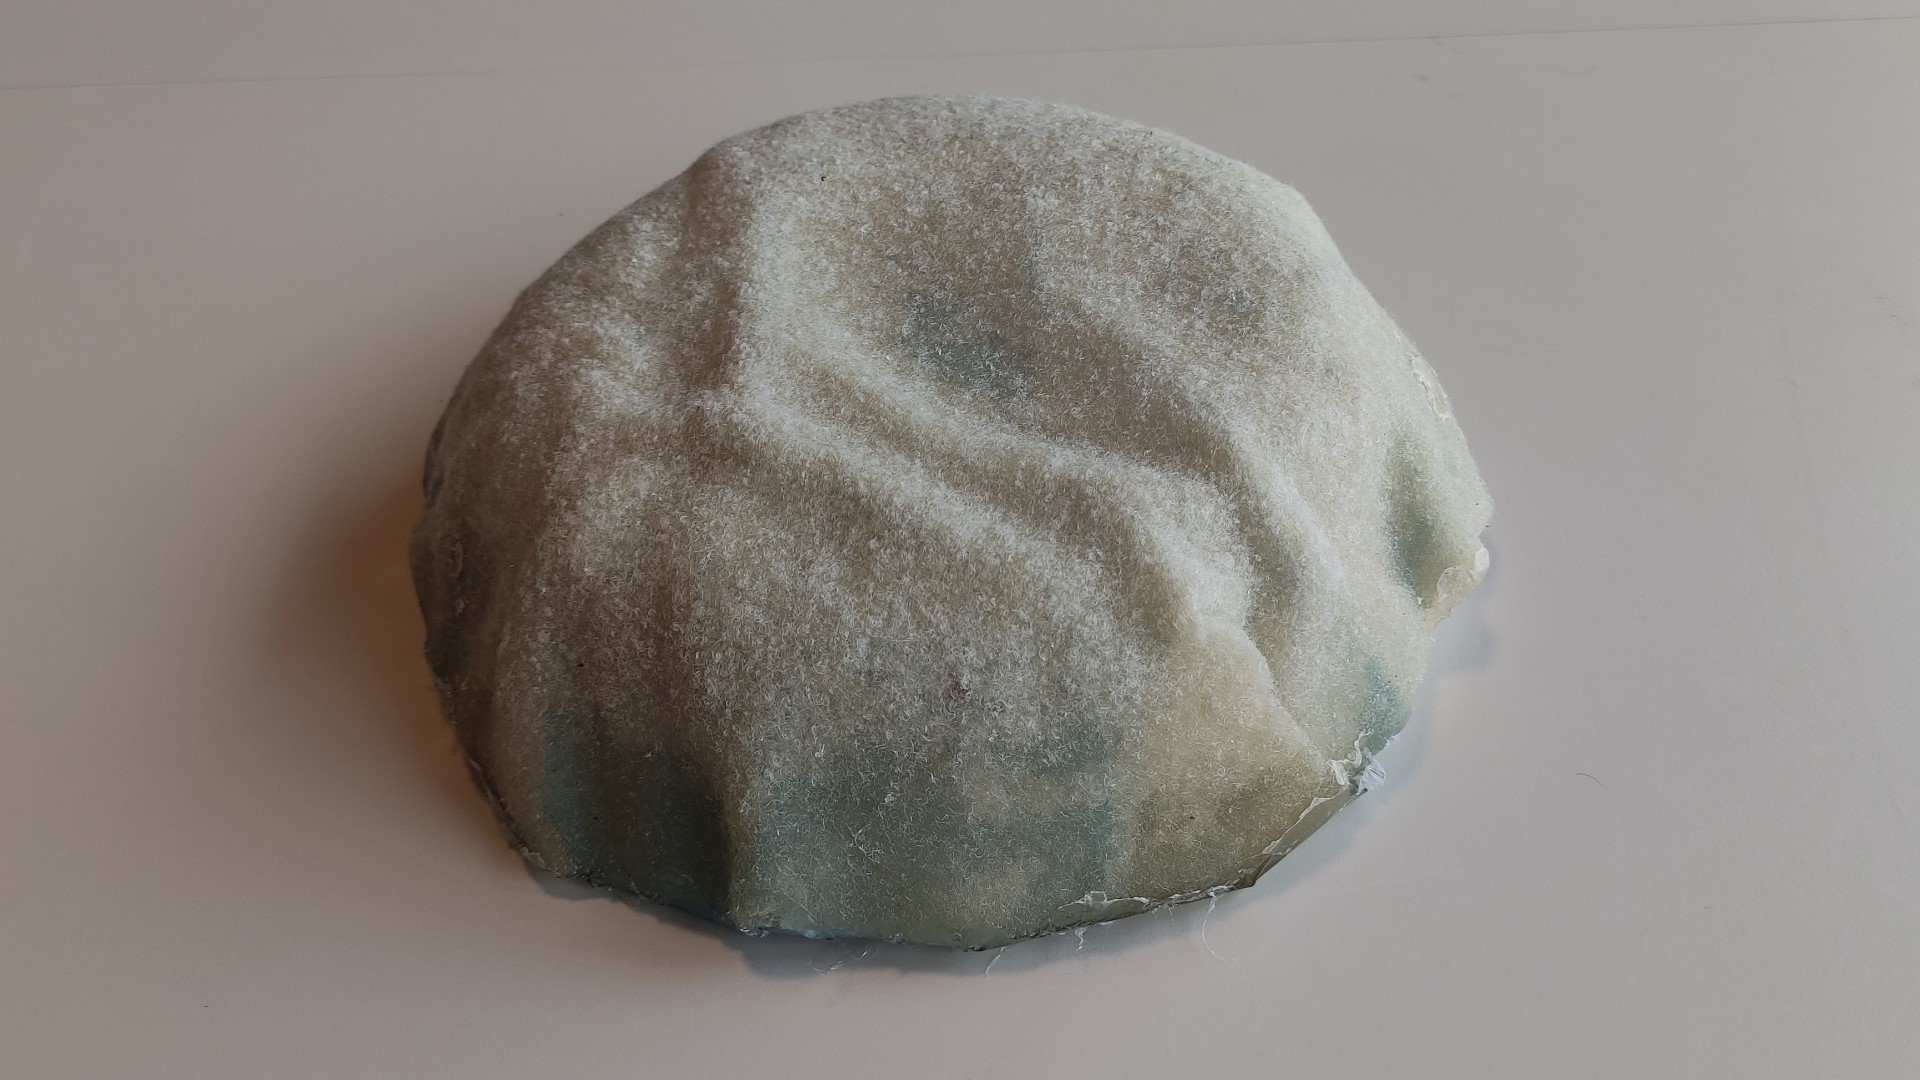
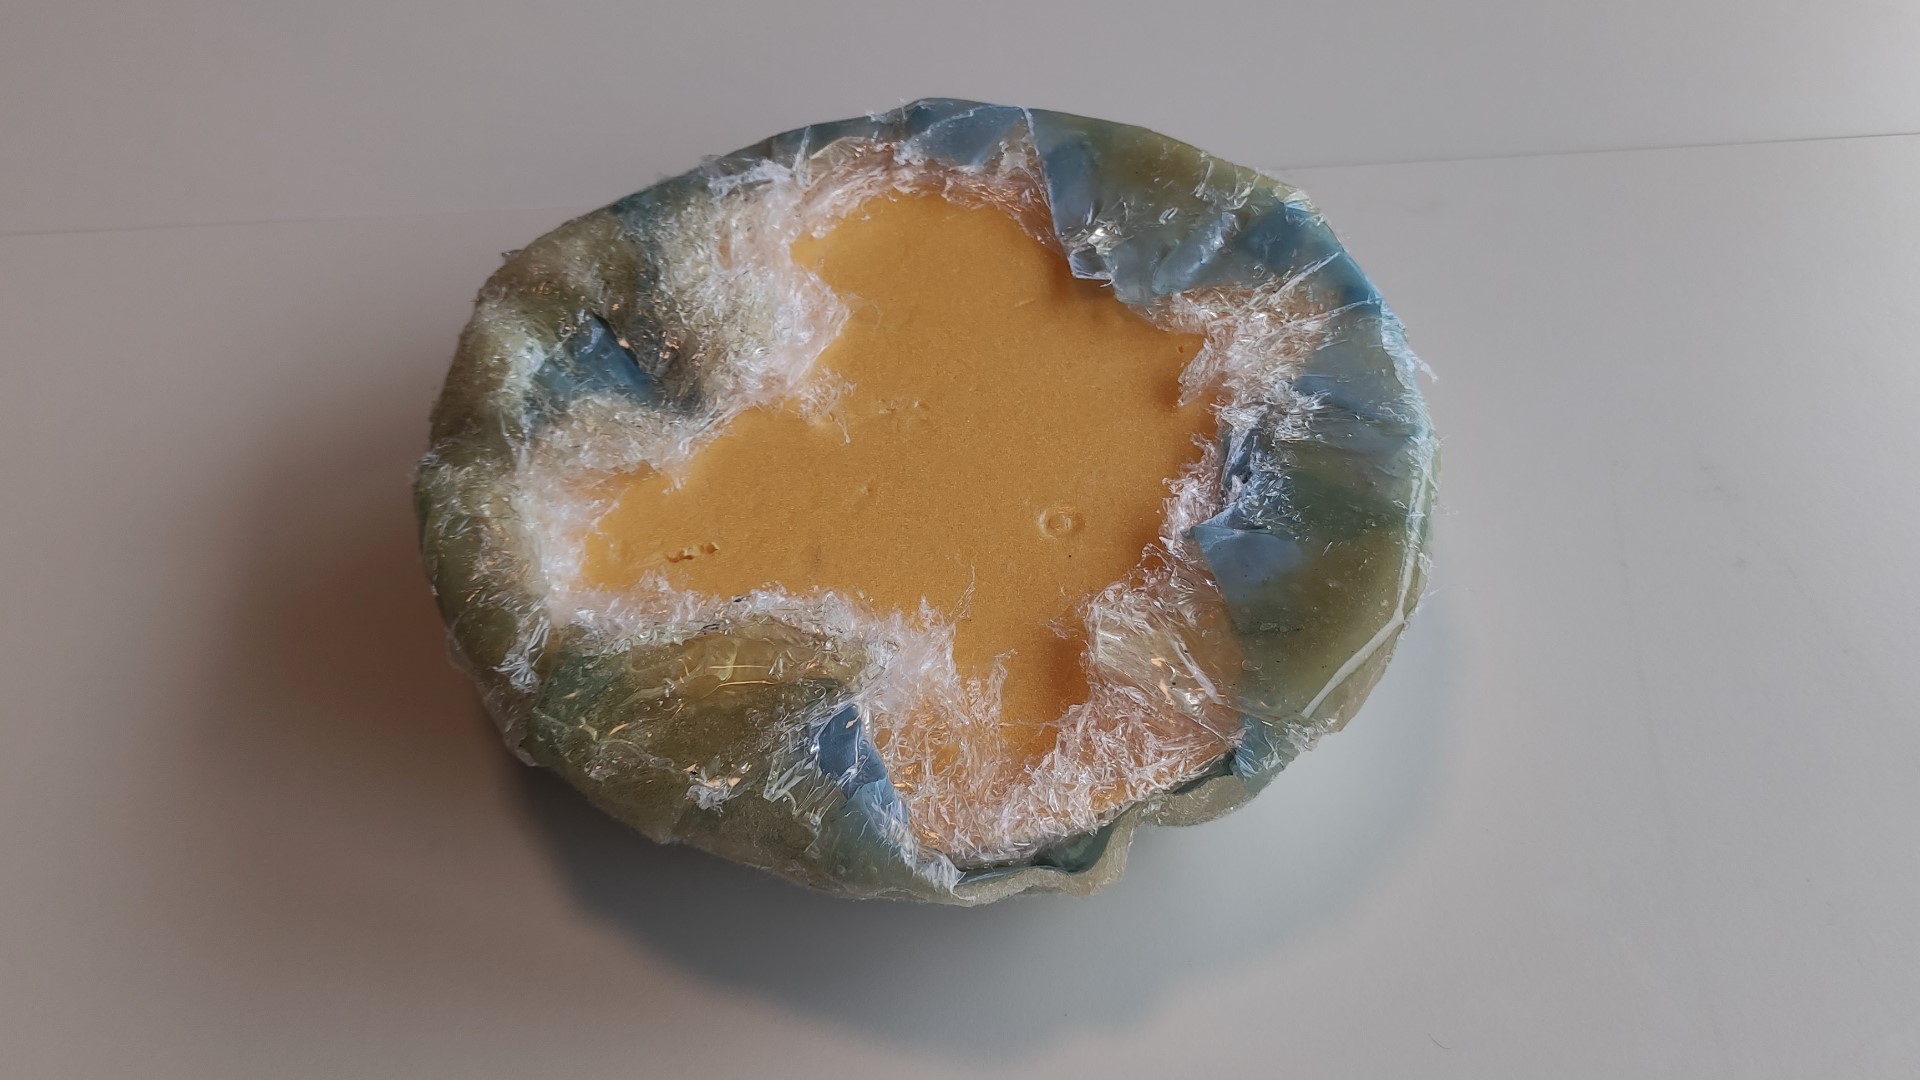
Result
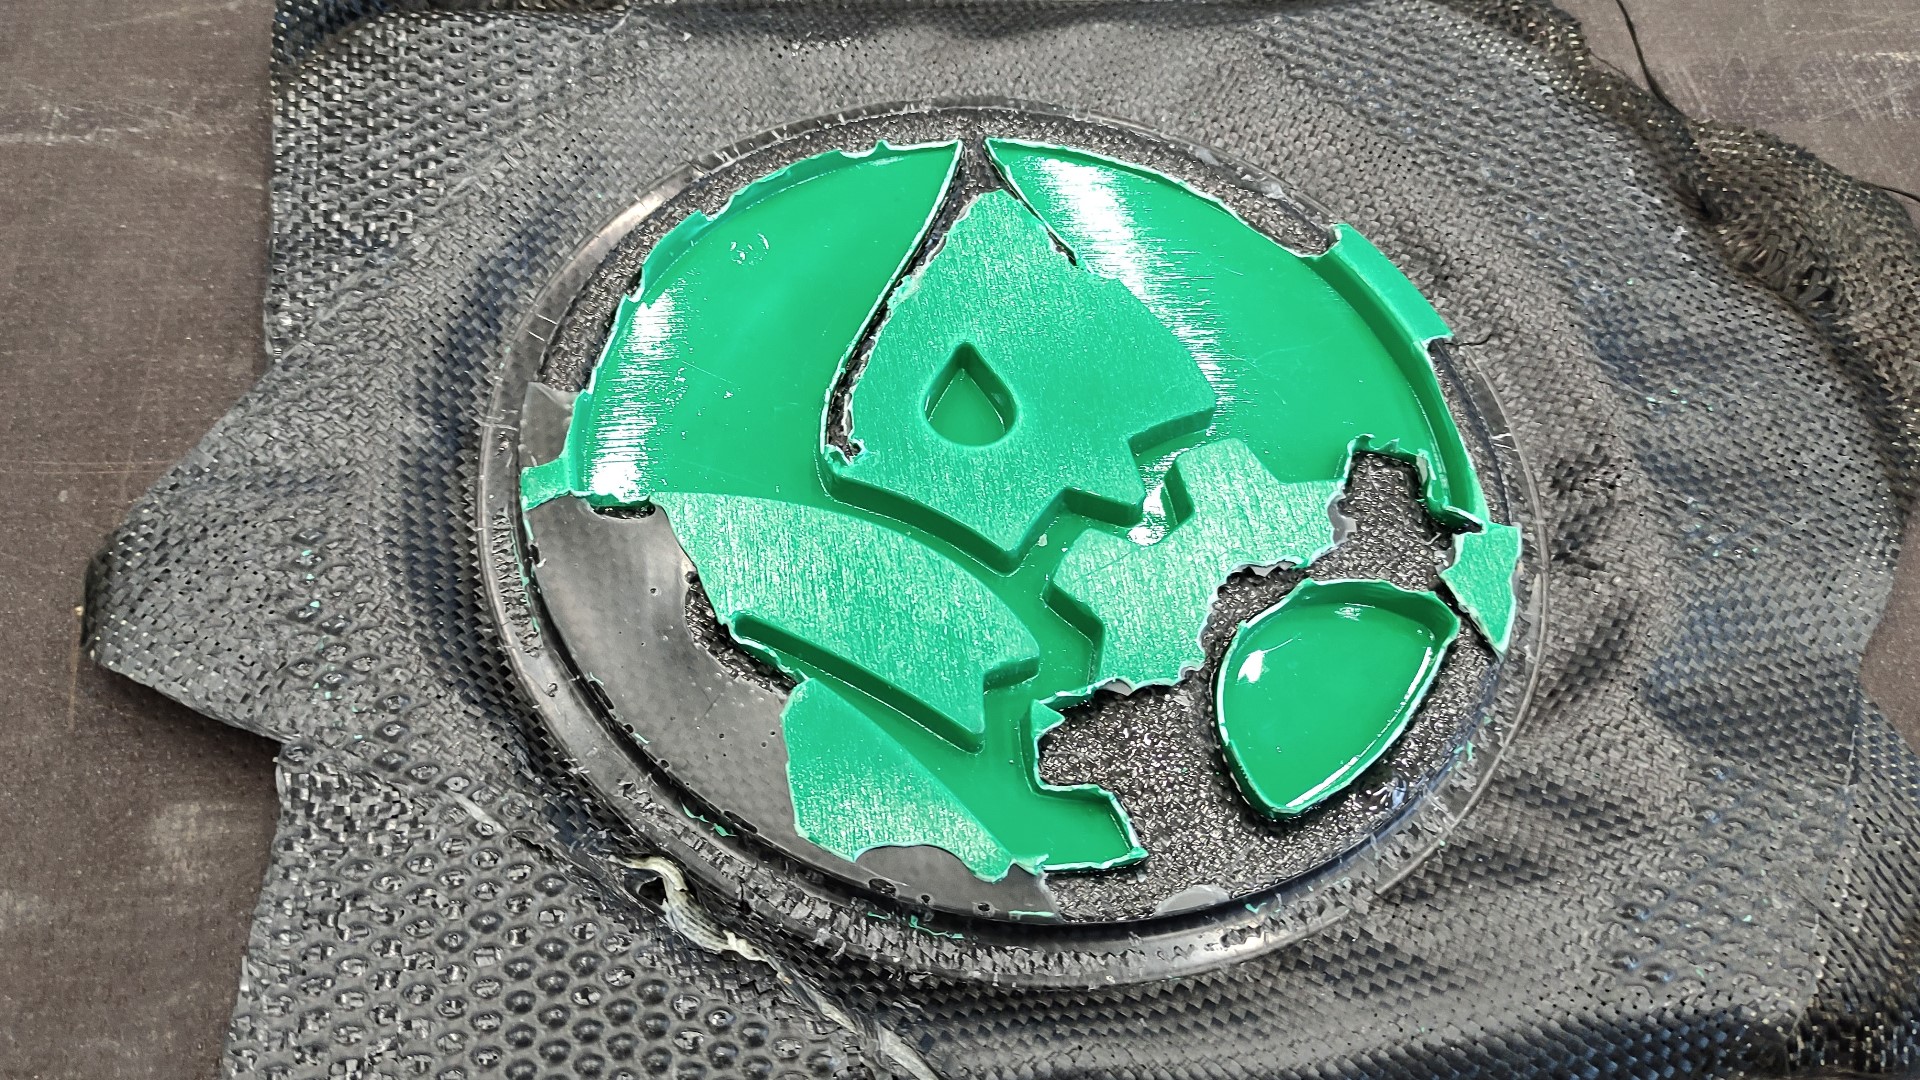
The plastic mold broke during demolding 😅
Naturally, my idea was to remove the mold in one piece, but it got glued with the resin and there was no other way but to break it.
Hypothesis:
- Maybe the release agent we used wasn’t good enough for this application.
- Also the shape of the mold wasn’t the most appropriate for it, specially when I’m just learning the techniques.
This is what the composite looked like after removing almost the whole mold, using hot water and pliers:
- Front:
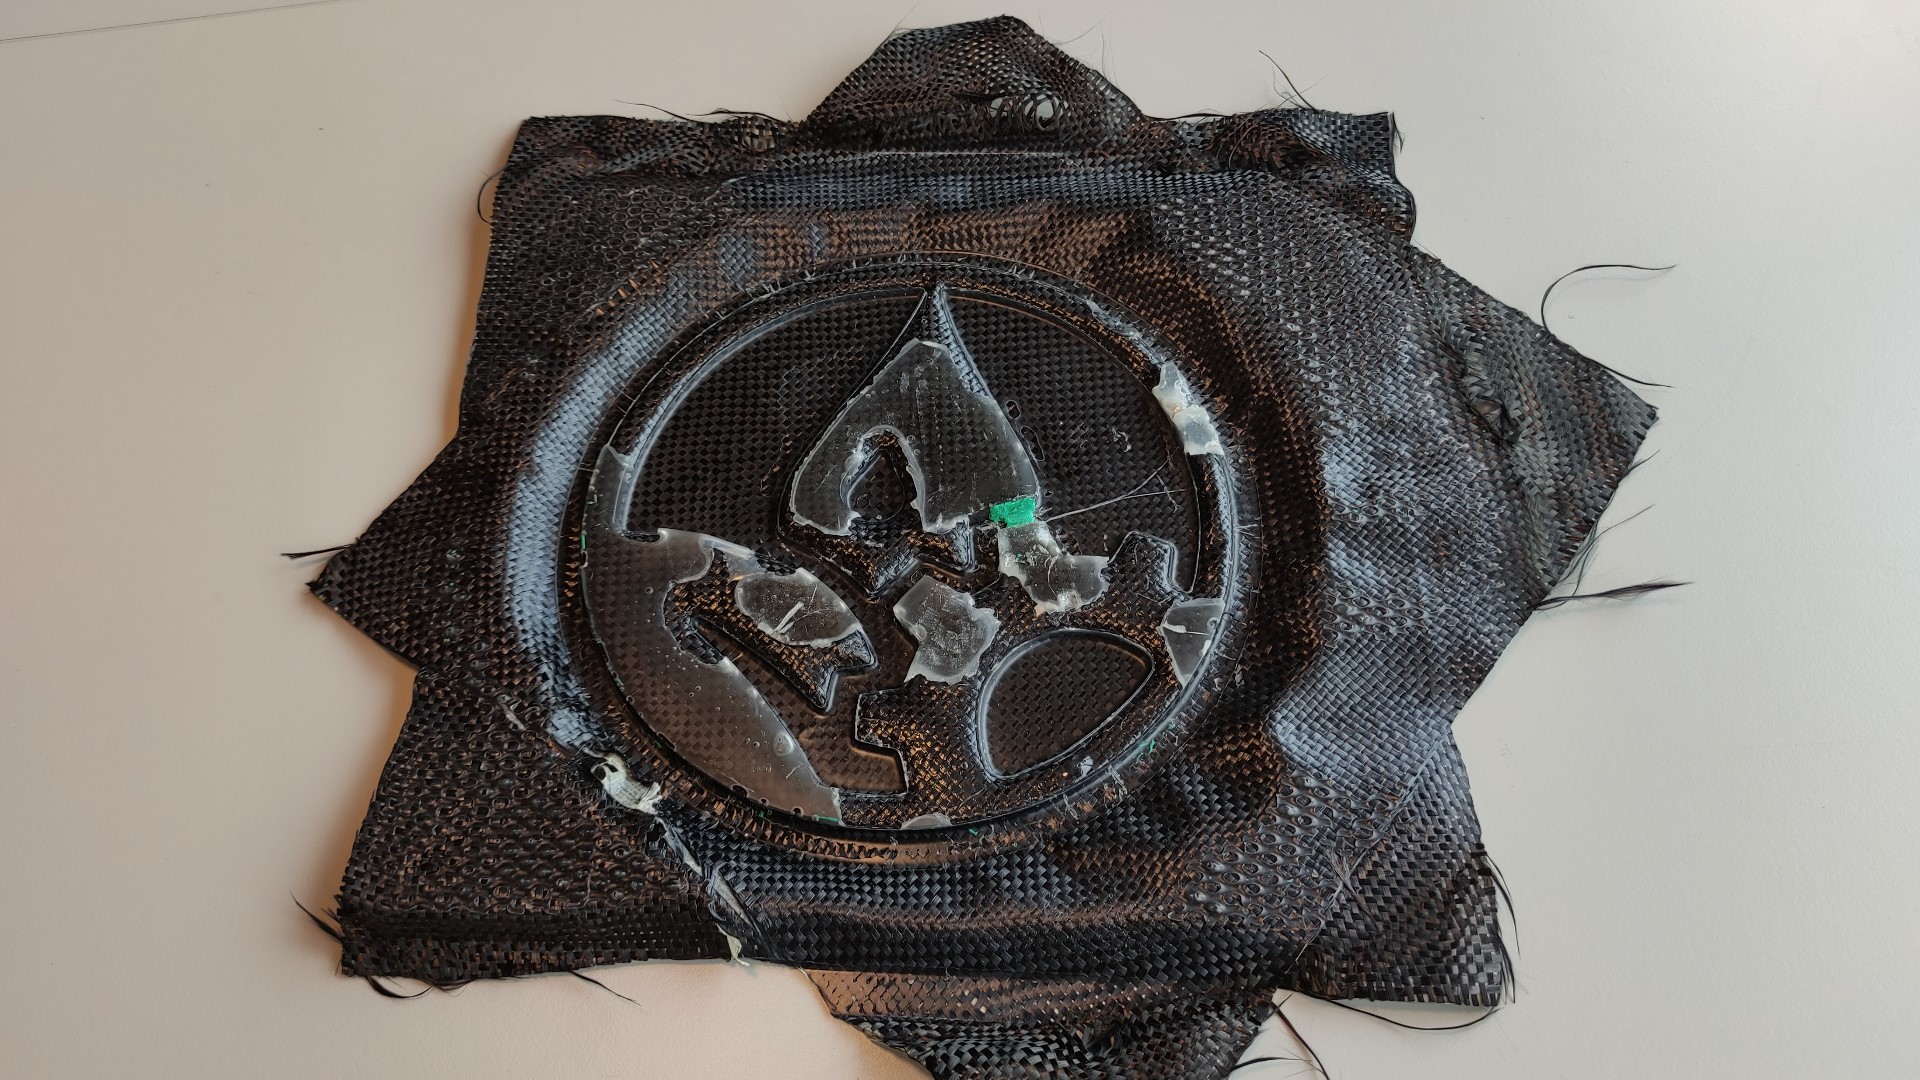
- Back:
Assignment outlook
Although in general it was not a very successful assignment, I don’t feel disappointed at all, no every practice needs to turn out well to learn from the process 🤷🏽♂️.
Files
- GFL-Logo.f3d
- Epoxi resin 3321 datasheet