16. MOLDING AND CASTING
TThis week I worked on Week 16 assignment:
Again there are two different tasks to do individually and in groups.
Group assignment:
Review the safety data sheets for each of your molding and casting materials, then make and compare test casts with each of them
Individual assignment:
Design a mold around the stock and tooling that you’ll be using, mill it (rough cut + (at least) three-axis finish cut), and use it to cast parts.
As every week, I continue to indicate in my weekly planning the tasks carried out in FabAcademy
We are still confined in alarm and cannot go to FABLAB yet.
I will try to do my best for this week’s assignment with the resources I have at home.
16.1. GROUP ASSIGNMENT
The Group Assignment page is at the following link.
Álvaro and I have studied the materials that we have bought to carry out this assignment, both the mold and the possible pieces obtained by milling. And also the materials that we can use in the wildcard assignment next week.
Now that we have this material at FABLAB we will try to take advantage of it.
In our individual assignments we have used the food silicone to make the mold and Álvaro has used the release spray, since I wanted the mold to make edible pieces to use, I have used olive oil that is common in the Mediterranean diet typical of Spanish gastronomy. For the mold of the mold, we have used Ferris wax.
In summary, the materials we have used are:
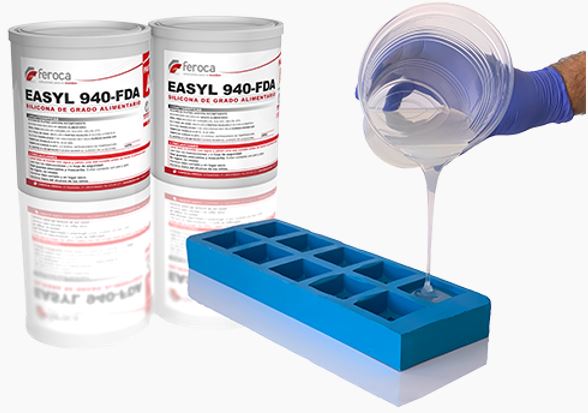
Easyl 940-FDA silicone
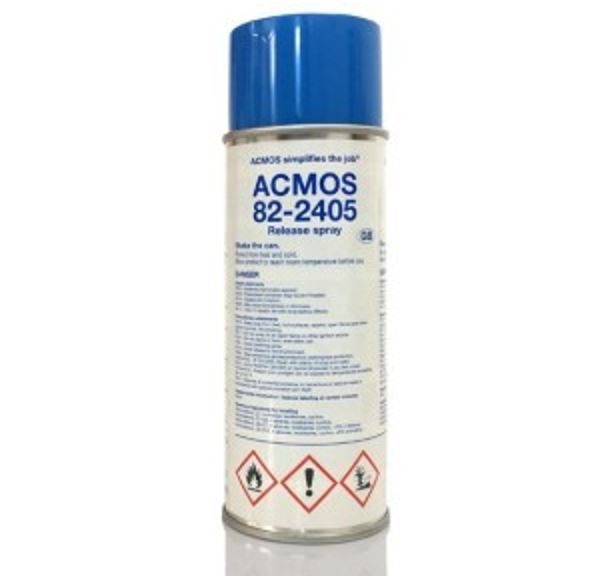
ACMOS 82-2405 release agent
The technical data of the materials used are collected in the following points:
16.1.1. Easyl 940-FDA silicone
EASYL 940-FD is a two-part silicone, platinum-cured or addition type, with a mixing ratio of 1A: 1B in volume. It can cure at room temperature and also under heat. It is a type of food grade silicone and is used mainly for the manufacture of molds.
Easyl 940-FDA silicone has a very good resistance to heat (220 ºC), and a negligible shrinkage.
This silicone has a very low viscosity which makes it flow very well to make the mold and that there are practically no bubbles in it.
It is perfect for making candy, candy, ice molds, etc. Once the mold has cured and after 24 hours, the inside of it should be washed well with dish soap before straining any food.
Easyl 940-FDA silicone features:
-
Instructions for use provided by the supplier.
-
Safety sheet 940FDA silicone.
-
Data sheet 940FDA silicone.
In summary, the Safety Sheet of this product indicates that for its use and handling it is necessary:
-
Good ventilation.
-
Wear waterproof gloves, such as butyl rubber, neoprene, or PVC.
-
Safety glasses with side shields.
16.1.2. ACMOS 82-2405 release agent
Release agent in spray bottles. The release agent is silicone-free. Suitable for polyester, epoxy resins, PMMA and polyurethanes. For the construction of molds. Advantages Excellent release CFC-free propellants Wide application field Economic use.
The technical documentation for this material is available at the link on the supplier’s page.
Also available for this material are the files of:
Hazards:
-
Extremely flammable.
-
Irritating to skin.
-
Toxic to aquatic organisms, may cause long-term adverse effects in the aquatic environment.
-
Vapours may cause drowsiness and dizziness.
In summary, the Safety Sheet of this product indicates that for its use and handling it is necessary:
-
Good ventilation.
-
Use only chemical protective gloves with CE marking category III according to EN 374.
-
Safety glasses with side shields
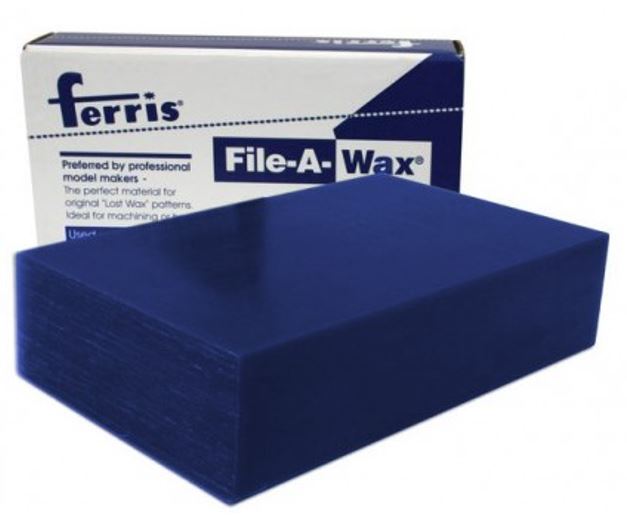
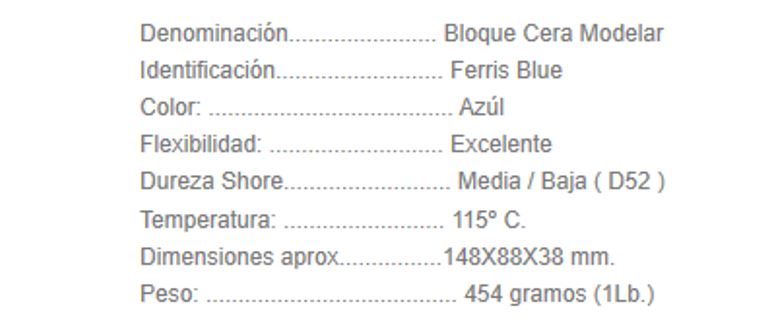
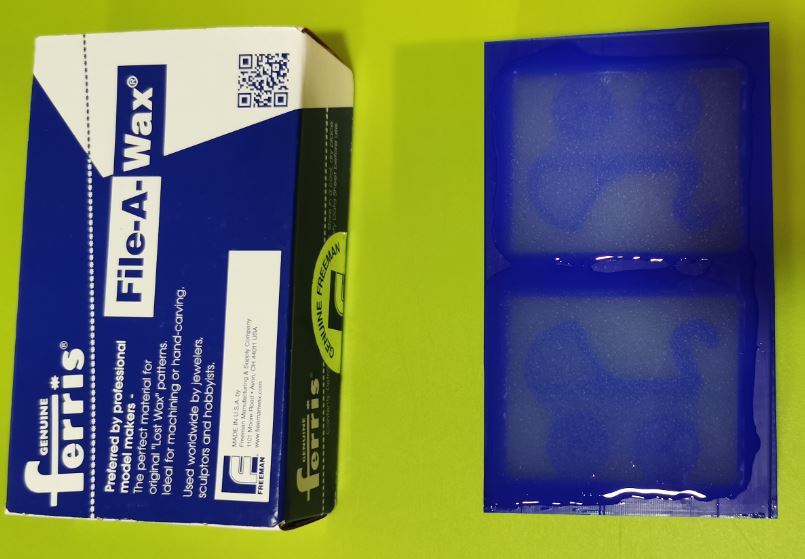
16.1.3. Modeling wax, Blue block
To make the silicone mold, first a counter-mold or negative is prepared, which in our case, both Álvaro and I have made it by milling a shape generated in CAD as a solid model, in the mini-milling machine on a special wax block to create molds. This wax is called WAX FERRIS.
its specifications are:
Links to download the technical data sheet and safety sheet.
16.2. INDIVIDUAL ASSIGNMENT
At this moment we cannot enter the Fablab, but Álvaro has asked me for permission to take the milling machine home, I have consulted him and the University has allowed us to remove it from the lab during the period of confinement decreed by the government of Spain.
Since Álvaro and I live very close, I have gone to his house to mill my design I have made, wearing a mask and respecting safety distances. It is really very difficult for us to infect each other if we are not already, because until the moment of Fablab closing we have worked side by side and since then, I have only had contact with my direct family and he with his girlfriend, and Enough days have passed and none of us have symptoms … Anyway, we have taken a risk.
16.1.1. Design a mold
I have to design the mold according to the characteristics of the tools that Iwe have available to mill it.
I bought the wax online and asked Álvaro what tools we had to mill a mold and to be able to carry out the individual assignment.
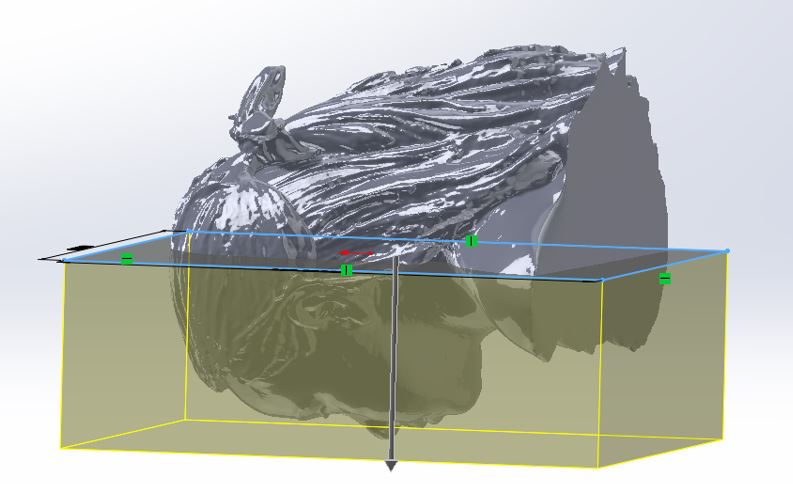
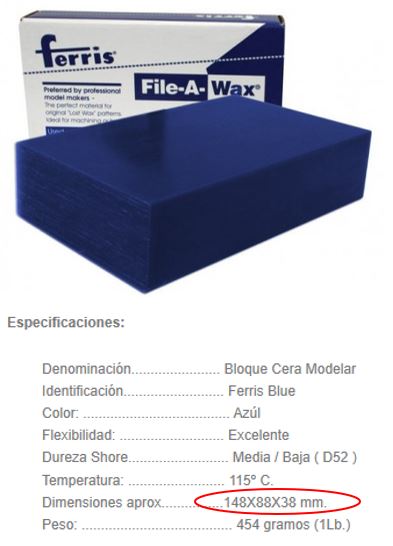
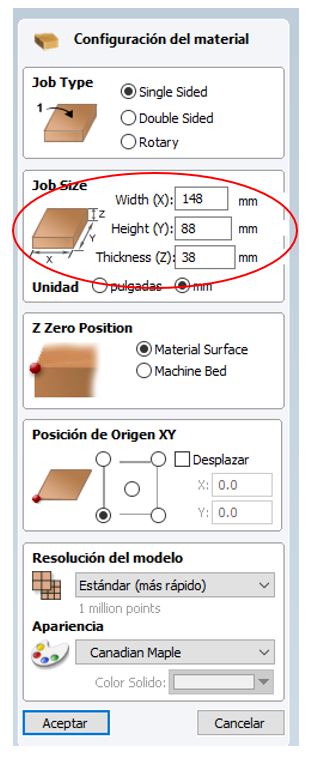
Wax block. My mold has to fit on the wax block. Its measurements are 148x88x38mm.
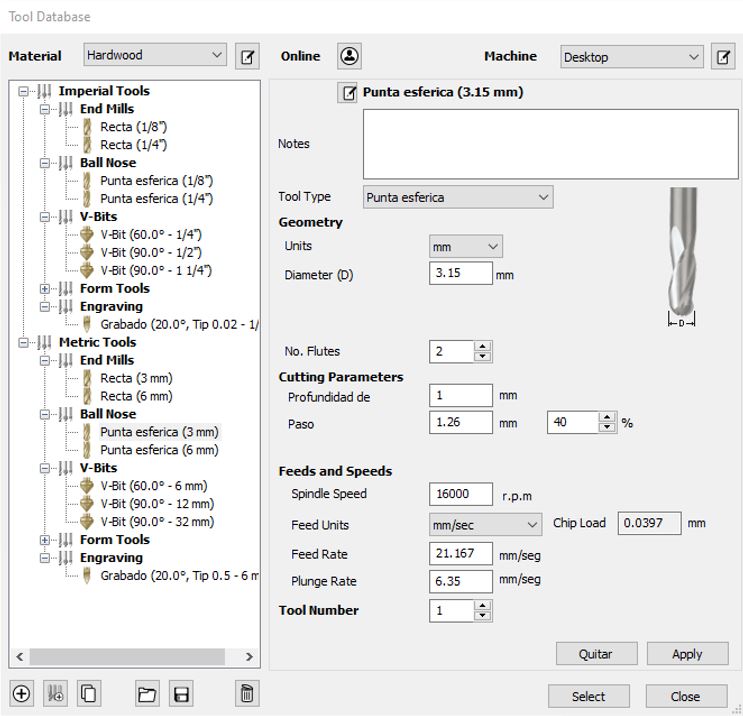
Diameter and length of the mill. I have a mill of 3.15mm in diameter and 30mm in total length.
So, the holes in my mold must be greater than 3.15mm for the cutter to pass through. I choose 4mm to make sure. And the maximum depth of my design should be less than 25mm.
Before taking all of this into account, my initial idea for this assignment shifted from a plan A to a plan B. Below I tell a little about the history of the work done.
Plan A
First I thought of an idea to materialize by making a mold and making multiple copies. For example figurines of chocolate or soap.
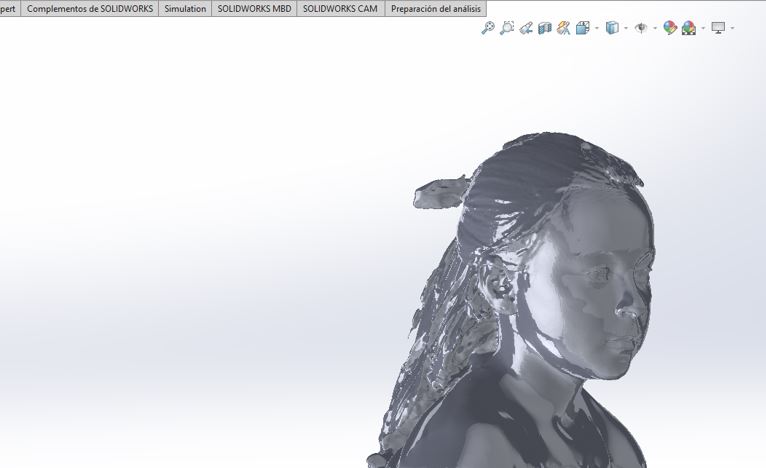
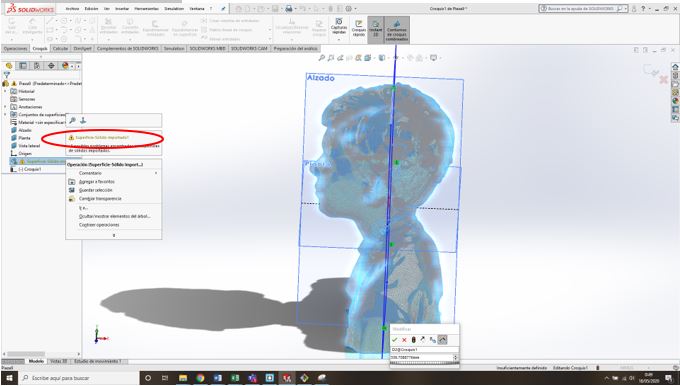
On the week 6 assignment, I did the Candela scan, and got a solid model of her bust. So it seemed like a good idea to make the mold from the 3D model that resulted after processing the scanned mesh:
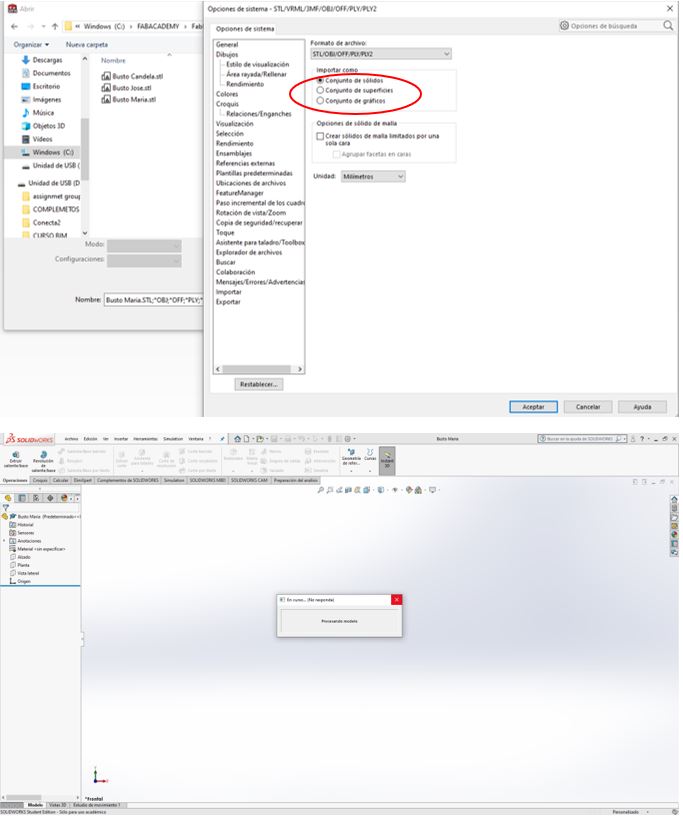
This file, it turns out, is too heavy to manage from CAD software and design a mold from it.
From a stl viewer, this is the model:
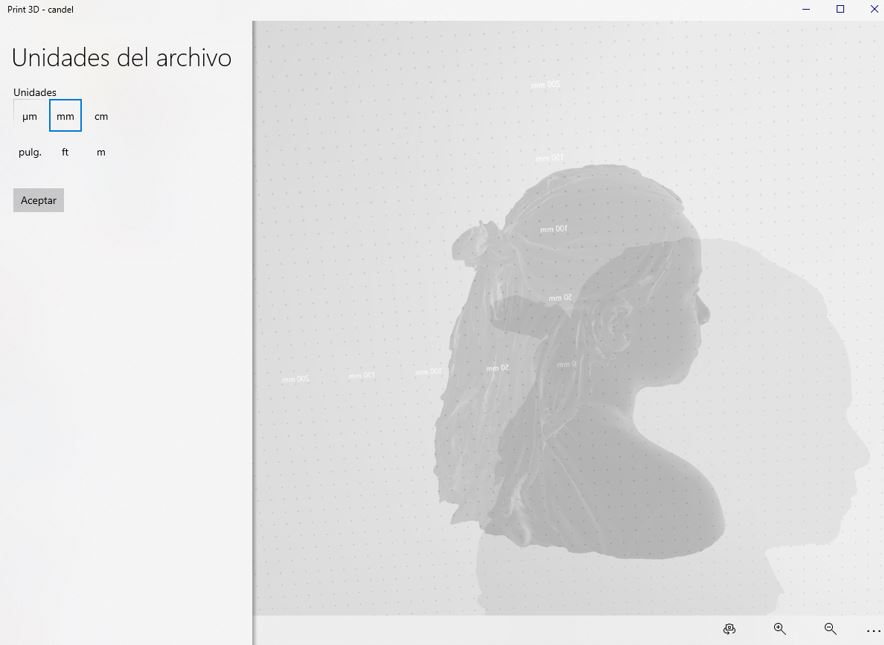
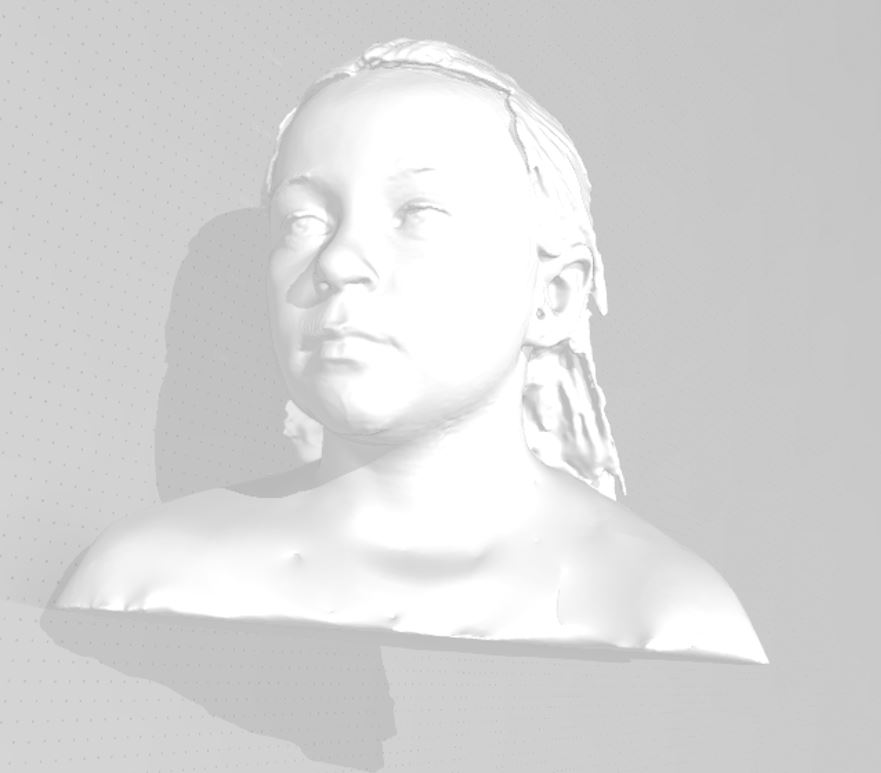
From a stl viewer, this is the model:
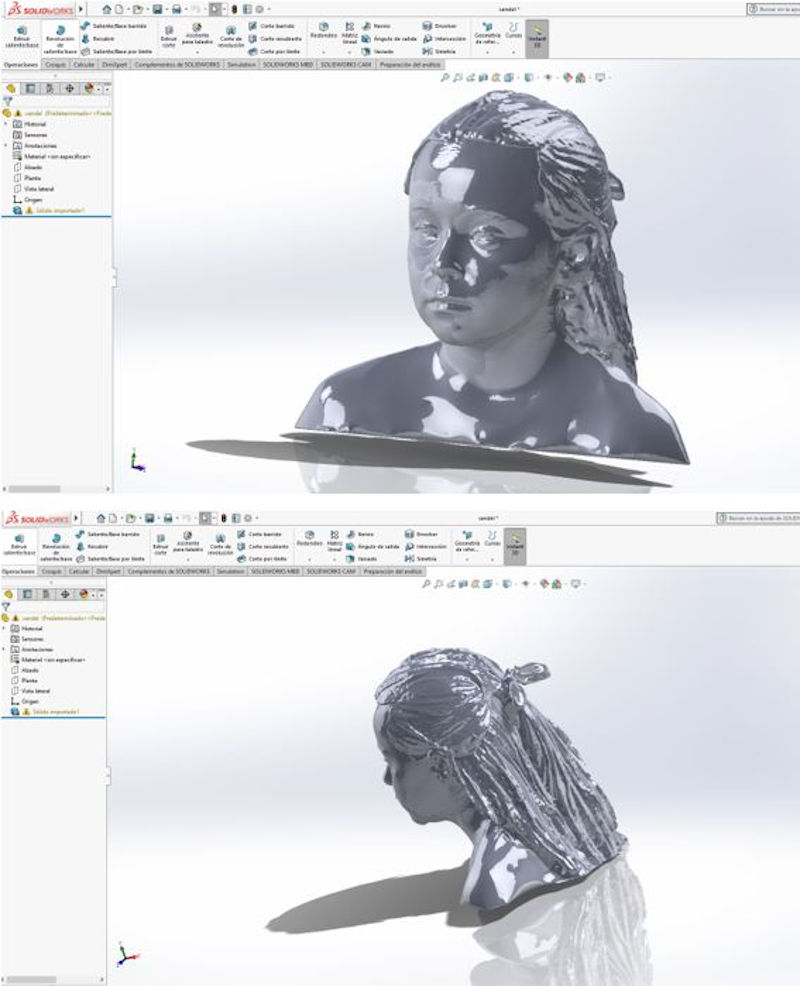
It has a lot of detail and a lot of resolution and it is difficult for my milling machine to be able to mill it, I have a 3mm diameter approximately milling cutter and it occurs to me that I can also use here the milling cutter that I use to create the PCBs to do the finishing part. from my milling for this 3D model, but still, this bur is about 1mm in diameter and is short in length to be able to reach the depth required to physically model this very accurate model.
I consult with my instructor (Nuria) and she recommends that I try to simulate the milling of this piece before materializing it.
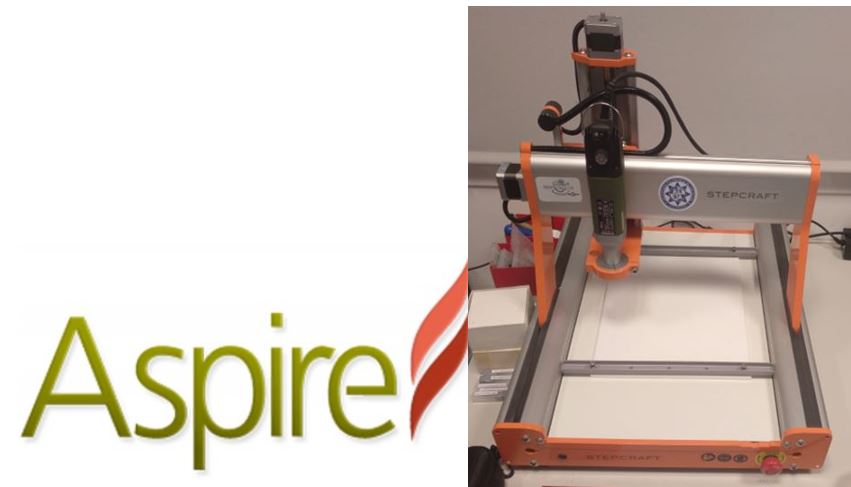
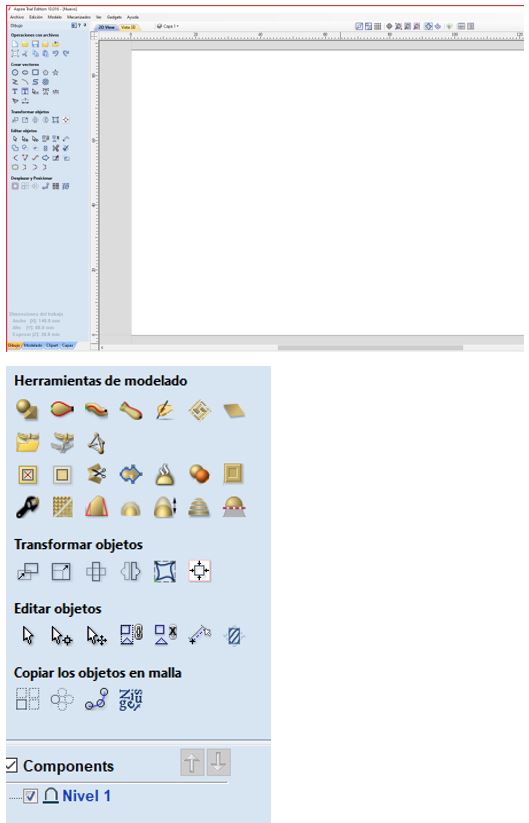
I will do it with the Aspire program, which is the one with which I configure the milling operations from my computer STEPCRAFT 420 .
Note: Although in previous assignments the documentation included the use of this program, this is the first time I use this program, but the assignments in which I mention its use, I later documented them due to the Covid- 19.
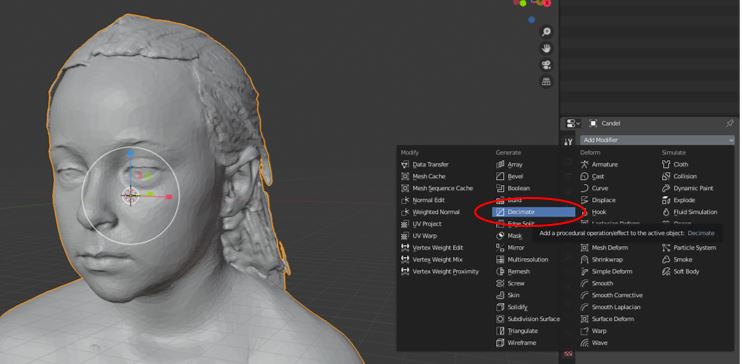
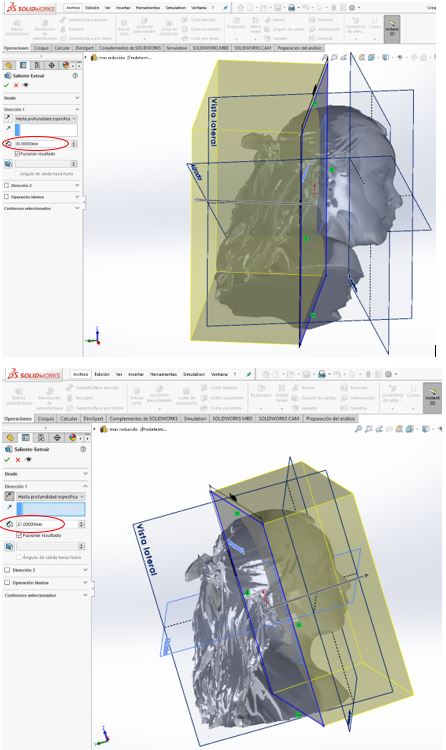
First I will try to reduce the size of the Candela stl file to make it more operational.
I use Blender, to treat the mesh and get it to have a smaller number of triangles, so it will be less heavy and I will be able to perform solid modeling operations from Solid, which is where I want to create my mold.
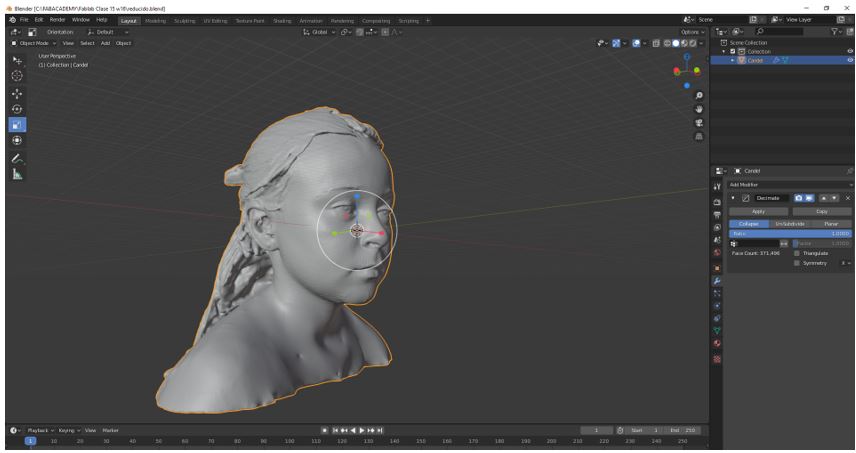
From Blender I reduce both the size of the object , and the number of triangles that form it.
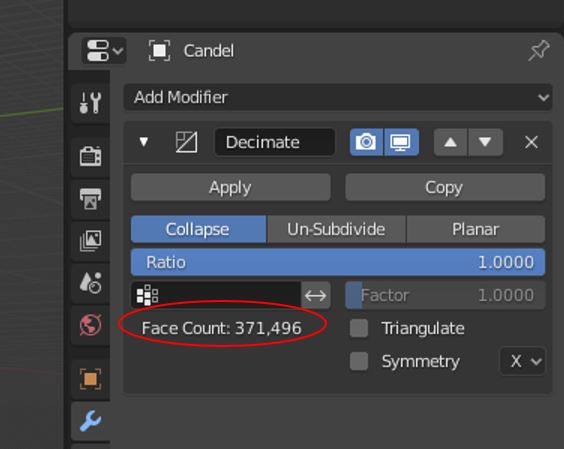
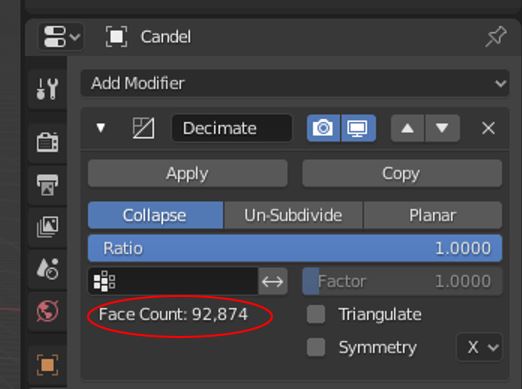
From Solid, I verify that it is still very heavy.
And I further reduce the number of triangles in the mesh from blender.

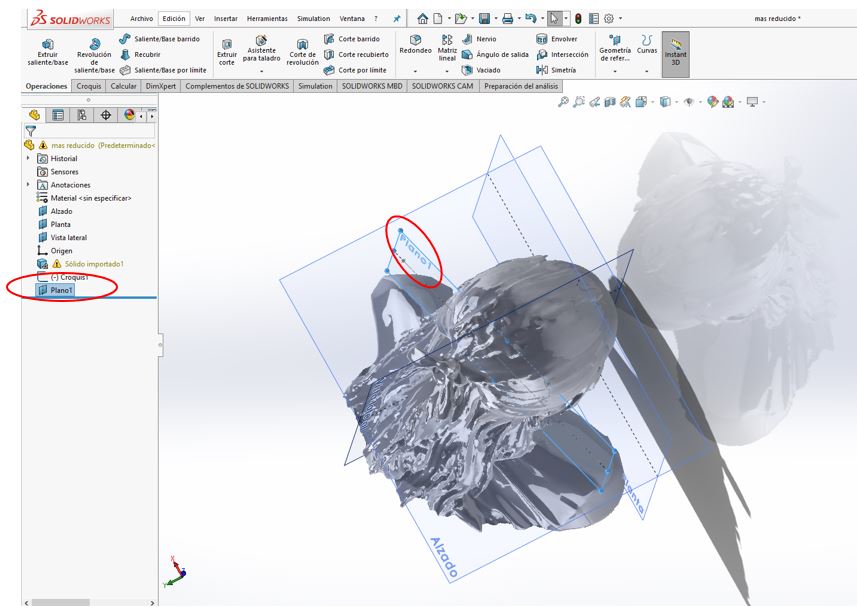
From Blender I export to stl and open in SolidWorks.
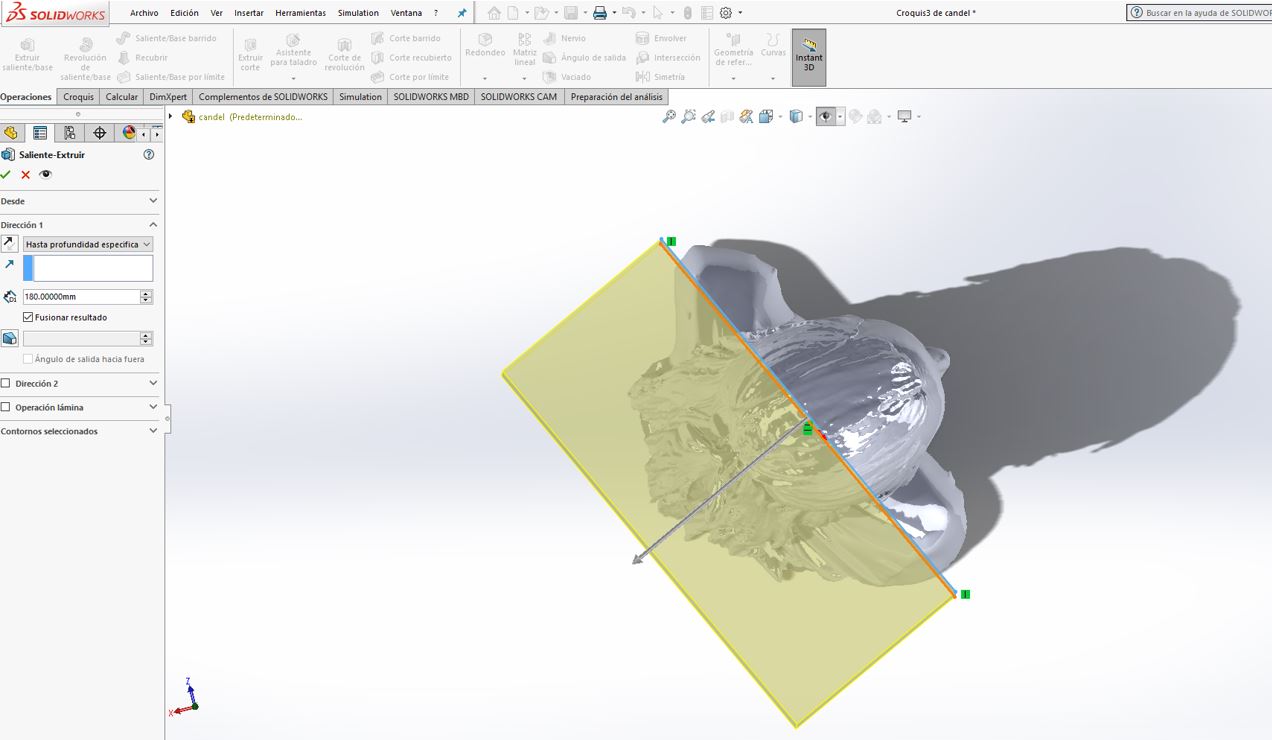
I create a plan that divides the piece into two areas that can be included in each of the two parts of the mold that I intend to make:
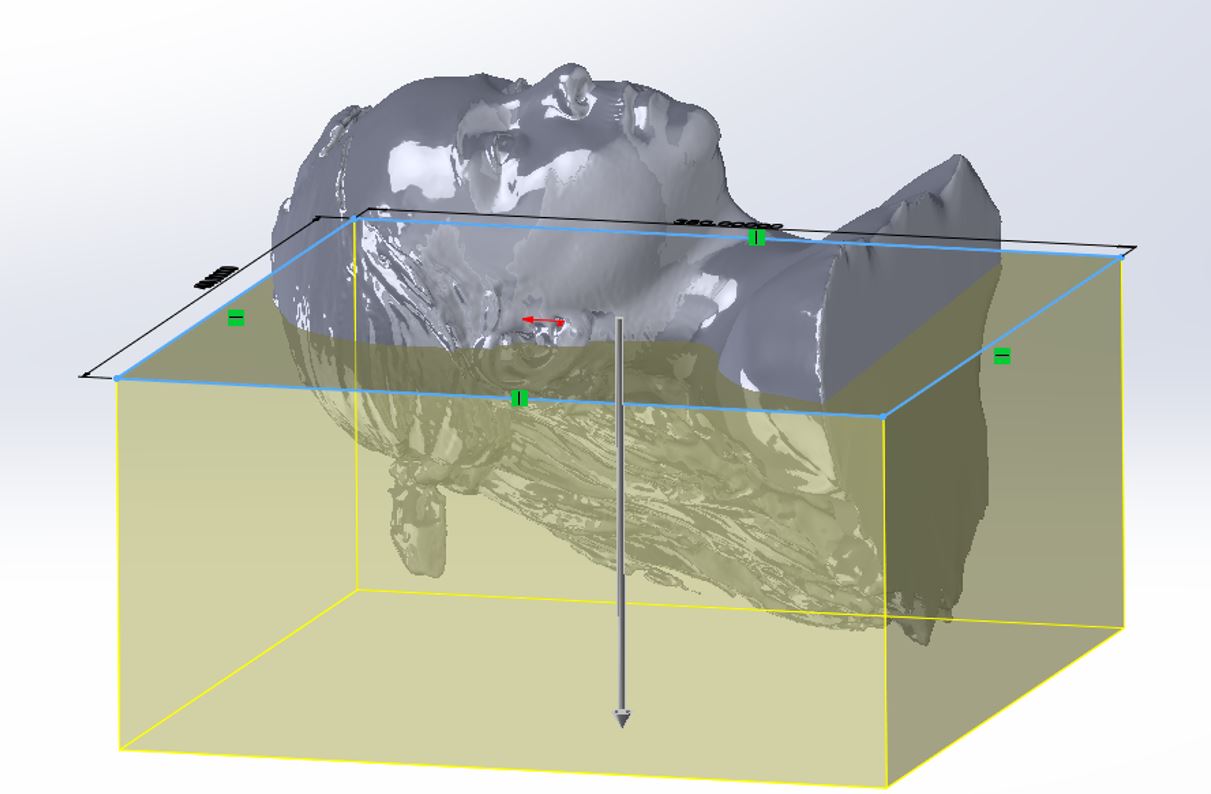
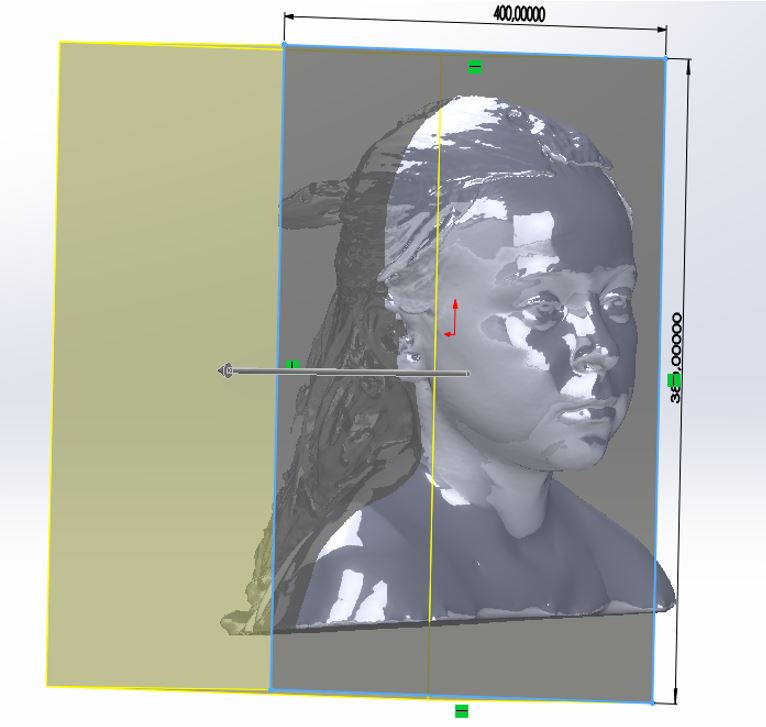
These are the dimensions that I have to take into account when designing my mold.
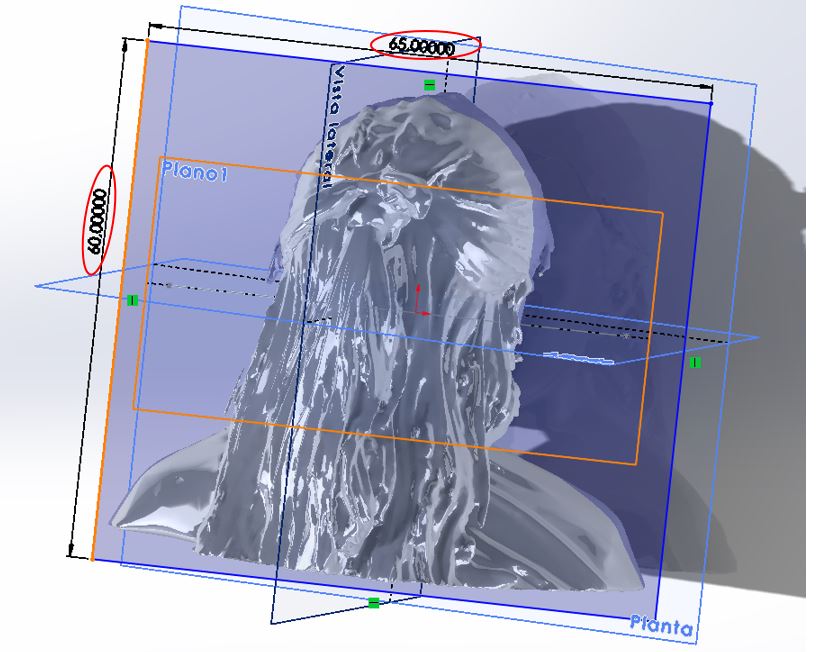
When I divide it into two halves it will look like this:
The dimensions of the wax that I am going to use to mill this shape that I am setting are the ones shown here and that I already quoted above:
Then the two parts of the mold would fit in one of these blocks without problem.
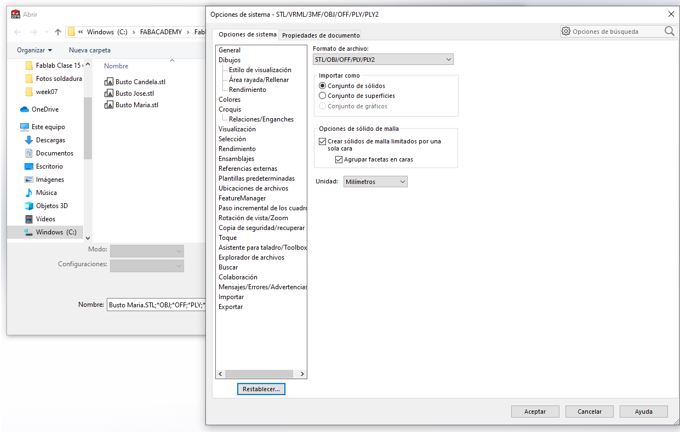
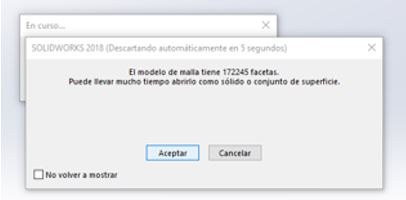
Issue: At the moment I cannot access the computer where the Aspire software is installed , with which I can do the milling simulation, and this inconvenience together with a warning in Solid, which indicates that this program detects errors in the operations generated in the conversion of the stl file to a SolidWorks solid file with which to be able to work and do operations between solids with which I can configure my mold, it makes me rethink my initial idea to develop this assignment.
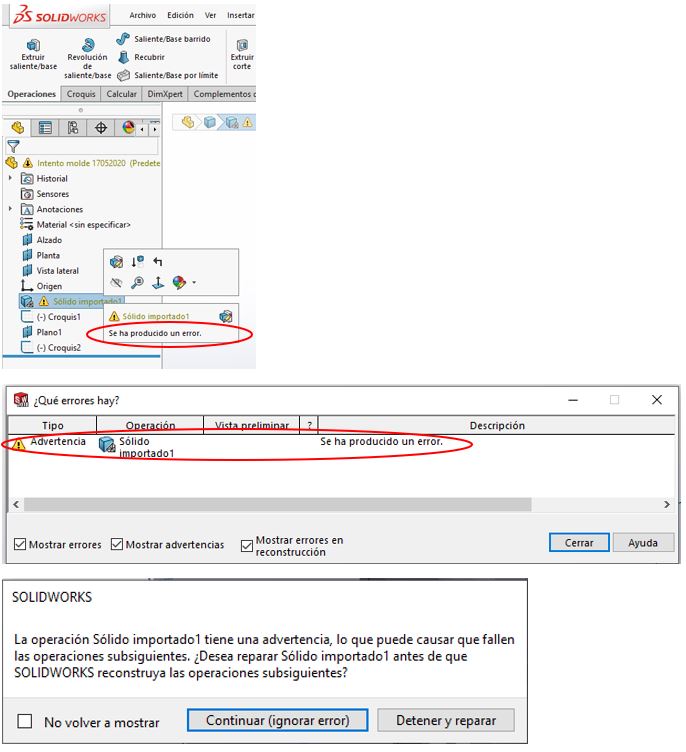
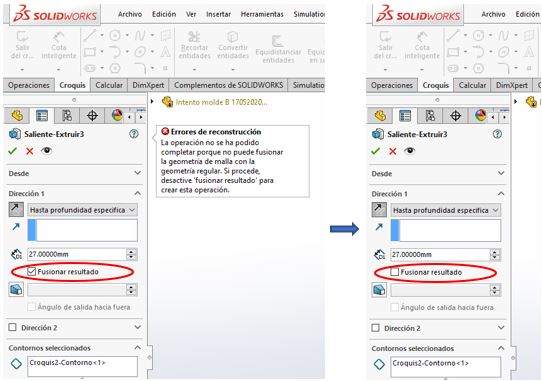
The errors may be due to the large number of facets in the stl file obtained from the scanning process, which has had to undergo triangle reduction to be able to import it from Solidworks and some of these actions have not liked this program very much, let’s not forget that compatibility problems between programs may appear.
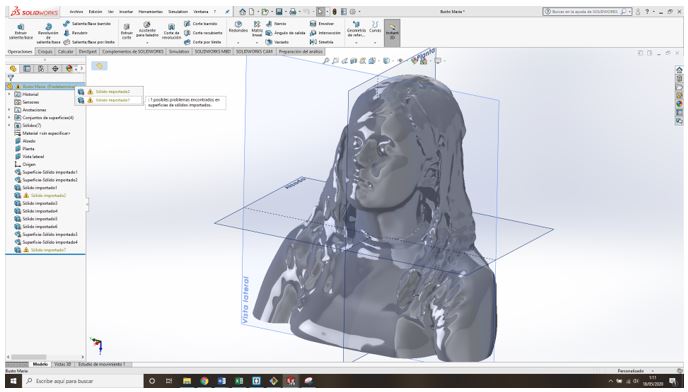
To check this, I import another file from the scan (this time from my nephew José), and the same errors appear in imported solid, which do not allow me to perform necessary operations.
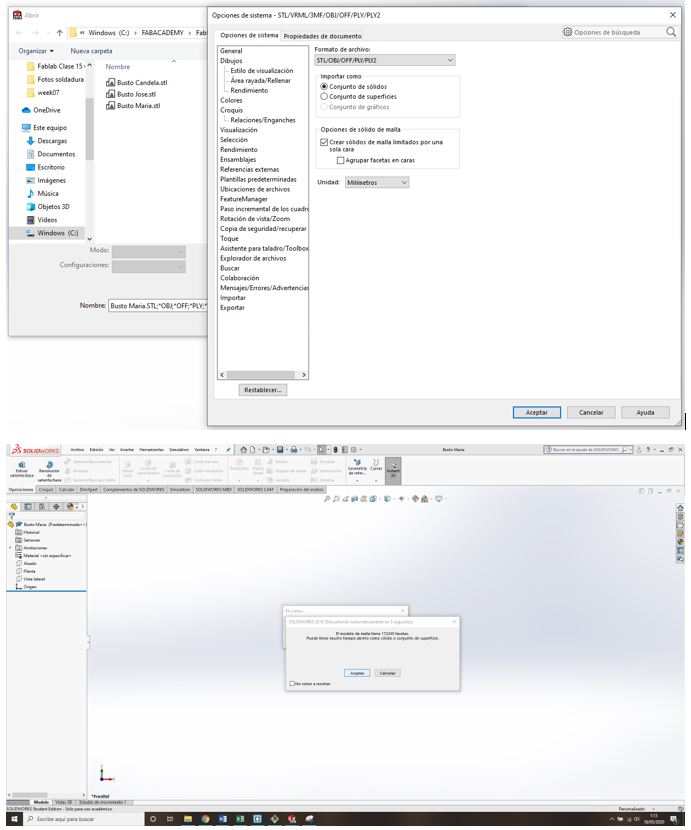
Another option in stl file import in Solid.
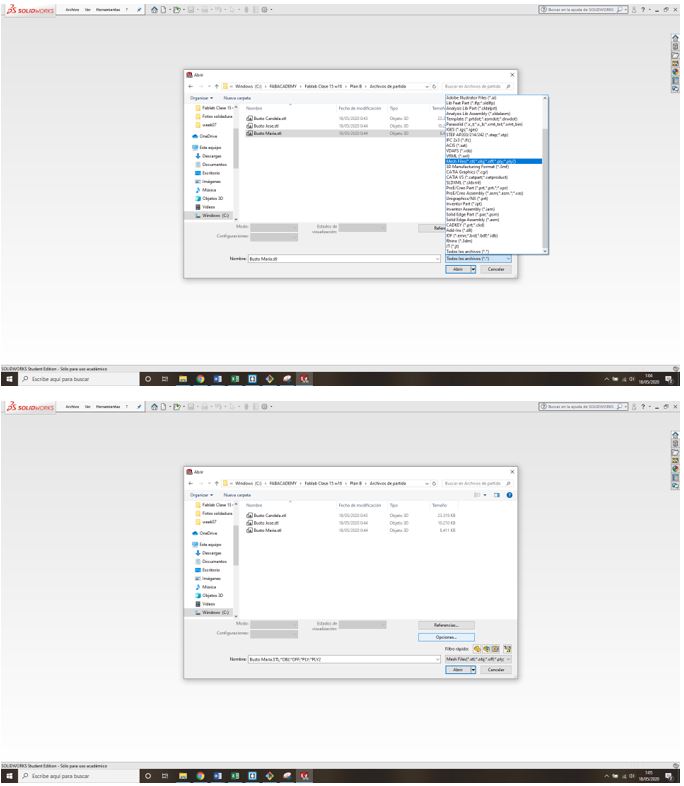
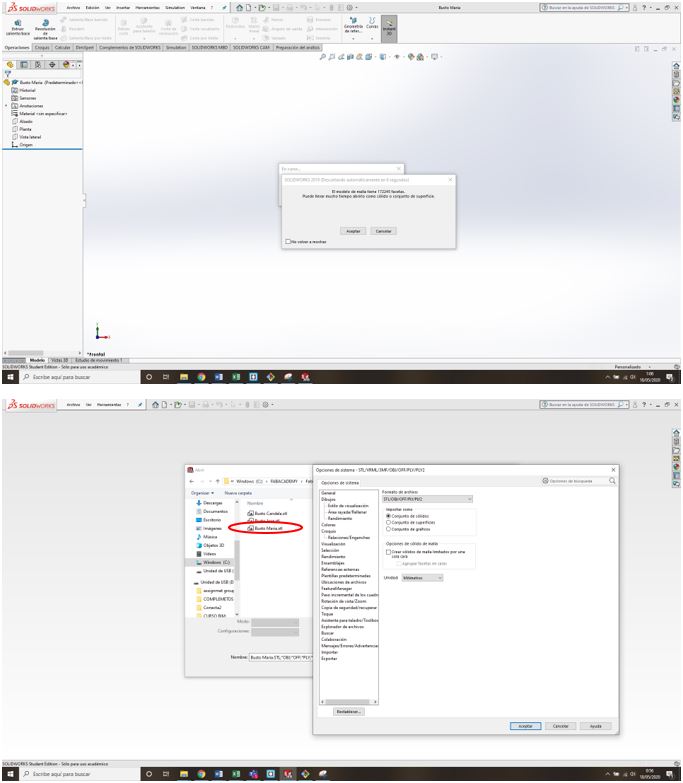

It does not respond and the program closes !! :(
Now I try this other stl file open option:
And imported solids also give problems.
I try this other option:
I accept and cross my fingers!!
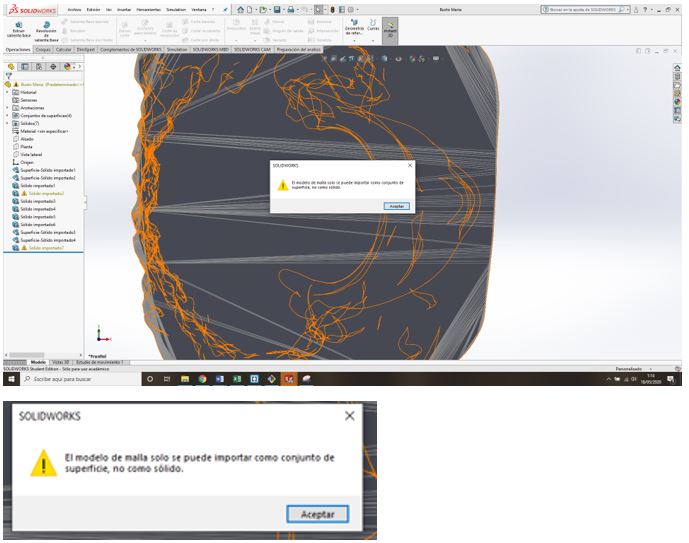
Problems again, so after all these attempts and all the work that has gone into it, I can’t afford to spend any more time on this initial idea.
Therefore, I decide to move to a plan B .
Plan B
I am going to make a new design of my own to mill the wax and strain the silicone and thus obtain a mold to make chocolates and / or soaps or whatever.
I take the measurements of the wax as a base to create my mold.
There will be two parts that will be milled, then the two parts will be made of silicone and then I will try to make that figure designed, modeled and molded in 3D from different materials such as ice, chocolate, soap, wax, resin, I’ll see …
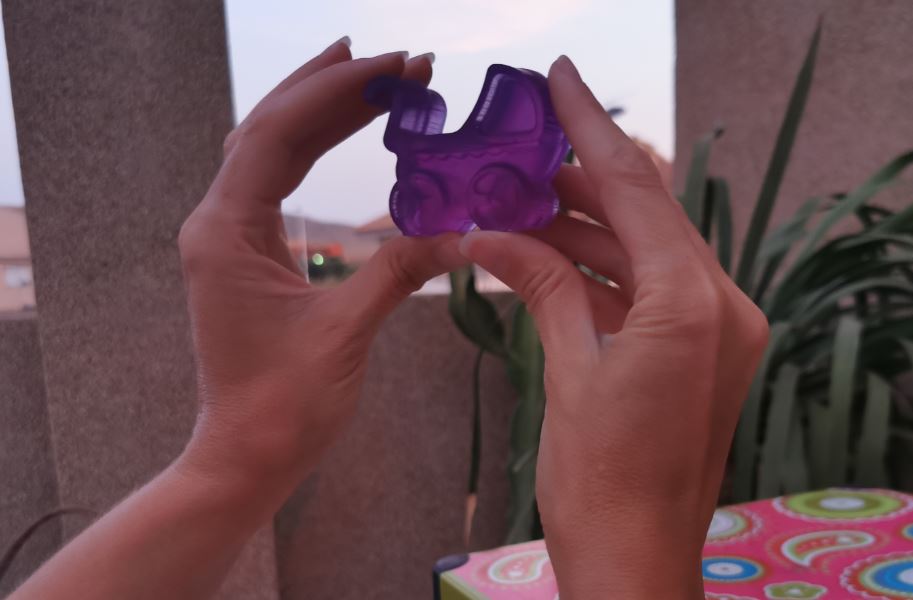
After thinking about the idea of what object to design, it occurs to me to shape a baby carriage, it is not that I have an active biological clock, I already did that task, but in my family there is a month-old baby and my sister She is also currently pregnant, the baby is due to be born in early June.
It would be nice to give the babies some detail made entirely by me. Since I don’t have time to knit, I think this may be an alternative. Some soaps to keep in the cabinets so that your tiny clothes smell good as well as being an endearing decorative object.
I have looked for tutorials to make soaps and waxes and I have found a website where on previous occasions I have bought soap base. They also sell molds here and I’ve found one that has inspired me.
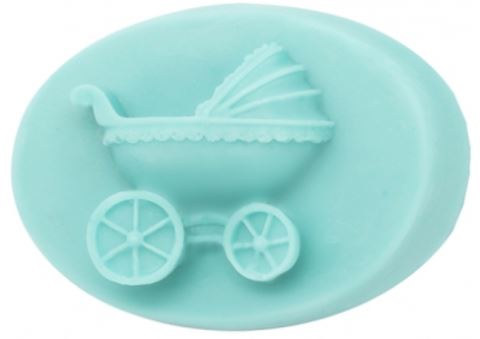
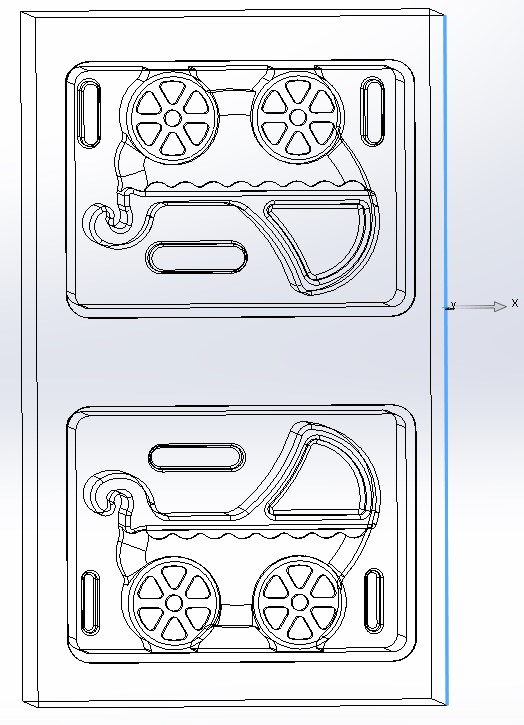
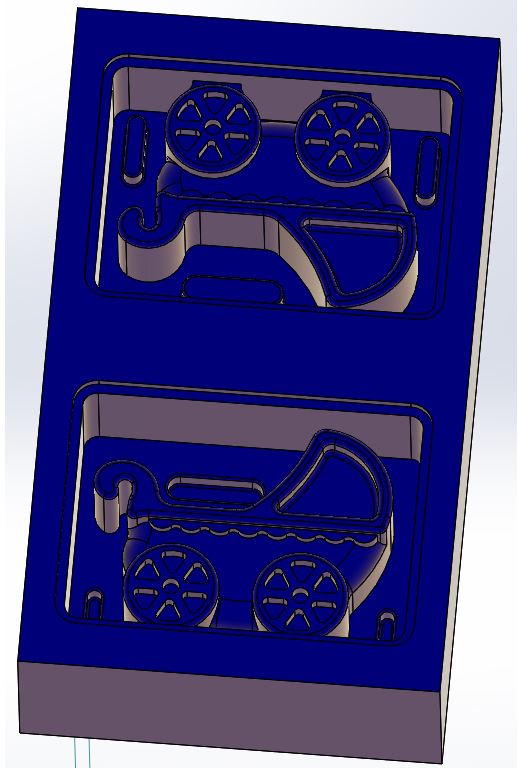
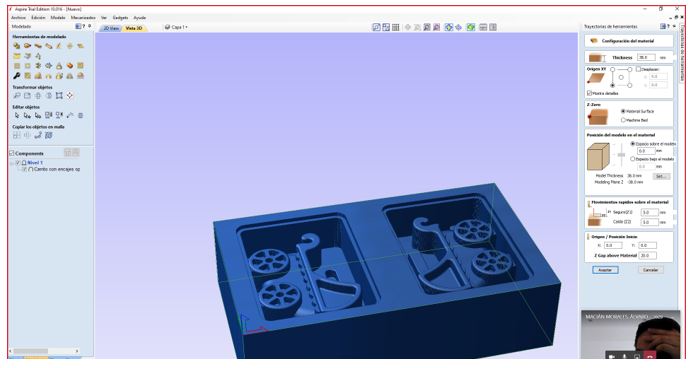
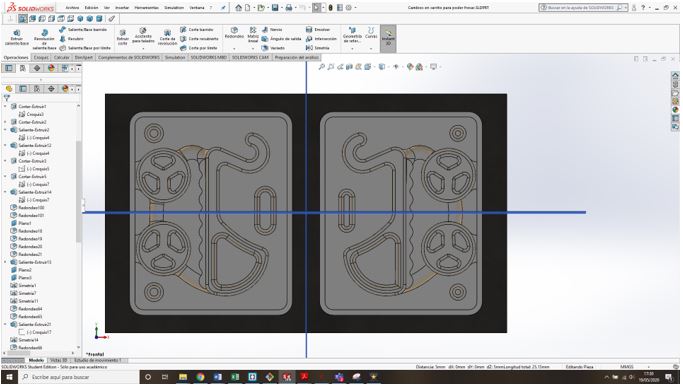
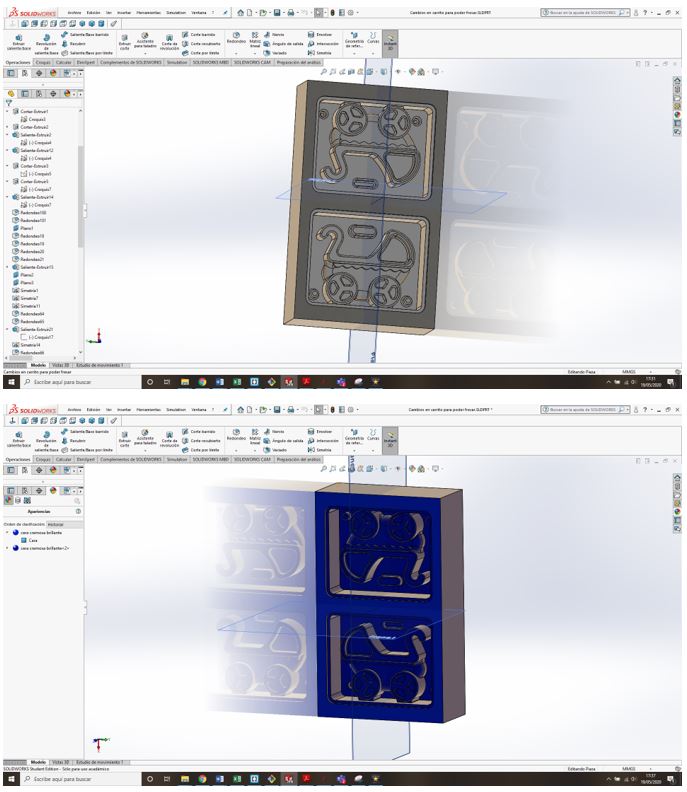
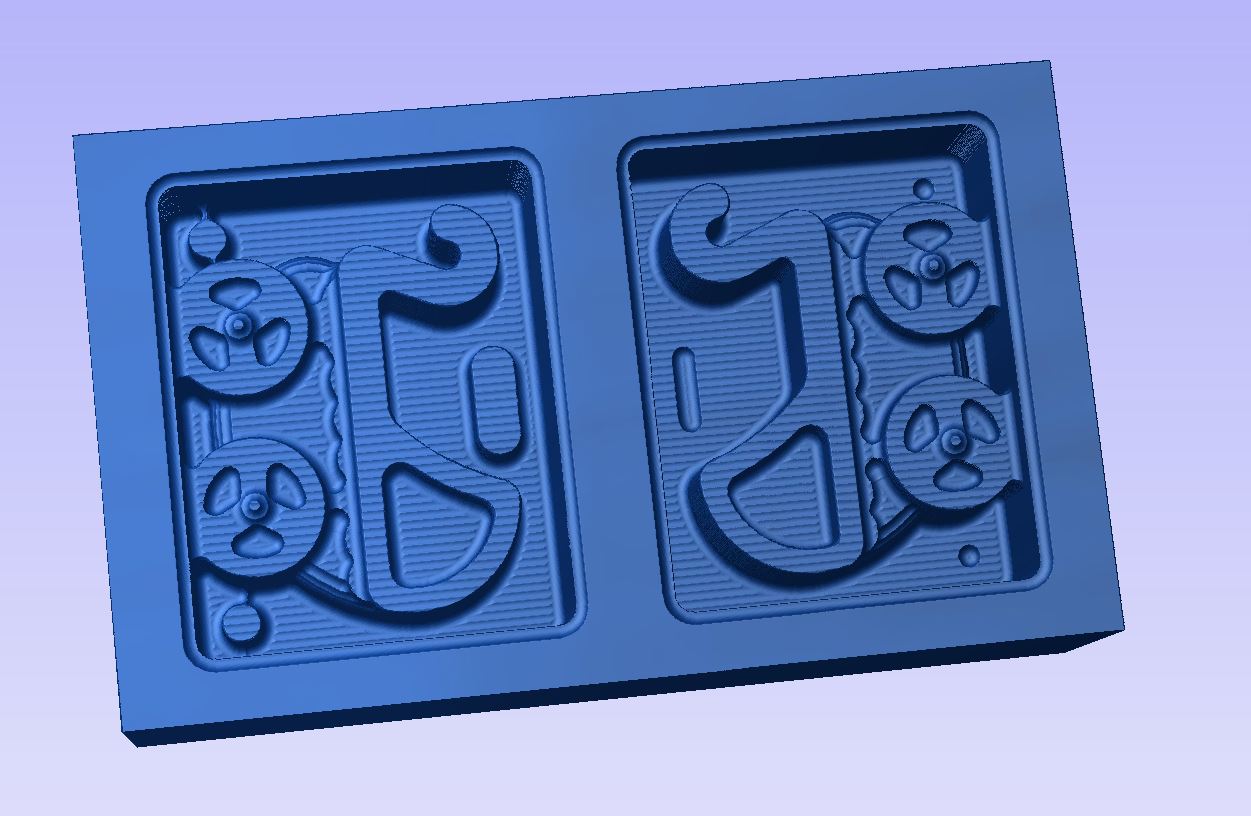
After changing things and trying to make the dimensions conform to those of the burs that I have in my milling machine and other points to consider, the result of my 3D modeling in SolidWorks is this:

16.1.2. Generating the GCODE
As I don’t have Aspire installed at home, I download a test demo in this link to be able to simulate the milling of my 3D design first and then I can go home from Álvaro to mill it from his equipment on the Stepcraf 420.

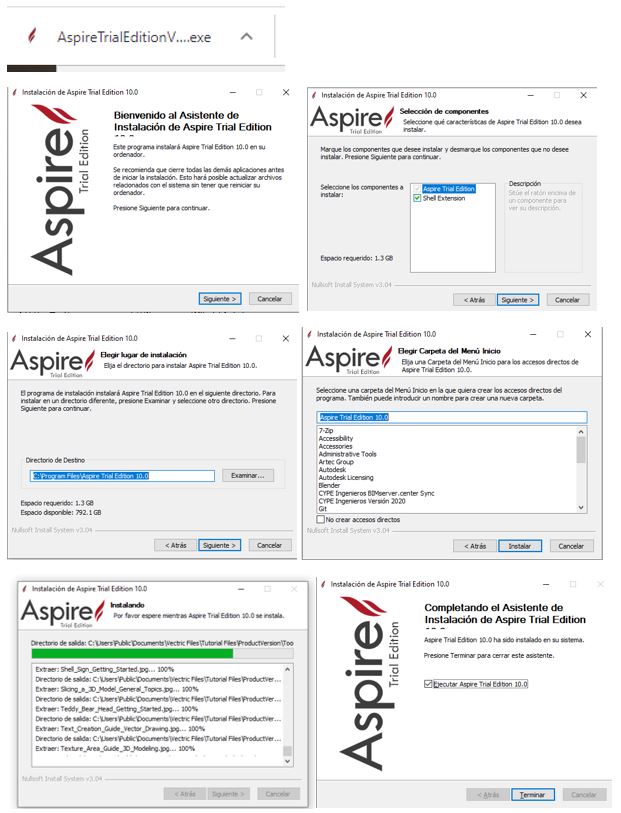

- I already have my trial version !! *
In this link of the ASPIRE website there are numerous video tutorials to follow to get up to speed with this simulator.
And I also follow this Aspire Youtube Tutorial, which I found on the website where I downloaded the demo of the program.

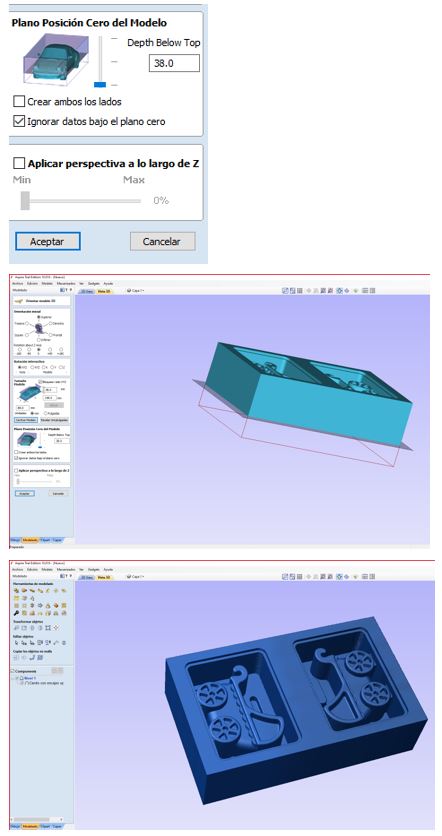
I change the depth in my design to ensure that the cutter can do the job from solid.
I close the above file from Aspire.
I open the new updated file
I leave it as is, and I generate the roughing operation. then select the tool by setting parameters.
Select
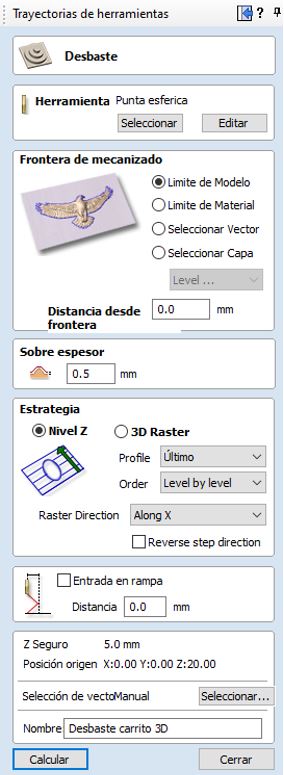
The “Calculate” command is selected
The simulation window opens
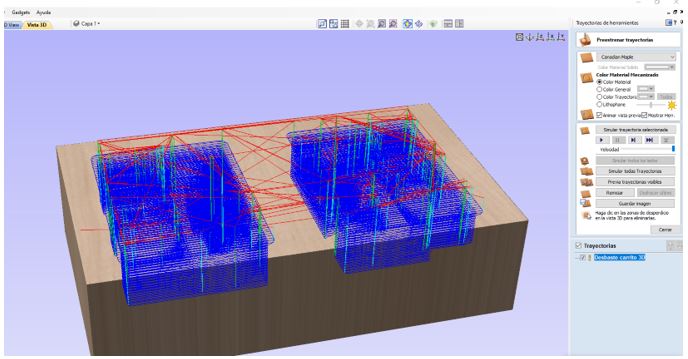
I change the appearance of the wax to blue plastic and I indicate parameters for the roughing.
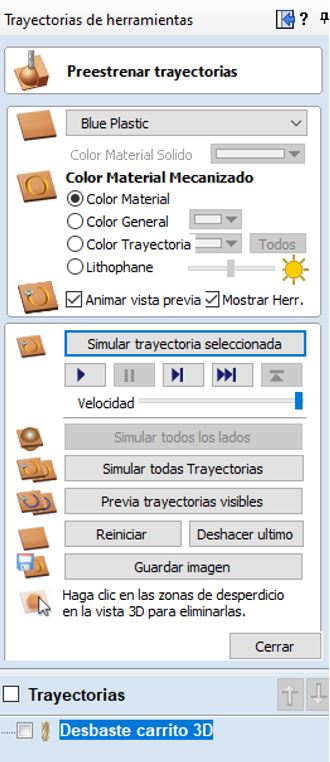
I select the option Simulate on all paths:

I lose a lot of details so I am going to modify my 3D model again.
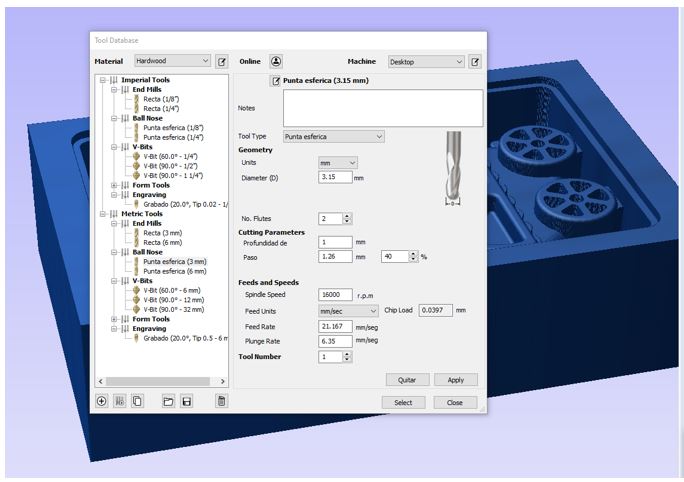
I make sure that I do not have anything less than 3.15mm, which is the diameter of the round nose bur that I have to mill. This way I will not have problems when milling.
I mainly modify the spokes of the wheels and some curved geometry like the handle of the carriage.
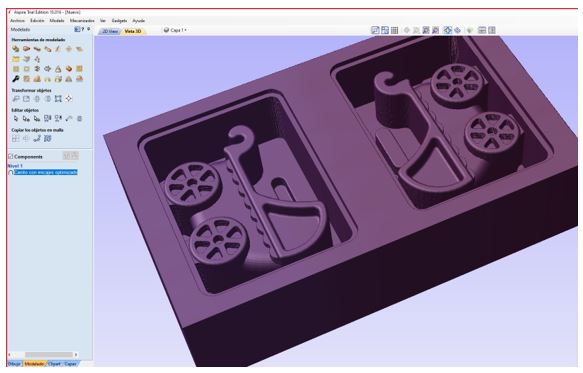
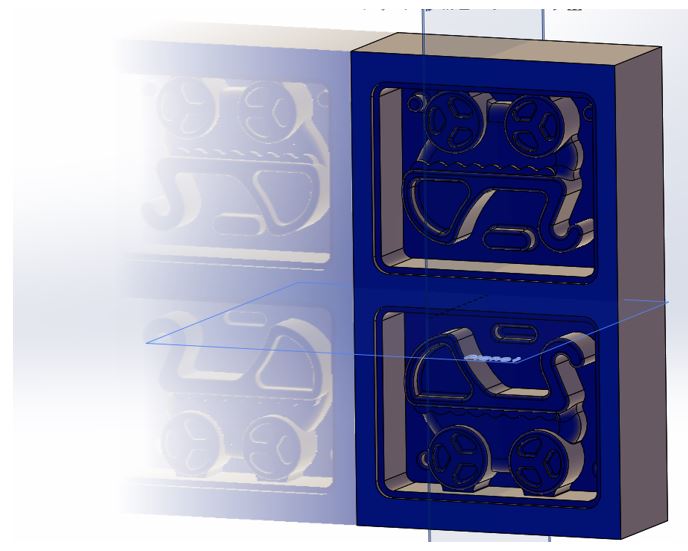
After all the changes in the modeling design, the mold looks like this:
I create the new stl:
And this is the design that I am going to mill.
I follow the same steps as above to configure the milling.
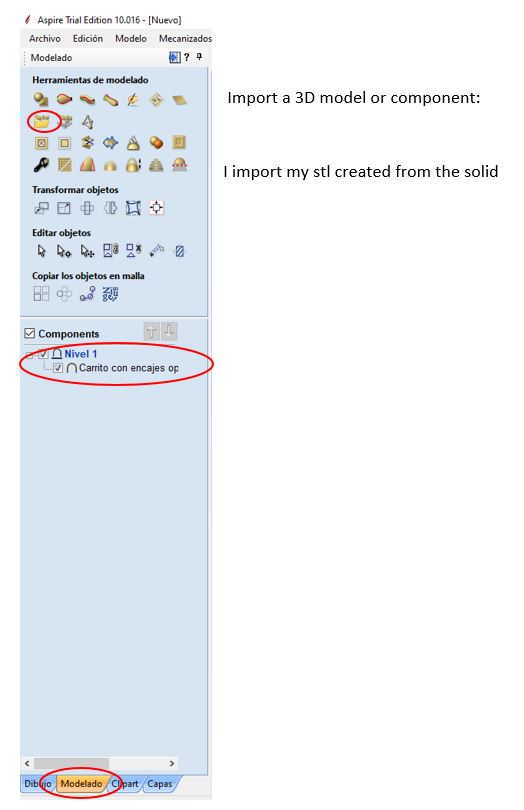
I import my new stl created from the SolidWorks.
The parameters used for the debug operation are the same that I have set to perform the simulation with the stl of the previous design, before optimizing it.
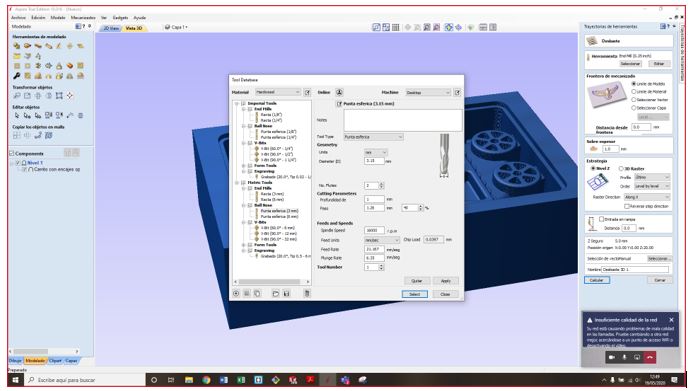
I select the tool and set the appropriate parameters.
Select:
The “Calculate” command is selected
The simulation window opens, then I indicate parameters for roughing and select the option Simulate in all paths:
The result of the roughing operation simulation is this:
Finally, I configure the finishing operation for the milling of this piece that will serve to make my silicone mold.
I choose the tool, indicate the parameters and configure the strategy of the finishing operation:
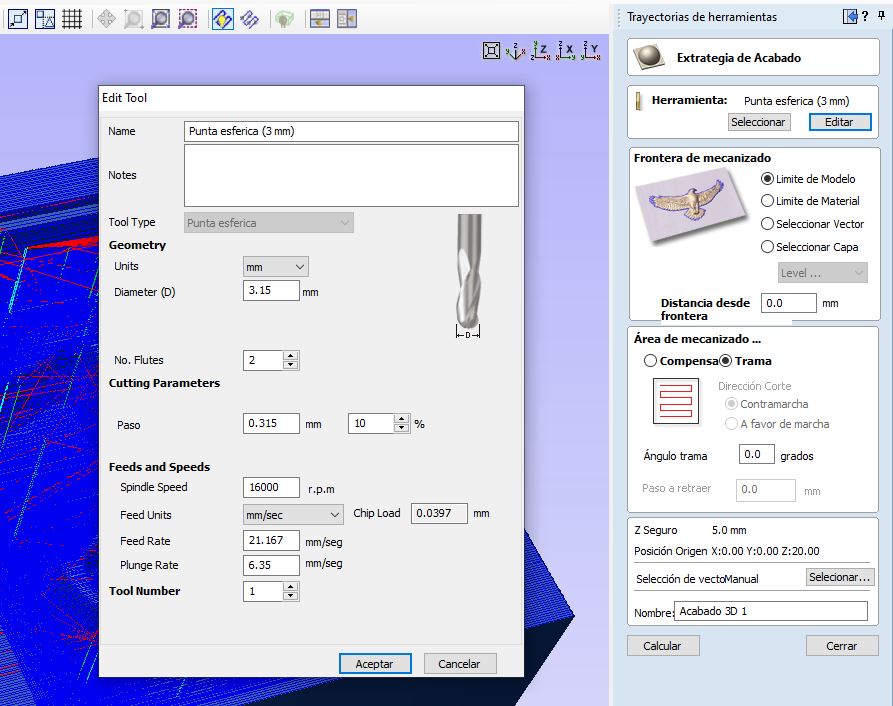
The result of the simulation of the finishing operation is this:
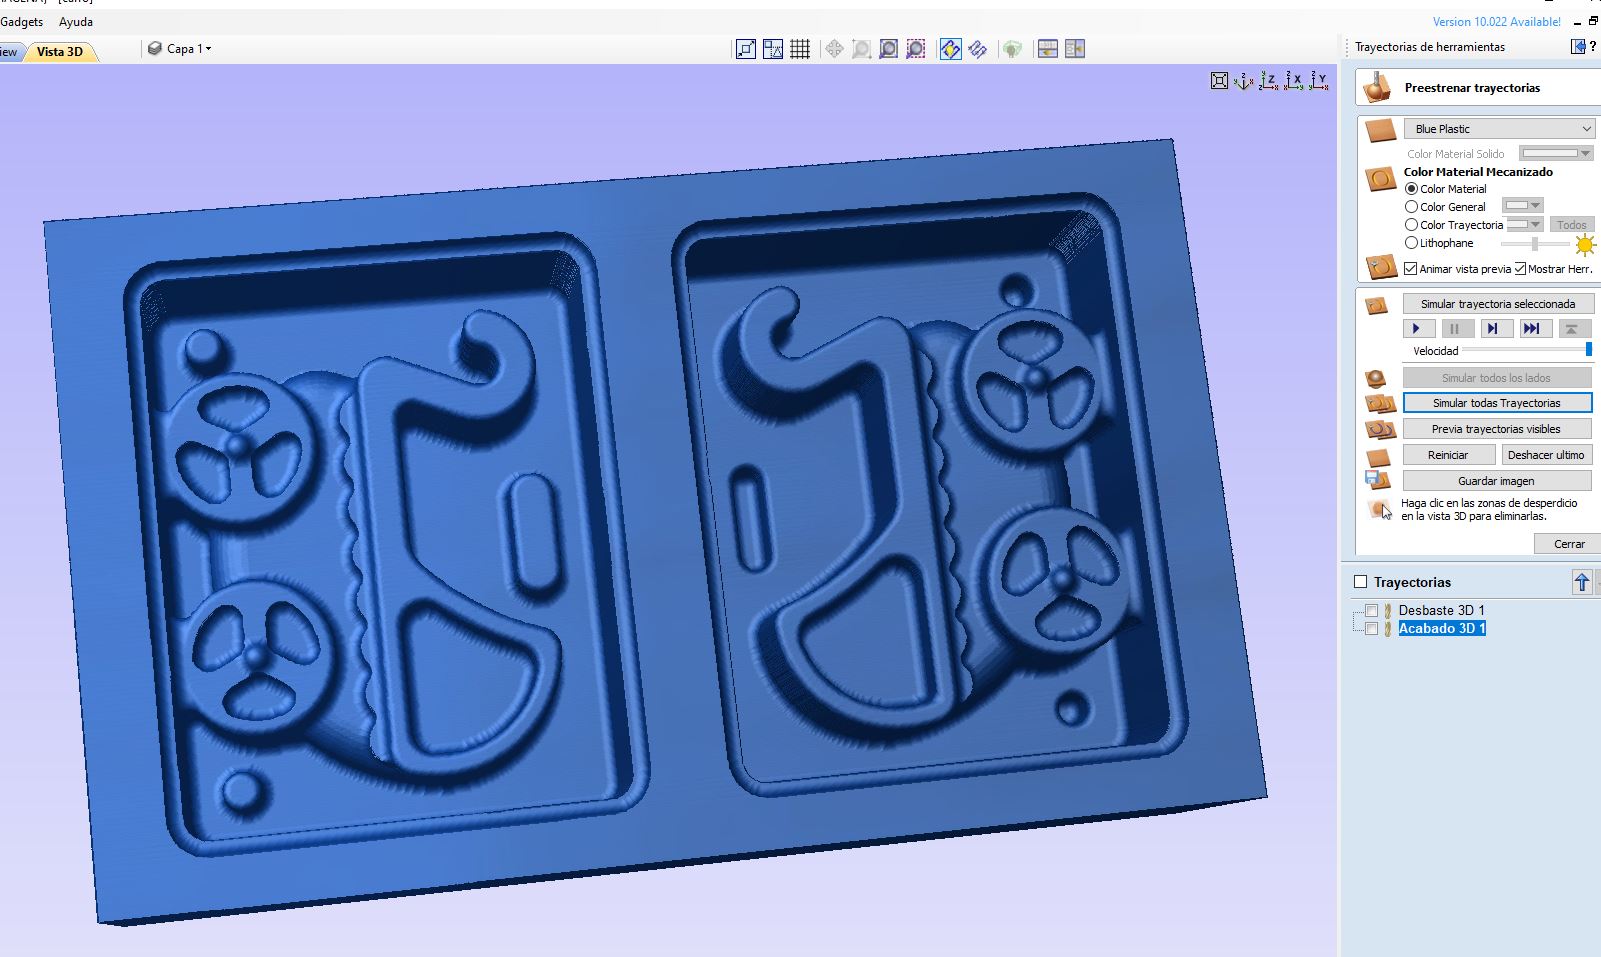
With this I think my milling work on the wax will be very cool.
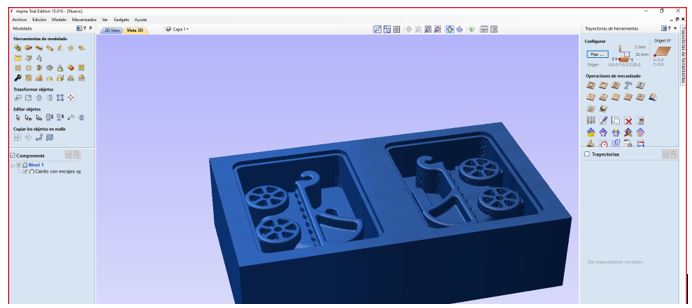
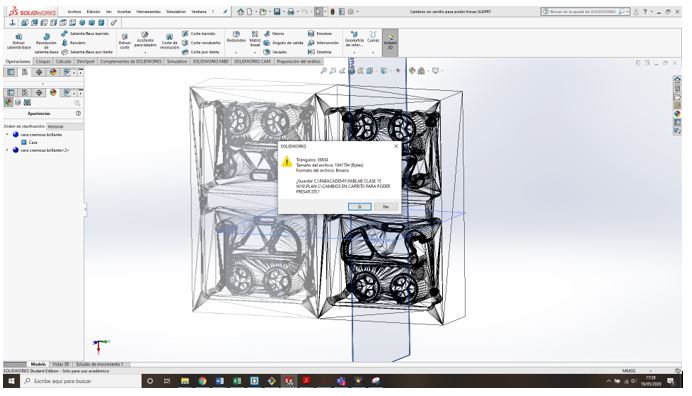
The generated files are these:
The simulation carried out is in the following file:
16.1.3. Milling
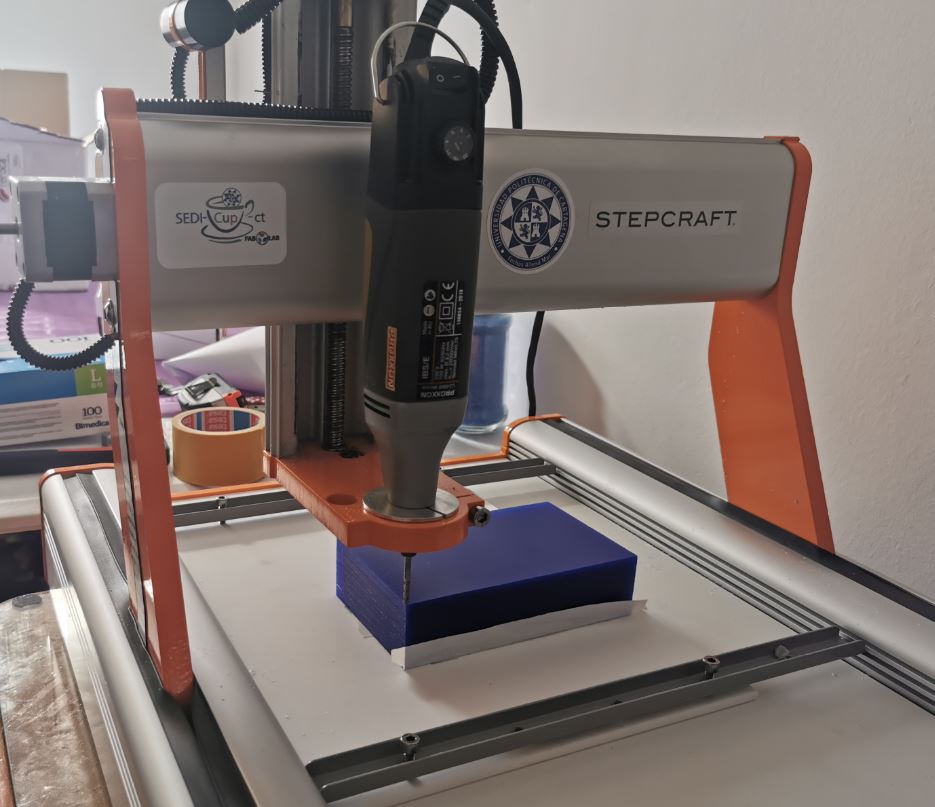
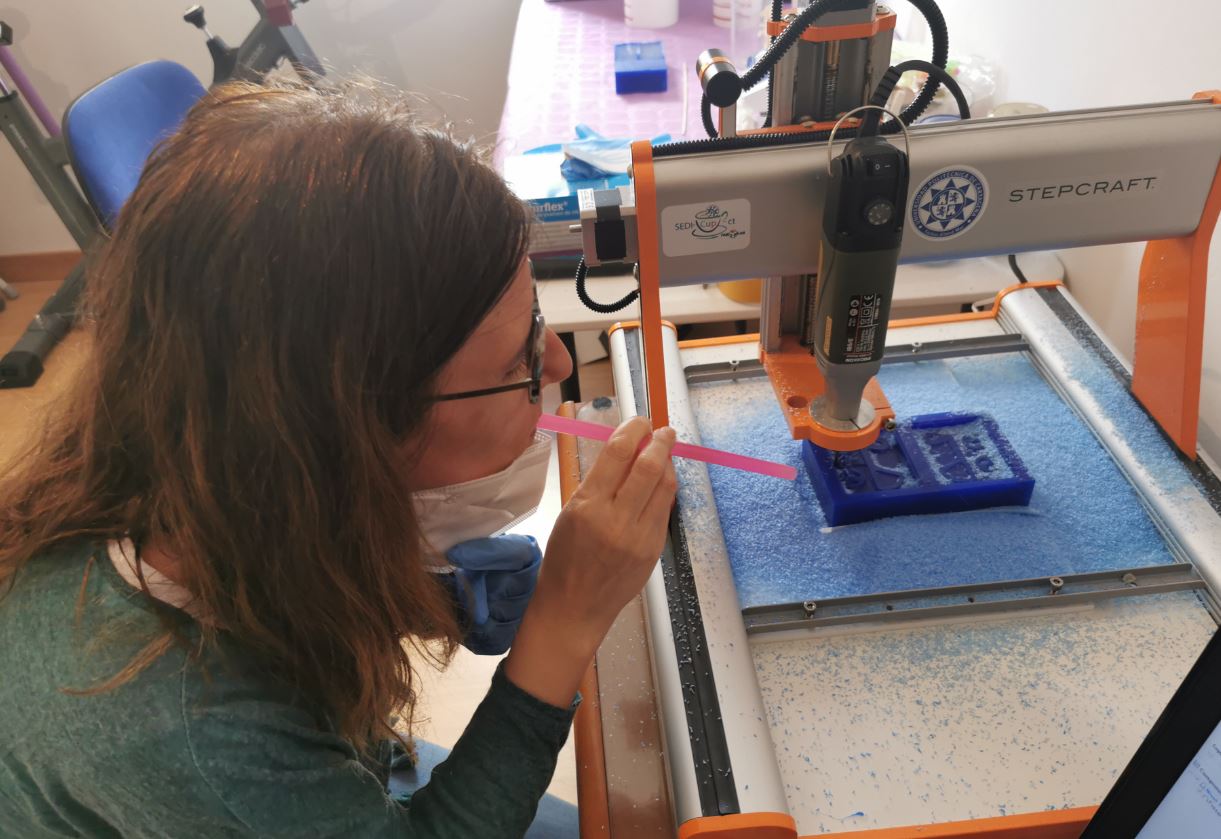
As I have already explained above, I use Stepcraft 420 milling machine and Stepcraft UCCNC software to mill the wax mold.
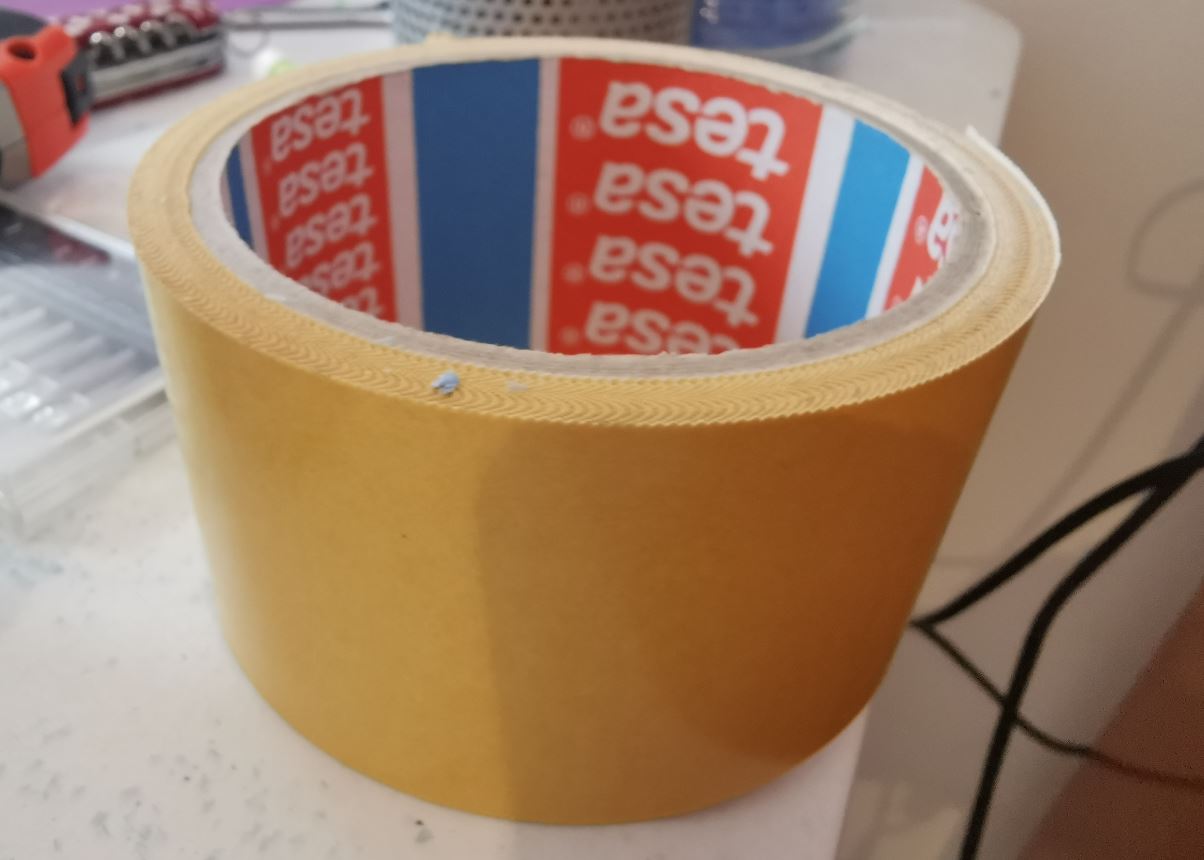
At Álvaro’s house, I prepare my block of wax in the router, so that it is well fixed I use double adhesive tape.
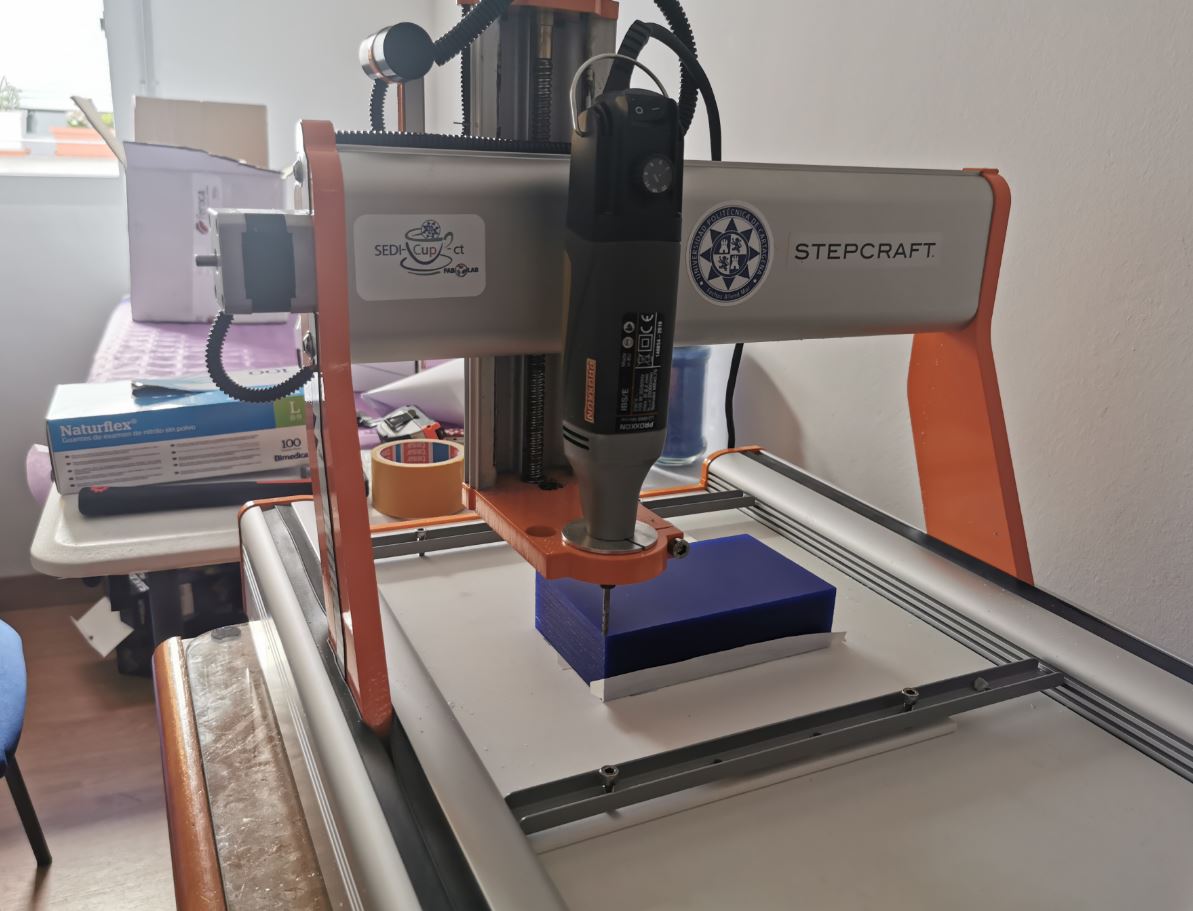
I prepare the file to send it to the milling machine and configure the parameters for this job.
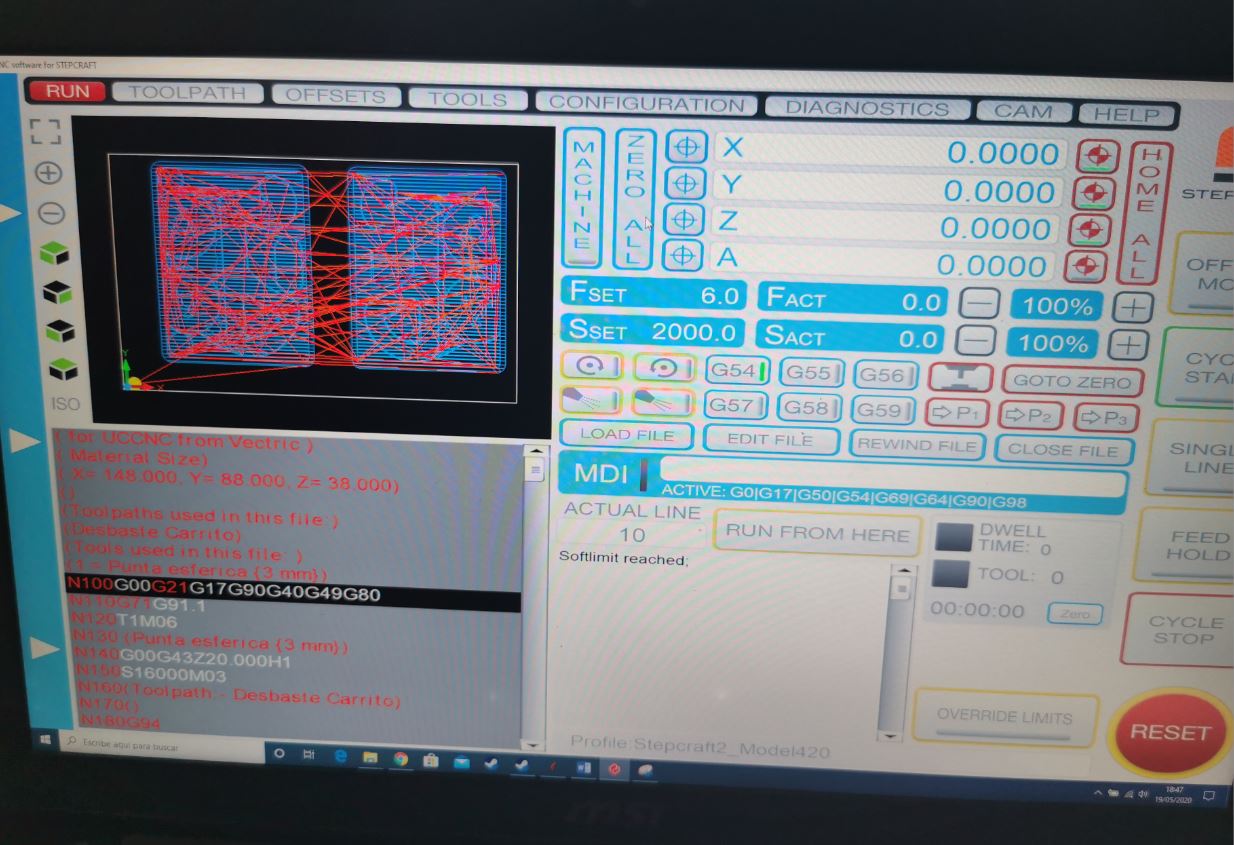
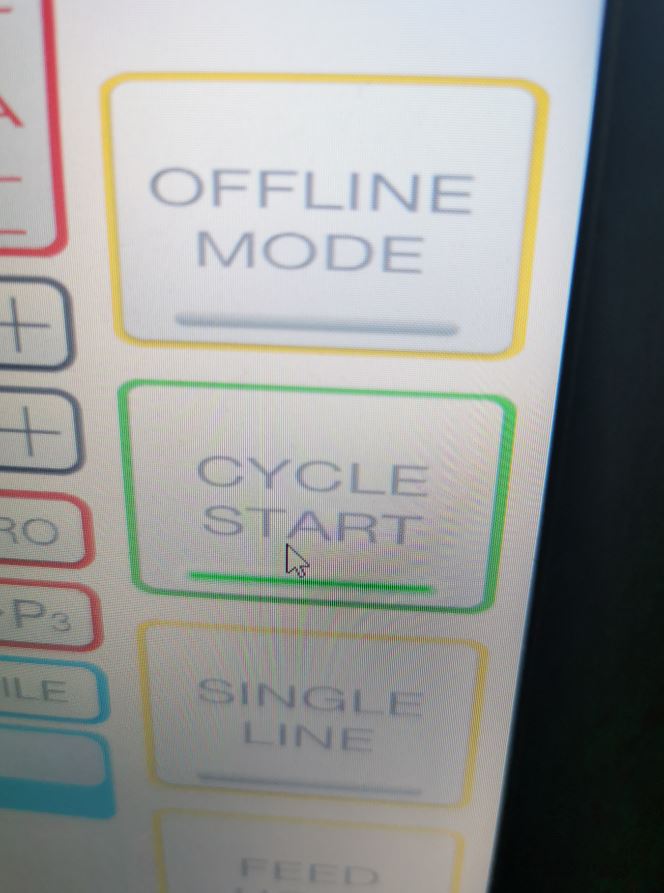
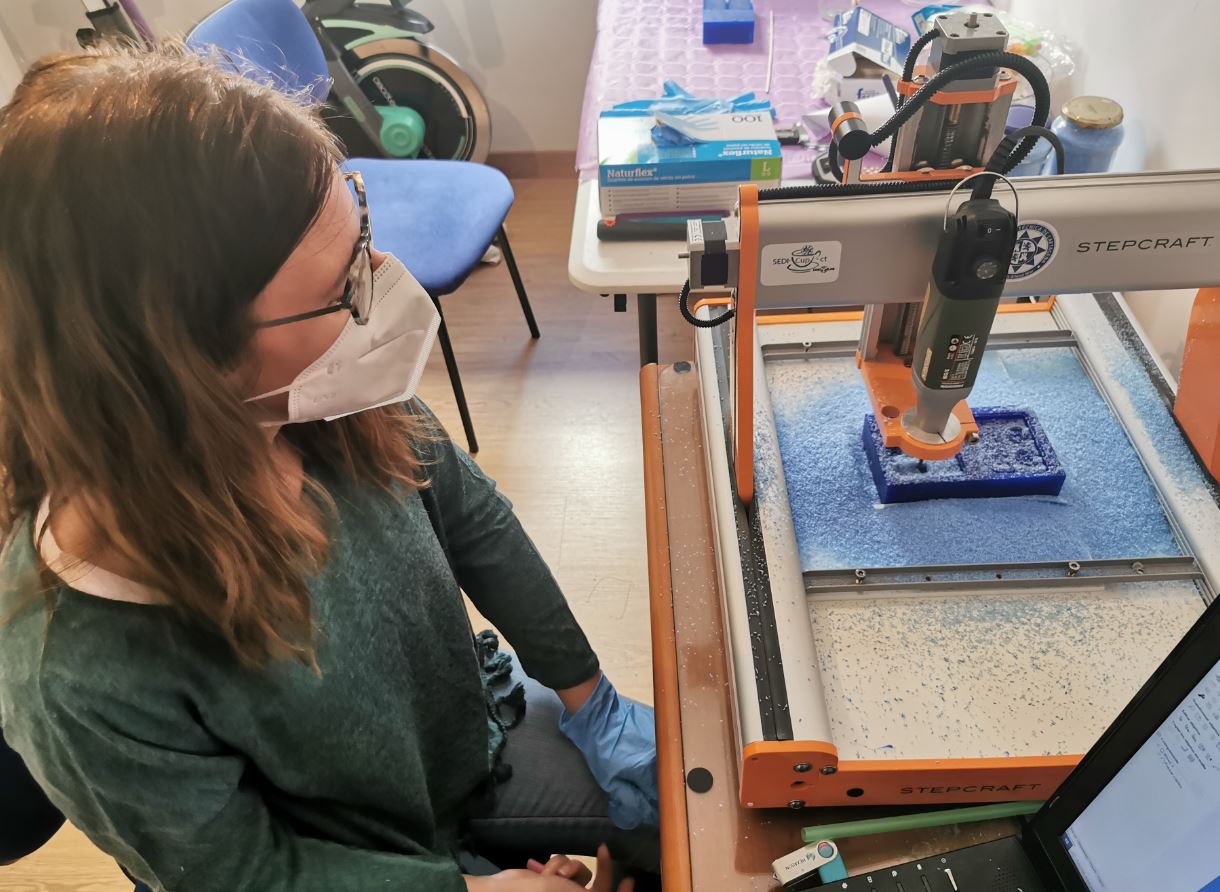
Start to begin milling.
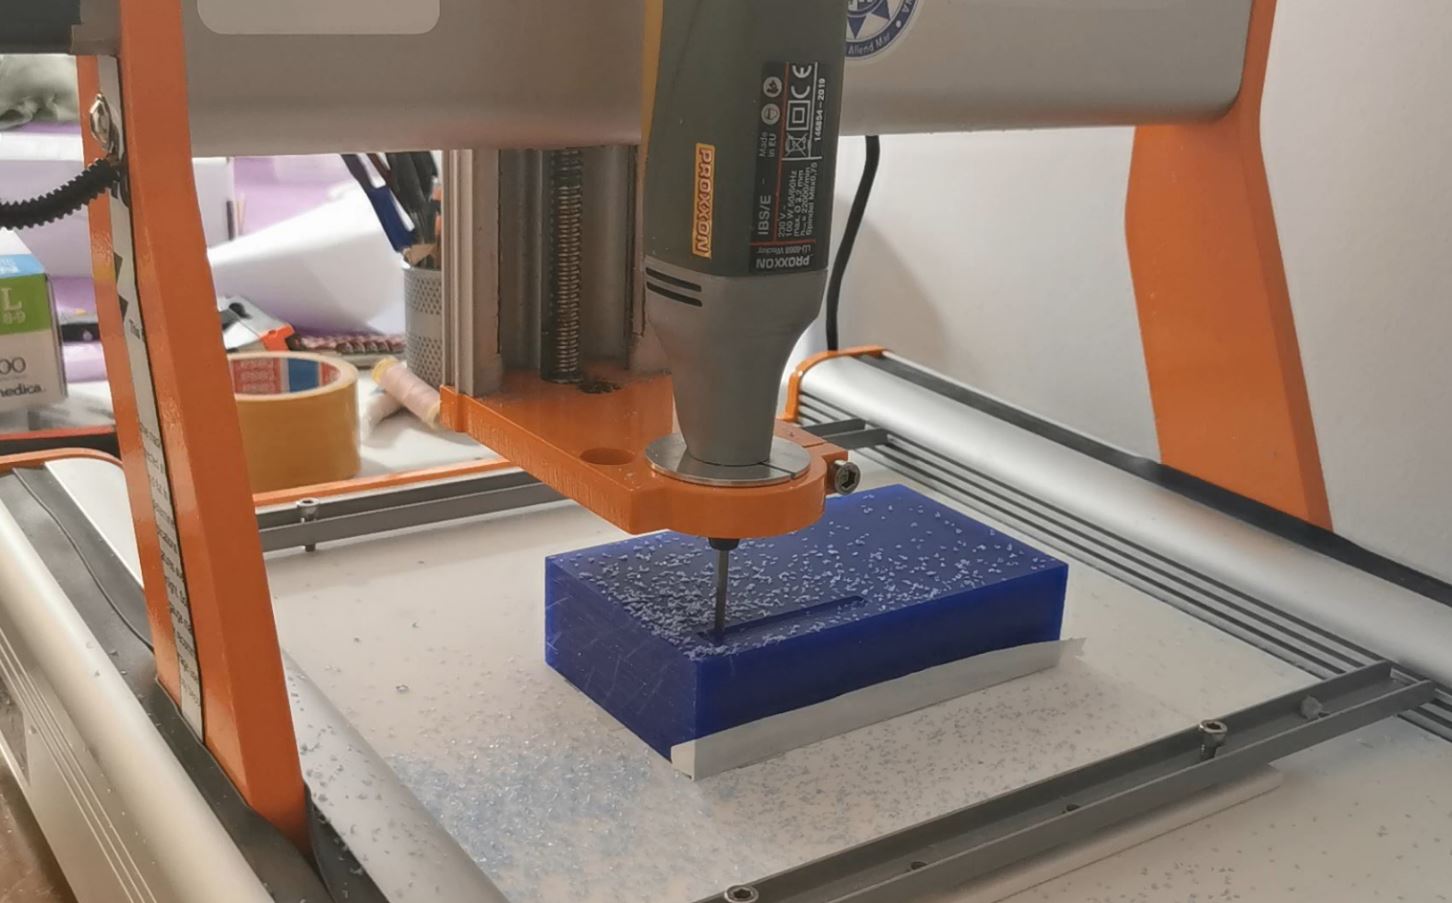
This is how the milling looks:
From time to time I observe so that the wax chip does not interfere with the work of the tool.
This process generates a lot of this wax chip and I try to remove it, if I blow gently directing the air with a straw, I can clear the area around the tool.
Finally I will collect the detached wax and if I melt it, I will be able to make a block of small dimensions that will serve me to be able to machine it again, or even to make candles with some shape that I have obtained with a mold.
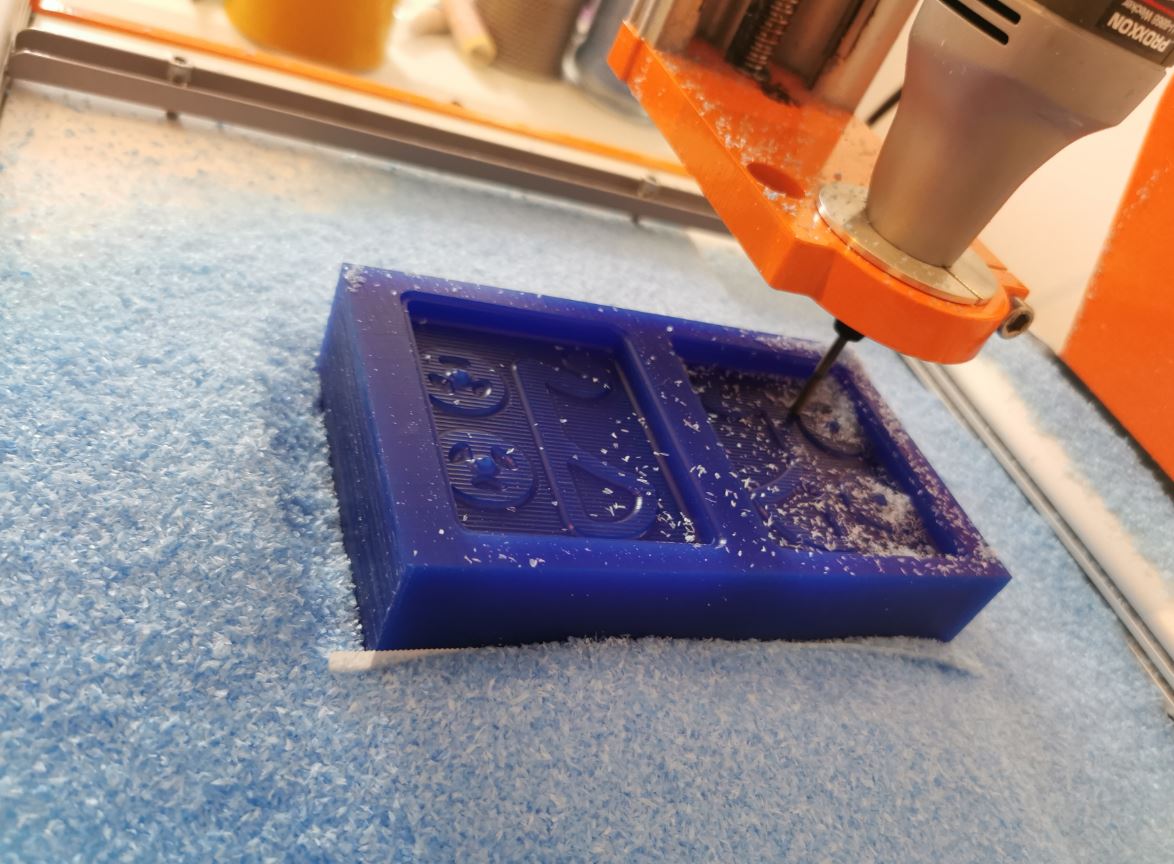
This is the result of rough milling, now the last phase is still missing which is finish milling.
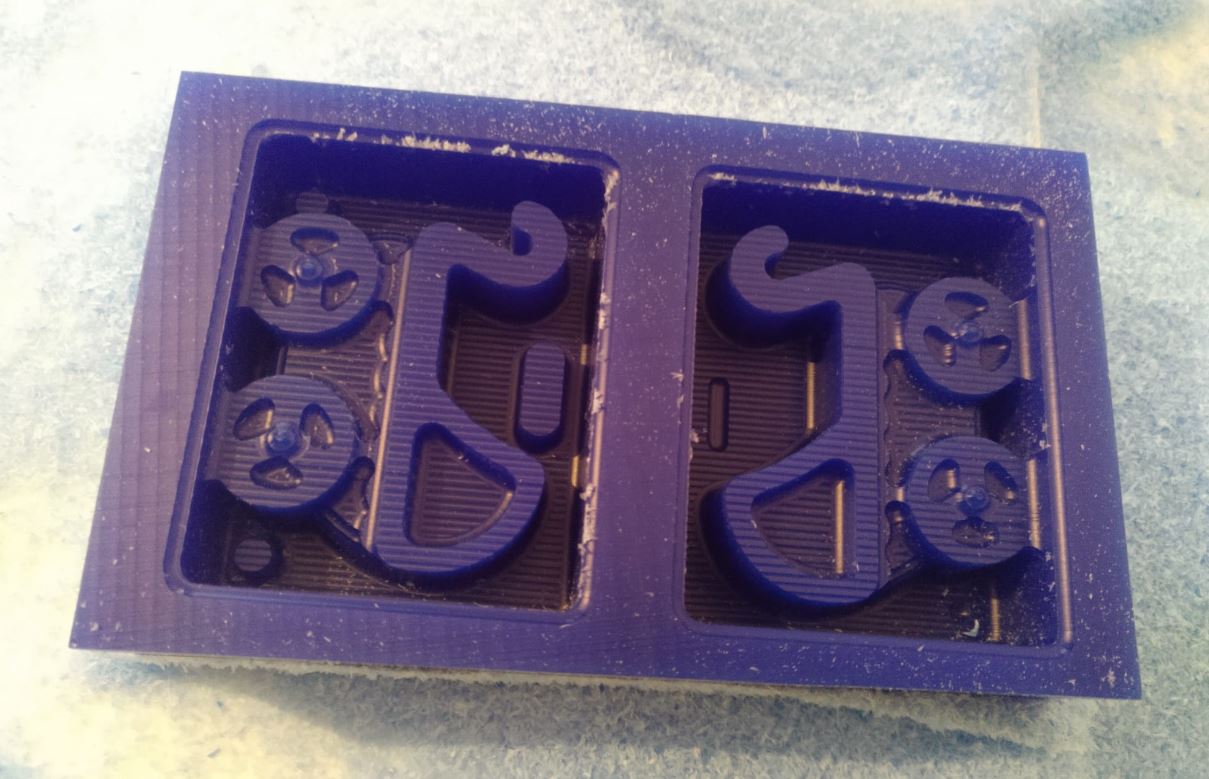
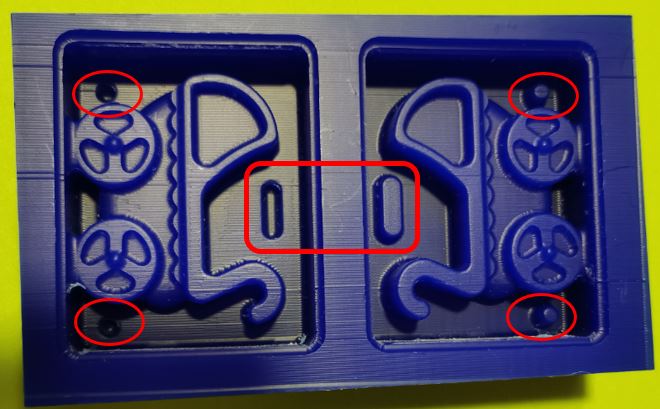
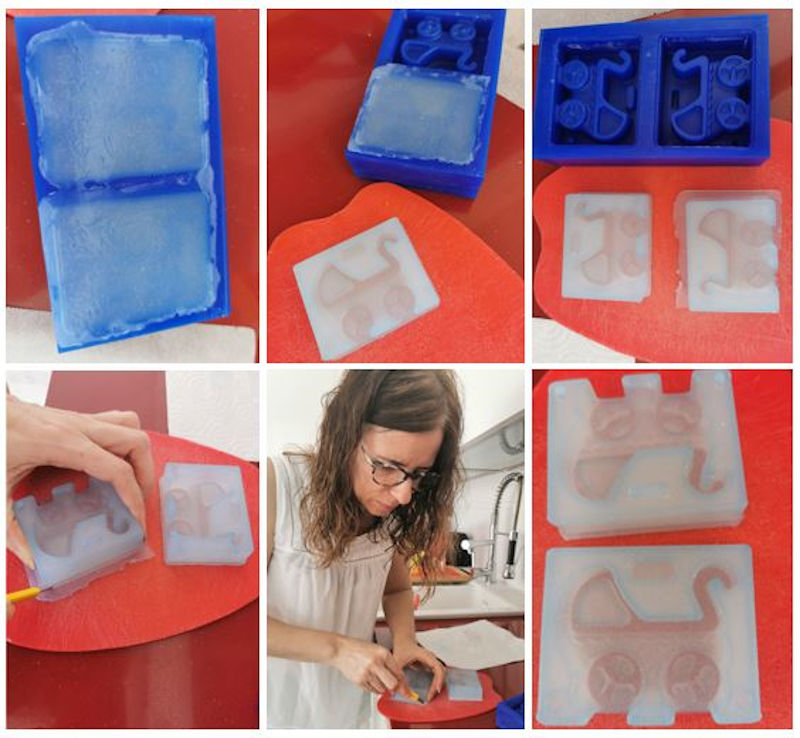
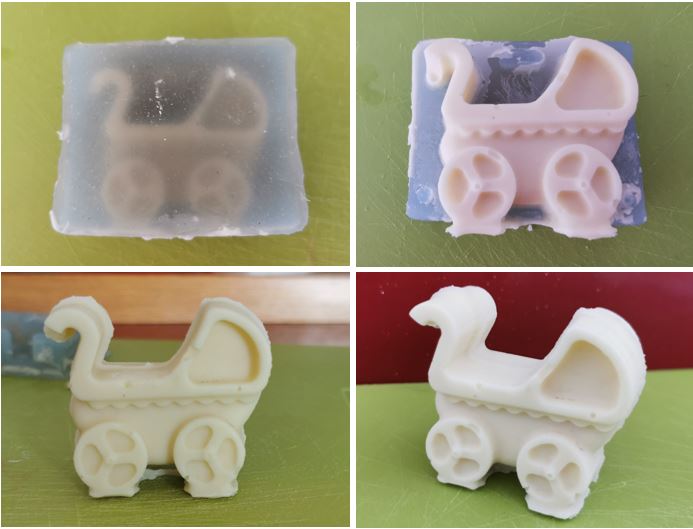
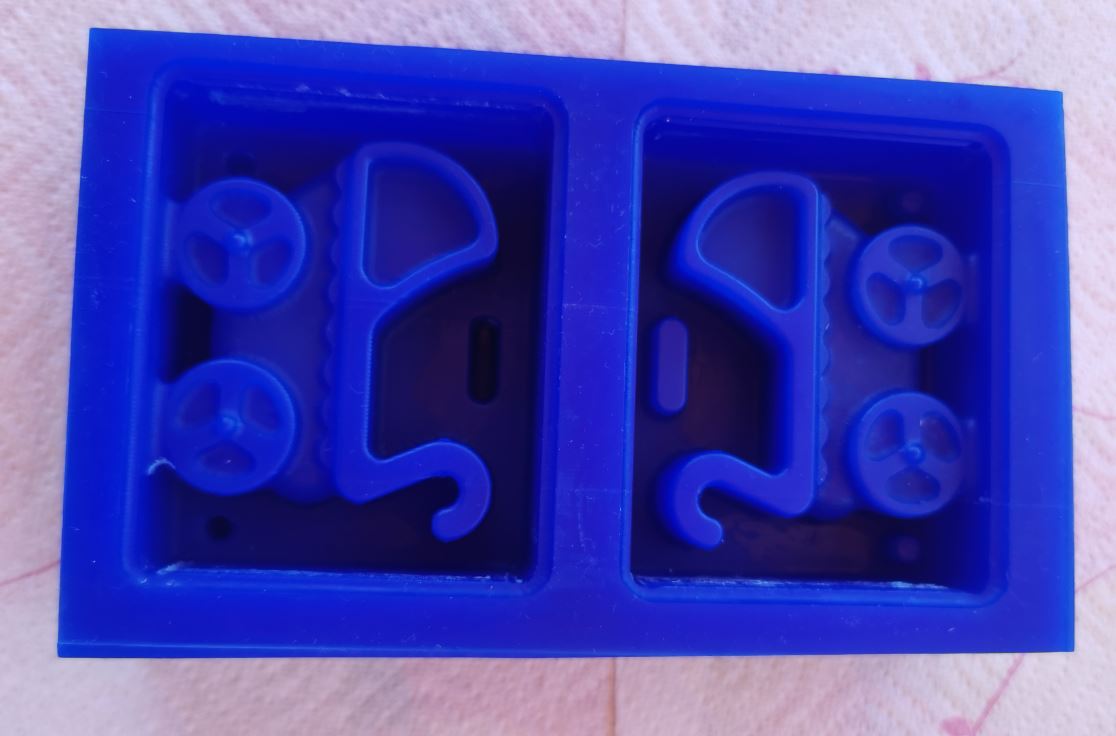
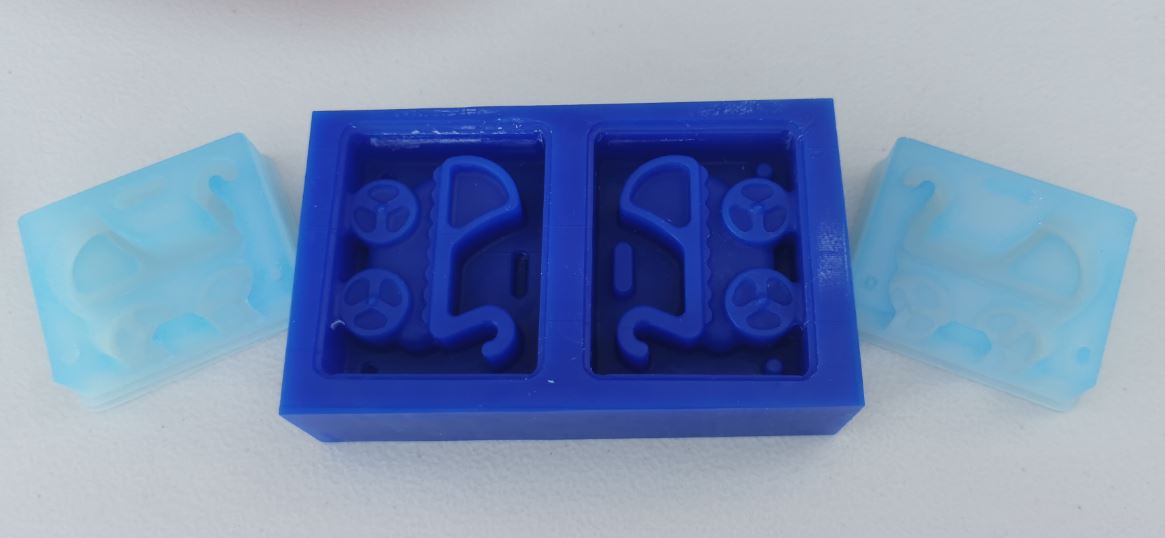
This is the result of my mold after finishing milling.
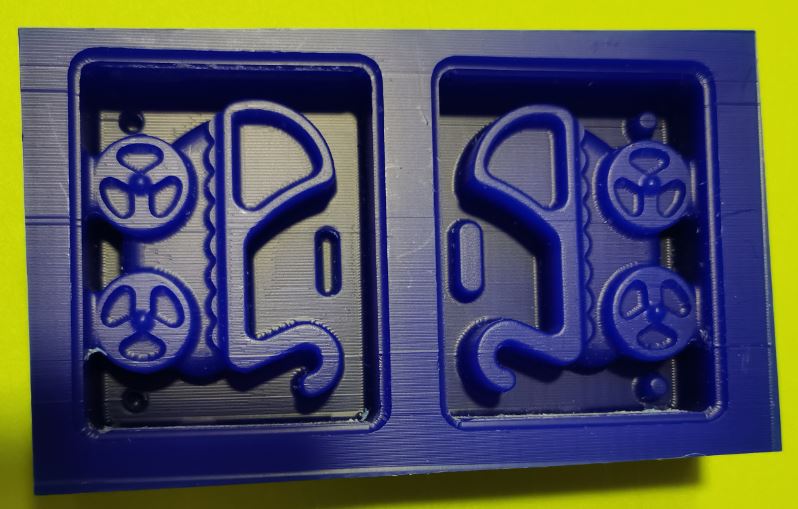
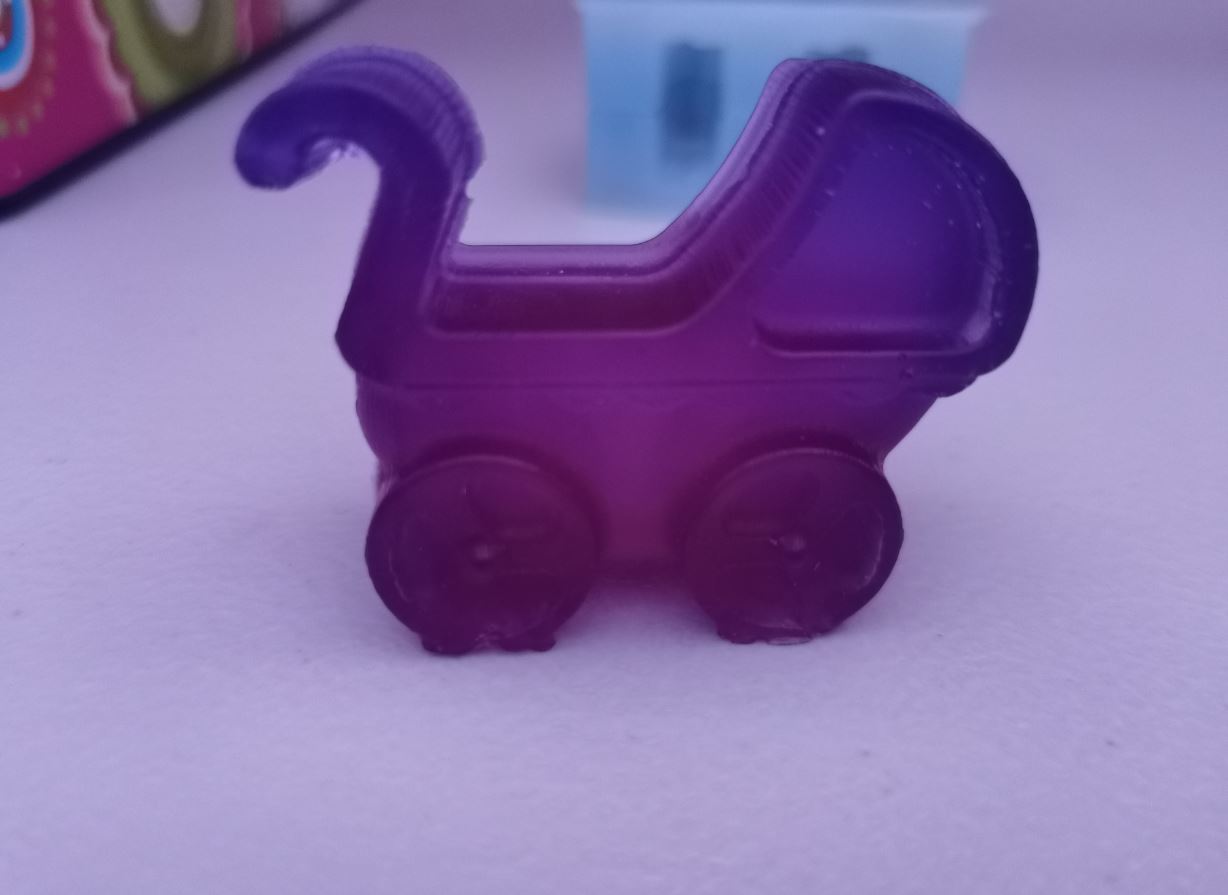
In the design I included some projections so that the two parts of the silicone mold that I am going to manufacture, fit perfectly.
16.1.4. Casting the silicone mold
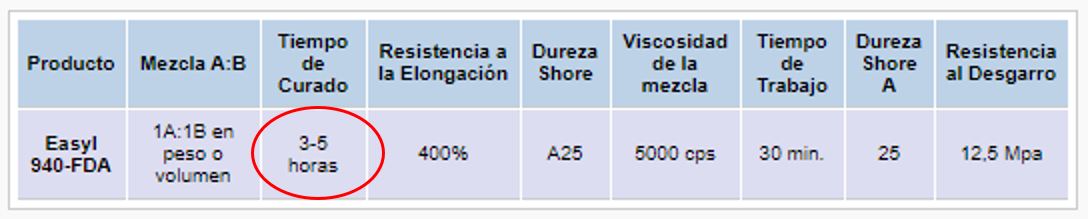
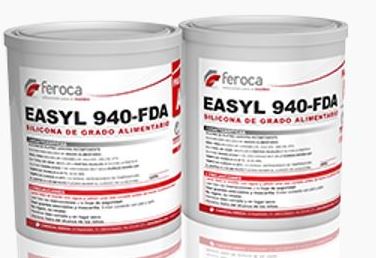
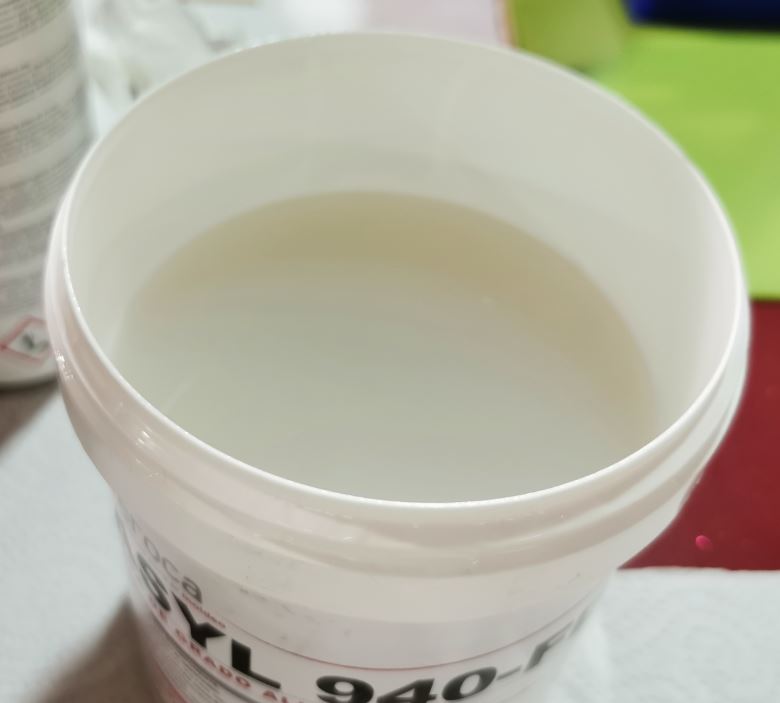
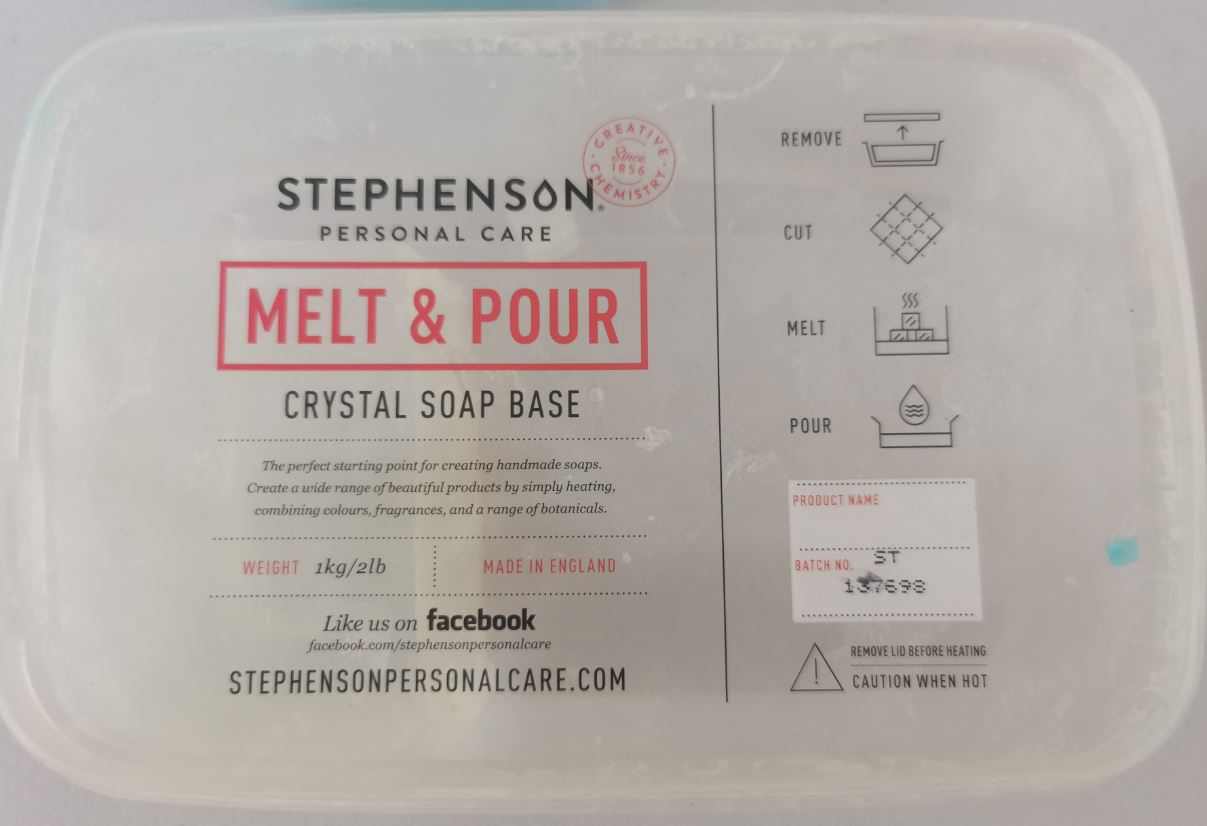
To make the final mold I have used Easyl 940-FDA silicone. It is a platinum silicone (addition) of Shore A 25 hardness, very easy to use and suitable for making molds of different foods.
On the website of the supplier of this product there are some characteristics of the material where a curing time of 3 to 5 hours is indicated, but there is an ambiguity between this information and the one that appears later in the instructions for use sheet available also on the same website, in which in contrast it is indicated that the curing time is 24 hours plus 4 hours in the oven at 100ºC.
Links to all this information appear in the groupal assignment.


In the updated information on the web, the silicone working time appears, which is 30 minutes.
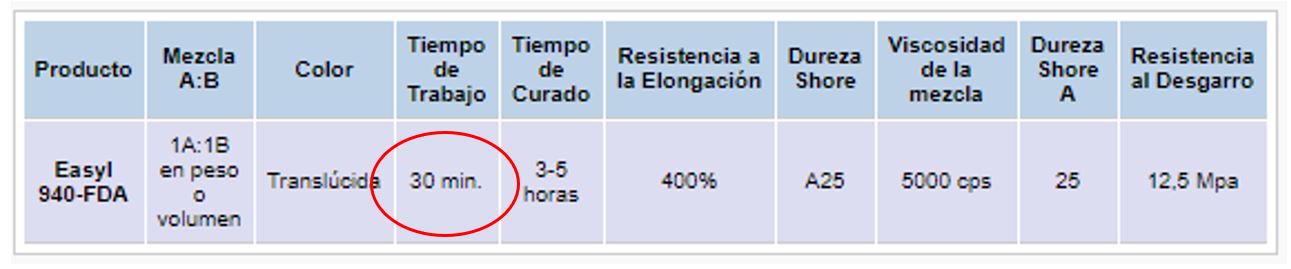
Therefore, before starting to manipulate the two components of the silicone, I have to foresee that it does not take me more time than those 30 minutes to fill the molds and other actions to be carried out.
I did all this operation at home, at night after dinner and cleaning up the kitchen to make room for the display of materials and objects, turning my kitchen into a laboratory.
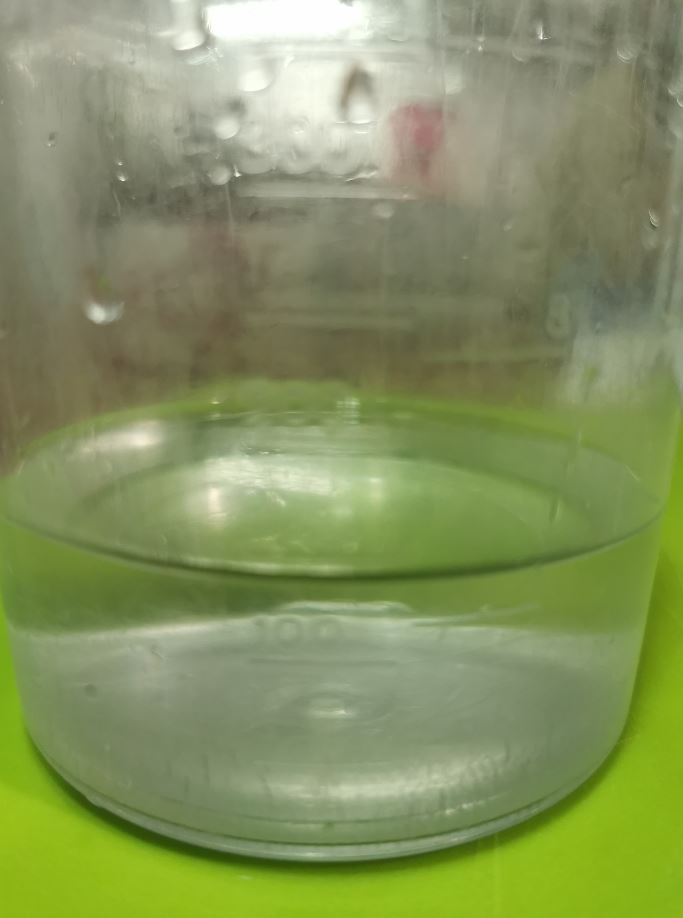
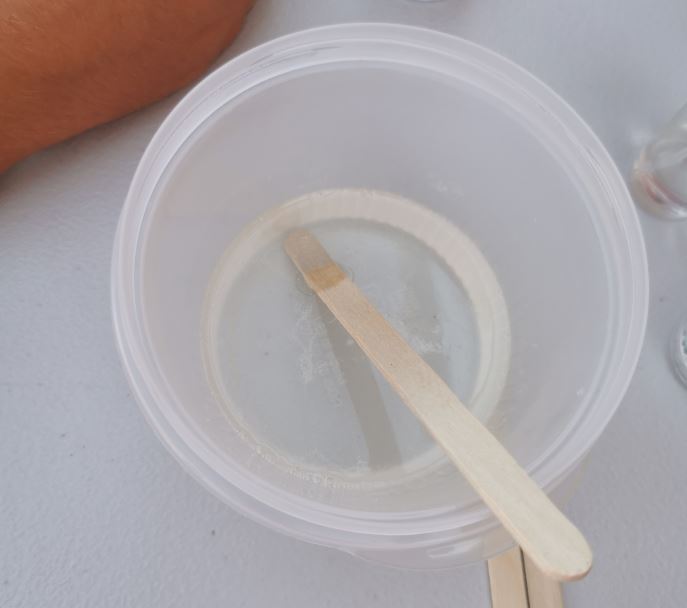
This silicone has two components that I must mix in equal parts. So first I calculate the total volume, filling the wax mold with water. Pour the water into 2 containers until the water level is equal. This is the volume that I will have to add to each component of the silicone.
This is my mold filled with water.
I pass it to a measuring glass.
And half of this measure I will fill with the type A component of the silicone and the other half with the type B component.
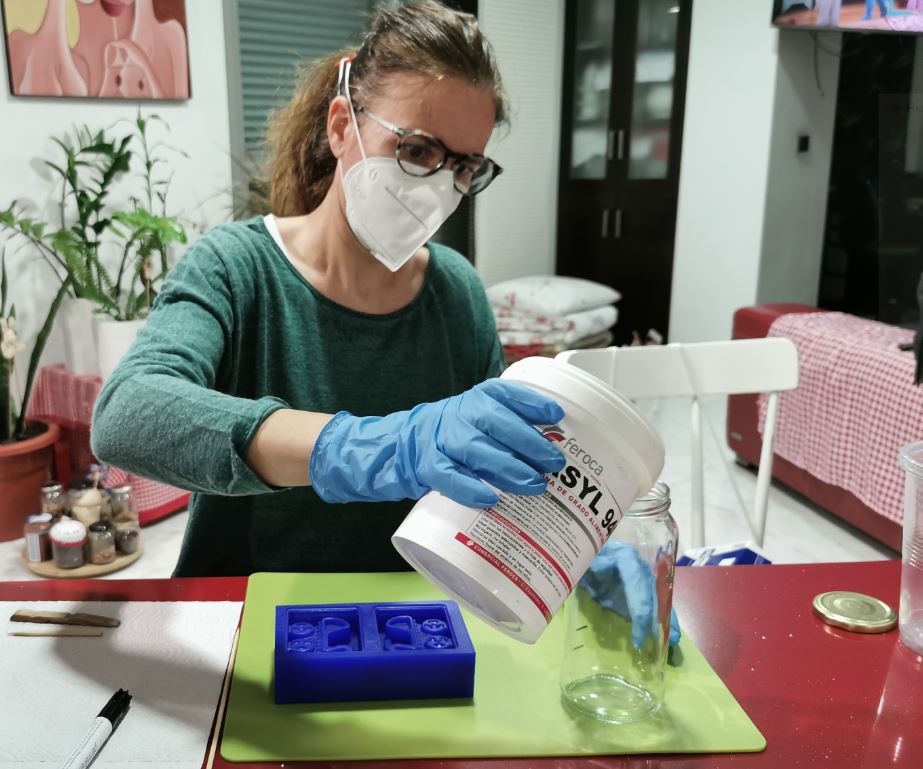
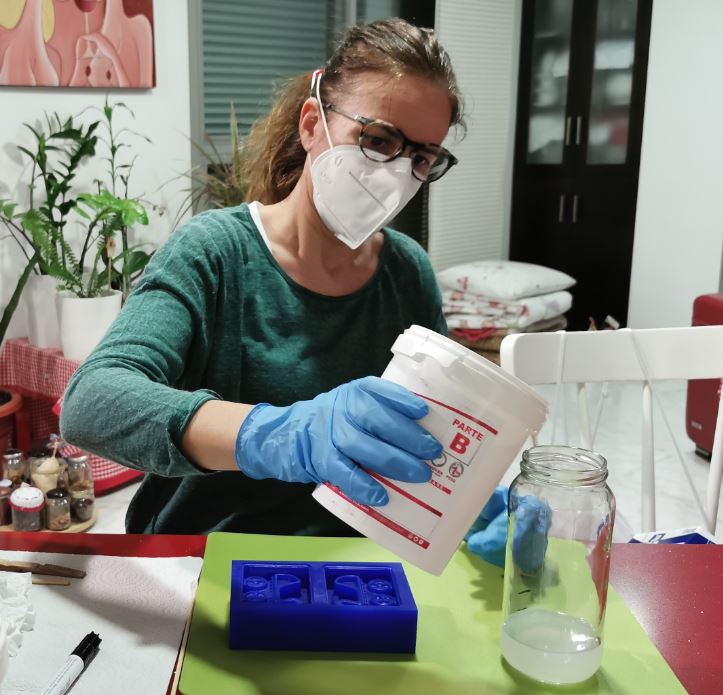
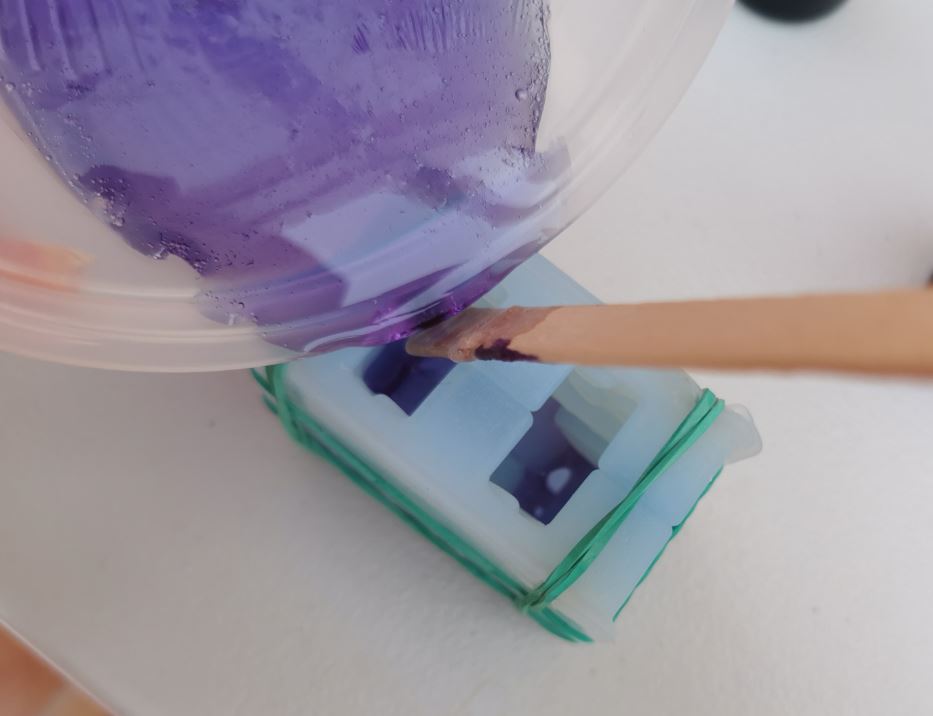
Once the two parts were mixed very well, I poured the mixture over the molds previously sprayed with olive oil.
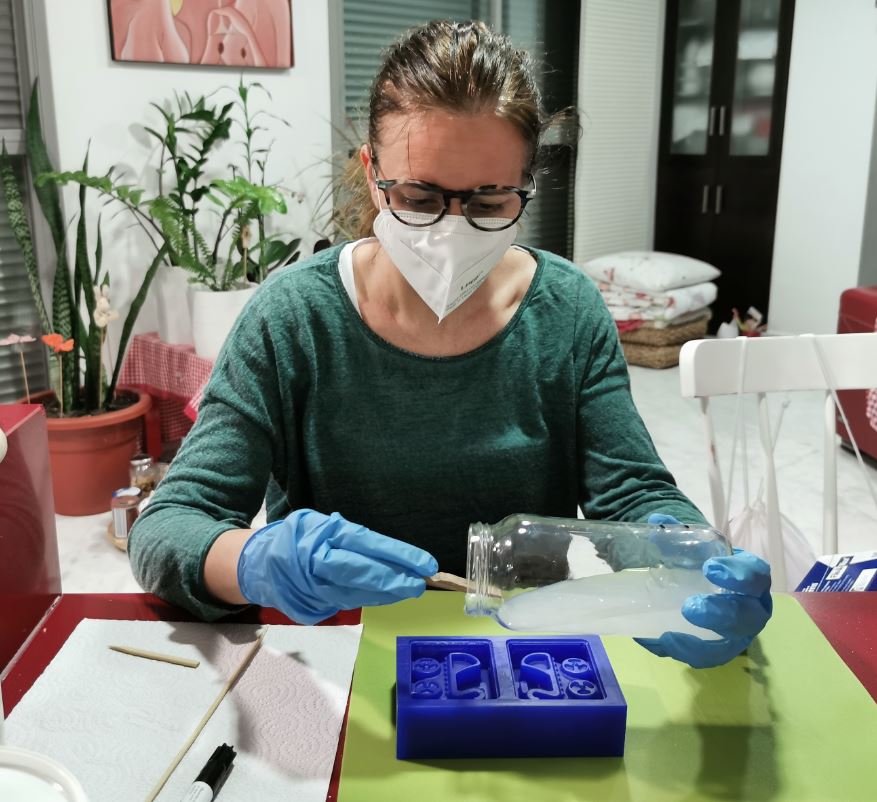
I do it very carefully so that there are no bubbles.
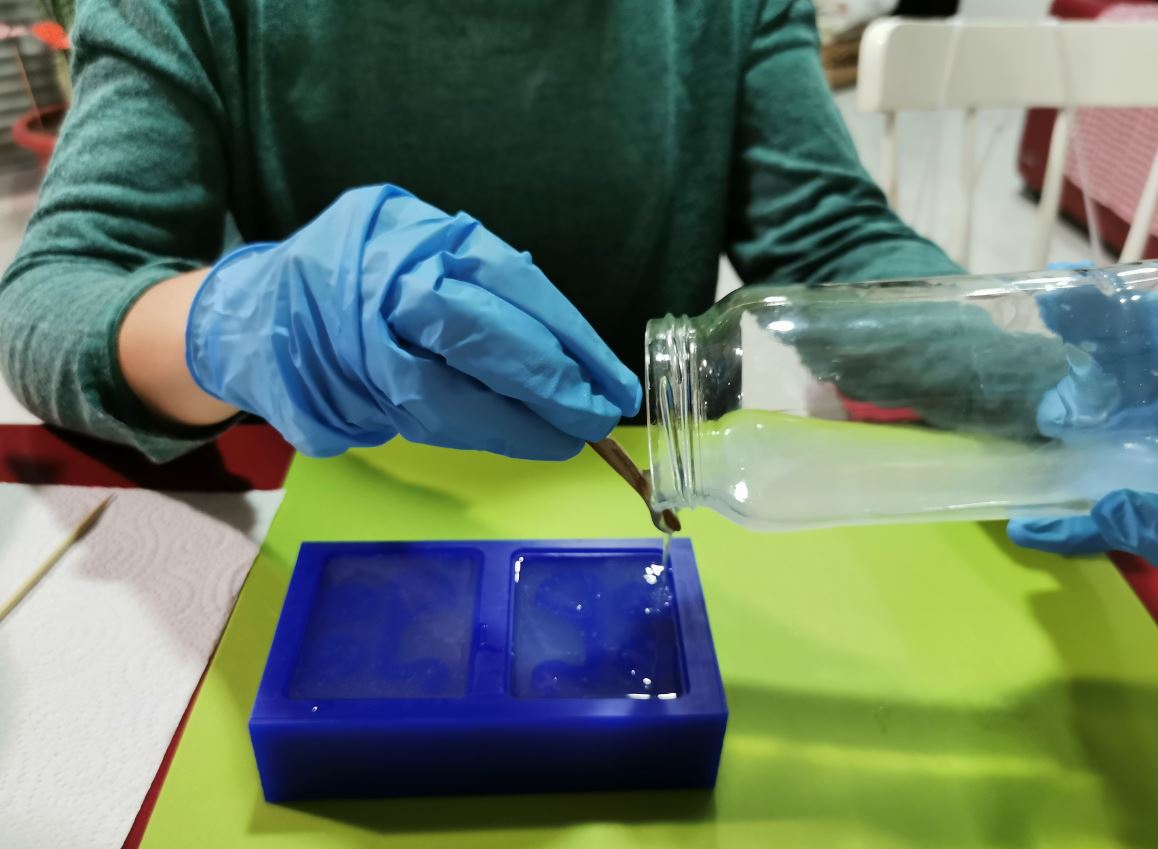
Once filled to the upper limit to facilitate unmolding, I shake and give soft and rhythmic strokes to eliminate any air that has settled in the form of bubbles.
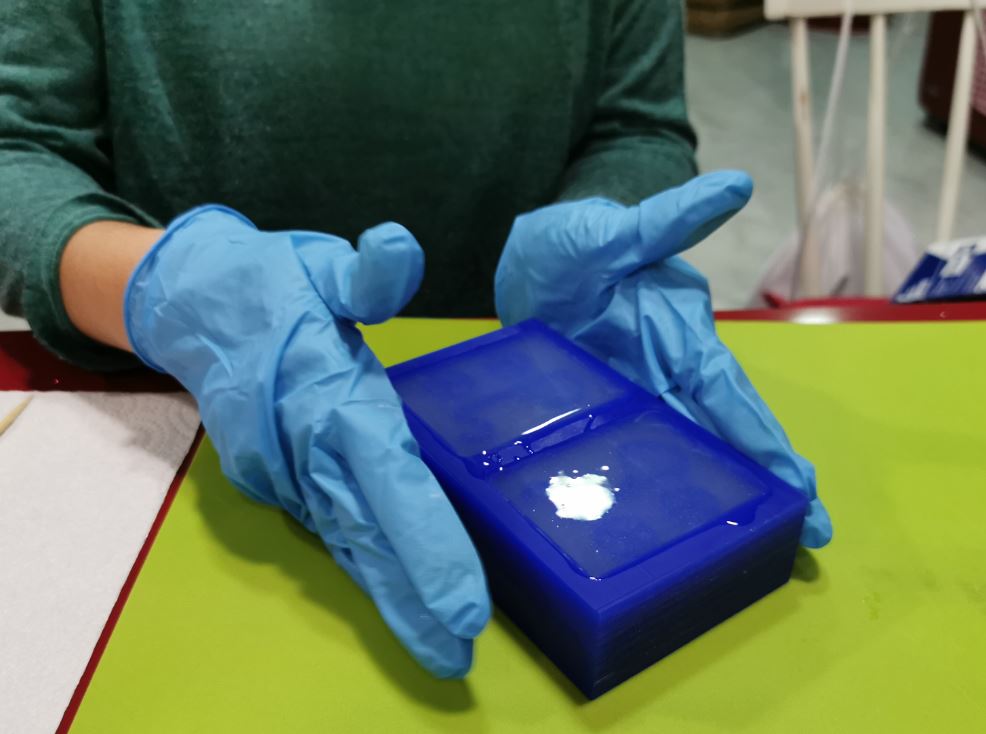
Casting operation completed.
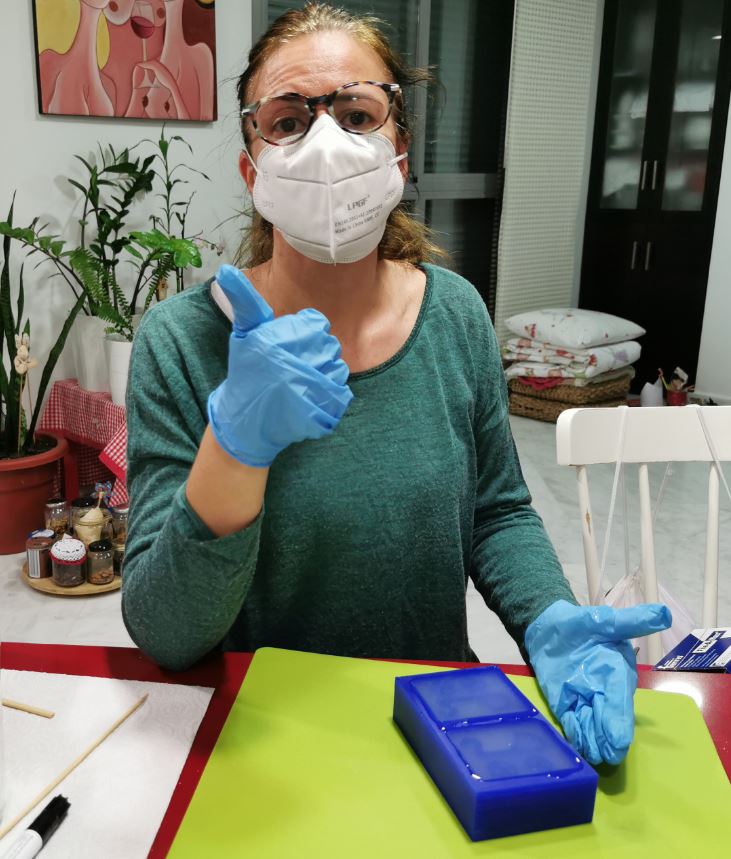
Now you have to wait for the necessary curing time. When in doubt, as I have two different pieces of information, I wait as many hours as possible, 24 hours until tomorrow night to see how my food silicone mold has been.
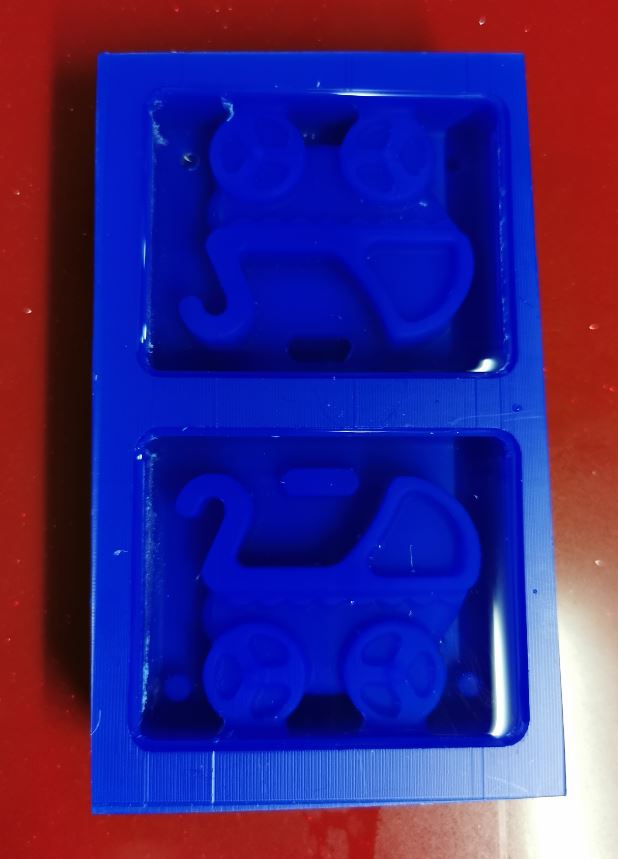
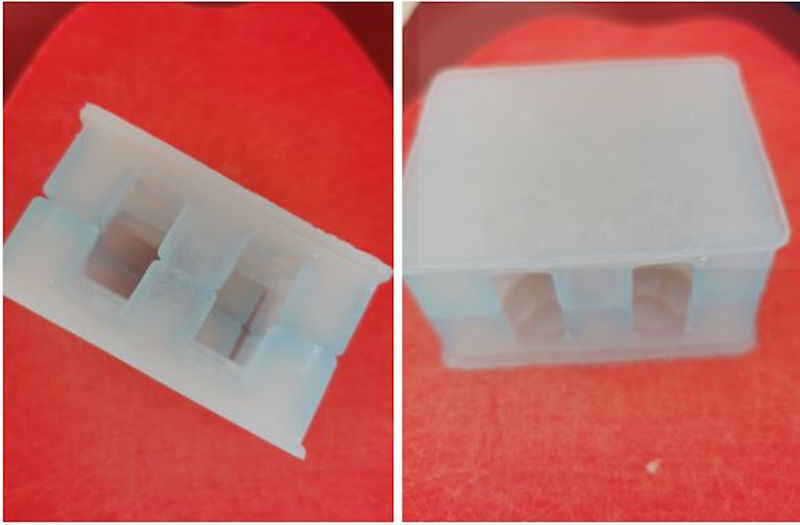
Removing bubbles from my mold After 24 hours I demold the silicone from the wax.
The two parts of the mold fit together perfectly.
And according to the instructions, as I decided to follow the most complete ones, I thought about putting the two parts of the mold in the oven for 4 hours at 100ºC.
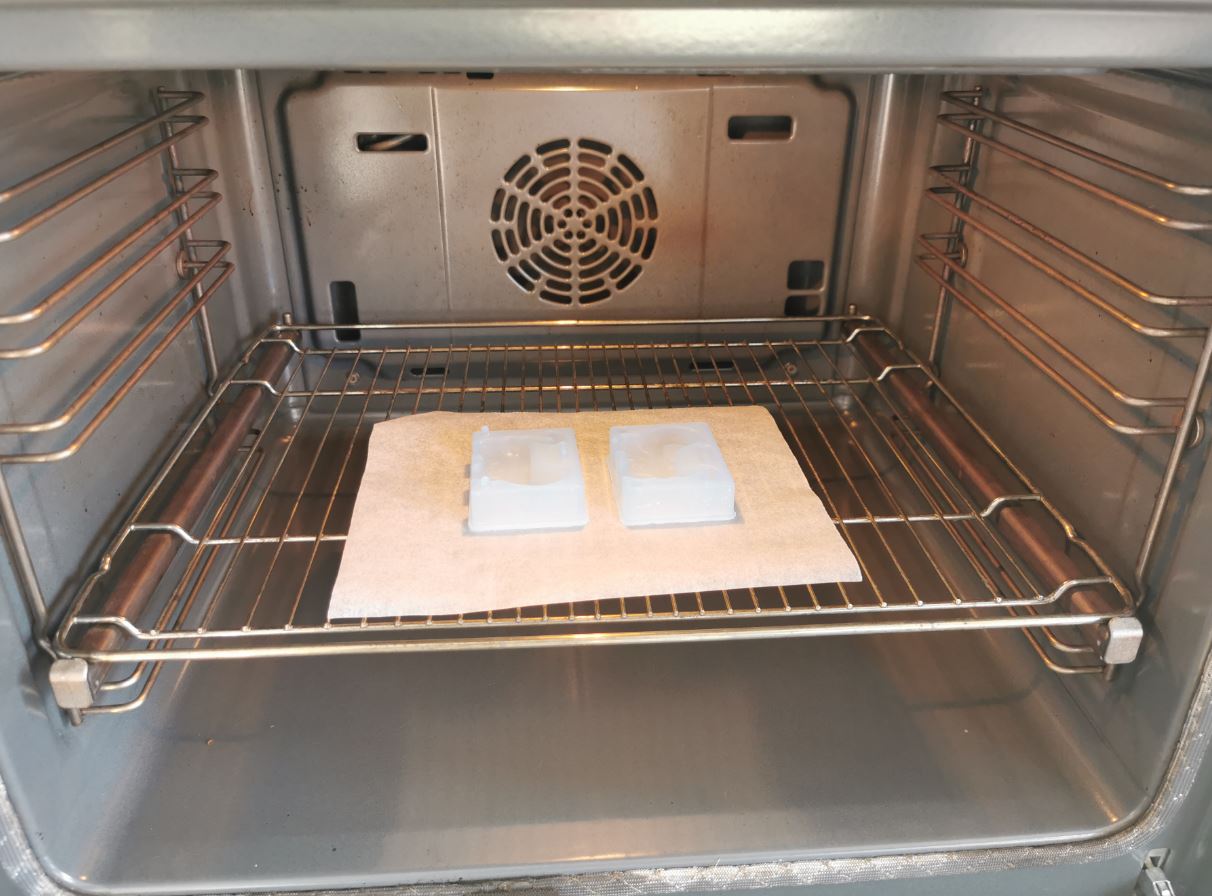
As I have not used any toxic product, only silicone, this is food grade, and its technical data sheet indicates that it can be used as a baking mold, I have dared to do the post-curing operation recommended in the instructions for use of silicone.
But for safety, “NEVER” do this in a domestic oven.
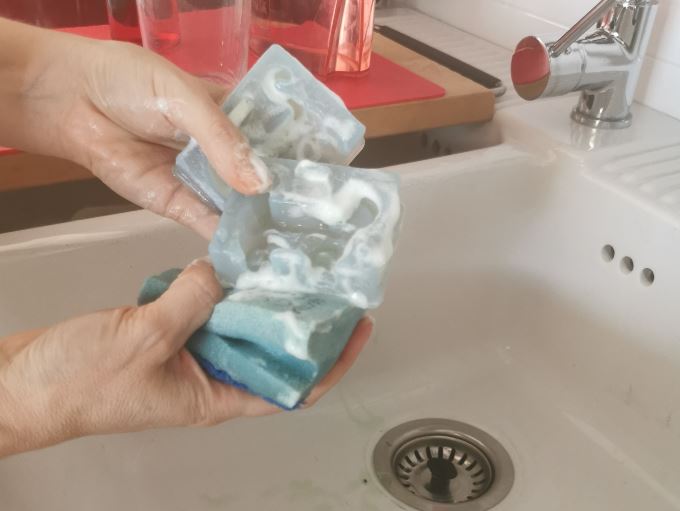
To finish, I wash my mold very well with water and dishwasher soap to be able to use it for food and I have cleaned my oven very well with a pyrolysis process.
16.1.4. My mold usage tests
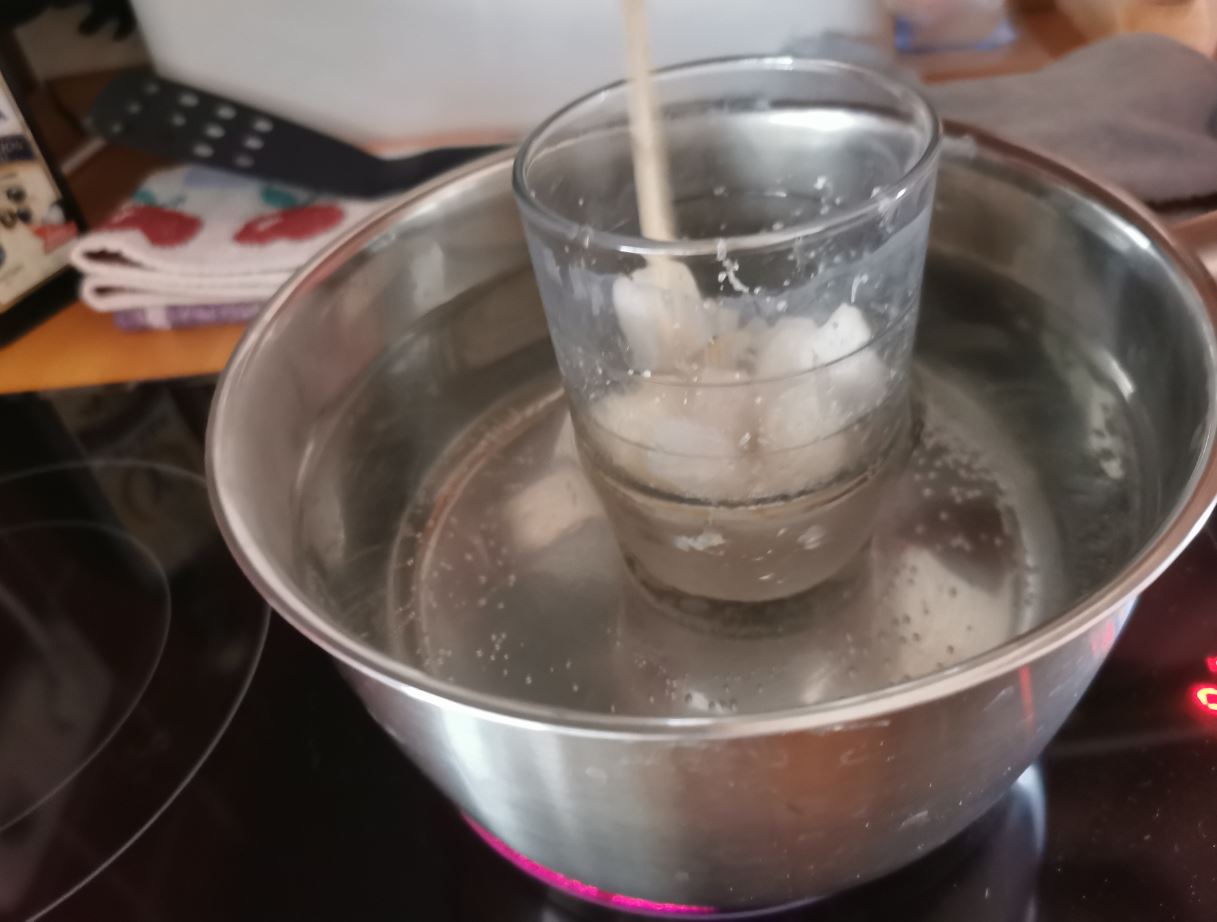
Test 1: Sweet Ice with Surprise
For the first test, I’m going to indulge Candela. An iced sprite lolly with sweets!!
Here I have prepared everything I need for this sweet and fresh test.
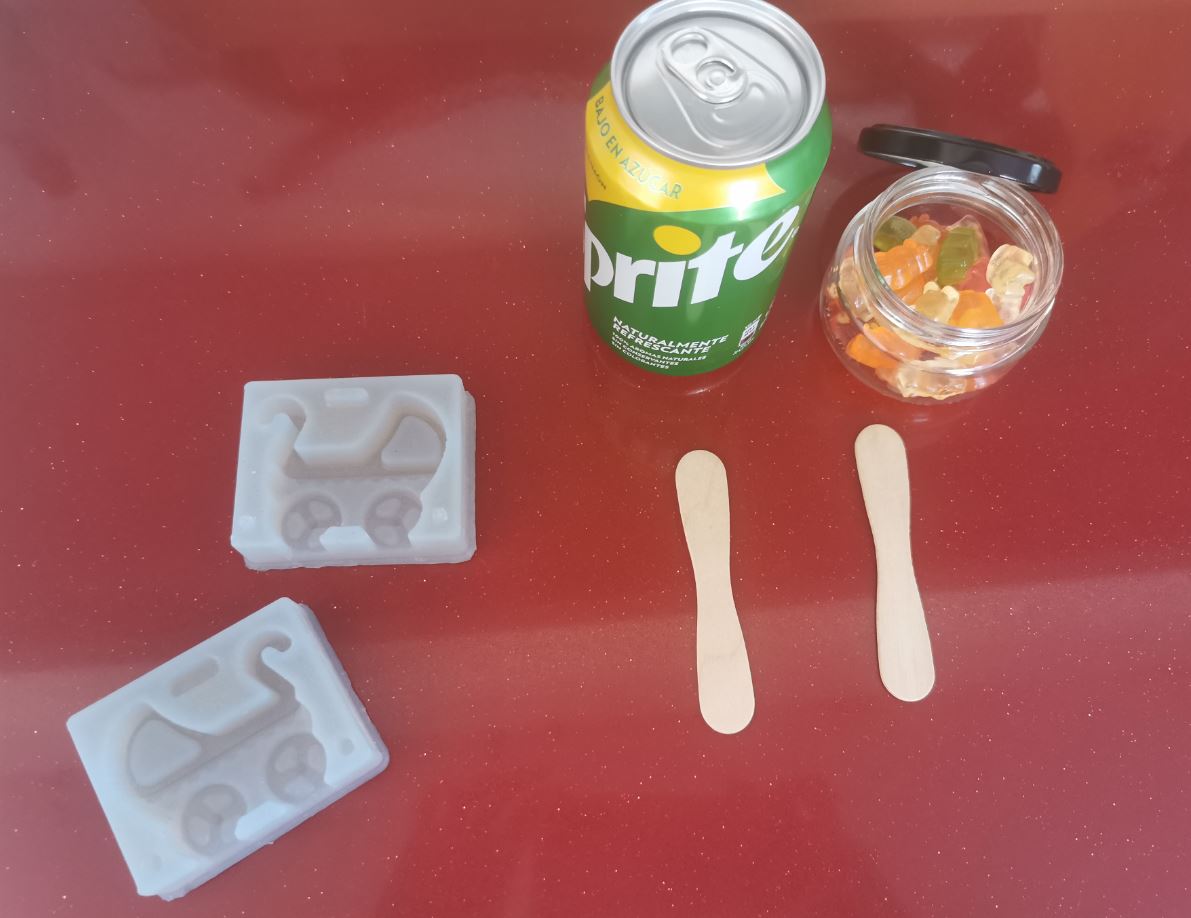
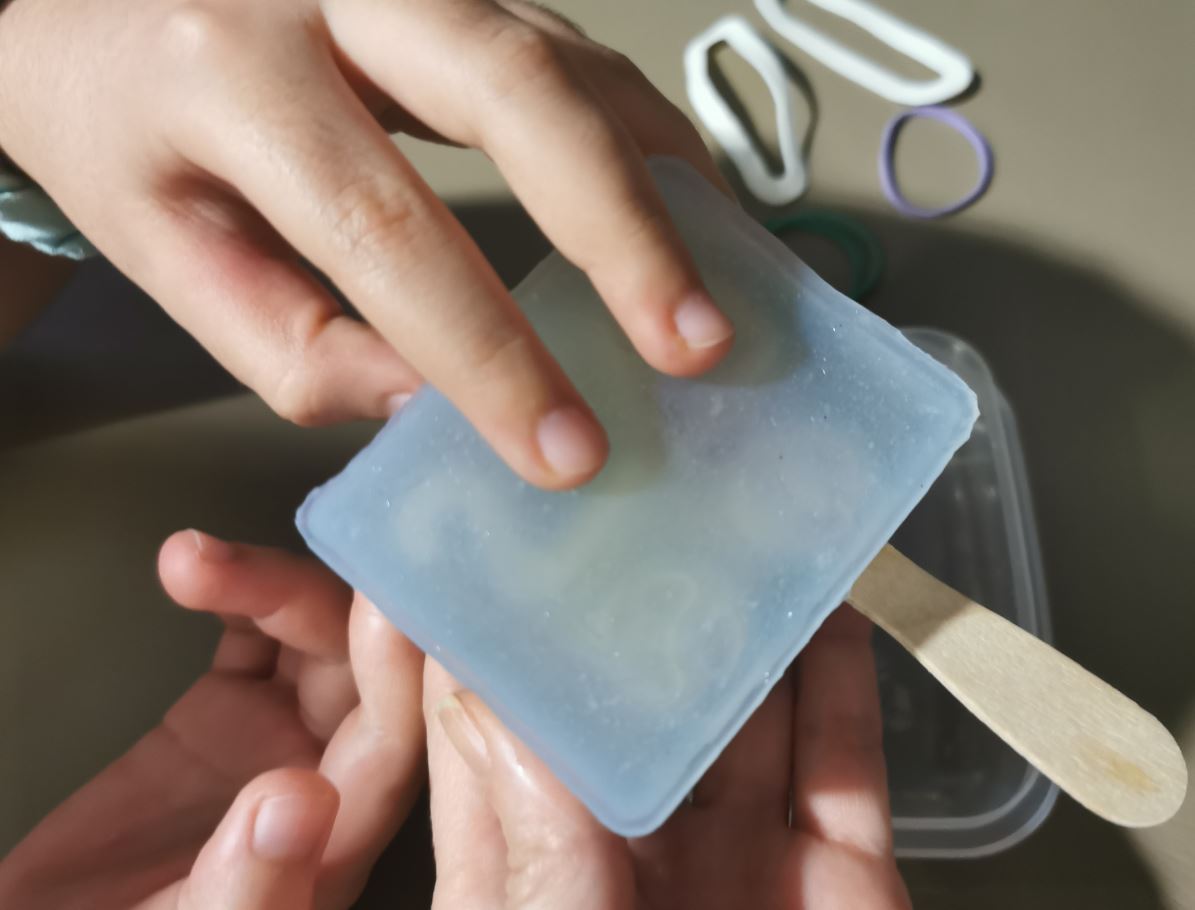
I join the two parts of the mold and fix them with an elastic tape, fill with the sweets and put a stick on it to later facilitate the holding of what will be an ice cream.
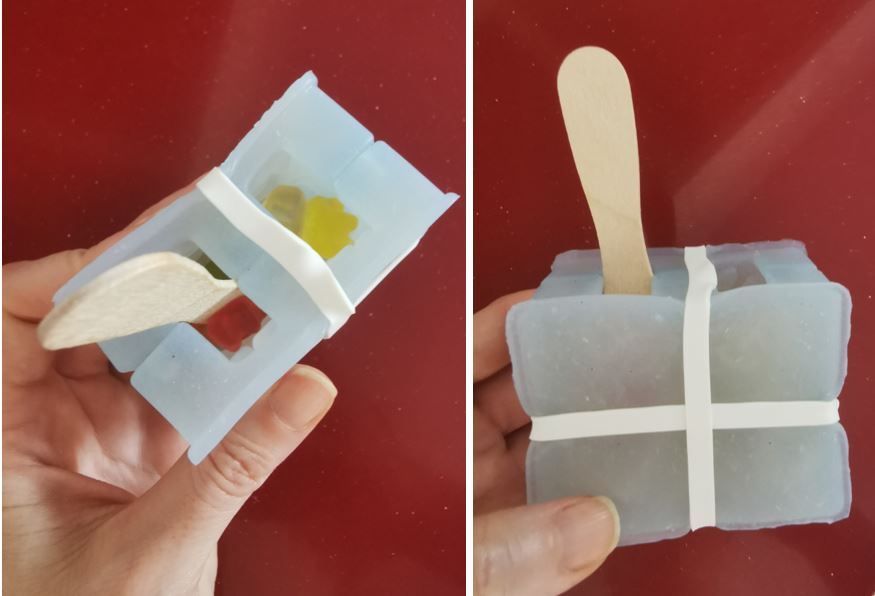
Then I finish filling the mold with the soda and the help of a funnel and of course the hands of Candela, who was crazy to participate in the realization of this test.

Now everything is ready to put in the freezer.
After a while, longer than Candela would have liked, we took our ice cream out of the freezer and started to unmold it.
And this is Candela’s tasty reward for being so patient with her mother who is always doing weird things in a labs full of junk …

Candela says it was delicious.
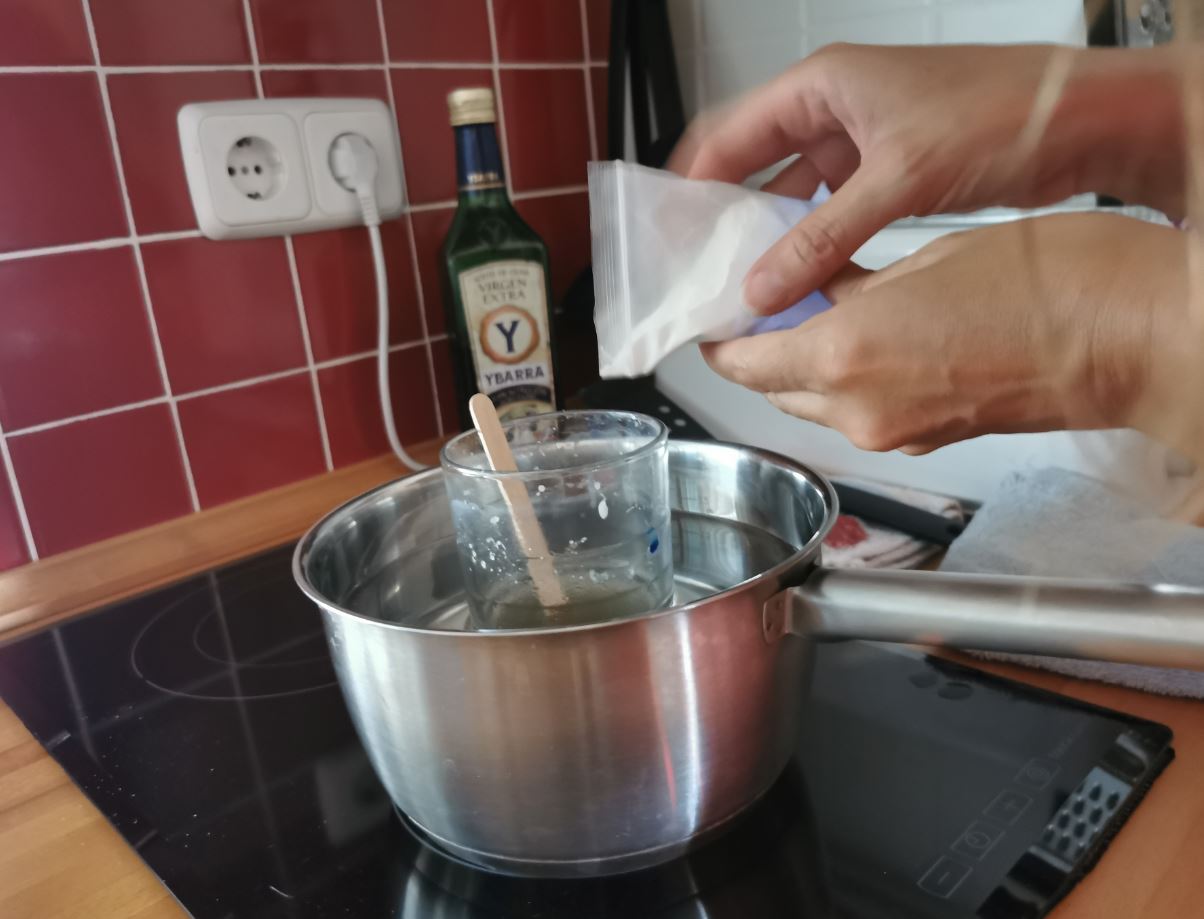
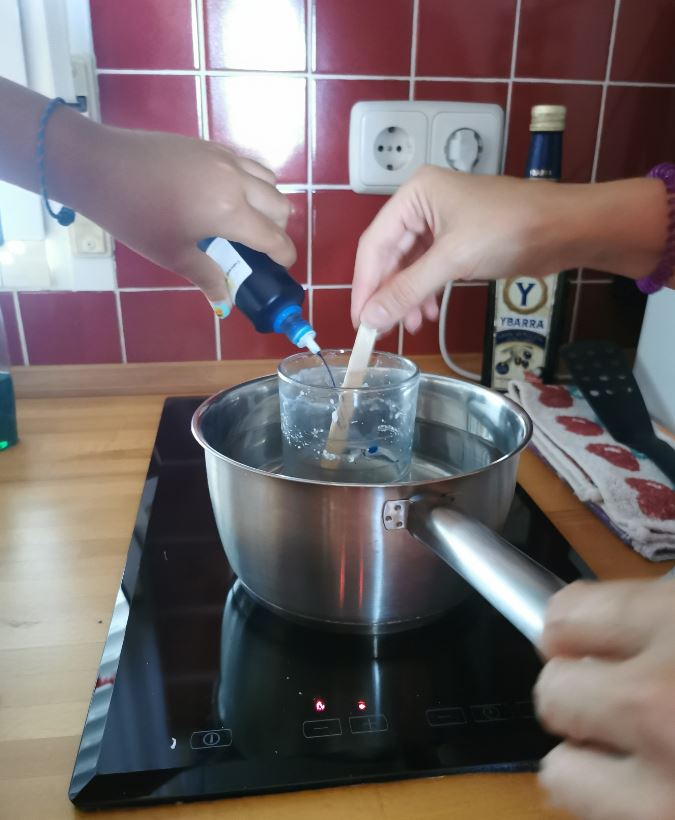
Test 2: Healthy ice cream
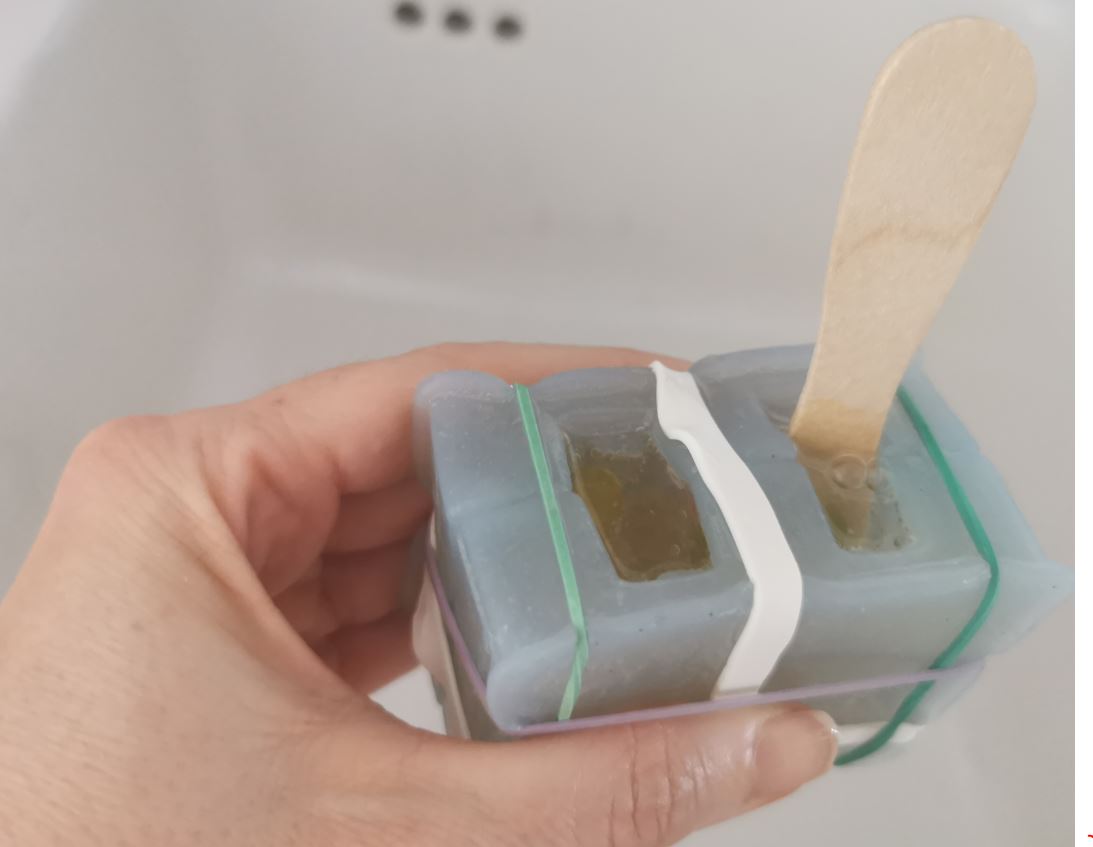
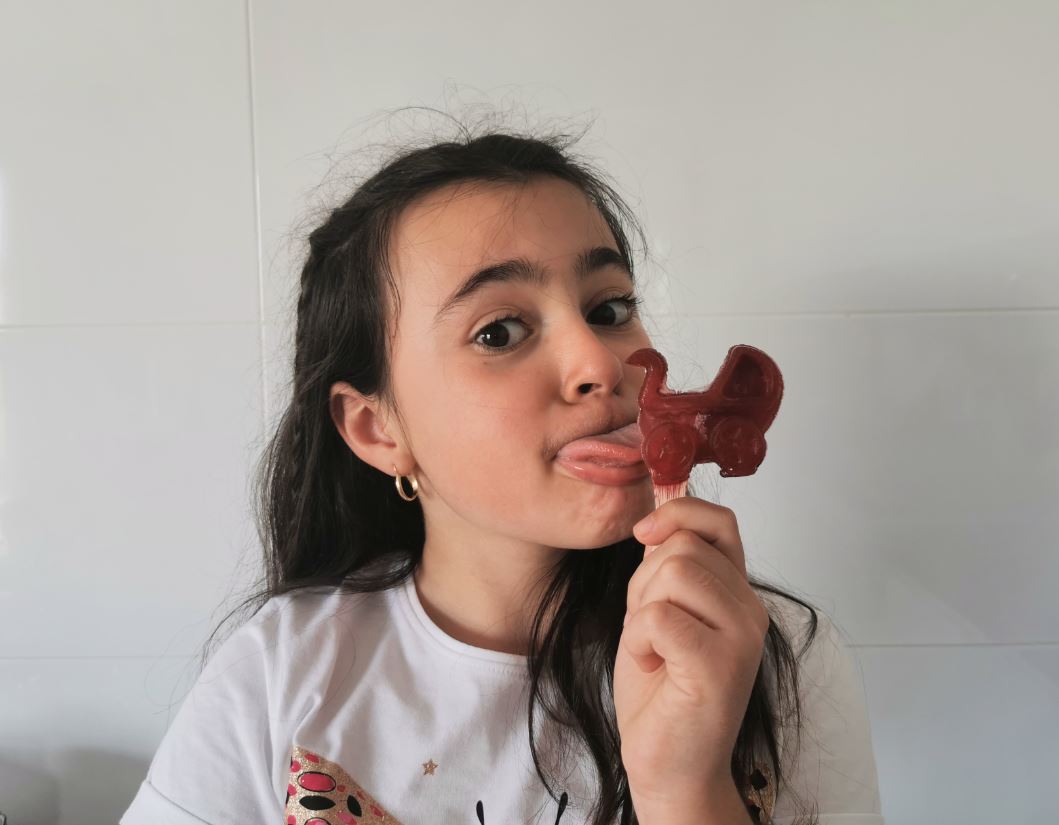
After cleaning the mold well, we tried another ice cream, this time with red fruit juice, which does not have bubbles and without the bits of sweets, but is high in fruit.
We prepare the mold as the previous time, fixing it with elastic, put the stick and fill with the juice.
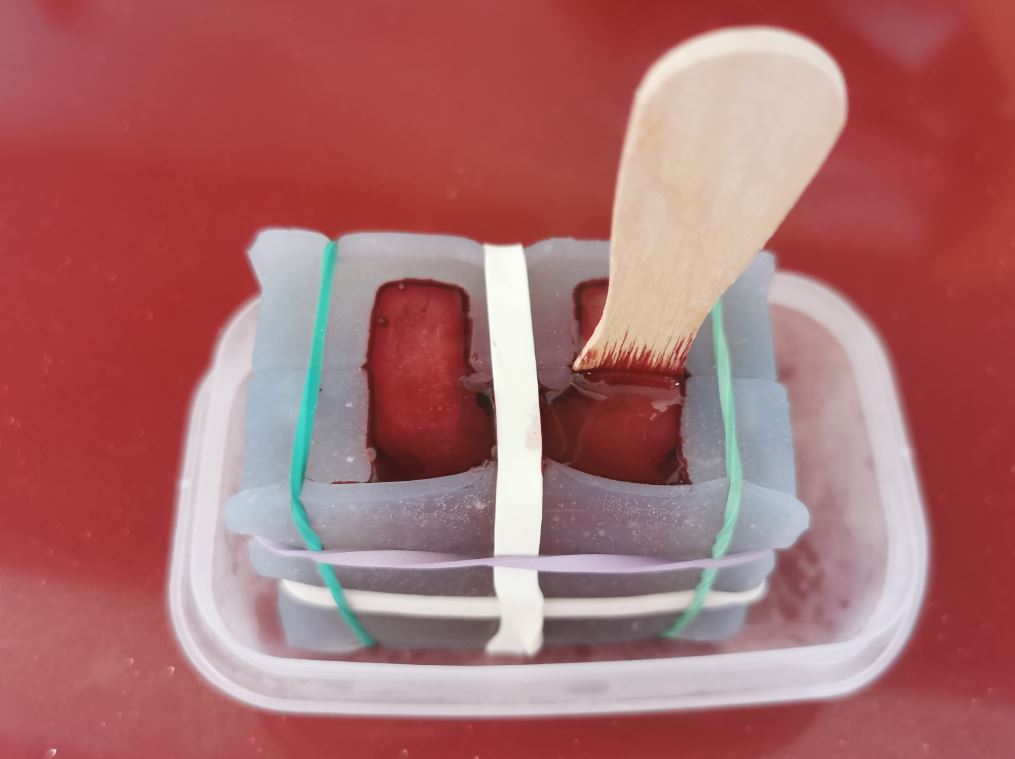
Again, we put it in the freezer and after a while…
This was the rich and beautiful result:
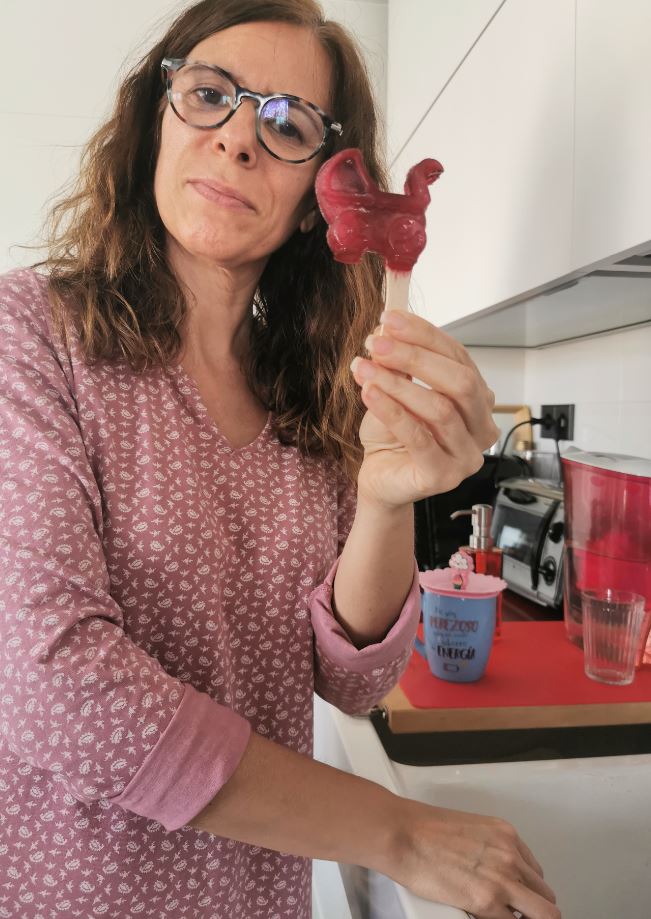
Candela also loved this other experiment.
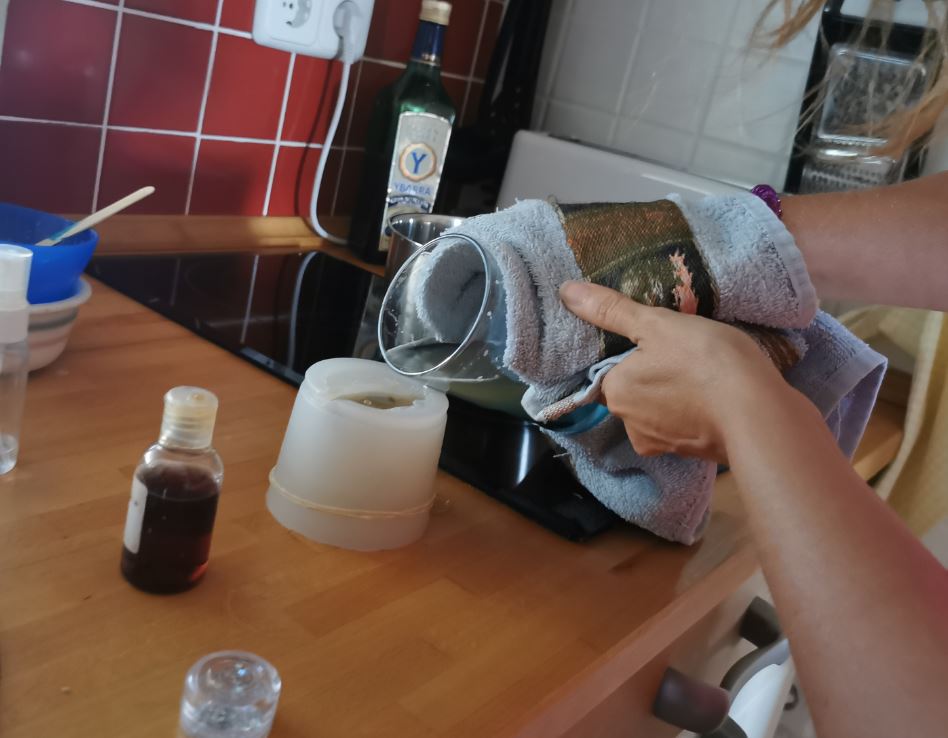
Test 3: Special chocolate bar
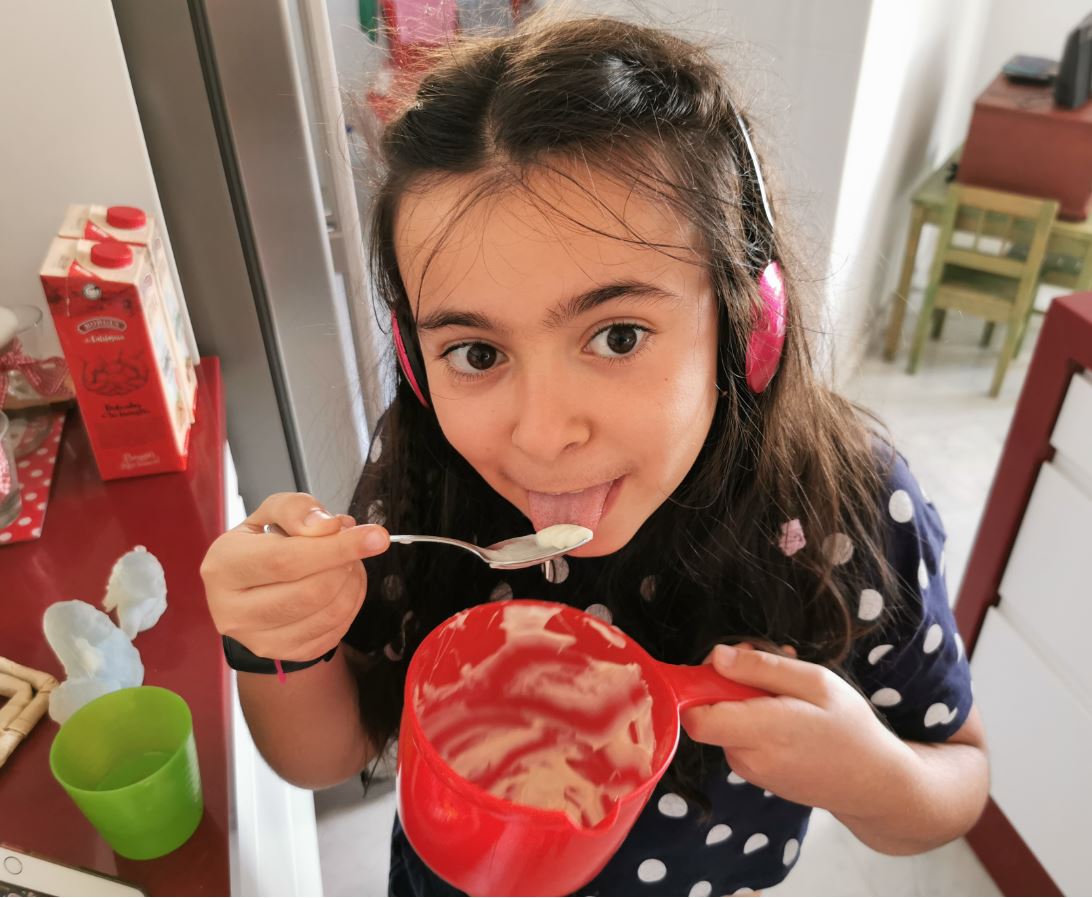
This time we are going to leave the ice and taking advantage of the fact that my mold allows it to be used with food, I am going to use the one preferred by Candela. White chocolate.
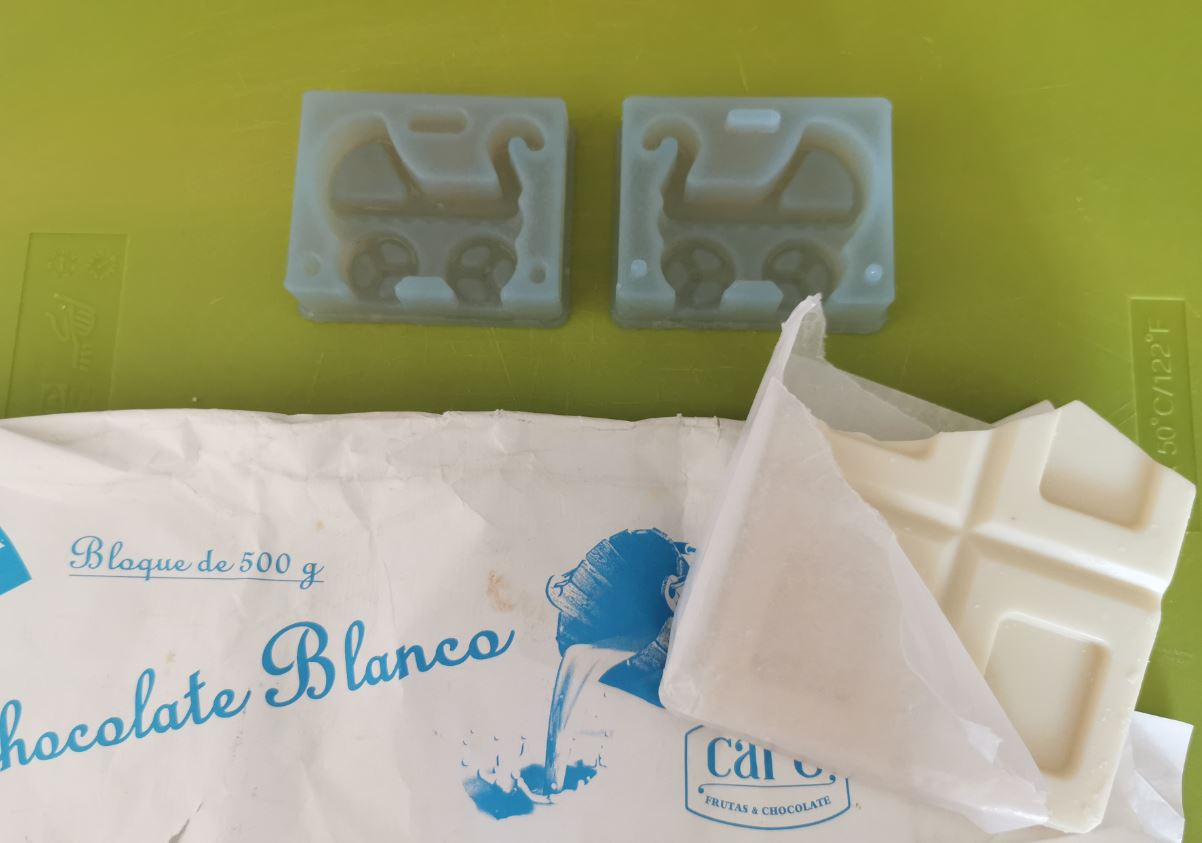
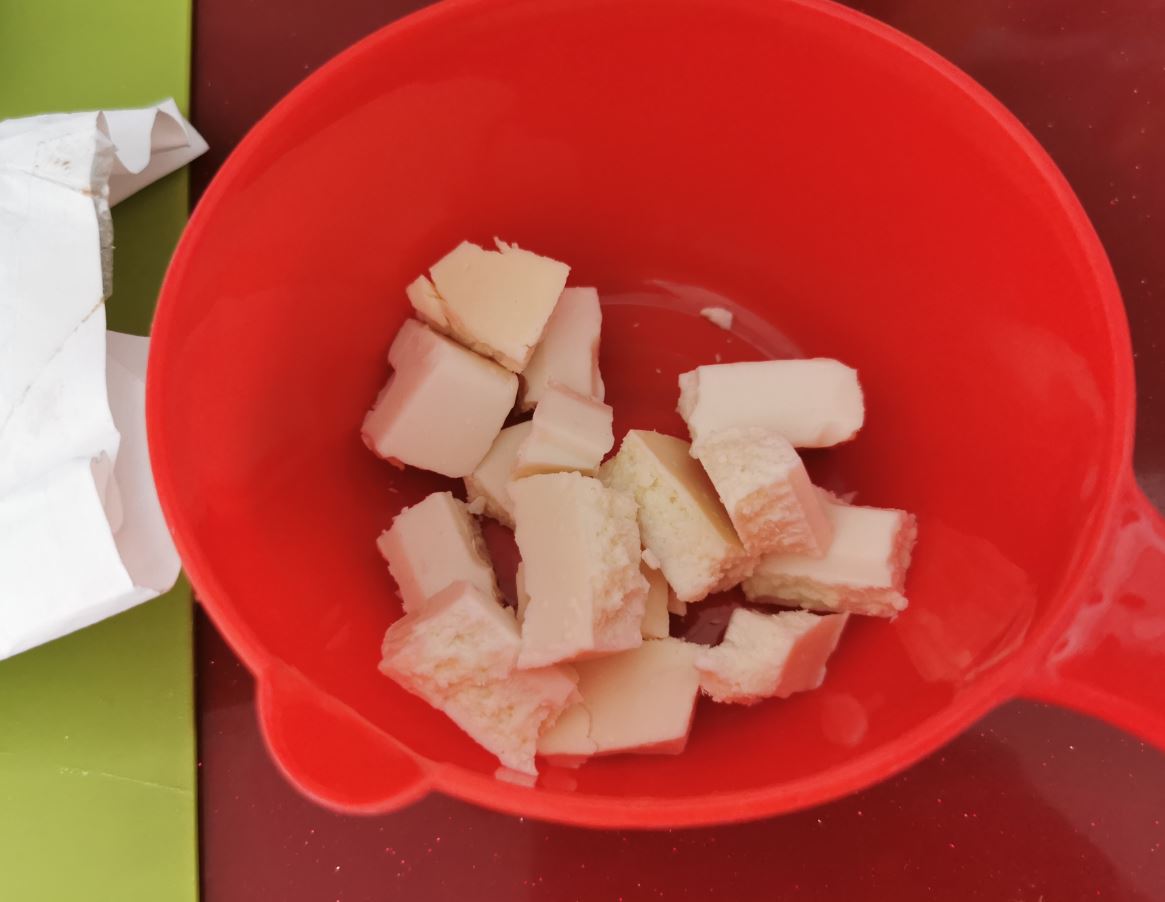
Chop the chocolate in a microwave safe bowl.
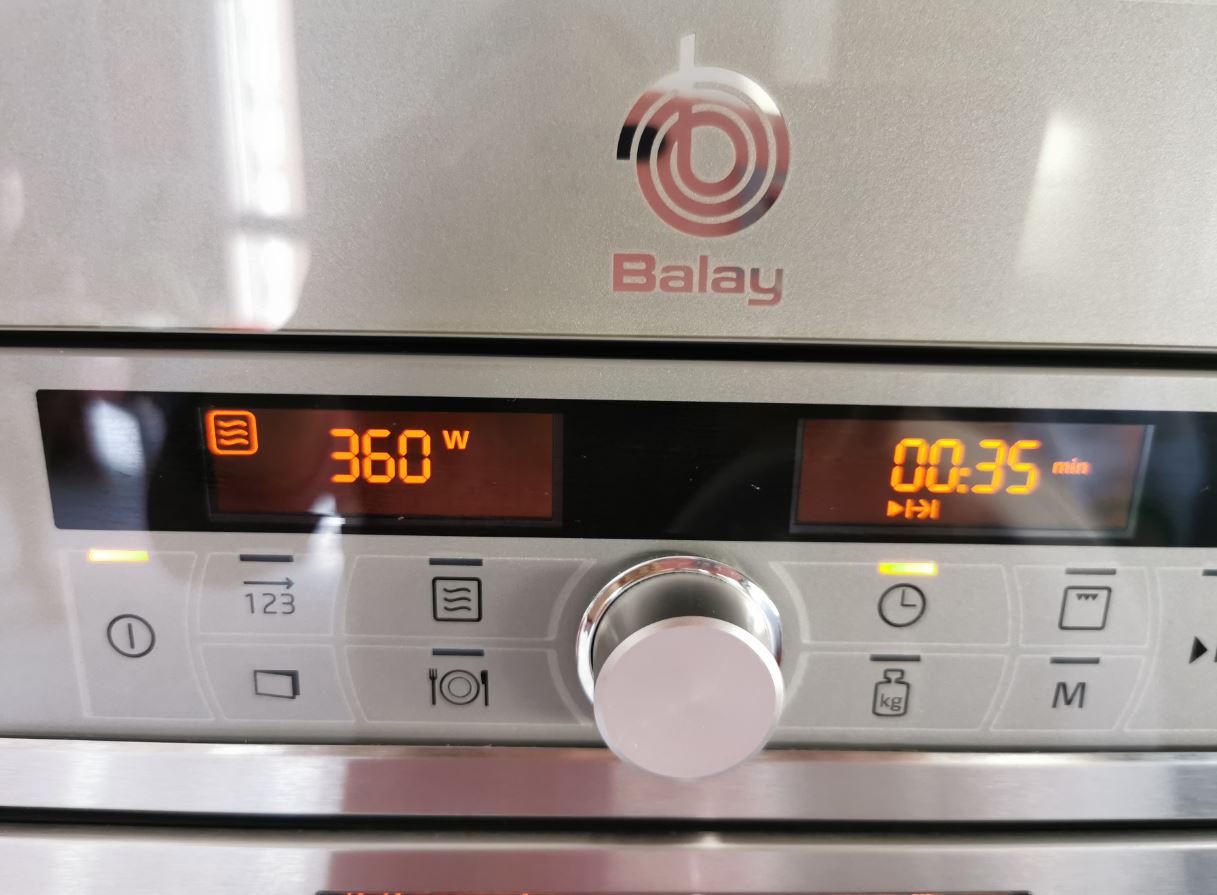
I put it in the microwave,
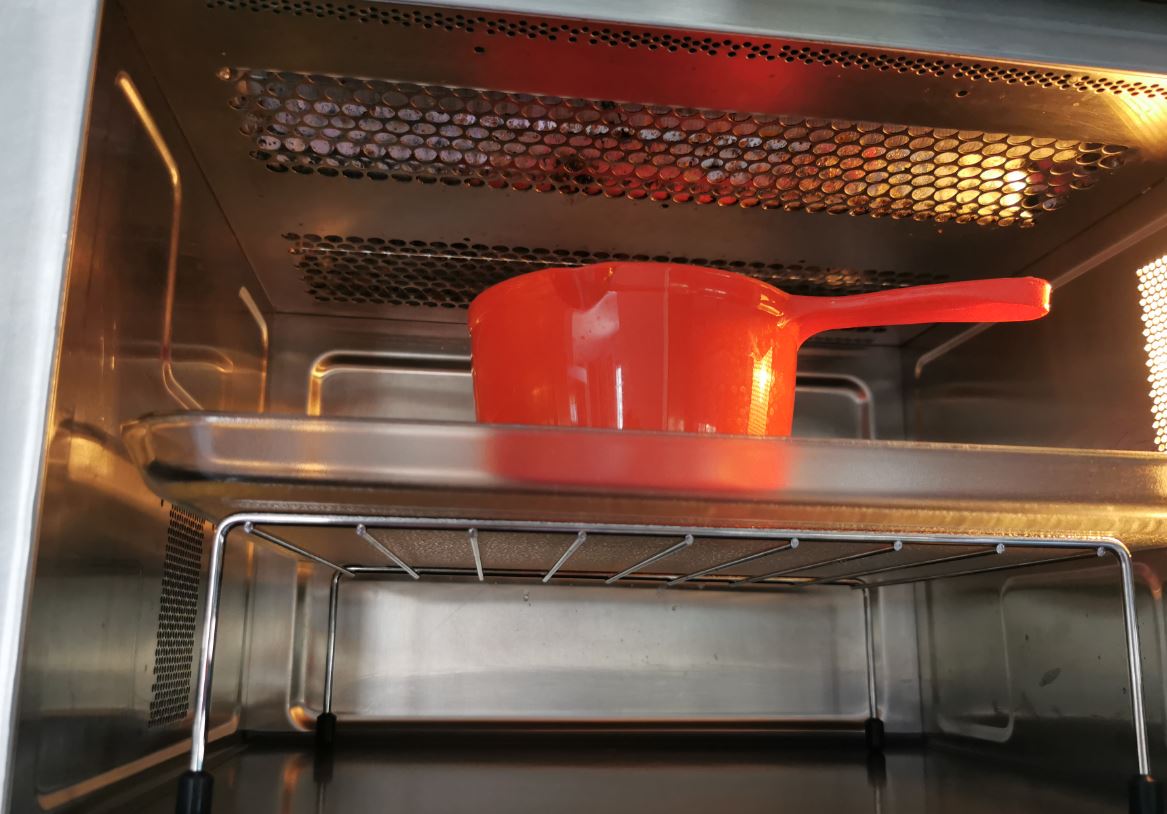
When it was melted and very well stirred, I filled the mold, there was very little liquid left, very thick and viscous and it was difficult for me to fill it and remove the air, I think it has to do with the quality of the chocolate that was artisan and very creamy.
Here began Candela’s feast, repelling what was left in the container.
After letting the chocolate cool so that it hardened completely and unmolding it, this was the result, there were some bubbles left …
And before I had time to remove the burrs from the joints between the two pieces of the mold, a sweet little girl mischievously made this chocolate bar in the shape of a baby carriage of rich white chocolate disappear,
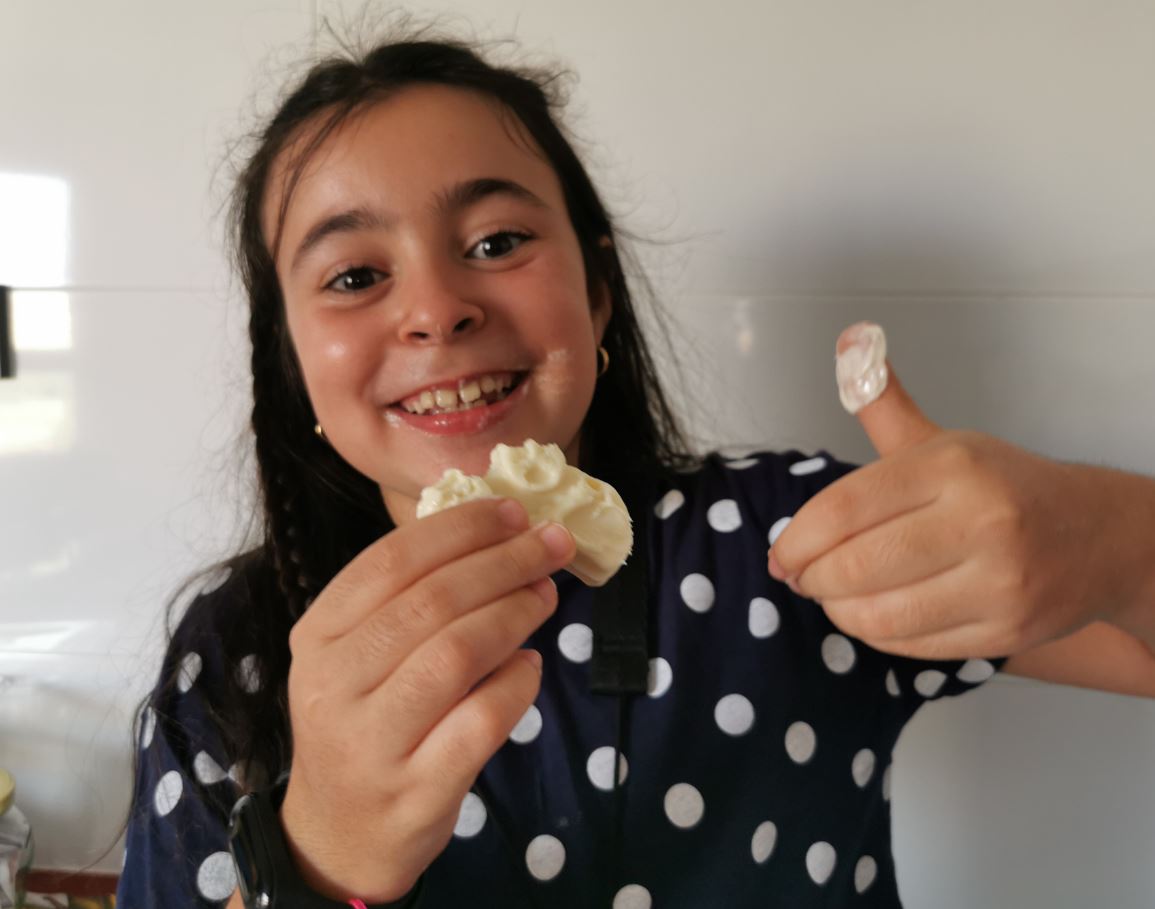
Test 4: Glycerin soap
Leaving behind the sweets before Candela has diabetes, in this case I am going to make pieces of soap in the shape of the baby carriage, now that I have used my mold for food products, I will start using it to make these clear glyceerin-based soaps.
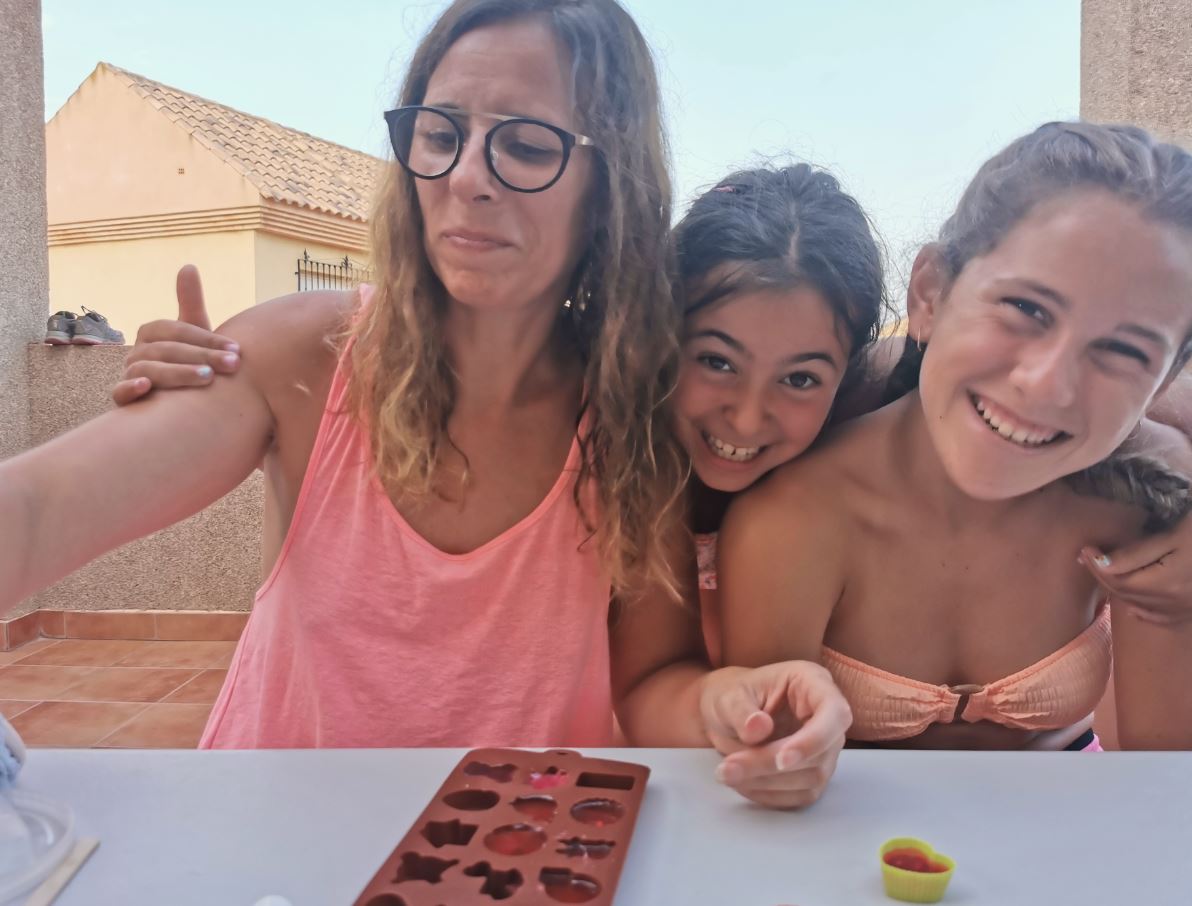
This is the last part I have documented for thisassignment, long after it was done. I did a Candela workshop with her cousins at the beach house where we are neighbors. After not seeing each other for a long time, they were looking forward to doing things together. It was very fun, the children really enjoyed it and the soaps were beautiful.
Update:
I visited this link to make children’s soaps.
And I also checked the website where I bought the base to make clear glycerine soap.
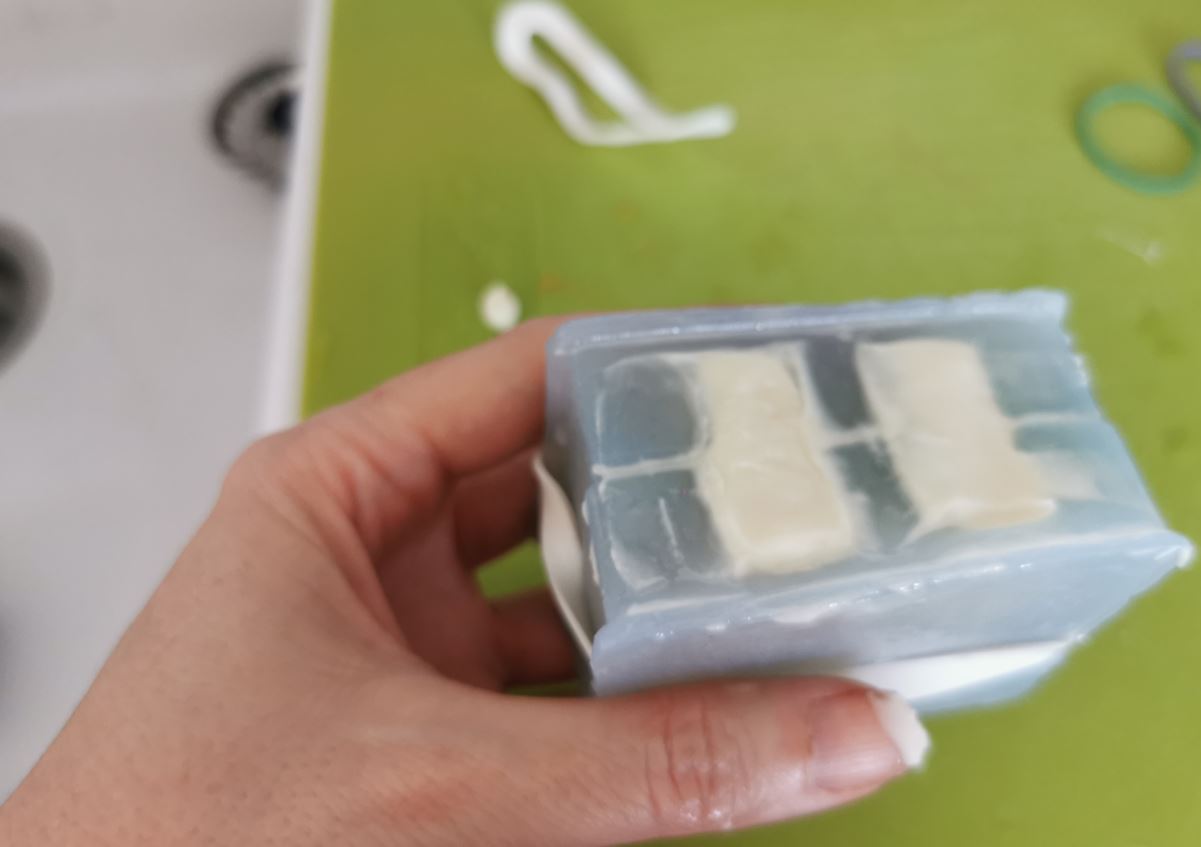
This is the soap base:
I decided to make a new silicone mold from the wax that I milled, to use the one I already have only with food products and this new one with soaps and candles for example.
As I do not have another type of silicone, I will use the same one that I have documented in the process explained above.
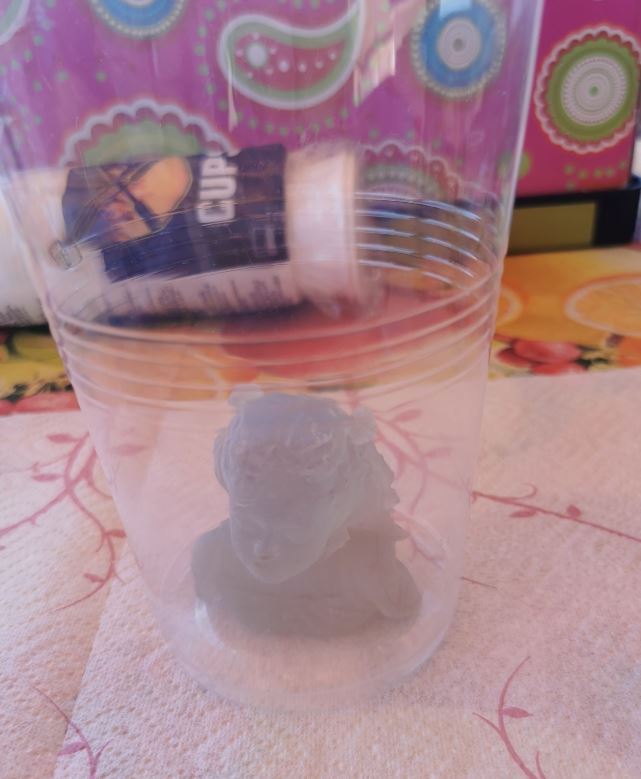
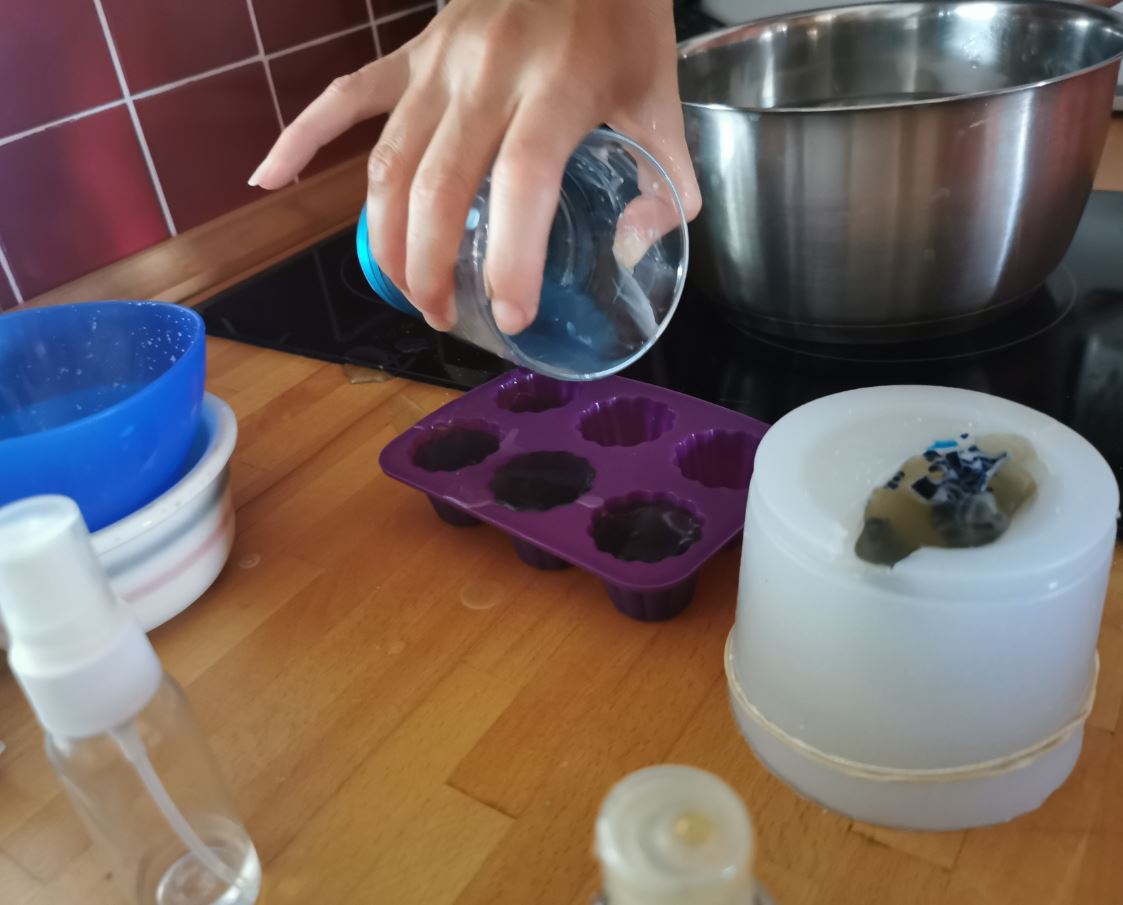
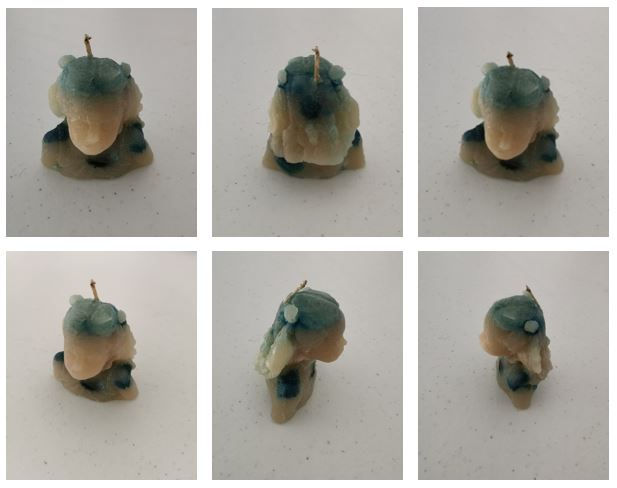
Since I am going to use the silicone again, it occurs to me to do a test and also try to make a mold from a 3D printed figure as positive and the mold would be the negative.
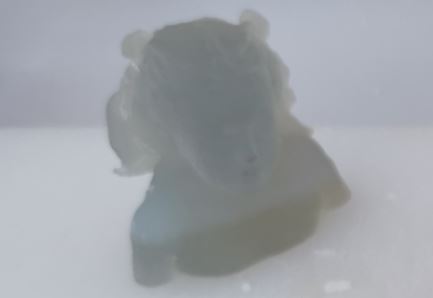
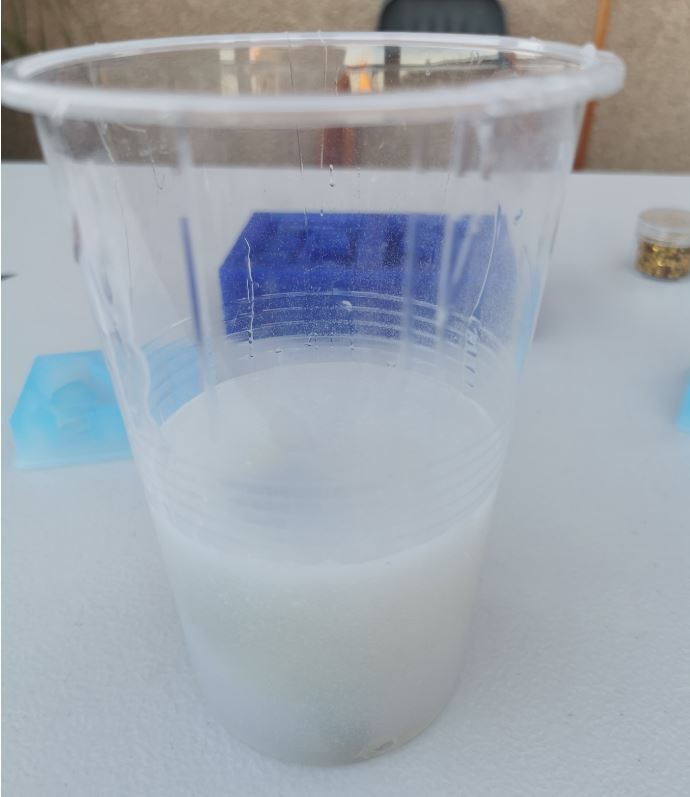
To do this, I am looking for a plastic cup that I can easily break when the silicone has solidified around the 3D printed figure that I have put inside the cup.
The silicone therefore I will have to add it here, to make a mold just like the one I already have:
And here, to make the new mold from a 3D printed part:
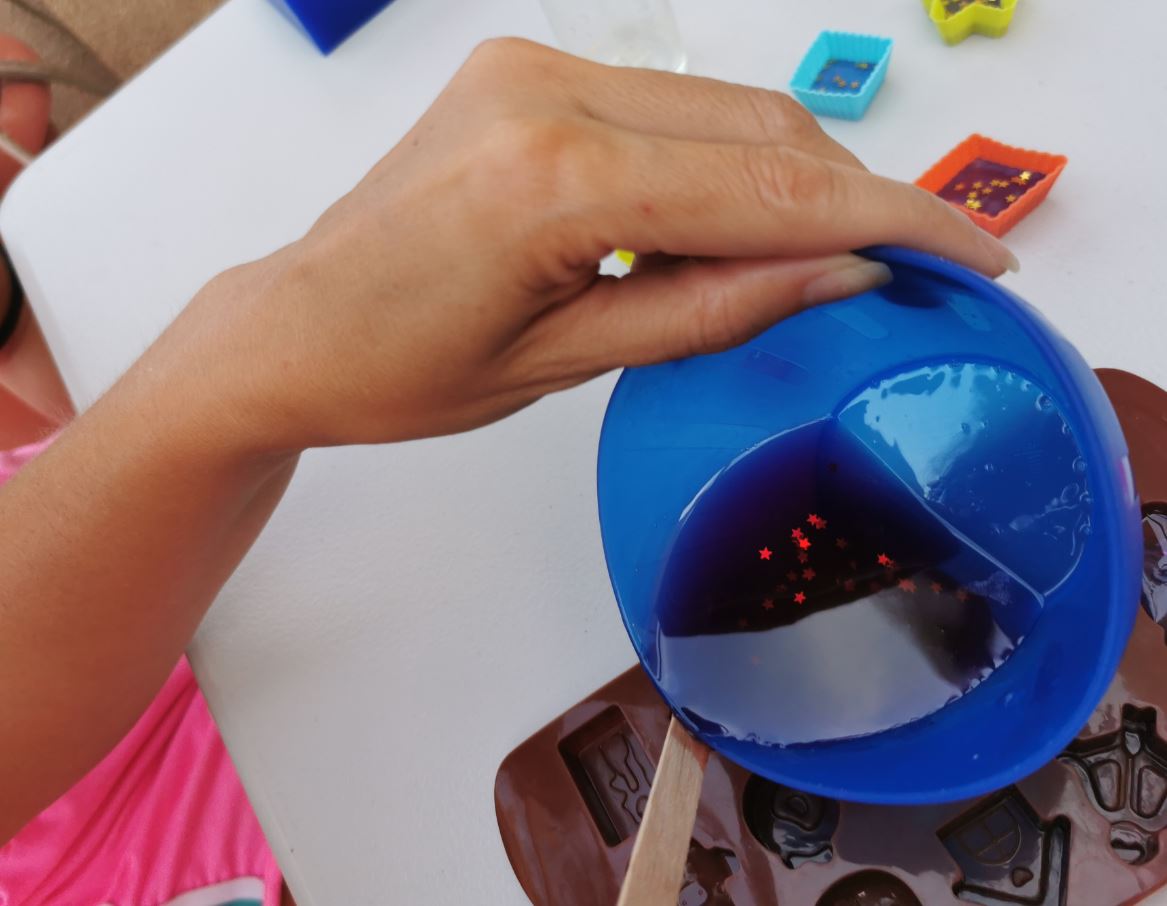
I have several very special helpers, my daughter and my nieces, who are looking forward to their glycerin soaps, made by themselves from scratch.
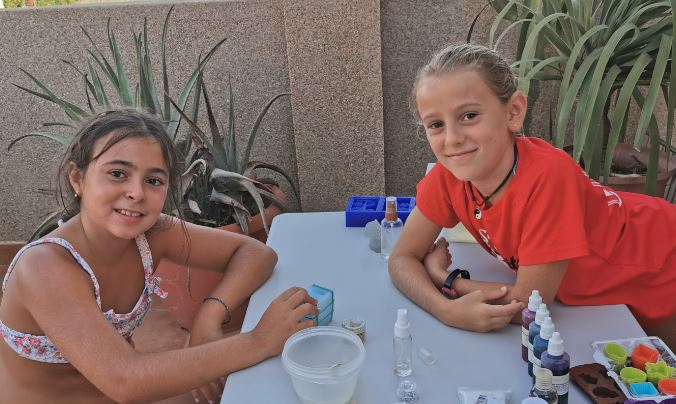
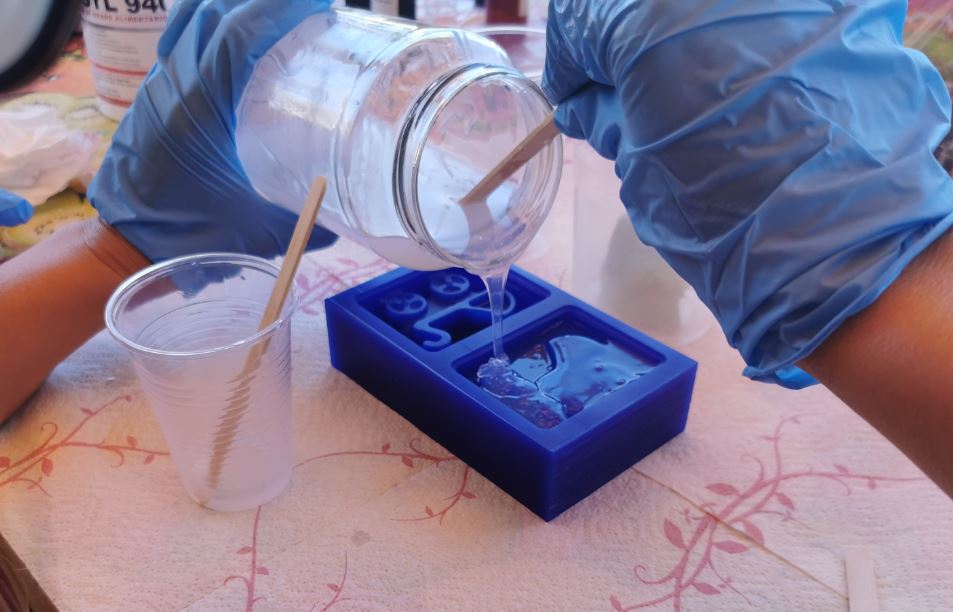
They help me to prepare the silicone and we pour it very carefully so that it does not bubble on the counter molds.
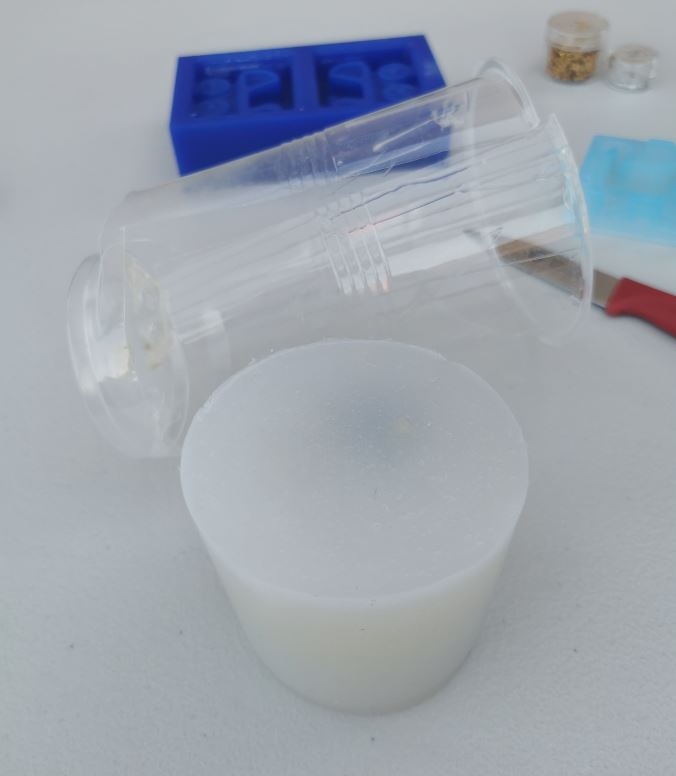
Once the silicone has cured, the molds must be removed.
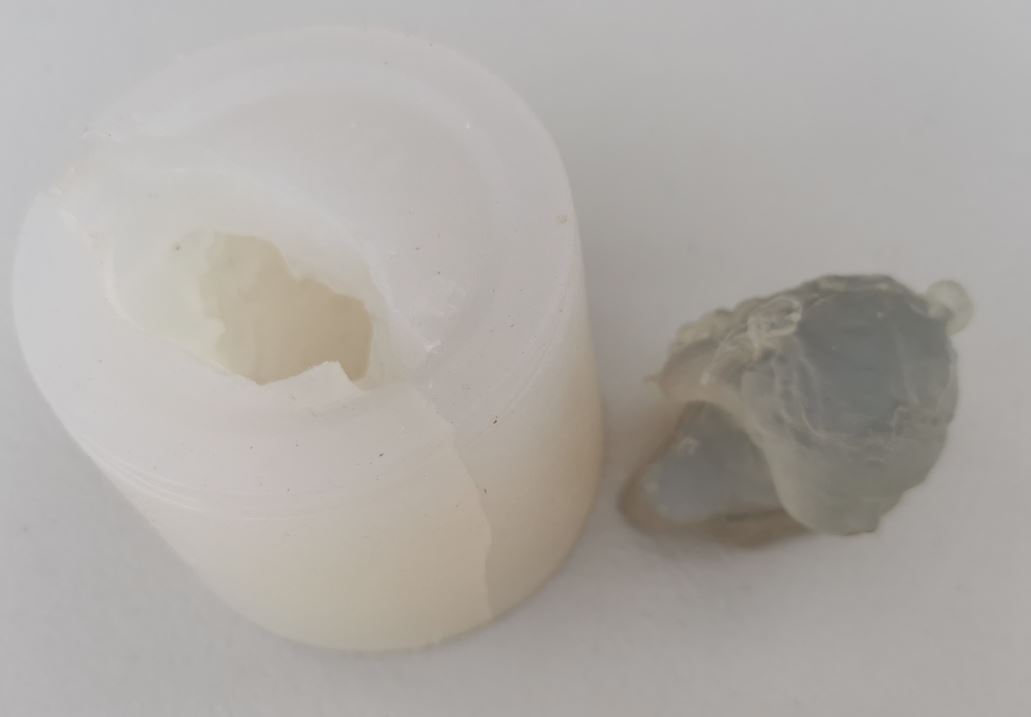
I break the plastic and with the help of a cutter I cut the silicone lengthwise to be able to open the mold and know the figure inside with which I have shaped my mold.
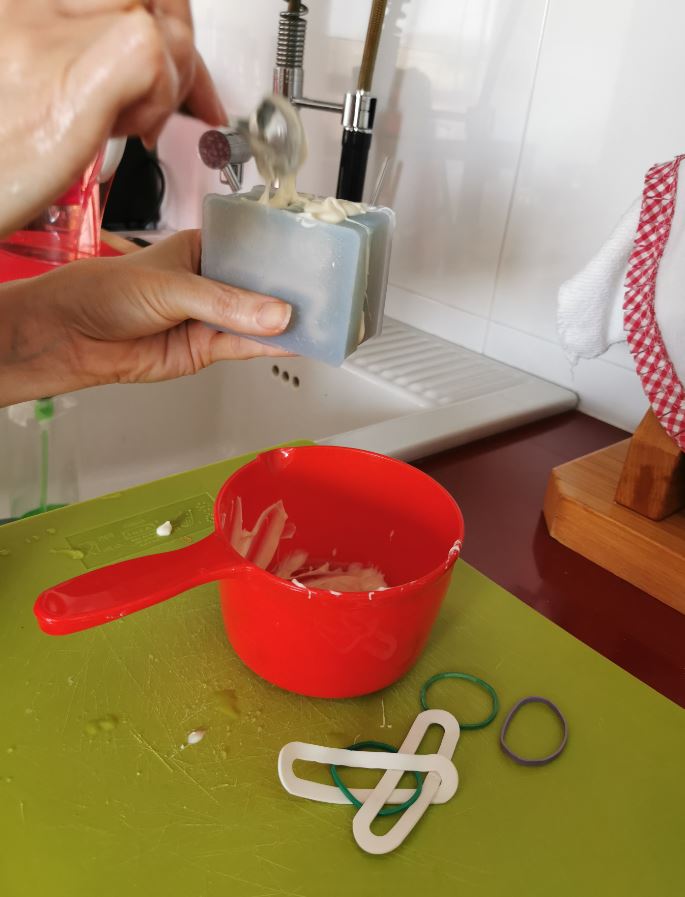
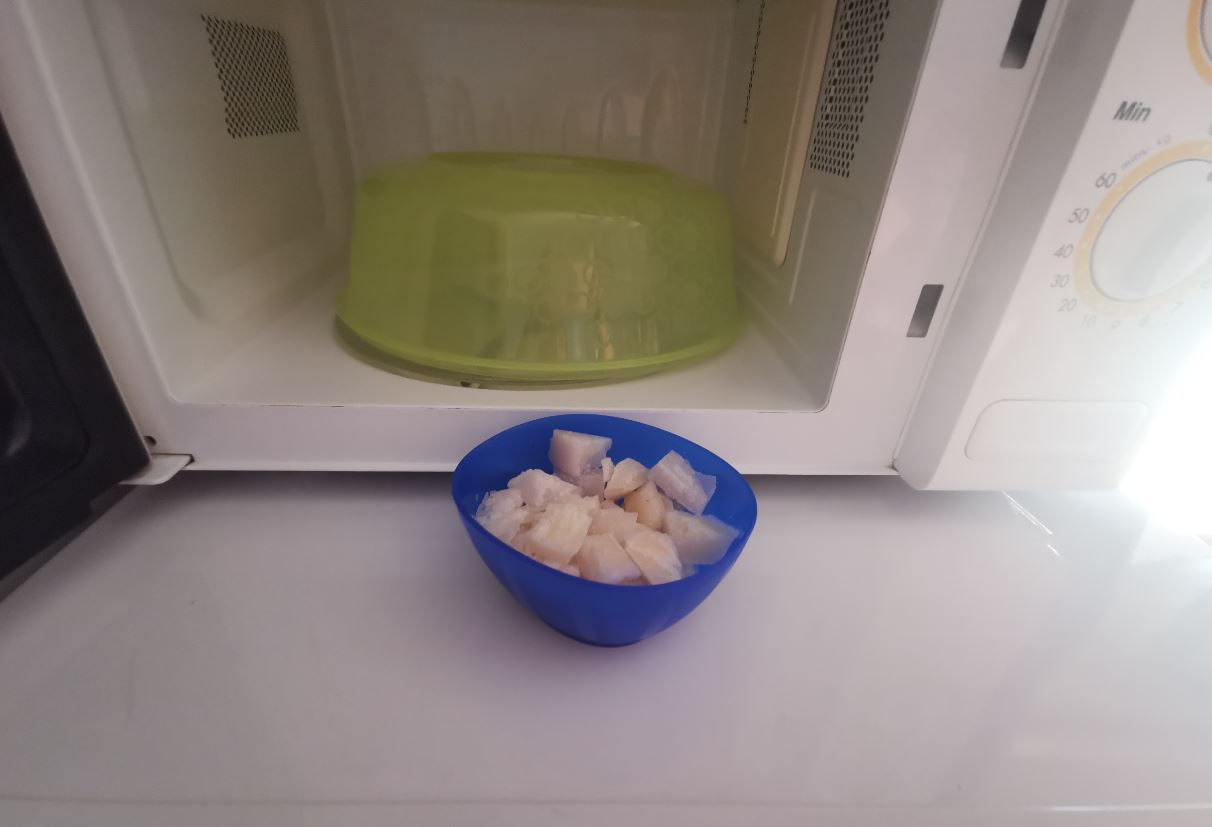
To make the soap, I trice the base into small squares to be able to melt them by applying heat, for this, I am going to use the microwave.
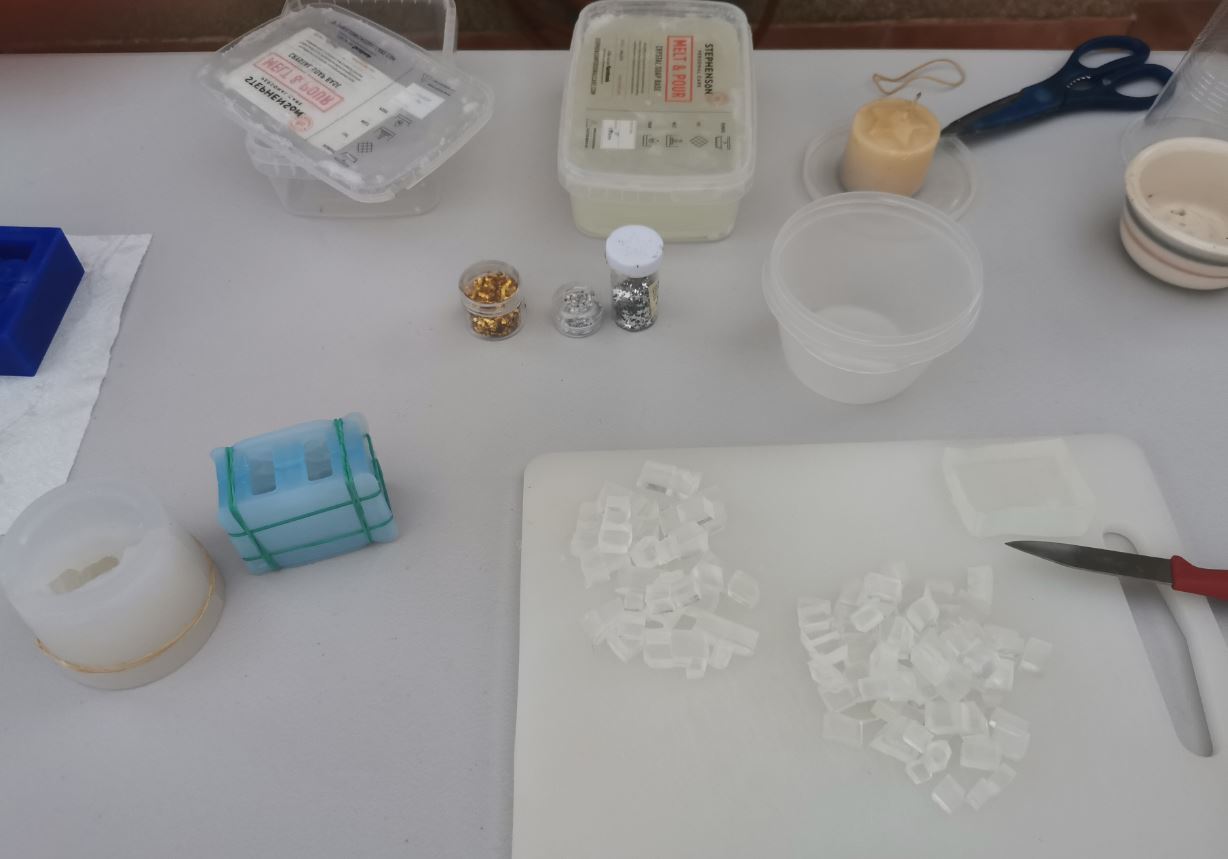
I have prepared my molds by joining the parts with elastic tape to pour the soap once it is liquid.
Once melted I add coloring and aroma to the taste of my girls.

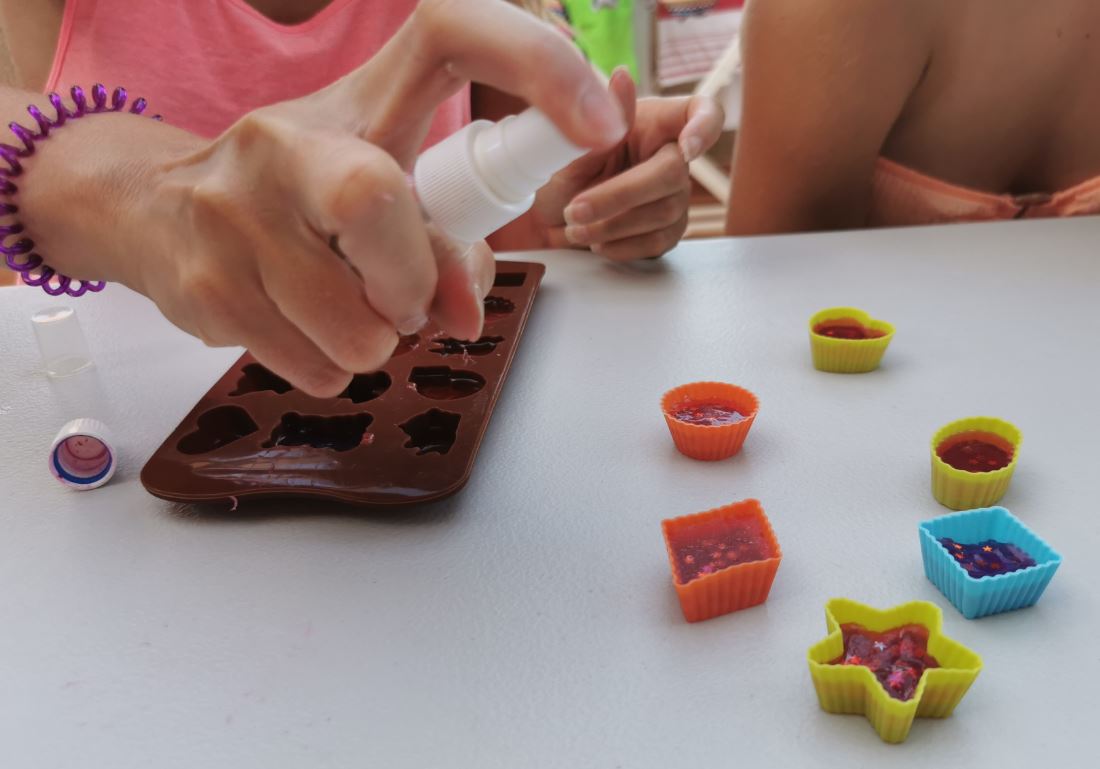
Then I fill the mold carefully so that there are no bubbles with the help of a wooden stick and with enough speed so that the soap does not solidify.
At the time, with the mold of the figure, it occurred to me to make a candle. I would have liked to try the blue wax shavings that I saved from milling, but I didn’t have it. So I took an old candle that I had at home and it was damaged and I chopped it up by removing the wick from inside and placing it in my silicone mold.
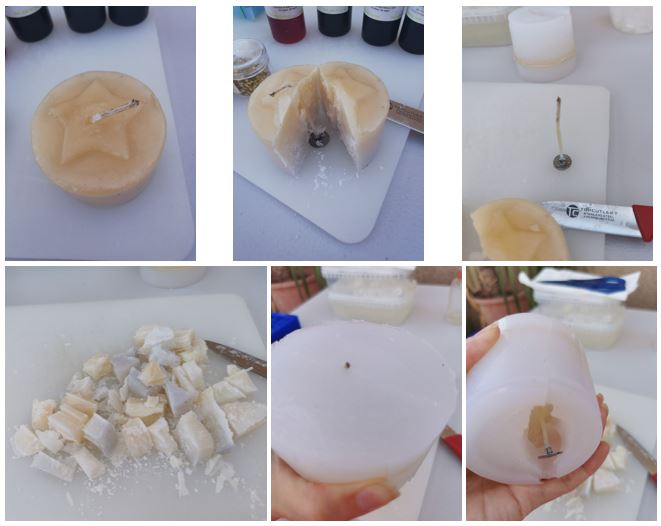
To melt the wax, the microwave did not work, the melting point of the wax was quite high, and since I did not have product specifications, since I recycled, I had to act in trial and error mode.
Finally I used the glass ceramic and a frecipiente to make this fusion in a water bath.
When the wax was already liquid, we added glow-in-the-dark flowing powders and blue dye.
The problem was that the dye used was for soap and was not soluble in wax, well, a shame…
Still, we poured the wax into the mold, since we still did not know that the dye was not soluble, it was evident when solidifying.
To complete the candle and soap workshop with my little companions, we used silicone molds that we already had at home to do this type of workshop.
We added more colors to the soaps, with different scents, and we put glitter and various decorations on them, as my girls wanted.
To make the surface shiny and without bubbles, we sprayed alcohol and it gave very good results.
Really enjoyed it, We gave excitement to this very hot summer stage, in which we can at least be together at the beach house but without going out to play and interact with other children.
And the soaps were so beautiful:
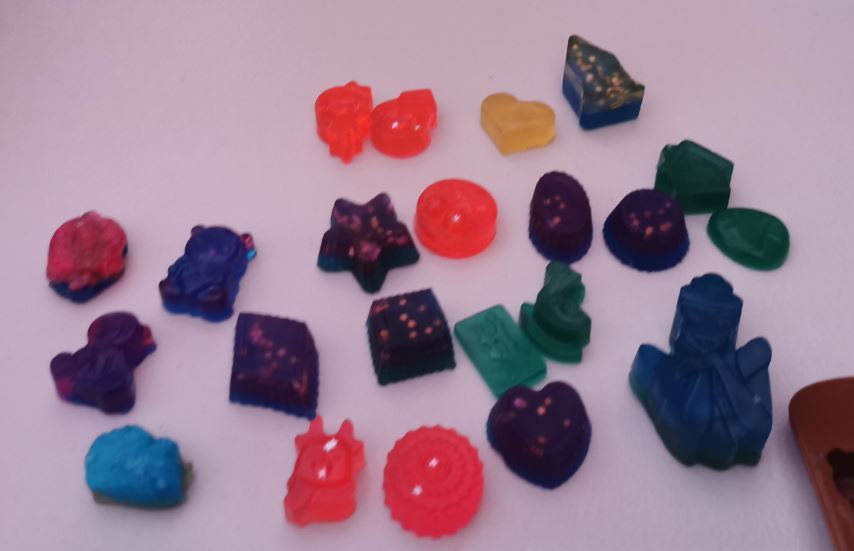
The result of the soap made with the baby carriage mold has been this:

Regarding the candle, as I already said, the blue dye in soaps is not soluble in the wax, so it has been marbled.
Even so, I am happy with the resolution of the mold, which has allowed the candle to look like this:
In summary , in this assignment I have managed to design and mill a counter mold in wax, from it I made two silicone molds composed of two parts that are assembled, with one of them I have made ice creams and chocolate leaks and with the other aromatic and colored glycerin soap.
I have also made a silicone mold from a 3D printed figure, whose stl was obtained after a 3D scanning process and to fill this mold I have melted wax, getting my “Candela” candle that glows in the dark.
Best of all, I have managed to entertain my little girls while learning new things.
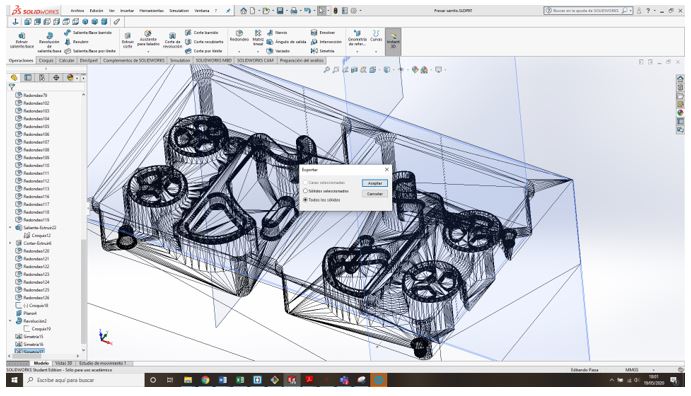
16.1.5. Assignment files
CAD file to be milled to make the mold (sldprt / Solidworks file)