This page contains the detailed process for some parts in my final project that were too long to place in the final page.
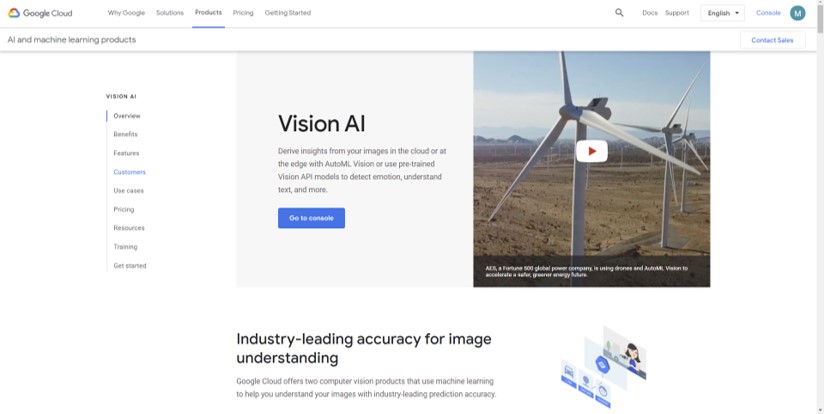
Gooogle vision API is a computer vision product that uses machine learning to understand images with a high rate of prediction accuracy.
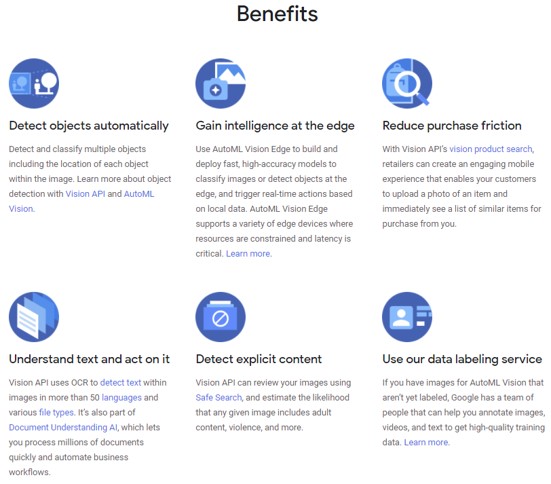
The tool uses pre-trained models to detect and identify objects, thus enabling the usage of the severs to upload images, and return prediction without the need for high processing power in the device. Some of the benefits of using the cloud processing API:
To start using the API, I clicked on get started, on the bottom of the home page. This takes me to an introductory page with different options of the services provided. The service I am using is the Vision API.
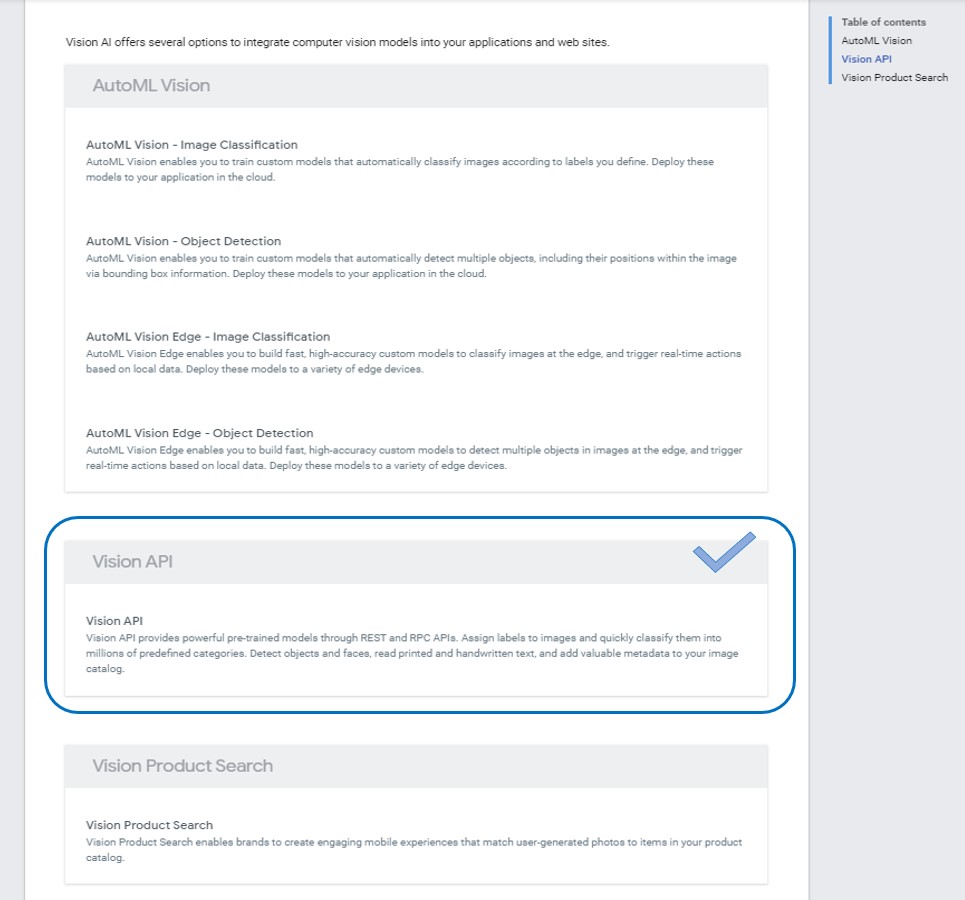
clicking on the API option, takes me to the documentation and tutorials page. Which has all the steps to create and use the service.
First, I had to create a project by clicking on go to project selector, which opens the console for Google cloud platform, then clicking on create project.

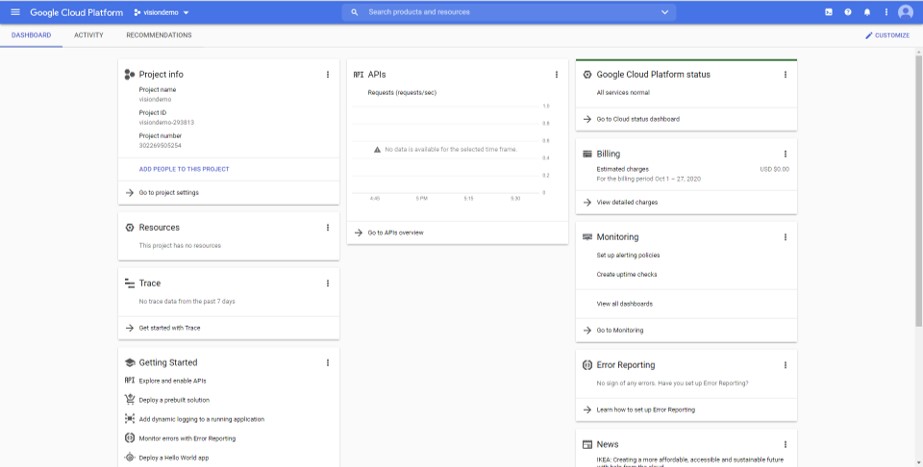
Once the project is created, we are re-directed to the dashboard of the project which contains all the information of the usage of the service.
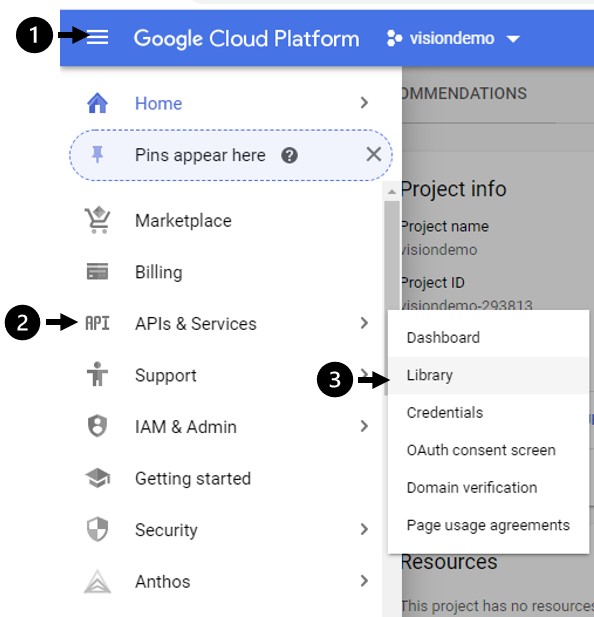
Next is enabling the vision API, by clicking on the navigation menu on the top left > API and services > library.
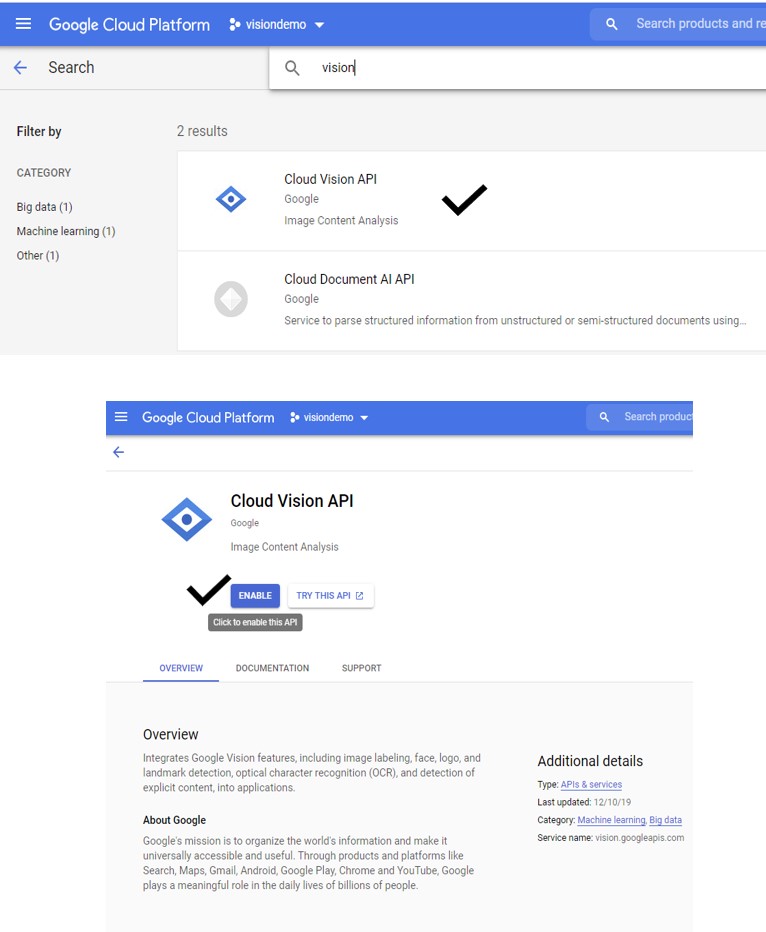
Then search for vision, select the cloud vision API, and enable the service.
Next is setting up the authentication service key by heading to API and services > credentials.
Then select new service account, and write the service account name, select the owner as the role, and json as the type of key. Then press create.
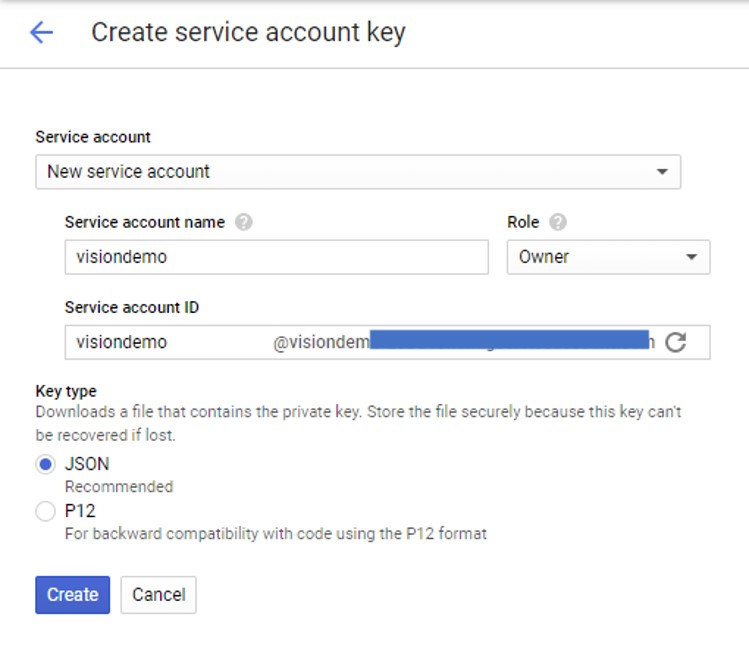
The service account key is generated and downloaded on the personal computer.
Next I downloaded Node.js for windows to run the service on. Node.js® is a JavaScript runtime built on Chrome’s V8 JavaScript engine.
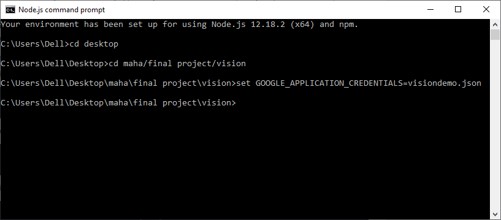
I copied the service key I got to an empty folder, and then opened Node.js command prompt and navigated to the same folder.
Next, I set the environment variable copying the command to my node.js command prompt and replacing the path with my service key. This connects the computer I am using to the API service on the cloud.
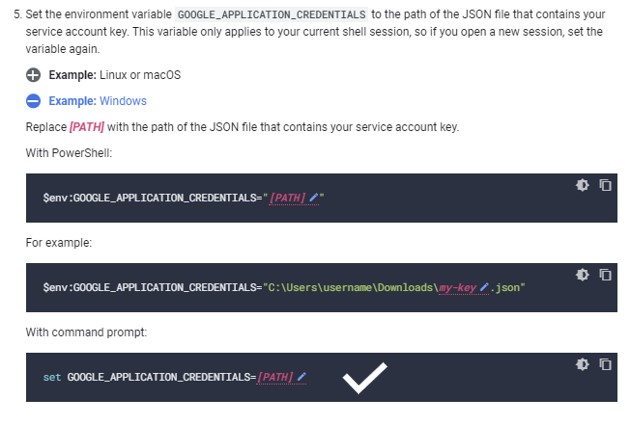
Note: every time the command prompt is closed, we have to set the environment variable through the previous command again, as it considers the “session” closed.
Next is installing the client libraries. Again I am copying the command from the tutorial and pasting it into my node.js command prompt.
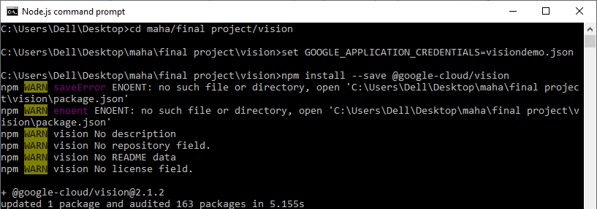
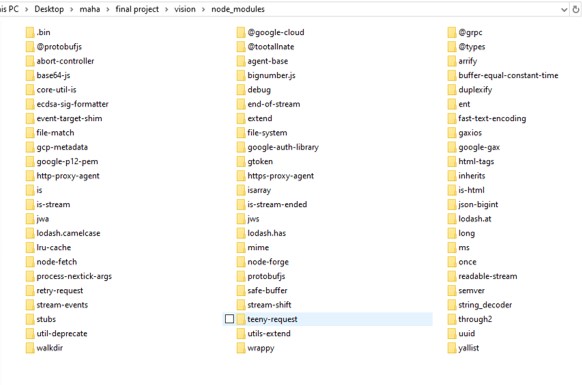
Once the node modules are installed successfully, we can try testing the API!
The google vision API already provides an example to use to test the service, so I copied the script and pasted it in a notepad and saved it as a test.js to use later.

// Copyright 2017 Google LLC
//
// Licensed under the Apache License, Version 2.0 (the "License");
// you may not use this file except in compliance with the License.
// You may obtain a copy of the License at
//
//      http://www.apache.org/licenses/LICENSE-2.0
//
// Unless required by applicable law or agreed to in writing, software
// distributed under the License is distributed on an "AS IS" BASIS,
// WITHOUT WARRANTIES OR CONDITIONS OF ANY KIND, either express or implied.
// See the License for the specific language governing permissions and
// limitations under the License.

'use strict';

// [START vision_quickstart]
async function quickstart() {
  const vision = require('@google-cloud/vision');   // this function Imports the Google Cloud client library


  const client = new vision.ImageAnnotatorClient();   // Creates a client

  // Performs label detection on the image file
  const [result] = await client.labelDetection('./pics/fish.jpg');
  const labels = result.labelAnnotations;
  console.log('Labels:');
  labels.forEach(label => {
    console.log(label.description);
  });
}
// [END vision_quickstart]

quickstart().catch(console.error);
To test the API as per the requirements, I created a folder named pics, and saved this image of a fish in.
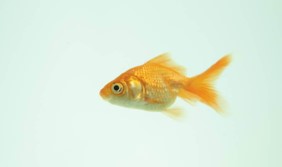
Then I called the test.js script I created earlier in the node.js. This script calls the google cloud client libraries, connects to the server, processes the image saved in the pics file, and returns the label of the objects found on the picture which indeed were fish!

Now I tested the API service, I need to create the server that connects the API service to the ESP 32 cam.
I got the server from this this tutorial. I downloaded the script of the server.
This script basically creates a server where the images captured by the ESP 32 are saved, and then connects to the service API to process these images and then return the results or labels as a json document to the ESP.
var fs = require('file-system');
const http = require('http');
const server = http.createServer();
const filePath = './resources/test.jpeg';

server.on('request', (request, response)=>{
    if(request.method == 'POST' && request.url === "/imageUpdate"){

        var ImageFile = fs.createWriteStream(filePath, {encoding: 'utf8'});
        request.on('data', function(data){
            ImageFile.write(data);
        });

        request.on('end',async function(){
            ImageFile.end();
            const labels = await labelAPI();
            response.writeHead(200, {'Content-Type' : 'application/json'});
            response.end(JSON.stringify(labels));
        });


    }else{
        console.log("error");
        response.writeHead(405, {'Content-Type' : 'text/plain'});
        response.end();
    }
});

async function labelAPI() {
  // Imports the Google Cloud client library
  const vision = require('@google-cloud/vision');

  // Creates a client
  const client = new vision.ImageAnnotatorClient();

  // Performs label detection on the image file
  const [result] = await client.labelDetection(filePath);
  const labels = result.labelAnnotations;
  var o = [];
  labels.forEach(label => {
    o.push({description: label.description, score: label.score});
  });
  return o;
}

const port = 8888;
server.listen(port)
console.log(`Listening at ${port}`)
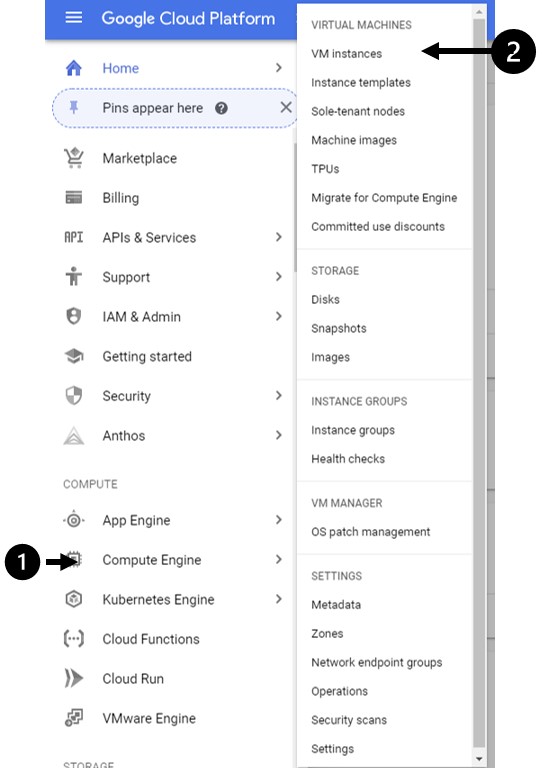
Next I created the virtual machine that will allow my project to be portable instead of running the server on my personal computer.
To do so I headed back google cloud platform console > compute engine > VM instances> create instance.
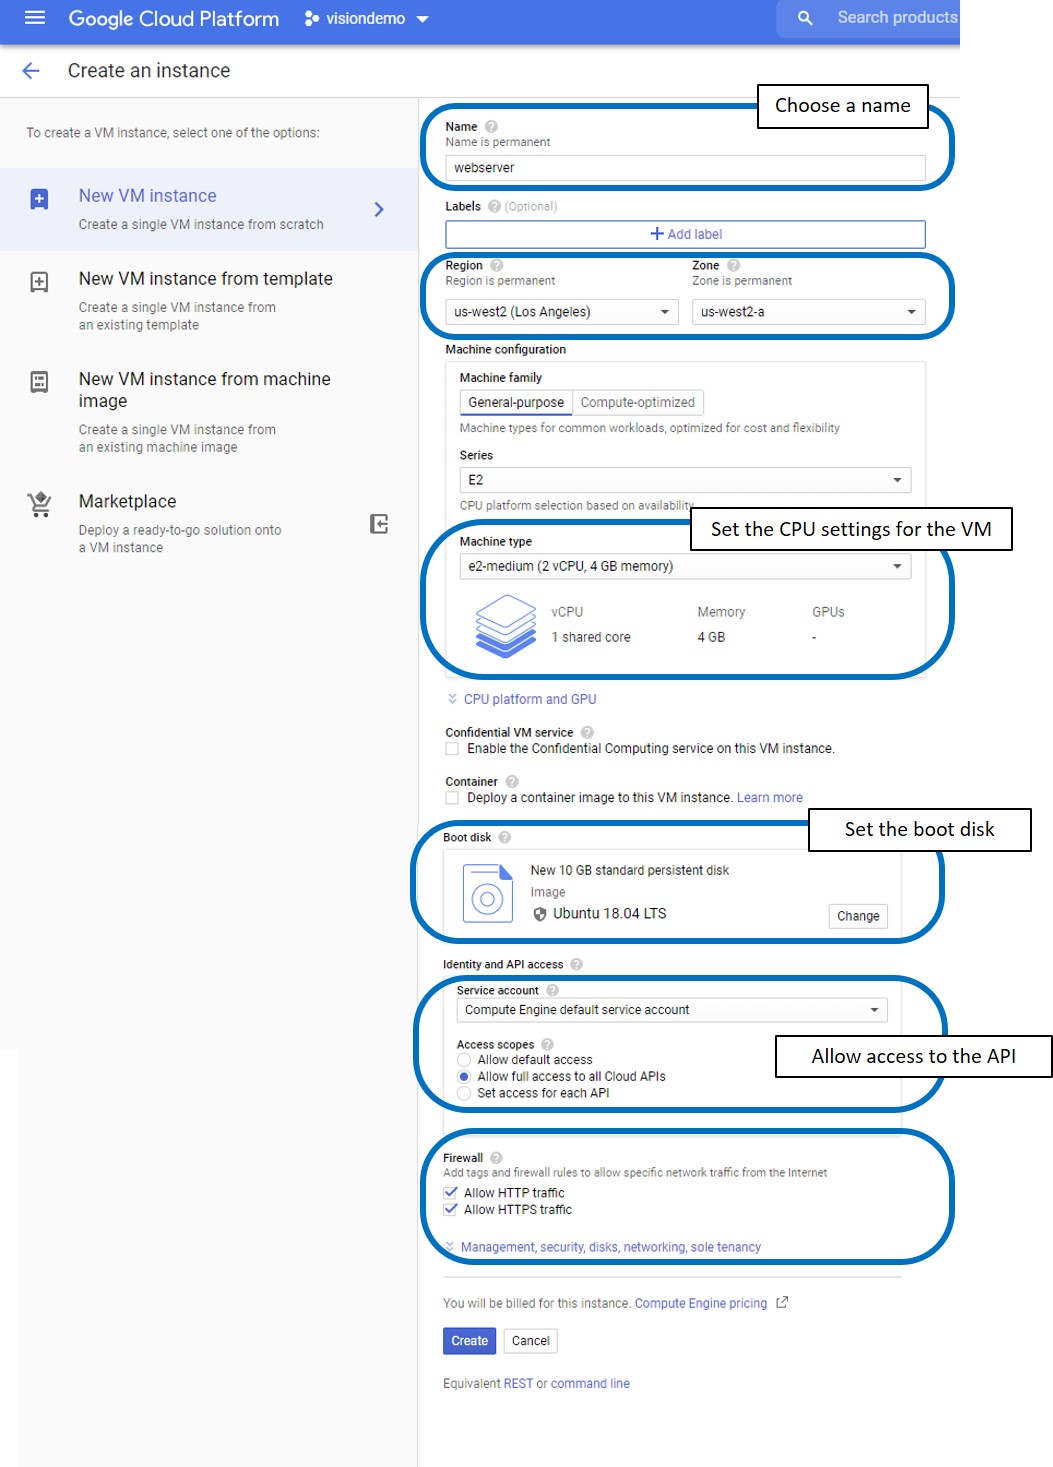
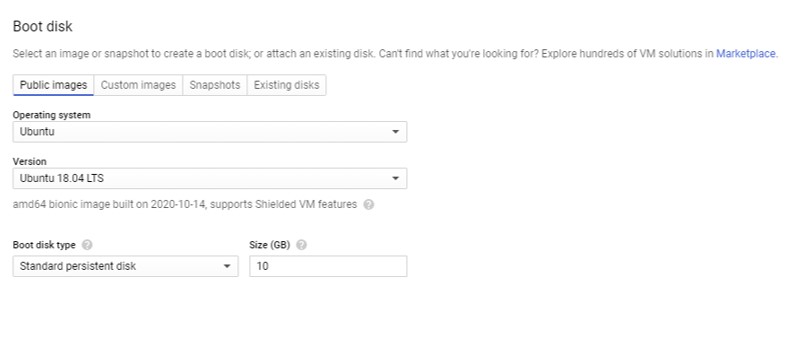
I will be using online ubuntu as the boot disk for my virtual machine, so I chose the following settings:
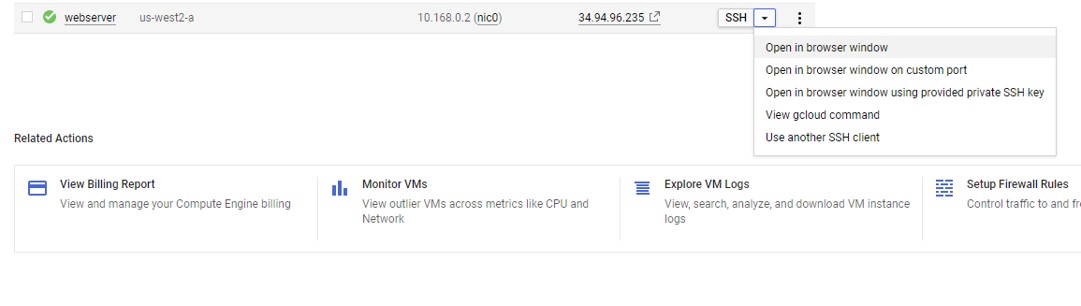
The VM is now ON, and the IP address is generated. Under the connect tab, I clicked and chose open in browser window to set the server we tested earlier.
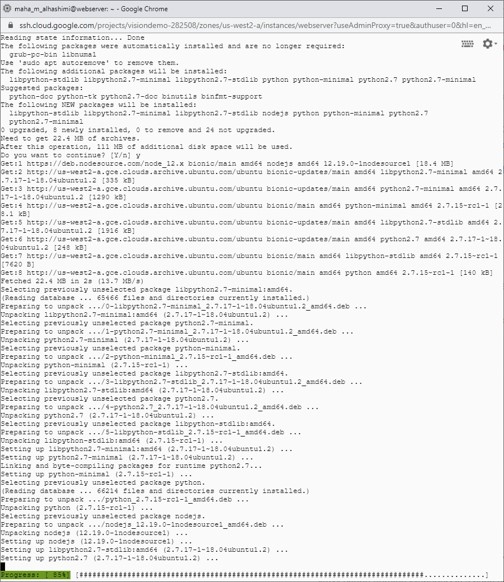
To do so, I needed to install Node.js first on the VM to run the server file. I used this tutorial to aid me throughout.

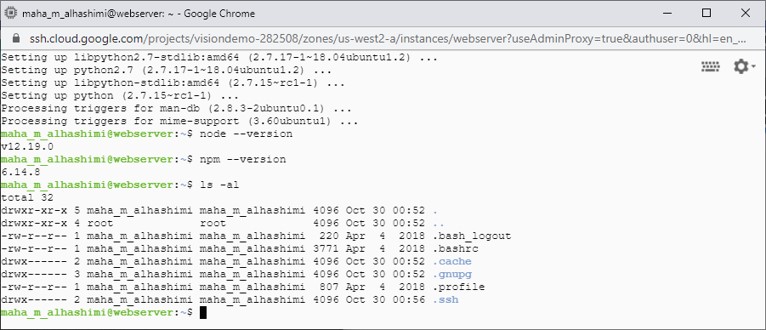
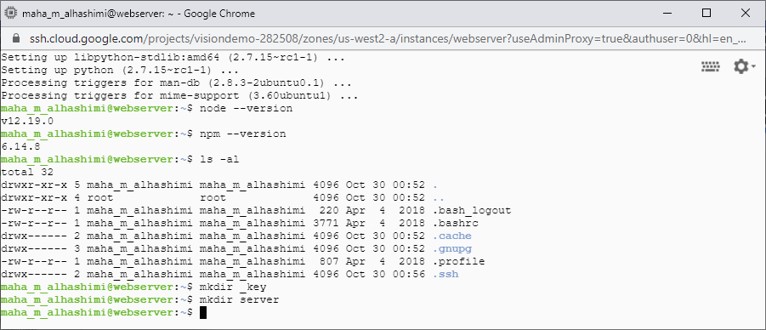
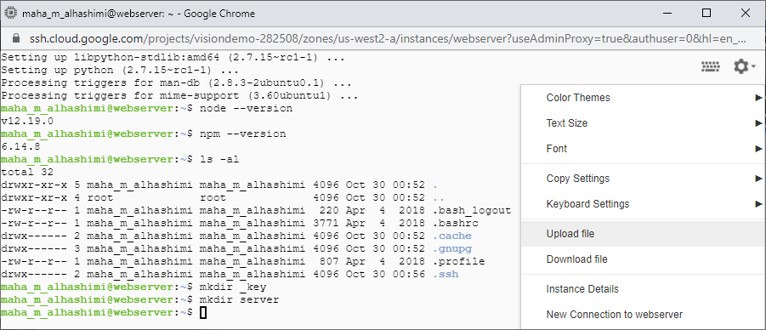
Next, I am creating files to save my service key, and to save server.js file I created.
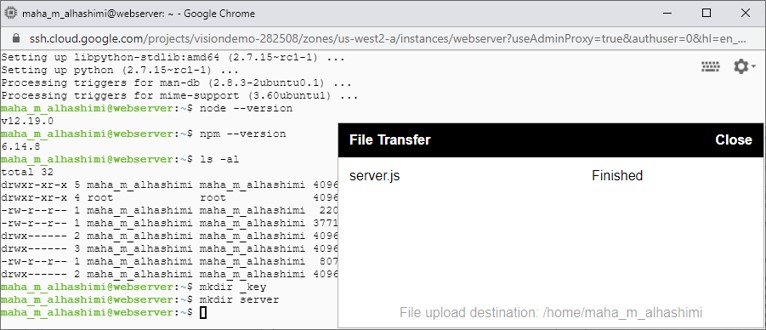
I clicked on the wheel on the upper right and chose upload to upload the files I needed.
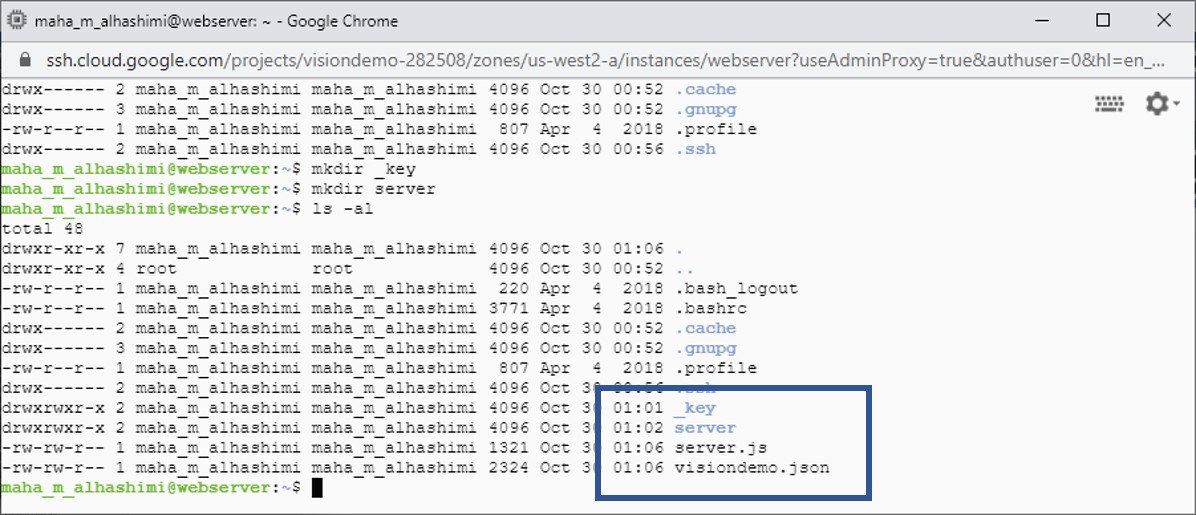
Let’s check if everything is created and uploaded correctly!
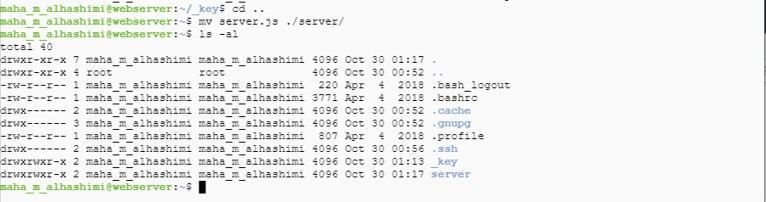
For the sake of organization, I am moving the service key to the _key folder I created, and the server.js file to the server folder I created.

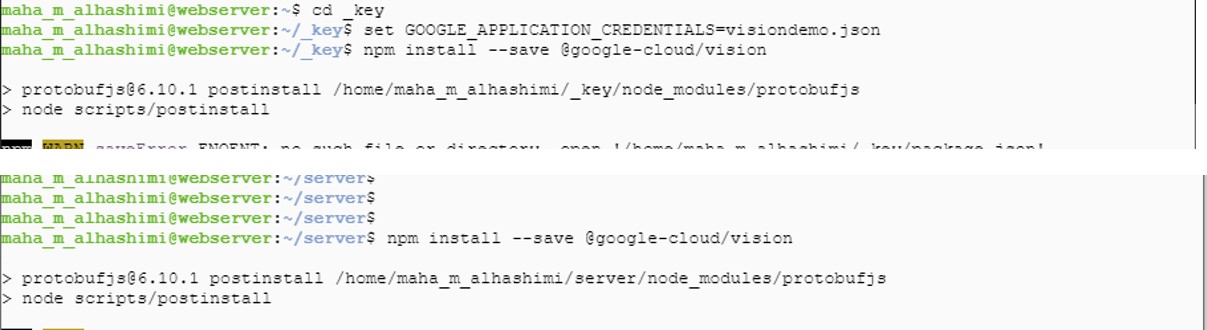
To start using the virtual machine, we need to authenticate the session first by using the same command as before set GOOGLE_APPLICATION_CREDENTIALS=[PATH] and calling the service key, and then install the client libraries again by the command npm install --save @google-cloud/vision.
Then, I opened the server.js file, and copied and pasted the content into it.
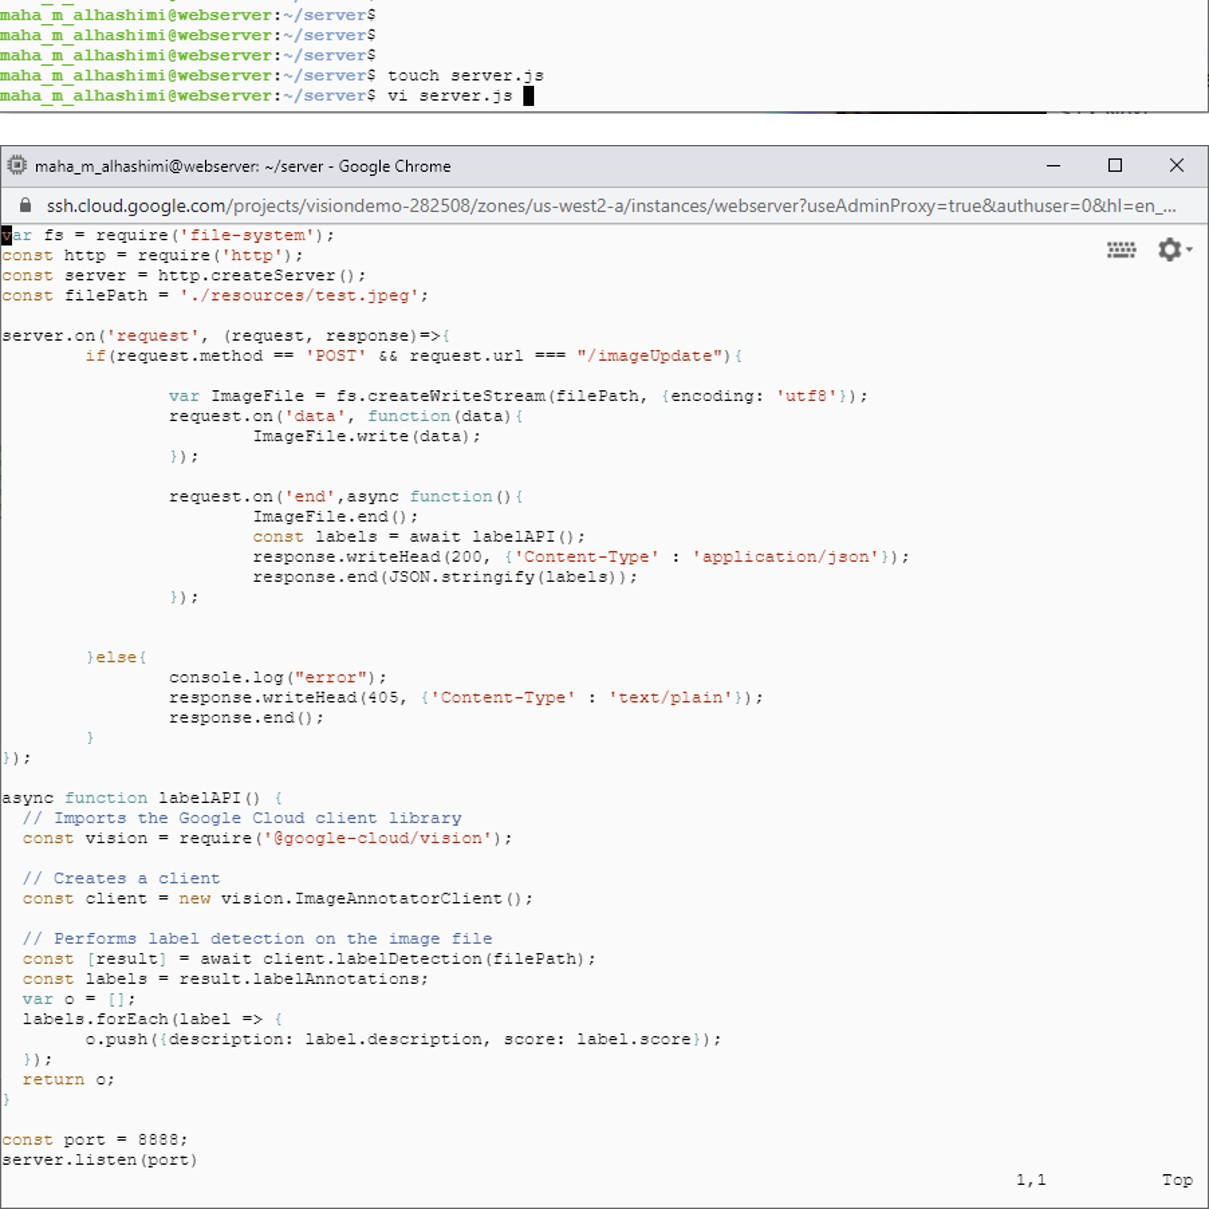
And the final setup step is to make the resources file, where the images captured by the ESP 32 will be saved then processed.

Now, we can open the server to start using it using the commands Sudo nohup node server.js &

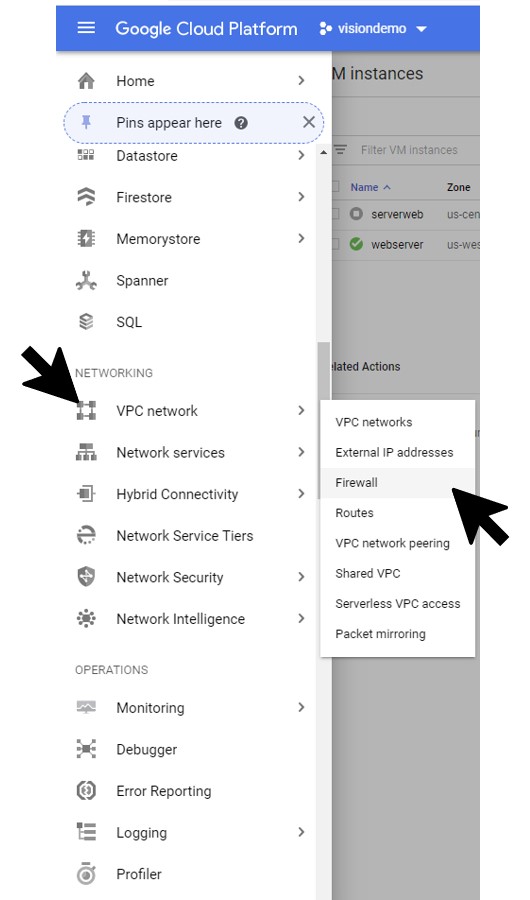
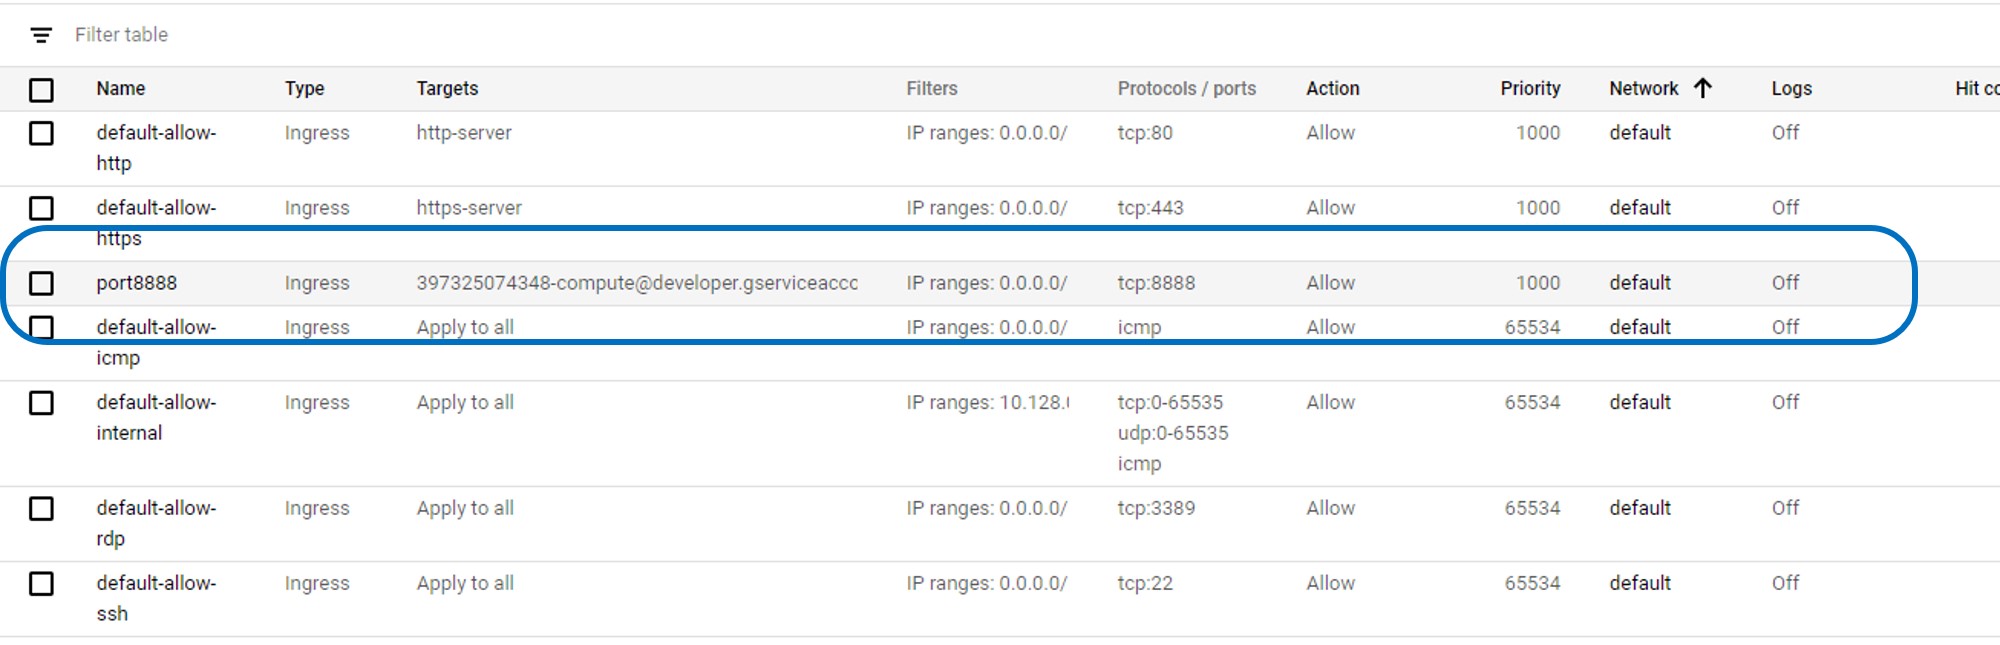
One last thing is to open the firewall for the server, by heading to VPC network > fire wall and then click on create firewall rule
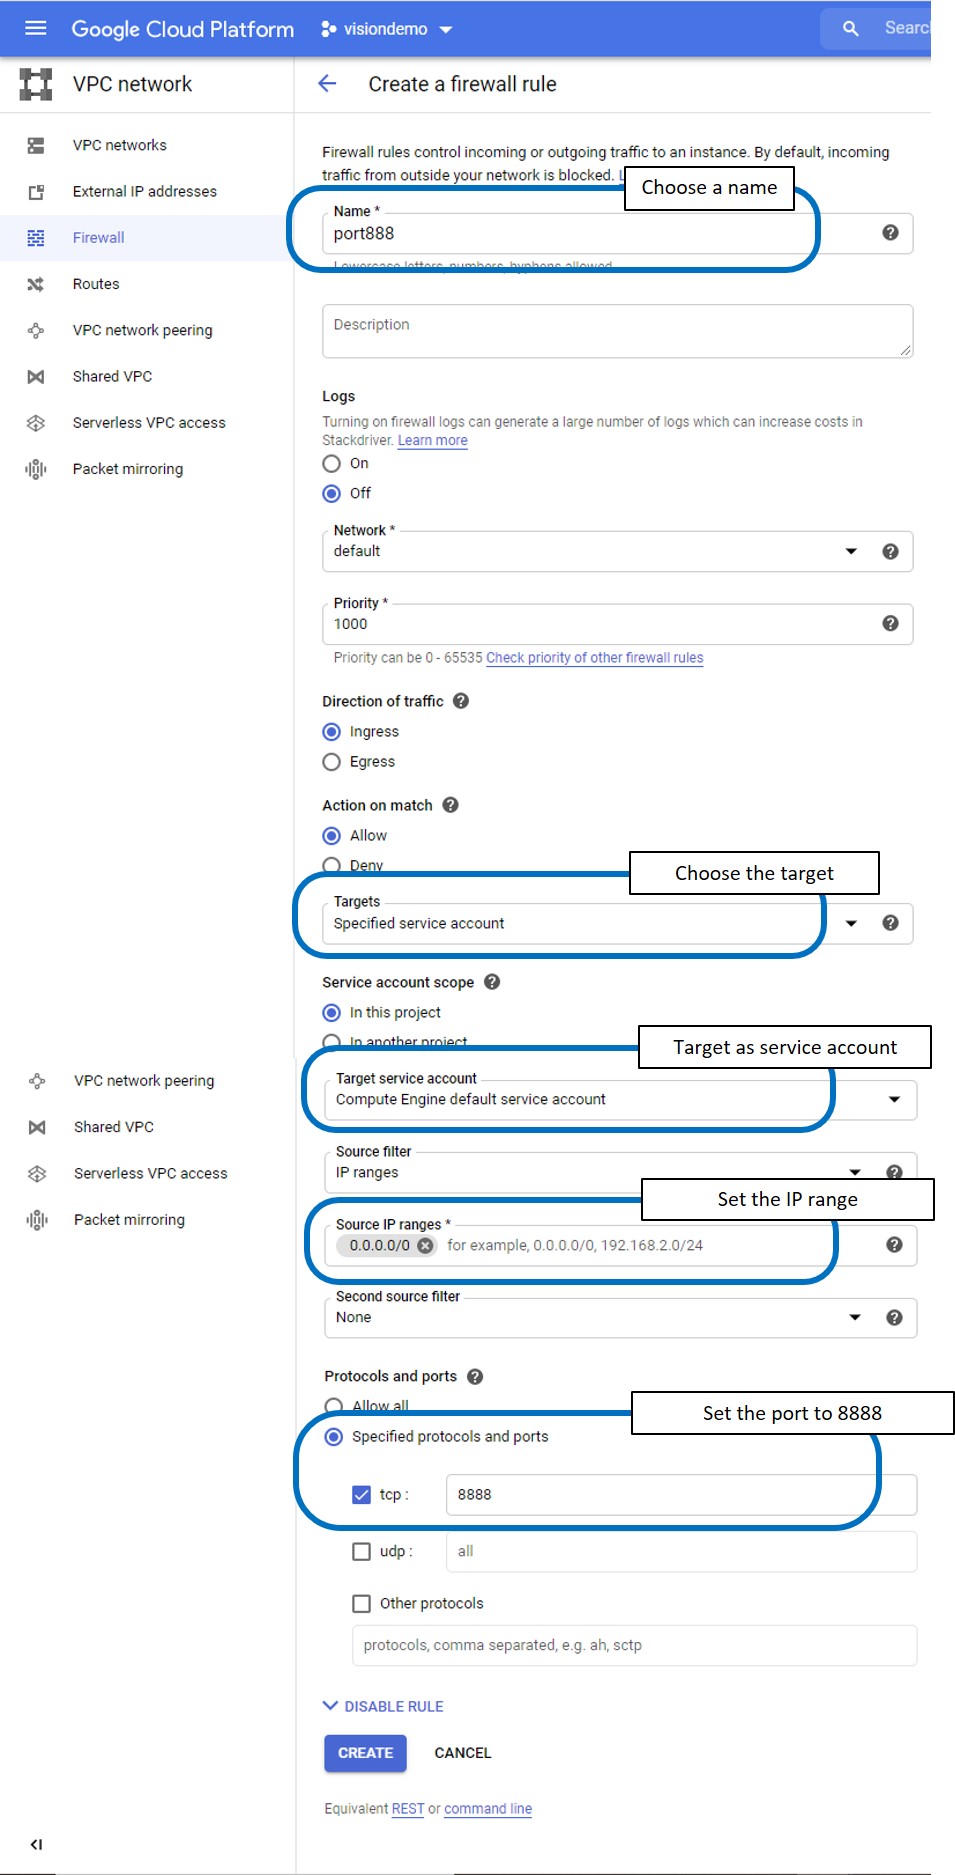
And the firewall is set!
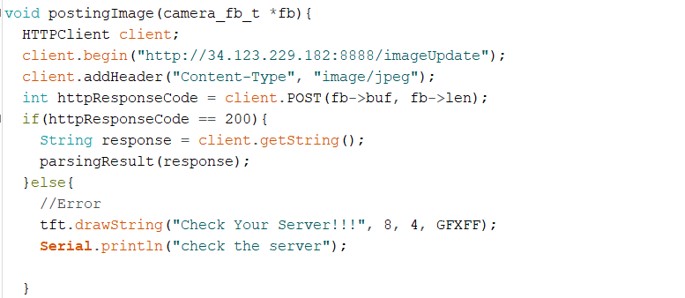
Finally, the server is ready to be used! Just copy the IP address to the ESP 32 code, and upload!
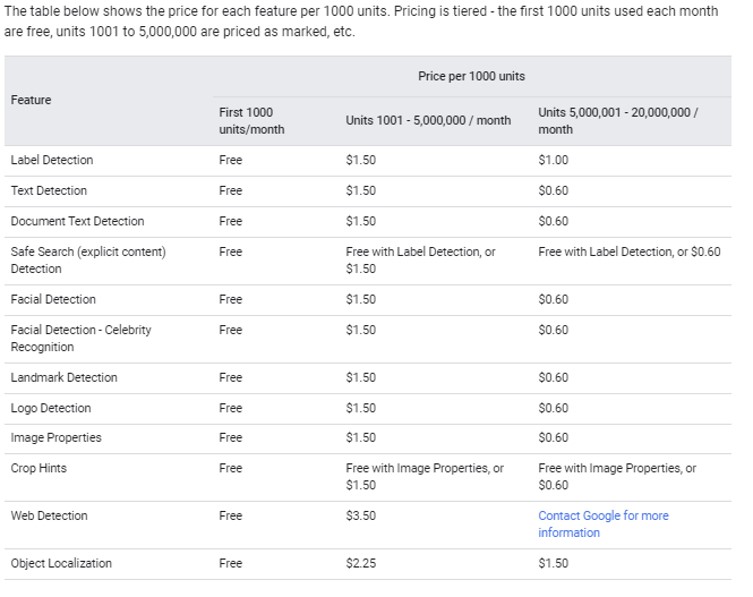
Disclaimer!, Google cloud computing services are not free! They offer nominal prices per the usage of the API’s they are providing. For example, the Vision API is free for the first 1000 models per month, but is charged for anything above that rate. The price list is shown below. Fortunately, google offers a free 300 $ credit to use on the APIs and VM with registration, so I was not charged while creating, testing, and using the Fab Cam so far.