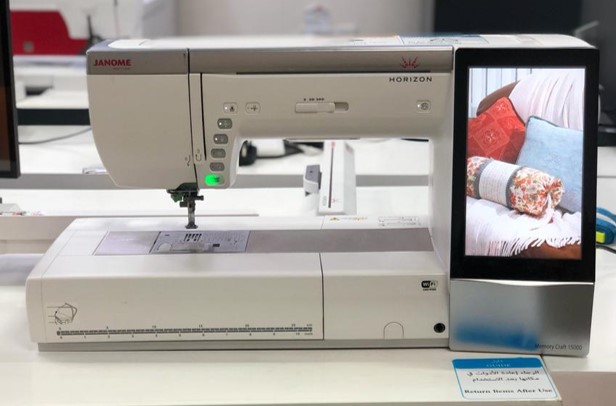
For this week, I decided to use the digital sewing machine, the Janome Memory Craft 15000 to produce a cute embroidered shirt for my 3 year old cousin! It happens to be her birthday month, and I wanted to gift her a special present made by me!
I followed Salama’s instructions and documentations throughout this week to navigate the process of sewing.
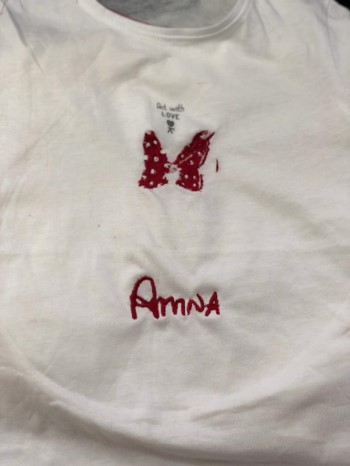
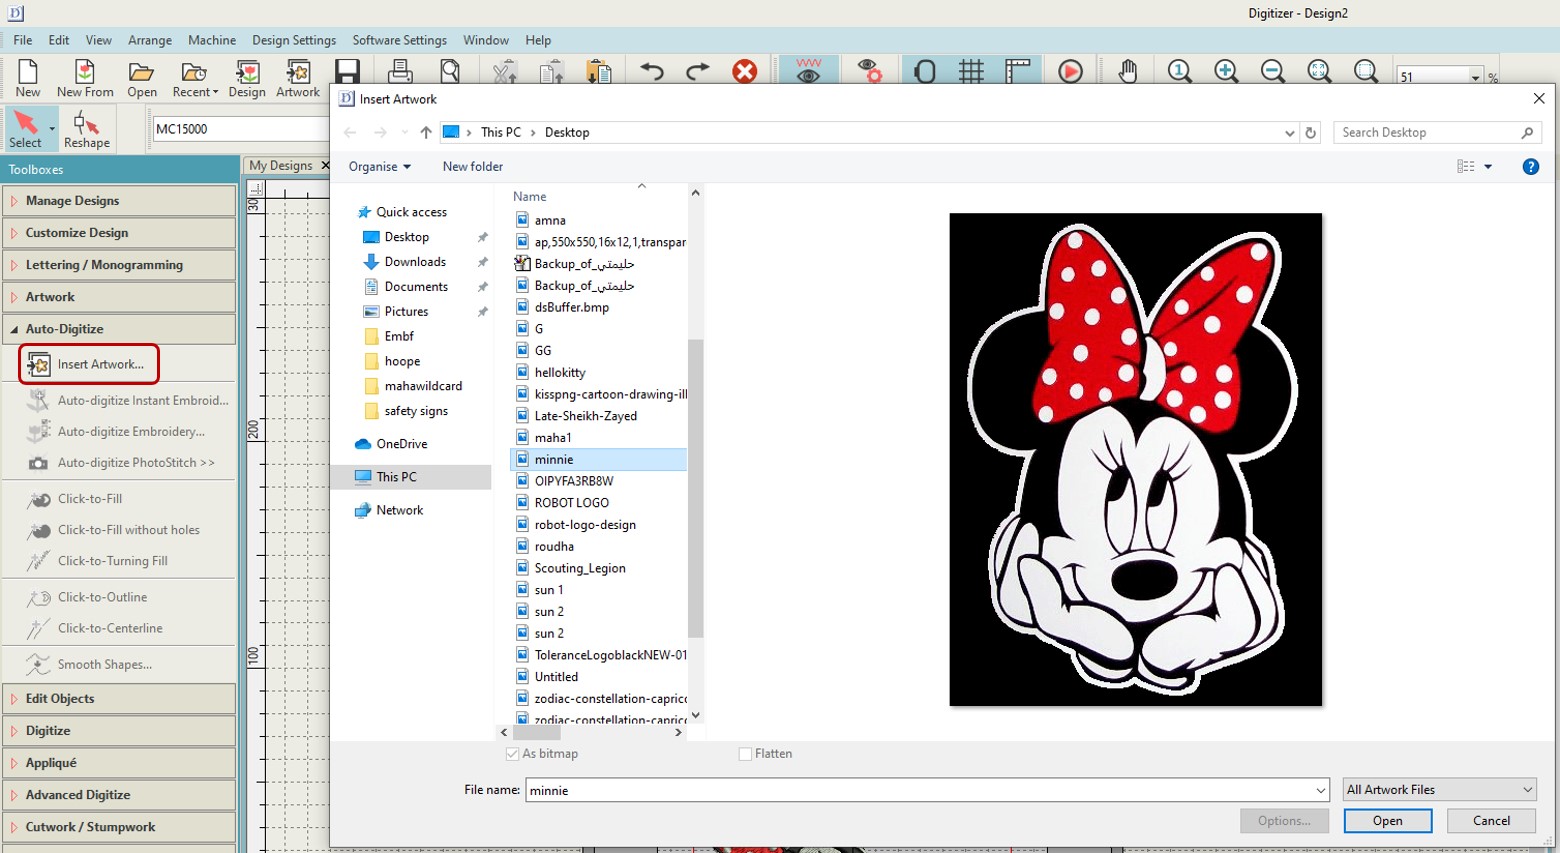
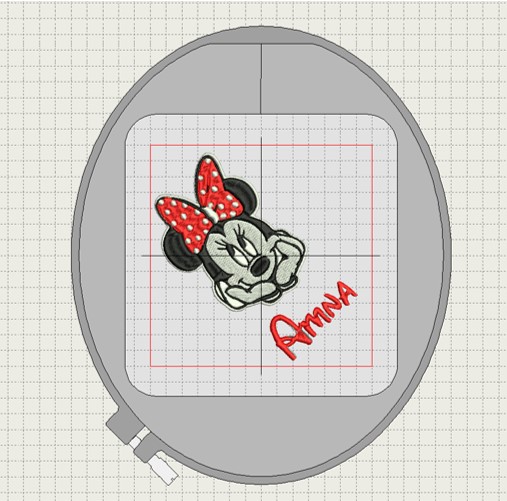
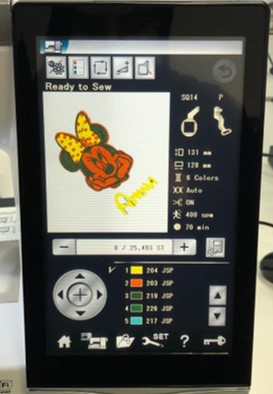
First, I needed a design to make! I chose a cute Minnie Mouse design I found on Pinterest, as it’s my cousin’s current obsession, and her name written in Disney font!

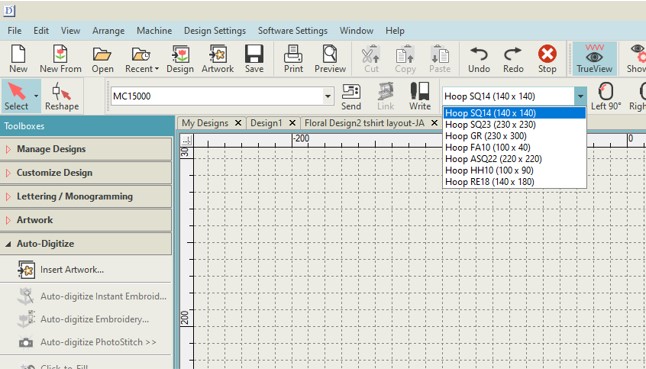
I have to choose the hoop size that would fit my intended design. I went with the FA10 100X40 hoop, since it would fit the both the image and the writing.
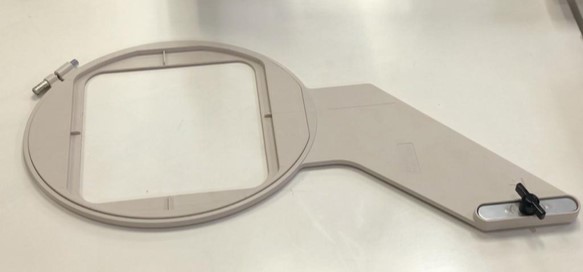
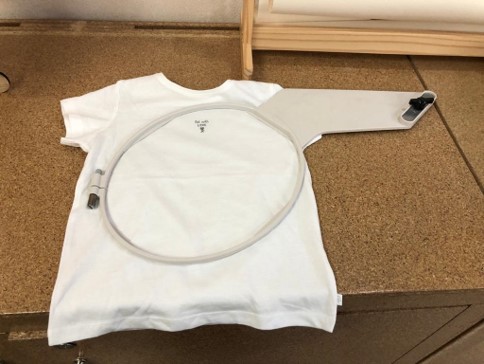
while choosing, some doubts were raised (by Fatima, Salama and myself) regarding the hoop size and the fitting of the shirt I had. The hoop needed to be secured to the machine, and the shirt had to be slipped into the machine so it would sew on one side only. The only solution to this was to place the hoop askew in the shirt.
Next, I opened digitizer, which is the software I am using to digitize the pictures and produce a toolpath for the machine.

First, I selected the hoop size I am using.
Then, I imported the pictures by heading to Insert artwork under Auto digitizer. I selected the photos I needed then clicked on Auto digitize instant embroidery, which digitized the image, referenced each color and set a sewing pattern to it.
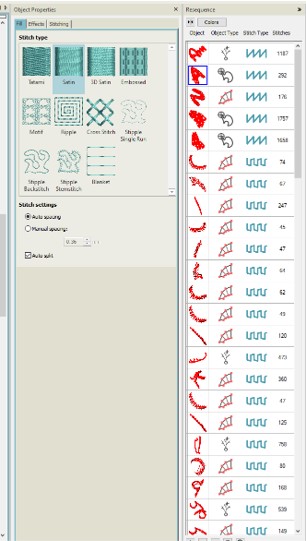
clicking on any part of the digitized image displays a window of colors, the number of parts per color, and stitching type.
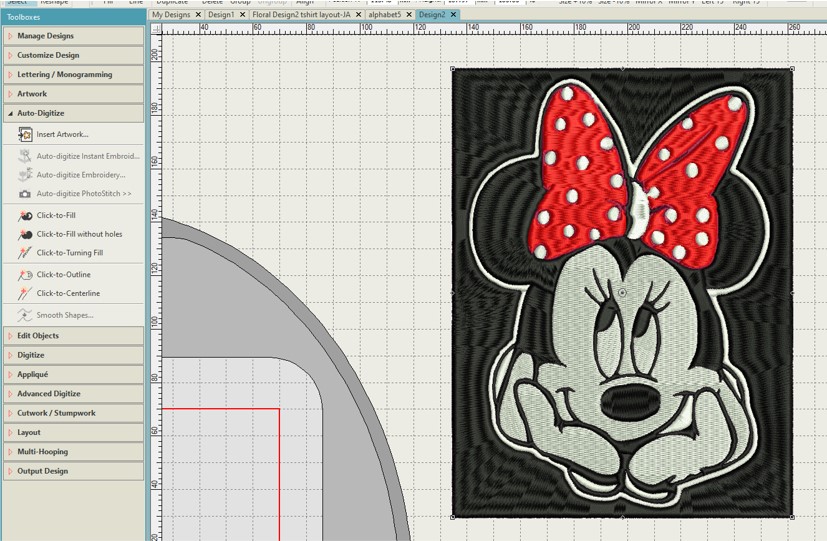
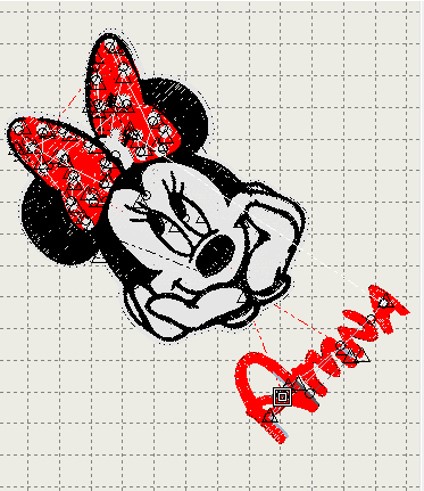
Here, I can drag each part to arrange the order, or delete parts that I don’t want. For example, I’d like my design to include the image of minnie mouse only without the black background, so I selected the background and deleted it. Also, since I intend to do my design in 3 colors, thus having to change the thread 3 times, grouping parts of similar colors together is more efficient. I placed the red color first, followed by white and lastly black.
I repeated the process of importing the name, and digitizing it and placing it where it needs to be. As the placement of the hoop in the machine as at an angle, I had to do the same with the design for the stitching to be straight so I rotated the design 45 degrees. This is how the final design looks!
And the toolpath of the machine.
I exported the files, saved them into a USB, a plugged the USB in the machine.
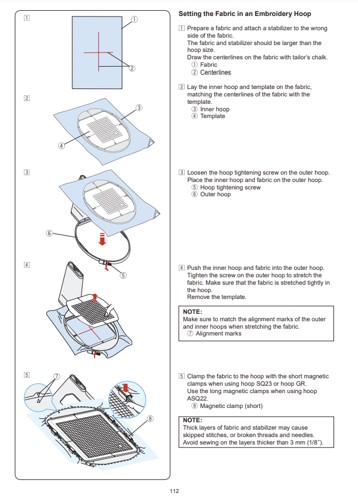
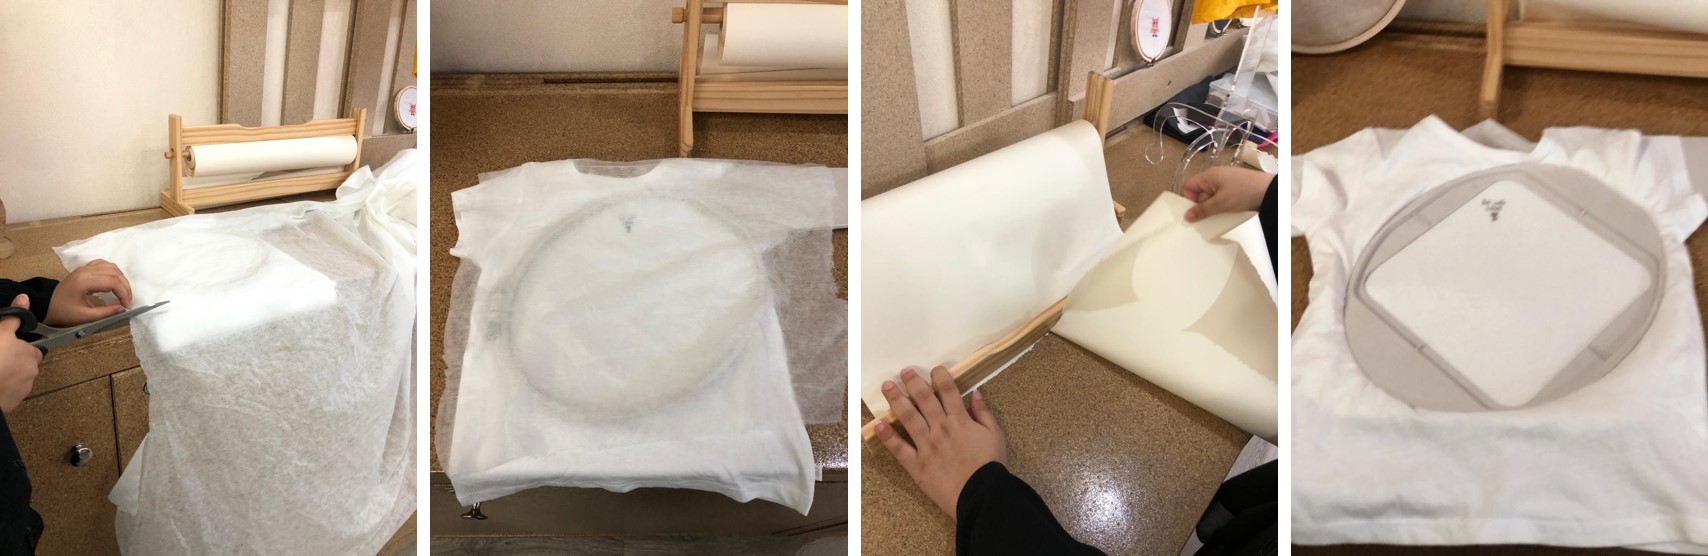
As per Salama’s recommendations, and the steps in the manual I setup the fabric into the hoop by placing a paper, and some Vlieseline fusible interlining underneath. And secured it by tightening the screw.
Next, I needed to fill the top and bottom threads, I filled it with red first!
I secured the hoop, and gave the sewing order!
Along the way, The machine paused and displayed an error message stating that bottom thread might be insufficient. So, I had to re-load the thread.
I placed the bottom thread again and clicked on the start button to start sewing. The machine continued to work on the bows, but the thread kept getting cut.
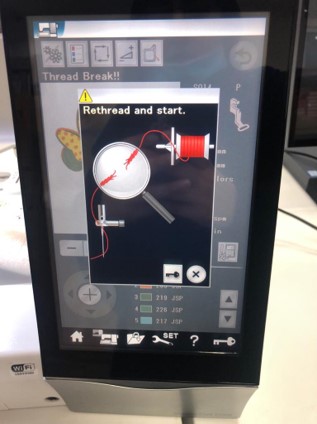
After several trials to re-thread and start, I noticed that the fabric was tearing at places because of the pull of the thread.
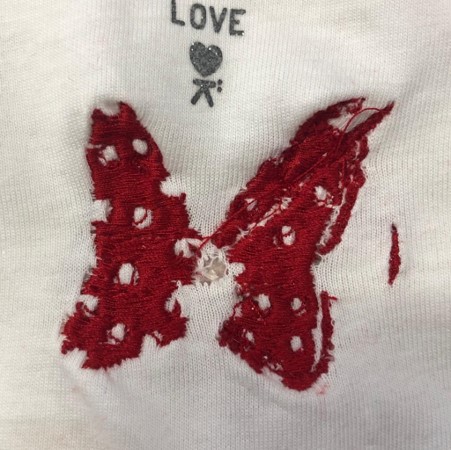
This eventually lead me to stop working on this piece. I was told by the expert (Salama), that the fabric, and the stitch type might have caused this issue, thus I will be attempting this again (when I have time).
The final result: