1. Principles and Practices
-
Individual Assignment
- Work through a git tutorial
- Build a personal site
- Start a class archive describing you and your final project
Research
Initially, to gain an insight on how the website should look like, previous years Fab Academy students’ websites were explored. The websites have two main components in common: 1) Homepage (Introduces the author and the final project idea briefly) and 2) Weekly Assignments (documentation pages for weekly progress).
Various suggested technologies were then explored on the FabAcademy Website. There were too many technologies outlined on the FabAcademy website, It was decided to review technologies that seem most familiar.
Version Control
There was no need for signing up for an account on gitlab. Accounts were already created (I just had to change password and update my profile). An SSH key was generated to provide a secure connection with the repository following Git Tutorial.
Note
Iván Sánchez (FabAcademy 2017 graduate) held a lecture on web development and the basics of Git.
- Install Git. See Git for Window.
- Create an SSH key to provide a secure connection:
- Open Git Bash.
- Generate the SSH key:
ssh-keygen -t rsa -C “your email address”
- View key generated
cat ~/.ssh/id_rsa.pub
-
Copy the SSH key.
-
Go to “fabcloud” site.
User Settings > SSH Keys, paste the SSH Key into the textbox.
- Create a local copy of the remote repository using clone command
git clone “repo dir”
Uploading file to the remote repository:
- Download the last copy from the repository and synchronize local repository with the remote repository
git pull
- To add the new files:
git add –all
- ‘commit’ command, stores the files that are in the index area, into the local repository.
git commit -m “changes made”
- Upload to remote the Repository.
git push
Figure below shows working with git.

Creating the Website
The web development technologies were of a main interest to complete the objectives. Next sub-sections discuss the technologies employed.
Note
These are limited to the suggestions provided by the FabAcademy Website.
Servers
- Apache HTTP Server: an open-source cross-platform web server software.
- NGINX Nginx is a web server which can also be used as a reverse proxy, load balancer, mail proxy and HTTP cache.
Note
There is no need for a server since webpages are hosted gitlab fabcloud.
Markdown
Markdown was chosen to be used for documenting FabAcademy progress.
Various options were listed on the FabAcademy Website: Markserv, Strapdown.js, Pandoc, and MkDocs.
MkDocs was picked because it was already installed, configured on the repository and the way it looks was favorable.
“MkDocs is a fast, simple and downright gorgeous static site generator that’s geared towards building project documentation. Documentation source files are written in Markdown, and configured with a single YAML configuration file.”
The current template was kept mkdocs material template, but the YAML file was edited to personalize the content.
Note
Project settings are always configured by using a YAML configuration file in the project ‘docs’ directory named mkdocs.yml . As a minimum this configuration file must contain the site_name setting. All other settings are optional.
Text editors and Integrated development environments (IDEs)
Various options were listed on the FabAcademy Website: (g)vim, emacs, Atom, Sublime, Geany, Brackets, Eclipse, loweb, SeaMonkey and Dreamweaver. From previous experience with web development, the right tools can make the process less tedious. Several IDEs were explored over the years. Visual Studio Code (VSCode) was chosen mainly because familiarity with it.
“VSCode is free, open-source, and provides support for debugging as well as built-in Git version control, syntax highlights … “
An HTML website was used as an author introduction page and Markdown MkDocs for documenting the weekly assignments.
Working with Markdown files in Visual Studio Code is simple. A useful tutorial for Markdown and VS Code was followed.
Working with HTML files in Visual Studio Code is also simple. A useful tutorial for HTML in Visual Studio Code was explored.
YAML configuration
There are two YAML files within the repo. mkdocs.yml and .gitlab-ci.yml. Both are discussed in the subsections below.
MkDocs YAML configuration
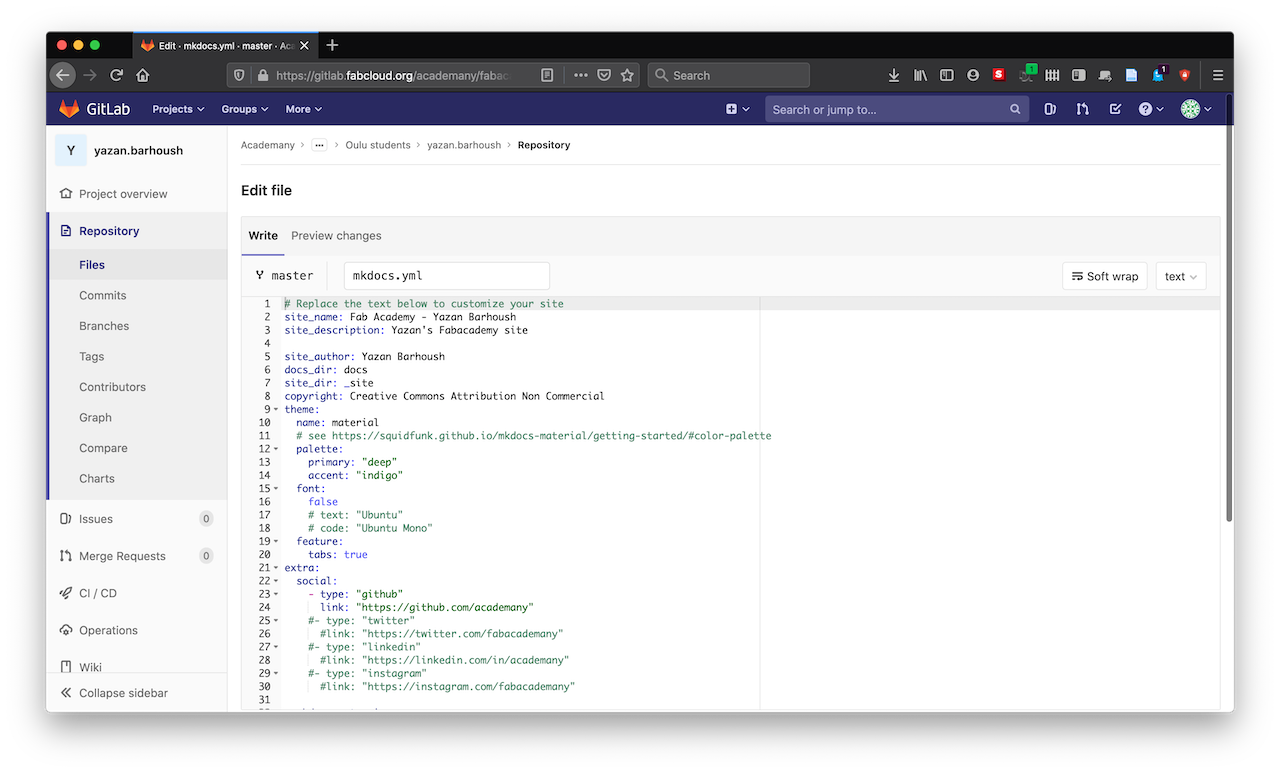
YAML configuration file for MkDocs can be found under mkdocs.yml. More personalization was done to the website by adding site info and description. Additionally, a bunch of Mkdocs extensions were added.
Figure below shows editing the YAML configuration file on Gitlab.
Note
Below is an example of editing the mkdocs YAML config for adding extensions.
See squidfunk.github.io.
markdown_extensions:
  - extra
  - smarty
  - admonition
  - codehilite:
      guess_lang: false
  - toc:
      permalink: true
  - pymdownx.arithmatex
  - pymdownx.betterem:
      smart_enable: all
  - pymdownx.caret
  - pymdownx.critic
  - pymdownx.details
  - pymdownx.emoji:
      emoji_index: !!python/name:materialx.emoji.twemoji
      emoji_generator: !!python/name:materialx.emoji.to_svg
  - pymdownx.inlinehilite
  - pymdownx.magiclink
  - pymdownx.mark
  - pymdownx.smartsymbols
  - pymdownx.superfences
  - pymdownx.tasklist:
      custom_checkbox: true
  - pymdownx.tabbed
  - pymdownx.tilde
  - admonition
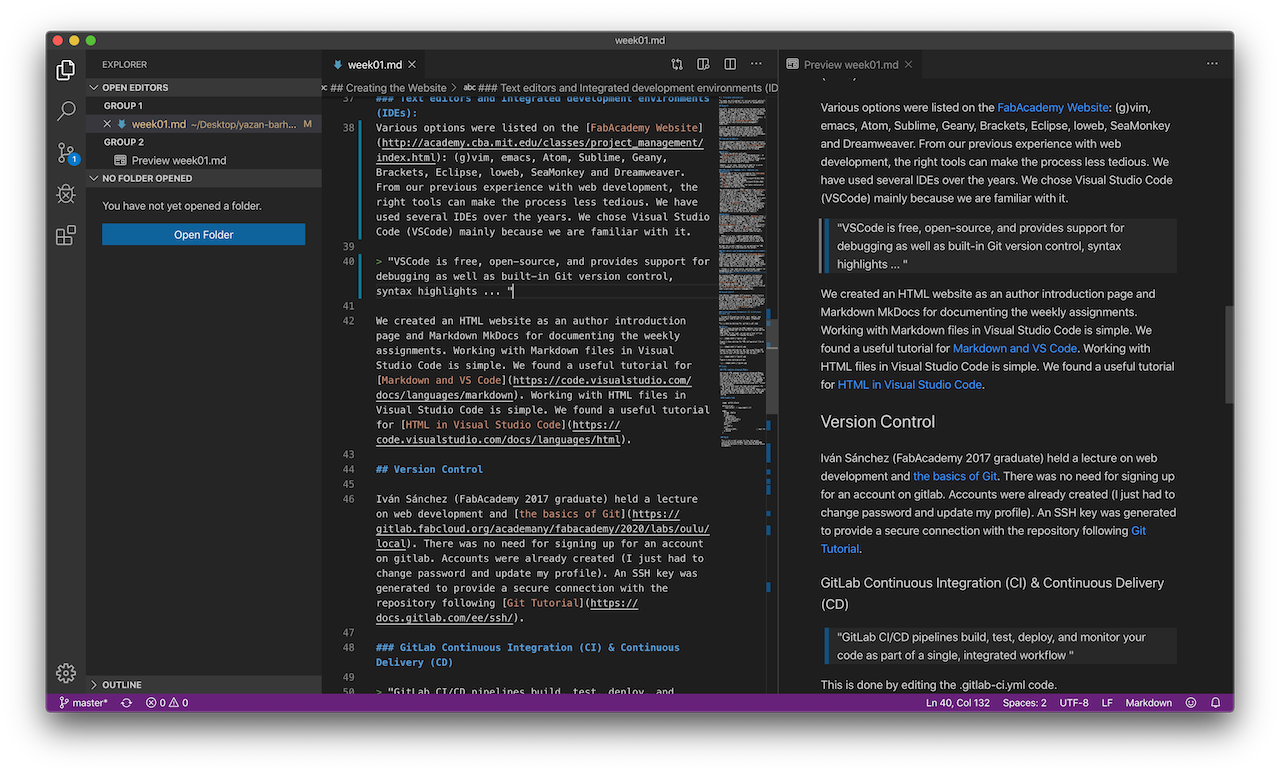
Figure below shows editing the .md file using VSCode IDE. On the the left, we can see the IDE. On the right, we can see a local offline view of the the edits.
GitLab CI YAML configuration
GitLab CI/CD pipelines are configured using a YAML file called .gitlab-ci.yml within the project.
The .gitlab-ci.yml file defines the structure and order of the pipelines and determines:
- What to execute using GitLab Runner.
- What decisions to make when specific conditions are encountered. For example, when a process succeeds or fails.
For a quick introduction to GitLab CI/CD, follow the quick start guide.
The following screen capture shows the .gitlab-ci.yml configuration within the project.
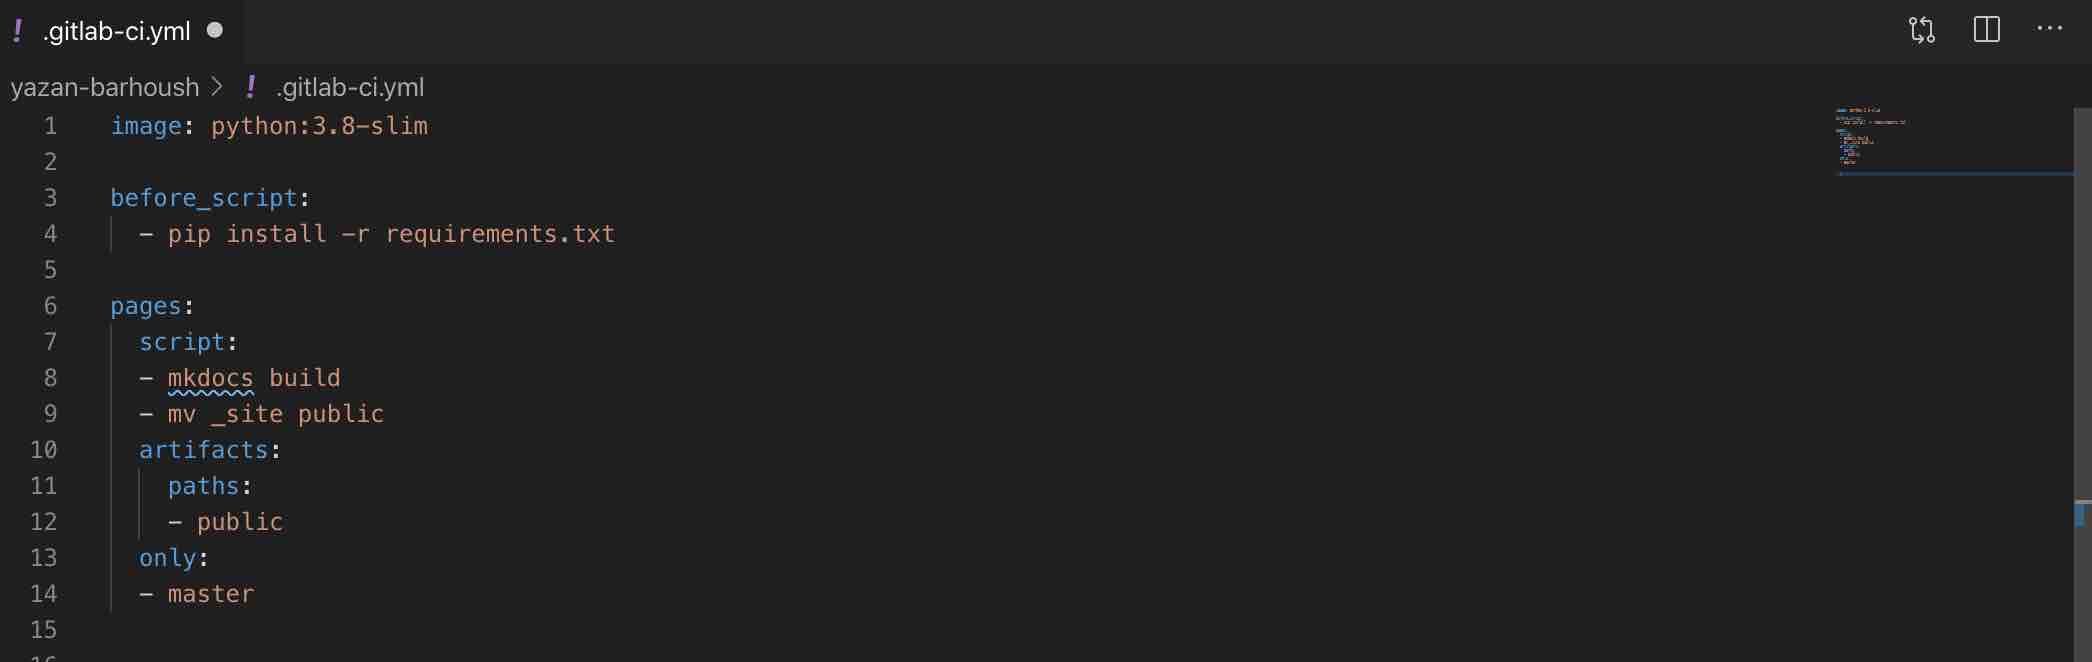
It uses python:3.8-slim as a Docker image. A before_script then runs installing mkdocs and mkdocs-material from requirements.txt, a script then runs for mkdocs building and site directory is moved using mv _site public … moving all files from the root of the project to the public/ directory.
Compressing images
OLD way: Figure below shows compressing images on MacOS.
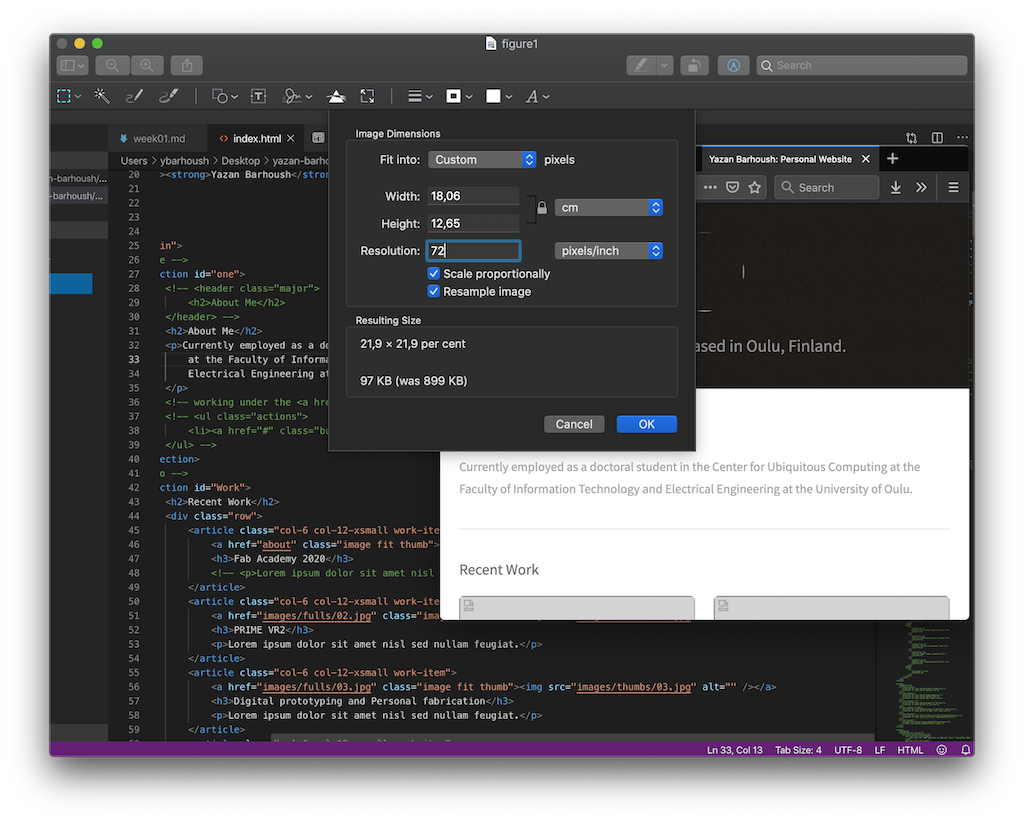
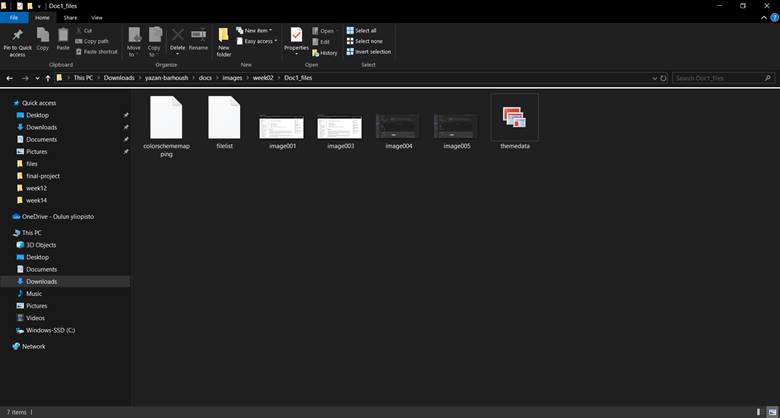
Another way for compressing images.
- Take a screen shot of the desired area and Paste into a word document
- Save the word document as a webpage
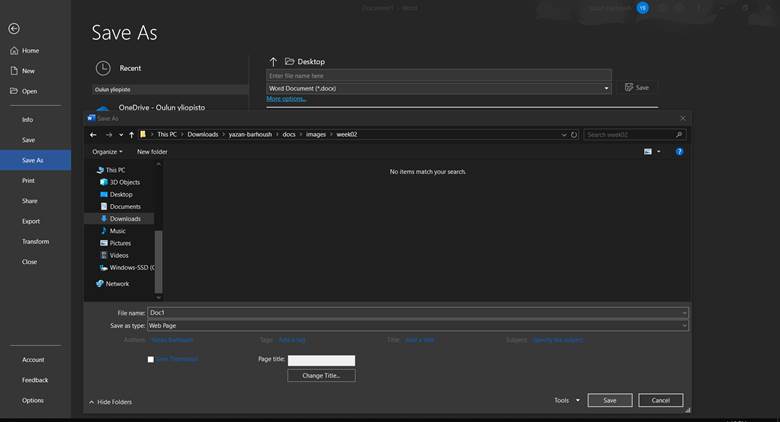
- Images will be compressed and exported!
Figure below shows the size of the image.
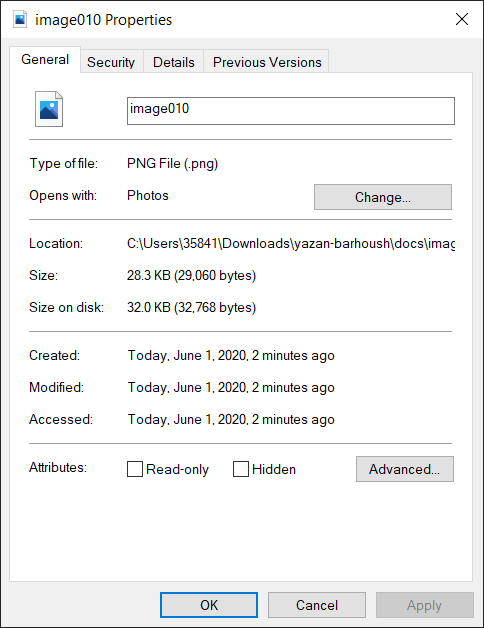
Note
A standard resolution was not followed, but size and the way image appears were checked for.