2. Project management¶
This week I created a new website and started getting used to the documentation process.
Documentation¶
“If it isn’t documented, it didn’t happen.” A good mantra to go by in any laboratory, indeed in any development process, documentation is arguably the most important step. Whether the information is for one’s self or for the world, it’s important to get it logged. Only if progress is written down (or uploaded) can successes be repeated and built upon. It is also important to document failure, so that lessons can be learned and the error avoided the next time.
With that in mind, the FabAcademy requires us to document everything we do using a website we design and build ourselves. We’re given a content template, with assignment reports, project description and personal info, so that Neil has something to refer to in the weekly class, but we’re given free rein on the presentation.
The tool we have for archiving information is called “github”. The information is compiled into webpages using a simplified formatting language called “markdown”, which uses a set of shorthand markups to represent some of the more common HTML and CSS commands. Regular HTML and CSS are also supported, though once a template is chosen, there is not often any need to do that.
Setting up git¶
git is an environment designed to deal with versioning. Basically, as far as we’re concerned for the moment in this course, it keeps track of all changes made to a collection of files, then provides a way of uploading them securely and organisedly to the server online.
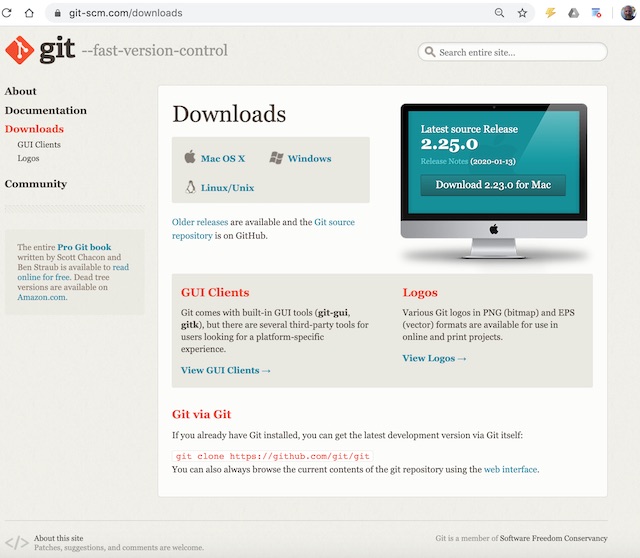
Setting it up wasn’t particularly difficult. I am working in a mac environment, after all! I downloaded version 2.23.0 from https://git-scm.com/downloads, then installed it in the usual way.
Once it was installed, the next step was to set up the keys so that git can communicate securely with the server.
Here I relied on an online tutorial at https://help.github.com/articles/generating-a-new-ssh-key-and-adding-it-to-the-ssh-agent. Rather than paste an illegible screenshot, here are the instructions in a <table> format:
| 1 | Open Terminal |
| 2 | $ ssh-keygen -t rsa -b-4096 -C “wmm@hsrw.eu” |
| 3 | When prompted to “Enter a file in which to save the key”, press enter. |
| 4 | At the next prompt, type a secure passphrase, twice. |
Last time I did this, I had to do some fancy footwork to get the SSH key into the Mac’s keychain. I didn’t have to do that this time, but that might be because it’s still there from two years ago.
Still following advice from the same website, I then added the SSH key to my GitHub account.
-
First step was to open the
~/.ssh/id_rsa.pub
file in a text editor (I used vi in the terminal window - that brought back memories!), and copied the contents of the file. -
Second step was to search out the “Settings” link on my Gitlab profile page. The link is buried under the “avatar” in the top right corner of the page:
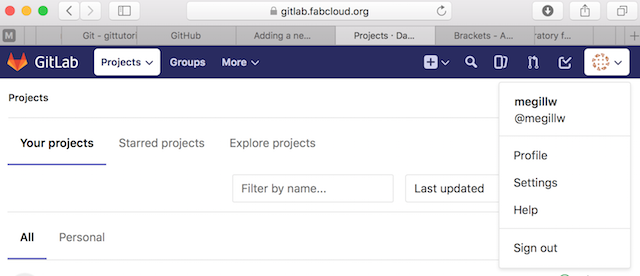
Along the left side of the page is a link to the SSH key page.
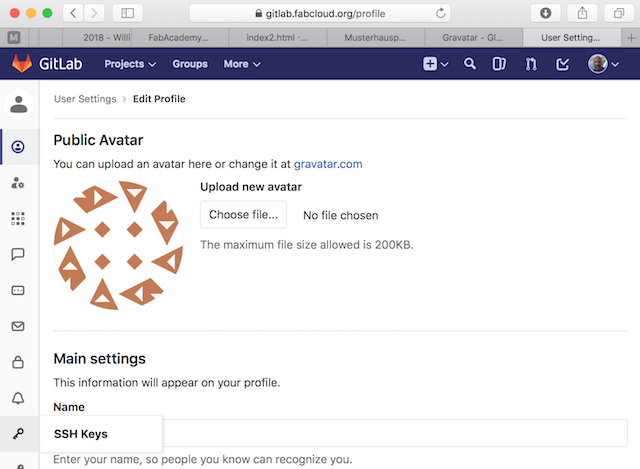
Then I pasted the key as instructed into the box shown, gave it a name, and hit “add key”.
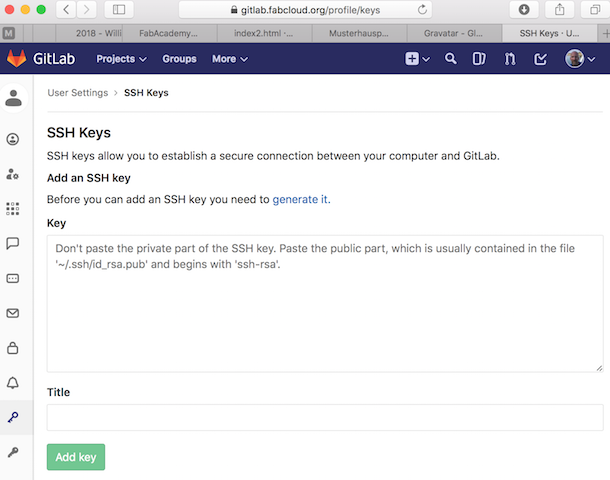
And voilà.
Those were the 2018 instructions. My notes for 2020 read:
| Now trying to get the system working via SSH keys. |
| Back to gitlab, and go to settings (in my profile), then SSH keys. Generate a new key. Copy and paste into the terminal. Then change the email. |
| Back to the generate SSHkey window. Go down to the “Adding an SSH key”, copy the macOS line “pbcopy < ~/.ssh/id_ed25519.pub” and run that in terminal. |
| Then back to SSH-keys on the gitlab website, and put it in the “paste public key here” box. |
| Need a new SSH for every new computer. |
Making Git work for me¶
git is very obviously a powerful piece of software. It took a while to boil it down to the bits I need for right now.
Basically the commands I need are:
-
Uploading to server:
wmm$ git add . wmm$ git commit -m “some useful comment” wmm$ git push -
Checking to see what needs uploading:
wmm$ git status -
Downloading after changes through the gitlab website:
wmm$ git pull
The command “add” looks through the local file structure and creates a list of changes that have been made relative to the last time the repository was updated. It puts these changes into a “staging area”. The idea is that all of the various little changes to the project can be gathered together and all synchronised at once.
The command “commit” rearranges the local repository, then saves the changes into the history. This is a sort of stage gate in the process. Once this commit has happened, it can’t be undone.
The final command, “push”, then sends everything to the remote repository and updates both the directory structure and the history on the remote machine.
Setting up the repository¶
I created an account on the server, then waited for the system to generate a repository for me. When that was ready, it came with instructions:
1. Add a new file into your official repository by using the gitlab interface
2. Choose the ".gitlab-ci.yml” file option
3. Apply the "html" template
4. Change the text of the commit field and press the commit button
That got the basic functionality set up.
git nightmares¶
I can appreciate that computer programmers and other sorts of project managers must have good things to say about git, for a one man band like me whose more interested in the content of the website than how to maintain it, git sure is a nightmare when it goes wrong. It’s obviously because I haven’t taken the time to learn how the various commands work.
My problem is this: every once in a while I screw up and try to upload files that far exceed the maximum limit. Whenever I do that, I get error messages back and then the commit list remains backed up with the erroneously large files. Even cutting them back to size doesn’t help, as the commit still wants I think first to upload them, then delete them, which of course would blow up the size of the repository.
The solution is to clone the repository afresh. Here are the steps that are involved in doing that:
- Backup the “william-megill” directory in the FabAcademy folder.
- Delete the “william-megill” folder from the FabAcademy folder.
- Go to gitlab and log in.
- Under “Clone” select the contents of the “Clone with HTTPS” text box
- Start up Terminal, go to ~/Documents/FabAcademy20
- Type “git clone ” and paste the contents of the clipboard. Enter.
- Watch the magic happen as the repository is copied back onto my local hard drive.
- Delete the “william-megill” folder from the FabAcademy folder.
- Restore the backup copy of the “william-megill” folder.
- In terminal, change directory to ~/Documents/FabAcademy20/william-megill
- Go through the git add/commit/push process.
- Voila. Back up and running.
Setting up the website¶
I’ve been writing HTML since 1994, back before Netscape. Our browser of choice back then was Lynx and we used Metacrawler to search the web. Mostly I used Notepad on windows machines to develop my sites, and uploaded files using simple ftp, then a secure SSH-based ftp system. vi was the weapon of choice on unix/linux boxes. At one point, I modernised my company website and built my own CMS using LabView to do the template maintenance (menus, etc). I don’t really like modern CMS systems, as I find the learning curve unnecessarily steep and the web-based editors/upload managers exceedingly frustrating. Having grown up in the dial-up era, I’m also not keen on superfluous bandwidth use, so I tend to shy away from fancy formats.
So it was nice to discover the static website generators that are available. I selected an easy one that suits the needs of this website, namely to document progress on a project. The website generator I chose is called MkDocs.
To install MkDocs, I first needed to install Python on my Mac. That I did in the usual way using the downloaded package from www.python.org. I then had to install the Python package manager, pip. It was included in the Python installation I had just installed, so it was easy to do. In terminal:
$ python get-pip.py
To install MkDocs was equally straightforward:
$ pip install mkdocs
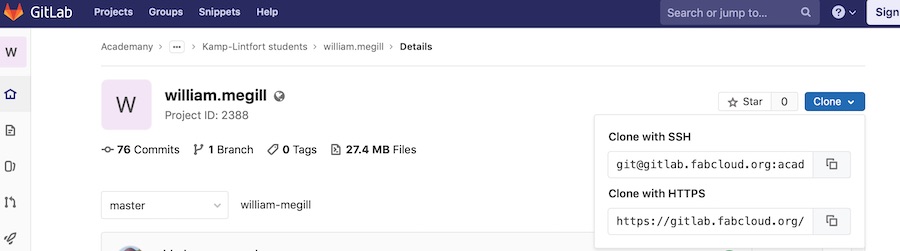
Then to start creating the website, it was a simple case of creating a directory on the Mac to work from and cloning the basic template using git:
git clone https://gitlab.fabcloud.org/§§§
where §§§ is the https option in the pop-up menu called “clone” (in blue to the right of my gitlab site):
I then deleted everything in the directory and ran the following commands in terminal:
cd ..
mkdocs new william-megill
cd william-megill
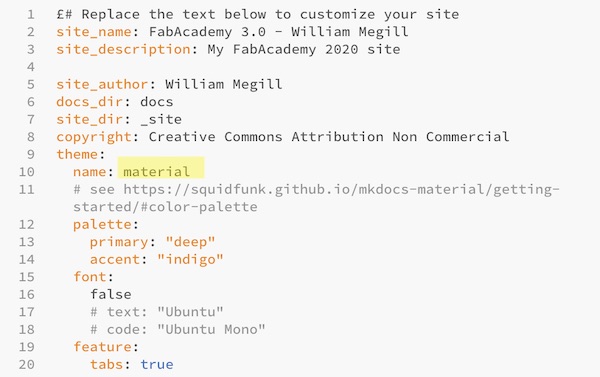
The next step was to choose a theme, or template. I chose one a template called “material” from the list compiled here. To install the theme on my computer, I used pip:
pip install mkdocs-material
To make use of it, all I had to do was edit one line (in yellow, below) in the mkdocs.yml file.
HTML coding¶
Now I was ready to start coding the website itself. I’m using Brackets to do the html editing, and it’s working nicely for me.
Standards¶
To save space on the git platform, pics and graphics will be saved in JPG format at a spatial resolution such that they fit within a max 600px wide space. Where it is absolutely necessary to use higher resolutions, for example to maintain the legibility of typescript or engineering drawings, I will compress them in the webpage to a max 600px width, but store them at a higher resolution so that the reader can click to enlarge.
Videos I’ve uploaded to my YouTube channel, where they’re classified as “unlisted”, so that they are referred to only through the relevant pages on this site.
Code snippets and Arduino sketches will be saved in separate .md files so that they can be read directly in the browser.
Editing markdown¶
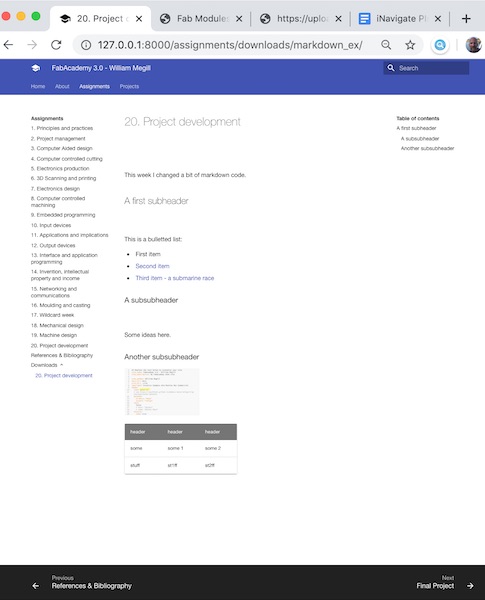
I’ve used a variety of different features of markdown as I’ve built this website. For example, the headers in the example pages that came with the installation look like this:
# 20. Project development

This week I worked on defining my final project idea and started to getting used to the documentation process.

## Research

"Lorem ipsum dolor sit amet, consectetur adipiscing elit, sed do eiusmod tempor incididunt ut labore et dolore magna aliqua. Ut enim ad minim veniam, quis nostrud exercitation
The levels of headers are indicated by the hastags. By adding another hashtag, a subheader is created. Then one can add a list of bullets with links to local pages and external websites, and under the second heading, maybe a figure and a table.
# 20. Project development
This week I changed a bit of markdown code.
## A first subheader
This is a bulletted list:
- First item
- [Second item](../../projects/final-project/)
- [Third item - a submarine race](https://www.subrace.eu)
### A subsubheader
Some ideas here.
### Another subsubheader
{width=200}
|header|header|header|
|------|------|------|
|some |s1me |s2me |
|stuff |st1ff |st2ff |
This example code is saved here
It looks like this: