17. Wildcard week
This week I’m looking into biomimetic engineering using techniques from soft robotics. The process will involve 3D printing, vinylcutting, moulding and casting, and some pneumatic actuation.
Soft Robotic Gripper
The inspiration for this week’s project comes from a workshop I did for the Fashion Design students at the Ho Technical University in Ghana last autumn.
The 4th Dimension Workshop was based around some practical exercises that are available online at the soft robotics toolkit. The goal was to introduce the students to the 4th Dimension (in this case, Movement) in fashion design. Soft robotics provides a simple and inexpensive way to add surprising and innovative movement to clothing and other fashion accessories.
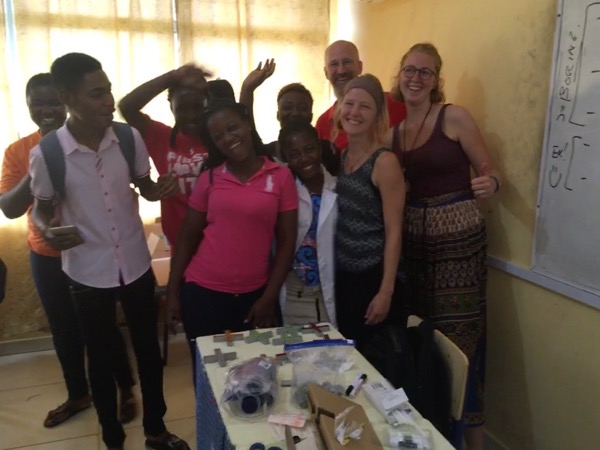
There I used an exercise from the Soft Robotics Toolkit to demonstrate what I called 4D-Design, with the 4th dimension referring to changing shape in their clothing designs. I’ve already spoken (in the vinylcutter chapter) about the inflatable splint I did with them in the first class of the workshop. In the second class, we made pneumatic rubber grippers. You can see some of the moulded soft-robotic grippers they made on the table in the picture below.
I had a lot of help preparing for that workshop in Ghana, and didn’t make all of the parts for the moulding exercise myself. For this week’s FabAcademy assignment, I’ll design and make everything myself, and put a twist on the project by moving from four gripper arms to five and make it biomimetic by adding starfish-inspired gripping.
Operating Principle
The basic operating principle of this soft robotic gripper is to use asymmetries or shape and complicance to focus the effects of pneumatic air pressure inside a cavity within the casting so that the arms curl up and grip something against the “palm” (on the starfish, its mouth). The arms are cast in solid silicone with an acetate spacer embedded within them. Once the silicone sets, a hypodermic needle is inserted into the cavity created between the acetate and the silicone. A tube is connected to that and air pressure added or removed.
Design (CAD)
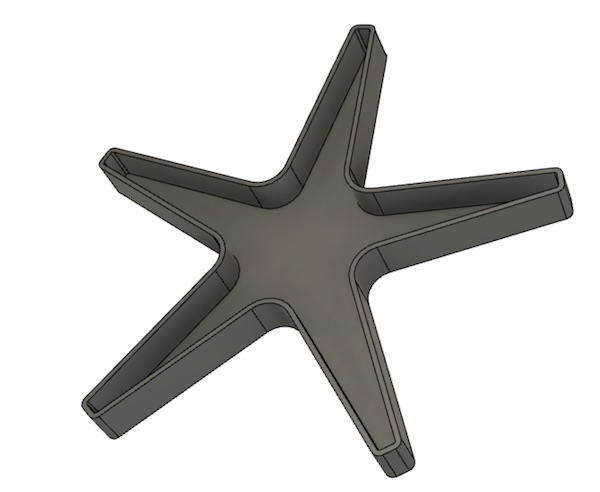
The first step was to pick a geometry. I started with the pentagonal symmetry that starfish are famous for, then added trapezoidal arms and rounded out the corners. The thinking behind the tapering is that the compliance will increase toward the narrower tip and with constant inflation pressure, the tips will roll up much more than that base. The final design looks like this:
Mould (3D-Printing)
It turns out that the latest update of Fusion360 has a direct connection to the Cura slicer. From the File menu, select 3D Print, then choose the Cura slicer from the pull down menu. That then calls up the Cura software and loads the Fusion model directly. Saves the step of exporting the STL and avoids needing to use the not-so-optimal Fusion 360 slicer.
In Cura, I used the following settings this time. Most are the same as in Week 6, but I’m trying a slight modification to the “Travel” setting, using the “Retract at Layer Change” option to see if that solves the seam problem we’ve been seeing lately on 3D-printed objects made on the Ender-3 printer.
| Setting | Value |
|---|---|
| Quality | both set to 0.2mm, half the bead diameter |
| Shell | Default 0.8mm is ok for this model, as the walls and floor are 2mm thick |
| Infill: Density | I’ve dropped it to 10% as the mould is mostly all wall anyway. |
| Infill: Pattern | I’ve been using “grid”, which seems to work ok for self-support. |
| Material | The PLA I’m using calls for 200°C printing temperature and a bed temperature of 50°C. 100% flow works ok. |
| Speed | I used the defaults of 100mm/s print, 250mm/s travel and 20mm/s initial layer speeds seem to be good. |
| Travel | Enable retraction. Otherwise the head will eventually hit the model. I’ve also added the “Retract at Layer Change” to see if that helps avoid the seam that’s begun to appear in models printed on this printer |
| Cooling | Enable. Helps ensure the plastic hardens quickly after it’s laid down. |
| Support | The mould doesn’t need any support. |
| Build plate adhesion | I use “brim”. On the Ender-3 with its bed cover, a brim of 2mm seems to be fine. |
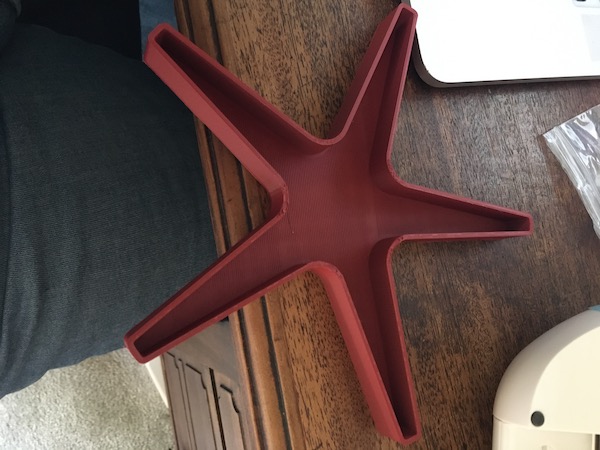
Here’s the beauty, hot off the printer:
Cavity Cutout (Vinylcutting)
To make the acetate insert, I created the shape as a separate component in Fusion and exported it as a DXF. The trick to getting this right is to create a new sketch on the surface of the object (to get rid of all of the history), and to export that as a DXF.
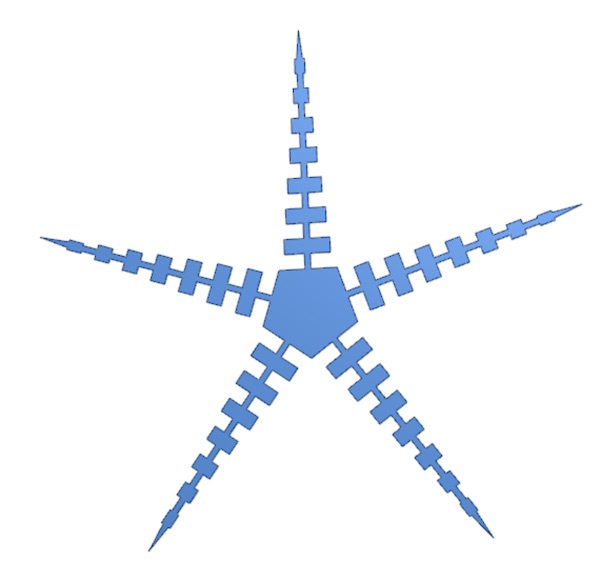
The Silhouette software for the vinyl cutter can read the DXF directly. The drawing was already all cleaned up, so it was just a case of selecting the outline to be cut.
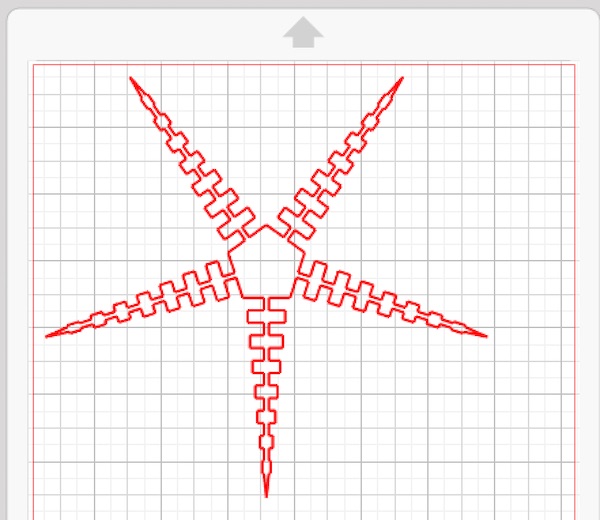
The hardest part of the operation is setting the cutting settings on the vinylcutter. I couldn’t remember what I used the last time I did this, but Lori Whitlock was very helpful with suggestions. I used the following settings on the Silhouette Portrait:
| Setting | Value |
|---|---|
| Material | Cardstock, Textured - Heavy (80g) |
| Action | Cut |
| Action by | Cut Edge |
| Depth | 6 |
| Speed | 3 |
| Force | 33 |
| Passes | 2 - a third pass would have been useful |
| Triangle corners | ticked |
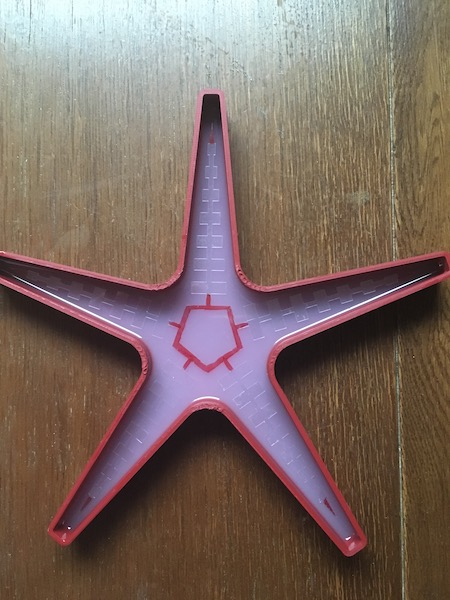
The result:
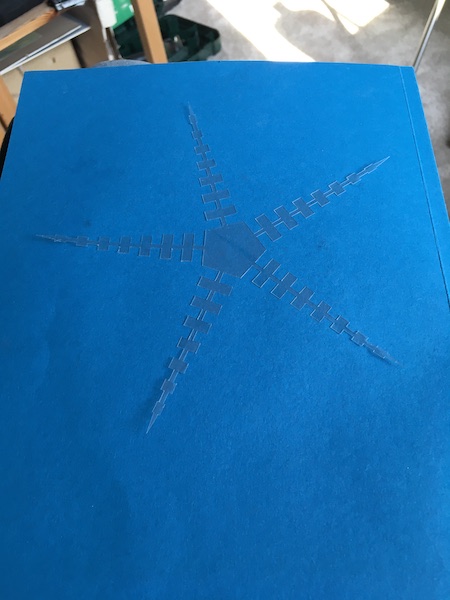
To make the later poking with a hypodermic easier, I’ve outlined the central pentagon and the tips of the arms with a red Sharpie.
Fabric Backing
To make the fabric backing that creates the inside of the gripper, I created a new sketch in Fusion and exported that as a DXF. I had a lot of trouble getting the export to work properly, which is why I had to create the new sketch. As I had done everything parametrically in the first place, this was easy to do.
The internet was full of advice on how to cut fabric with a vinylcutter. In the end I used the setting that came with the machine, but slowed it down a notch. Here are the settings:
| Setting | Value |
|---|---|
| Material | Fabric, Thick (Canvas) |
| Action | Cut |
| Action by | Cut Edge |
| Depth | 5 |
| Speed | 3 |
| Force | 33 |
| Passes | 1 |
| Triangle corners | unticked |
I stuck the fabric to the (new) sticky cutting mat and popped it in the machine.
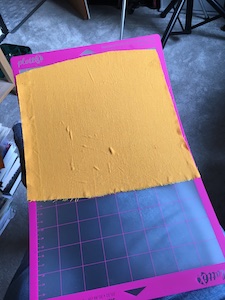
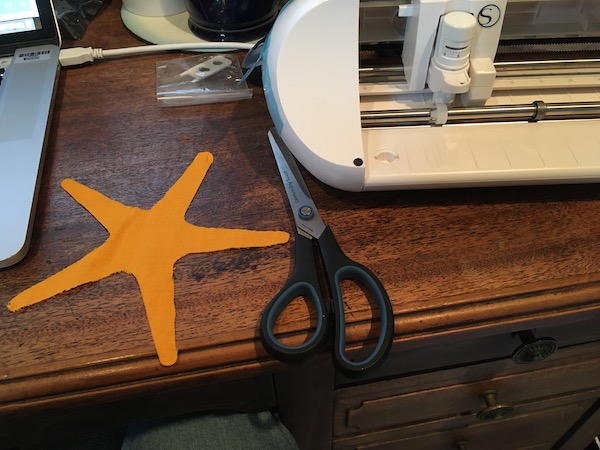
It was obvious once it started cutting that the blade was moving way too fast. The fabric bunched up behind the needle and the cut was incomplete. Though it managed to make enough of a cut that I could finish it with scissors, the next time, I’ll slow down the cutter, add a bit more force and maybe increase the depth a notch. After some not-particularly-fancy scissor work, here’s the end result:
Casting
The rubber material I’m using is made by Smooth-On and distributed in Germany by KauPo. It’s a two-part silicone called EcoFlex 00-30. The recipe is simple: mix equal parts A and B, stir thoroughly without making bubbles, then pour into the mould and let set for 4 hours.
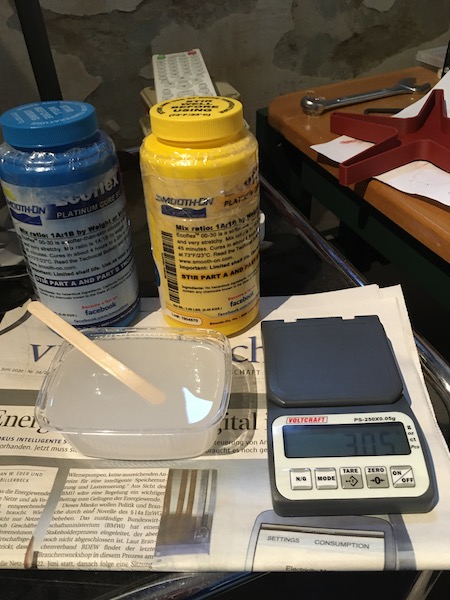
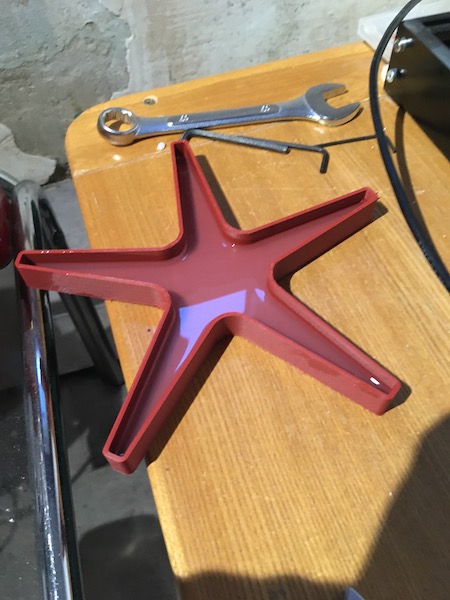
Once the first layer of rubber has set, then the next step was to add the acetate spacer carefully so that it was centered everywhere. Then I mixed up some new rubber and poured that in to fill up the mould. Finally, I lay in the fabric till it was just moist from the rubber.
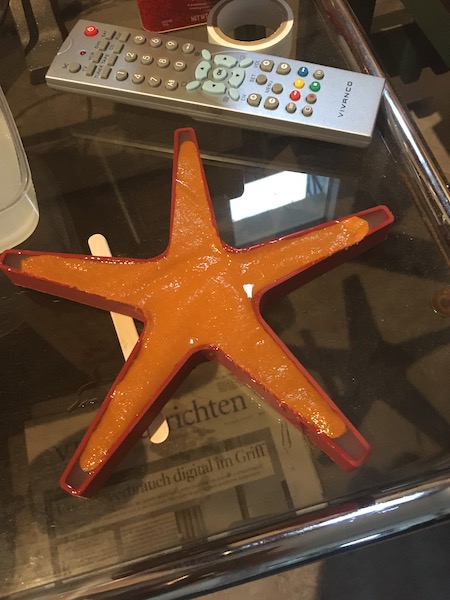
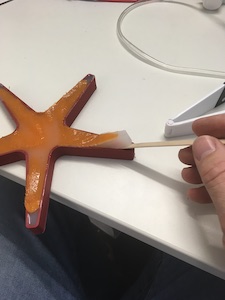
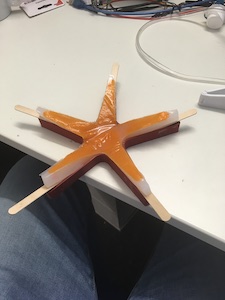
Removing the rubber from the mould was nicely straightforward. A tongue depressor inserted along the side of each of the arms pried them loose from the mould, and I could slip the tongue depressor further under the arm toward central core. I then repeated the process for each arm in turn. Here’s the extraction in mid-process, first with one arm, then all five:
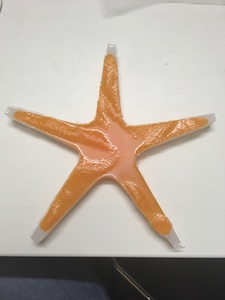
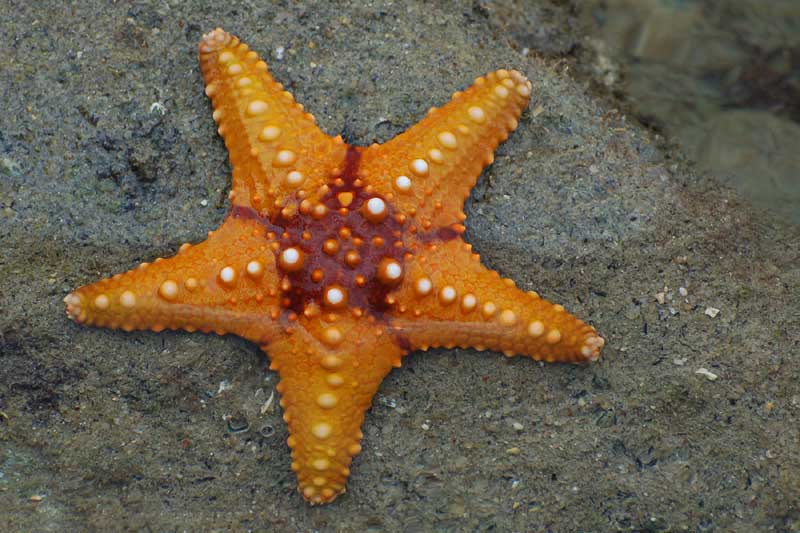
The rubber starfish has slightly higher aspect ratio arms than its inspiration, but otherwise fairly true to life, don’t you think?
Testing
Once I’d extracted the rubber starfish from the mould, the next step was to insert a hypodermic needle into the central cavity, between the plastic sheet and the rubber, then hook up a syringe.
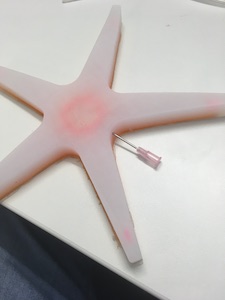
The trick is to inflate the centre gently at first and distribute the air around the inside to separate the rubber from the acetate, both in the central core and out into the arms. Blow too hard with the syringe, and the central core will inflate and pop before any air gets into the arms at all.
After the first few careful pumps, it was time to try getting the arms to bend. Unfortunately there was a leak in one arm, and a bunch of other things went wrong, but the following video does show one of the arms actually working as designed:
Problems
The mission was not the success I wanted it to be. I’ve seen four-armed versions of these grippers work much better, with all four arms curling up to grip a tennis ball quite firmly. So what happened?
-
The internal acetate was too big, and I placed it too close to one wall, which is why there ended up being a leak there.
-
The central area of the acetate pattern was too big. This is what creates the big bubble in the middle, and results in no pressure being left over to expand the arm cavities.
-
As ever in these soft robotic grippers, there is one weak point, which is what causes the aneurism in the one arm and hence the failure of the whole mechanism.
Improvements for next time
-
Redo the central acetate pattern. The new pattern will have a very small central area, with plenty of colour on it so that I can aim the needle properly.
-
Redo the arm patterns of the acetate. The aneurism happened because the wall thickness was insufficient, and I think a large part of the problem with the other arms was that the central chamber didn’t sufficiently open up into them. So some kind of triangular input to the arms is in order. The smaller central area will help with that. Rethinking the cross-ties to change how much bend there is along the arm might also help.
-
Be more careful placing the acetate, so that the wall thickness over the whole of each arm is consistent and sufficient to avoid any chance of piercing.
-
Make a thinner bottom layer, leaving more silicone on the fabric-reinforced side of the casting. That side is going to bend less anyway because of the fabric, so by thinning out the free side, the pressure will create larger bubbles there. Will have to be careful not to make it to thin.
Downloads
The starfish mould and acetate insert were made in Fusion 360 and is available here. The insert is Component3 - you’ll need to turn off the other two components and turn it on to see it.
I’ve also made the model available as an STL file. The link is here